


As protests surge in the wake of George Floyd's murder by a Minneapolis police officer, powerful photographs and videos from the demonstrations have gripped the world, putting our nation's very real and very justifiable widespread civil unrest out into the digital world. Unfortunately, these pictures could put you or others in danger if precautions aren't taken before uploading them online.
At the protests, we take and share media to show the world that police brutality and systemic racism still exist. While Gil Scott-Heron's poetic song proposes that "the revolution will not be televised," it is broadcasted — sometimes in front of the wrong eyes. Posting images and videos online as-is can lead to arrests, harassment, and worse, regardless of the innocence of the protesters seen in the medium. So it's essential to take preventative privacy measures.
If you've attended a protest or match and have imagery you want to share, it's crucial to protect your identity and everyone else's that you captured. We'll discuss the steps you should take before posting protests pictures and vids on social media, such as stripping metadata, blurring faces and identifiable objects, using anonymous or burner accounts, and more.
Remove Geotags & Other Metadata
Exif data, or exchangeable image file format data, is the metadata recorded by digital cameras, including the ones in your smartphone. The data shows useful information for photographers about the camera settings used, such as the aperture, ISO sensitivity, focal length, flash use, exposure time, zoom level, resolution, color space, and more.
While those are useful, there is also data in there that can help track you and the picture's location, and anyone from grandma to hackers and law enforcement can use that information to figure out where you've been and who you are.
The most sensitive information are geotags, or geocoordinates, which pinpoint the exact location of where the image or video was taken. Then there's the make and model of your camera used, its software, and the time and date, all of which can place you at the scene. There's even acceleration and altitude data, the latter of which can say whether you took an image or video at ground level or on the fiftieth floor of a skyrise. All of this is bad if you're part of a protest that went south.
For smartphones, there are tons of options to remove GPS data and other metadata from photos and videos. Still, not every feature or app will work for both types of media — or even on the same mobile operating system. Although some social media sites remove metadata automatically, including Facebook, Twitter, and Instagram, it's better to play it safe and remove it manually.
Removing Geotags & Other Metadata from Photos
As mentioned above, there are many different ways to remove geotags and other metadata from photos. Before we get into third-party apps that delete most Exif data, your device probably has a native feature to remove the location from your images. For some of you, that might be all the privacy you need.
On iOS, you can remove the location data of any photo before you share it from the Photos app. It's a bit more complicated on Android, depending on your make and model. For instance, on a Samsung Galaxy, in its Gallery app, you can swipe up on an image to reveal its details, tap "Edit," then remove the location.
If you primarily use Google Photos as your gallery, like on Pixel phones, you can't delete a location unless it was "estimated" by your device (swipe up on a photo, tap "More info" next to the place, then "No location"), but you can disable location-sharing when sharing images via Google Photos links.
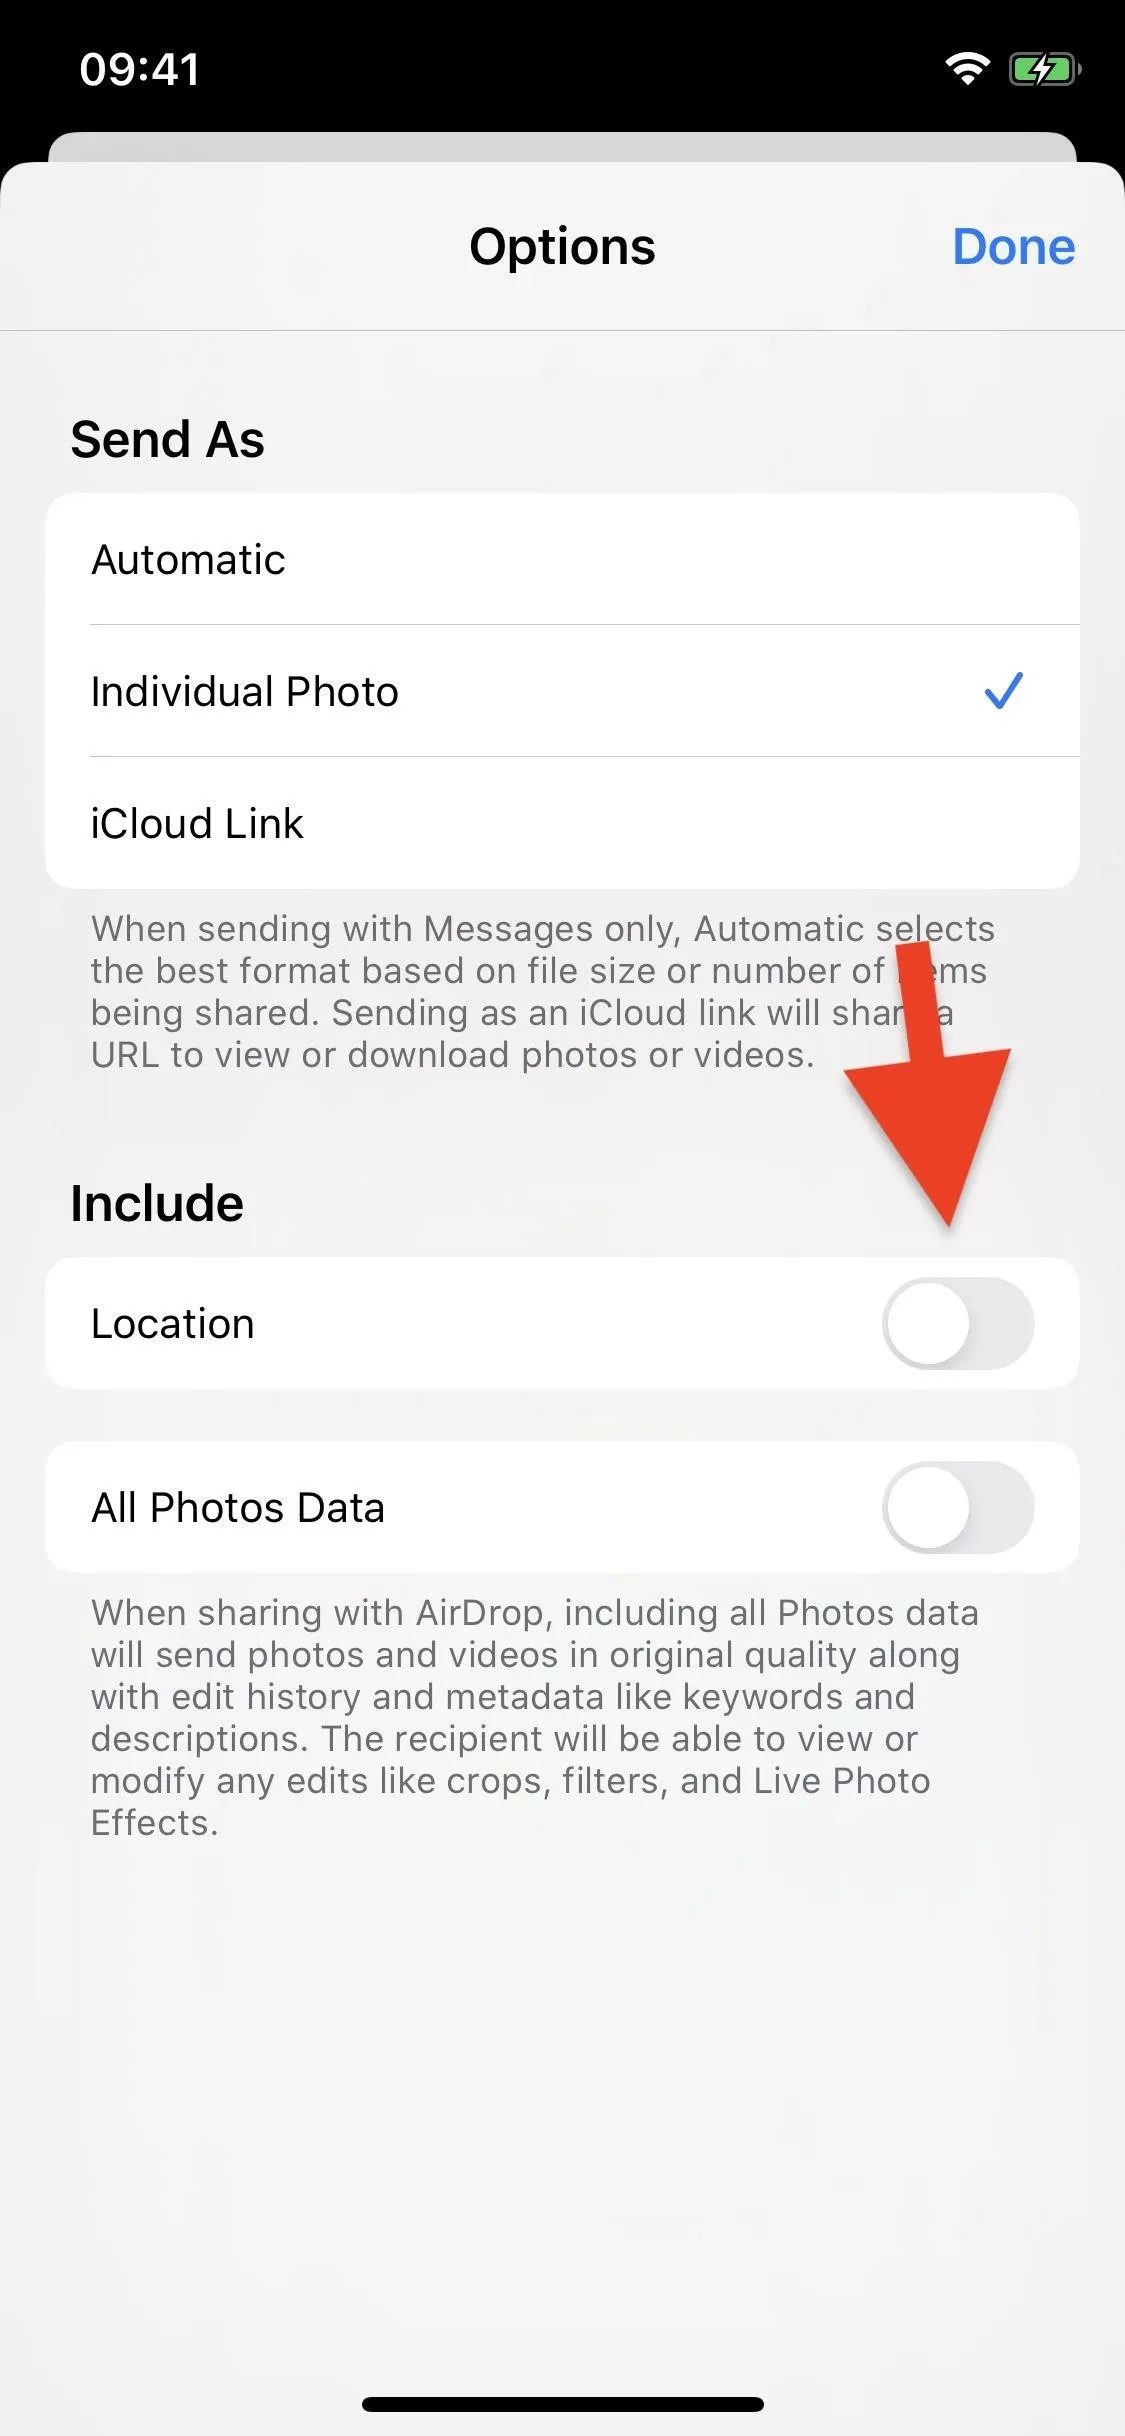
The option in iOS 13 (left), and the link setting in Google Photos (right).
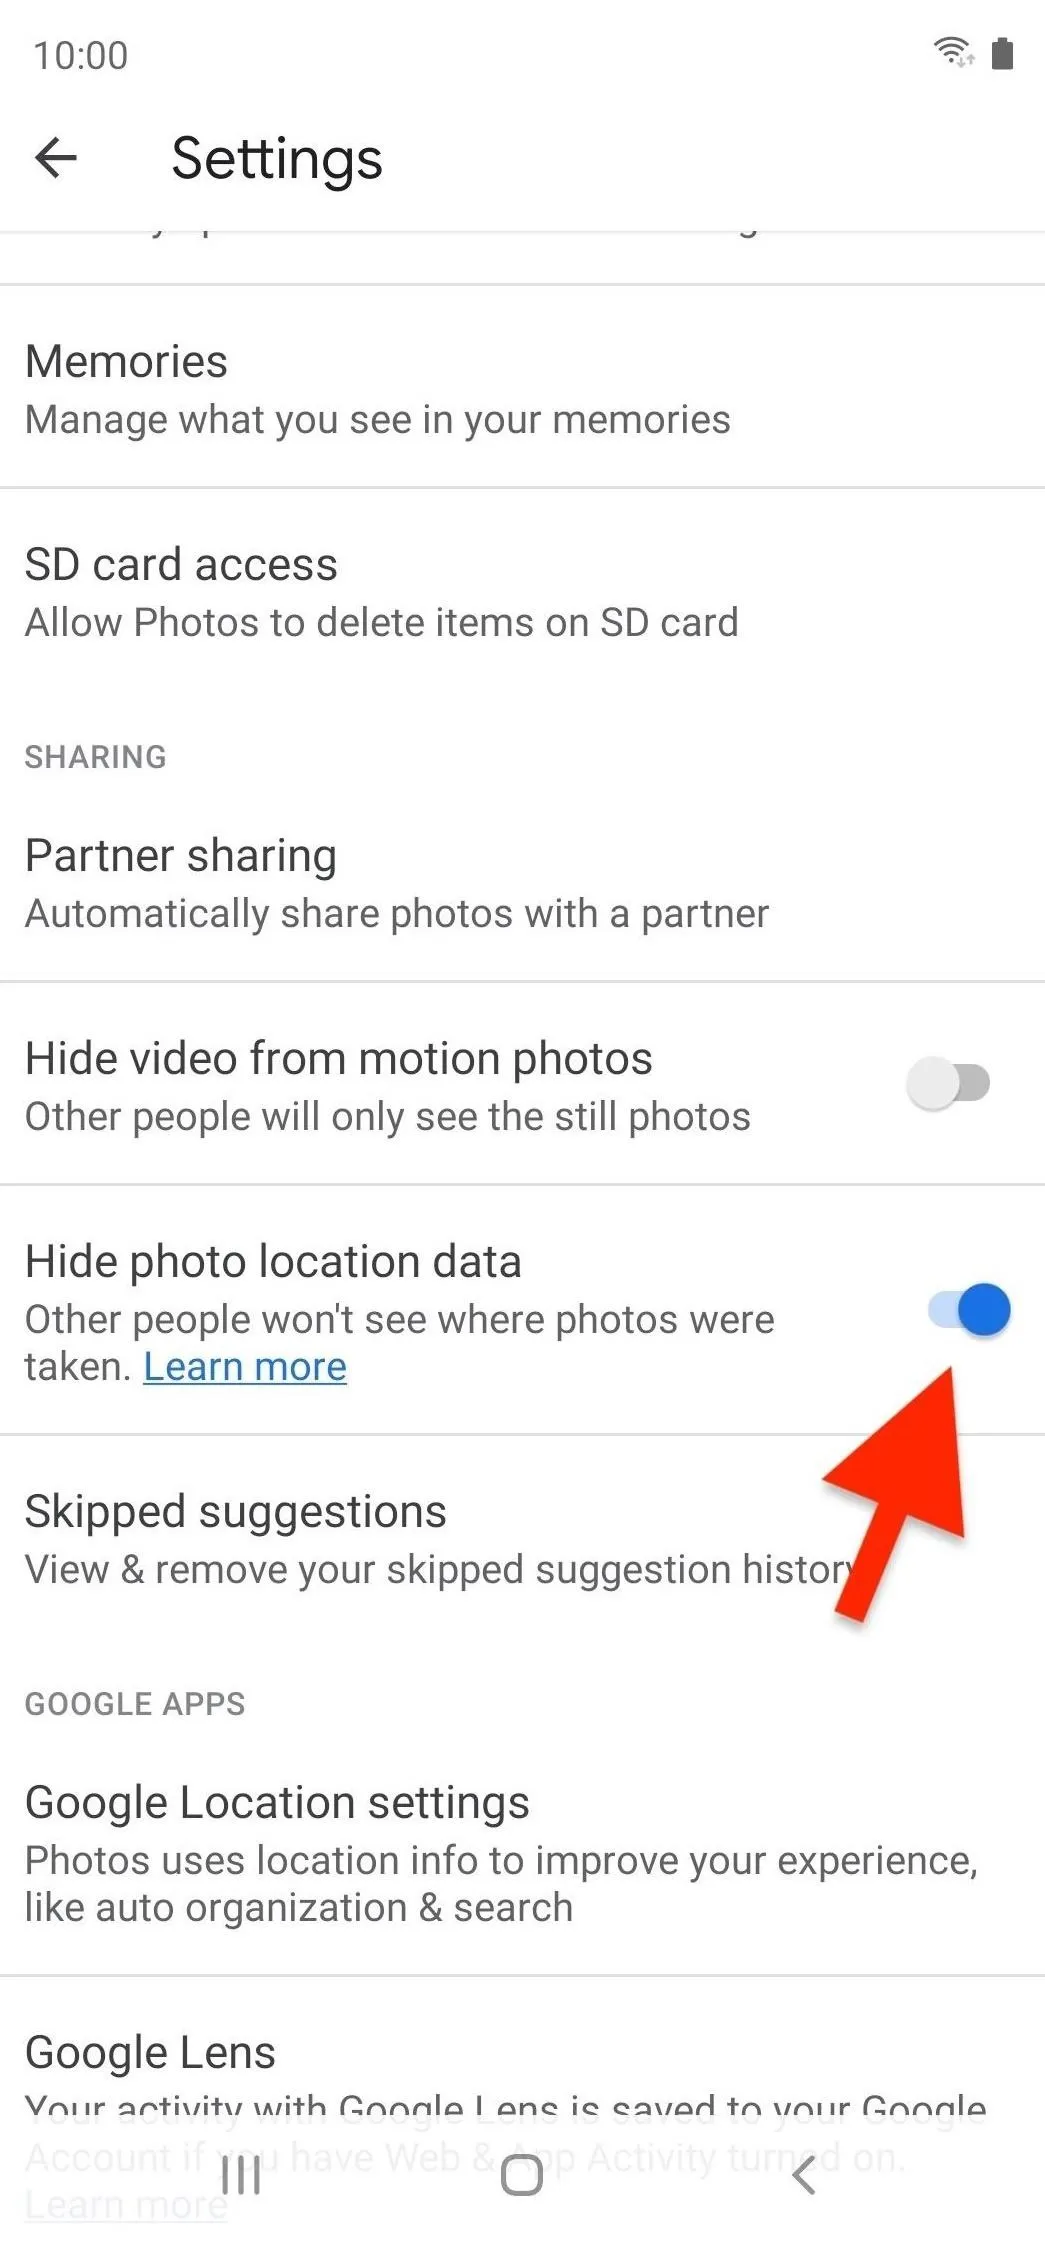
The option in iOS 13 (left), and the link setting in Google Photos (right).
In addition, you can simply take a screenshot of any photo on your iPhone or Android, which removes not only the location tags but all other Exif metadata from the original image. However, doing so lowers the photo's quality and puts another picture on your device. It's a viable option if you're in a hurry to upload the photo online, but for everything else, there are third-party apps that can do better.
On iOS, apps such as Exif Metadata, Metapho, HashPhotos, Exif Viewer, Koredoko, ViewExif, PixelGarde, and Photo & Video Metadata Remover can scrub geotags and other metadata from pictures. Many of them also let you edit the metadata, so you could throw people off by changing the actual location where the image was taken.
Android, on the other hand, has apps such as Metadata Remover, ExifTool, Scrambled Exif, and Photo Stripper to wipe away any Exif information.
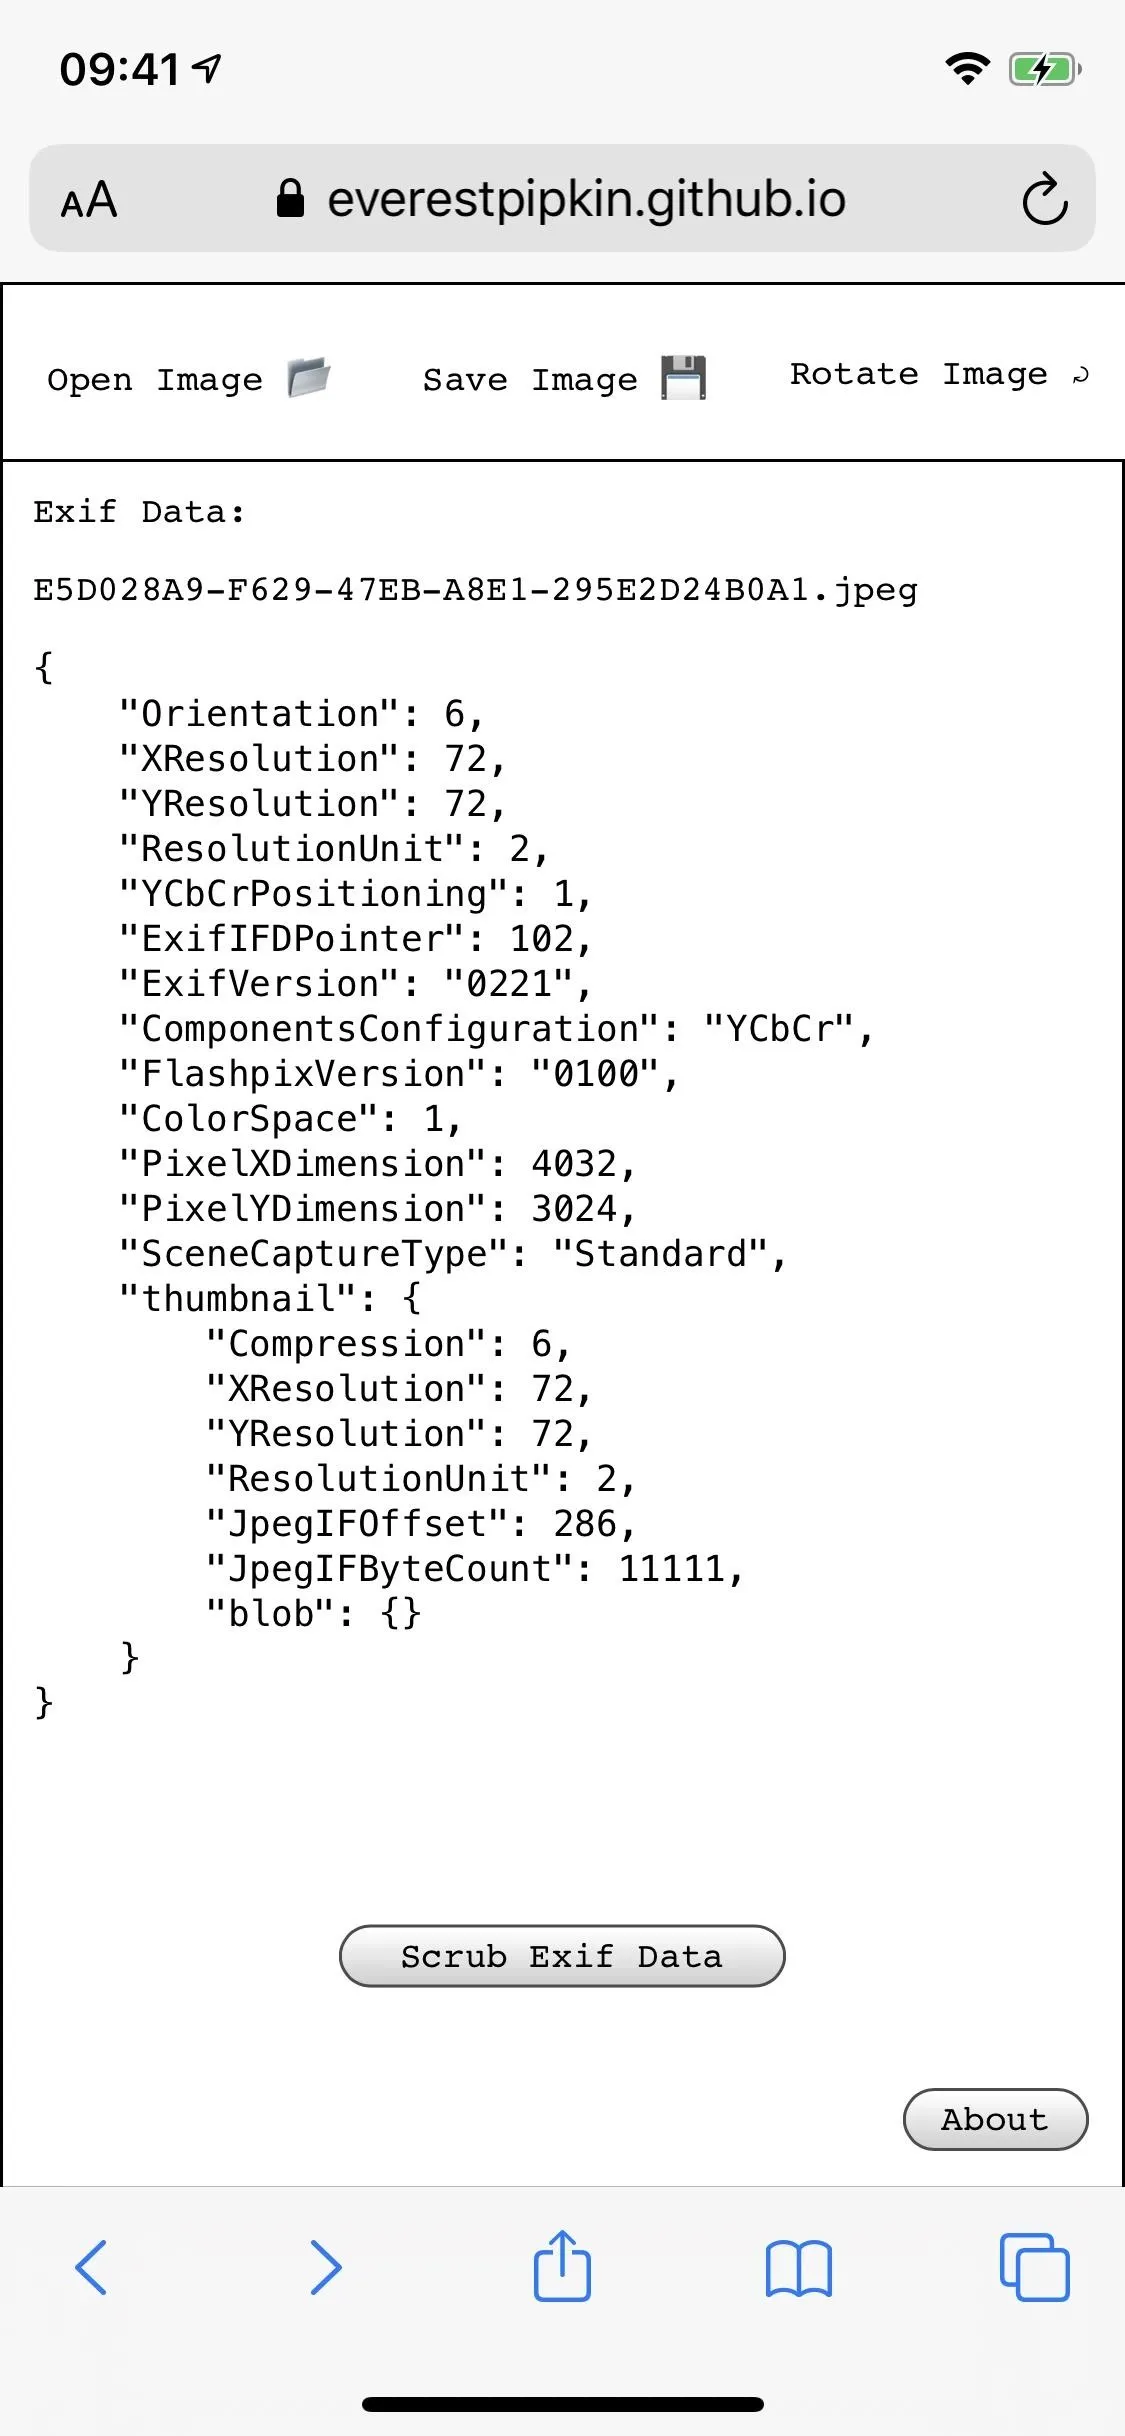
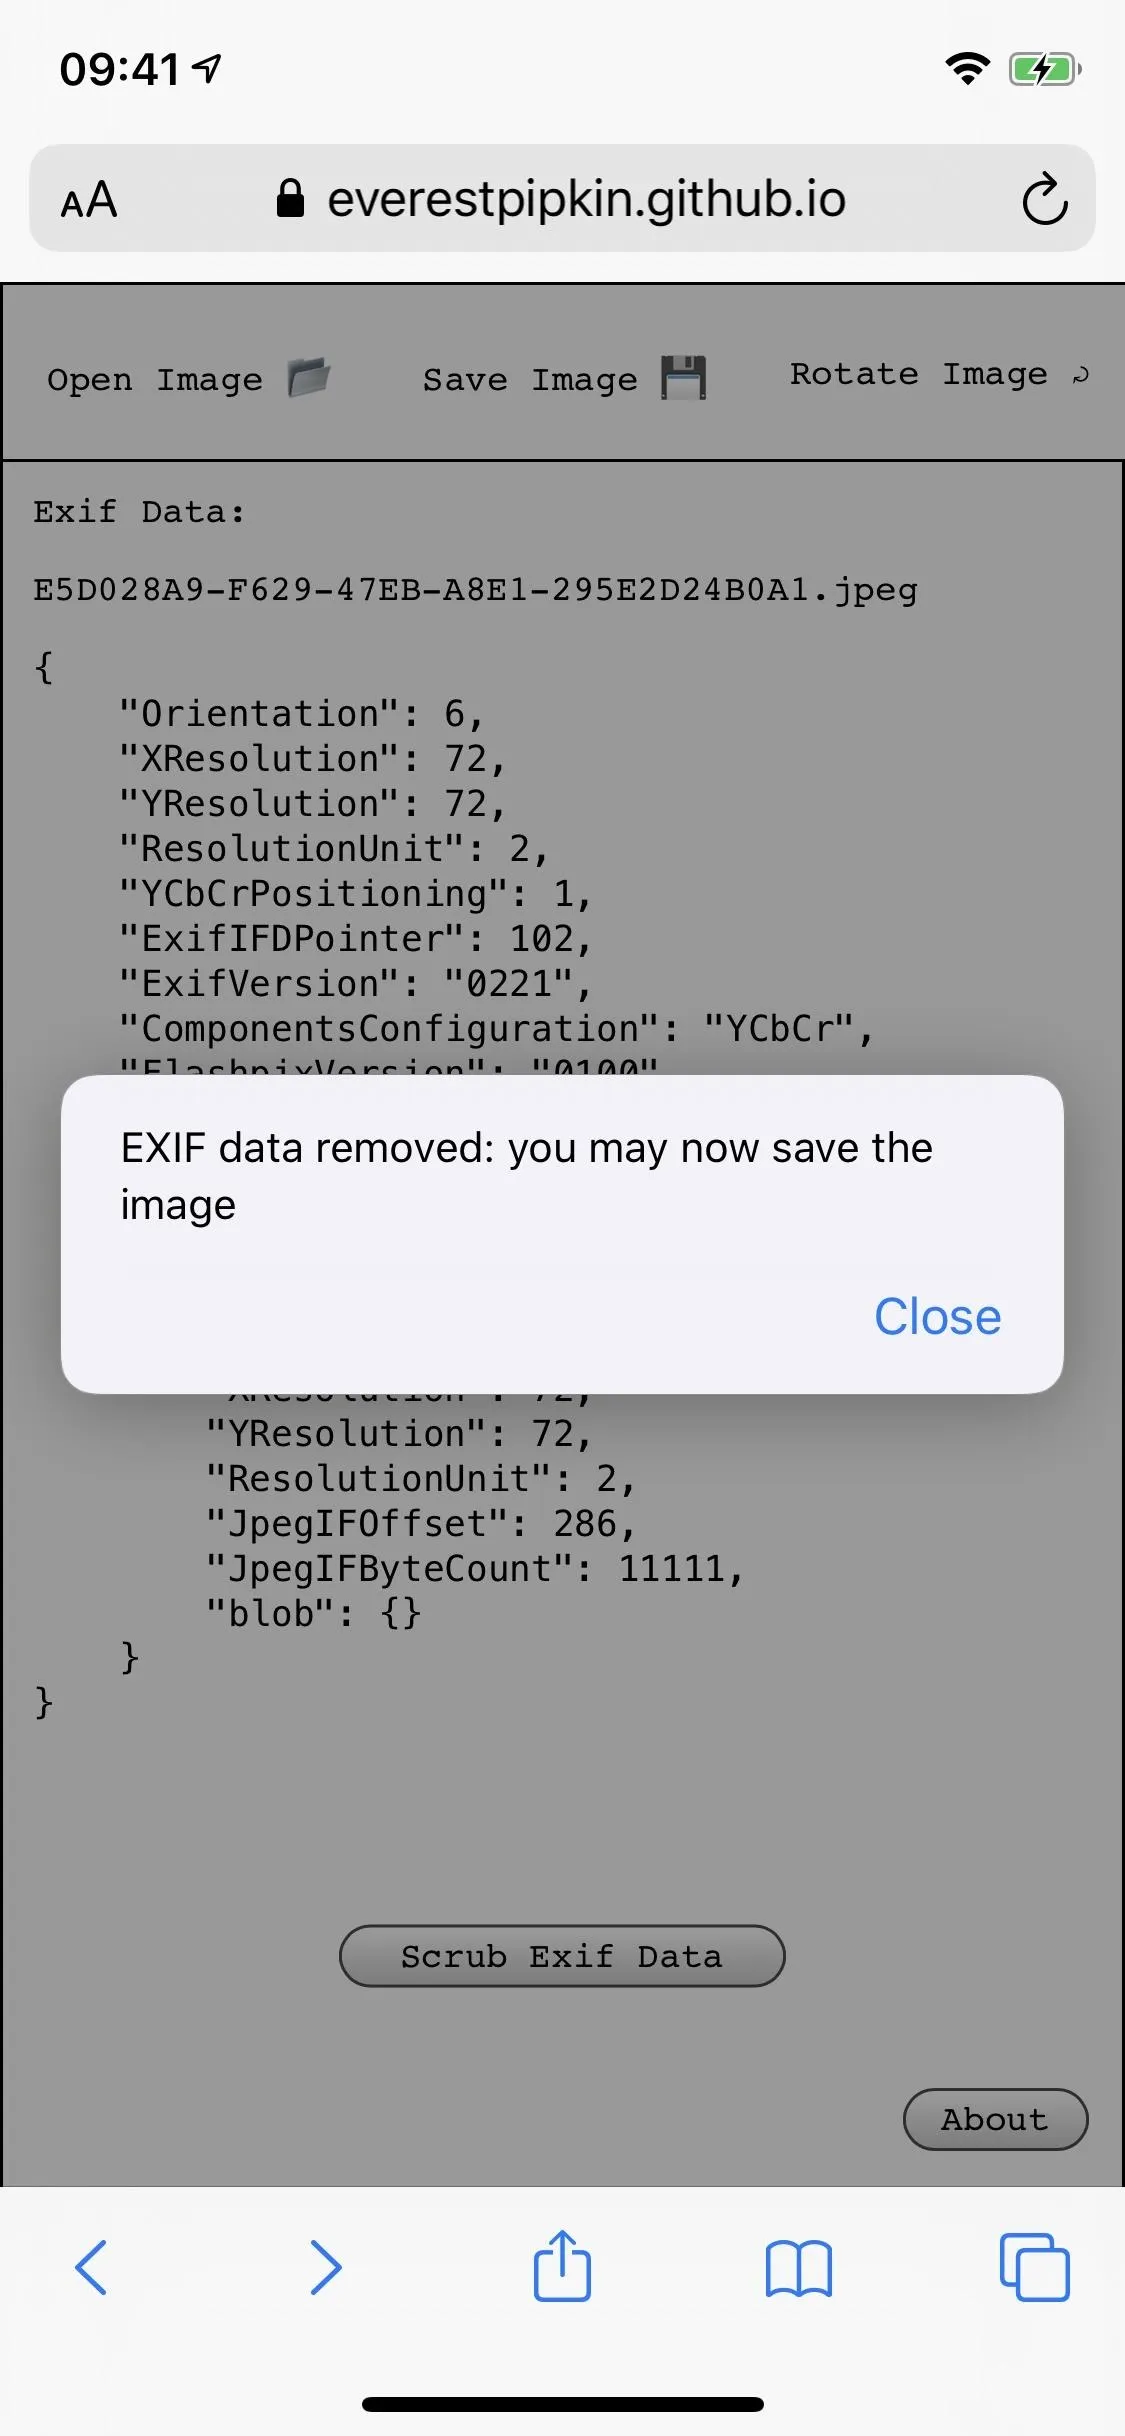
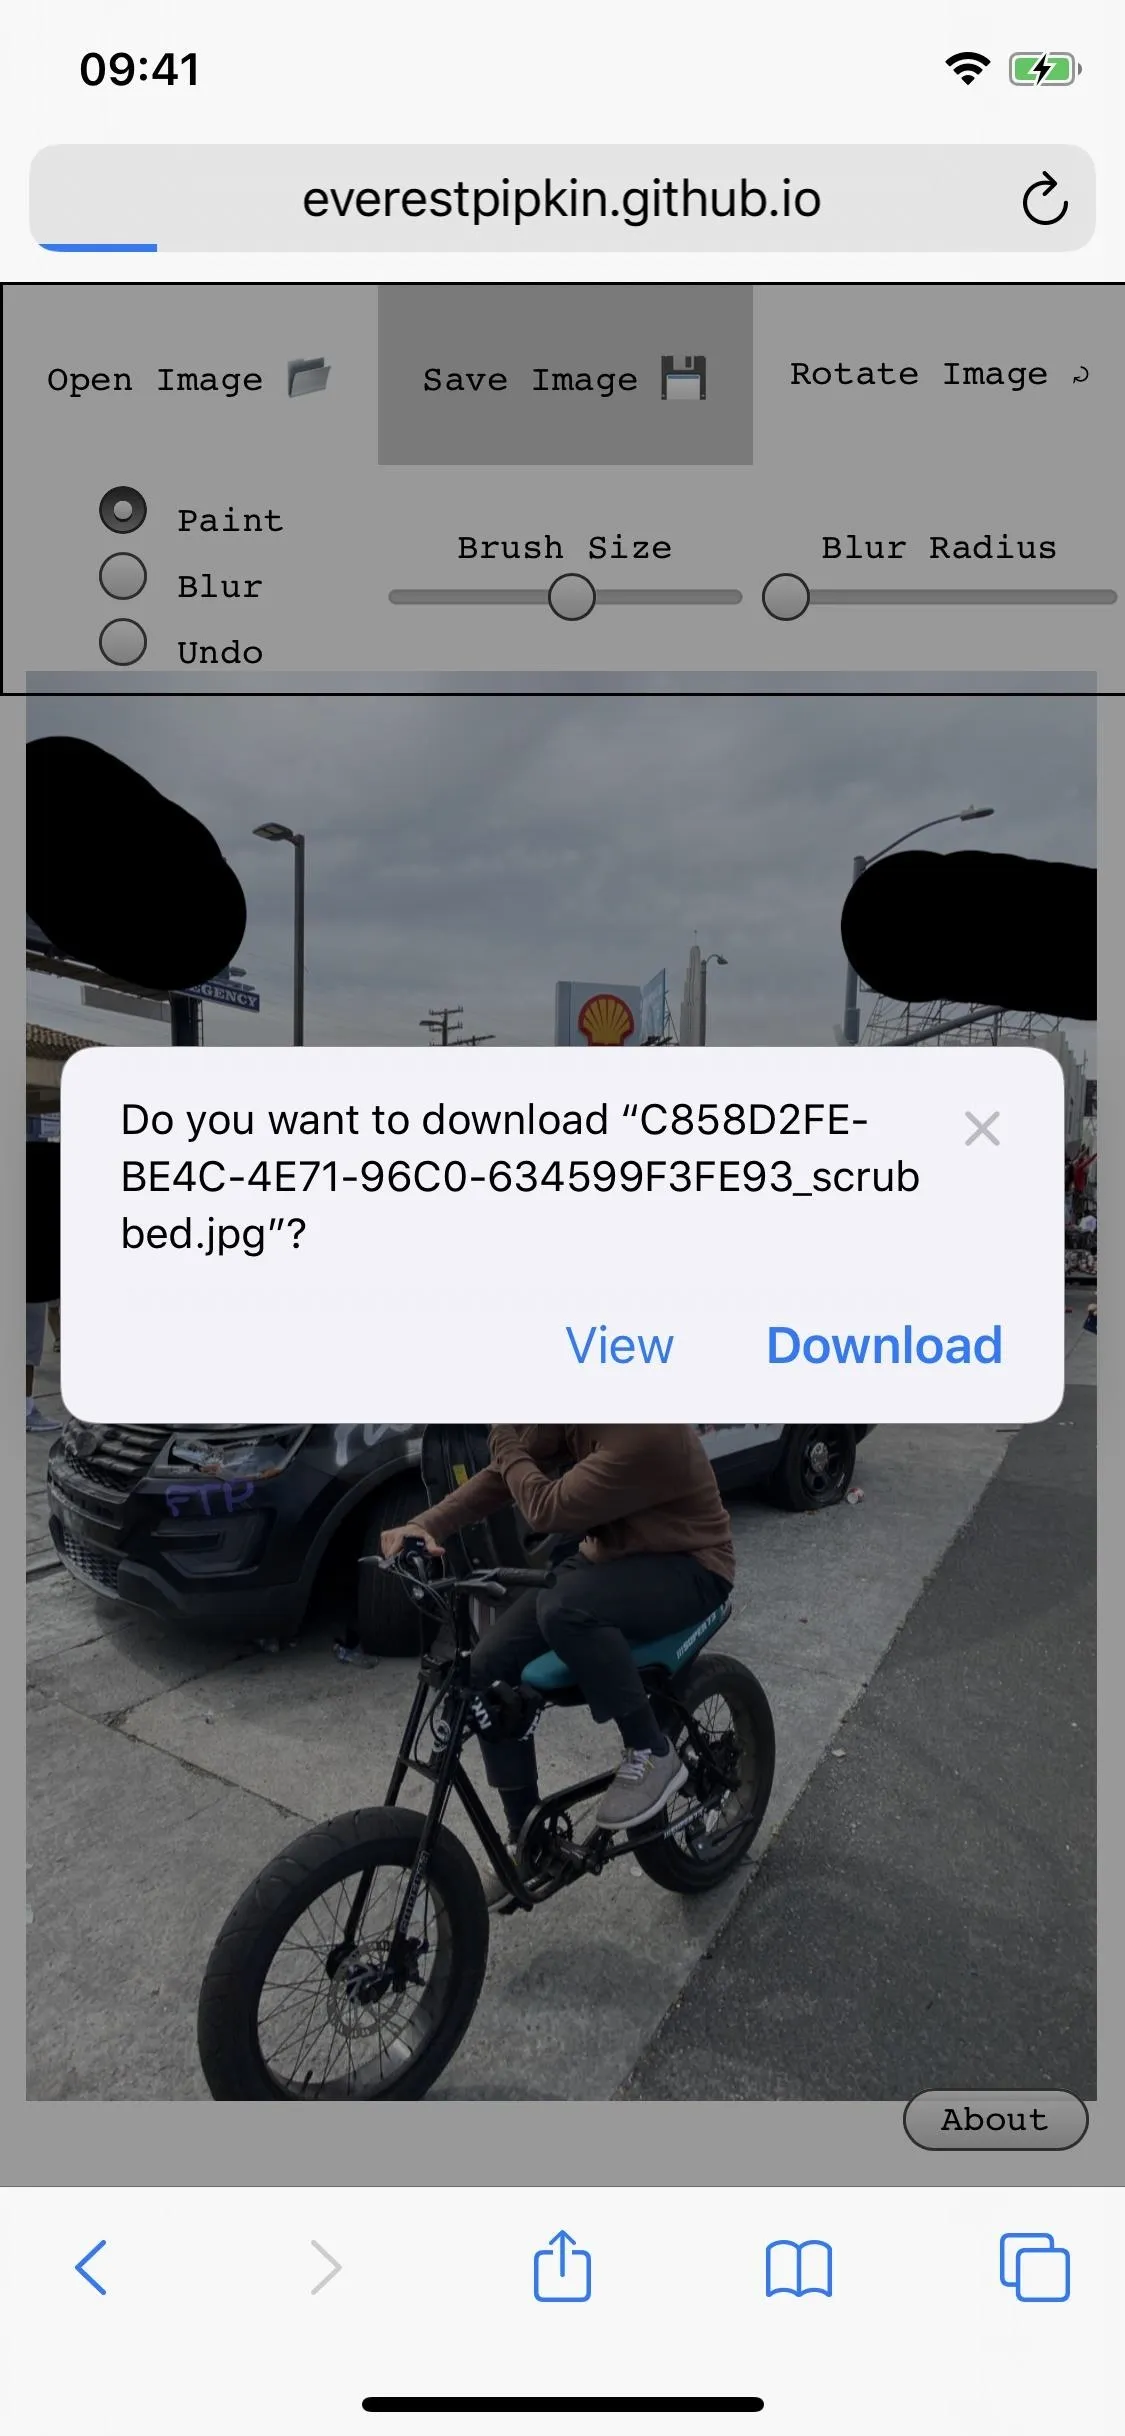
However, one of the best options you could use is a cross-platform, open-source tool, so you can use it on any device you own, including your computer. It's called Image Scrubber, and it works right from any web browser. After uploading an image, it shows you all of its Exif data, where you can then "Scrub" it. If you want to capture a still image from a video, you can upload a video too and pick the frame, then view and scrub Exif details if available.
Removing Geotags & Other Metadata from Videos
Videos are published just as much if not more than still pictures, and you can strip the metadata from them as well. However, when it comes to native Exif removal tools on your smartphone, you don't have as many options.
You can use iOS 13's removal option via the Photos app, as mentioned above, and the same things outlined in the previous section regarding images in Google Photos apply to videos, but Samsung blocks removing Exif from videos.
When it comes to third-party tools, many of the apps brought up for images also work for videos. To show you how a few of them work, I'll quickly show off Photo & Video Metadata Remover for iOS and ExifTool for Android, both free tools.
Using Photo & Video Metadata Remover (iOS)
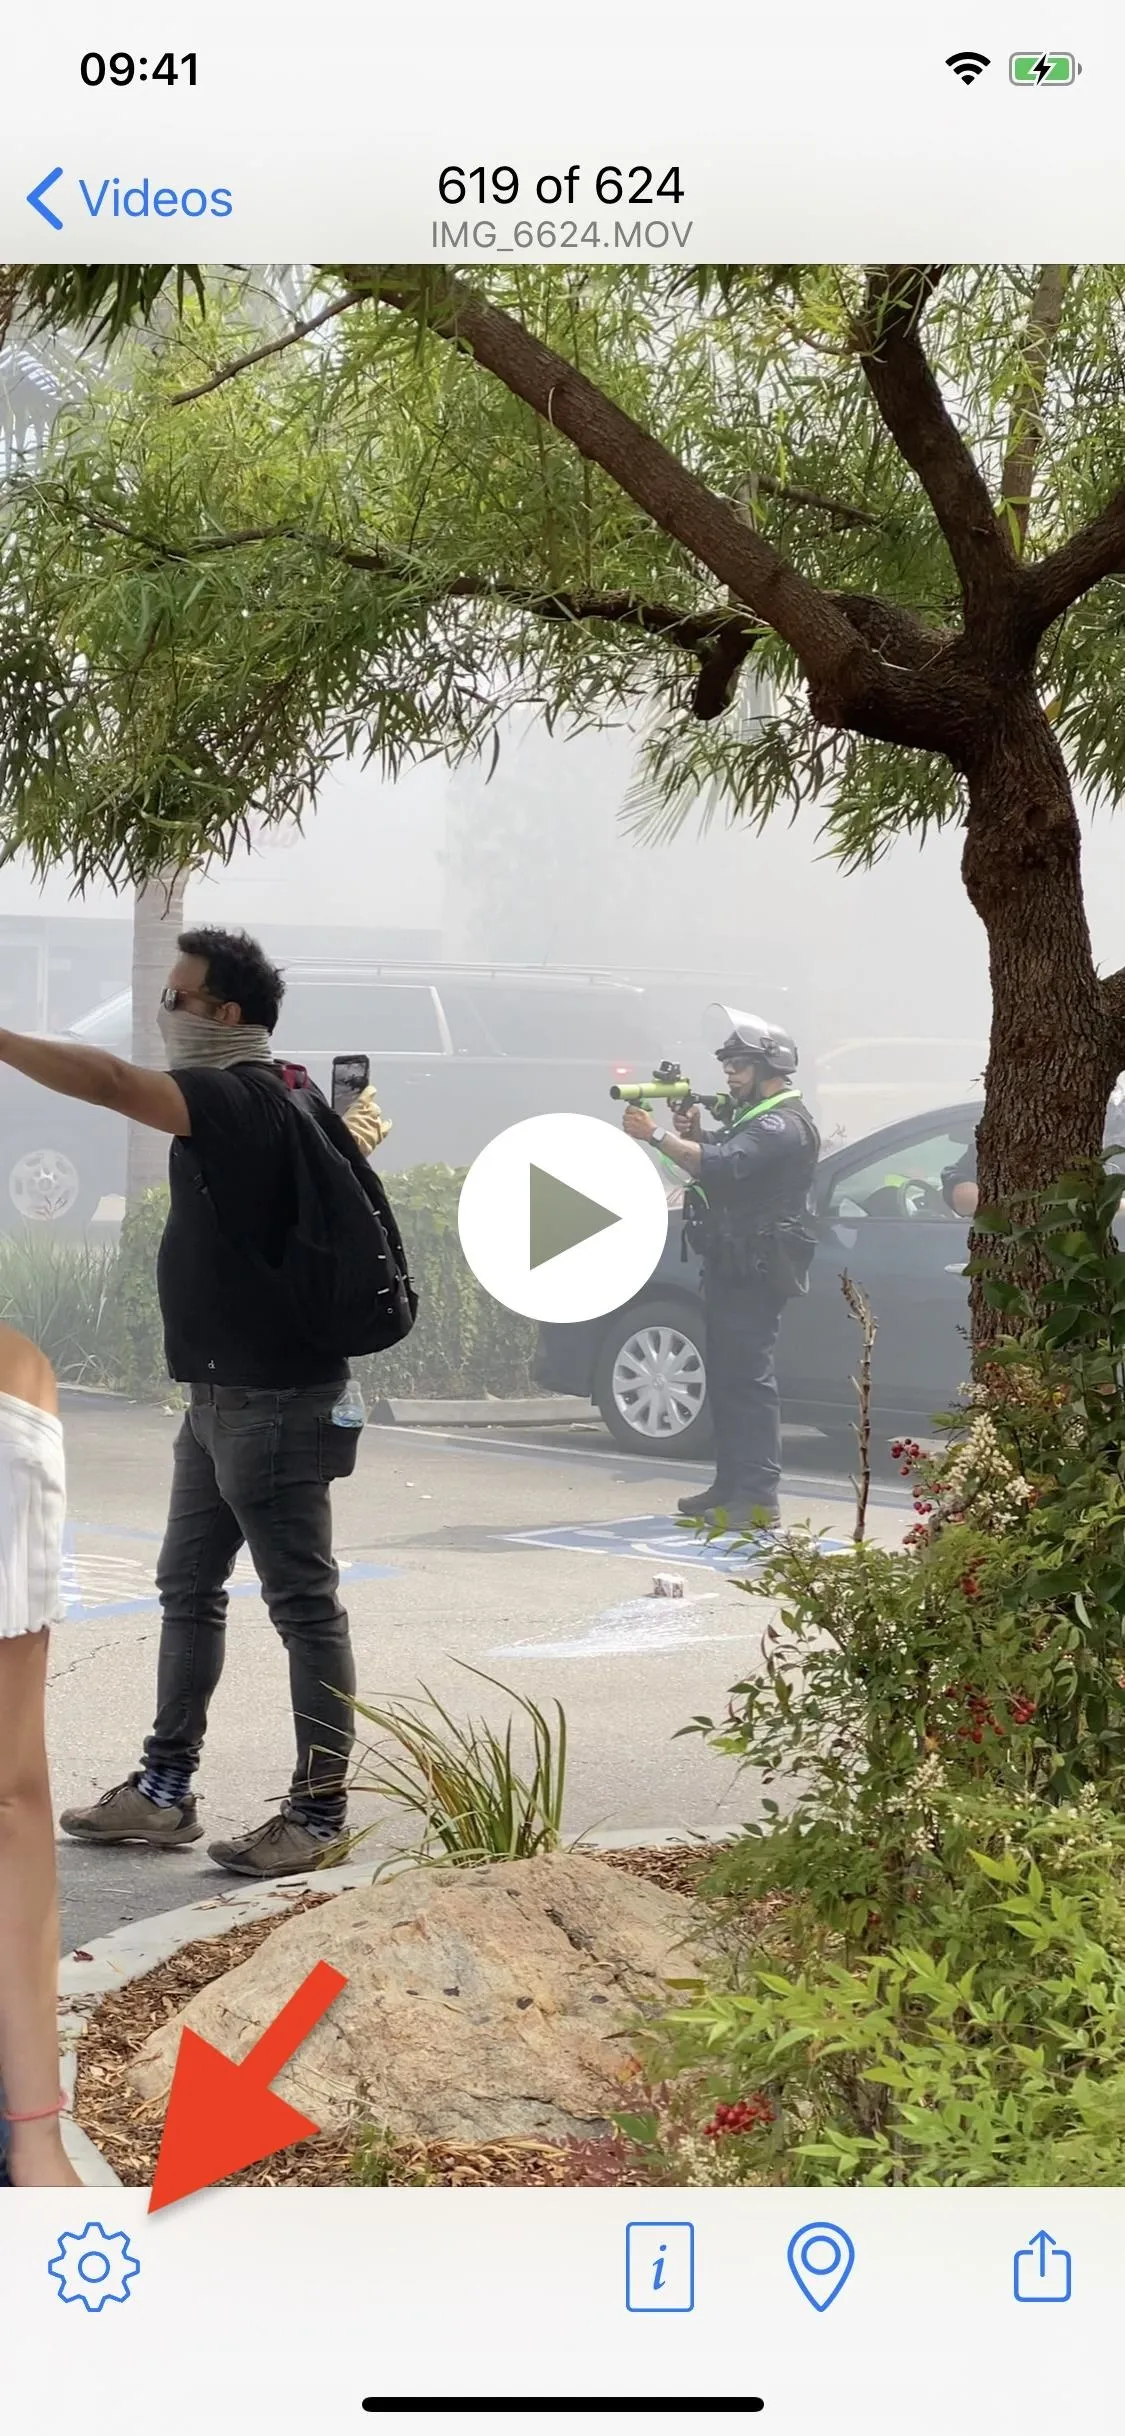
Open up the Photo & Video Metadata Remover app, select a video from your Photos app, tap on the gear icon that appears on the bottom left of the video, then select "clear all metadata." A new video, without any metadata, will be saved to your device.

Using ExifTool (Android)
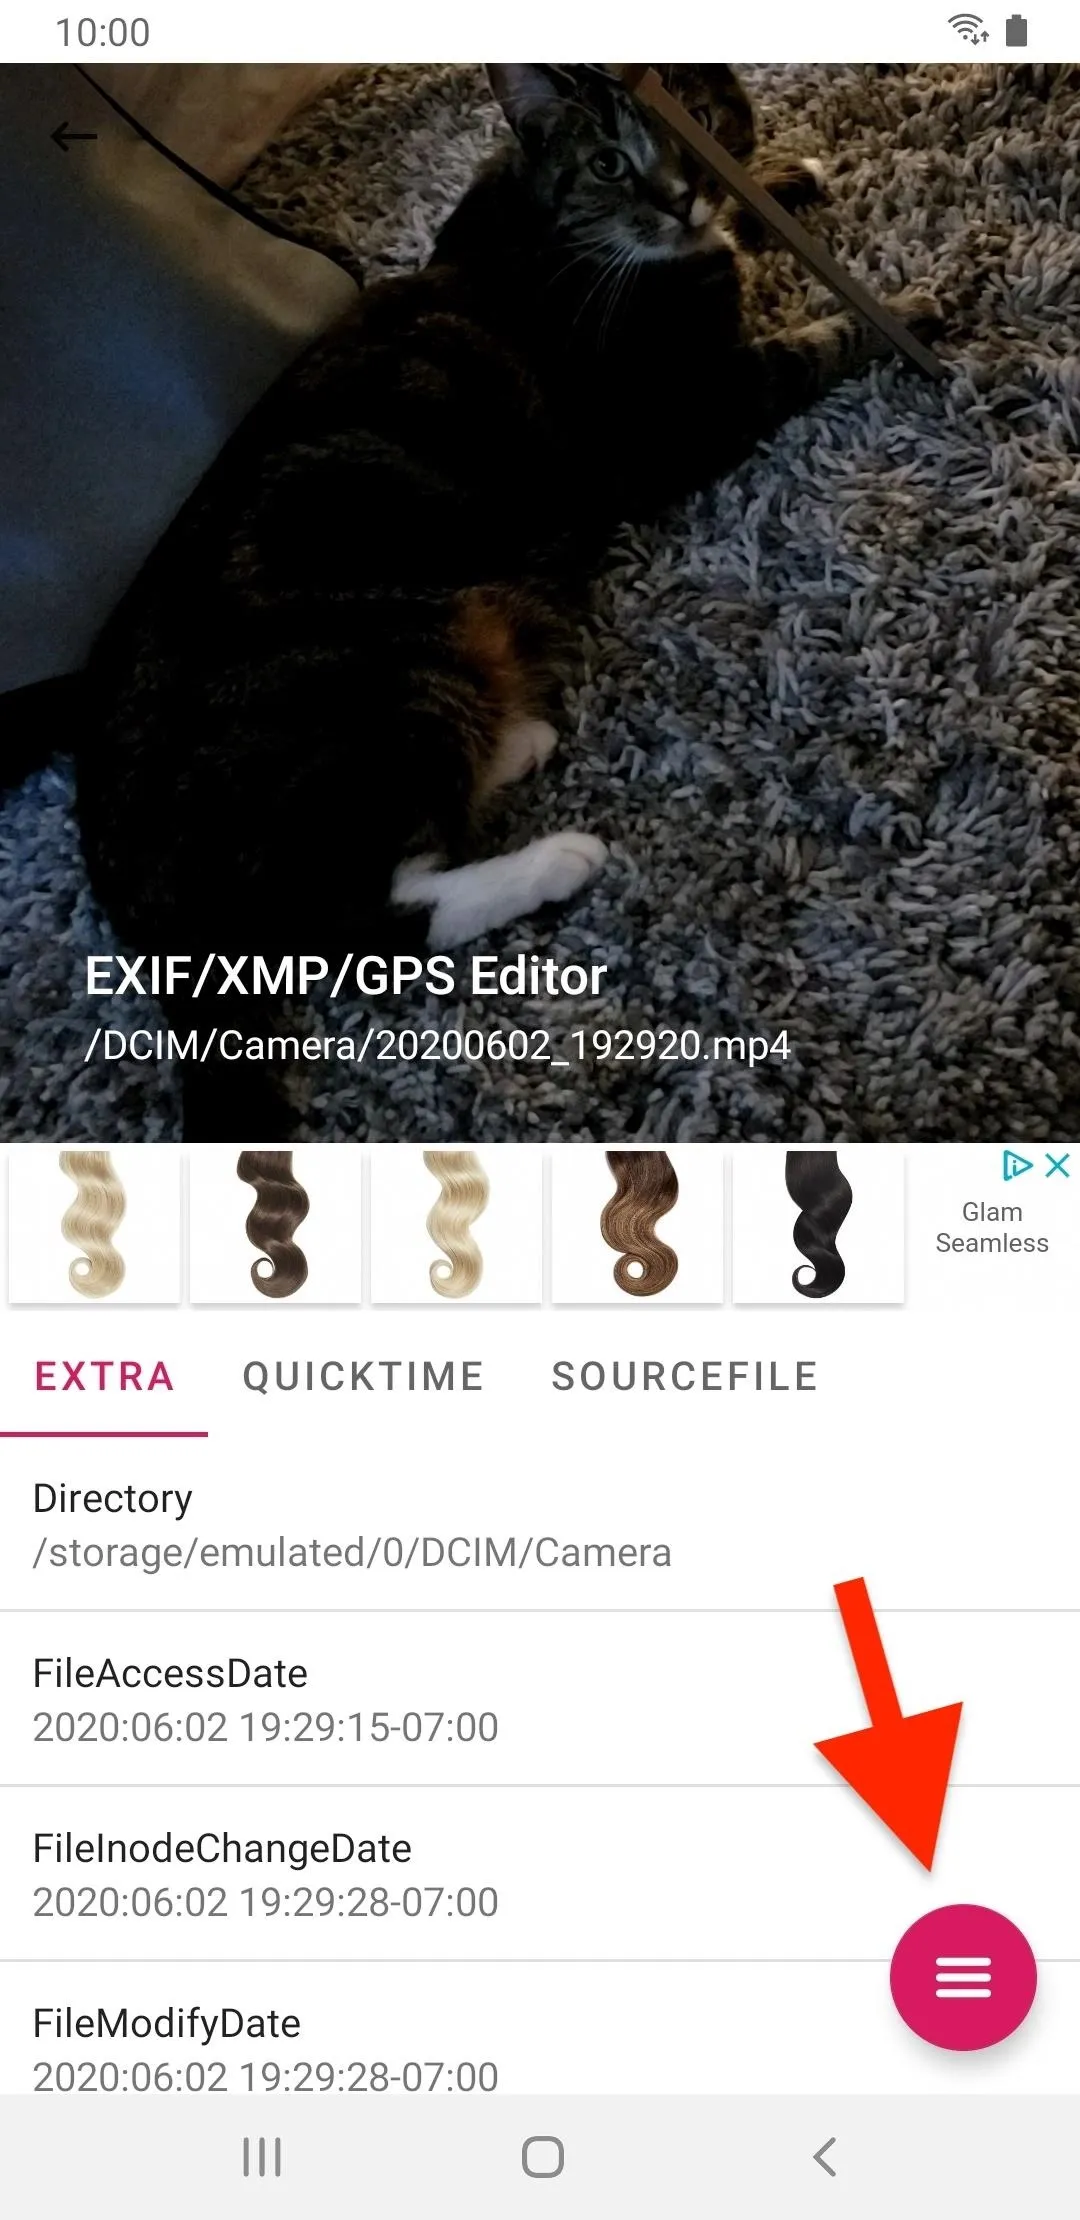
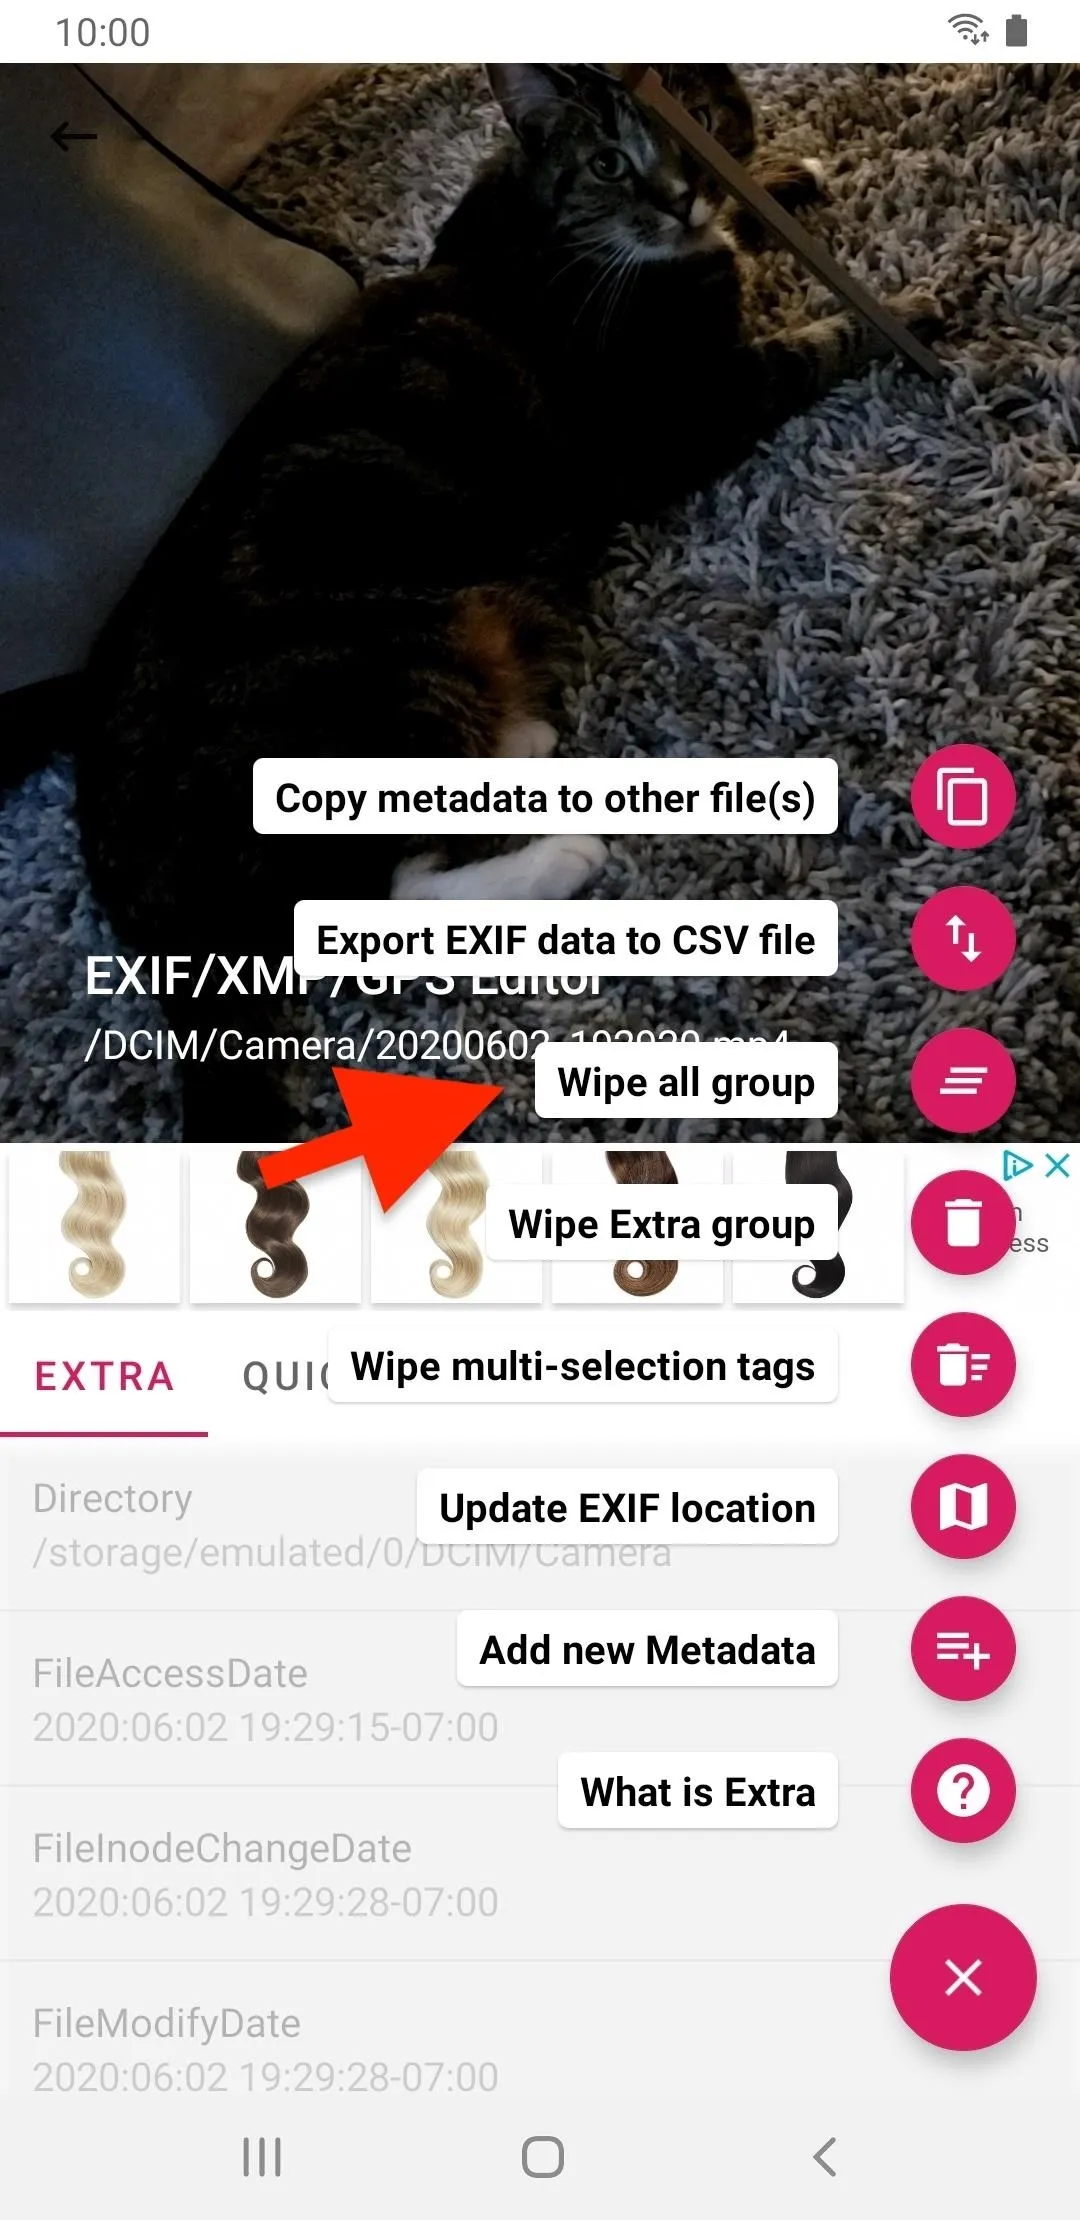
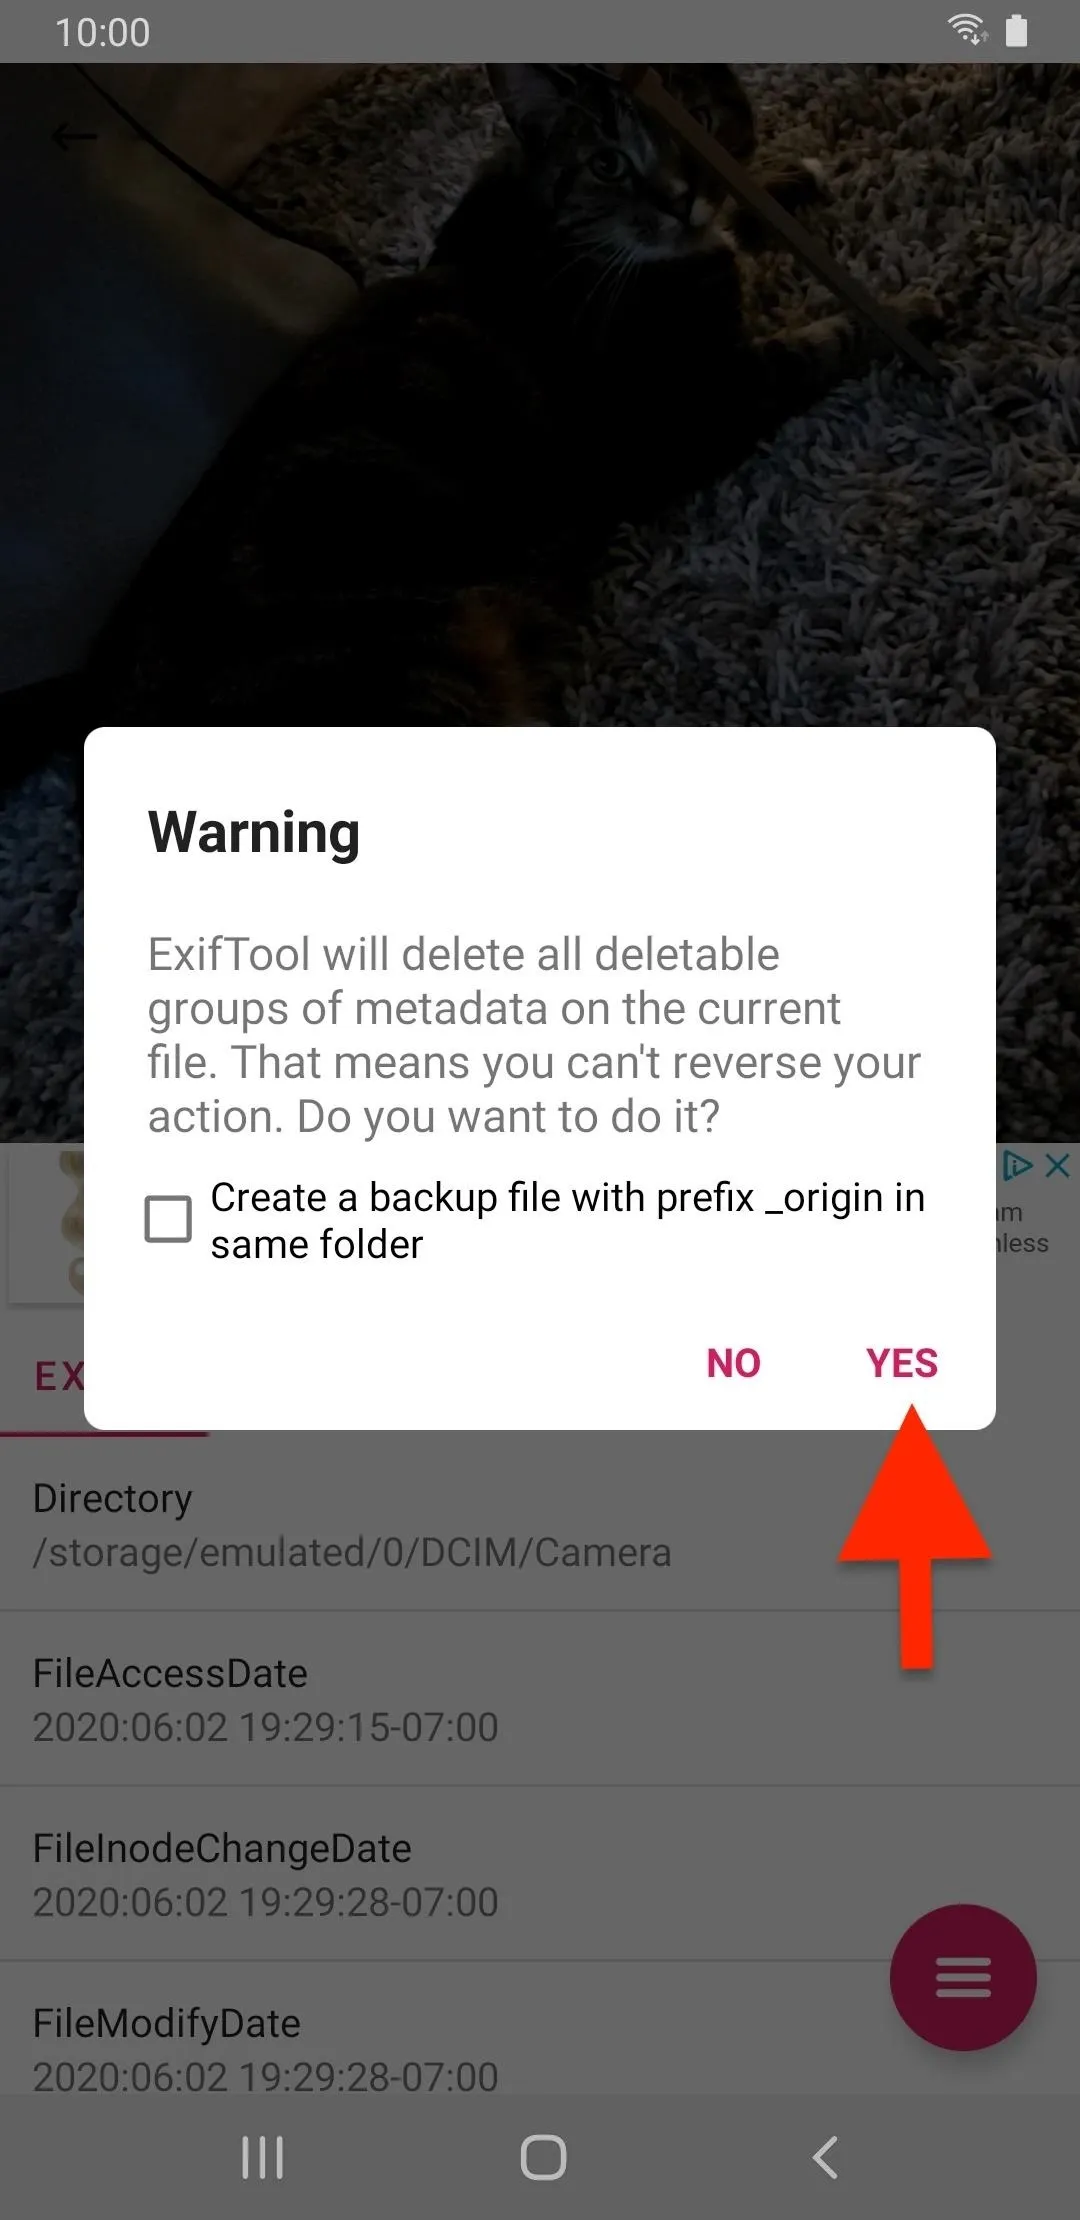
Open up the ExifTool app, select a video from your gallery, and you'll see the video's metadata separated into different groups. Tap the three-dash menu button in the bottom right, select "Wipe all group," then "Yes" to confirm. It will remove all deletable metadata, such as location and date, but keep other useless metadata.
Blur & Obfuscate Faces & Identifying Marks
Aside from stripping media of its metadata, it's vital to protect the people and places in your photos and videos. Faces, clothing, scars, tattoos, birthmarks, addresses, businesses, billboards, and famous landmarks can be easy to identify from a photograph or video. That's a bad thing if law enforcement, hackers, or some random internet user with ill intent are inspecting the media. Even a unique shirt design can help identify somebody.
The best way to hide faces and identifiable objects is to blur or black them out. Blurring is fine and looks the best overall, but blacking out sensitive information in media is safer since there's no way to reverse the effect. However, it's highly unlikely that you'll be the subject of that kind of attack, so blurring will likely be enough, as long as you use software that processes blurring on your smartphone and doesn't save copies in the cloud.
Obfuscating Information in Photos
If you just want to black things out (or use another solid color), the native tools on your smartphone are probably enough to get it done.
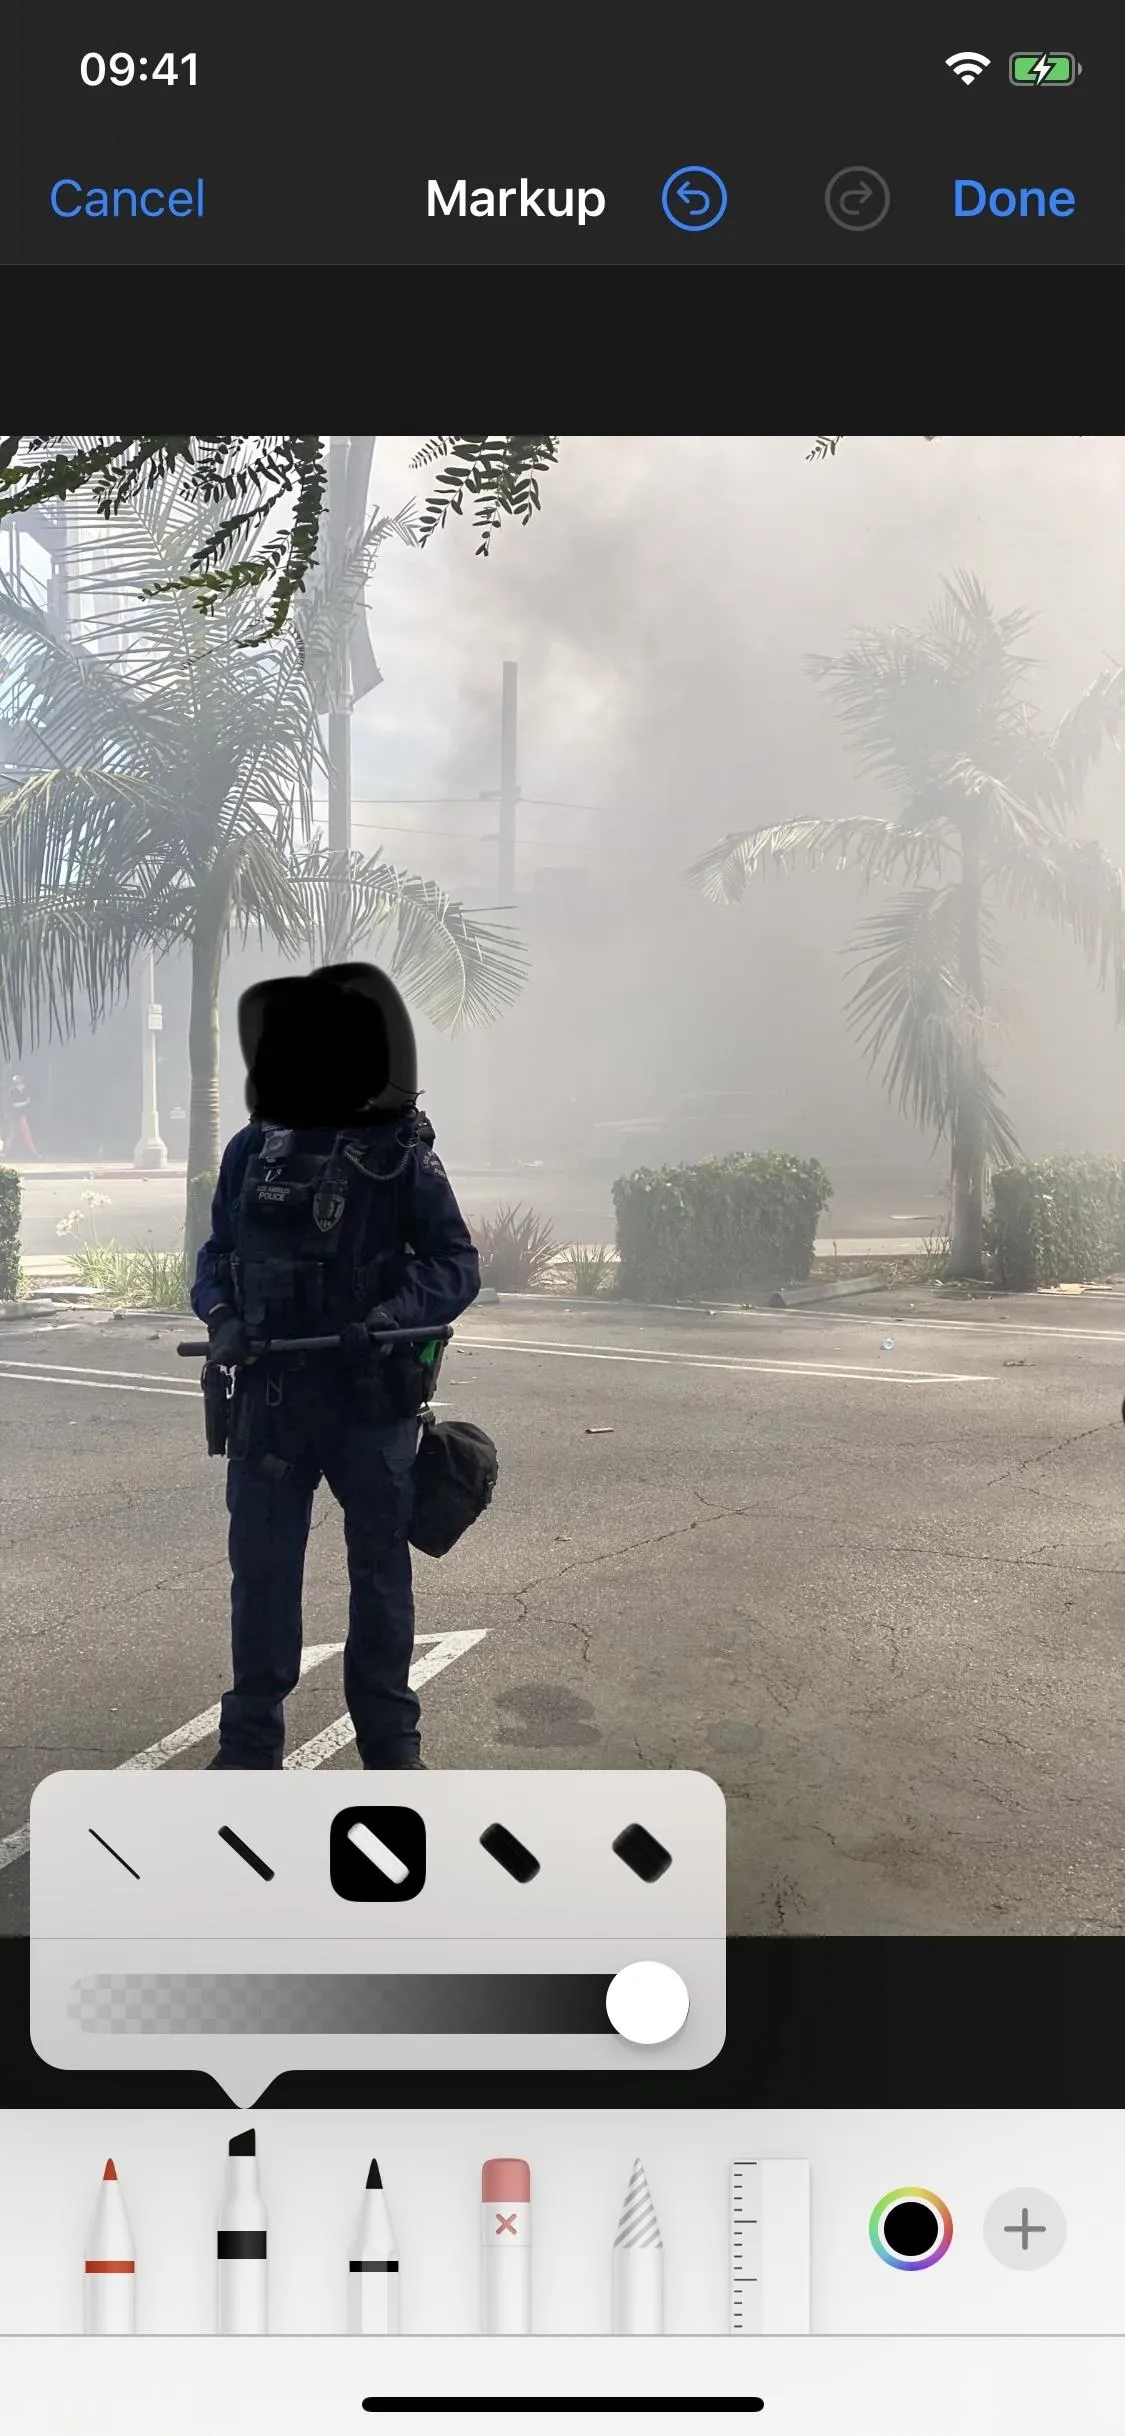
On an iPhone, tap "Edit" when viewing an image in the Photos app, then the ellipsis (•••), followed by "Markup." Here, you can use solid ink with the pen, pencil, or shape tools to hide objects. If you use the screenshot method above to wipe Exif data, tap the thumbnail that appears, then use the Markup tools from there.
For a Samsung Galaxy phone, open an image in the Gallery app, tap the pen icon in the toolbar, then the paint icon. Hit the pen icon that appears to choose the tip and intensity, then use black ink to paint over objects. You can also use the stickers tool to place fun art over sensitive information.
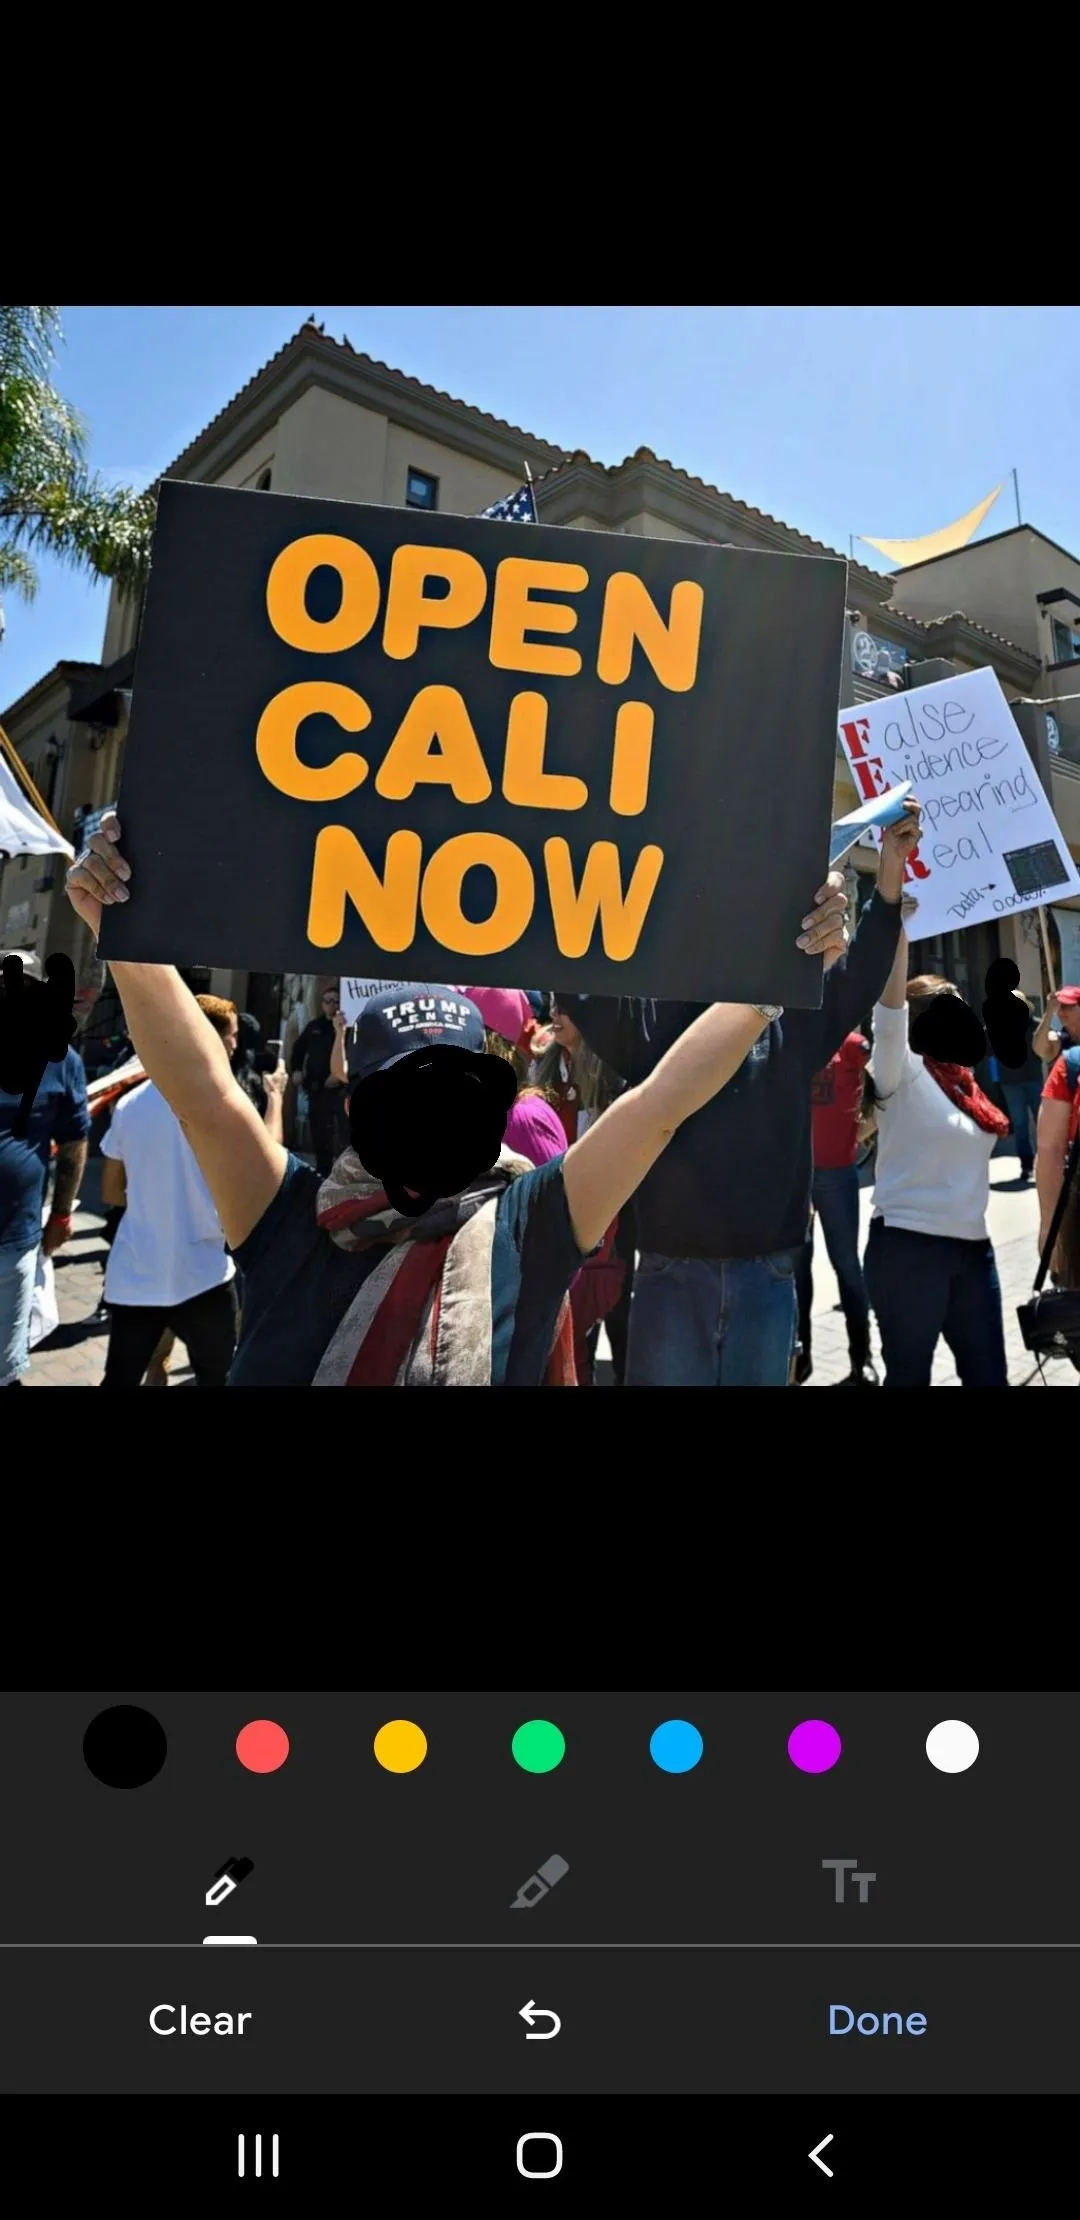
If using Google Photos, tap the squiggly line icon in the toolbar. Select the marker tool, black ink (or another color), then start drawing over things.
Blacking out faces in iOS 13 (left) vs. Google Photos on Android (right).
Blacking out faces in iOS 13 (left) vs. Google Photos on Android (right).
However, there is no native blur tool in any stock app, so you need to use a third-party tool if that's the route you want to take. Signal just came out with a blur tool for its secure messaging app, with auto and manual options for covering faces up, and you can download images after editing them without sharing them in a message there.
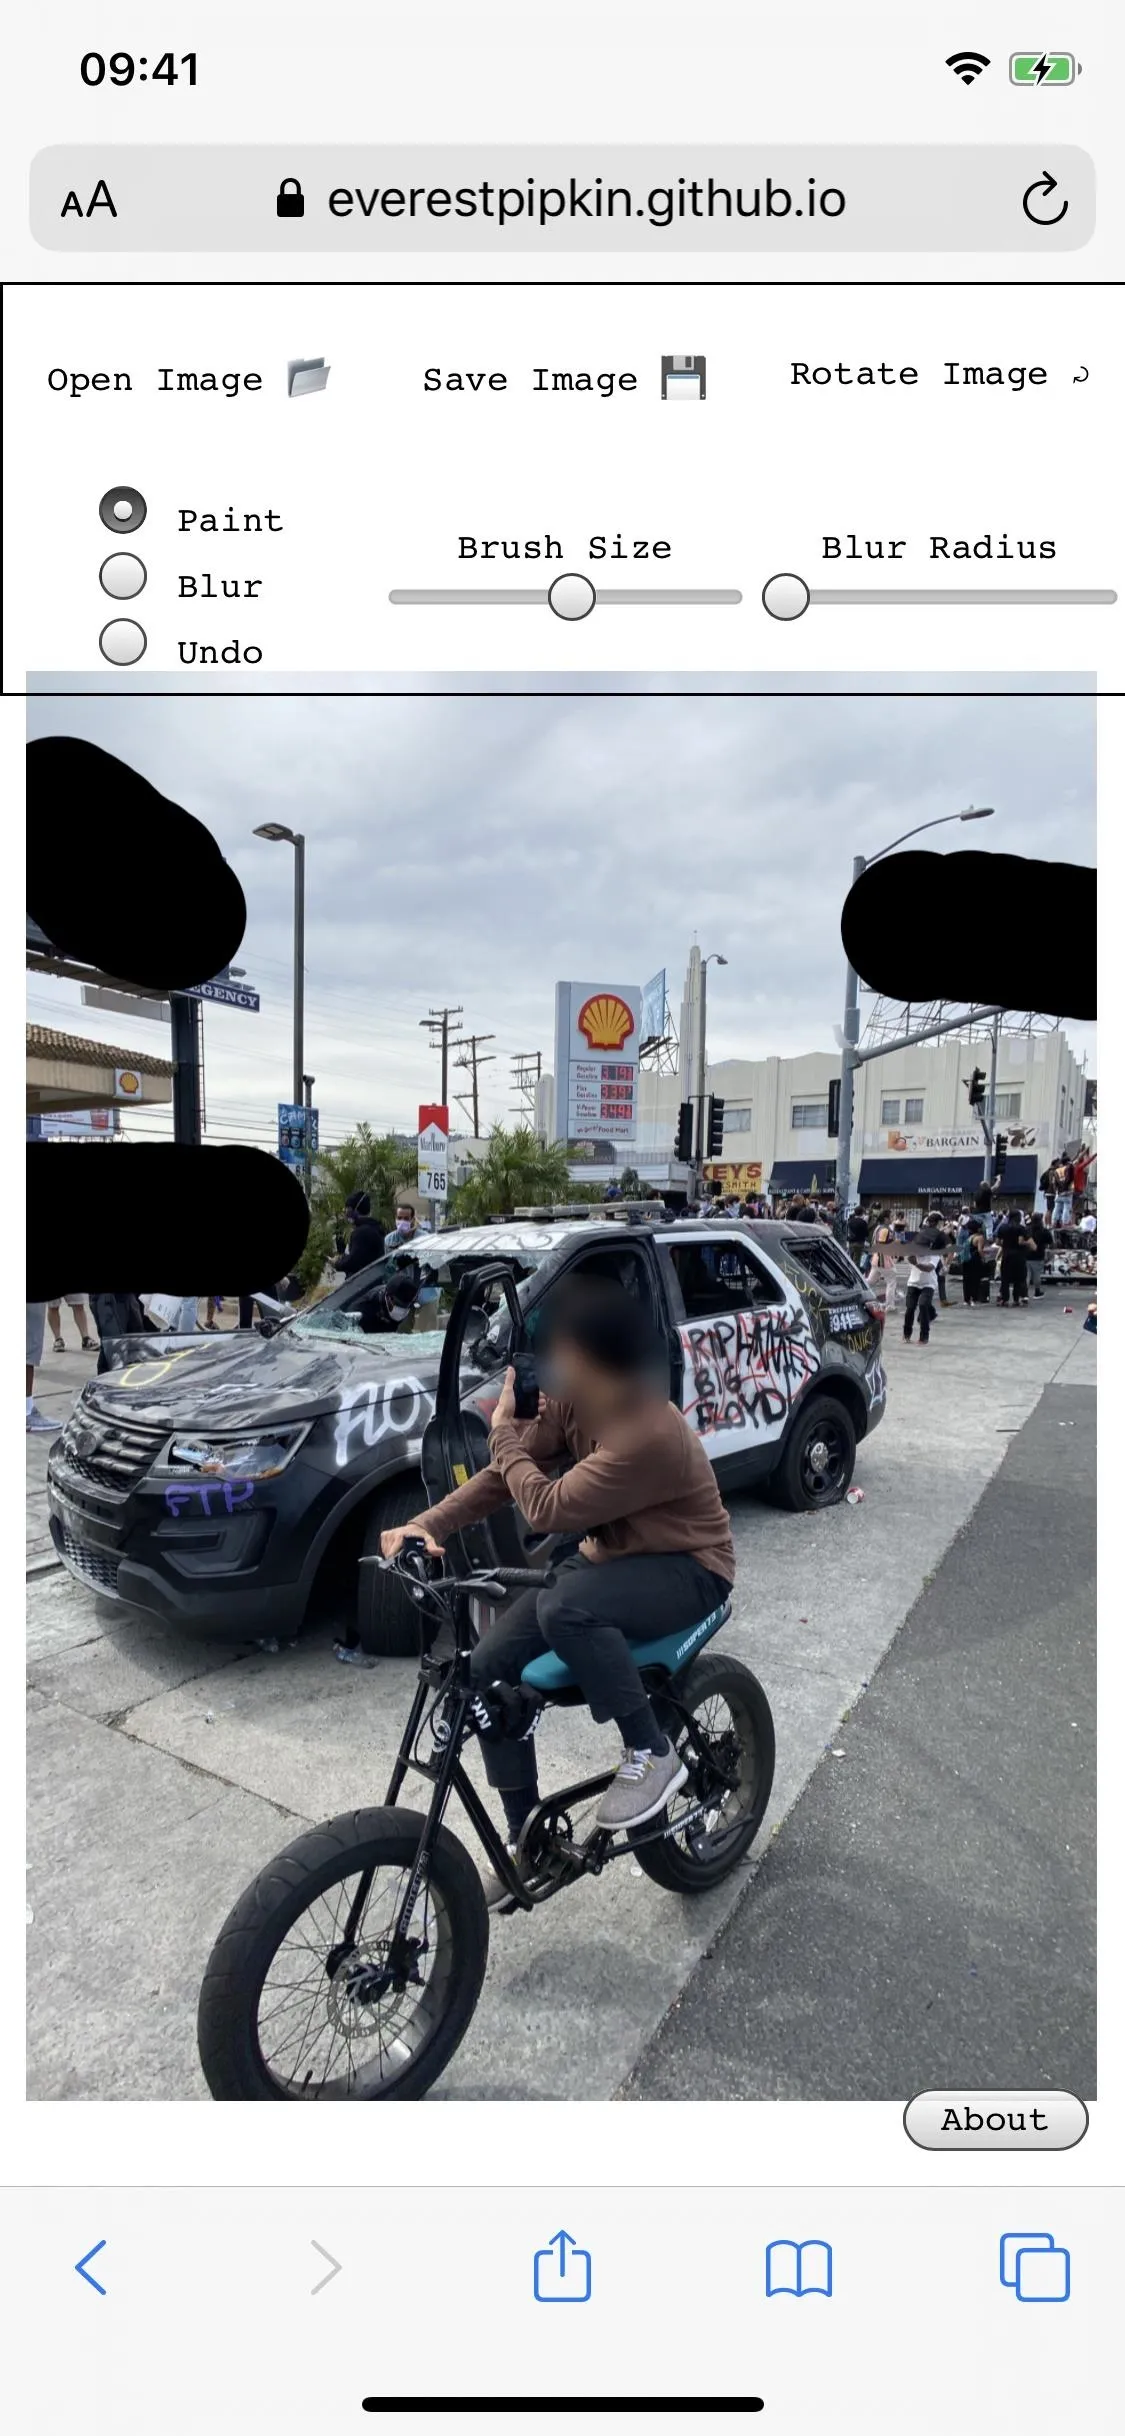
Besides that, there are many other tools available, which you can search for in your app store, but one of the easiest is Image Scrubber, which is discussed above for Exif removal. It's a cross-platform web app that also lets you blur or black out parts of your photos. Pipkin, the developer, states that Image Scrubber doesn't share your information anywhere, and all of the image processing occurs in the web browser on your device (source code available).
Obfuscating Information in Videos
Although videos are more difficult to alter than photos, it's still essential to blur any faces, addresses, license plate numbers, and other identifiable information. There are many third-party apps you can use, but two popular ones that are both free and don't include watermarks are Video Mosaic App for iOS and Blur Video for Android.
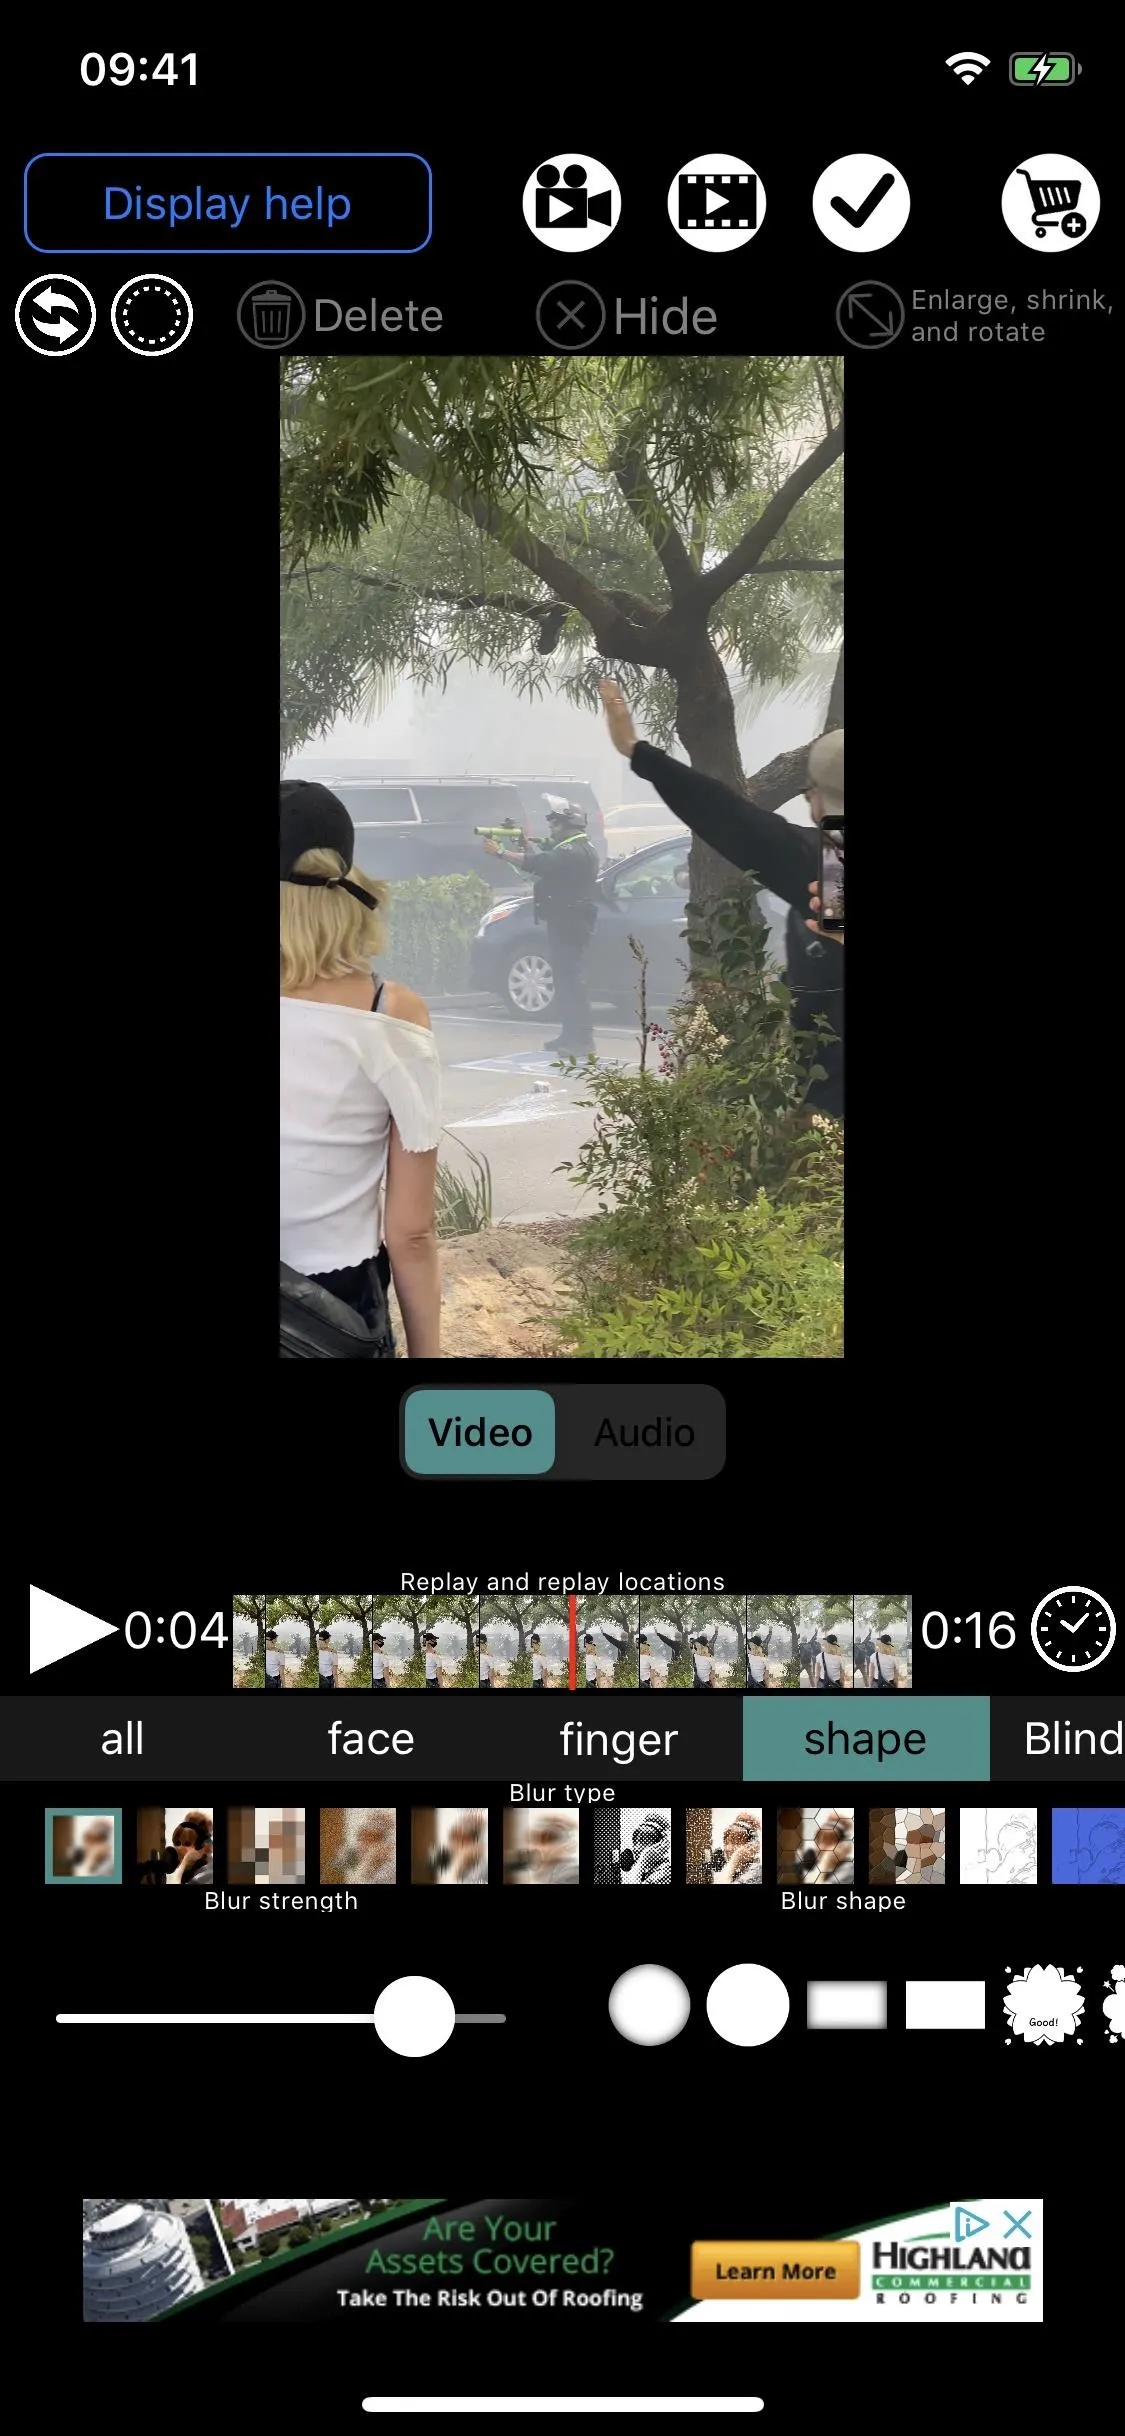
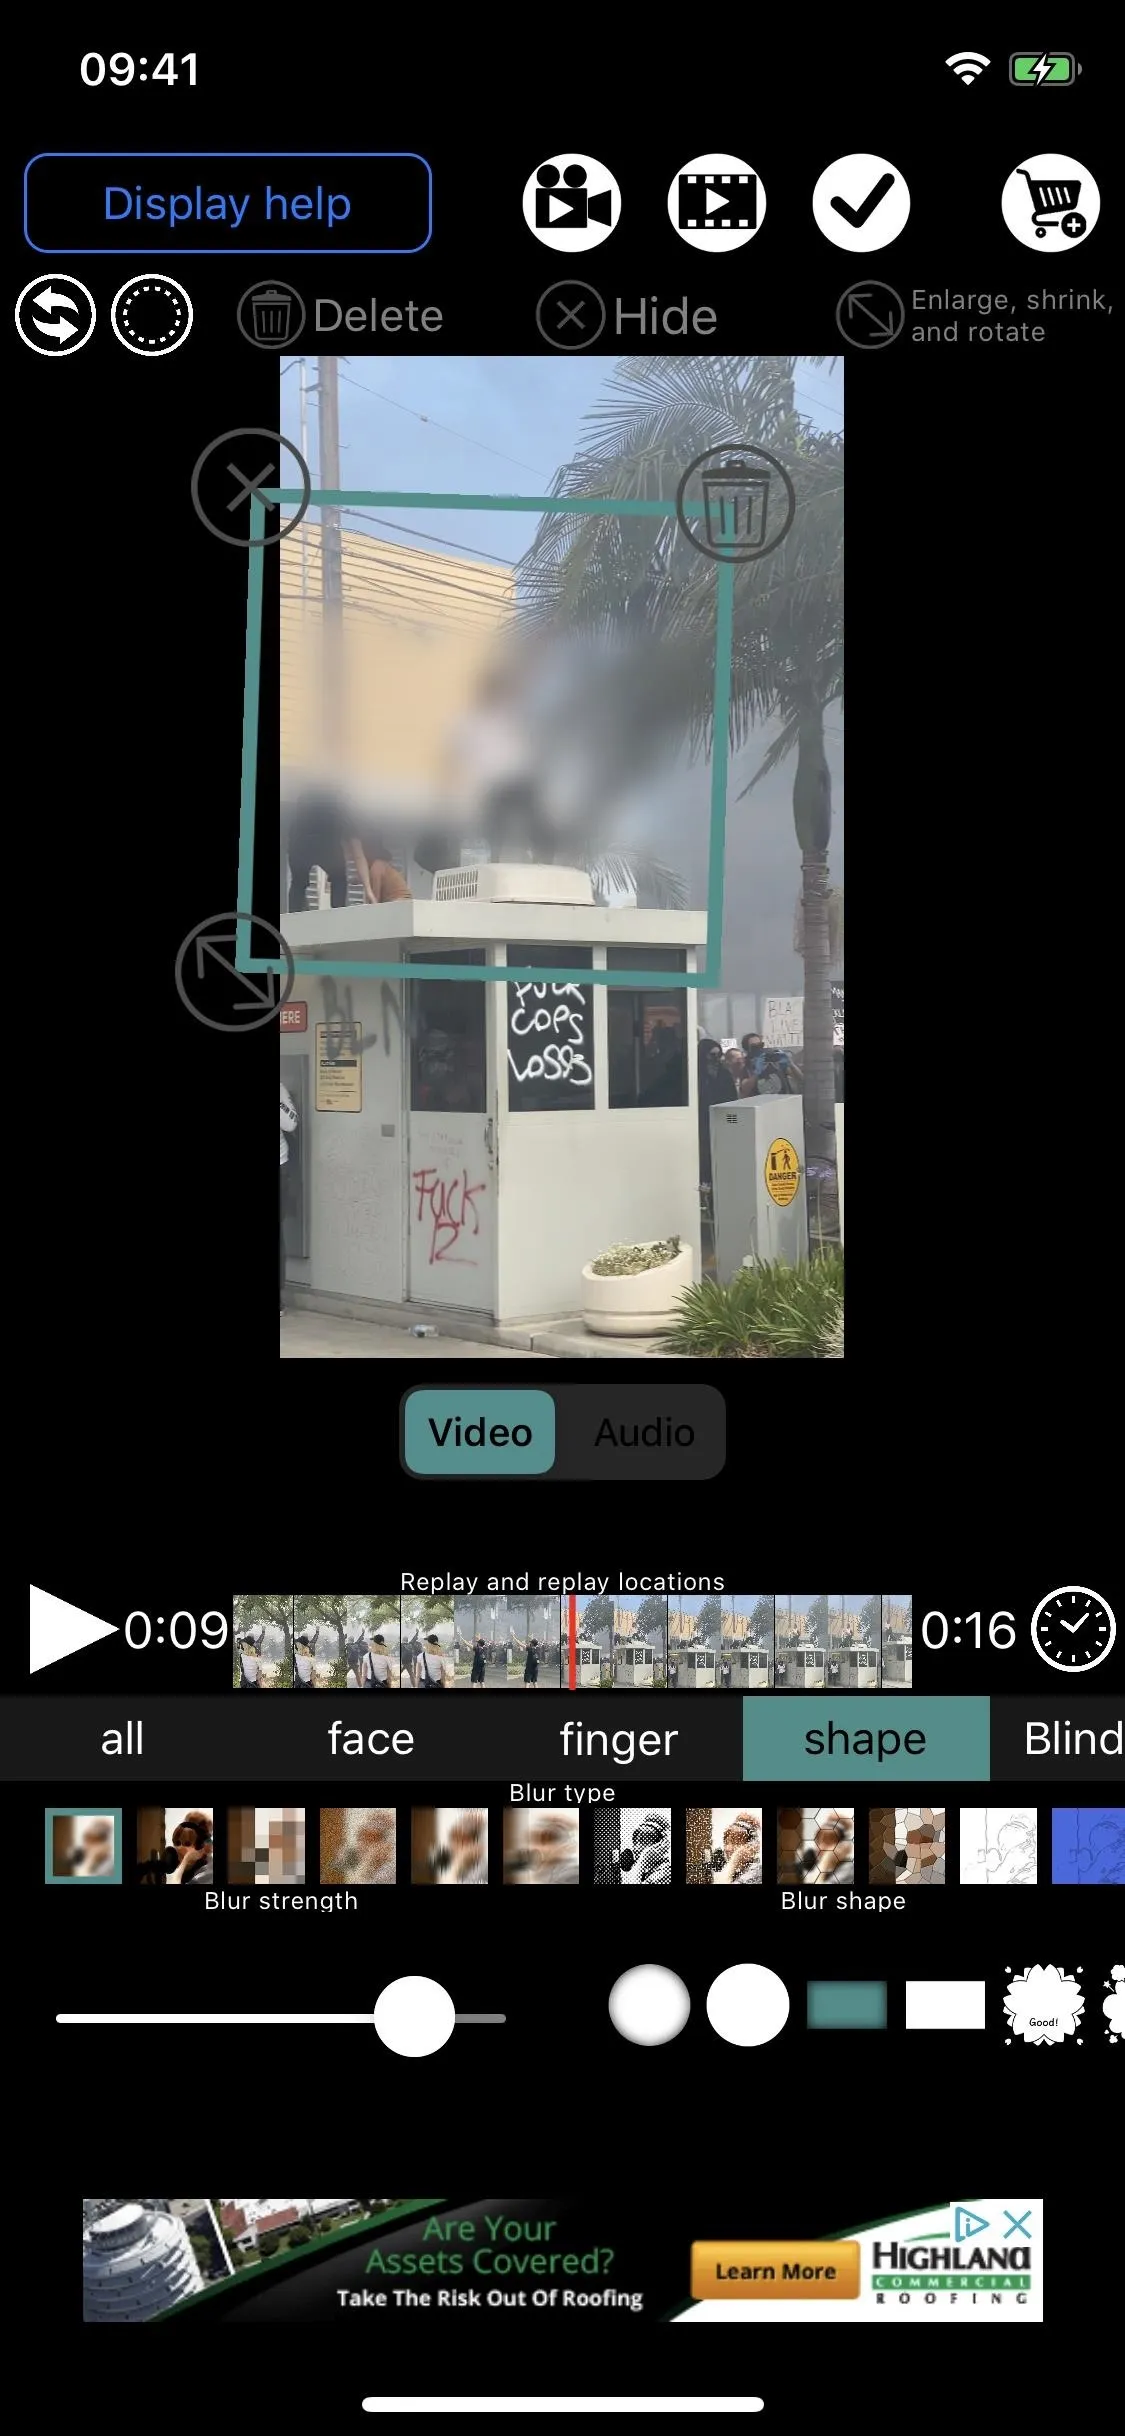
Photo & Video Mosaic App (iOS)
In Video Mosaic, open up a video. Using the preview bar underneath the video, you can scroll to exactly where you want the blur to begin and end. Use shapes, your finger, or automatic recognition to add blur to faces, addresses, text, license plates, buildings, and more. Change the blur strength and blur with the tools at the bottom of the app. Once you're finished, save the edited video back to your Photos app.
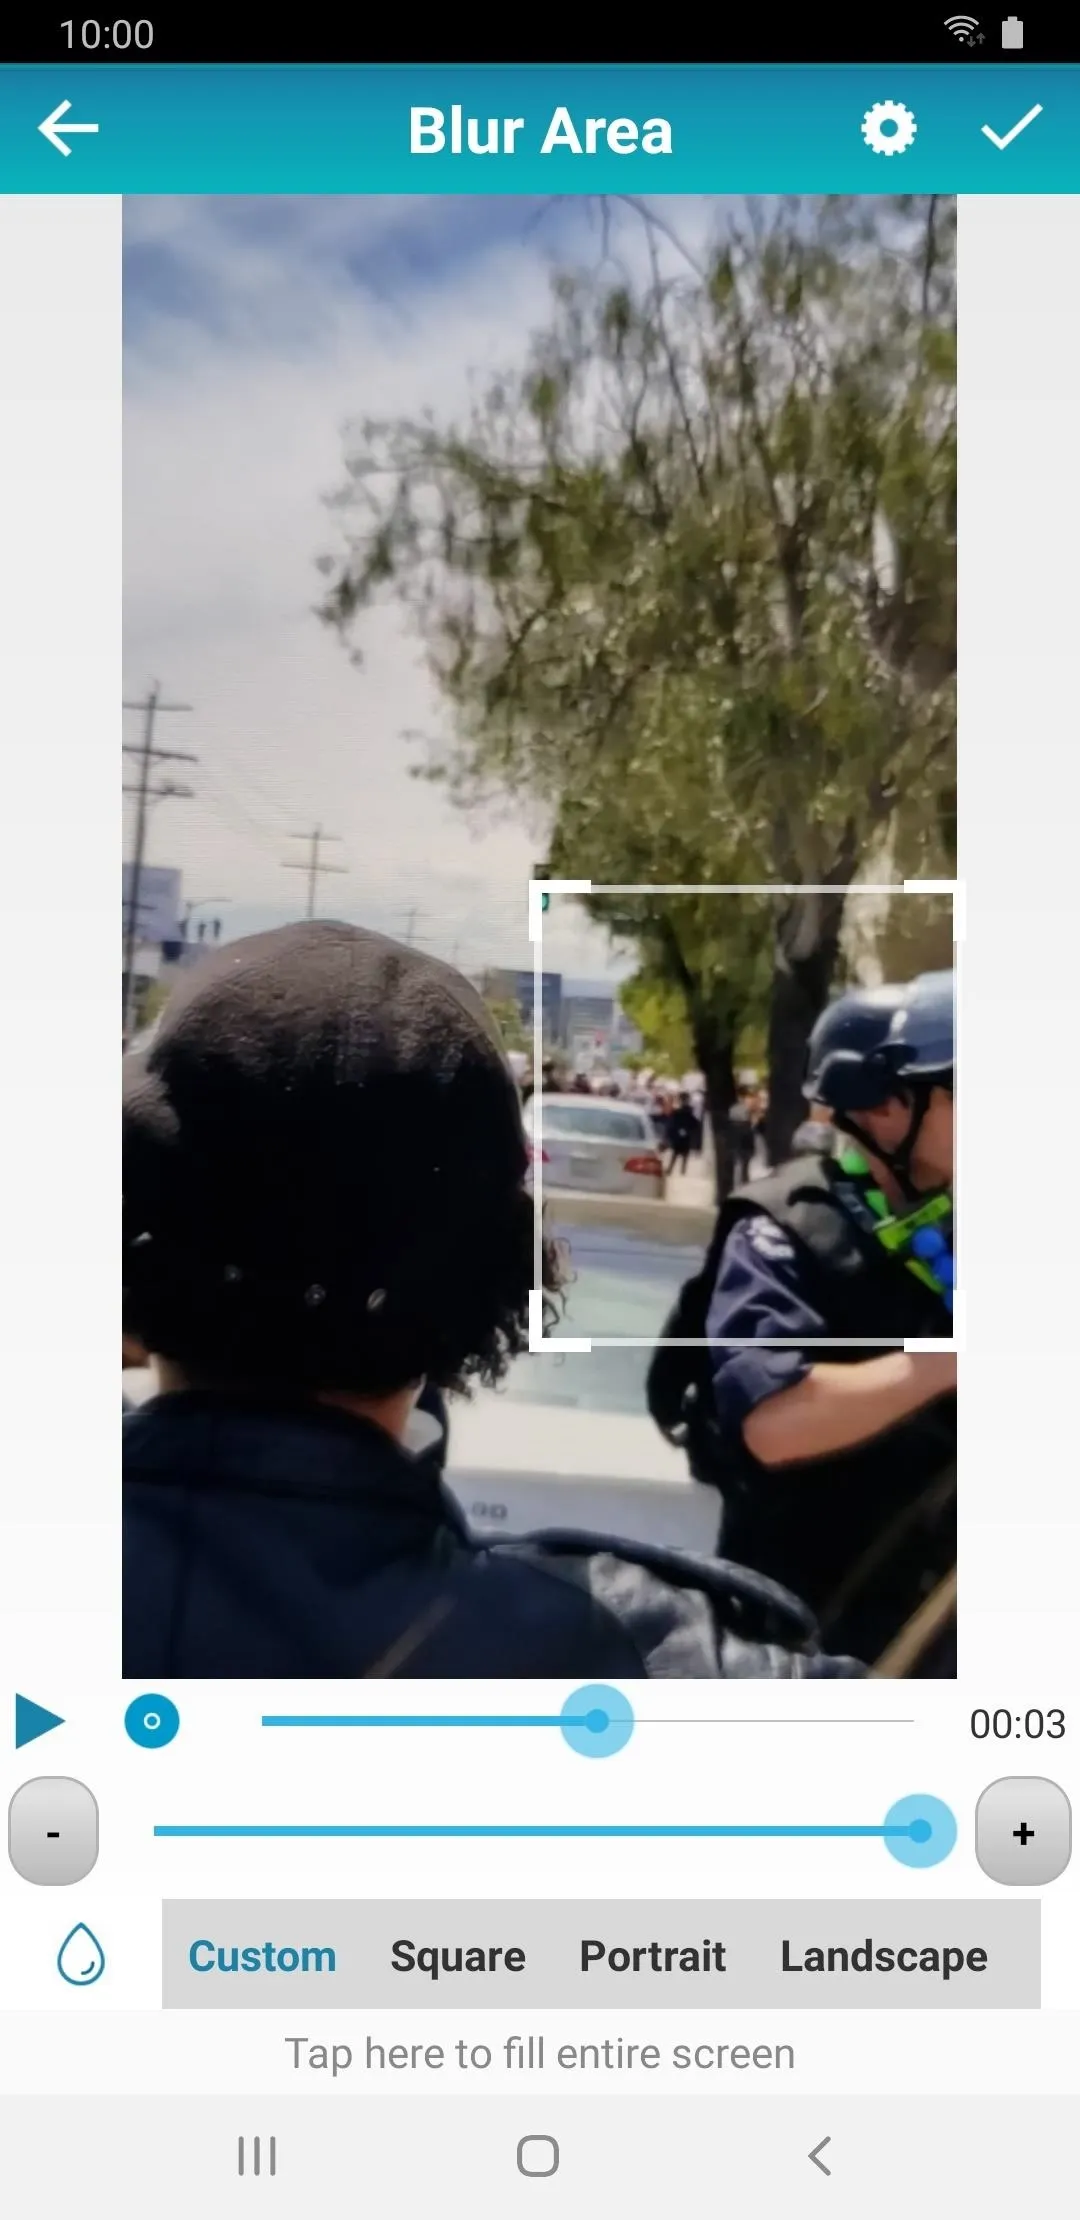
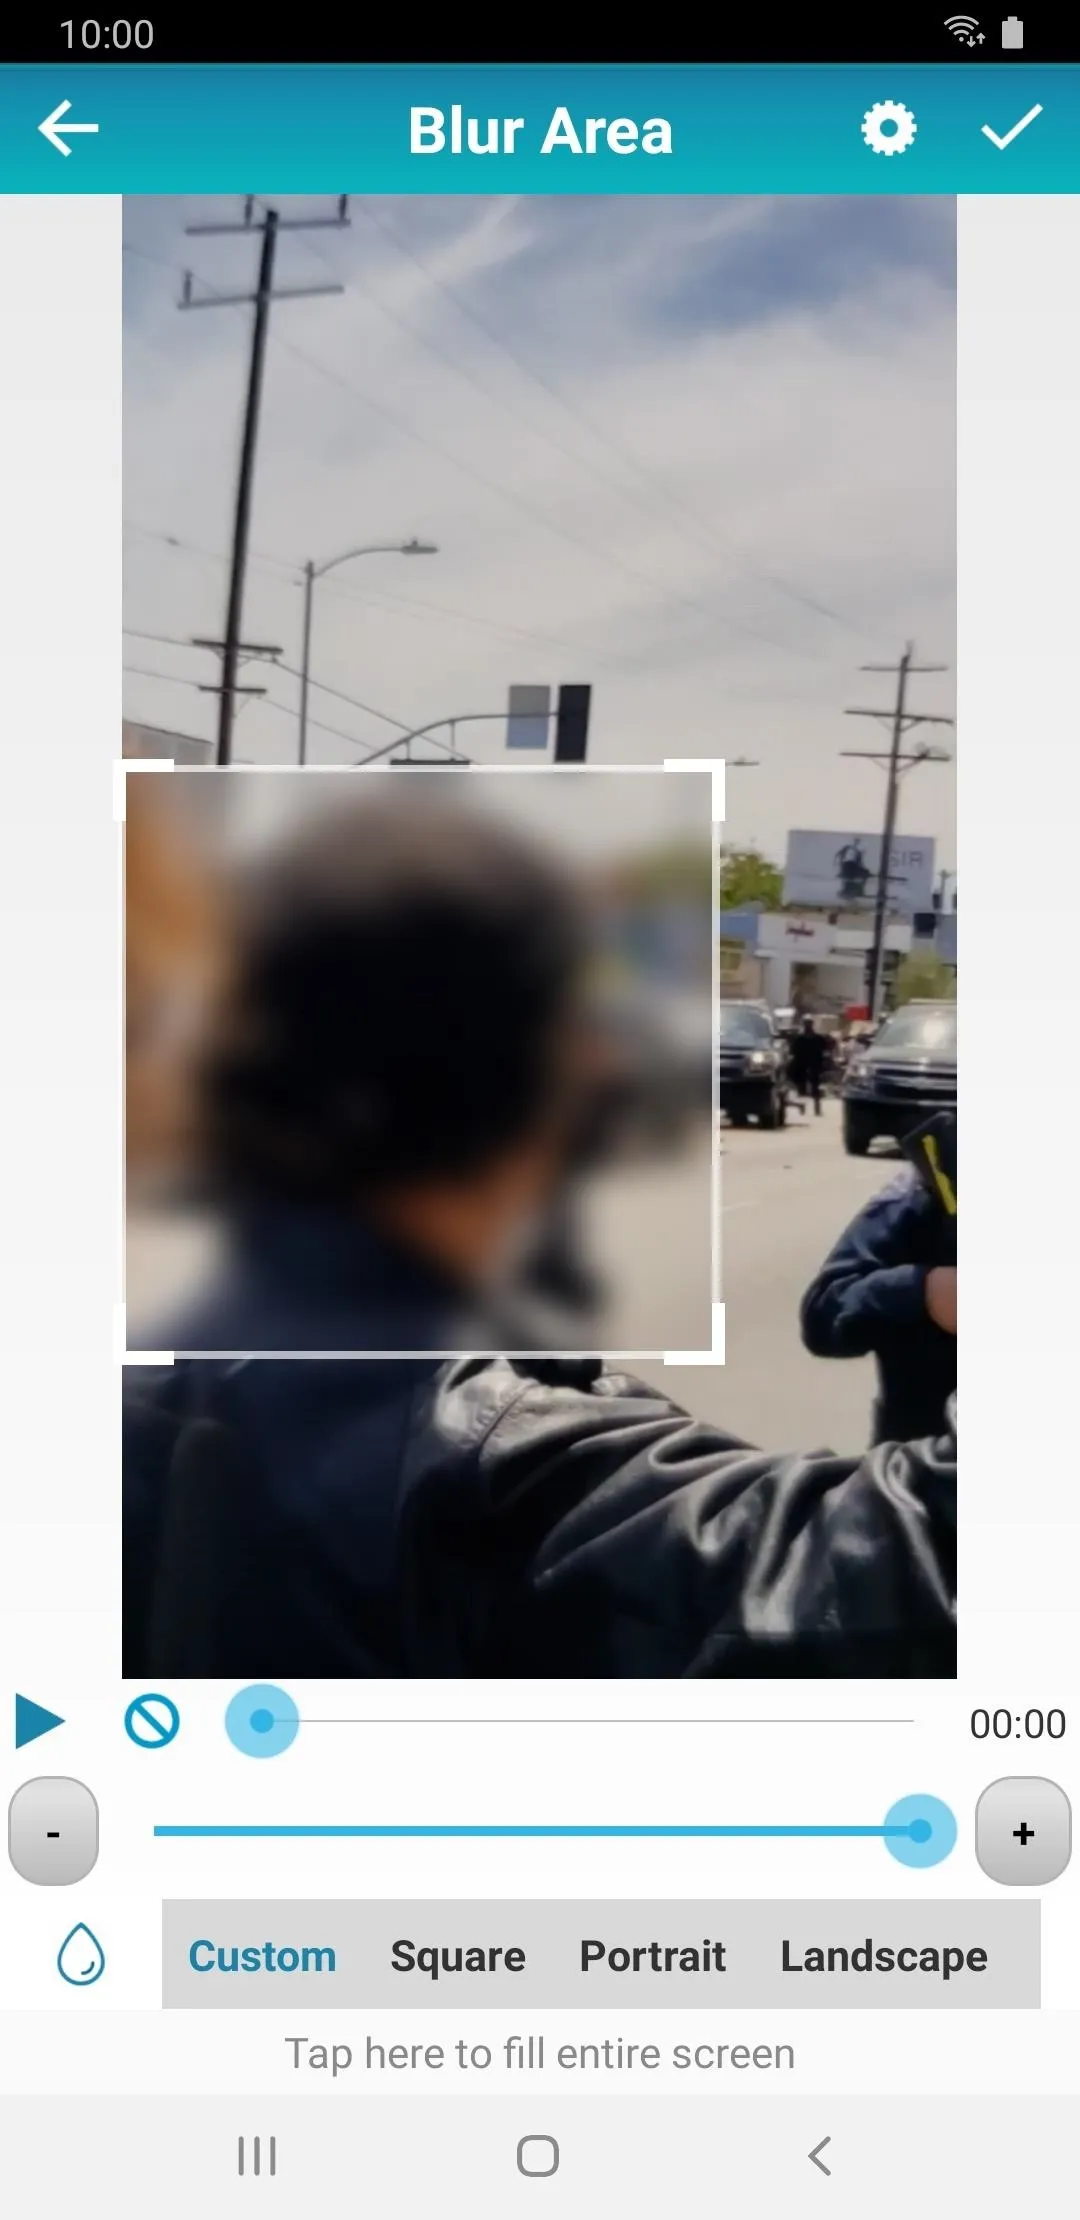
Blur Video (Android)
Open Blur Video, select "Fun Blur," then load a video. Now, you can play the video and add blur in real-time. The app records you moving the blur across the video as it plays, making it easy to move blur around if the faces are moving around constantly, or even remove the blur when you don't need it. The blur can only be placed via objects, but you can change the size of it from a square to a rectangle. Save the video to your device when you're finished.
Use an Anonymous Account to Post
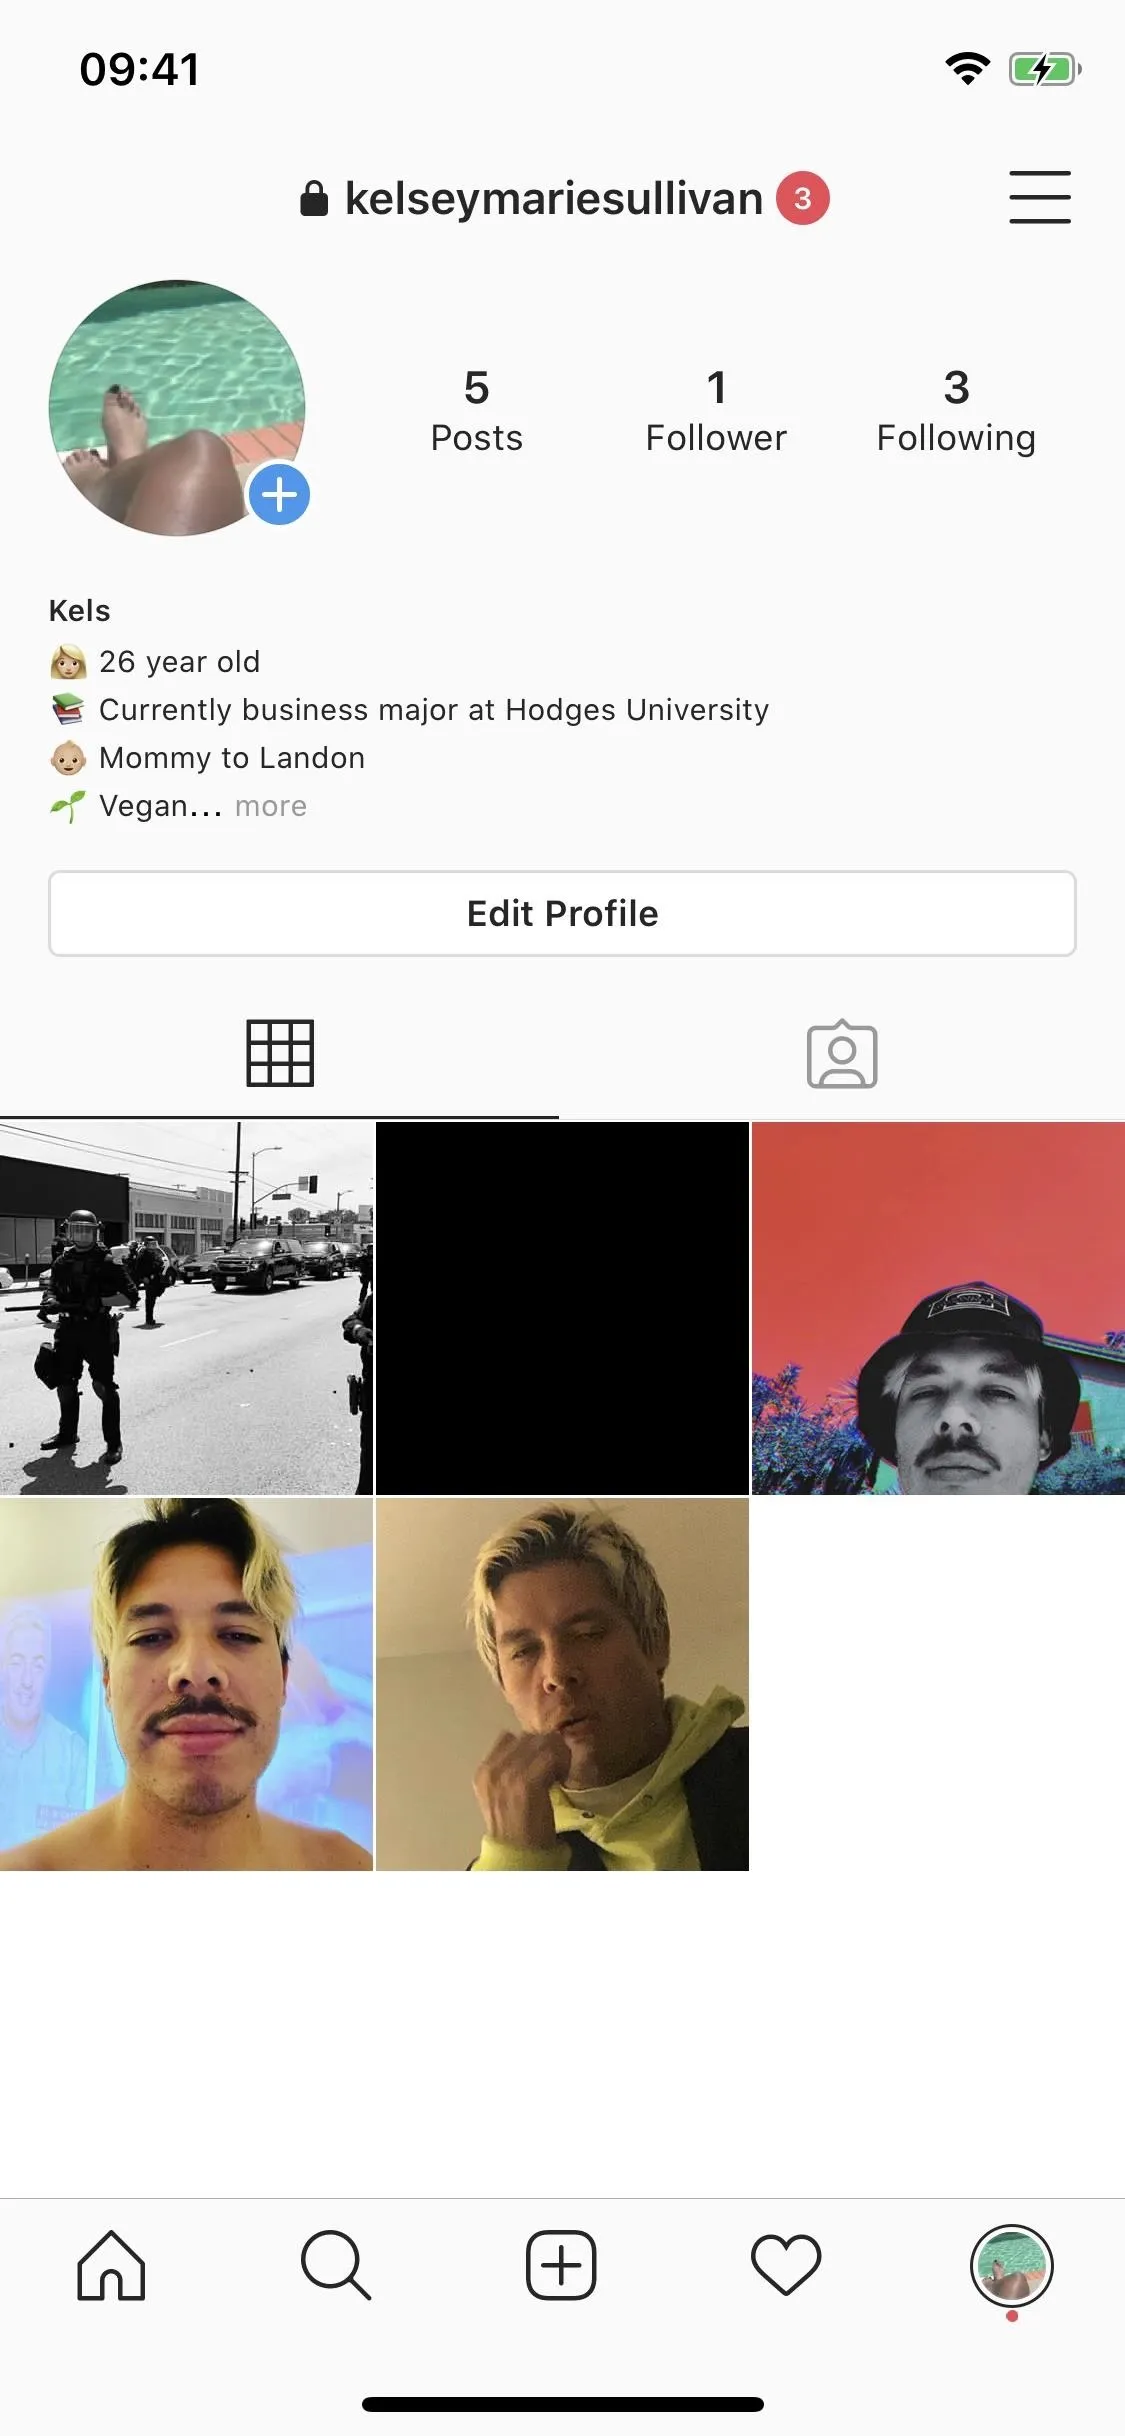
Removing the metadata and blurring identifying faces and objects can protect others, but it won't save you if you post it on your personal account. If anyone were to find the protest photo on your account, they could look more closely into your life by eying your friend list, reading old posts, accessing links to your other online accounts, and more. That's why your best bet is to post to either an anonymous account or an account that has relatively little personal information about yourself.
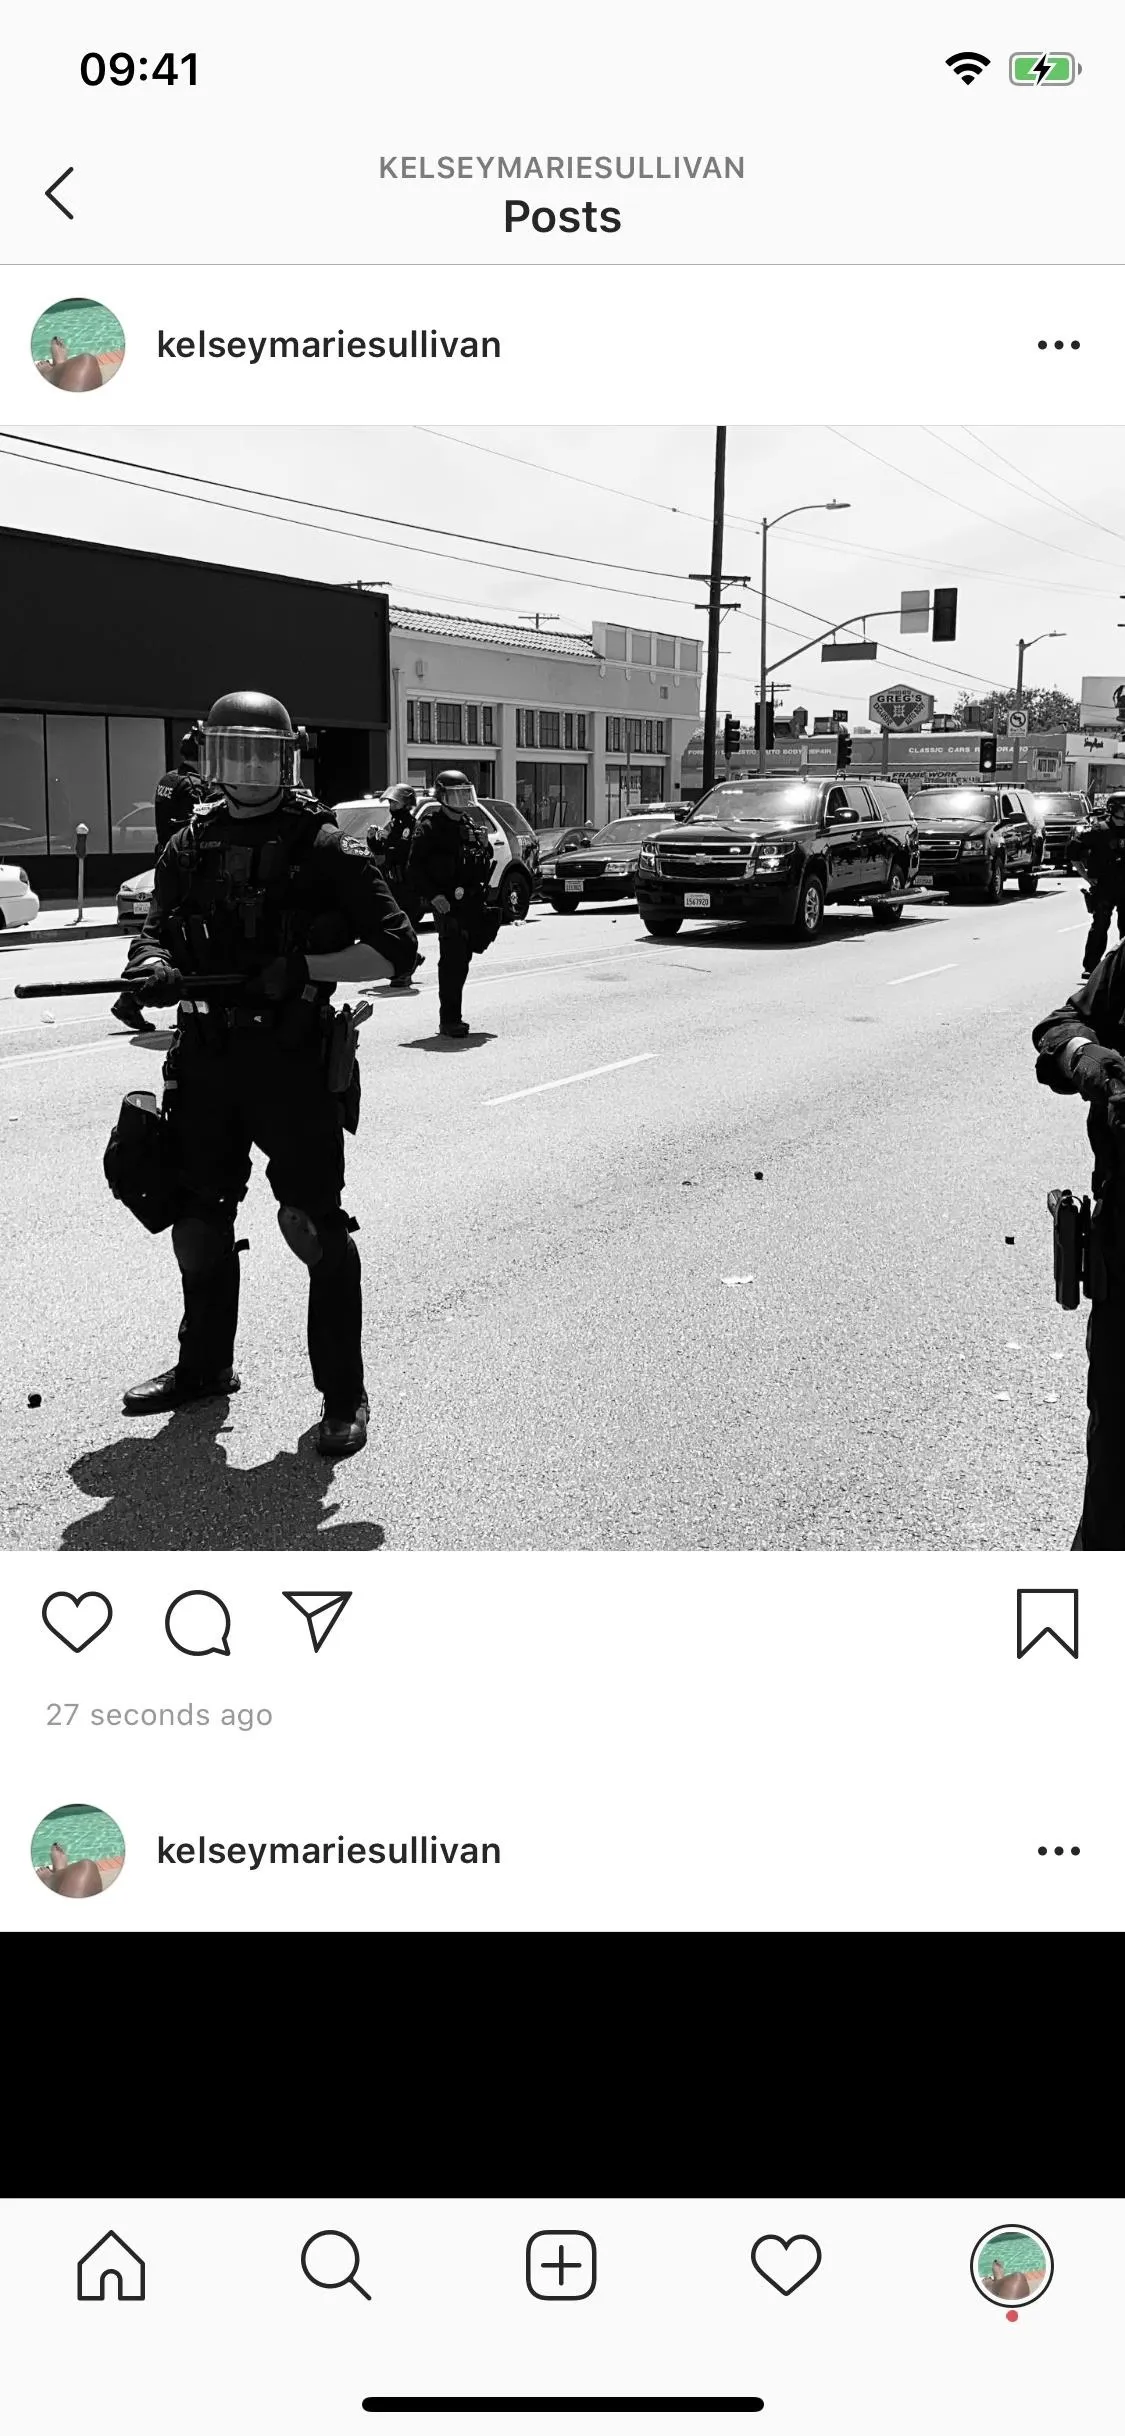
Twitter is your best bet if you're going to post a protest photo online, simply because it's easy to stay anonymous and gather a following. On Instagram, that's a bit more difficult since people mostly post pictures of themselves, but you can create and post to a Finsta, as long as it's not connected in any way to your personal account.
You can also use an anonymous Facebook account to post your protest photos. Check out our guide to fake Facebook profiles to see how to create a burner email or phone number, isolate the app from your phone's data, install a VPN, delete and disable your location history, change your privacy settings, and more.


Also, always remember to remove your location from your post, even if you're posting on an anonymous account. While your photos may have their coordinates scrubbed, you may inadvertently give up your location by adding it to your post. For the most part, it's easy to avoid. On Instagram and Facebook, all you need to do is not include your location manually.
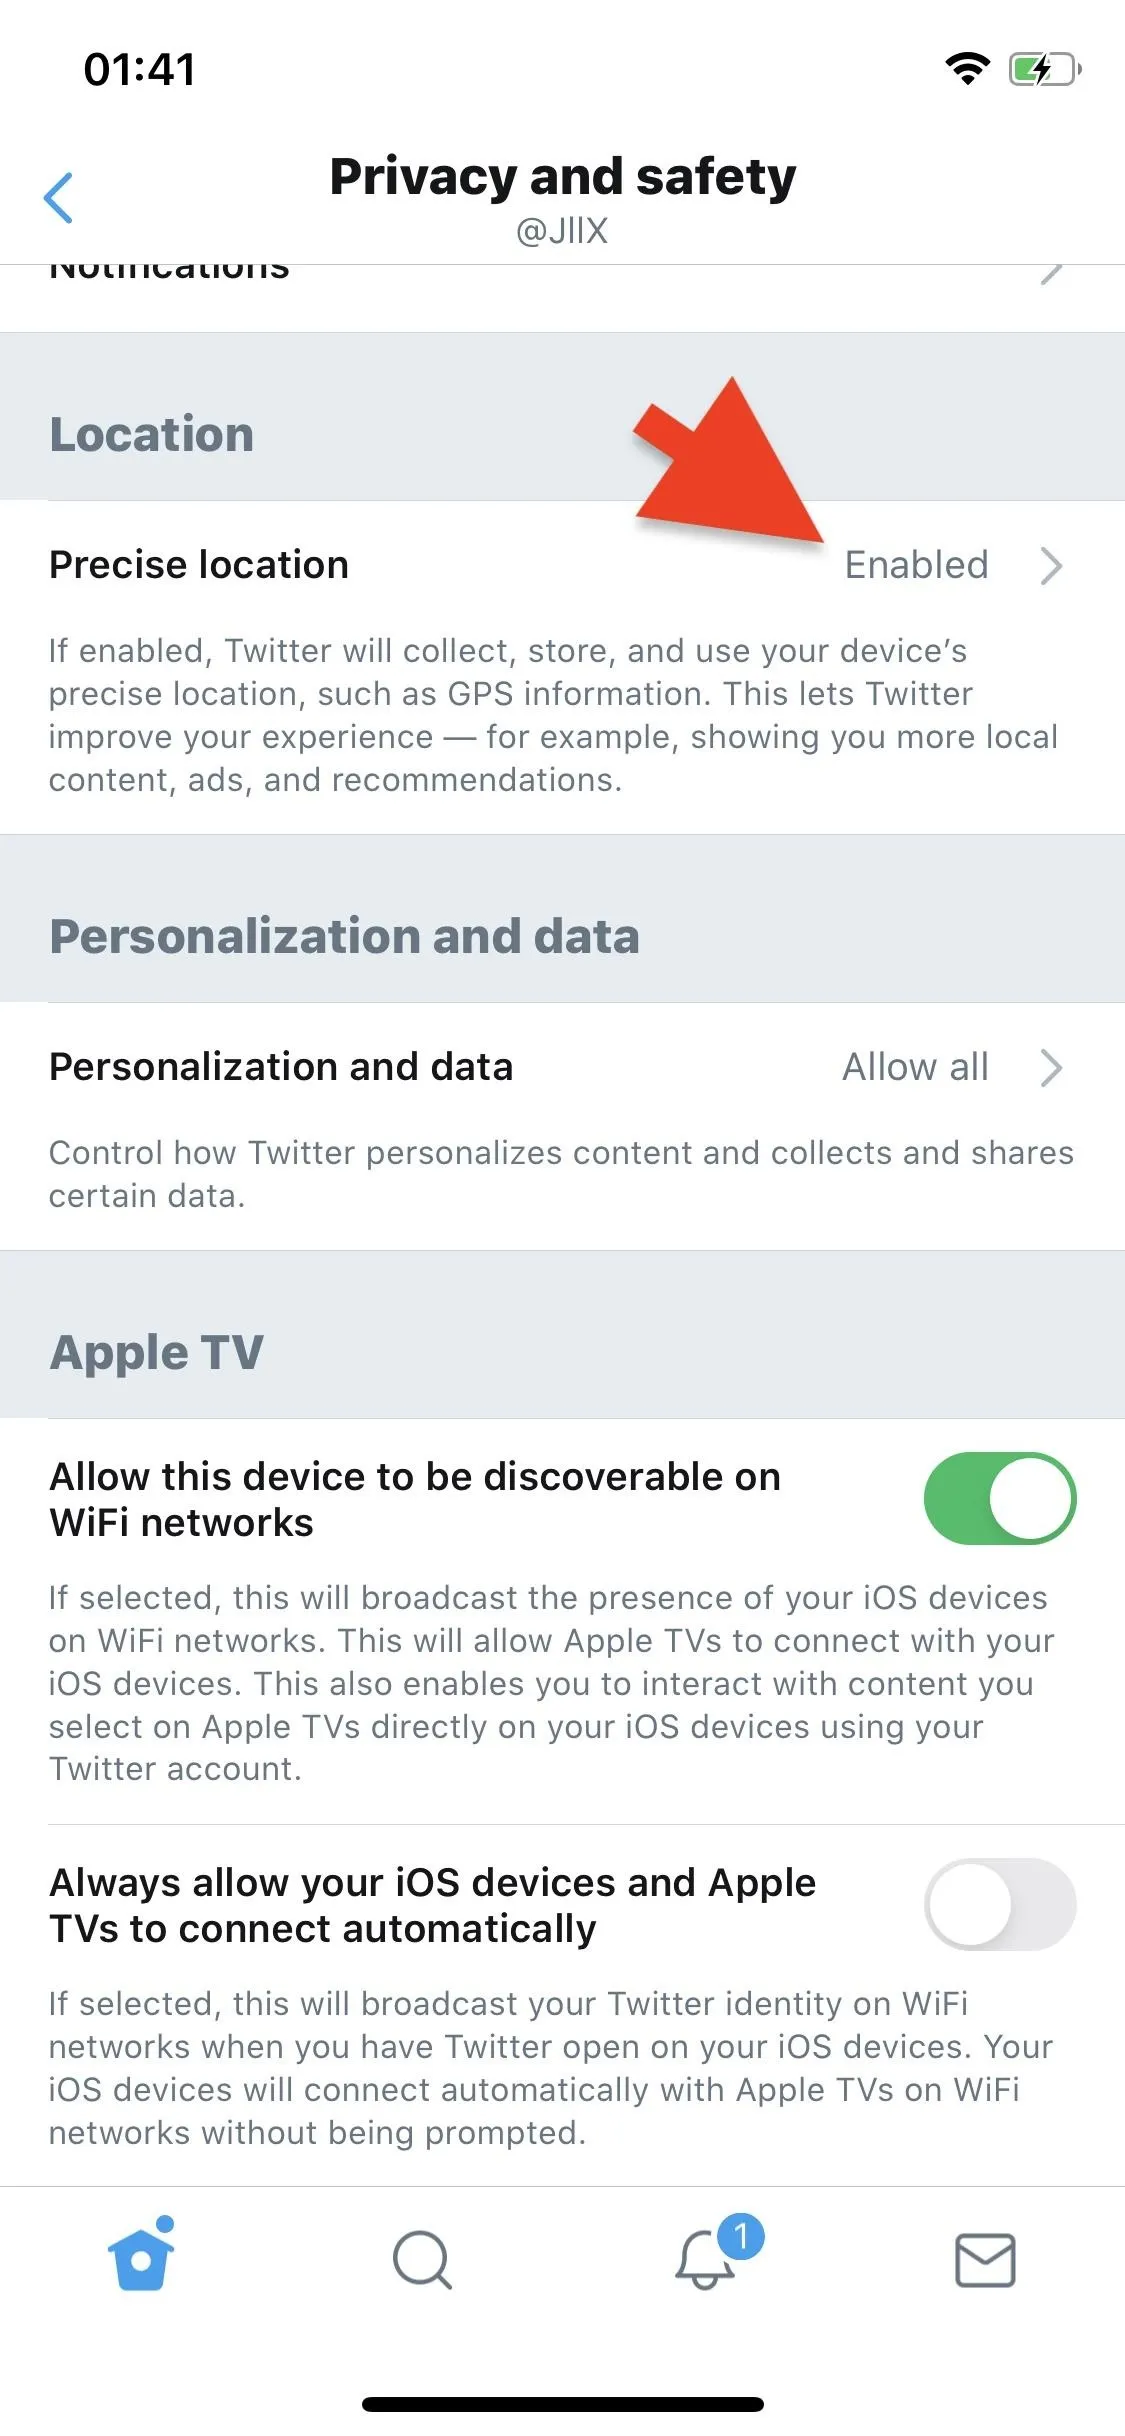
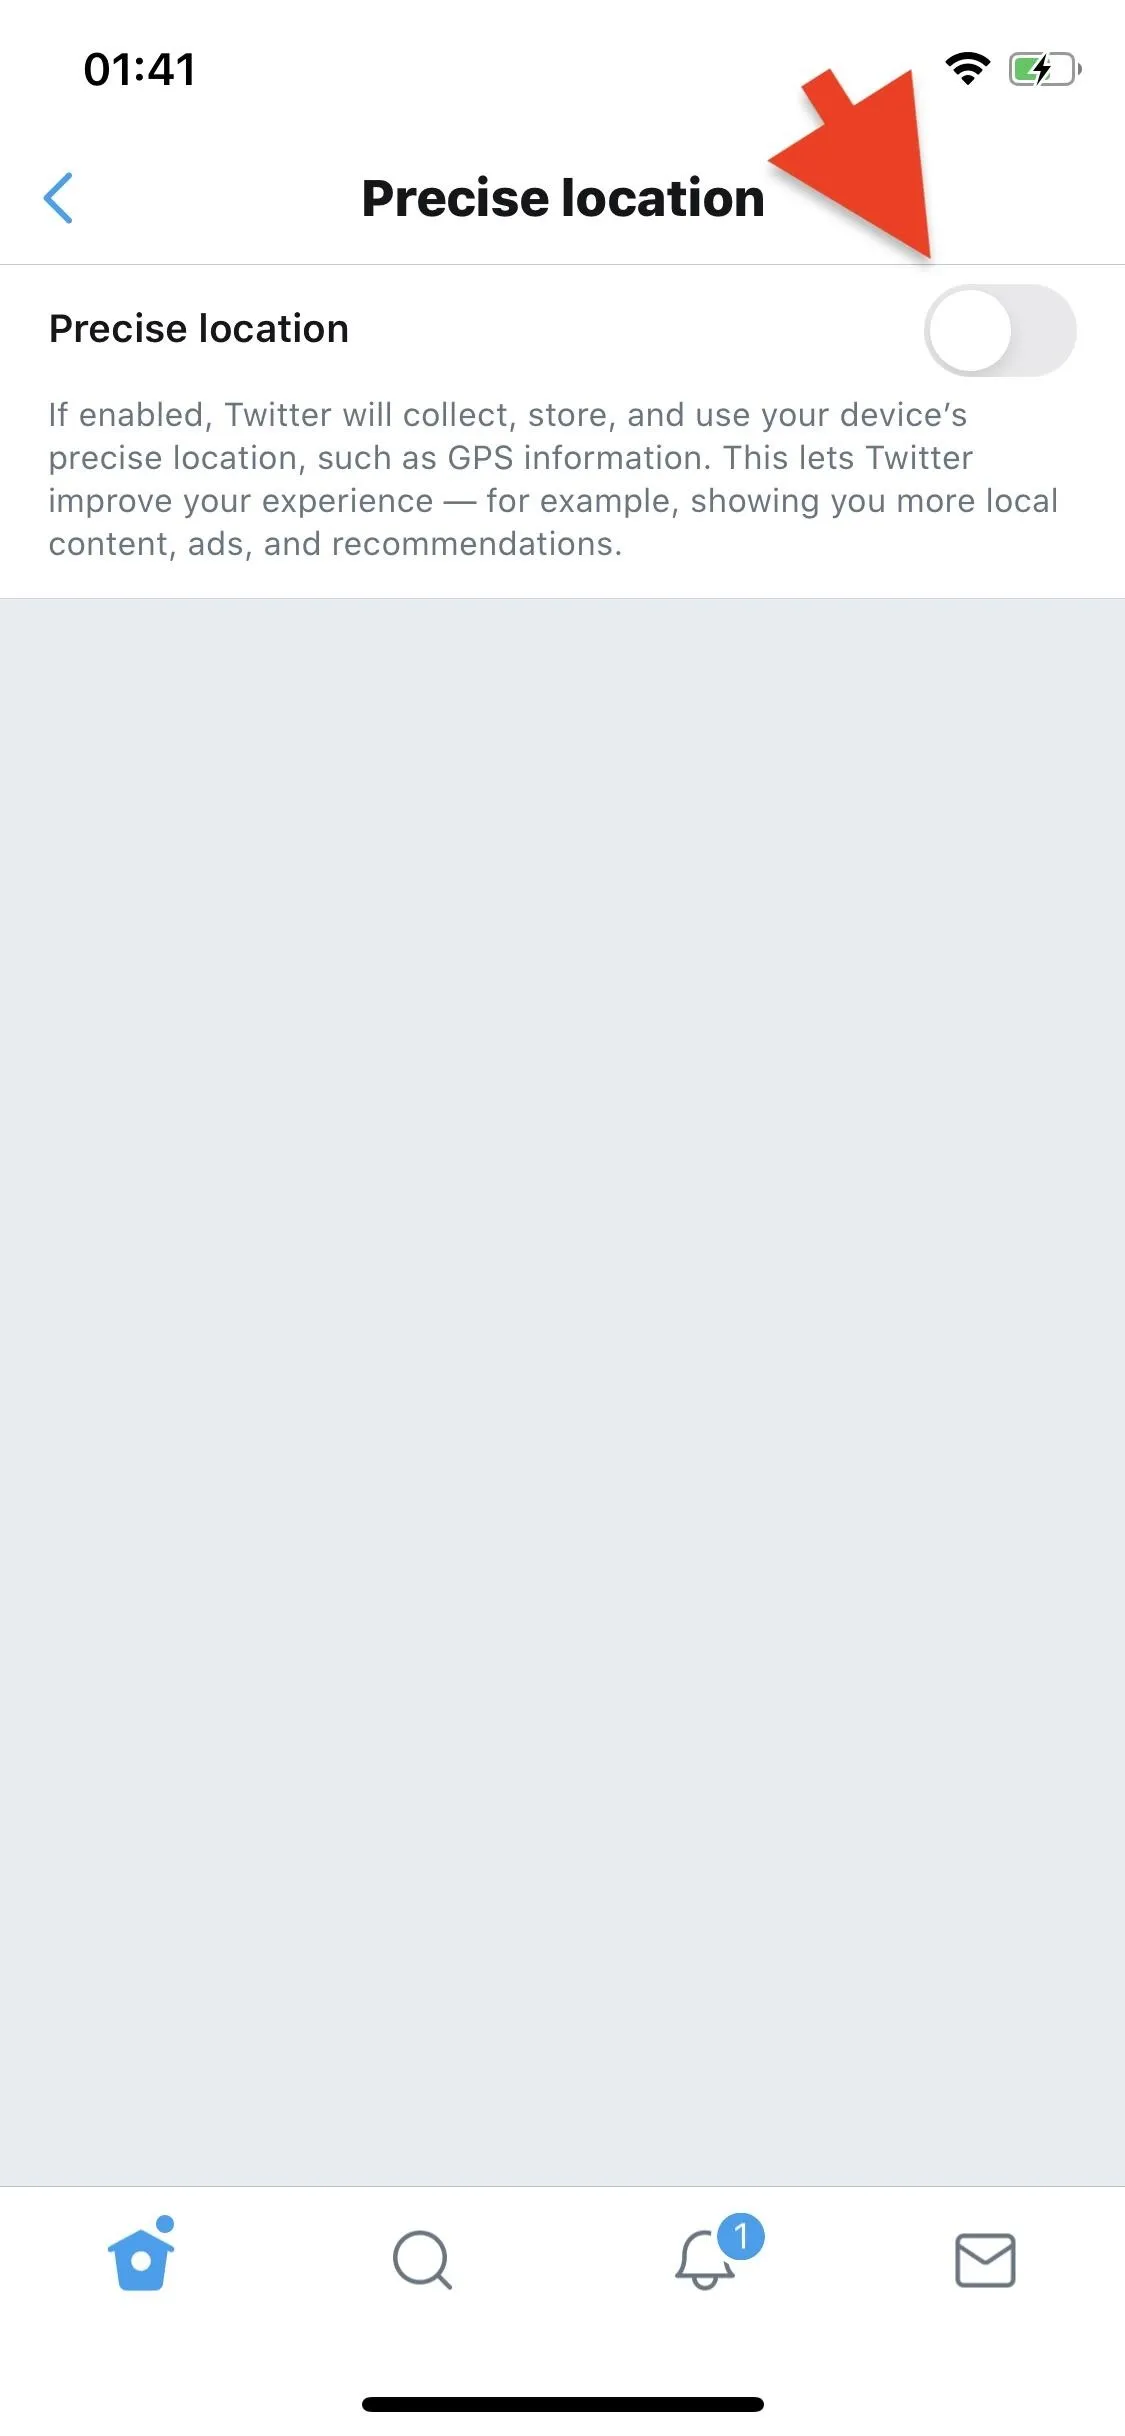
However, on Twitter, your precise coordinates may be tracked. To turn off location data, tap on your profile photo on the top left, go to "Settings and privacy," then "Privacy and safety." Scroll down and tap on "Precise location" and disable it. Not only will it prevent you from adding your location to a tweet, but it will also stop you from getting local advertisements.
- More Info: Disable Your Precise Location on Twitter
Use a VPN Before Posting Photos Online
A virtual private network, or VPN, is a simple way to connect to the internet securely, making it difficult for others to see what you're doing. That even includes your internet service provider. VPNs connect you to a secure server, encrypt the data flowing between your device and the server, and provide you with another IP address so that your IP remains hidden.
To stay on the ultra-safe side, you can turn on a VPN when you're about to post online. There are tons of great VPN apps out there, including CyberGhost, ExpressVPN, NordVPN, and VyperVPN — all of which cost money to use — but we recommend these because most free VPN services often collect data. Each of these VPN services has a no-log policy, which means they don't collect your IP address or traffic.


Cover photo and screenshots by Nelson Aguilar/Gadget Hacks (unless otherwise noted)


Comments
Be the first, drop a comment!