


VPNs add a protective layer between your data and your internet service provider (ISP) or bad actors (hackers), so it makes sense they've become so popular lately. Probably the most common one of these is NordVPN, so we explored its mobile app to find all the options worth checking out.
Our main focus in doing so was to increase security in this always-connected world. As it turns out, NordVPN provides some pretty strong supplemental settings for iPhone and Android that help protect data packets during transit — particularly the Android app, since a couple of these tips don't work in the iOS version.
- Don't Miss: The 4 Best No-Log VPN Apps for iPhone & Android
Use the NordLynx VPN Protocol
NordVPN started testing its next-generation NordLynx VPN protocol (based on WireGuard) in late 2019. As of early 2020, it was made widely available across all platforms and devices. Before this, the most consumer-friendly VPN protocol for nearly two decades was known as OpenVPN. Many VPN providers today still use OpenVPN since the industry hadn't needed to evolve until recently.
Since we live in a world full of internet-connected devices, the time for a next-generation VPN protocol is right on track when we need it most. NordLynx is much faster, lighter, and more secure than all previous consumer VPN protocols, including OpenVPN. You'll definitely benefit once you start using NordLynx on your own devices in a variety of ways, especially when it comes to reliability.
For Android Devices
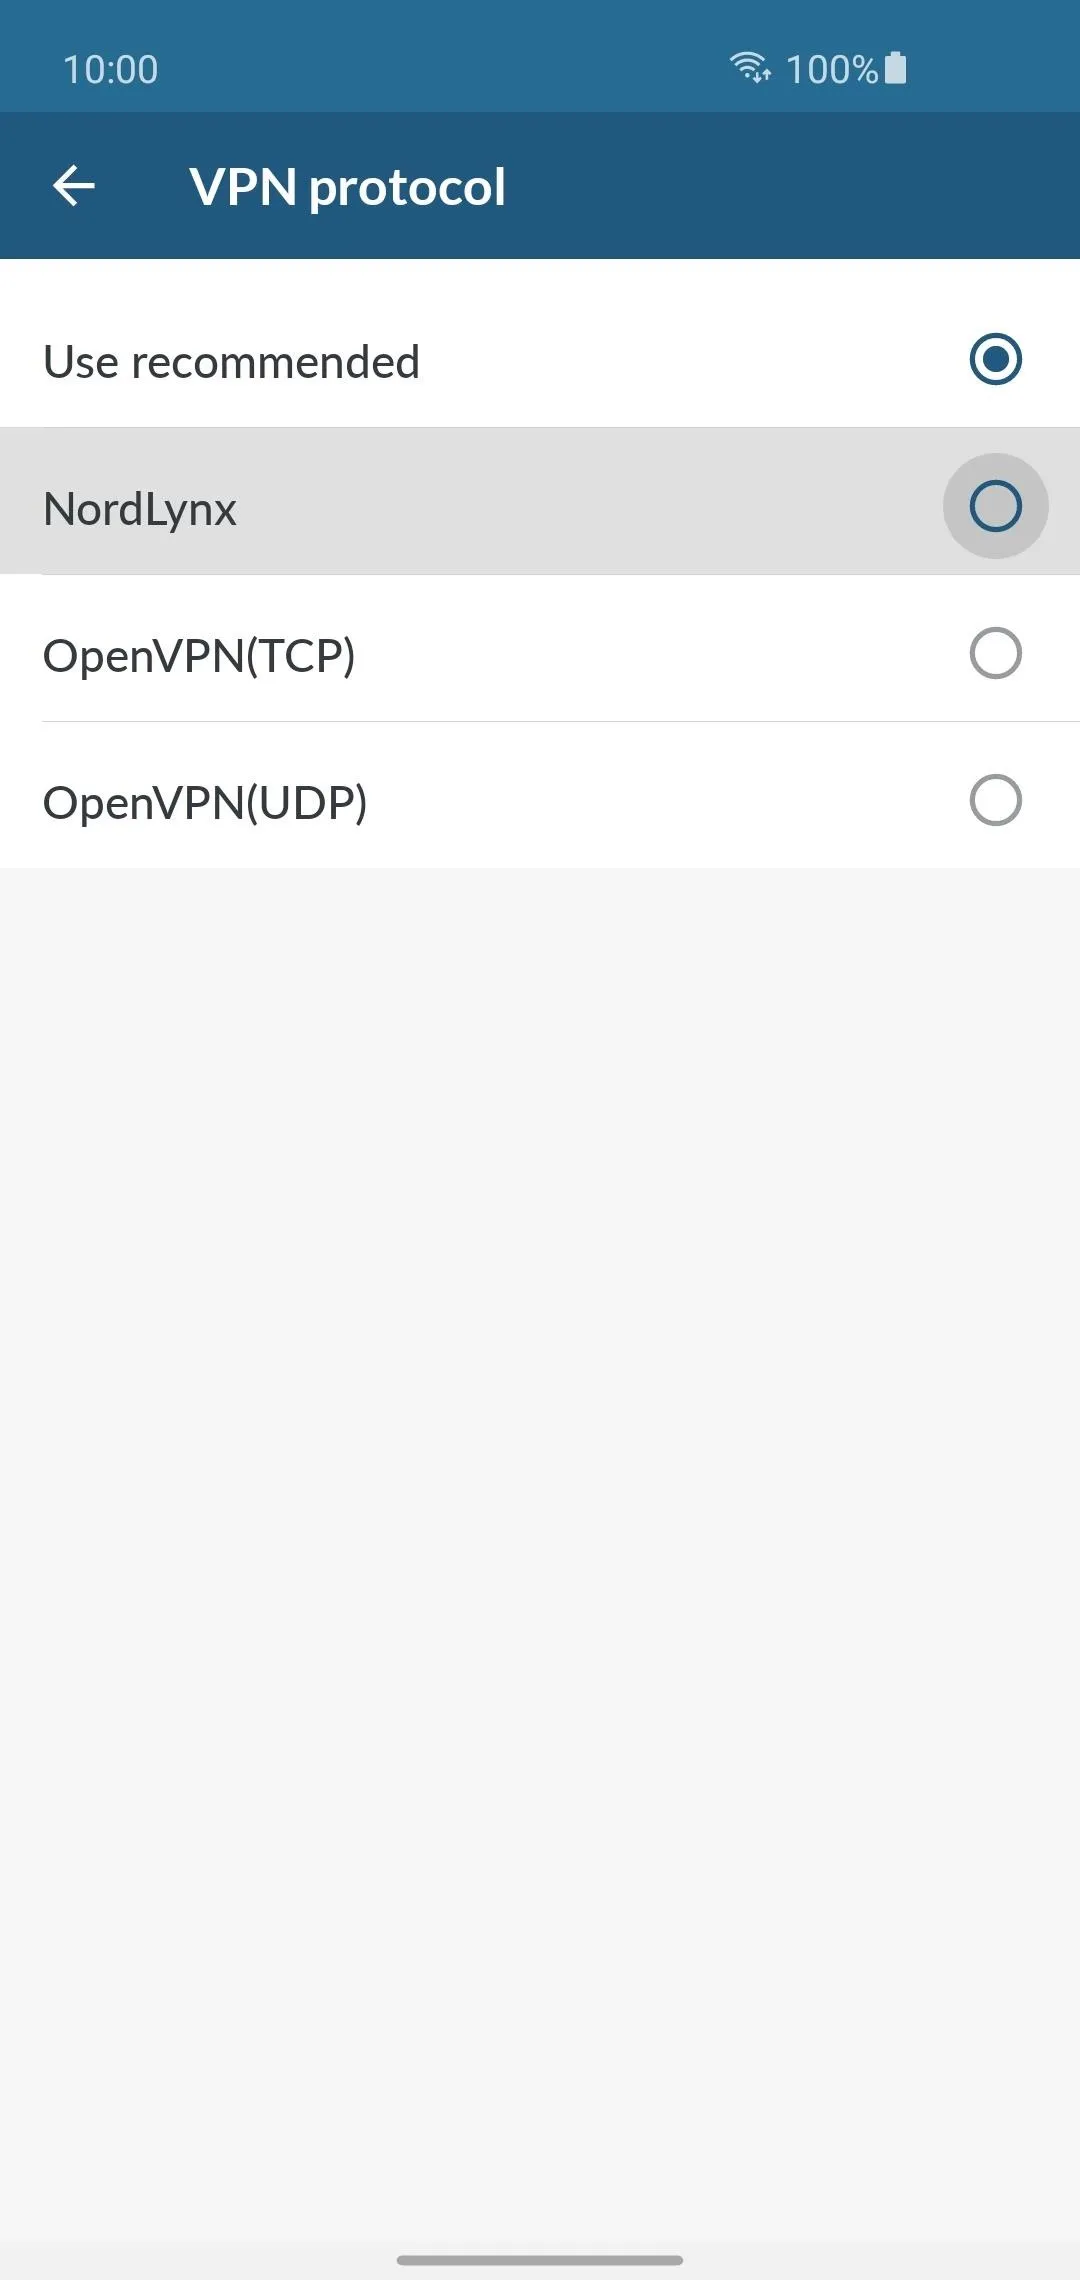
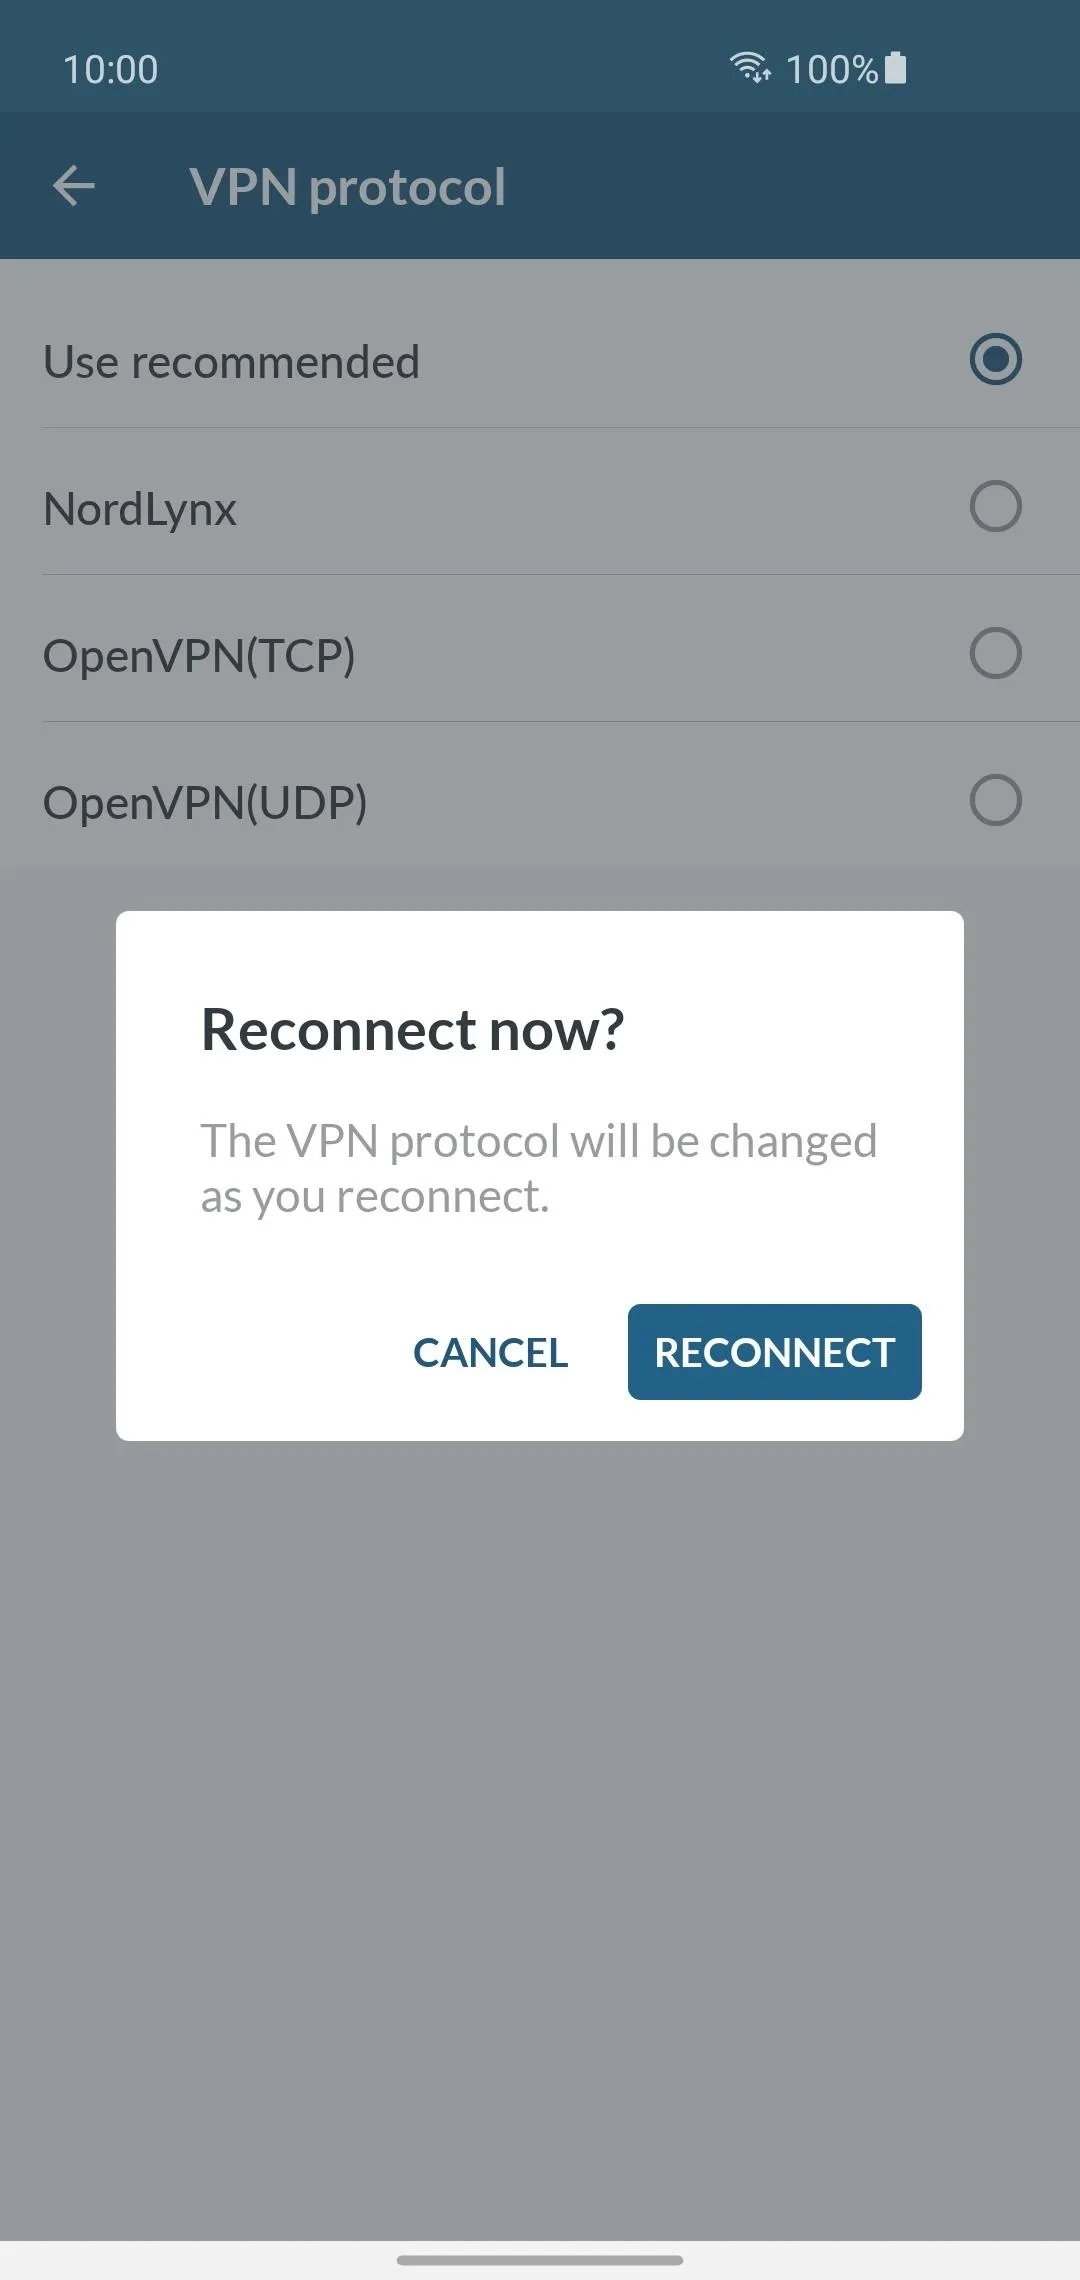
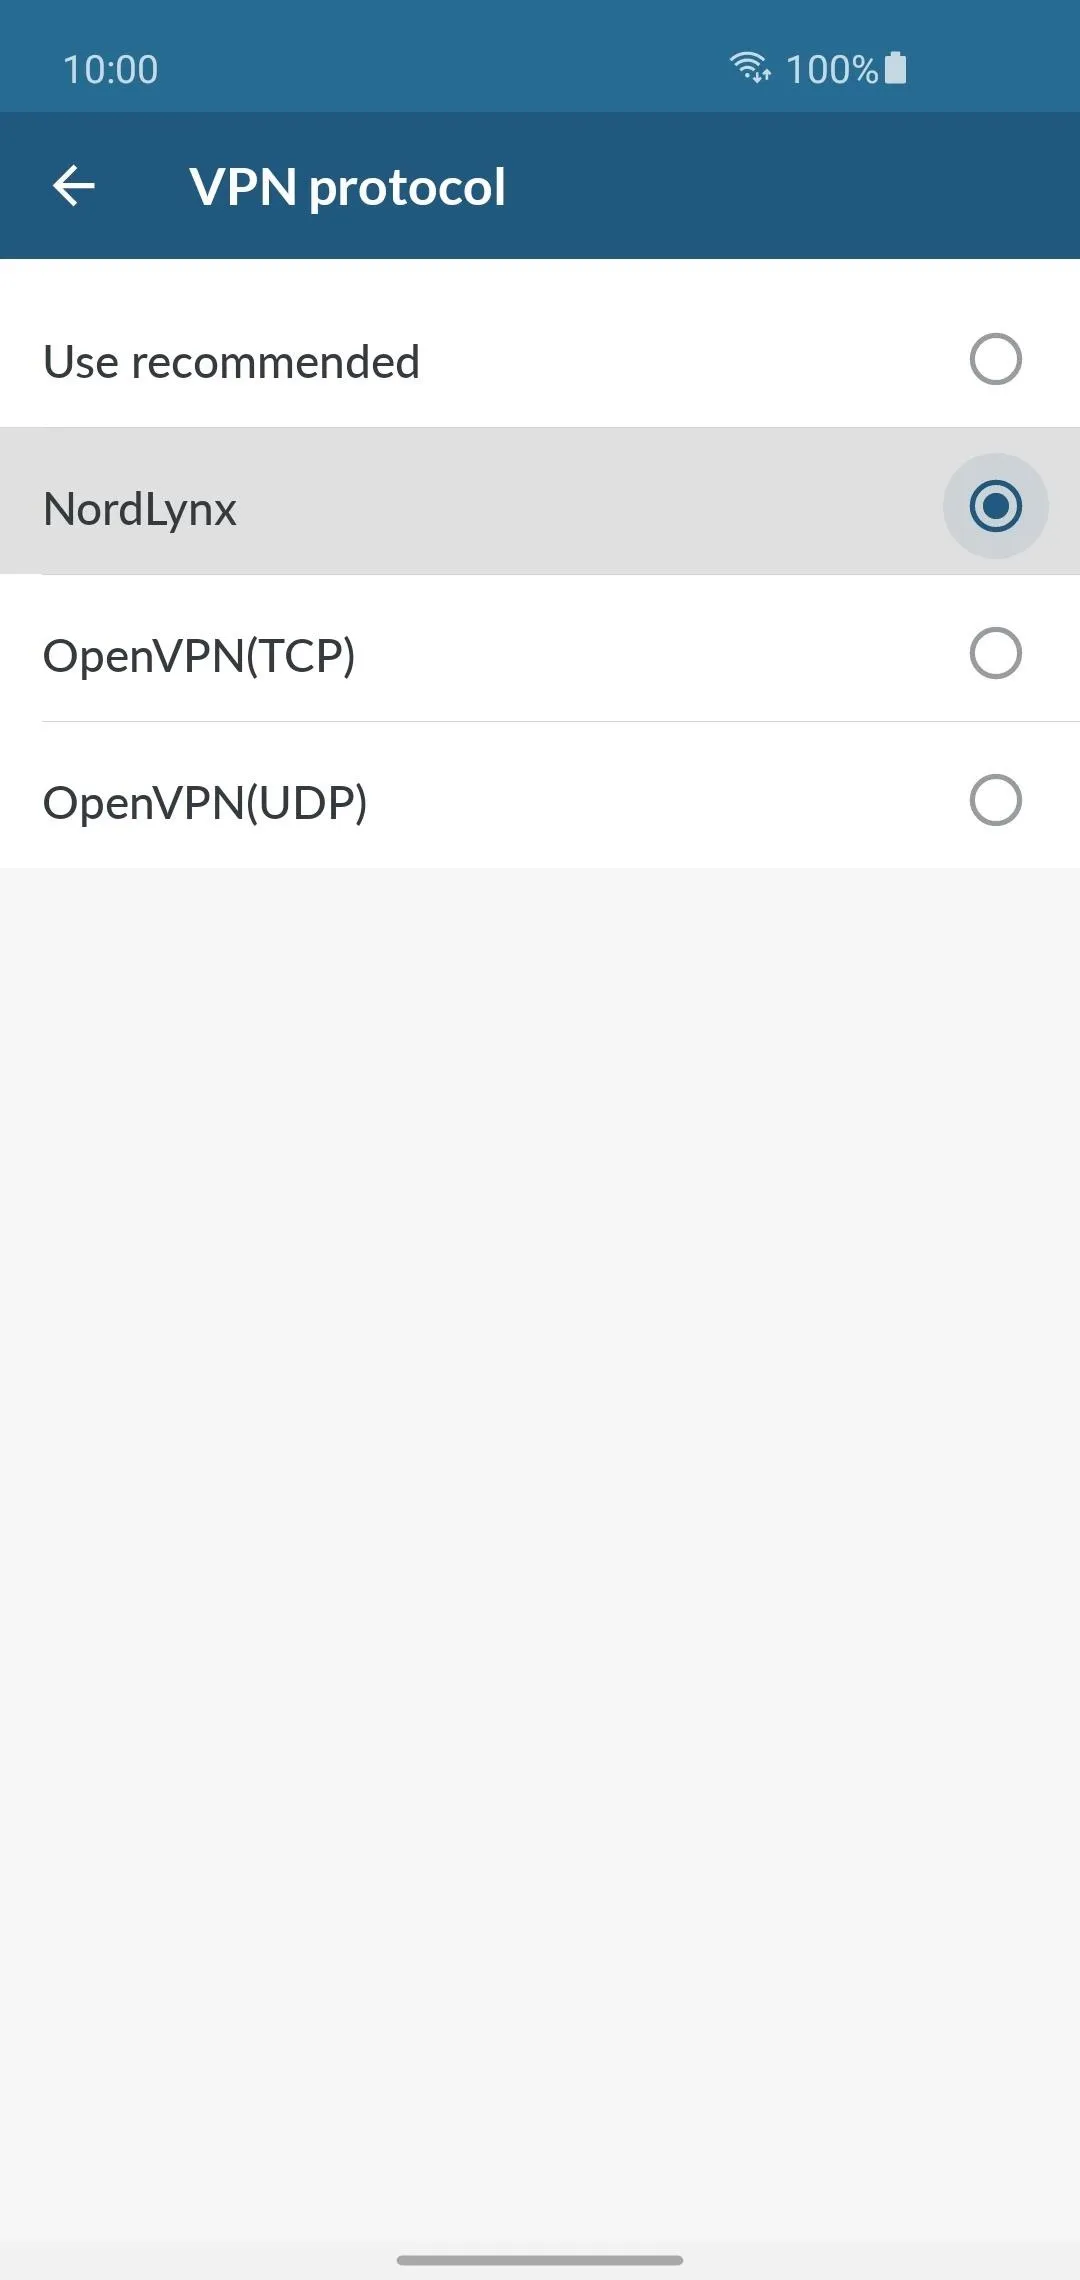
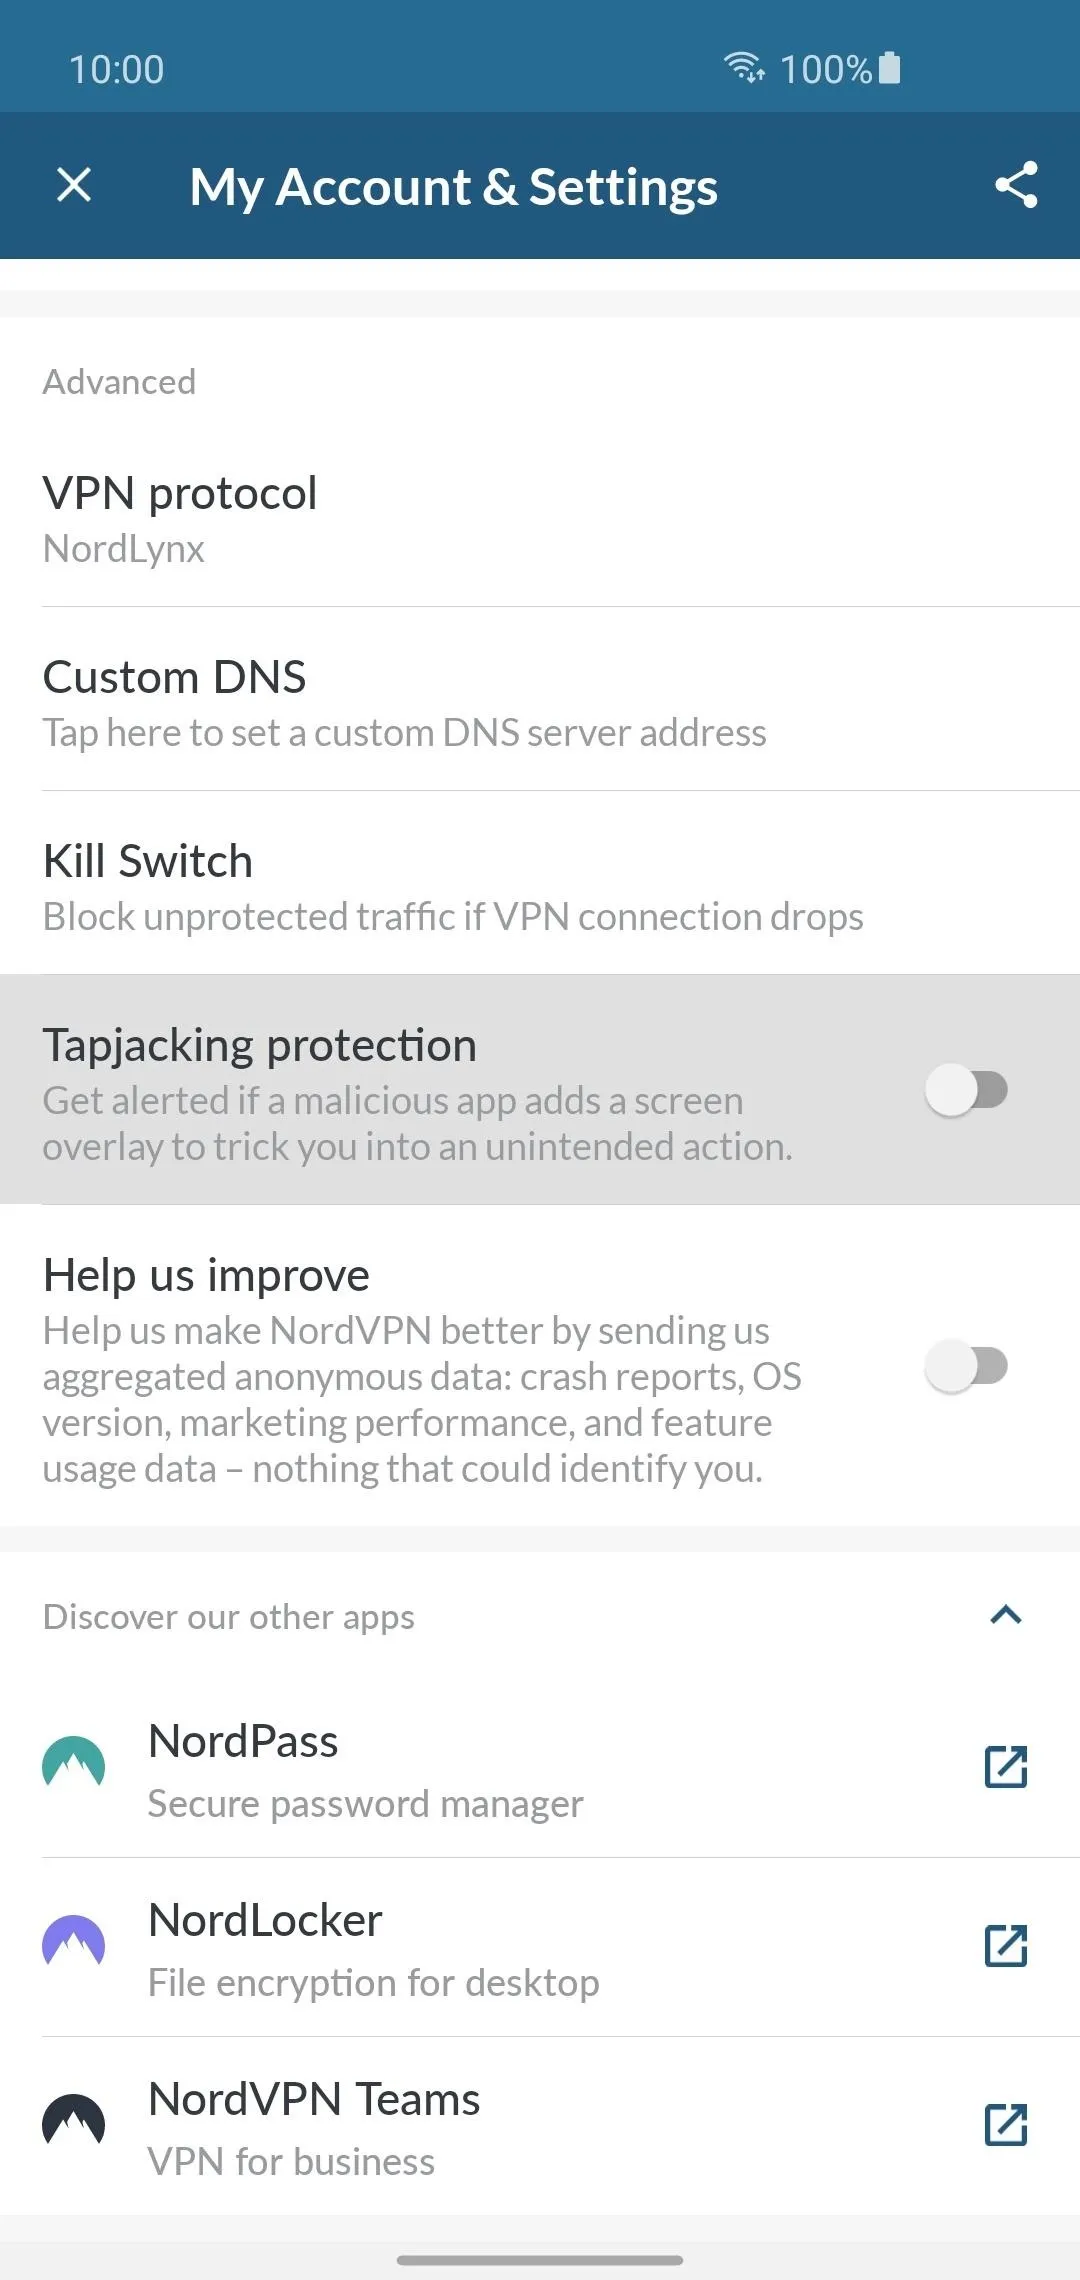
To enable NordLynx at all times on your Android device, you can easily switch the settings in the NordVPN app itself. Open the app to the main screen, hit the settings icon in the upper left, then locate "VPN protocol" on the list and press it once.

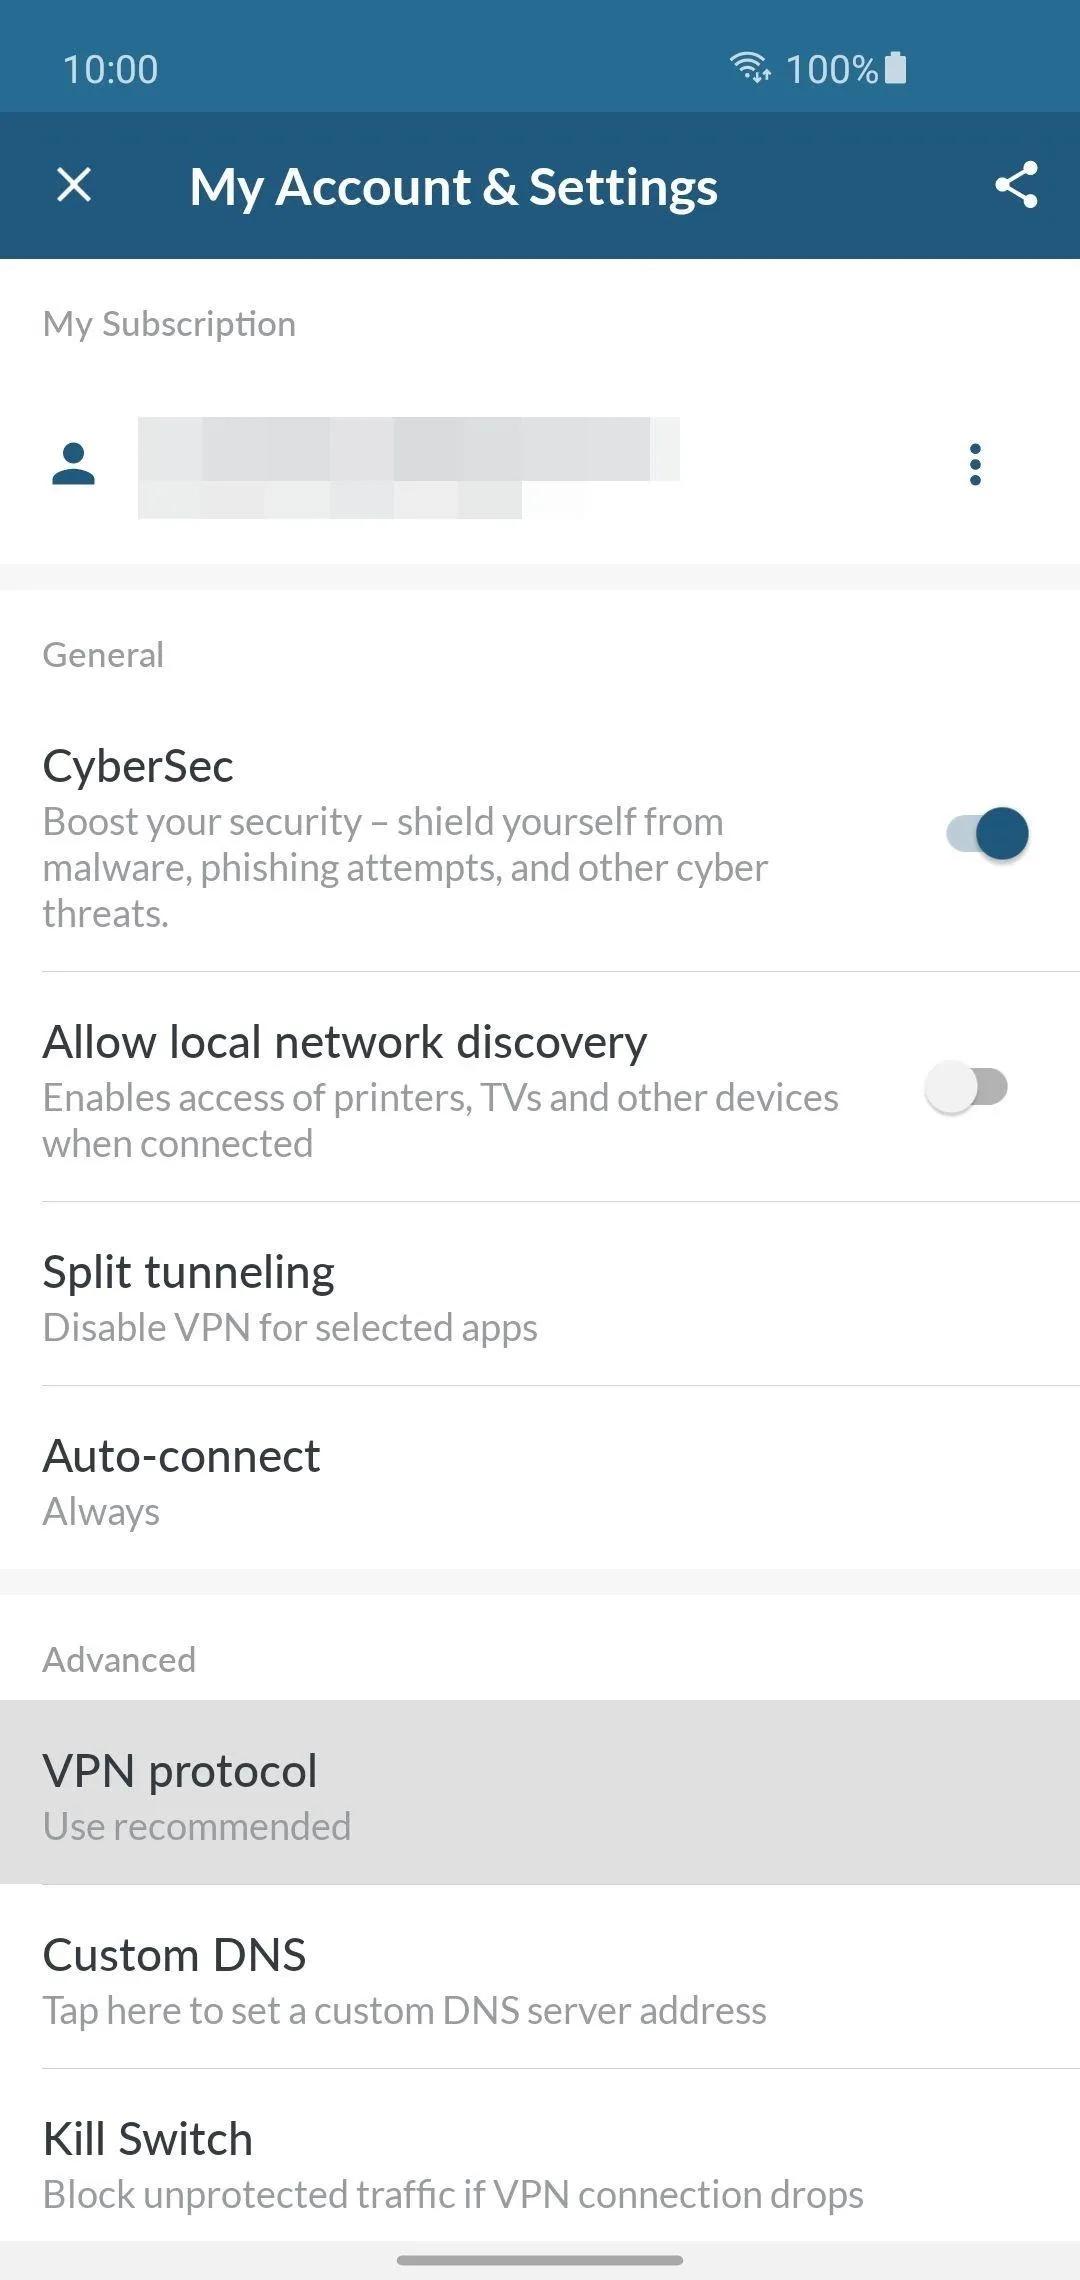
Tap "NordLynx" to force your connection to always use NordLynx servers, then hit the "Reconnect" button to connect to a new server. All set. Your mileage may vary based on location with NordLynx enabled; however, the results have been quite positive overall in these early stages of the protocol. That's a big win for us all!
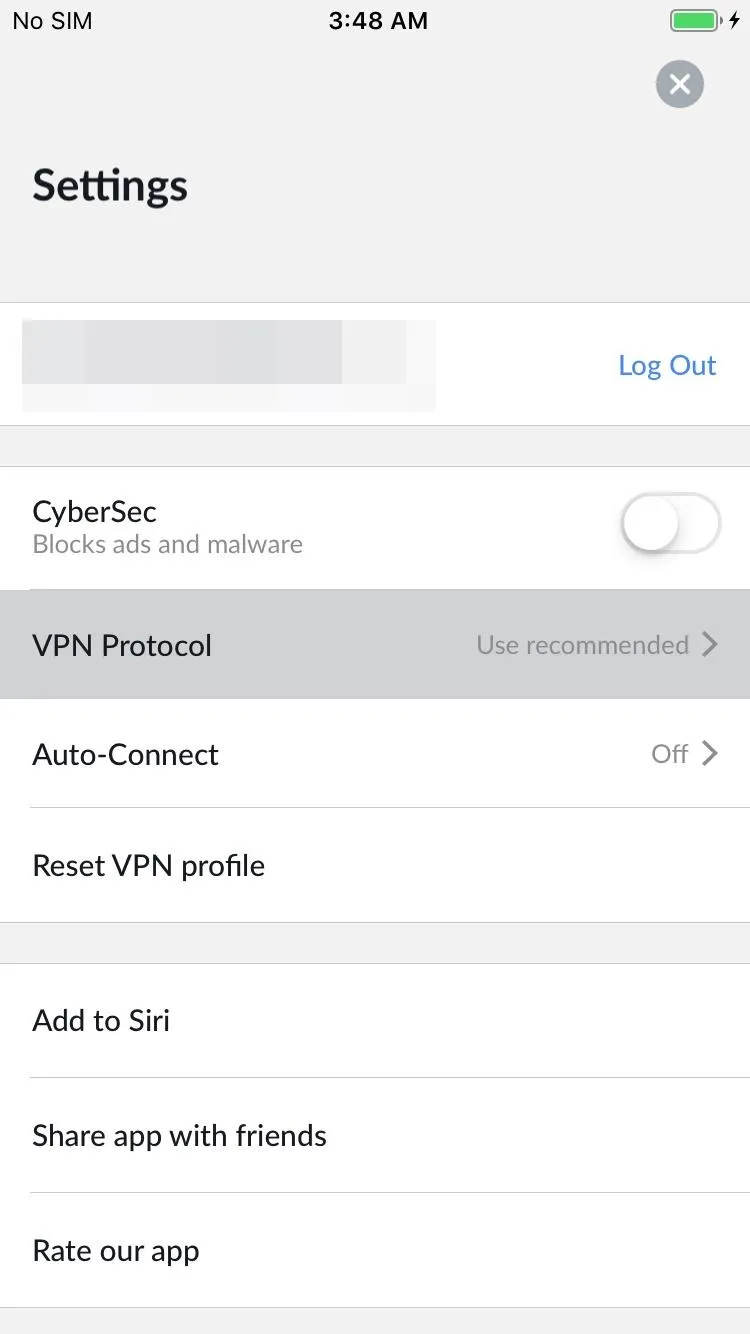
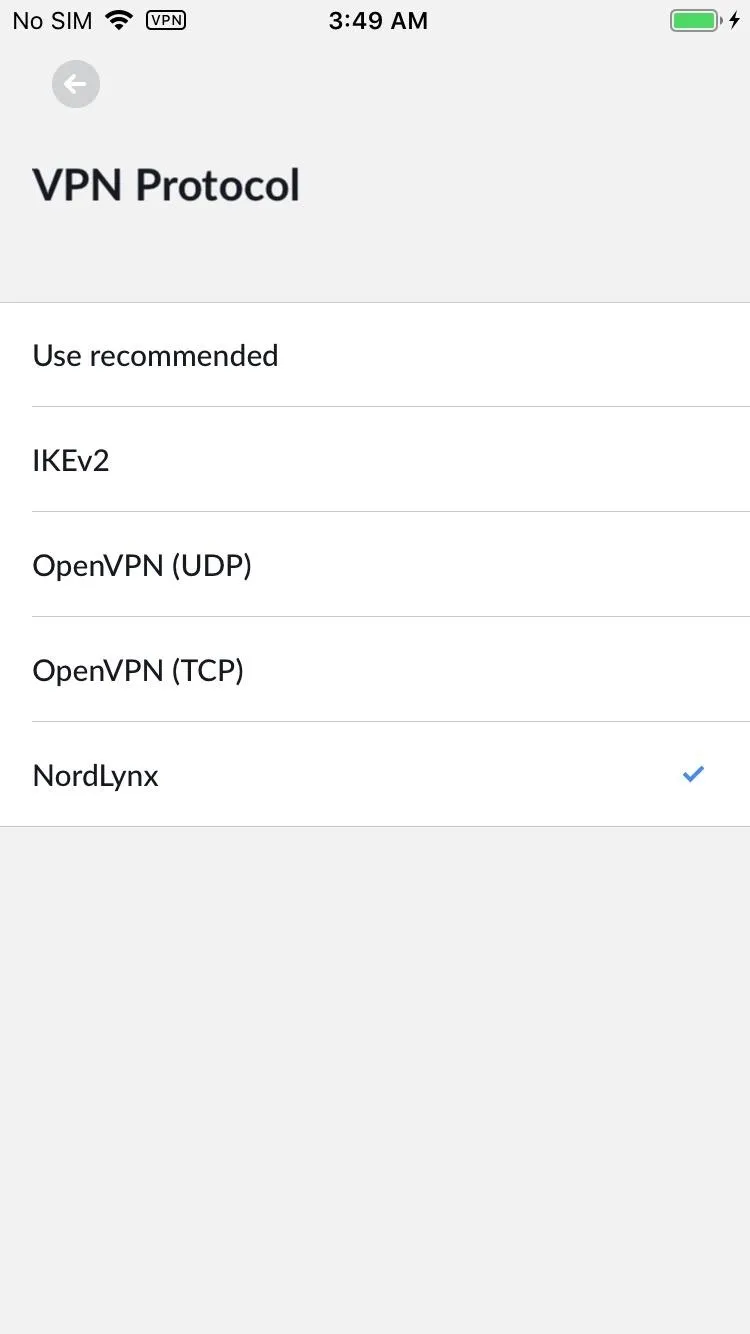
For iOS Devices
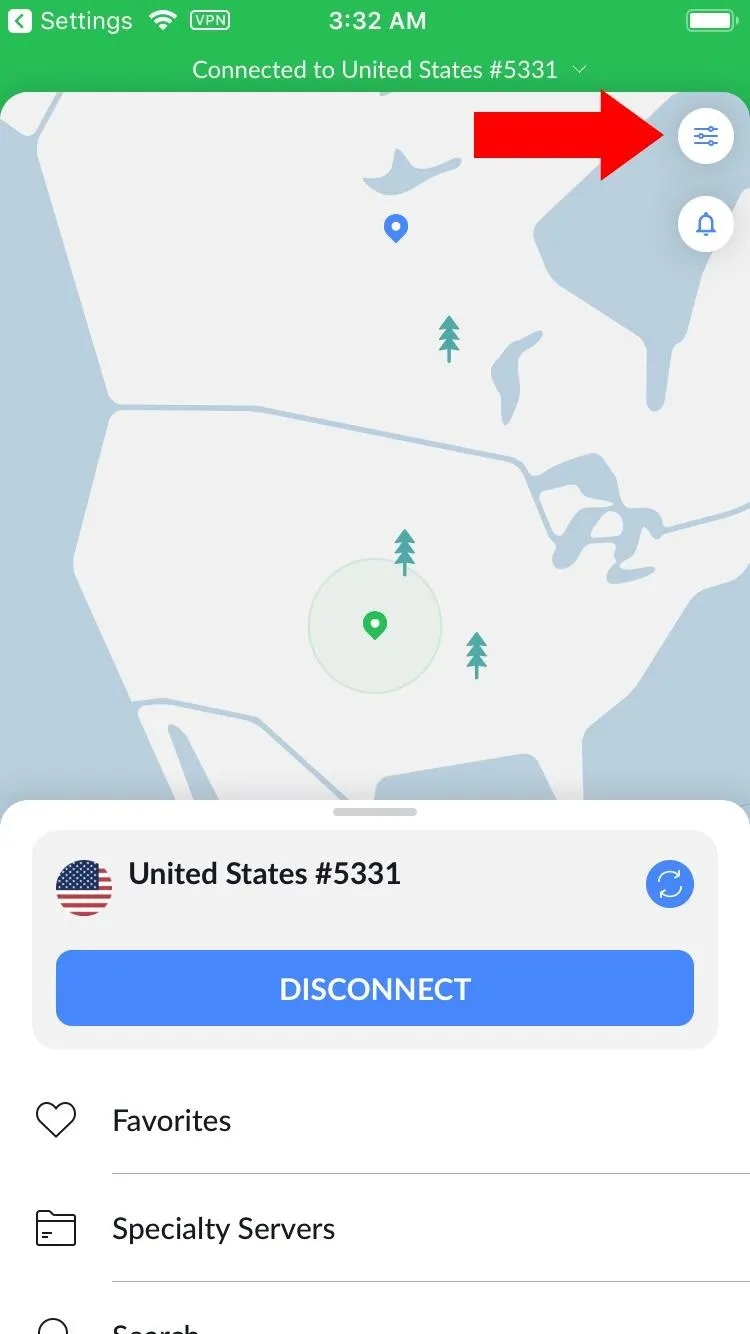
To enable NordLynx at all times on your iOS device, tap the settings icon in the upper right from the main NordVPN screen. From there, locate and tap the "VPN Protocol" entry once to continue.
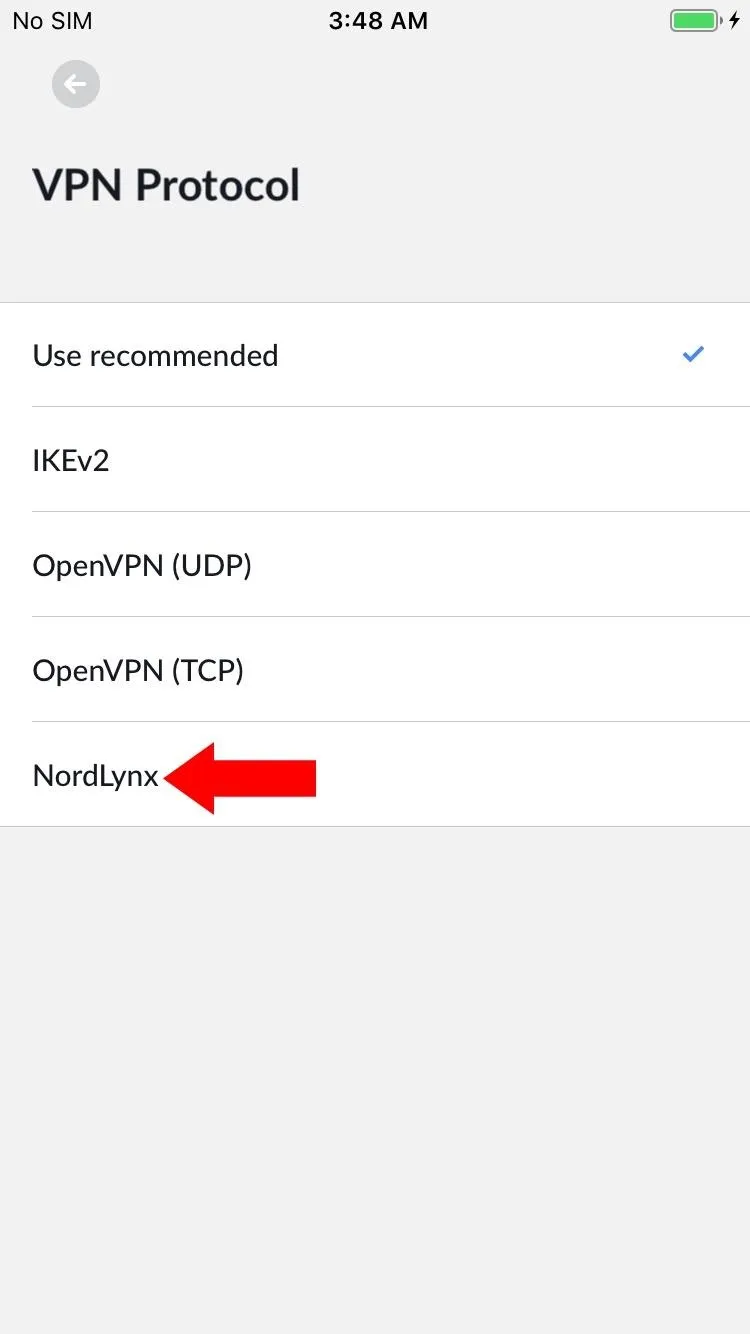
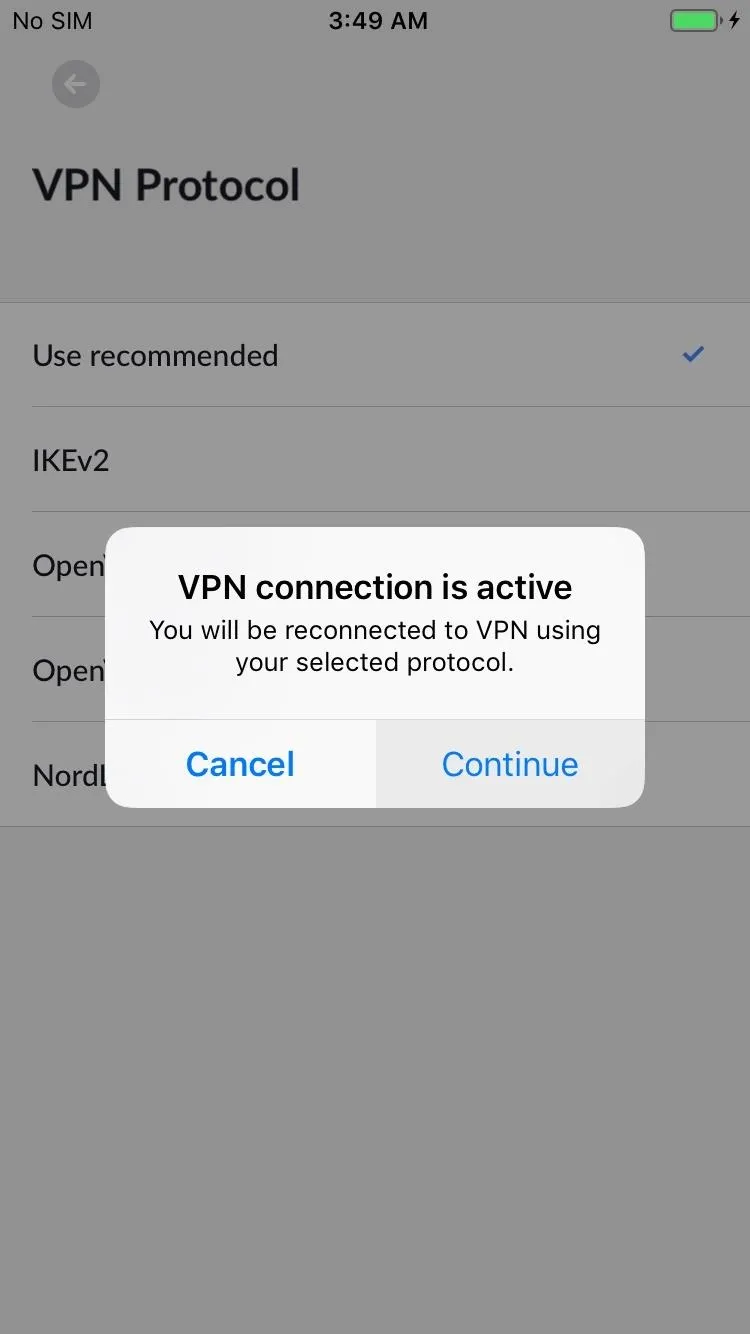
From this new list of VPN protocols, locate "NordLynx" at the bottom and press it once to enable the setting. Hit "Continue" to reconnect to a new server that supports NordLynx, and you're all set.
Use Tapjacking Protection (Android Only)
With smartphones being the hottest devices around, of course, comes the unfortunate increase in scams and malware to wreak havoc on your personal data. When one malware gets identified and defeated, it seems there are thousands to take its place instantly. Thanks to those sheer number of infections daily, it's one of the most challenging aspects we face today in the tech industry.
In comes the "Tapjacking protection" feature to automatically keep you protected from harmful apps. There are plenty of malware-ridden apps out there that try to manipulate buttons or other things on the screen with its own malicious overlay. It masks itself to look harmless, but it could likely be trying to siphon a specific set of data from your device.
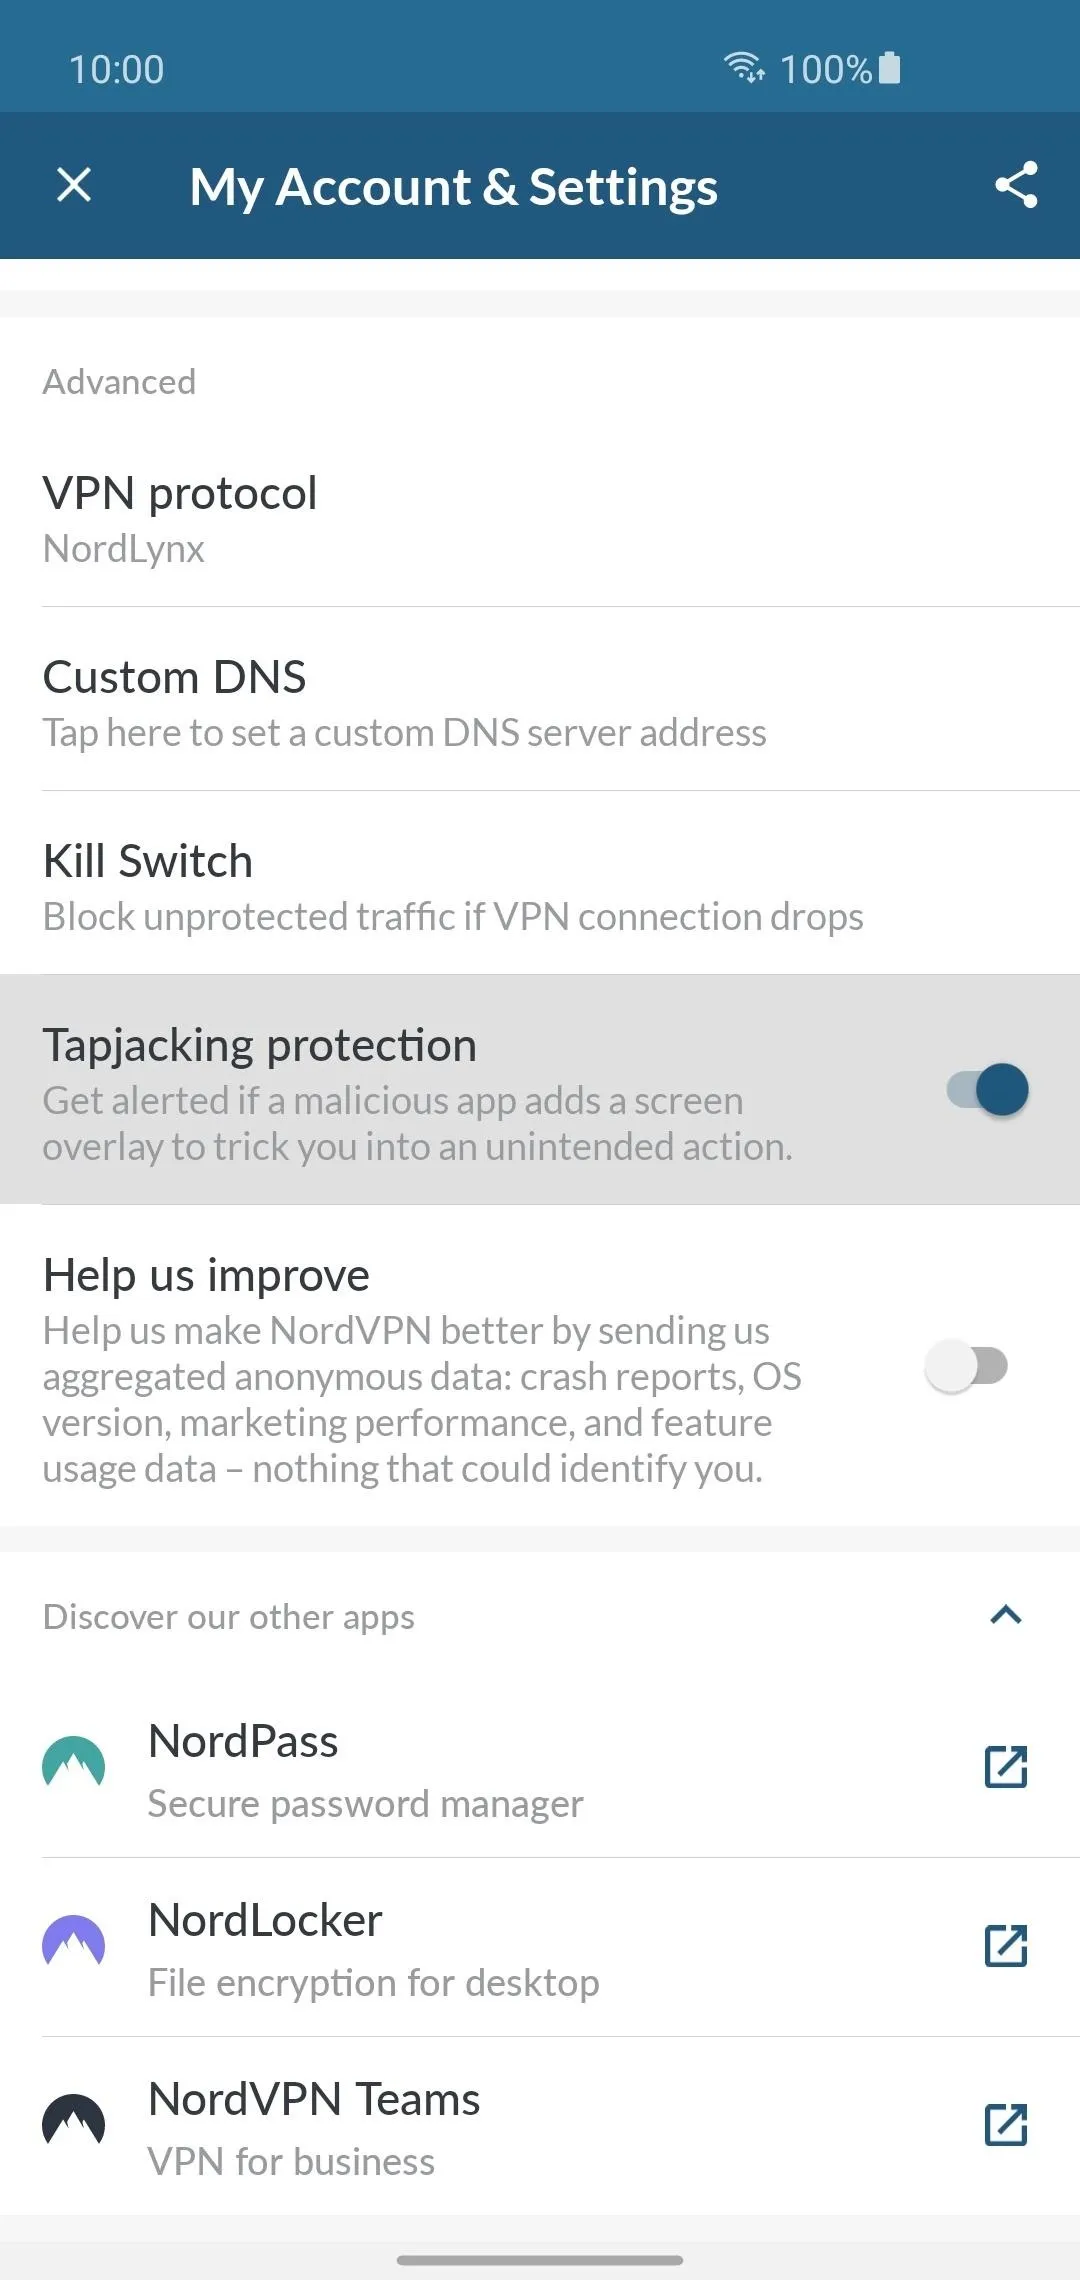
To protect yourself from these potential threats, open the NordVPN app on your device to the main screen. Tap the menu icon in the upper left, then locate the "Tapjacking protection" entry on the list. Tap it once to enable the setting, and that's all there is to it. Whenever there's a potential threat trying to manipulate your screen with an overlay, you'll be notified instantly!
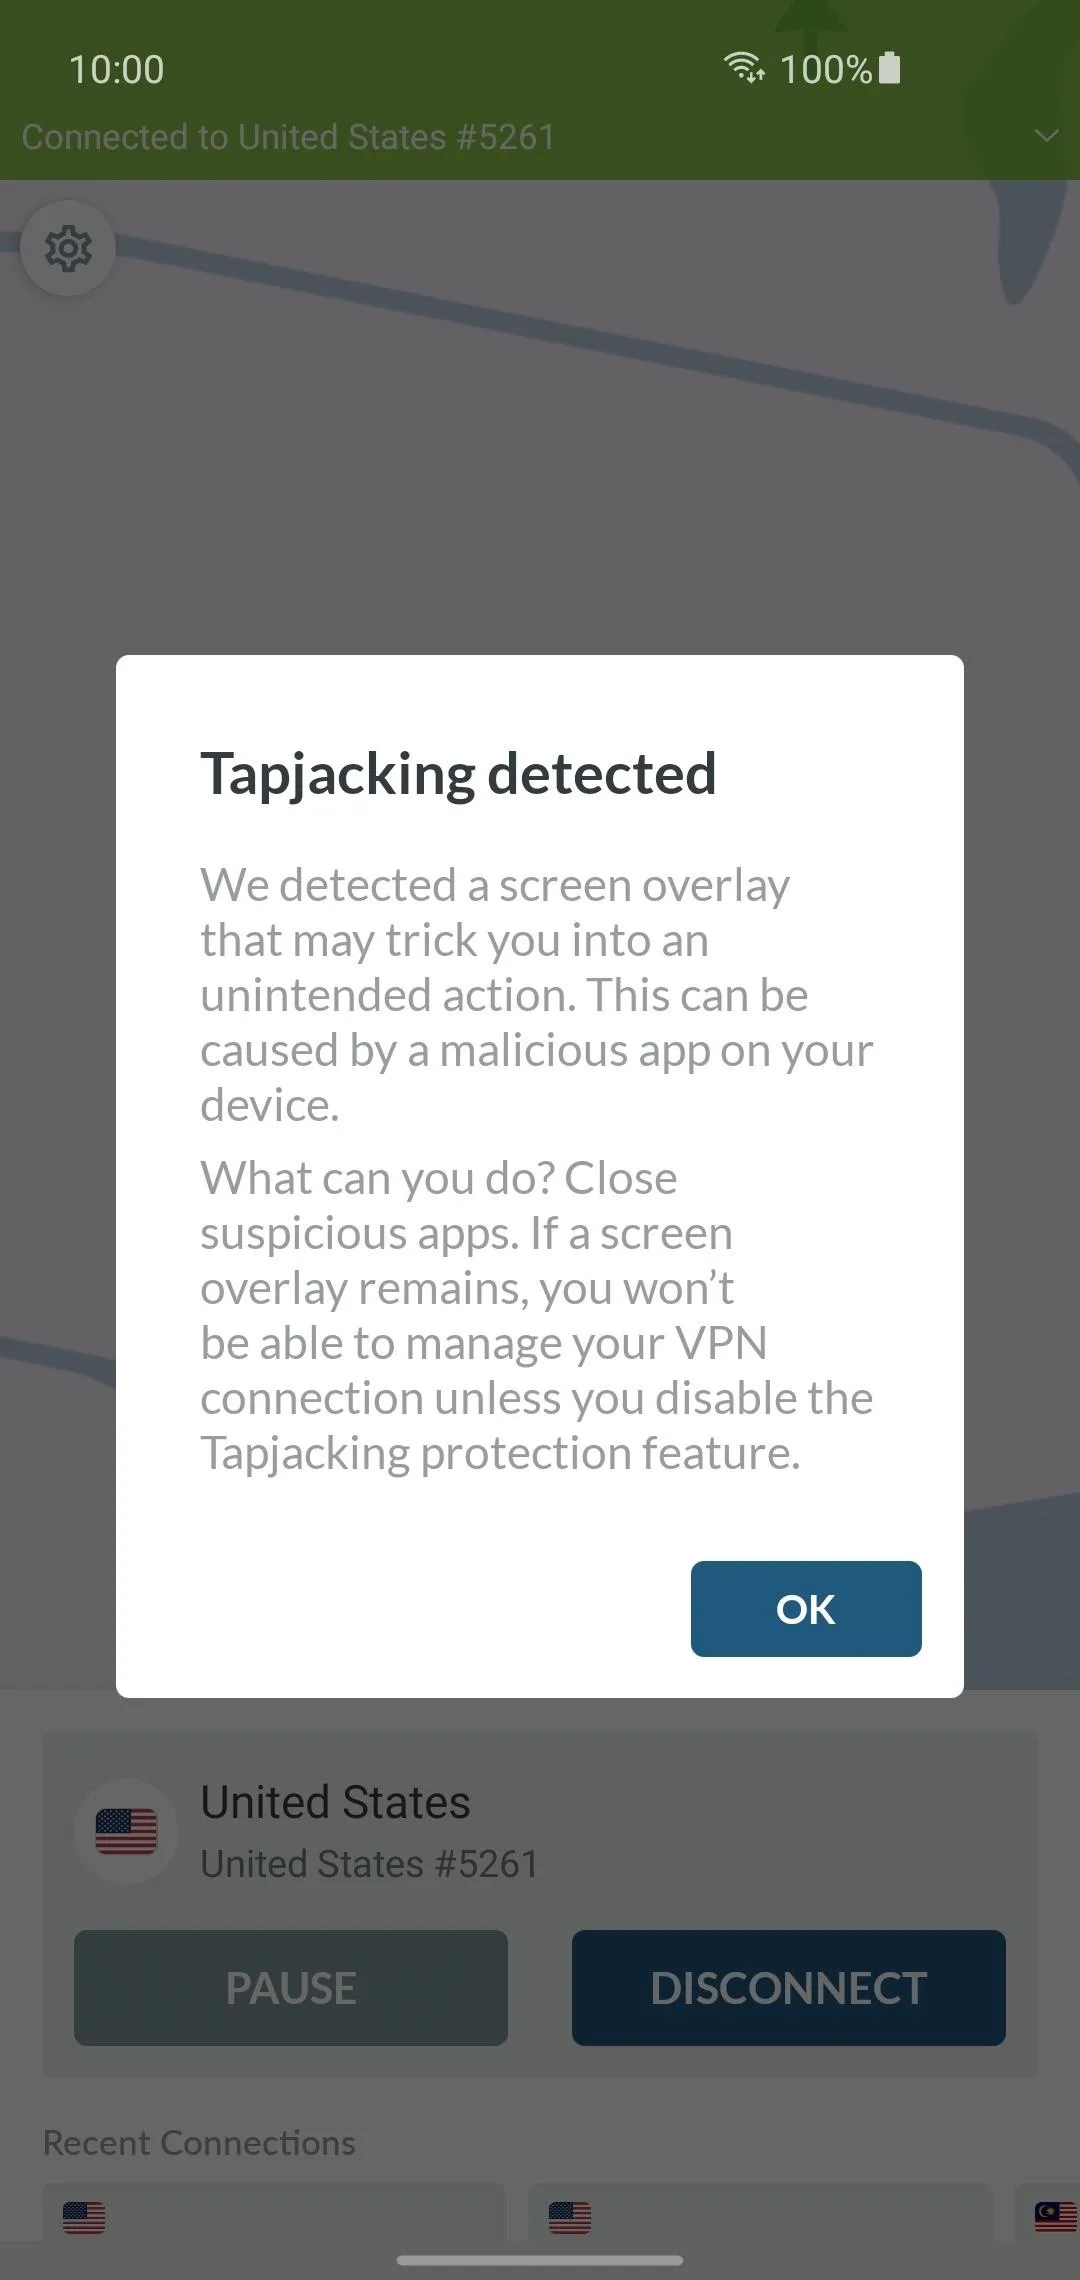
This is an example of a popup that you'll see if the Tapjacking protection feature thinks an app overlay might be malicious.
This is an example of a popup that you'll see if the Tapjacking protection feature thinks an app overlay might be malicious.
Enable the Kill Switch Settings (Android Only)
One of the most important details when using a VPN is to make sure your connection stays active at all times to keep you protected no matter what. If your network connection or VPN server drops out for some reason, it's possible you aren't actually connected to the VPN once you reconnect. Of course, this can easily go unnoticed if you aren't paying close attention to your connection status.
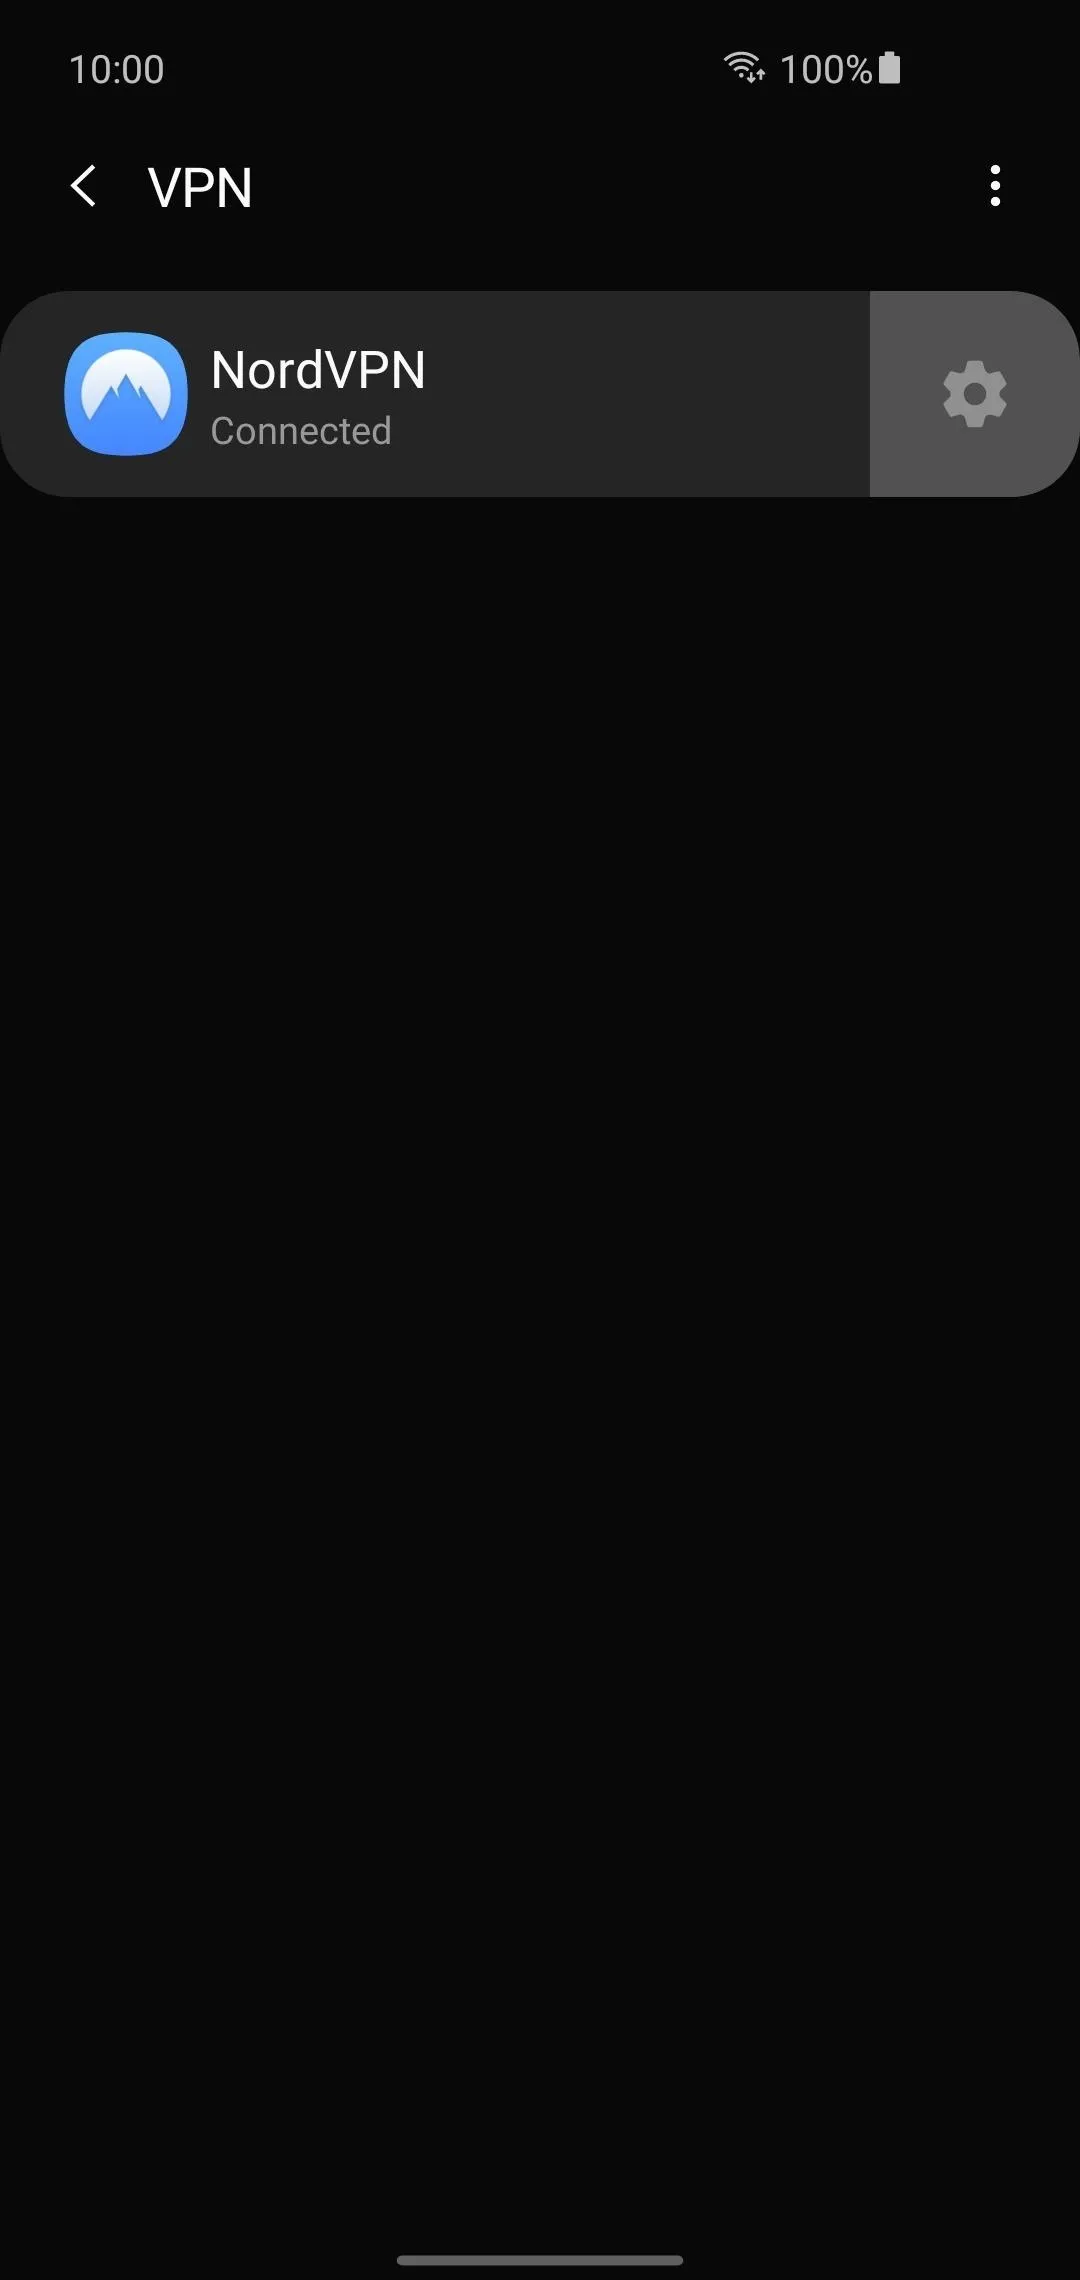
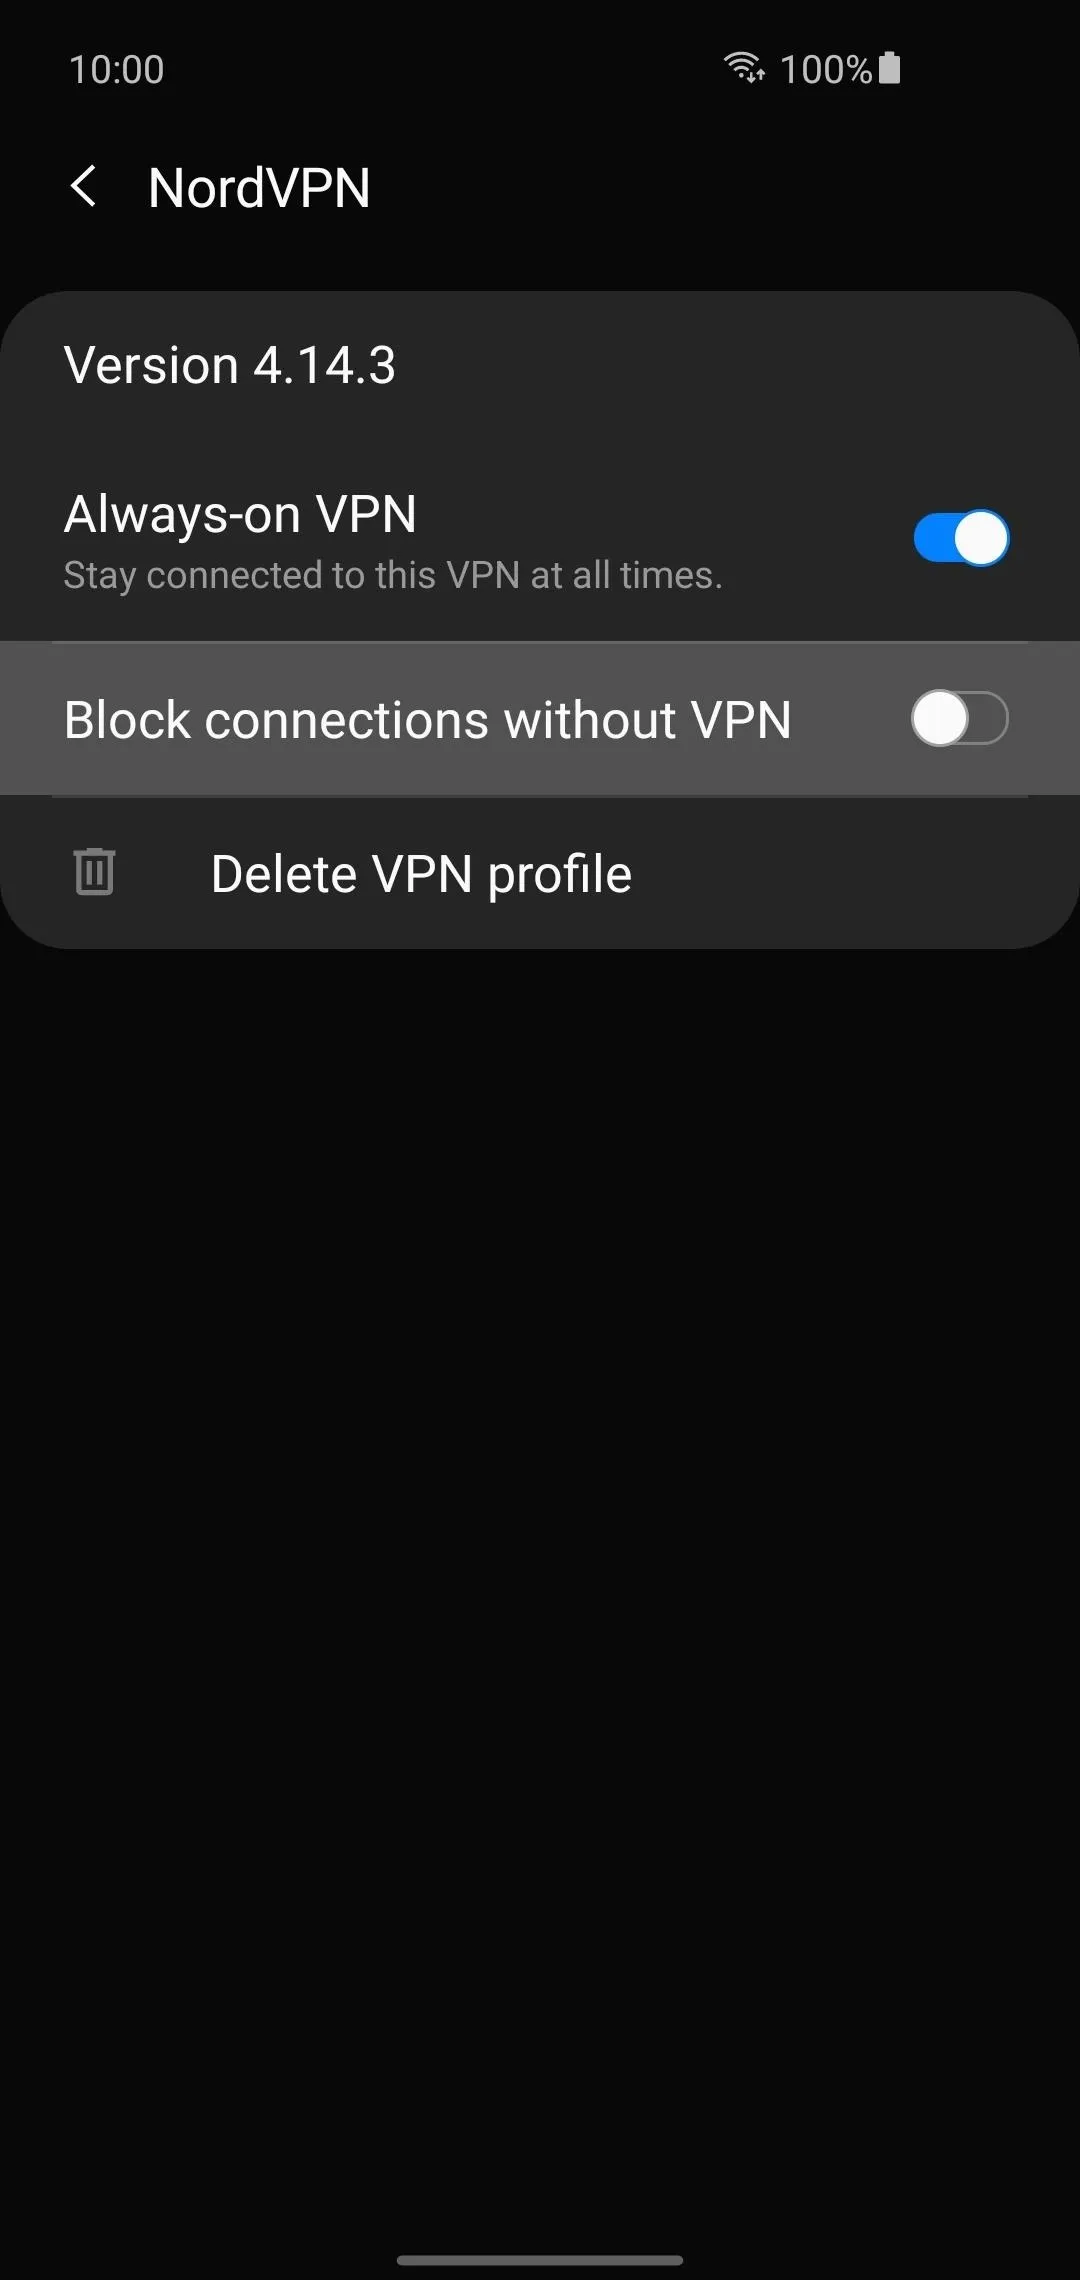
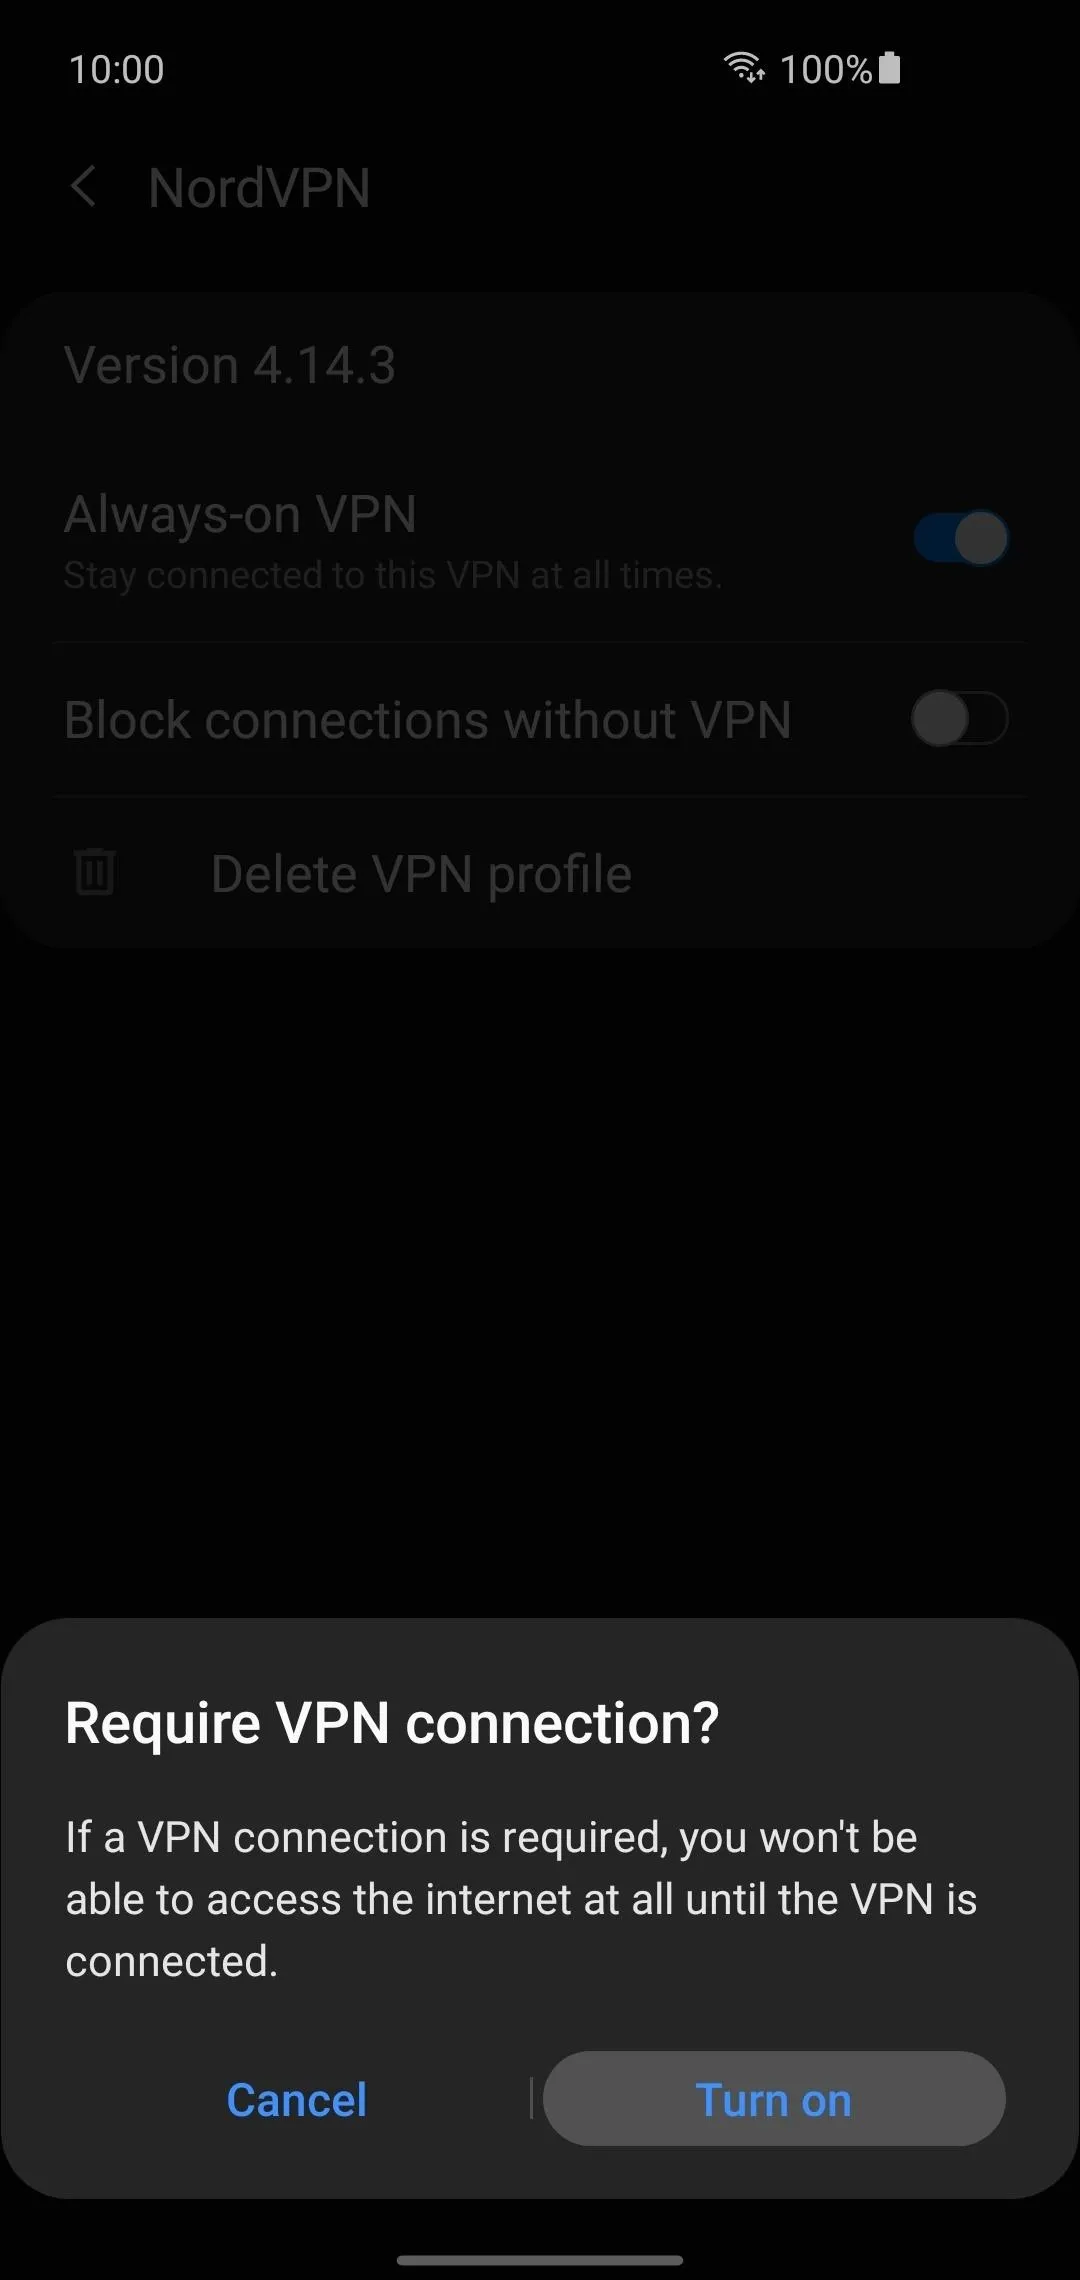
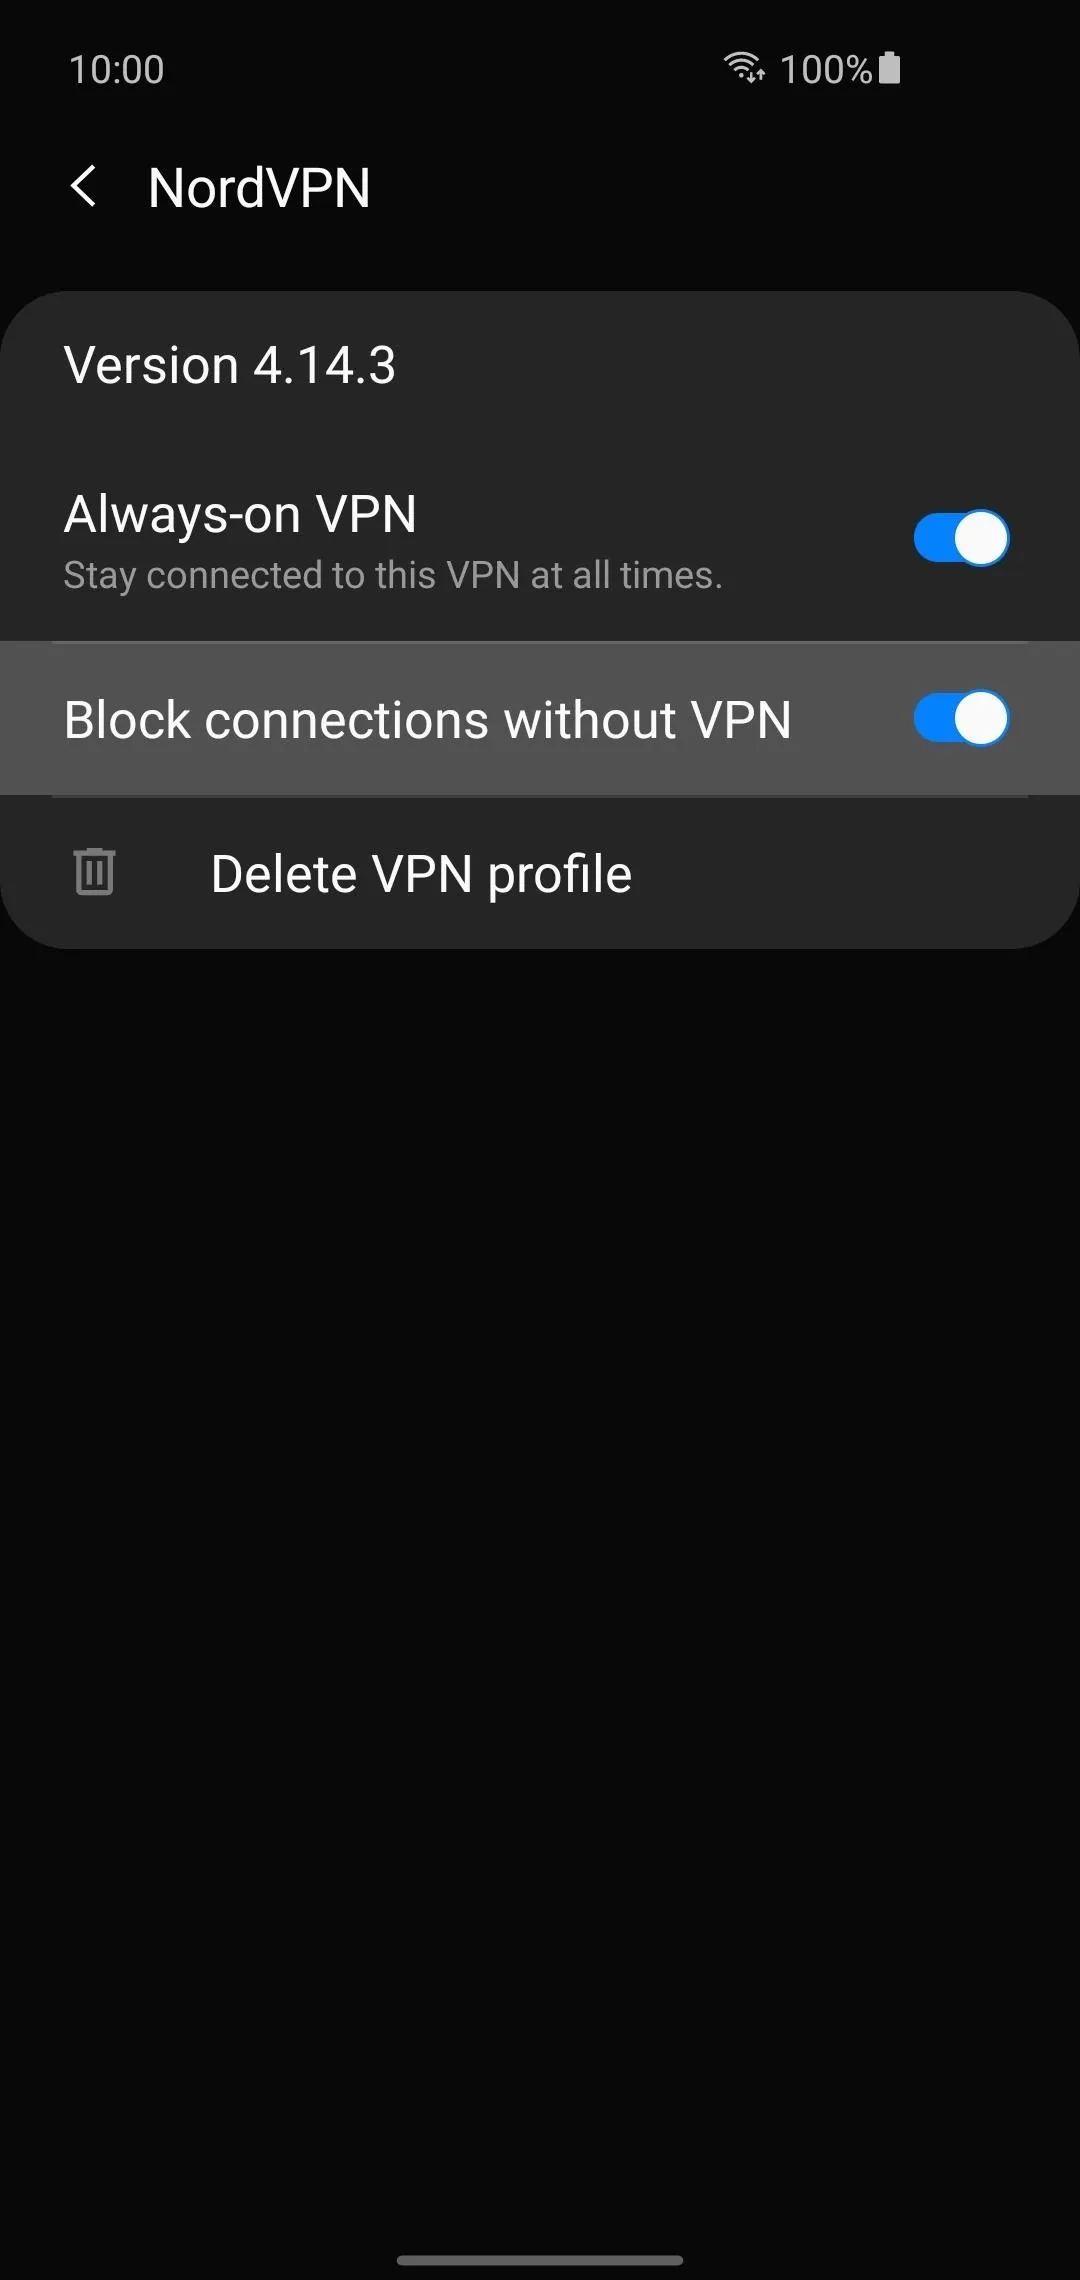
Although not an actual feature itself, the Kill Switch option will redirect you to your VPN system settings on your device instead. Open the NordVPN app to the main screen, tap the menu icon on the left, then locate and tap the "Kill Switch" entry. Press the "Open Android Settings" button, hit the options icon to the right, then press the "Always-on VPN" switch to enable it.
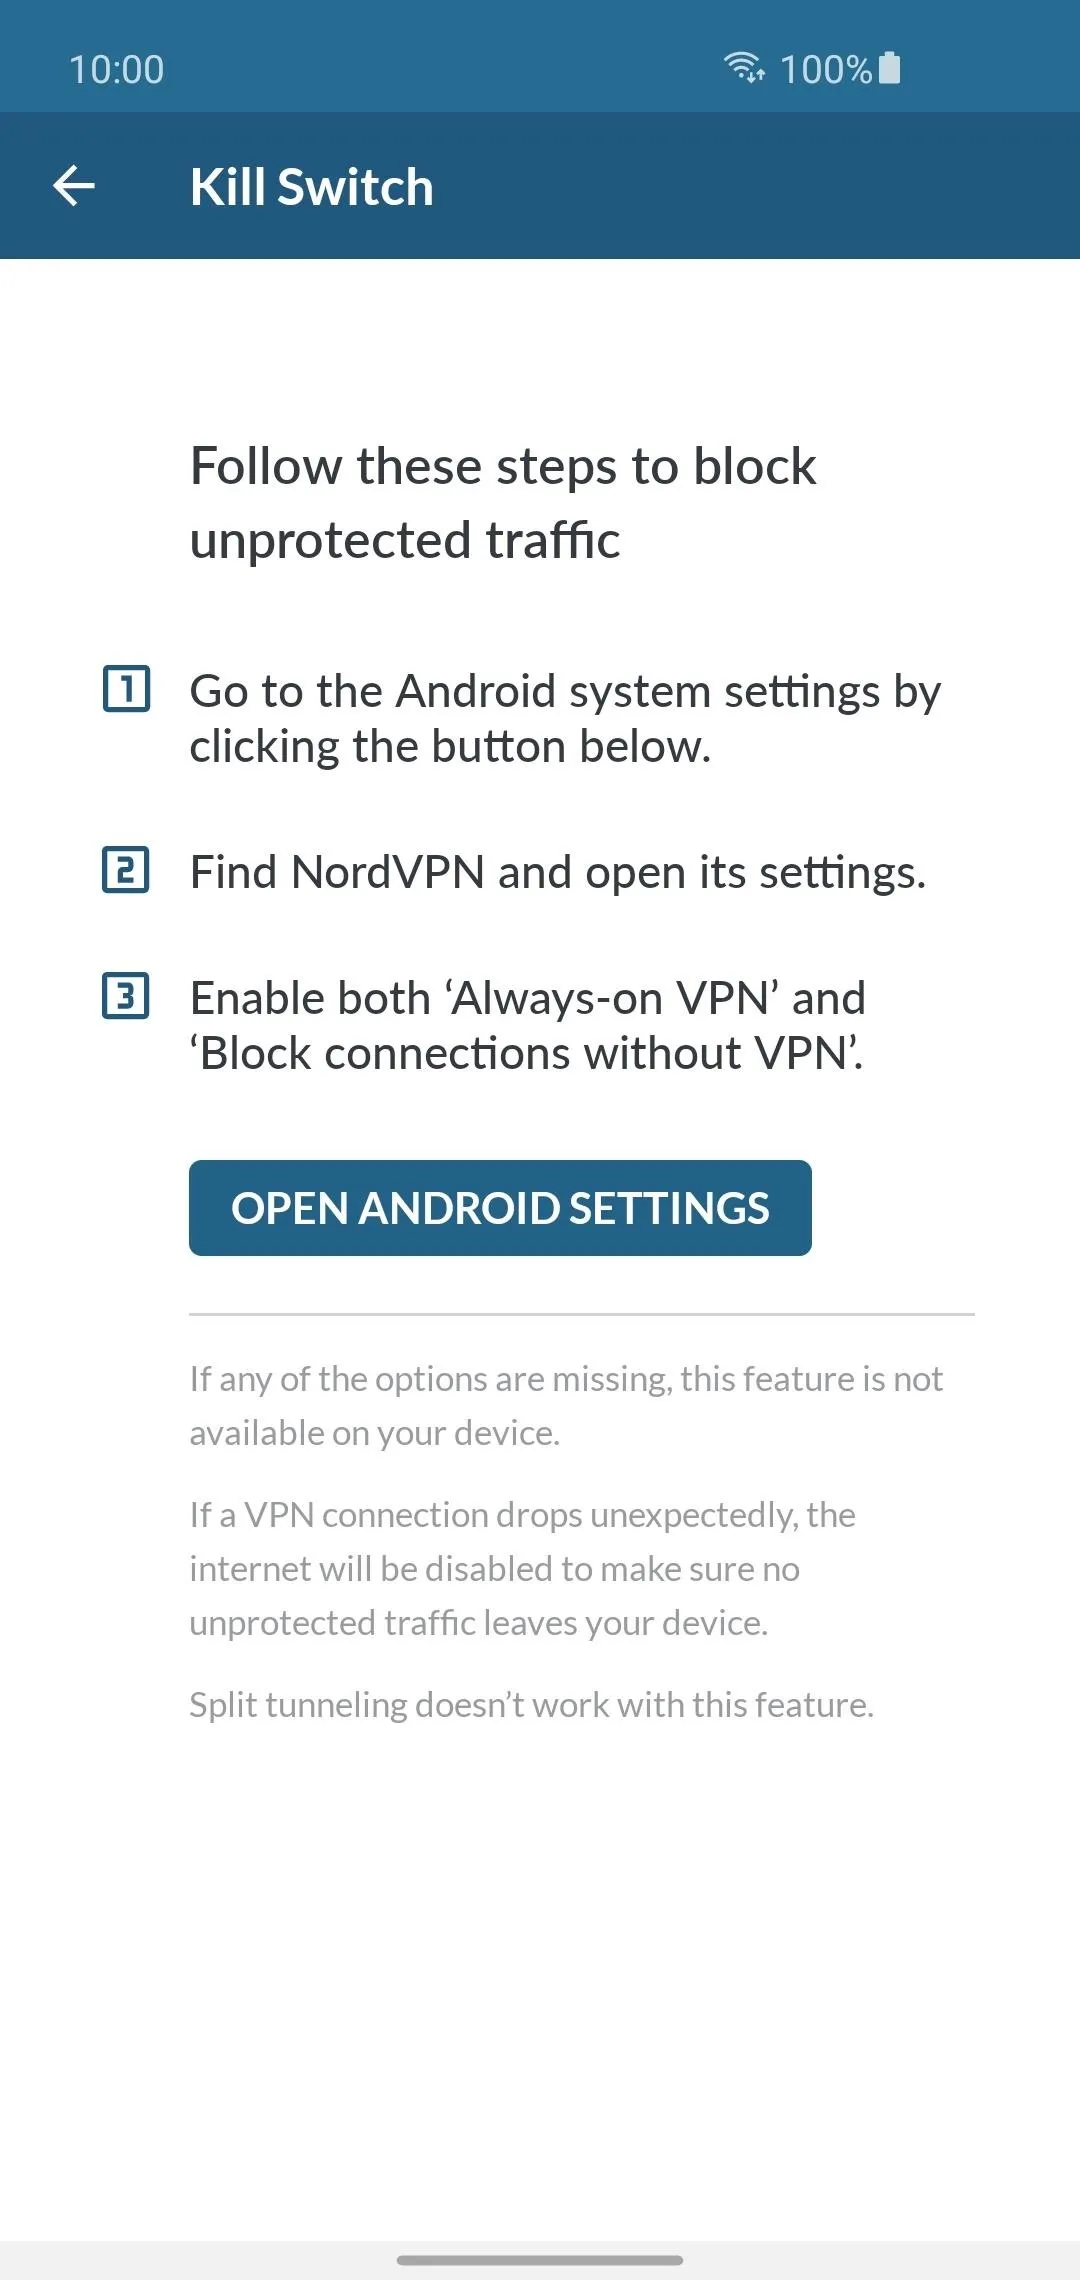
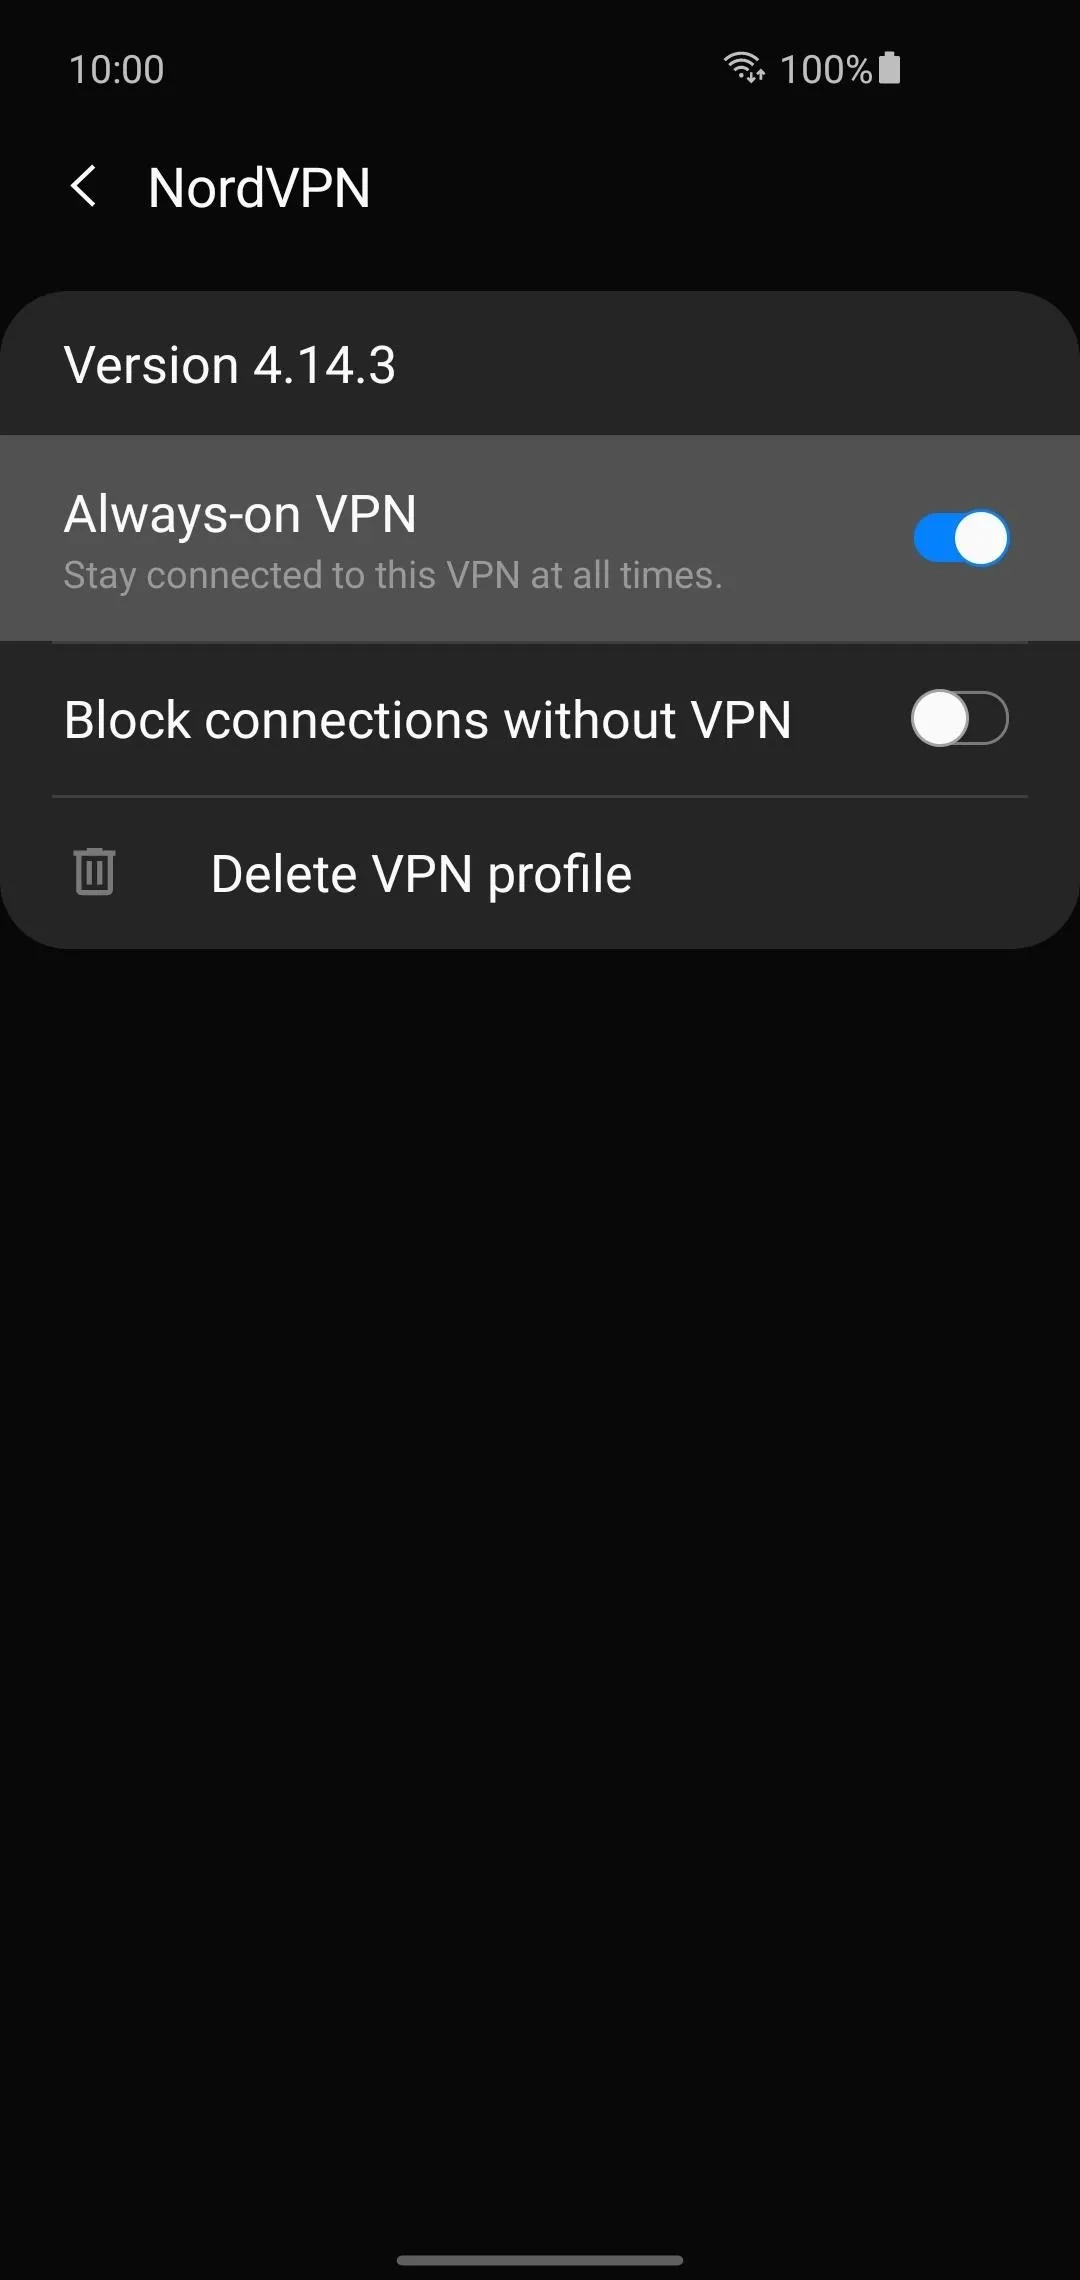
To add an extra layer of protection, you can also turn on the "Block connections without VPN" switch. Doing so will prevent all apps, services, and other external devices not connected to your VPN from exchanging data with your device. For example, you won't be able to cast music to your unsecured smart speakers unless the entire Wi-Fi network has been set up with a VPN.
Keep Auto-Connect Always On
The Auto-connect feature ensures your VPN will automatically connect to your desired server without any user input. So if a server goes down for maintenance or your Wi-Fi signal blinks out, it'll connect to another server automatically. When you combine the Auto-connect feature with the Kill Switch options, they create a super tight seal of security that takes care of itself.
For Android Devices
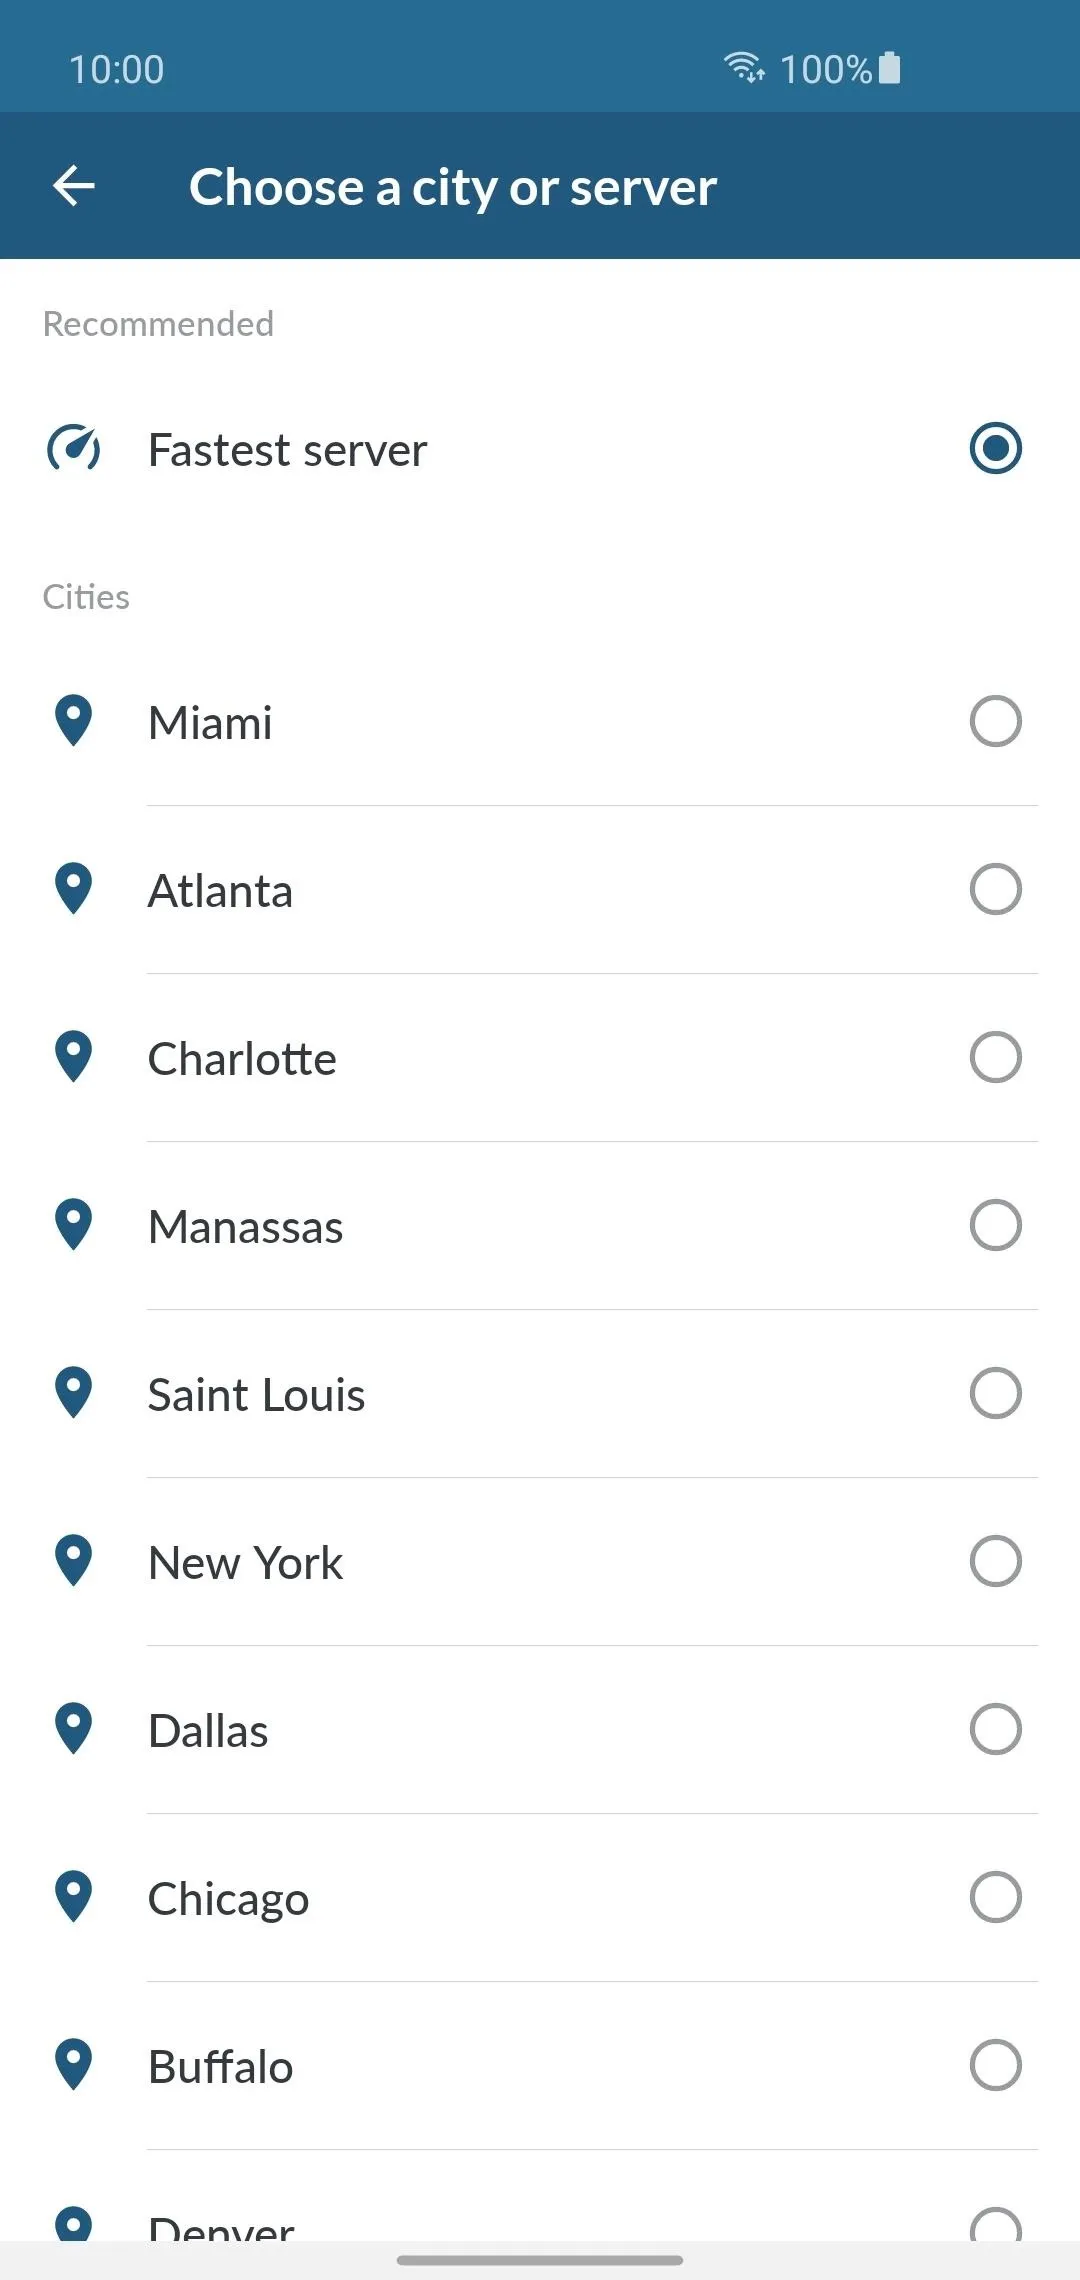
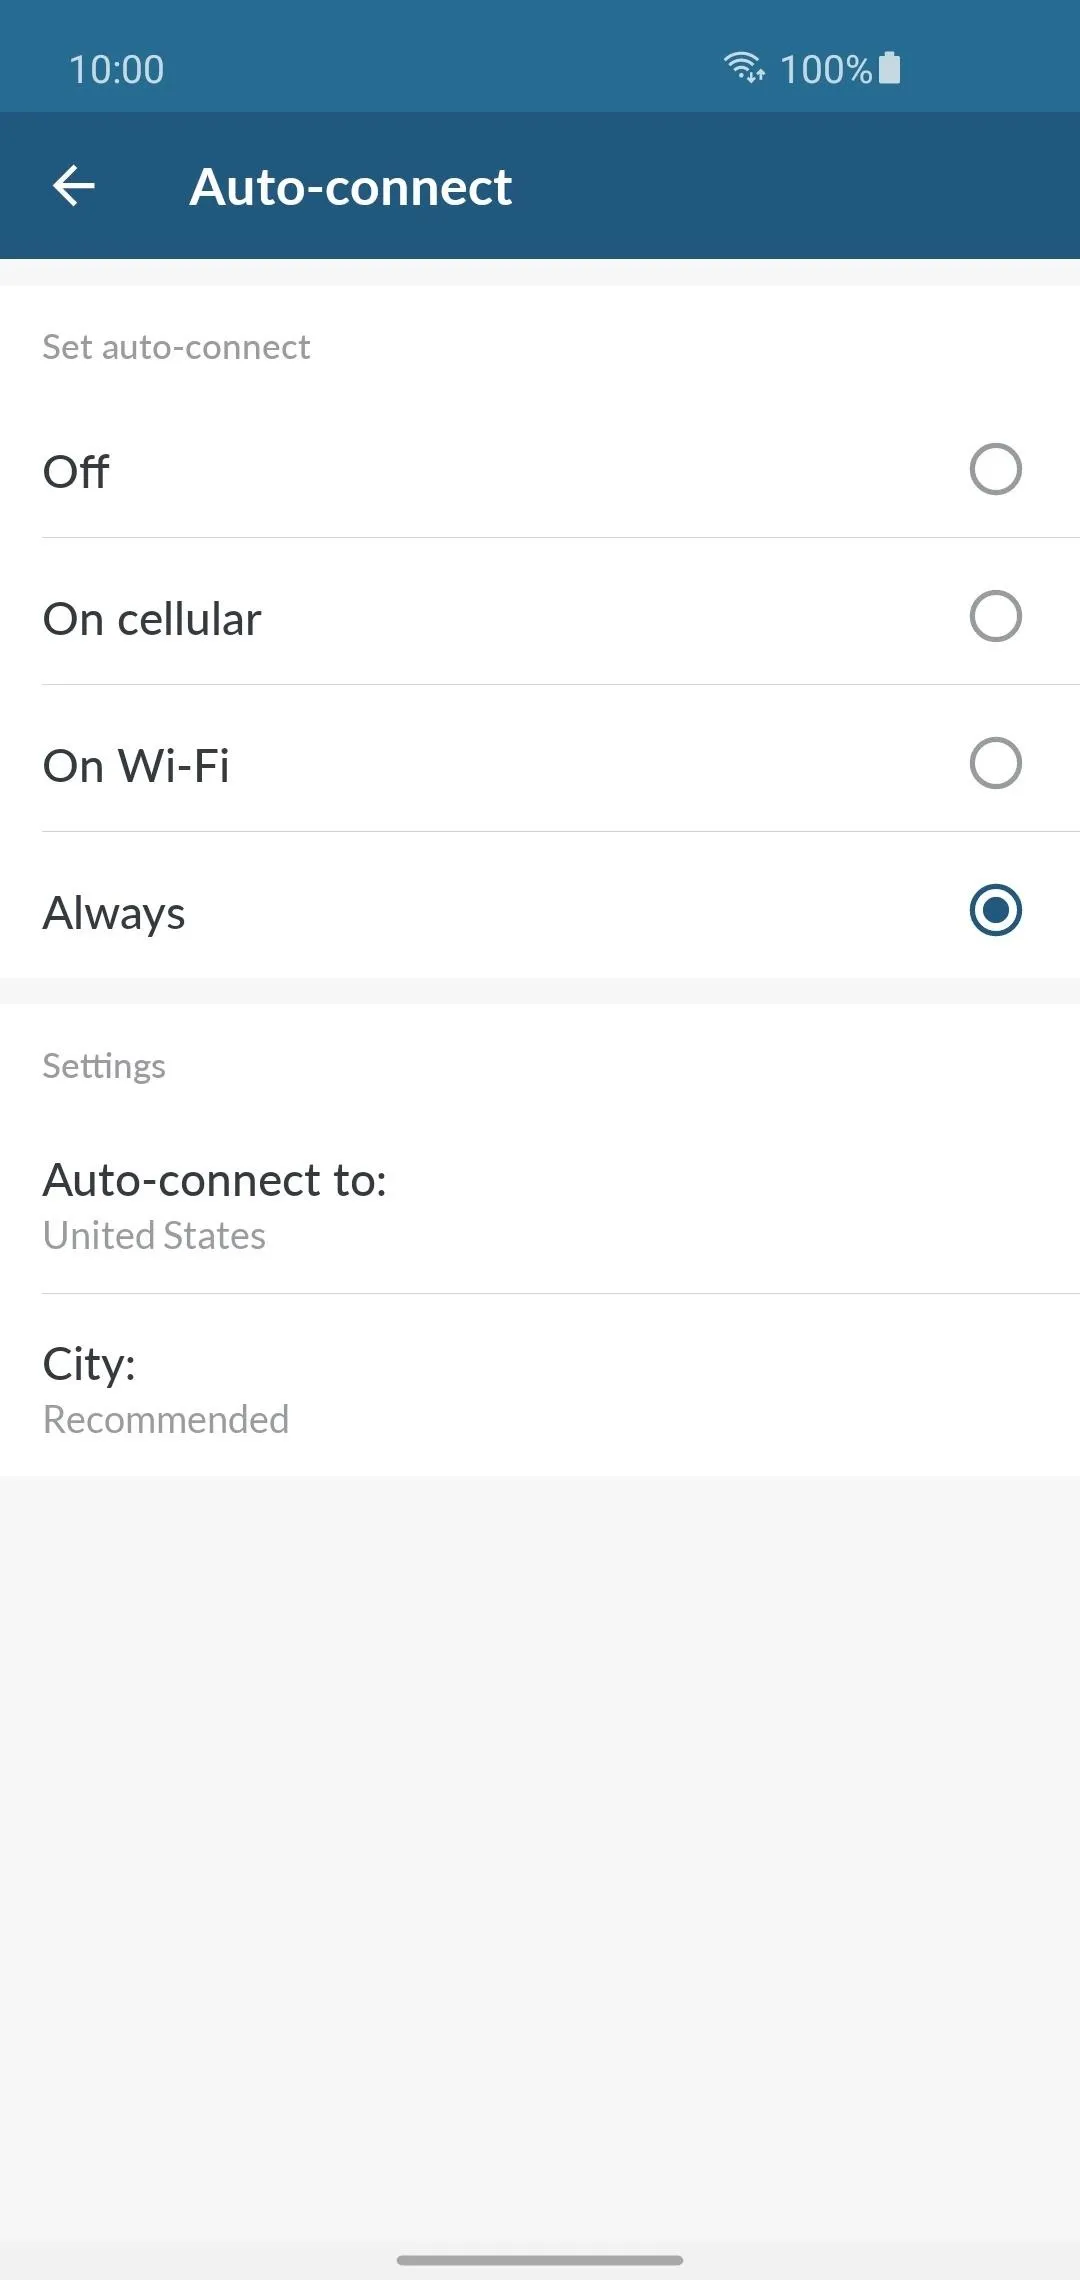
To get started, open the NordVPN app, hit the settings icon on the left, then locate the "Auto-connect" entry on the list and tap it to continue. Press the "Always" option to enable the feature, then you can fine-tune the VPN location options if desired.

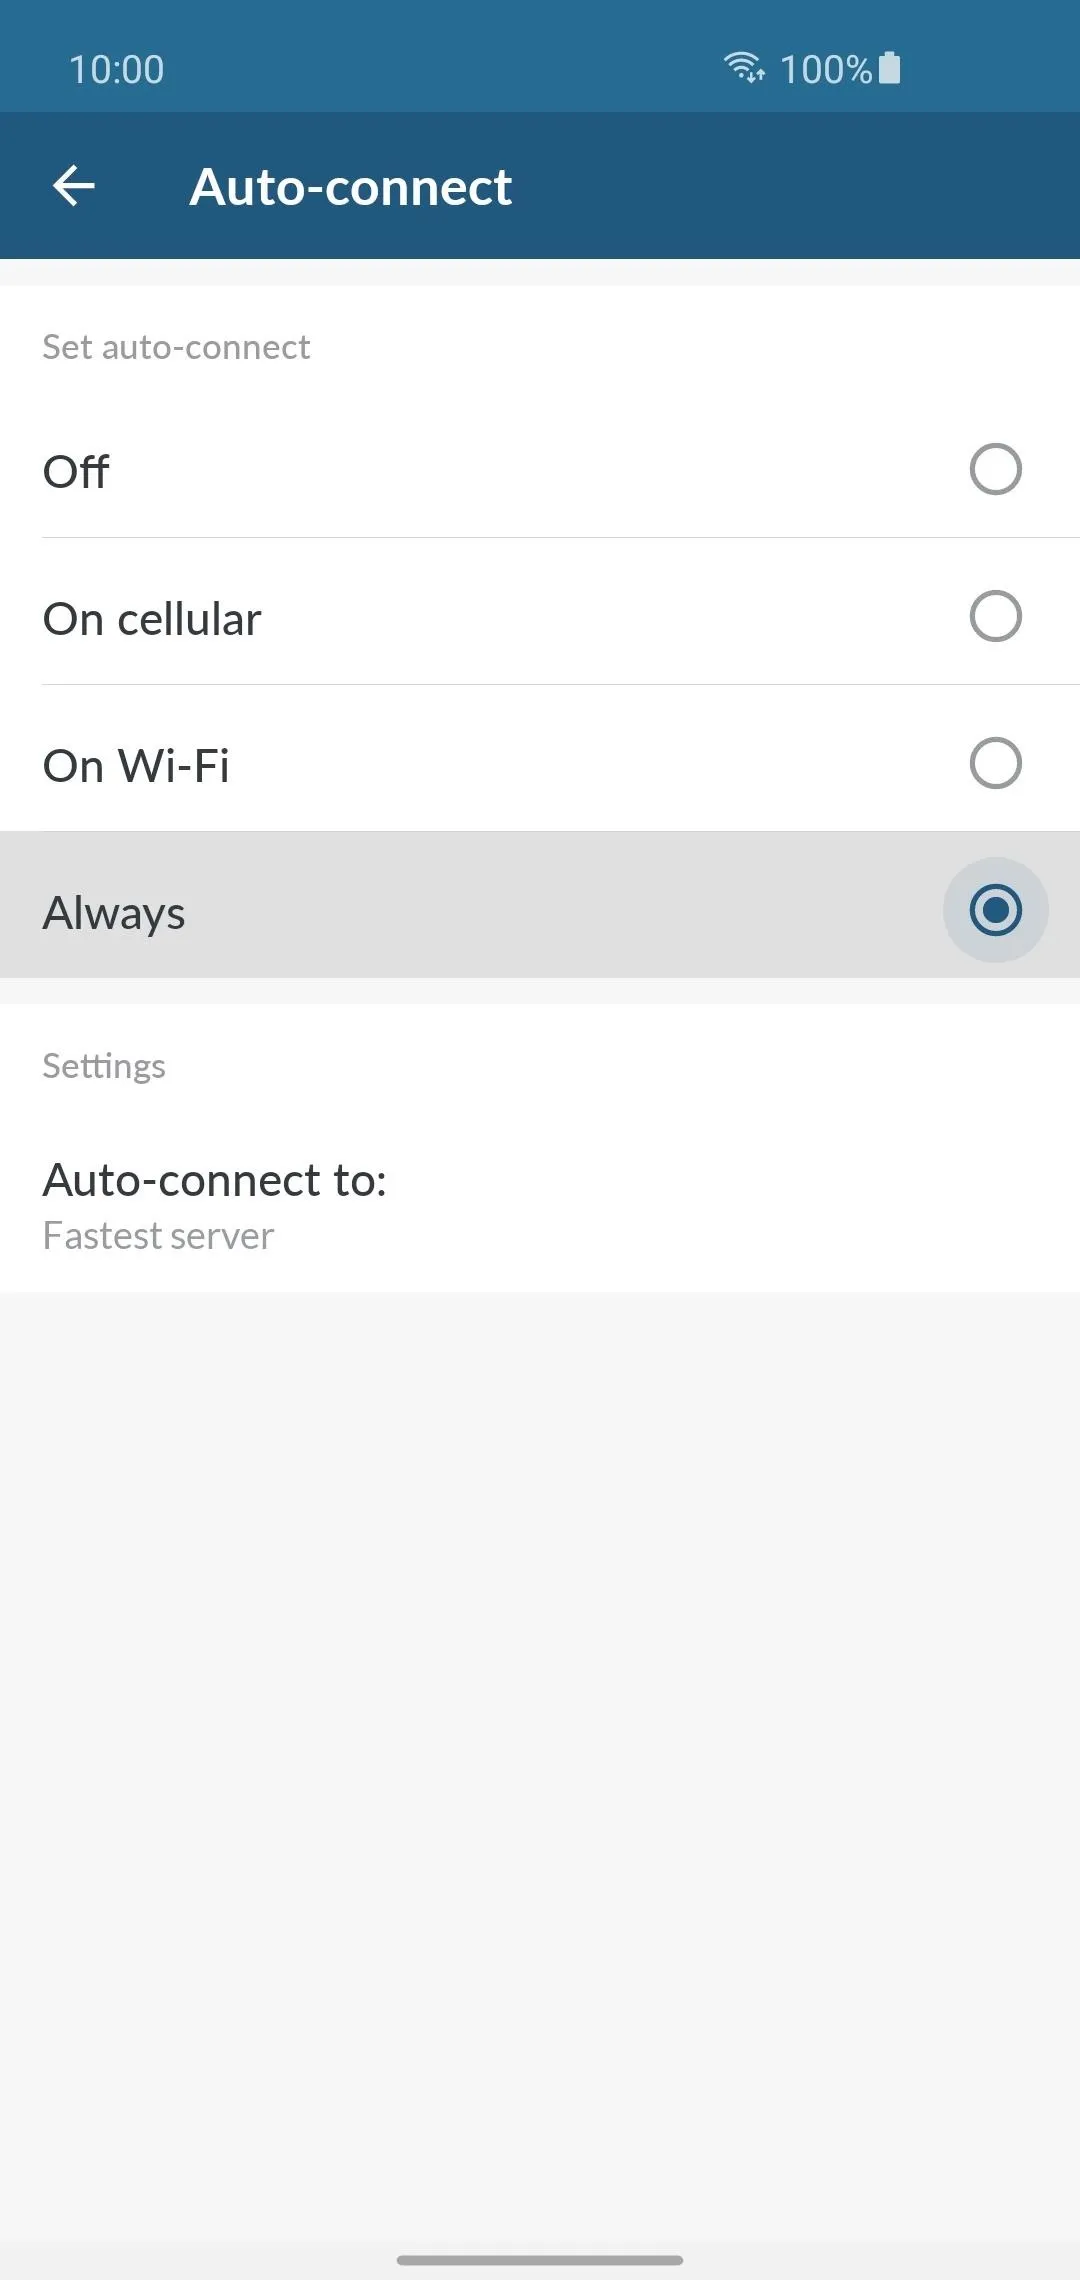
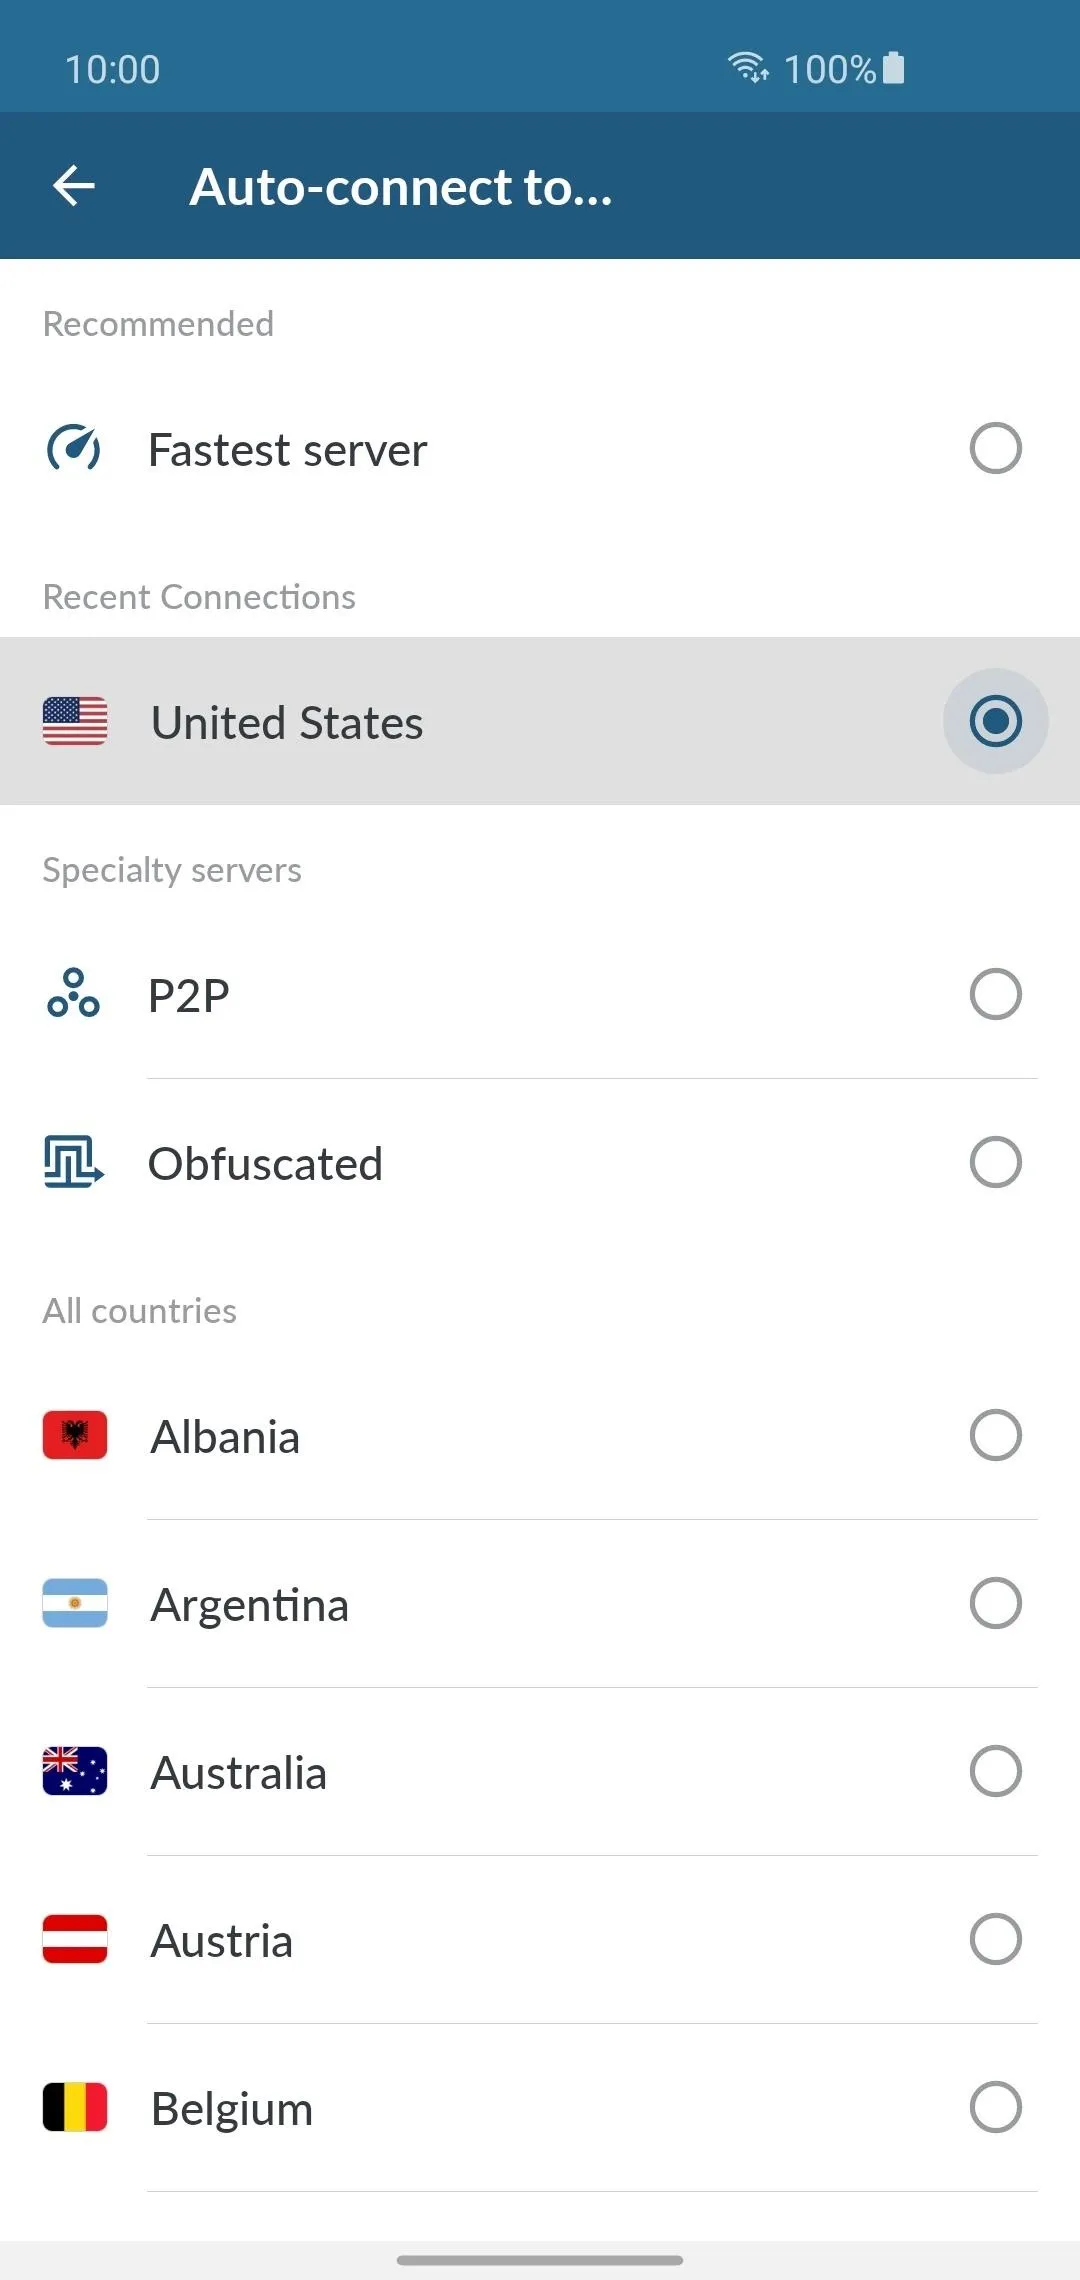
Tap "Auto-connect to" for specific location changes you wish to do automatically, or just use the default "Fastest server" setting. You can do the same for the city setting as well, or simply set the "Fastest server here as well. From now on, your device will automatically connect based on the settings you selected here if your connection drops out. One less thing to deal with!
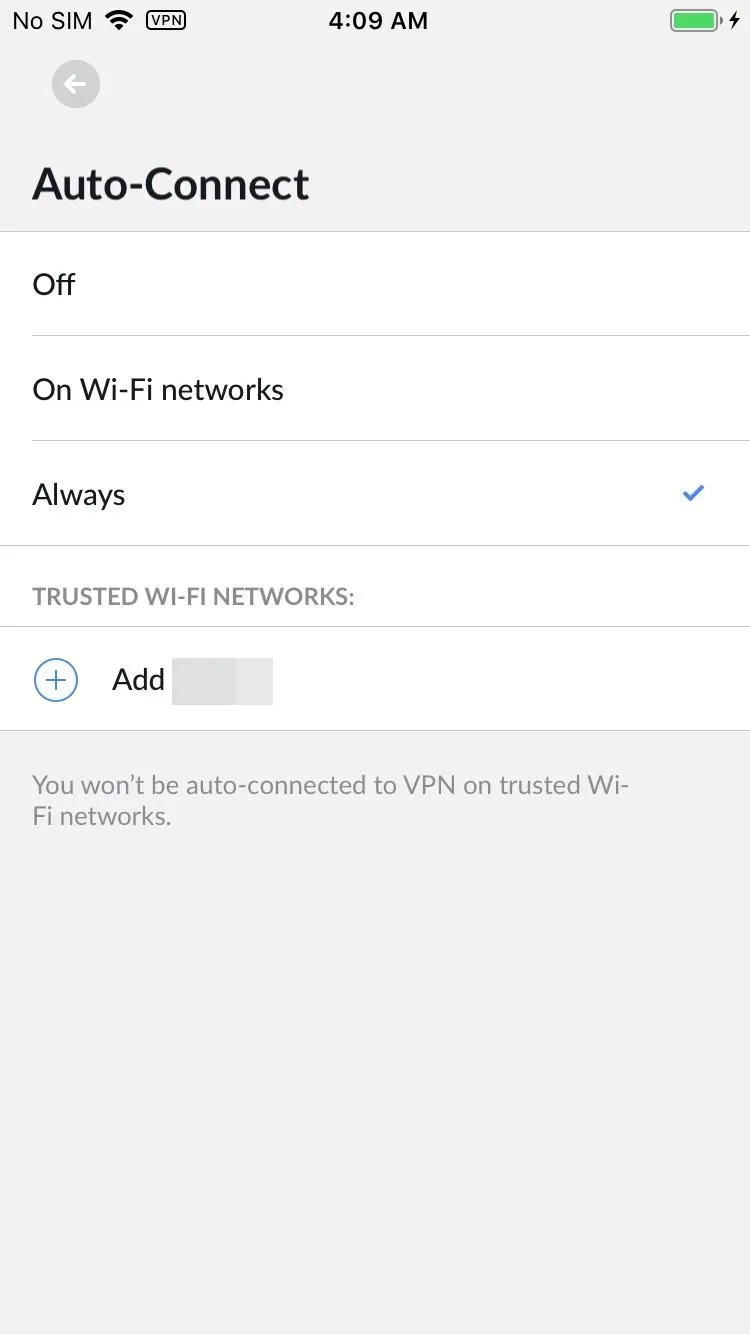
For iOS Devices
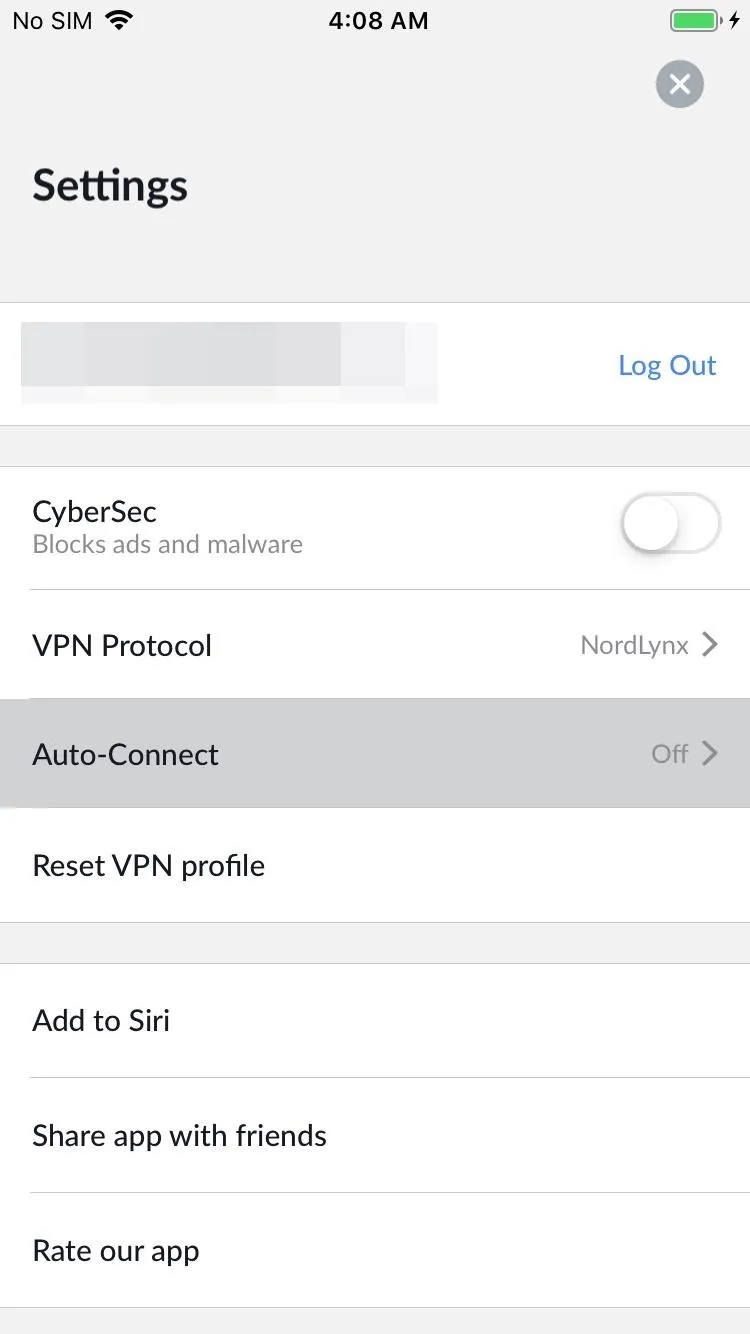
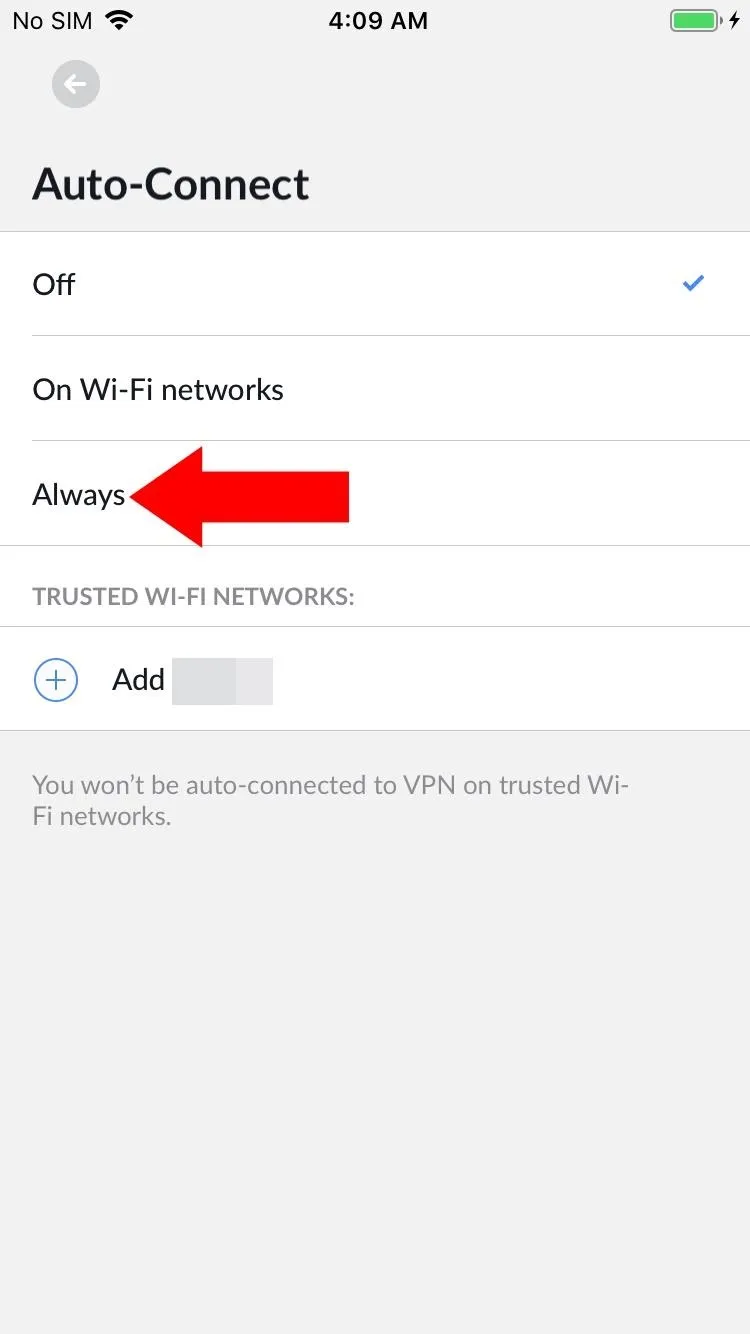
To get started, open the NordVPN app to the main screen, hit the settings icon in the upper right, then locate and tap "Auto-Connect." From there, press "Always" to enable it. That's all there is to it! You can add your Wi-Fi network as a "Trusted Wi-Fi Network." However, it's not recommended since it prevents you from auto-connecting to the VPN anyway.
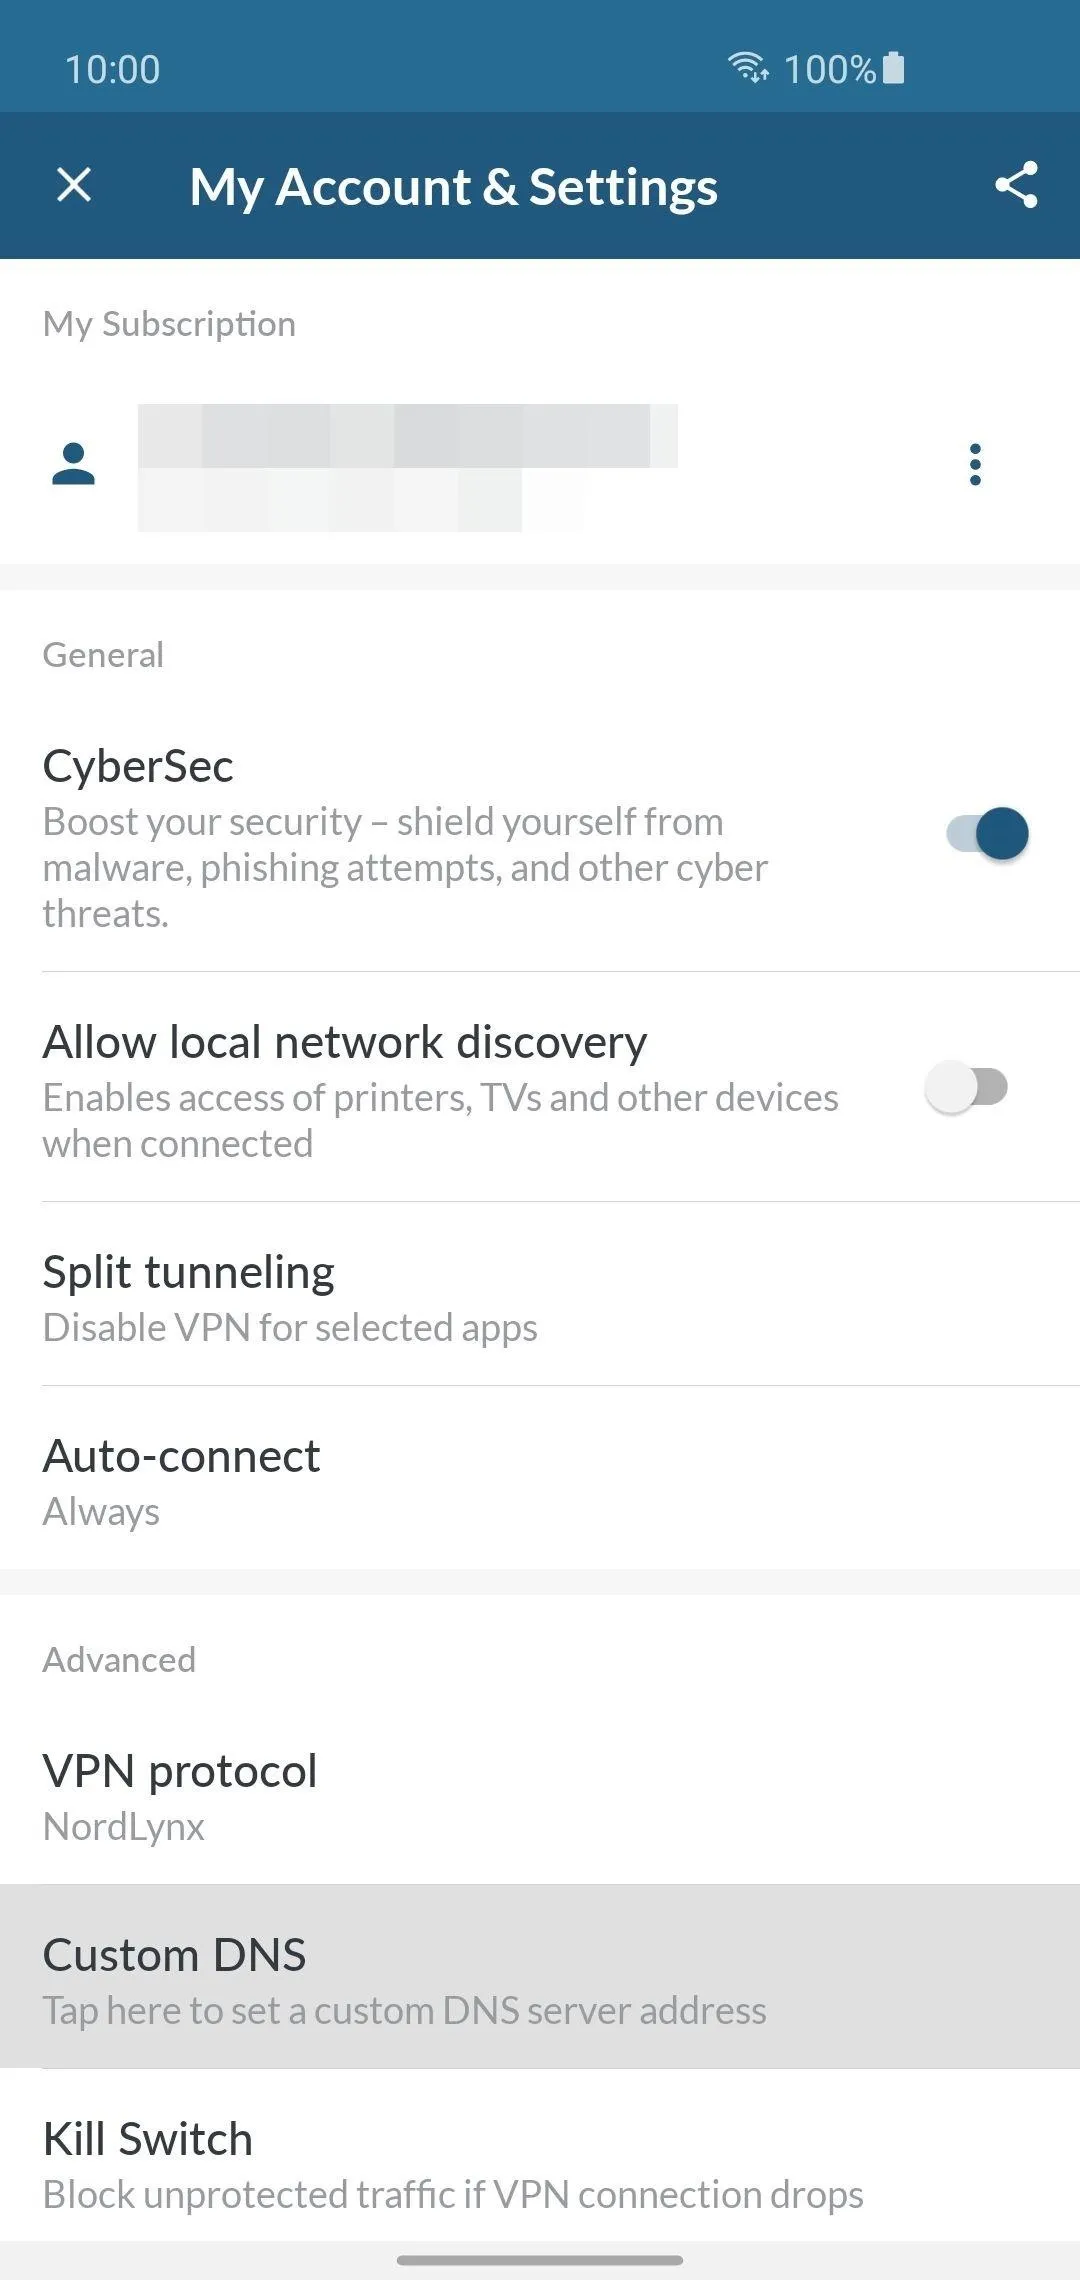
Always Use CyberSec or a Custom DNS
The Domain Name System (DNS) server used on your home network is a crucial part of the online experience. It translates a domain of words into an IP address with numbers, which can be read by computers. Many don't realize the DNS server on their home network is set to their internet service provider (ISP) by default. If left unchanged, it means your ISP can keep tabs on your network activity.
NordVPN recommends using its built-in CyberSec feature, which automatically sets your device DNS settings to their secured ones. This keeps you protected from DNS leaks and other security threats by encrypting your DNS queries via the same VPN connection. You won't have to worry about your ISP or other third-party services messing around with your private data any longer.
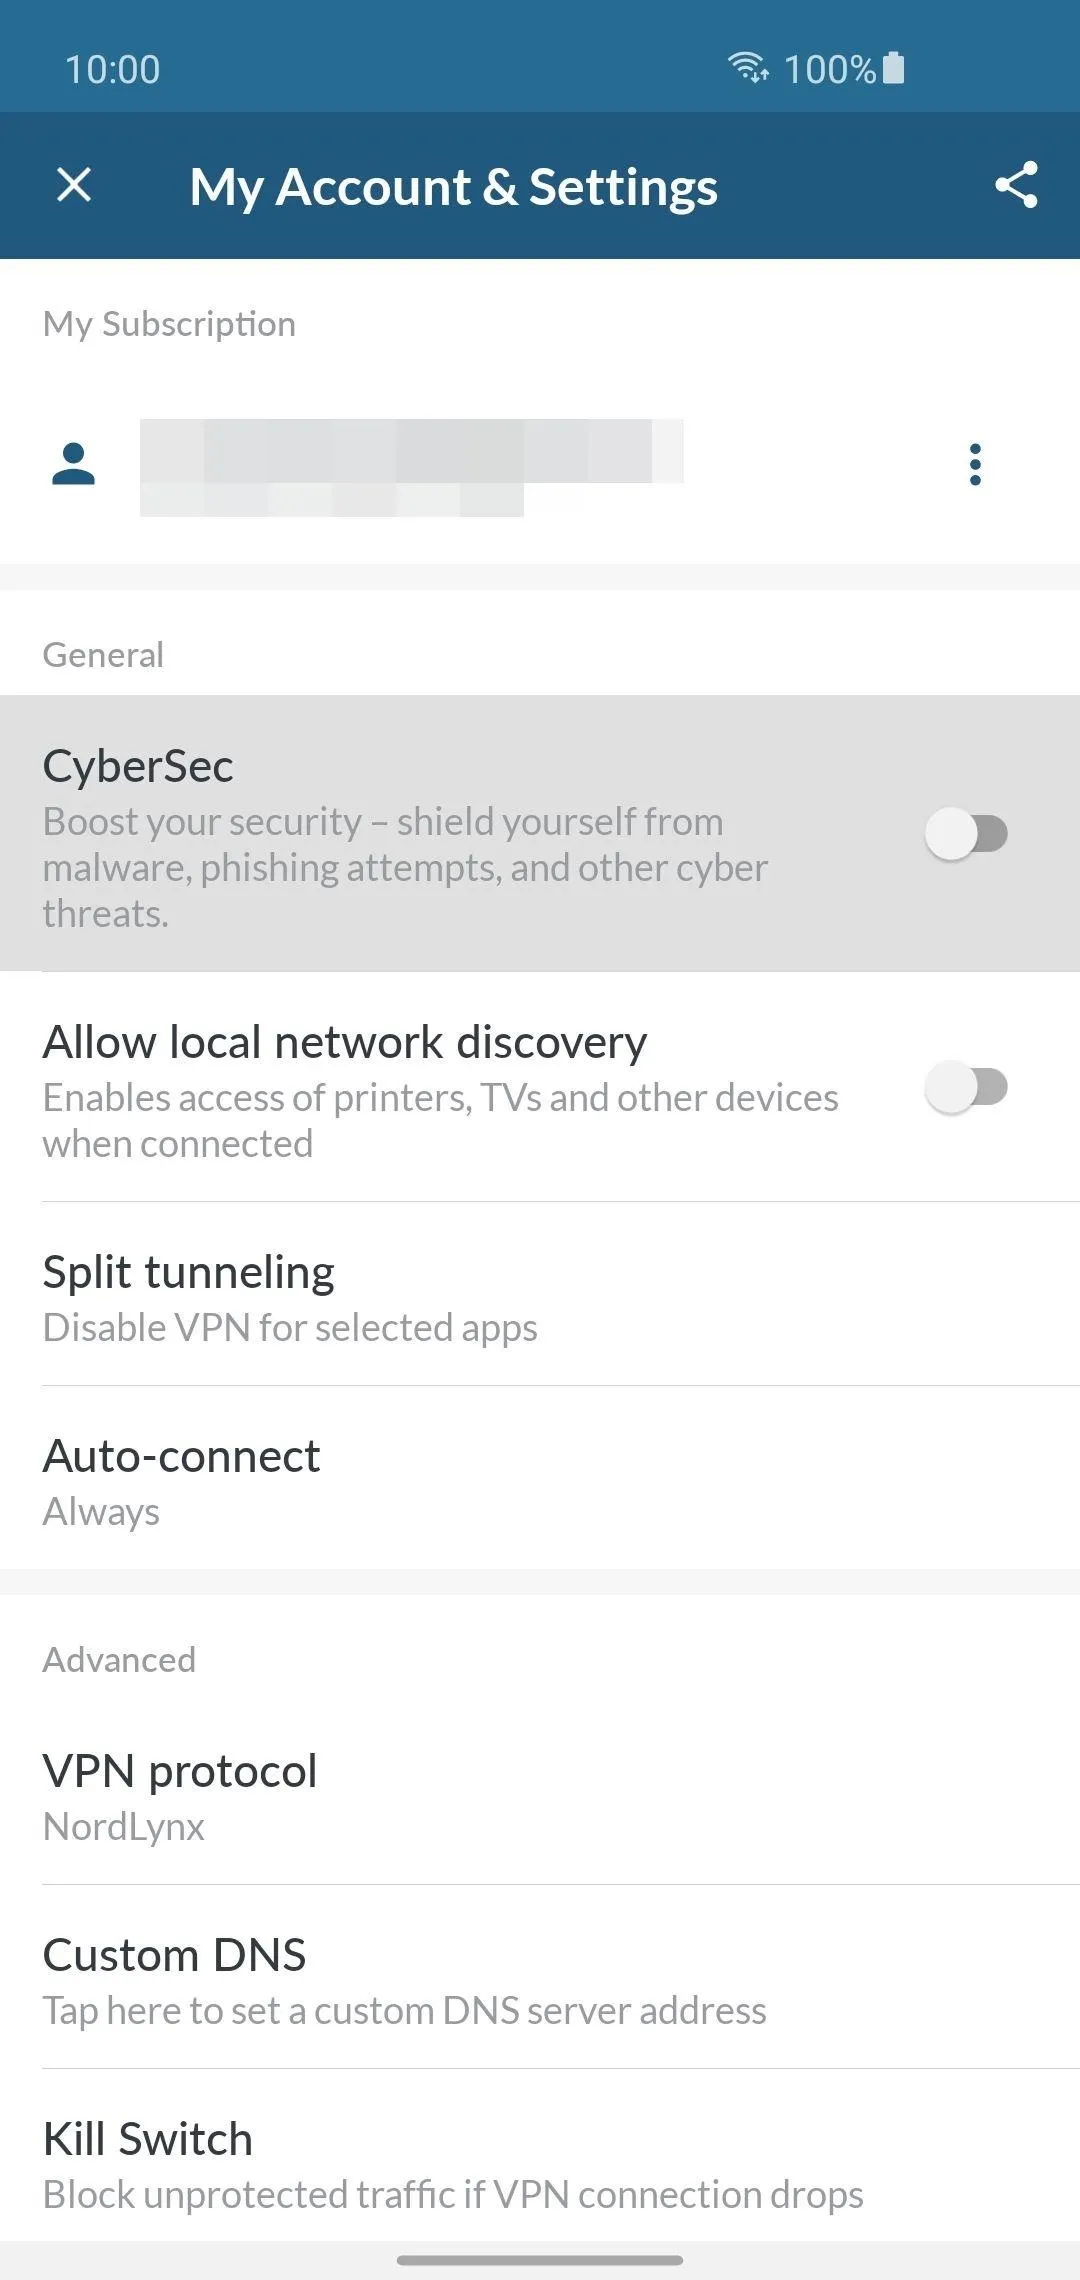
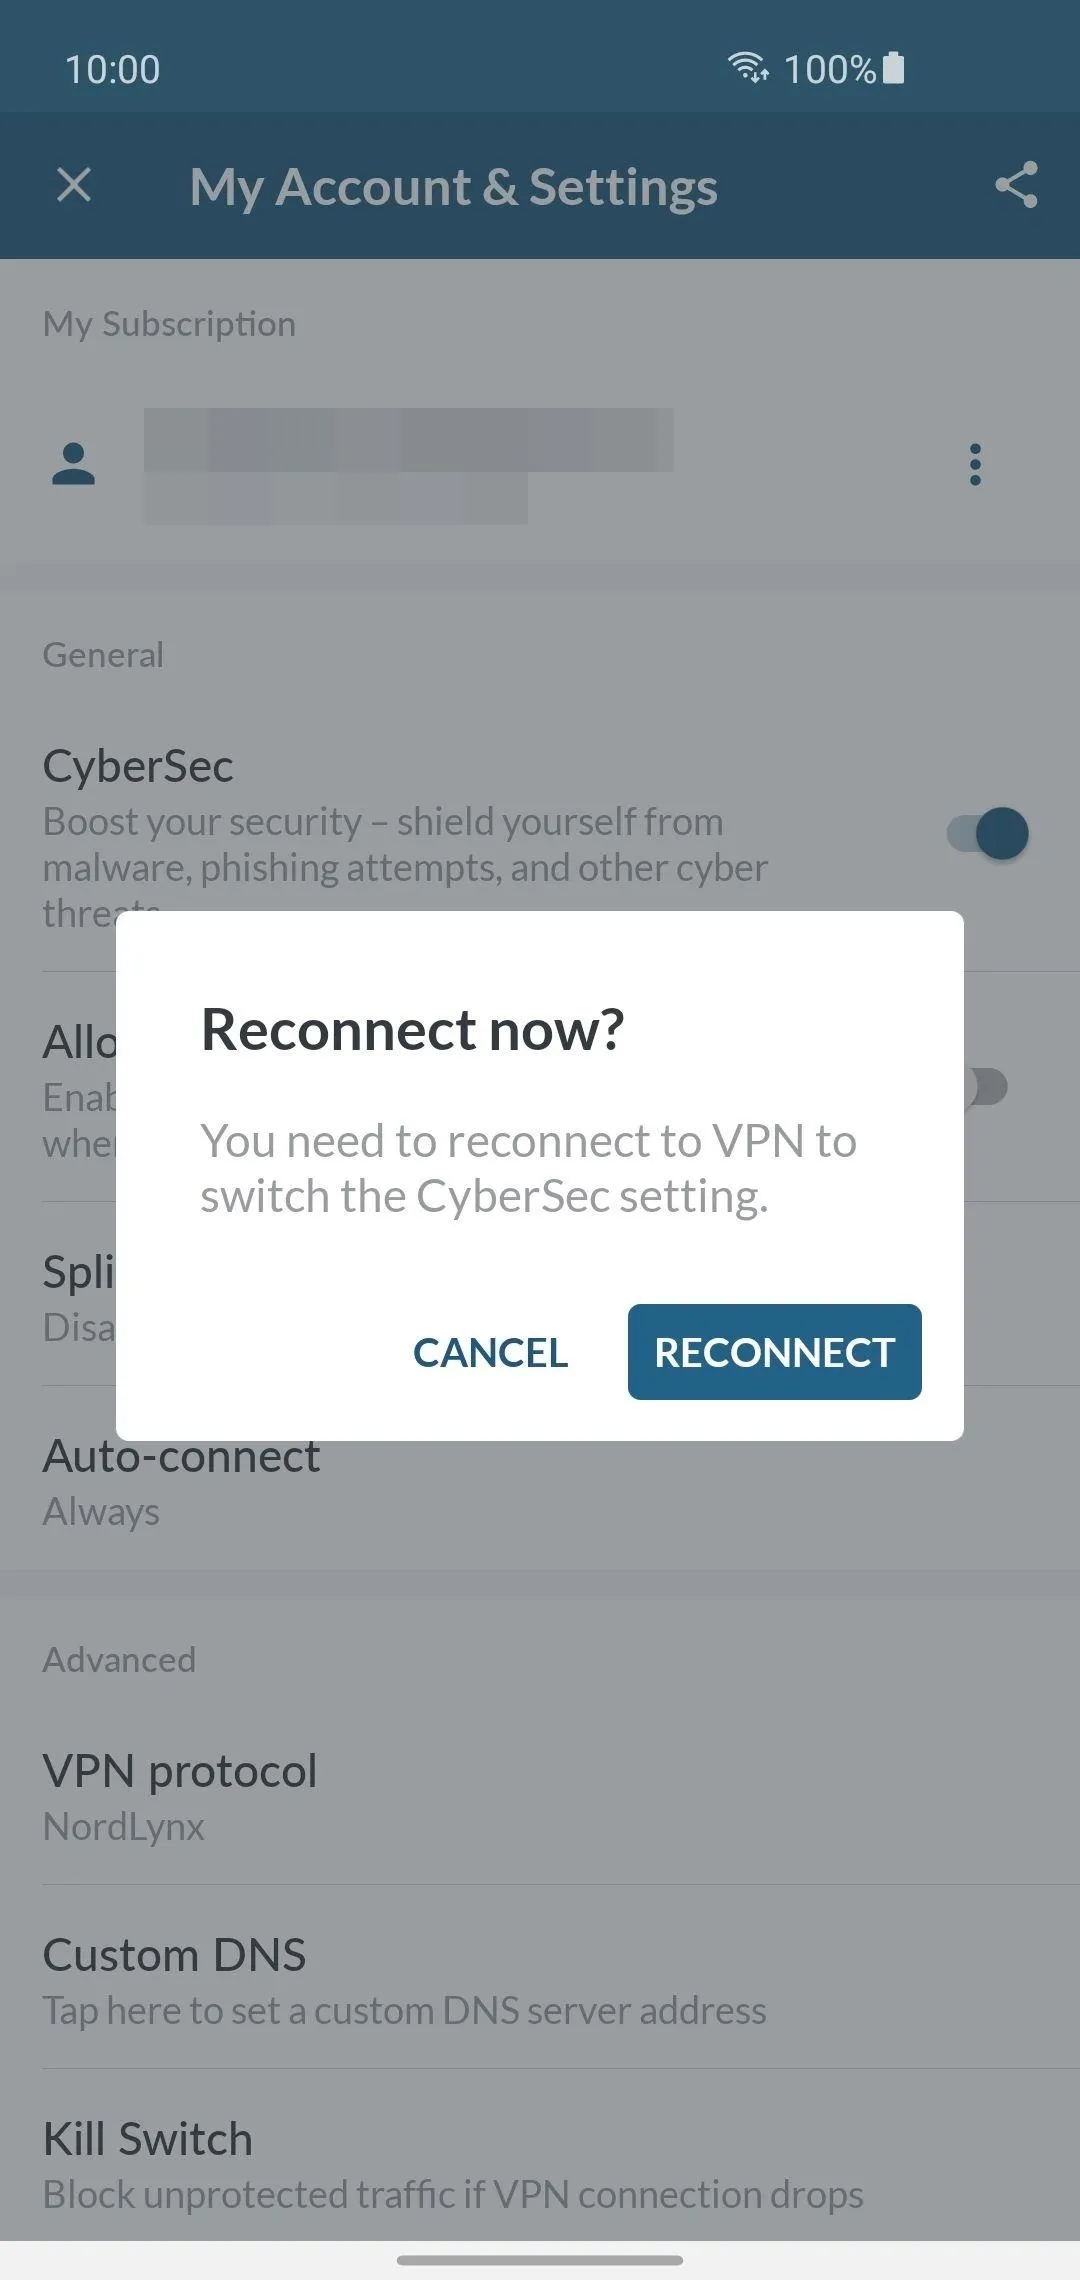
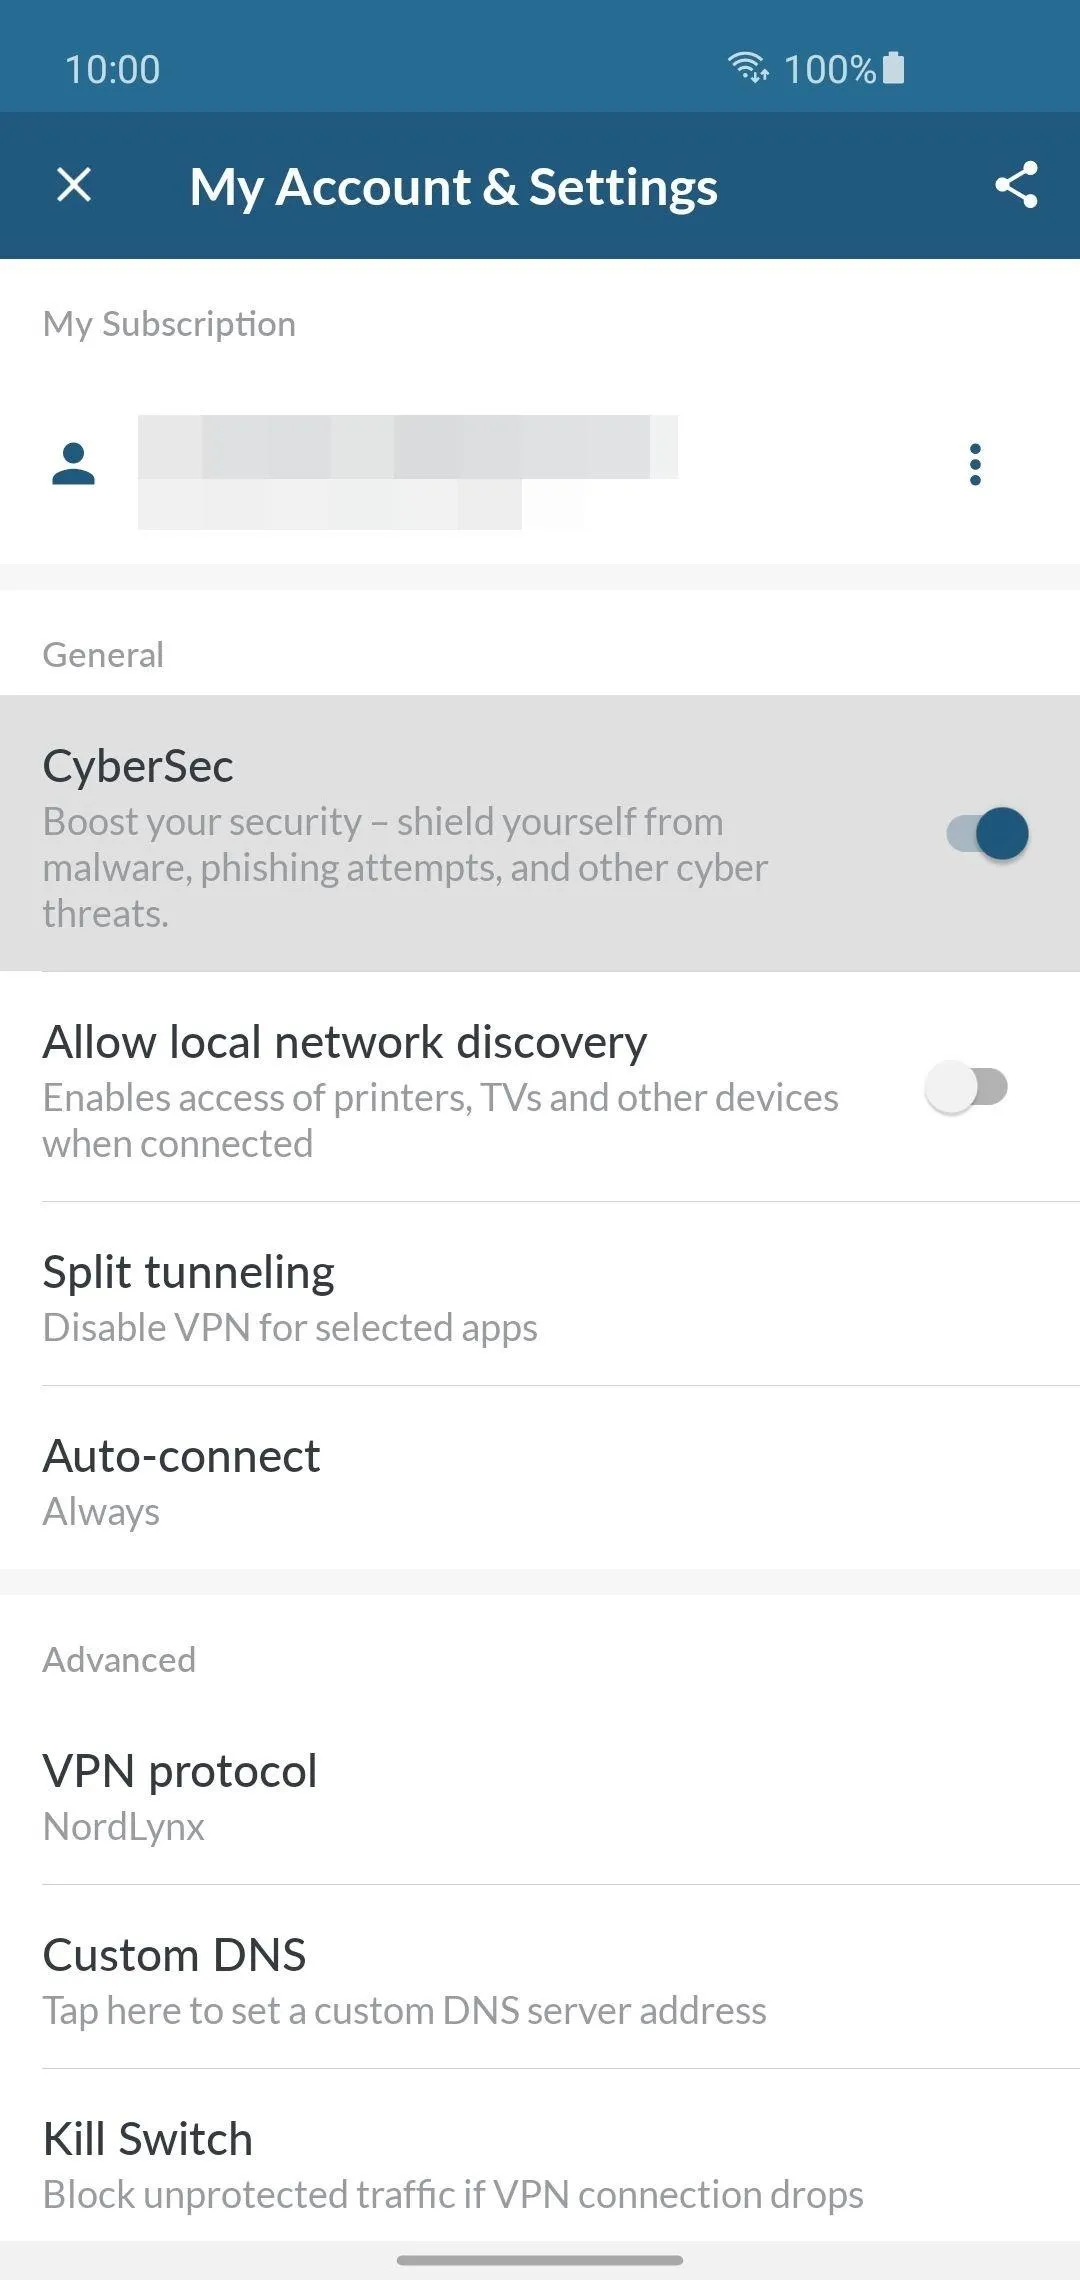
For Android Devices
CyberSec might have popped up the first time you installed the NordVPN app, but maybe you skipped over it earlier. To make sure you're using this feature, head into the NordVPN app, tap the settings icon on the left, then locate the CyberSec option. Tap the switch to enable it, then press "Reconnect" to connect with the new DNS settings. Now you're safe from DNS leaks and other security threats!
Using CyberSec combined with NordVPN by default will solidify your DNS leaks; however, you can also choose any DNS provider you wish. Open your settings in the NordVPN app, then locate and tap on the "Custom DNS" entry on the list. CyberSec can't be used when you set a custom DNS, so press "Continue" to accept the popup message. Now you can enter any DNS server address that you want.

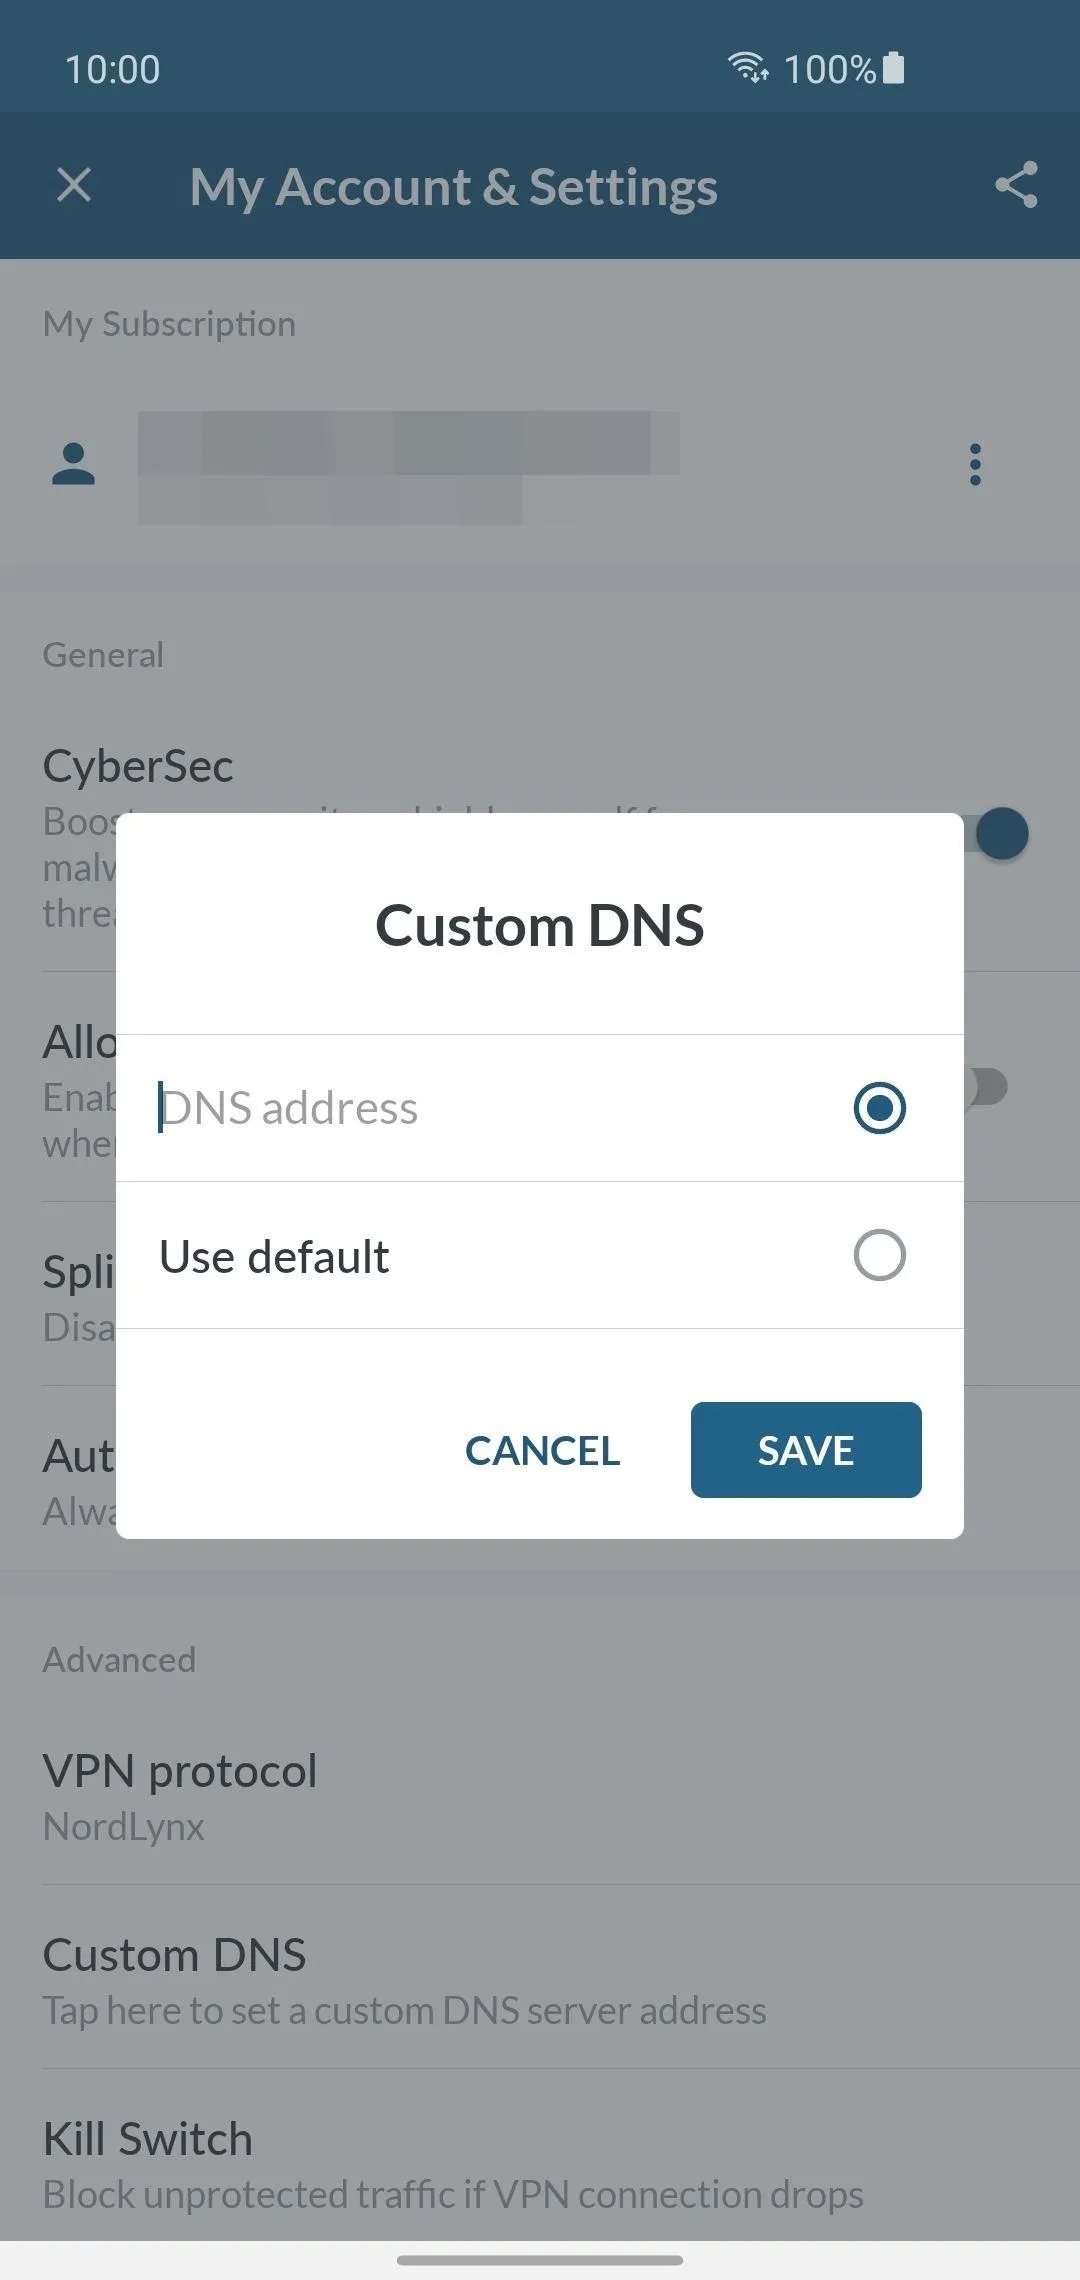
When setting a custom DNS through NordVPN, you should make sure it's a reliable DNS provider. Would you trust them to keep your data safe? There are many reliable providers for free, but a premium DNS would ensure maximum security.
When setting a custom DNS through NordVPN, you should make sure it's a reliable DNS provider. Would you trust them to keep your data safe? There are many reliable providers for free, but a premium DNS would ensure maximum security.
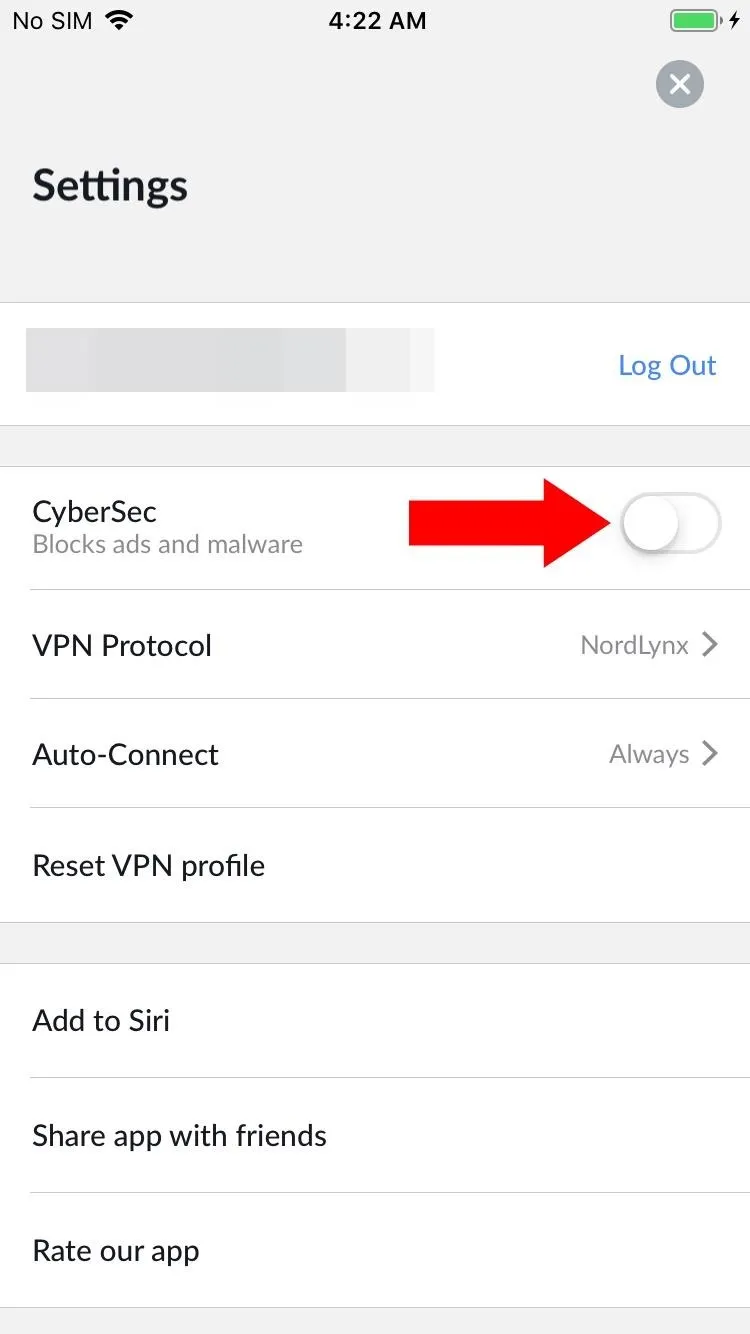
For iOS Devices
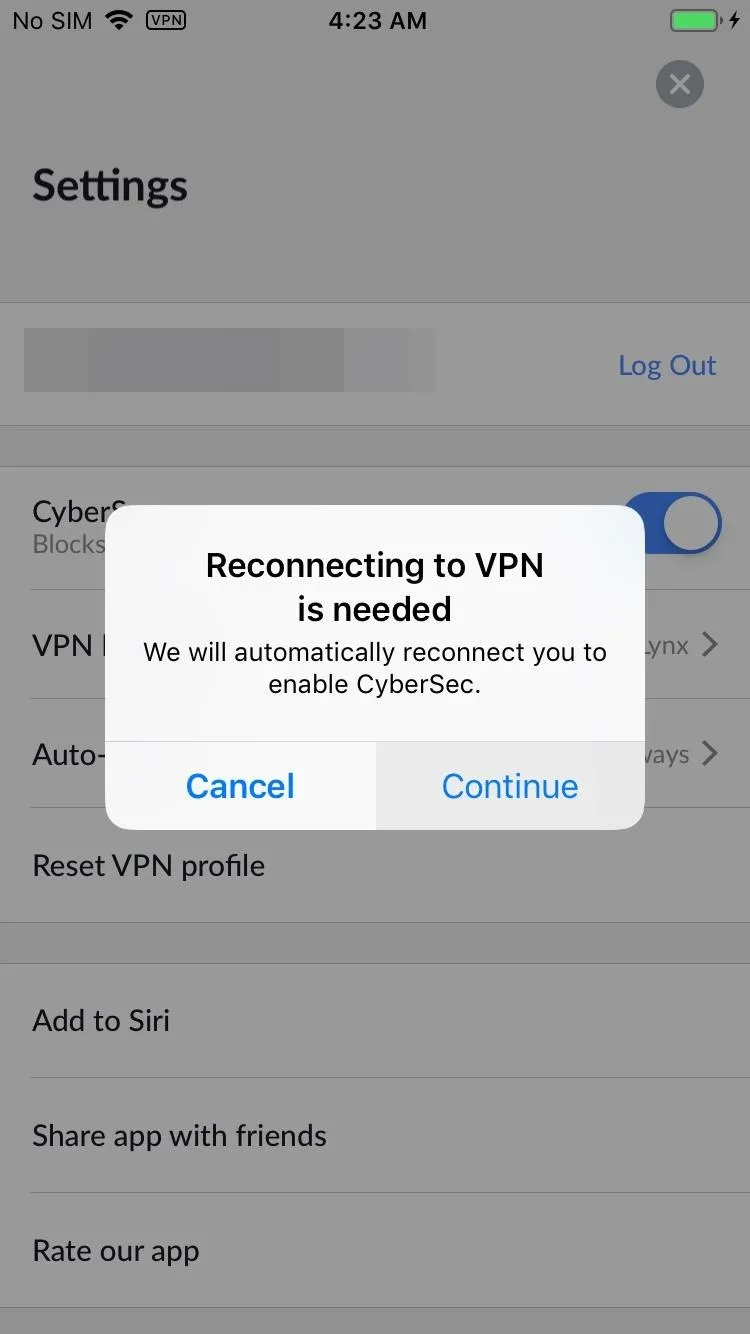
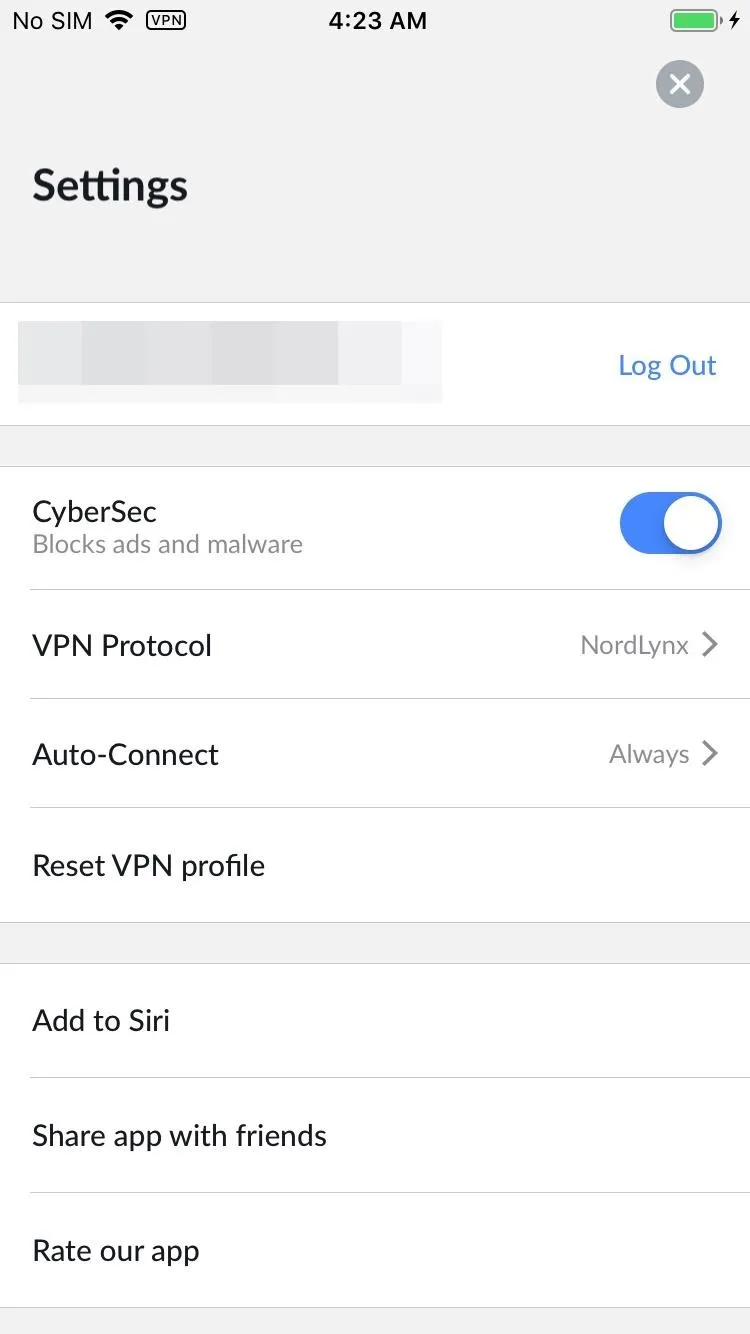
Open the NordVPN app to the main screen, hit the settings icon in the upper right, then tap the "CyberSec" switch at the top to enable it. Press "Continue" to reconnect to a server with your new CyberSec DNS settings. Now you're safe from DNS leaks and other security threats!
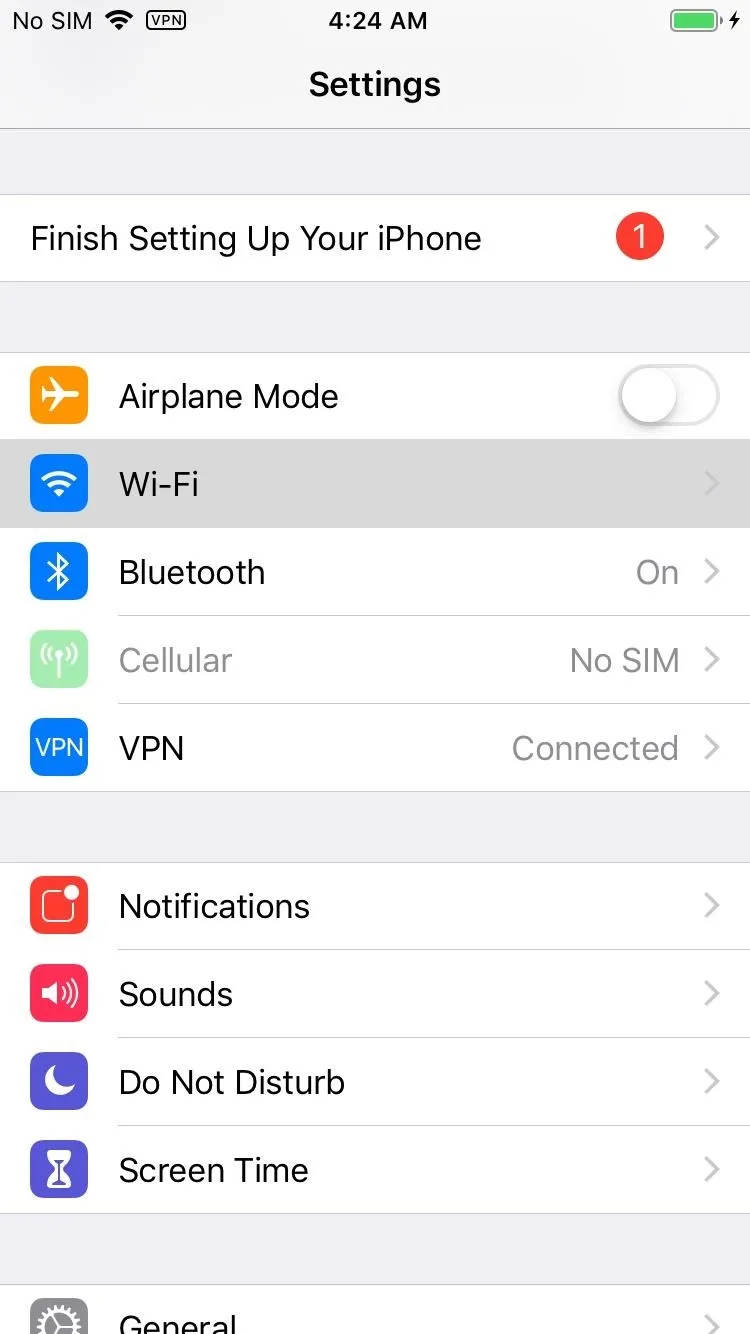
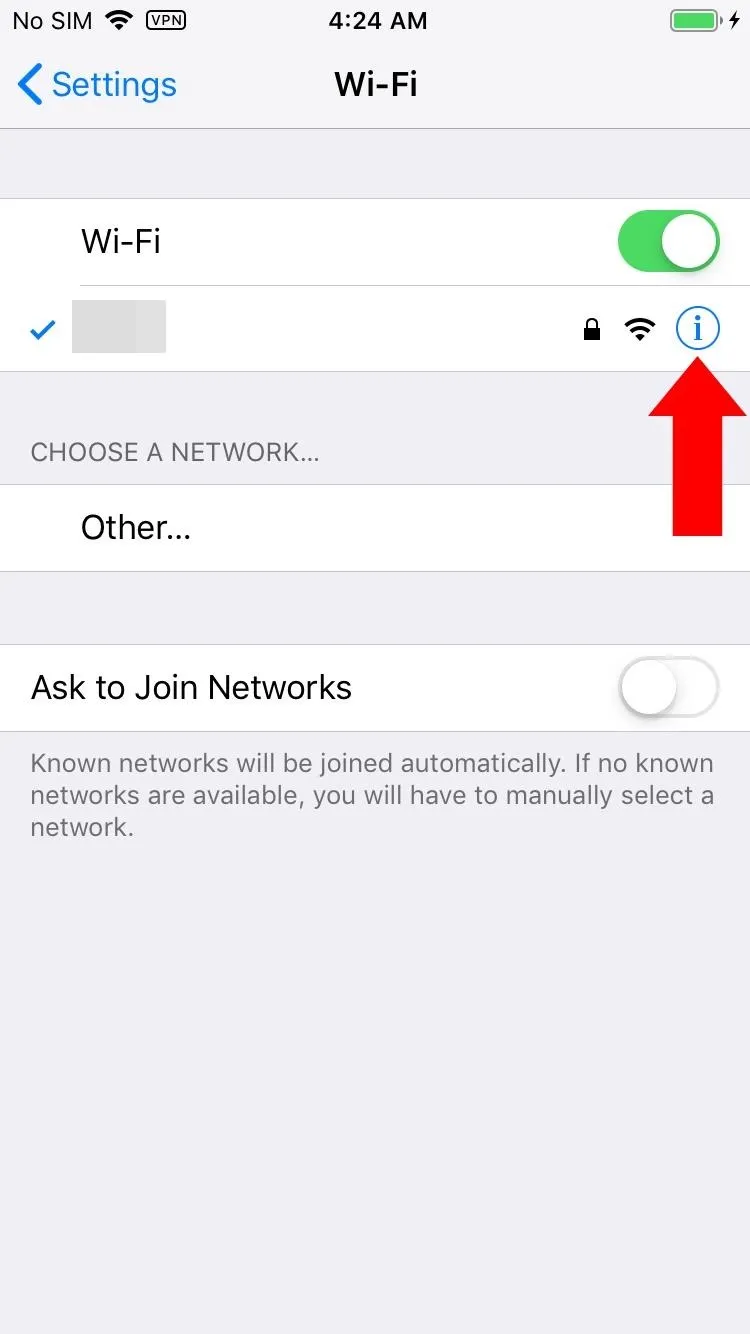
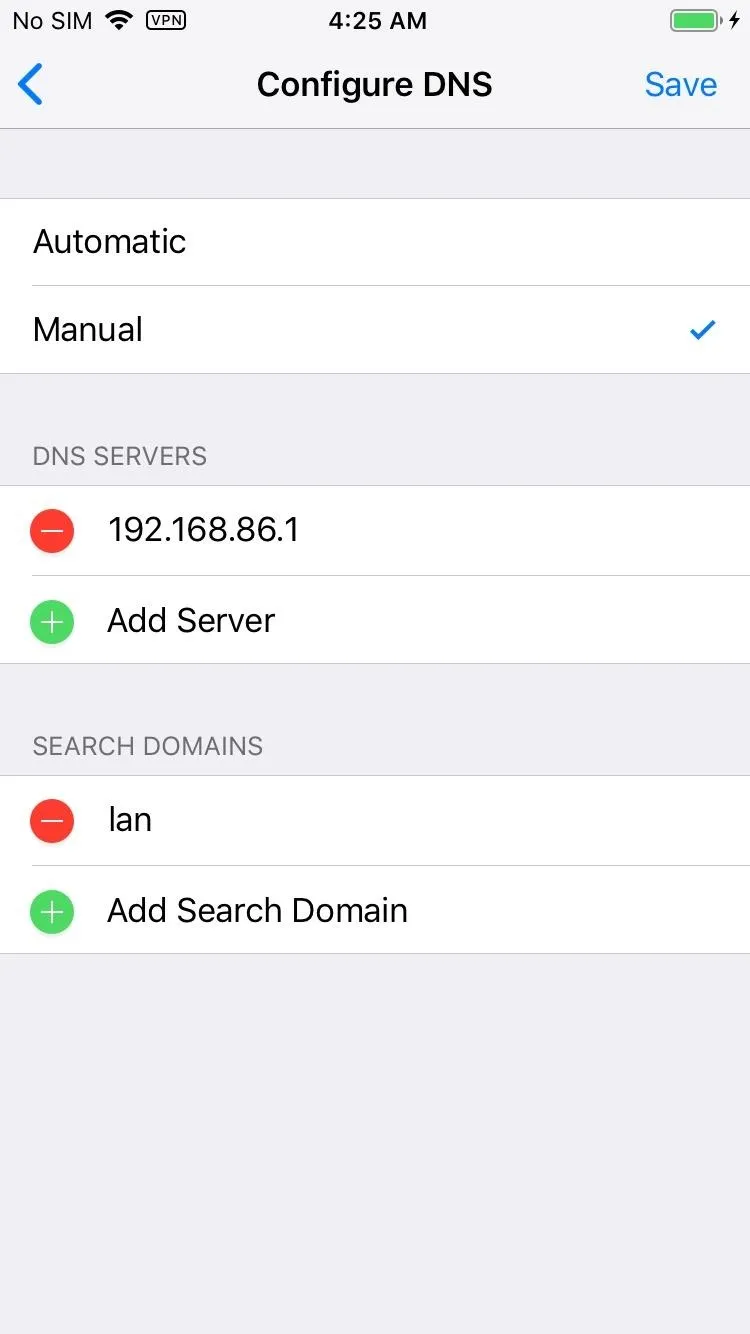
Using CyberSec combined with NordVPN by default will solidify your DNS leaks; however, you can also choose any DNS provider you wish. You need to first open your iOS system settings, go to "Wi-Fi," then tap the blue exclamation point icon on the right. From here, just simply hit "Configure DNS" to continue.
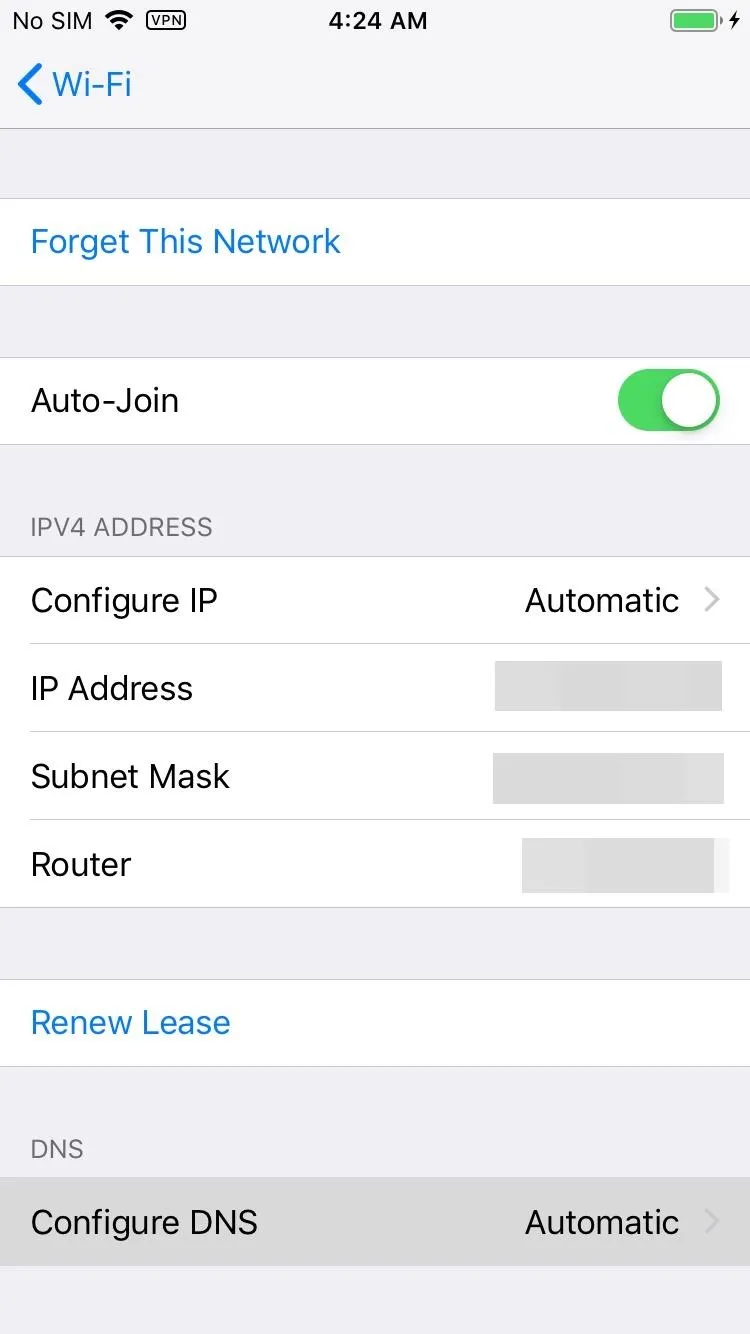
Tap "Manual" to switch over your DNS settings, then you can enter any DNS server address that you want. Edit the first one, then you can include a secondary DNS server if desired by tapping "Add Server." You should note, CyberSec can't be used when you set a custom DNS, so it's either one or the other, not both.

Now that you've learned about these five things on how to make your NordVPN experience even better, it's time to reap the benefits. Whether you're new to NordVPN or already have an active subscription, you should be using these methods all the time to keep your data secure. Plus, with the NordLynx VPN protocol, you get next-generation speeds over a VPN connection as well. Stay safe out there!
Final Note
Although a VPN will protect your personal and private information by encrypting your online activity, it won't save you from everything. You still need to be aware of the continually evolving scams that get passed around via emails, text messages, and phone calls. A VPN will have no effect if you willingly give your information to scammers, so make sure to be extra careful with these things.
Cover image and screenshots by Stephen Perkins/Gadget Hacks


Comments
Be the first, drop a comment!