


Snapchat is an app built on sending quick-to-disappear pictures to your friends and family. Sure, this is the primary function of the app, but sometimes users want longer-lasting Memories while interacting with Snapchat. While My Story allows snaps to stick around for 24 hours, they still disappear in time. This is where Memories come in handy.
Using Snapchat's Memories feature, you can save snaps you've just taken, either to your Memories tab or to your Camera Roll. You can even save snaps from My Story, as long as it hasn't been more than 24 hours. Additionally, you can send photos from your Camera Roll to your friends in the form of snaps. Lastly (and perhaps most importantly), you can edit all of the pictures that I mentioned above, so don't worry about inspiration striking afterwards you hit "Send."
Save a Snap to Your Memories
In order to use Memories, you'll have to save a snap to the Memories section first. Don't worry, saving a snap to your Memories is pretty easy.
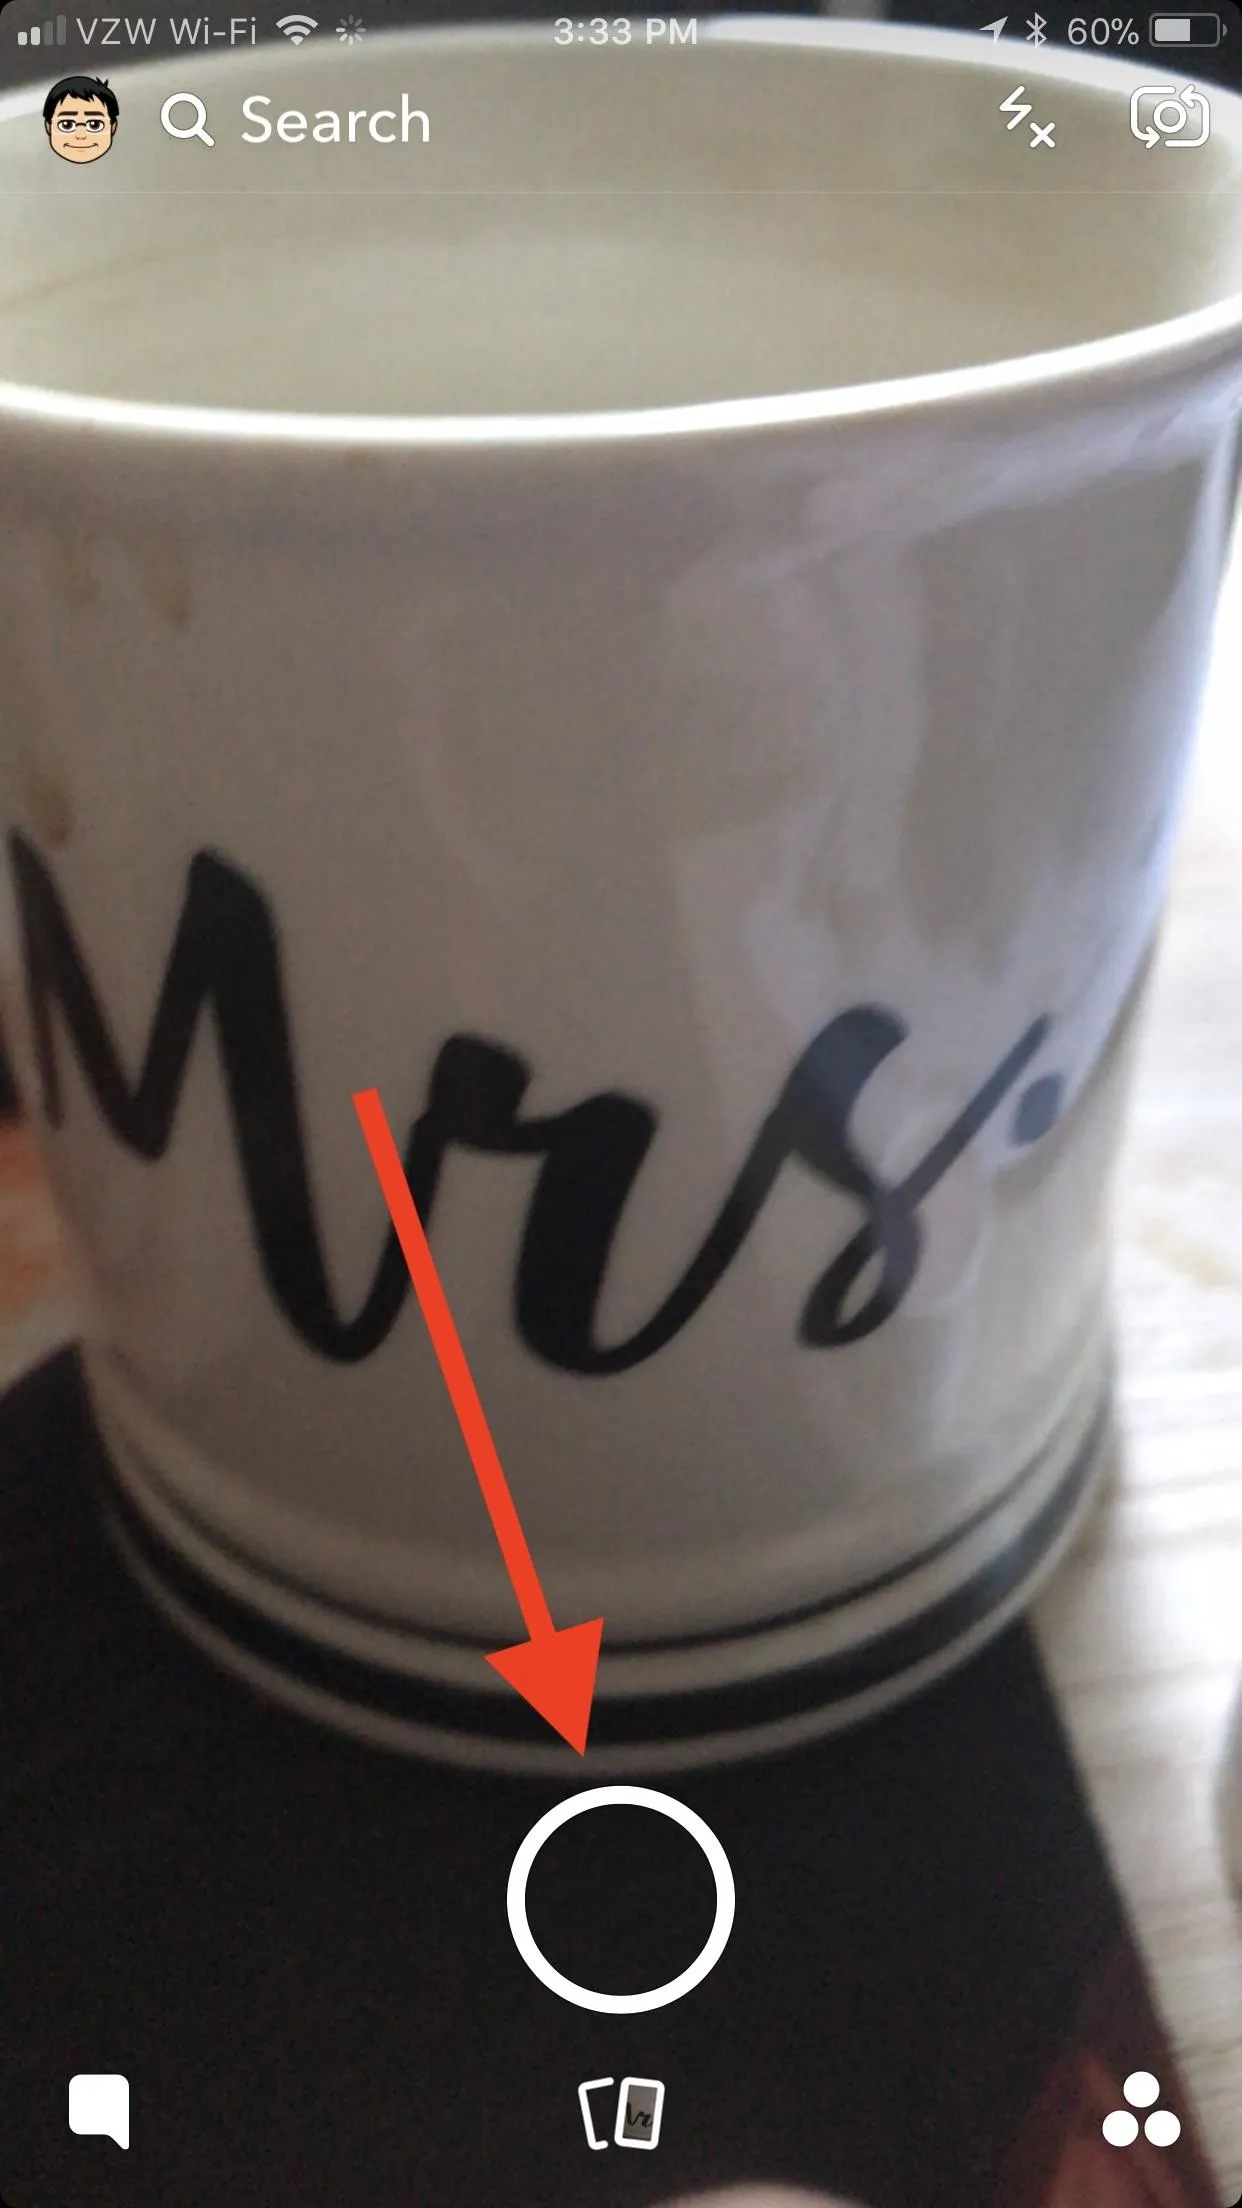
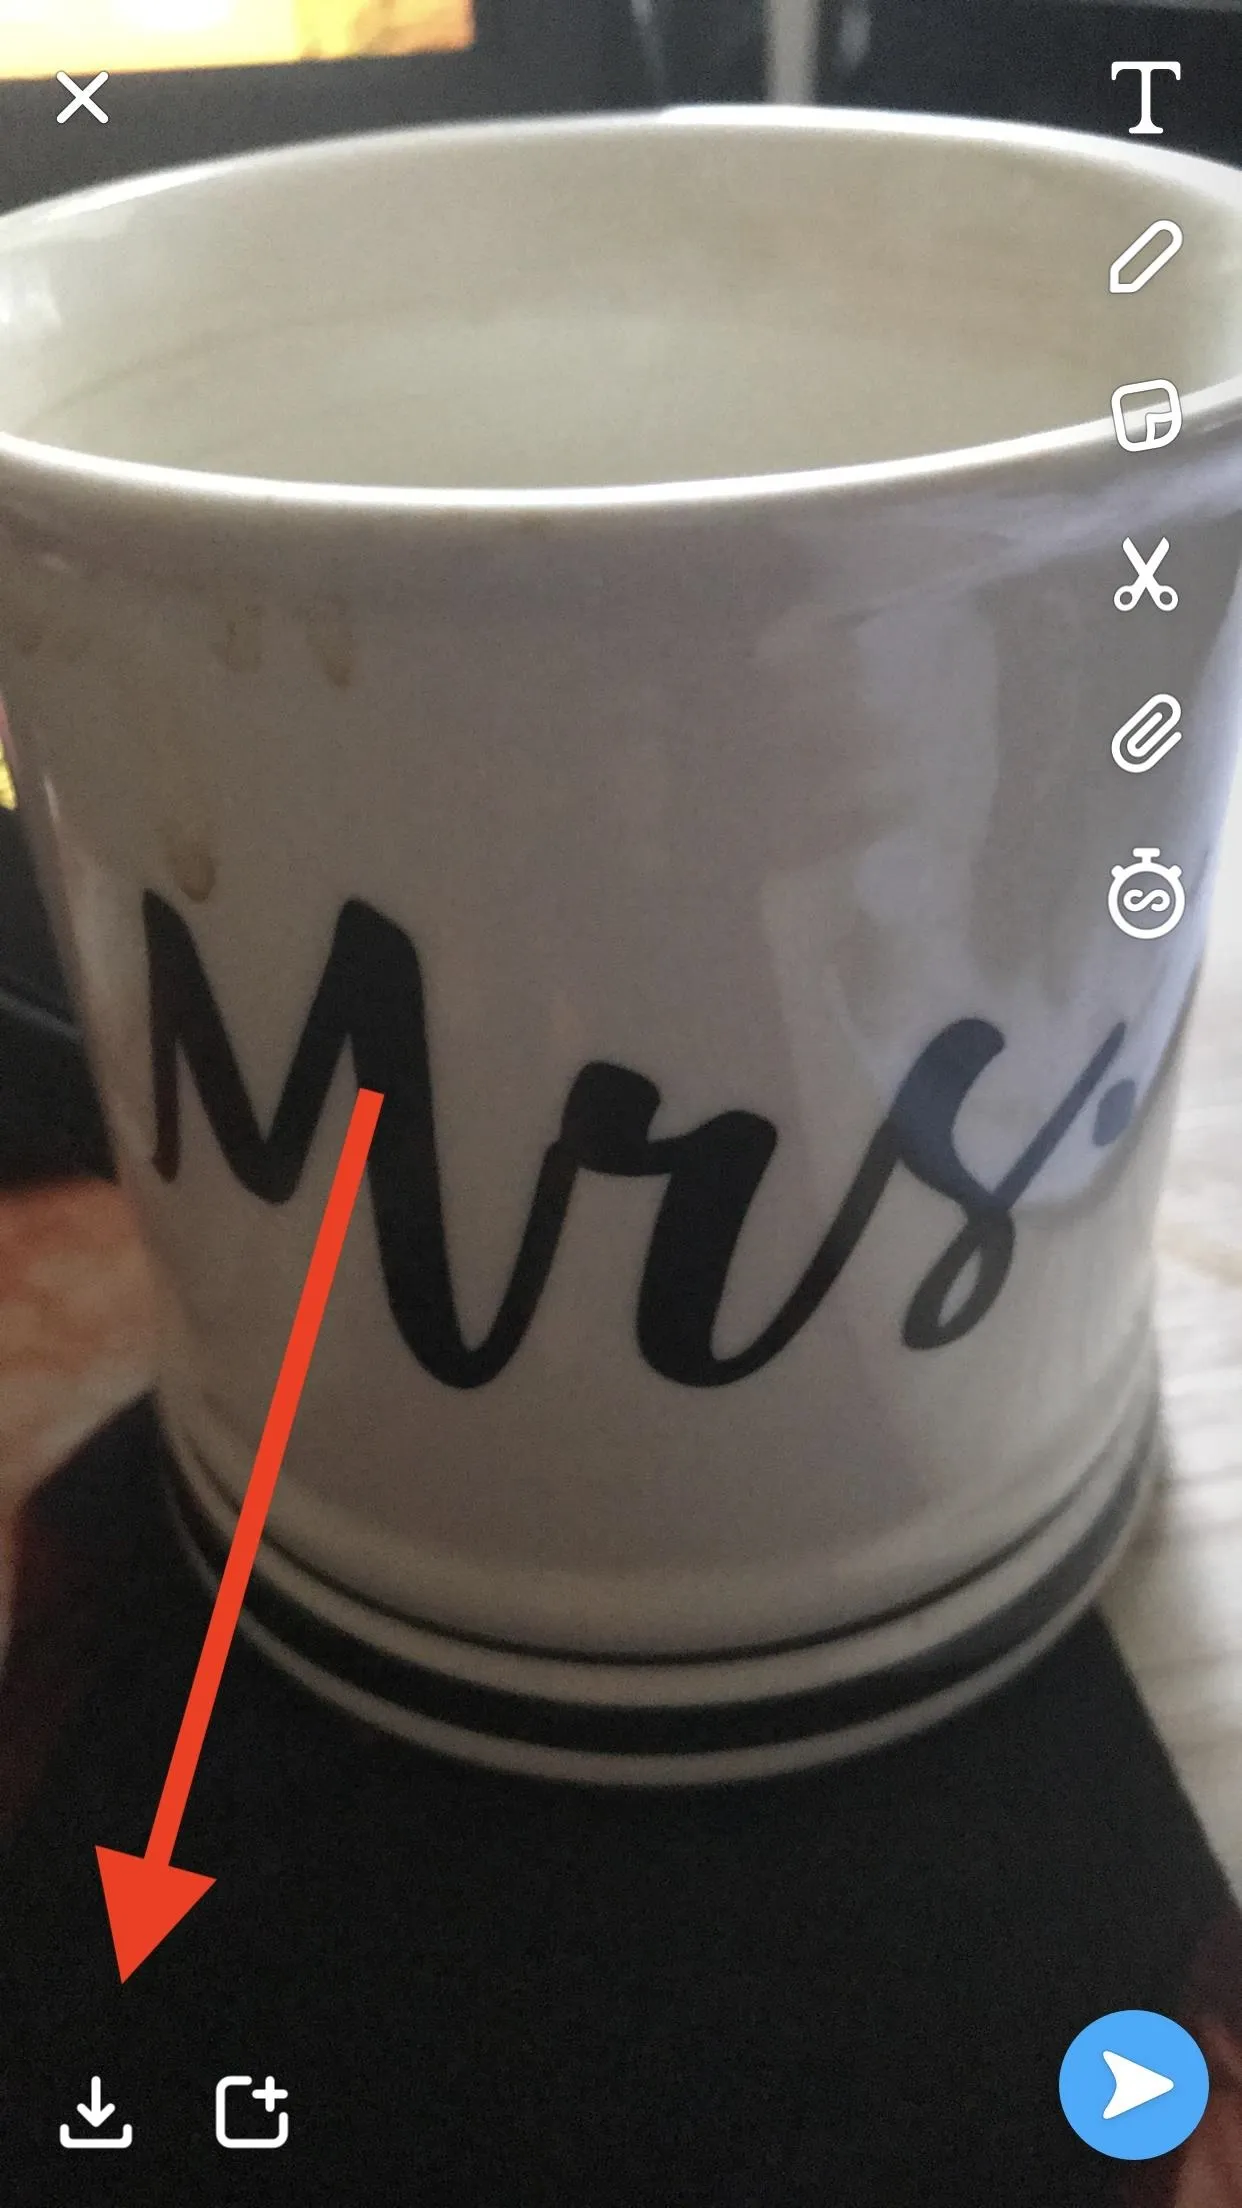
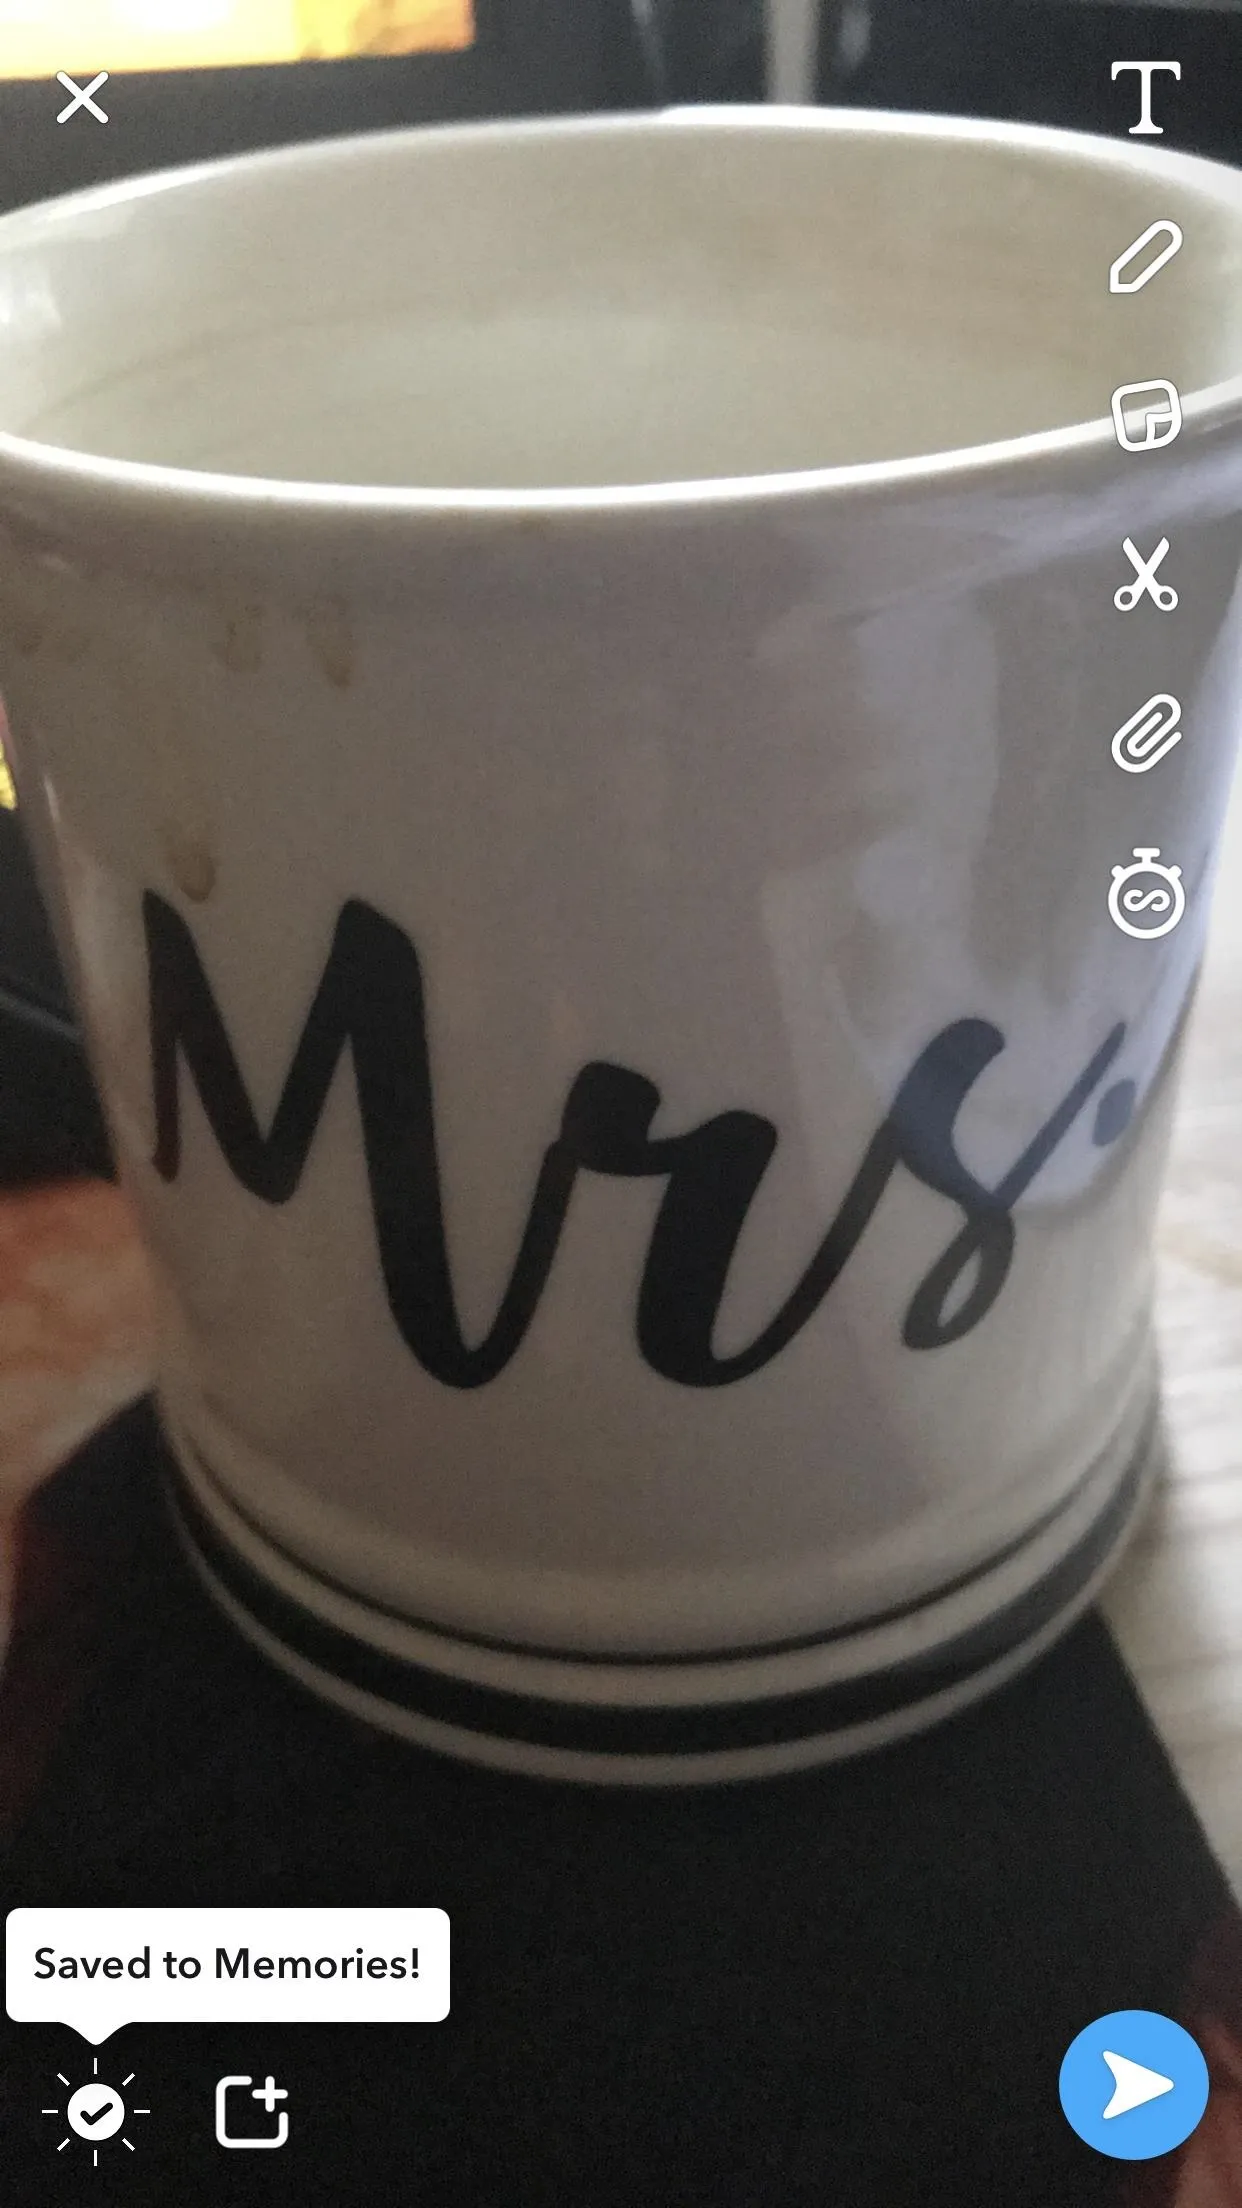
First, take a snap as you would any other time by tapping the white circle on Snapchat's main screen. After you take the picture, hit the download icon in the bottom-left corner to save it to Memories. From there, you can tap the send icon in the bottom-right corner to send the snap out to your audience if you'd like.
Keep in mind that snaps that you ship to My Story can be saved to your Memories later (within 24 hours), so you don't have to save those with the download icon beforehand if you're not sure you want to keep them.
Access Your Memories
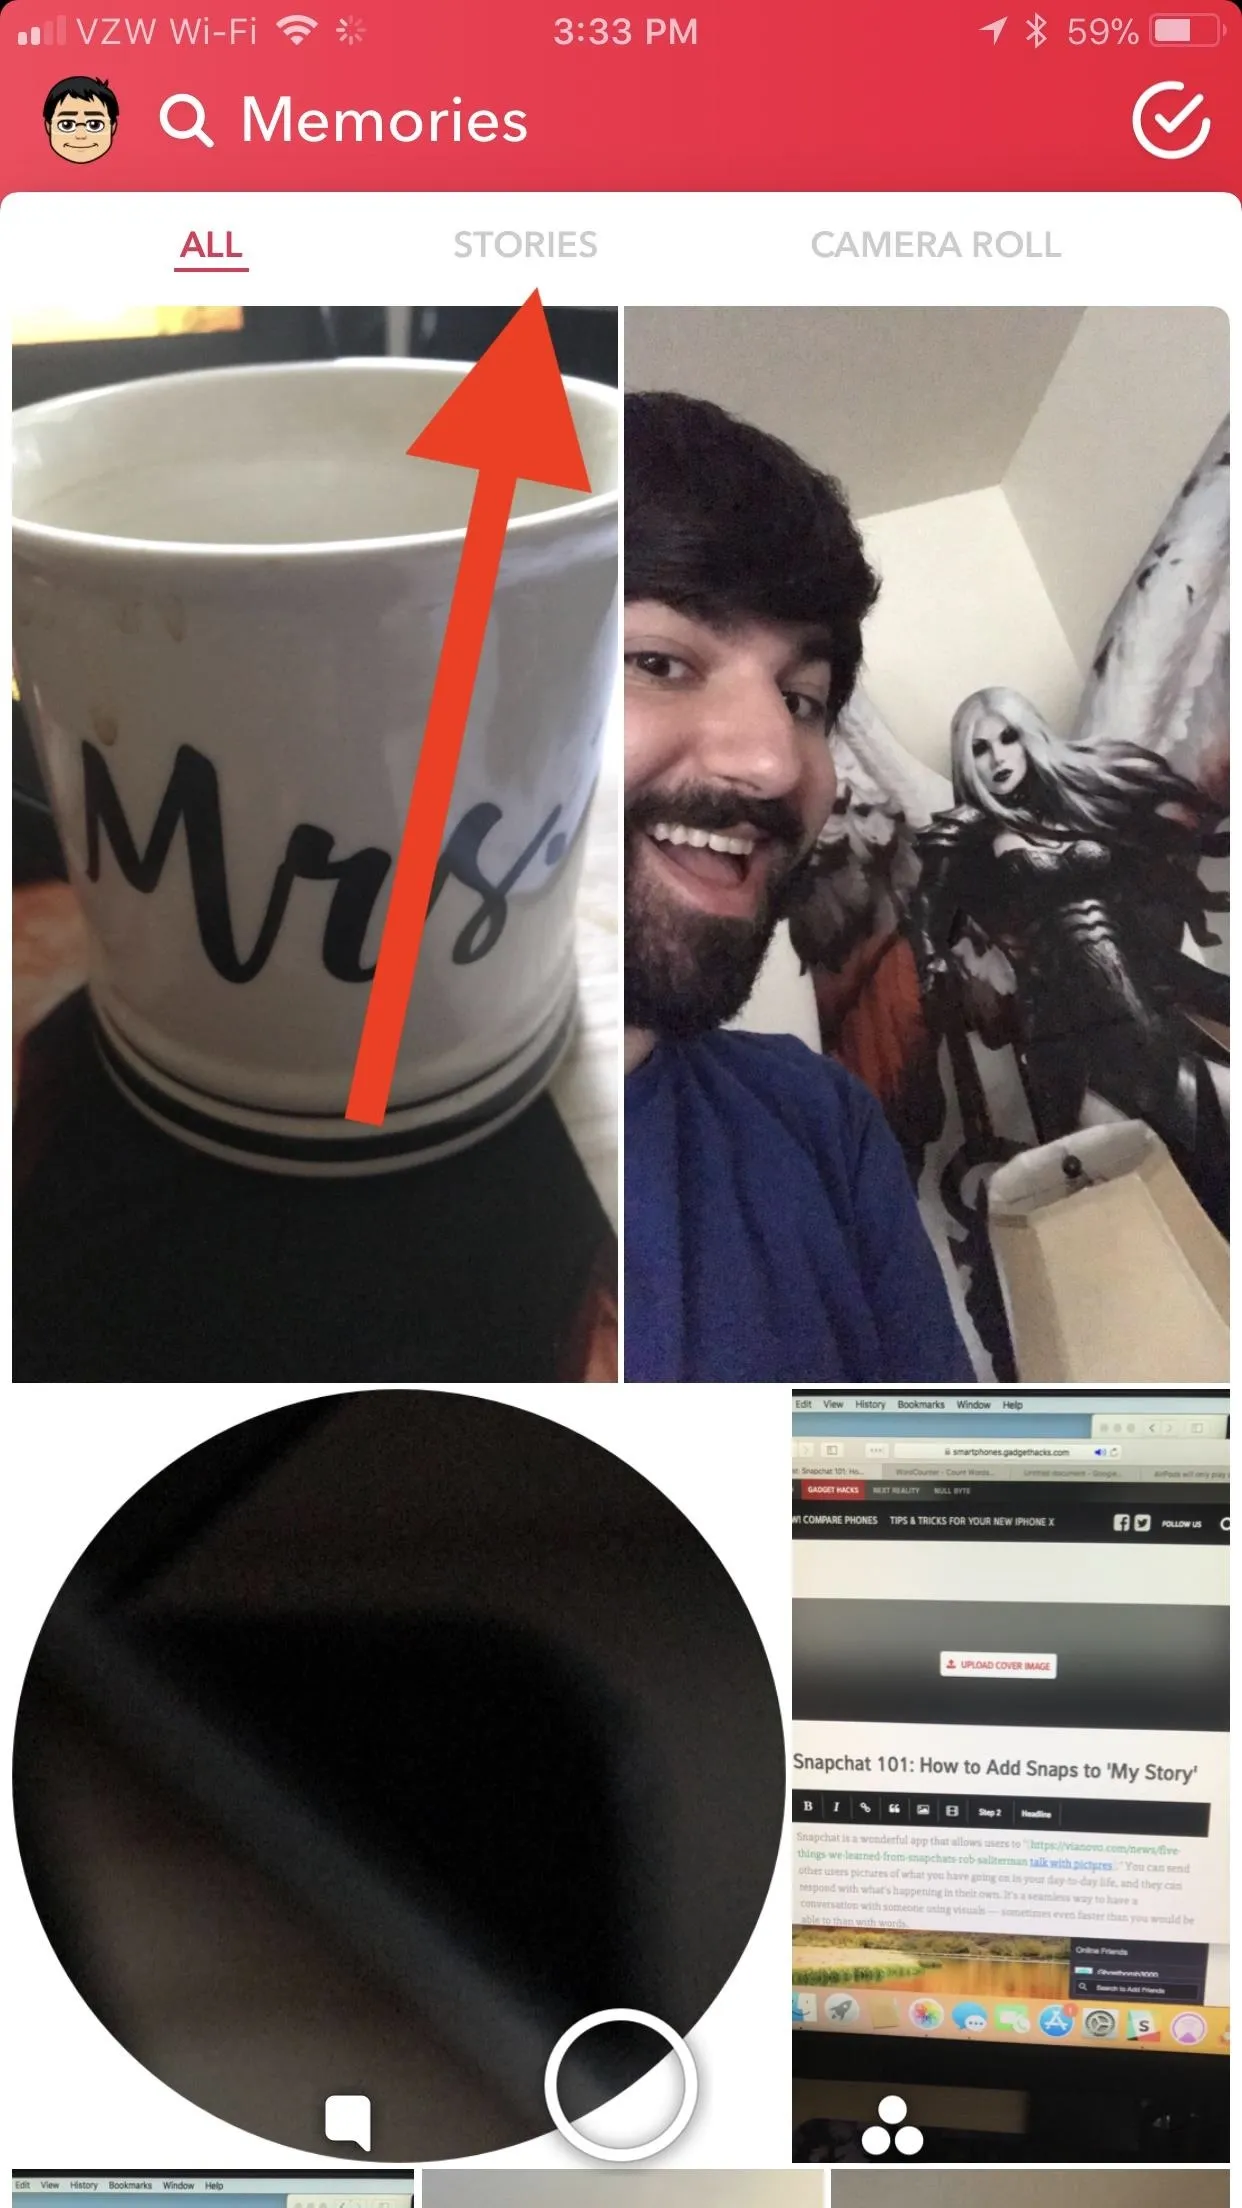
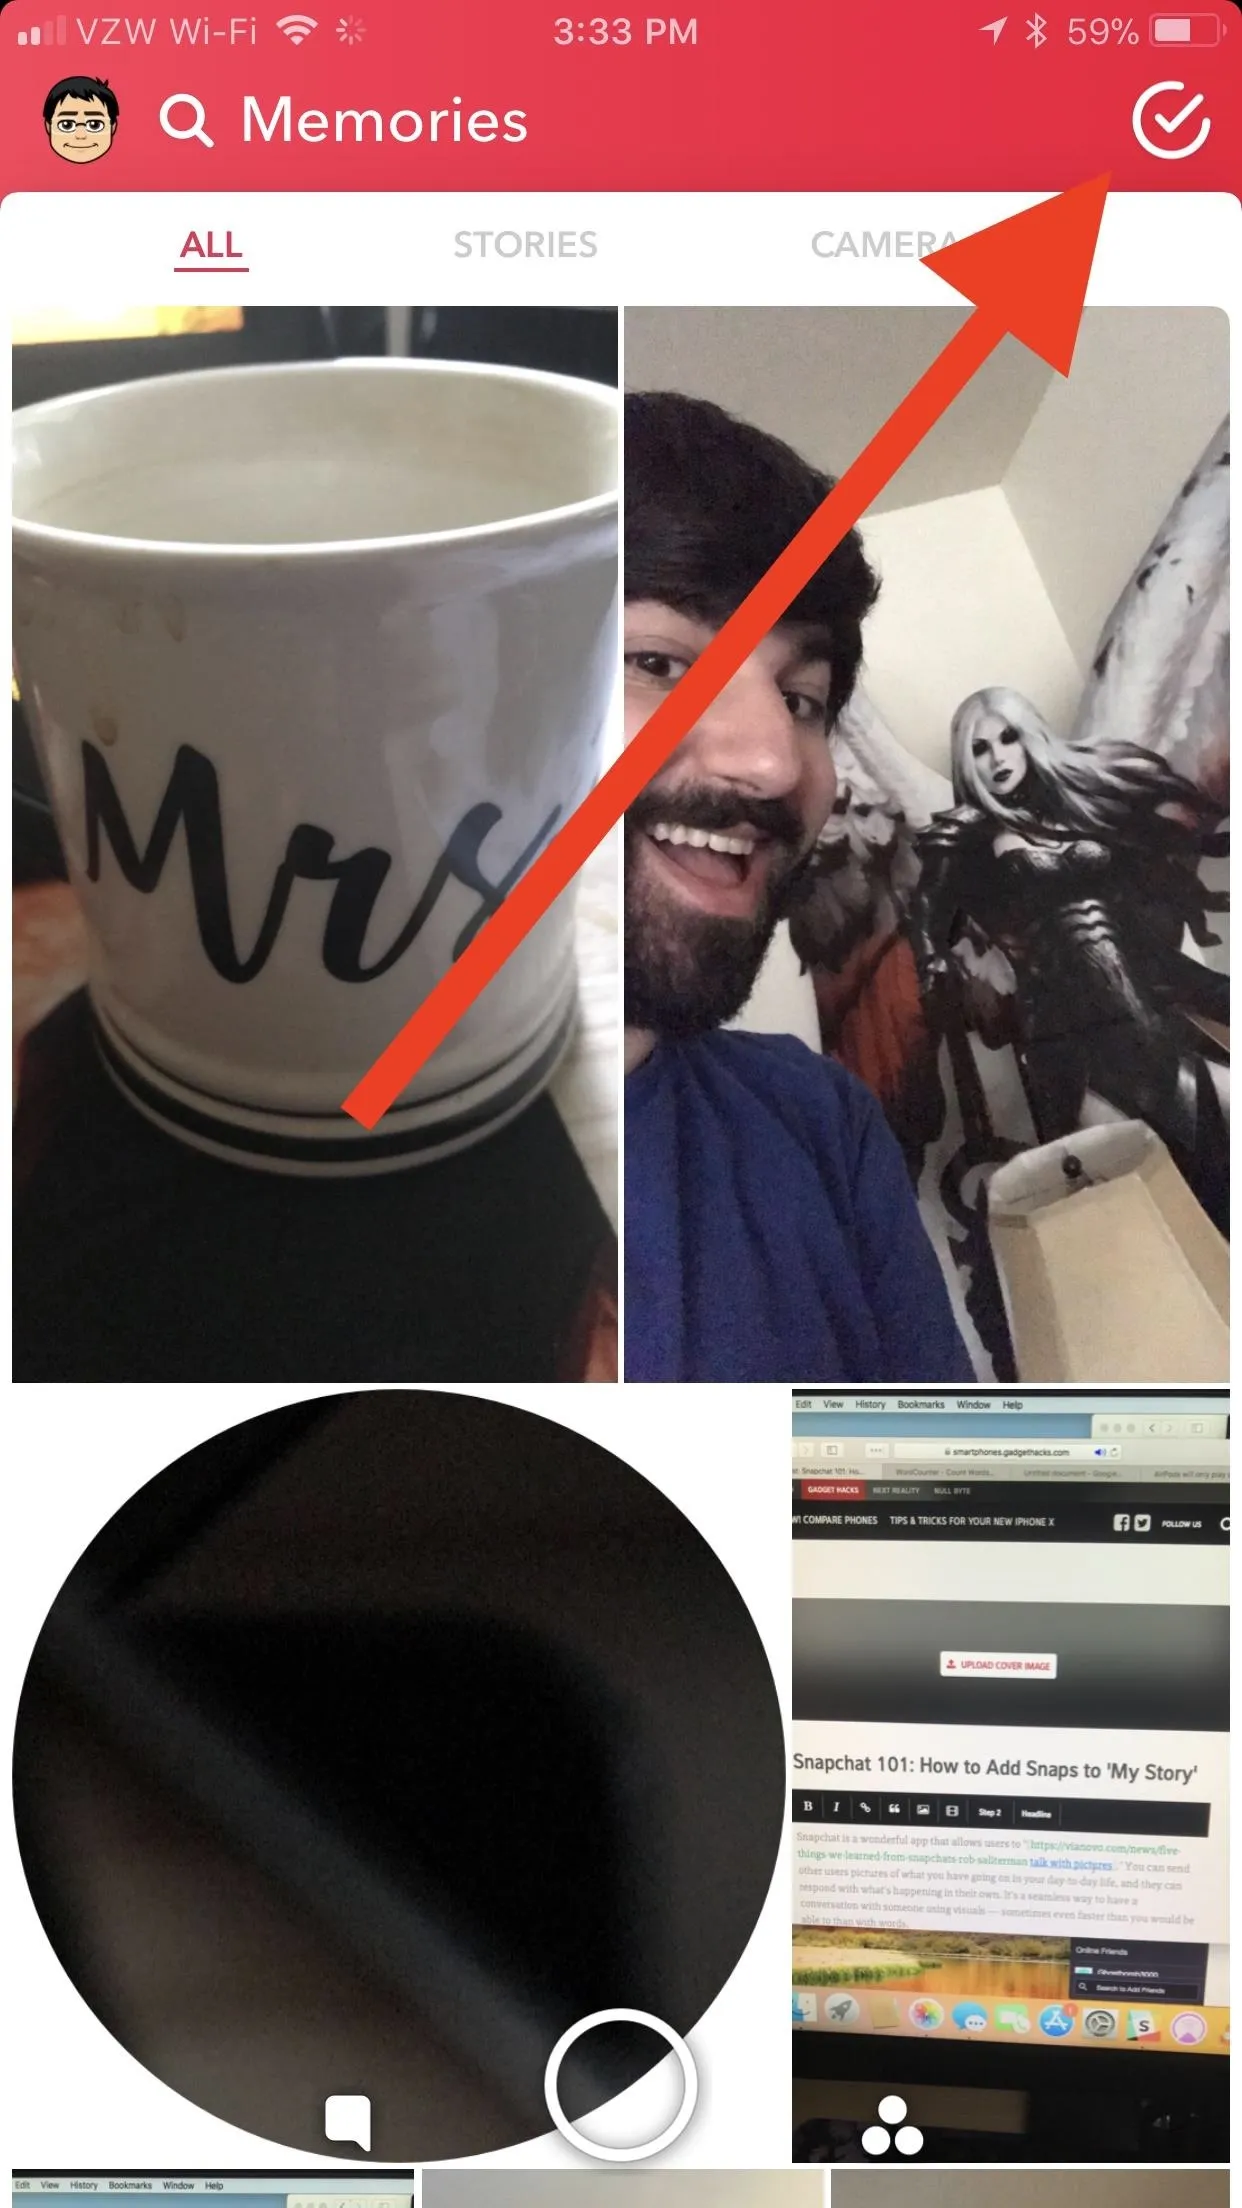
Next, you'll want to learn how to access your Memories. Getting to your Memories is pretty straightforward, but it's not really clearly outlined anywhere inside the app.
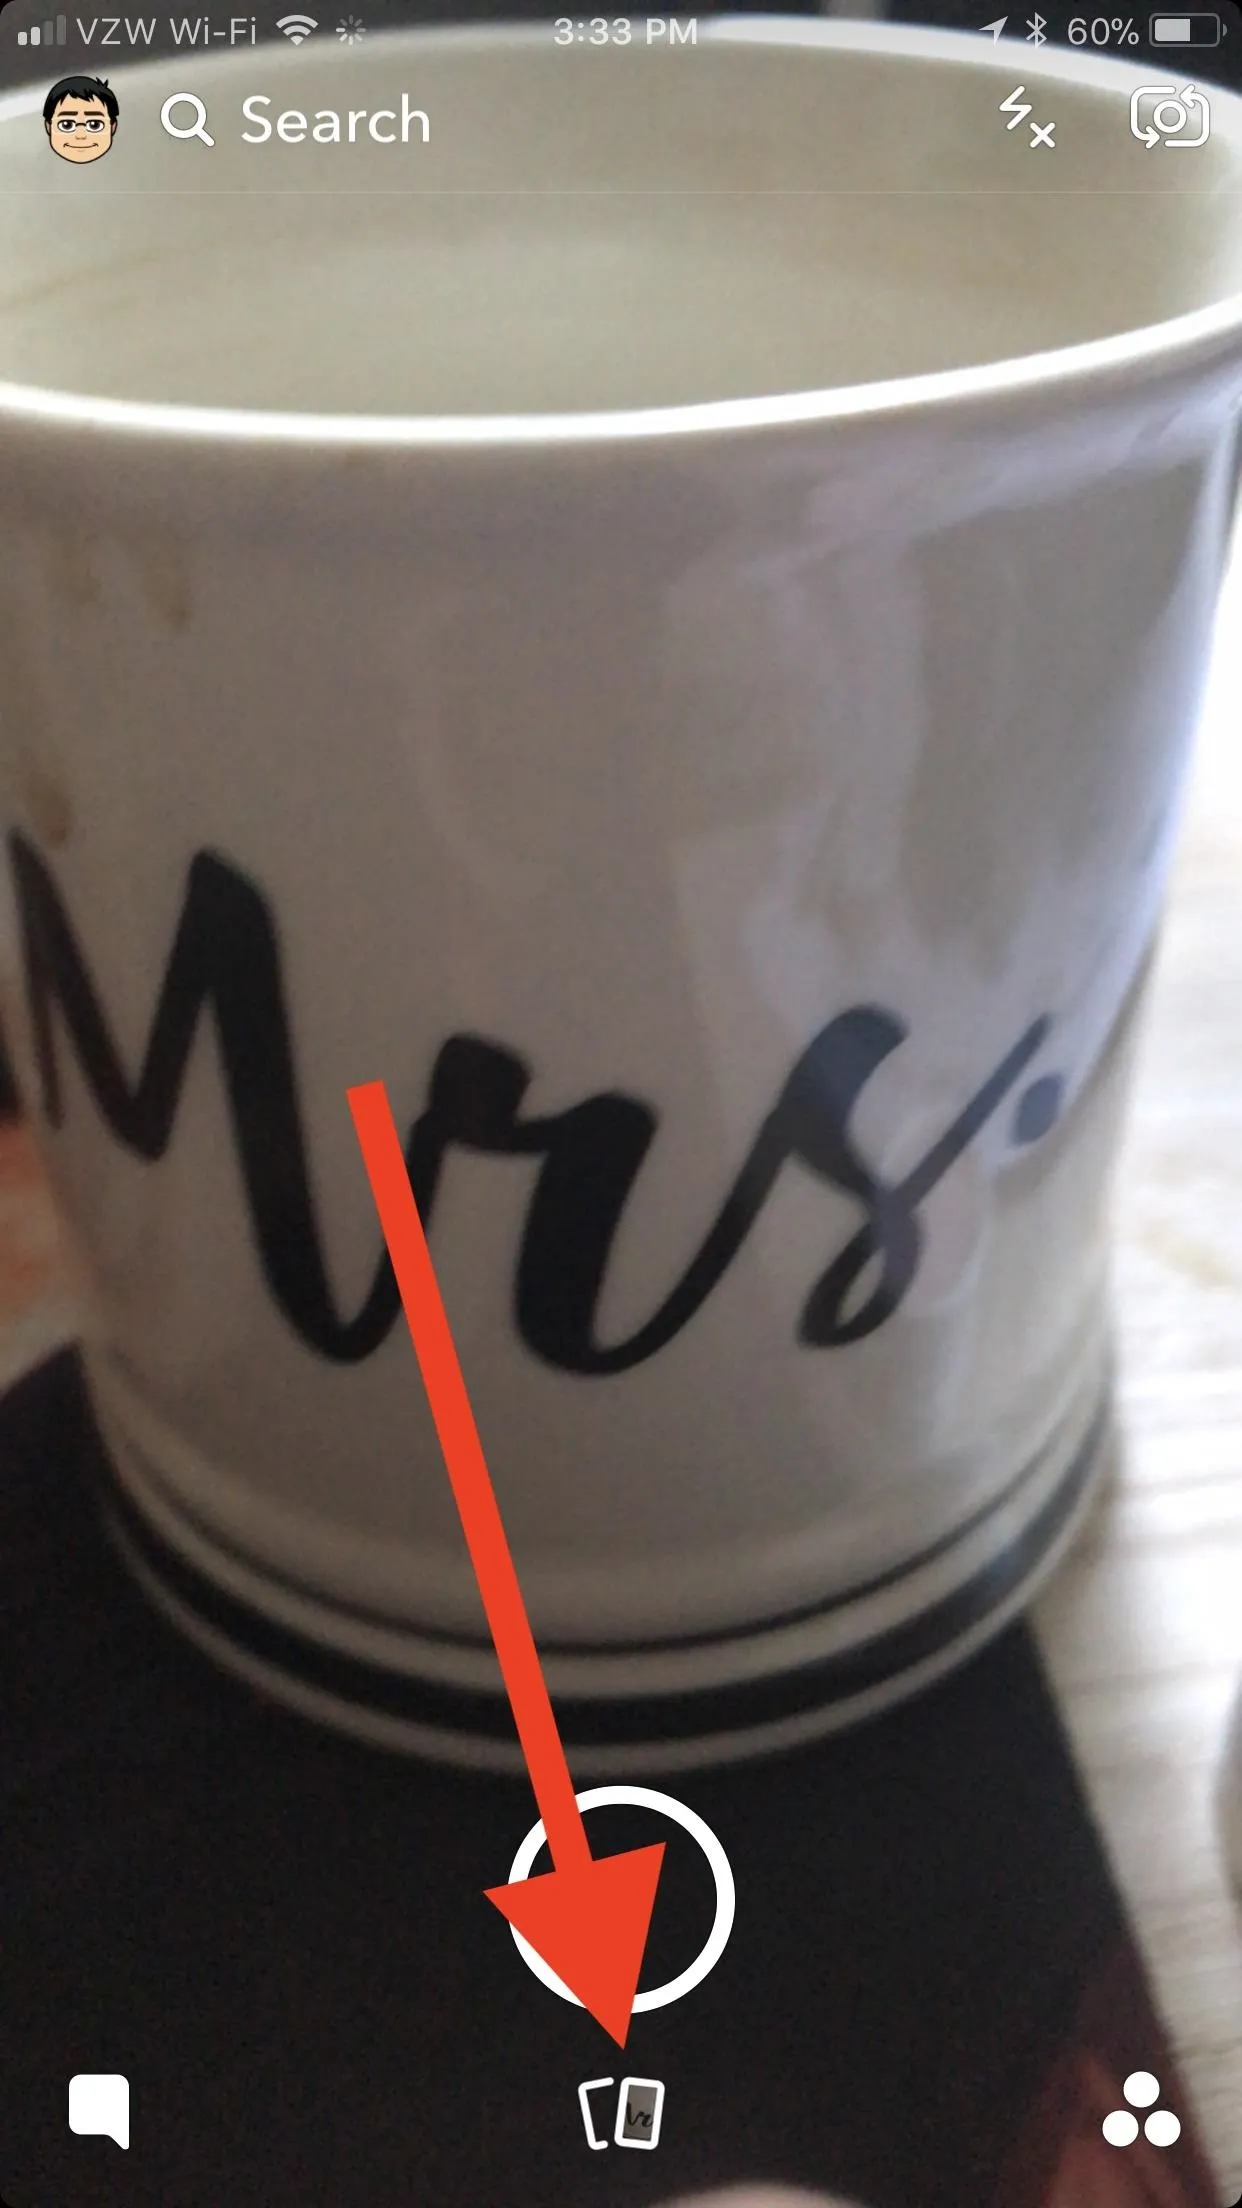
Go to the main screen (where you would take a picture from) and tap the icon below the big white circle. It should look like two cards. You can also access your Memories by swiping upwards while on the main screen.

Learn What the Tabs in the Memories Section Do
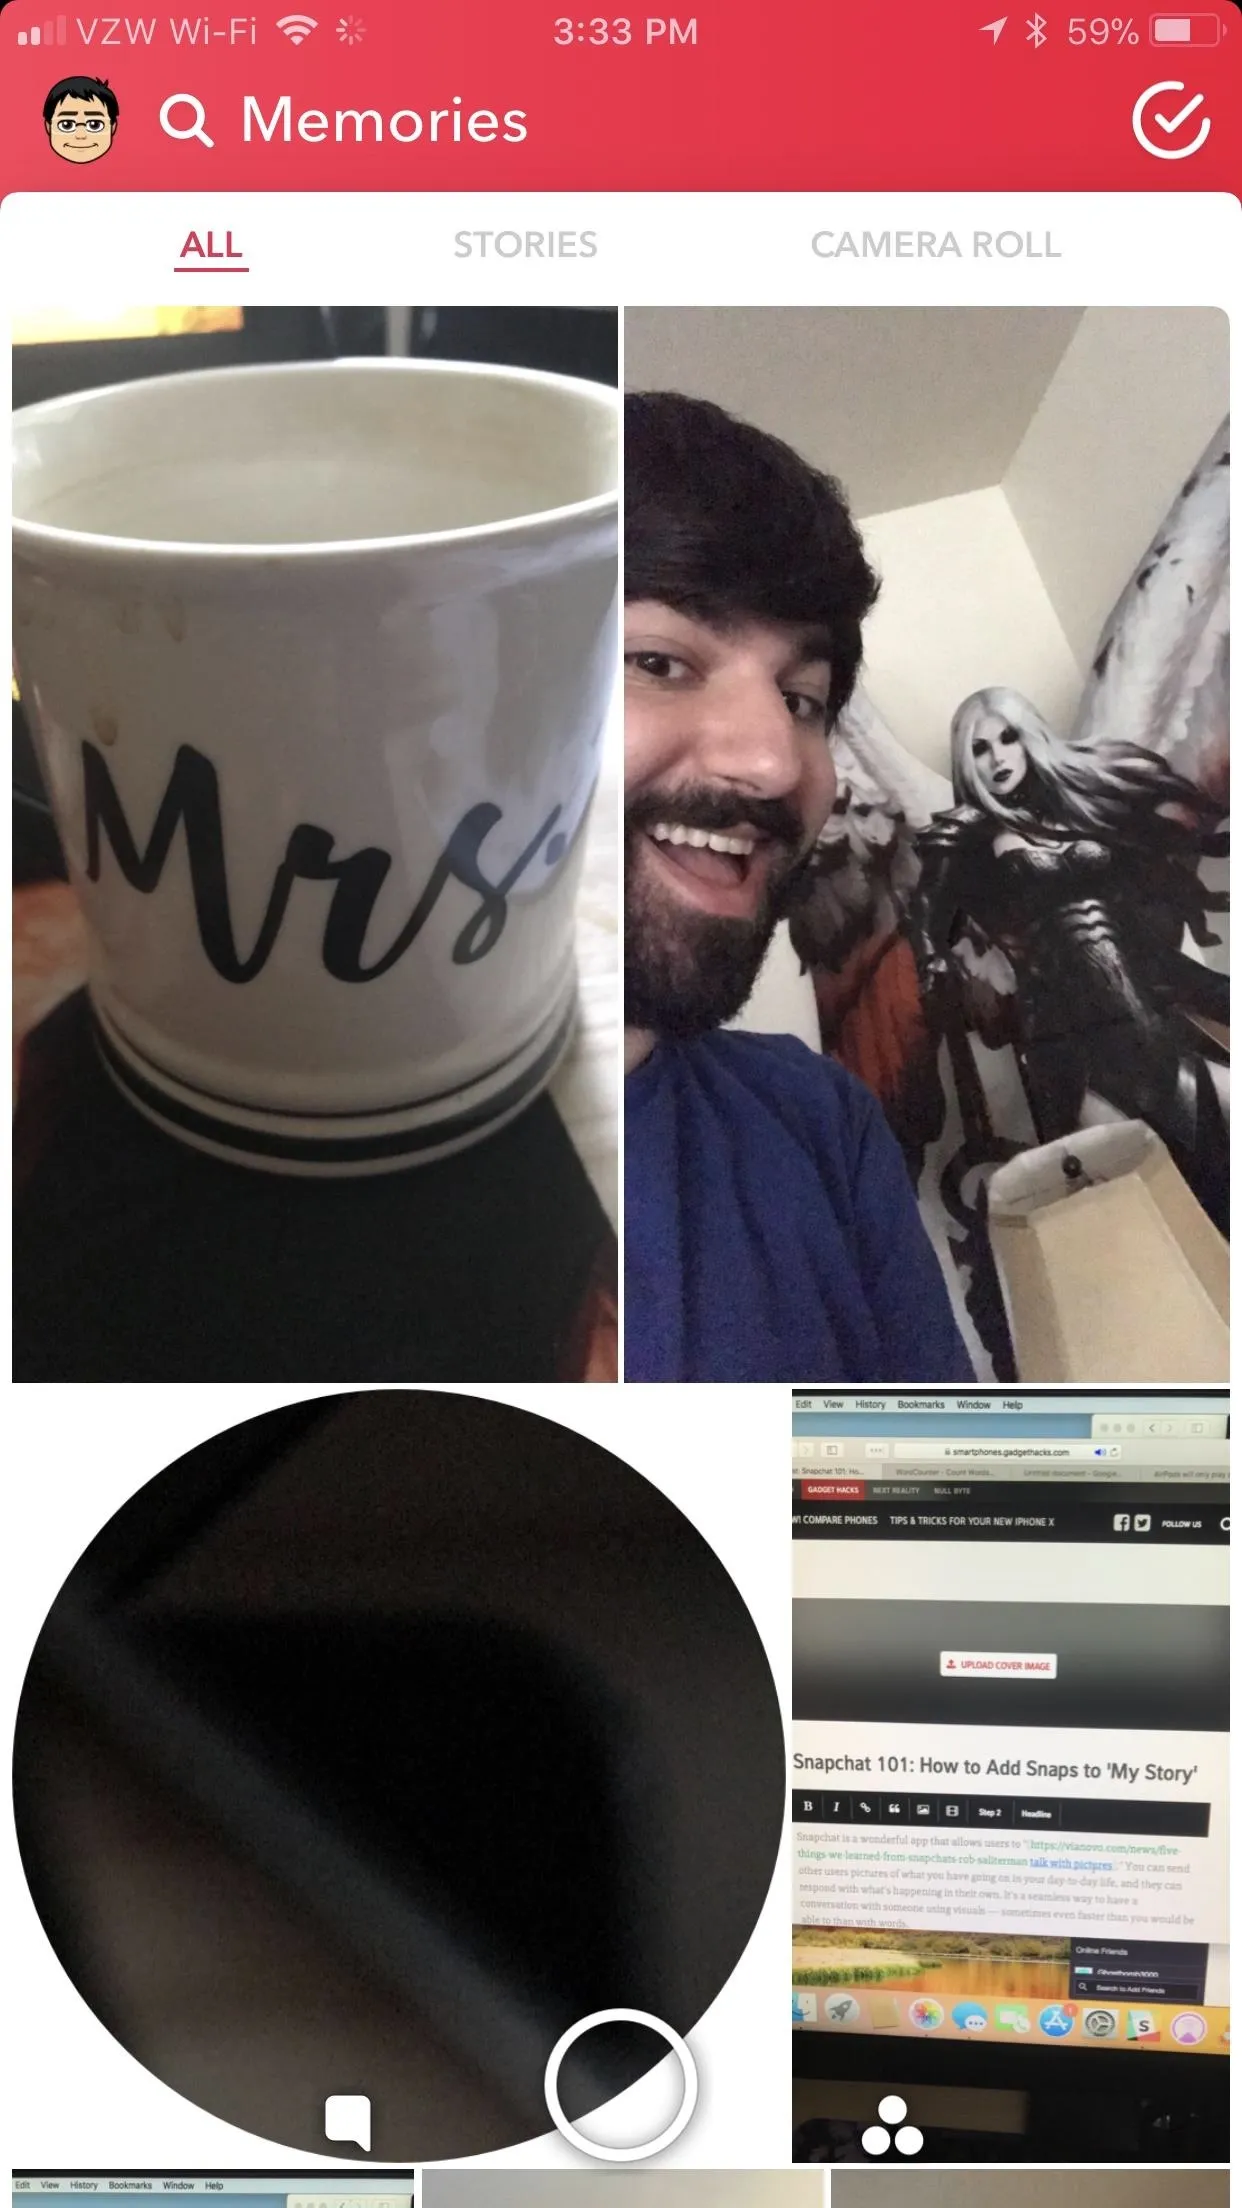
Once inside the Memories section, you should take some time to learn about the four different tabs you'll see: All, Stories, Camera Roll, and My Eyes Only. Each tab has its own function, so I'll break all four of them down before we move forward.
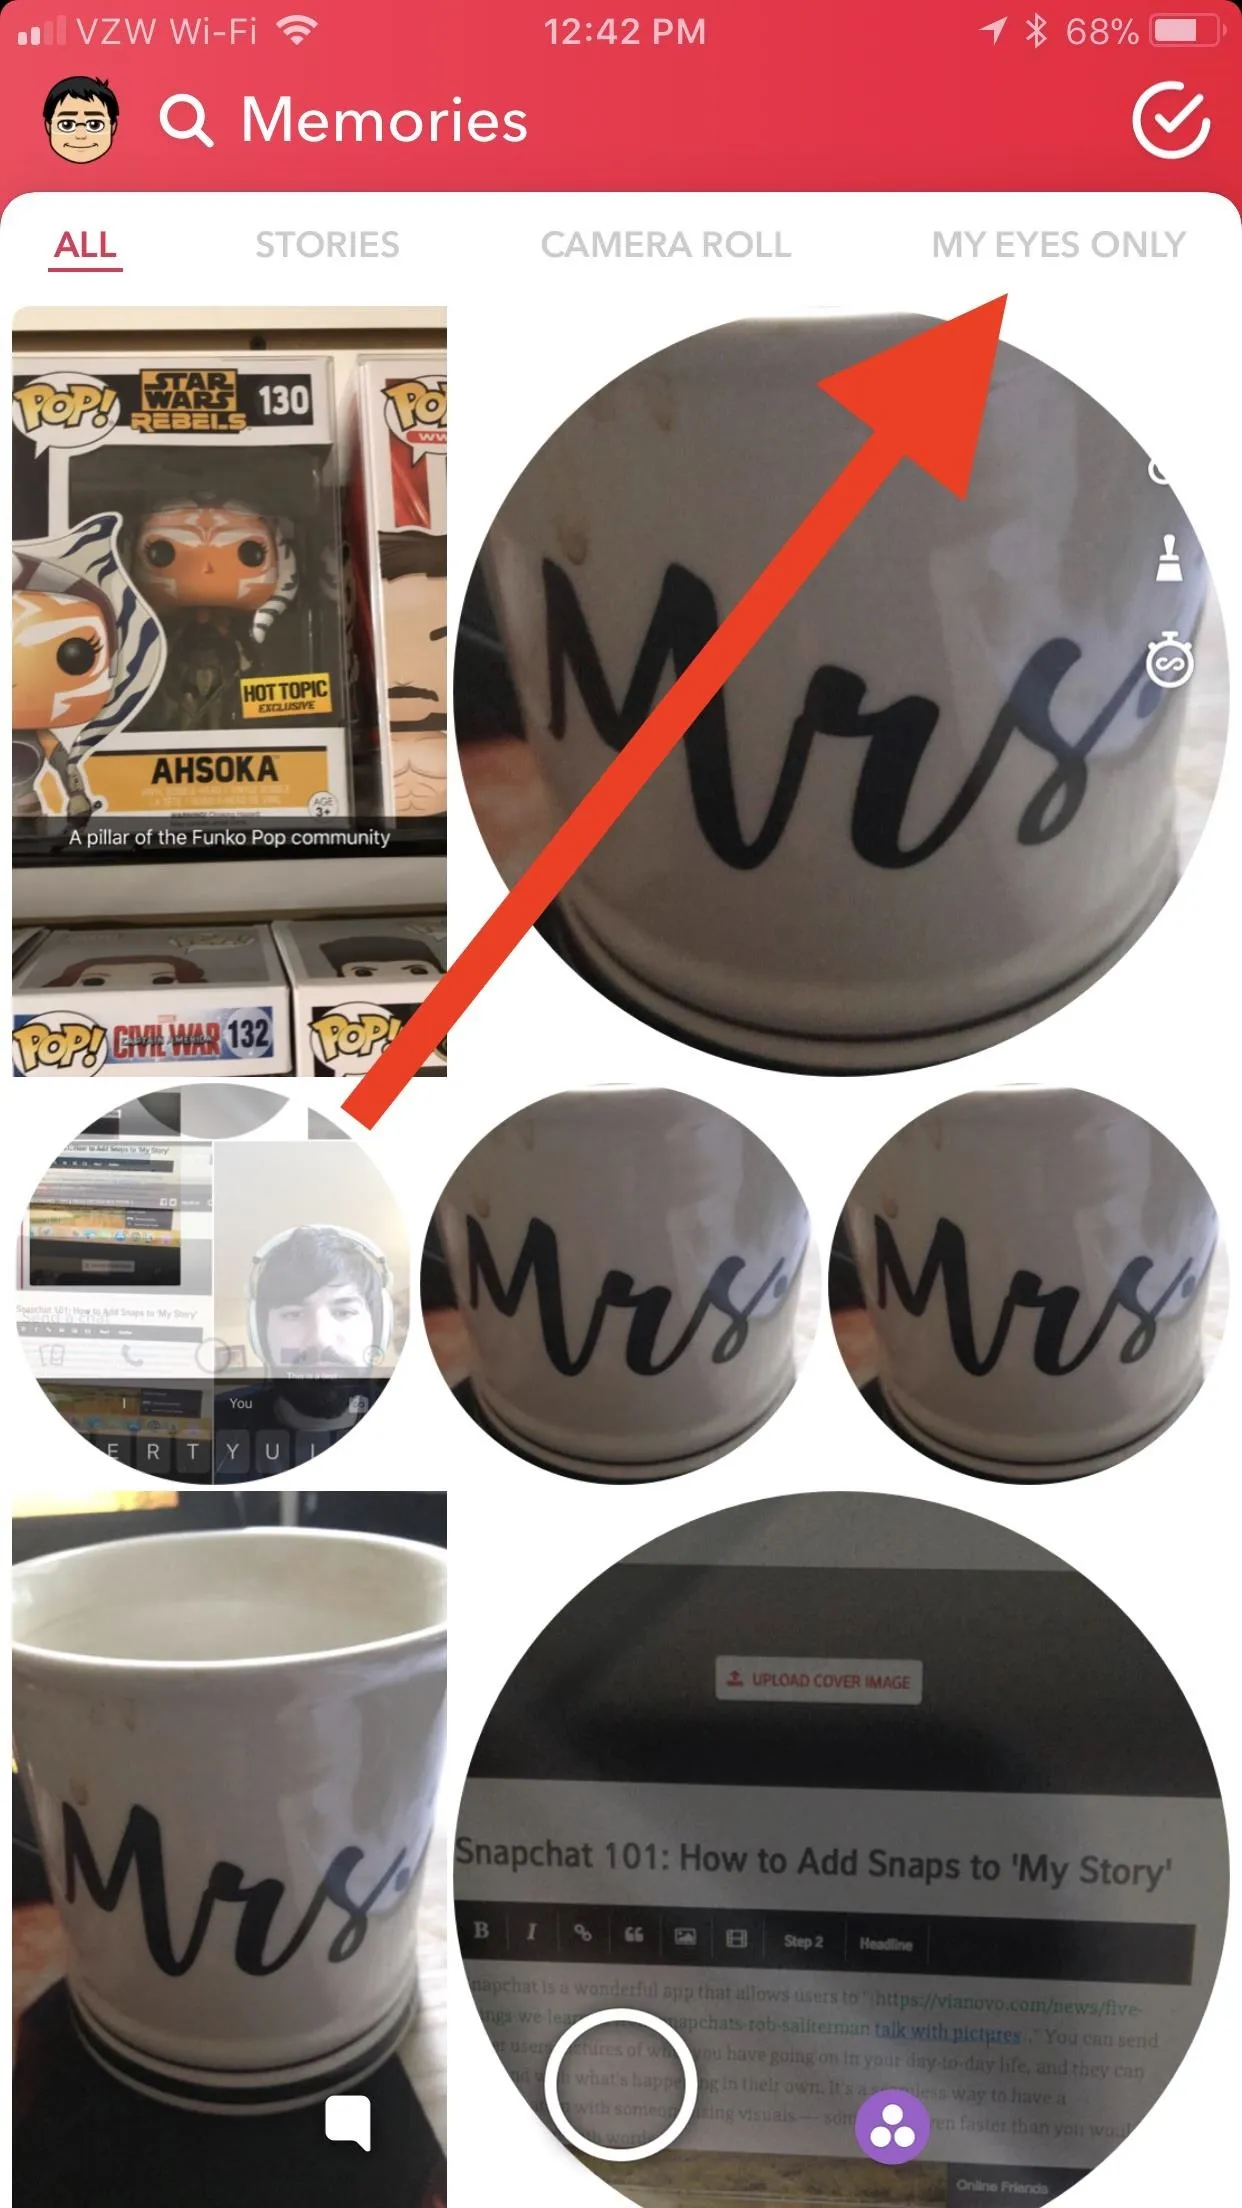
All
Regardless of what you may think, the All tab is not a combination of the snaps that occupy the other three tabs. It's actually every snap that you've saved, either by downloading them as you take them or by downloading them from My Story.

Stories
The second tab, Stories, is comprised of snaps that you downloaded from My Story. Keep in mind that when you download My Story, Snapchat downloads your entire story as one entity. So if you want to download your snaps individually, be sure to do it as you take them.
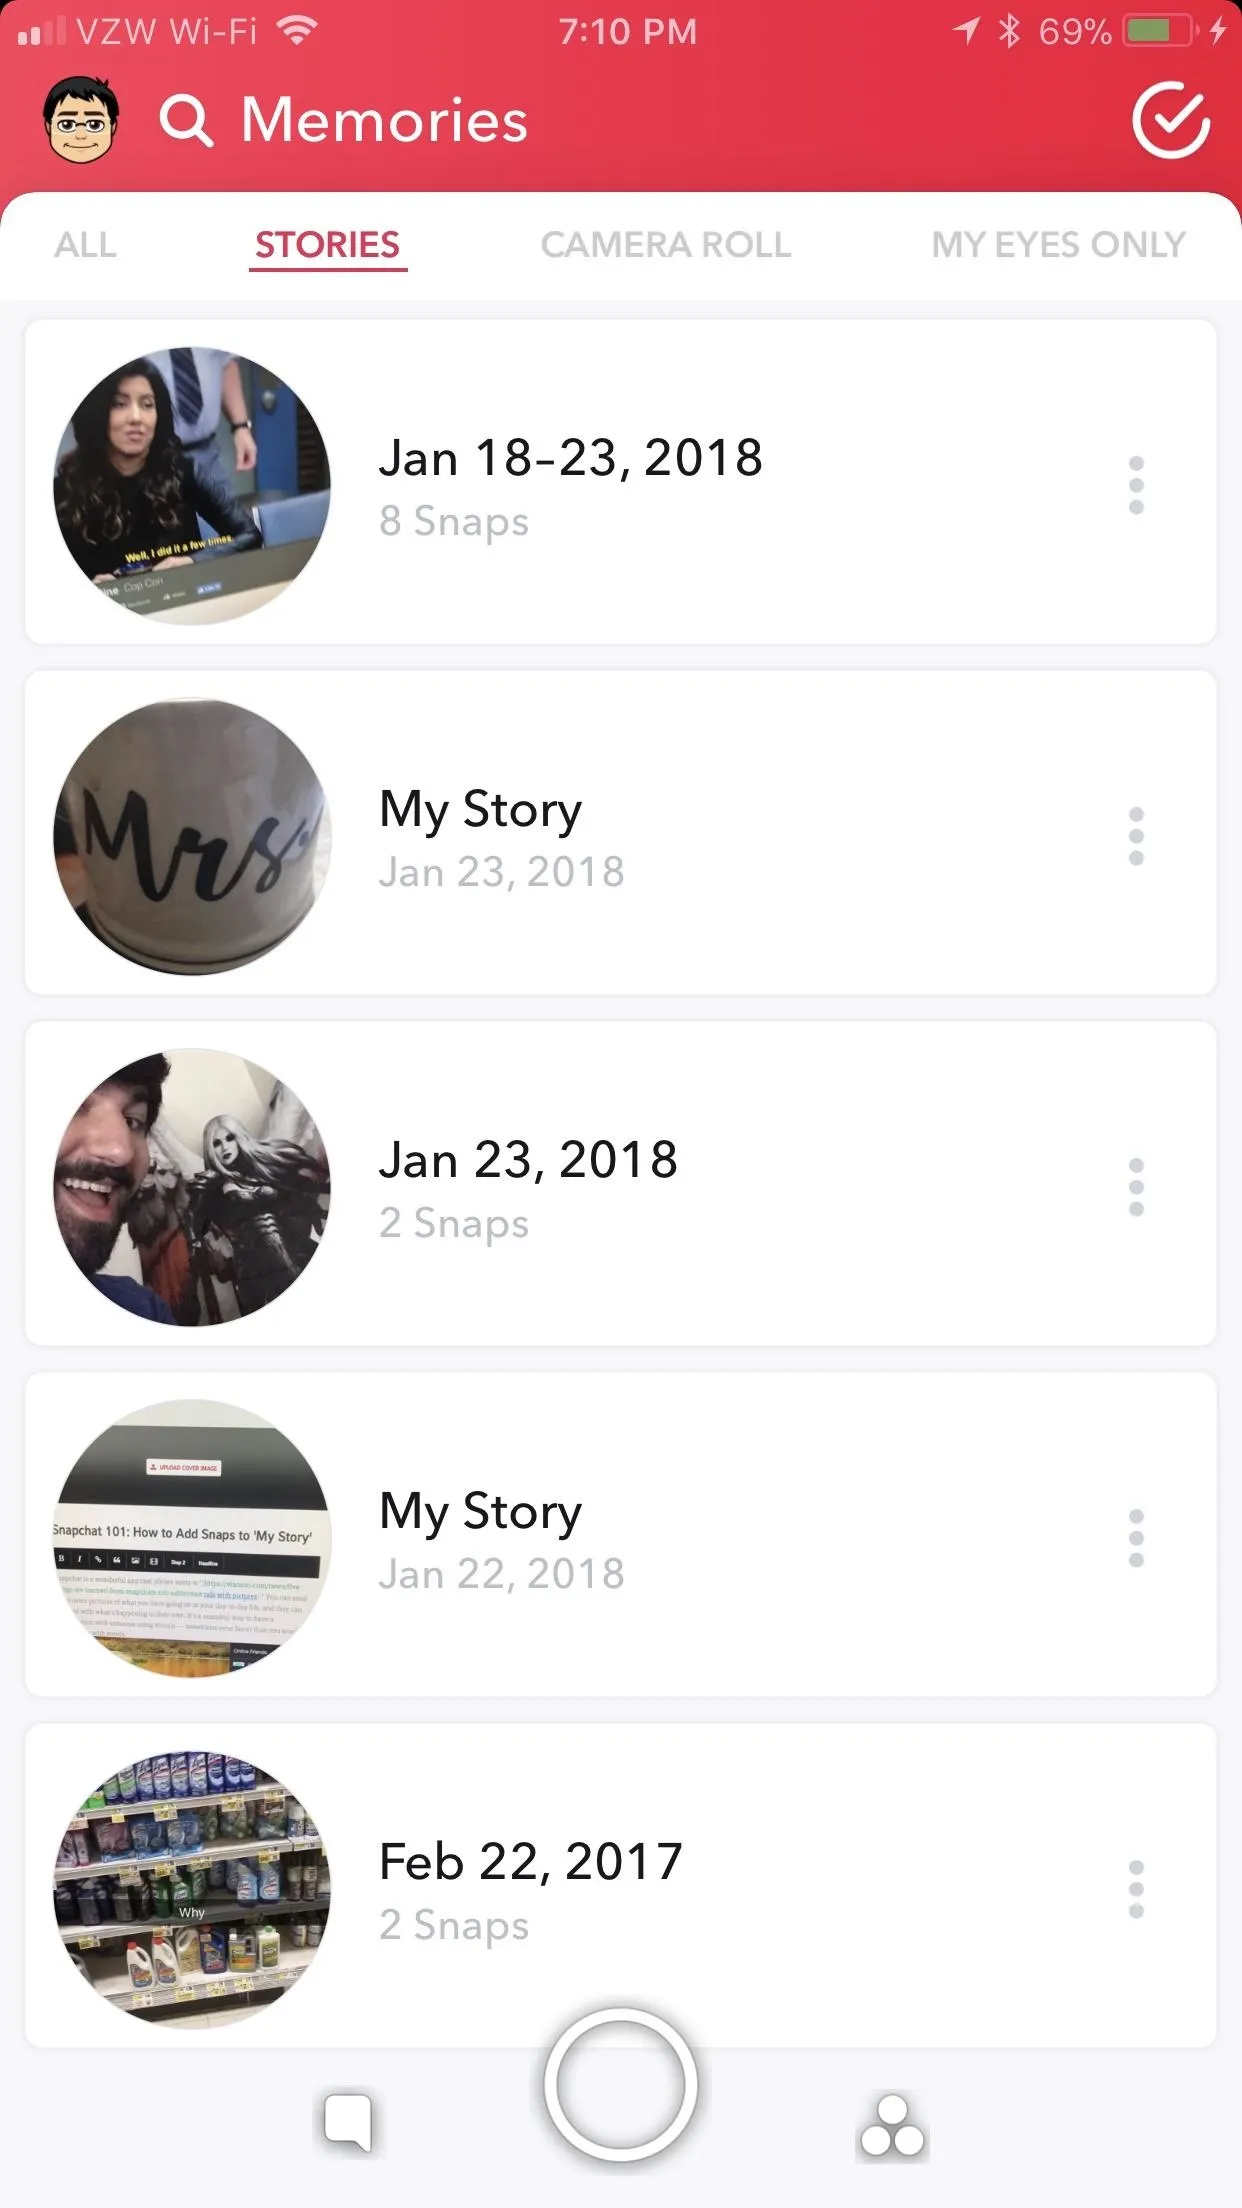
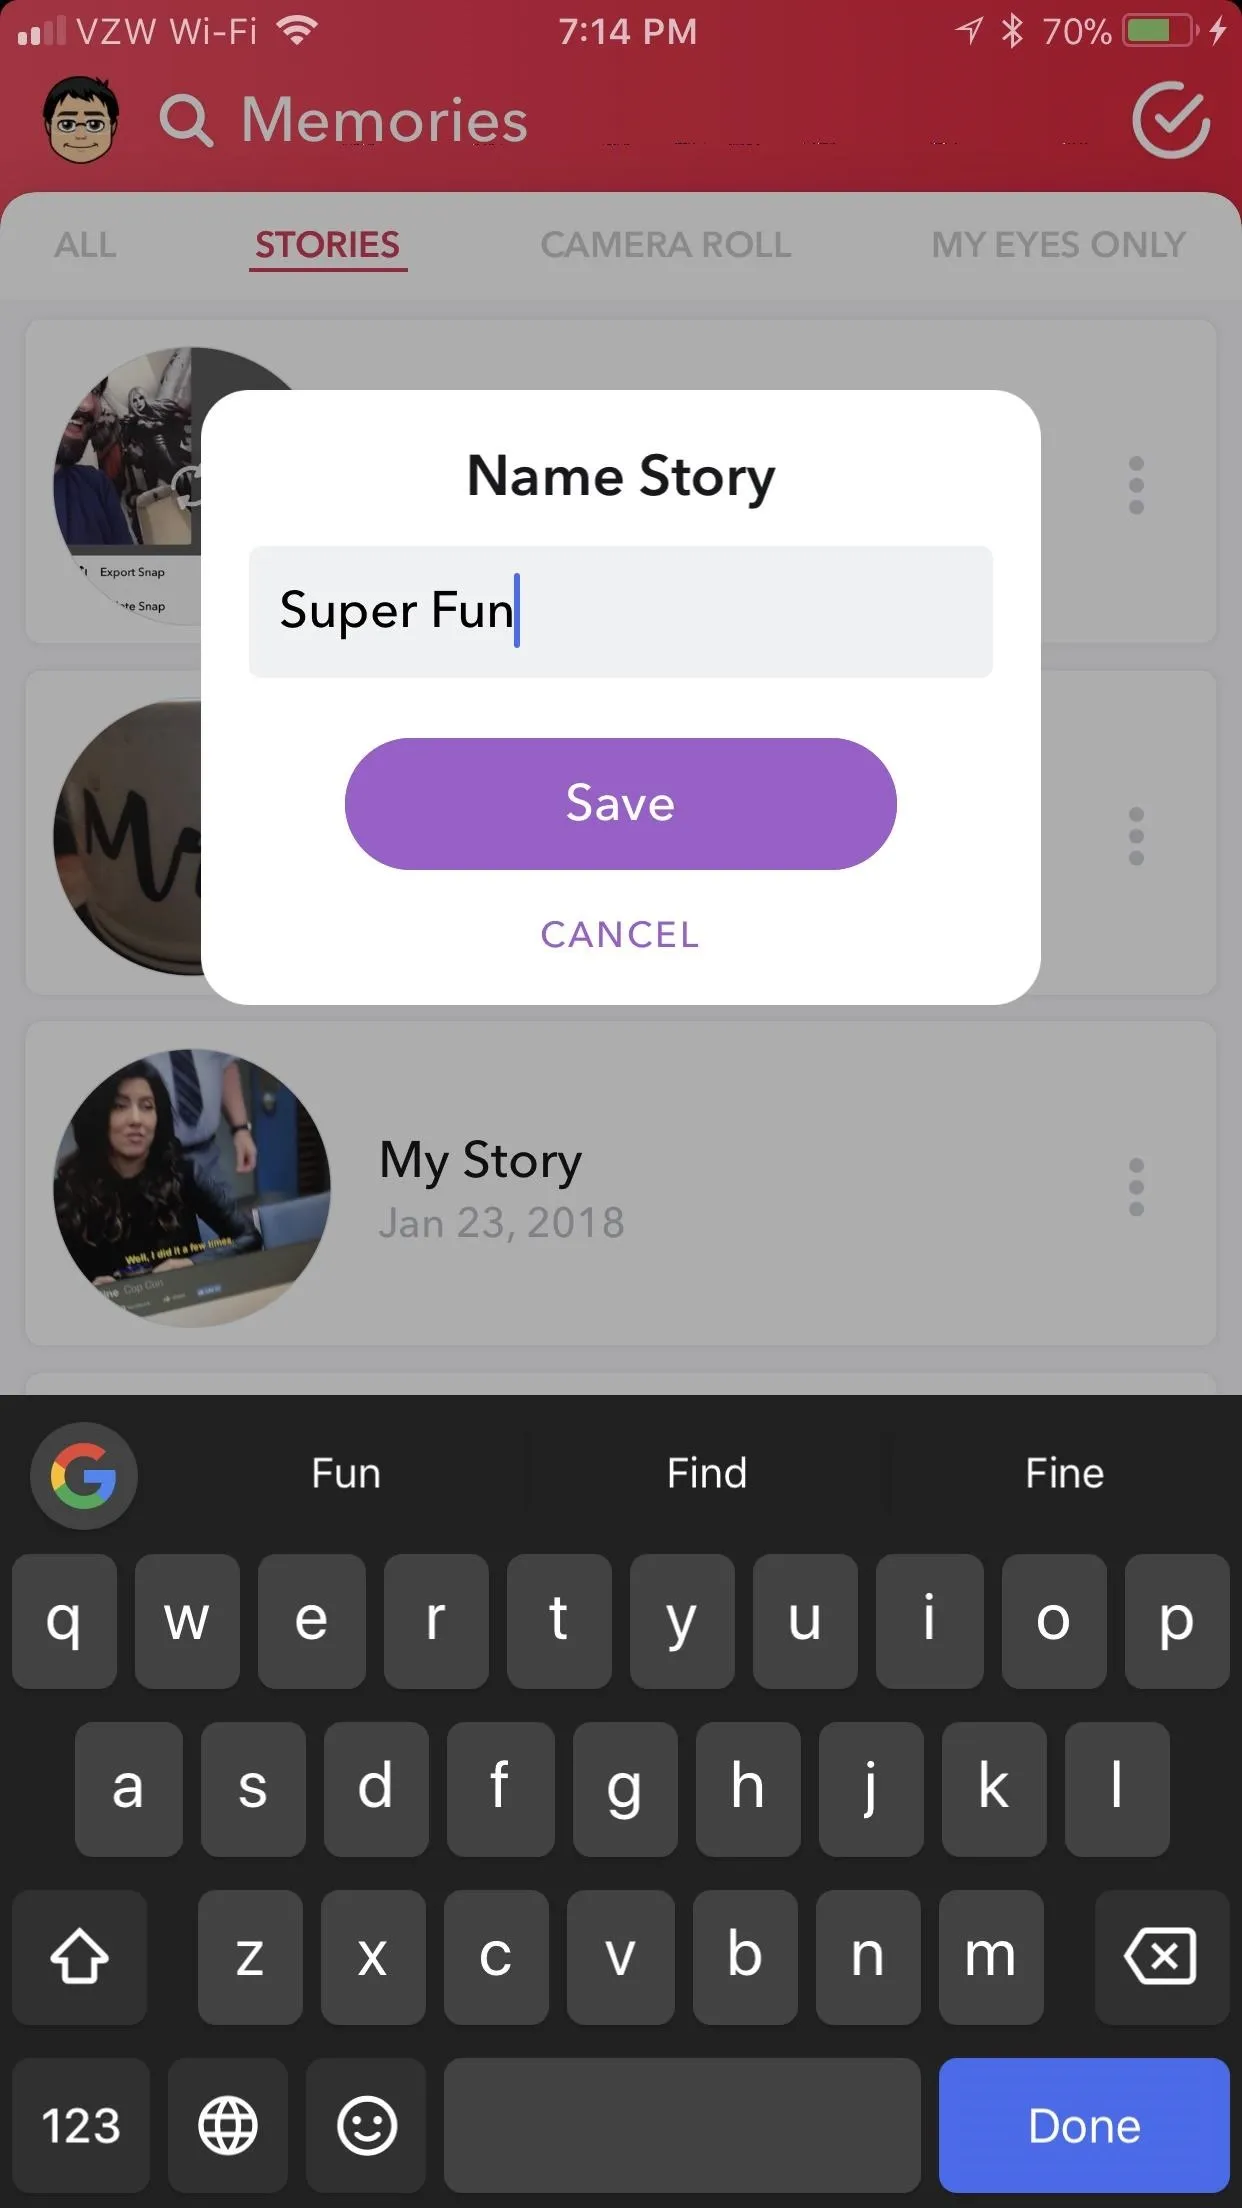
While you're in here, you should know that you can rename stories from this menu. Typically, when you save a story to your Memories, Snapchat names it based on the date (e.g., Jan 18–23, 2018). If you want to be able to recall a story easier, you might want to rename it.
To do so, tap on the three-dot menu next to a story to open up a sub-menu that will let you name (or rename) a Story. After hitting "Name Story," your keyboard will pop up, allowing you to create a name for your Story. Select "Save" if you're content with the name, or "Cancel" if you want to start over.
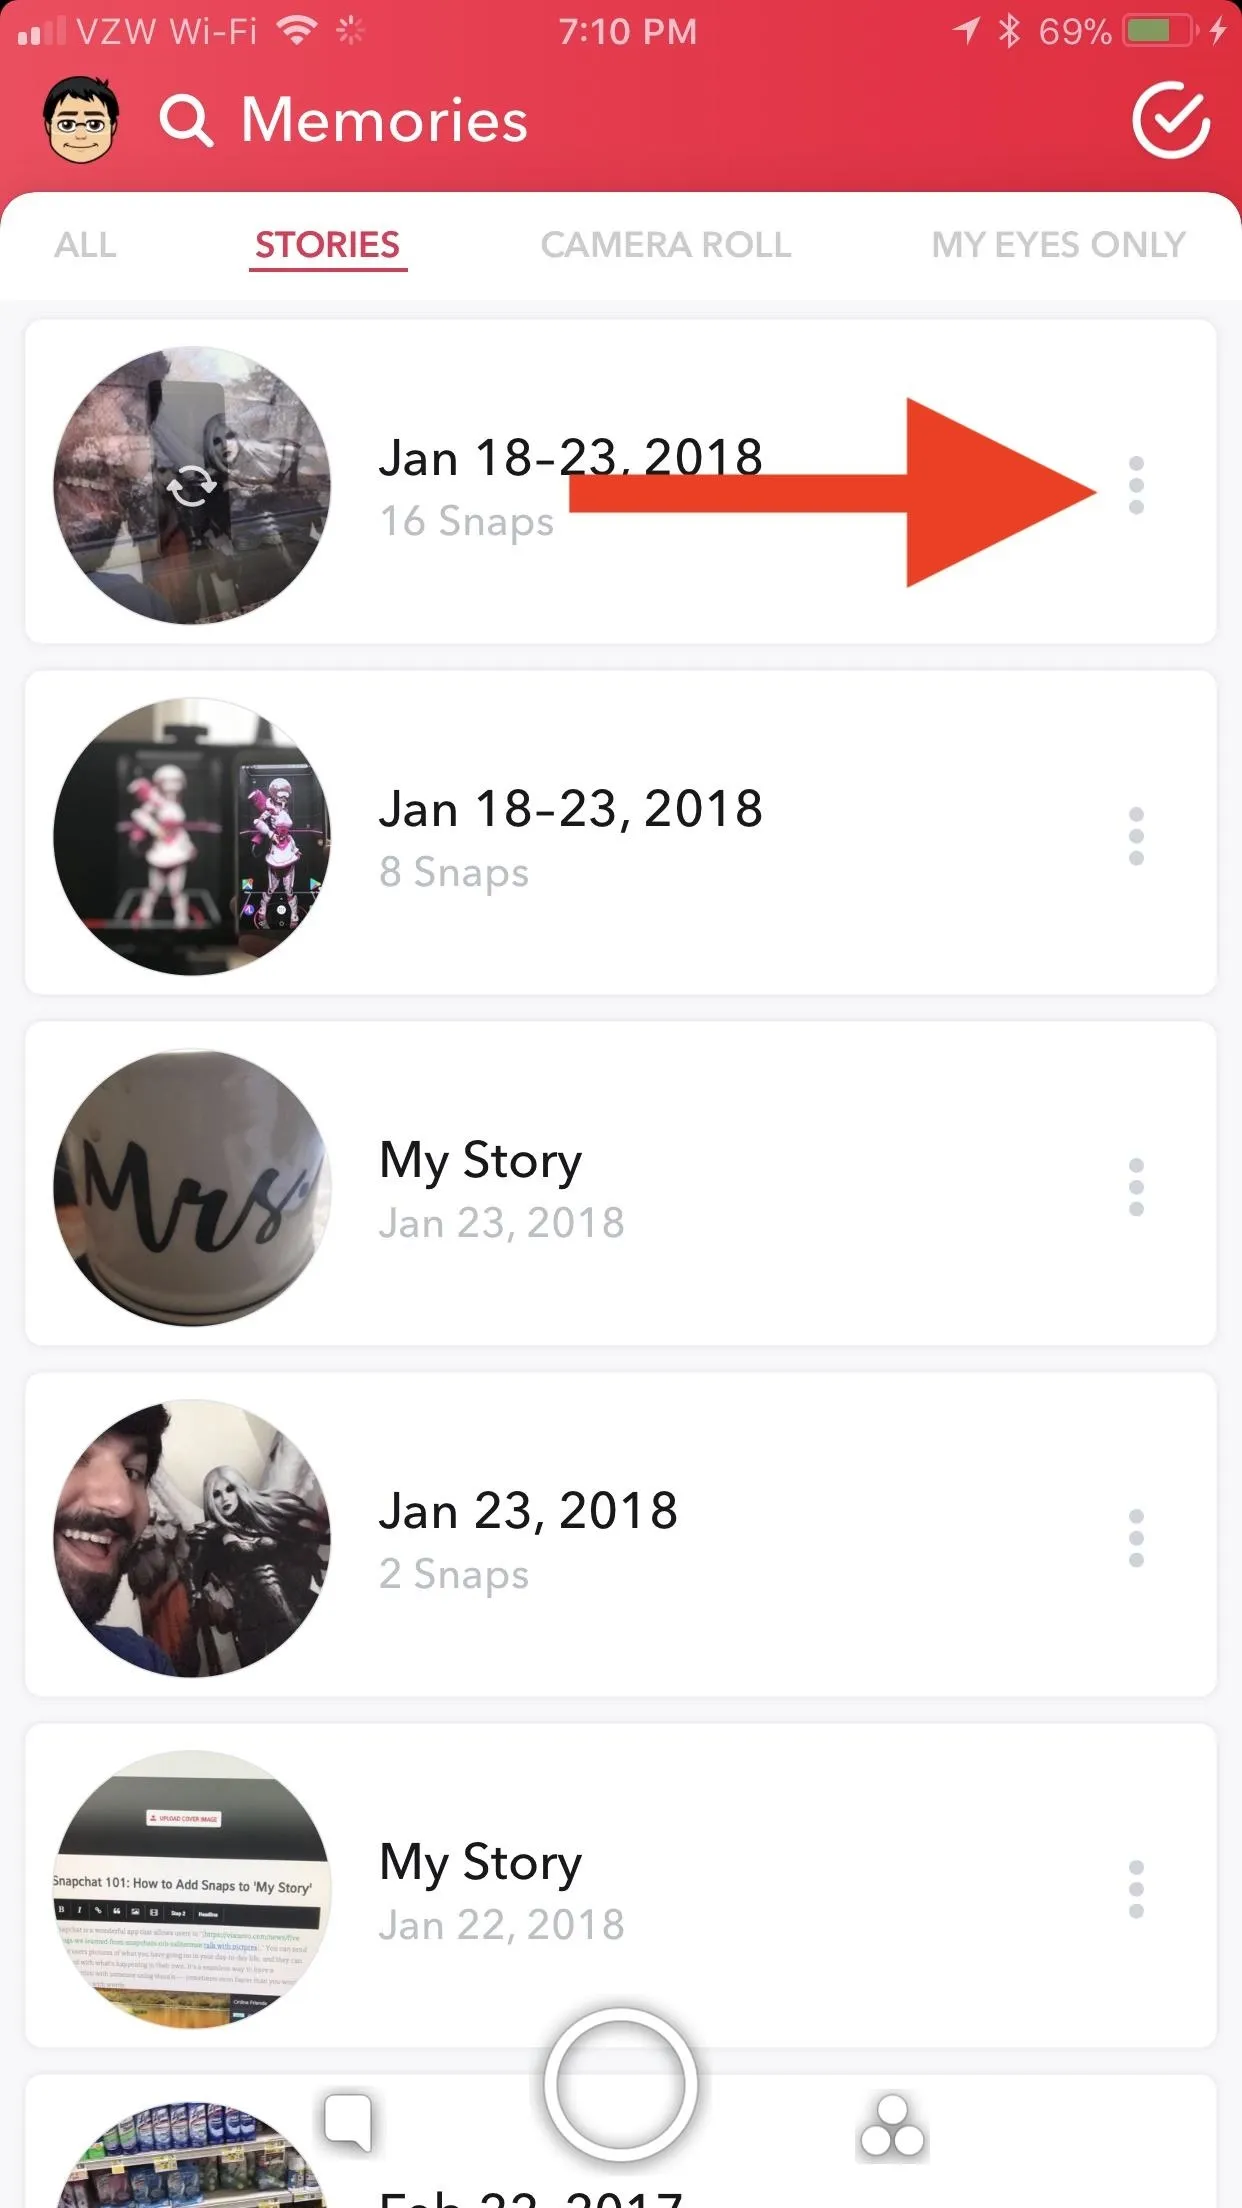
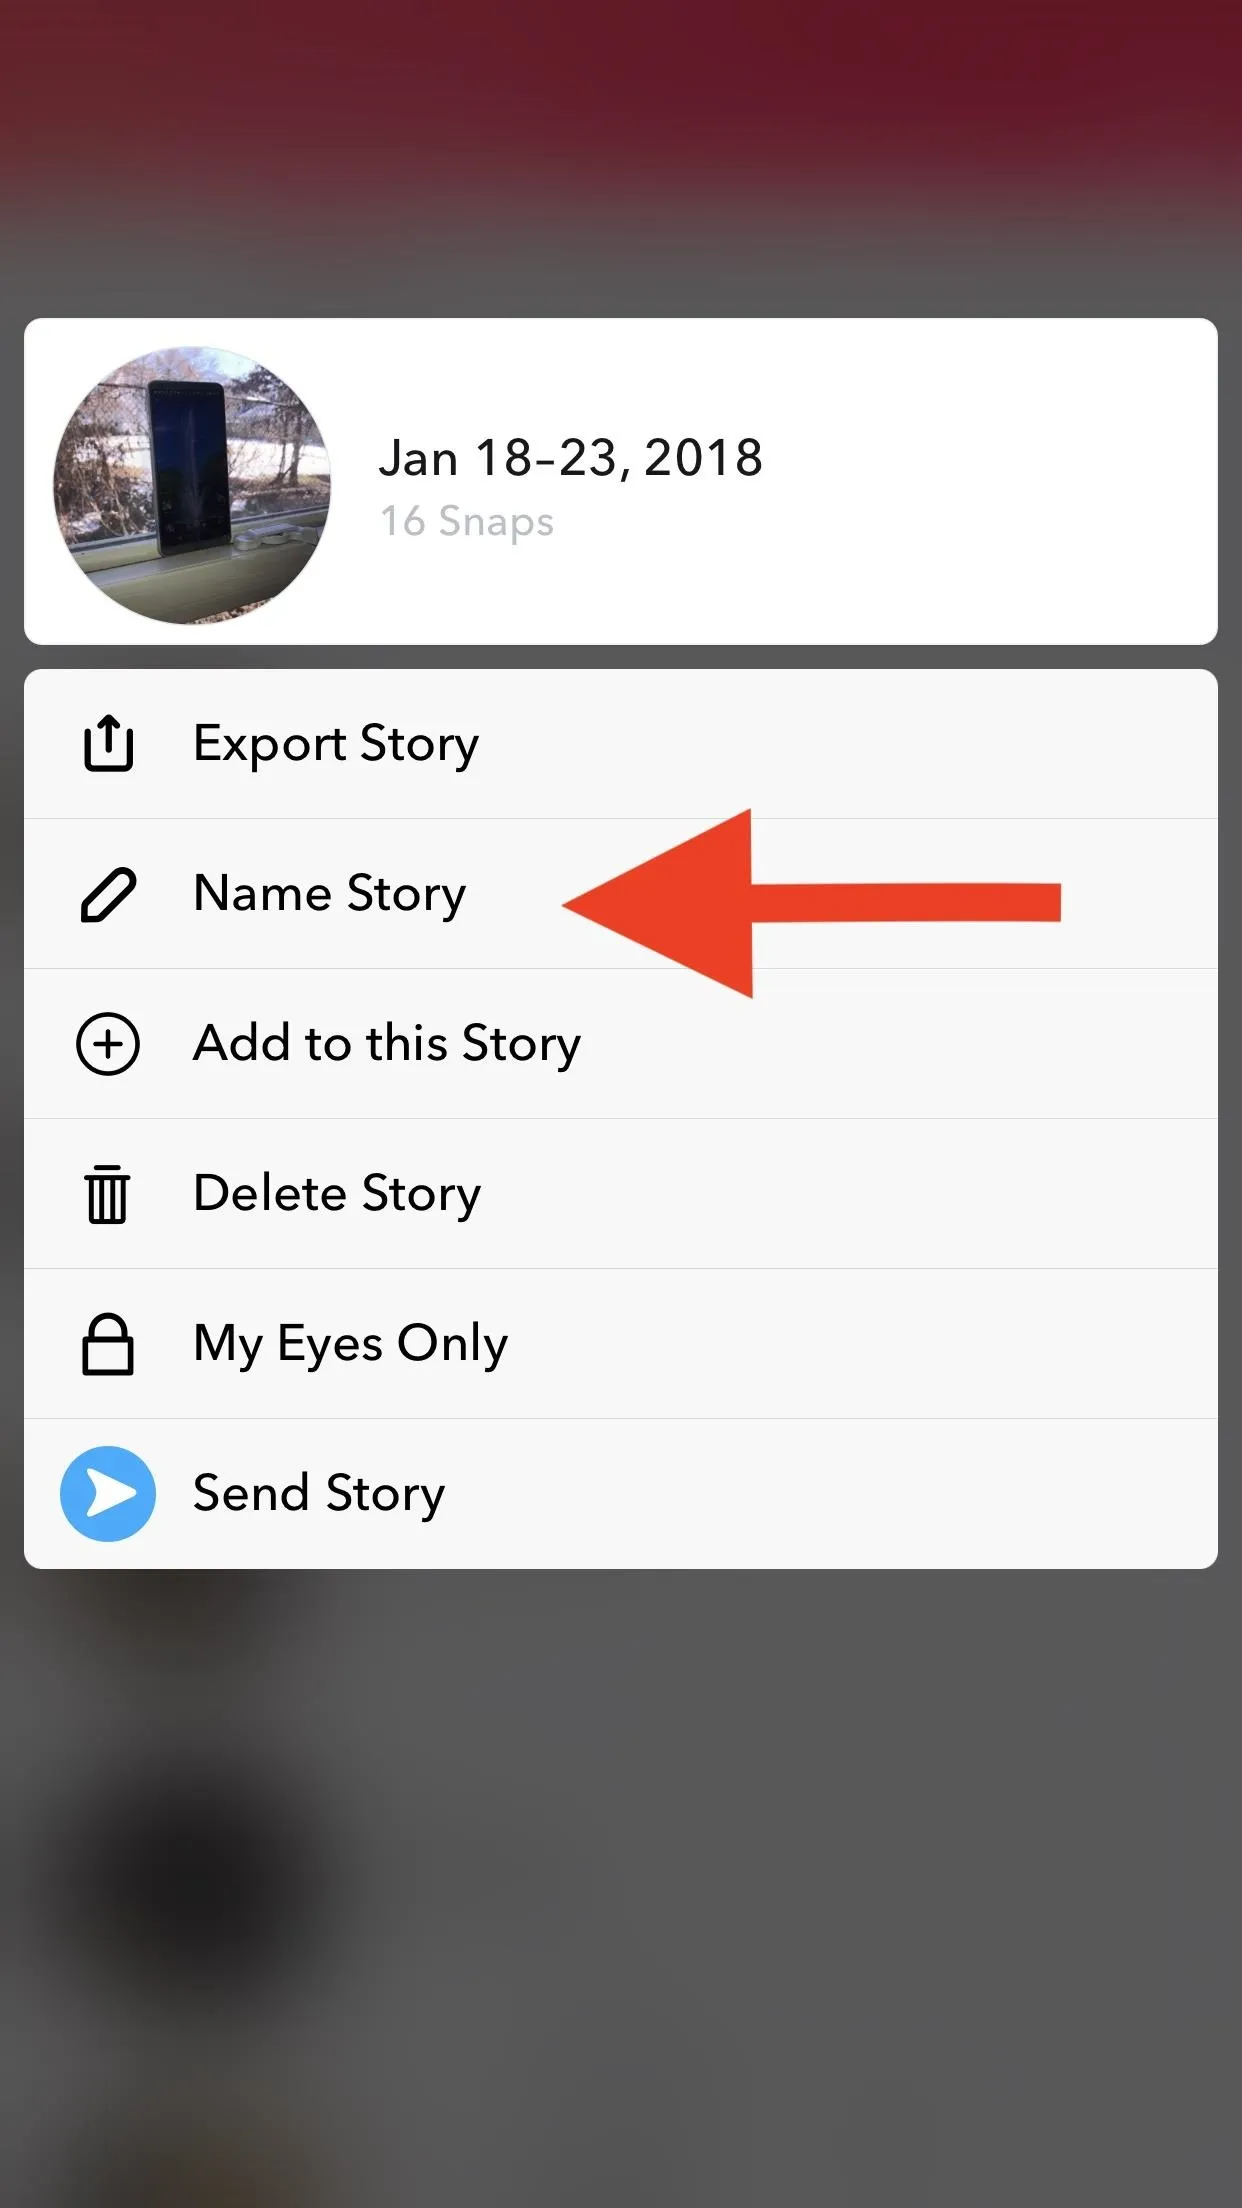
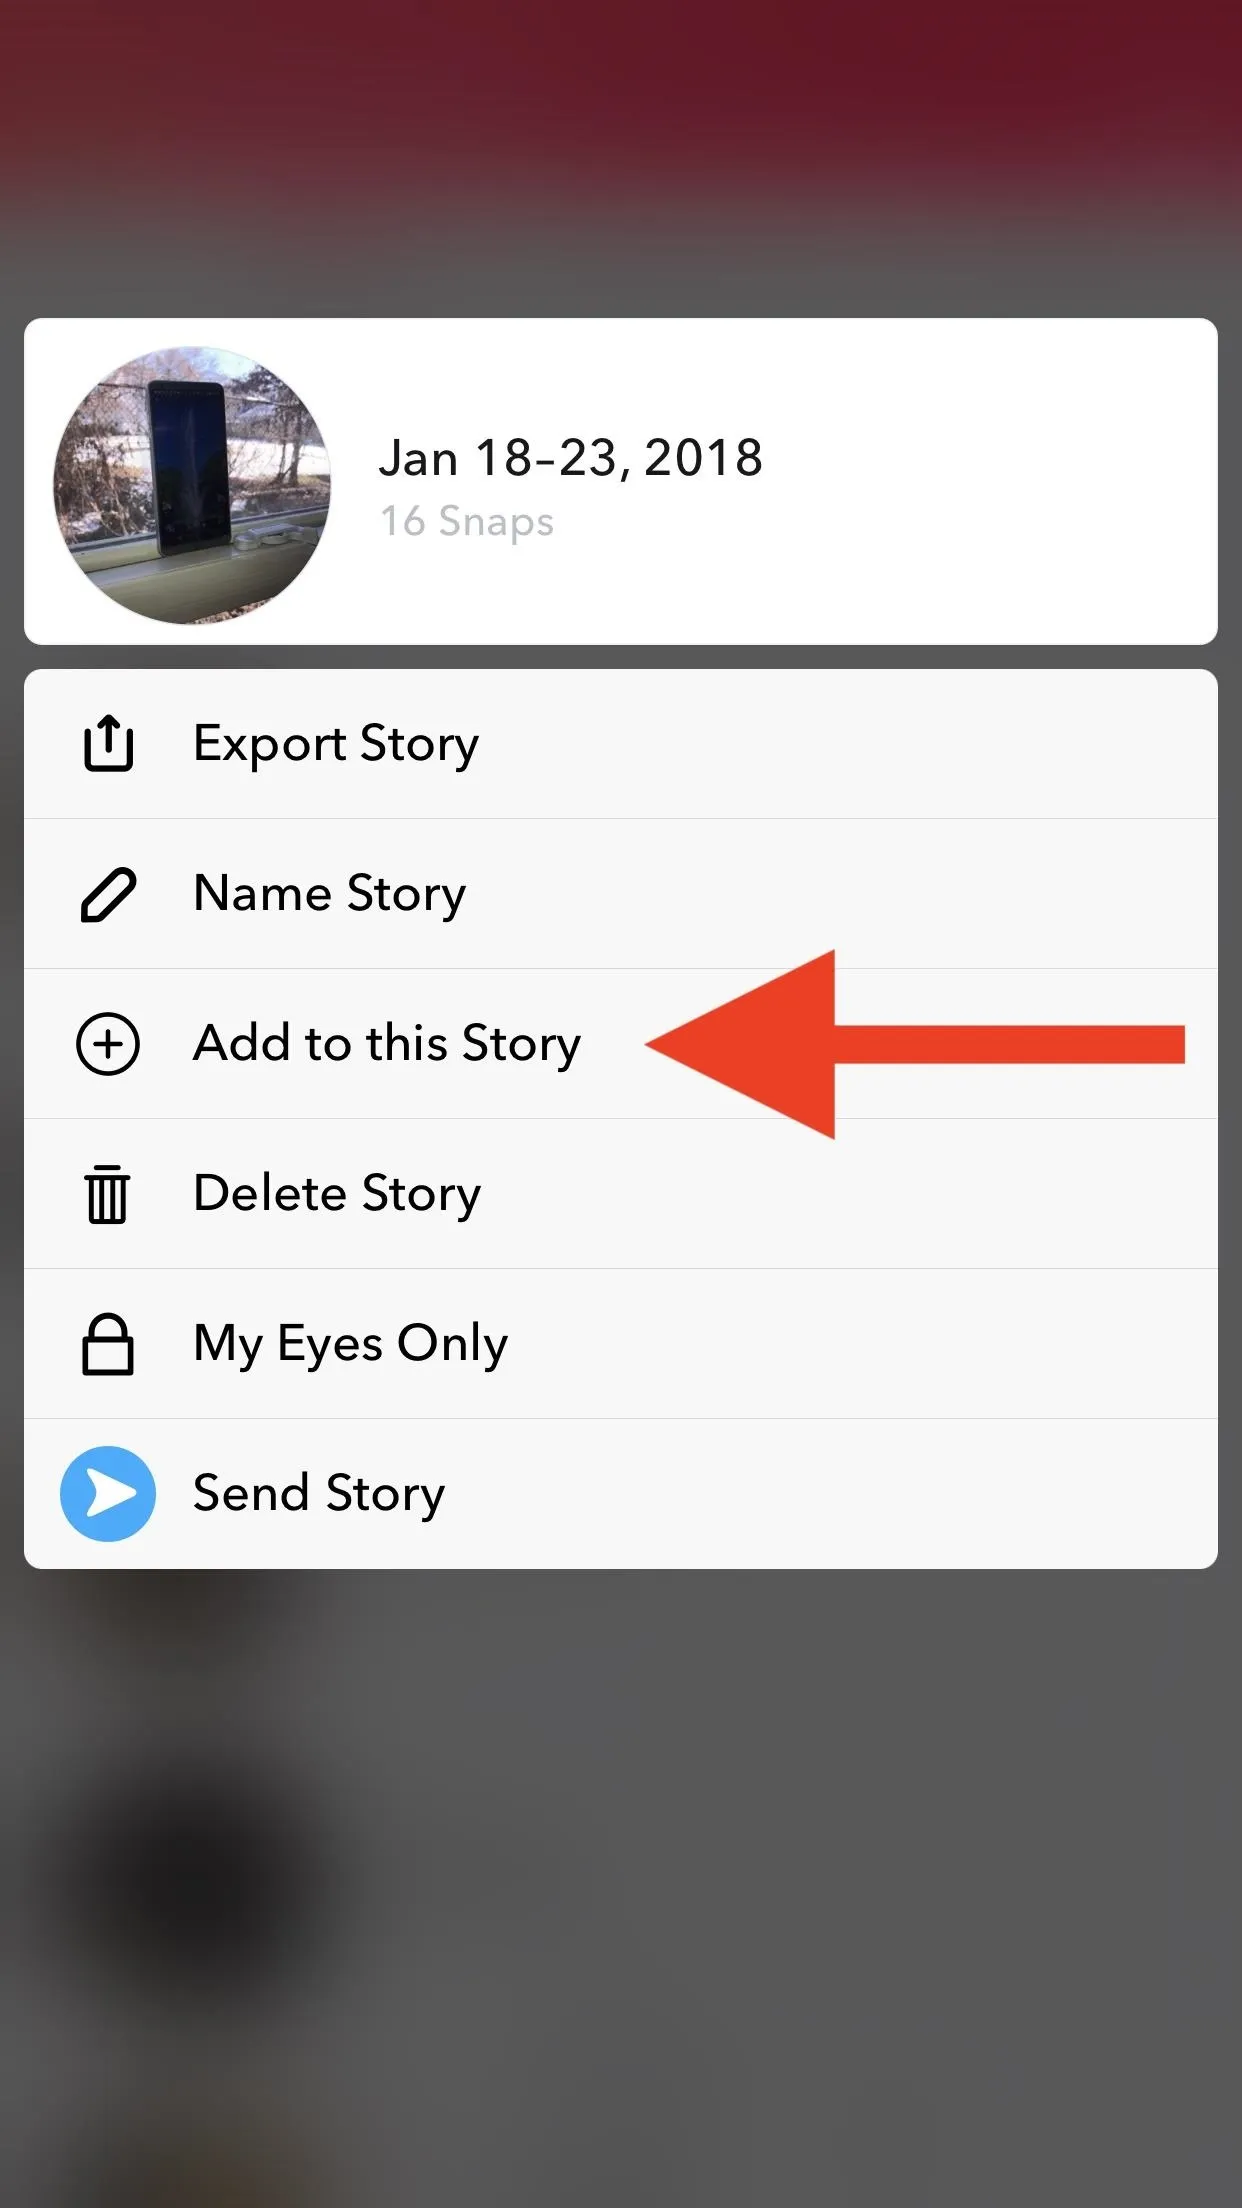
You can also add items to your Story by hitting "Add to this Story." Tap all the items you want to add, then tap "Add to this Story." The rest of the options in the three-dot menu will be covered a little later on in this guide.


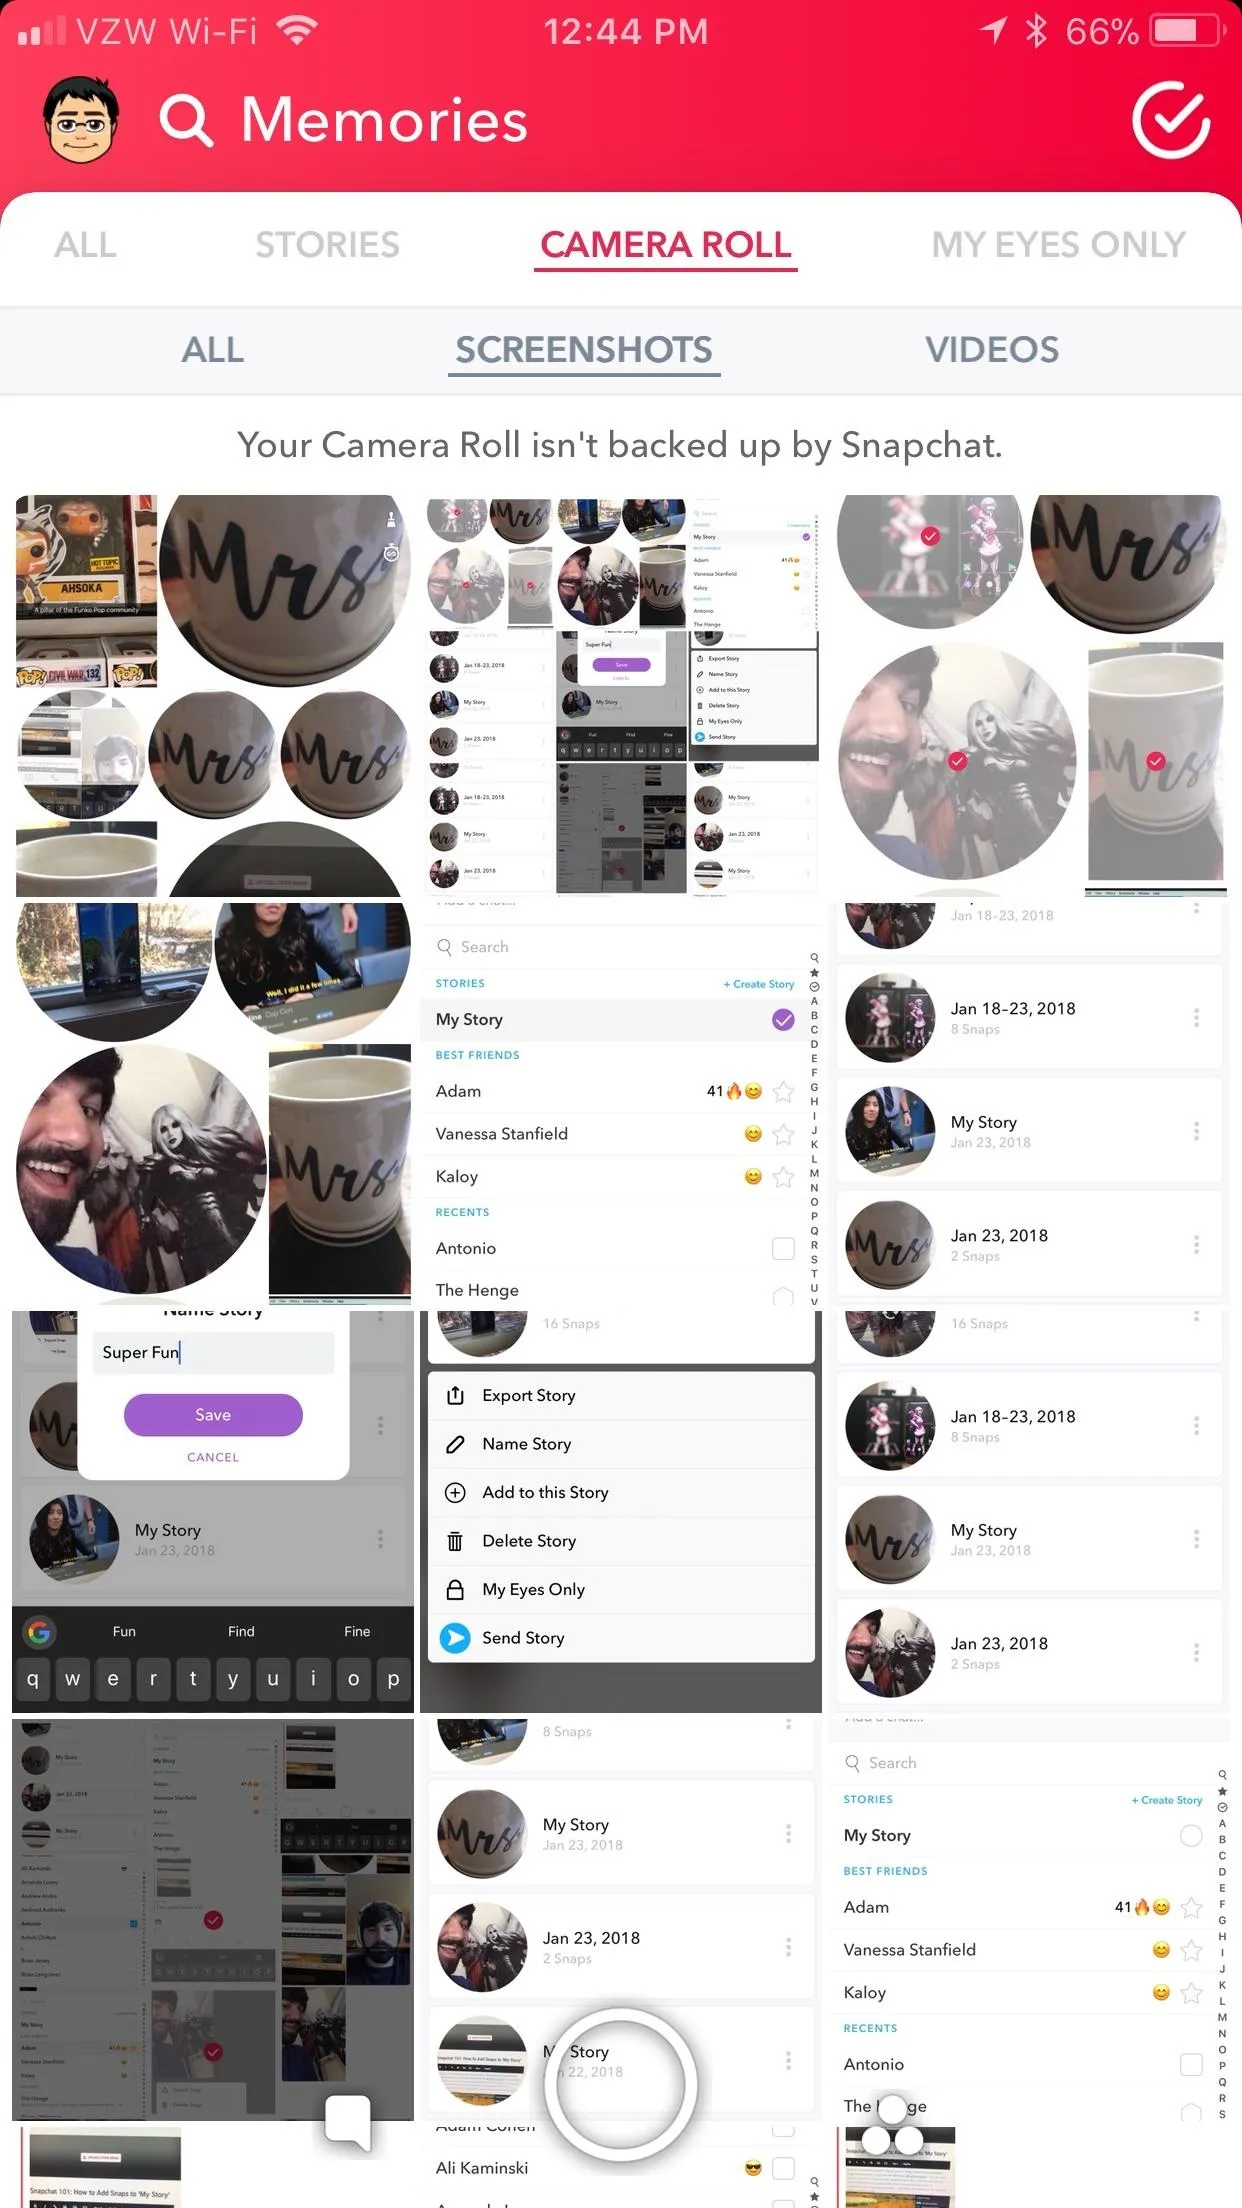
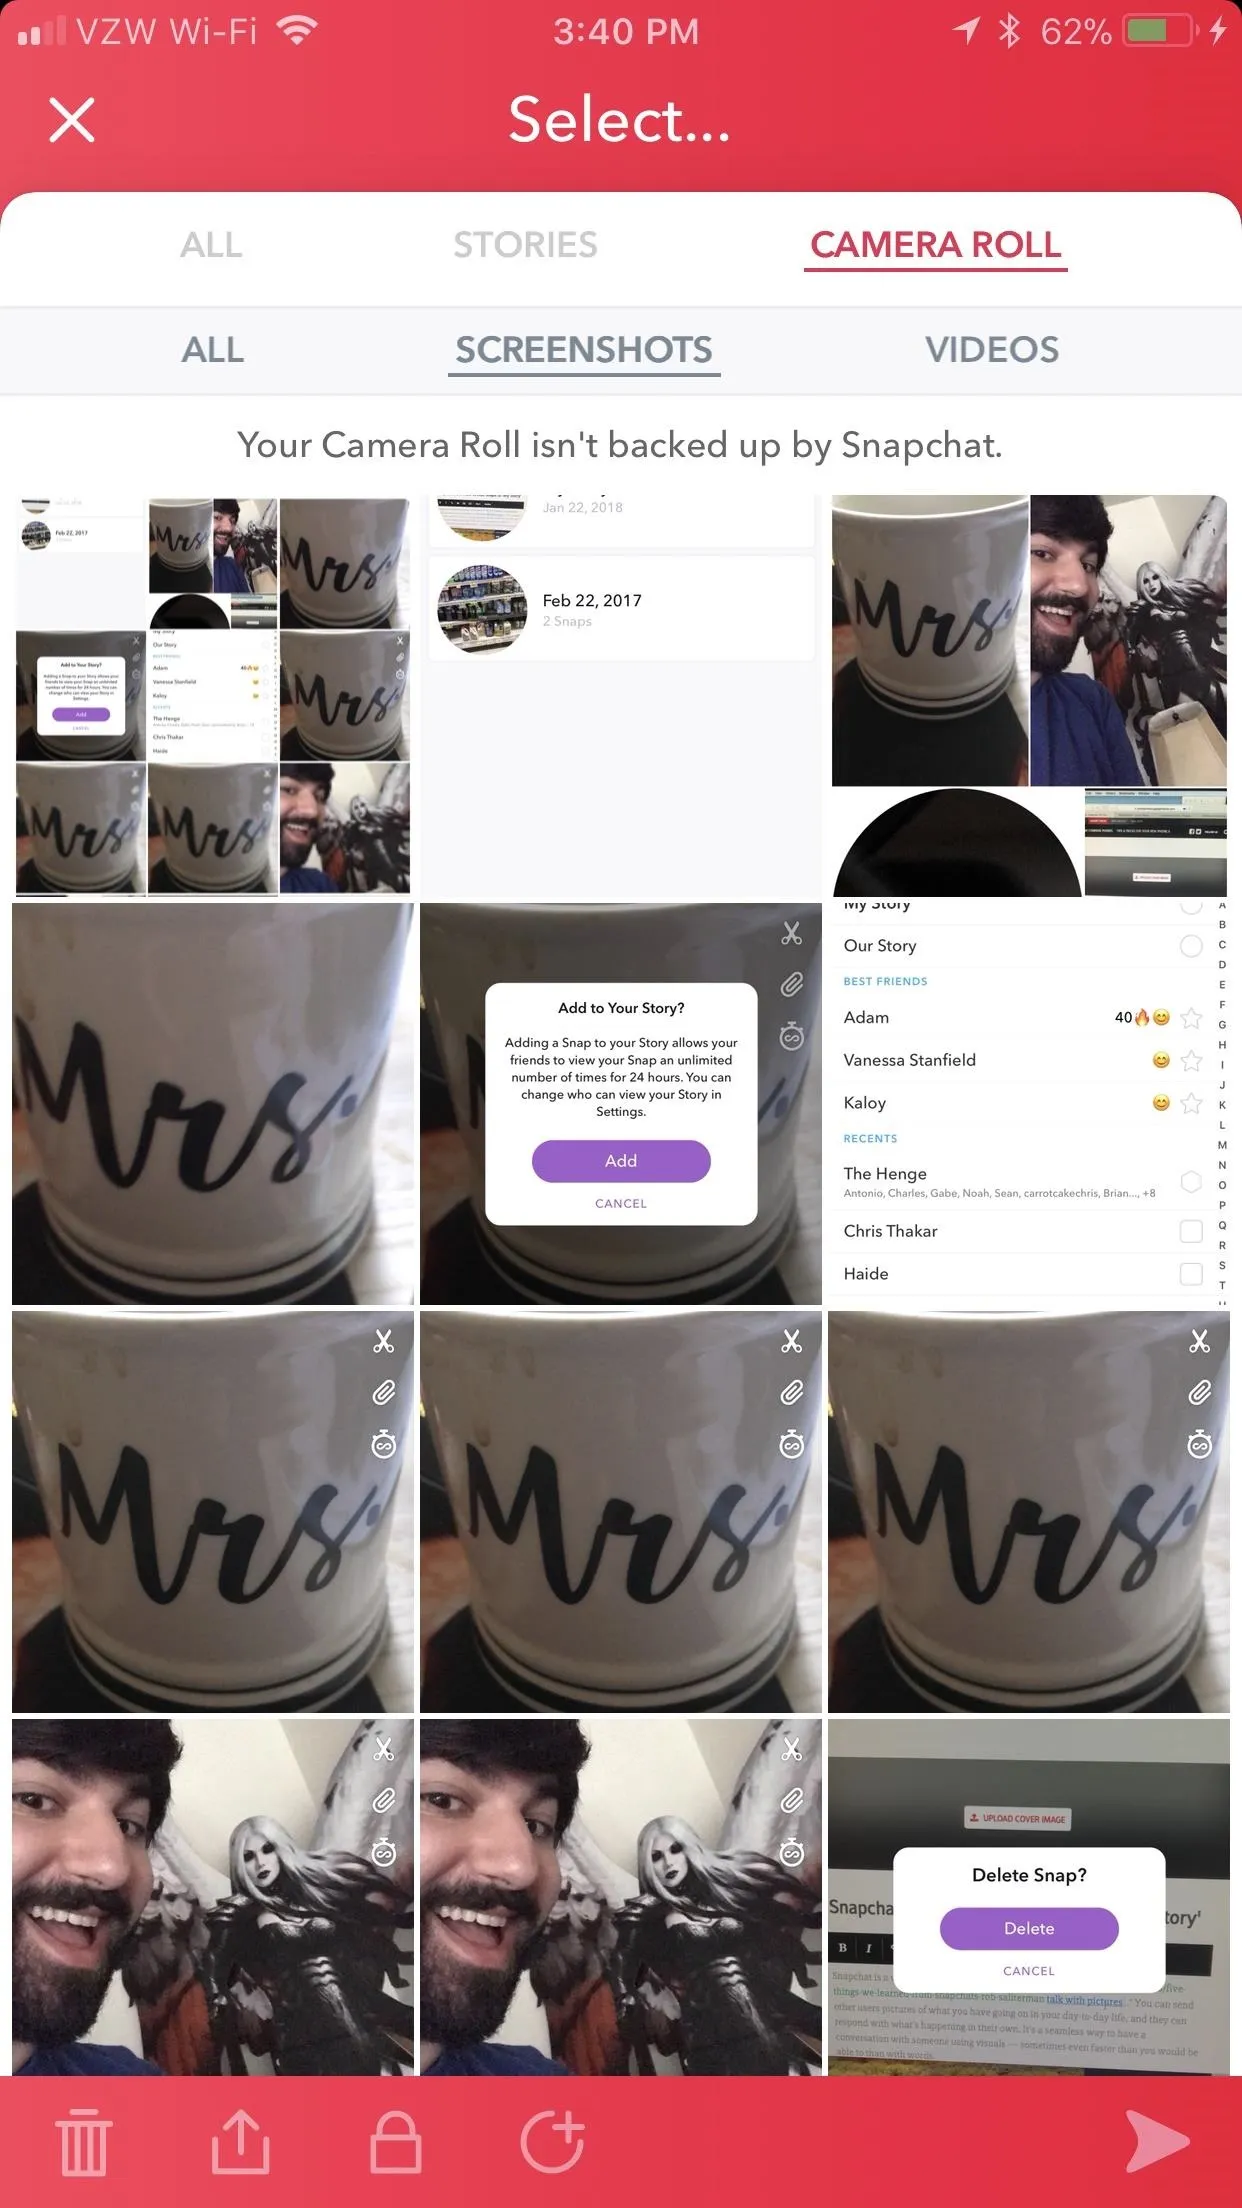
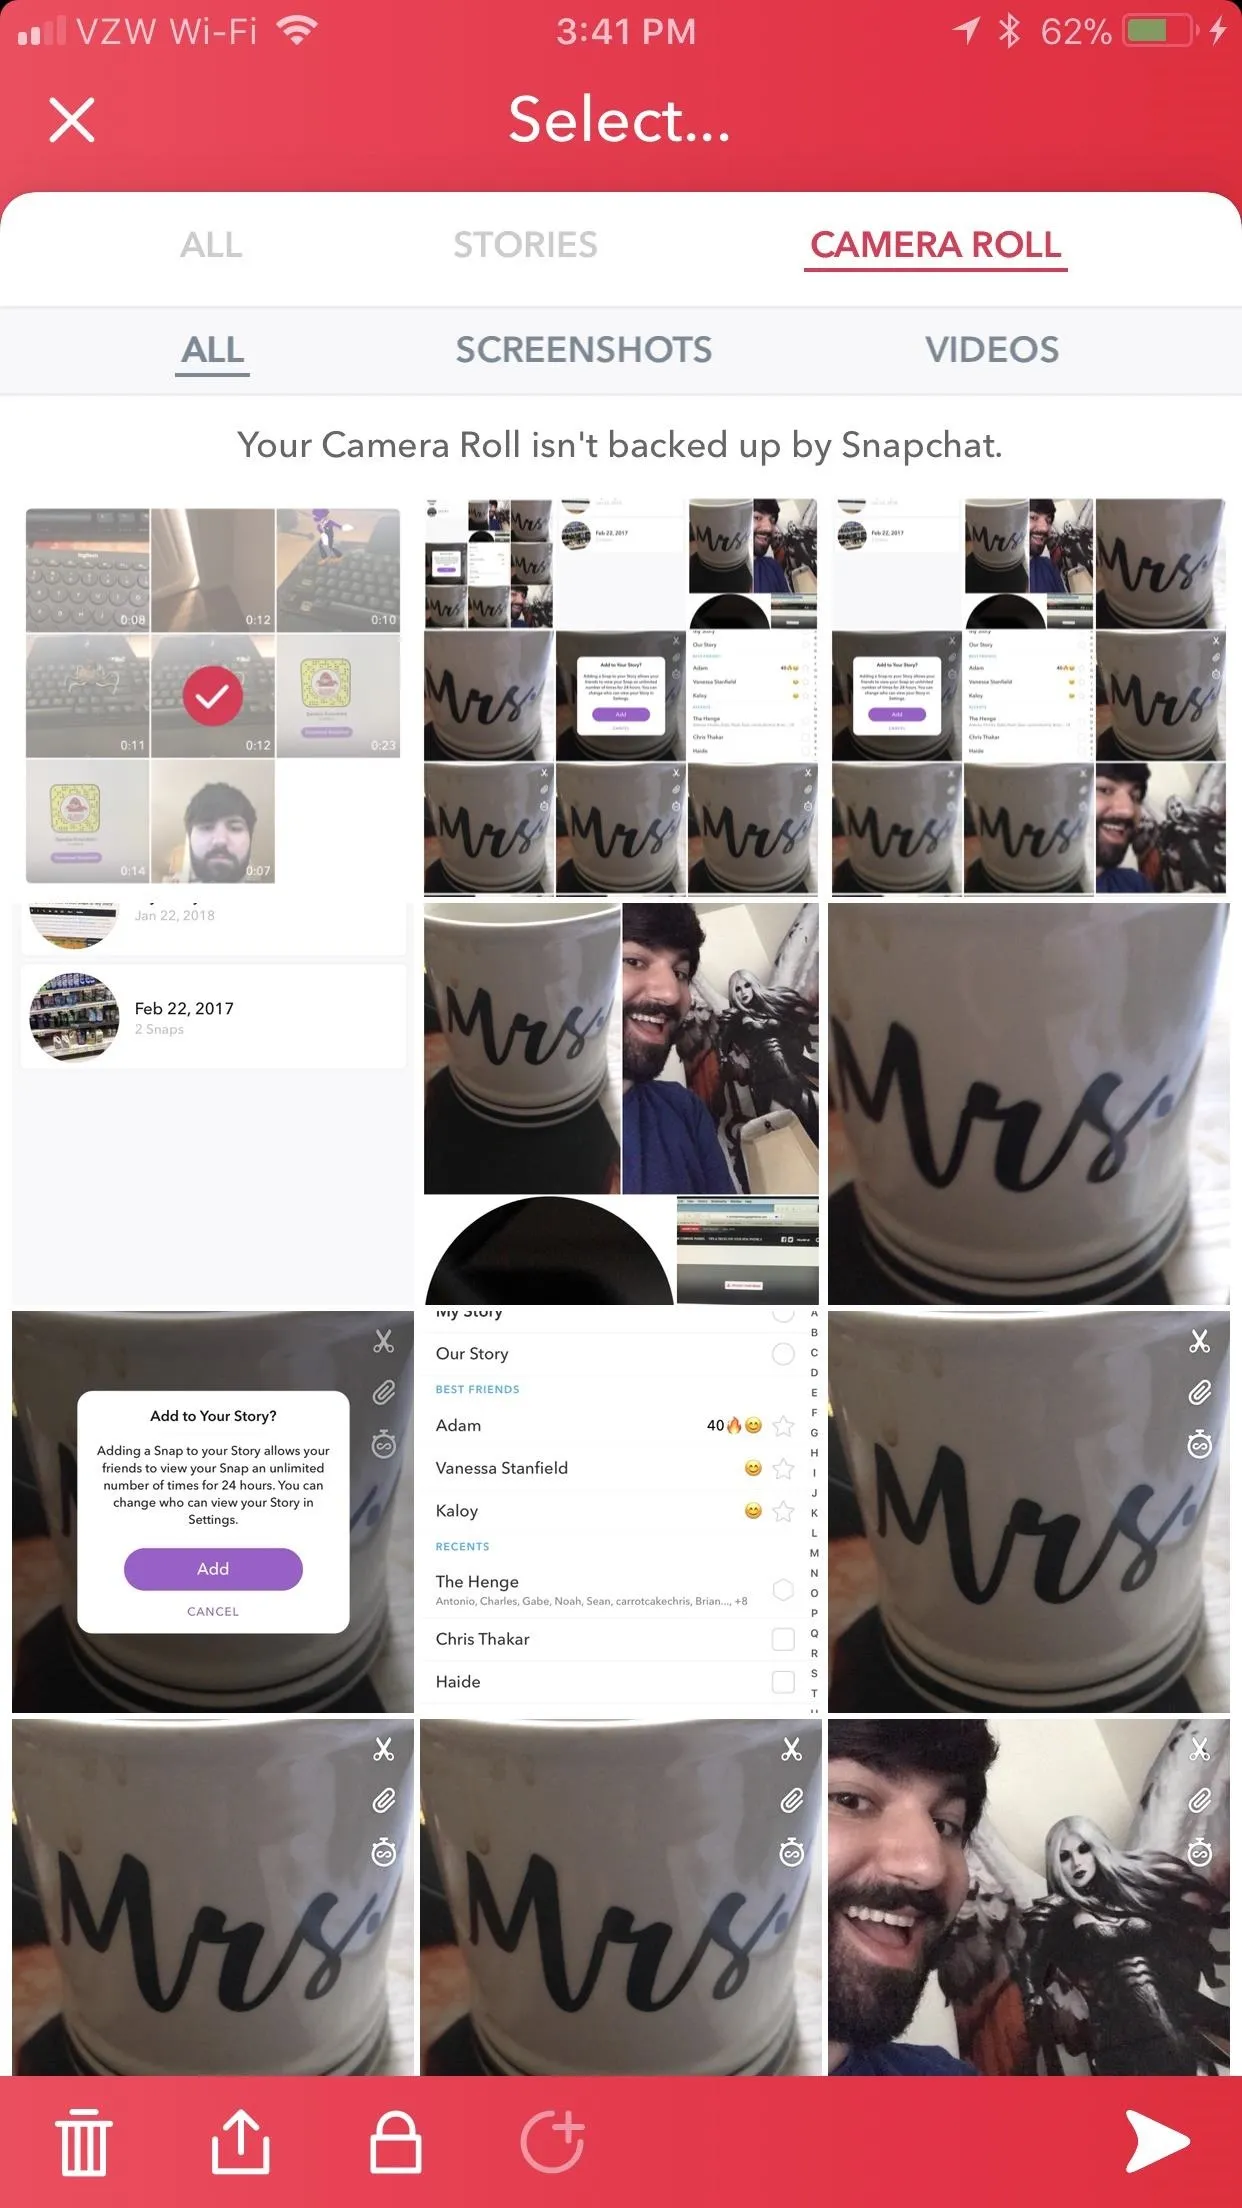
Camera Roll
The pictures inside Camera Roll are all the ones that you've taken on your phone (outside of Snapchat). These are the pictures that are usually stored in Photos (for iPhones) and Gallery or Google Photos (for Android phones). Regardless of your phone's operating system, Snapchat uses "Camera Roll" as its umbrella term.
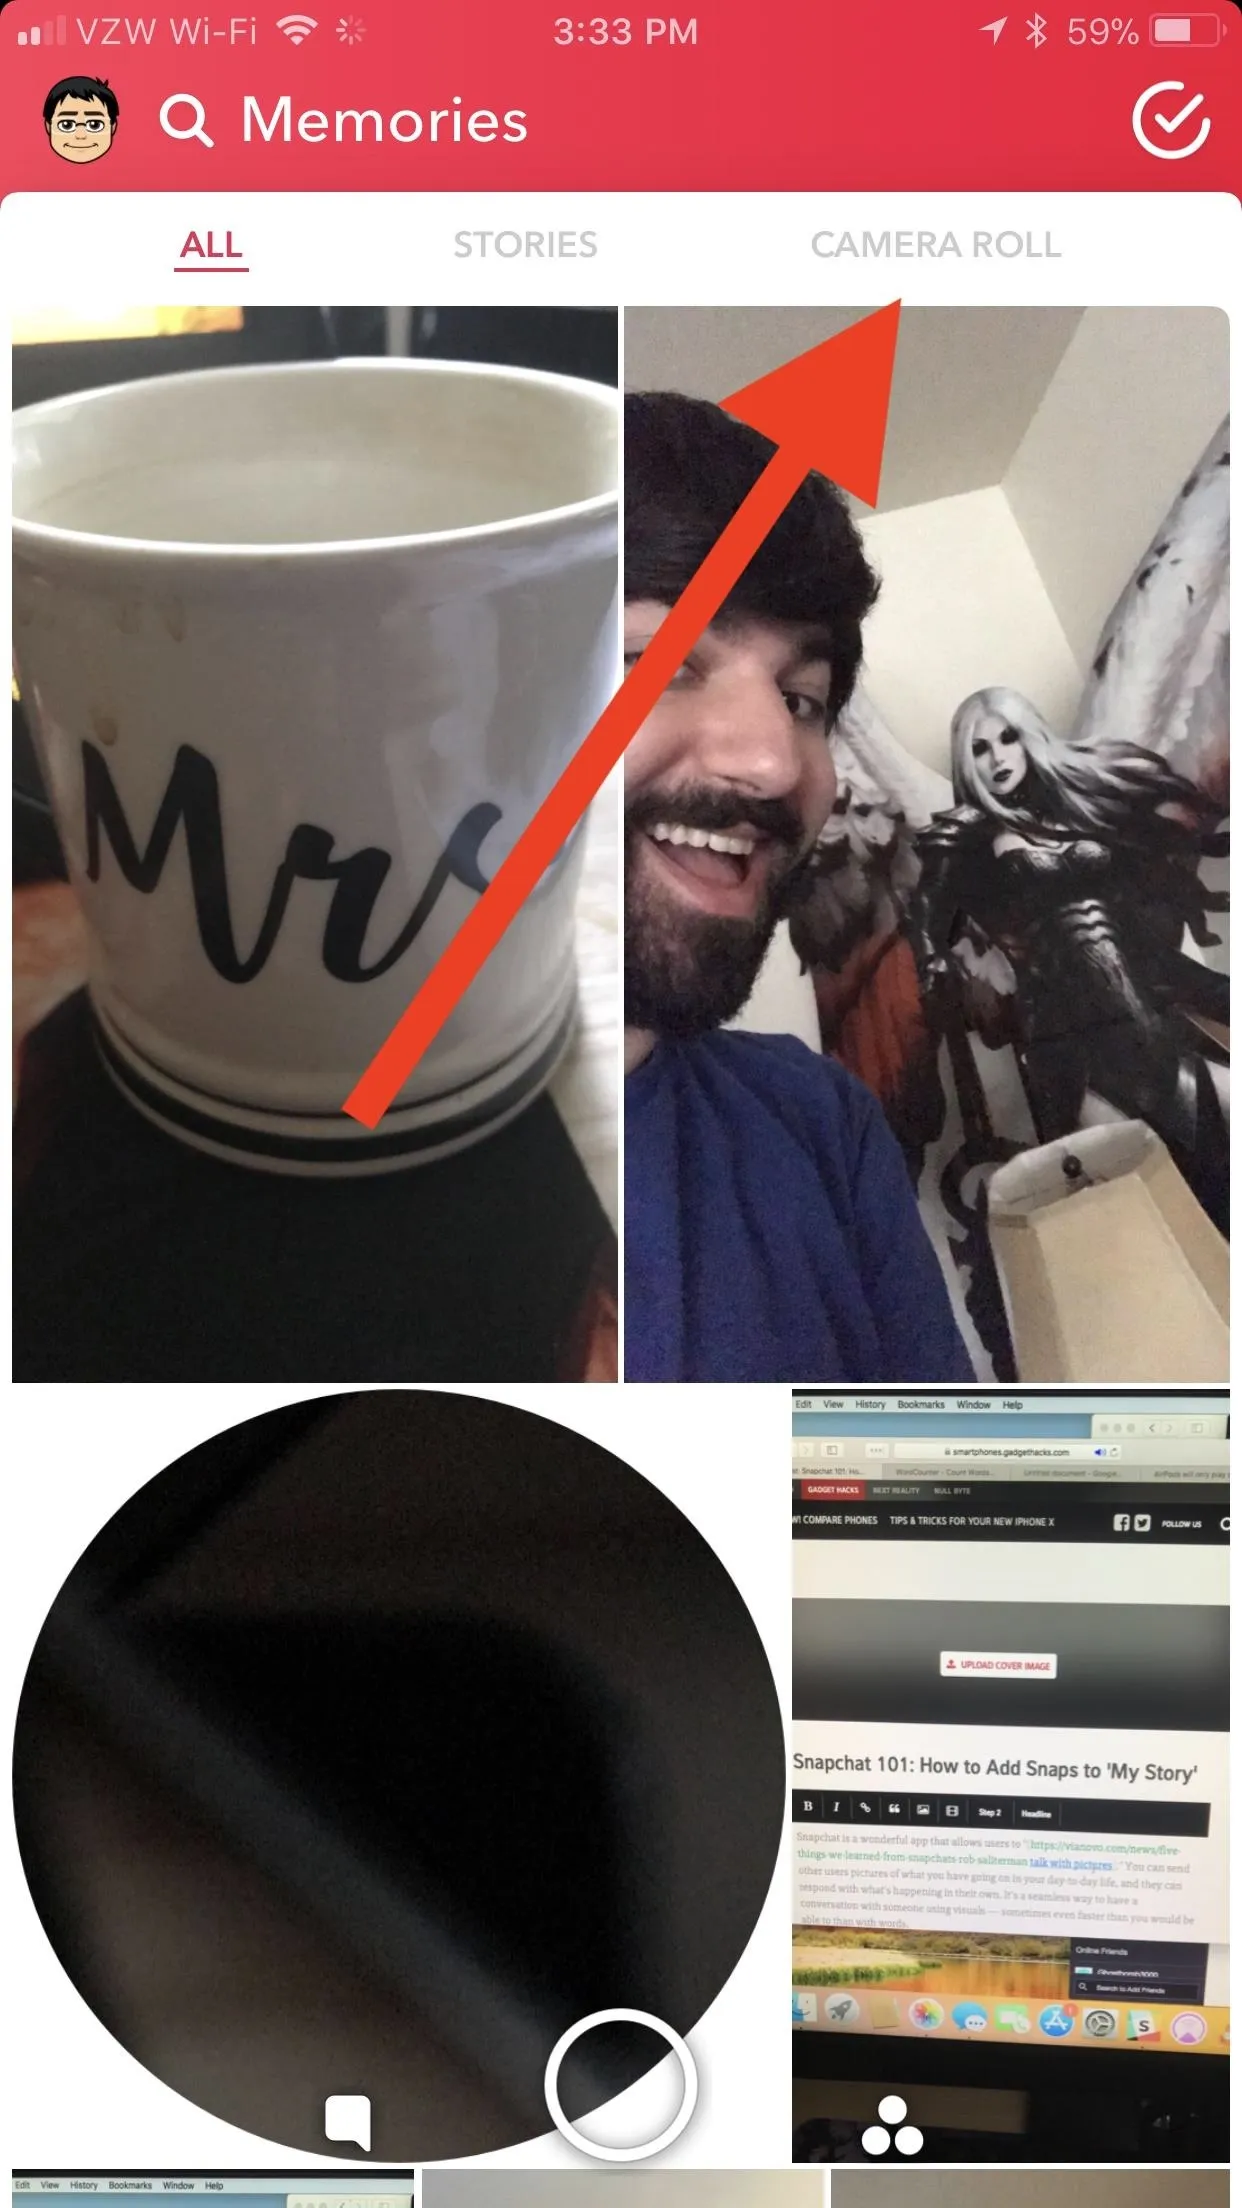
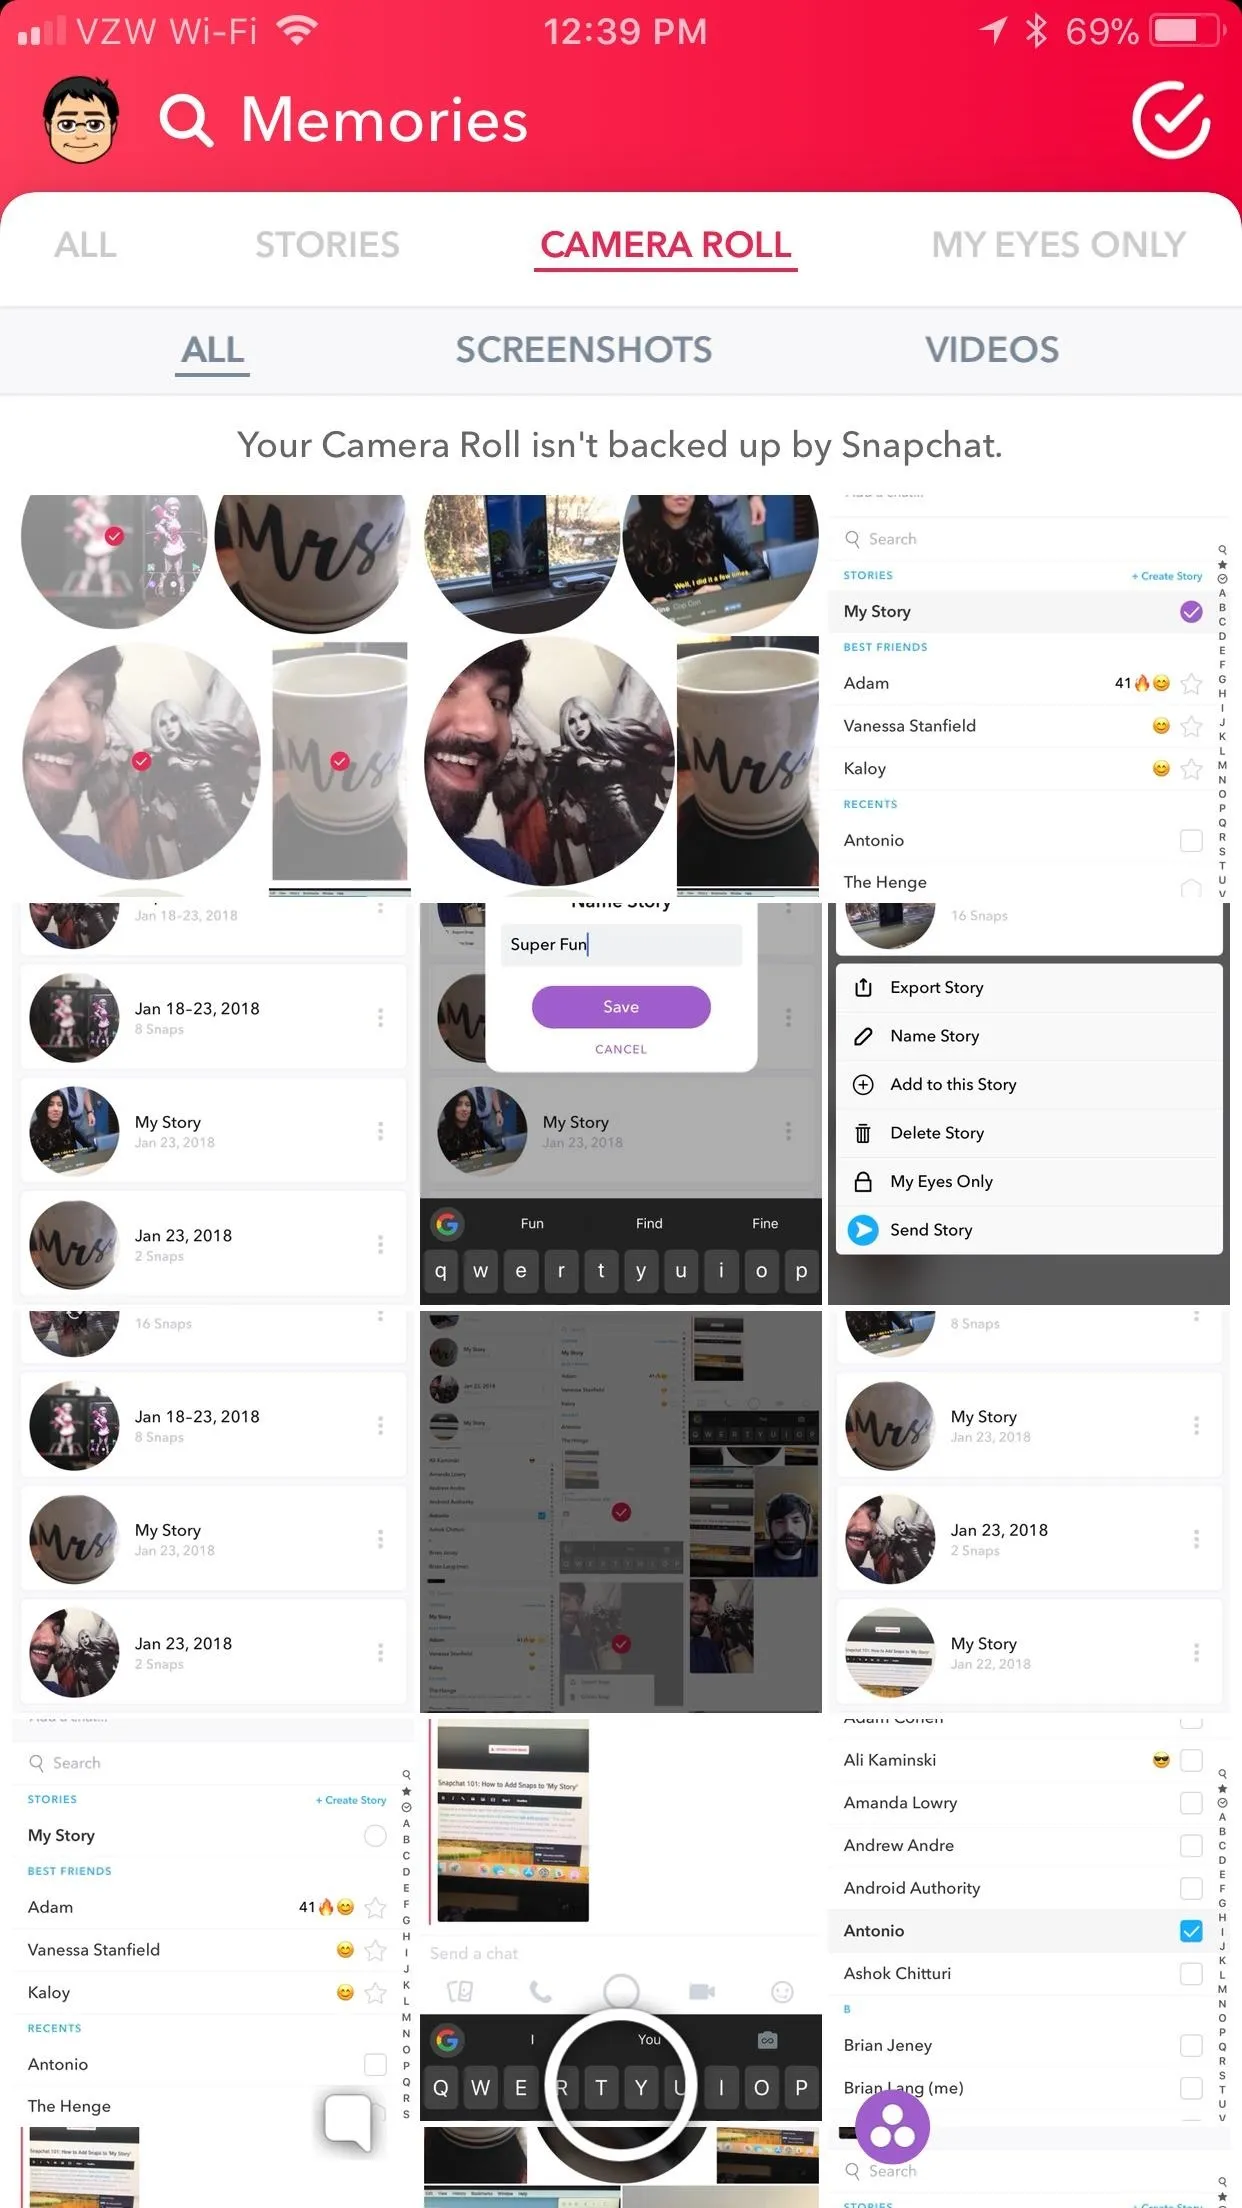
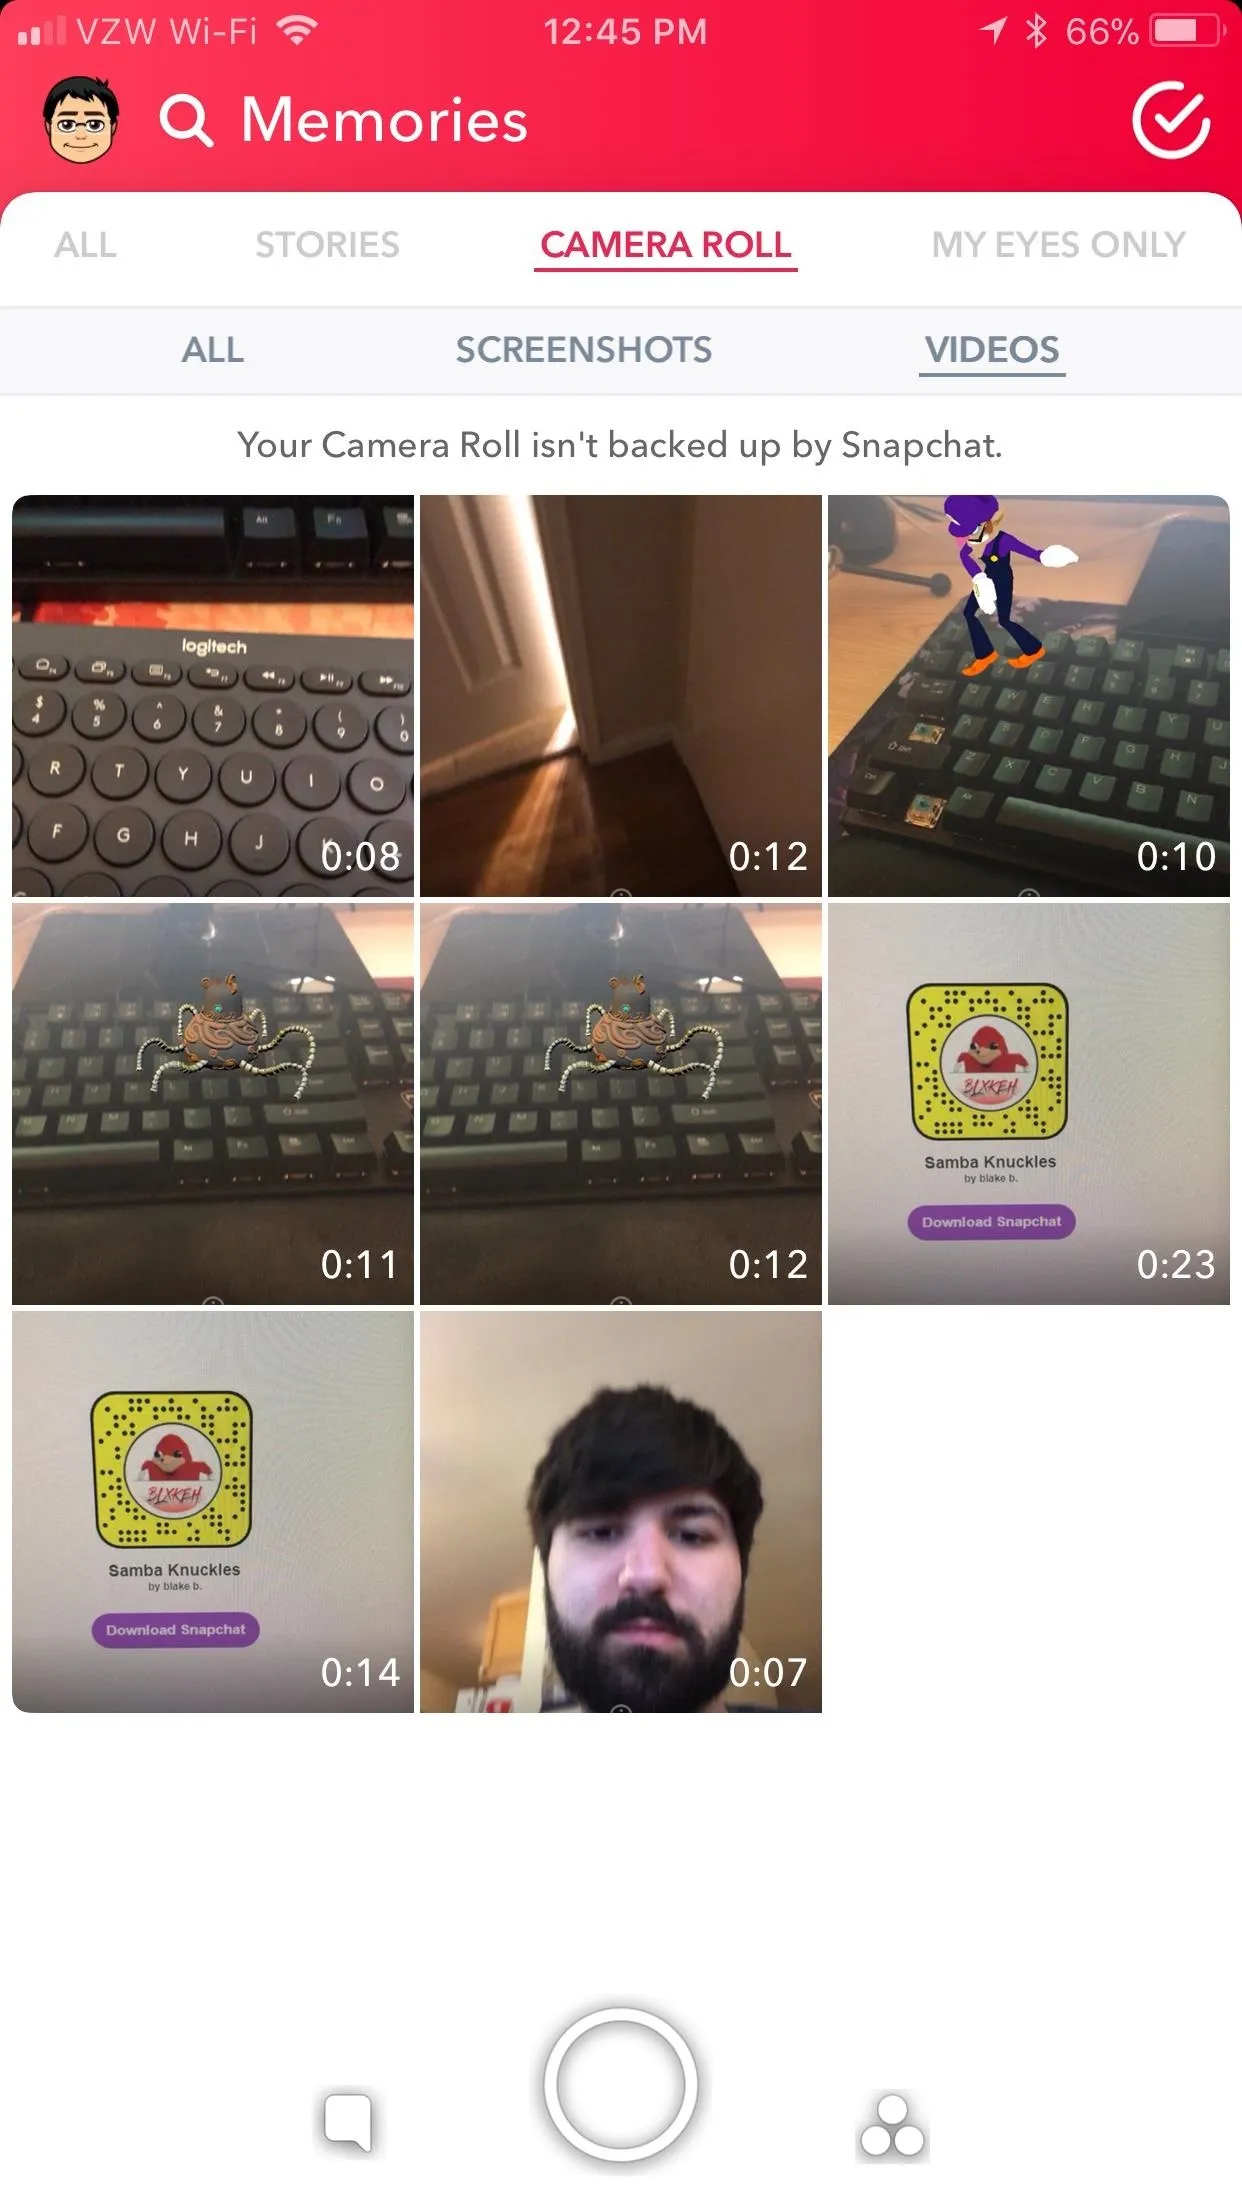
Camera Roll is broken up into three self-explanatory sub headers: All, Screenshots, and Videos. There's nothing special or unique about these headers, but they can help you sift through your junk more quickly. All is comprised of everything on your Camera Roll. Screenshots is just the screenshots you've taken with your phone. And finally, Videos is the recordings you've taken with your phone.

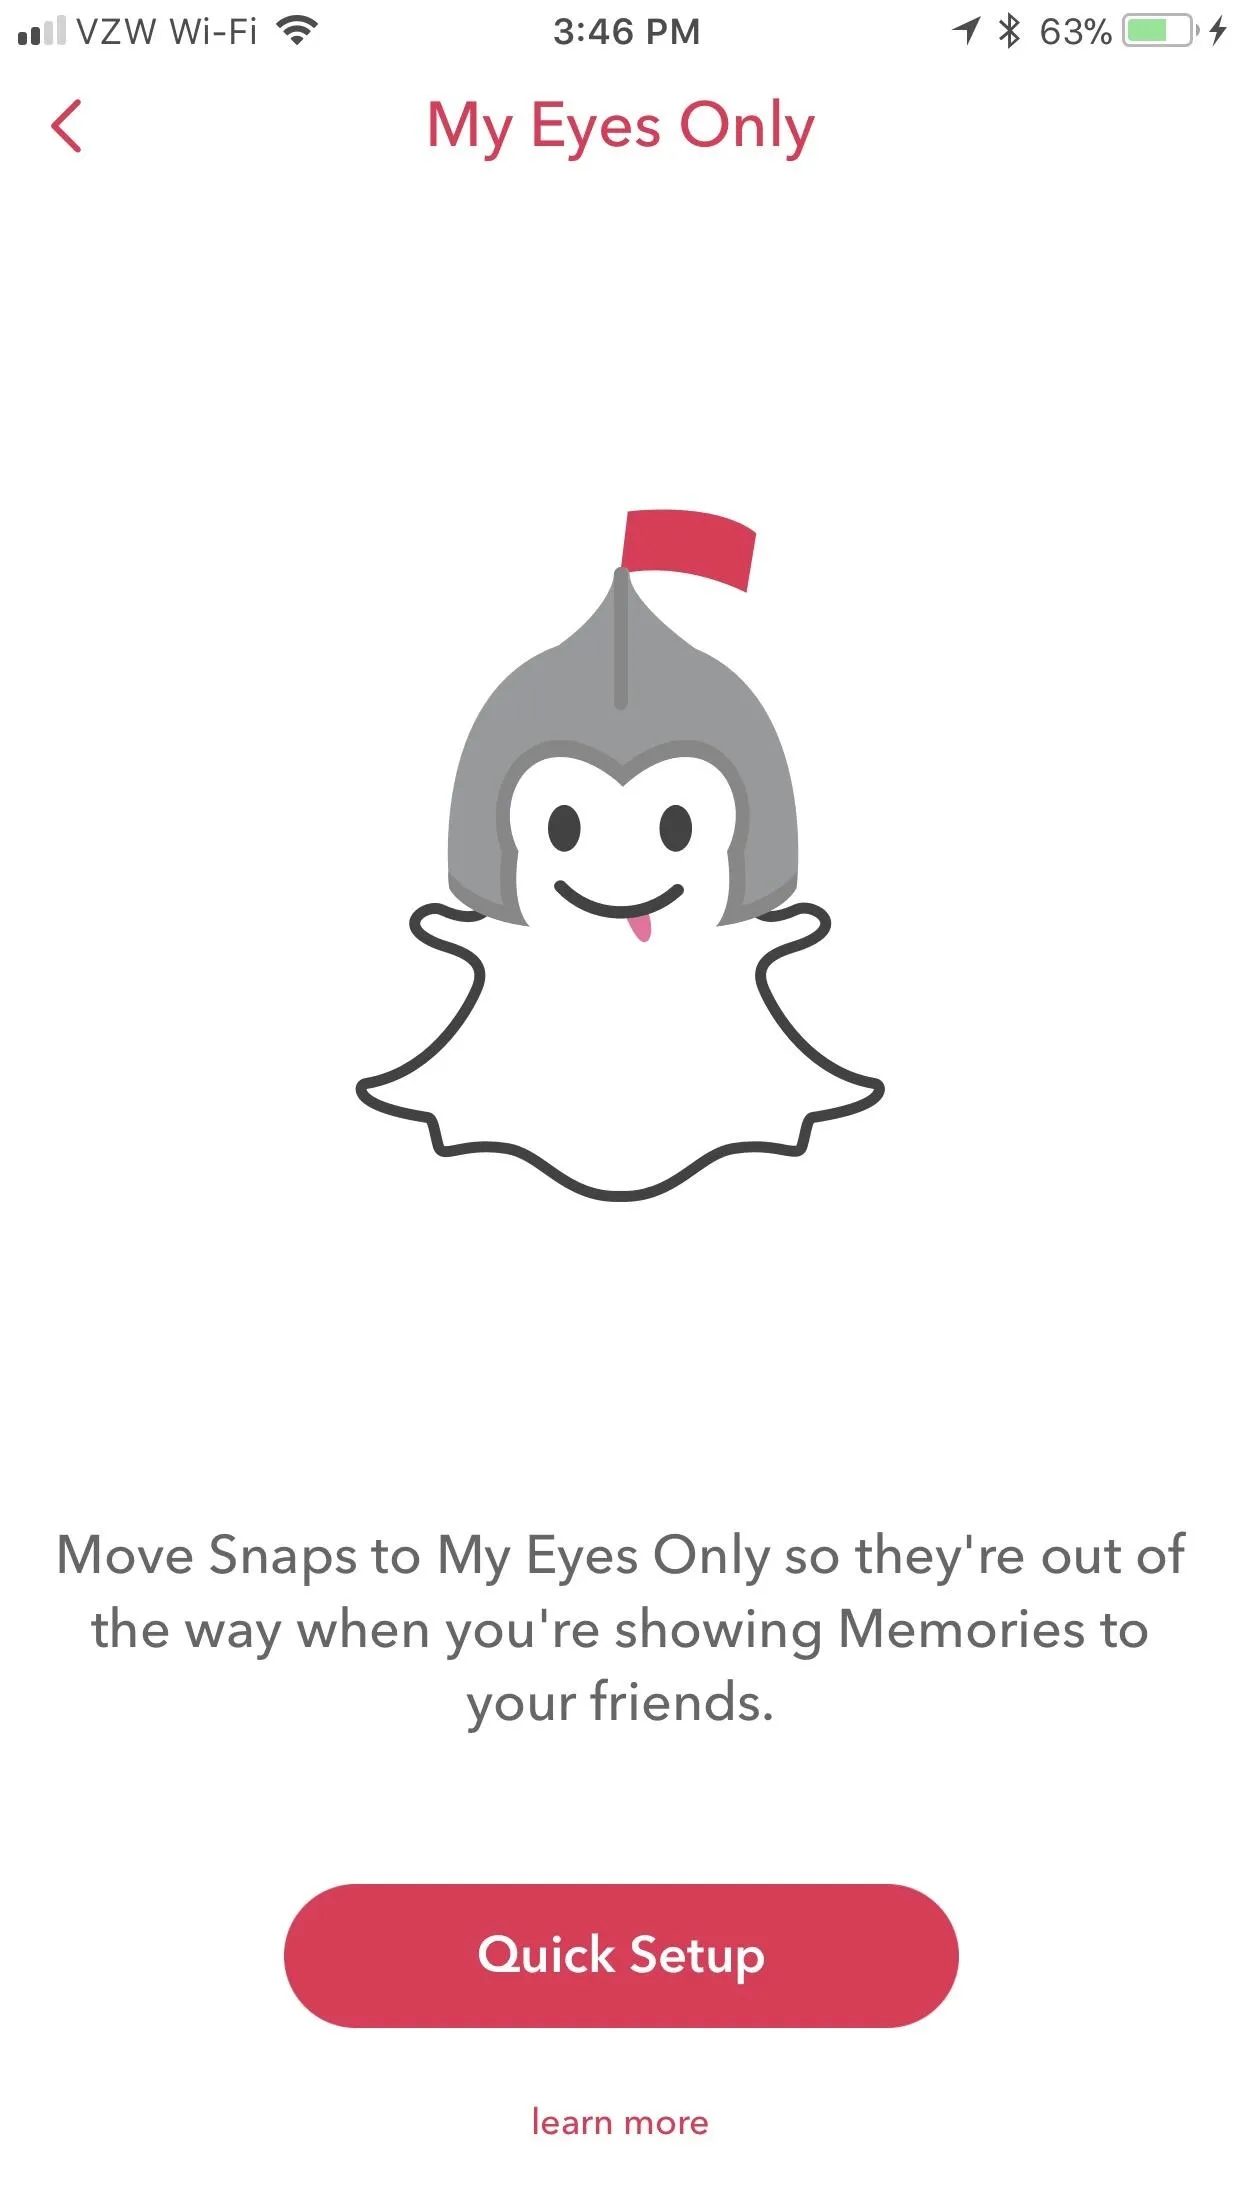
My Eyes Only
My Eyes Only is the most complicated tab, but also the most valuable one. It allows you to stow away sensitive photos behind a PIN or passcode that you don't want others to see. If you haven't accessed it before, it'll ask you to set everything up when you first enter it. First, tap "Quick Setup," to begin.
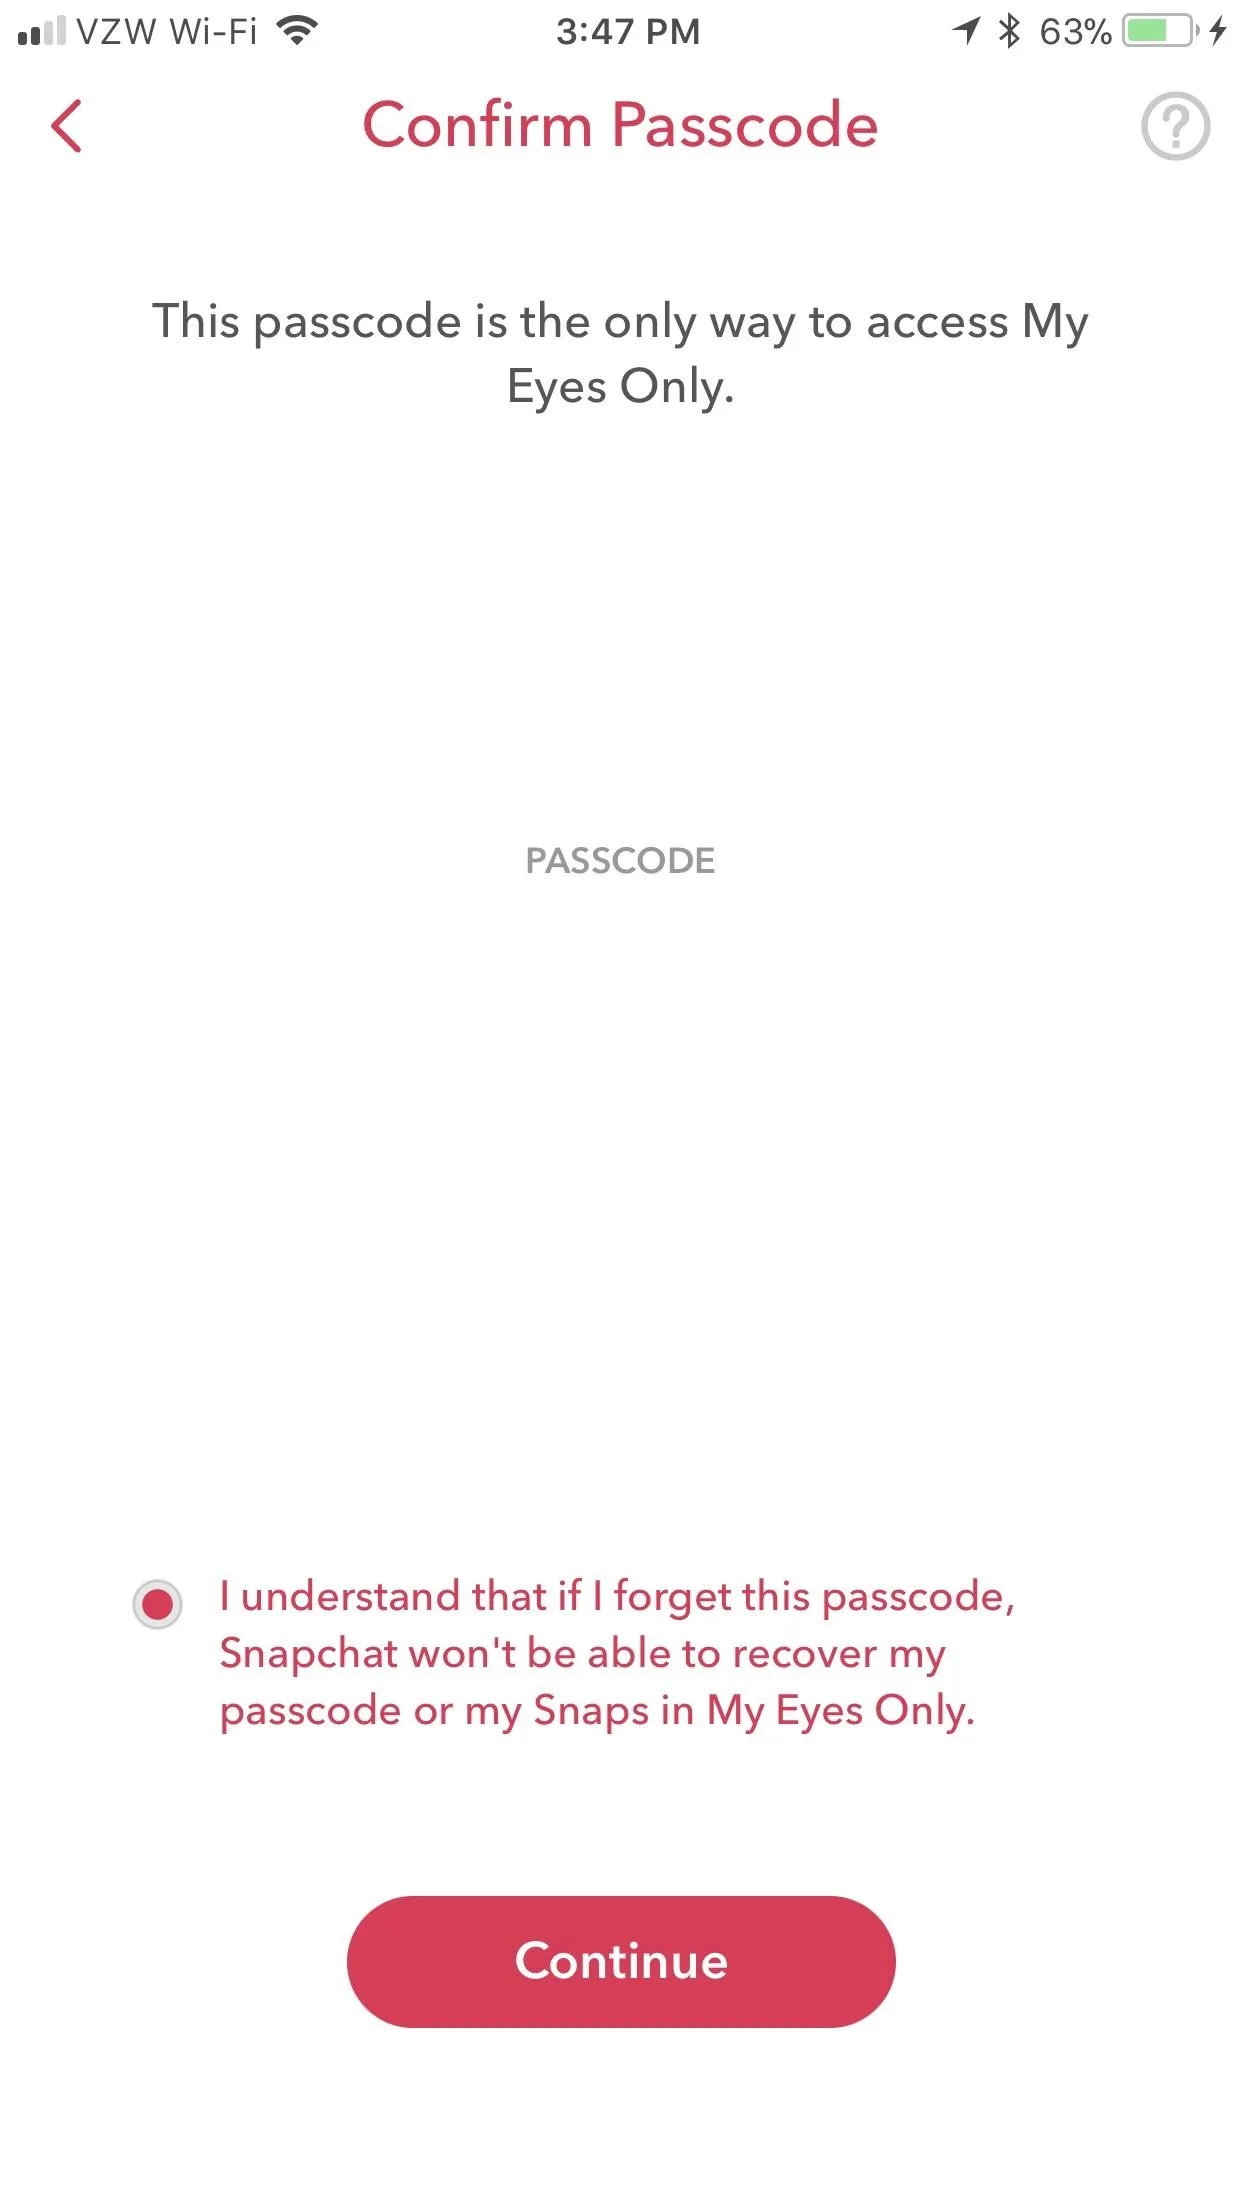
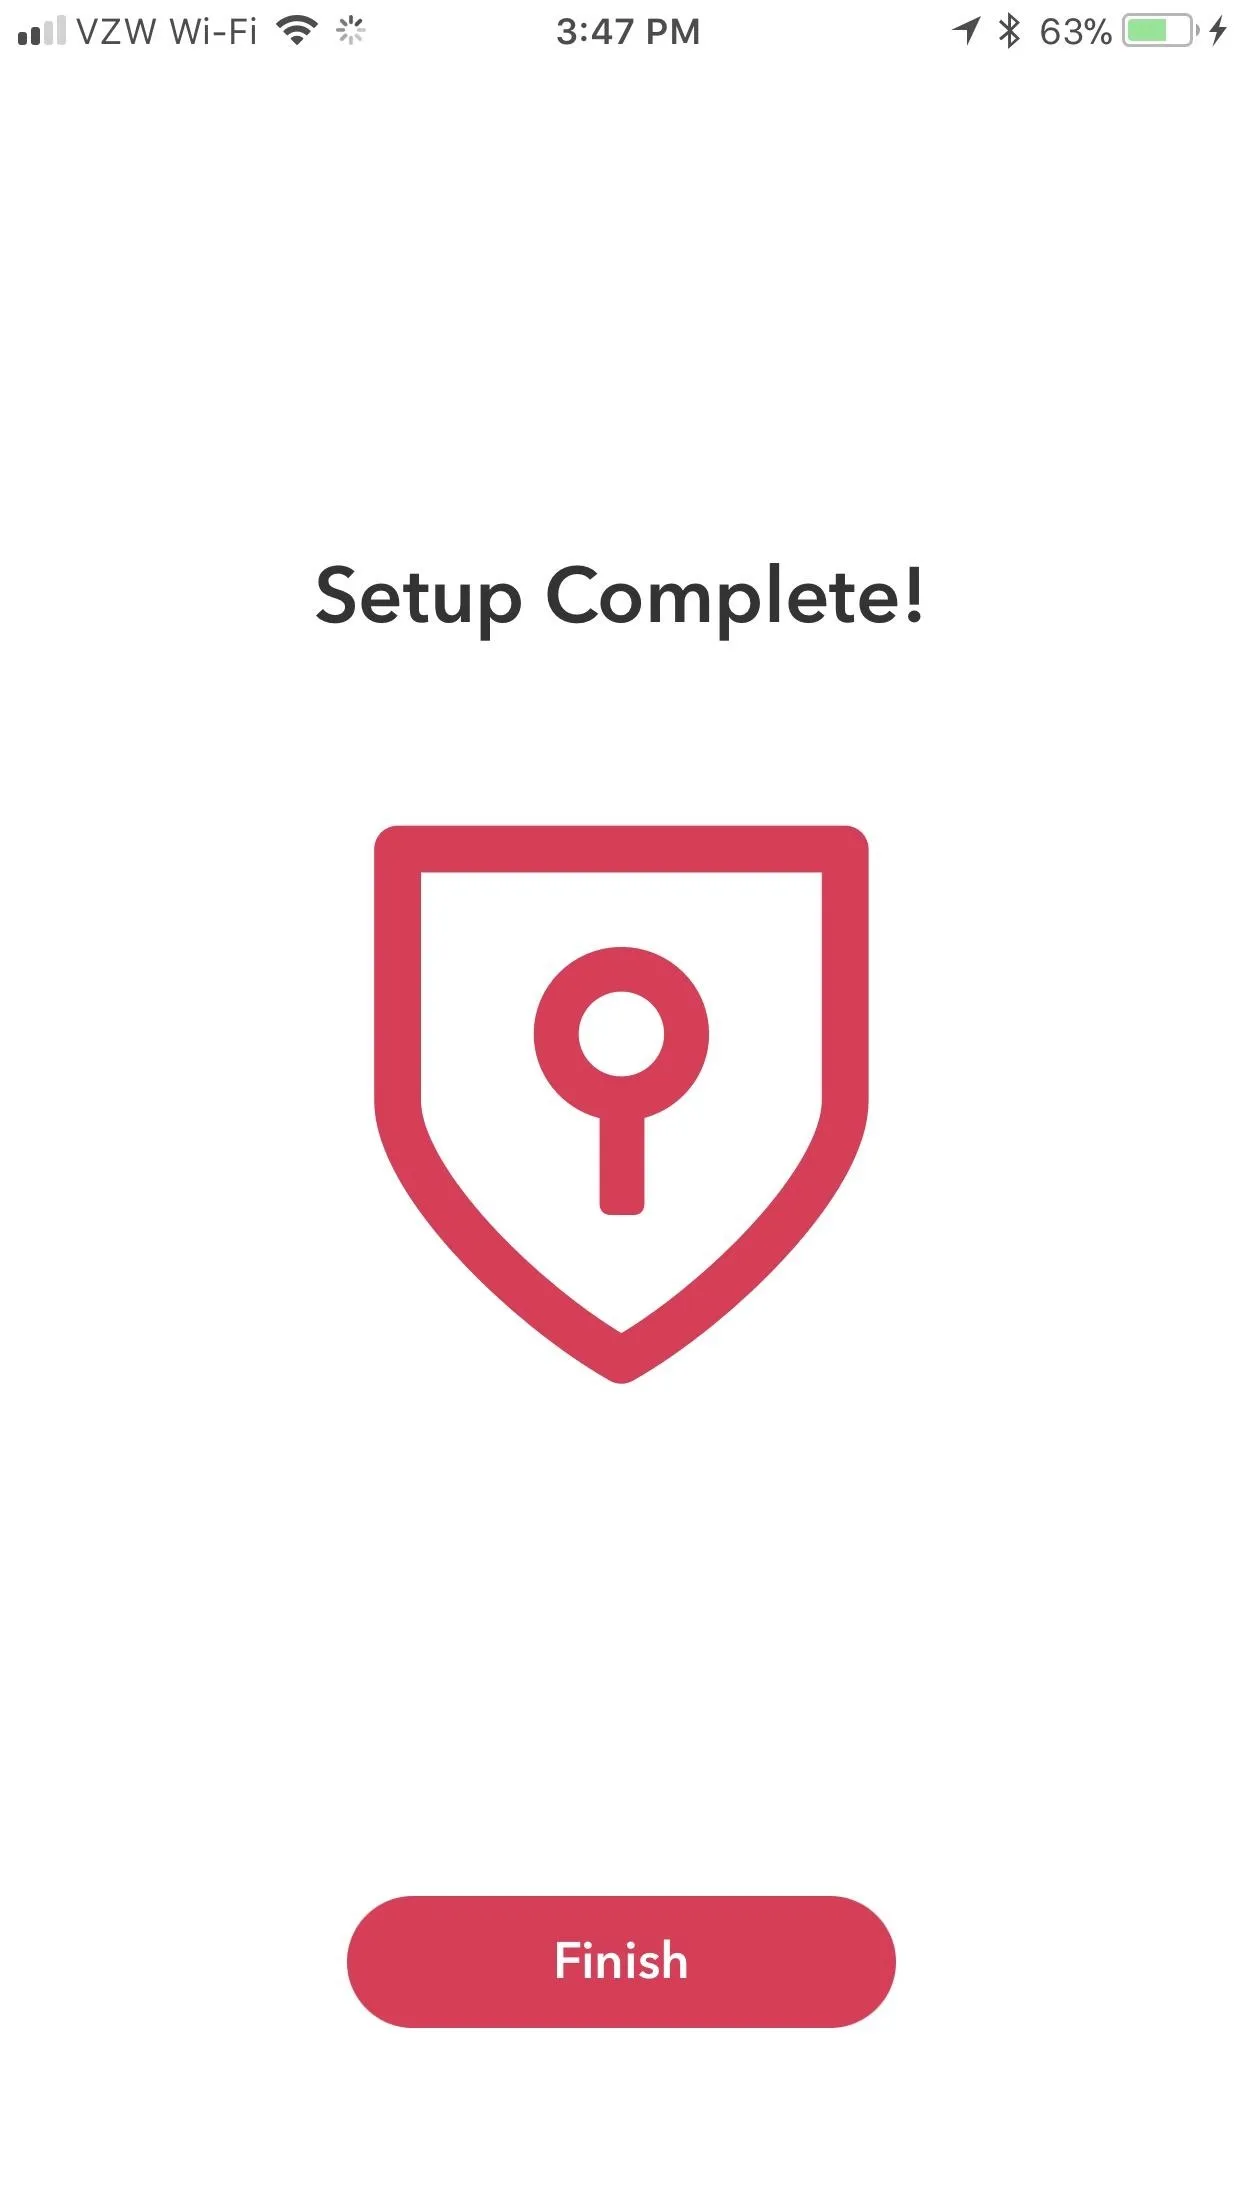
Next, create your passcode, which is basically a PIN. For security reasons, you shouldn't use the same PIN you use on your phone's lock screen (if you have one, that is). Confirm your My Eyes Only passcode by entering it in again. This next screen will display your passcode, so tick the box next to "I understand..." on this screen, then hit "Continue." The last screen will say "Setup Complete!" Tap "Finish" to complete the setup process.
Once that's done, banishing snaps behind the walls of My Eyes Only is pretty easy — we'll cover it in subsequent steps.
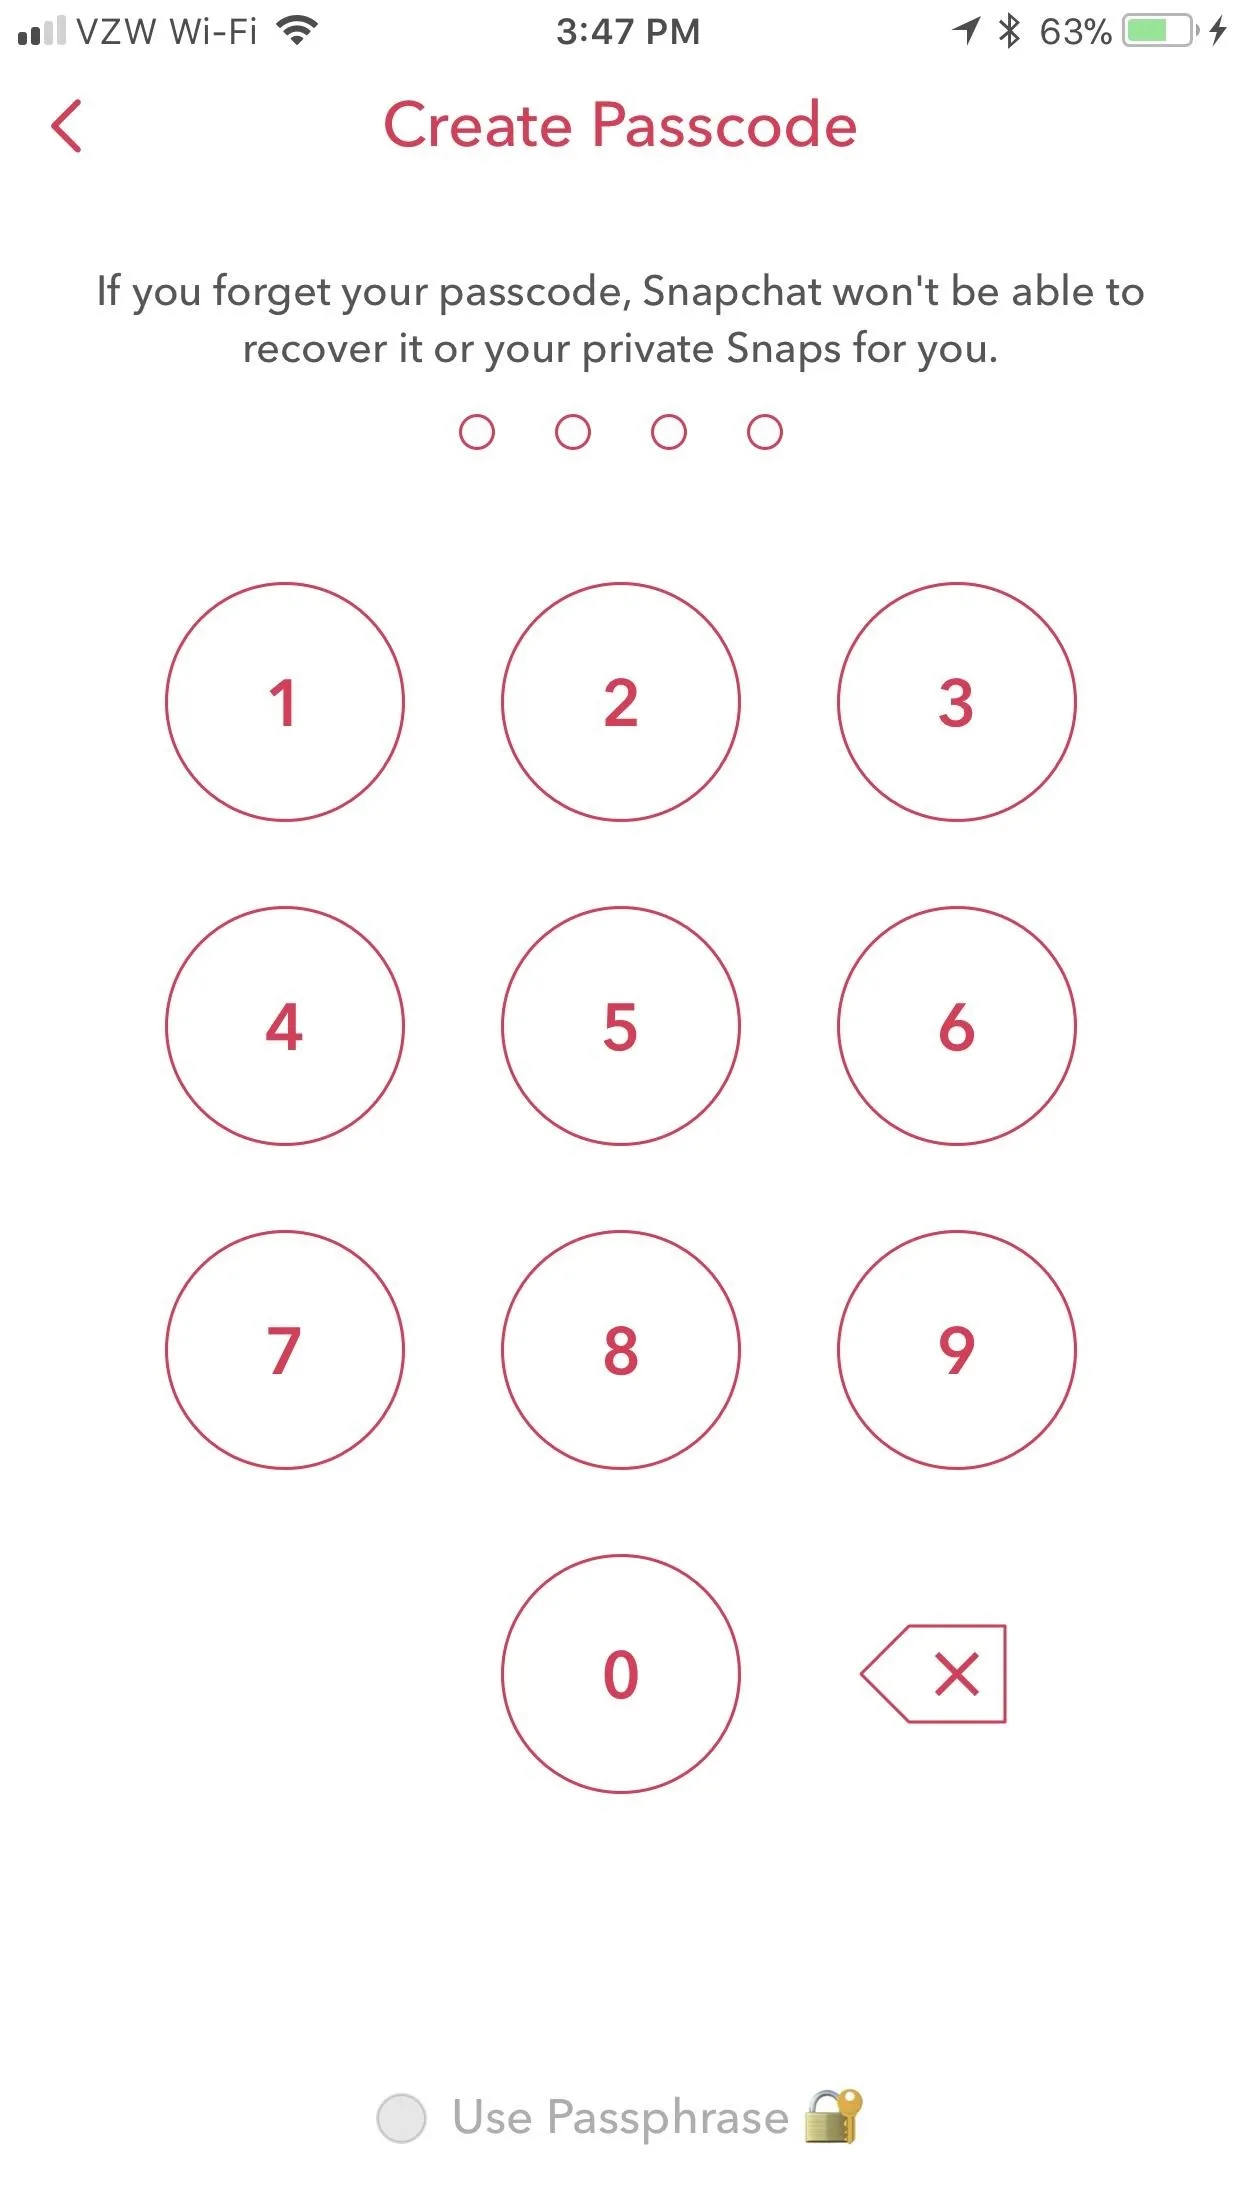
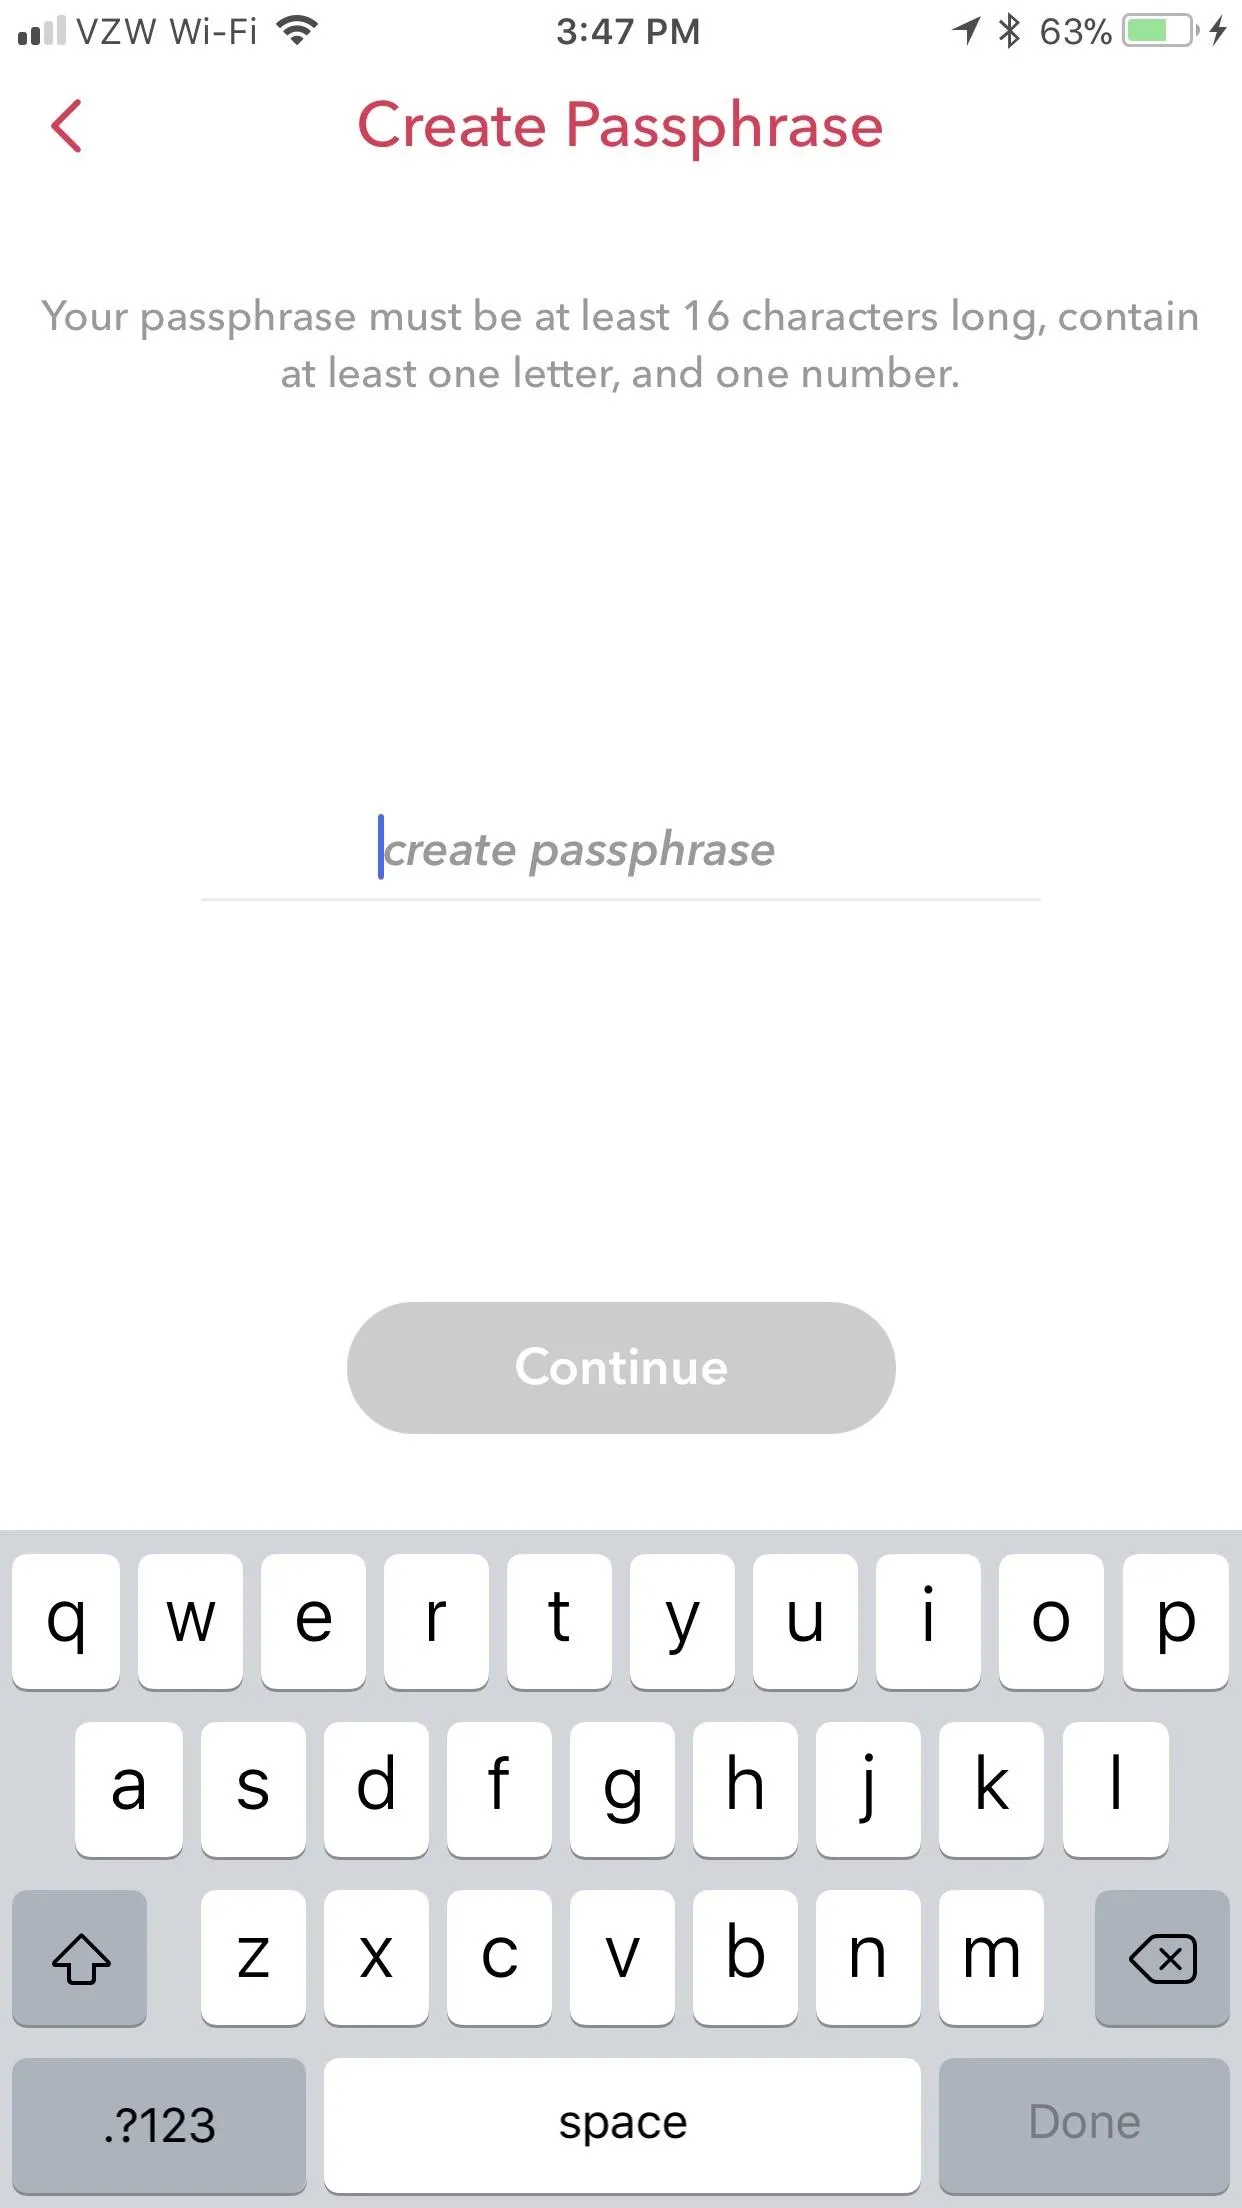
If you'd rather use a phrase, tap "Use Passphrase" at the bottom of the first screen where you'd otherwise create a passcode. Tap "Continue" to move forward with the passphrase-creation process, or hit "Cancel" if you'd rather not. The rest of the steps mirror the above, except you're using a phrase instead of a PIN.


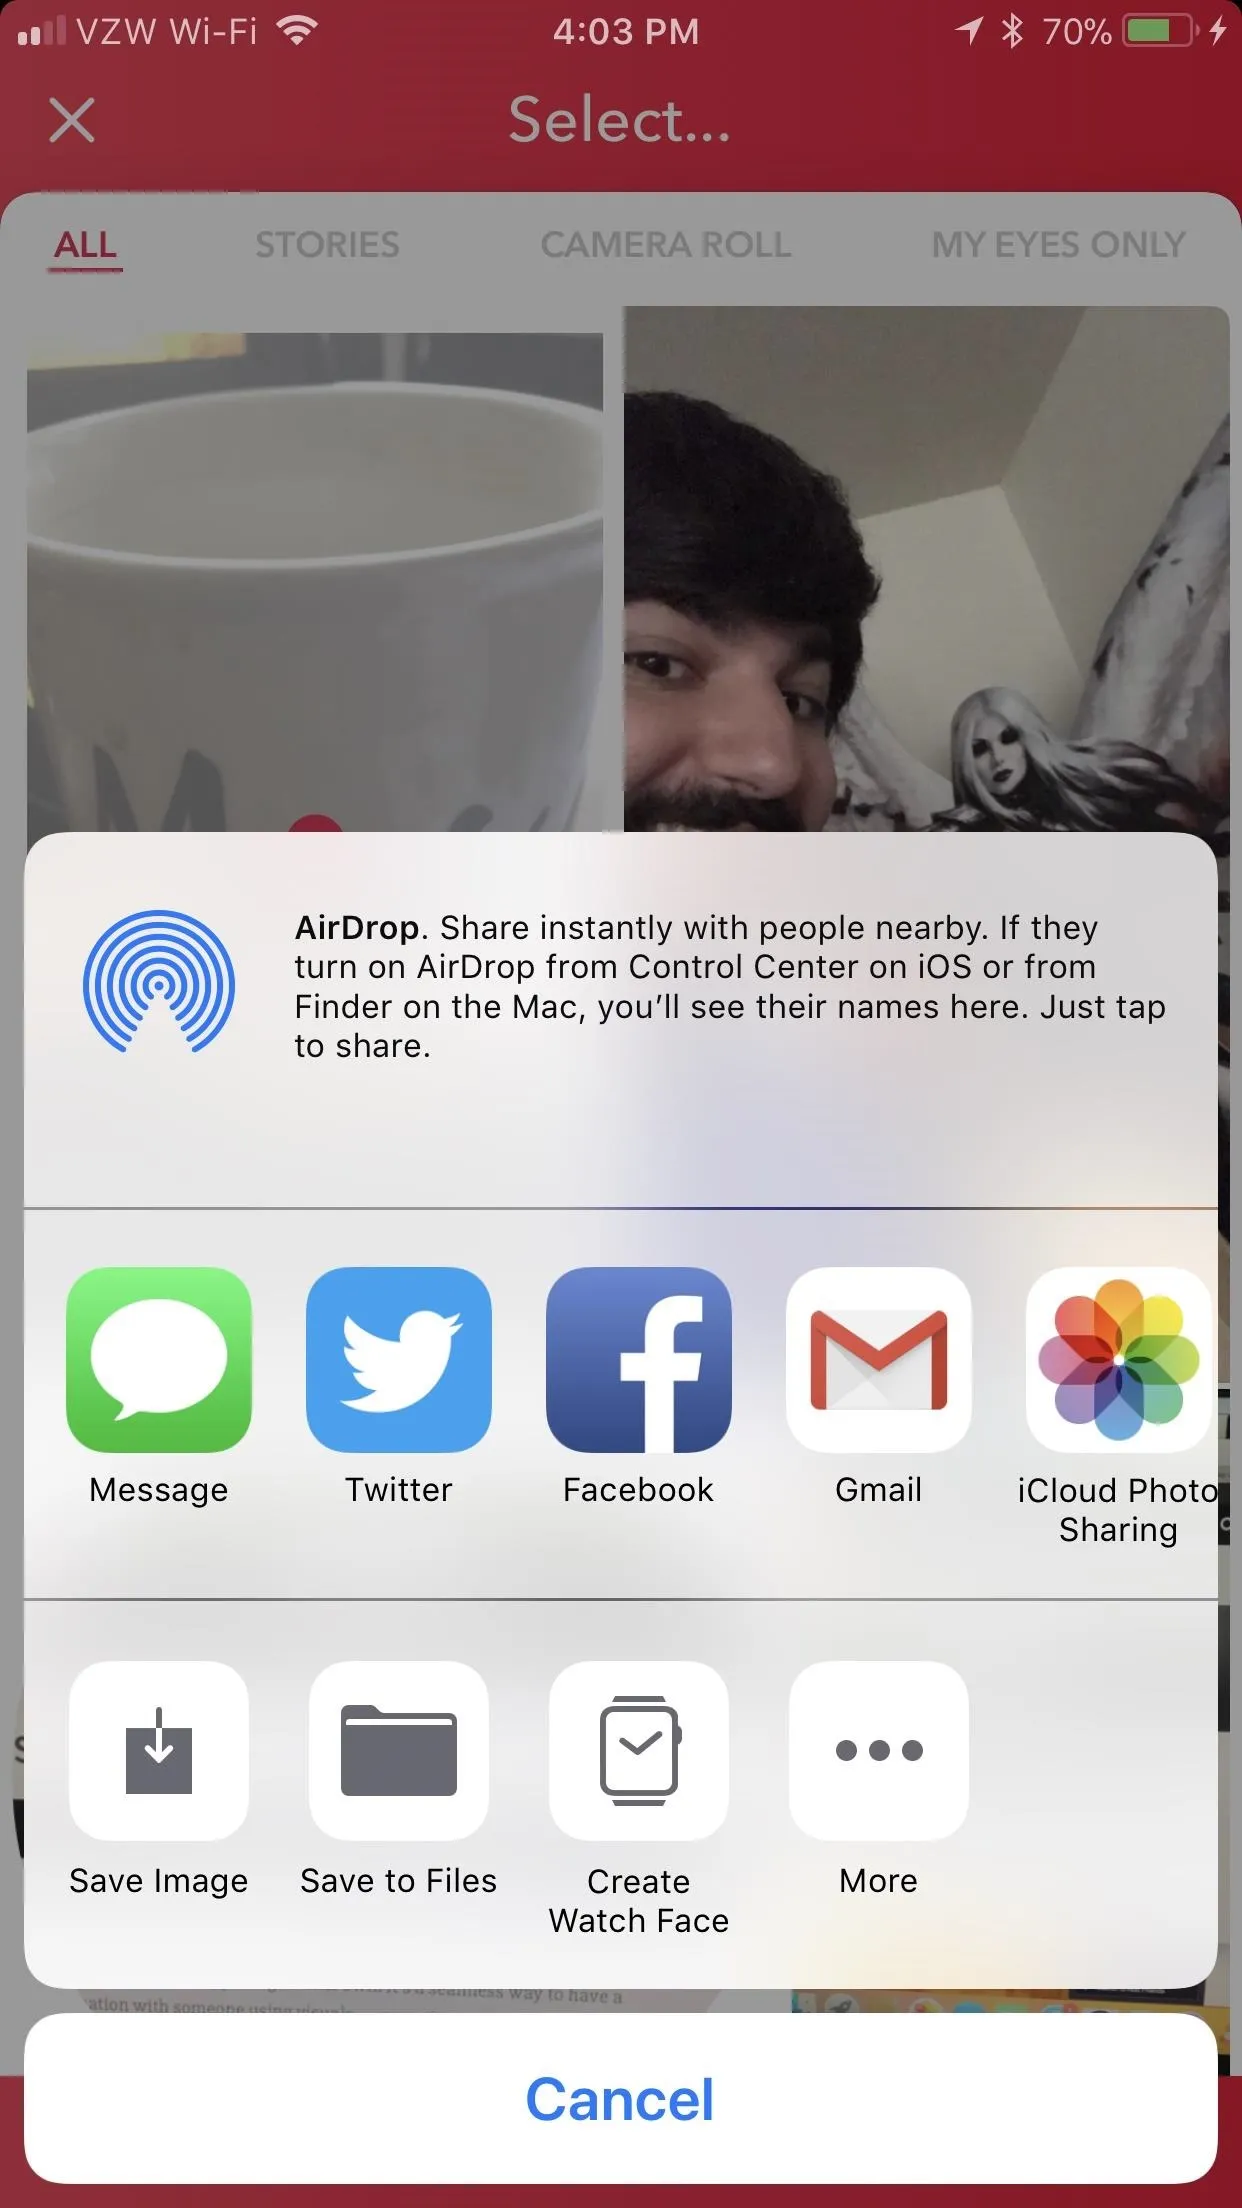
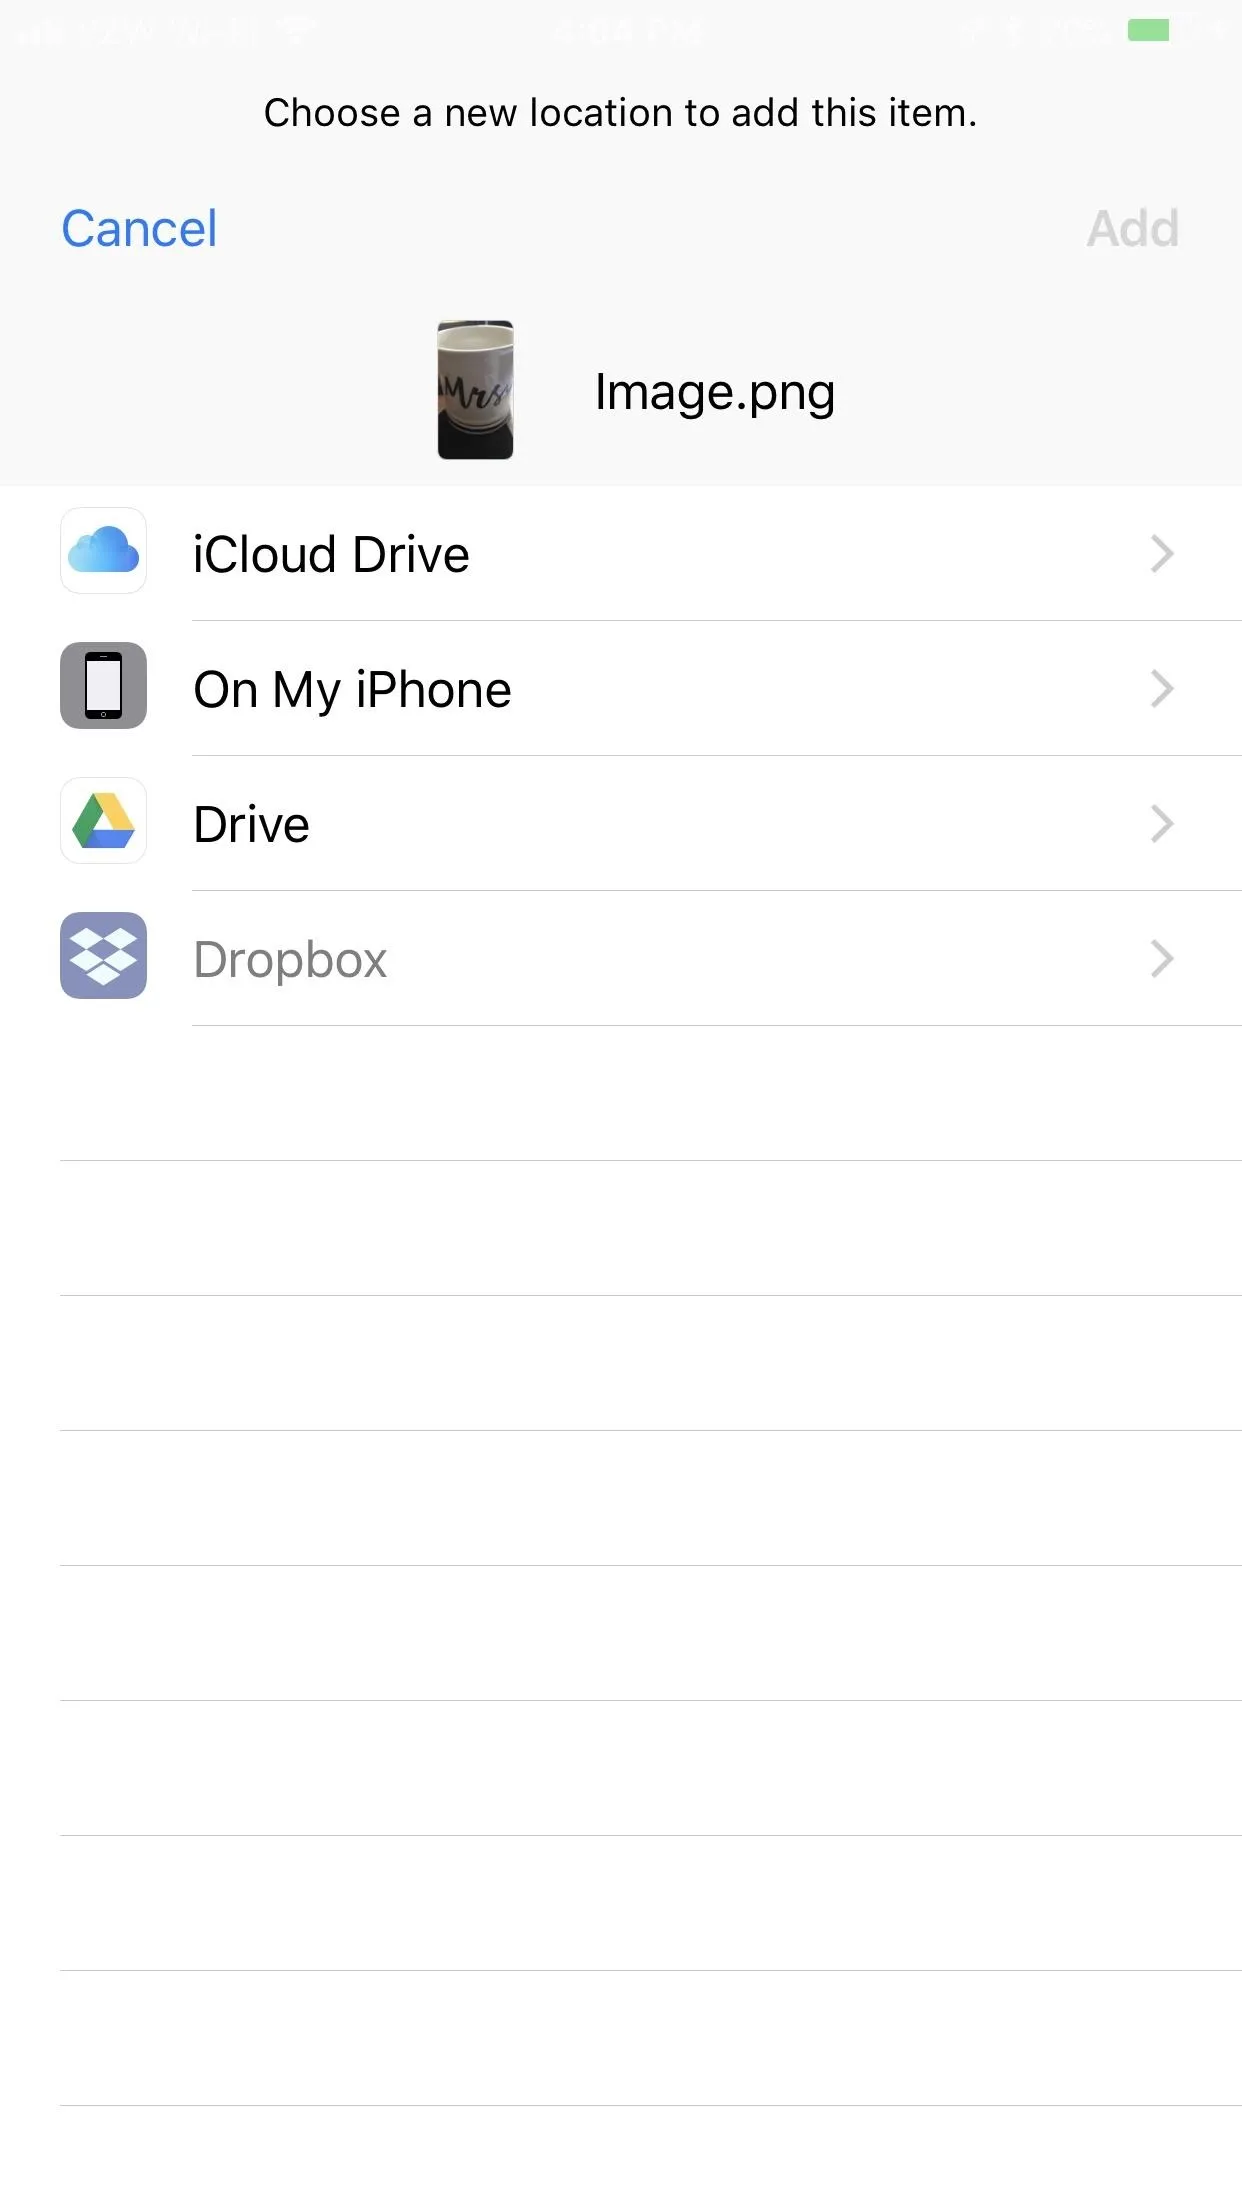
Export Snaps in Memories
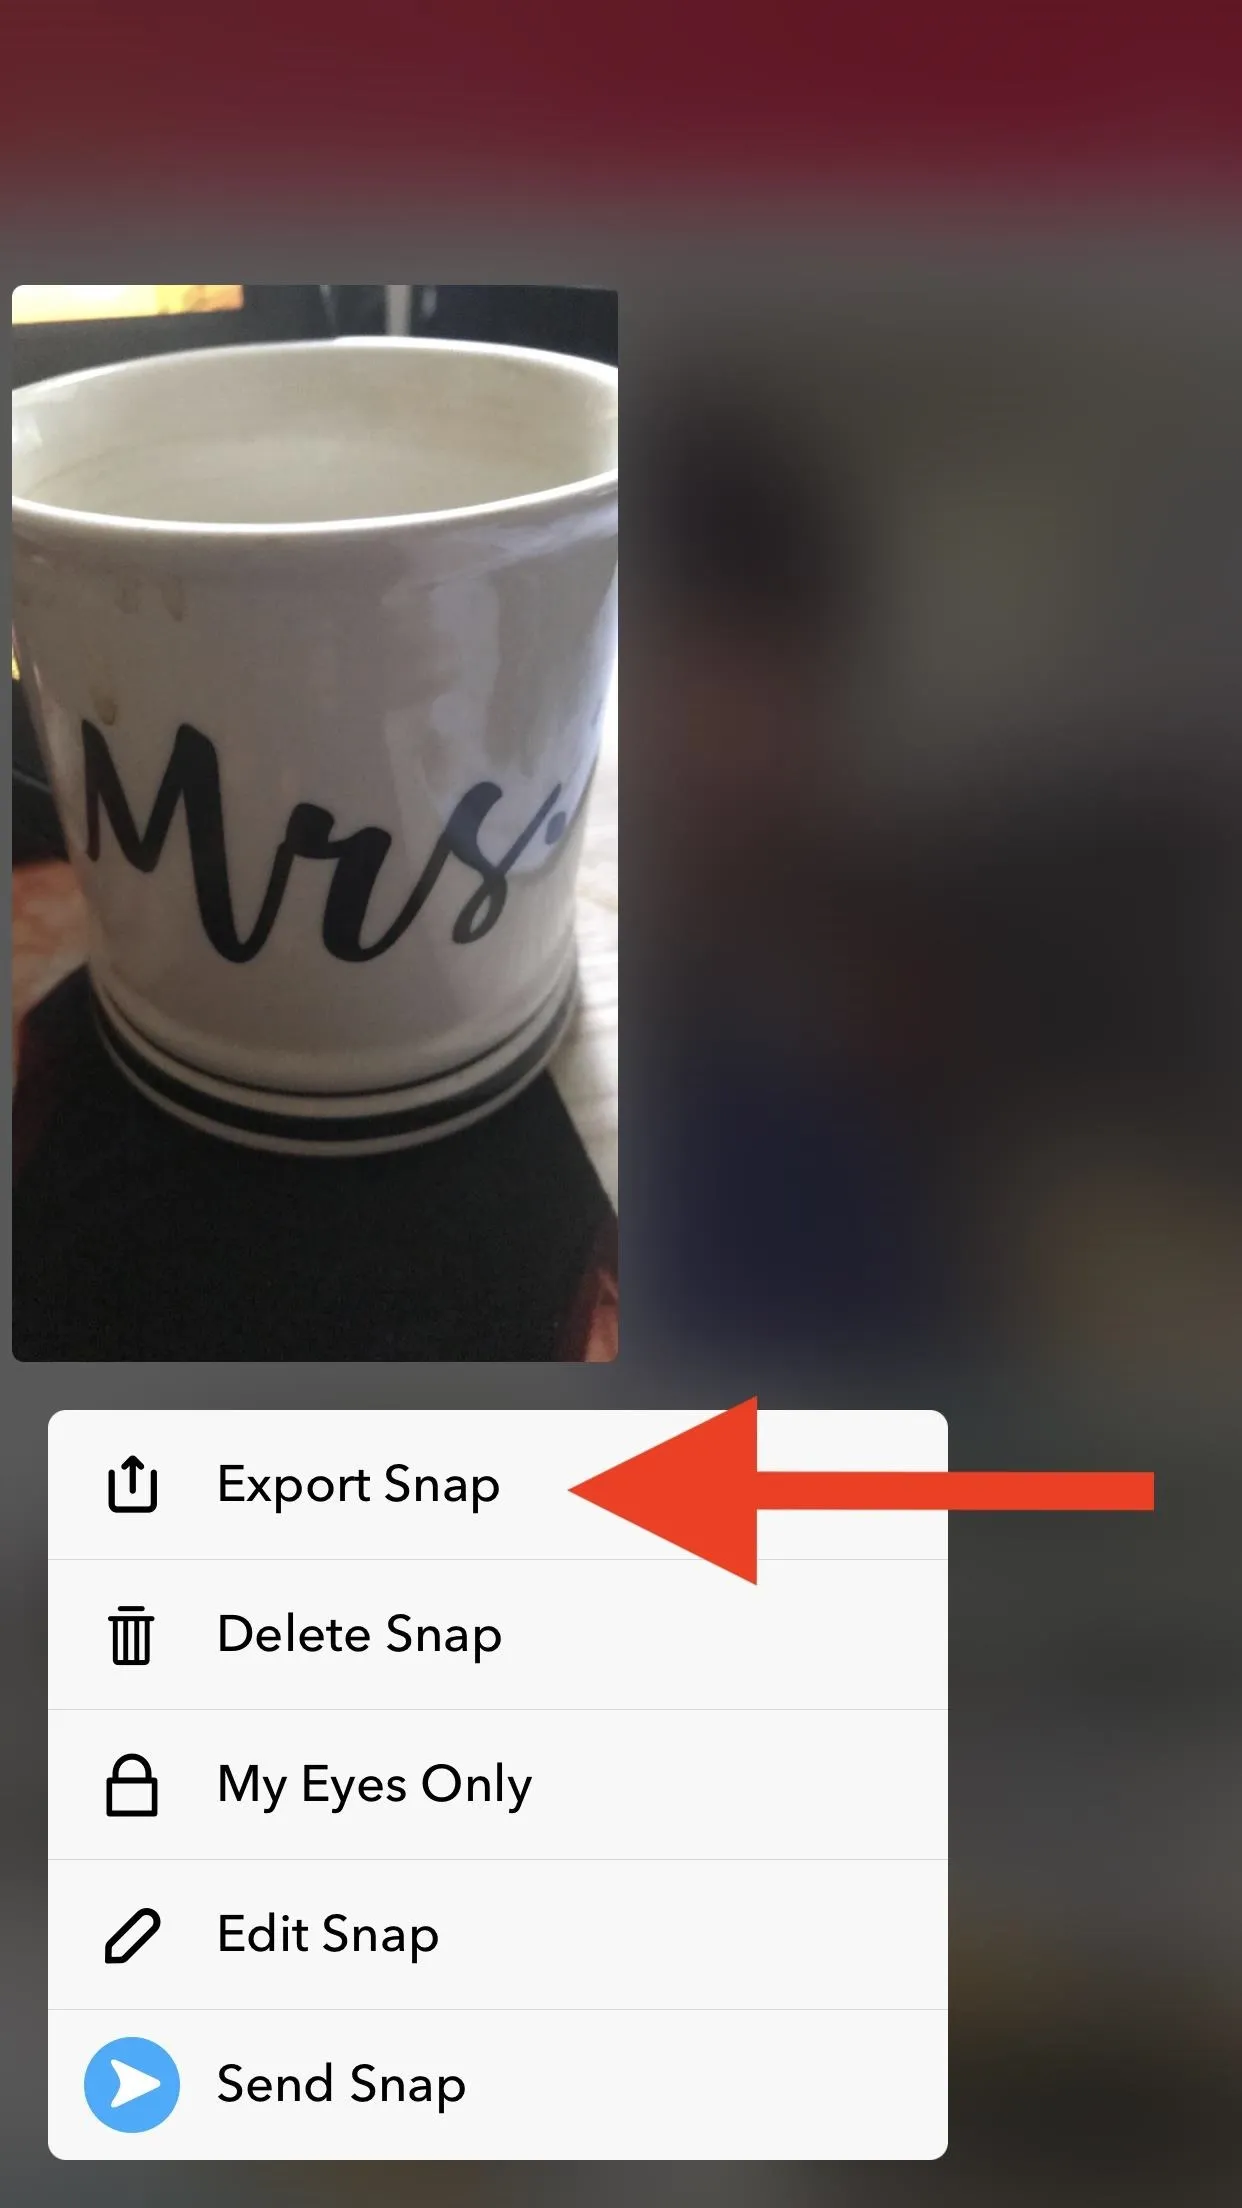
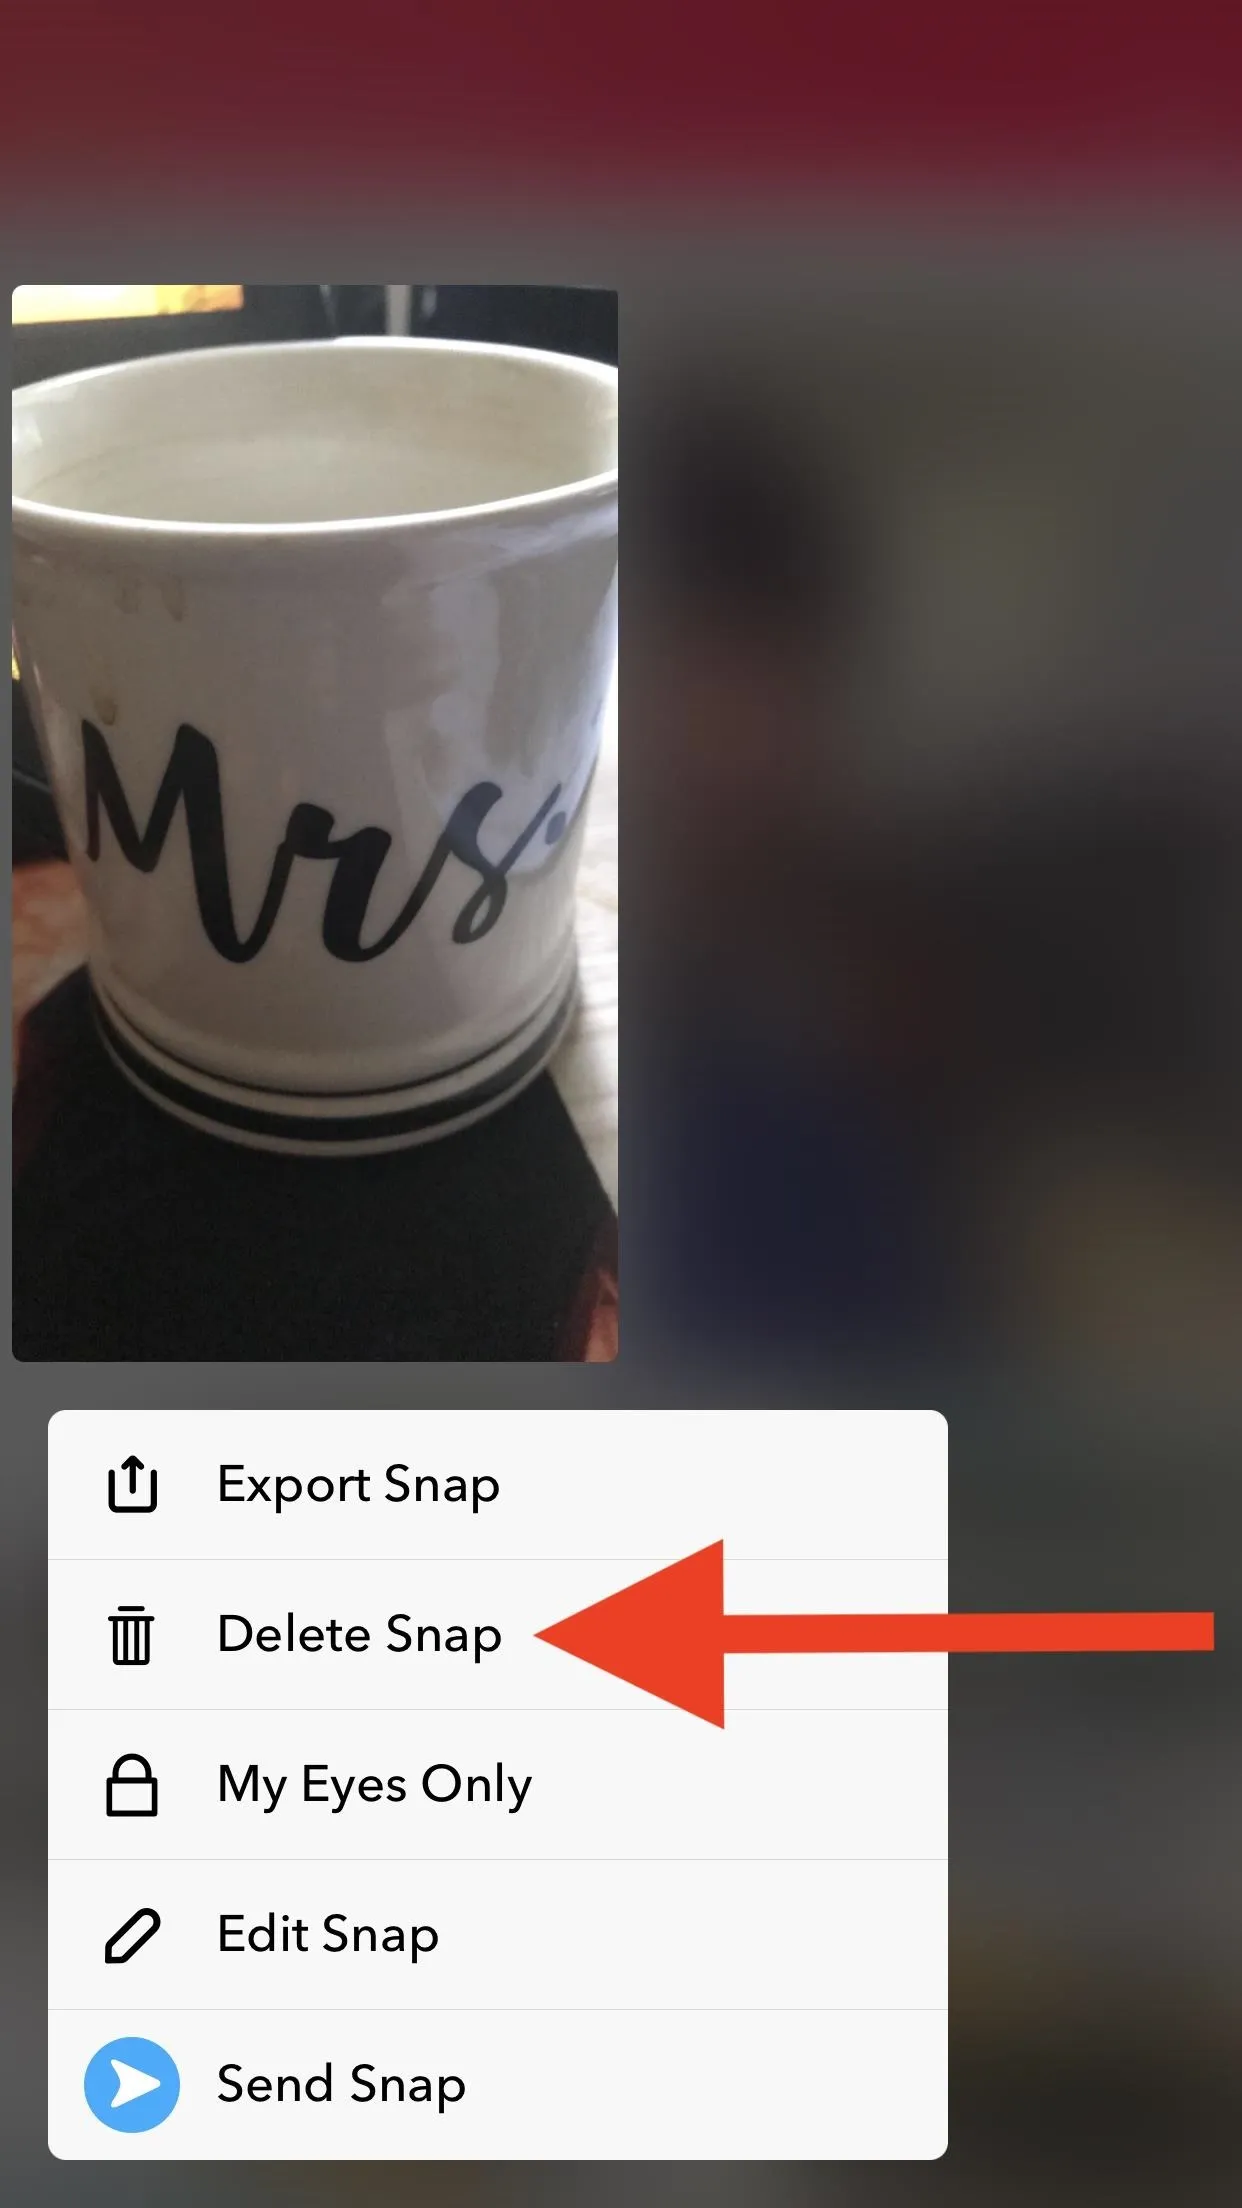
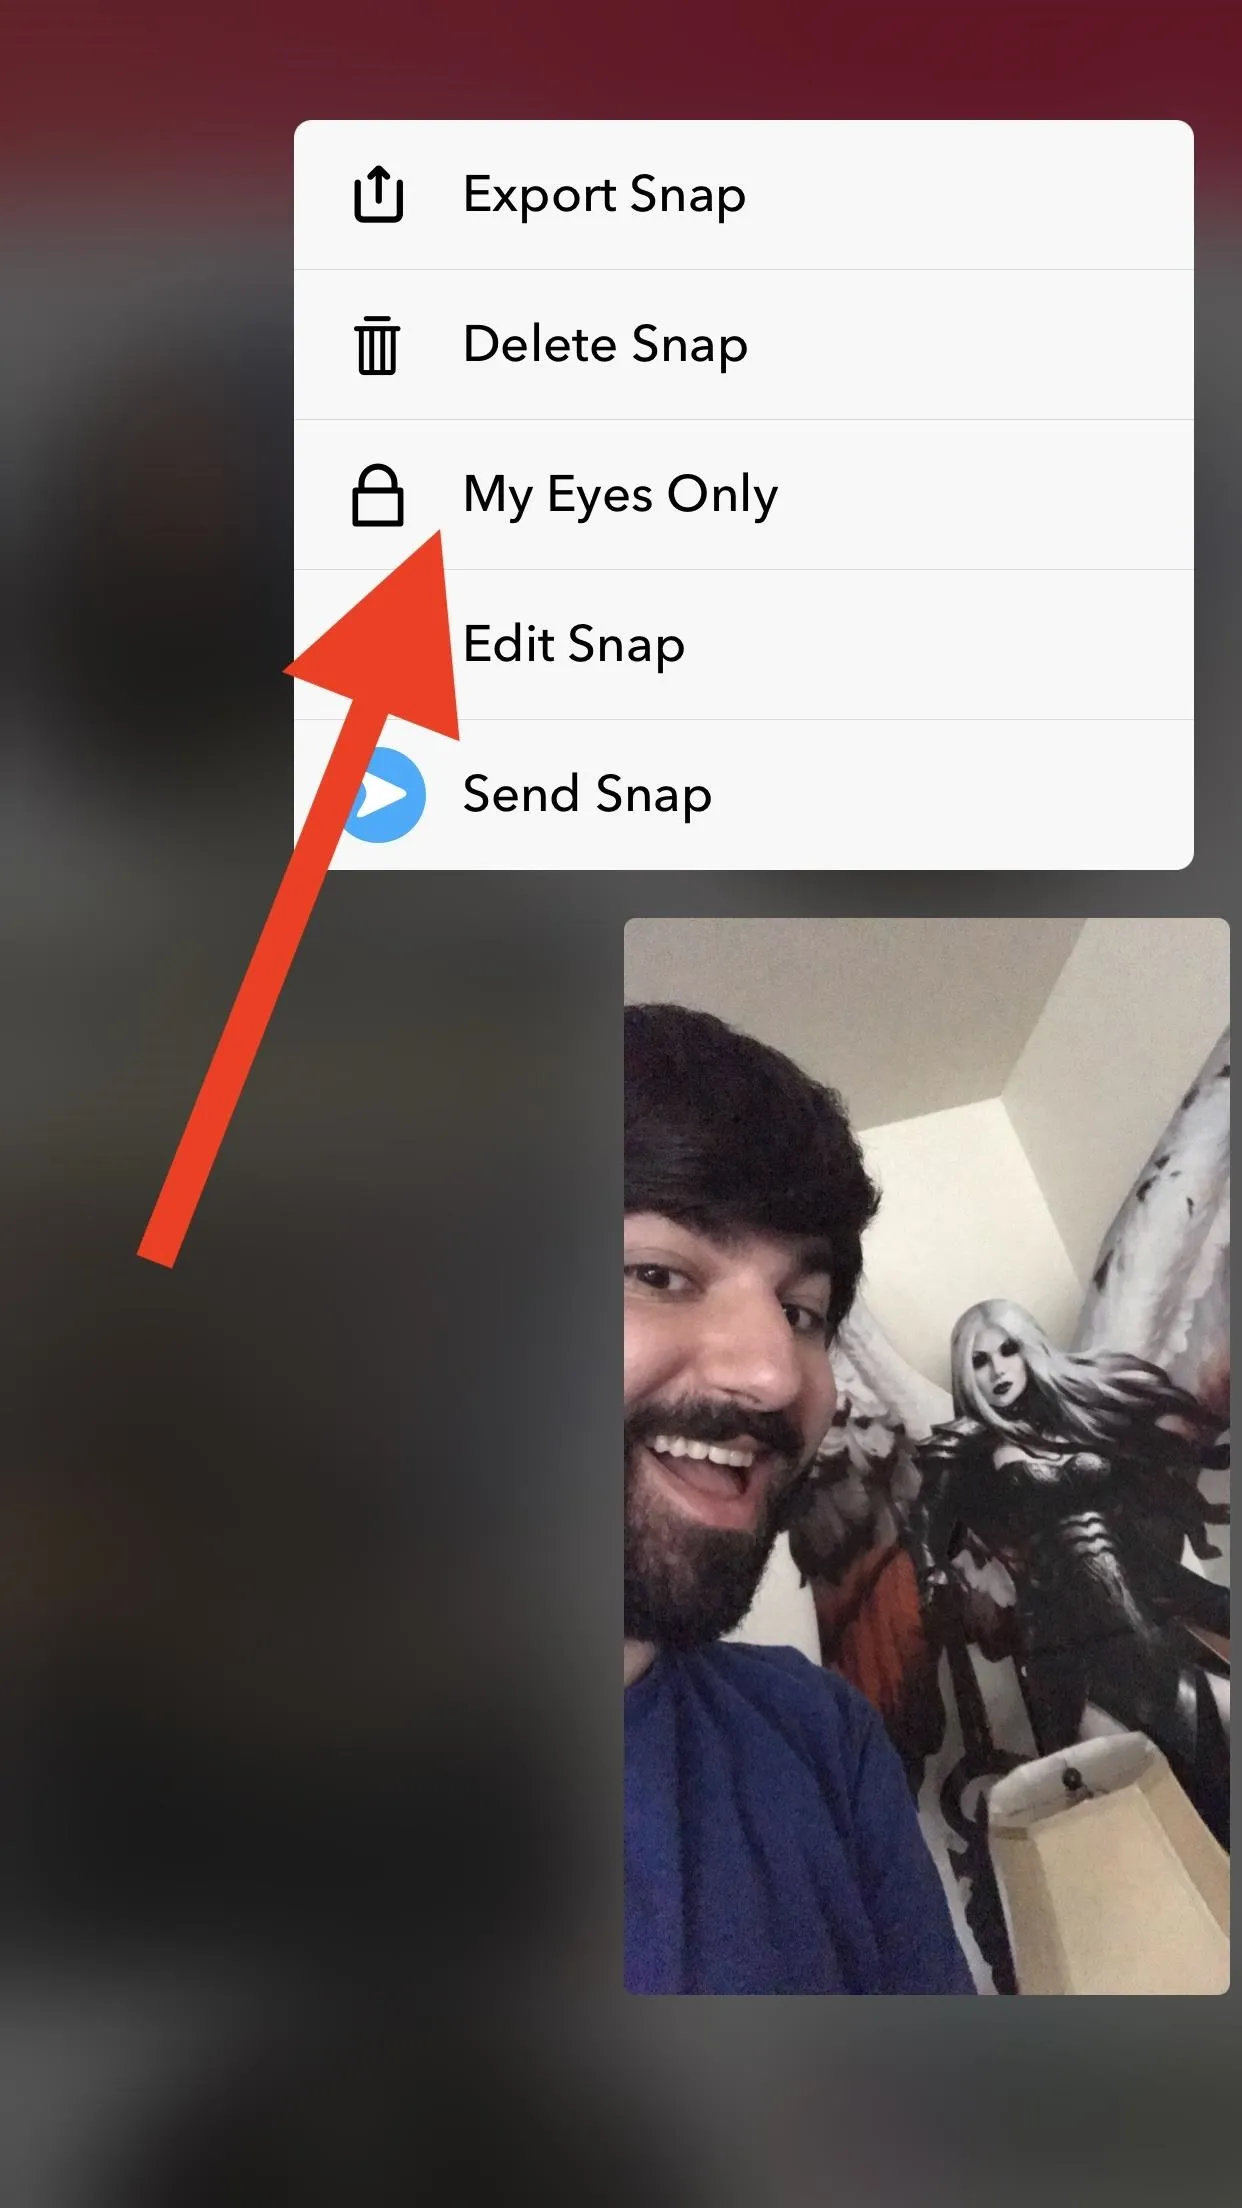
Now that you know where everything is, you can start to really use Memories. Long-press any snap, photo, Story, or video to open up a sub-menu that reads "Export (type of file)," "Delete (type of file)," "My Eyes Only," "Edit (type of file)," and "Send (type of file)." First, I'm going to cover "Exporting."
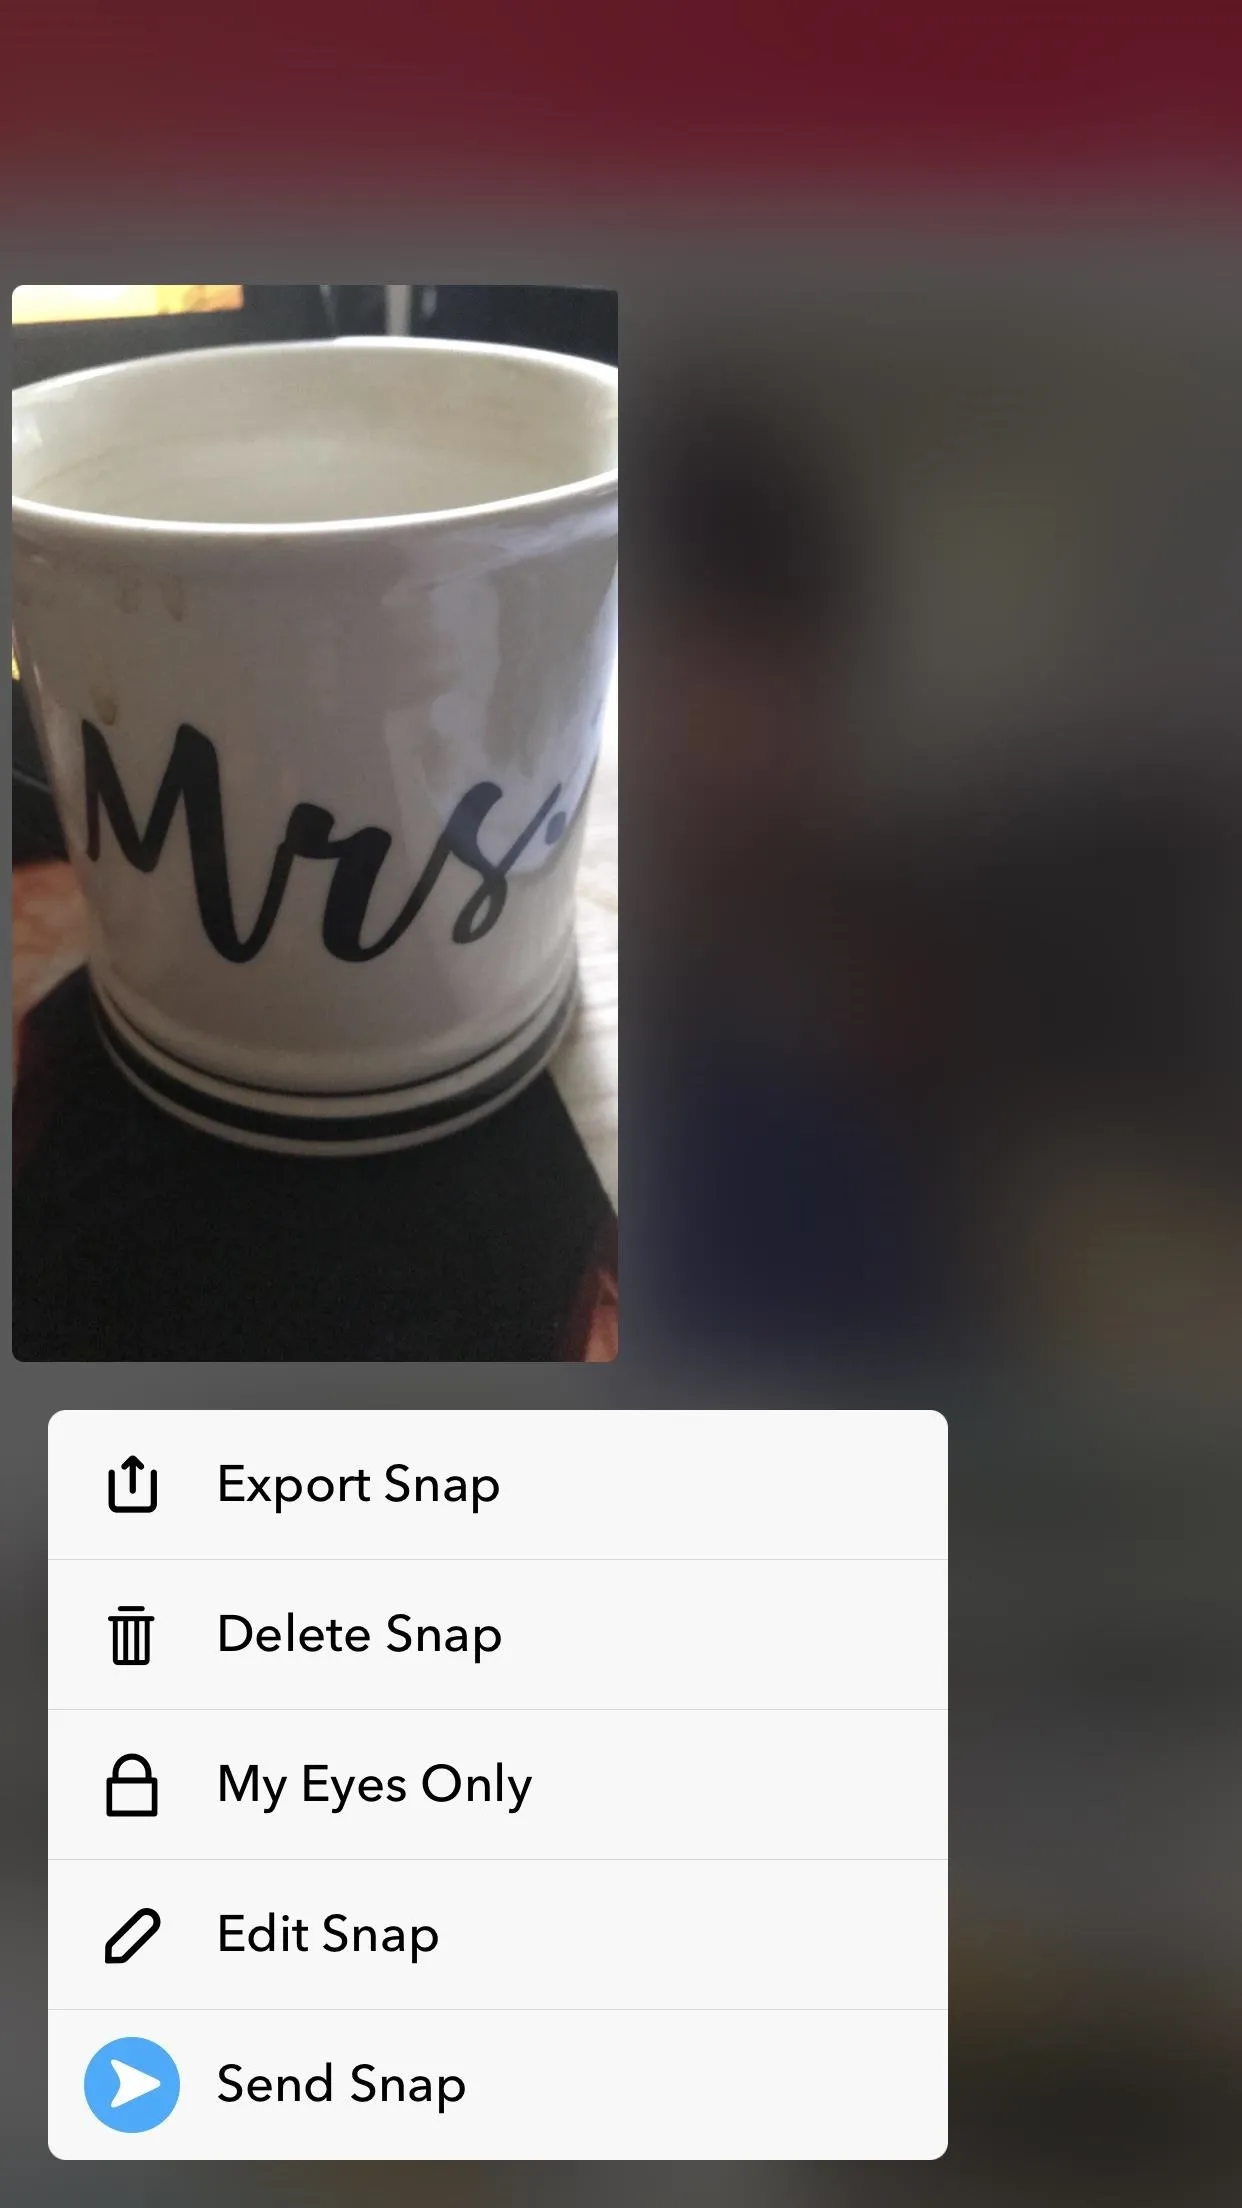
For the sake of brevity, I'm going to refer to all items here as snaps (rather than snaps, photos, Stories, or videos). Just keep in mind they all apply to each other the same way.
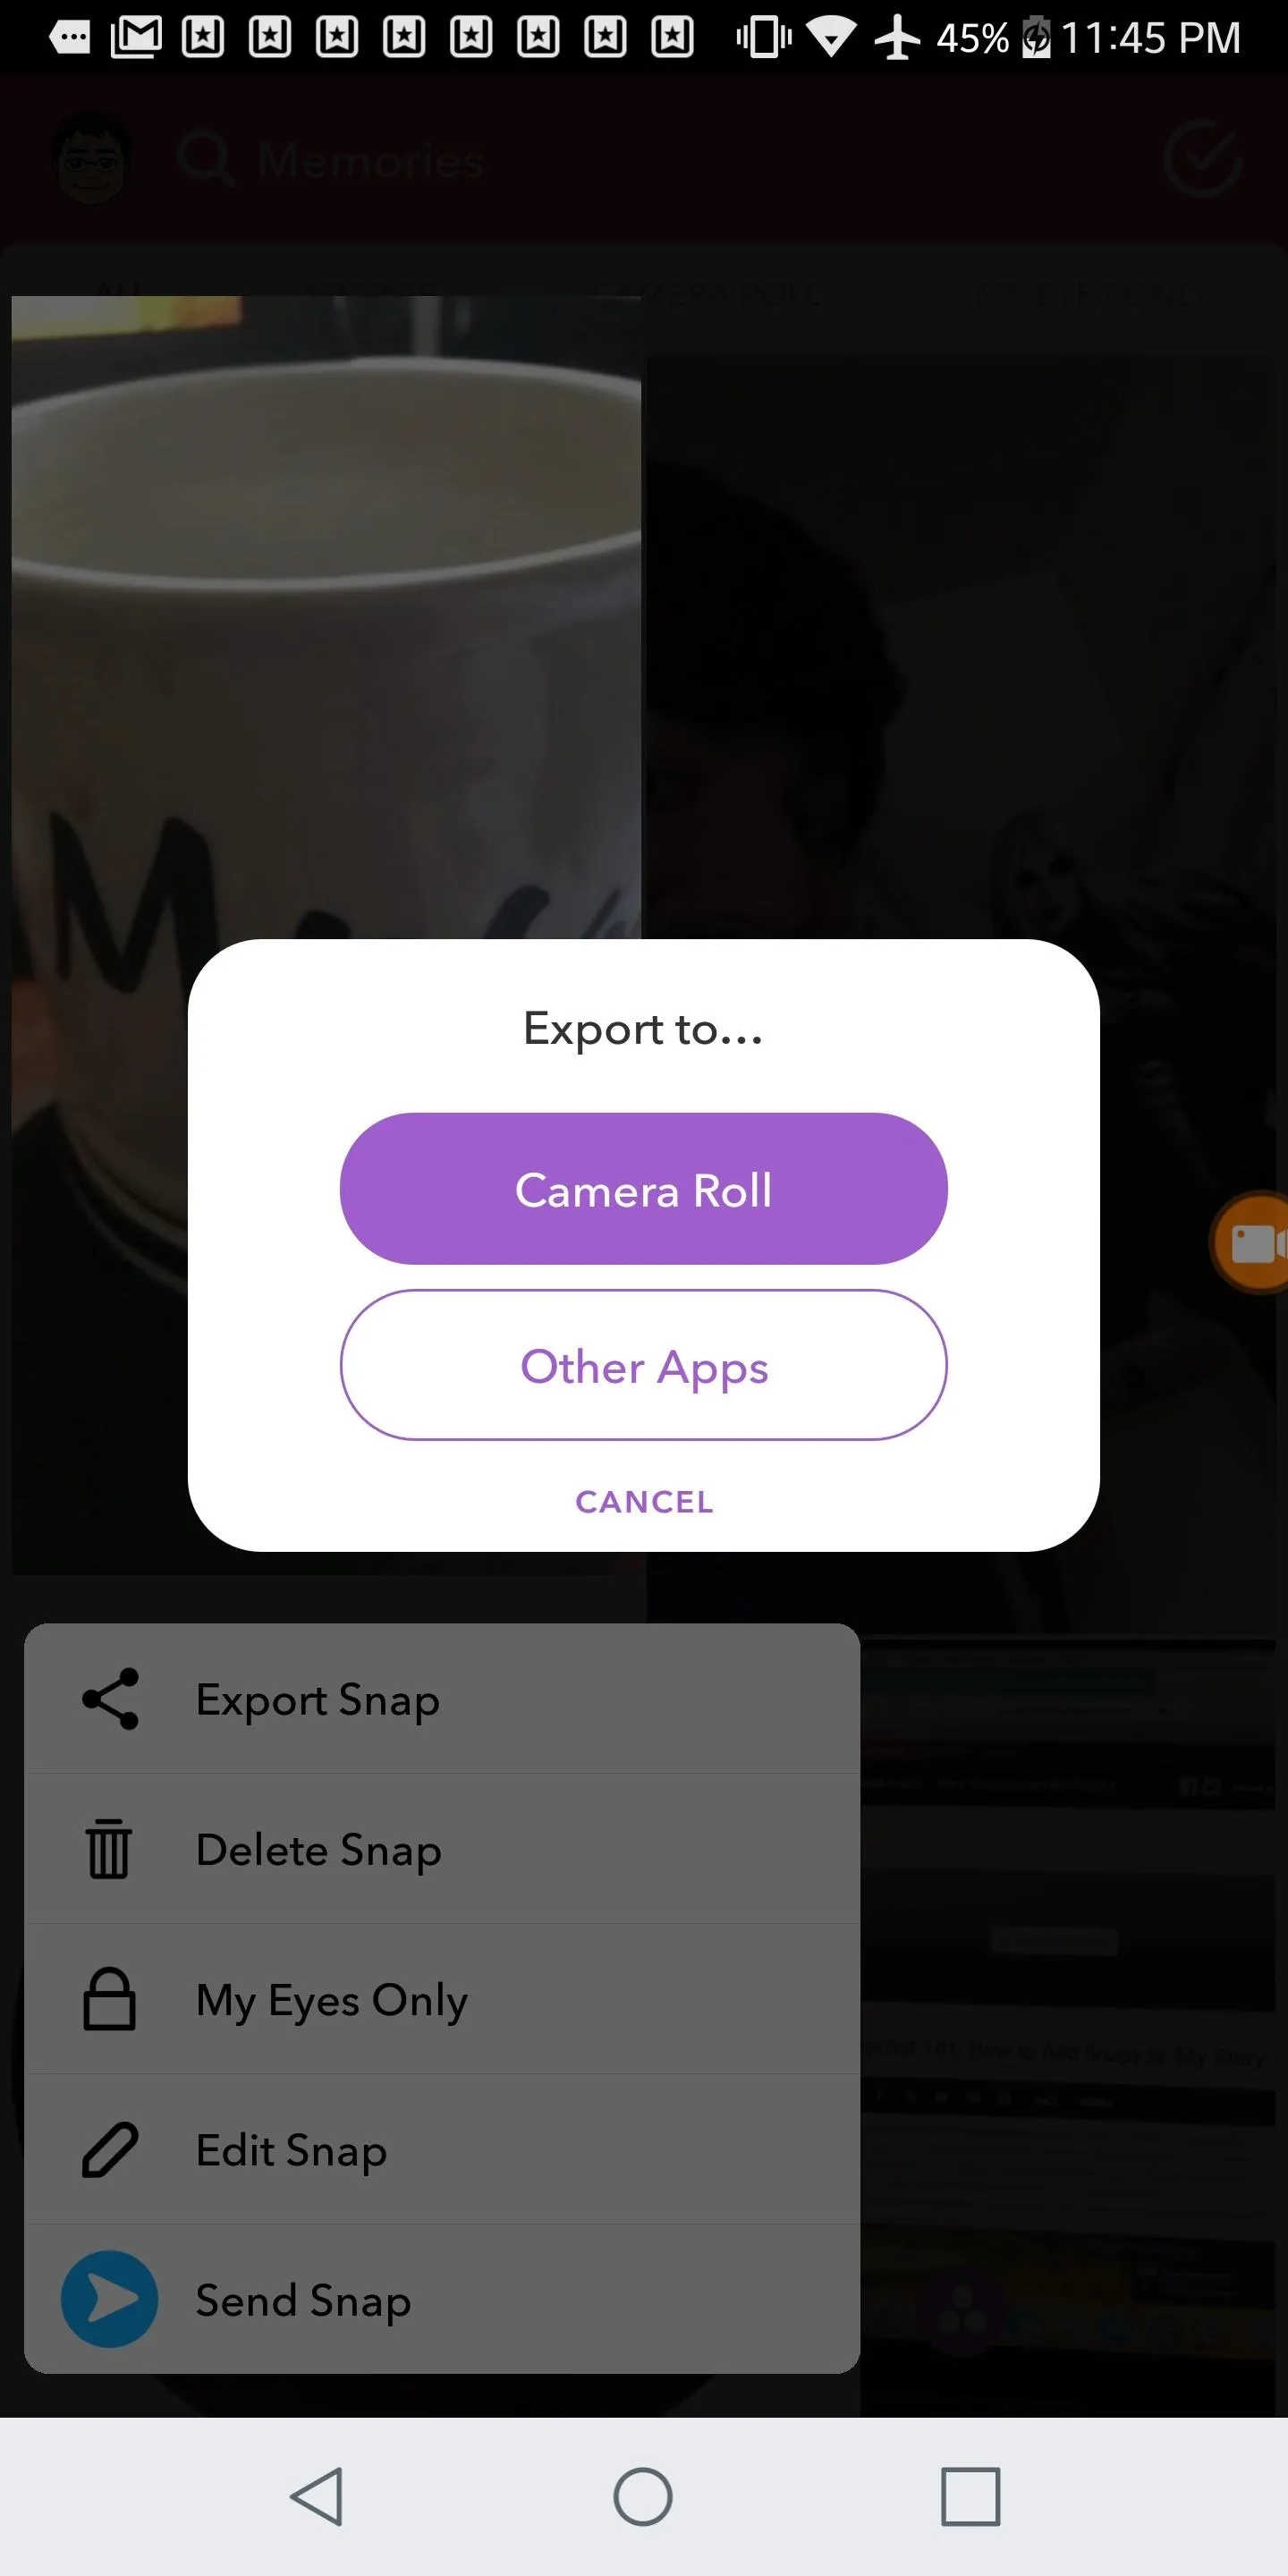
So, tap "Export Snap" to get started. At this point on Android, you can save the snap by tapping "Camera Roll" in the "Export to..." menu that pops up. Alternatively, if you want to share the snap to an external app, tap "Other Apps," then share the snap as you would any other file on your Android phone.

For iPhone users, you can also save snaps by tapping "Save Image." As with your Android brethren, you may also share the snap as you would any other file on your iPhone.
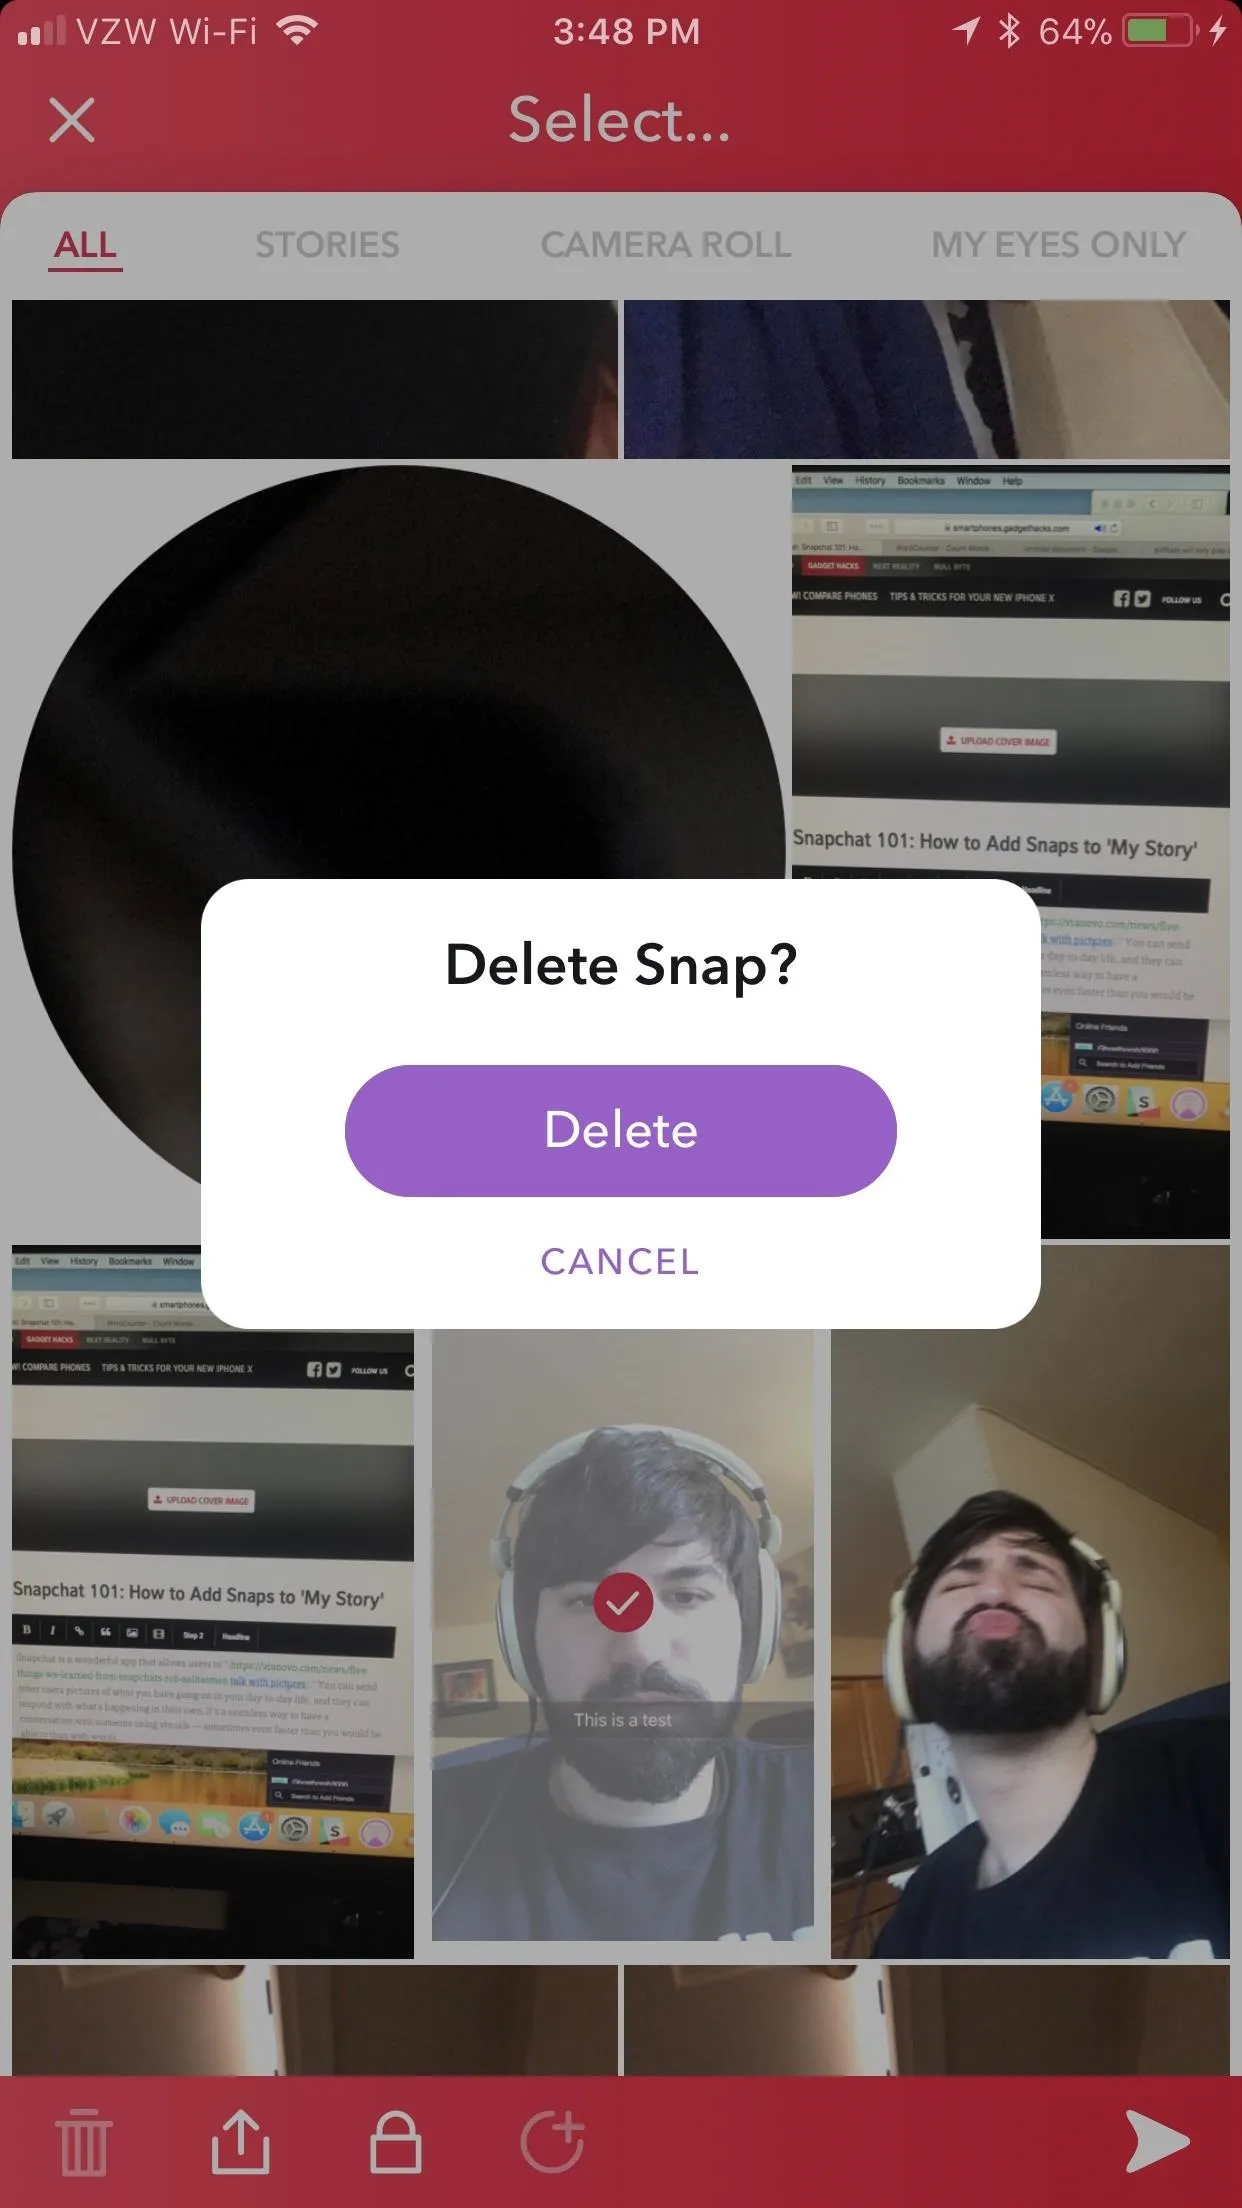
Deleting Snaps from 'Memories'
To delete a snap from your Memories, long-press a snap, opening up the same sub-menu that you opened in Step 4. Next, tap "Delete Snap," and confirm by hitting "Delete" when Snapchat asks — or press "Cancel" if you decided against it.
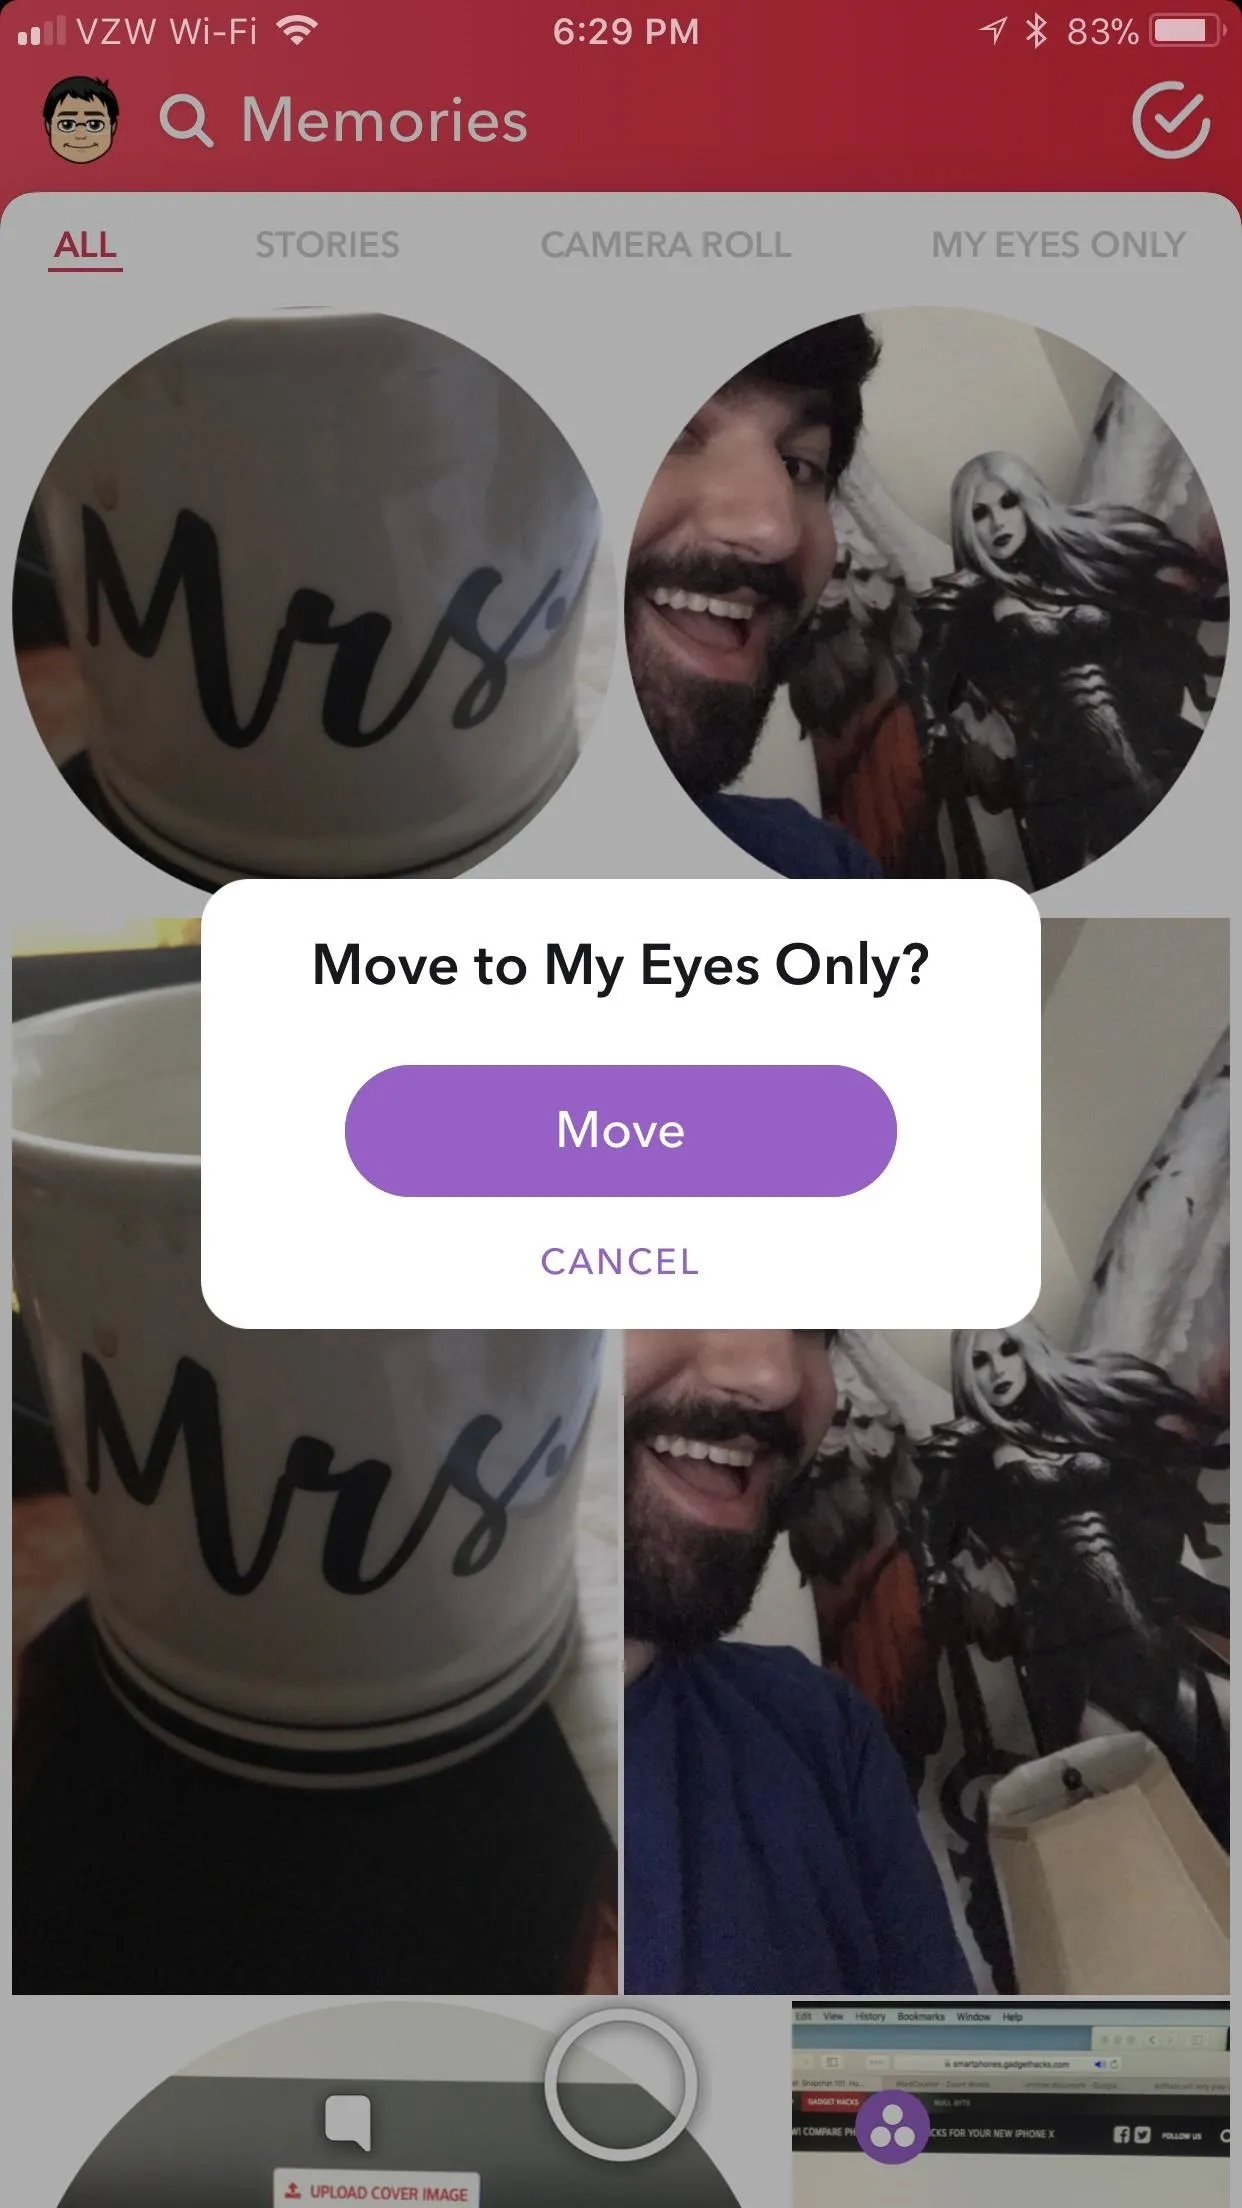
Move a Snap to 'My Eyes Only'
To move a snap to "My Eyes Only" (as explained in Step 3), long-press a snap to open the sub-menu. Tap "My Eyes Only" and press "Move" when Snapchat asks "Move to My Eyes Only?" — alternatively, hit "Cancel" if you changed your mind.

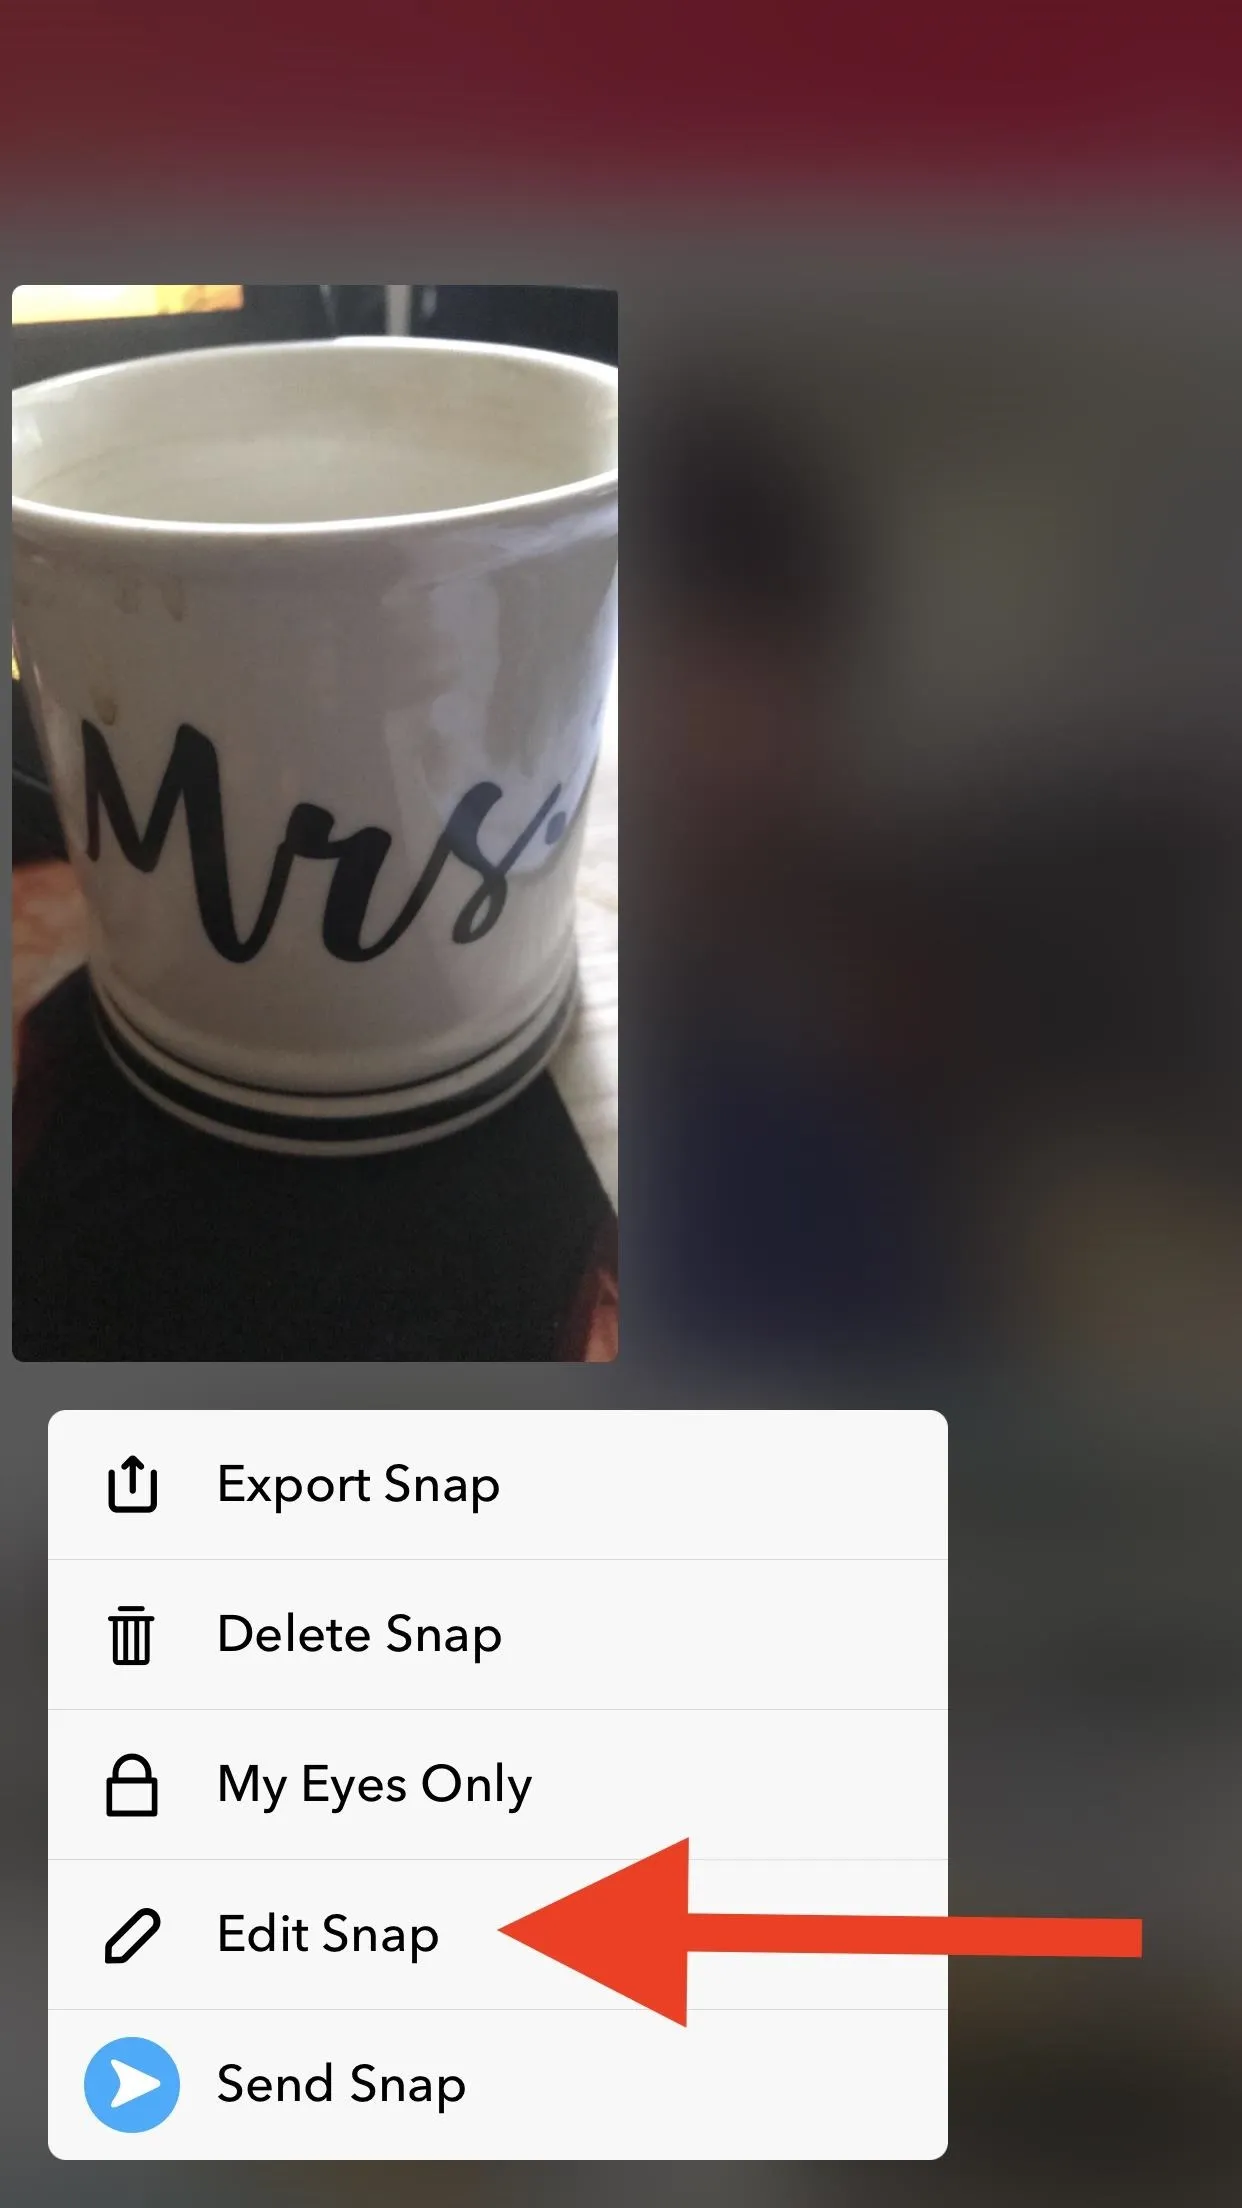
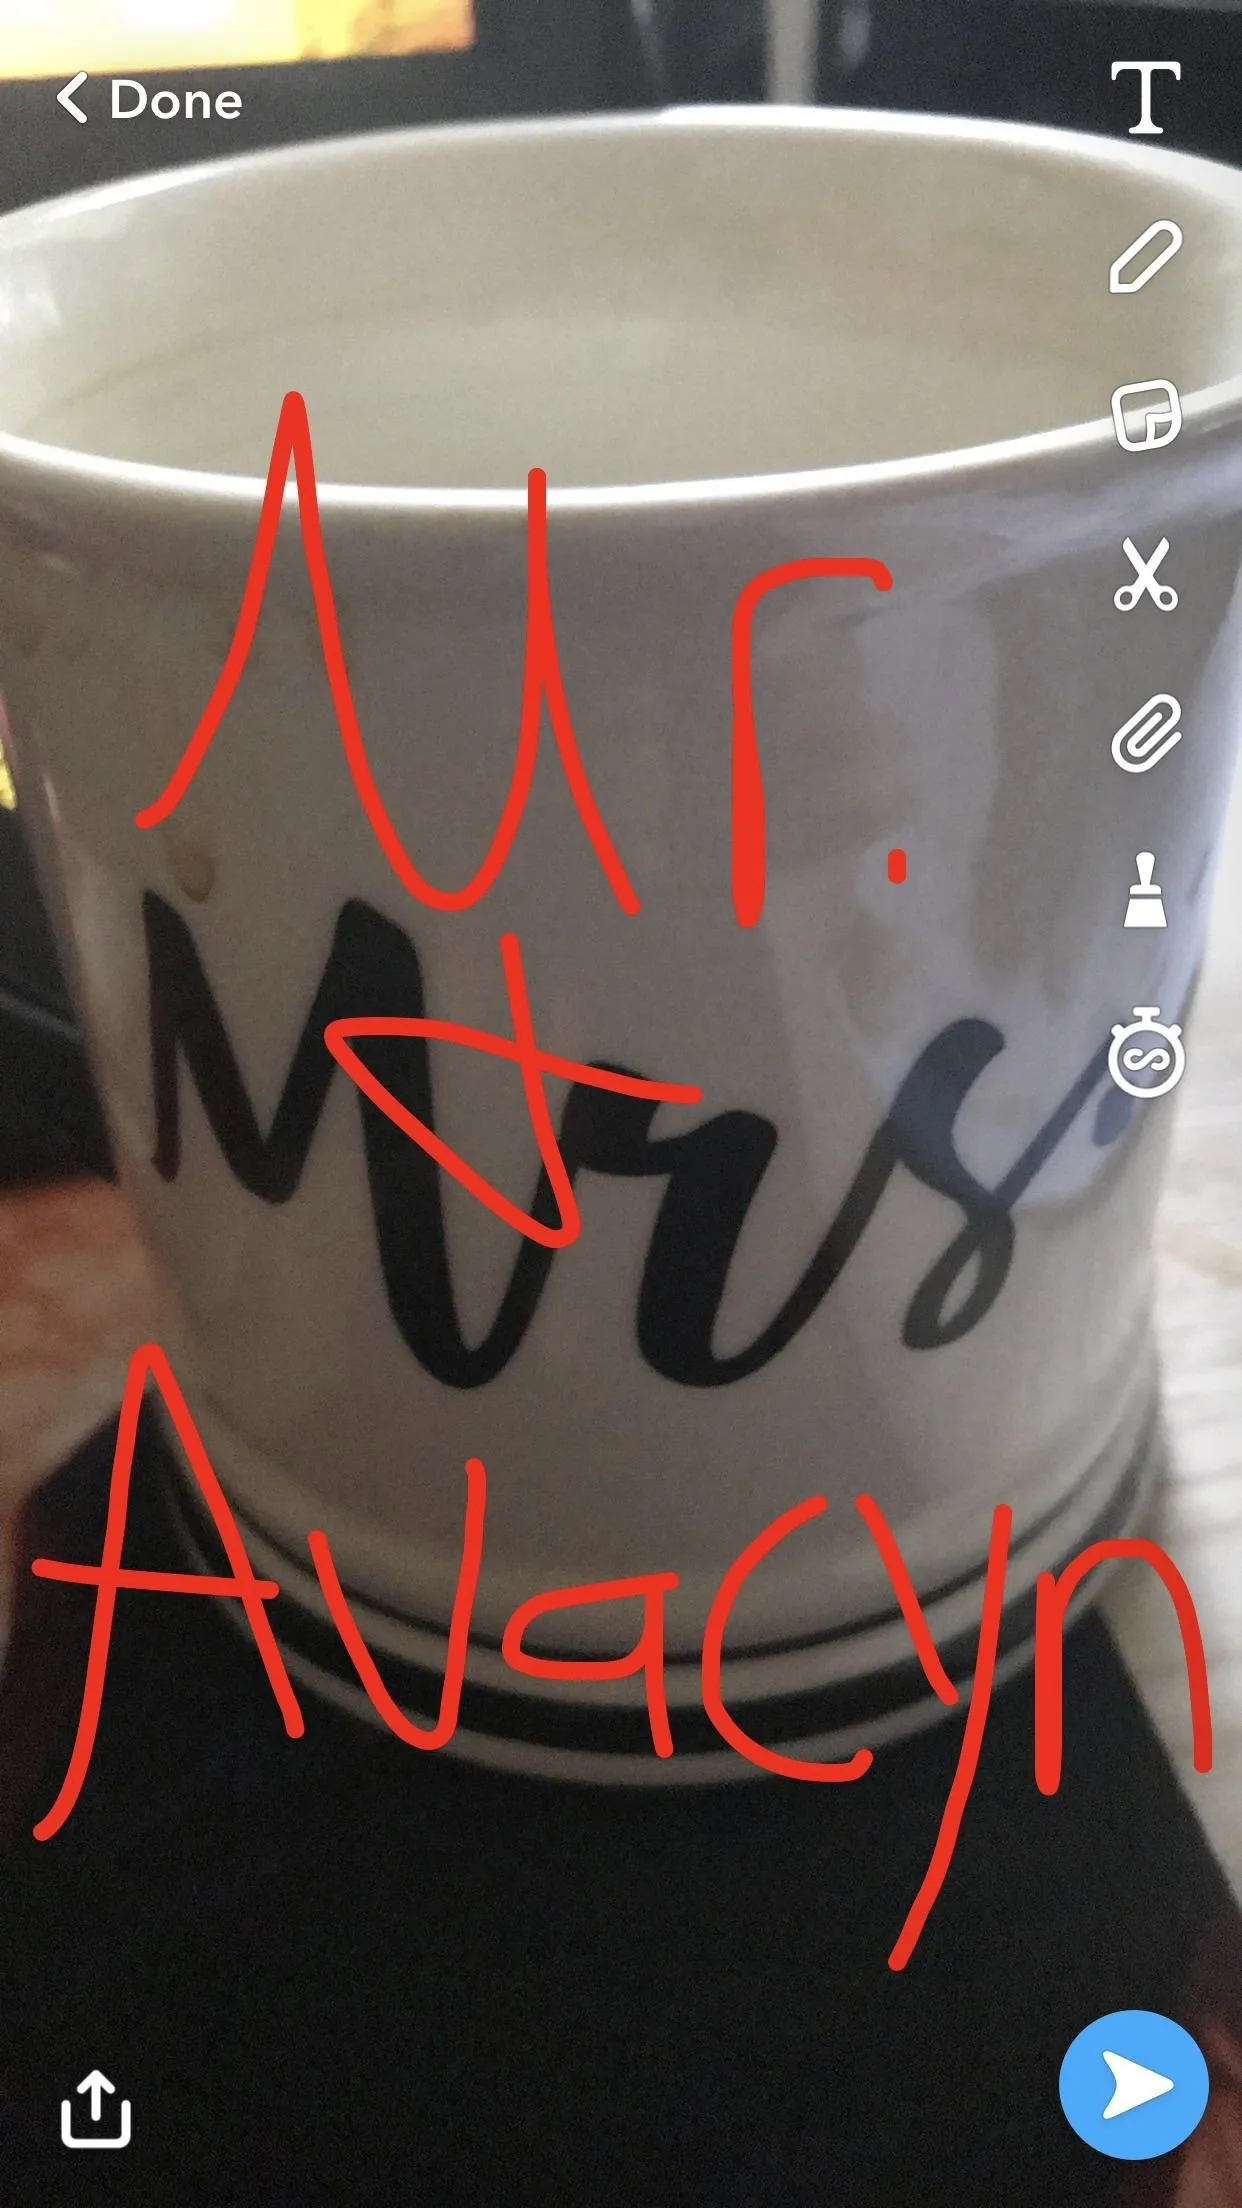
Edit Your Snaps
You can always edit snaps you've sent out in the past by tapping "Edit Snap" from the submenu that we've been using in Steps 4–6. You'll be brought back to the snap in a screen that looks identical to the one you go to after you first take a snap (and can edit it initially). Edit it to your heart's desire, then either send it out (like any other snap) by tapping the send icon in the bottom-right, or hit the back arrow in the top-left to save the changes you made to it.
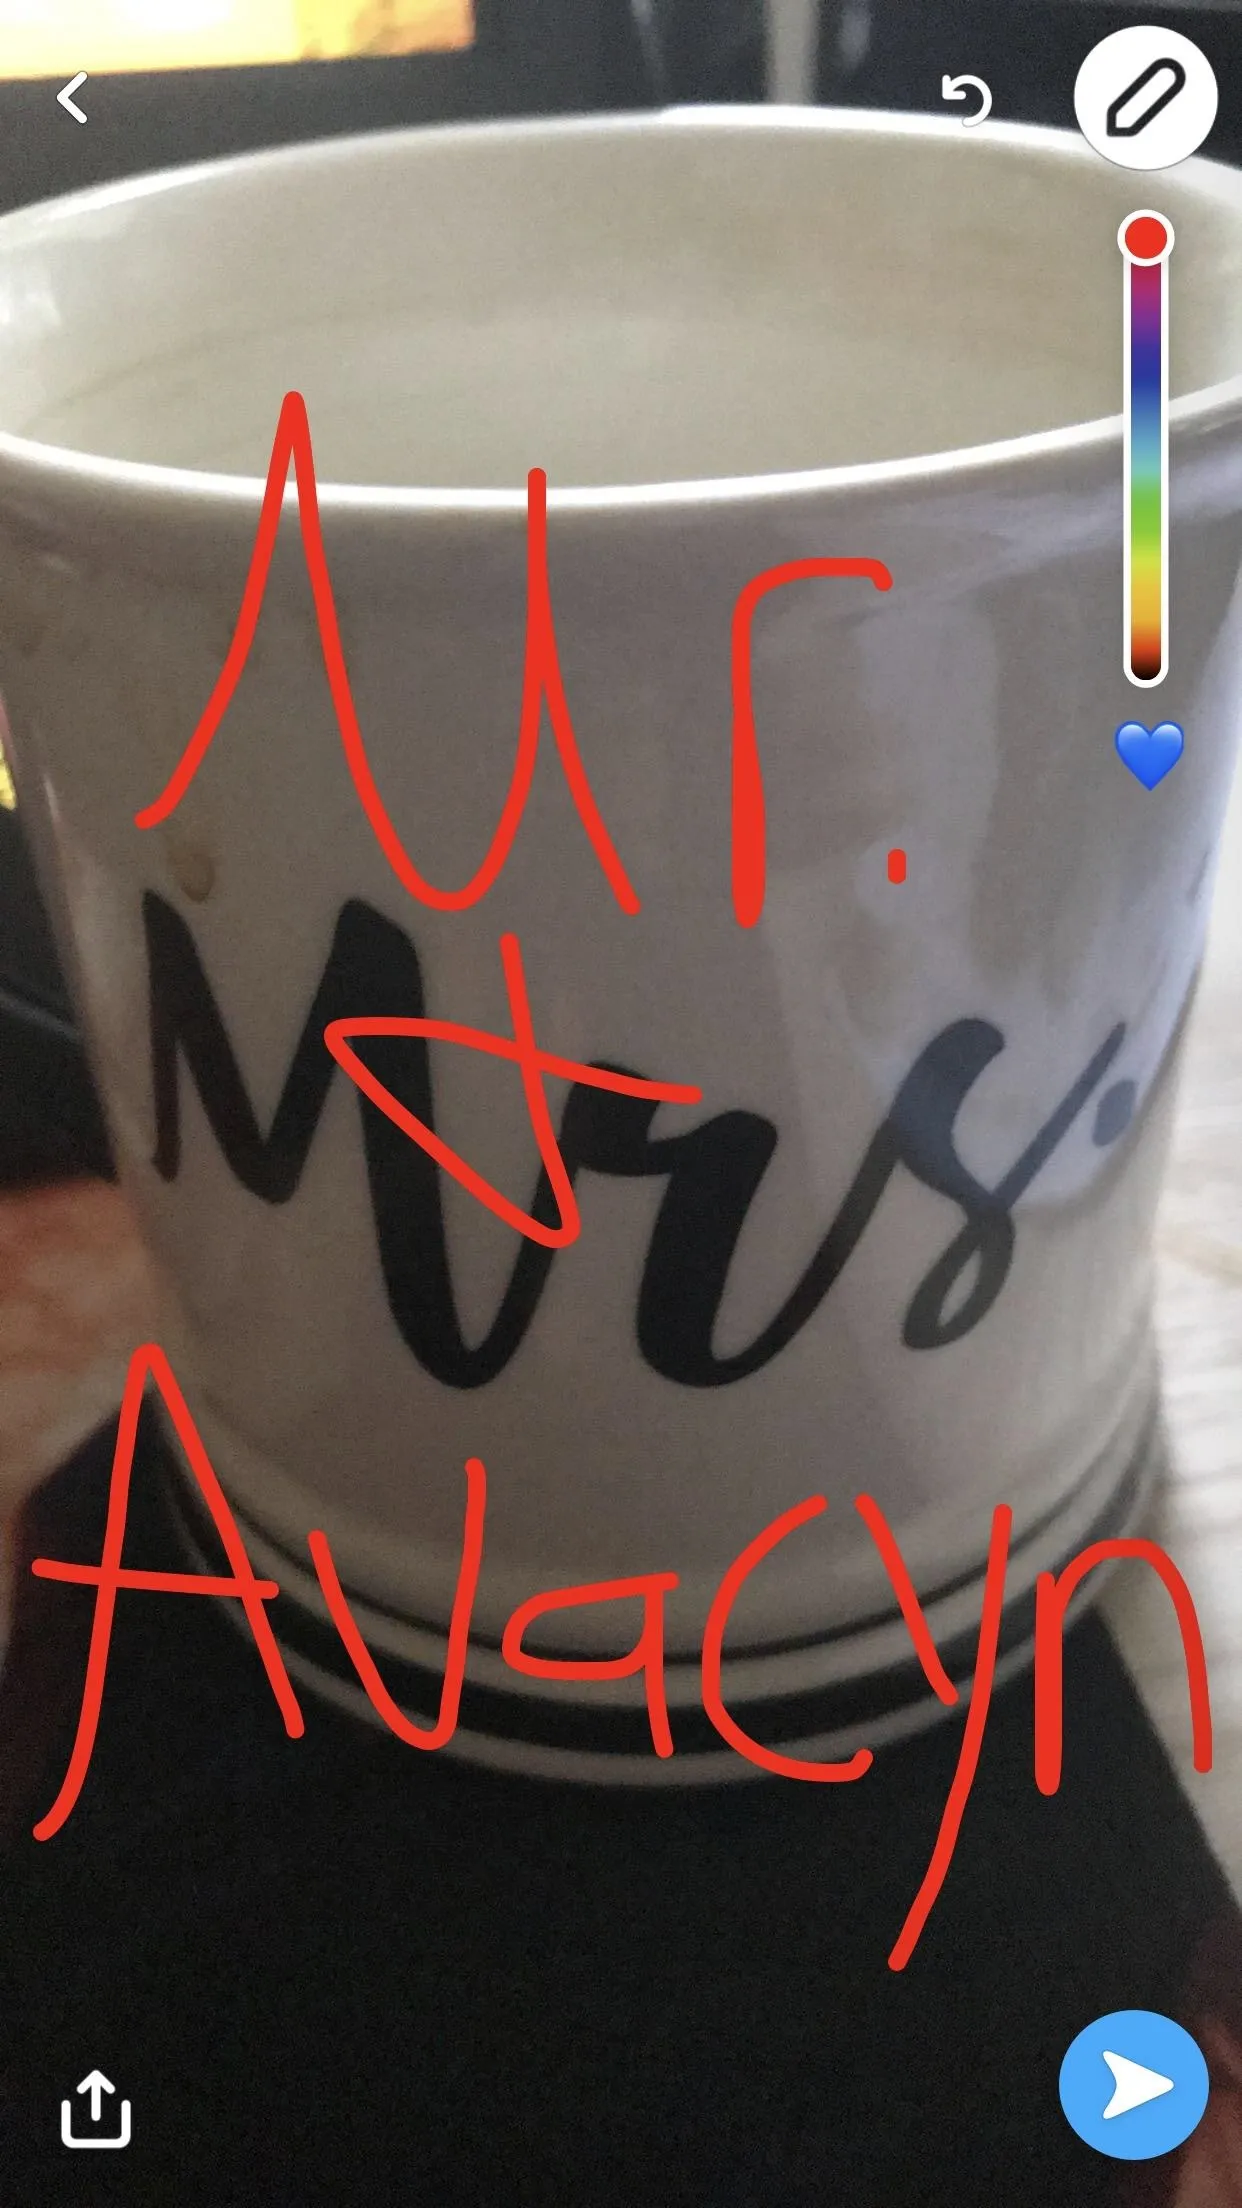
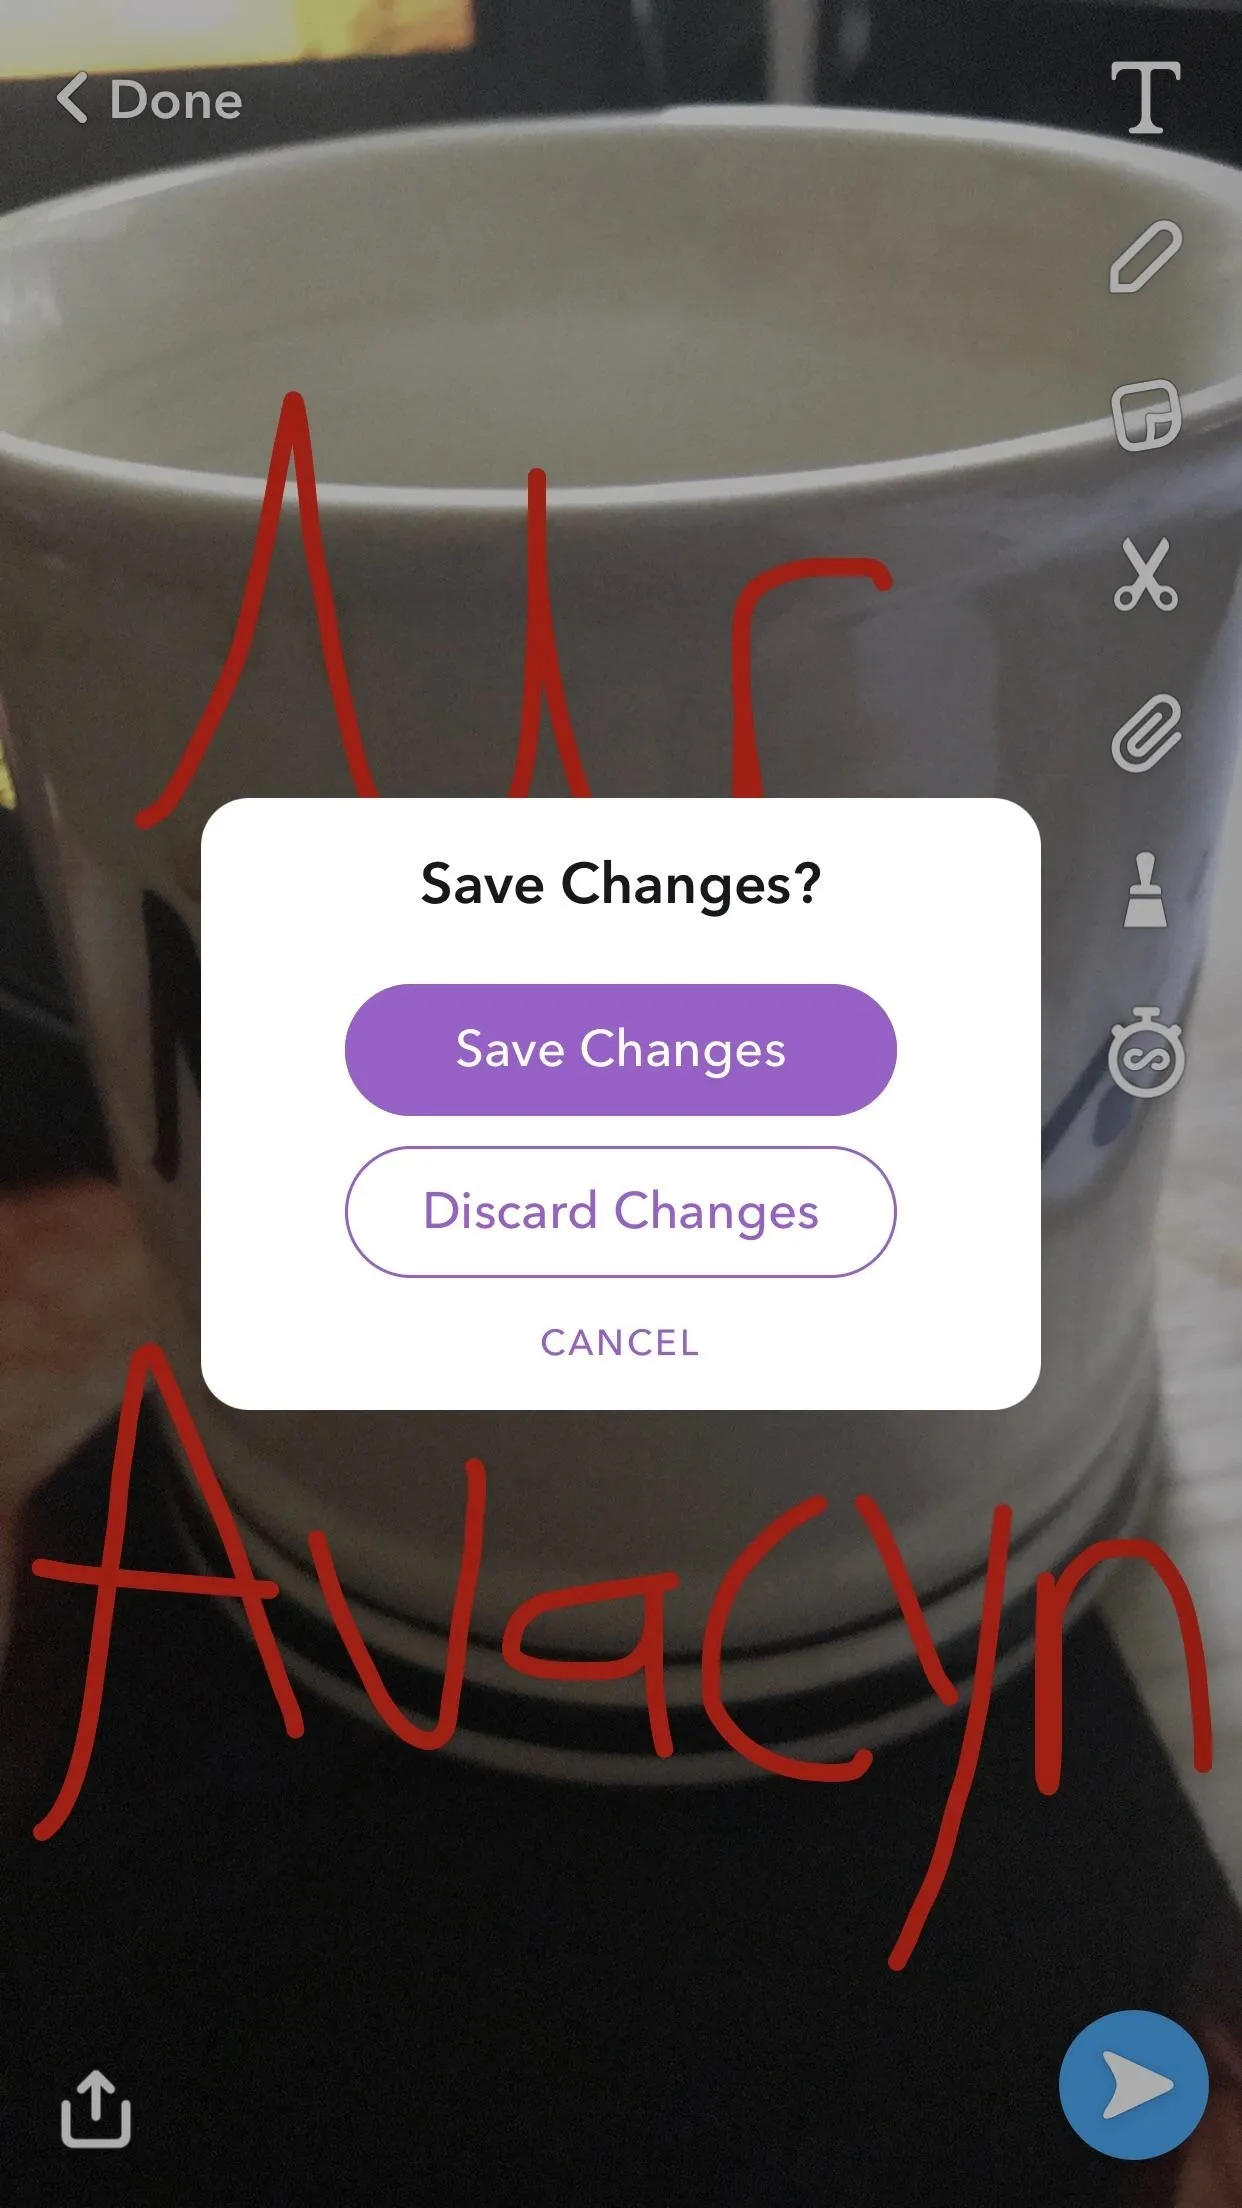
The back arrow will then say "Done." Hit that, and you'll be asked if you want to save the changes — if you do, tap "Save Changes;" if not, press "Discard Changes." If you want to work on your masterpiece a little longer, select "Cancel."
Re-Send Your Snaps
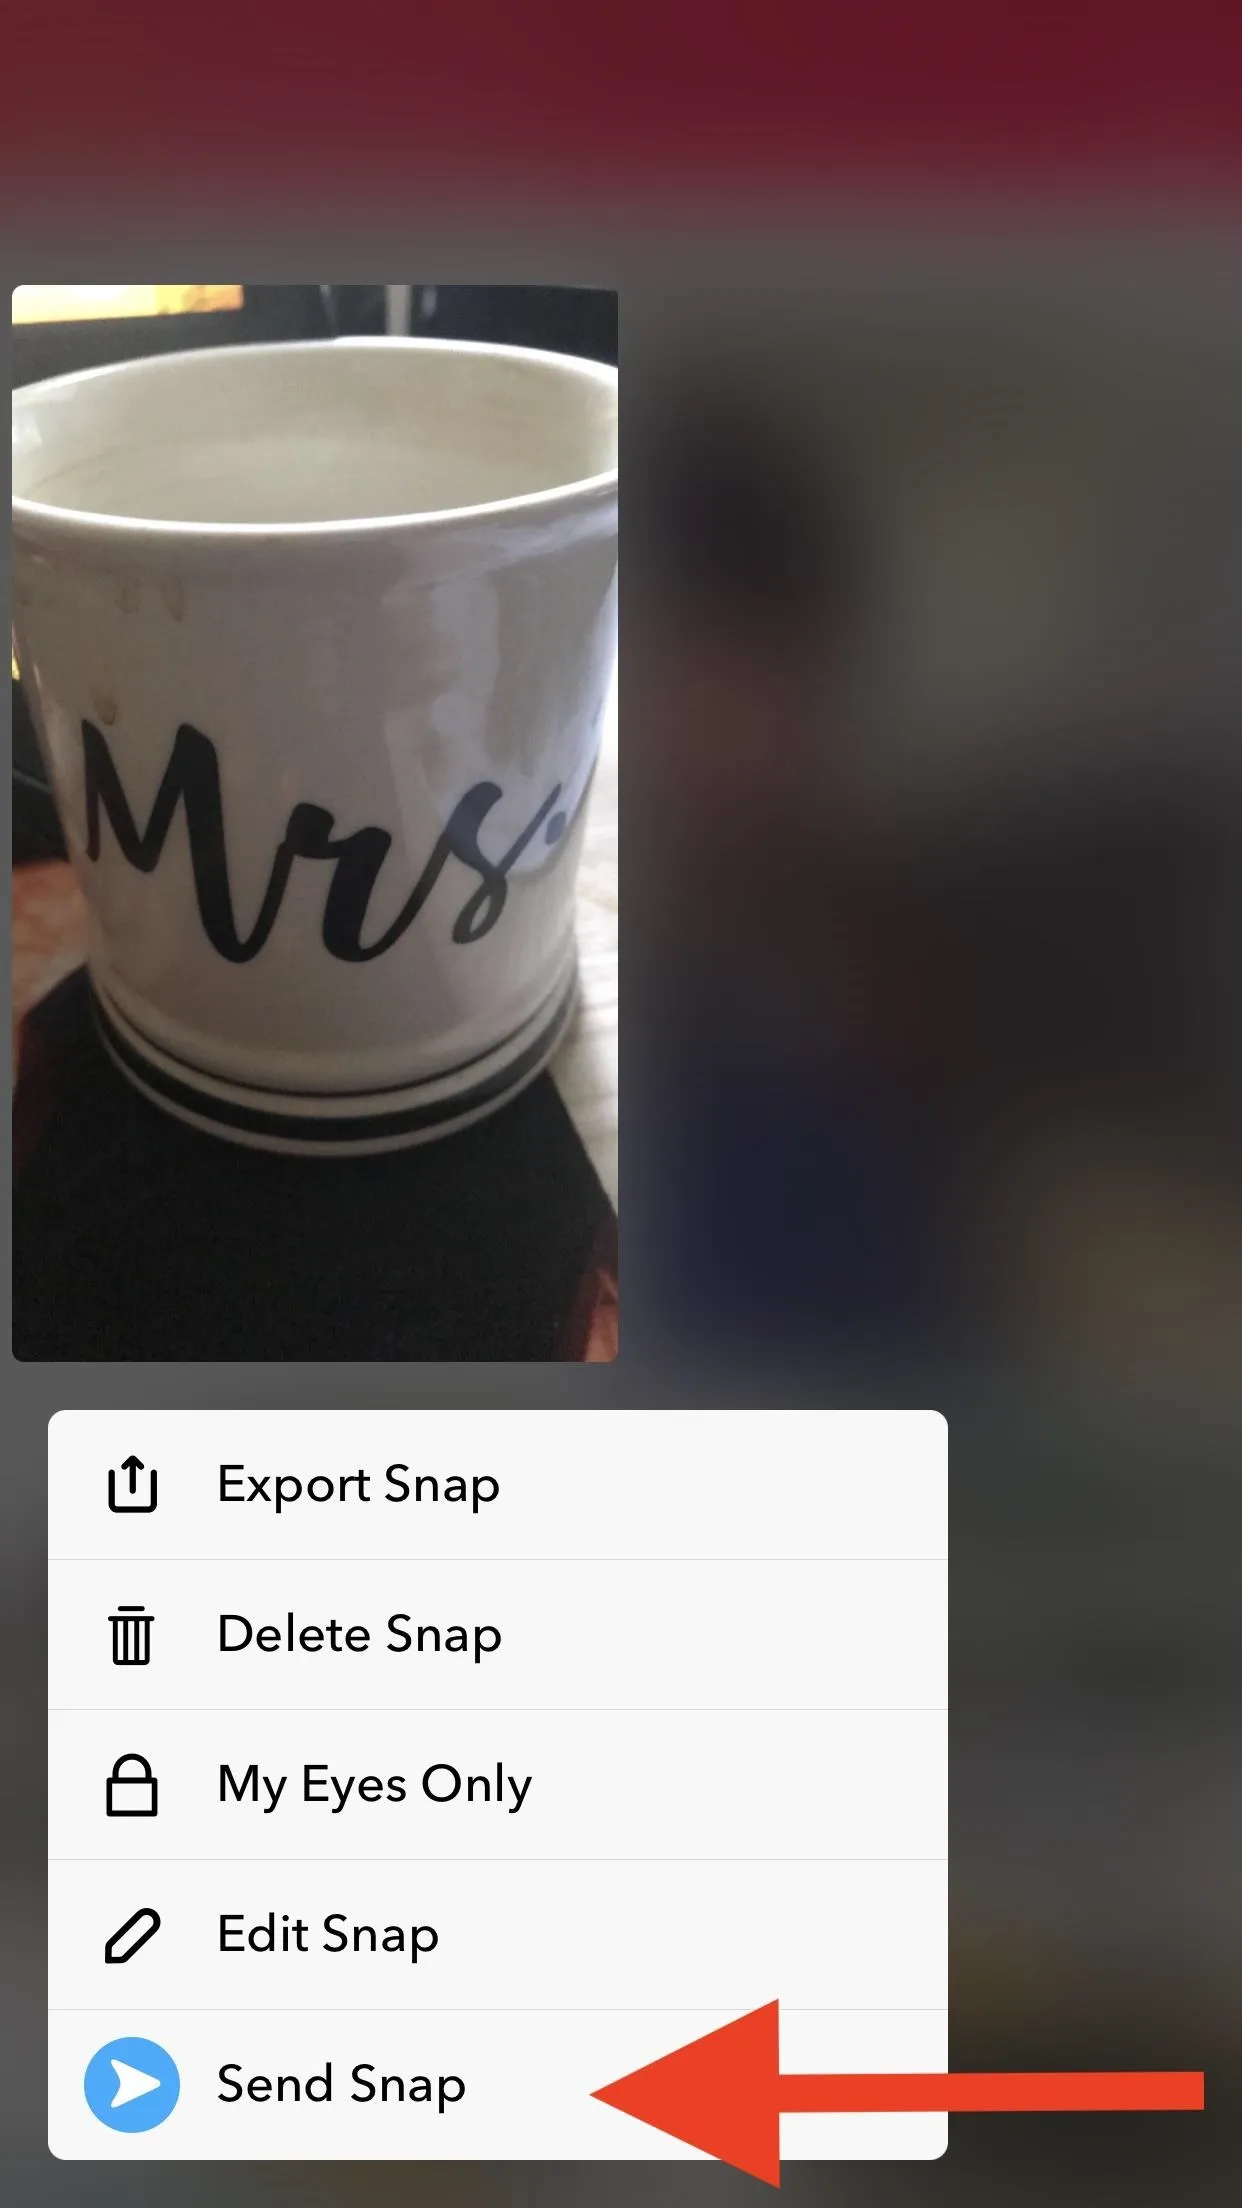
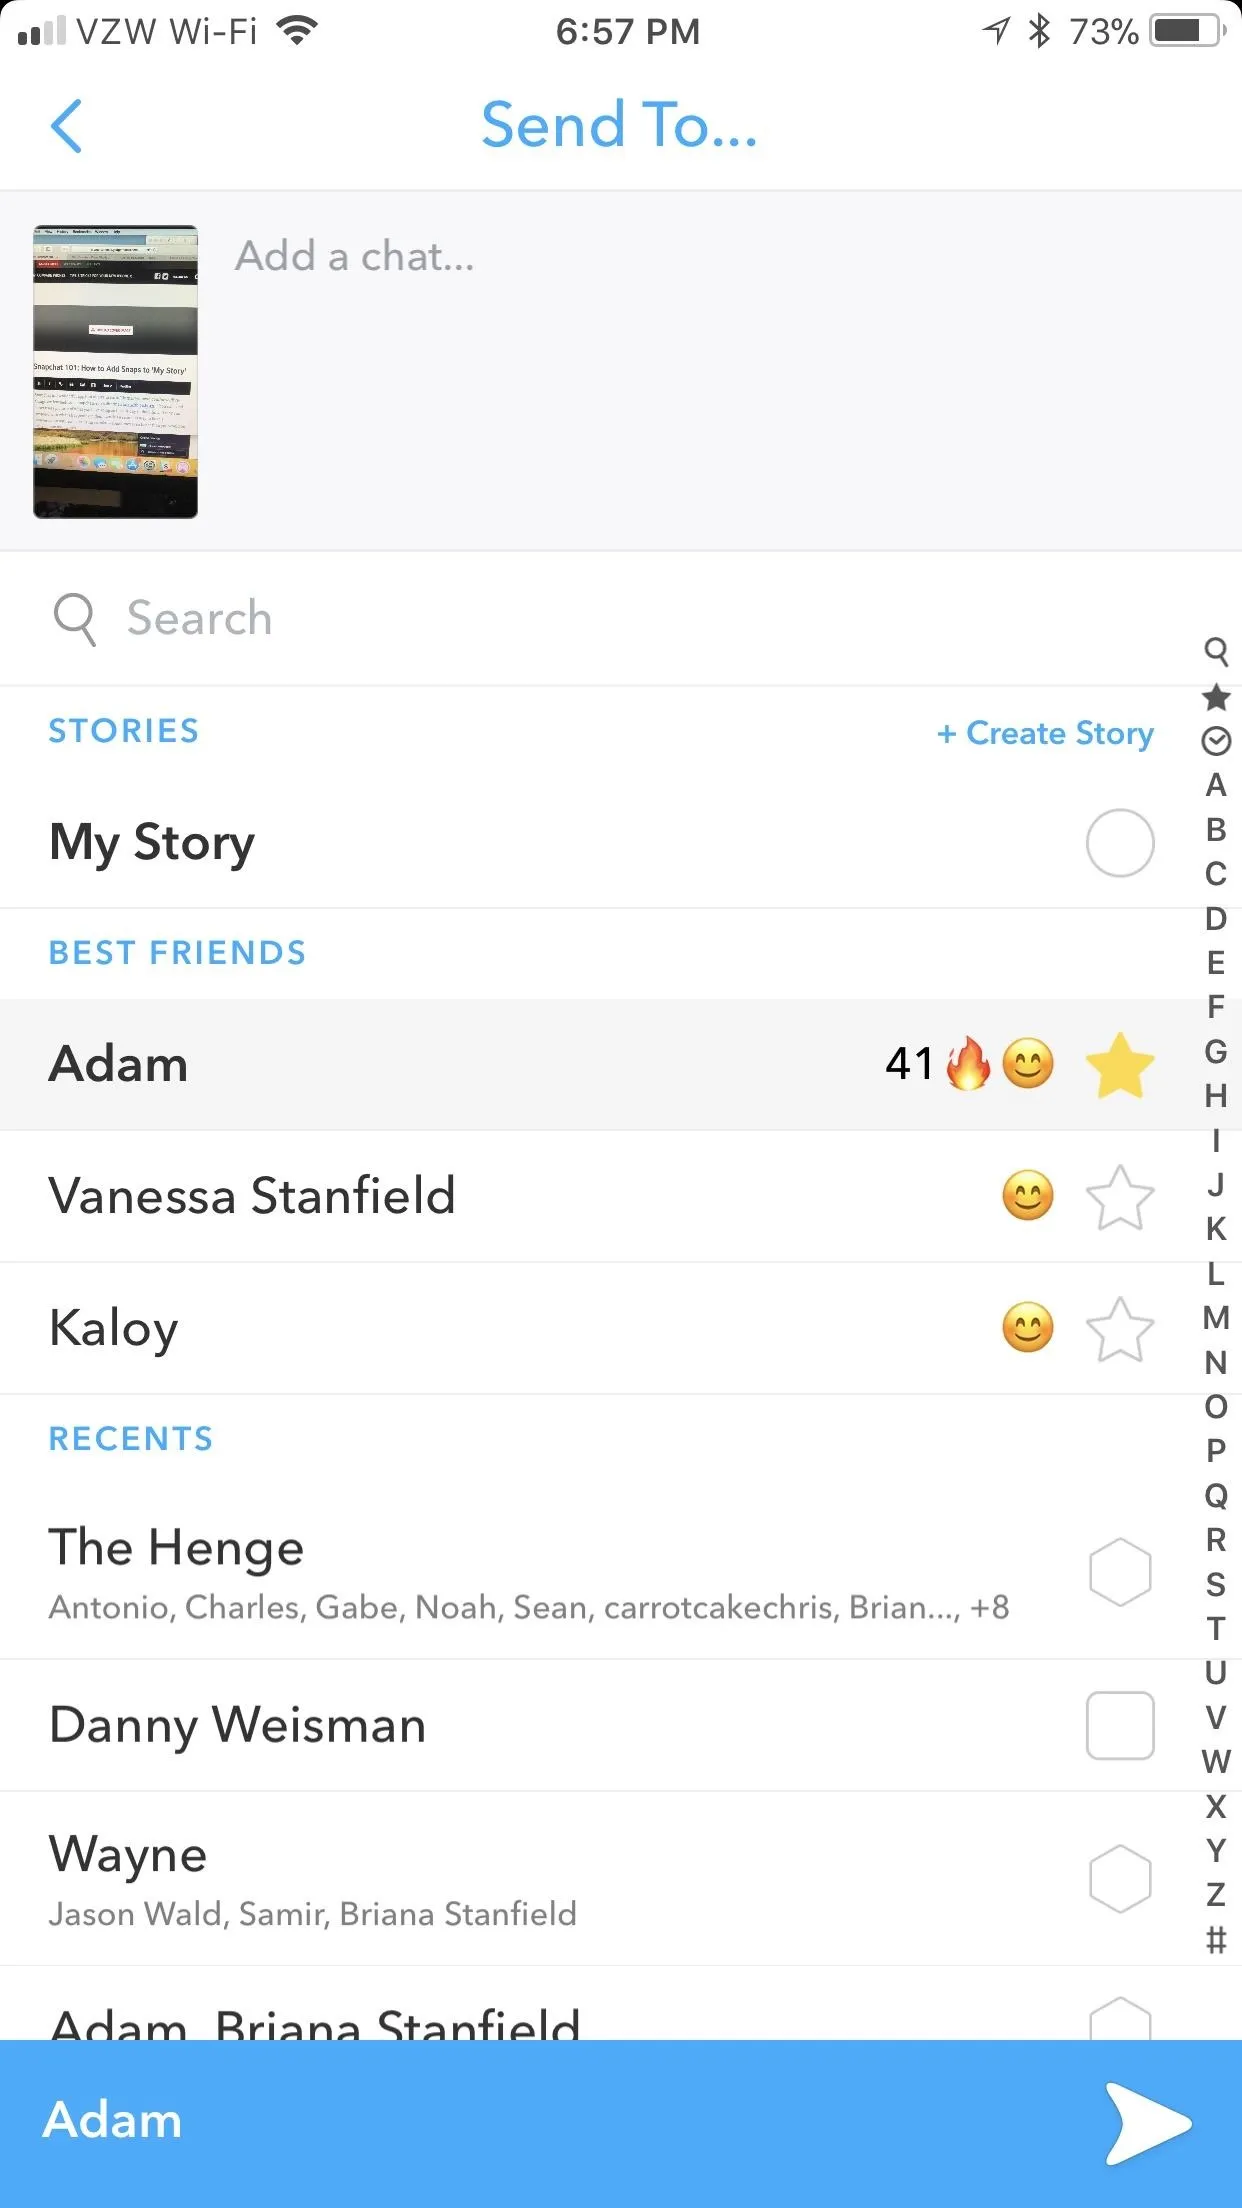
If you'd like to re-send a snap (or send, in the case of other file types), tap "Send Snap" from the sub-menu that we accessed in Steps 4–7. Next, choose who you want to send your snap to, just like any other snap. Keep in mind that this will be sent in Chat form, so it won't count for your Snapstreaks. However, you can send these snaps to "My Story," so that's nice.
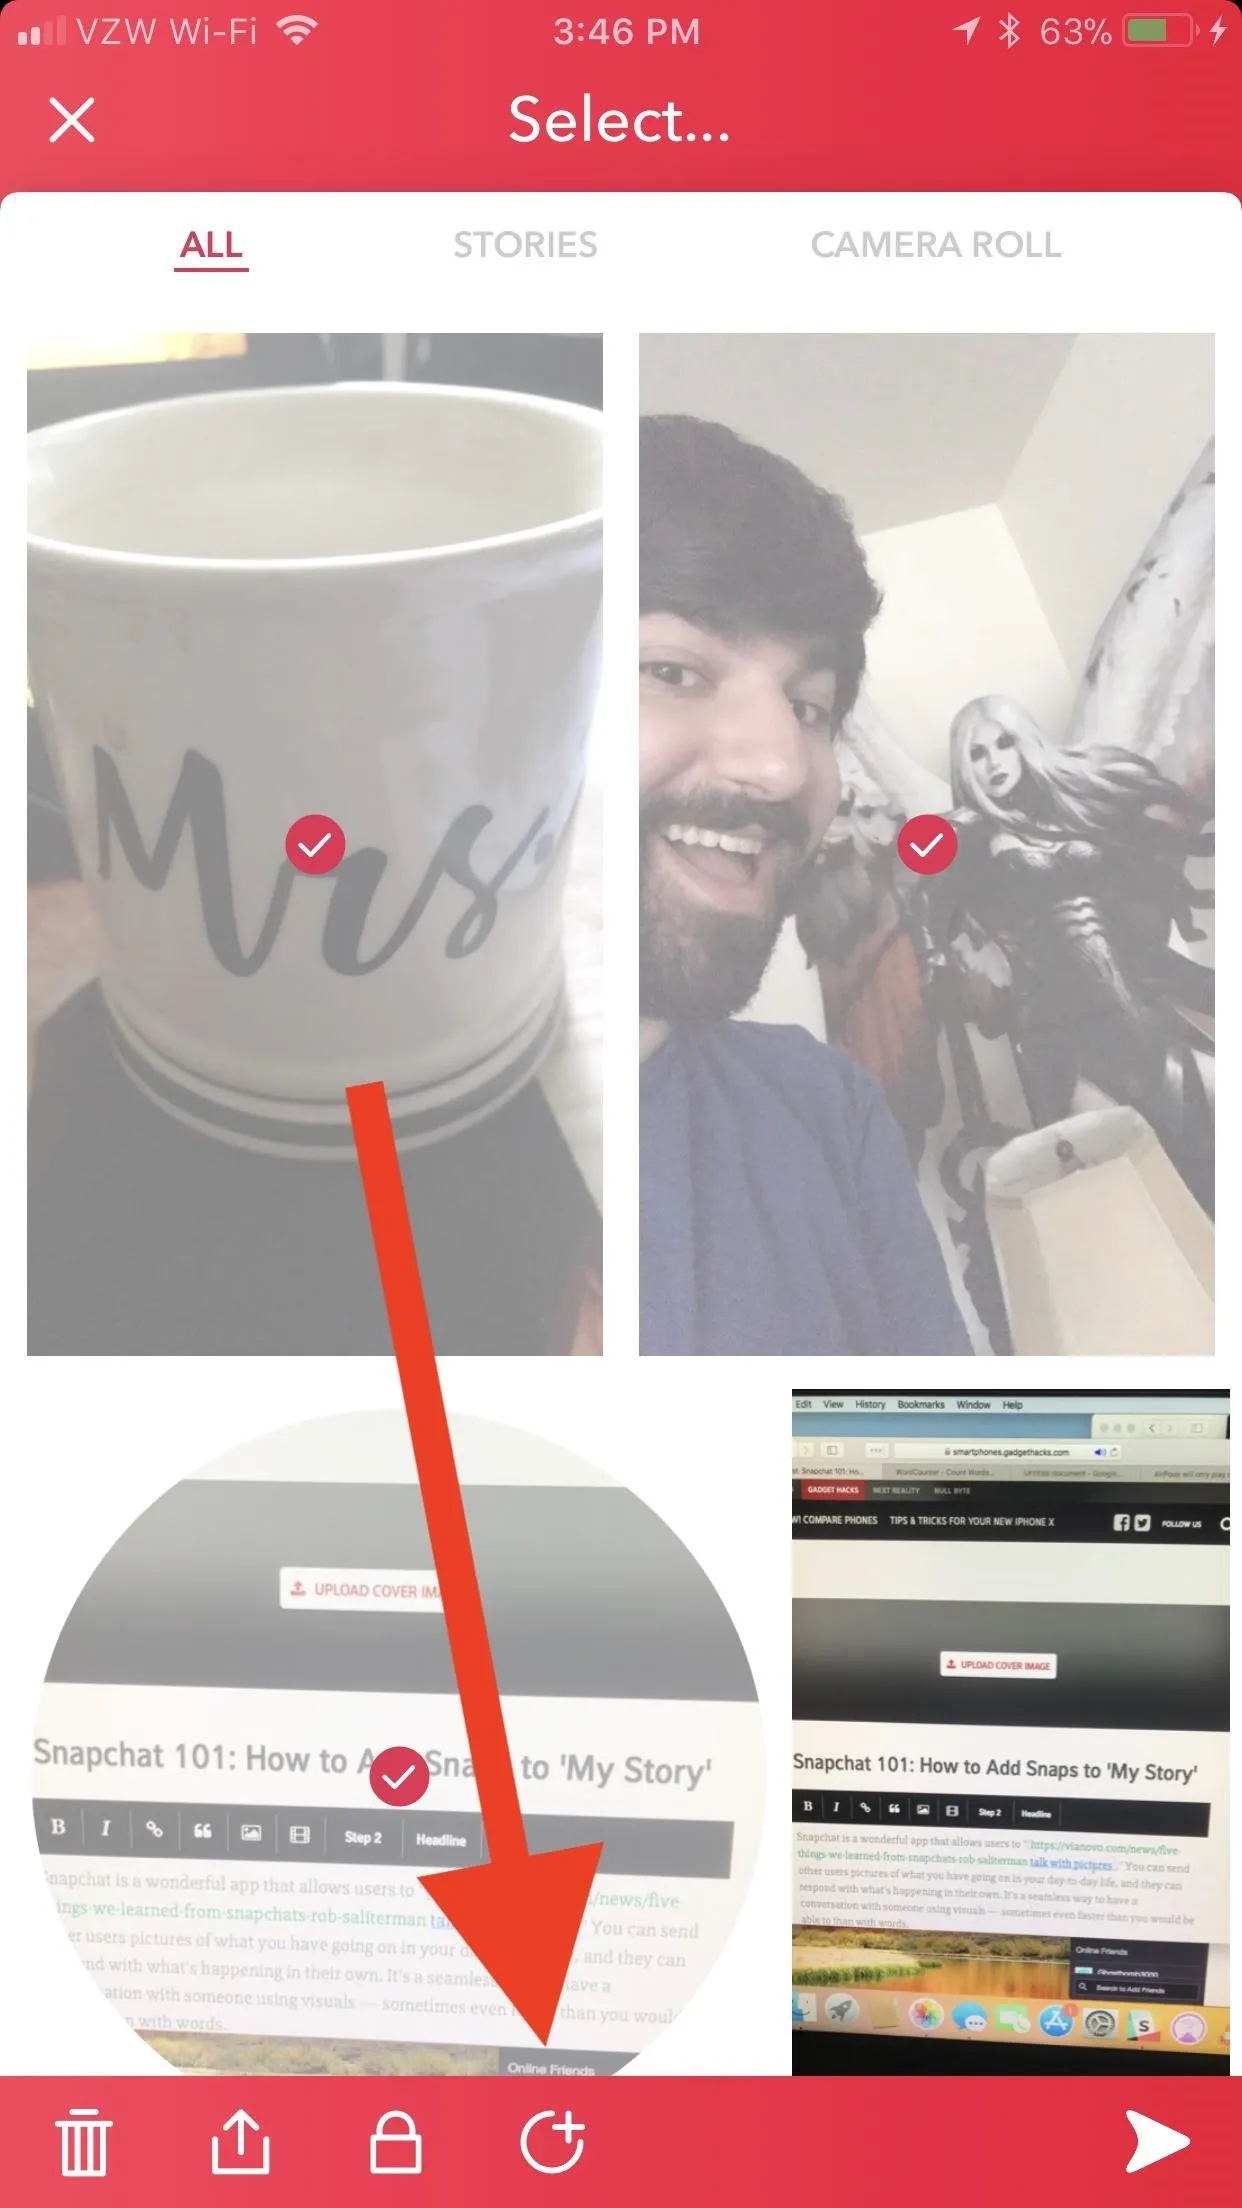
Select Multiple Snaps at Once
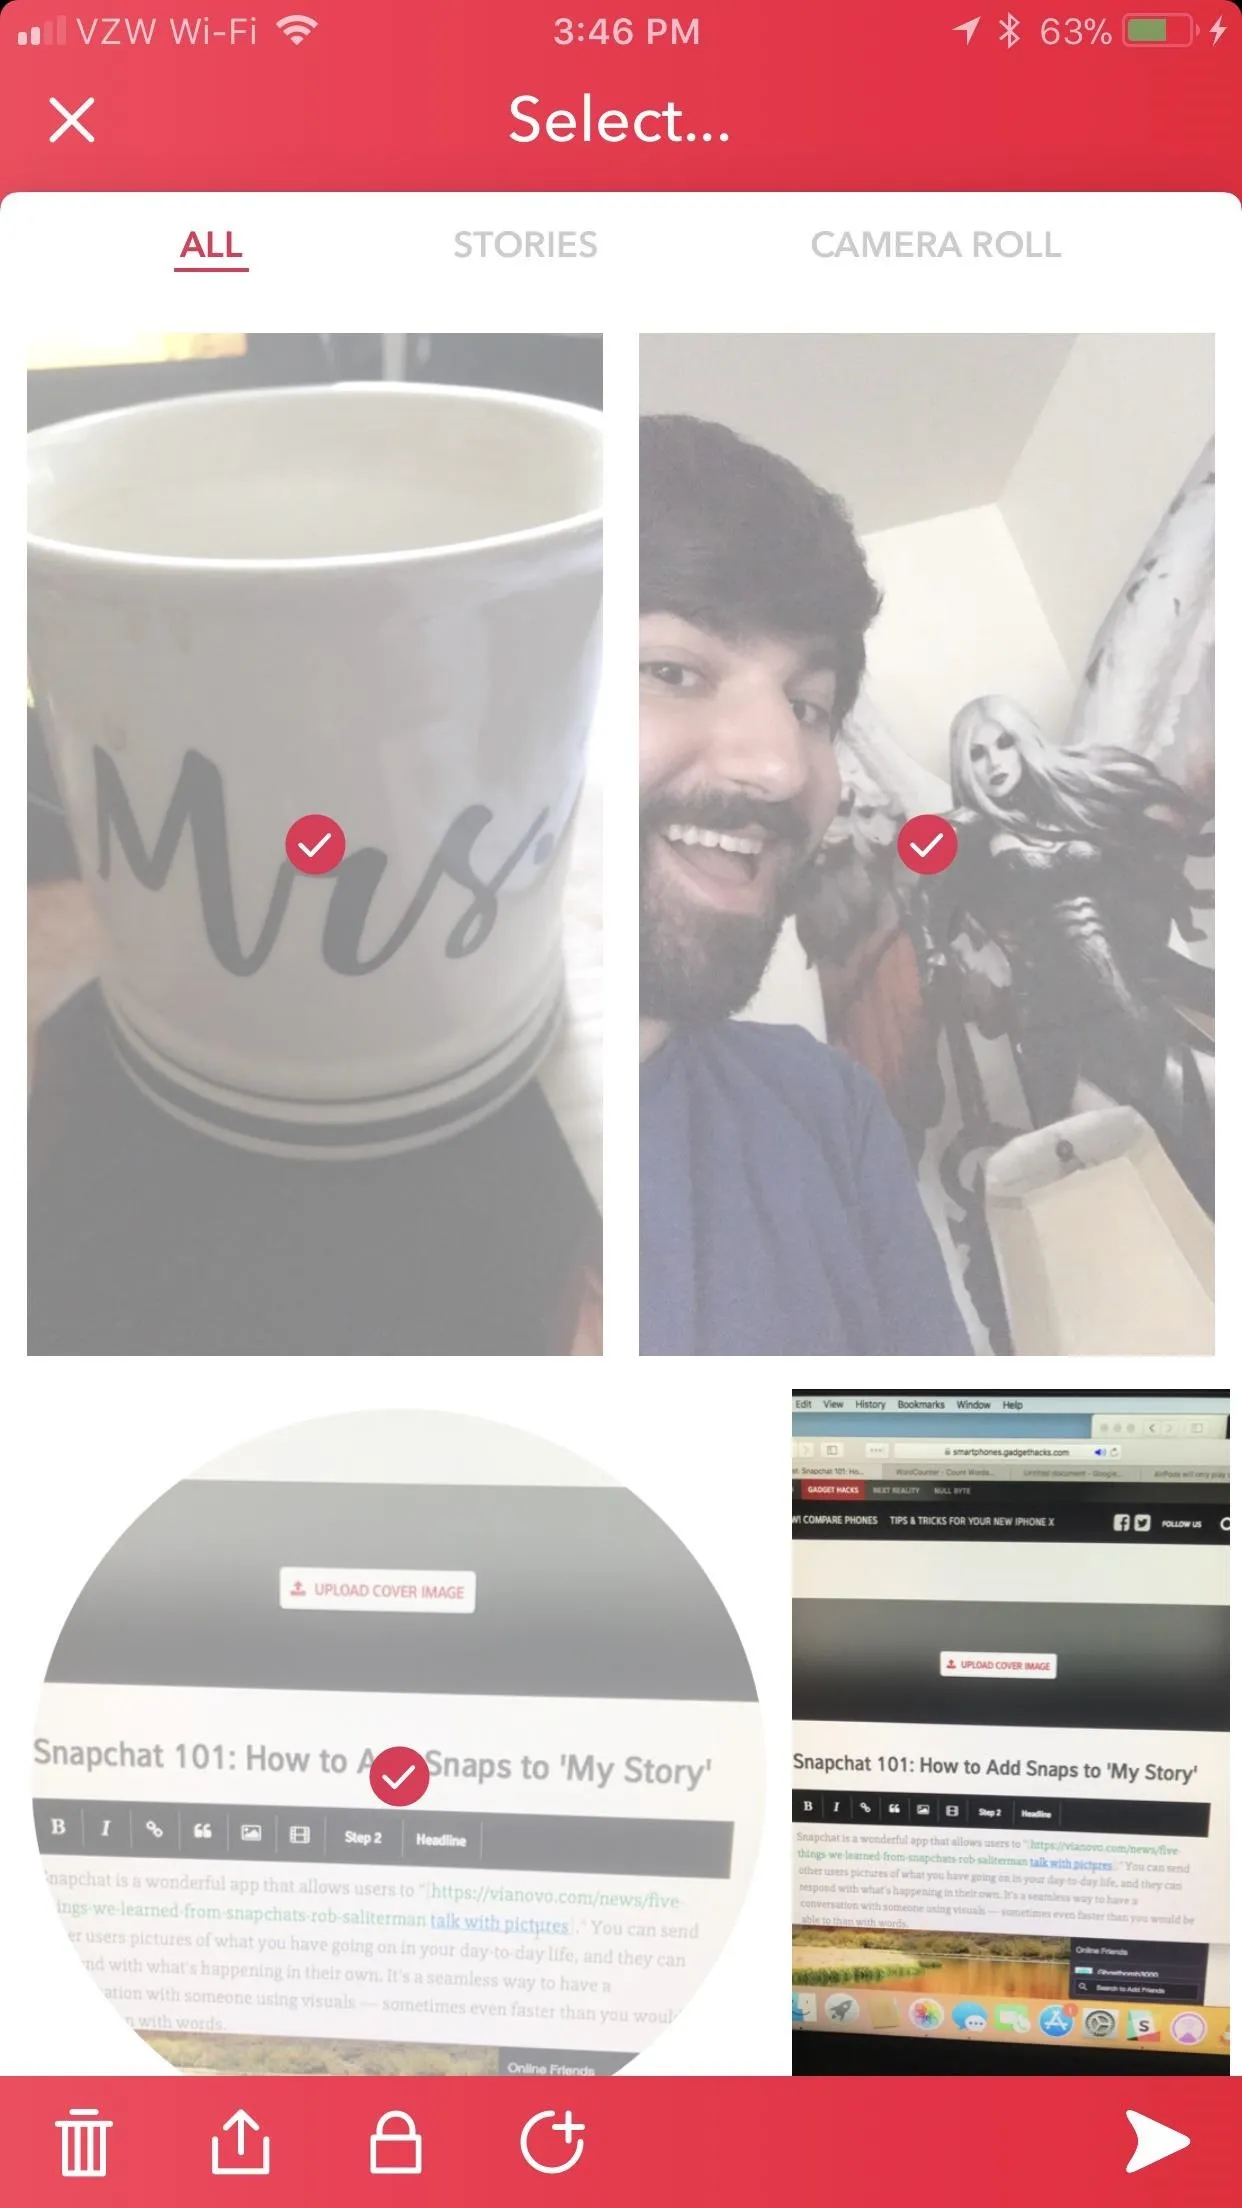
Lastly, I want to touch on how to select multiple Snaps at once from the Memories screen. Tap the check icon in the top-right corner, then tap each file you wish to select (cancel this action by tapping the "X" icon in the top-left). Once a file is selected, it will be grayed out with a red checkmark on it.
You can mix and different file types here, so don't feel pressured to stick with only snaps or only videos. A small menu will appear from the bottom that is very similar to the sub-menu we accessed in Steps 4–7. The garbage icon will delete multiple files, the "share" icon will export, and the padlock will move them to "My Eyes Only."
The final icon (the circle with a plus sign) will create a Story for the files you select (the only files that you may not use here are the ones from "Videos"). This Story will only be accessible from the Stories tab of your Memories, but you can always add it to "My Story" using the three-dot menu from Step 3. Then, tap "Send Story" just as you did in Step 8.
So how do you like the Memories feature from Snapchat? What have you bundled into a Story? Let us know in the comments below.
- Follow Gadget Hacks on Facebook, Twitter, YouTube, and Flipboard
- Follow WonderHowTo on Facebook, Twitter, Pinterest, and Flipboard
Cover image via TeroVesalainen/Pixabay, screenshots by Brian Lang/Gadget Hacks


Comments
Be the first, drop a comment!