


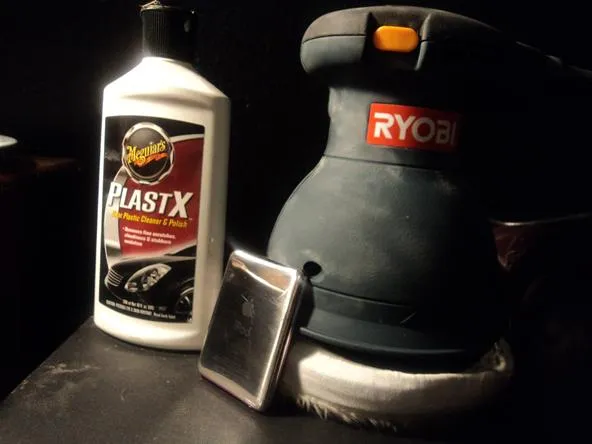
Materials Needed:
- iPod
- 1500 grit sandpaper (or higher) - Can be bought at AutoZone.
- PlastX (or any other polishing liquid) - Can be bought at AutoZone.
- Buffer - Can be bought at Home Depot
- Sponge pad (optional) - Can be bought at Home Depot
Sand the iPod.
Warning
- If you are worried about hurting or damaging your iPod then do not proceed.
Sand the iPod with the 1500 grit sandpaper. The longer you sand the more scratches you get out.

(See above. This is how it looked before I got started.)
Remember 1500 grit sandpaper or higher.

Fold the sandpaper into thirds. The pad helps you sand, but it is not needed in order to get a nice clean iPod. Sand it in one direction only. Do not sand it in circles.

Buff It.
After you have sanded it, it should look a little bit cleaner.

Buff it with the buffer and the buffing liquid.

Do not buff it while it is laying on the table. Hold the Ipod with your hand and hold it WELL.
Clean Up.
After you have buffed it, the iPod will look a little less shiny like this:

Just wipe it down with a napkin or a rag or just use your shirt, then it should look something like this:


Your iPod will now be very shiny, and if you plan on selling it you could get a little extra money.


Comments
Be the first, drop a comment!