


There are so many tips and tricks on how to improve your Instagram photos, but one really easy way is to use the HDR camera setting. HDR is high dynamic range imaging and takes three exposures of a photo — overexposed, underexposed, and one in the middle at the normal exposure. The end result is just one image of the three exposures combined.
HDR brings out better color and details in an image that a regular photo might not catch. A normal snap might concentrate on a bright sky instead of the subject in the photo, causing the subject to look dark and lose details. Likewise, if the subject is the main factor, the sky will end up unnaturally bright. HDR finds a nice balance between the two for a pro-looking photo that's both lit well and detailed.
While HDR is not appropriate for every photo that you'll want to take, I have found it to be helpful when taking selfies, which you know, is super important on Instagram.
You should definitely also use HDR when taking landscape or outdoor portrait photos. I would not recommend using HDR when it would be better to use a flash (if you aren't able to enable flash and HDR simultaneously on your device), when you are shooting moving subjects (the result might look deformed), or when you want to capture realistic colors (HDR tends to desaturate color).
Overall, I would suggest enabling HDR on your phone and experimenting with the quality of photo that you get. From there, you can decide when HDR is appropriate for you or not.
How to Use HDR on an iPhone
Open up your Camera app. At the top lefthand corner of the screen, you'll see "HDR." Tap on it. To enable HDR each time you shoot, tap "Auto." If you'd like to just use HDR for your purposes now, then tap on "On."

If you'd like to also save a non-HDR photo so you can compare the two side by side and have a better chance of getting the picture you want, then go to your iPhone's Settings app and scroll down and tap on "Camera" (in iOS 11) or "Photos & Camera" (in iOS 10 and below). At the bottom find the HDR section, then tap on the toggle to "Keep Normal Photo."
How to Use HDR on Android
First, check to see if the HDR capability is available to you in your device's Camera app.
If you are using a Samsung Galaxy device, then some devices list HDR under the "Shooting Mode" or "Smart Modes" menu. You may also find it listed as "Backlight HDR," "Backlight Correction HDR," or "Rich Tone." For some HTC devices, you may find HDR under the "Camera Scenes" section.
If you still can't find the HDR option, then try searching for it in the Camera app's Settings menu.
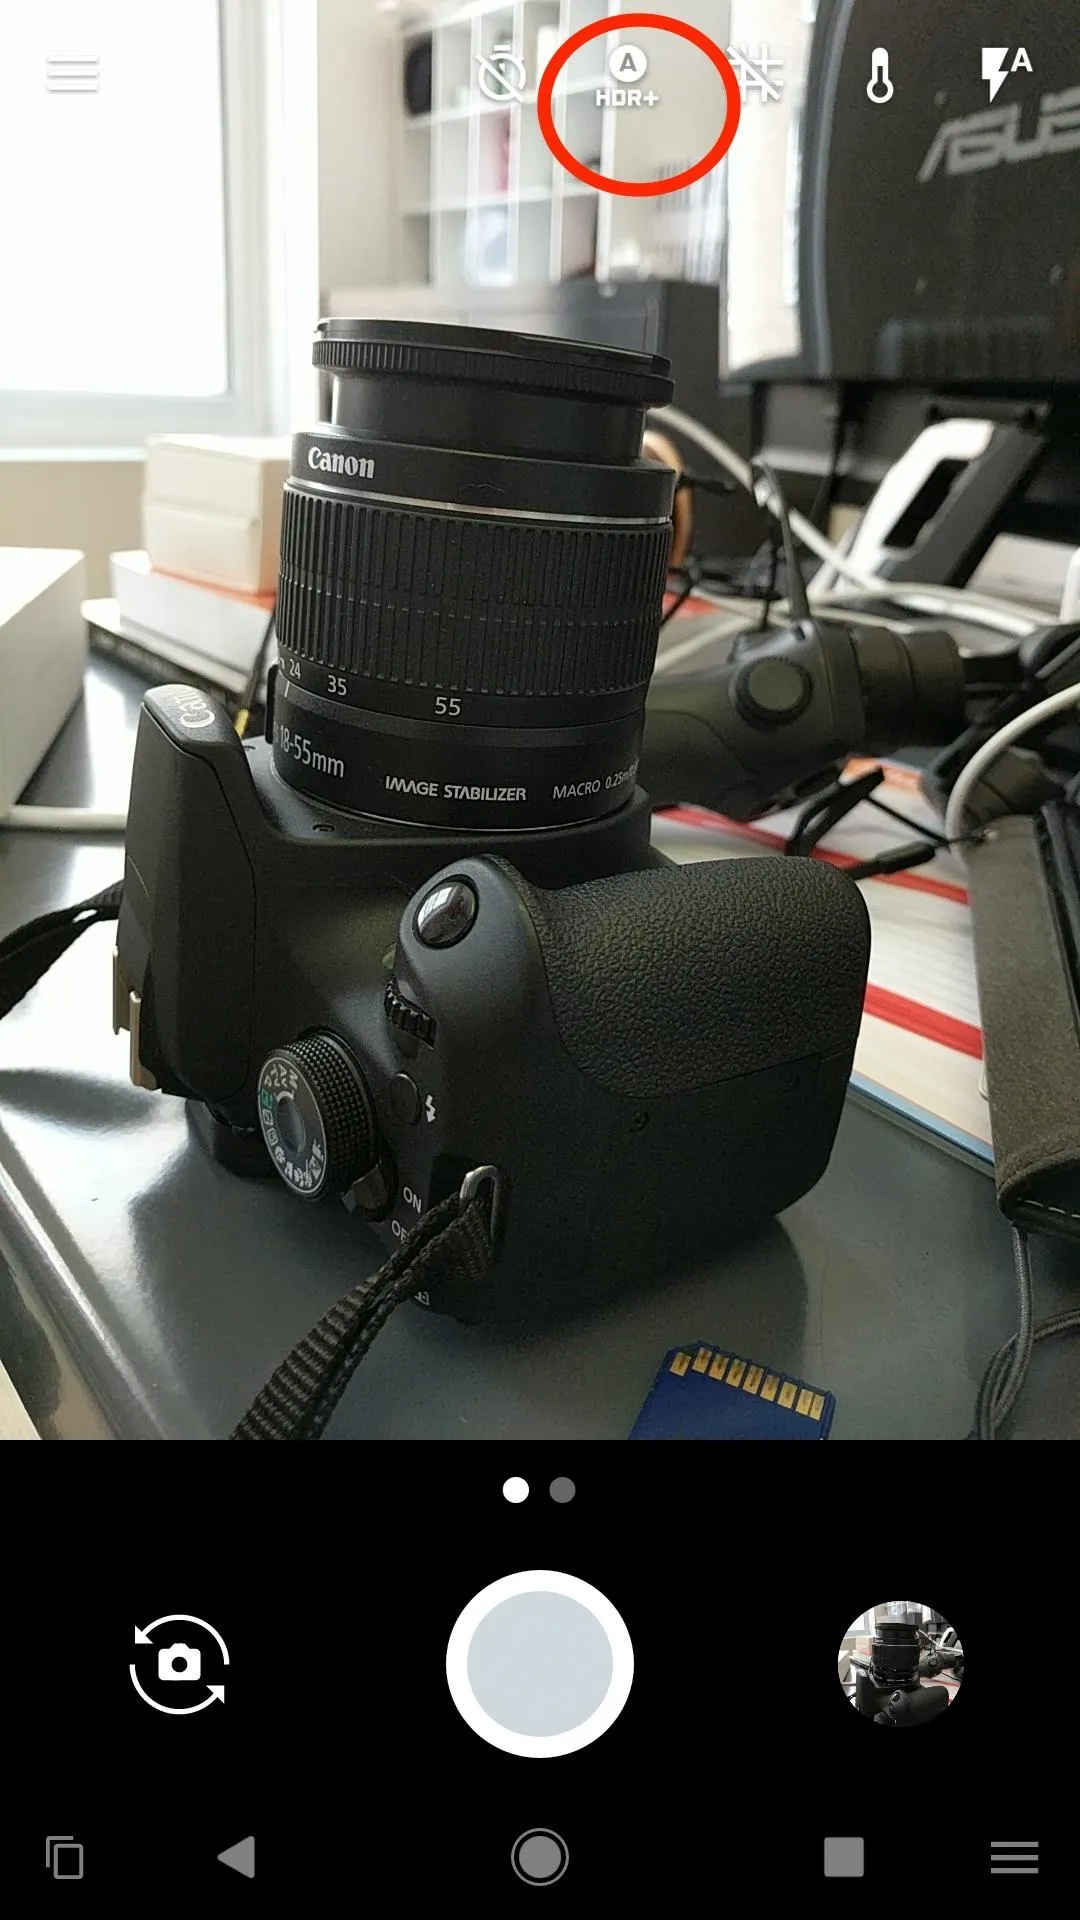
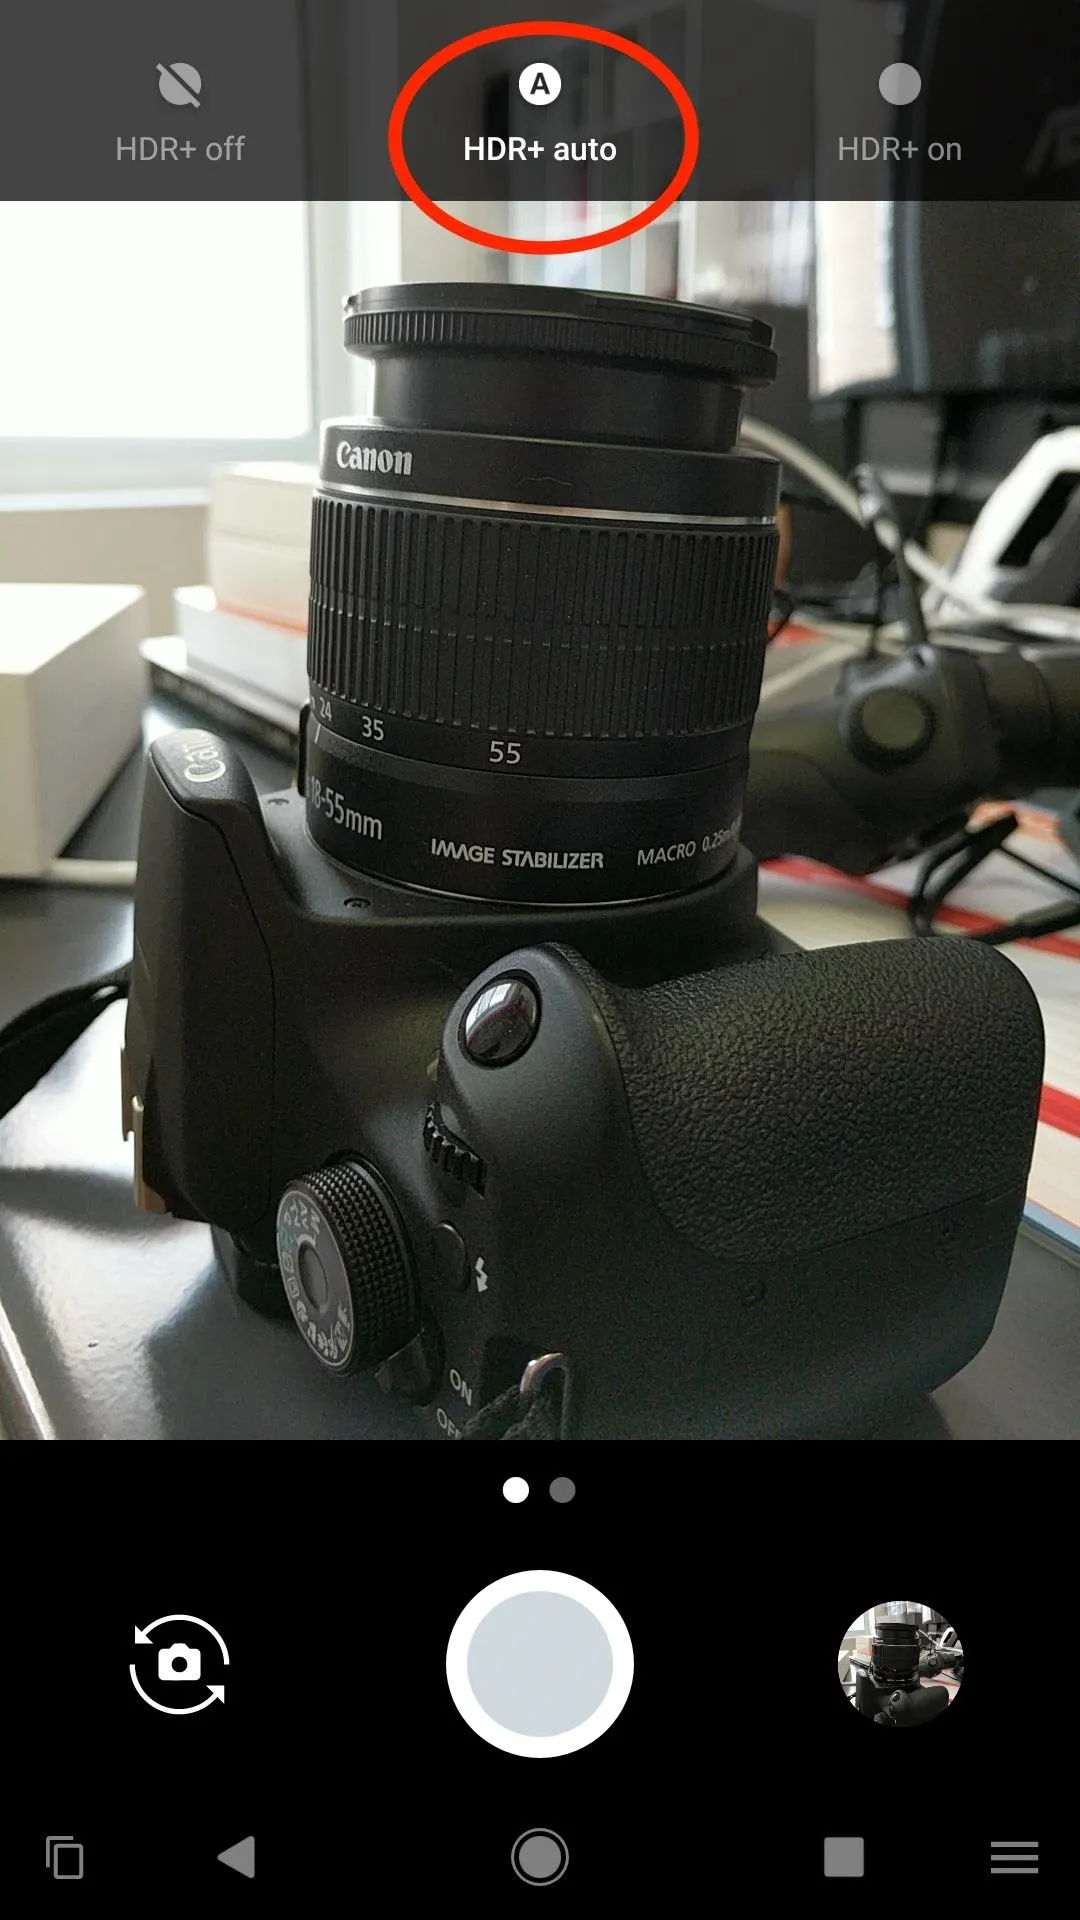
On the Google Pixel, you can find HDR in your Camera app. At the top right of the screen, you'll find "HDR+." Tap on that and enable it for "HDR+ auto" or "HDR+ on" depending on how you want to use the function.
Once enabled, test out HDR's capabilities. You may be surprised to find that if you take a selfie against the sun, it looks pretty freaking cool.
If you'd like to know how I used these emojis and stickers in my Instagram posts, then check out the link below.
And before you go, feel free to check out our video tutorial on how to enable HDR:
Follow me on Instagram @b3t.tina to see how I'm currently using these tips and tricks on my own profile page.
- Follow Gadget Hacks on Facebook, Twitter, Google+, YouTube, and Instagram
- Follow WonderHowTo on Facebook, Twitter, Pinterest, and Google+
Cover image, screenshots, and .gifs by Bettina Mangiaracina/Gadget Hacks


Comments
Be the first, drop a comment!