


We might not be able to hang out with friends in-person during a mandatory lockdown or self-quarantine, but we sure can in "Animal Crossing: New Horizons." Snapping pictures with the new NookPhone feels almost as personal as taking selfies in real life, so, naturally, we want those memories to live on our real phones as well. In pure Nintendo form, however, it's not easy.
The first thing to understand here is that the photos you take with your NookPhone aren't really "photos," they're screenshots. It's just like using the screenshot button on your controller, only the NookPhone lets you frame up your shot, add filters, and all the rest. But since they are technically screenshots, they don't save to a photo library — they save to the screenshot library on your Switch.
- Don't Miss: Free Apps & Services to Use During the Pandemic
In the past, moving a screenshot from a Nintendo Switch to an iPhone or Android phone was enough to make you pull your hair out. Thanks to version 11.0.0, however, the process is vastly improved. It still isn't perfect, and it might make you wonder why Nintendo hasn't figured out a more straightforward method, but it isn't nearly as painful as it used to be.
If you want to see what it used to take to get your New Horizons screenshots on your phone, you can see those legacy instructions at the bottom of this article.
Share Directly to Your Smartphone
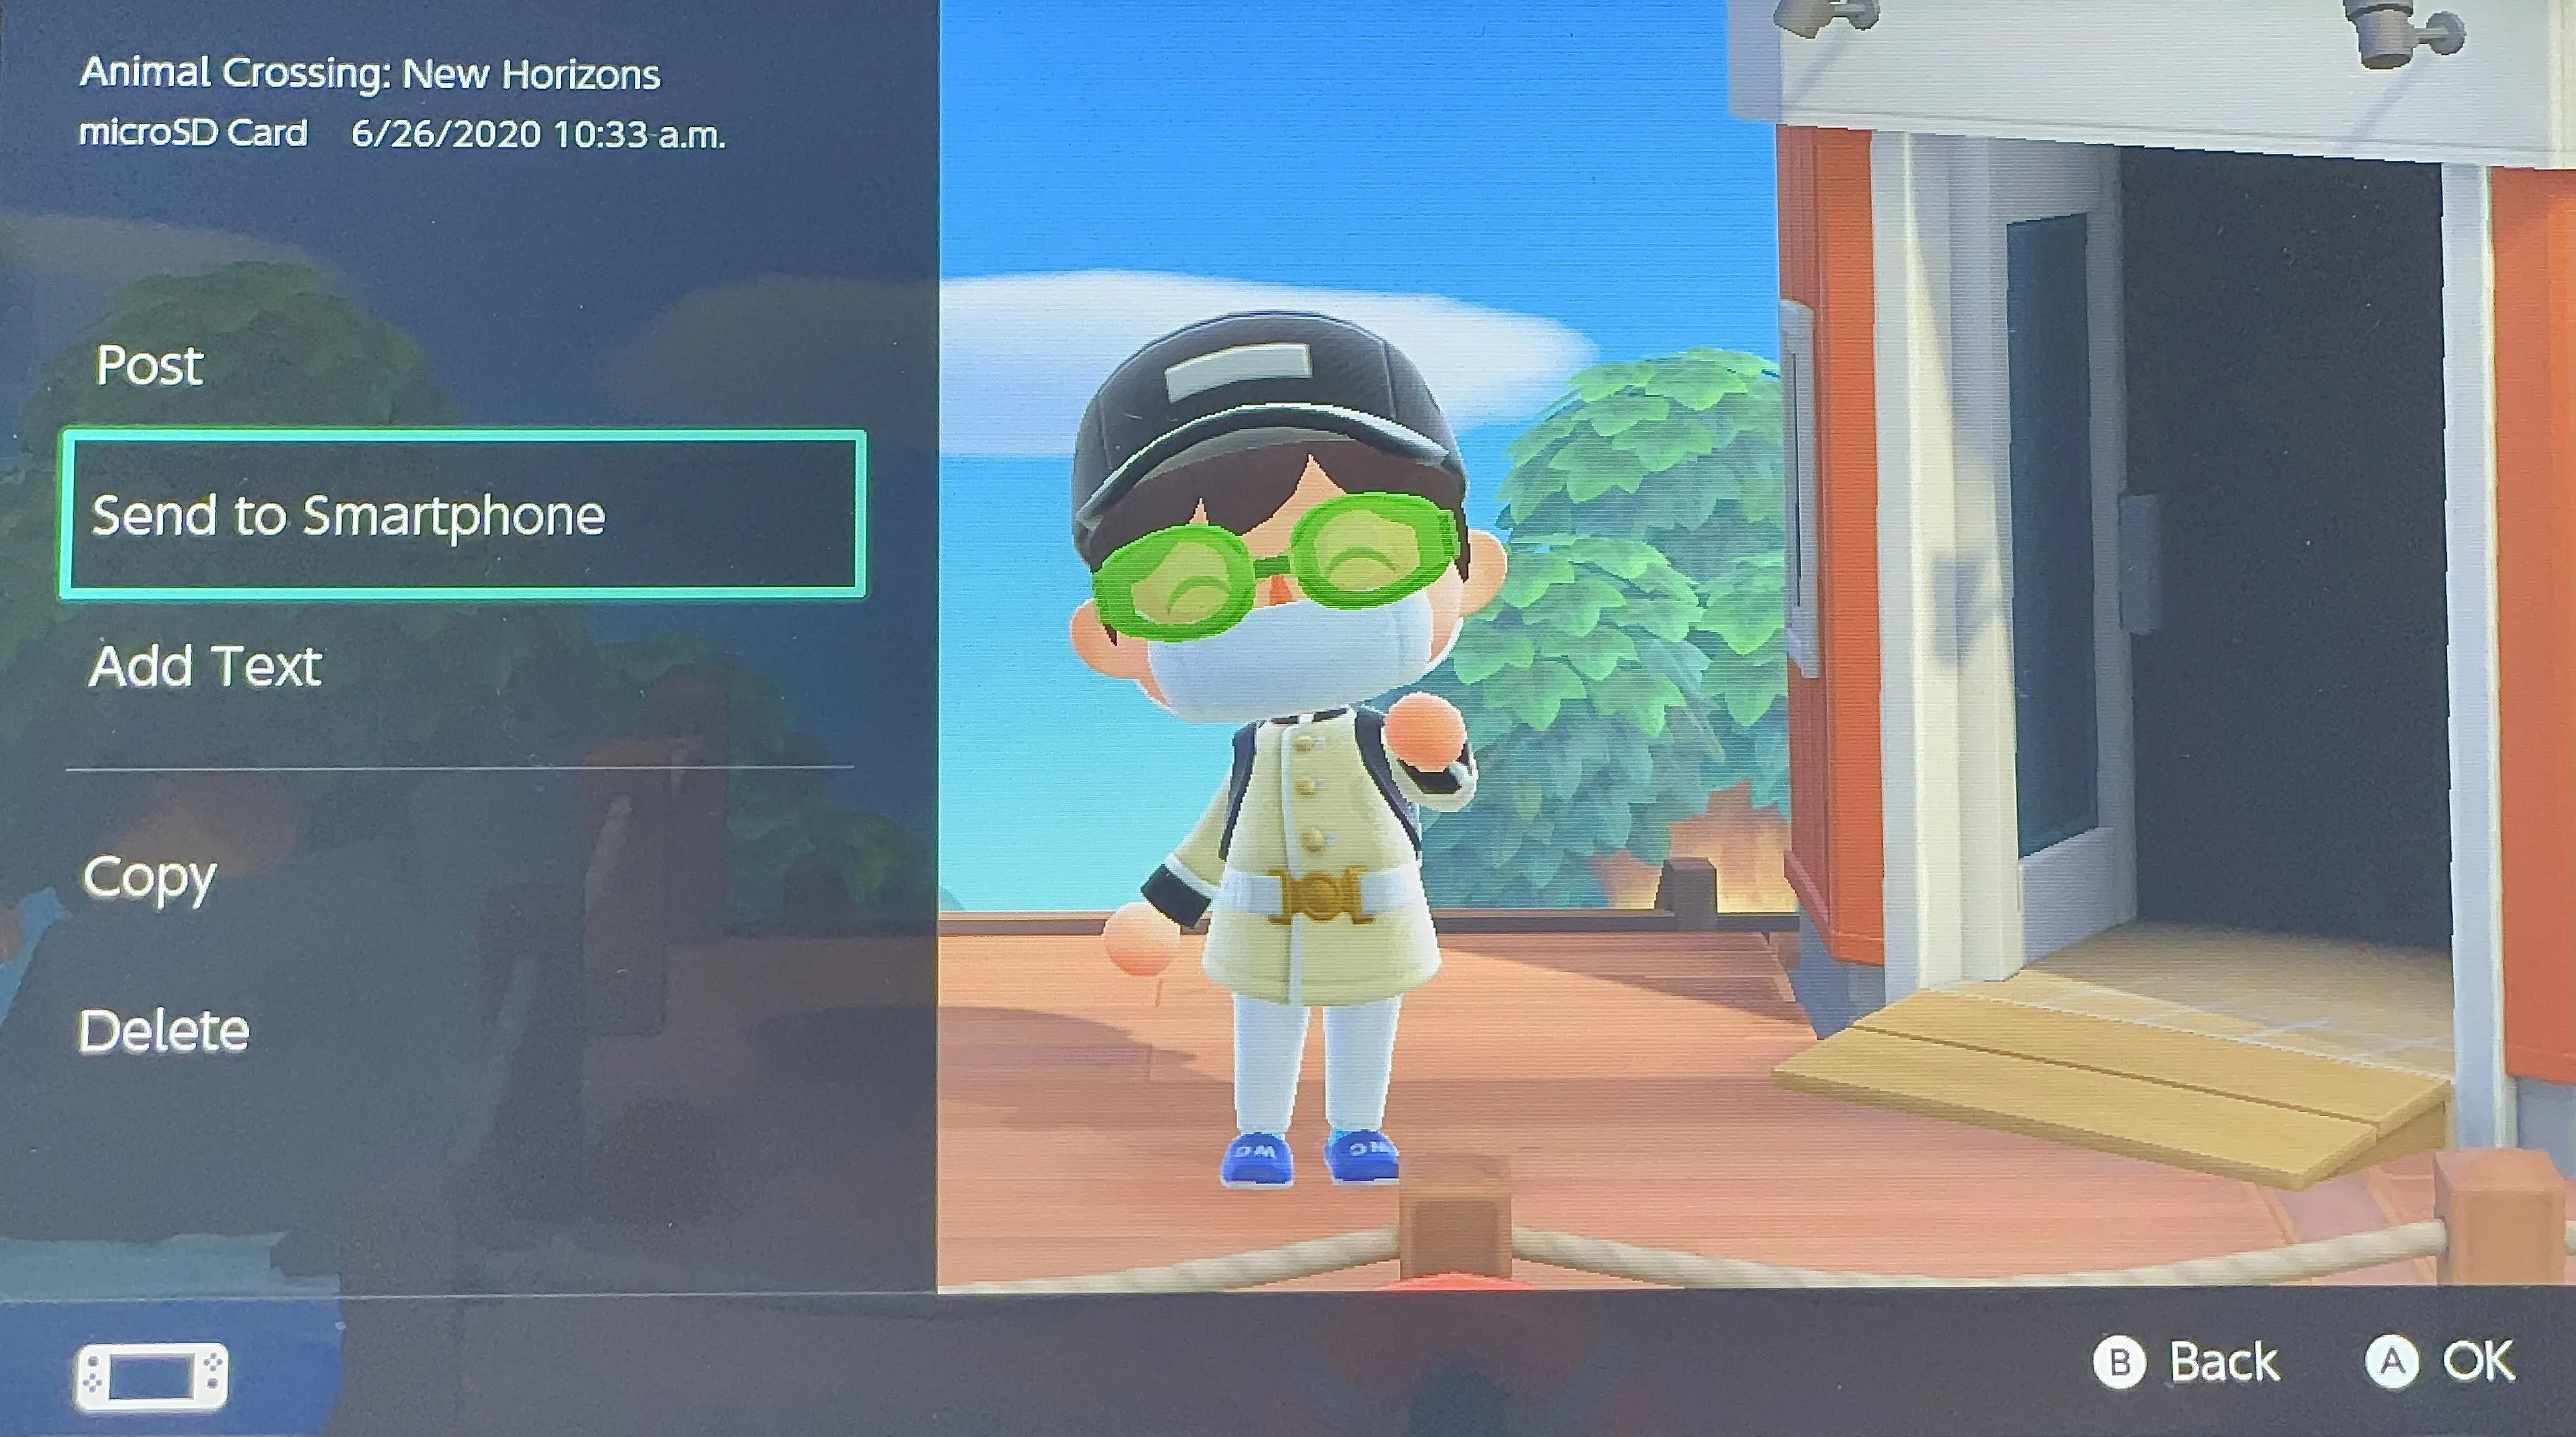
To start, make sure you have your iPhone or Android on-hand, and that your Switch is updated to at least version 11.0.0. Next, get to the Switch home screen, open "Album," then select the image you want to share. From here, press "A" for "Sharing & Editing," then select "Send to Smartphone" from the options.
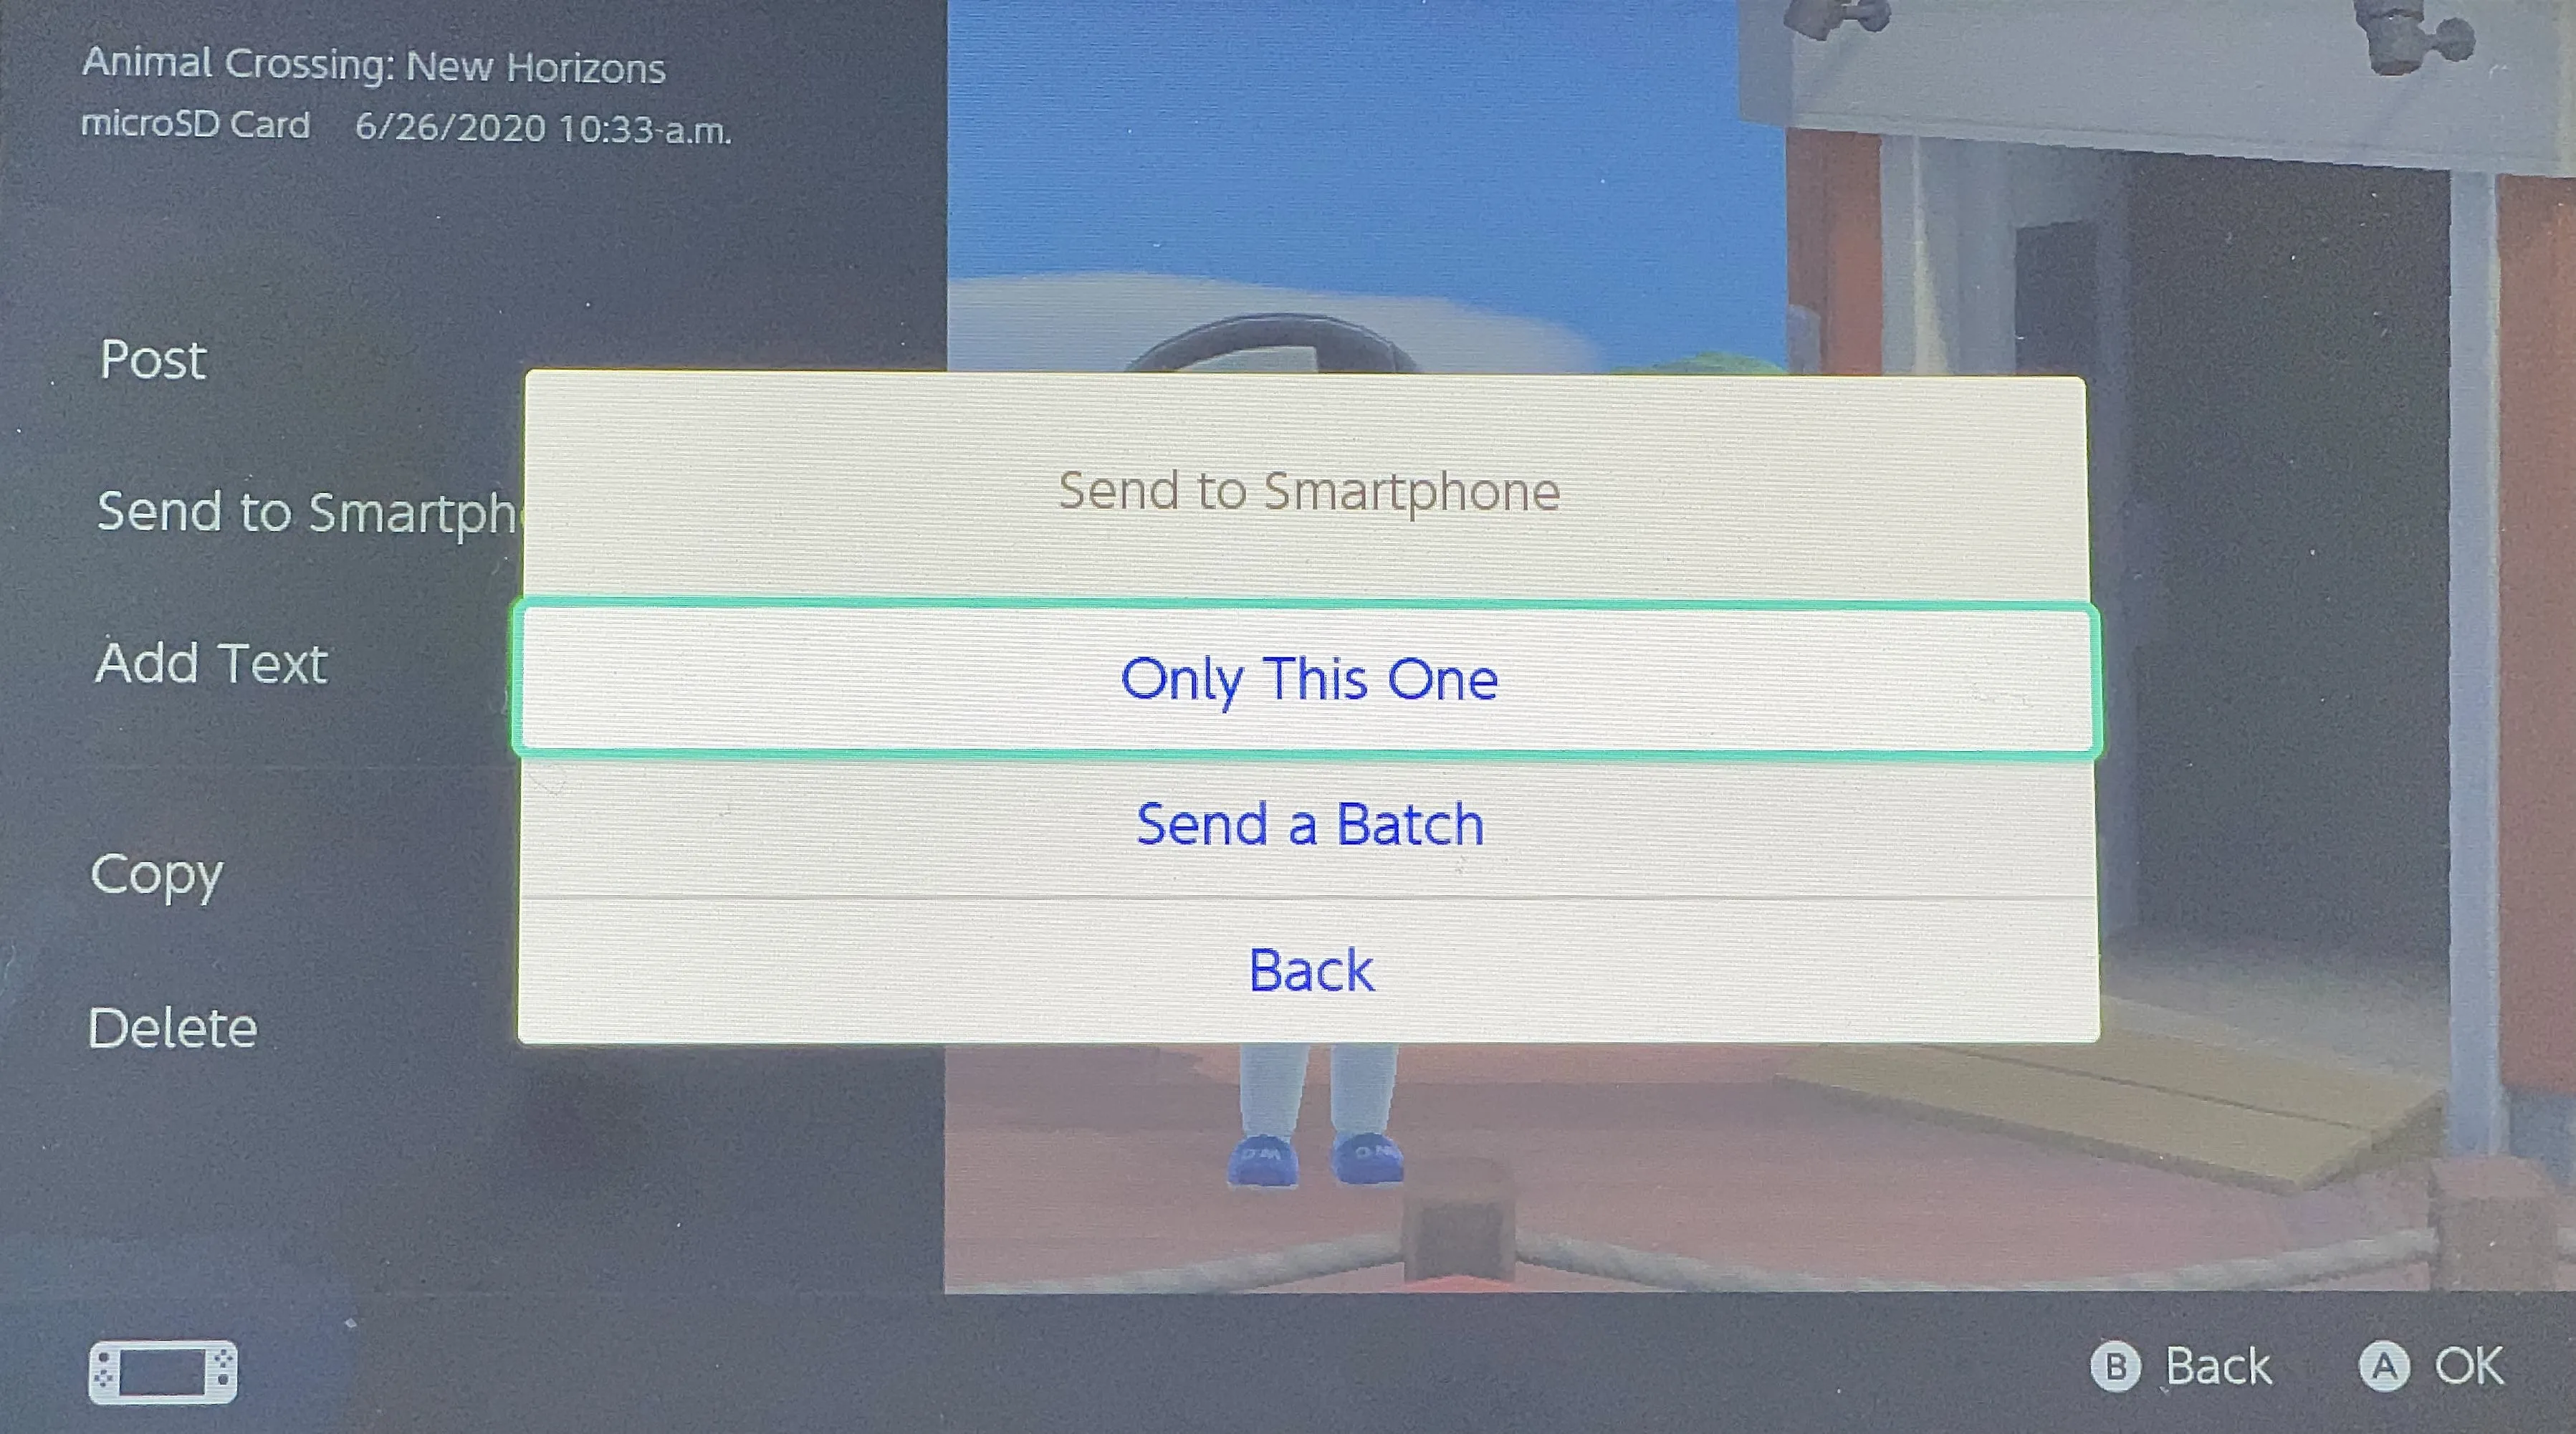
From here, you have the choice to select "Only This One," which only shares the photo in question, or "Send a Batch," which allows you to select up to 10 images at once.
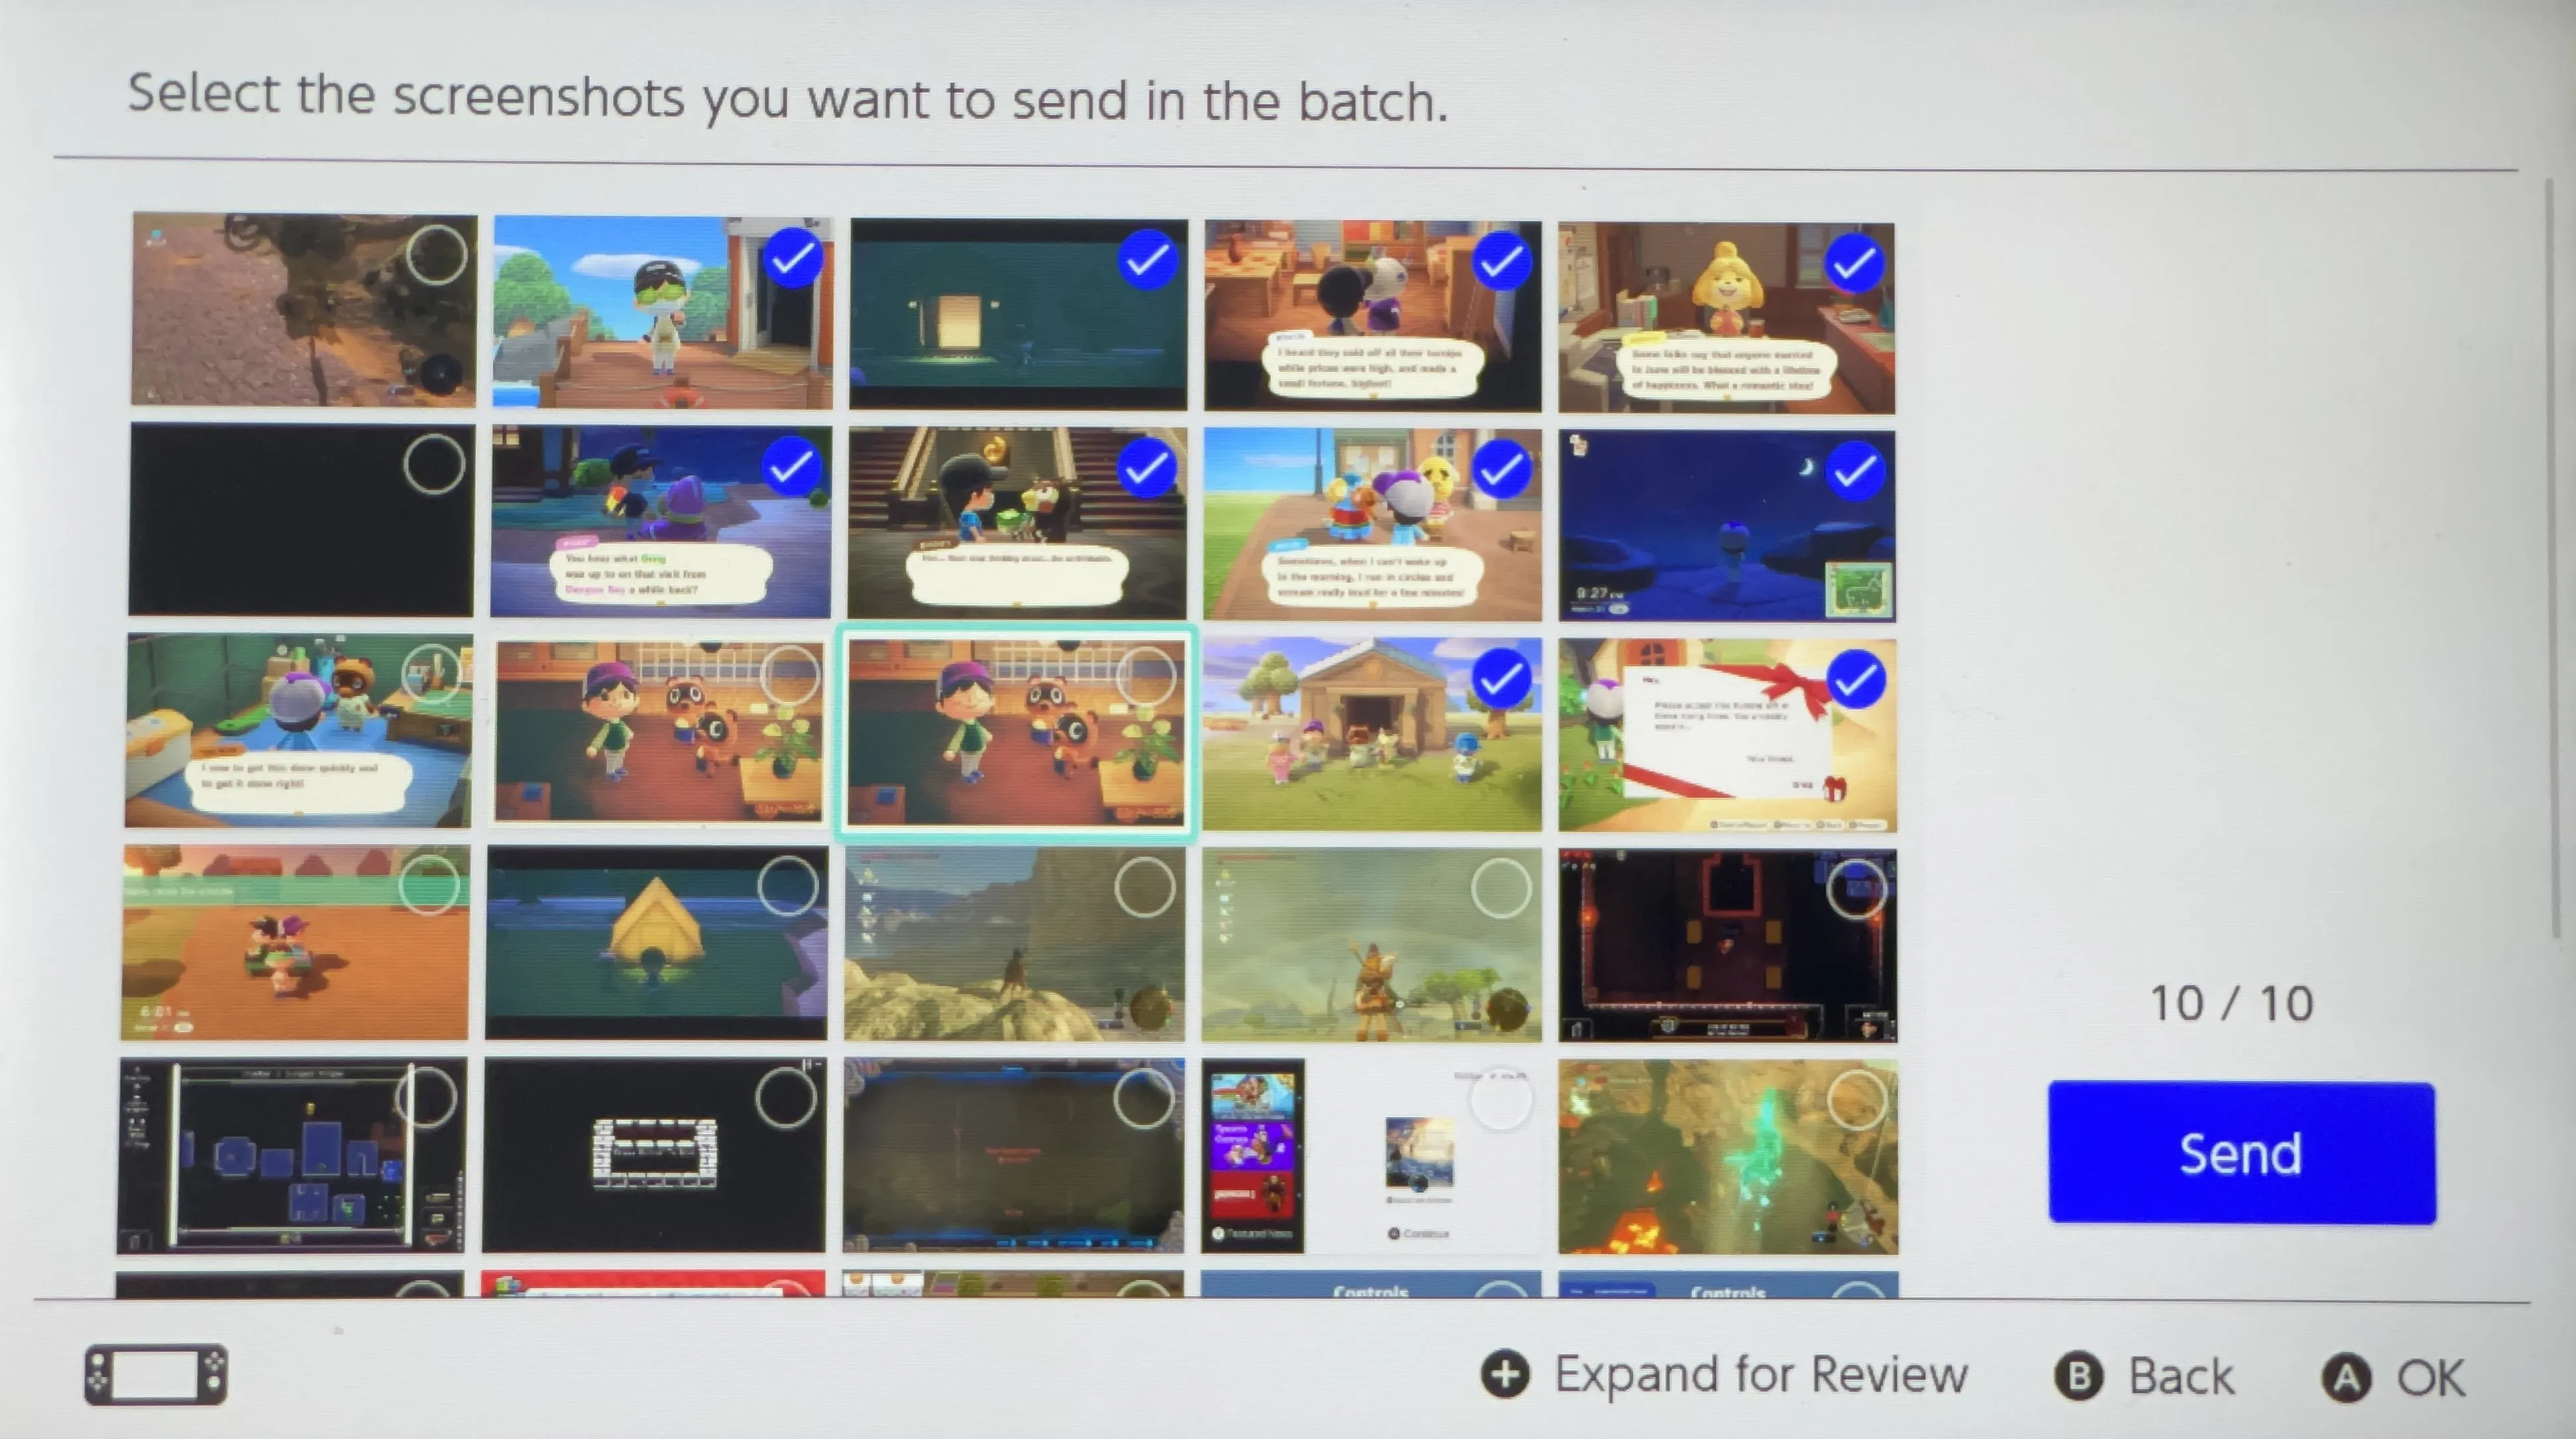
If you choose the latter, just select up to 10 desired images, then choose "Send."
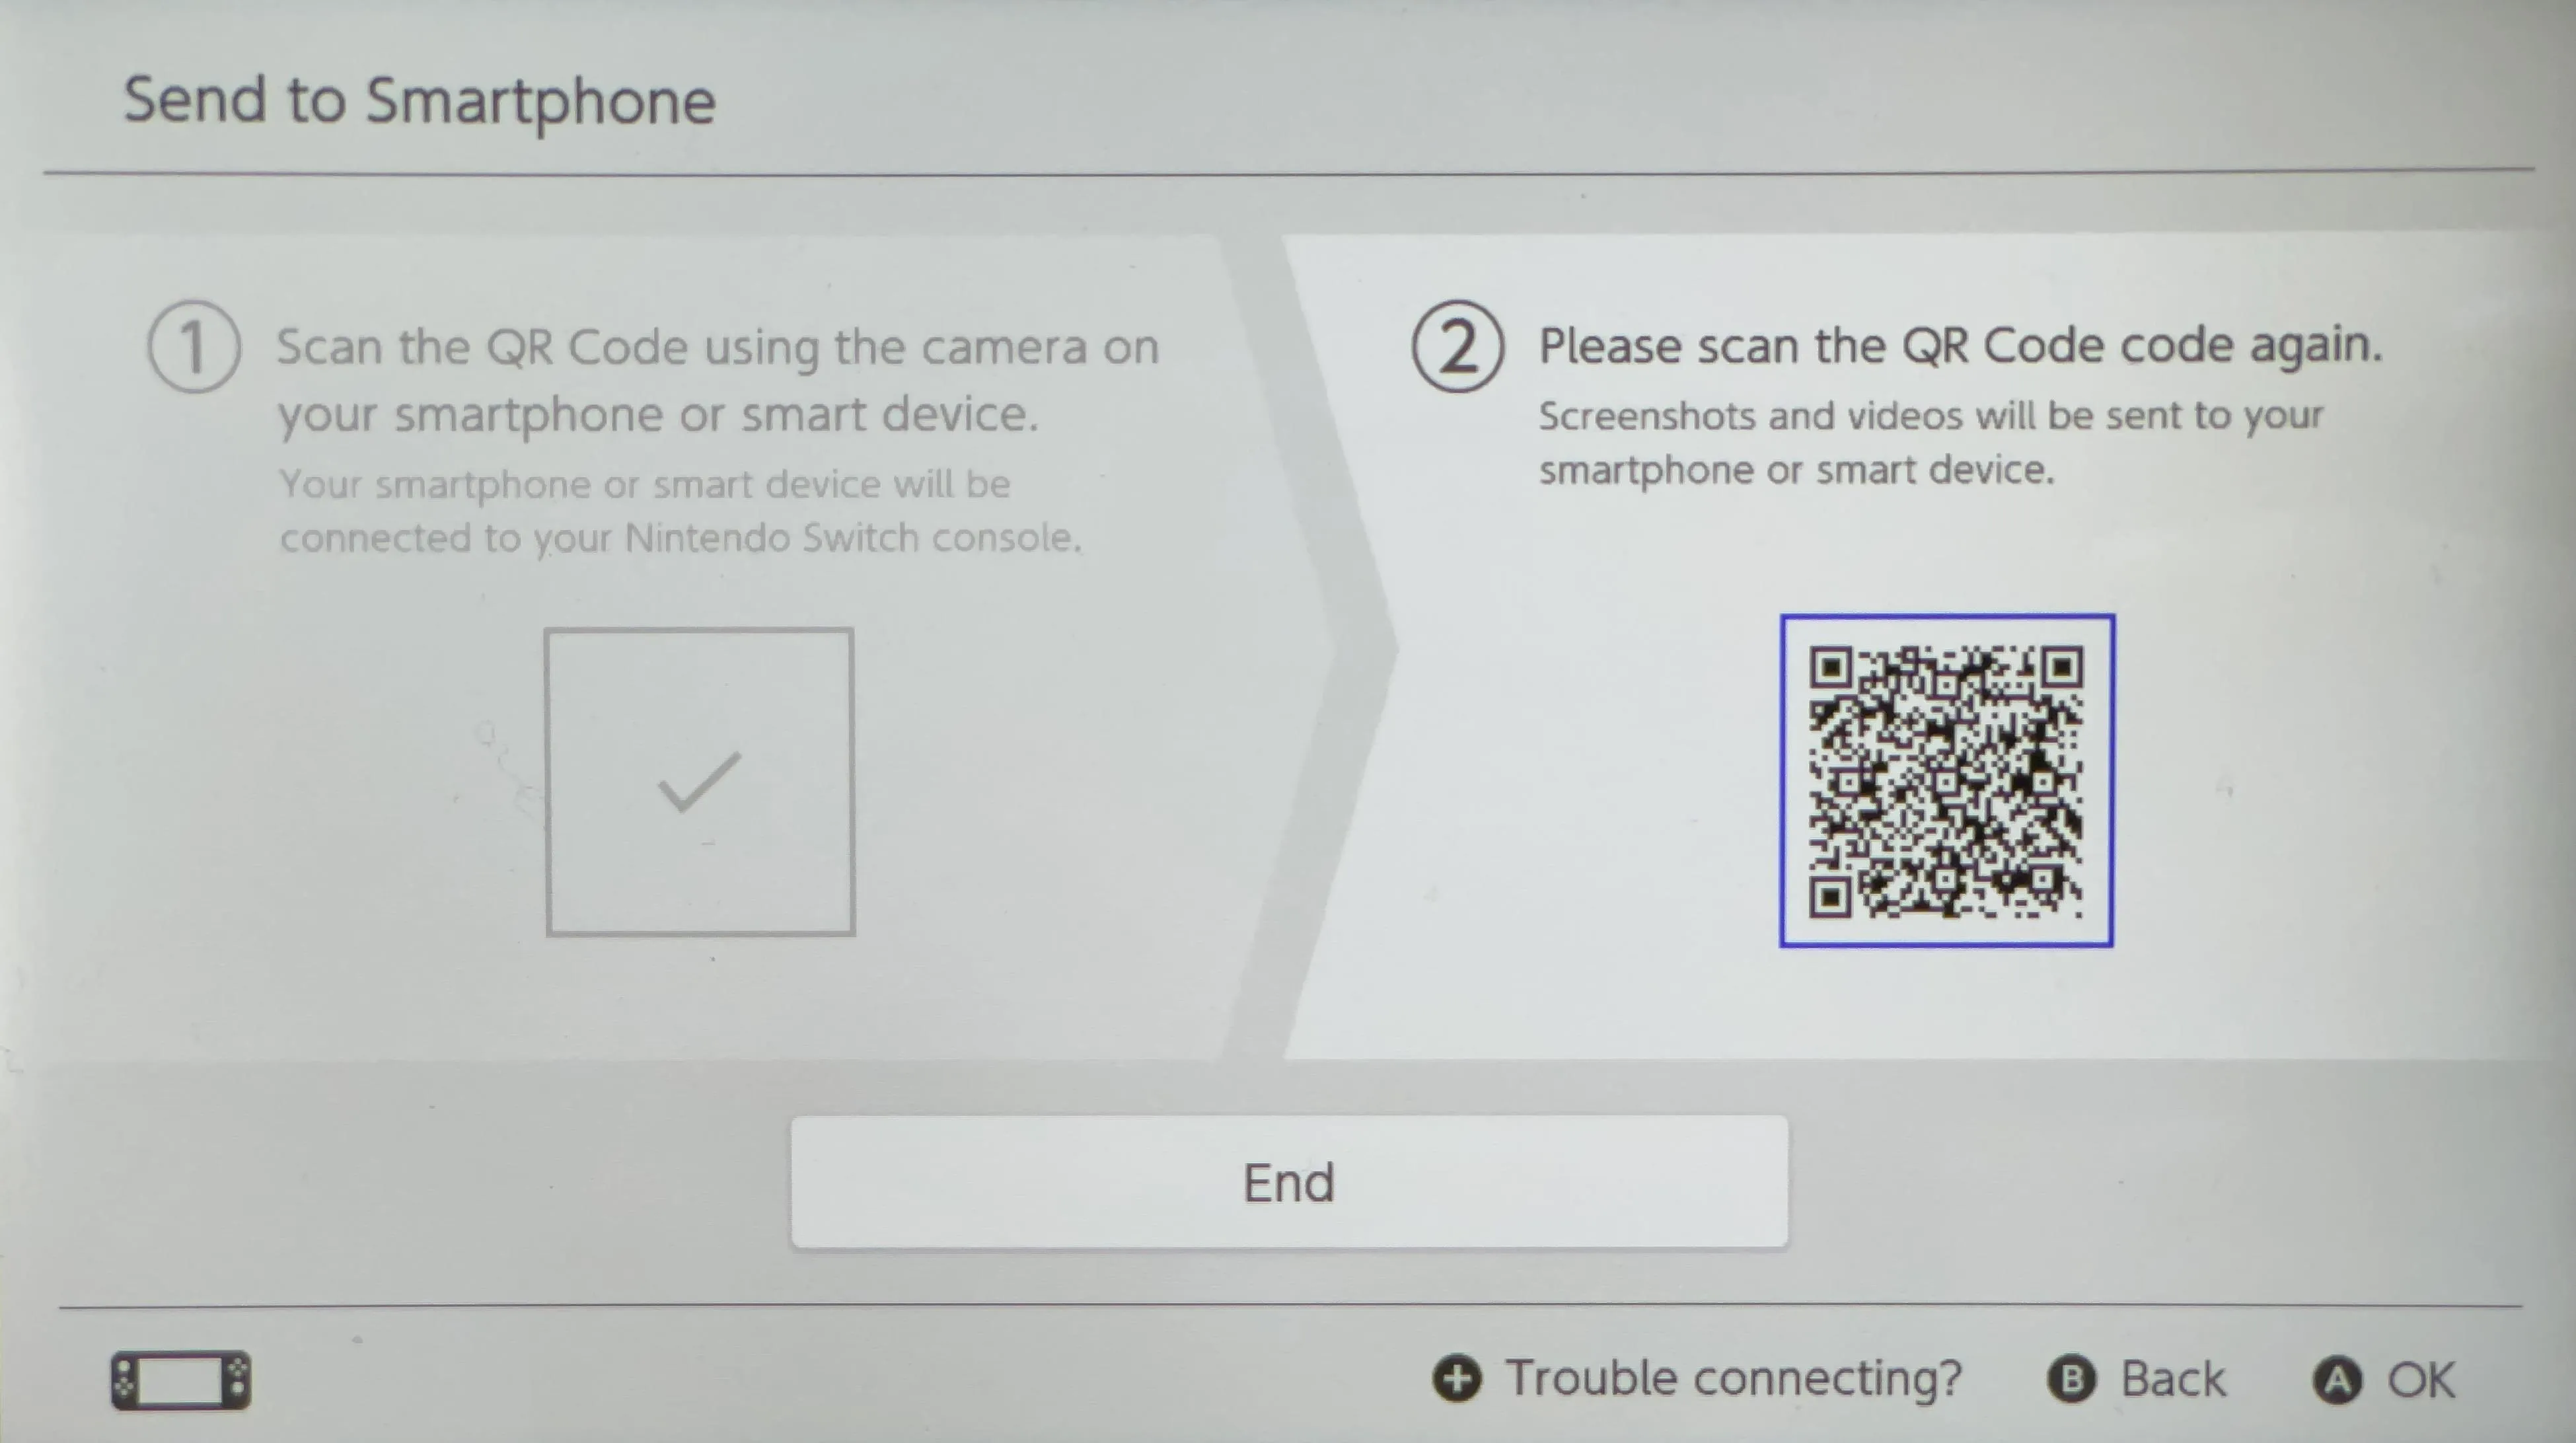
Once you choose "Only This One," or the "Send" button in "Send a Batch," you'll see a QR code on-screen. Take out your iPhone or Android, and scan the QR code. Tap on the pop-up that appears, and confirm you'd like to connect to the Switch's network.
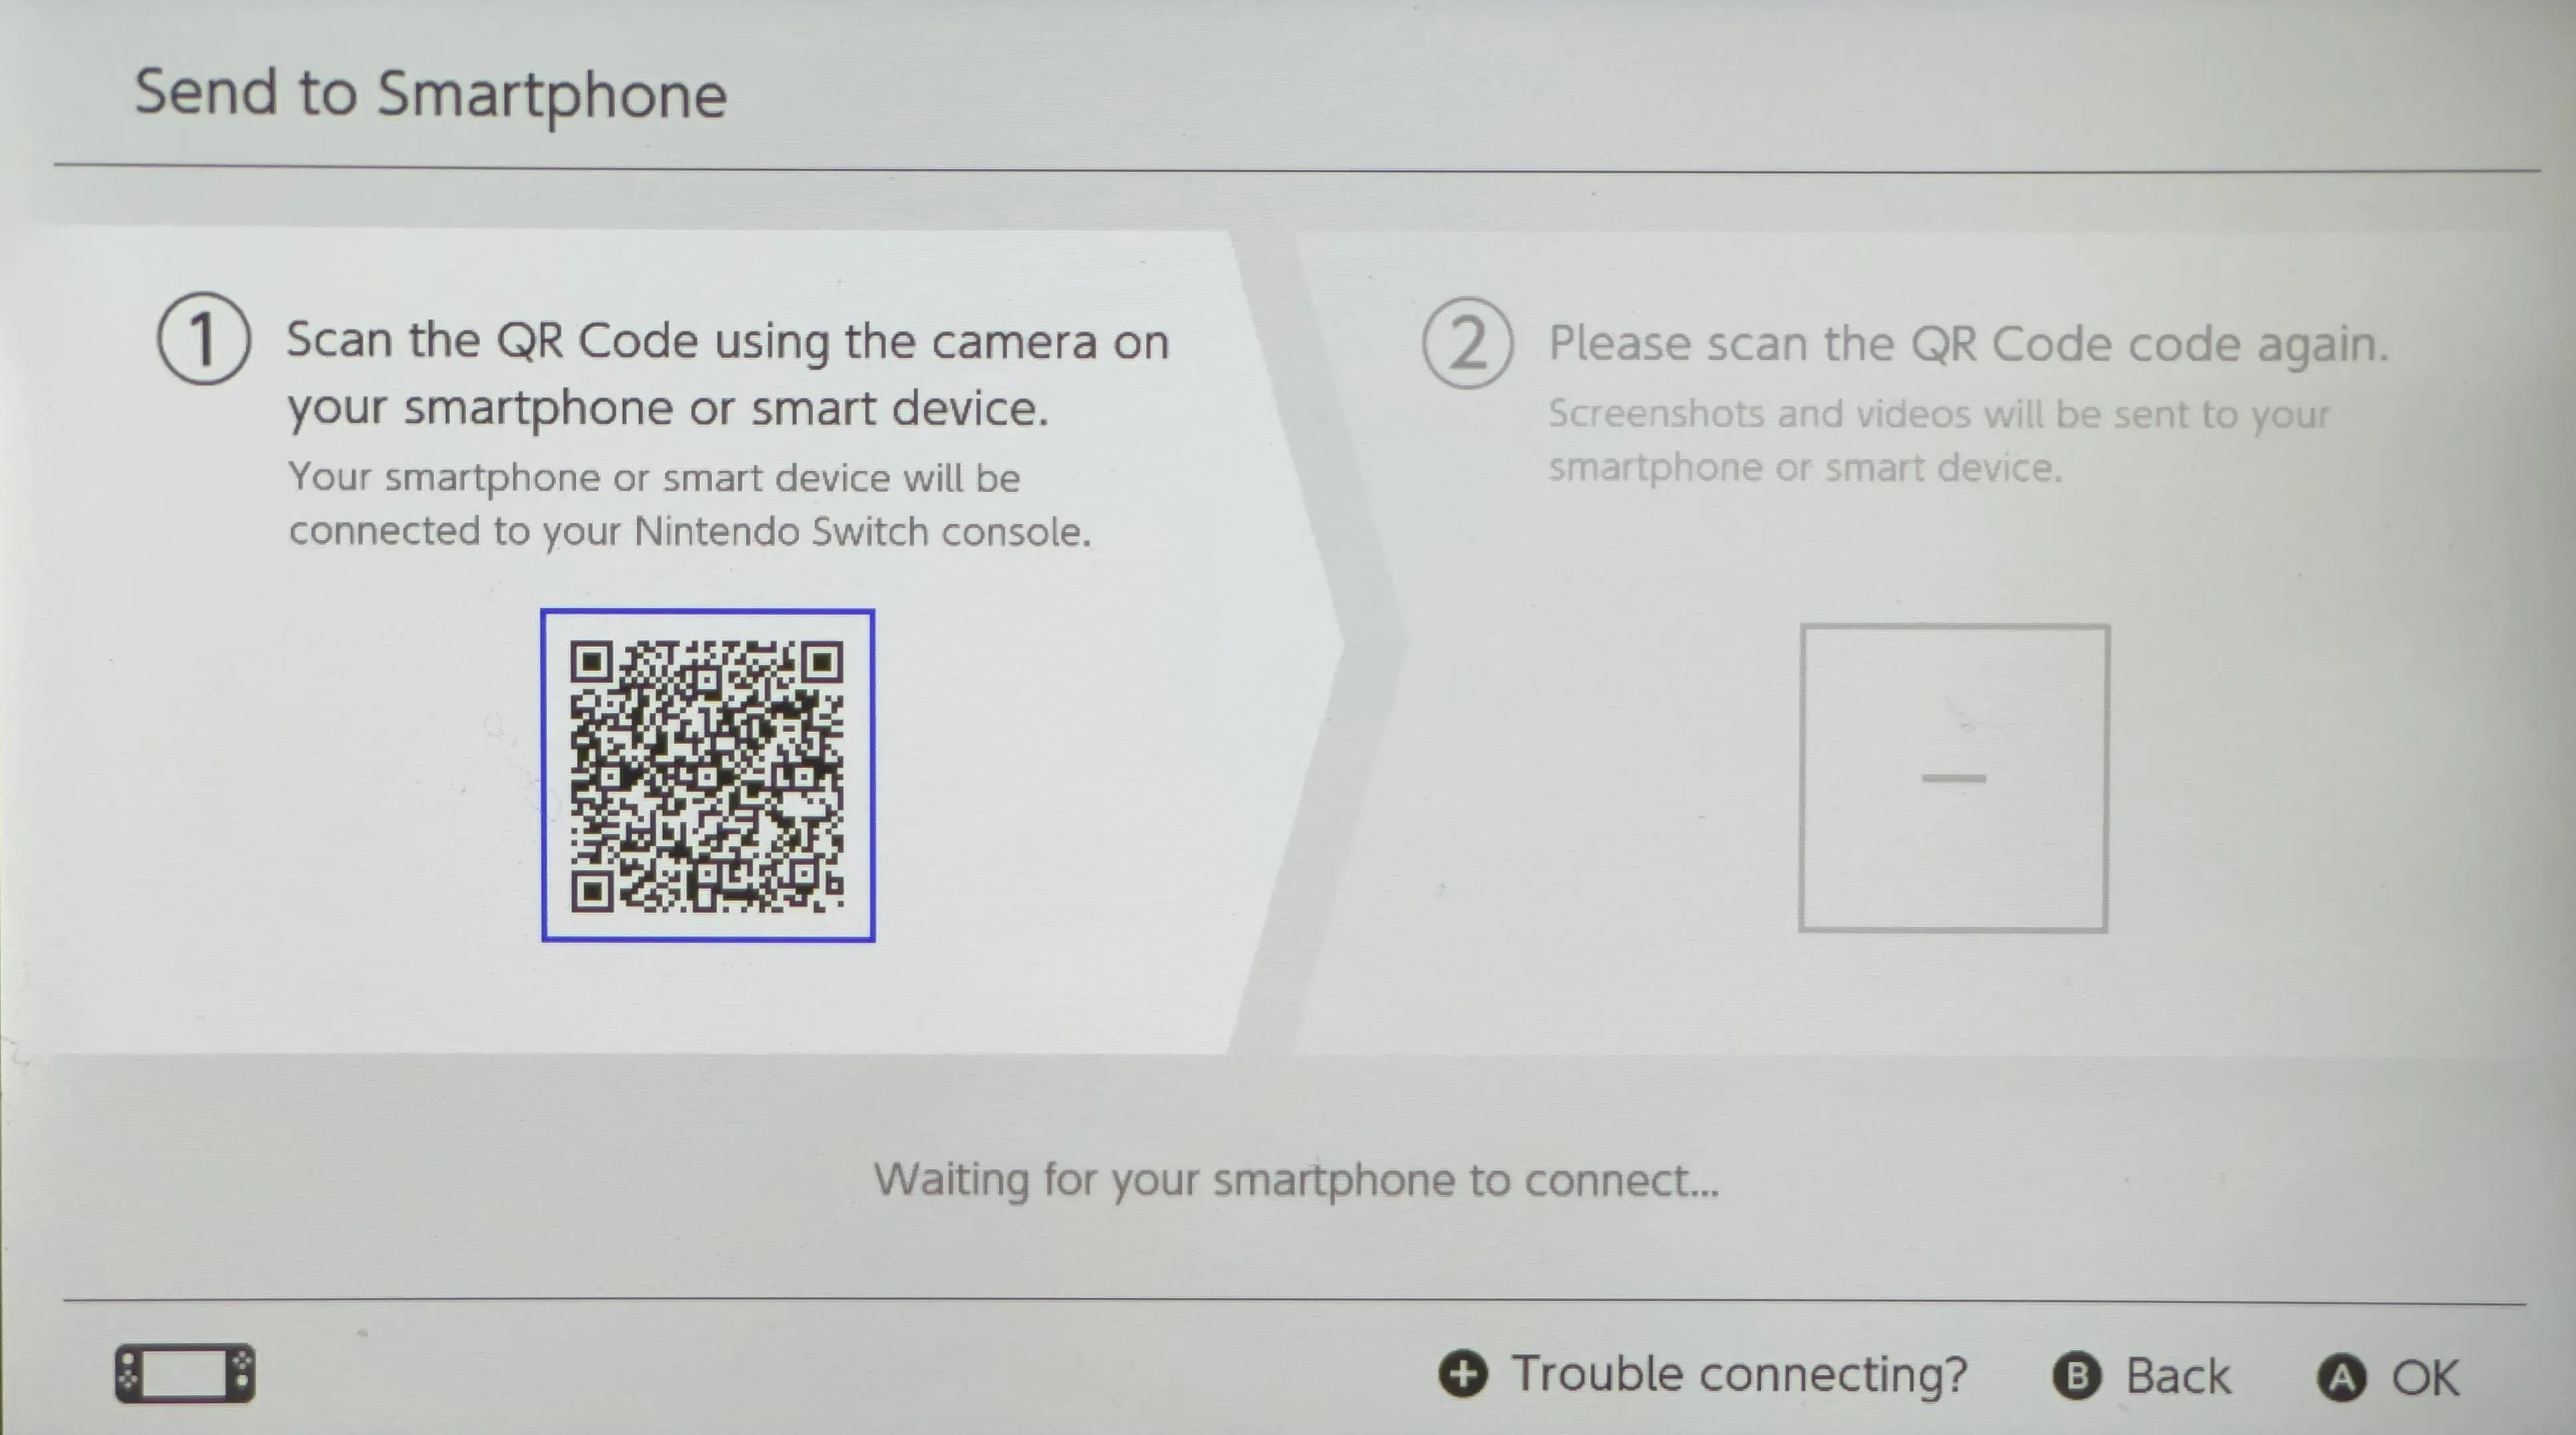
Once your phone is connected to the Switch's network, you'll see a second QR code appear on your Switch. Just scan it like you did the first code, and it will take you to your image or images.
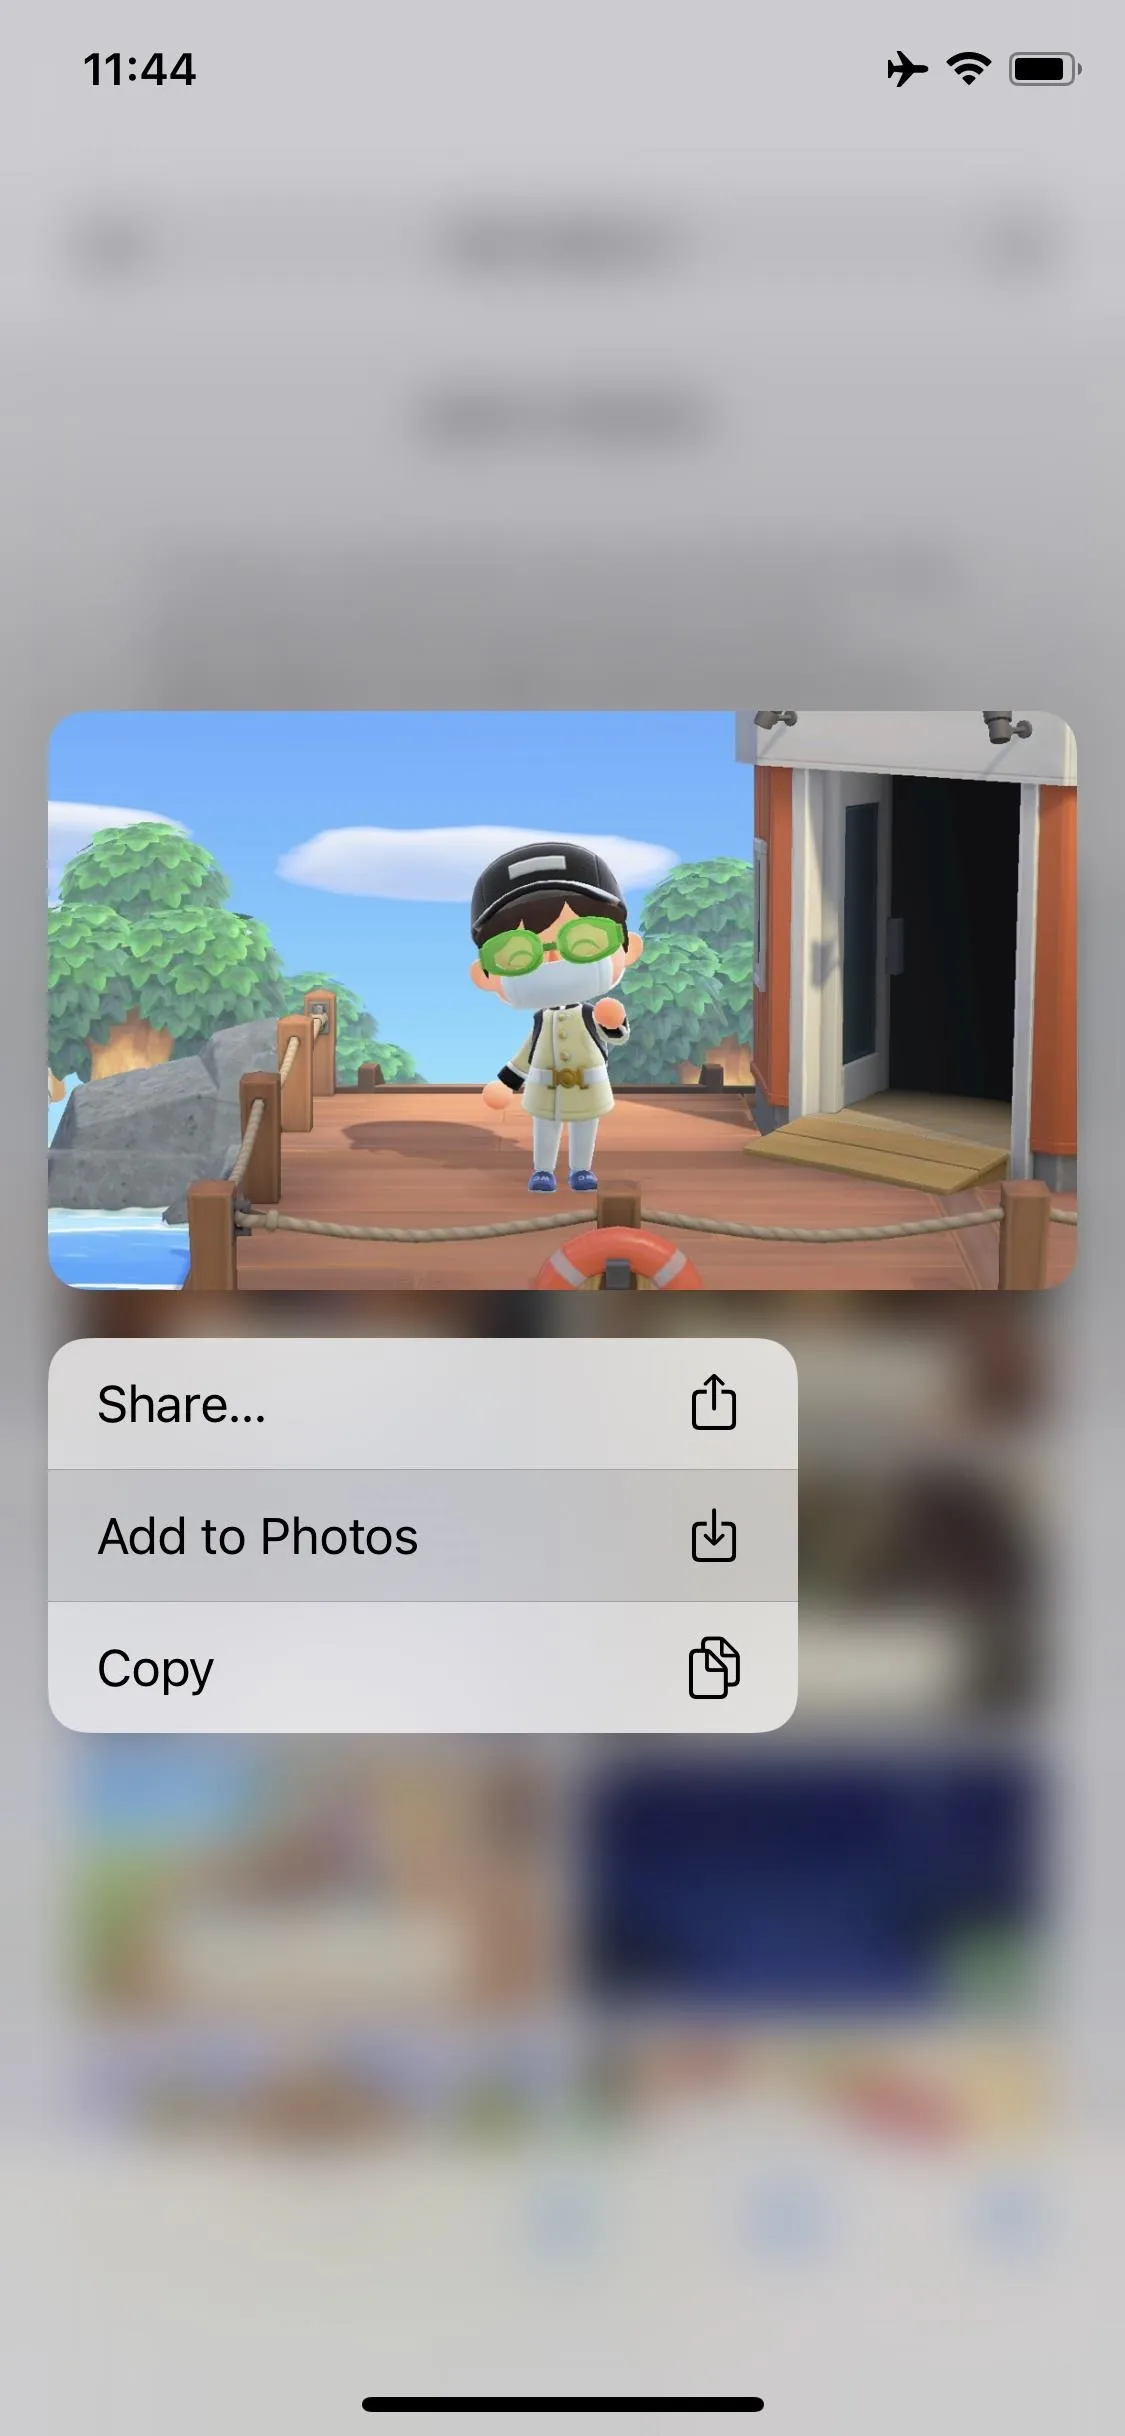
From here, all you need to do is save each image individually to your iPhone or Android's photo library.

Privately Share to Social Media First
To pull this off, you'll need to have a Facebook or Twitter account. If you don't have one, you can make one or skip to Method 2 if you have a microSD card connected to your Switch.
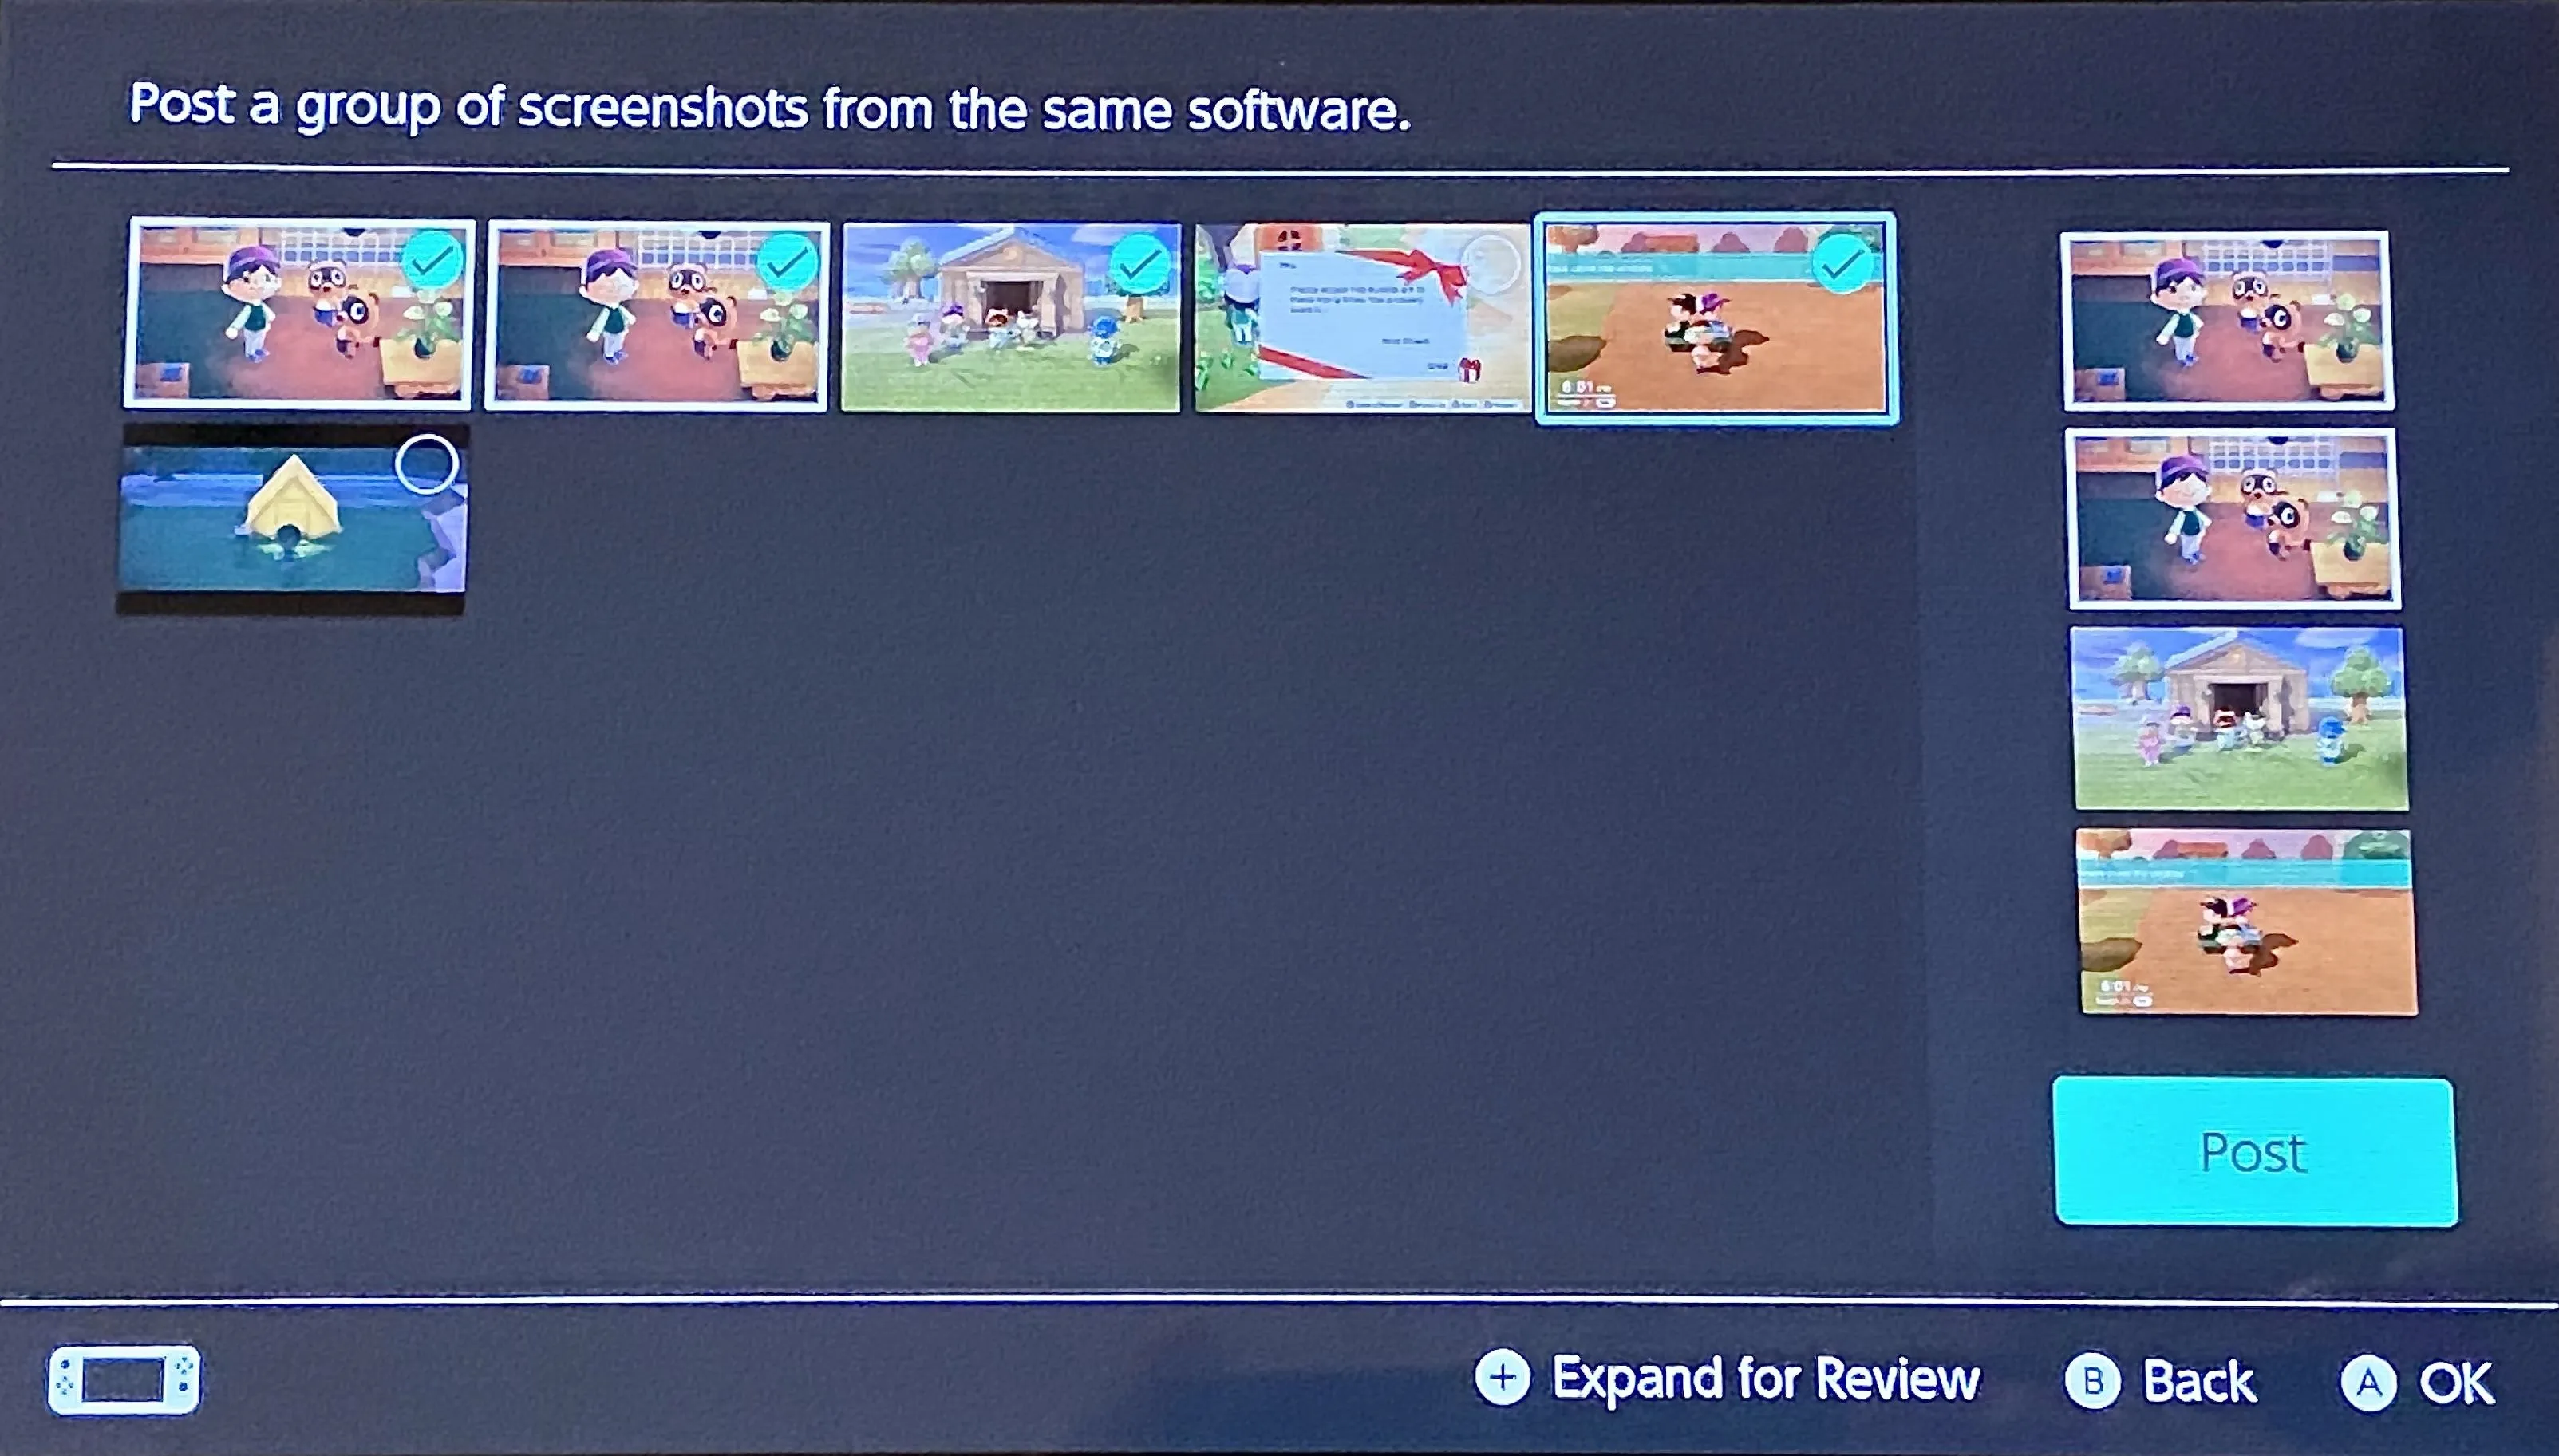
To start, open "Album" from the Switch home screen. Next, choose a photo from your library you'd like to share with your phone. Now, tap the A button for "Editing and Post," then select "Post."
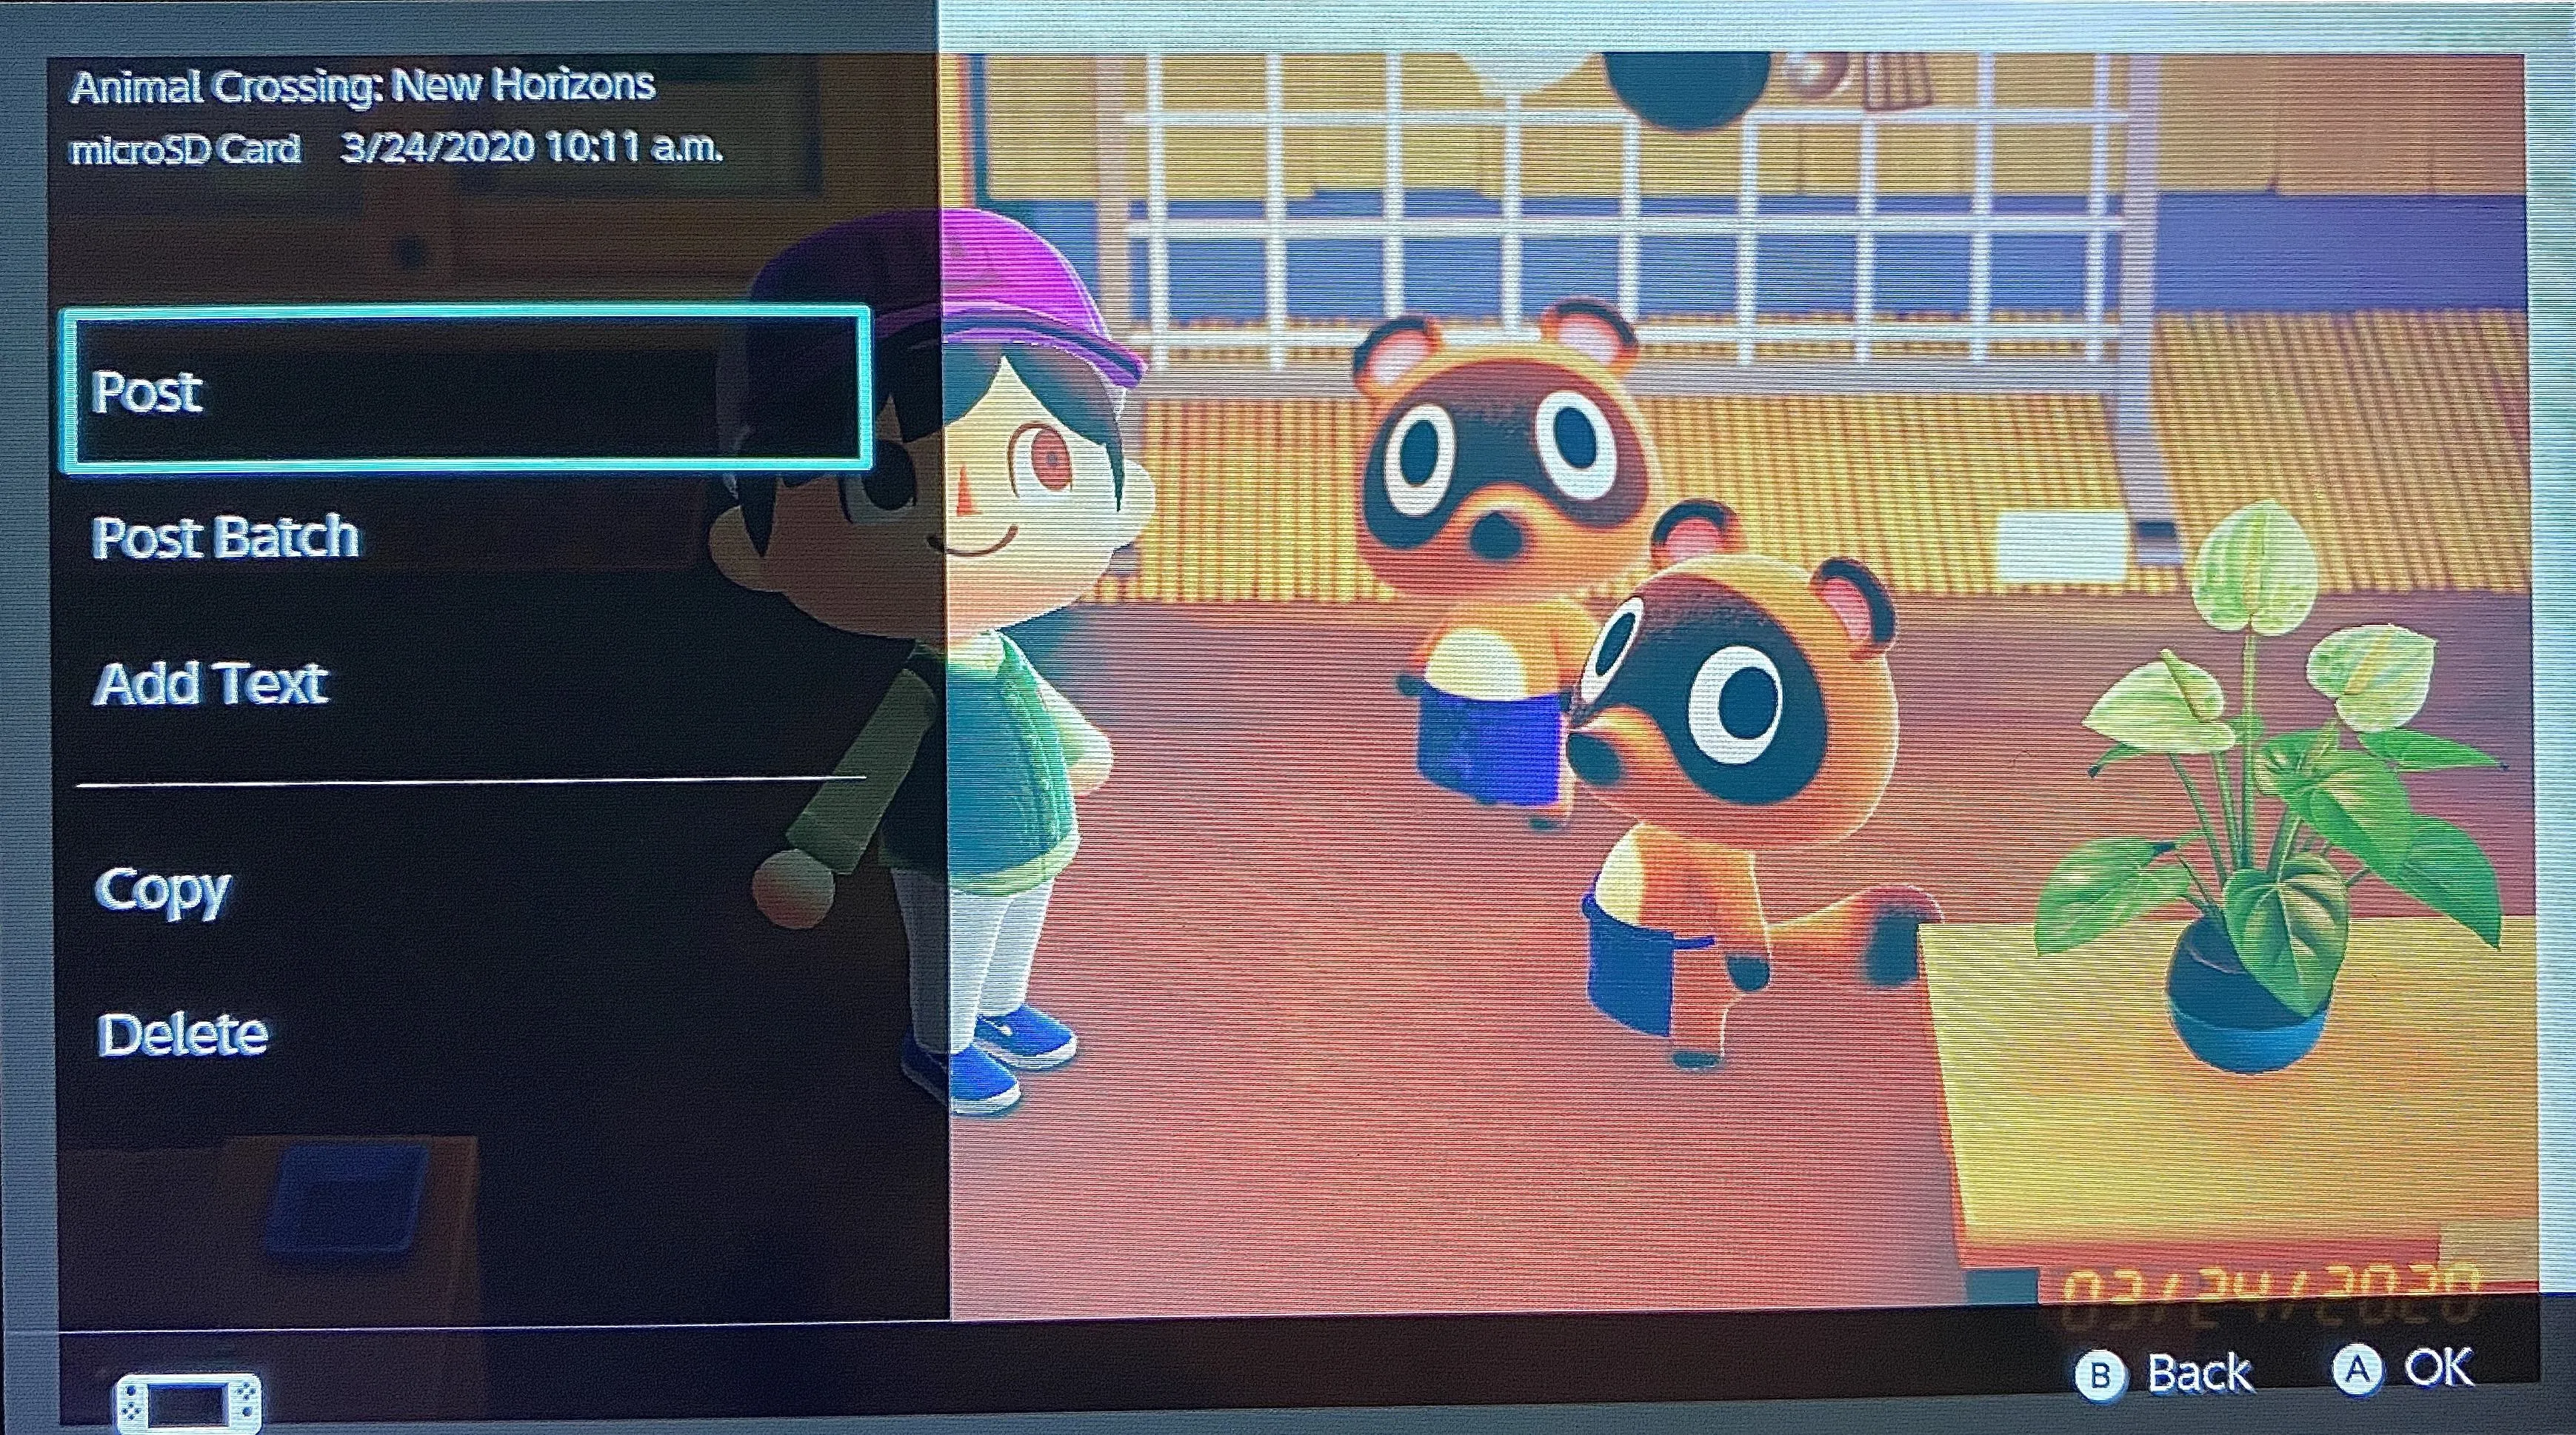
If you'd like to post multiple photos at once, select "Post Batch" instead, then choose up to three other images to accompany your first selection. When satisfied, choose "Post."
Your Switch will now bring up the initial social posting page. Here, you can choose to post to a Facebook account or a Twitter account. It doesn't matter which you choose, although we'd recommend Facebook to most people since you can decide to make all of your Switch uploads private. You can't do that for Twitter, so unless you connect a private, unfollowed Twitter account, your posts will be visible to anyone who has access to your tweets.
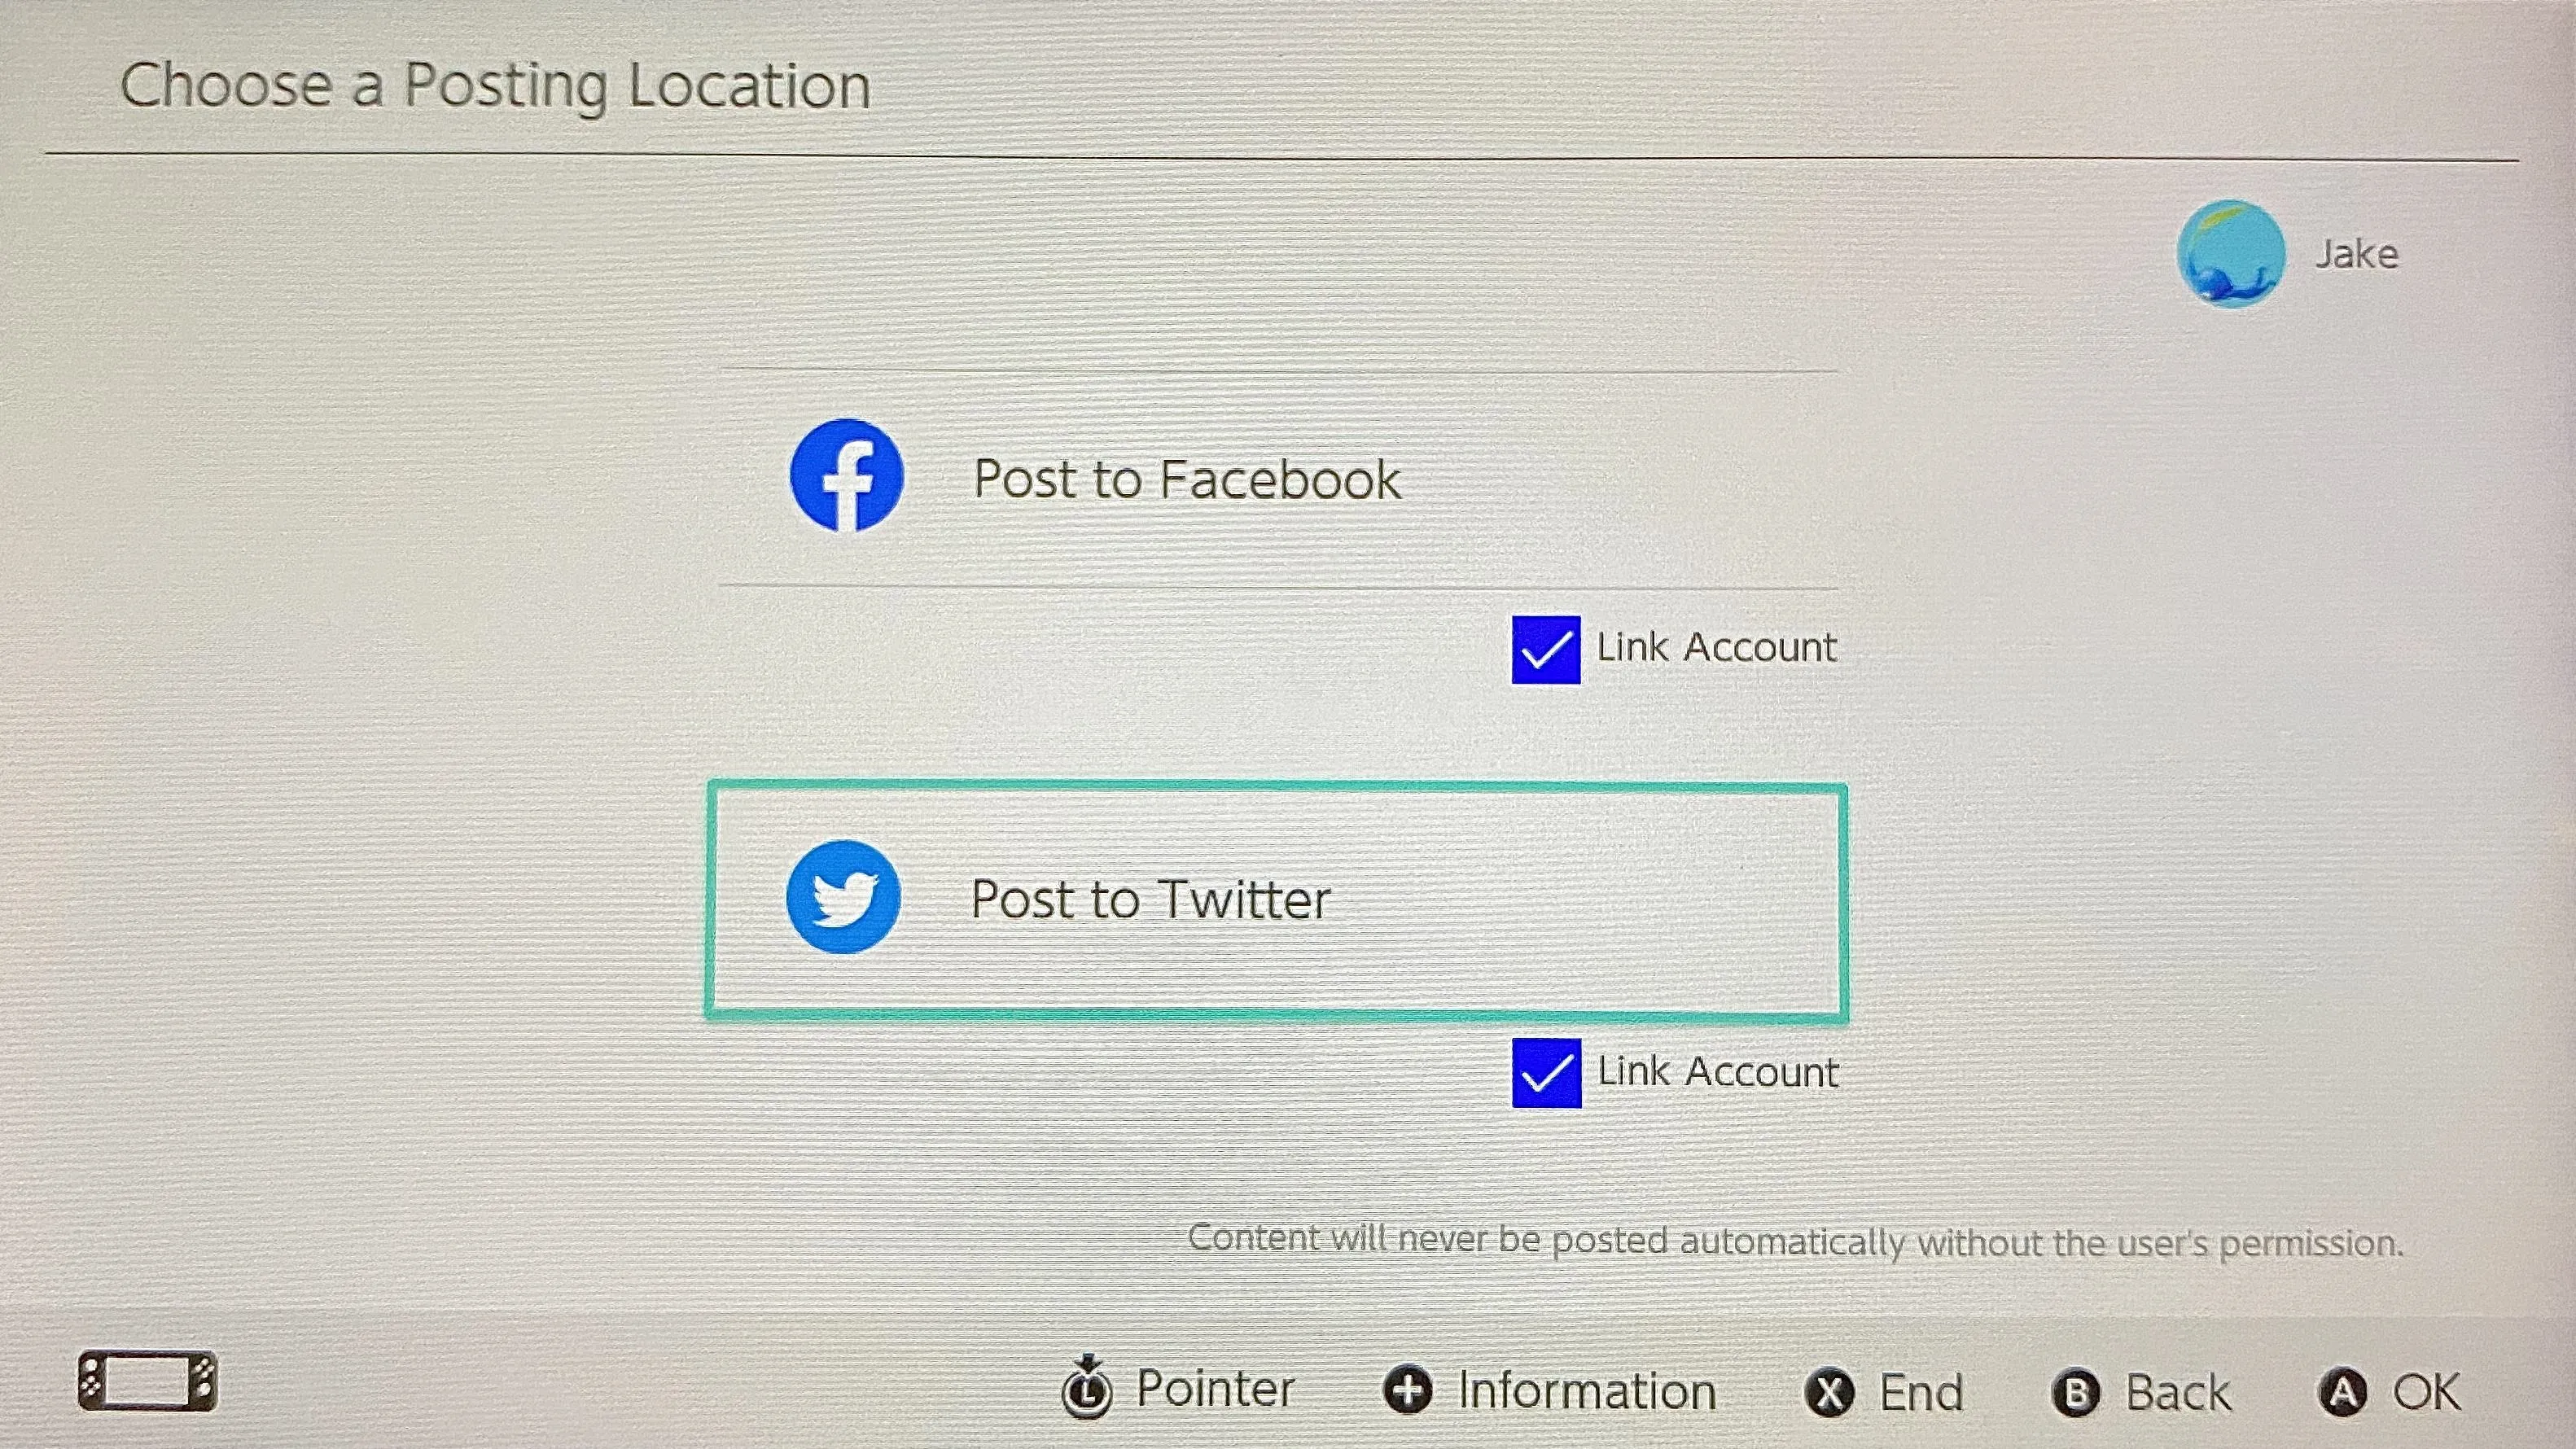
I'm going to connect through Facebook here because I don't want other people seeing my "Animal Crossing: New Horizons" pics while I'm transferring them to my phone. Other than the post visibility setting, the instructions will be mostly the same should you decide to choose Twitter.
Select "Facebook," then follow the sign-in instructions on-screen. Keep "Link Account" checked if you want to stay logged in for future posts.
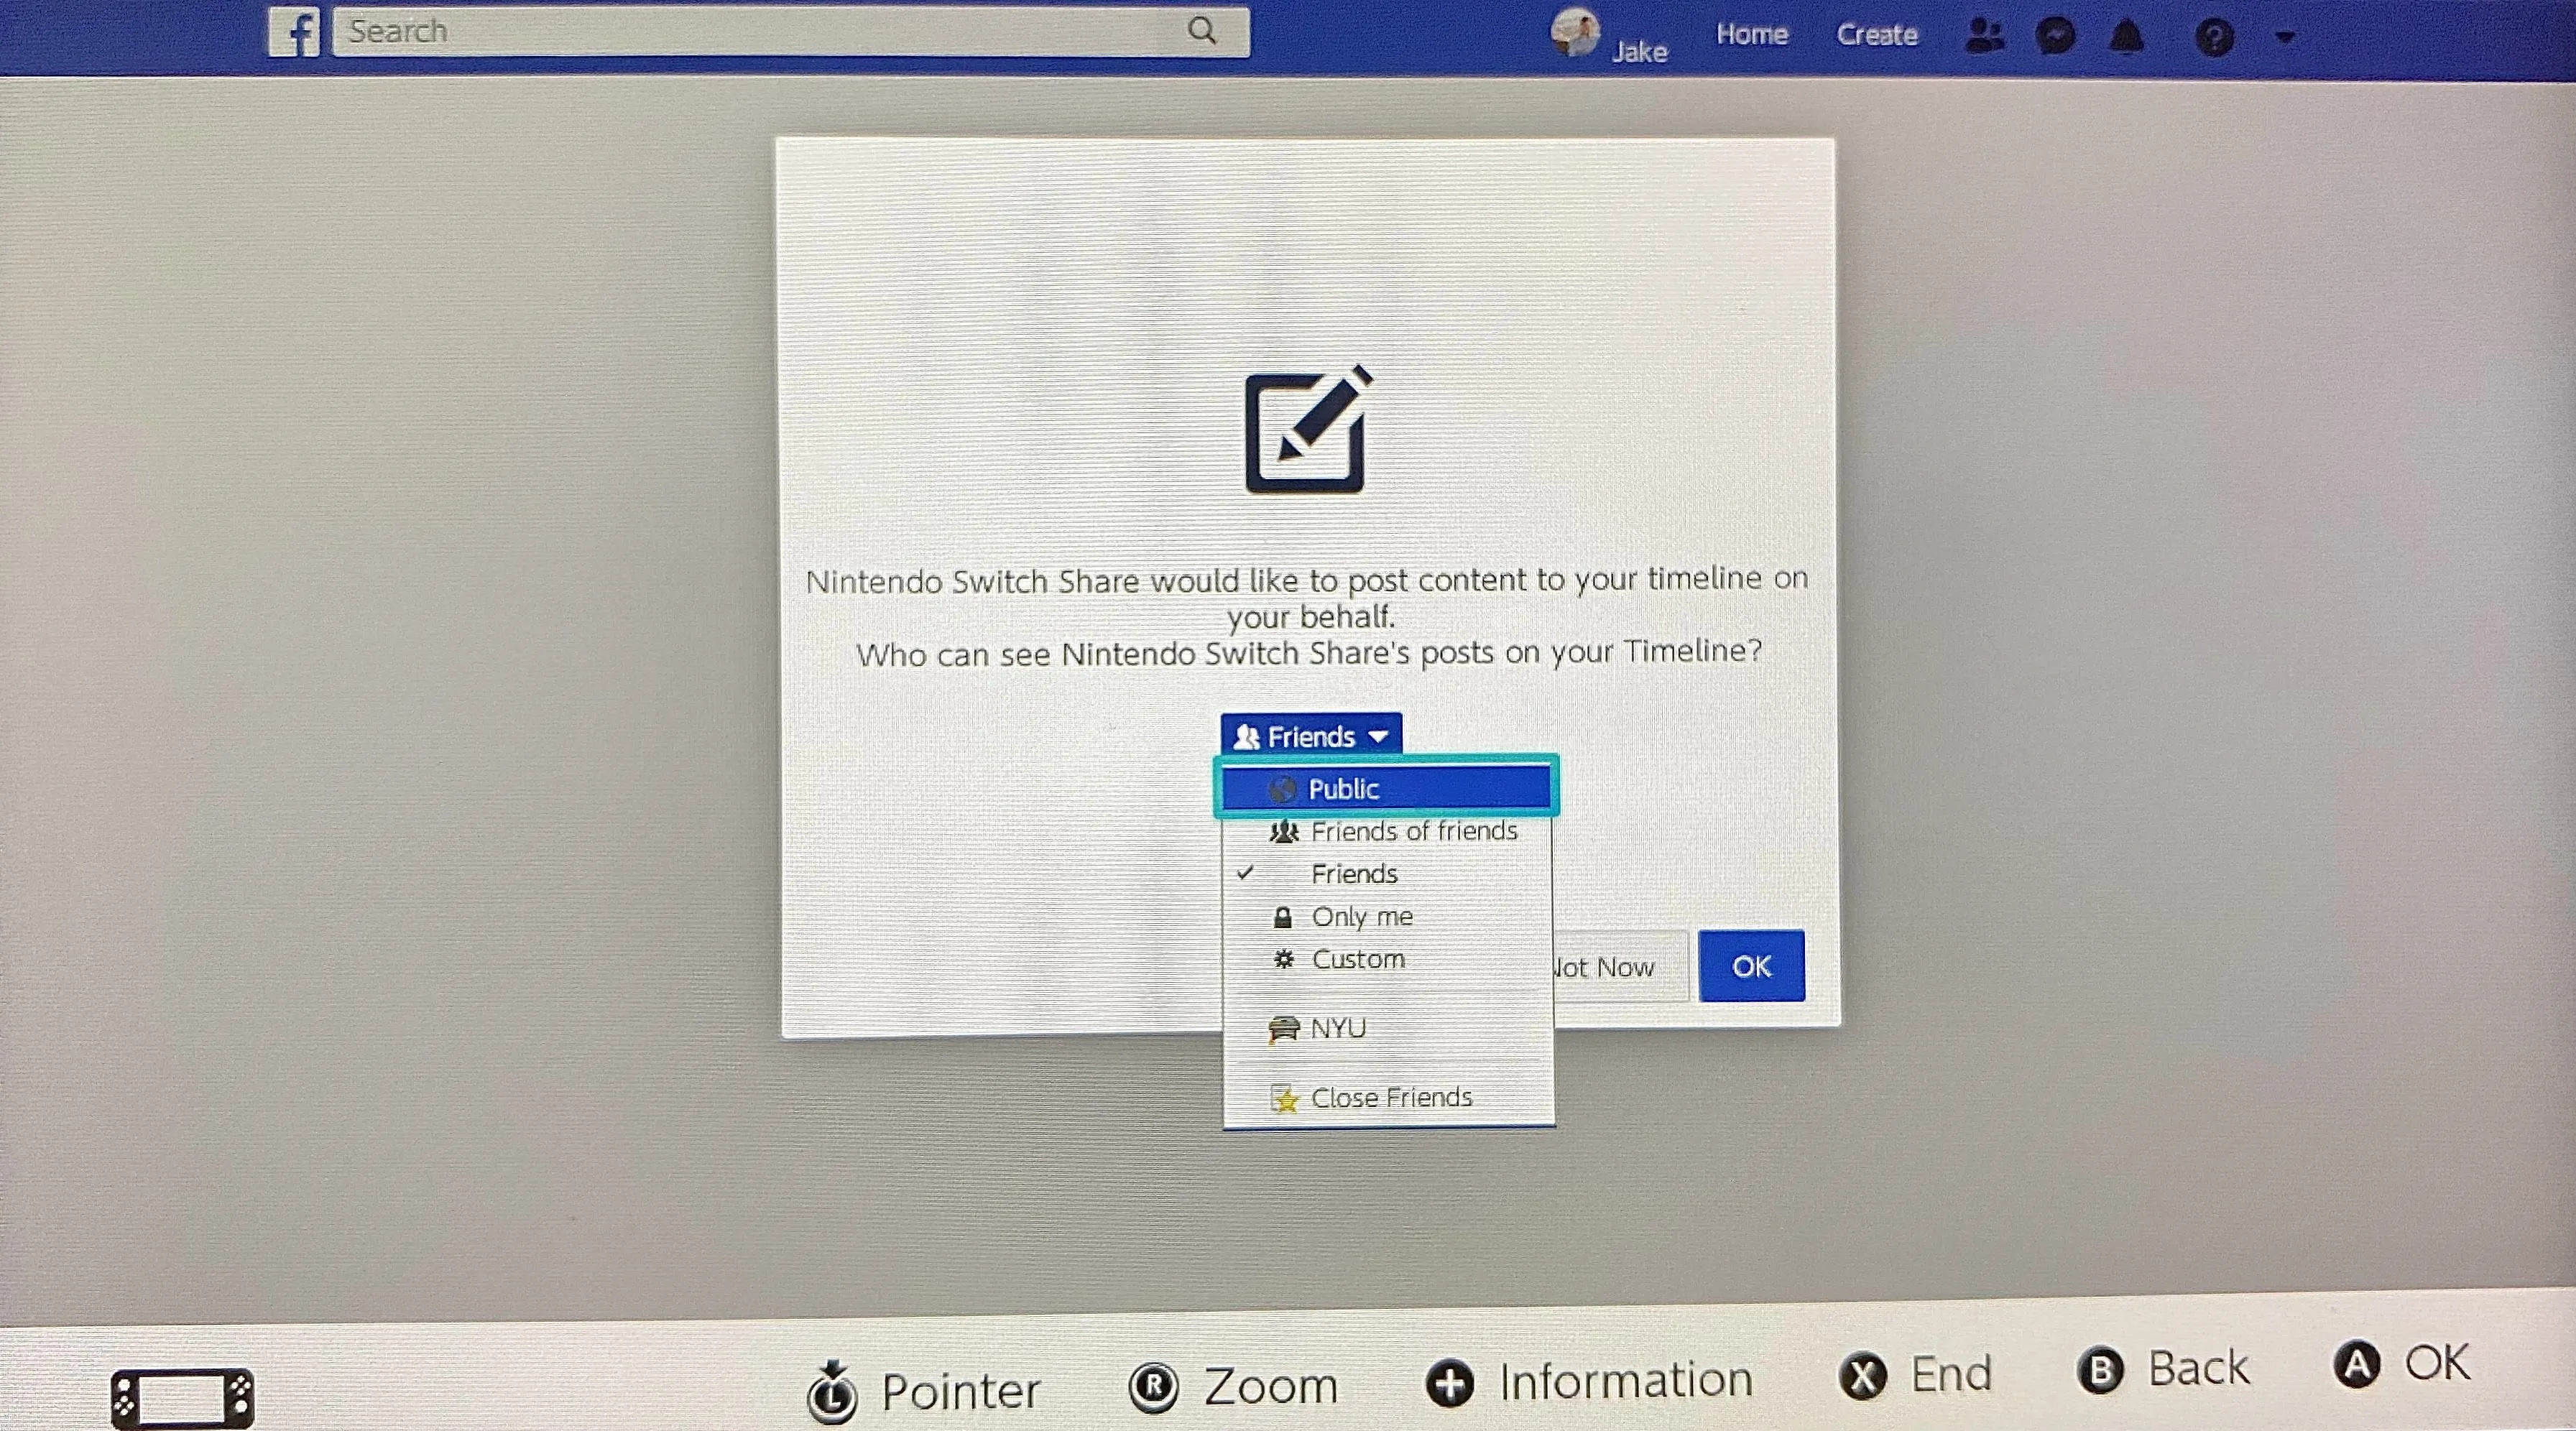
The only super vital piece to look out for is the post visibility section. Here, make sure to switch your visibility from the default "Friends" to "Only Me." That way, your posts won't be seen by anyone else. Once you do that, continue with the setup until you reach the post screen.
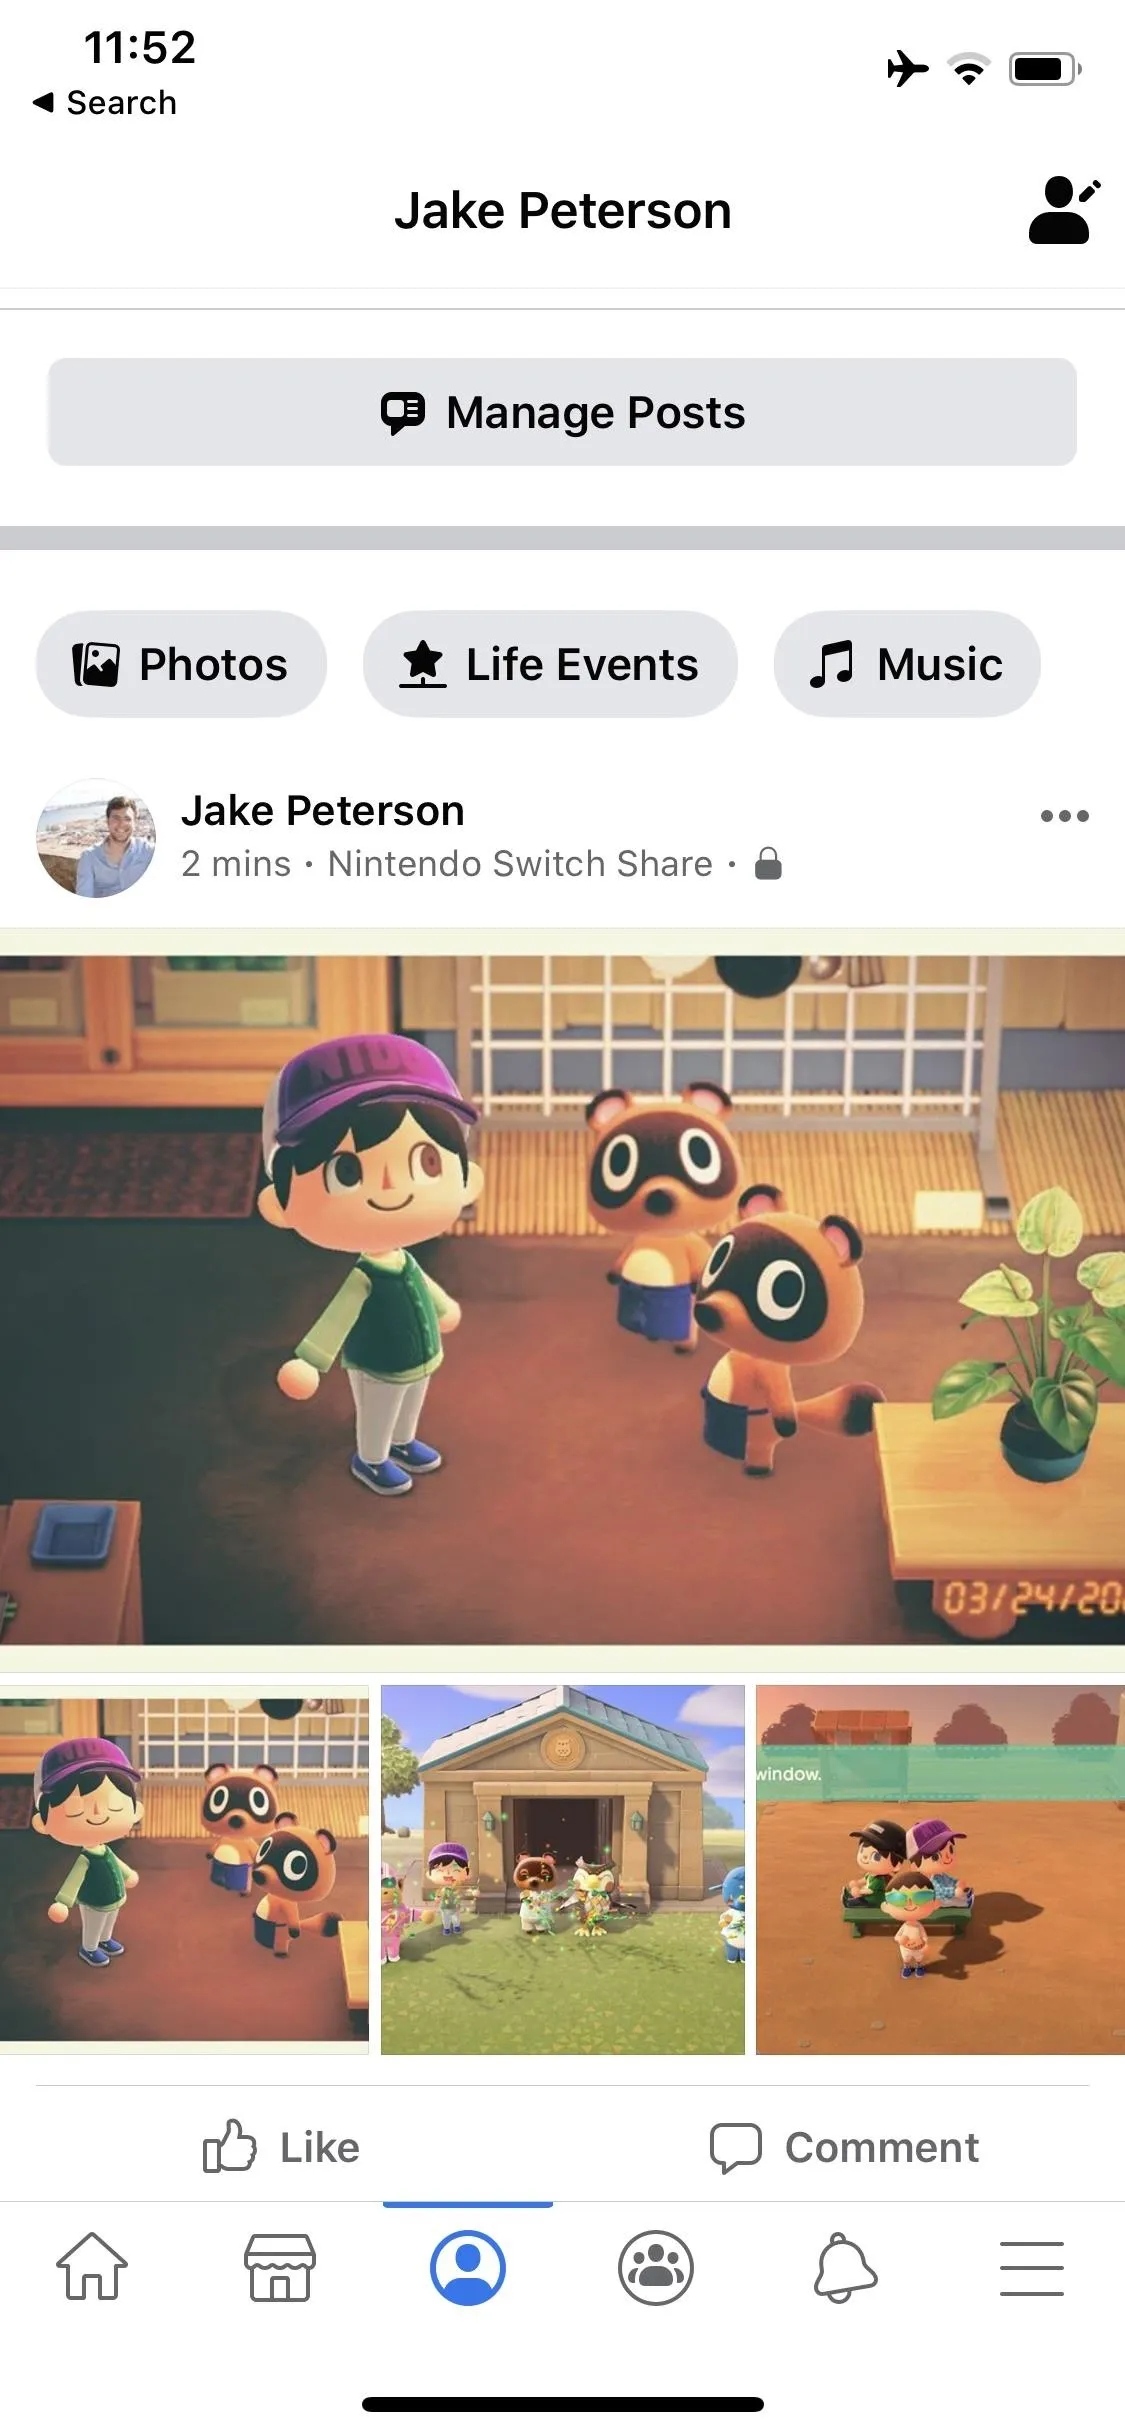
Now, simply tap "Post to Facebook." You don't need to add text unless you want to make a real Facebook post.
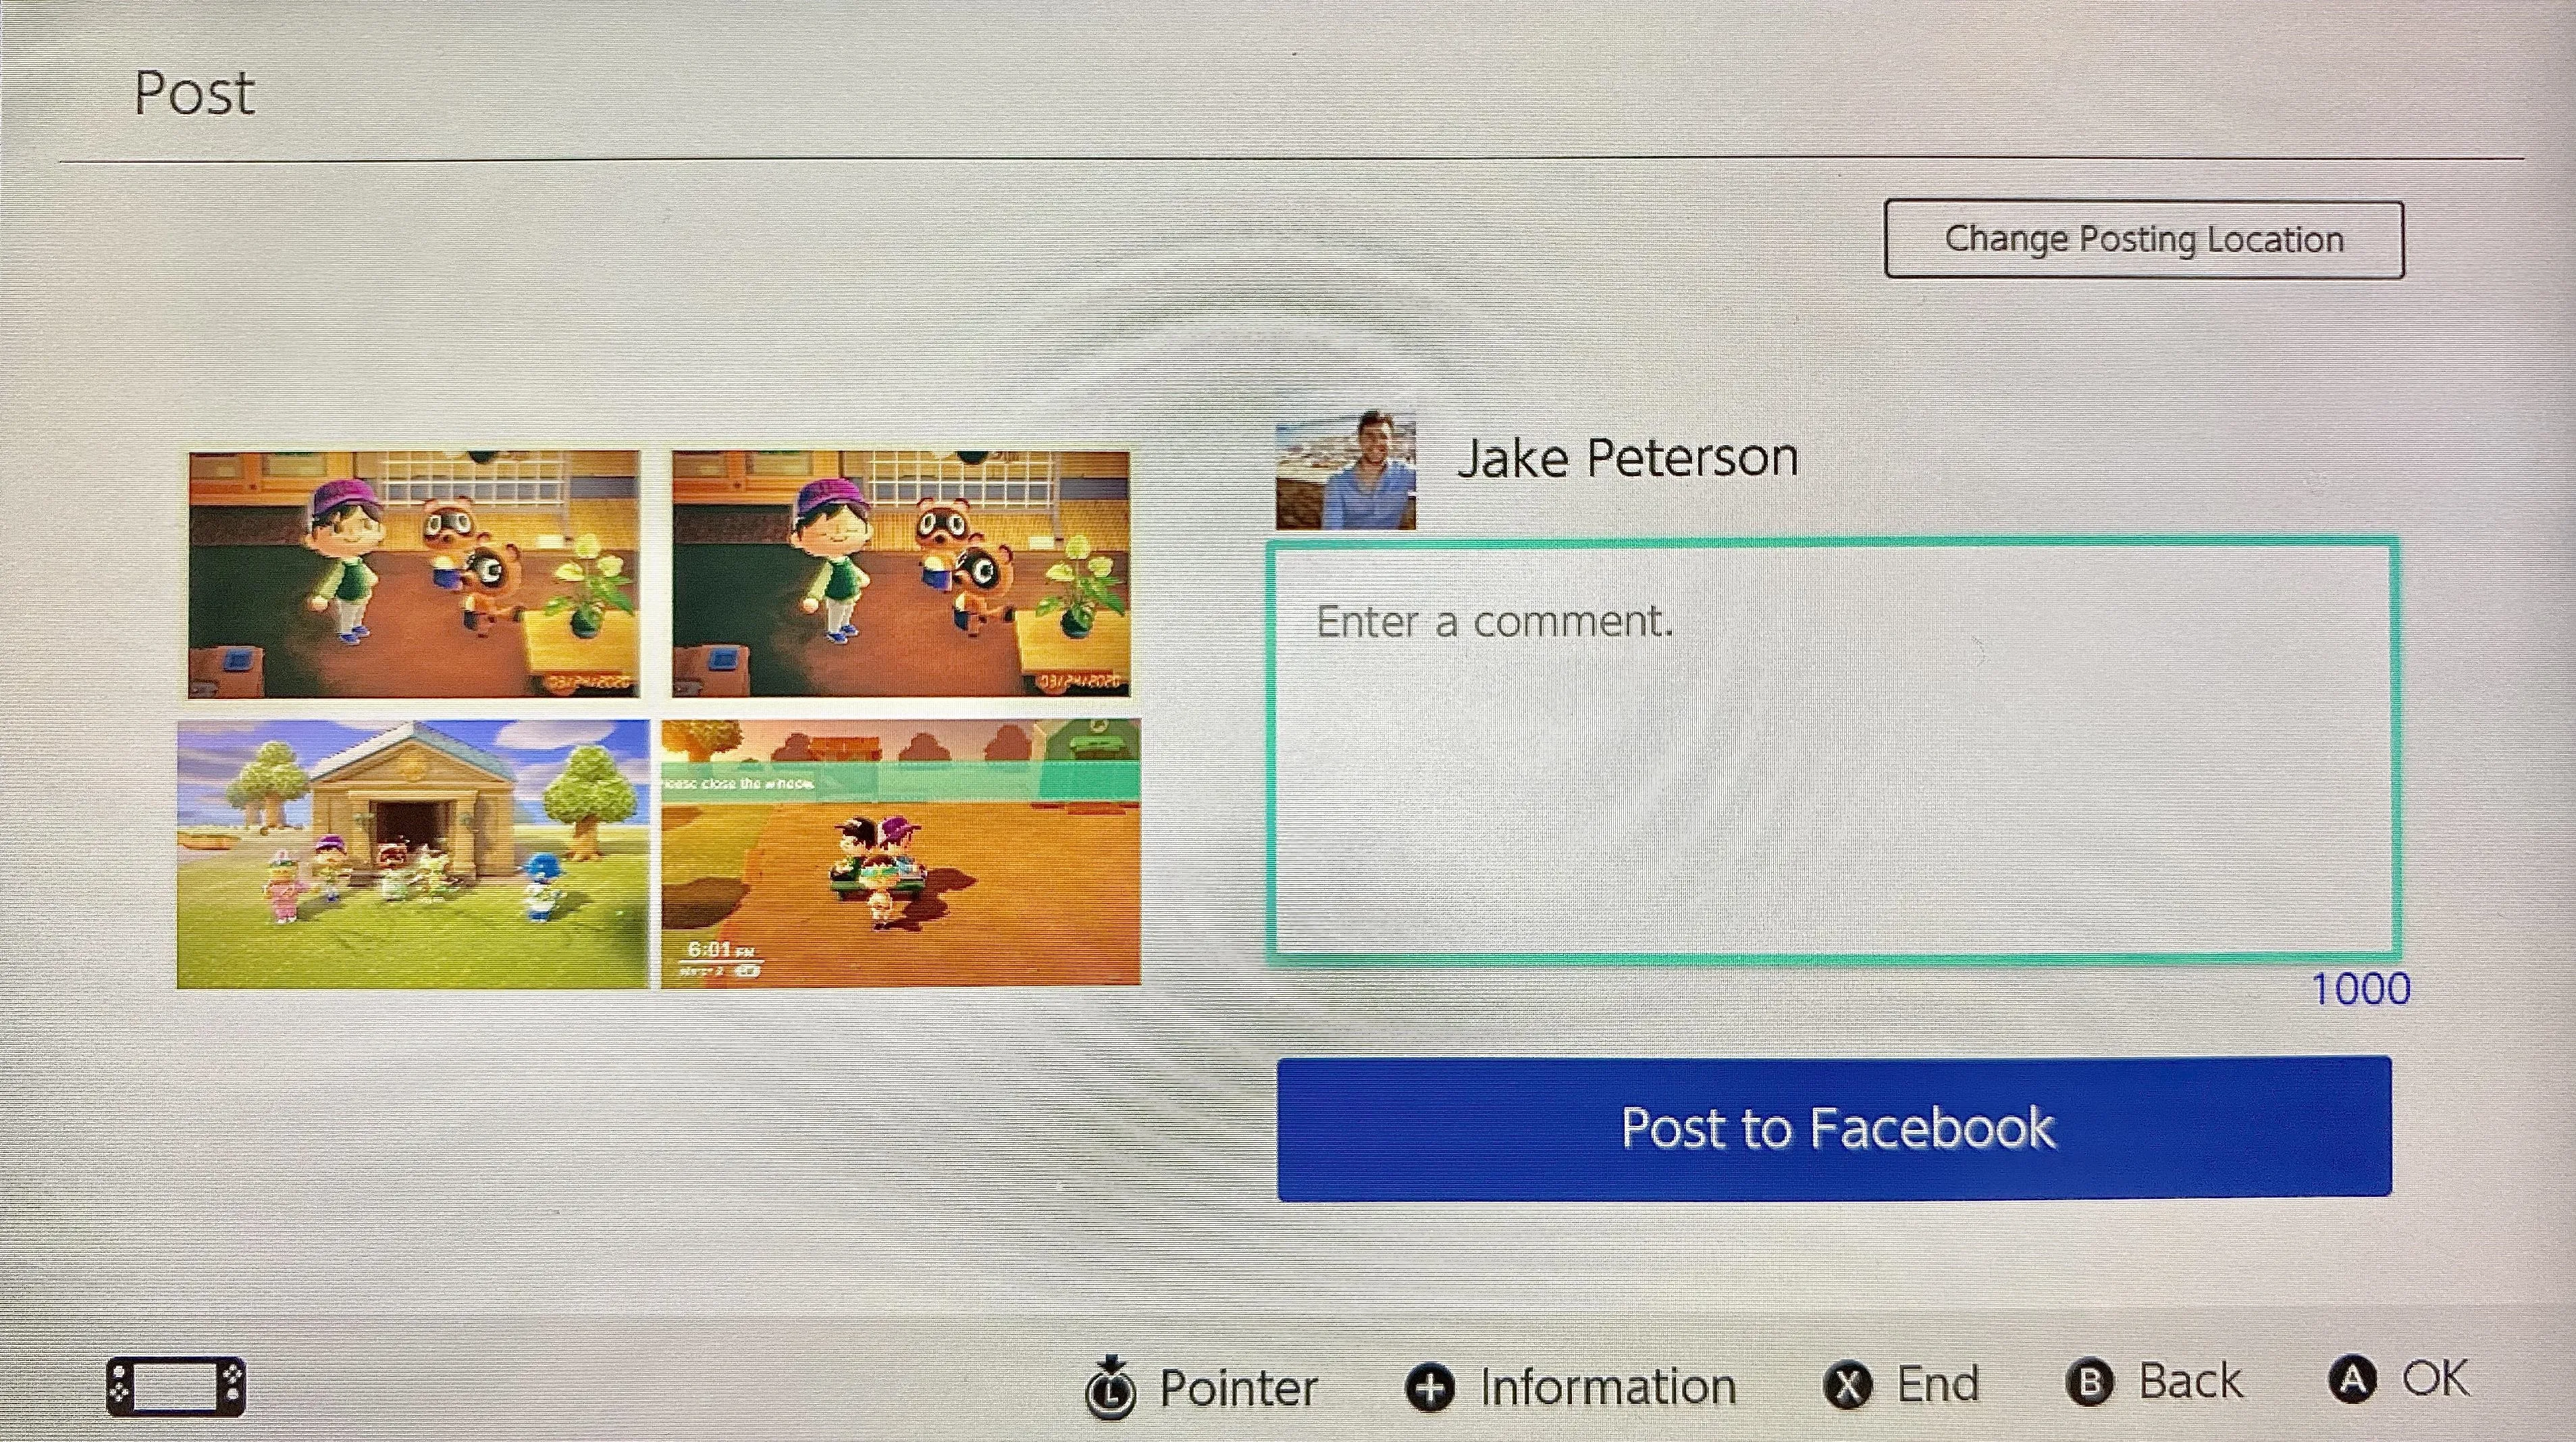
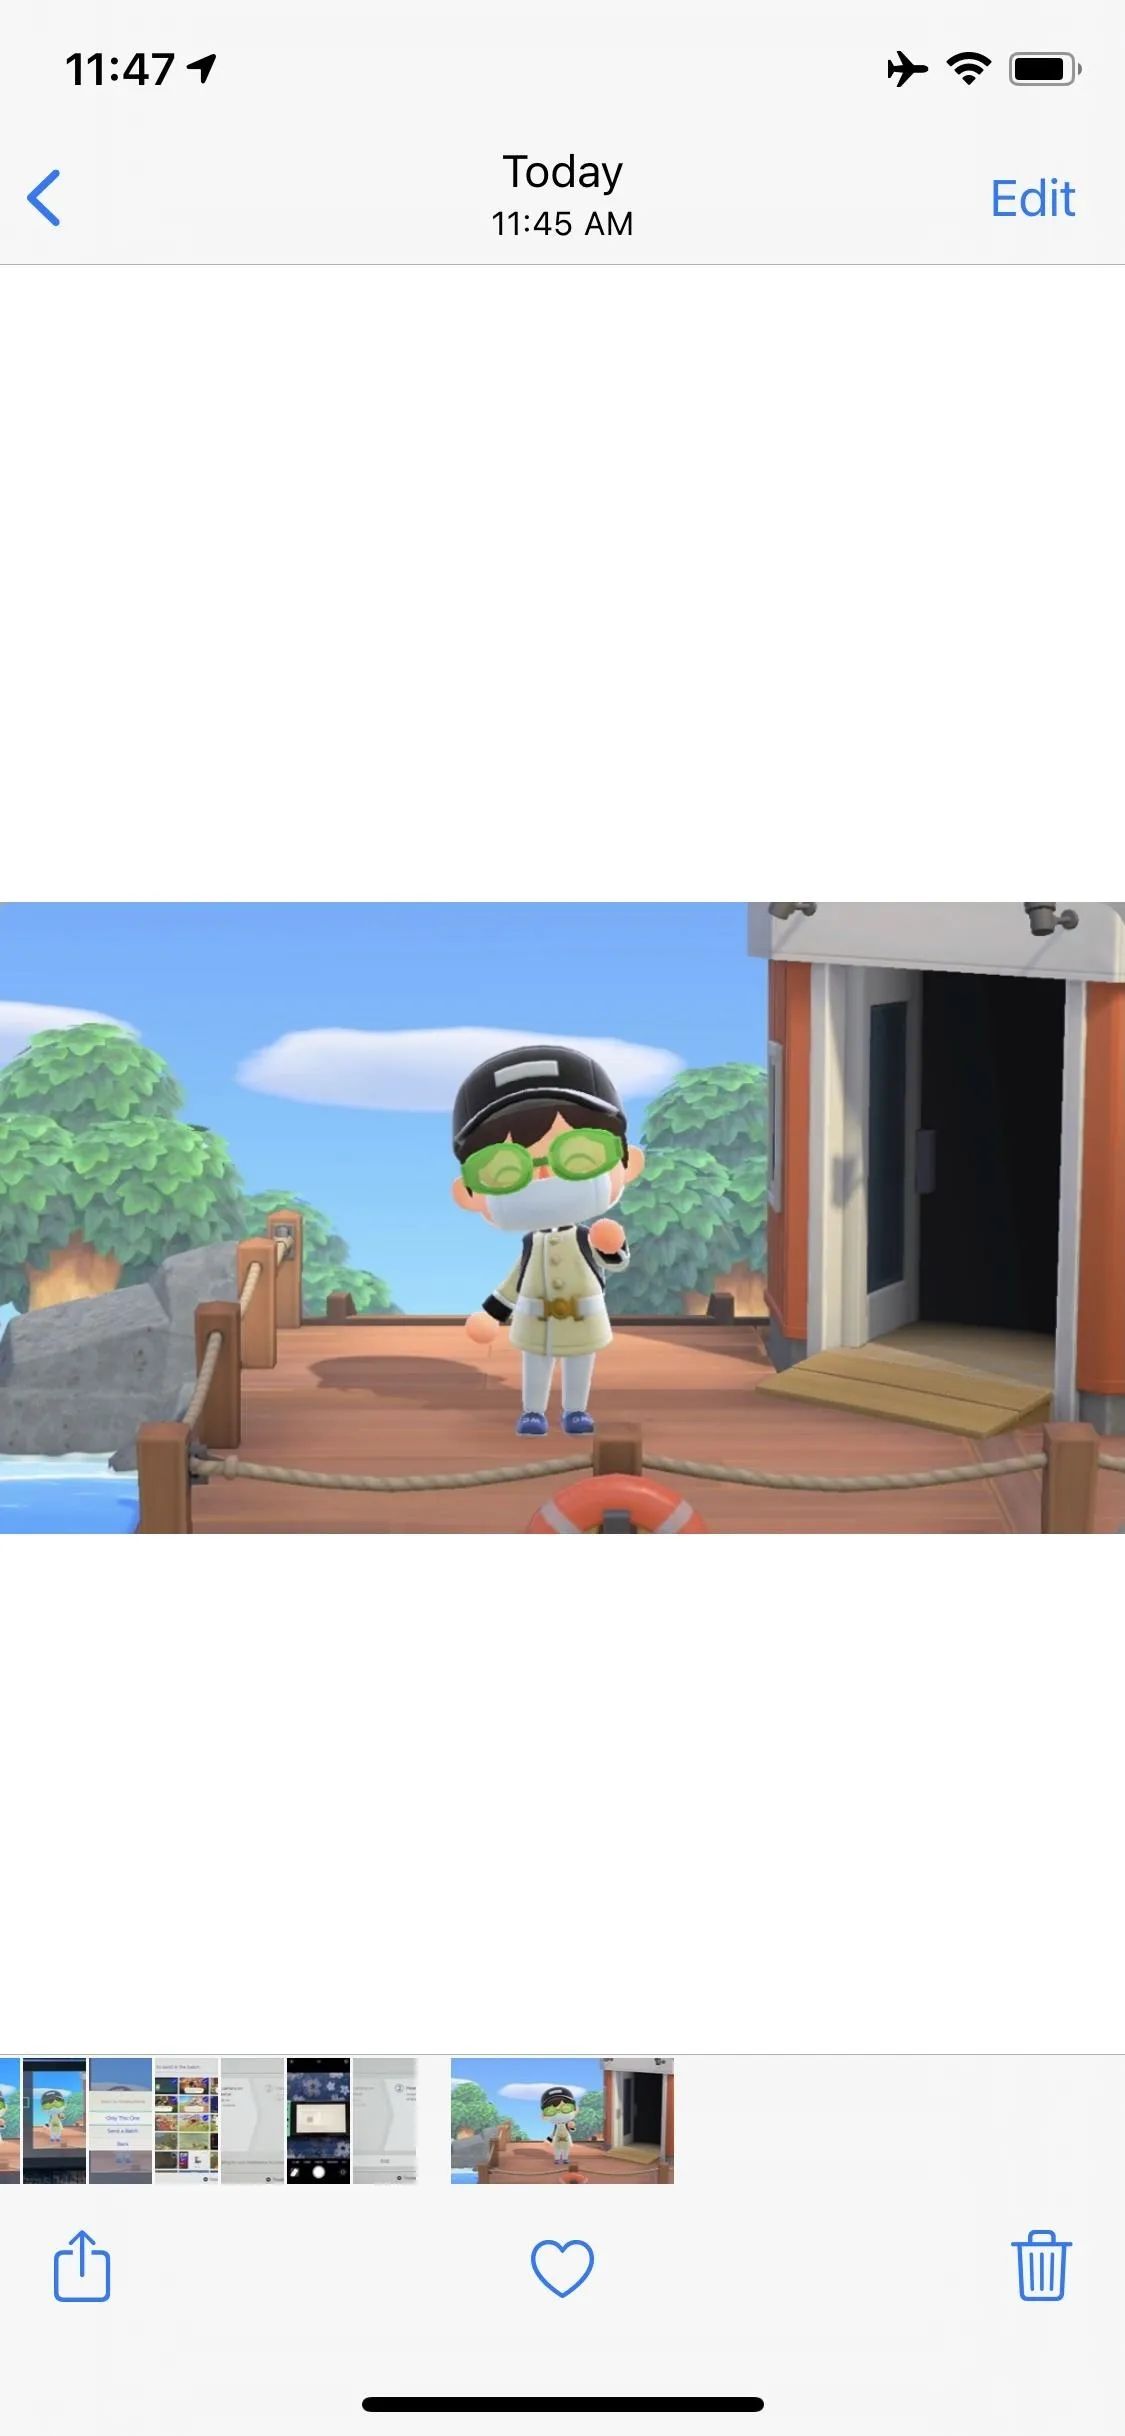
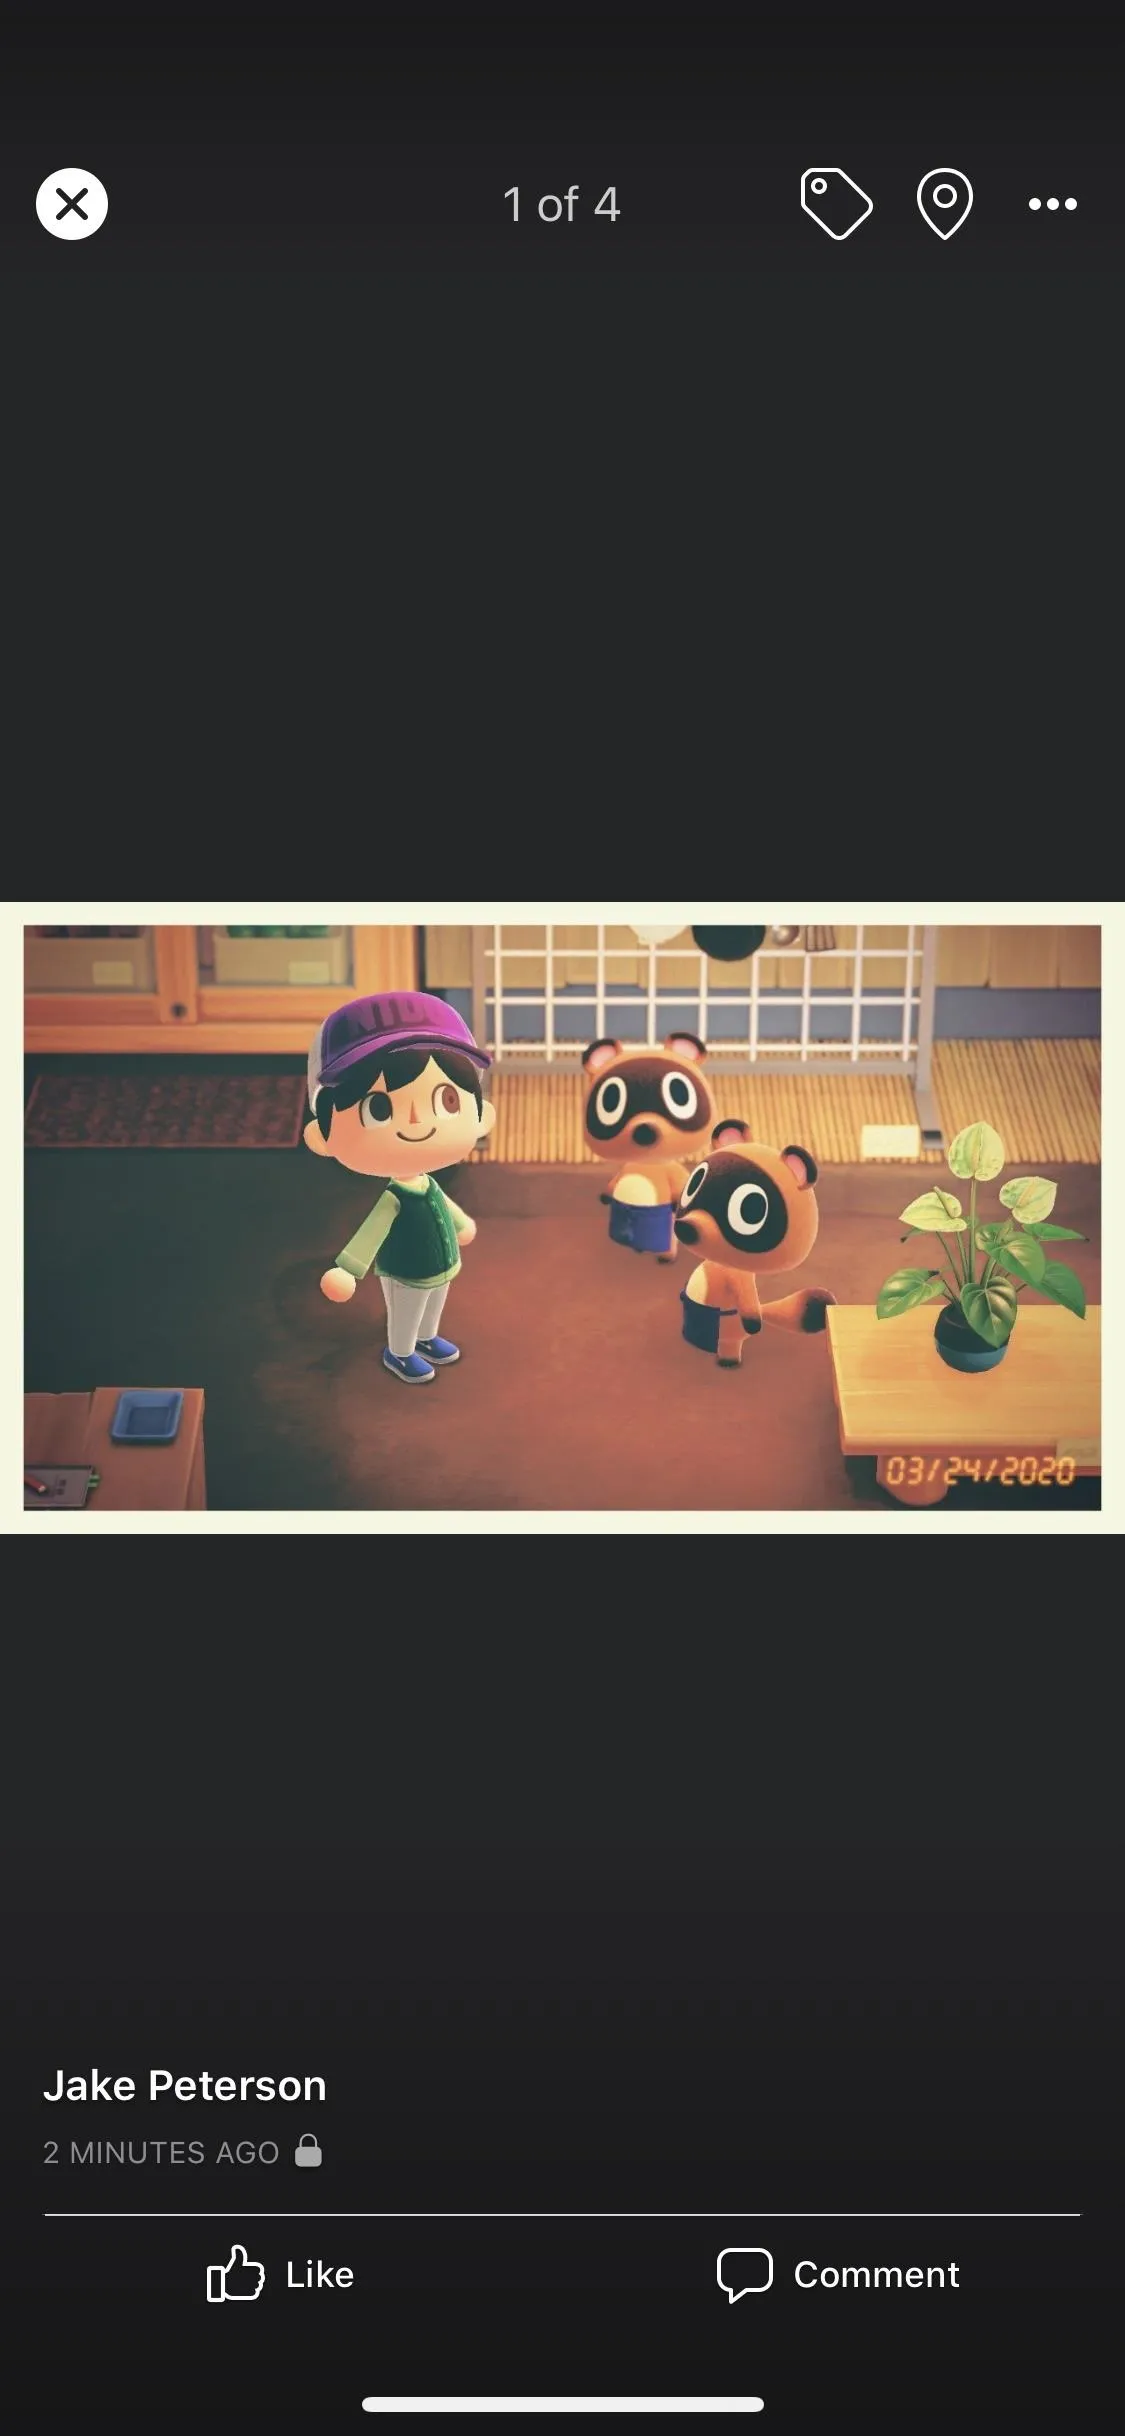
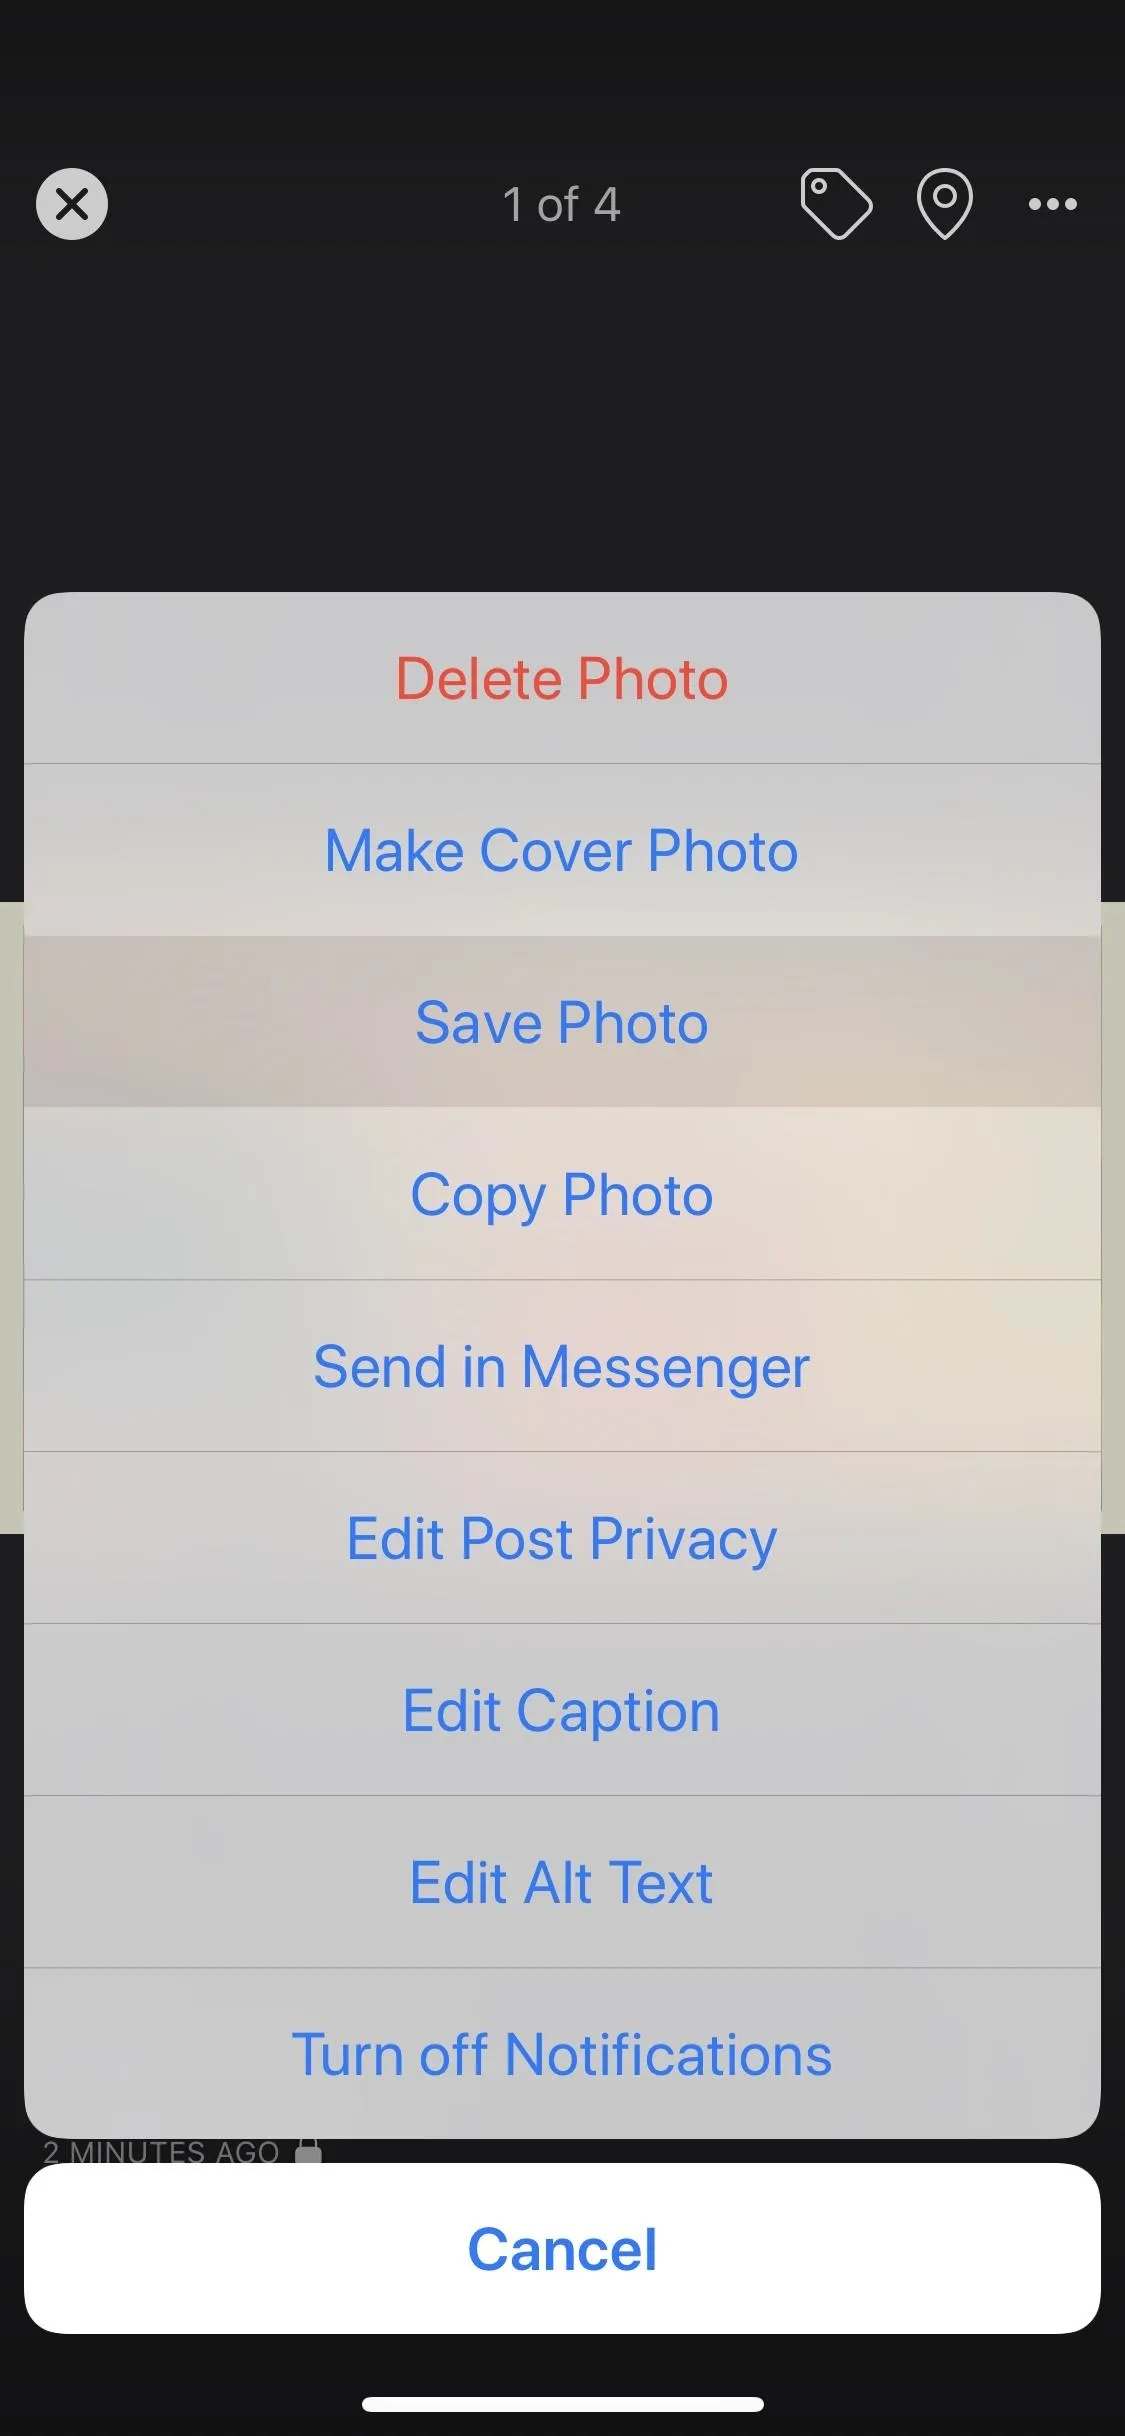
Now, open your phone, head to your Facebook page, then check out your newly-uploaded Animal Crossing photo or photos. You can simply save these pictures to your device like you would any other, then view and share as you see fit!
Transfer to an SD Card First
If you don't use a microSD card with your Switch yet, now's a good time to try it out, as microSD cards are cheaper than they've ever been and work between devices.
When using a microSD card in your Switch, you can simply pop it out and plug it into your phone to transfer the files over. Of course, those files need to be saved to your microSD, not to the Switch's internal system memory, for your phone to pick up your photos.
If your screenshots were all taken after you inserted your microSD card, you should be all set. The Switch's OS defaults to the microSD card for saved images, so all screenshots should fall in line. However, it's easy to check where a screenshot is currently saved, and it's just as easy to move it to your microSD if needed.
Checking & Managing the Save Location for Screenshots
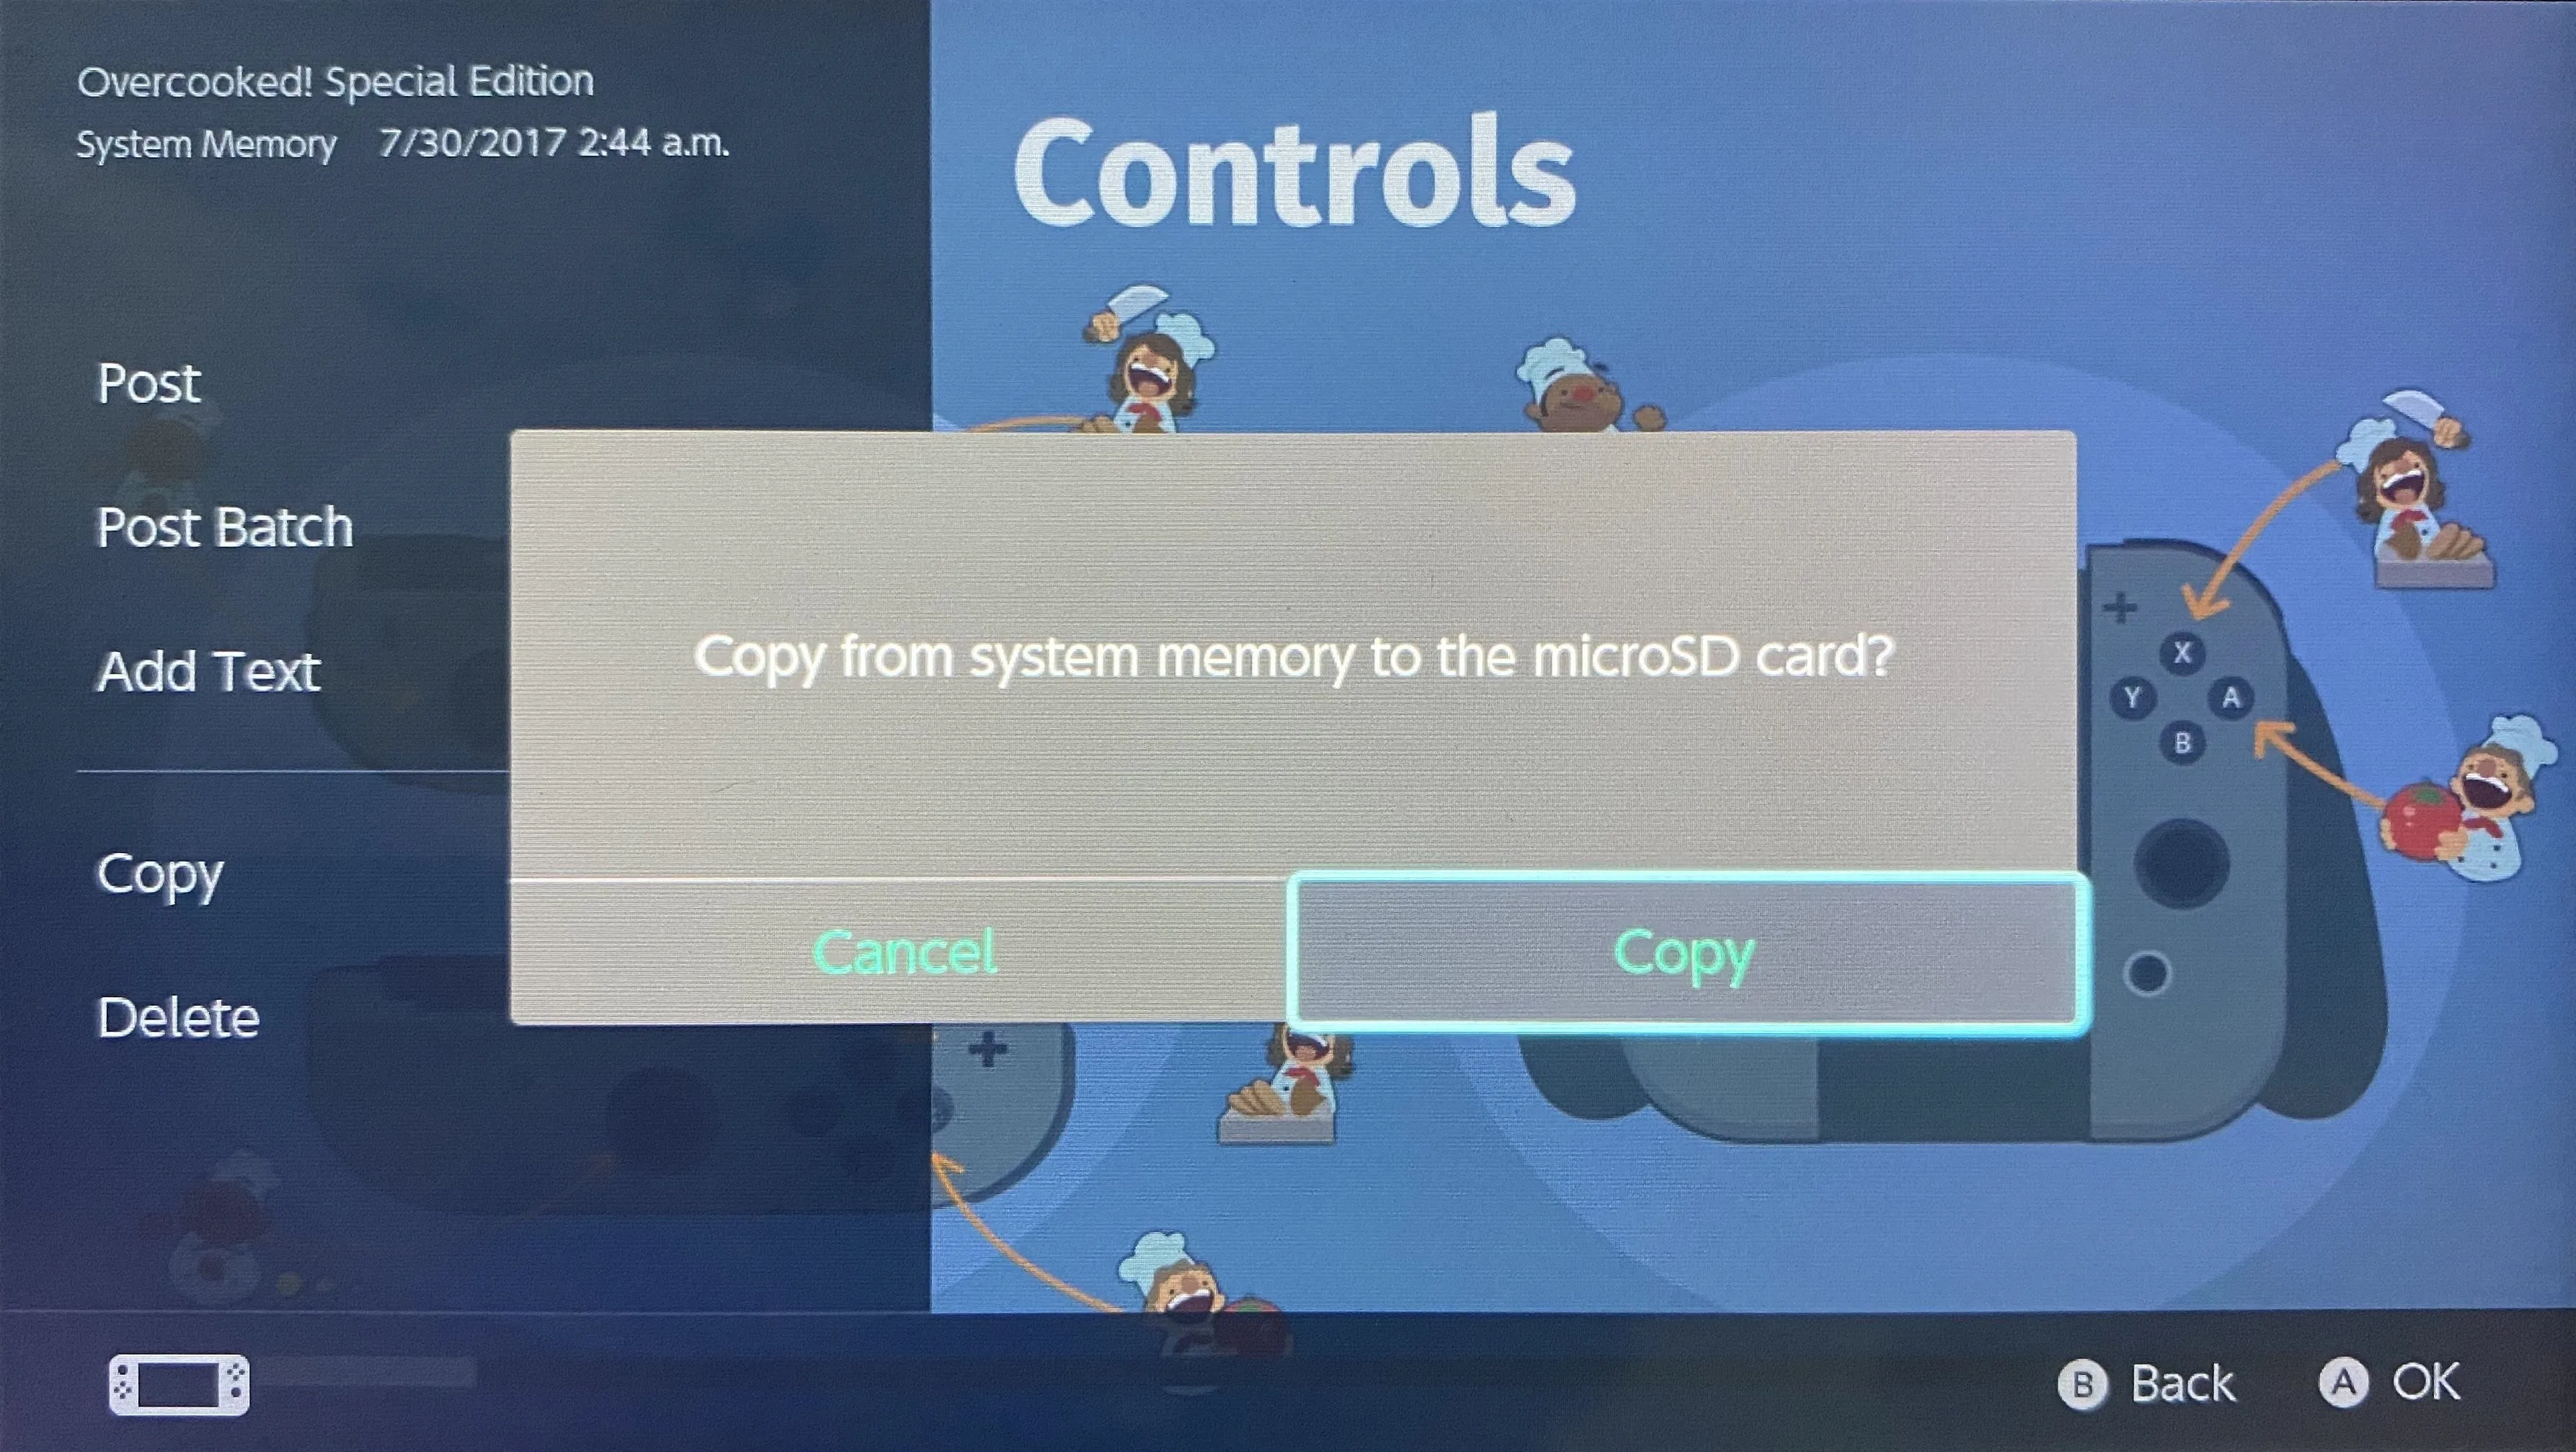
First, select the screenshot you want to share, then press the A button for "Editing and Posting." Here, in the top left, you'll be able to see the location where the image is saved. If you see "microSD," you're all set. If you see "System Memory," however, you'll need to copy it over to your microSD before proceeding.
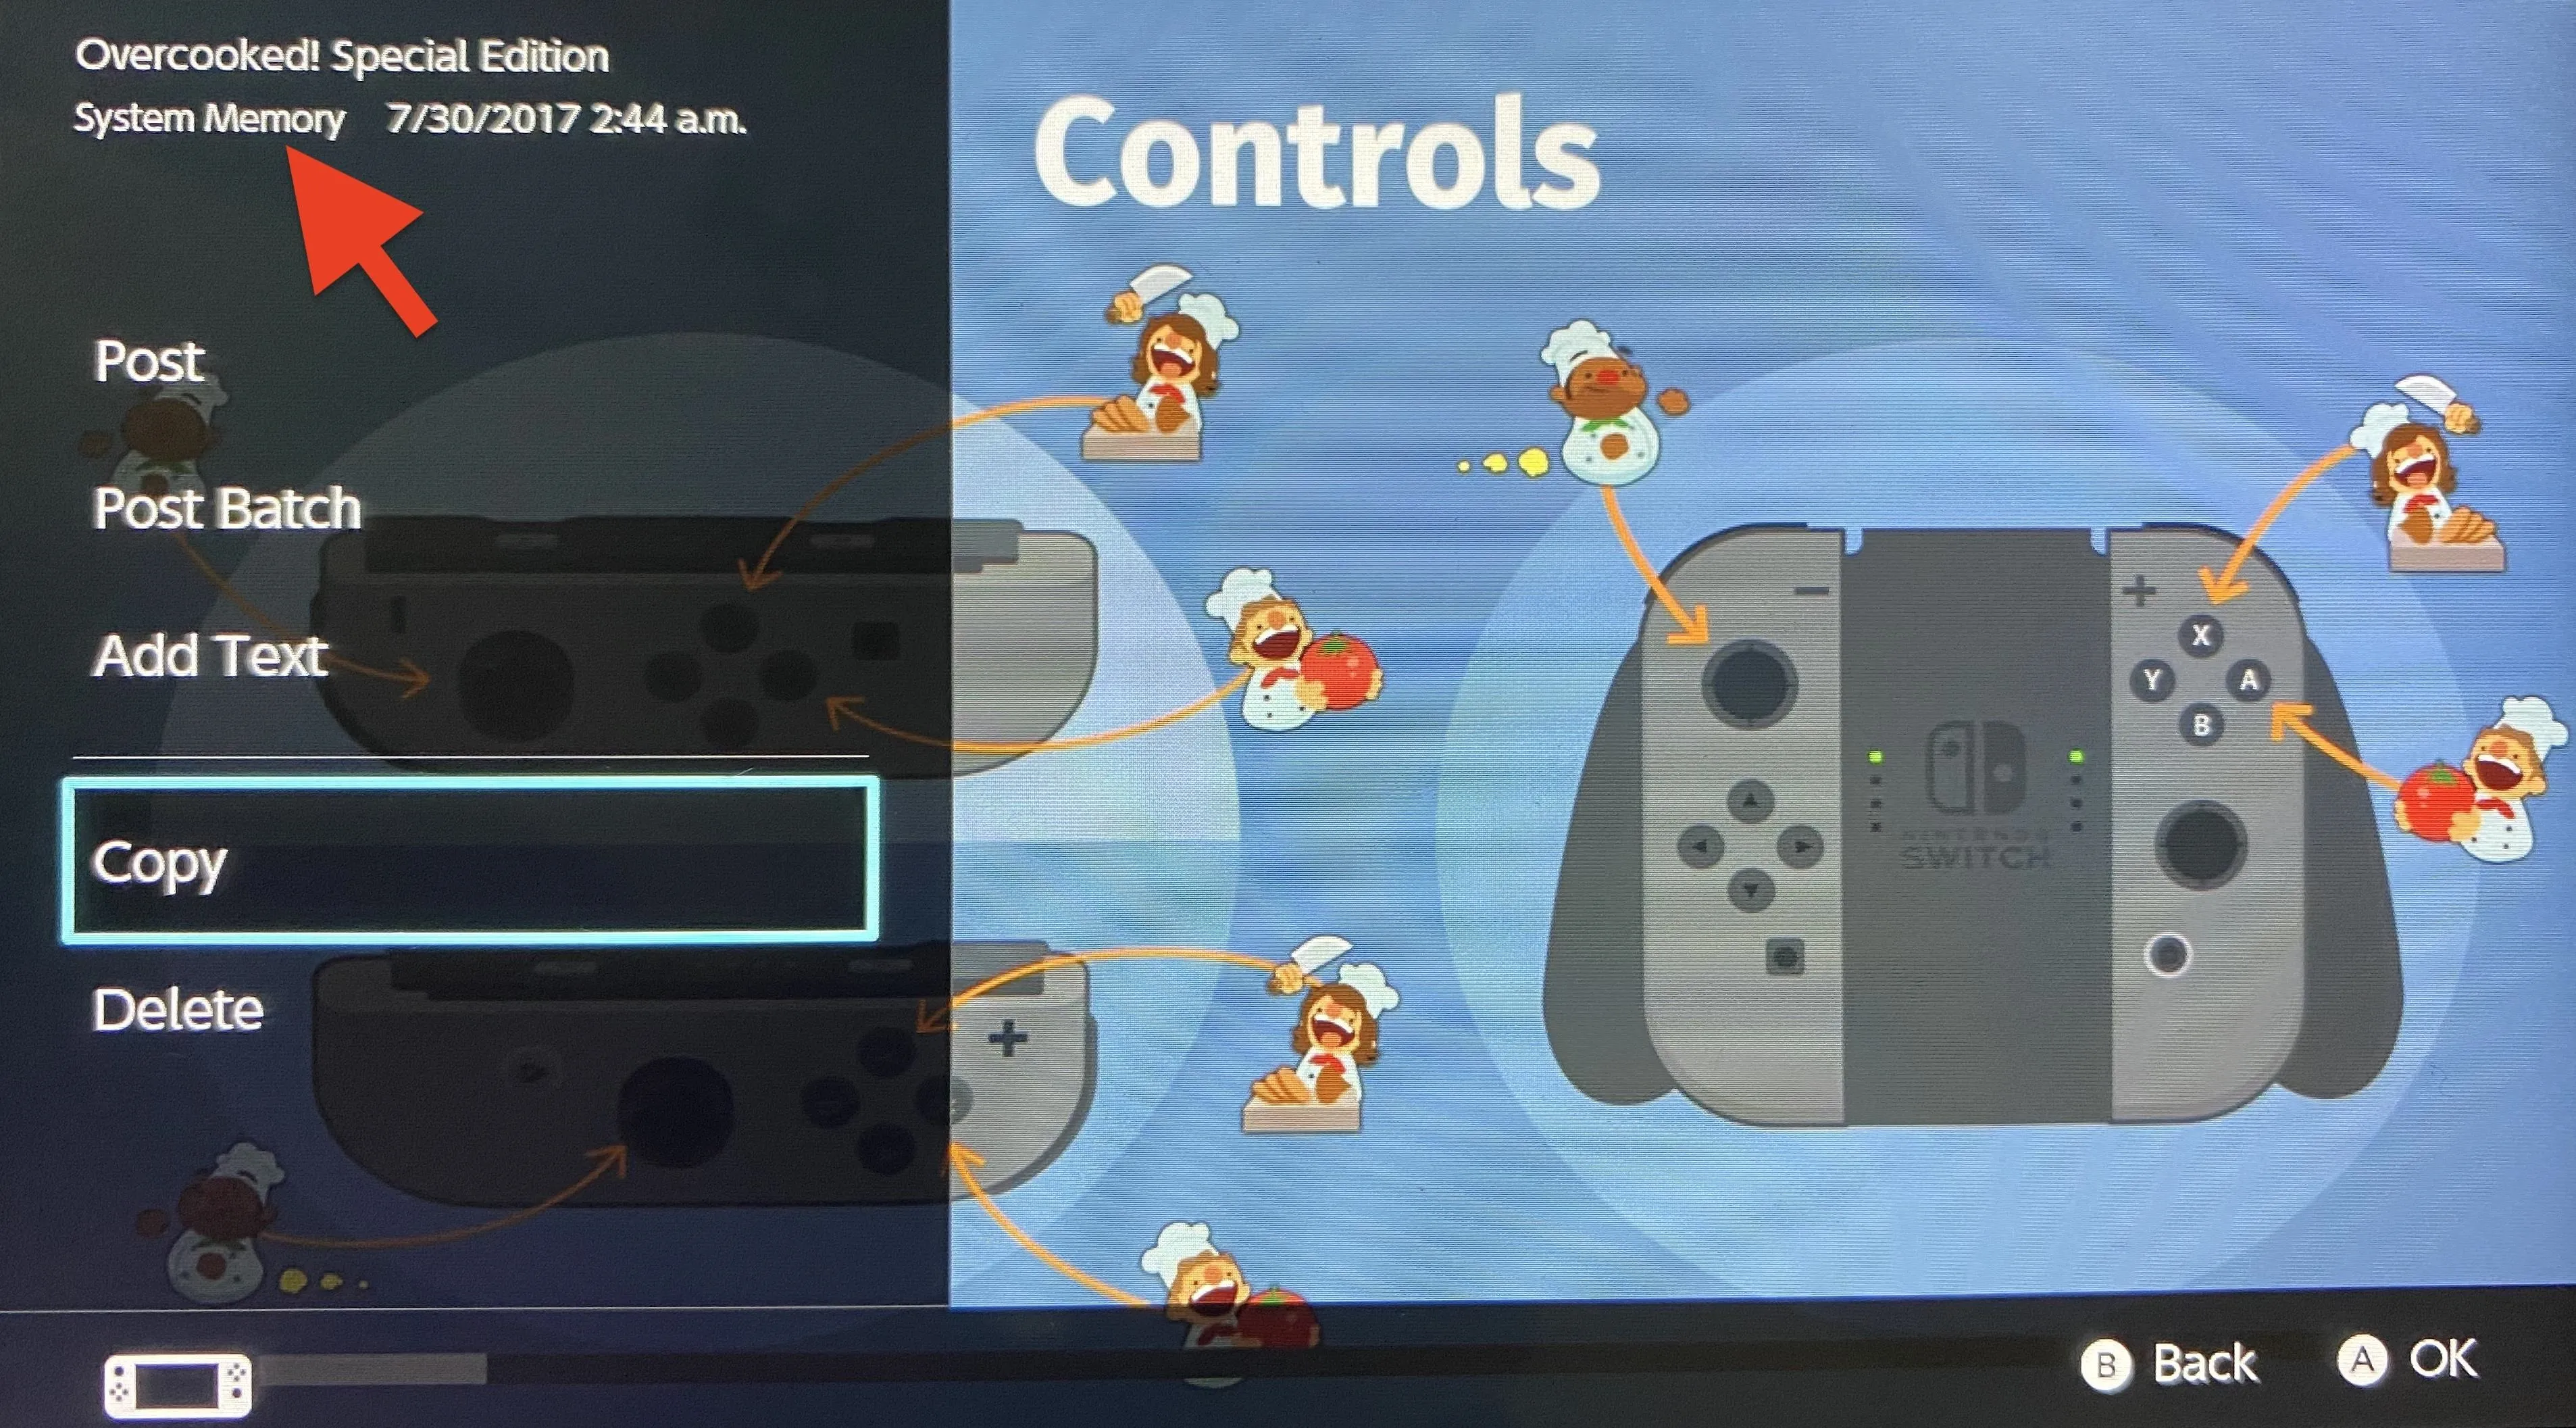
To do so, just select "Copy." The Switch will ask if you'd like to copy the image from system memory to your microSD card. Select "Copy" again to continue, tap "OK" on the confirmation pop-up, and return to the Album. You should see your new microSD copy directly next to the system memory original.
Transferring Files from microSD Card to Your Phone
If you have a phone that supports microSD cards, it's a piece of cake; just pop the card right in and use your files manager to move the photos over.
For other phones (such as every iPhone ever), you'll need a way to connect the microSD card to your device. The simplest way is with a card reader that has either a Lightning, USB-C, or Micro-USB connector. That way, you only need one thing.
- Buy a microSD card reader for Lightning port on Amazon
- Buy a microSD card reader for USB Type-C port on Amazon
- Buy a microSD card reader for Micro-USB port on Amazon
If you already have one, but it only reads normal-sized SD cards, such as Apple's Lightning to SD Card Camera Reader, then you'll need a microSD-to-SD card adapter to use it. If you bought a microSD card for your Switch, it's possible it came with an adapter anyway.
For old-style card readers that only connect via USB Type-A, you'll need to get a USB-A adapter to fit whatever connector your phone uses. For instance, if you have Apple's Lightning to USB Camera Adapter, you can plug the Lightning end into your phone, then use the USB-A port on the other end to connect your reader to.
There are plenty of options out there, so find the reader/adapter that's right for you. Once you have one, just connect it to your phone and use the phone's file manager to transfer the images. On an iPhone, you need to be running at least iOS 9 to transfer files over using the Photos app. On Android devices, there aren't many phones that won't let you do it.
Cover image and screenshots by Jake Peterson/Gadget Hacks


Comments
Be the first, drop a comment!