


Imagine an Instagram feed filled with a wild array of vivid color. Beautiful right? But when you look at the photos in your iPhone or Android phone's albums, they're all just too dull to pull off that dynamic look. There's no doubt that colorful images are more eye-catching than dull ones, so how do you get your photos to overflow with vibrant color? The answer: Add it in post.
A photo, even taken with the right settings, usually doesn't capture the vibrancy we see in real life. With Adobe Photoshop Express, you can turn up the color in a photo to get an effect that is more true to life, or you could max out the color to get a magical-looking picture, with more life than ever thought possible.
Four main adjustments in PS Express deal with color: temperature, tint, vibrance, and saturation. Each of these settings reacts with color differently to alter photographs, either to correct or to enhance the images. Temperature and tint are related, as are vibrance and saturation, so I grouped them below.
Note that Adobe's mobile PS Express is available for both iOS and Android. If you already have it, make sure to update it before continuing.
Adjust the Temperature & Tint
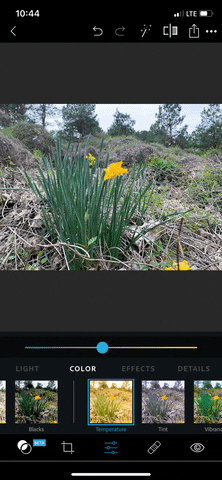
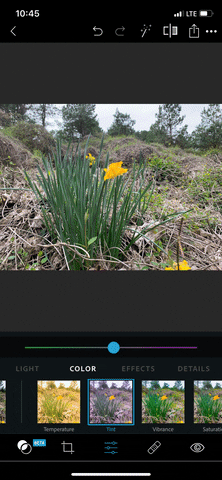
First, open PS Express and select your image. Then, tap the adjustments tab in the bottom toolbar and scroll over until you've reached "Temperature" an "Tint." On an iPhone, you can jump right to these color tools by tapping the "Color" tab above the available adjustments tools.
Temperature and tint both alter the color of a photo based on color perception. The cones in our eyes help us perceive color in red, blue, and green, and we view the differences between those colors to get other colors in the visible spectrum. Those are spectral colors, but there are also non-spectral colors such as magenta that we perceive by mixing blues and reds without any greens. For simplicity's sake, in human chromaticity, the temperature goes from blue to orange horizontally, while tint covers from green above the line to purples below.
The temperature of a photo refers to the amount of blue or yellow/orange in the image. When a picture is taken, the temperature can shift naturally. For example, an image taken at dawn will have a warm temperature that's yellow or orange, and a photo taken under fluorescent lighting will have a cool temperature that's blue.
The tint of a photo refers to the amount of magenta or green light that appears. Tint is not often used in corrections since a photo only typically needs this type of adjustment when taken under gas-emission lighting such as neon lighting. However, the tint sliders in PS Express can be used differently by augmenting the color of your photo. This is the fun part of working with color adjustments!
When you tap on the "Temperature" adjustment tool, adjust the slider above it to your liking, from blue on the far left to yellow on the far right. The same goes for "Tint," but the far left is green and far right is magenta. When augmenting color, there is no right or wrong way to do it. Just play with the sliders until you find something you are happy with.
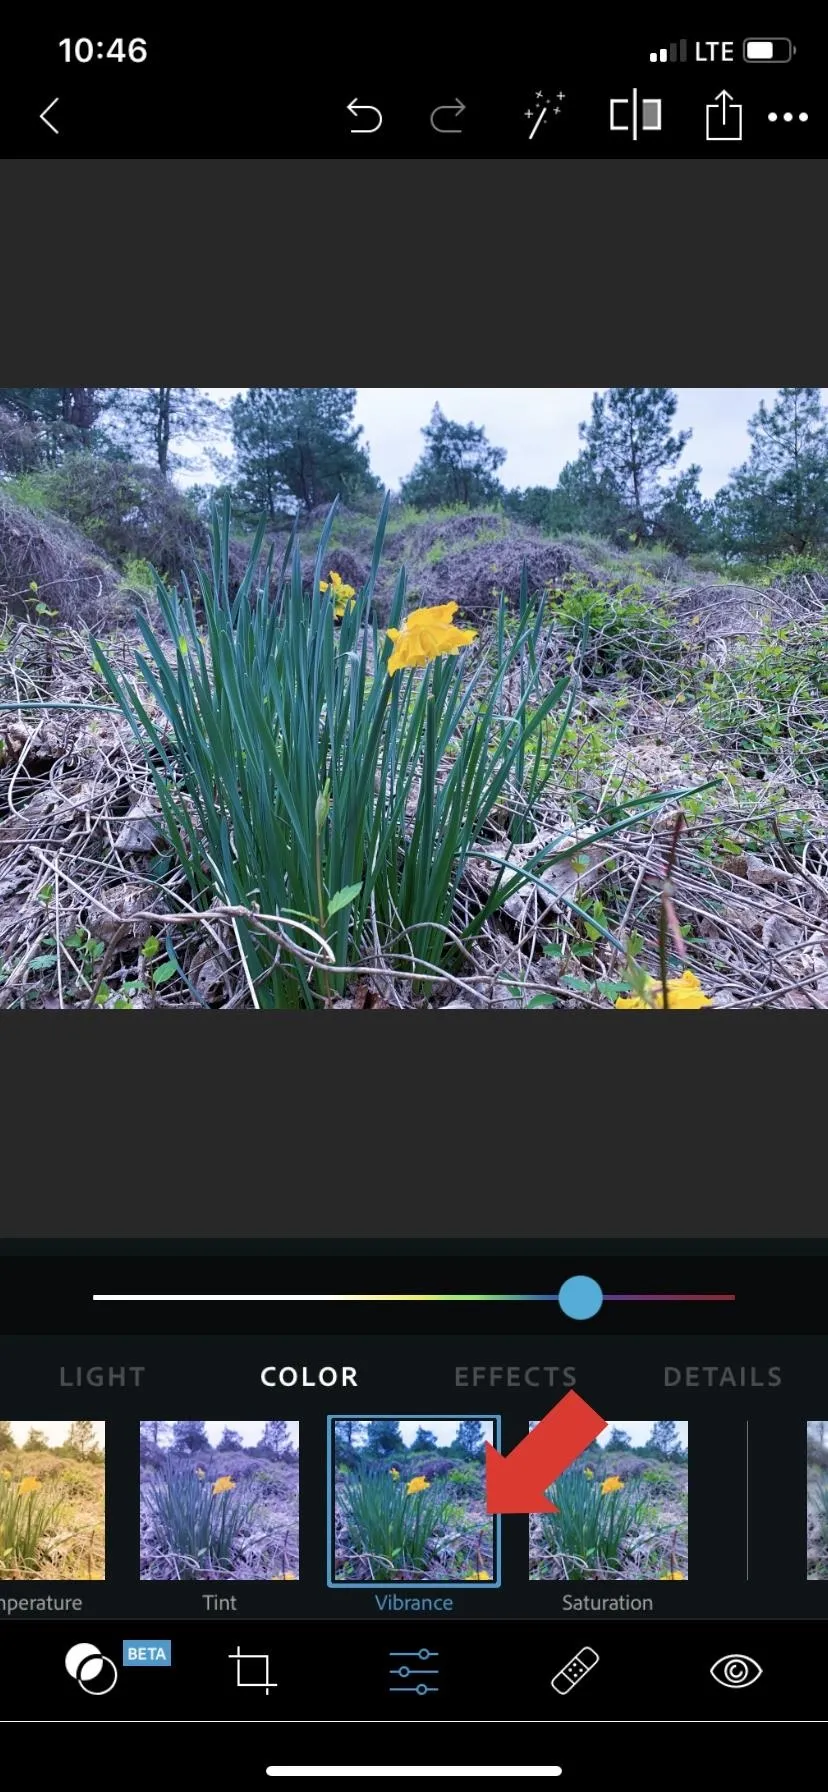
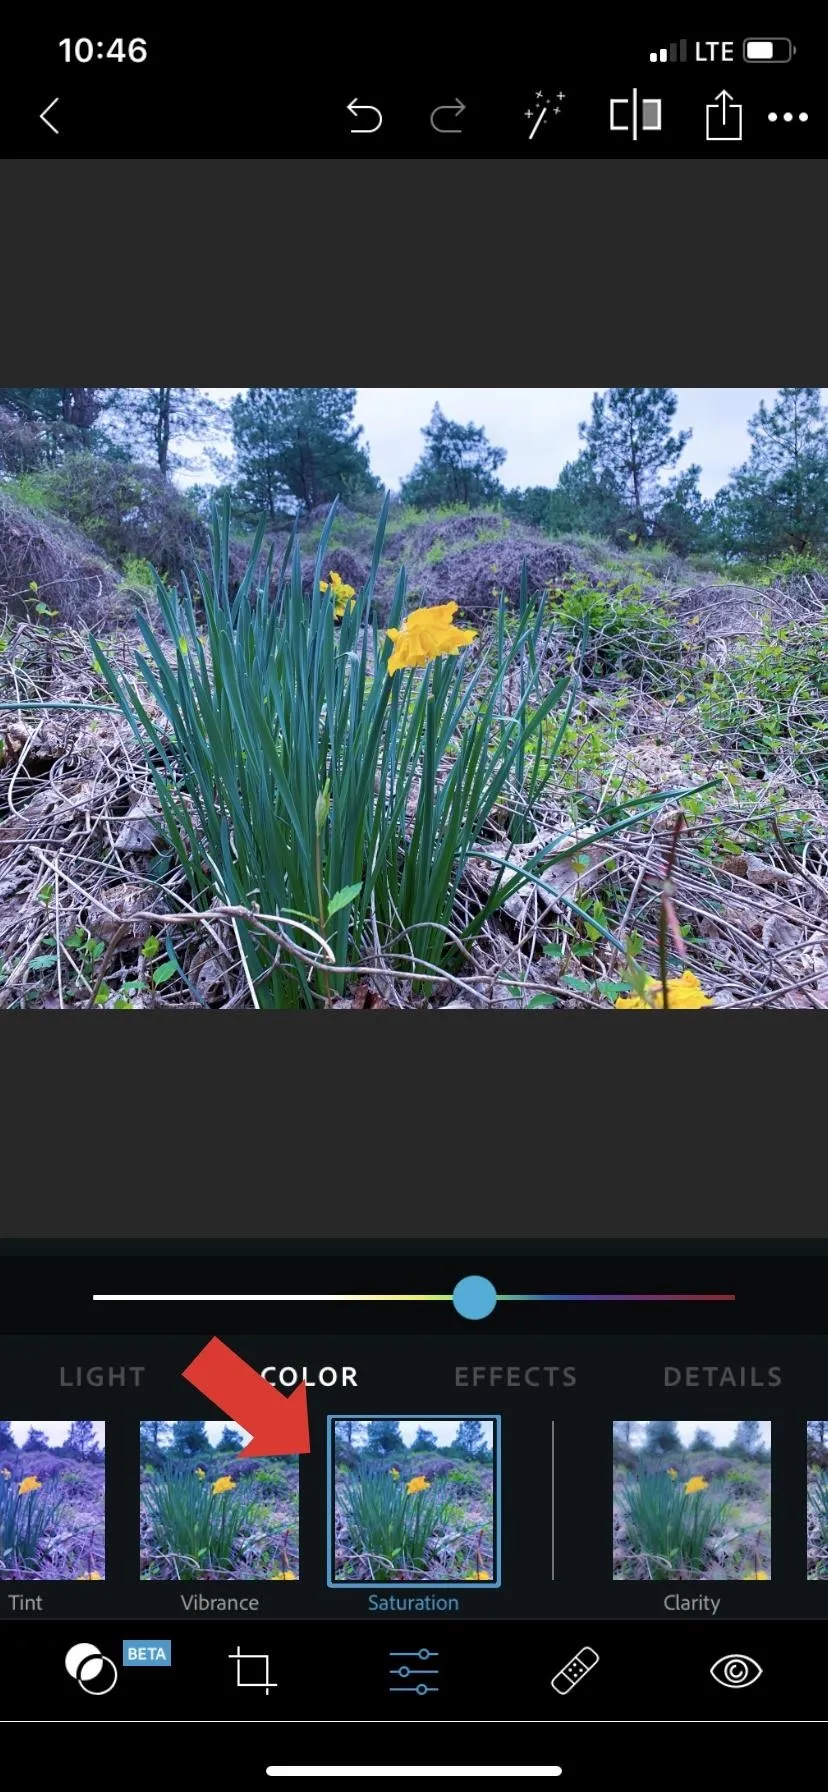
Adjust the Vibrance & Saturation
"Vibrance" and "Saturation" will turn up the intensity of your color without actually changing the tones. Saturation affects the overall intensity of the color in your image, where it saturates and enhances all colors in the photo equally. Vibrance uses smart tools to increase only the areas of the picture that lack saturation, and it leaves the already saturated parts alone so that the color boost will be less harsh.
Tap the "Vibrance" slider, just to the right of the adjustment tools discussed above, then move the slider above it left or right. Left will decrease the color intensity of the low-saturation areas while the right will increase those areas. To adjust all colors at once, tap "Saturation" and adjust the slider, left to remove all colors or right to exaggerate them.
You can toggle back and forth between the two tools until you find the look you're going for. Also, don't be afraid to return to "Temperature" and "Tint" to make adjustments as needed.
After you're satisfied with the adjustments you've made, don't forget to save your image. If you think you may like to use these same adjustments again, you can save this look to your custom presets and use it over and over again.
- Follow Gadget Hacks on Pinterest, Reddit, Twitter, YouTube, and Flipboard
- Sign up for Gadget Hacks' daily newsletter or weekly Android and iOS updates
- Follow WonderHowTo on Facebook, Twitter, Pinterest, and Flipboard
Cover image, screenshots, and GIFs by Courtney Raphael/Gadget Hacks


Comments
Be the first, drop a comment!