


When it comes to digital security, one of the best ways to protect yourself is to use two-factor authentication. Most apps these days support it, including Facebook, a site where the more privacy you can muster, the better. However, of the two 2FA options available for Facebook, only one should be used as the other will share your phone number with the world, a huge privacy concern.
The two options you get for Facebook use either SMS texts or an authentication app, the former being the culprit you'll want to avoid. For one, SMS-based 2FA is about the least secure form of 2FA available. On top of that, if you use your phone number with Facebook's 2FA, or even just list your number through Facebook in any way, Facebook will use your number to recommend your profile to contacts, it will be searchable, and it could be shared with Instagram and WhatsApp.
If you already set up 2FA on Facebook using your phone number, we'll show you how to totally eliminate your digits from the site, then walk you through setting up 2FA with a third-party authentication app instead. An authentication app acts as a second password for Facebook to use to confirm your identity. Authenticators employ their own encryption and security measures that blow SMS out of the water. Best of all, you don't need to spend a dime on these apps if you don't want to.
Choose a Third-Party Authentication App
Before we even open Facebook, you can save yourself some time down the road by downloading a third-party authentication app right now. Keep in mind, you can download this app on either the iPhone or Android phone you use Facebook on or a secondary device to increase security. It's up to you to weigh the security and convenience of each option.
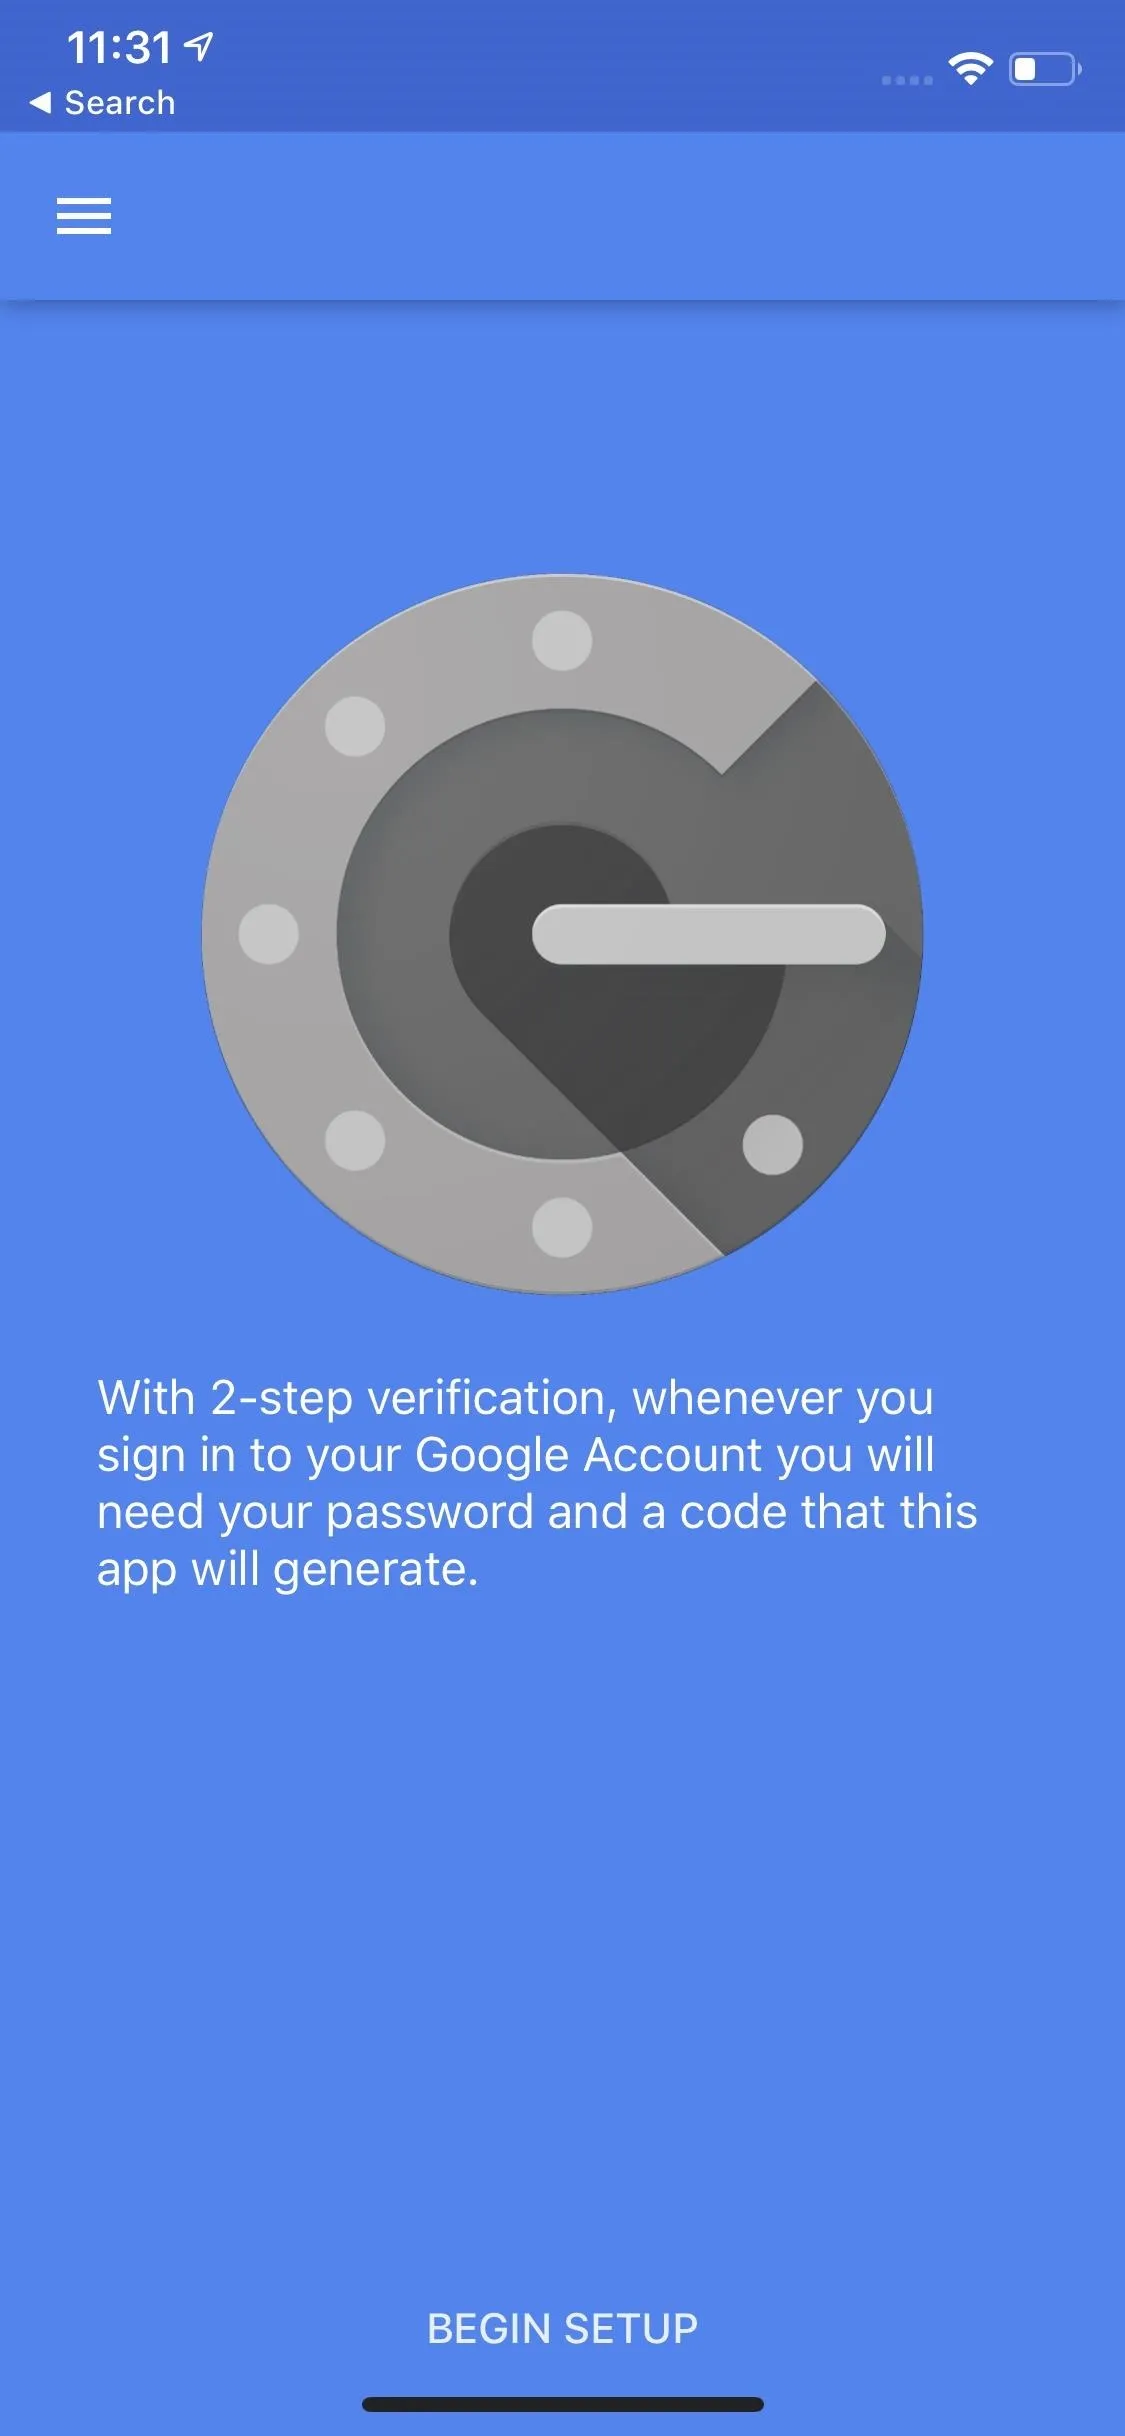
What app you choose is also up to you. Facebook mentions both Google Authenticator and Duo Mobile, but there are many more options out there, such as Authy (our favorite), each with its own pros and cons. If you need some help choosing the right 2FA app for you, check out our roundup of the best apps.
Delete Your Phone Number from Facebook
Trust us, this is going to feel good. If your phone number is connected to Facebook in any way, shape, or form, the company is leeching off it. You're better off protecting your privacy by removing the number entirely.
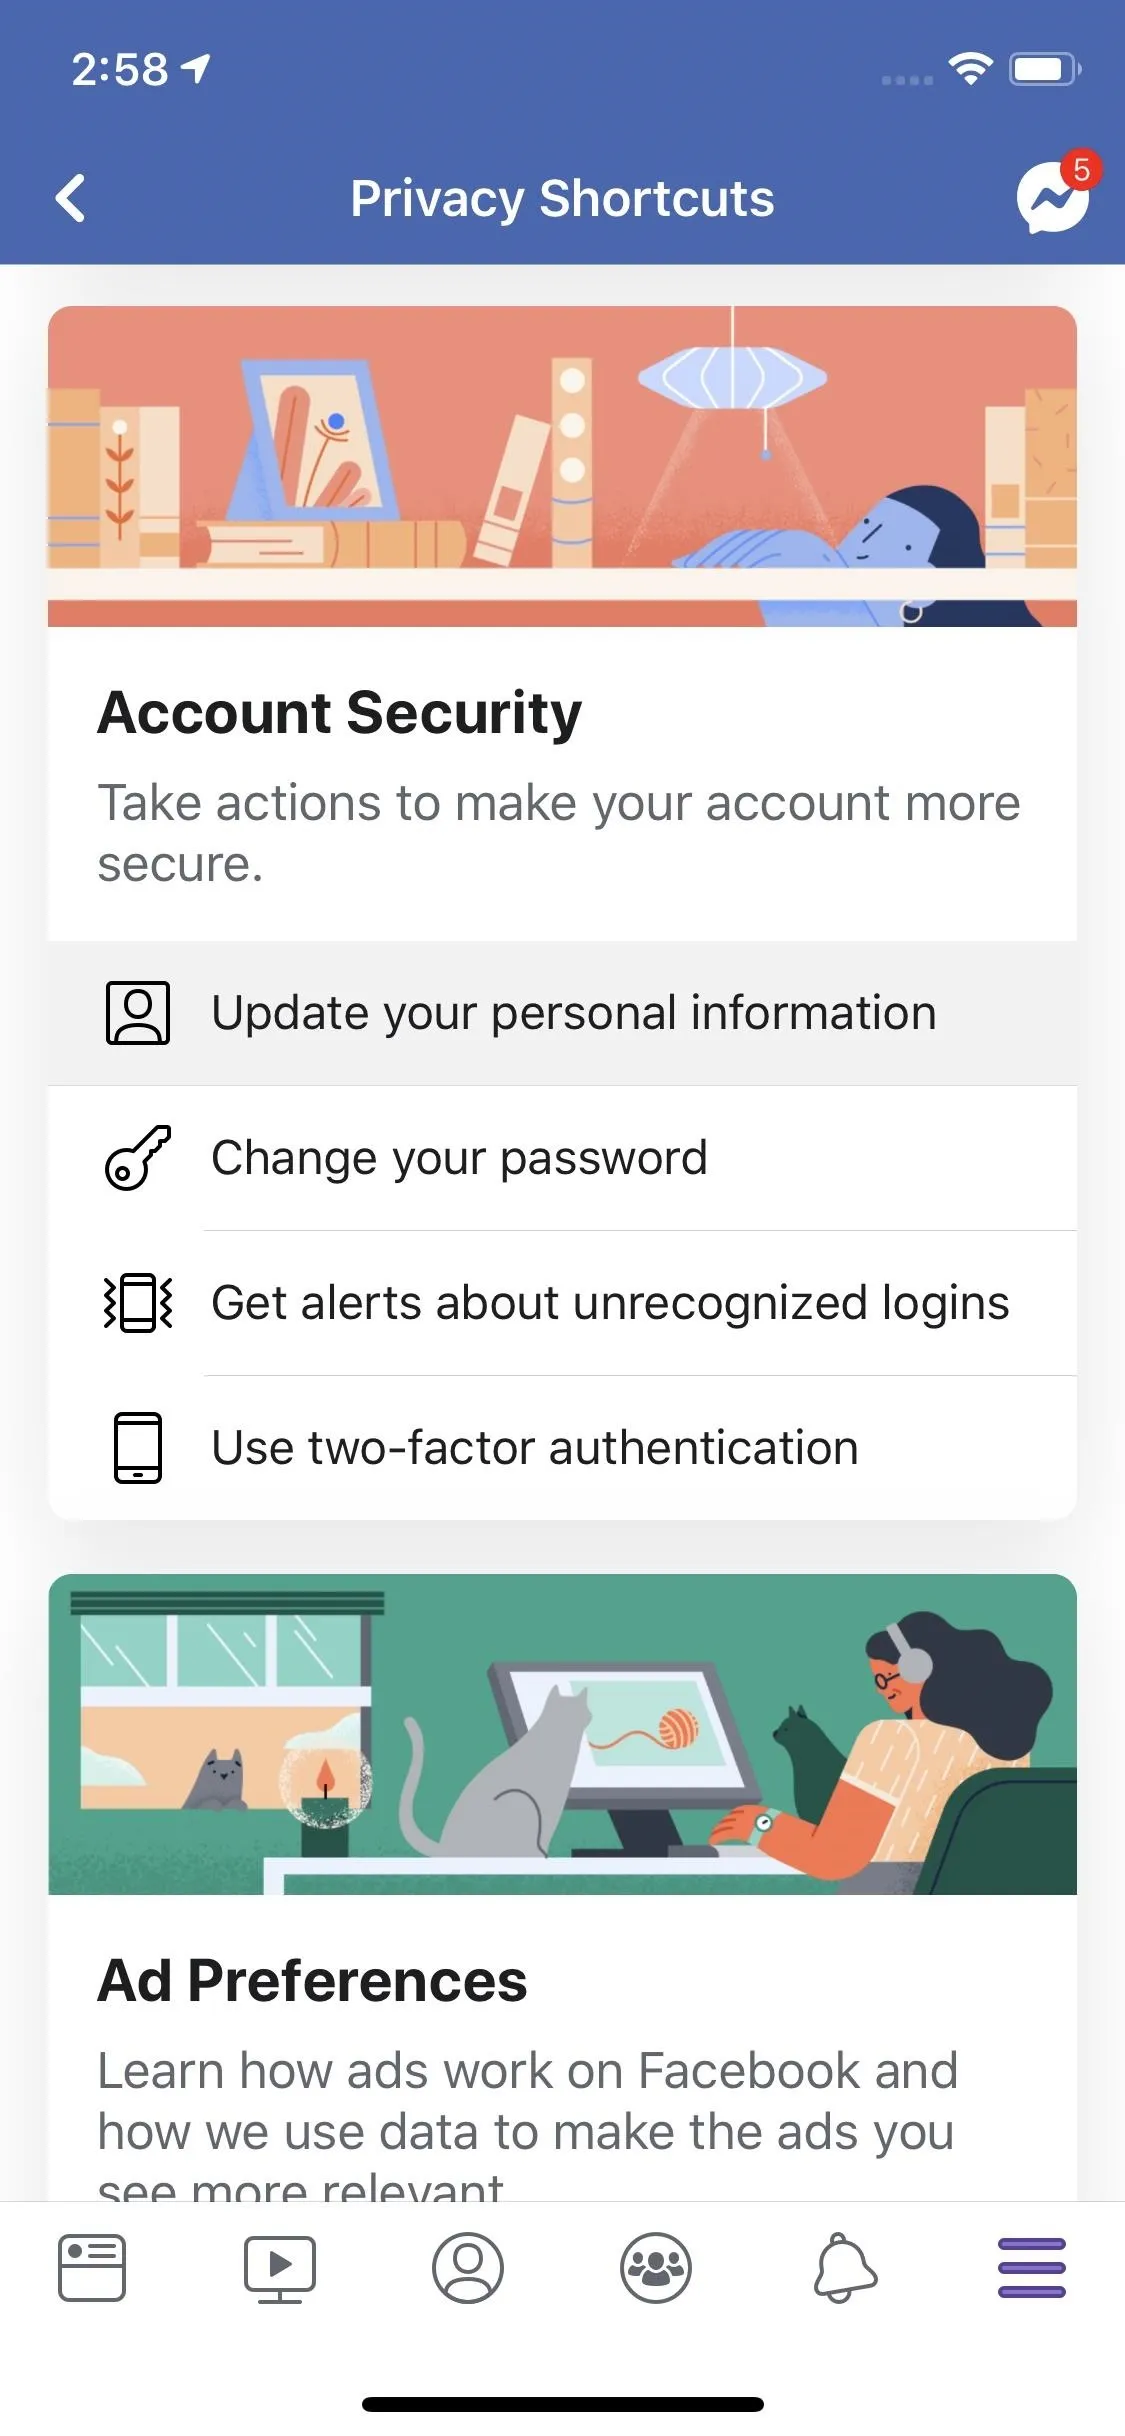
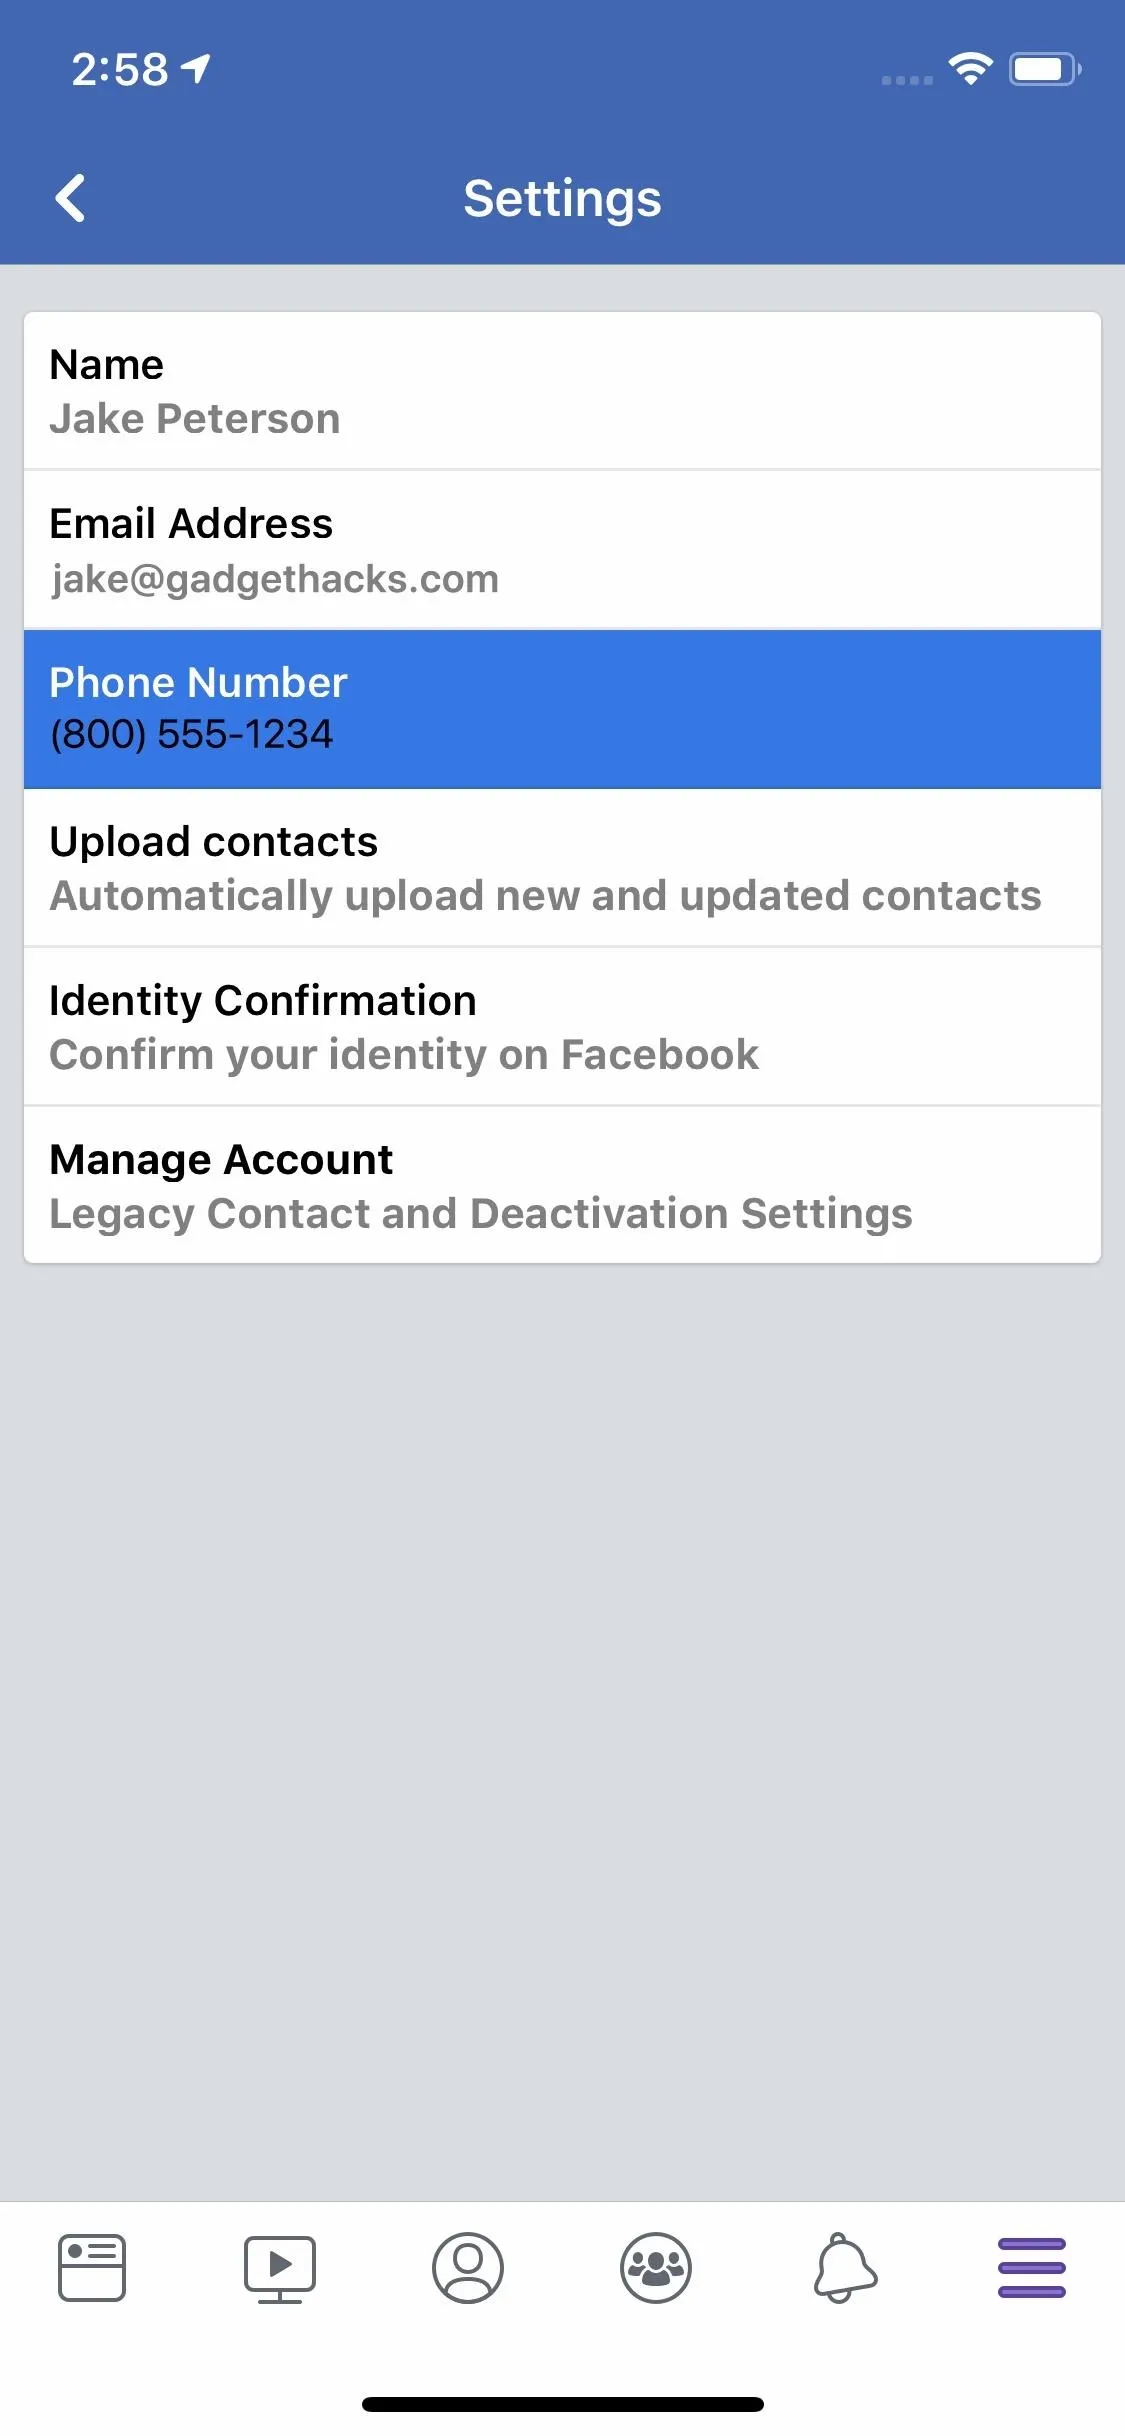
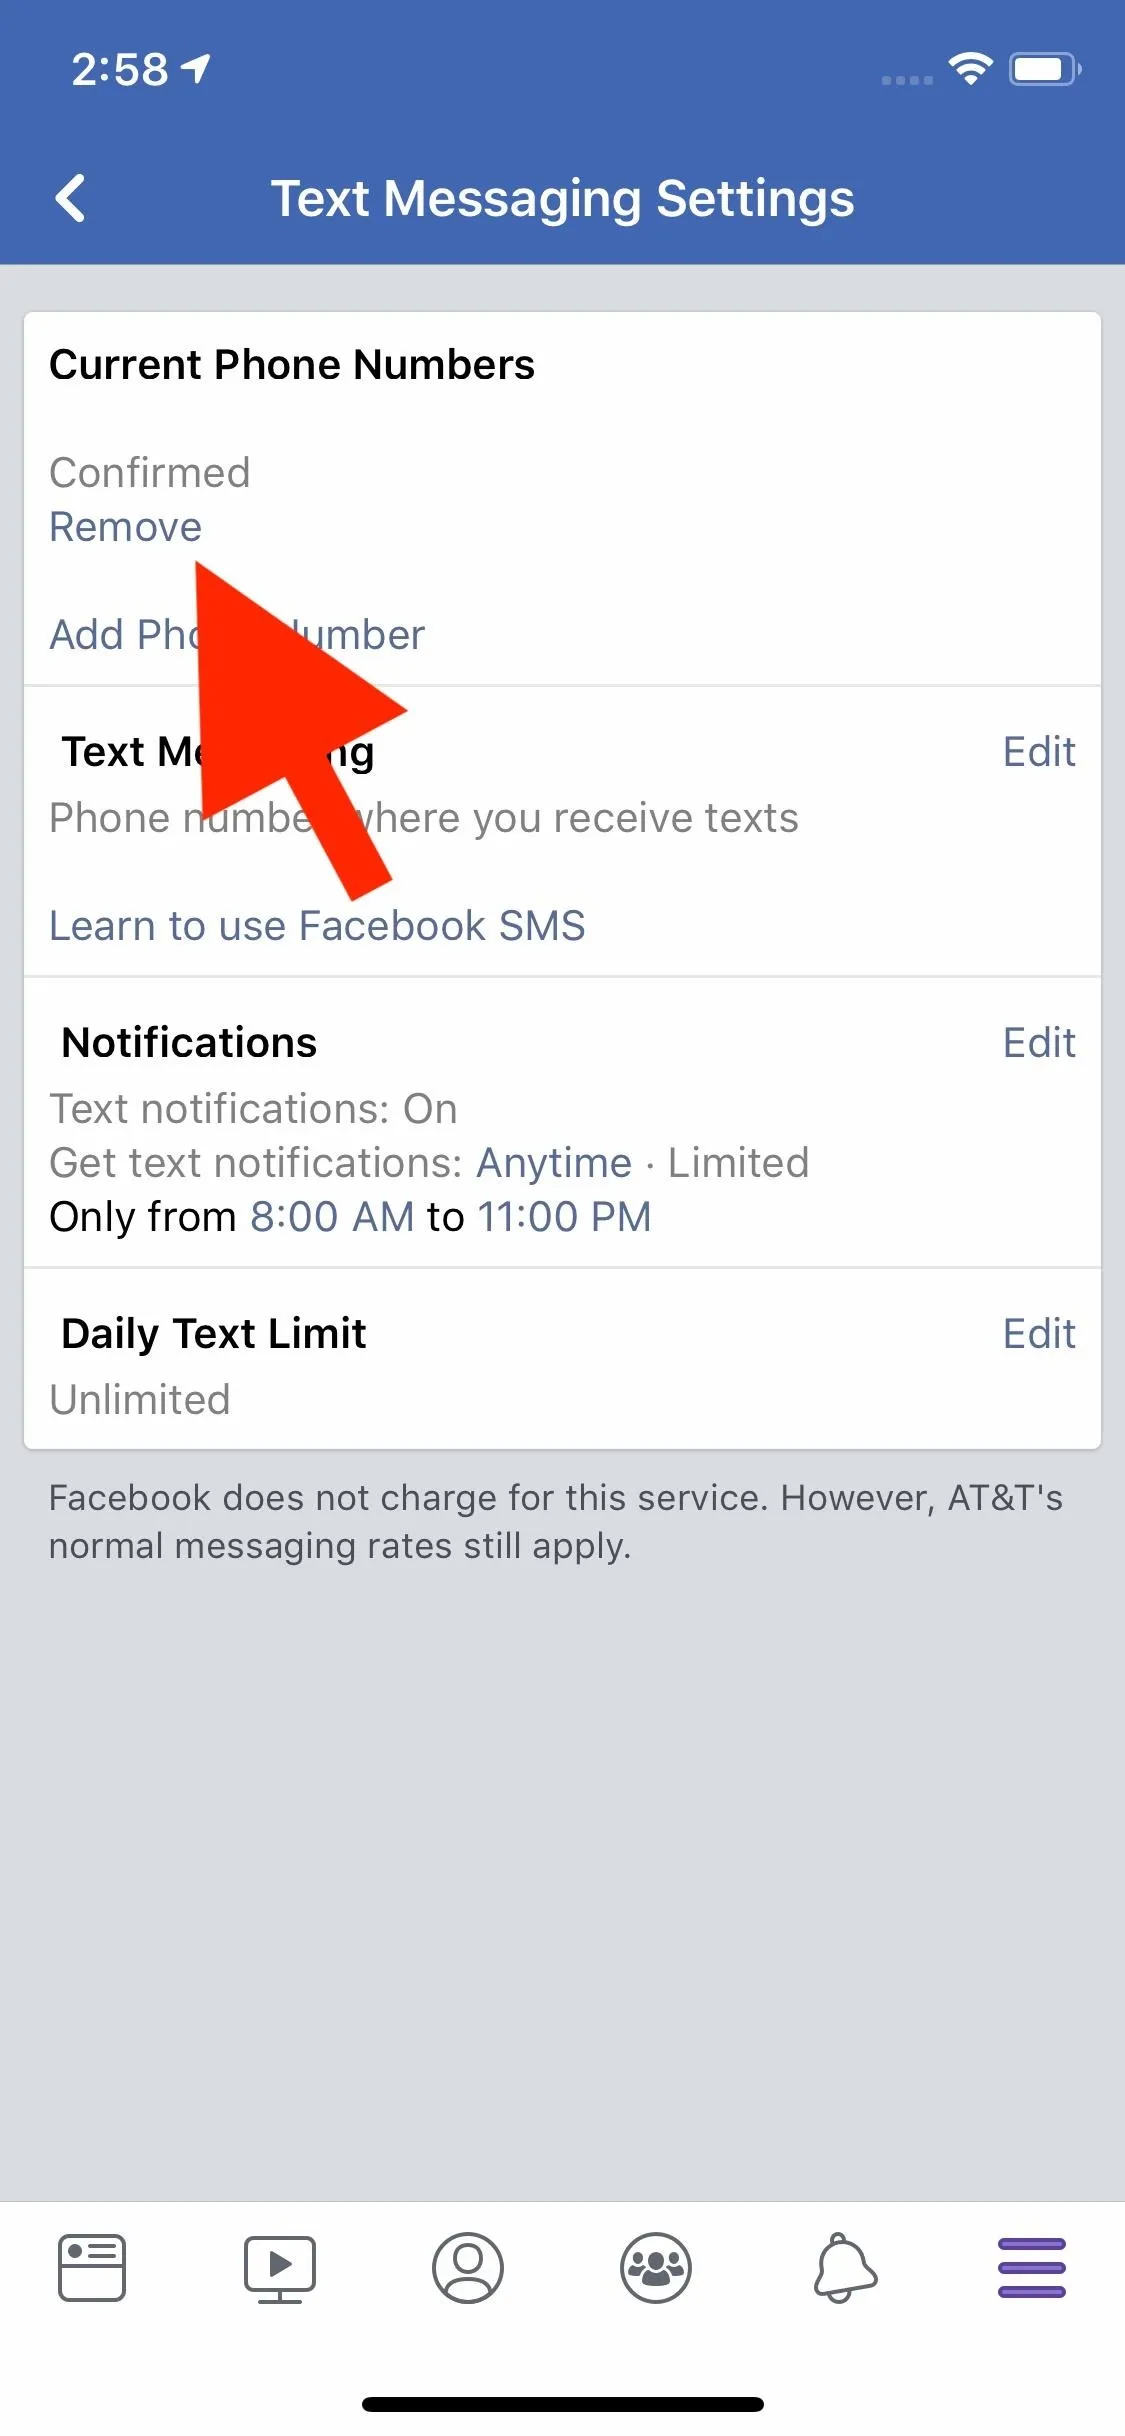
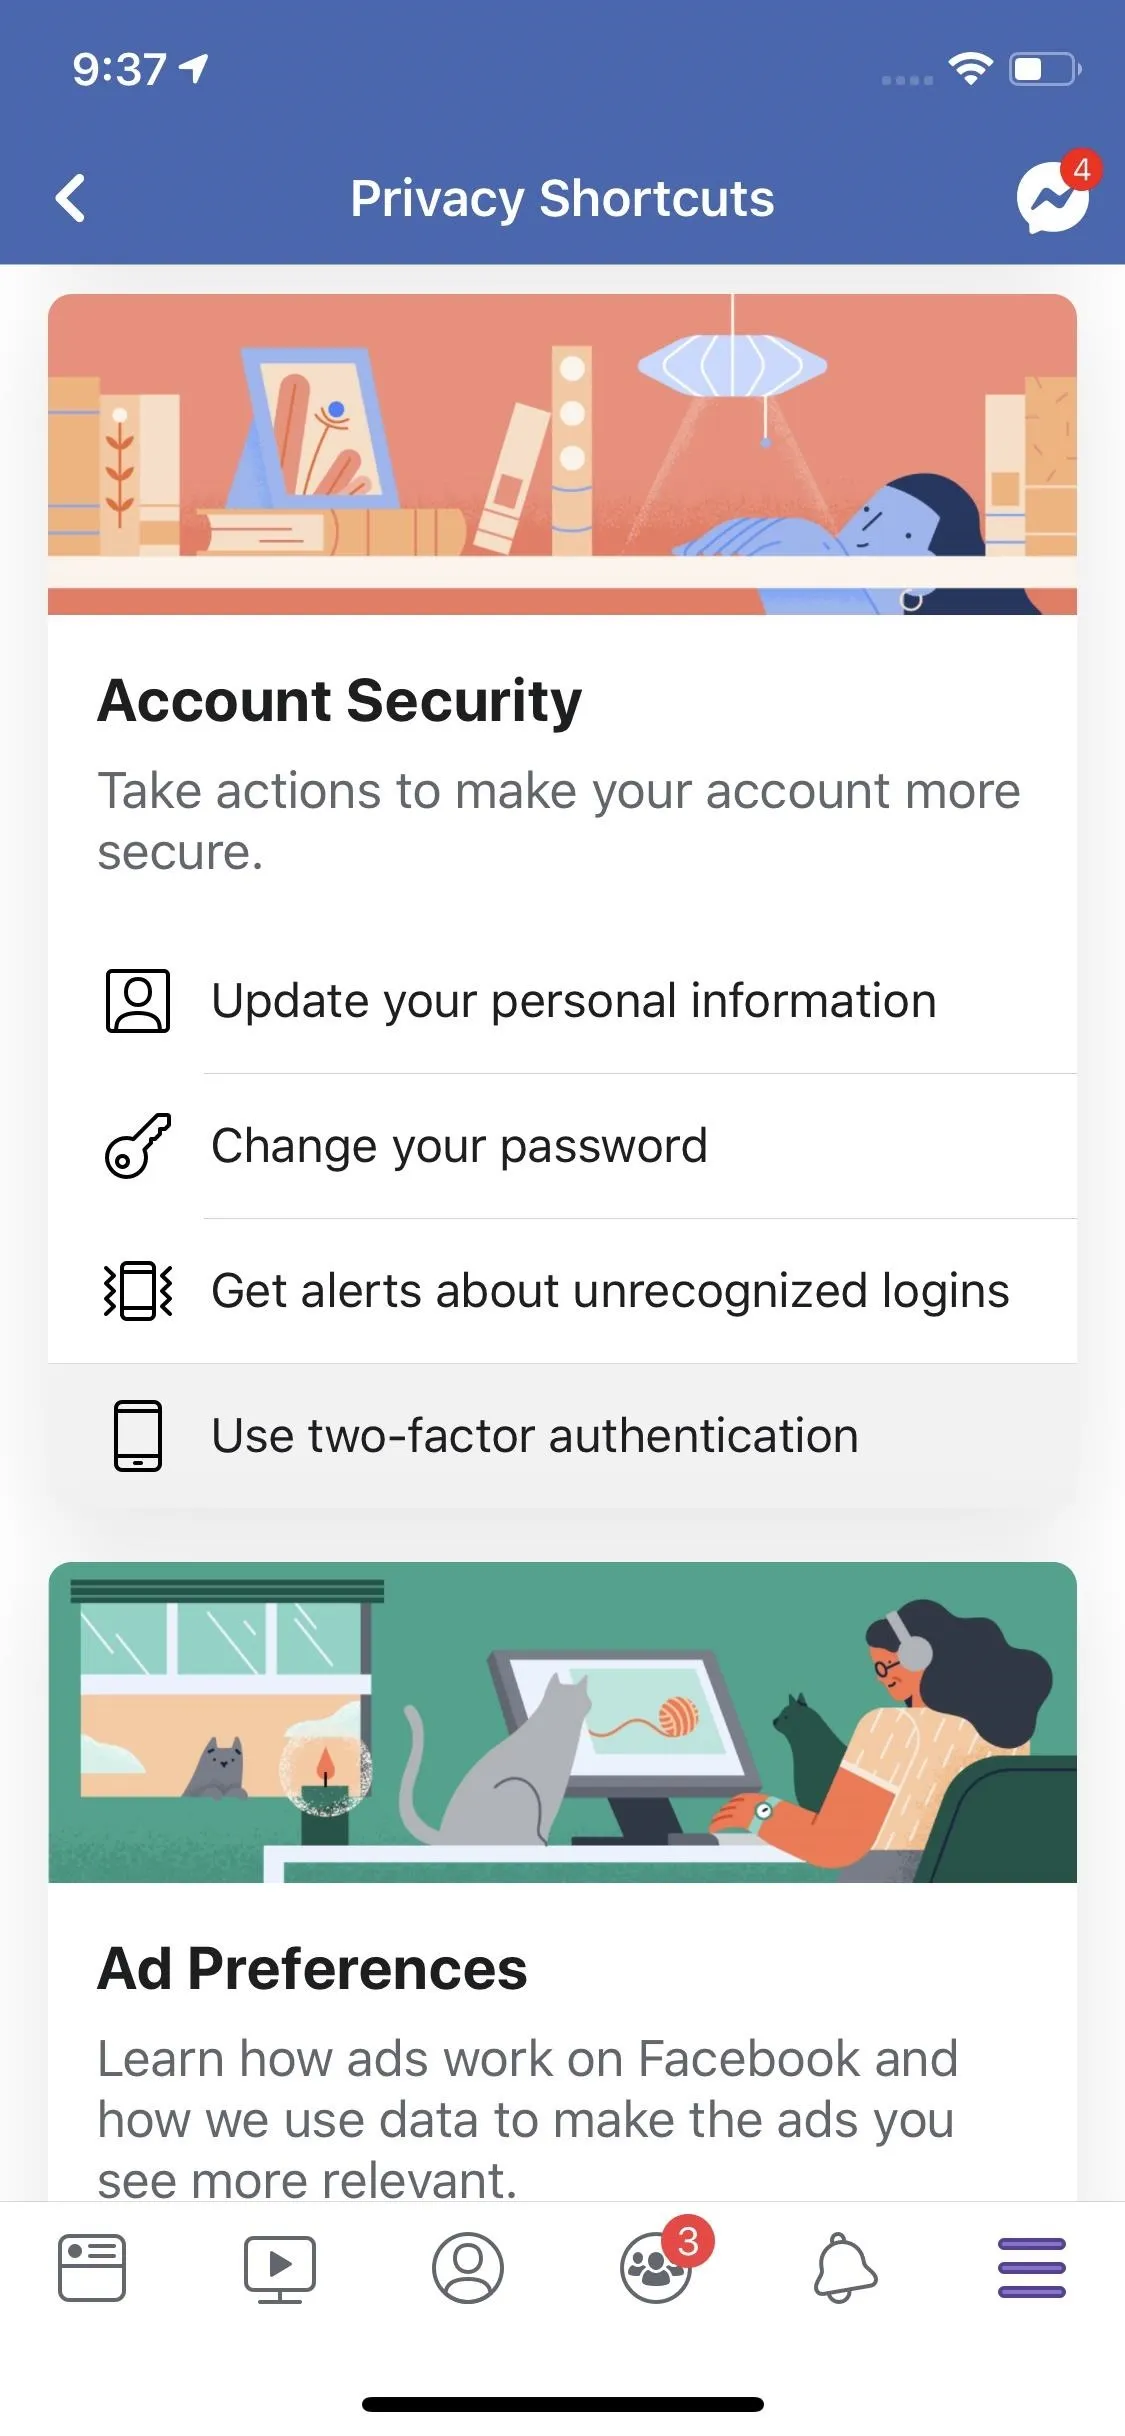
Tap the hamburger menu icon, then tap "Settings & Privacy." Choose "Privacy Shortcuts" from the list, then choose "Update your personal information" under Account Security. Next, tap your phone number, and on the following page, select "Remove," as shown below.
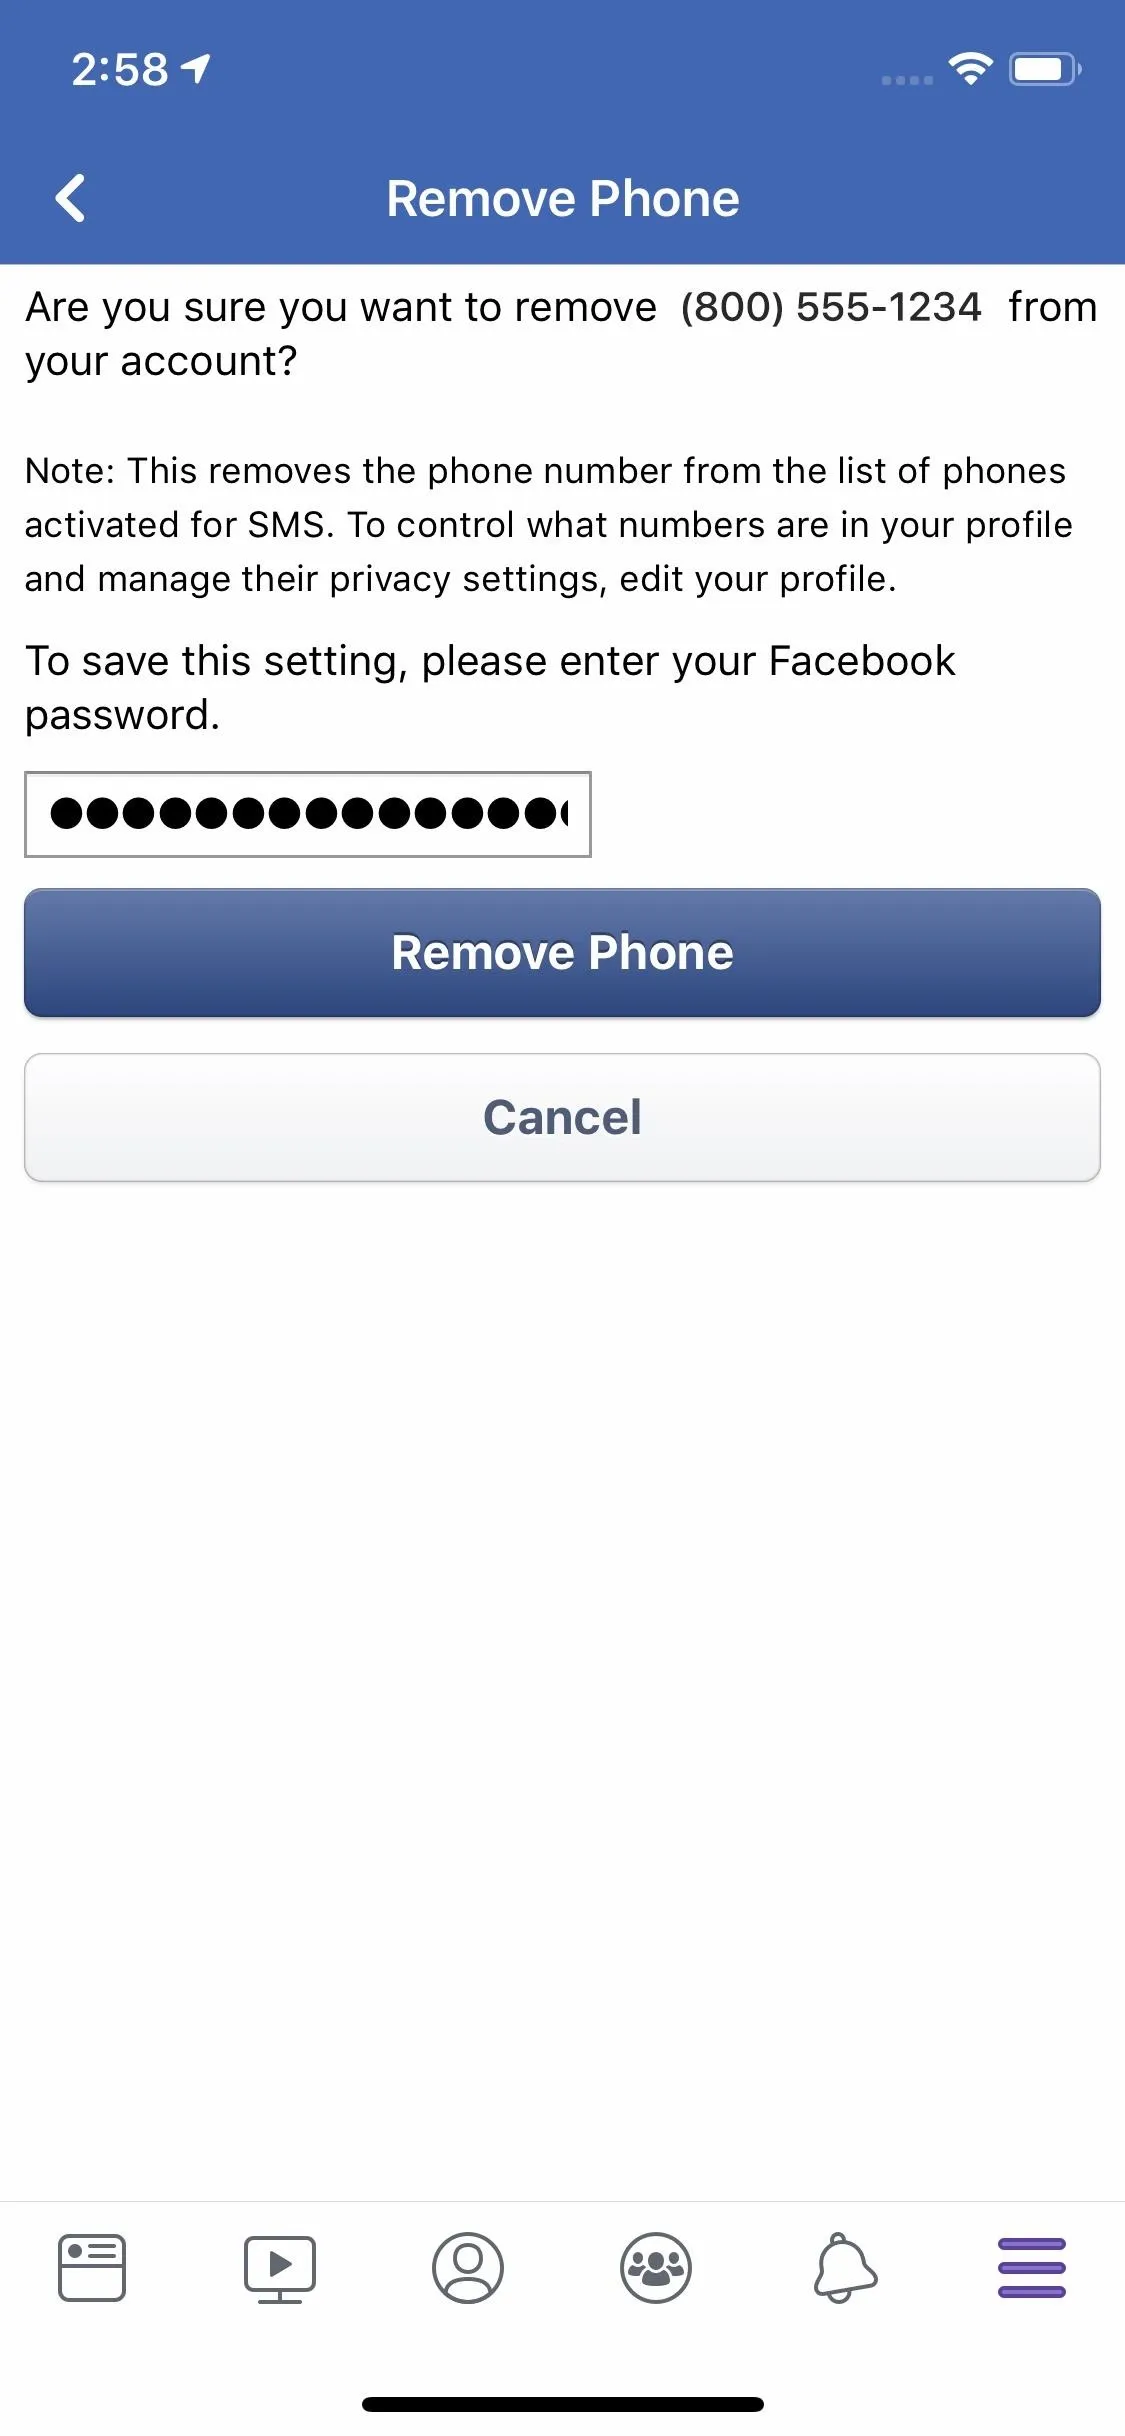
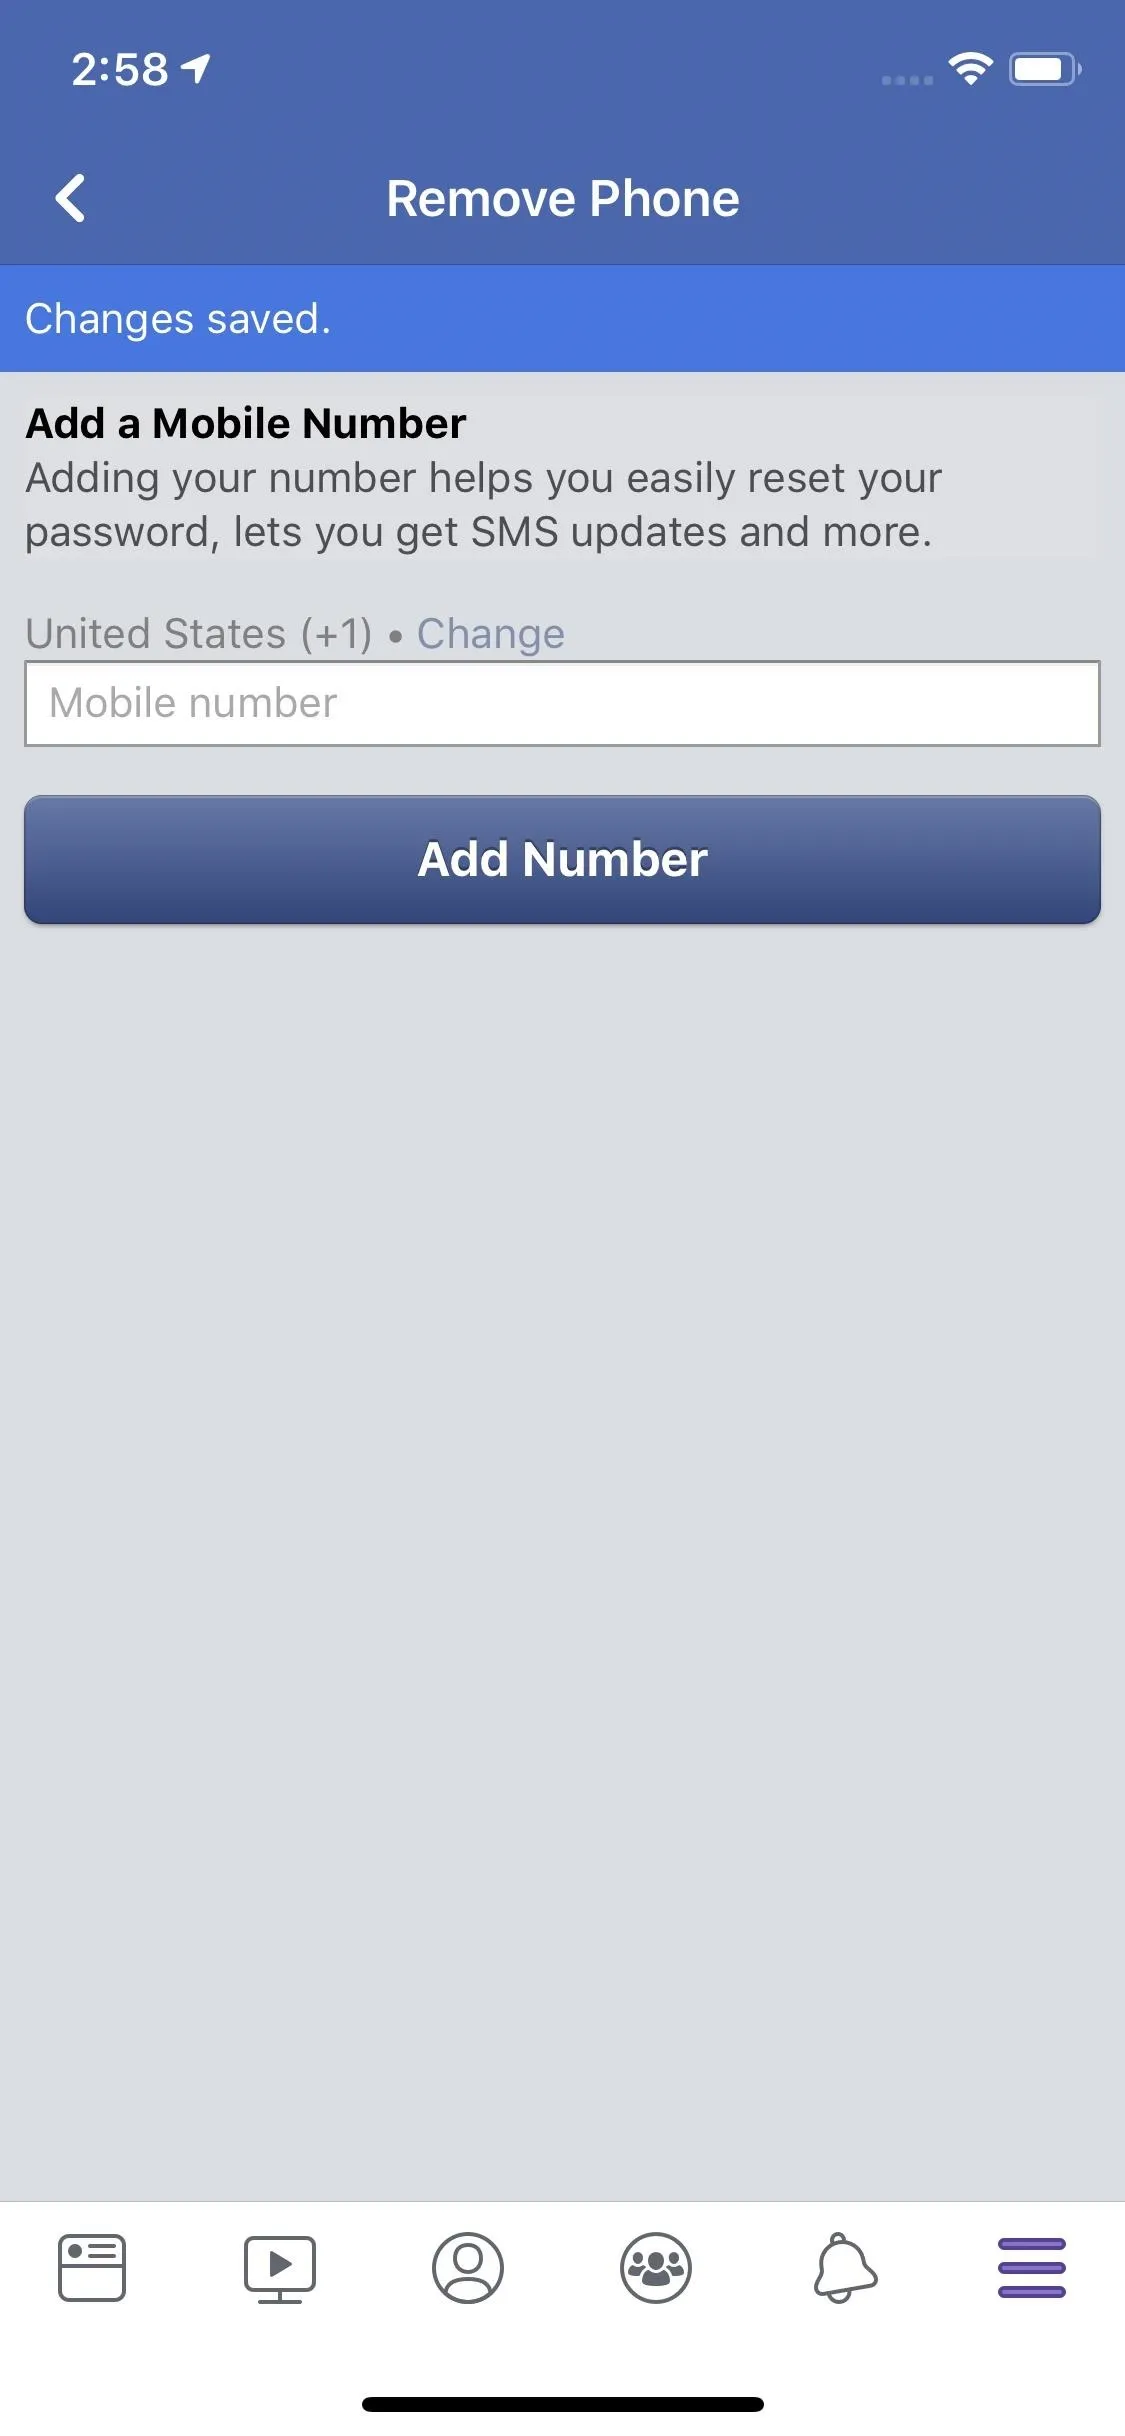
Next, enter your Facebook password in the provided field, then tap "Remove Phone." Give Facebook a minute to begrudgingly scrub this number from your account, and presto! You are now the proud owner of a numberless Facebook. That does mean if you had 2FA set up with this number, you no longer have 2FA enabled. But we're about to set up 2FA with a much more secure method.
Get Started with 2FA
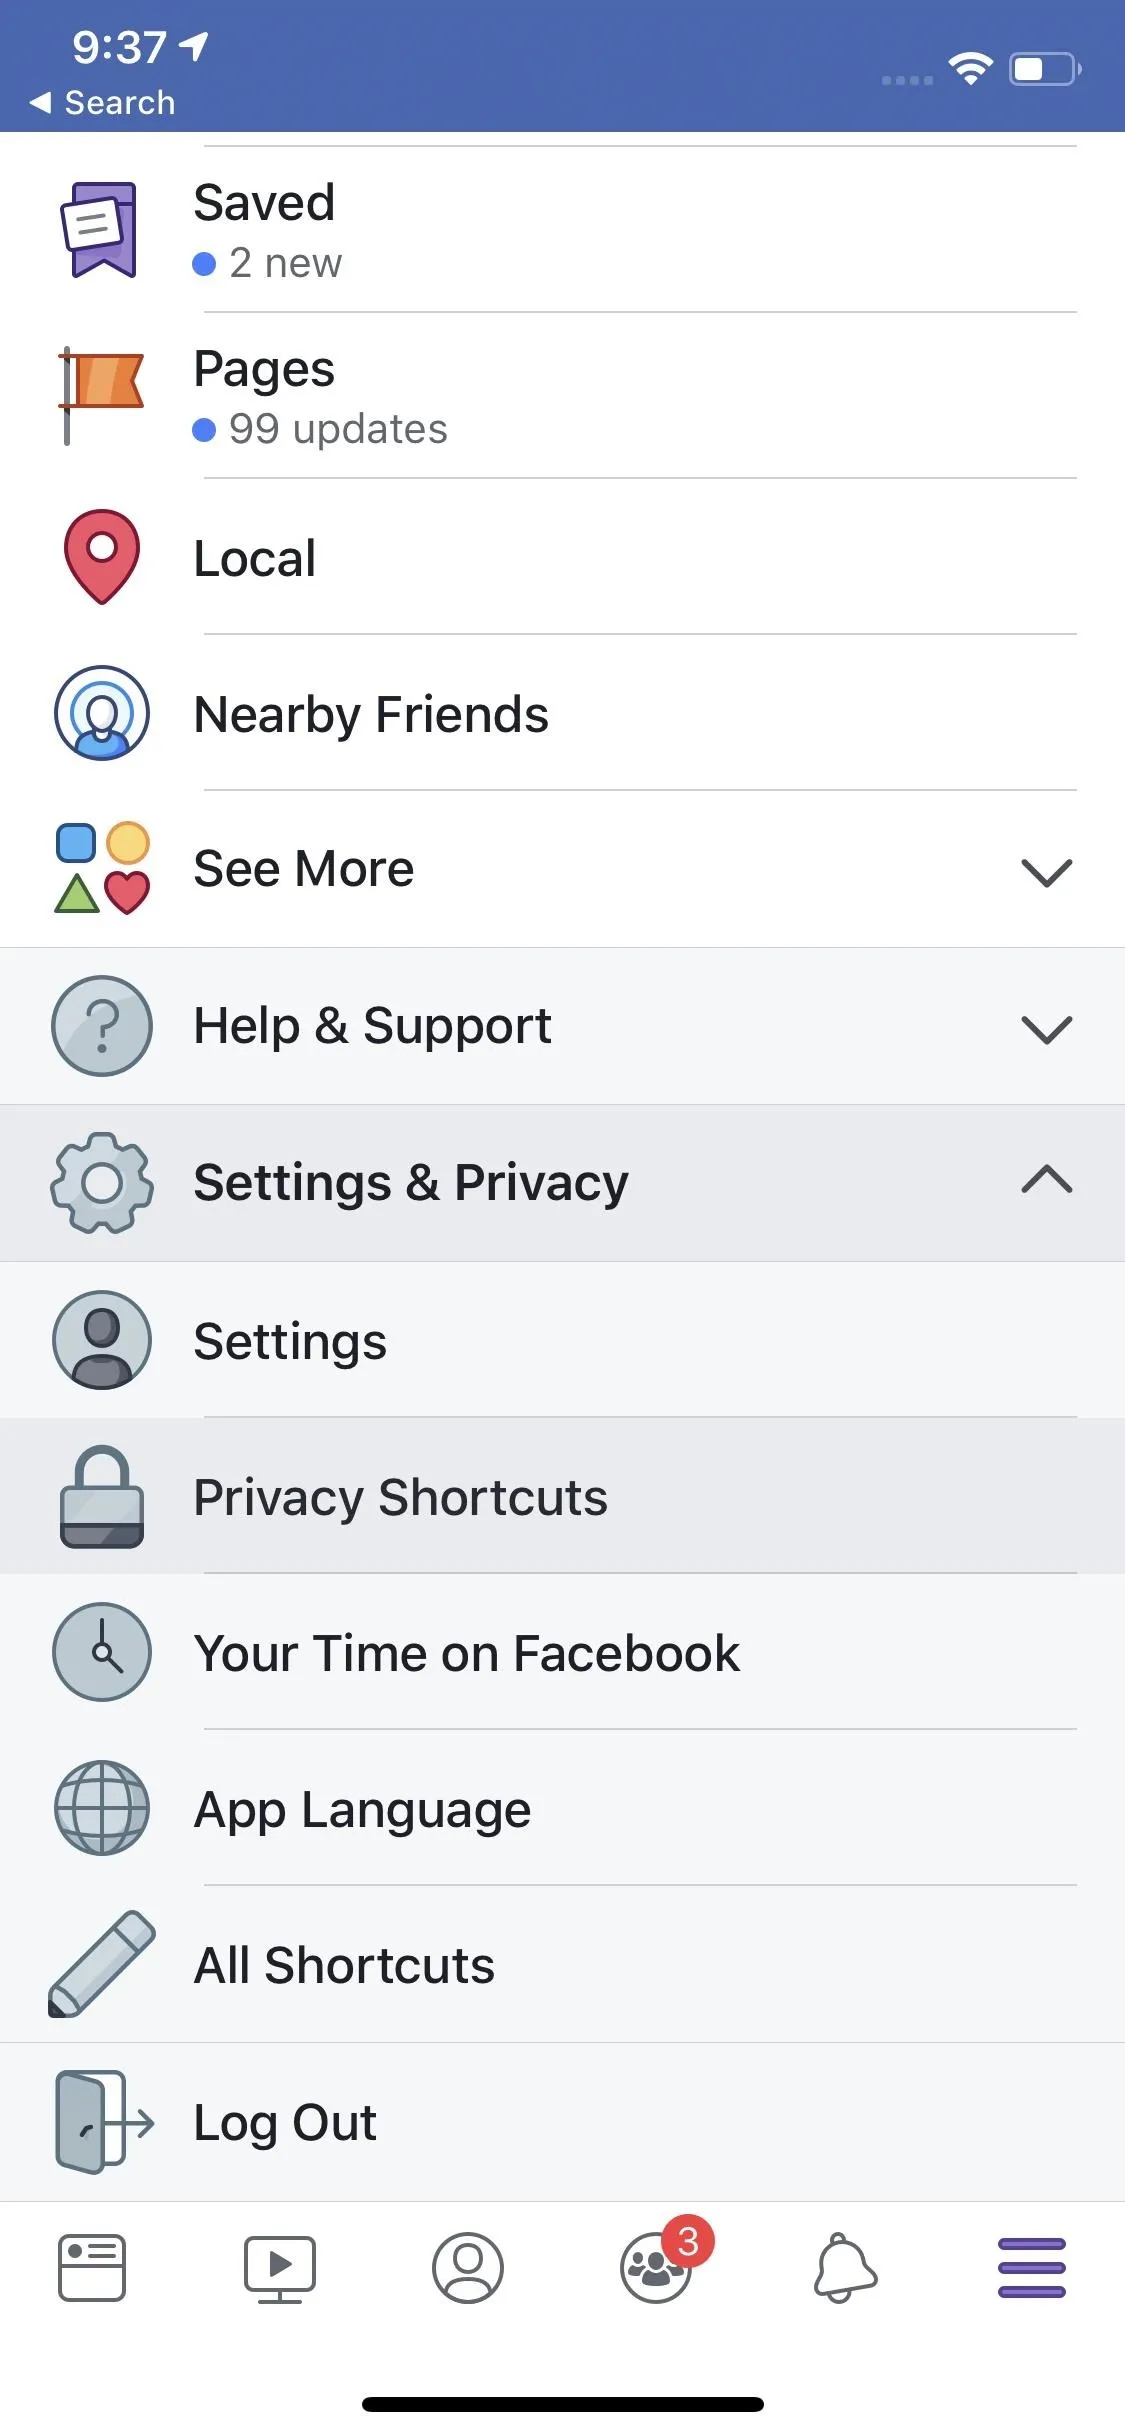
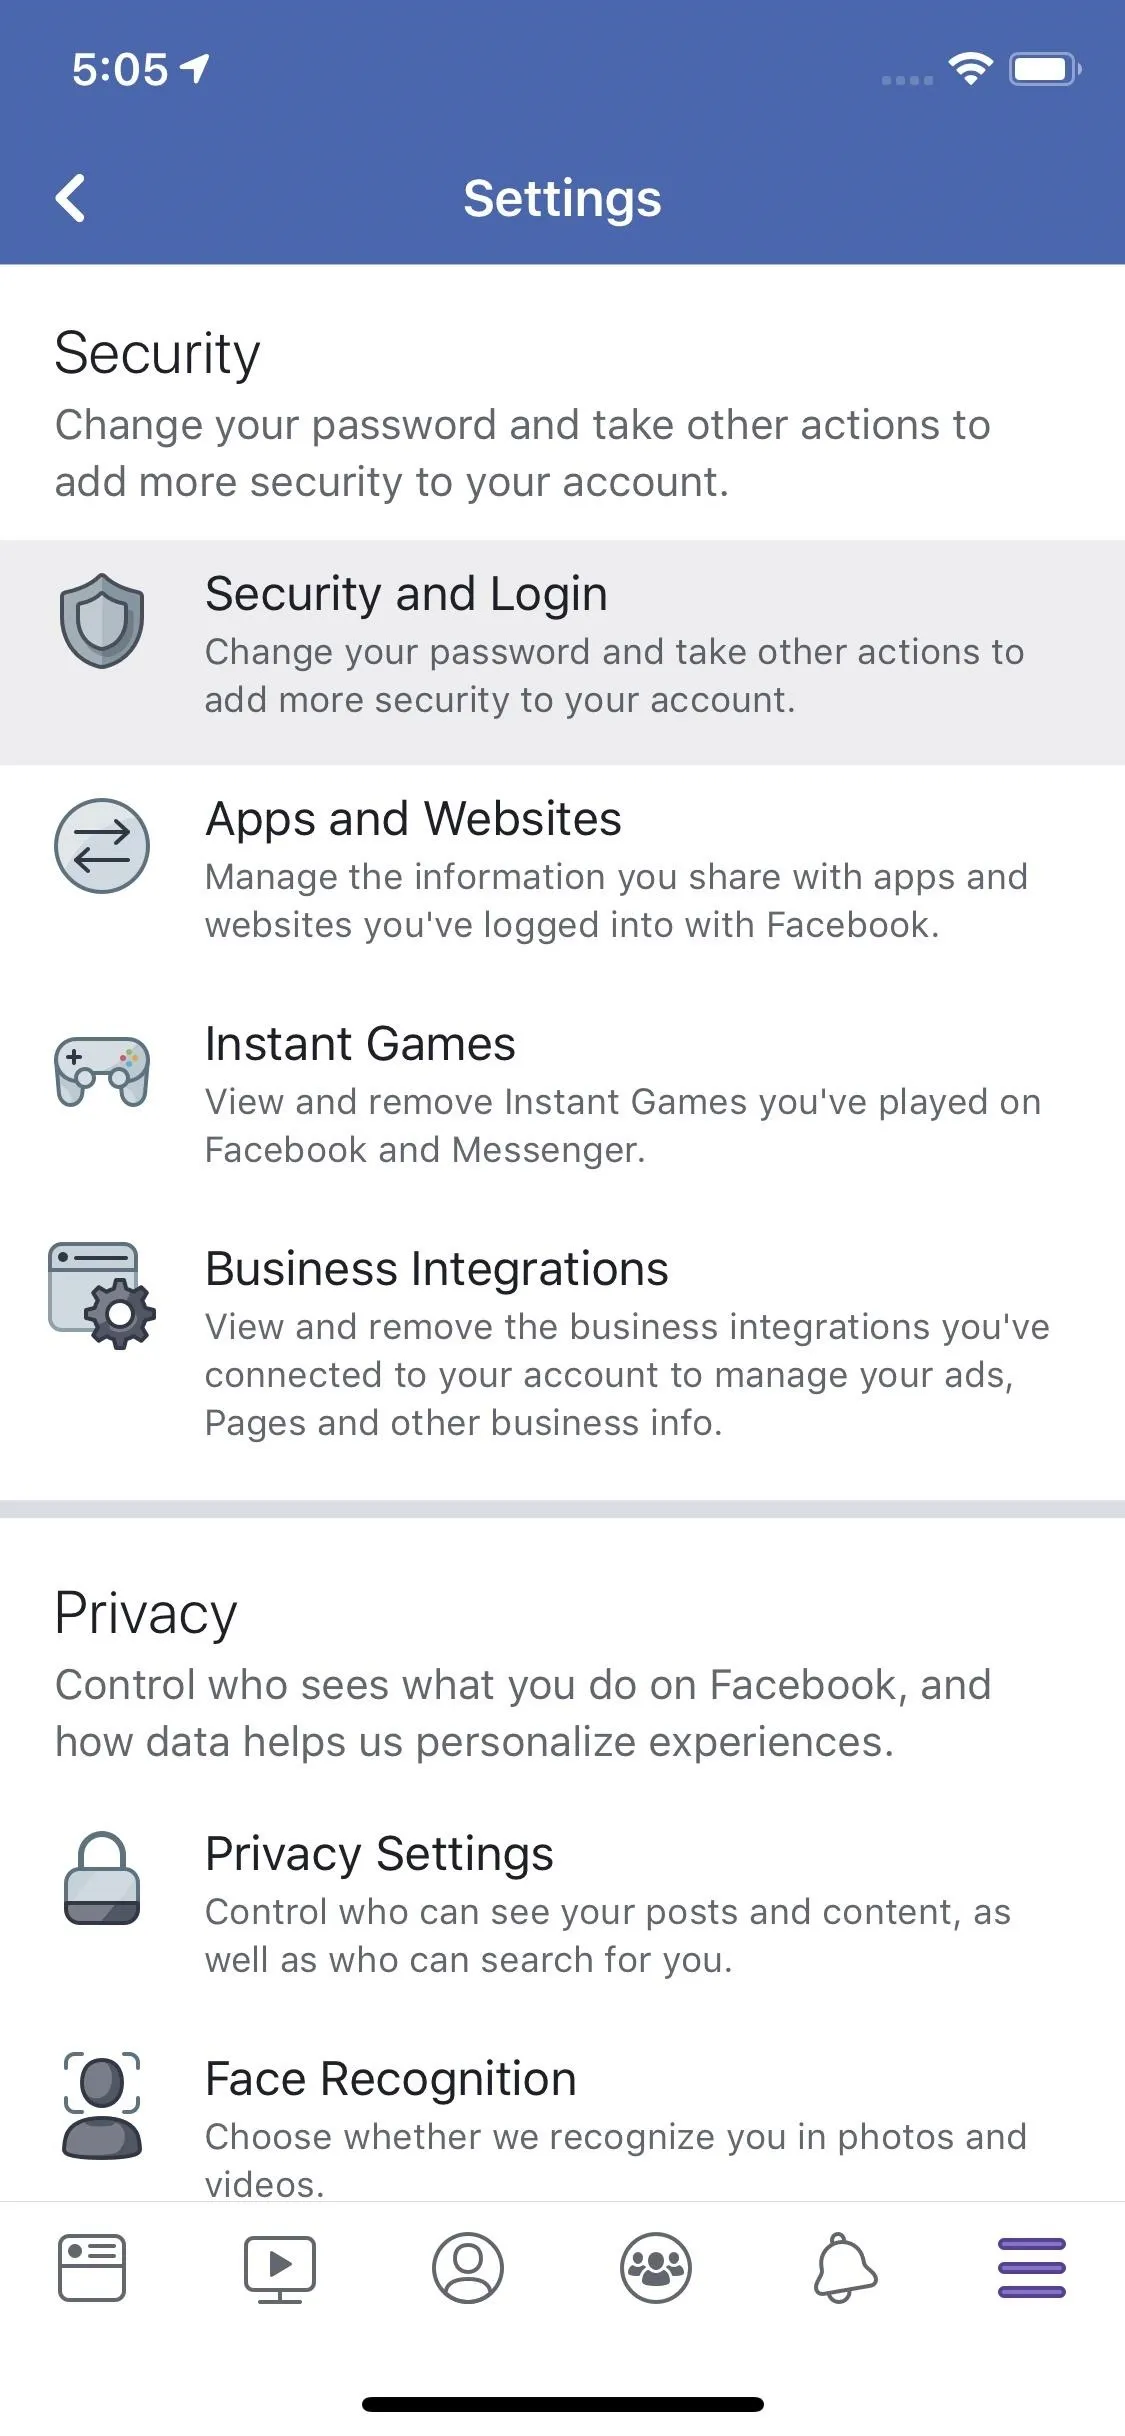
To set up 2FA, open Facebook, then tap the hamburger menu icon. Tap "Settings & Privacy," then select "Privacy Shortcuts." Scroll down, and tap "Use two-factor authentication."
Connect to Third-Party Authentication App
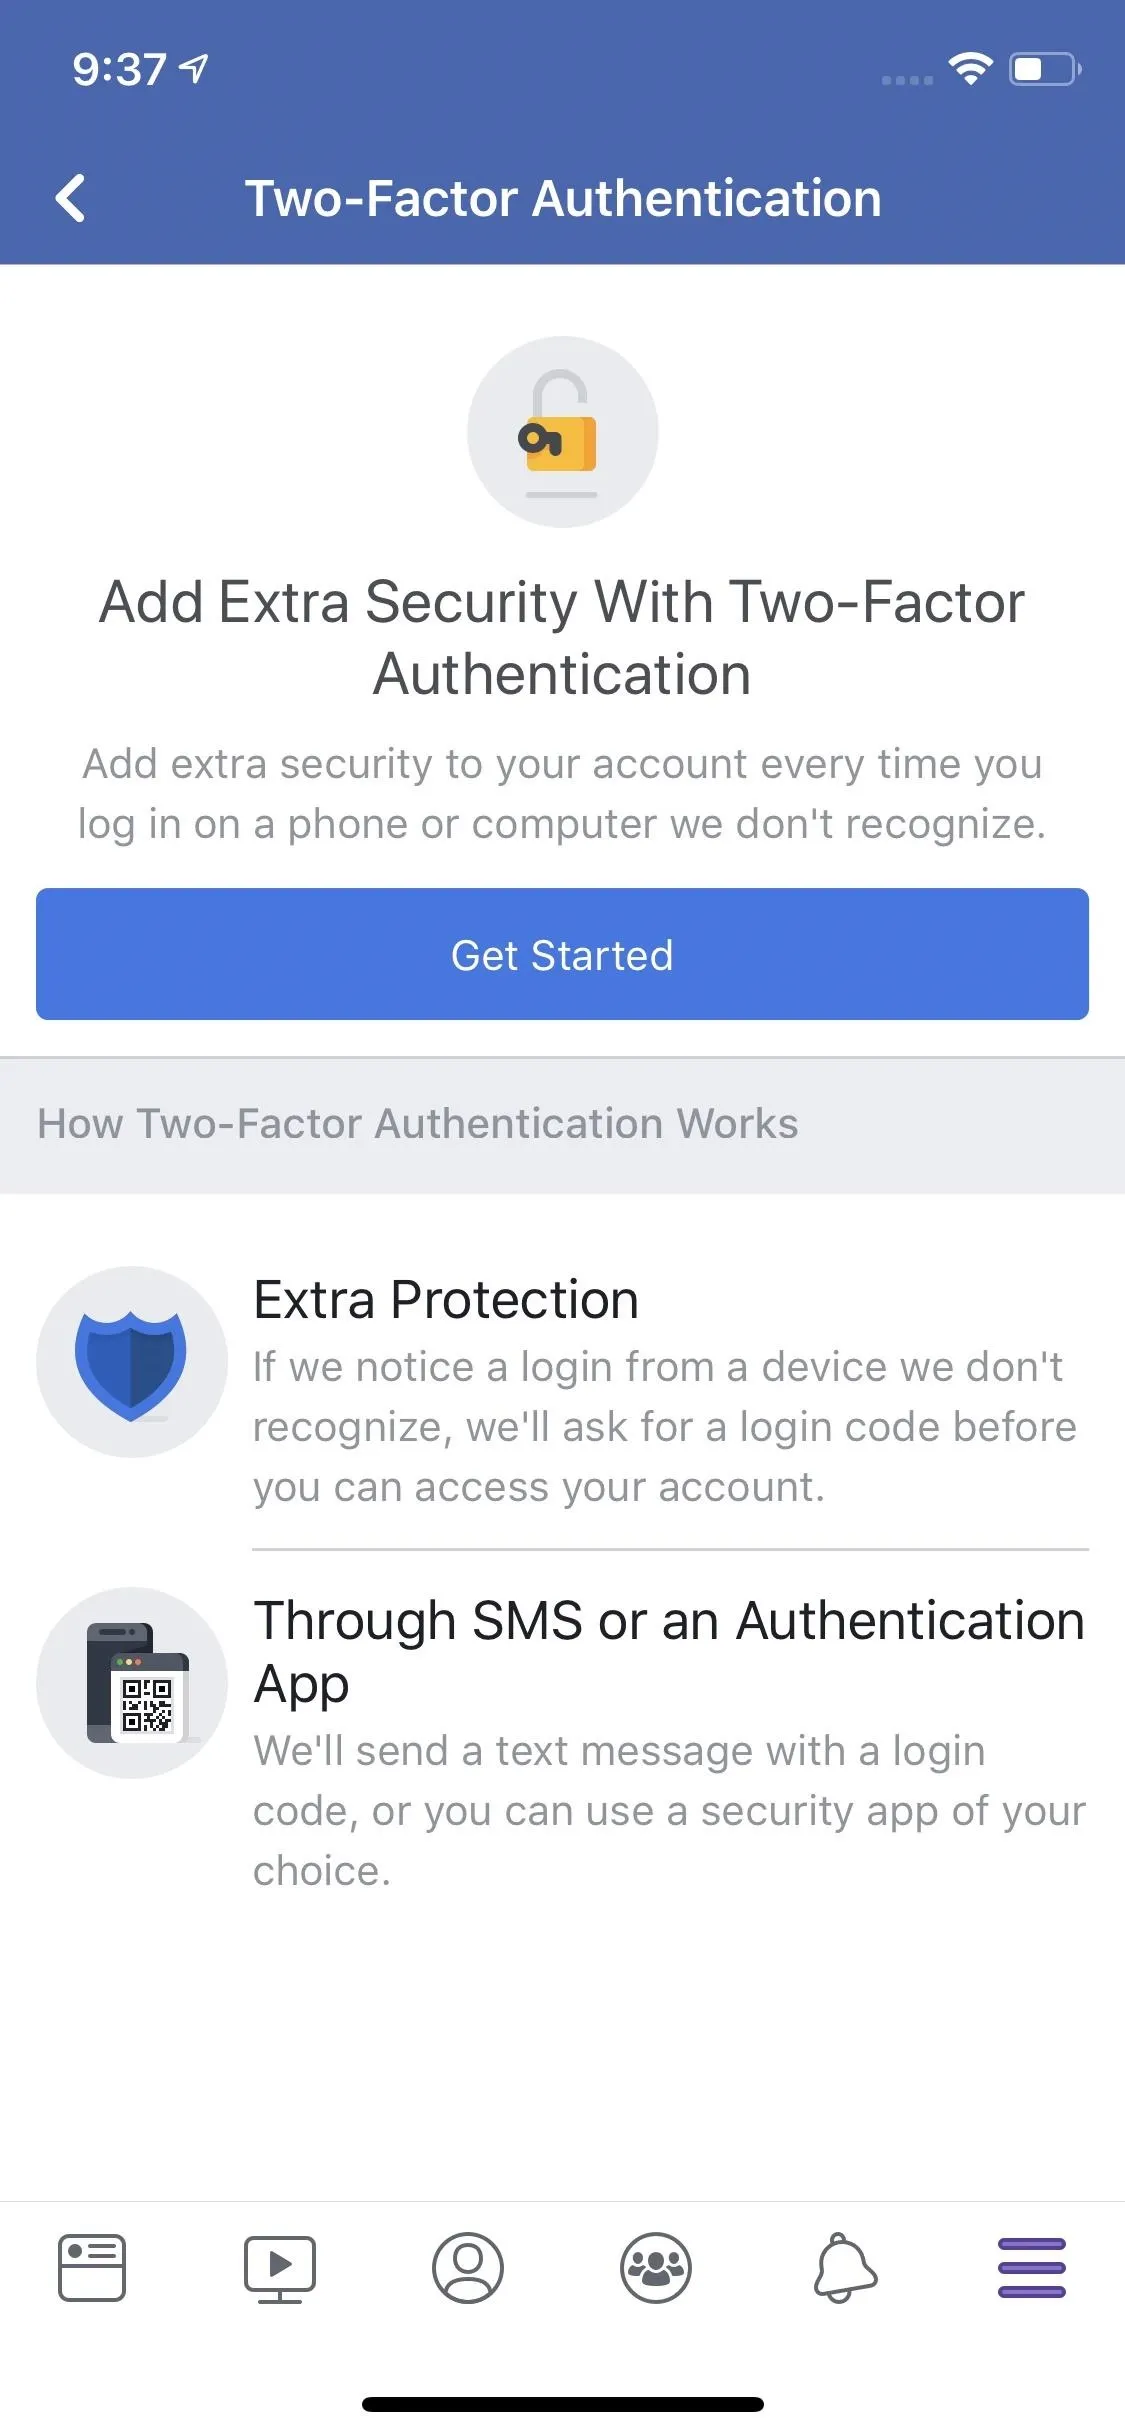
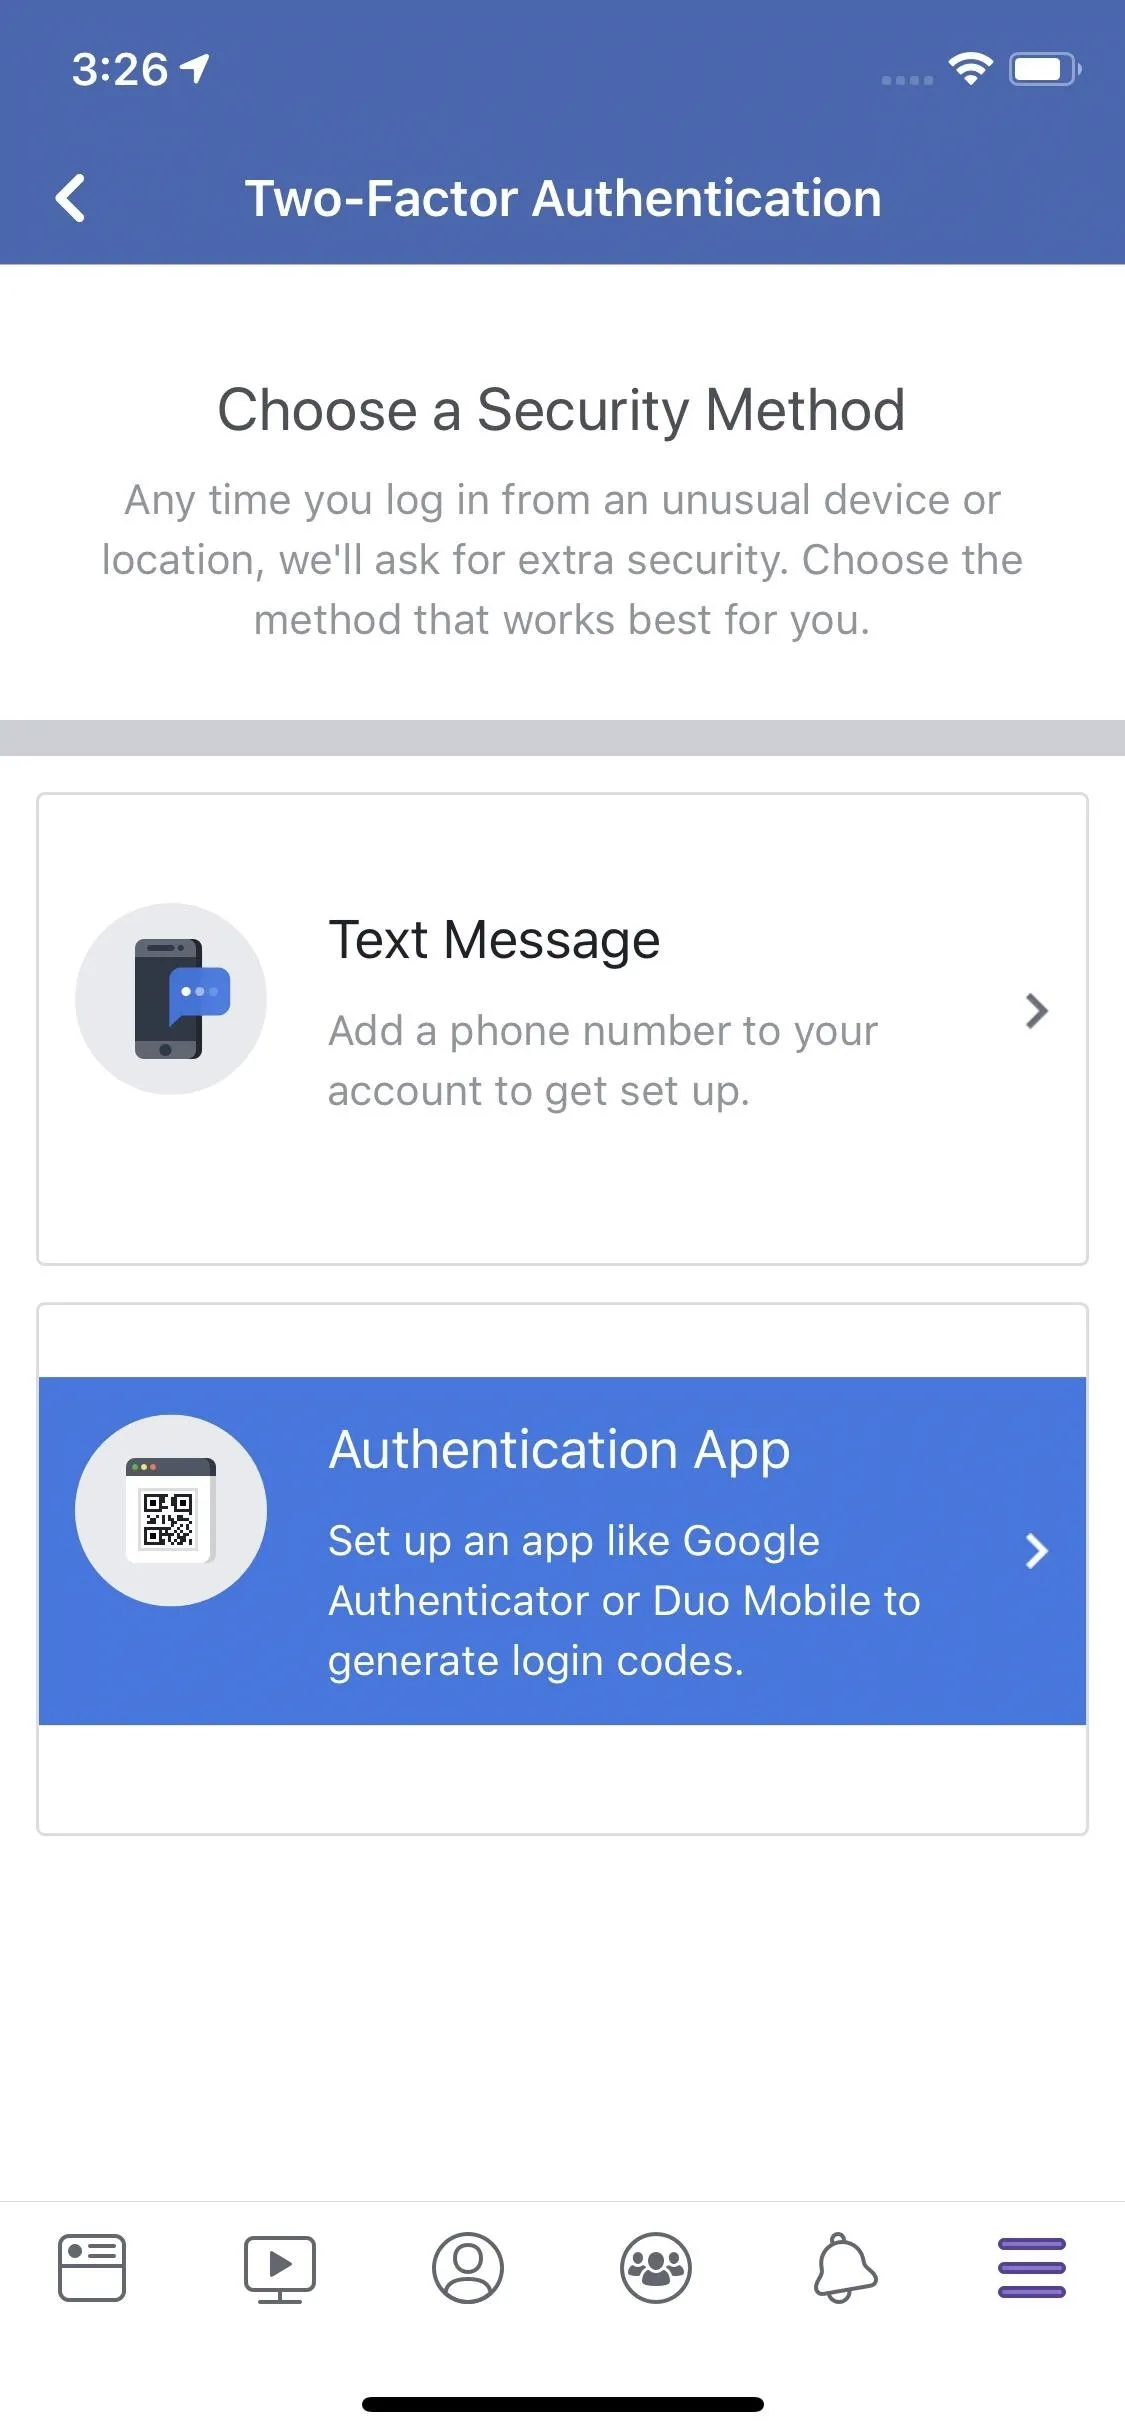
On the following page, tap "Get Started." If prompted, enter your Facebook password. Now, on Choose a Security Method, tap "Authentication App" rather than "Text Message." This option will allow you to run 2FA through your third-party app rather than through SMS texts.
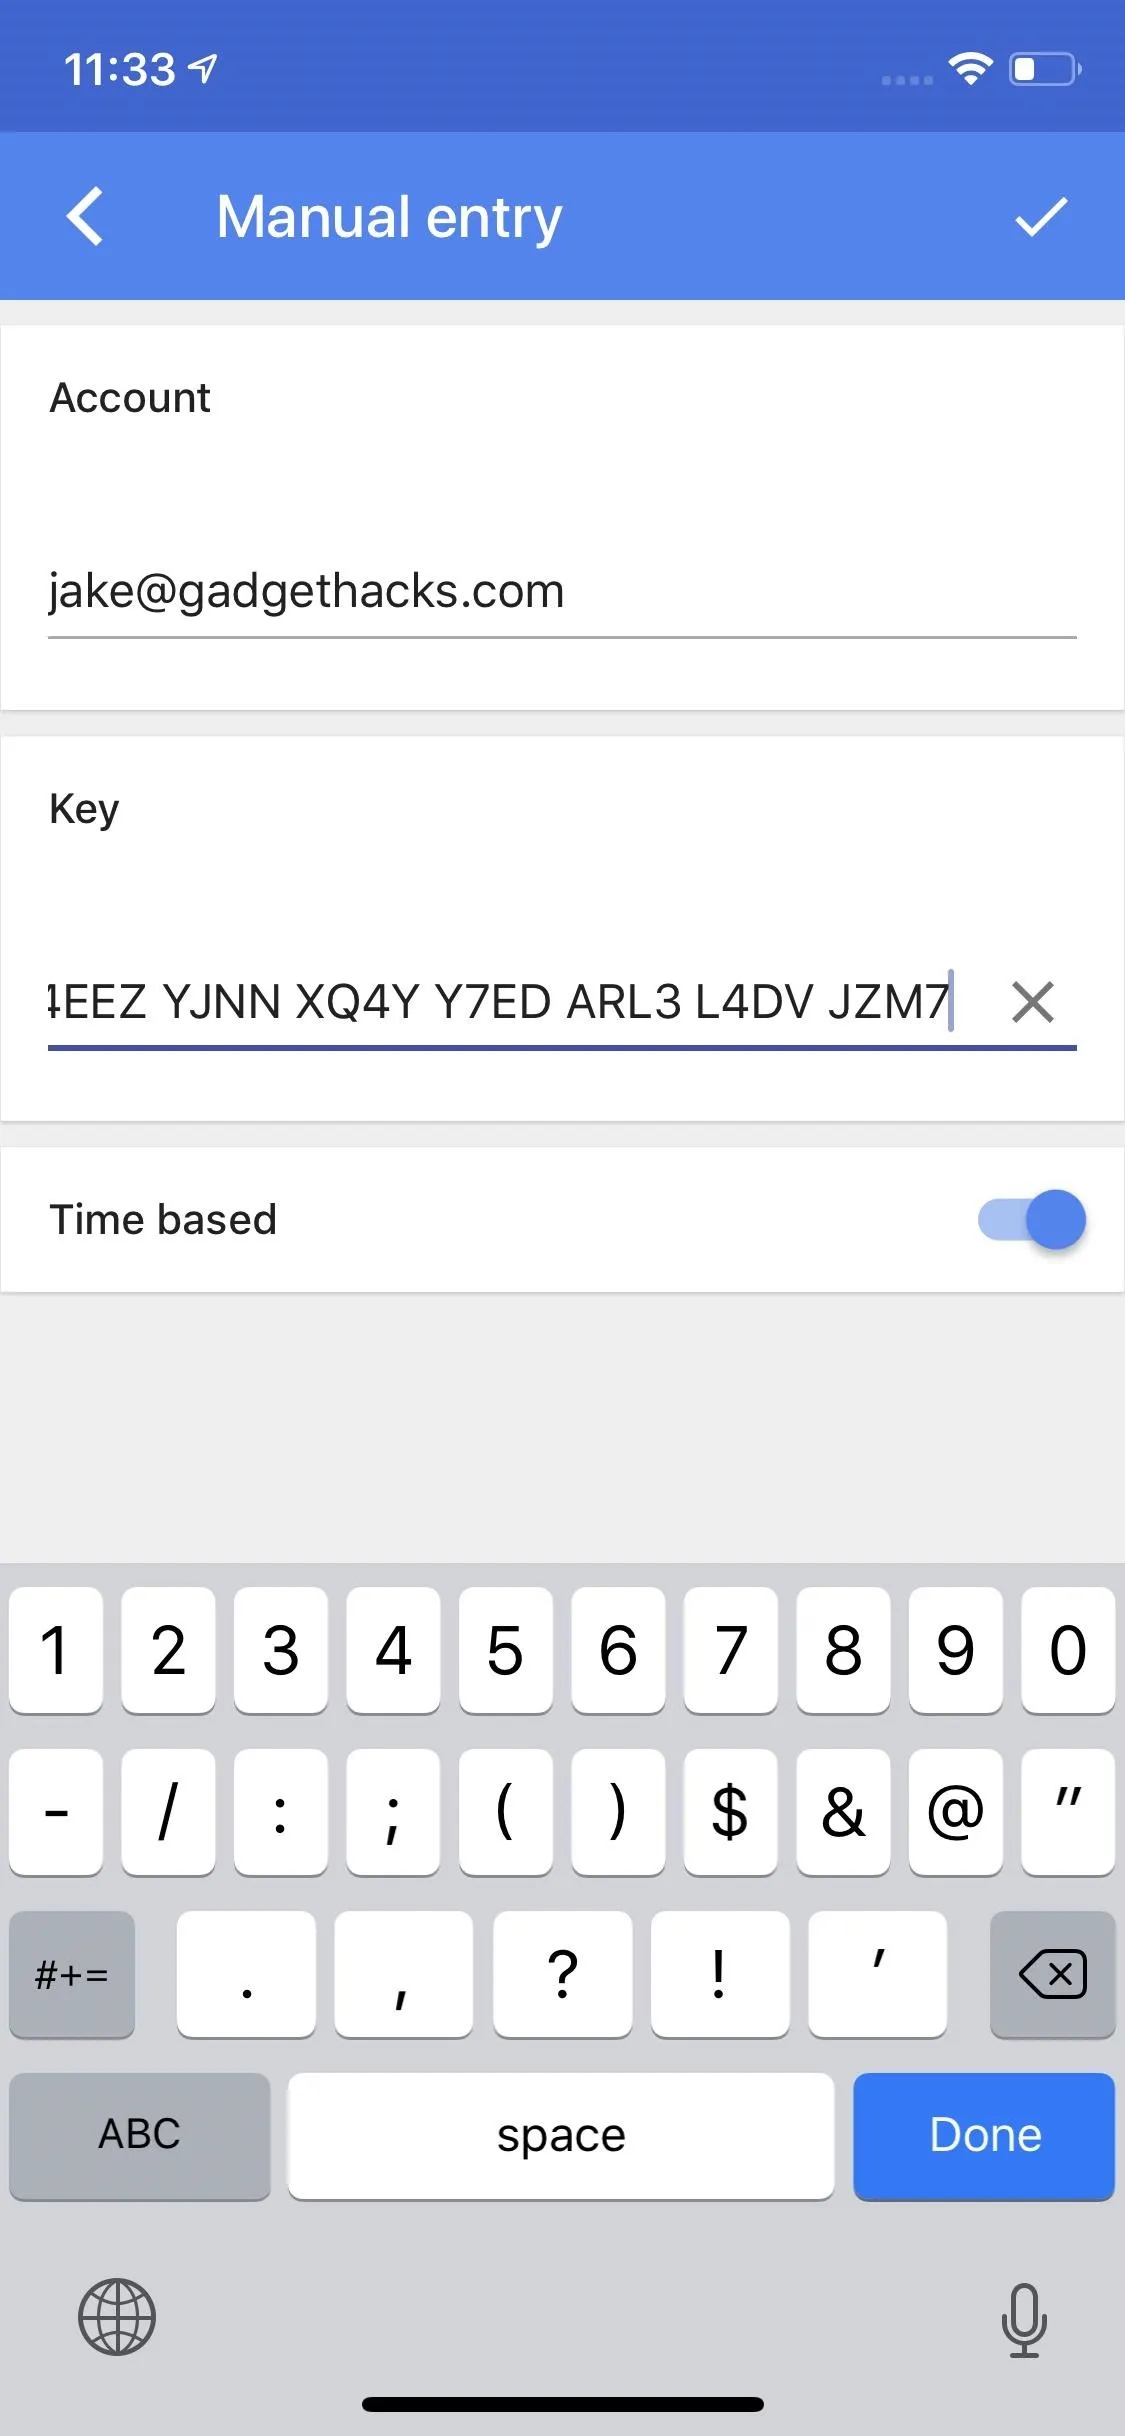
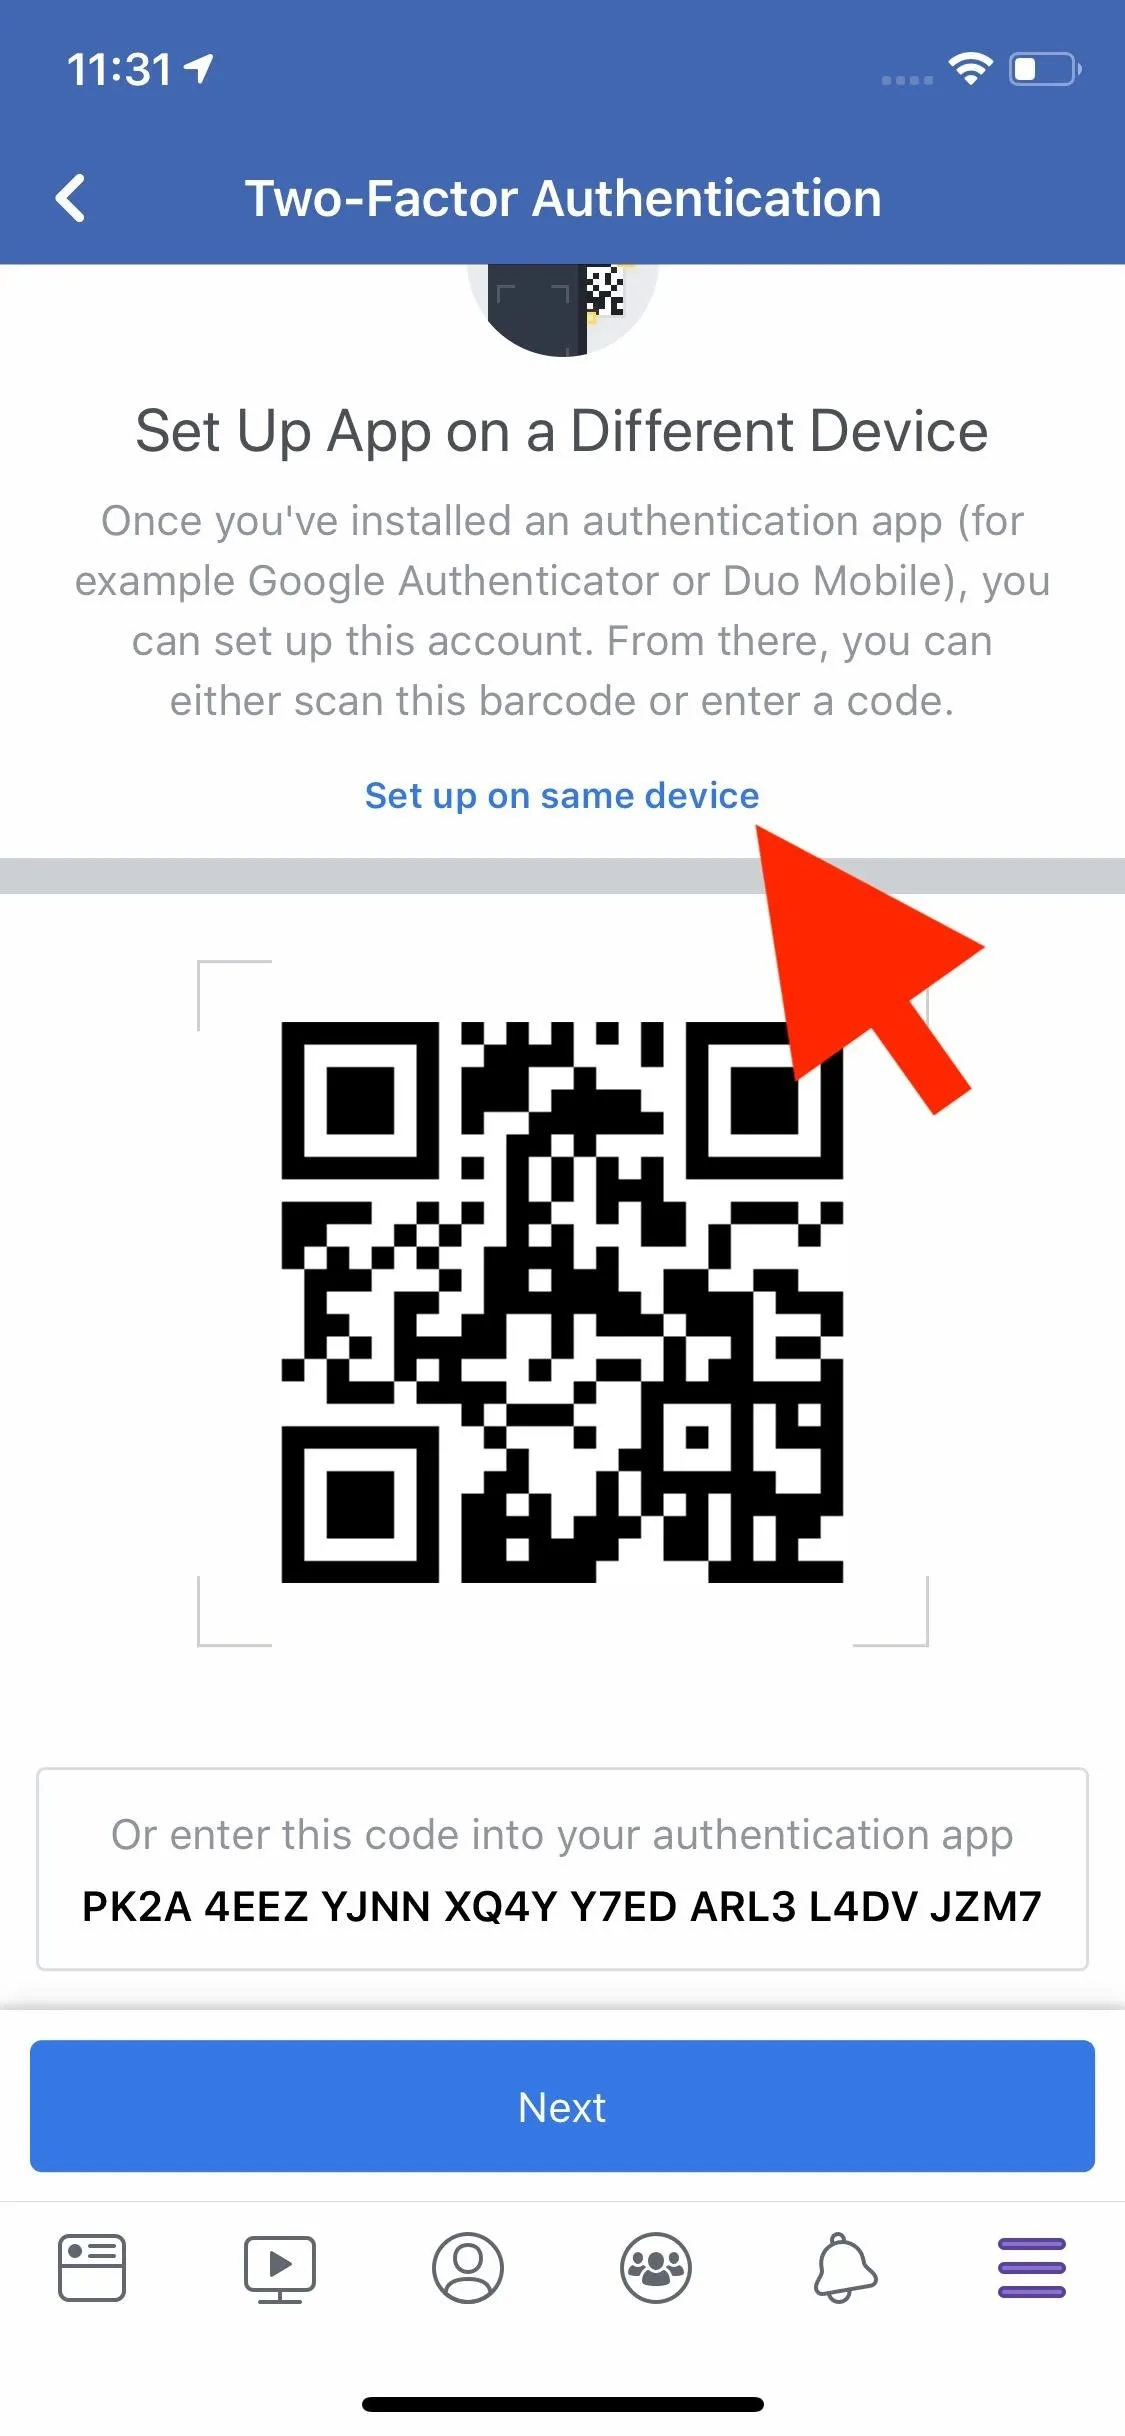
Now, if you've done your prep right, this next step should be a breeze. Firstly, did you decide to download your third-party authentication app to this device or another one? If you choose the latter, go ahead and open the app, then either scan the QR code on-screen or enter the alphanumeric code at the bottom of the display into your app.
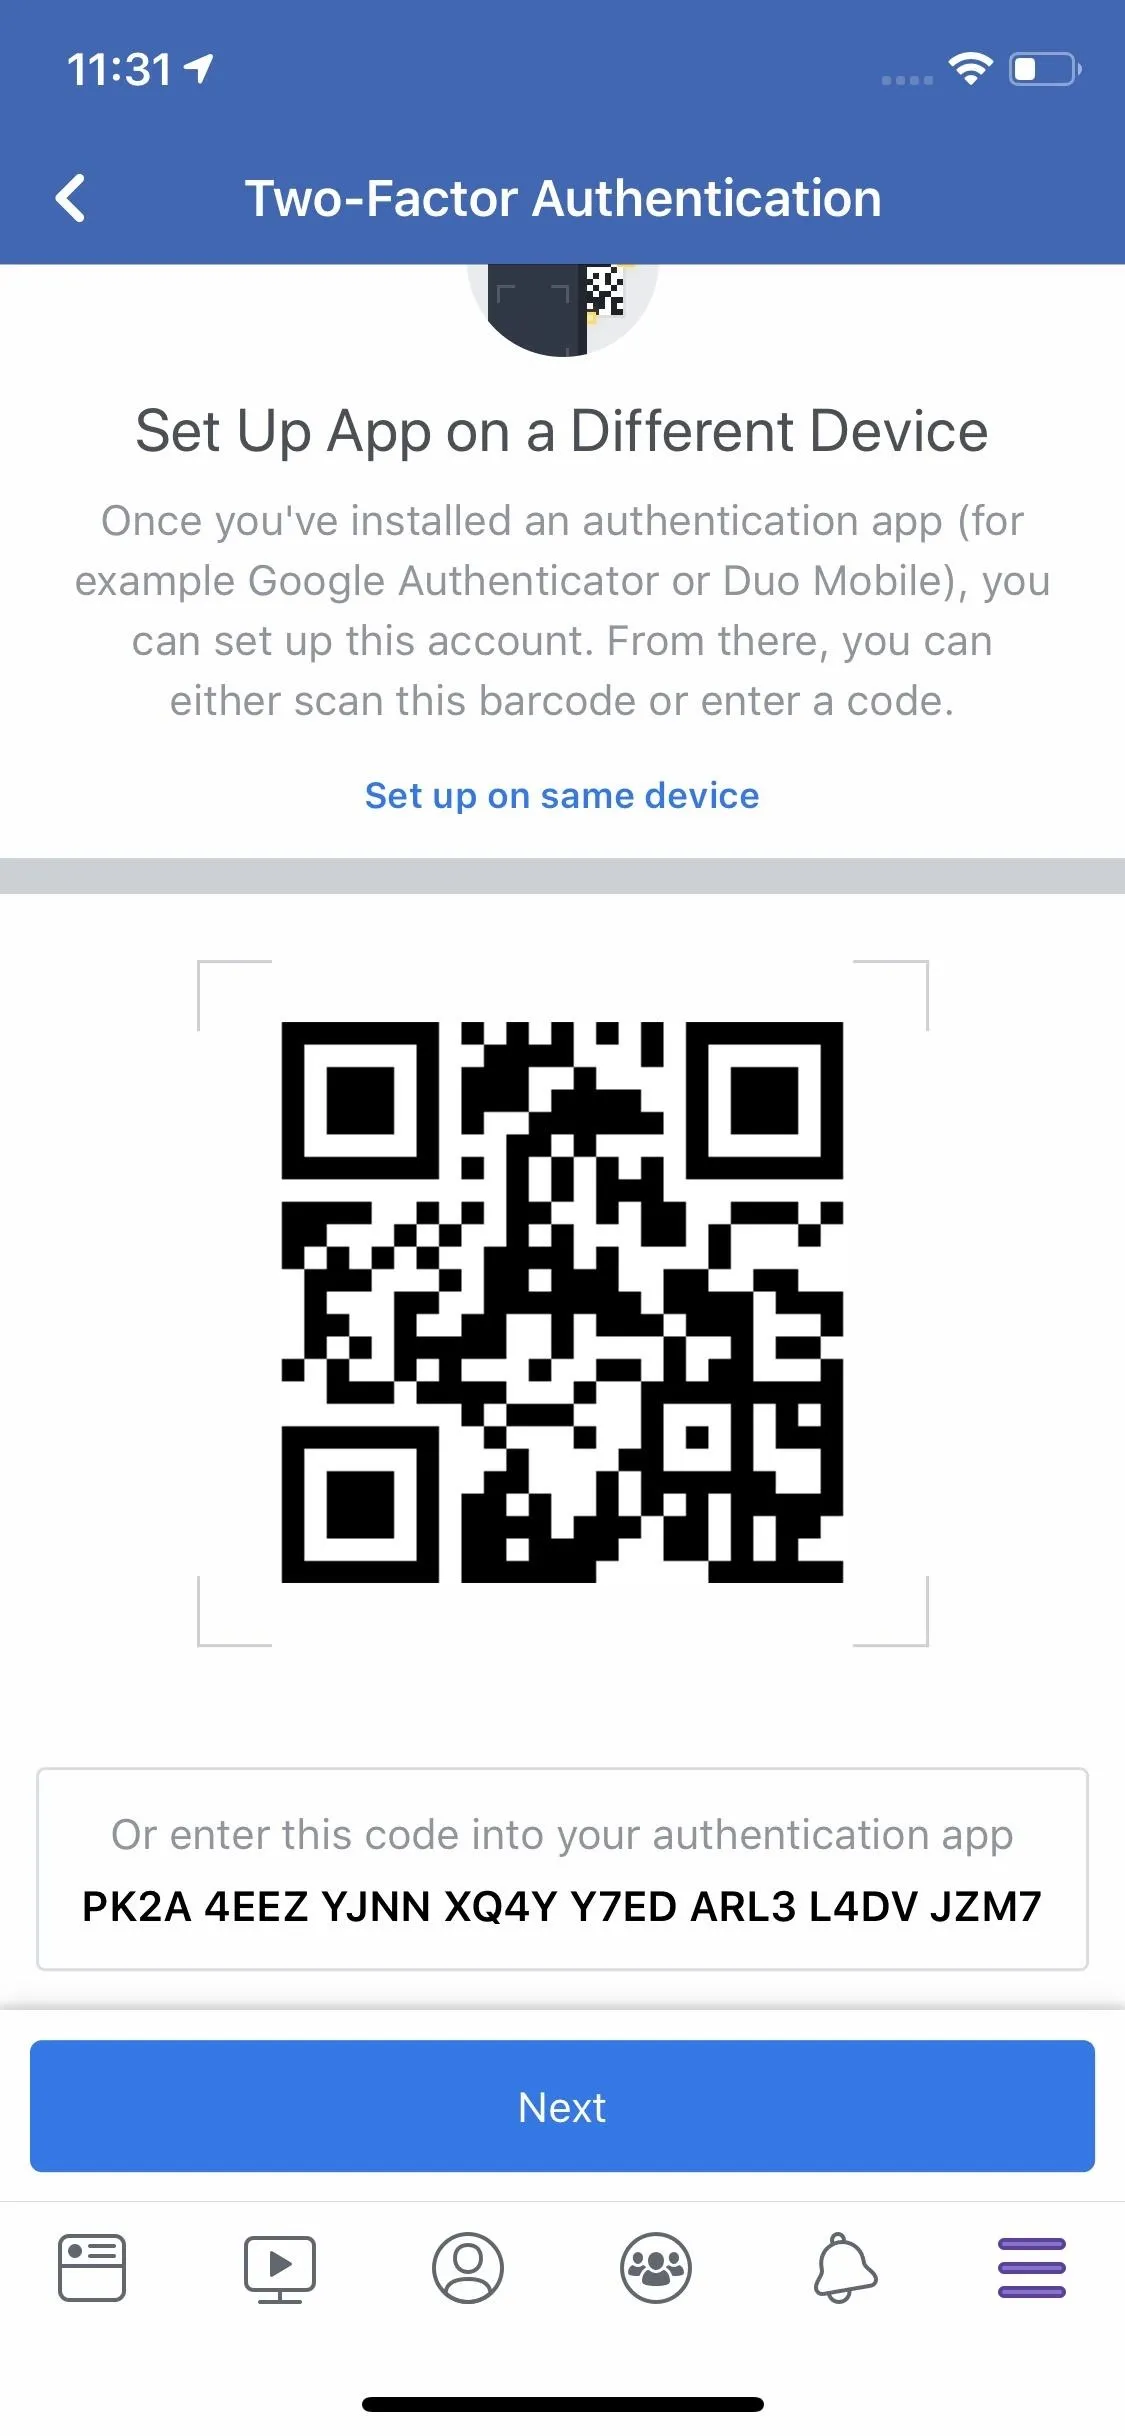
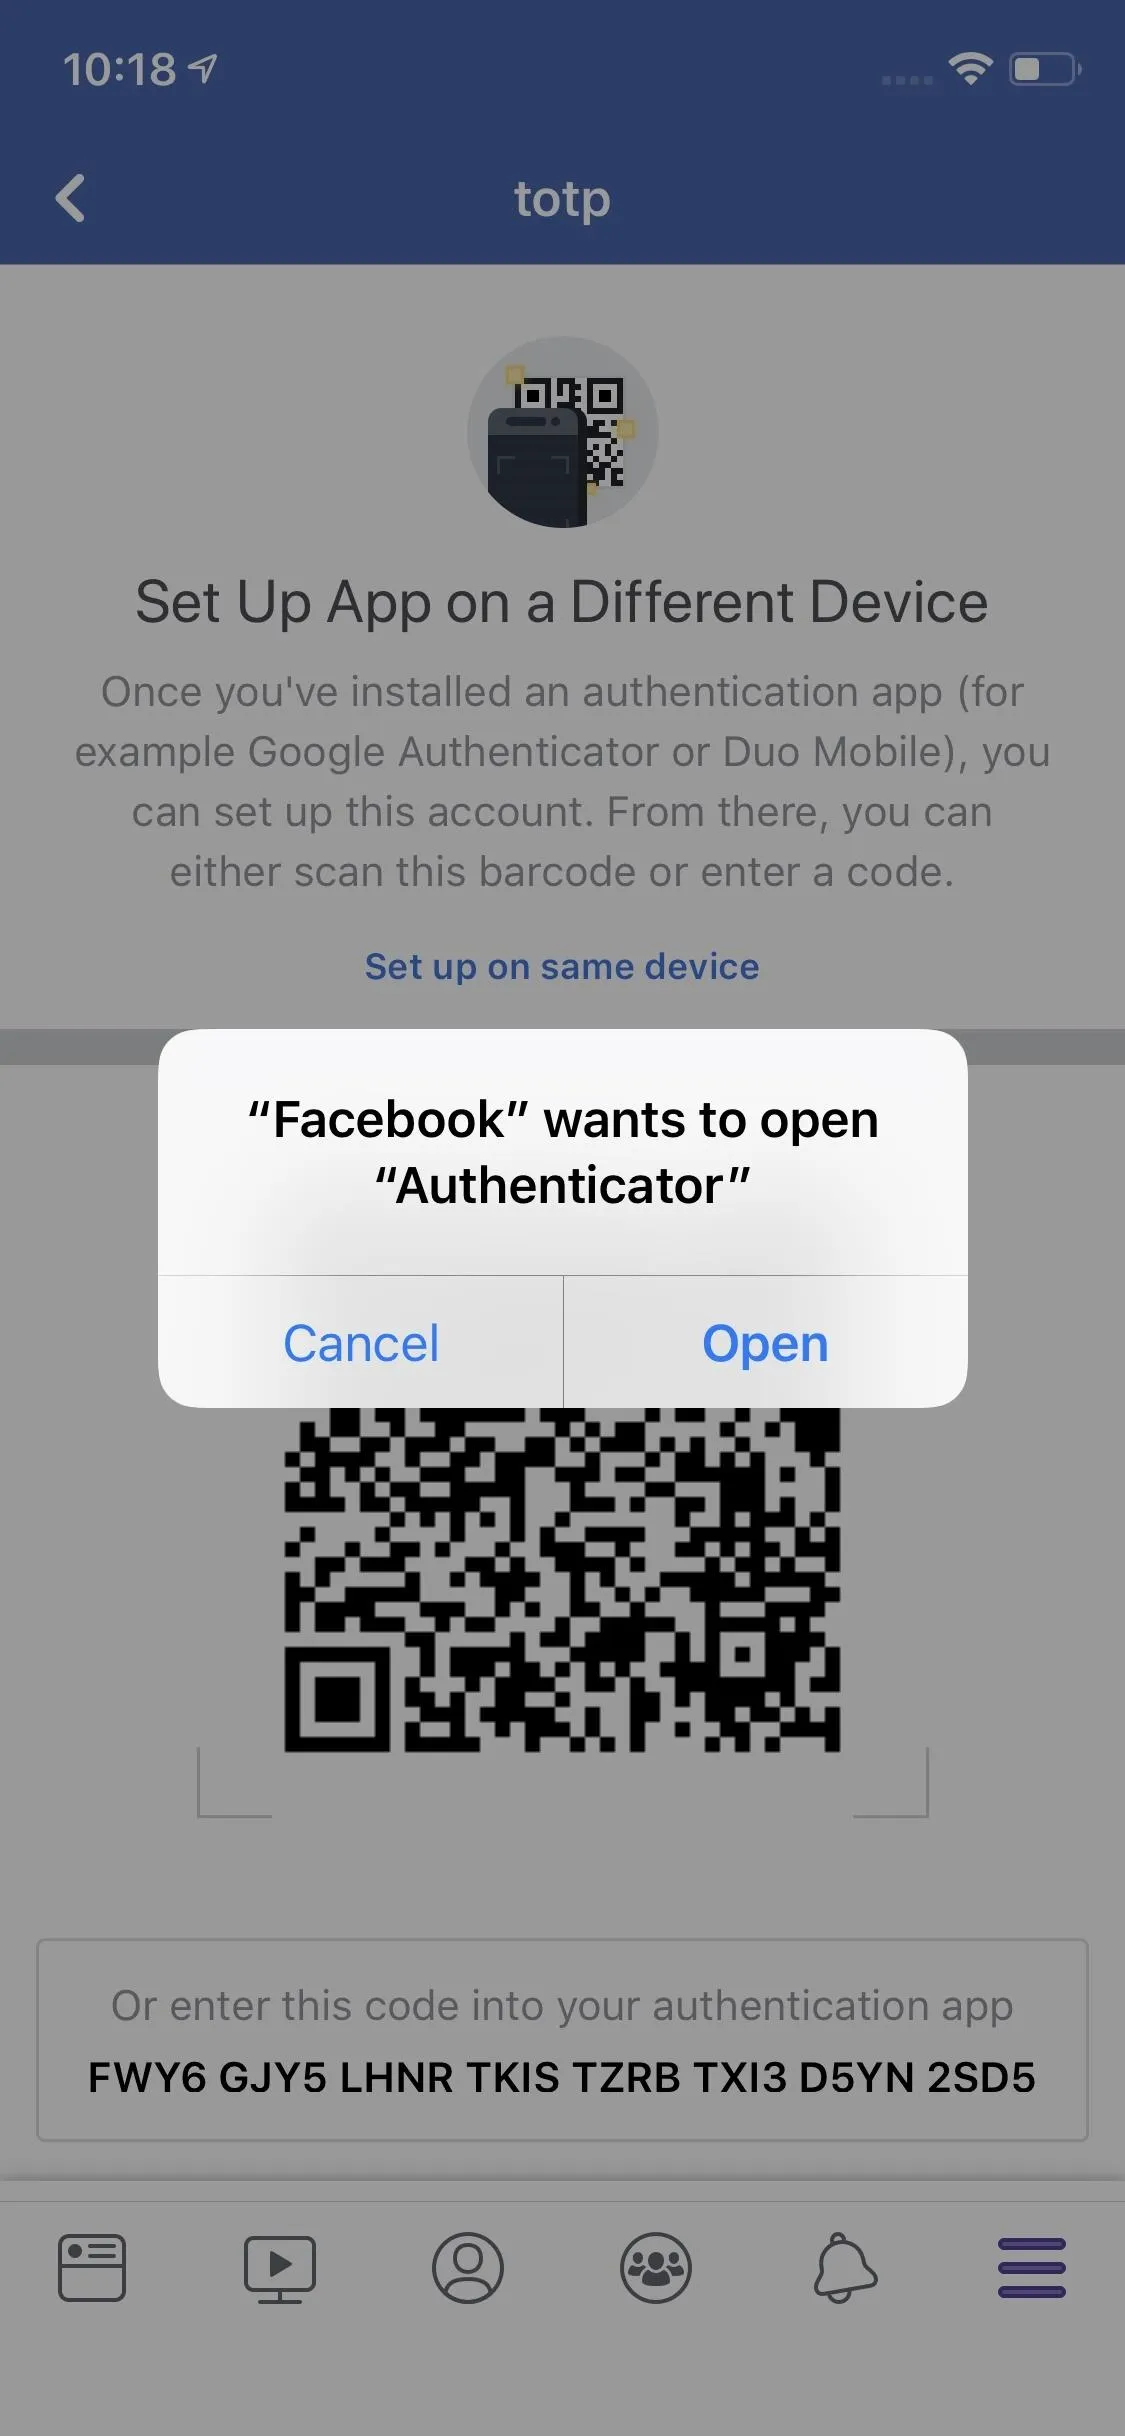
If you chose to download the authenticator onto the device you're using, tap "Set up on same device." Next, Facebook will prompt you to open the authentication app. Choose "Open," then follow the on-screen instructions in your authentication app.
Paste Your New Code
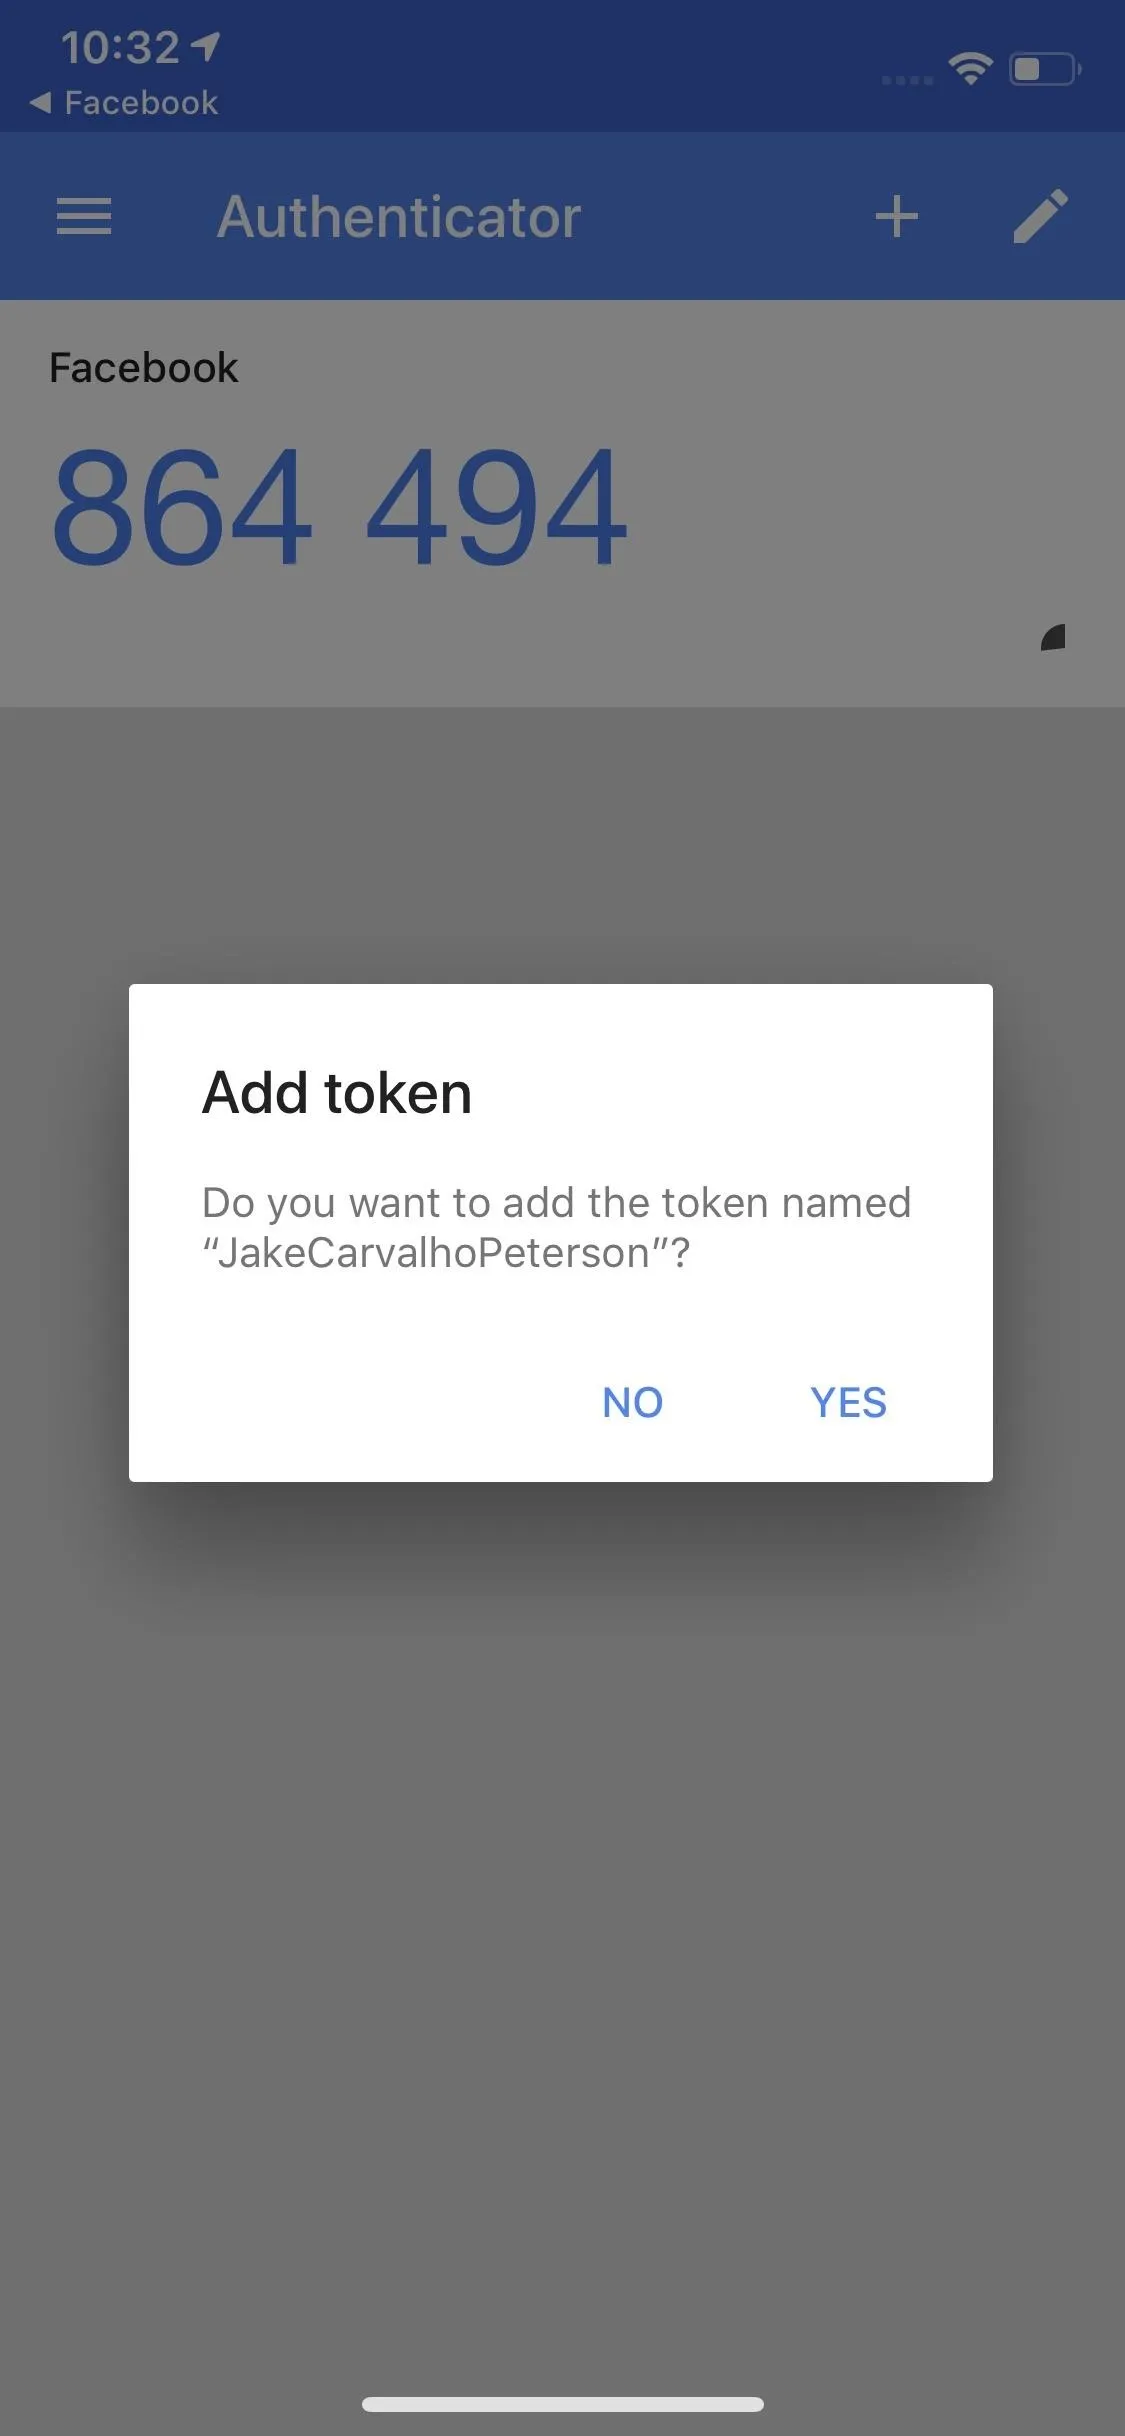
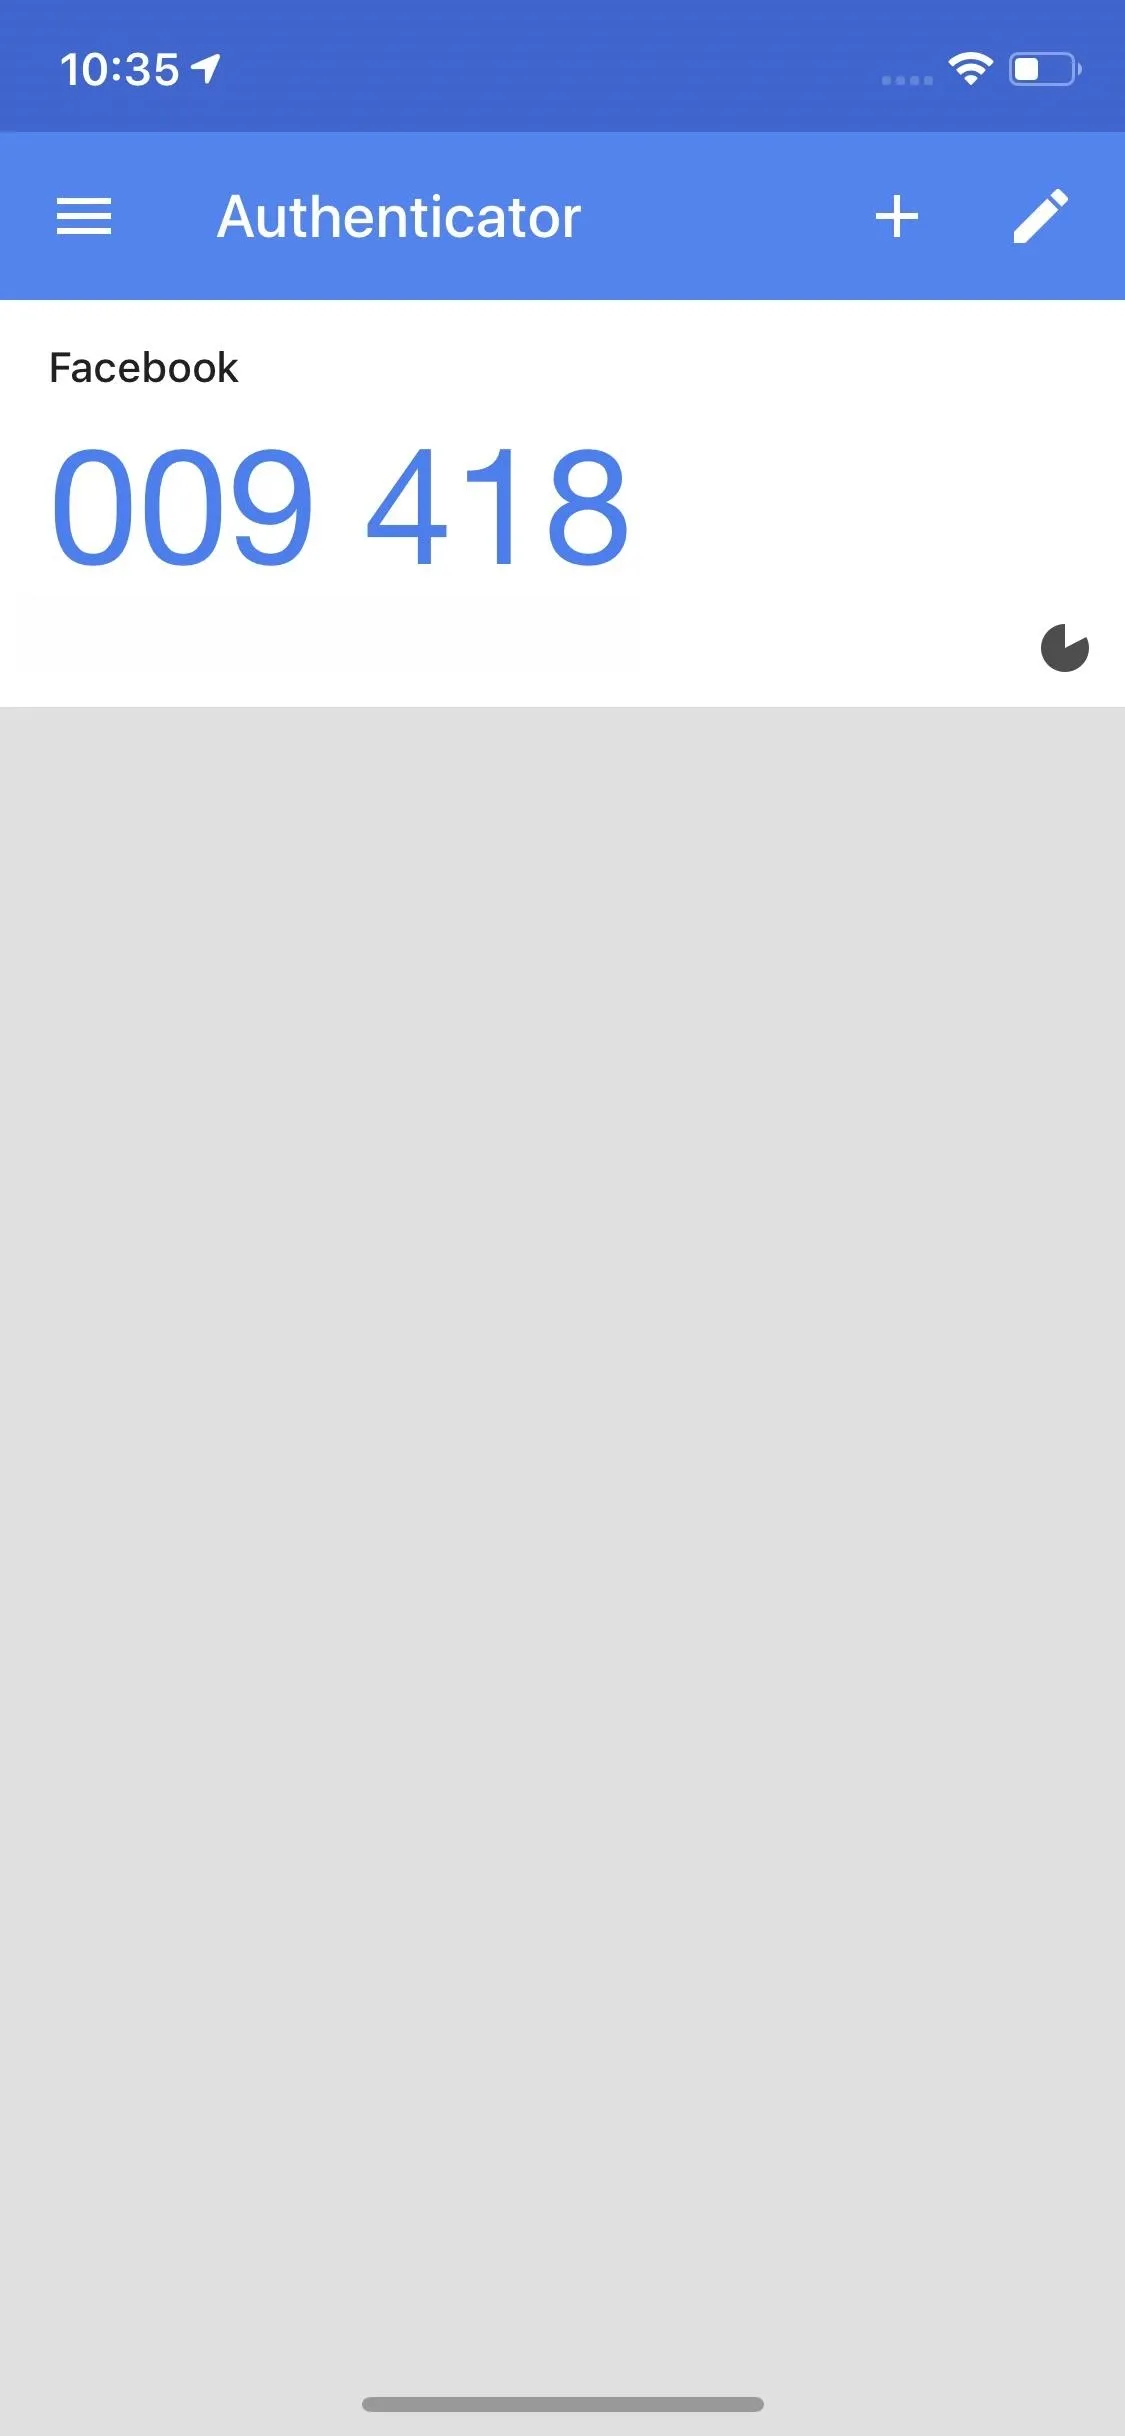
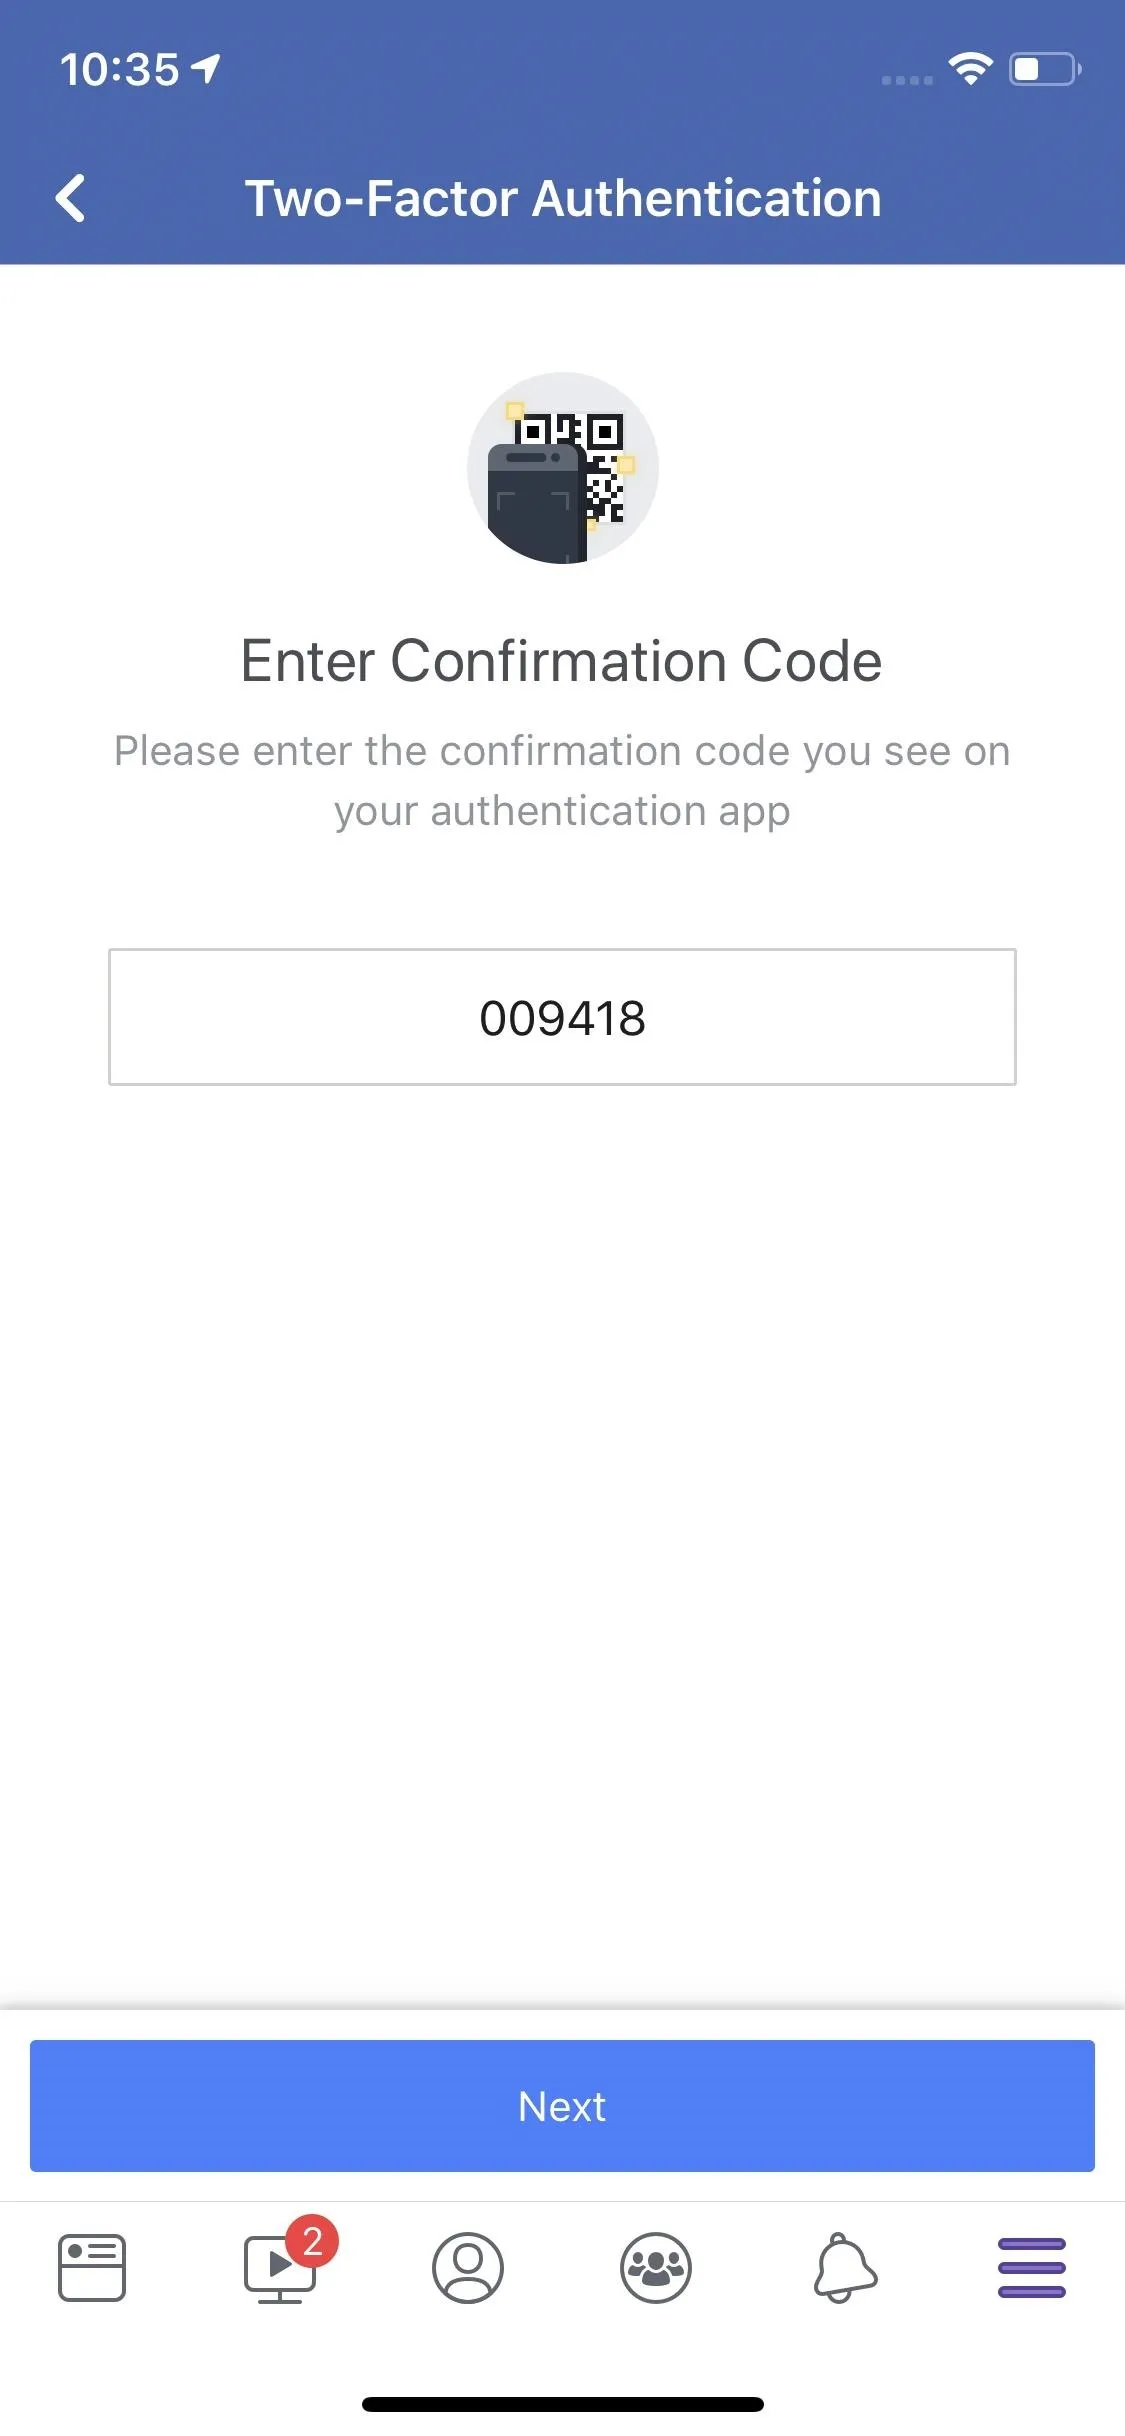
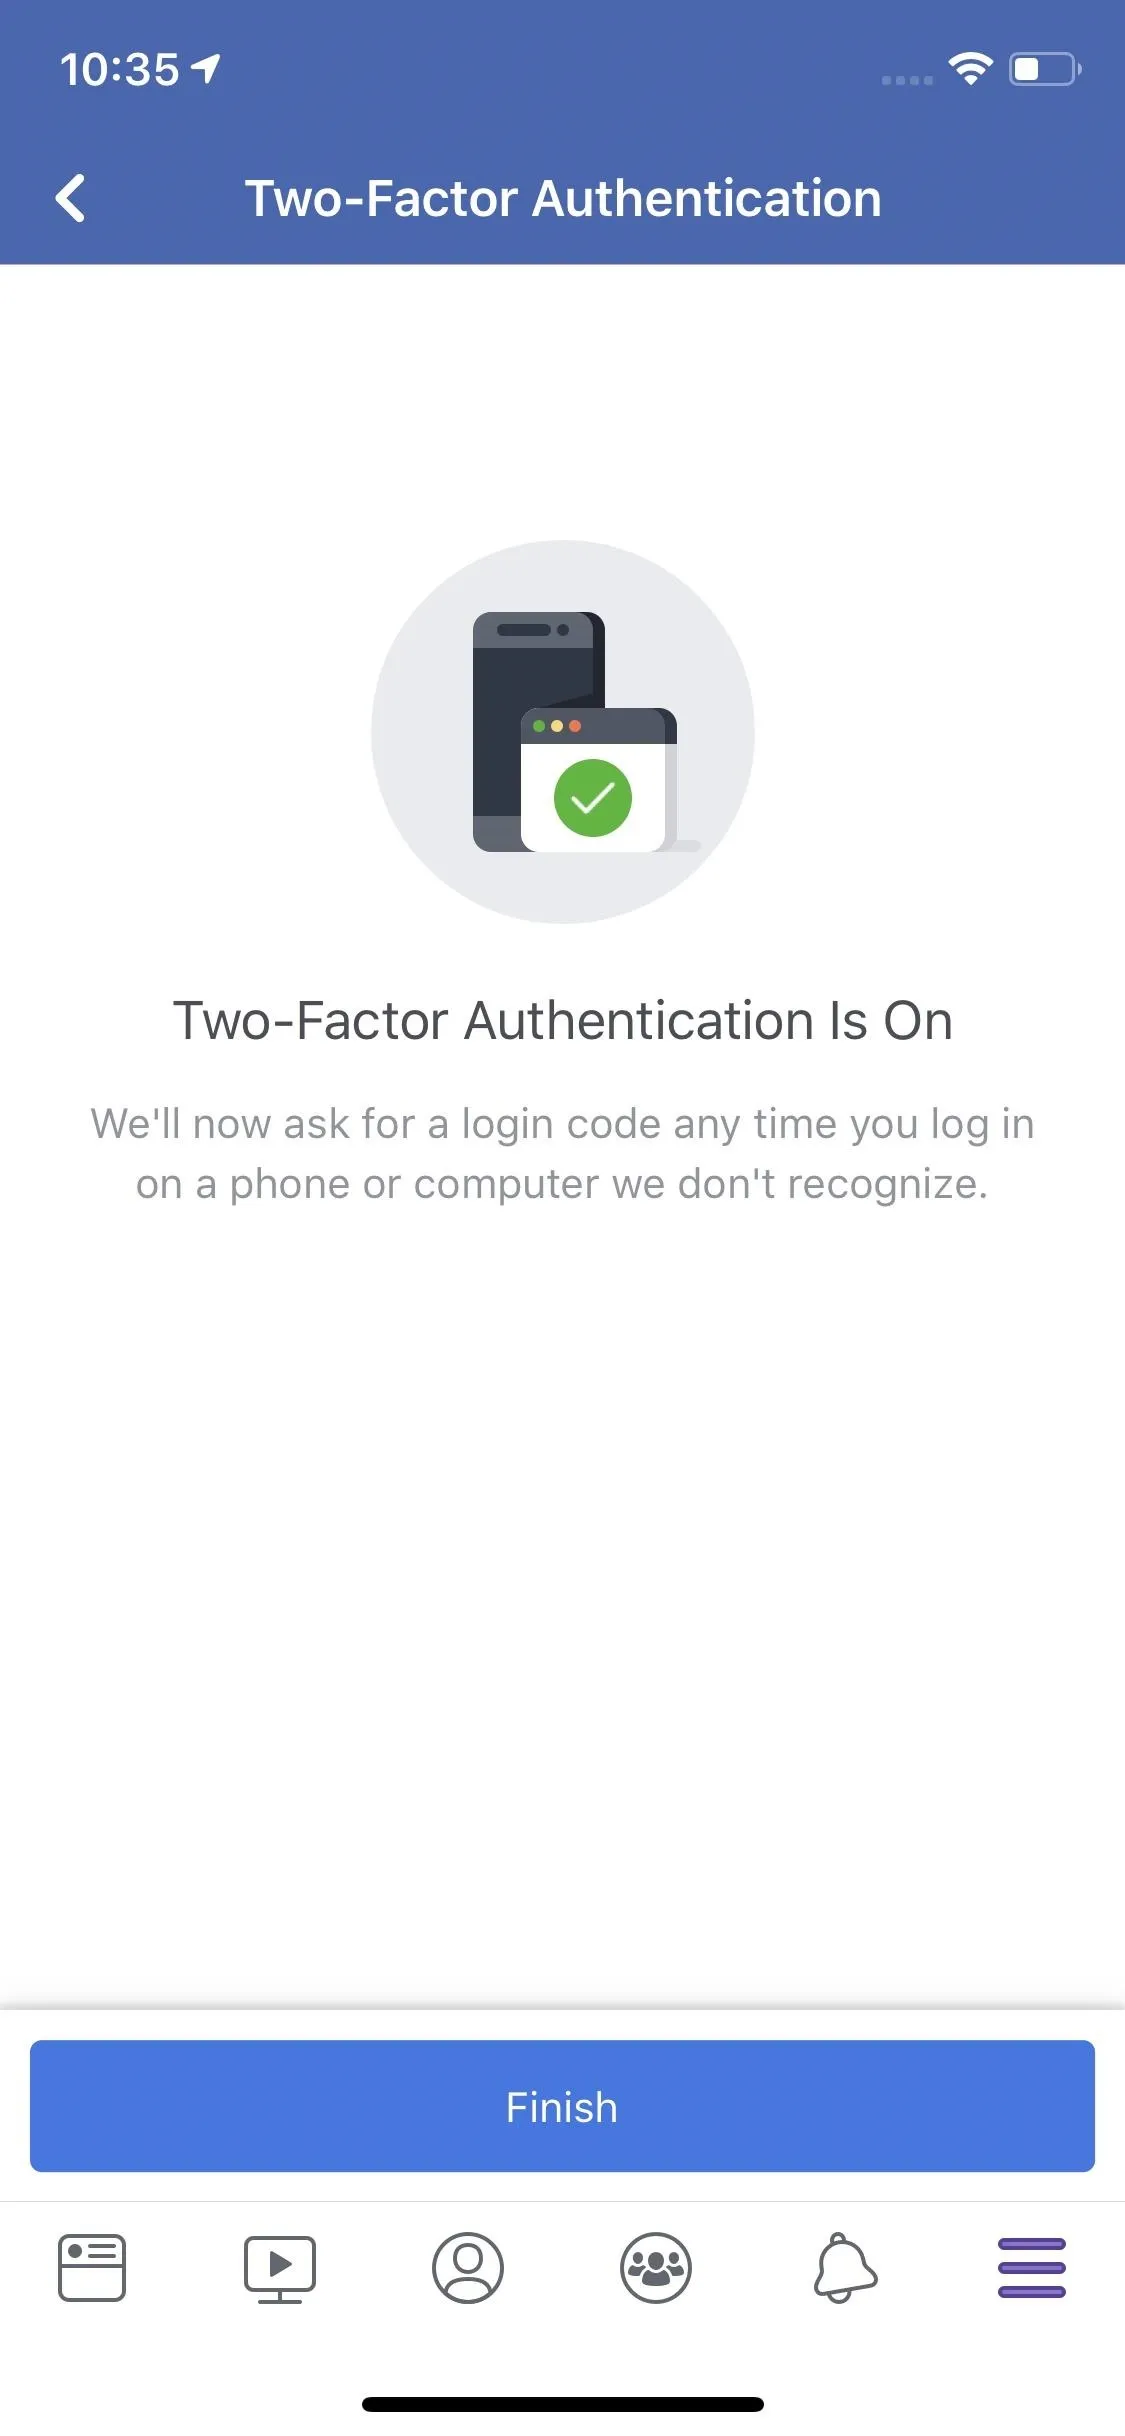
With either method, your authentication app should give you a temporary code. Copy that code, then head back to Facebook. Tap "Next" at the bottom, then type out or paste the code into the Confirmation Code box that appears on-screen. Finally, tap "Next" to finish the 2FA setup. You can tap "Finish" on the next screen to exit.
Save Your Recovery Codes
While 2FA is a great security measure, it can be downright inconvenient if you need to access Facebook without the authentication app handy or when something happens to your phone or authentication app that prevents it from working.
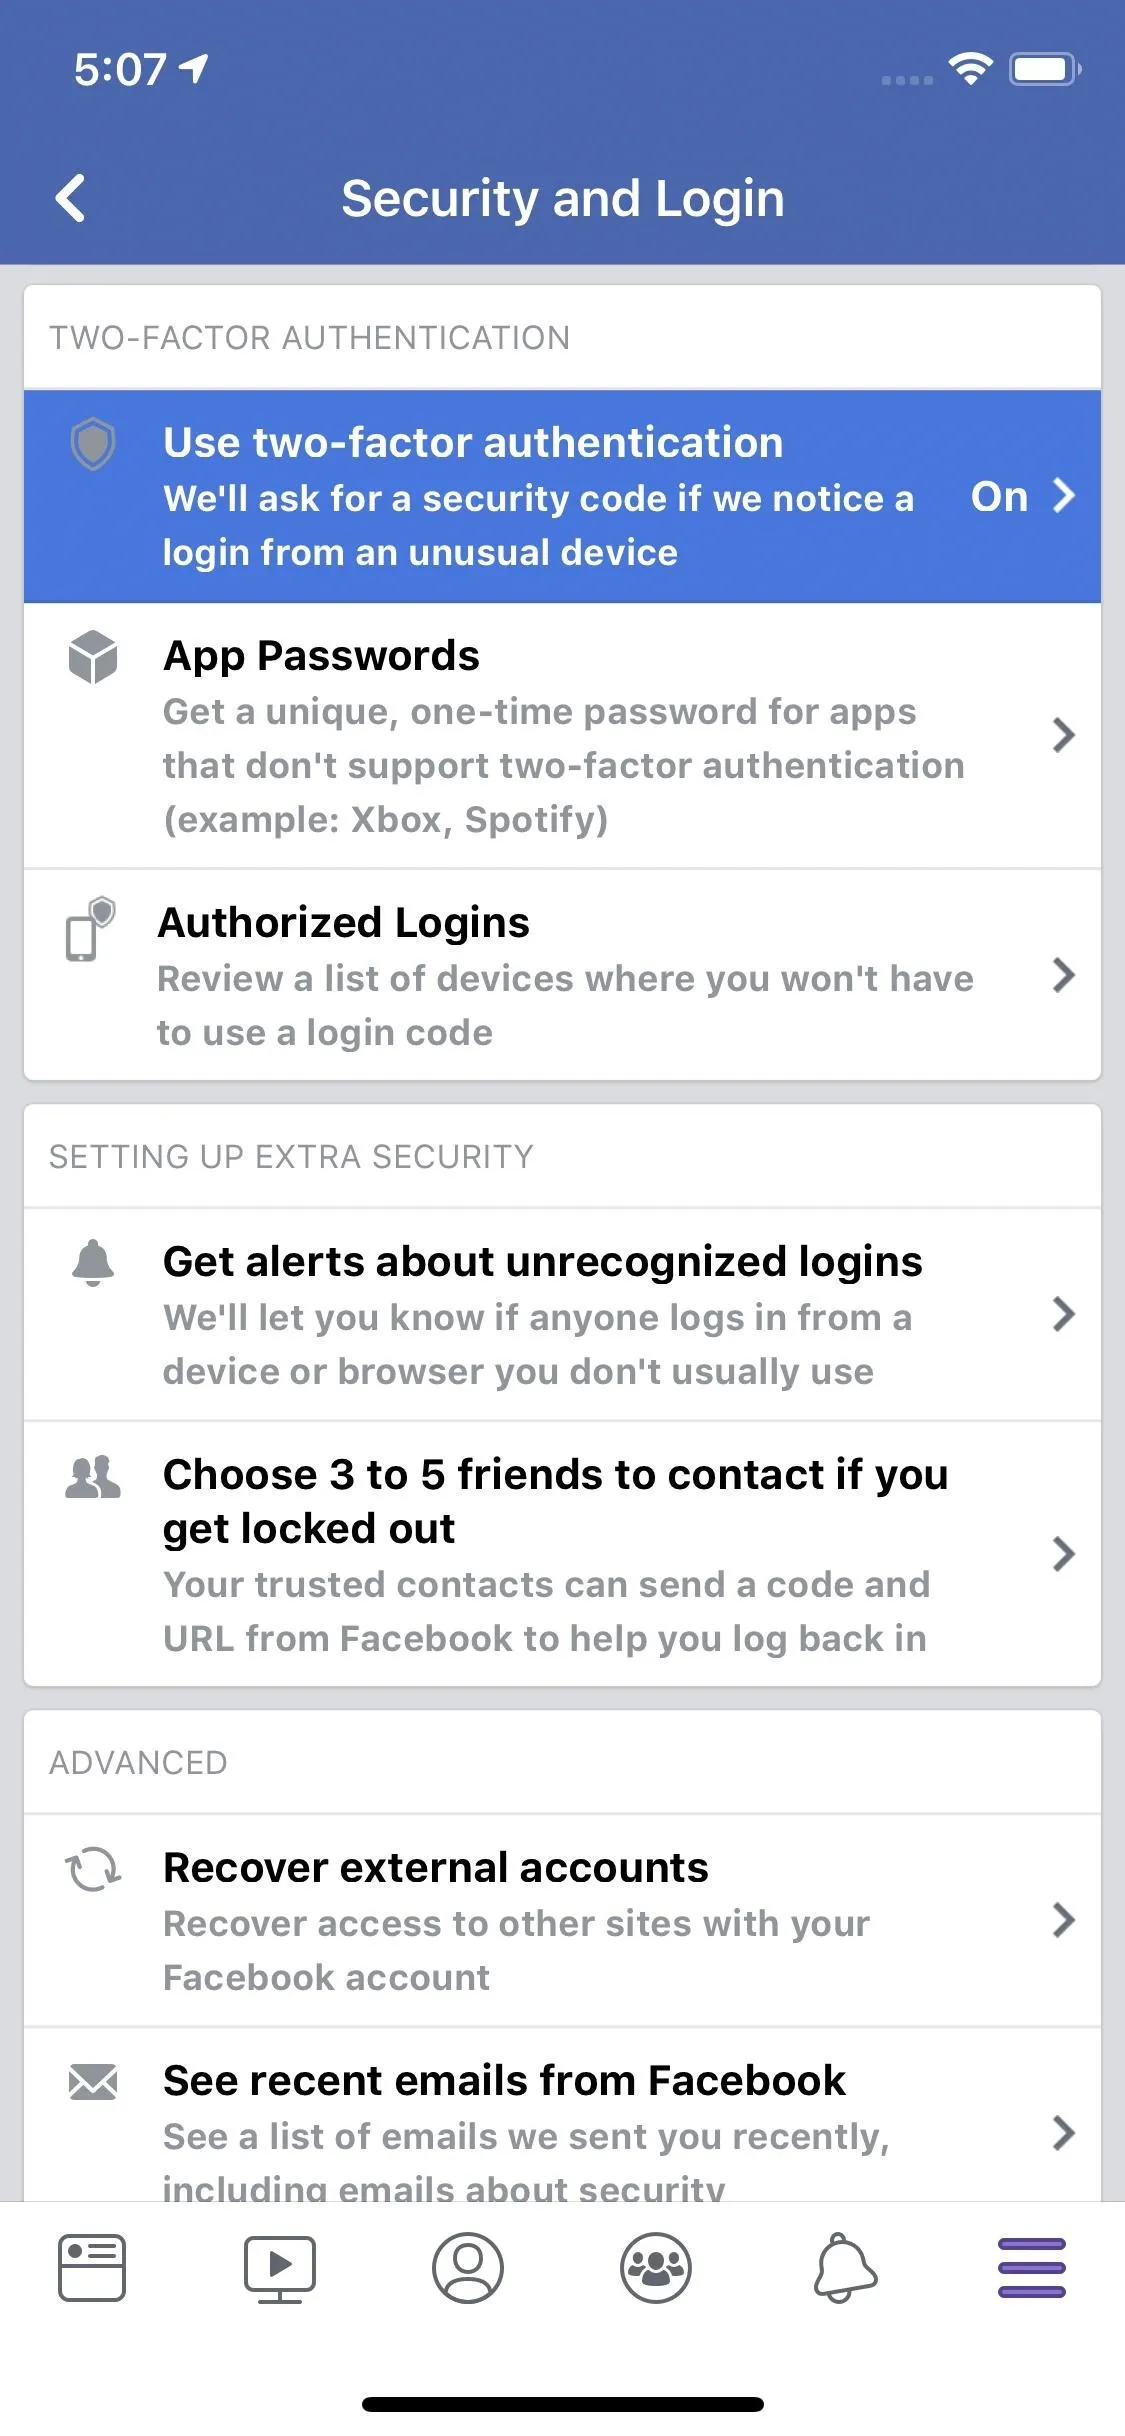
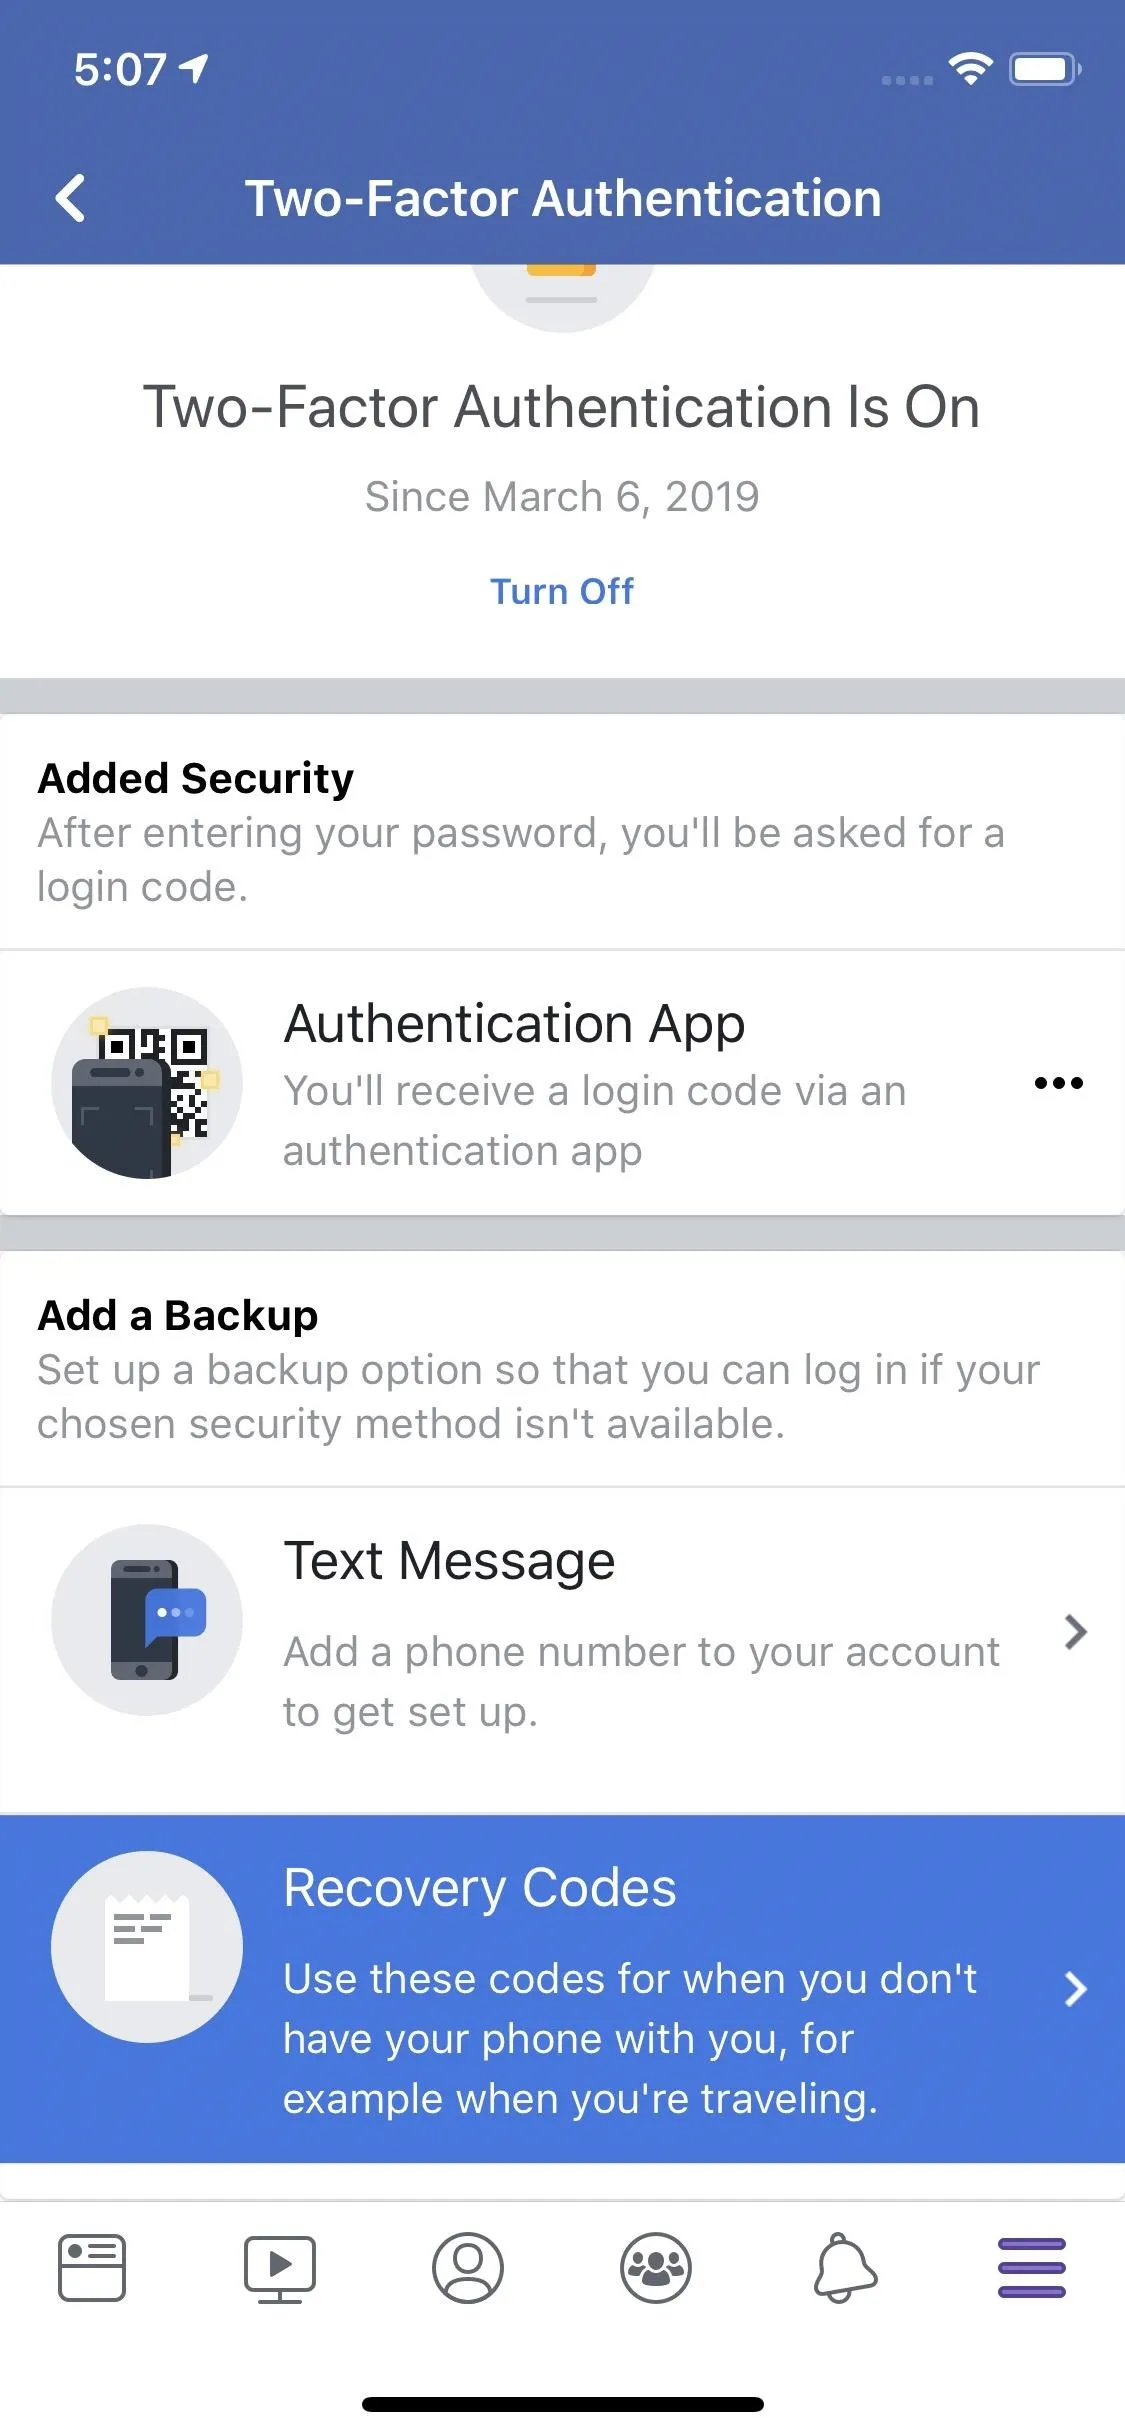
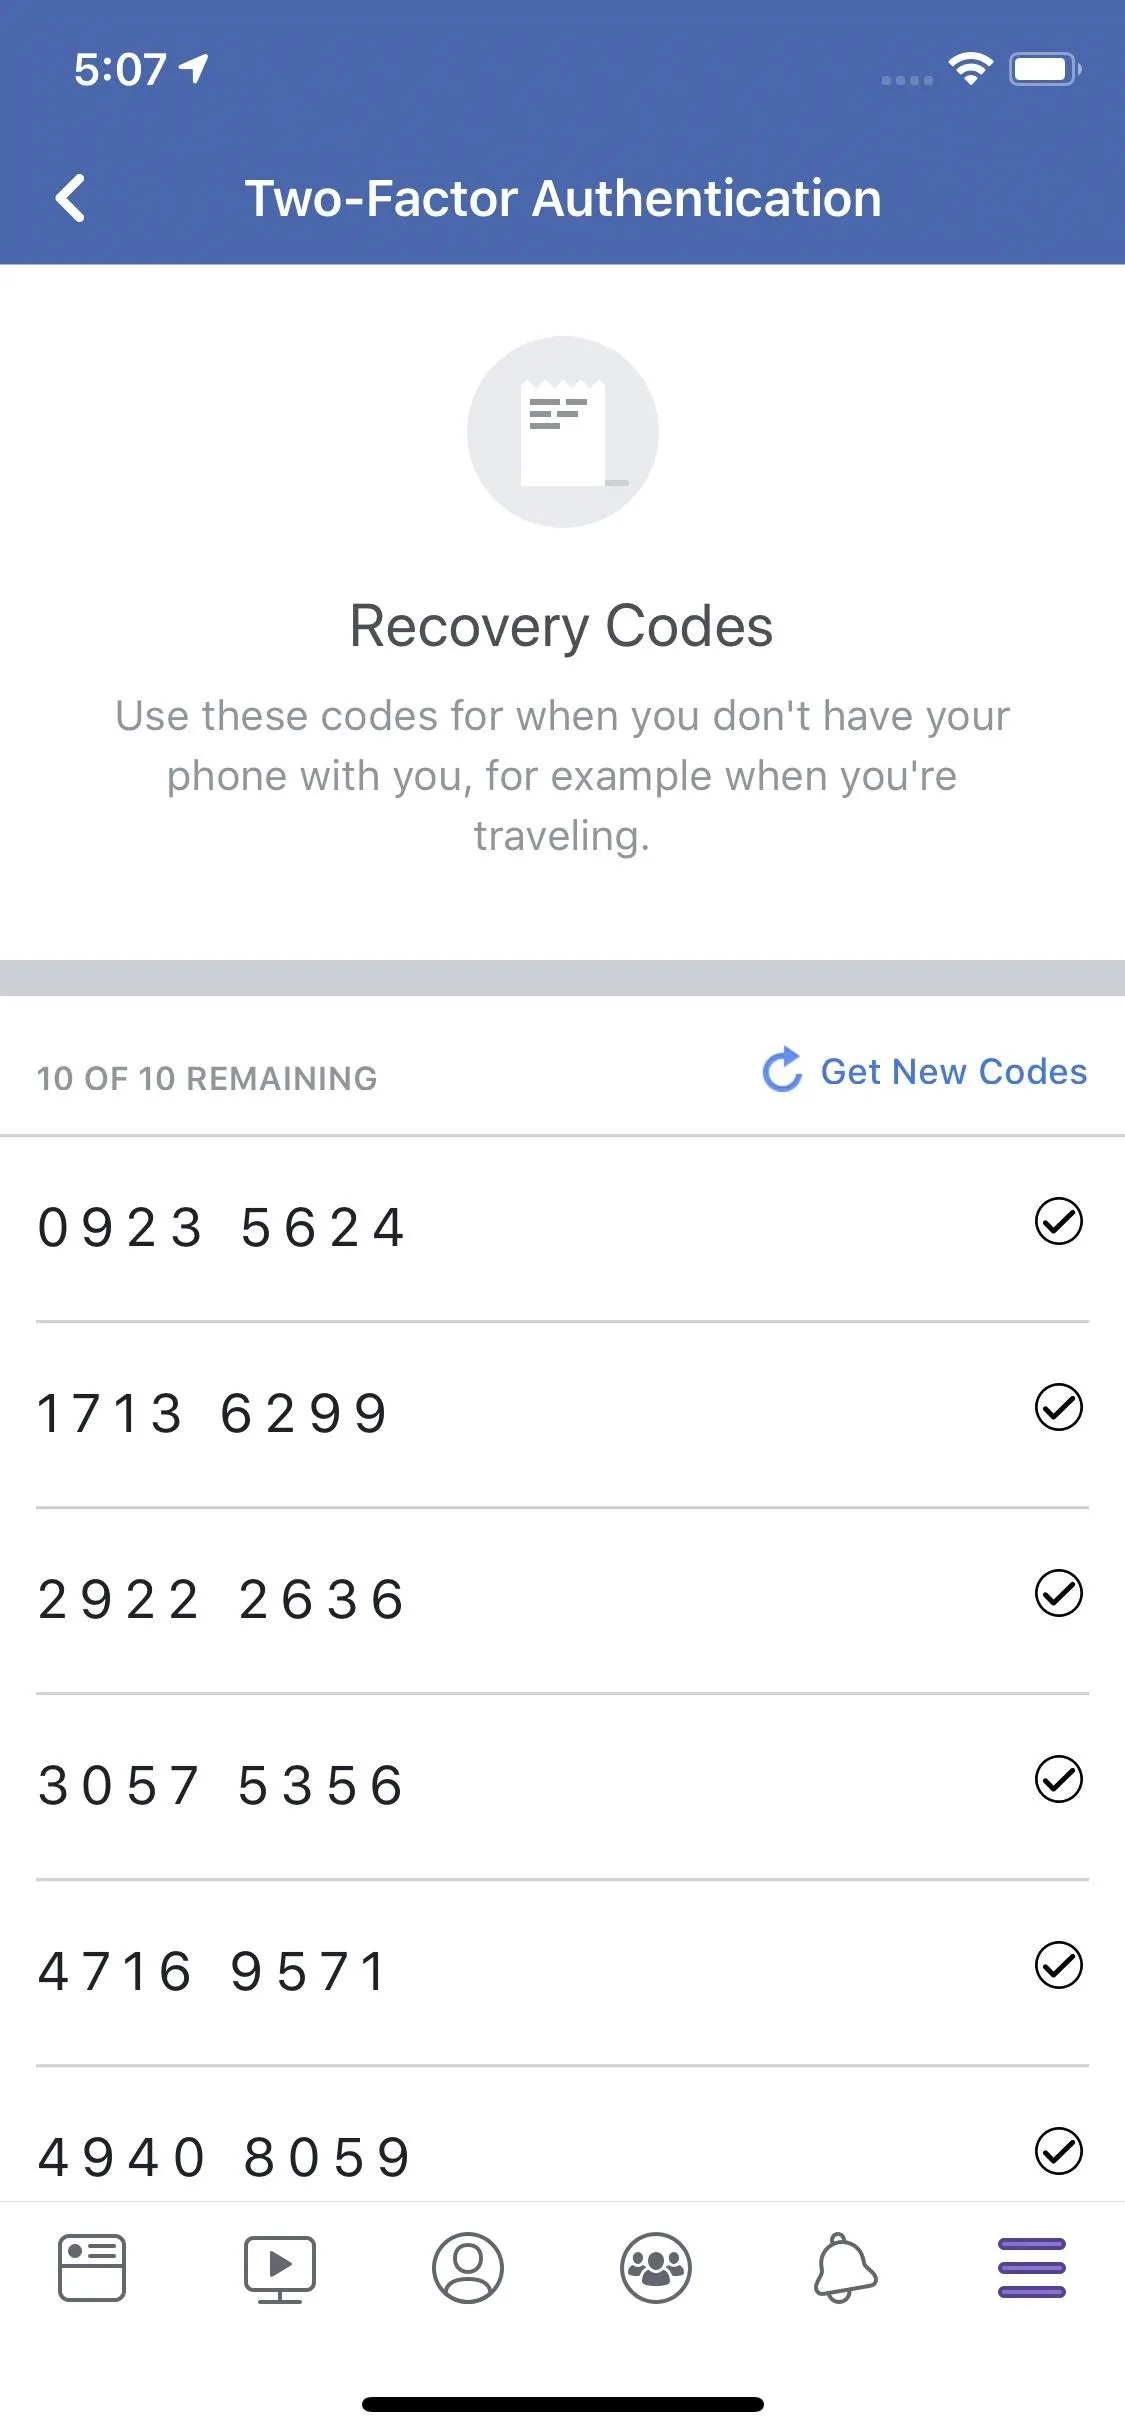
Facebook offers a workaround, however, in the form of recovery codes. When you set up 2FA, no matter the method, Facebook gives you a list of 10 unique recovery codes for your account, which can be used in place of your authenticator app. To find this list, tap the hamburger menu icon, then tap "Settings." Head to "Security and Login," then tap "Use two-factor authentication." On the following page, select "Recovery Codes."
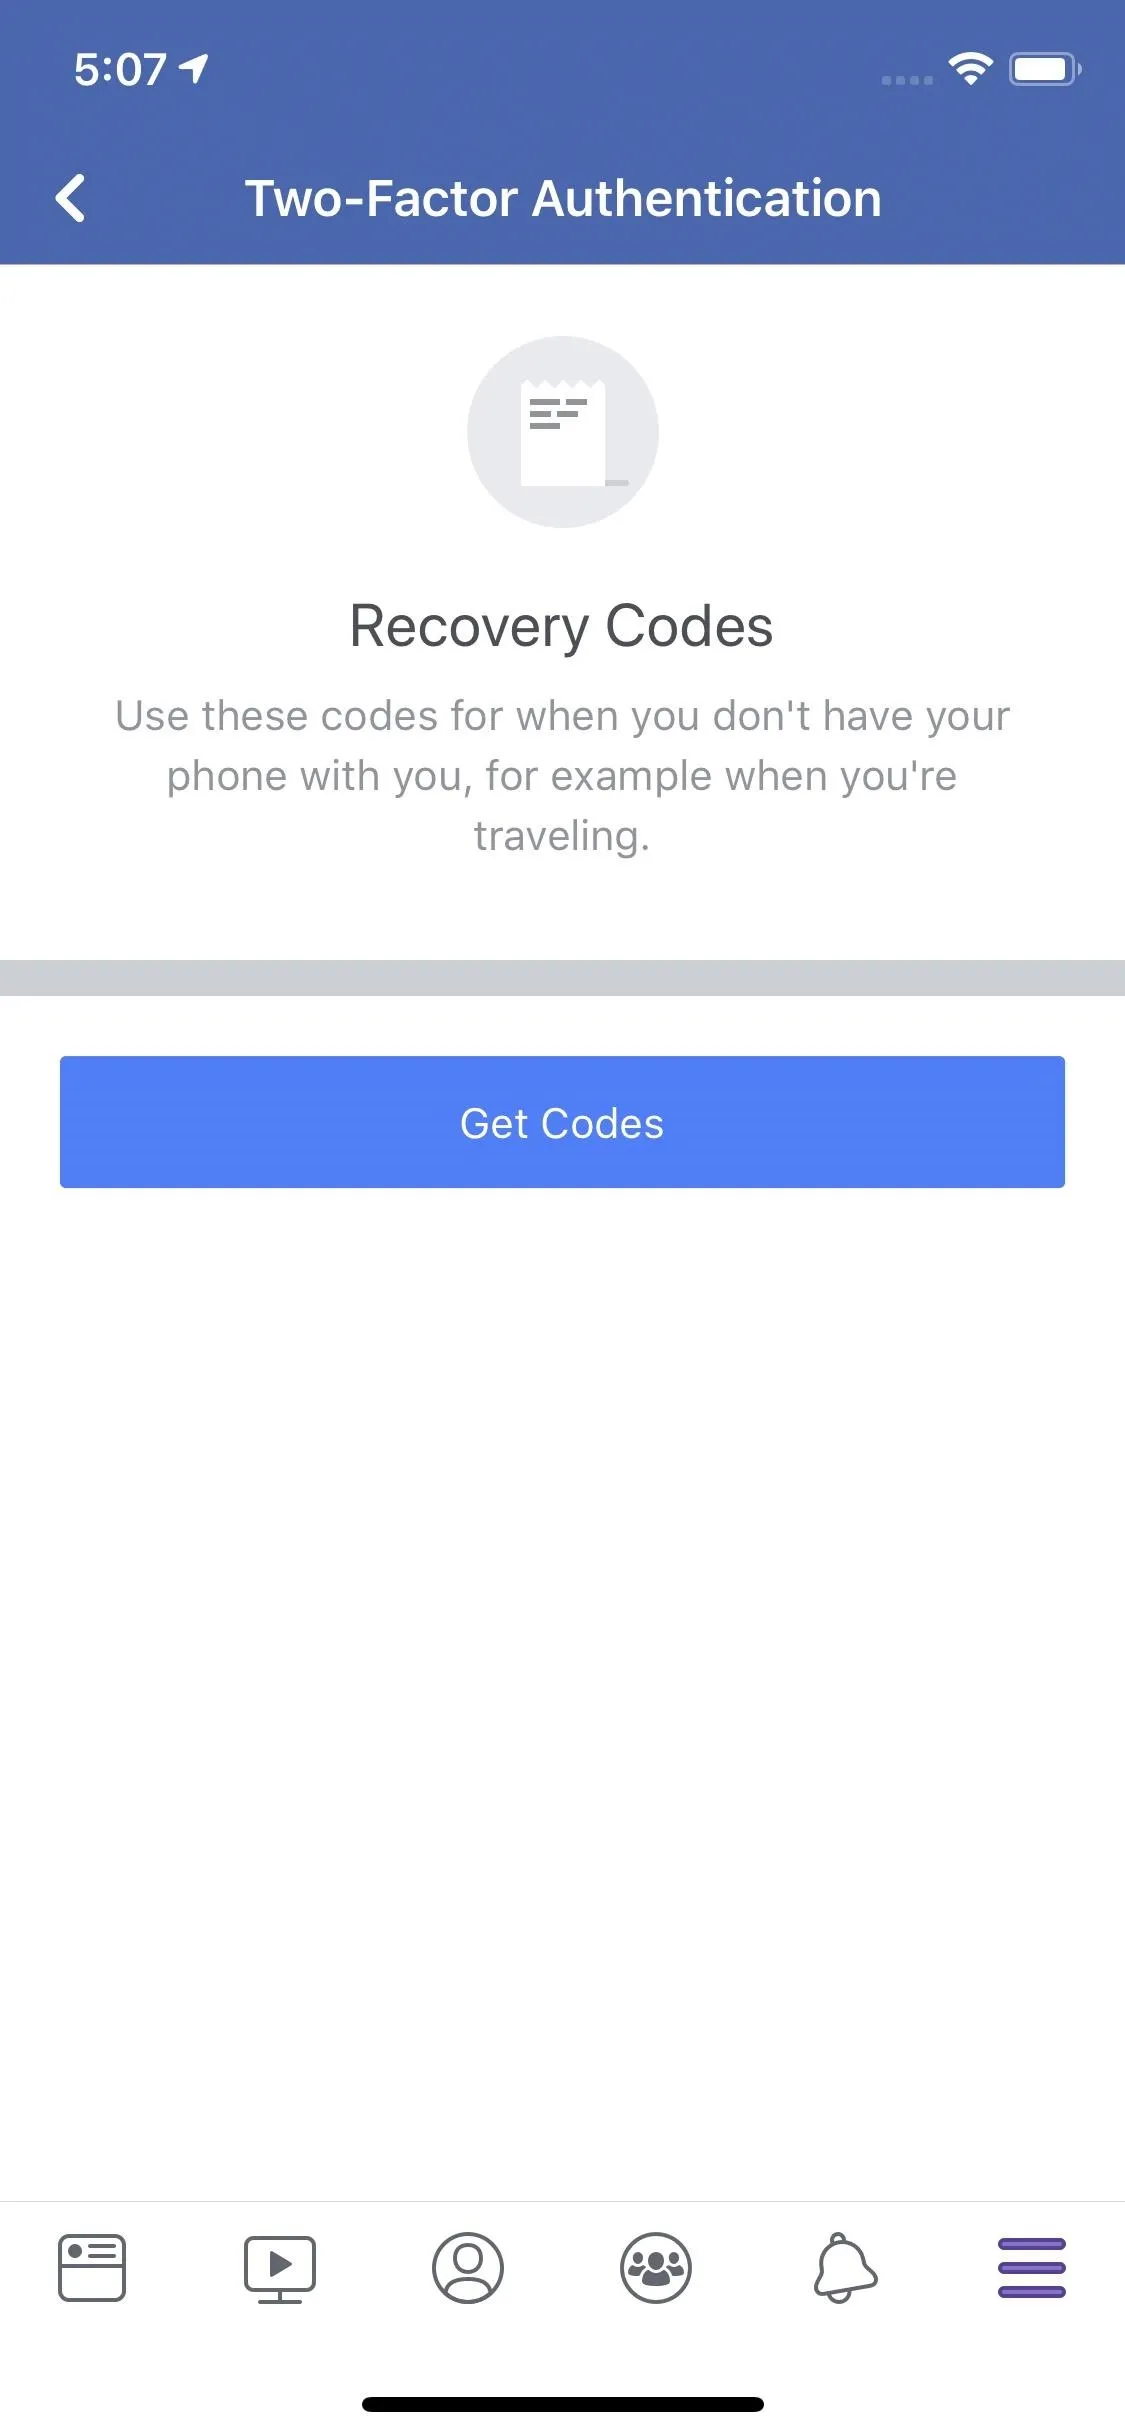
Now, tap "Get Codes." Facebook will then generate your 10 recovery codes. Write these down someplace secure where you can access them. You could also take a screenshot and save it in a secure location. We recommend either saving the screenshot or adding the codes to a password manager such as LastPass.
If you lose your codes somehow, like if the post-it note in your drawer (or wherever) went missing, the next time you log in on your phone, just return to this page and tap "Get New Codes" to restore your security.
- Follow Gadget Hacks on Pinterest, Reddit, Twitter, YouTube, and Flipboard
- Sign up for Gadget Hacks' daily newsletter or weekly Android and iOS updates
- Follow WonderHowTo on Facebook, Twitter, Pinterest, and Flipboard
Cover image and screenshots by Jake Peterson/Gadget Hacks


Comments
Be the first, drop a comment!