


You finally did it! You've combined all your knowledge about photography and angle to take theperfect selfie. It looks stunning, and you cannot wait to post that bad boy to Instagram. But wait, what's this? Your skin looks so uneven and — is that a zit!? I guess the selfie gods were not in favor of your skin when you snapped it. Luckily, you can fix all of those minor flaws with the help of Photoshop Express.
Adobe's mobile PS Express app is available for both iOS and Android, and the process for fixing blemishes is the same whether you're on an iPhone or Android device. If you already have the app, make sure to update it before continuing.
- Don't Miss: Make Your Selfies Look Professional with This Simple Lighting Adjustment Trick in Photoshop Express
Open Up the Spot Correction Tool
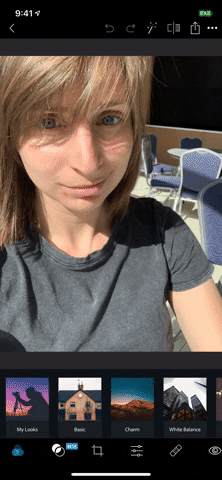
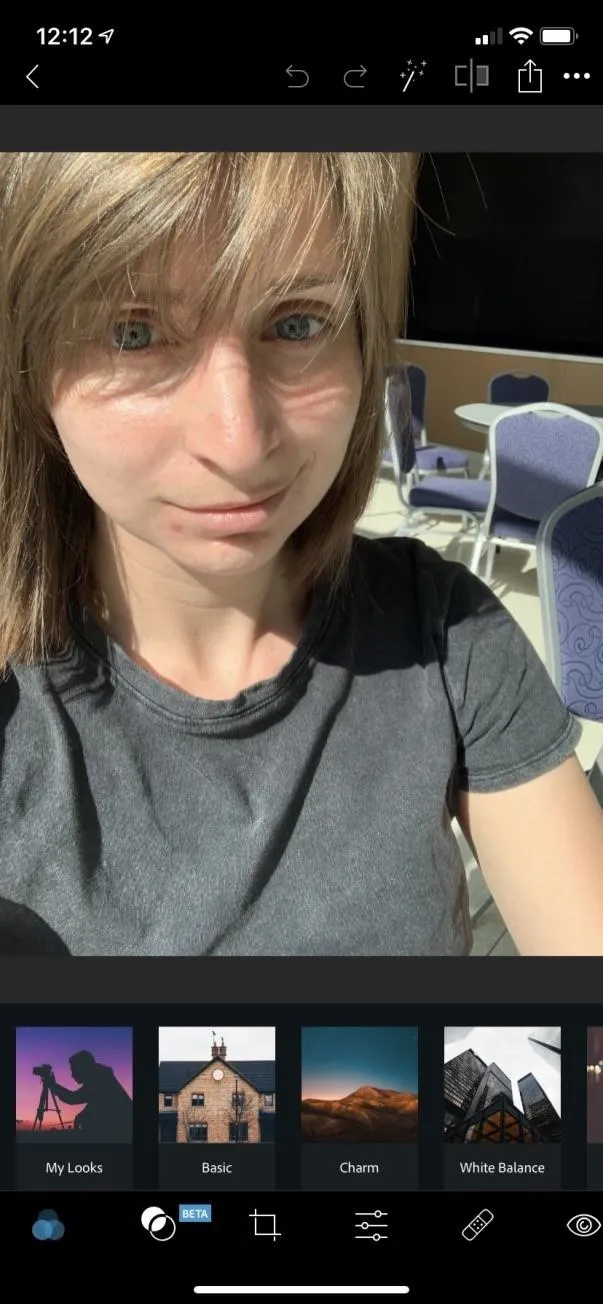
Take a look at my selfie. Not bad, right? Well, except for my skin. Like many of you, I suffer from the occasional zit from time to time, but I am not going to let that ruin my selfie game.
The first thing we are going to do is get rid of all the blemishes. Open PS Express, and select the selfie you want to edit. Then, scroll through the bottom toolbar and tap on the bandage or double-bandage icon — this is your spot correction tool.
The slider that appears in the toolbar is used to determine the size of your spot correction area. You can zoom in on your photo by using the pinch gesture, which will help you isolate the blemish, so nothing else gets inadvertently "corrected."

Zoom In & Zap Those Imperfections
Zoom into your photo so that all the imperfection in your skin can be seen more clearly. Select only one area to focus on at a time, then adjust your slider so that the brush is only slightly bigger than the blemish you are correcting. Next, tap on the defect and watch it disappear.
If you did not get the result you wanted, tap the undo button at the top of your screen and try again, adjusting your brush as needed. It's completely normal to use the back button several times and try your spot corrections again. It's a tricky process in some images.
Repeat the process for any other areas you would like to correct. It may take some time to get all of them, but it'll be worth it. Zoom in and out frequently so you can see how the whole image is turning out.

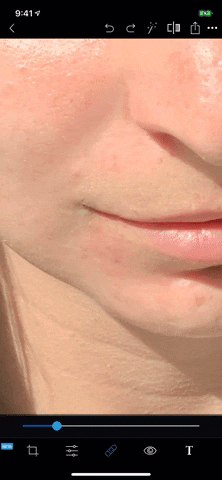
Be careful not to tap the areas close to your features, such as your eyes or nose. The spot corrector brush will blend incorrectly if the area it's correcting is inconsistent. You can make your brush smaller to get those areas close to one of your facial features if needed.
Soften Your Skin Texture
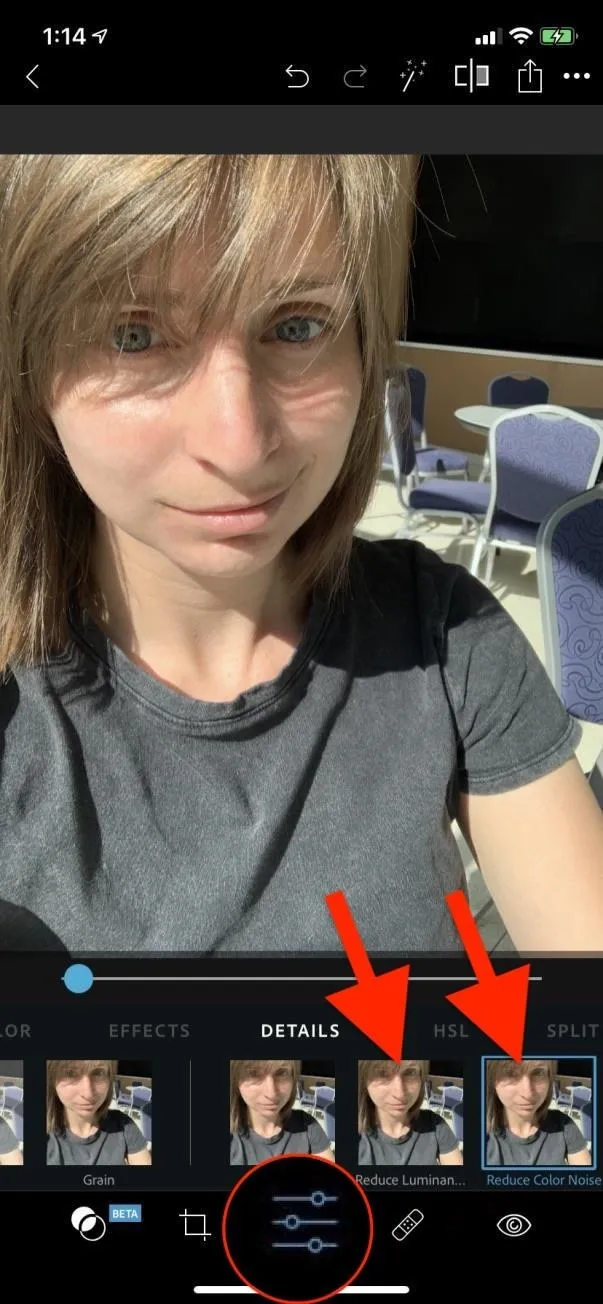
Next, in the toolbar, tap your adjustments panel, the two or three sliders icon. Scroll over to "Reduce Luminescence Noise" and "Reduce Color Noise." Select one, increase the slider, then repeat for the other to soften the look of your skin. You should increase these until any part of the background starts looking blurry. In some pictures, that never happens, so it's OK to increase both sliders to max.
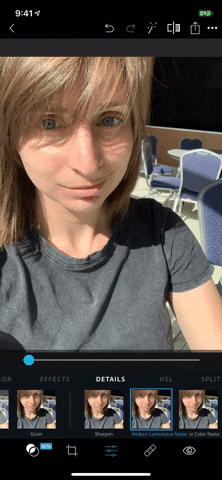
After you finish, you can head back to the spot corrector if needed. Also, don't be afraid to play with a few other adjustments — my personal favorites are lighting adjustments, filters, and split tones.
To check your edits, tap the before-and-after tool up top, the one that looks like a square chopped in half. This will toggle between your original image and your edited image. It's an excellent way to see all that you've accomplished, as well as help you determine if more adjustments are necessary.

Don't forget to save your image after you're done with all of your adjustments, so you don't lose any edits. If you're ready to upload your image to your favorite social media site, tap the Share icon in the top right, where you'll see some image options as well as apps you can send the pic to.
- Follow Gadget Hacks on Pinterest, Reddit, Twitter, YouTube, and Flipboard
- Sign up for Gadget Hacks' daily newsletter or weekly Android and iOS updates
- Follow WonderHowTo on Facebook, Twitter, Pinterest, and Flipboard
Cover image, screenshots, and GIFs by Courtney Raphael/Gadget Hacks


Comments
Be the first, drop a comment!