


Facebook's shadiness when it comes to user privacy has never been much of a secret. The Cambridge Analytica scandal, however, has thrown the company and its practices into the limelight, with users taking their data more seriously than ever. If you're one of those users, you might want to check your "Location History" to see if and how Facebook's kept tabs on your whereabouts.
On Facebook, your Location History is a series of logs the app makes of your various movements. It touts Location History is an integral part of the Facebook experience, as you can easily connect with other users that are nearby or find Wi-Fi hotspots you can use while you're away from home. It also "helps you explore what's around you, get more relevant ads, and helps improve Facebook."
However enticing that feature might sound, many might find that the invasion of privacy outweighs the positives. If you're not sure how you feel, you should at least see below to learn how to view and delete your Location History so you know what's up. Keep in mind that Facebook will still have access to your location so you can perform actions such as geotagging your posts.
Access Your Location History
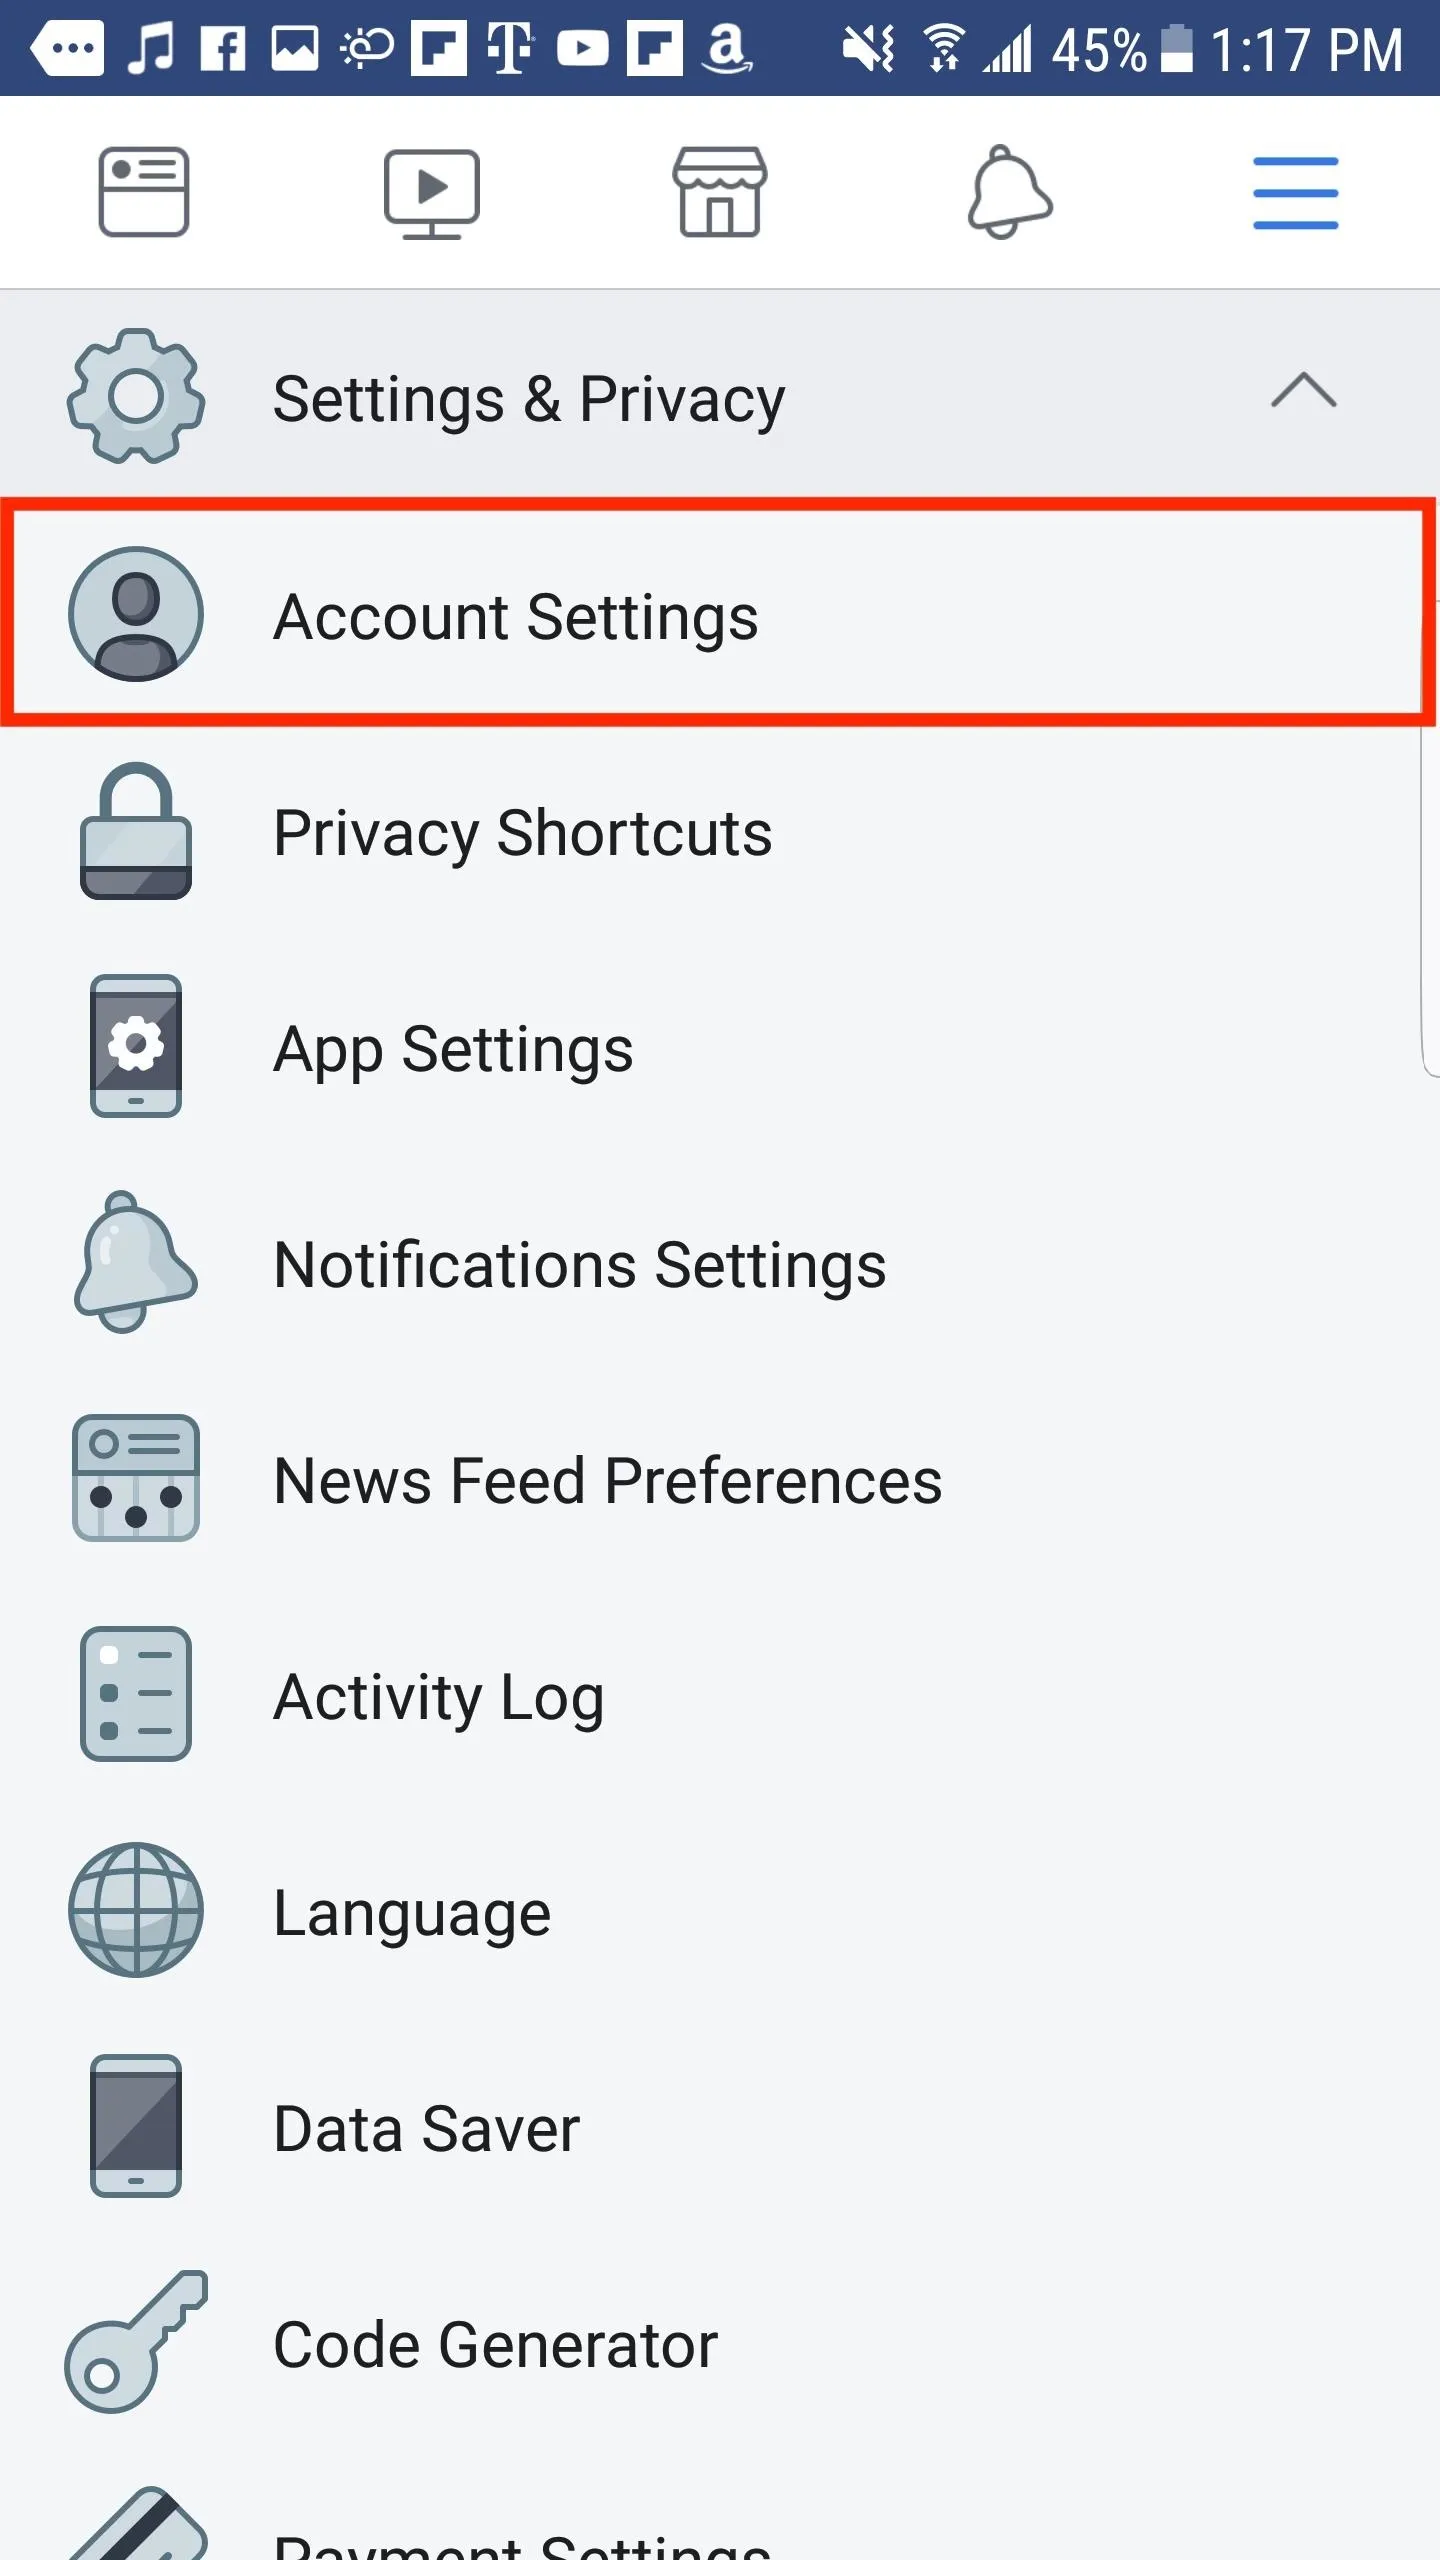
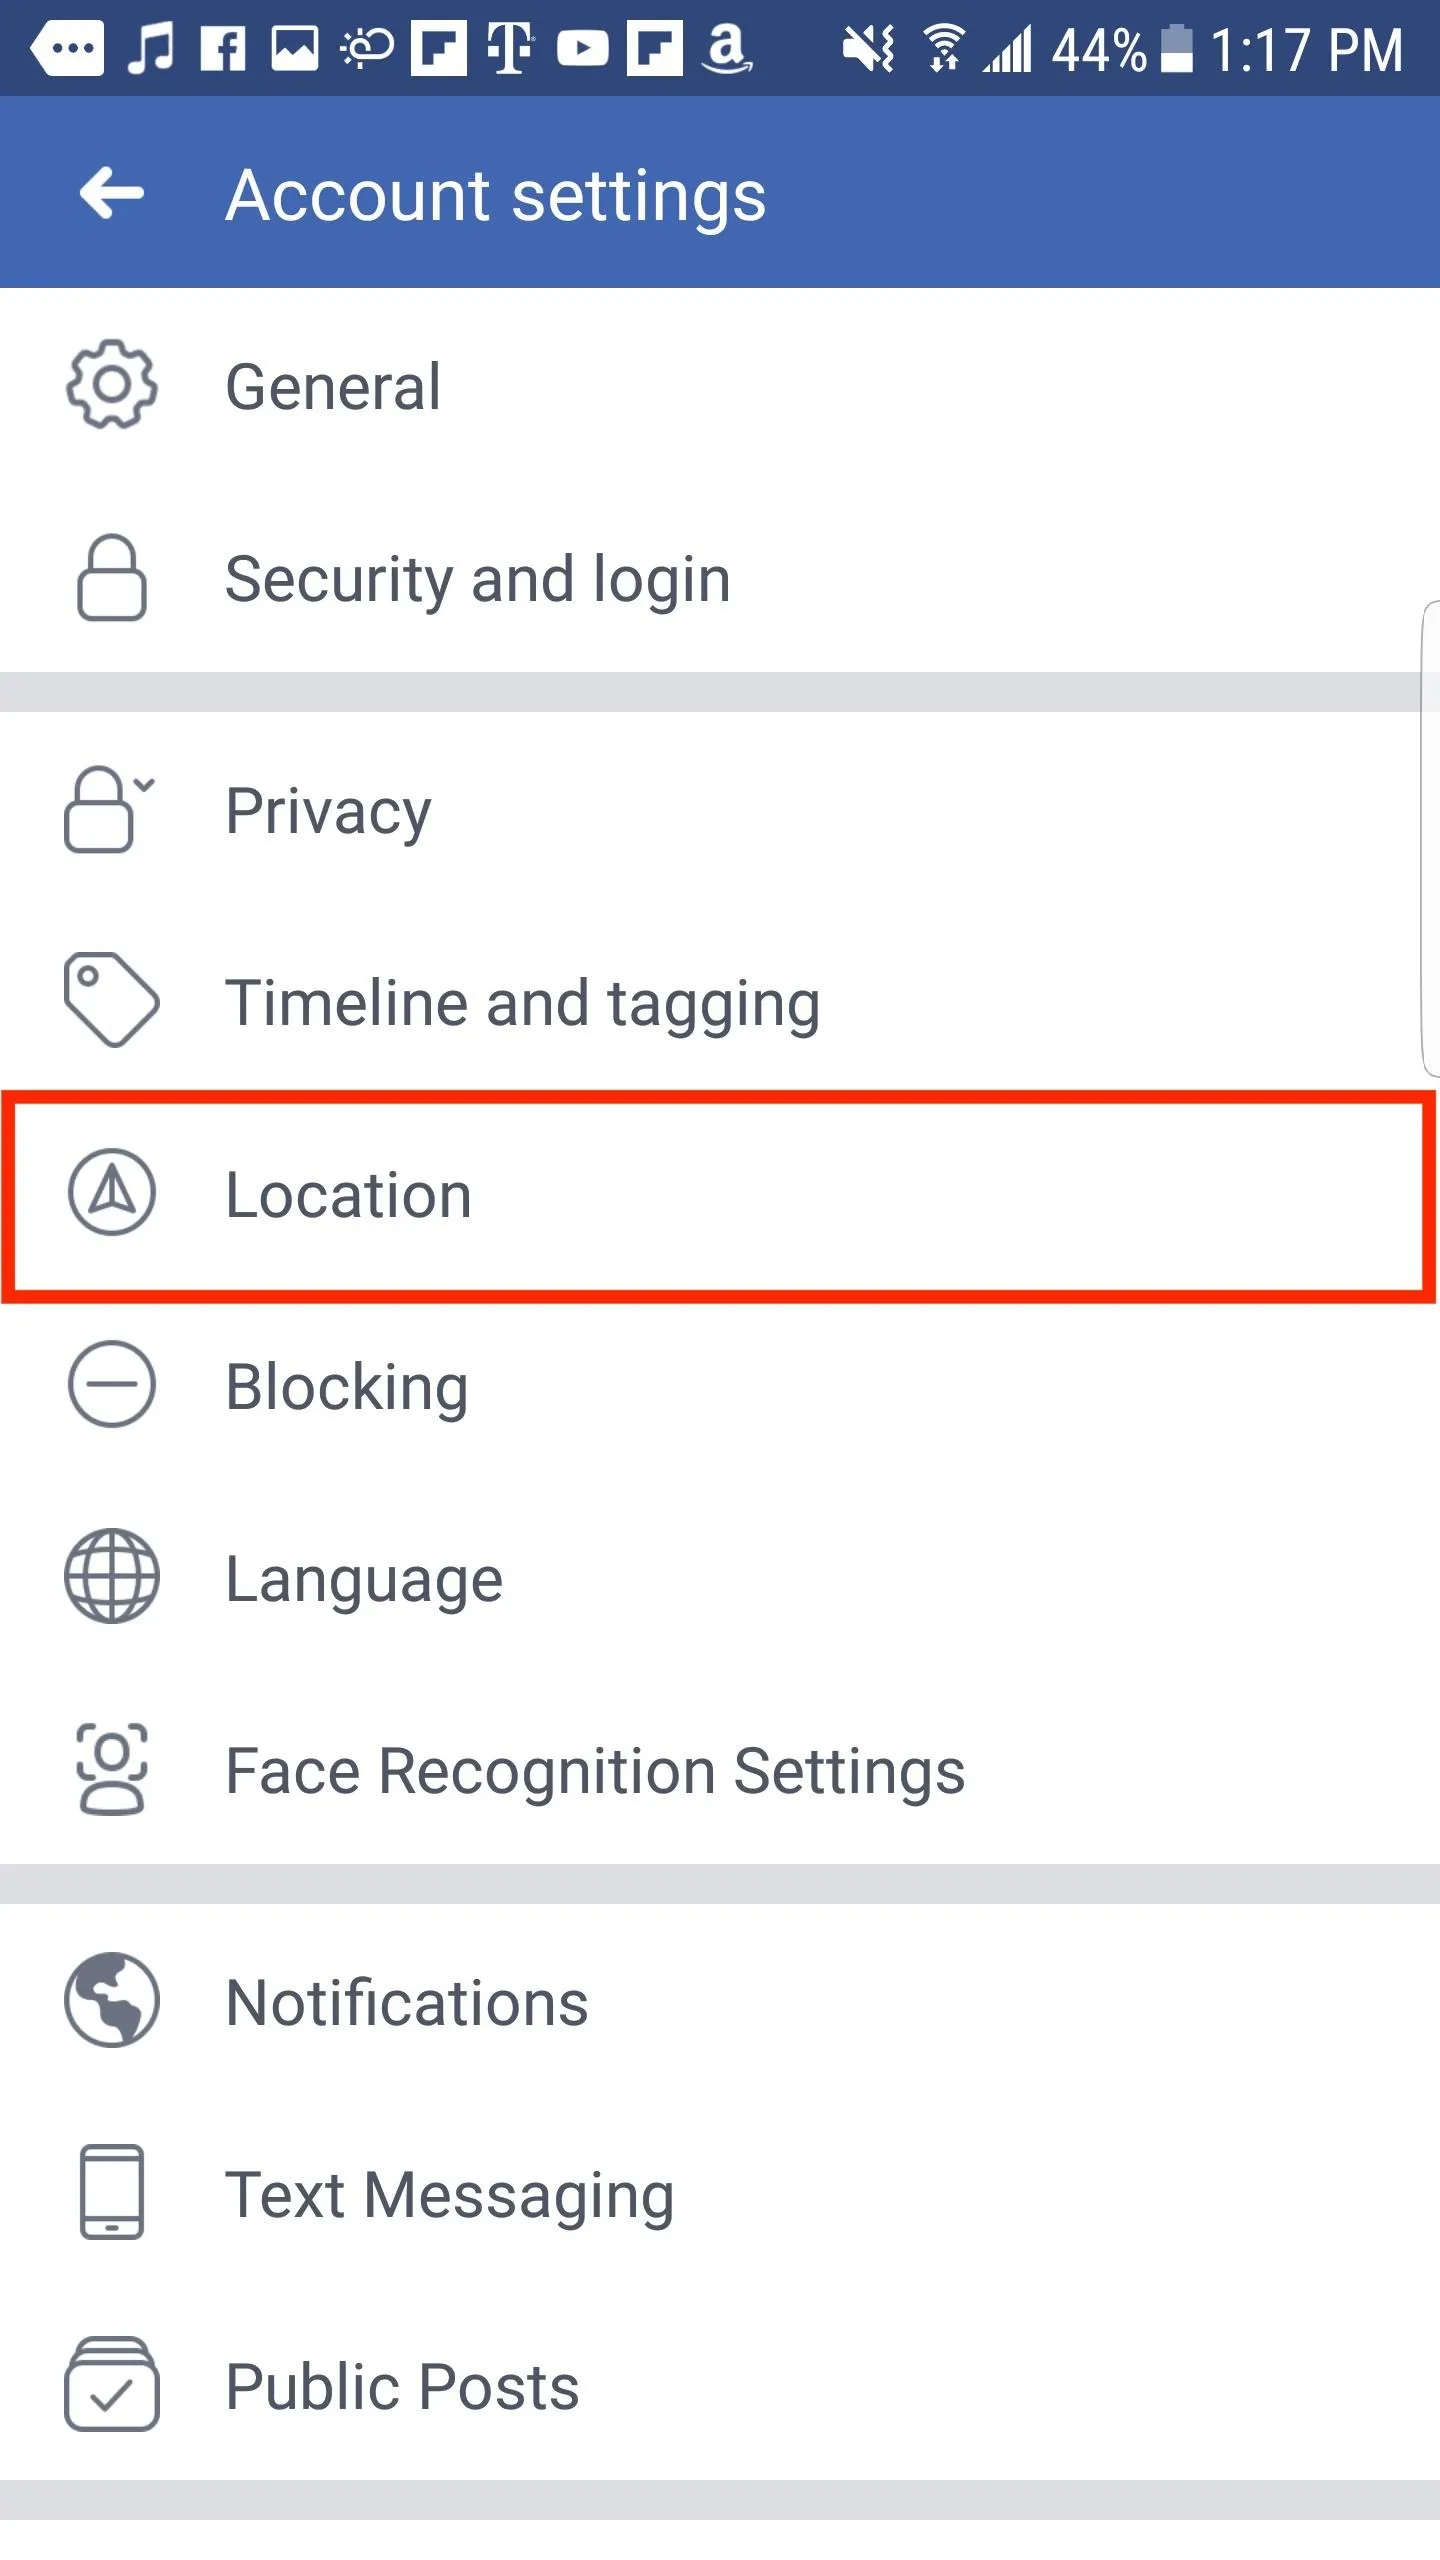
To access your Location History, whether you're using the Android or iOS app, tap the hamburger menu icon on the main screen. Under "Settings & Privacy," tap "Account Settings," then select "Location."
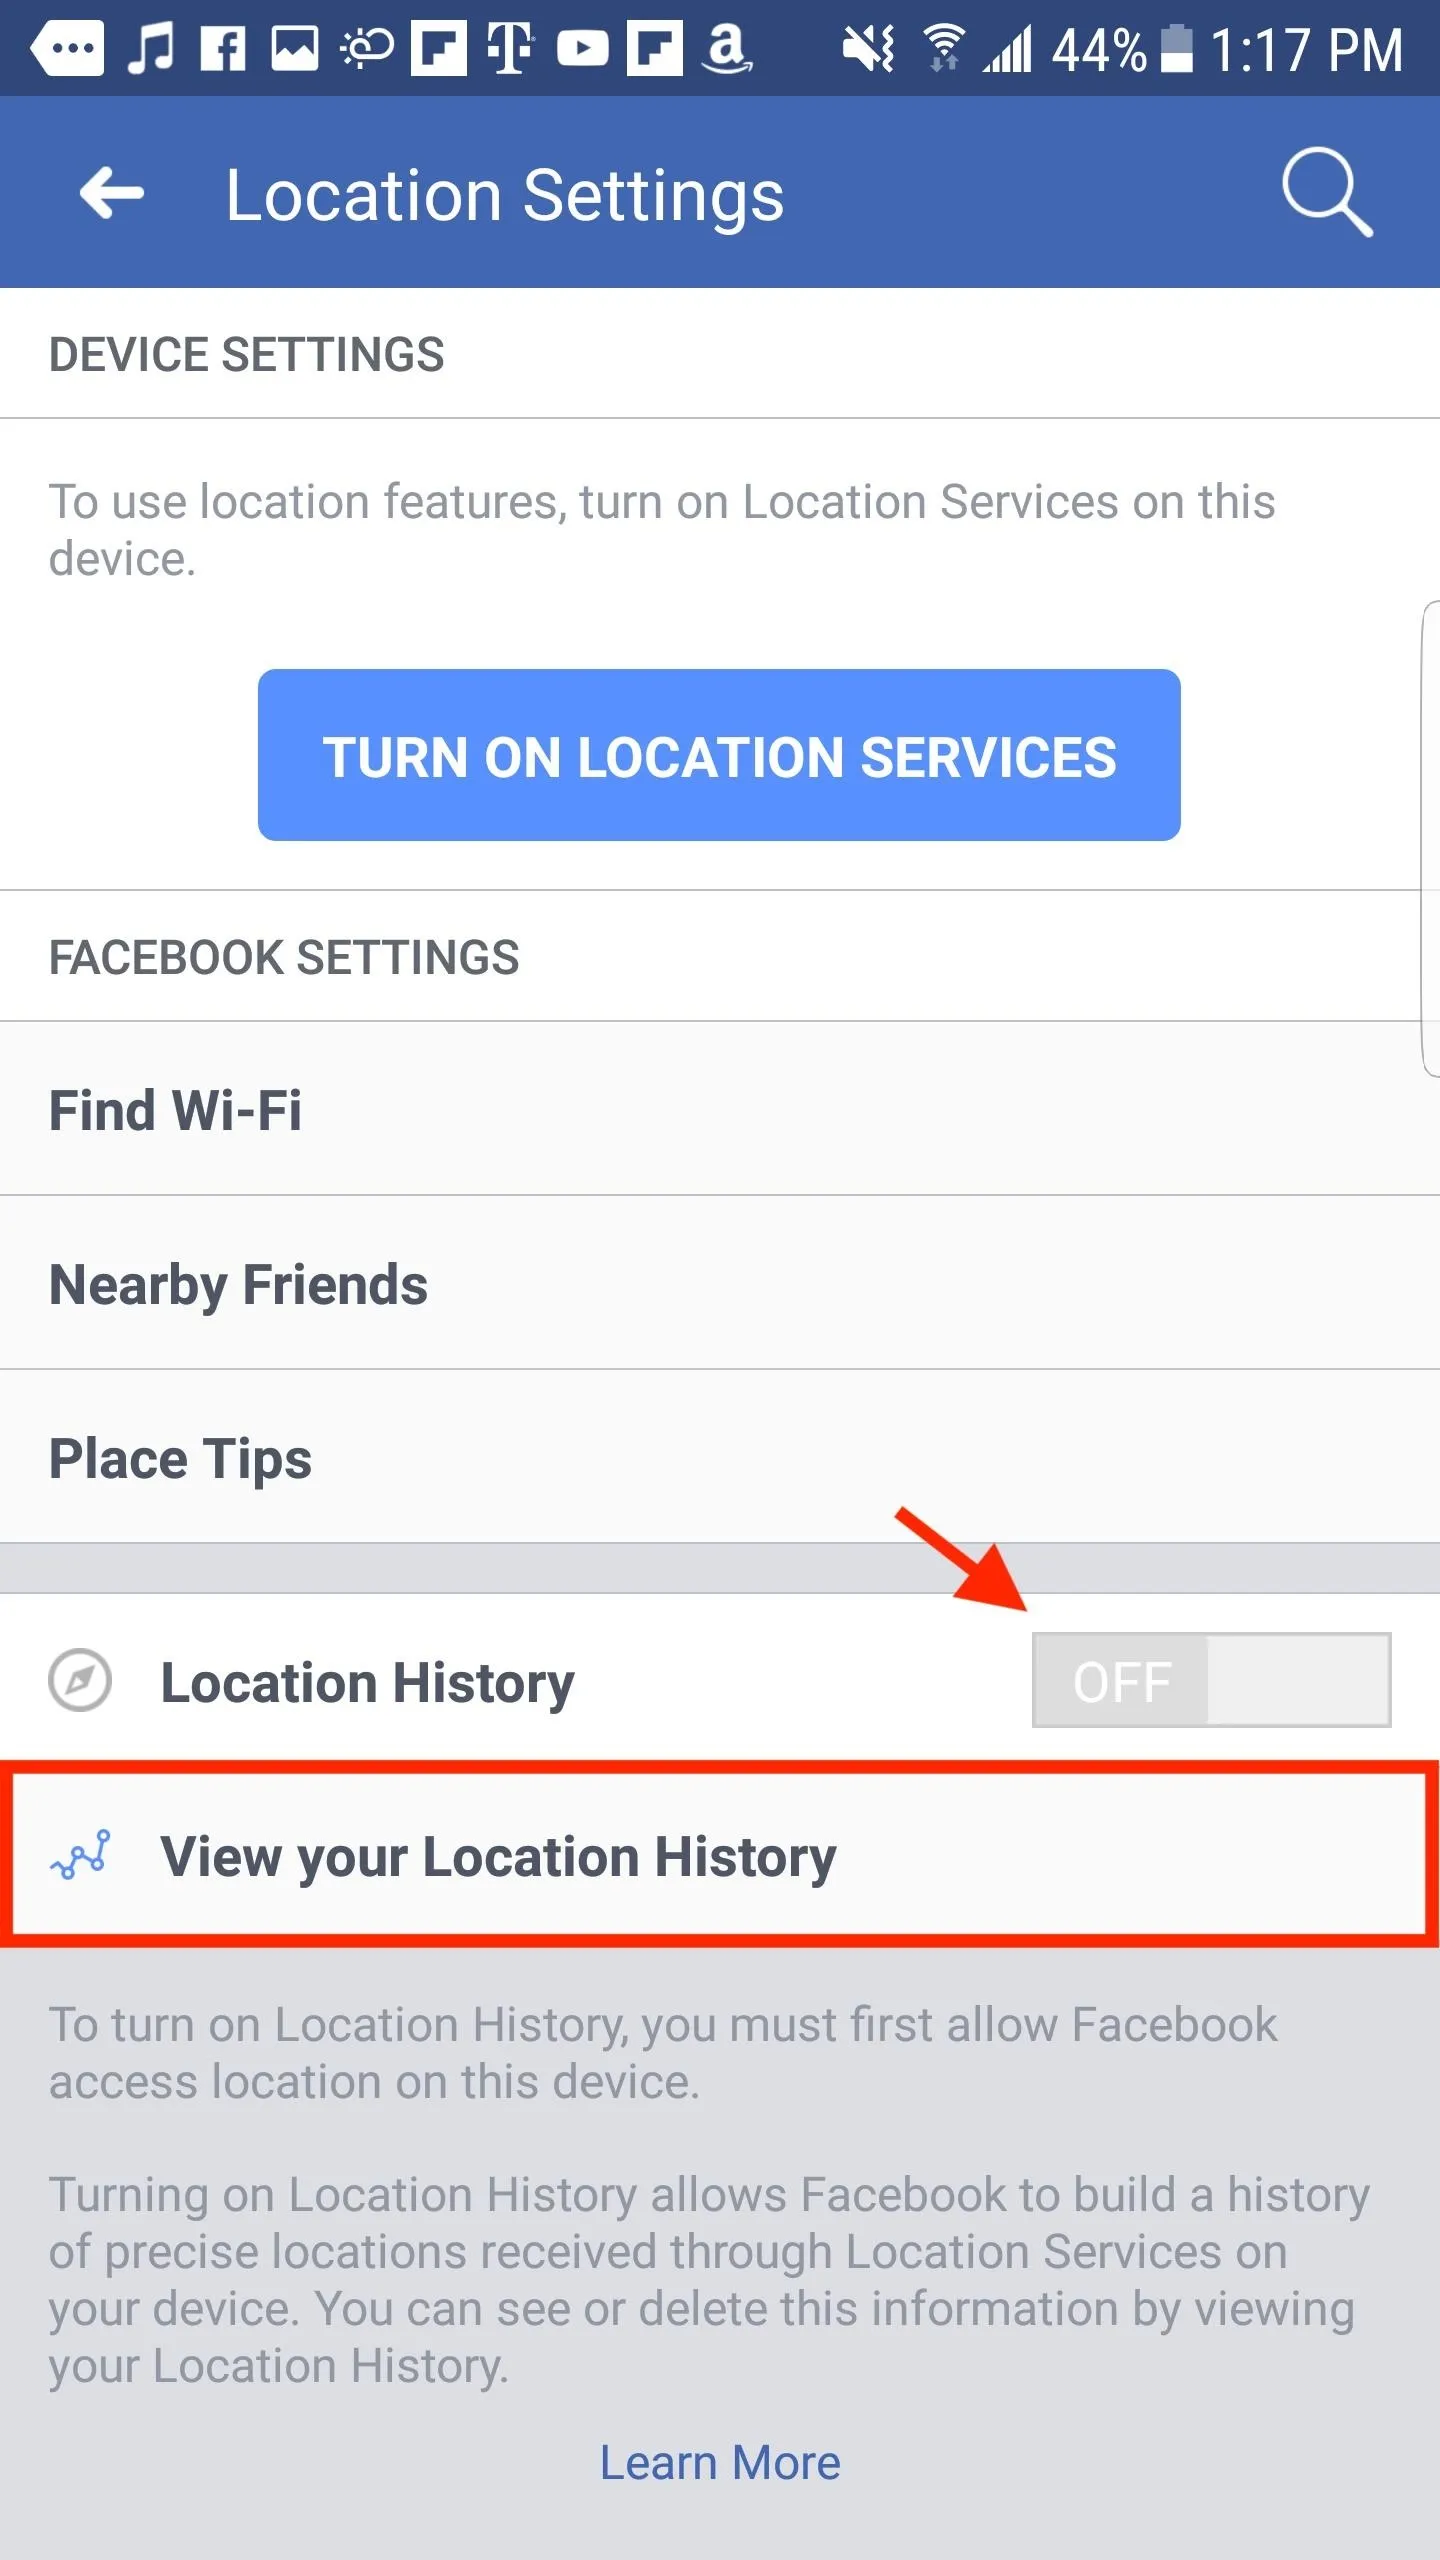
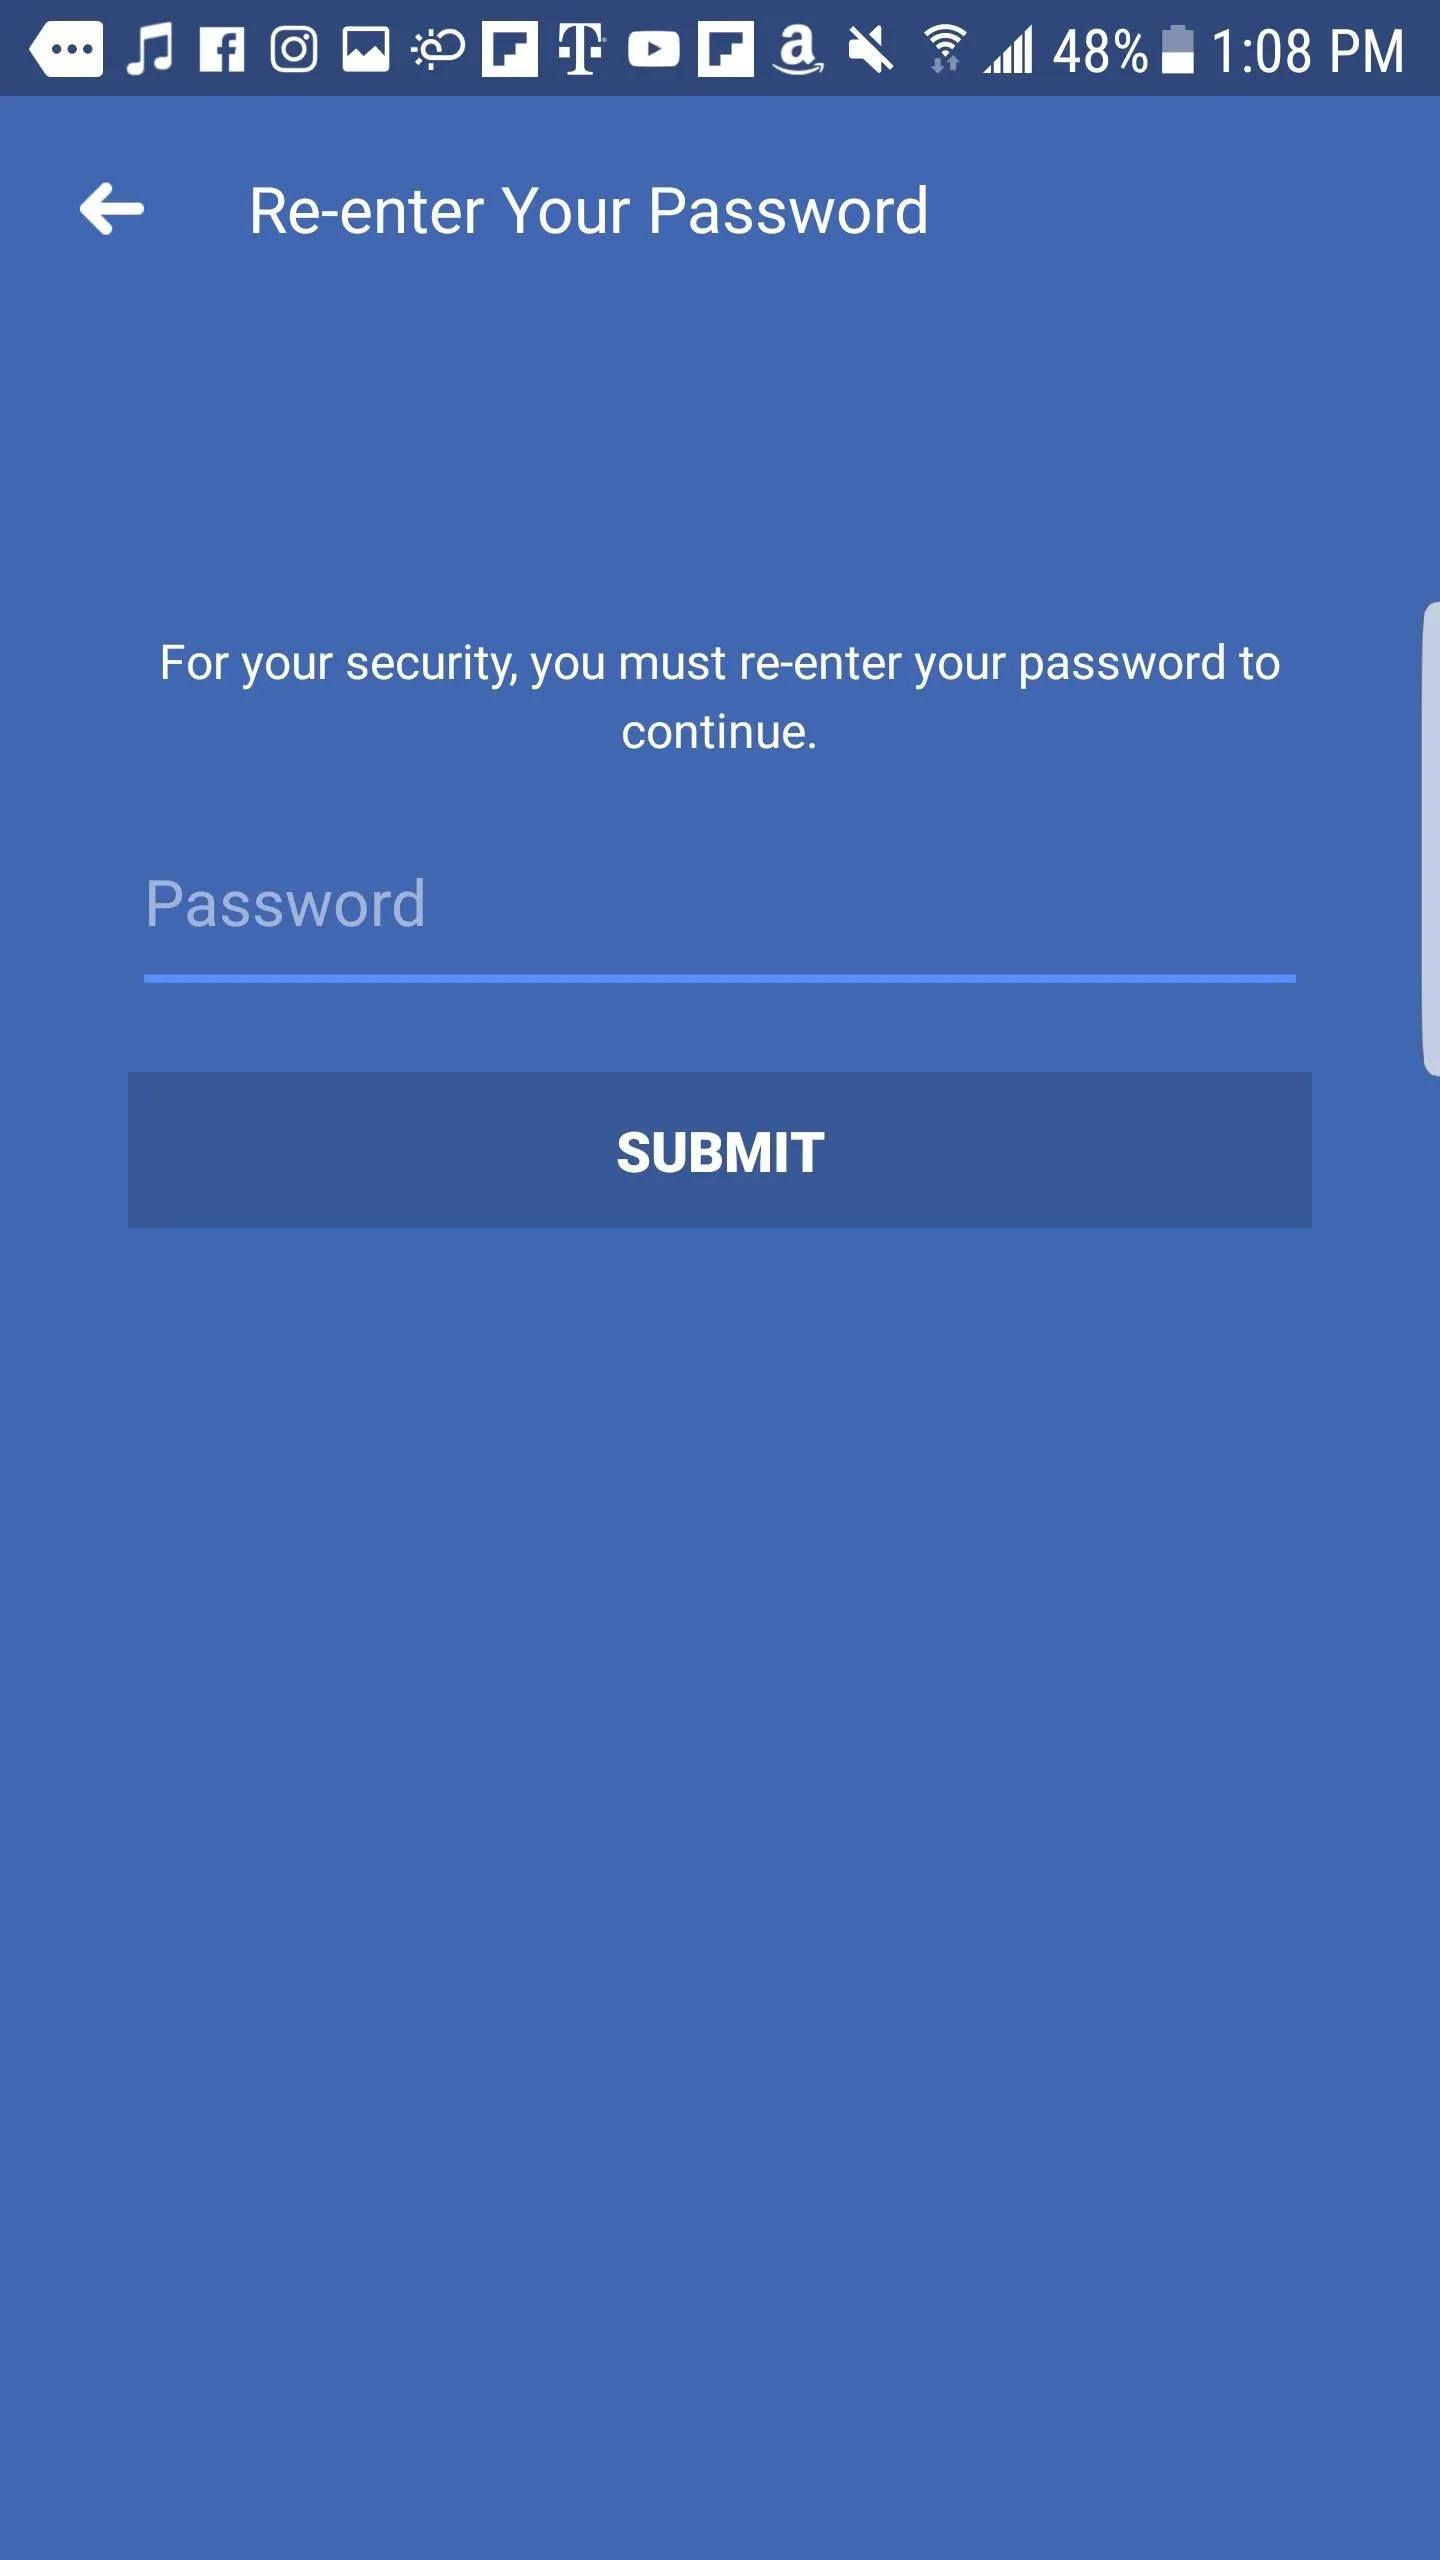
Check to see if Location History is enabled or disabled. You can turn it on or off, depending on your preference. However, if it is enabled or you suspect it has been enabled in the past, tap "View your Location History" to see where Facebook has tracked you. Enter your Facebook password when prompted.
View Your Location History
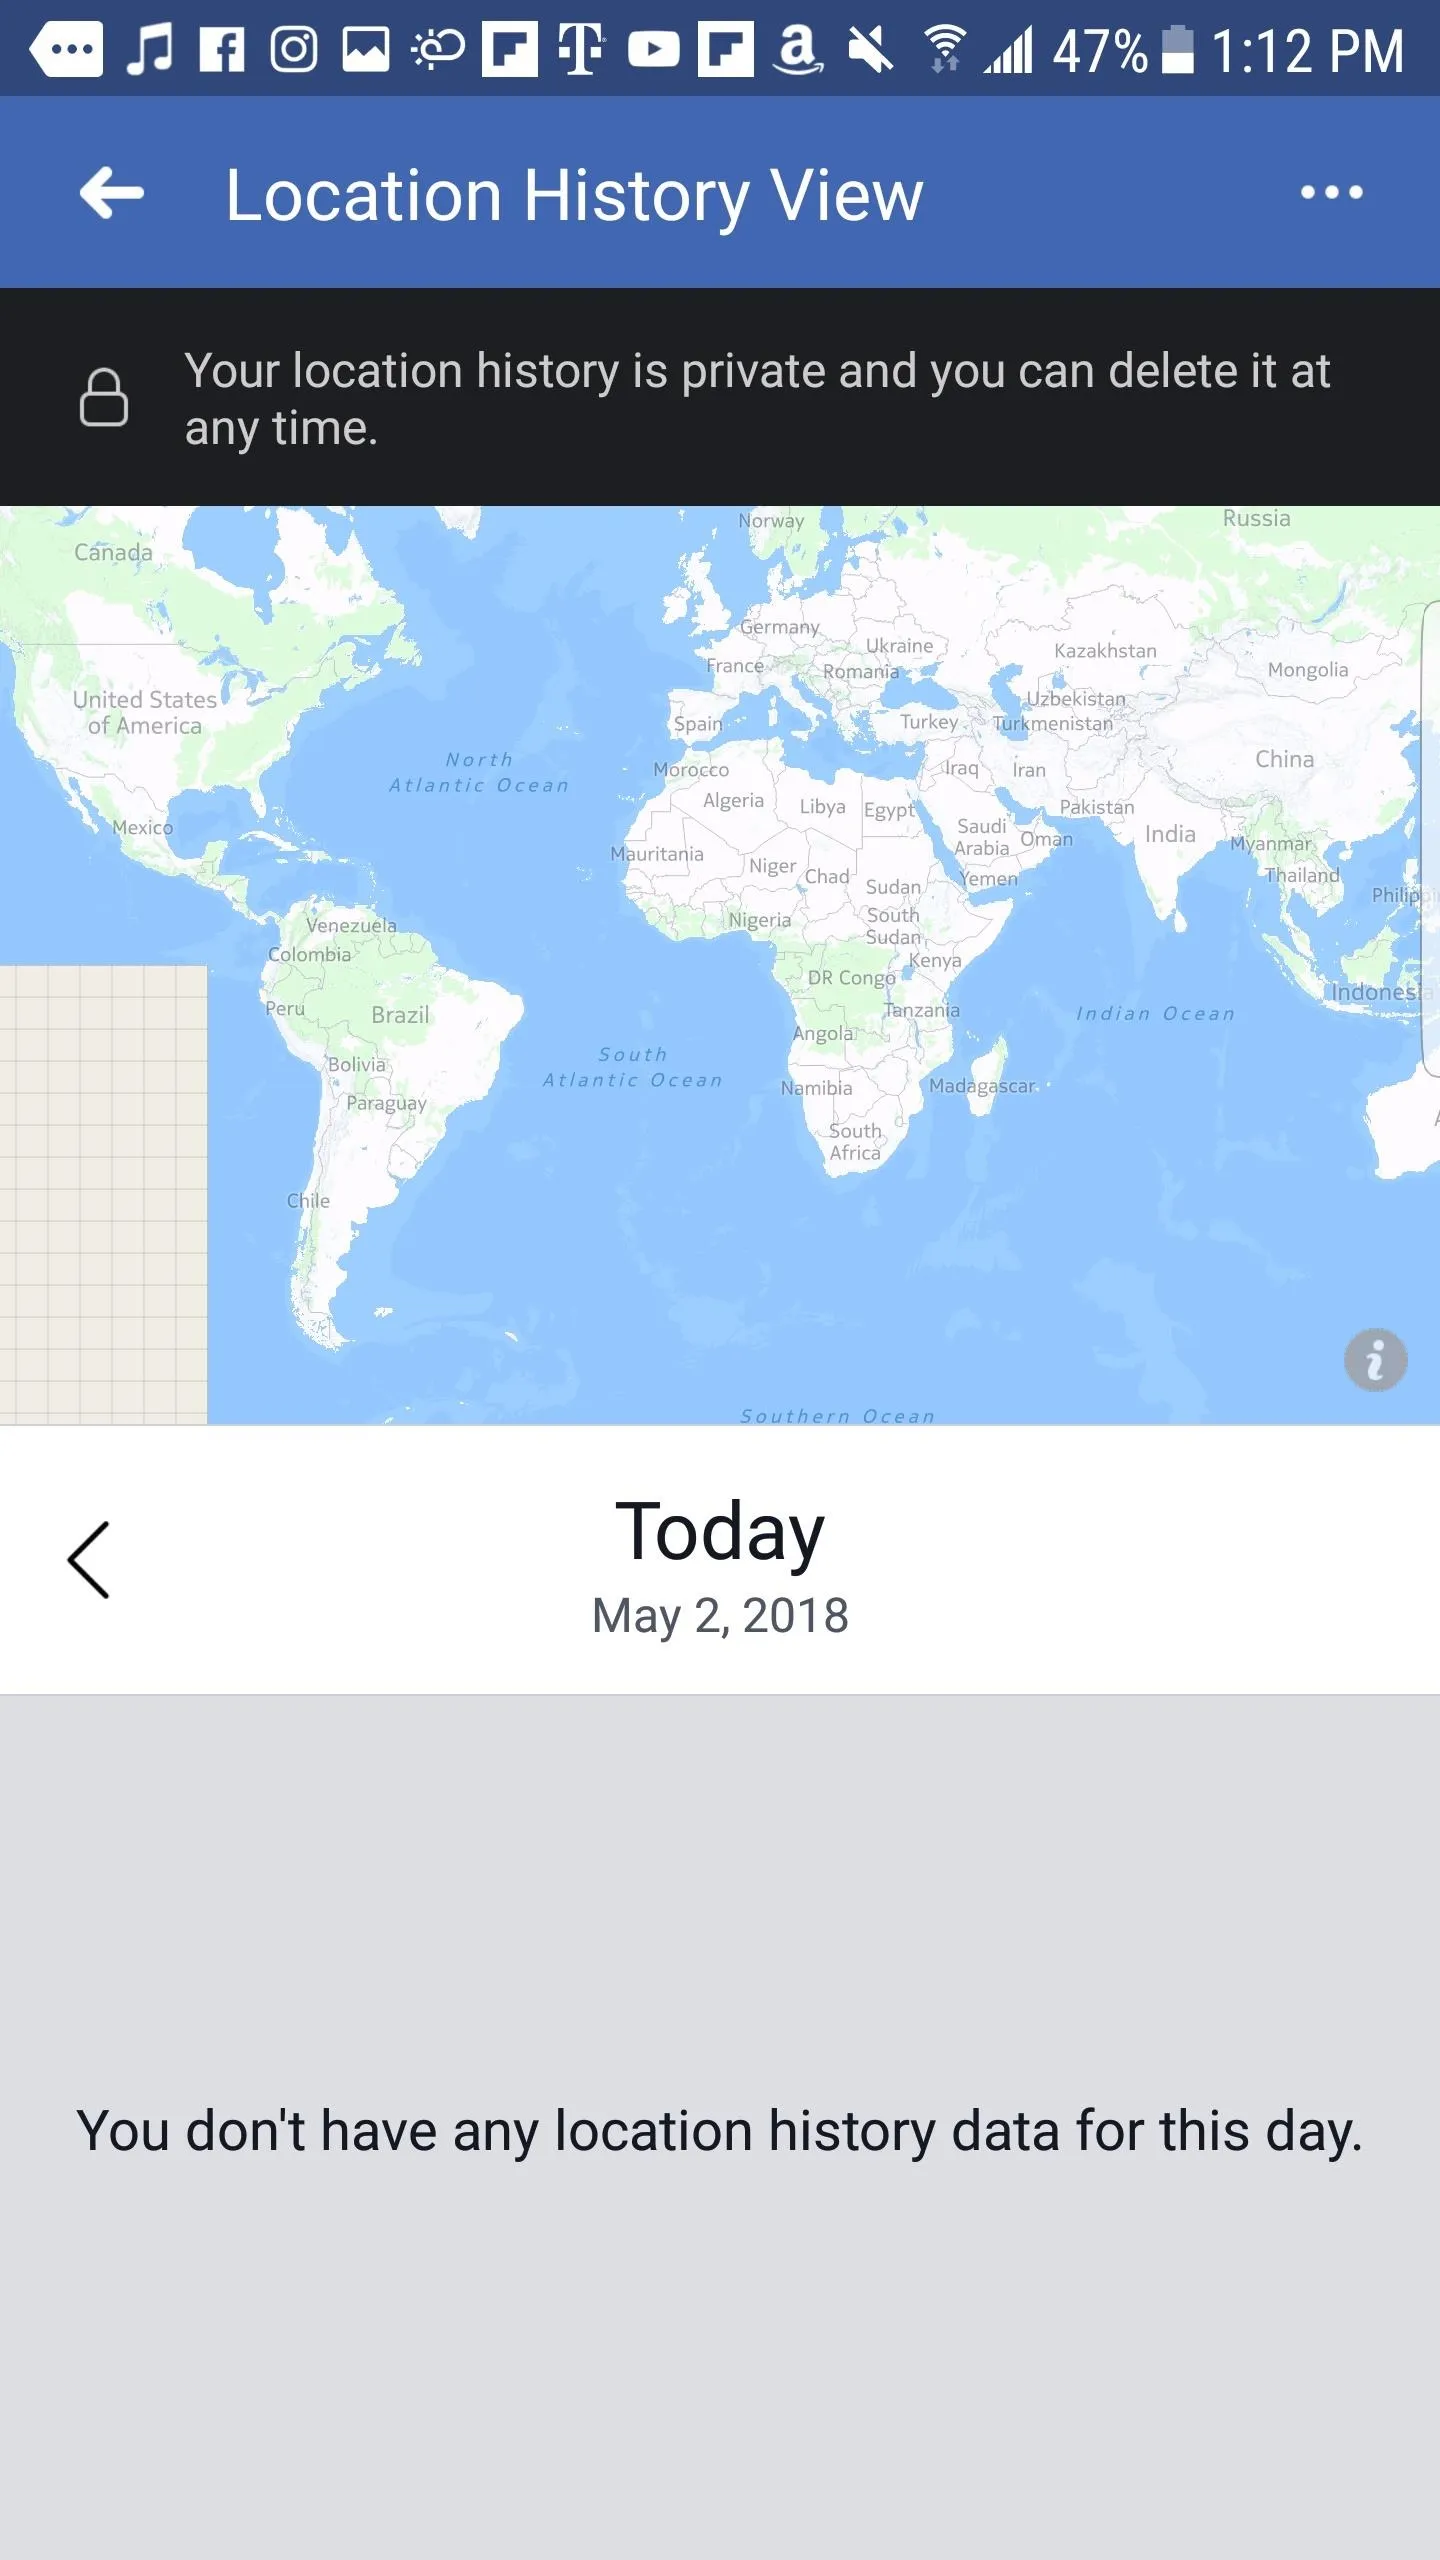
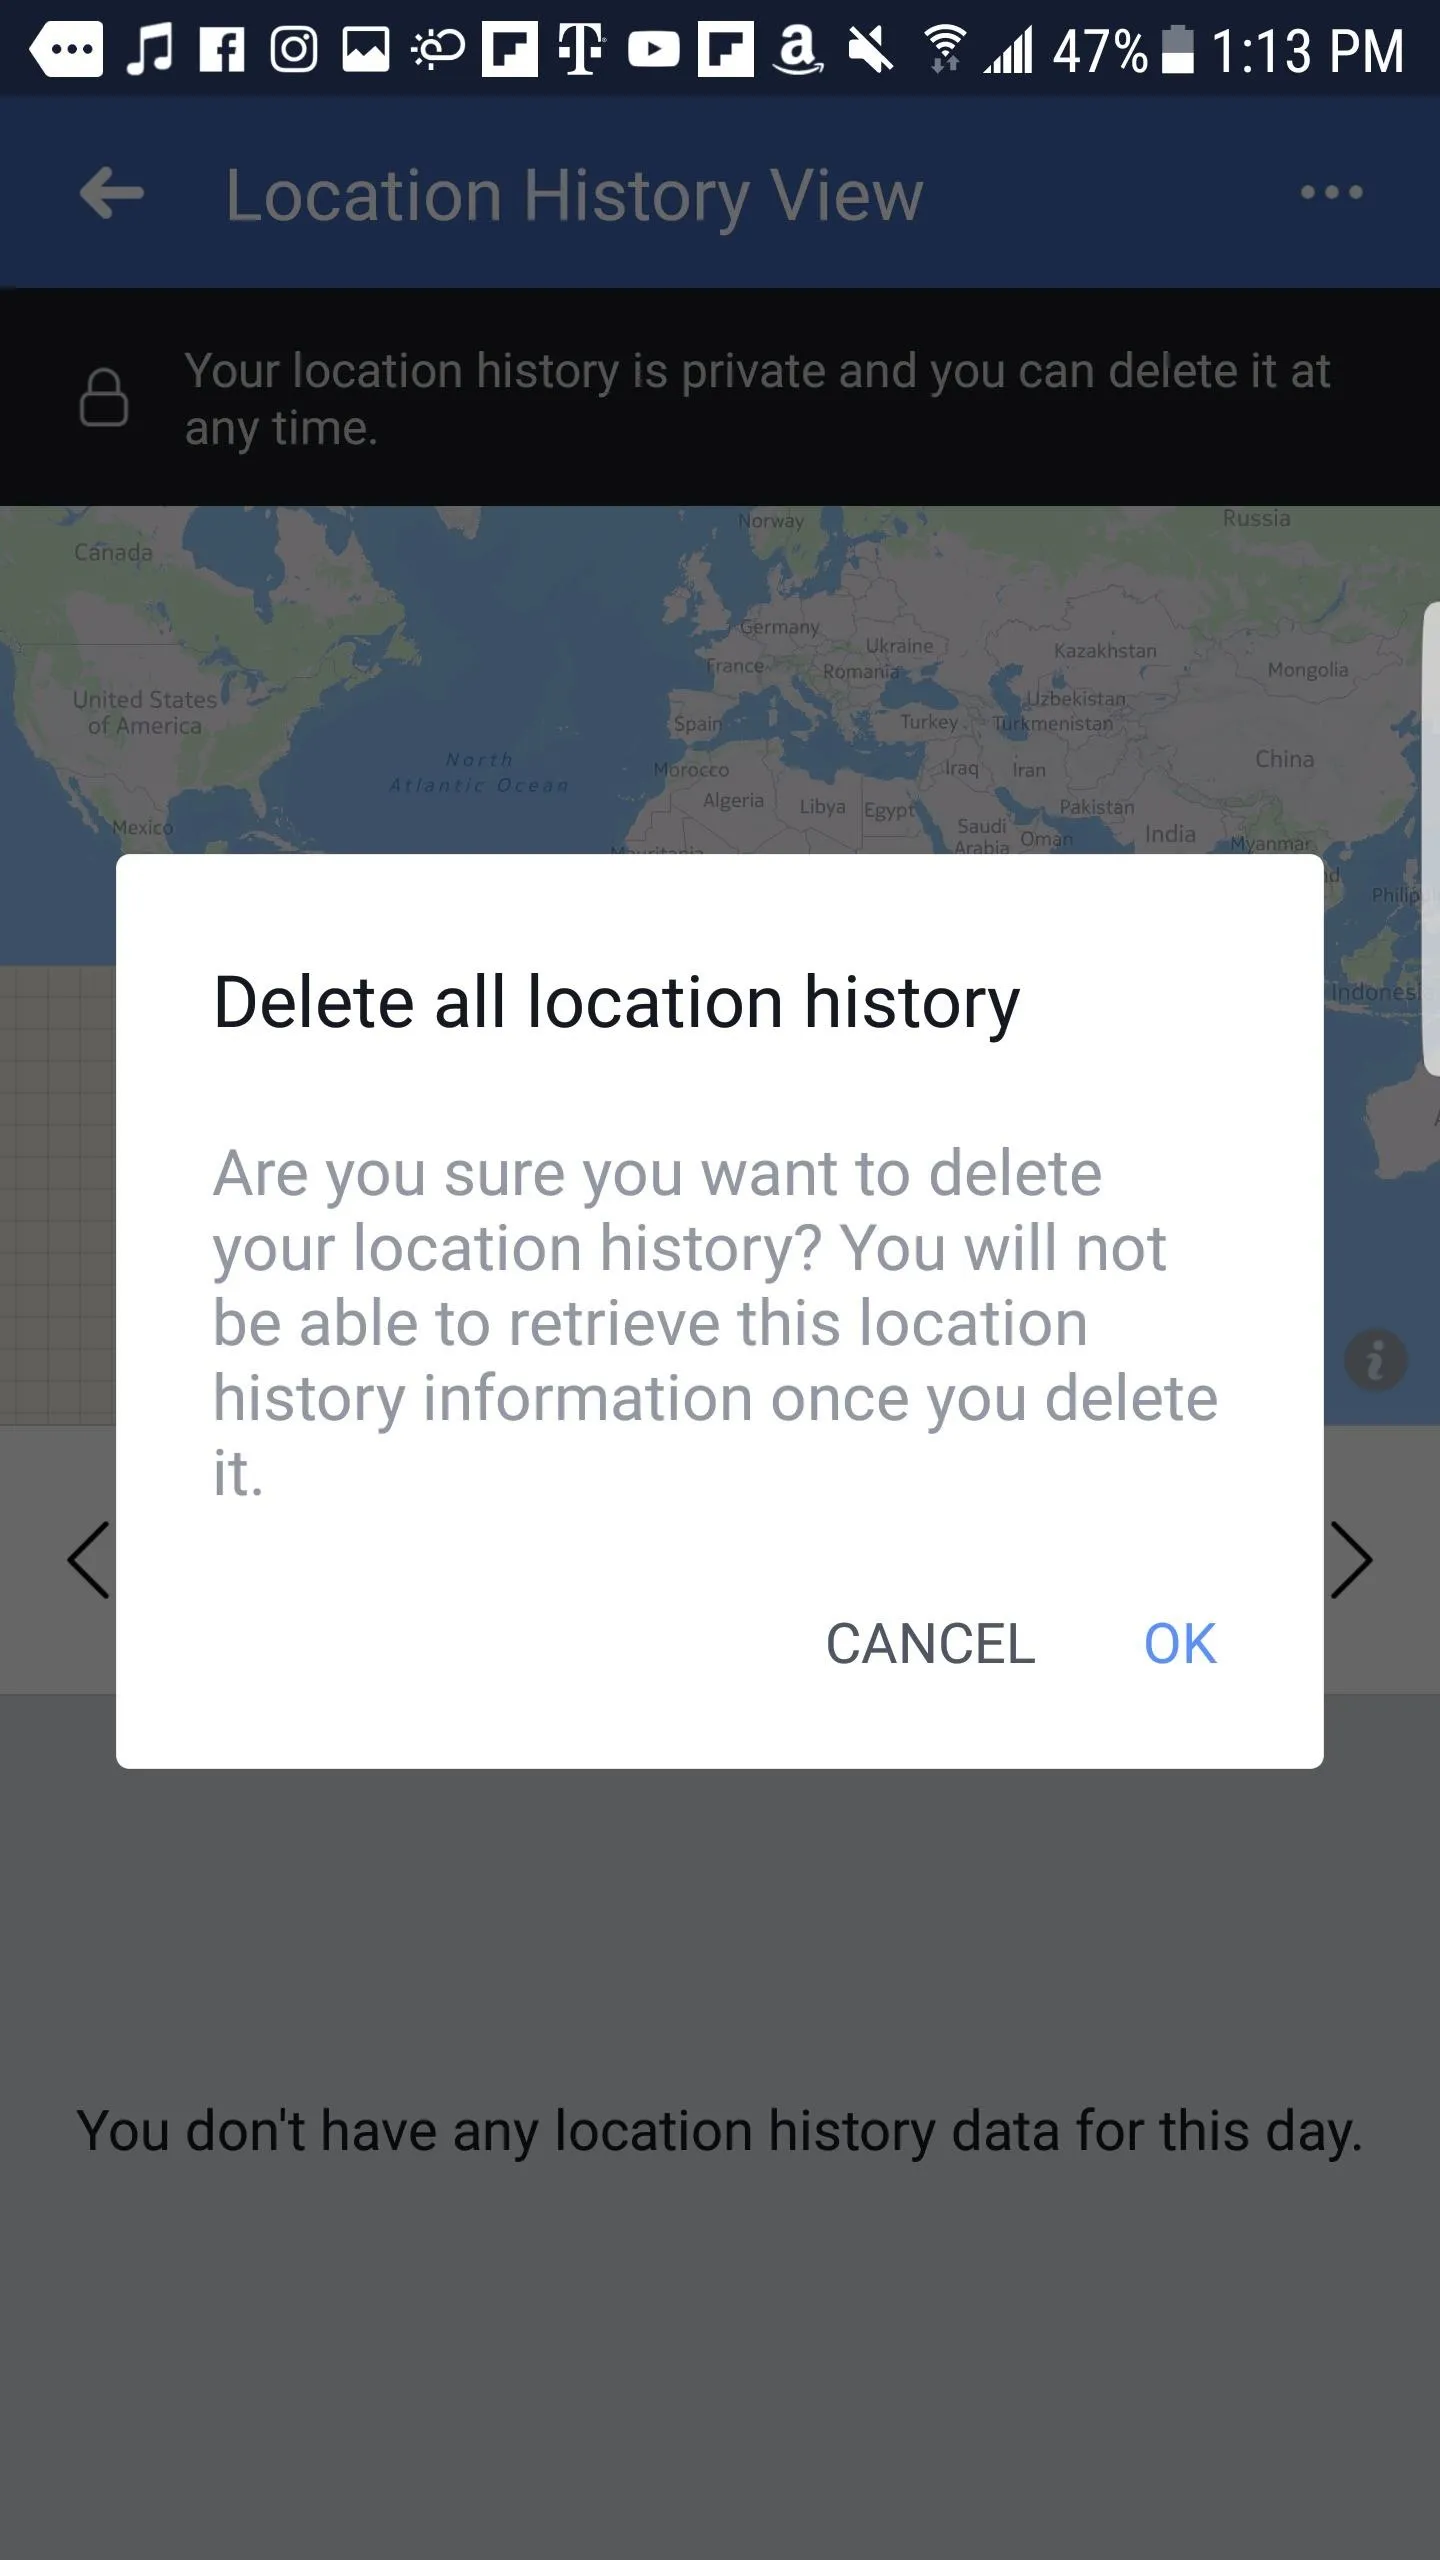
Here, you will see the first page of your location history, which begins on today's date. If you have location services enabled for Facebook, you'll see your current location in the map view in the middle of the display.
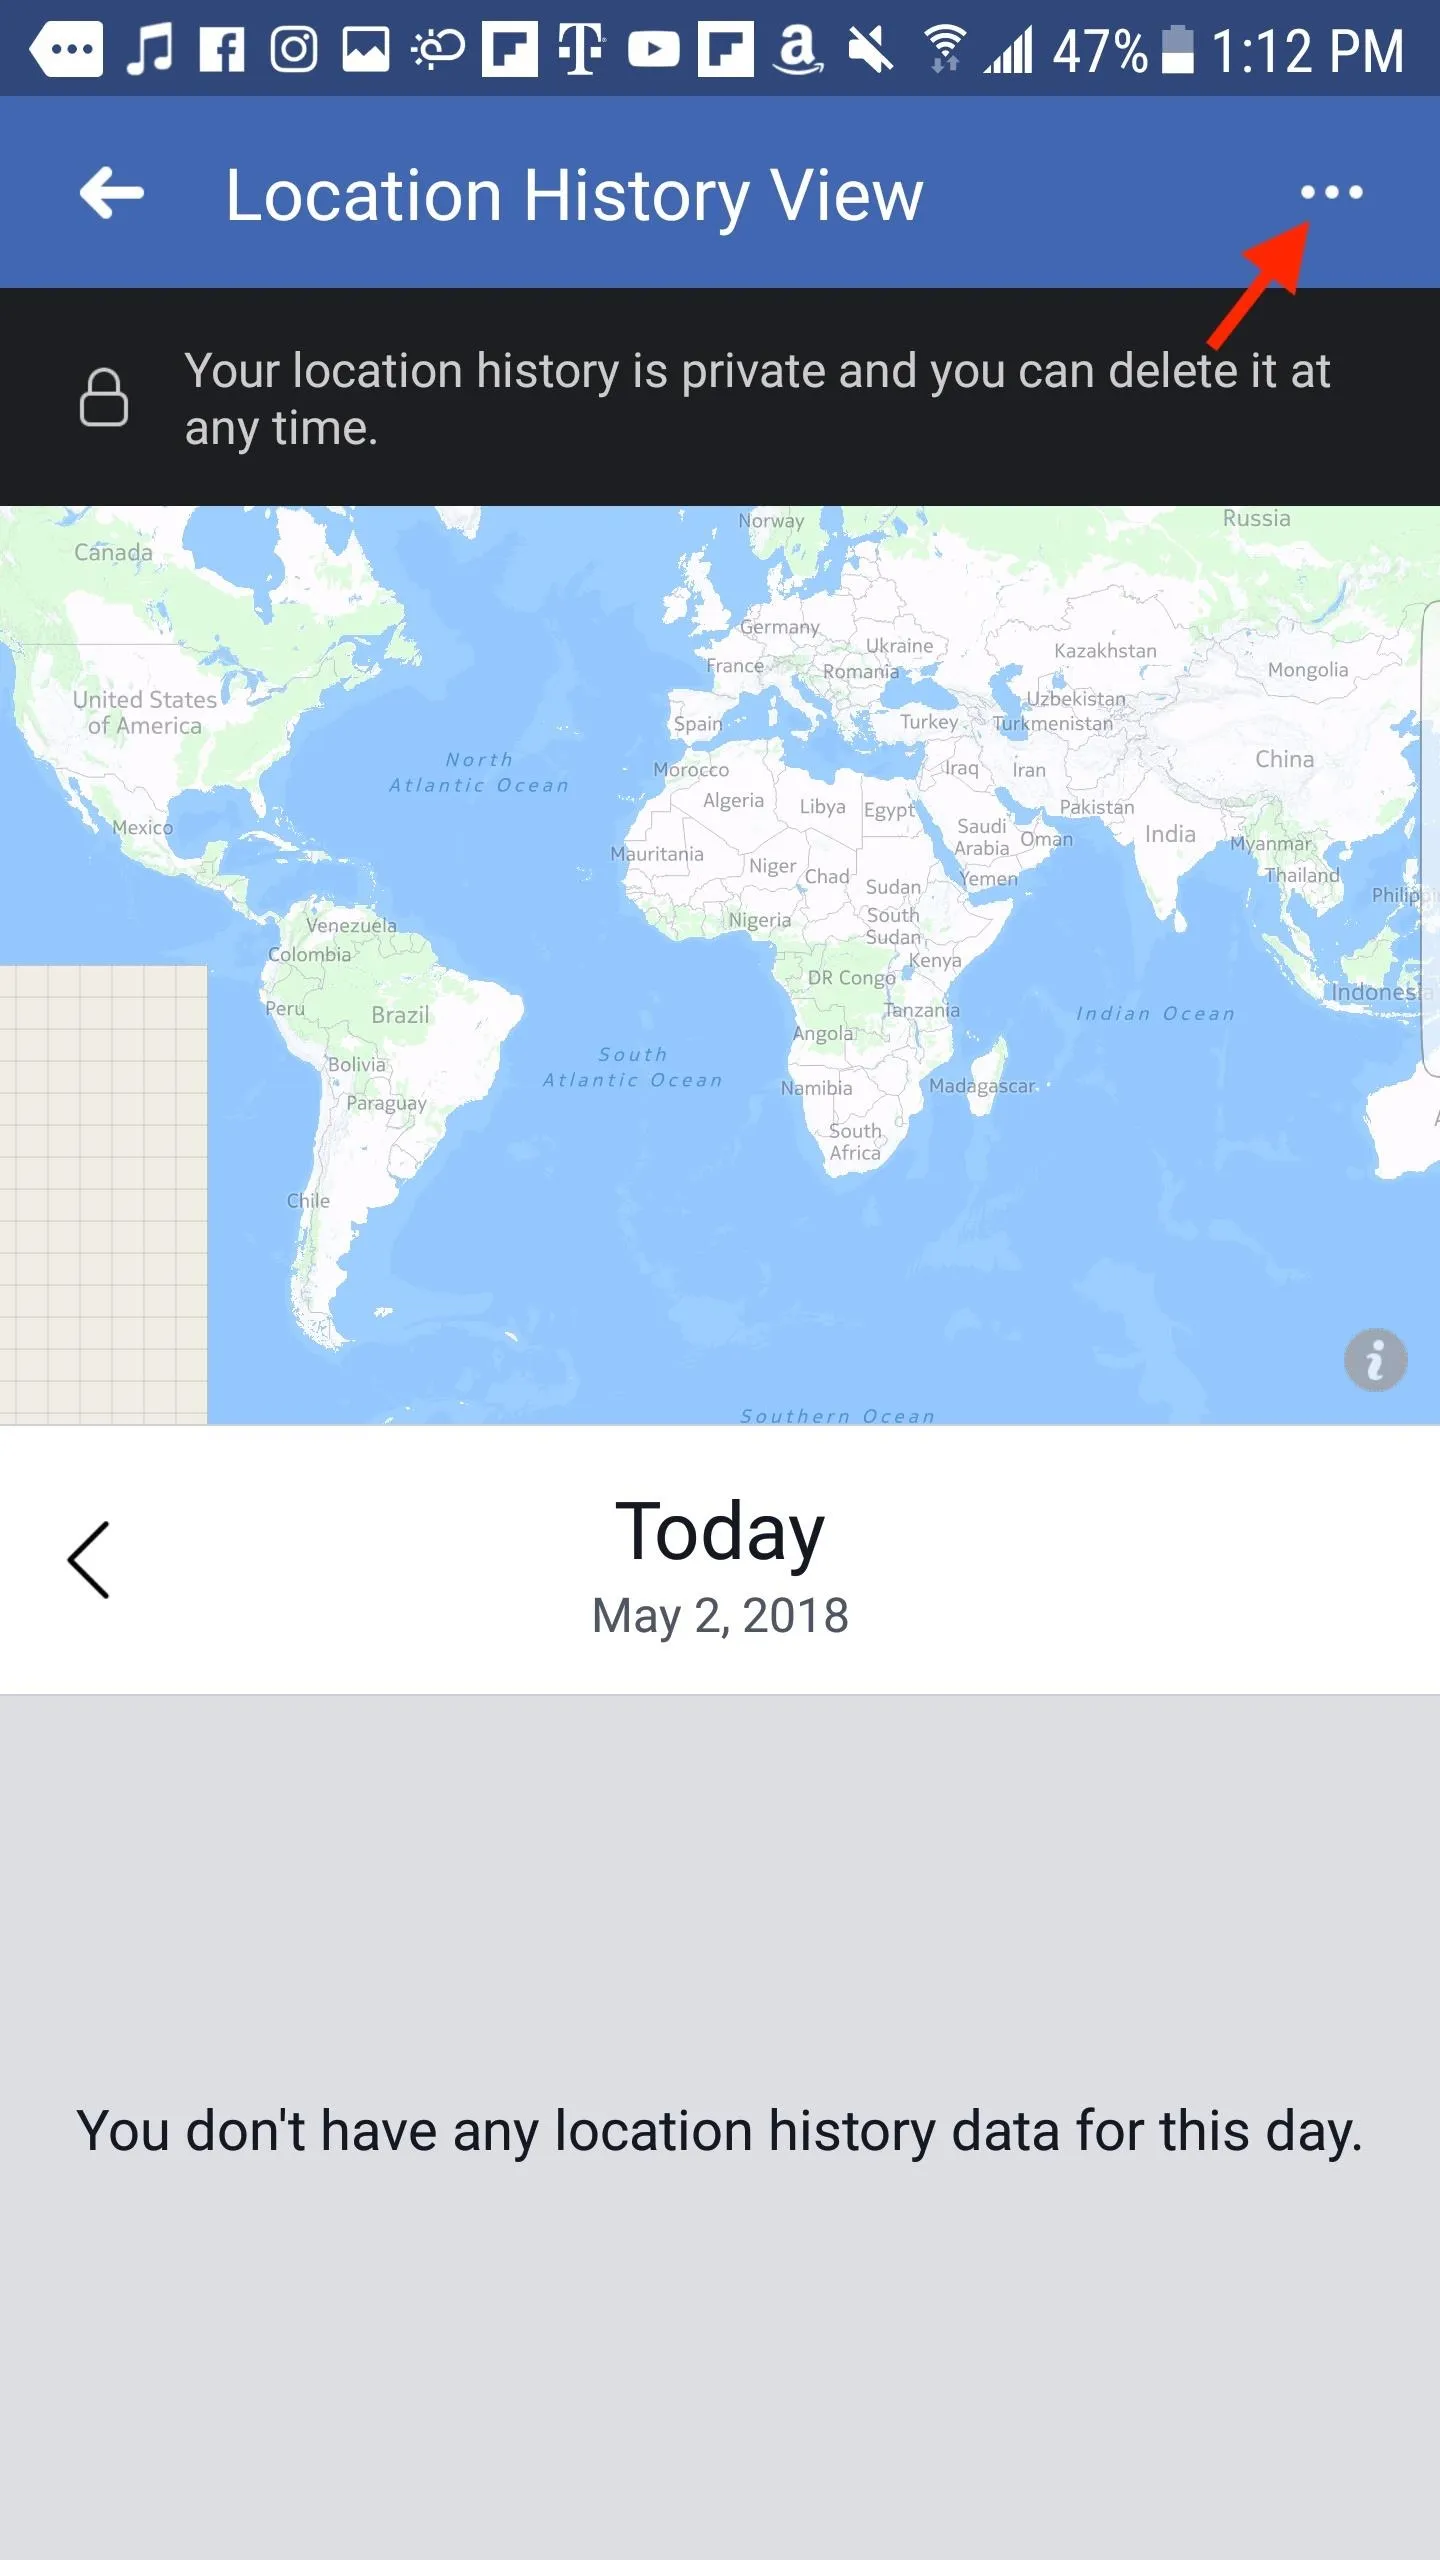
If Facebook does not have location data for you for a specific date, you will see "You don't have any location history data for this day." However, if you do, you will see the logs in this same area. Tap on each, and Facebook will show you in the map viewer where it recorded your location.
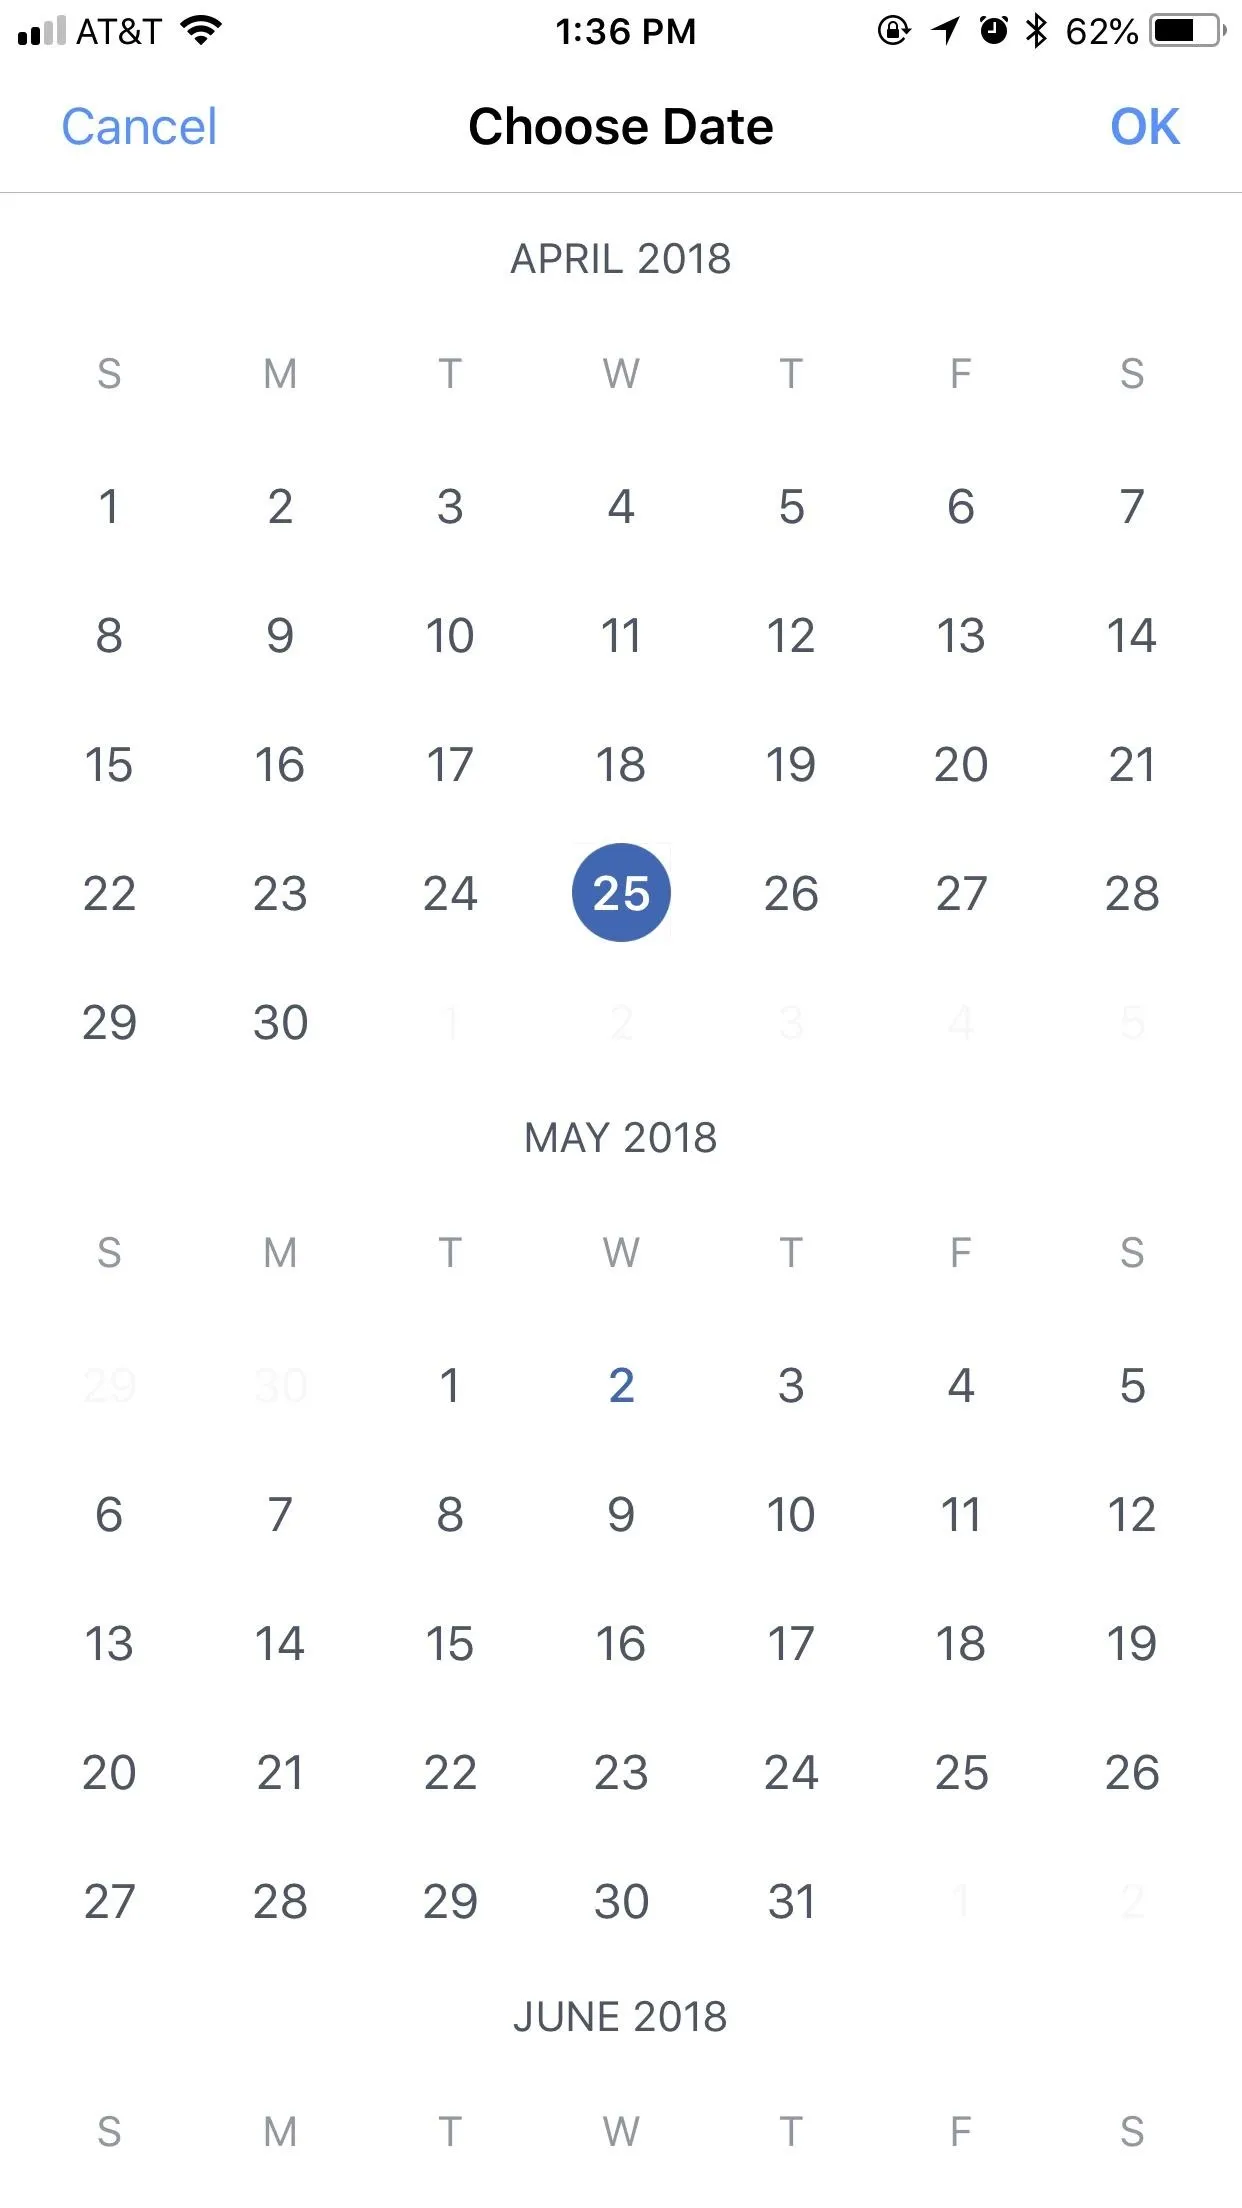
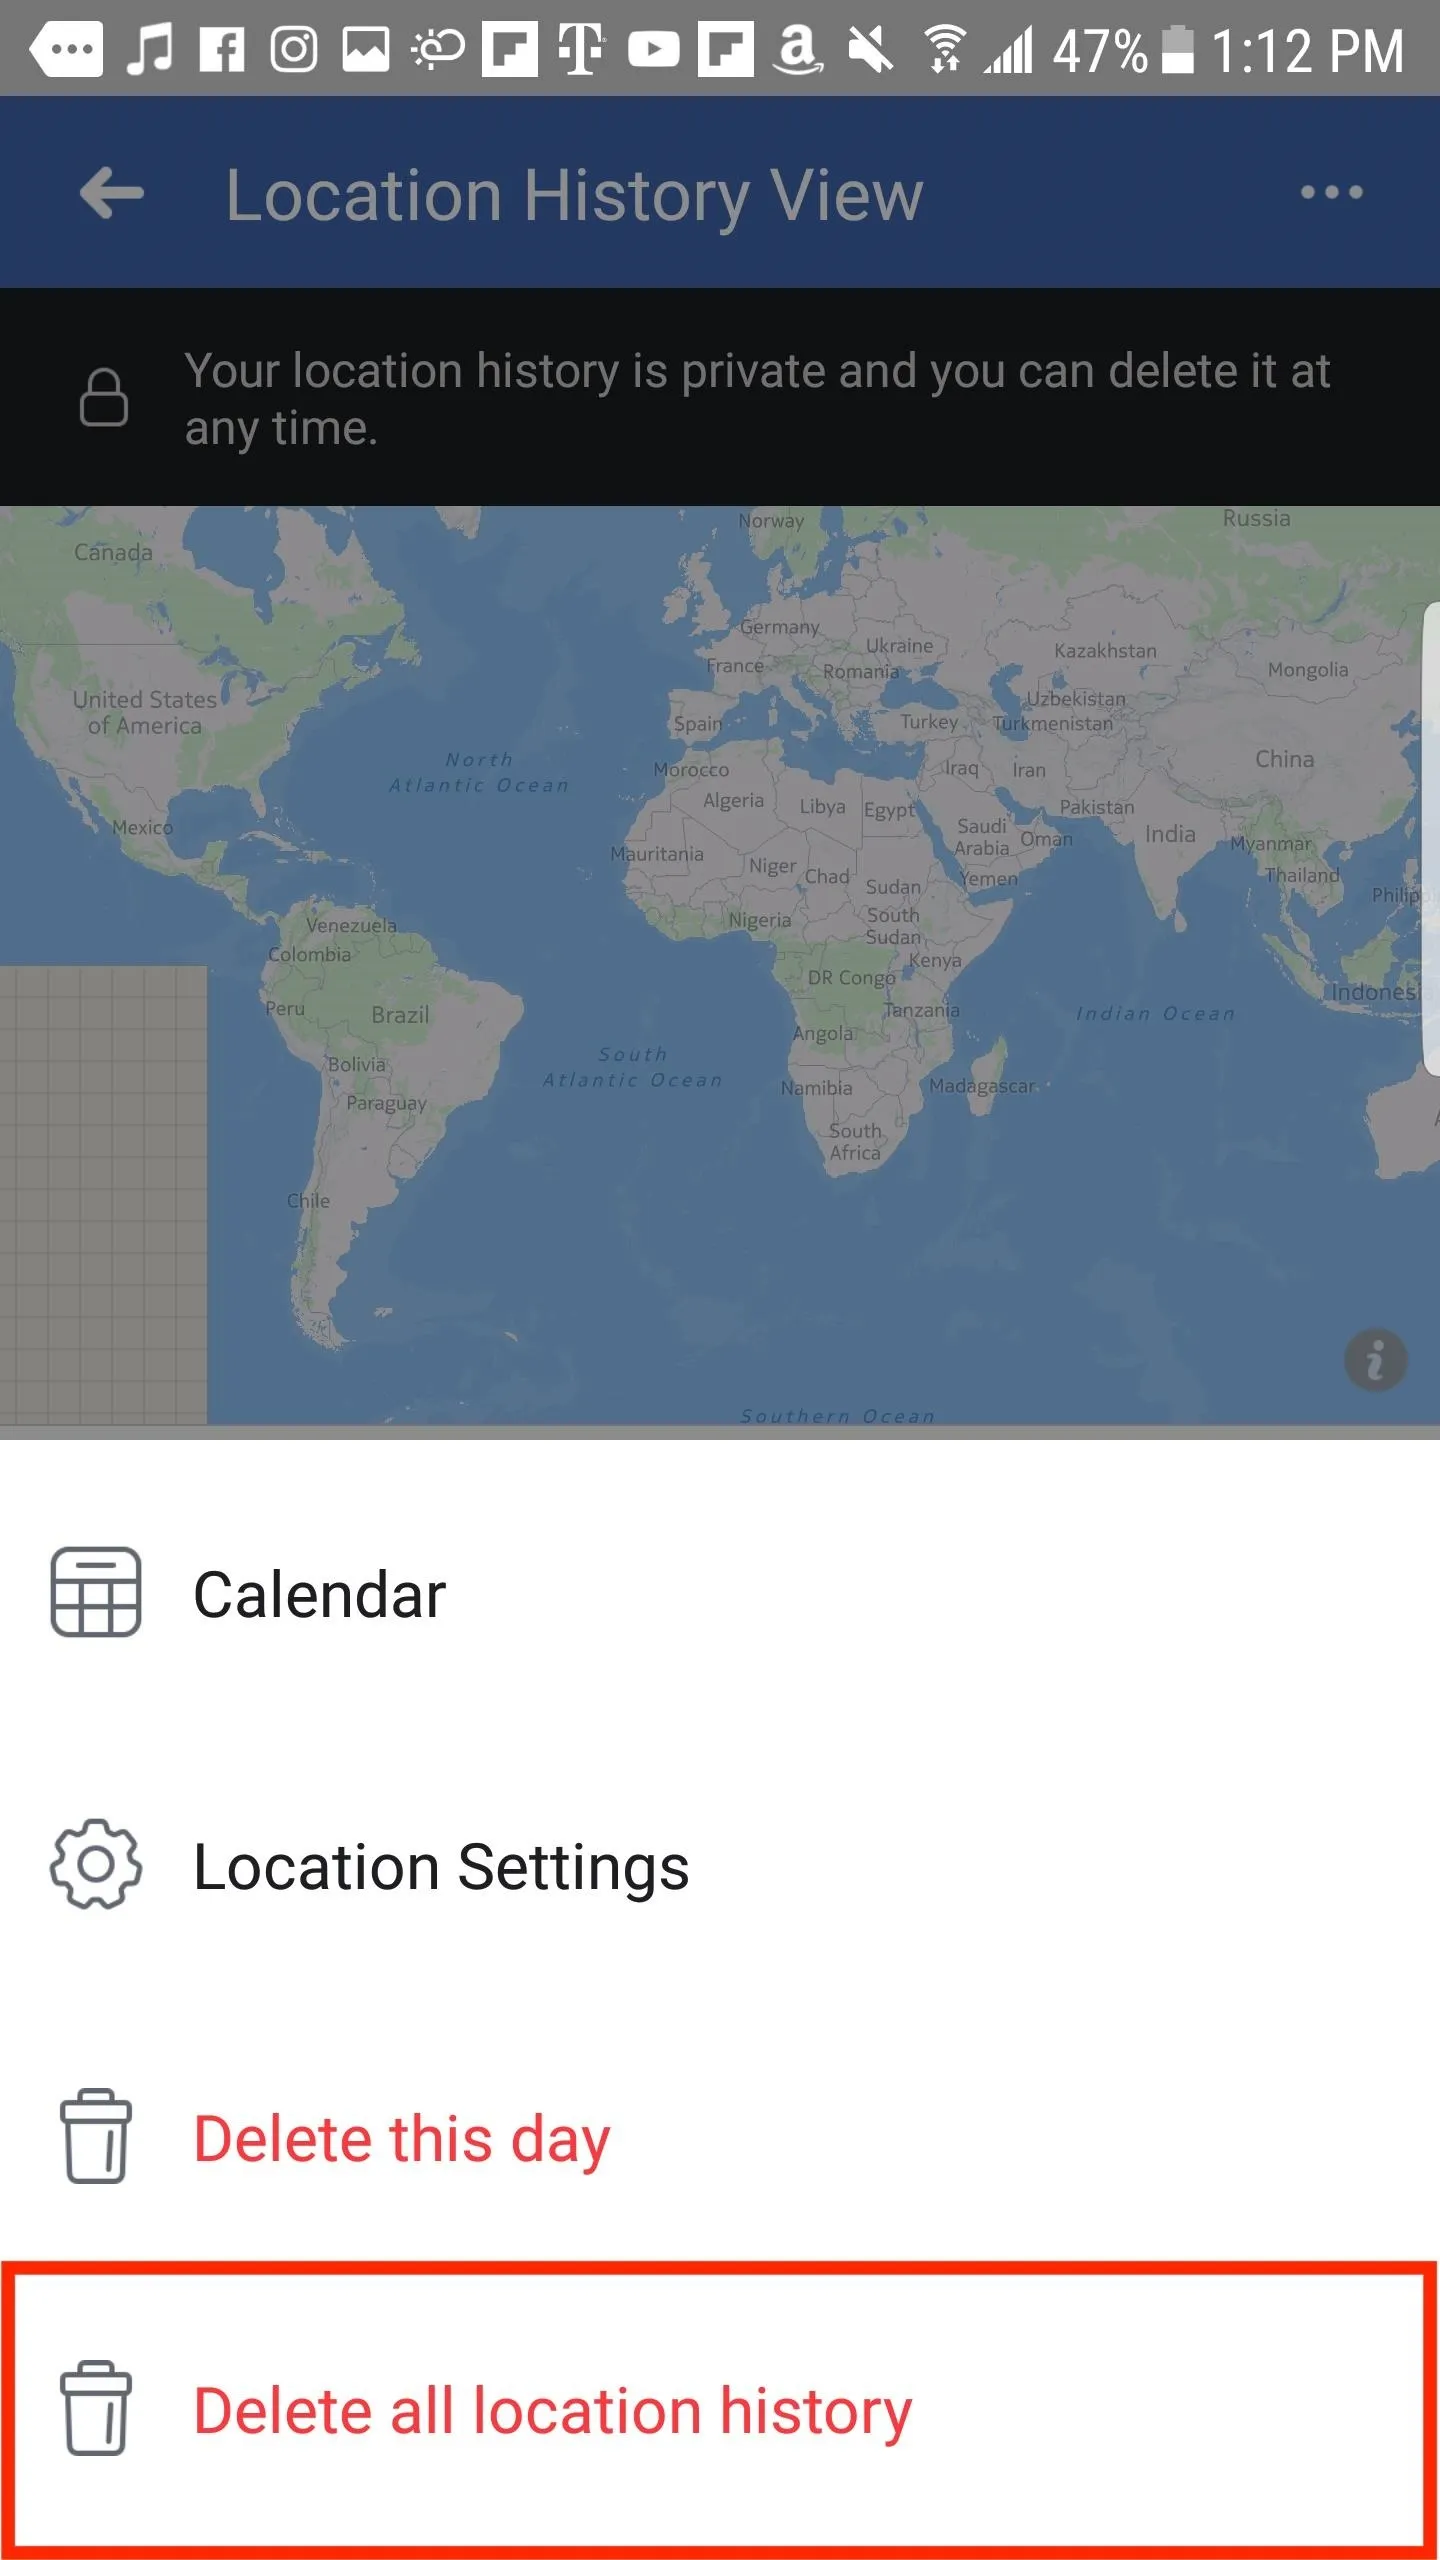
You can move day by day by tapping on the arrow on the "Today" line, but you can also quickly change the date by tapping the calendar icon (on iOS) or tapping the ellipsis (•••) in the top right corner of the display, then "Calendar." Choose a date from the calendar view, then tap "OK."

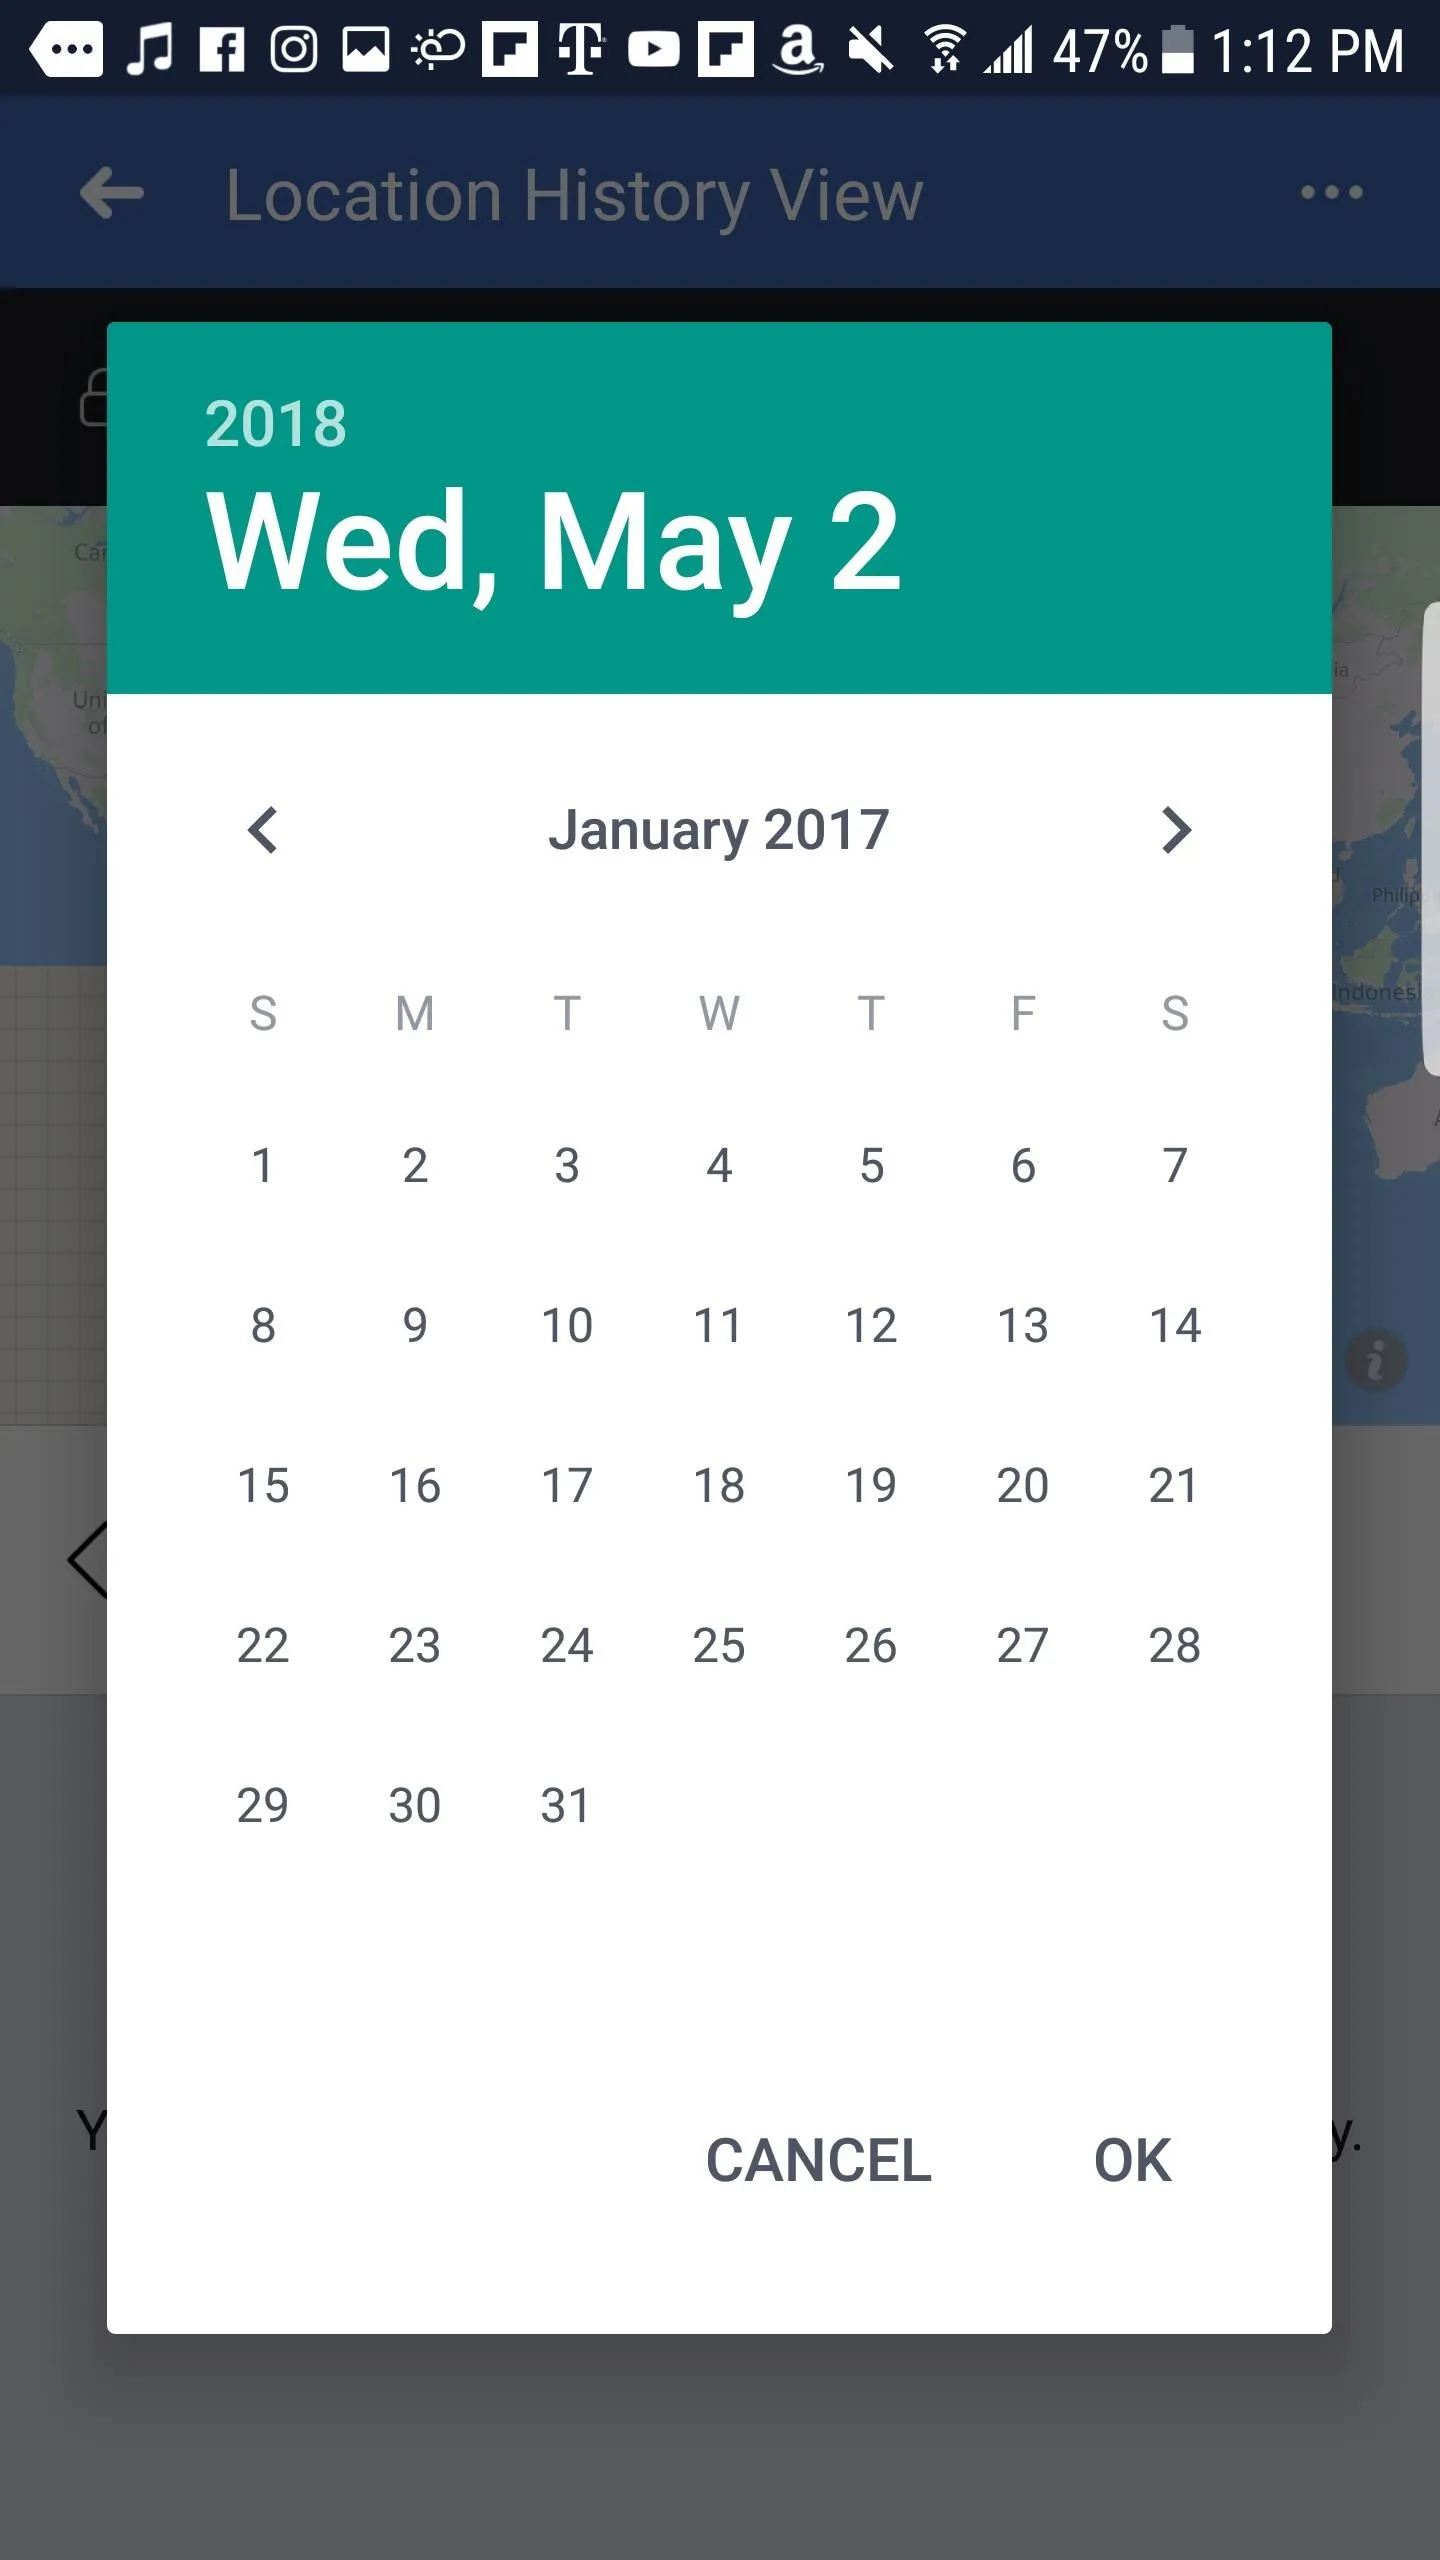
On Android, you can go back as old as your account is in the calendar, while on iOS, you can only go back one year. If you want to see further back, sign in on a computer or use an Android device instead.
Clear Your Location History
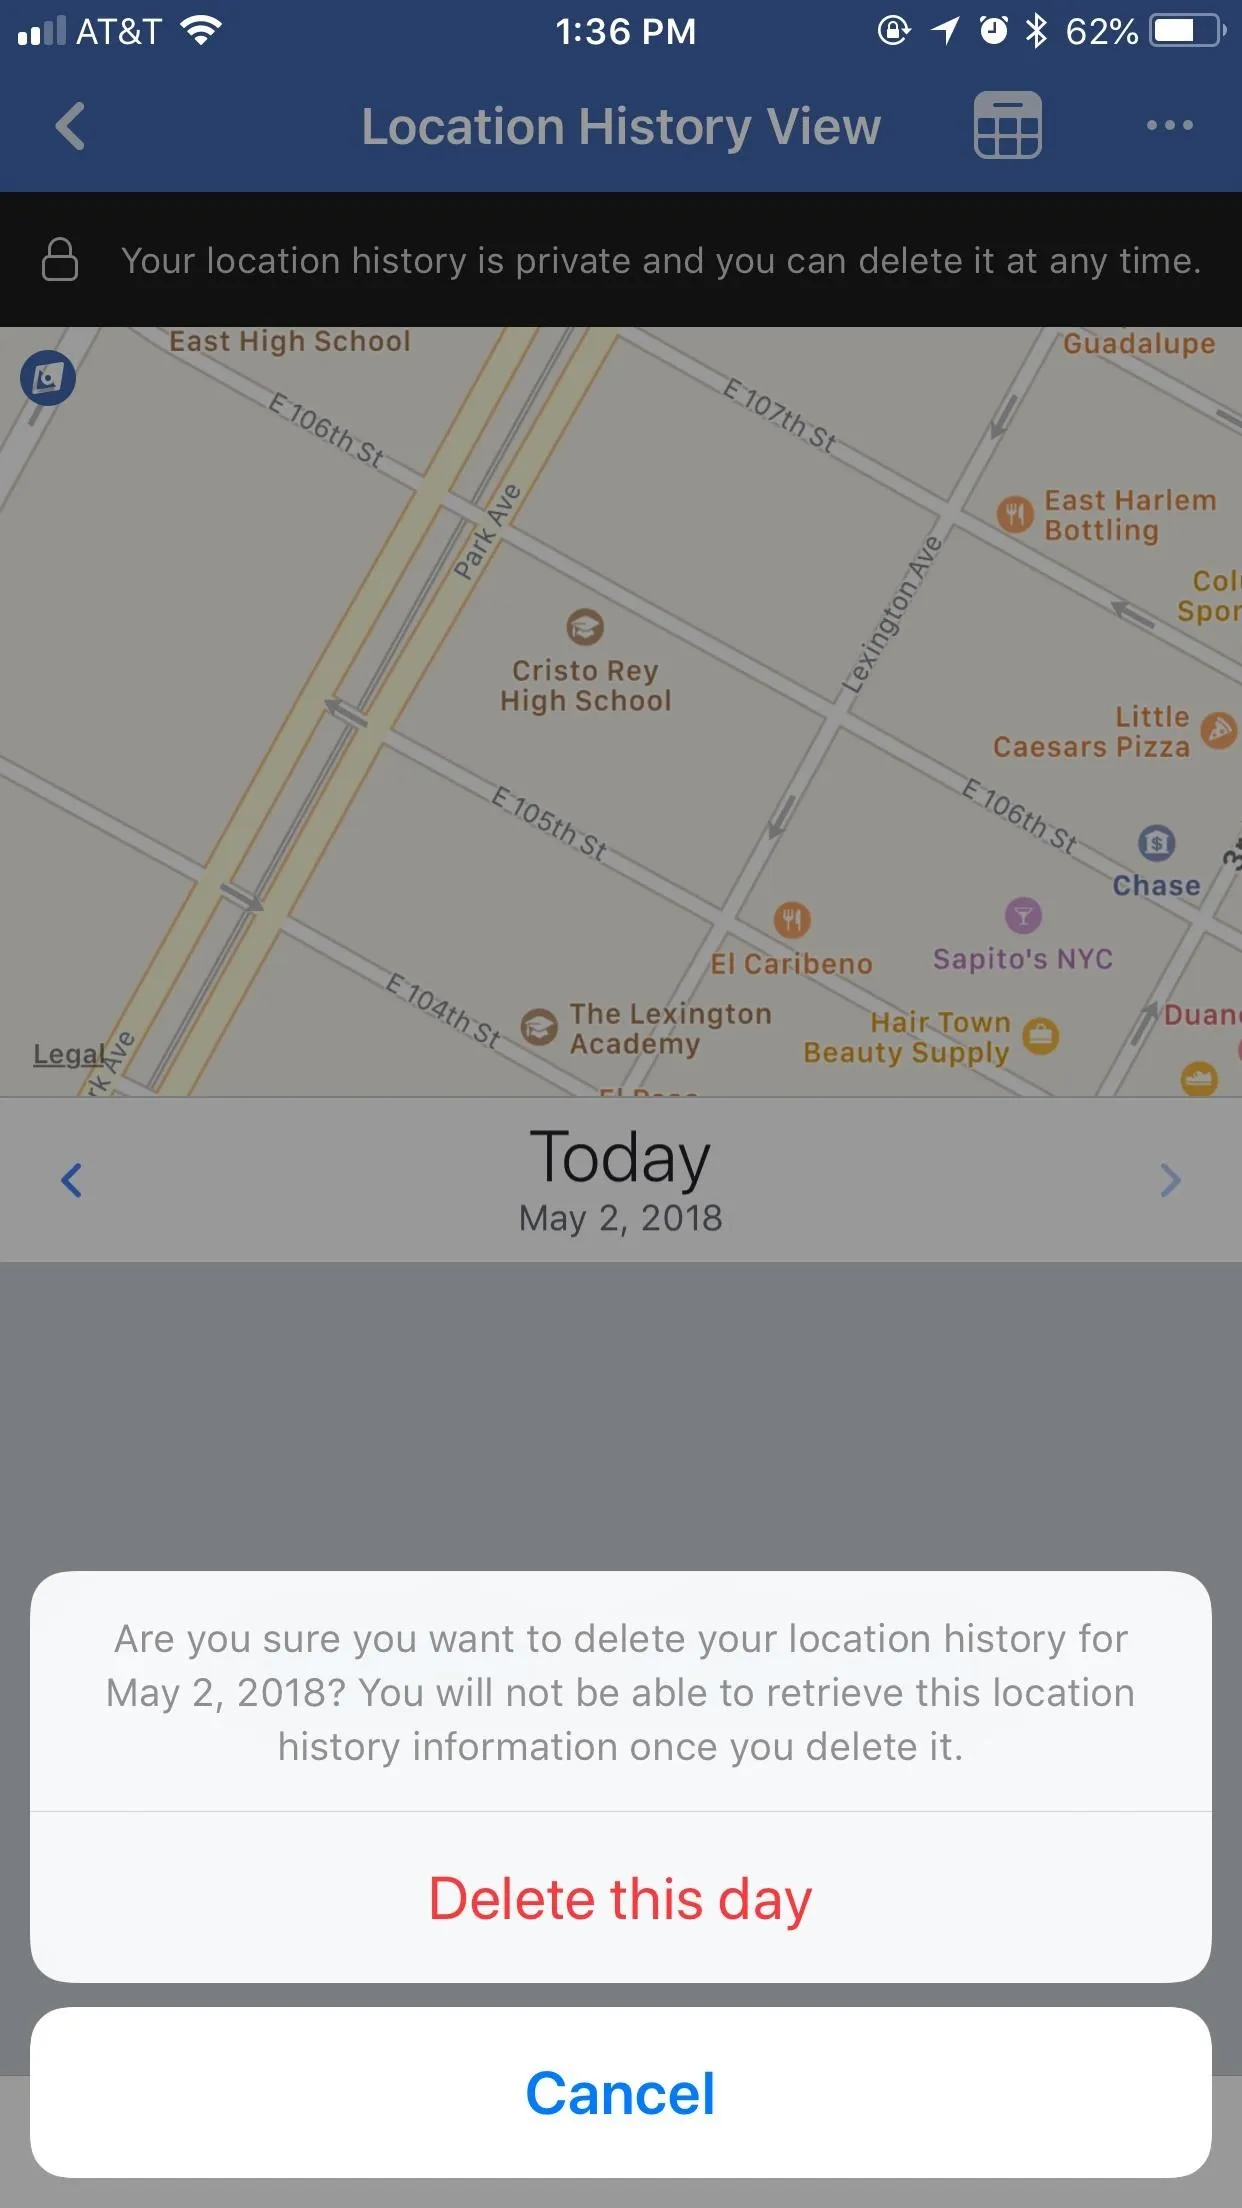
If you decide you'd rather not have Facebook store your location, it's simple to clear. To delete the location data for any particular day, select that day in the calendar. Then, tap the ellipsis (•••) in the top right, and tap "Delete this day." Facebook will ask if you're sure you want to delete this data. Confirm you do, and that day's location history will be cleared. Unfortunately, you cannot delete individual logs themselves.
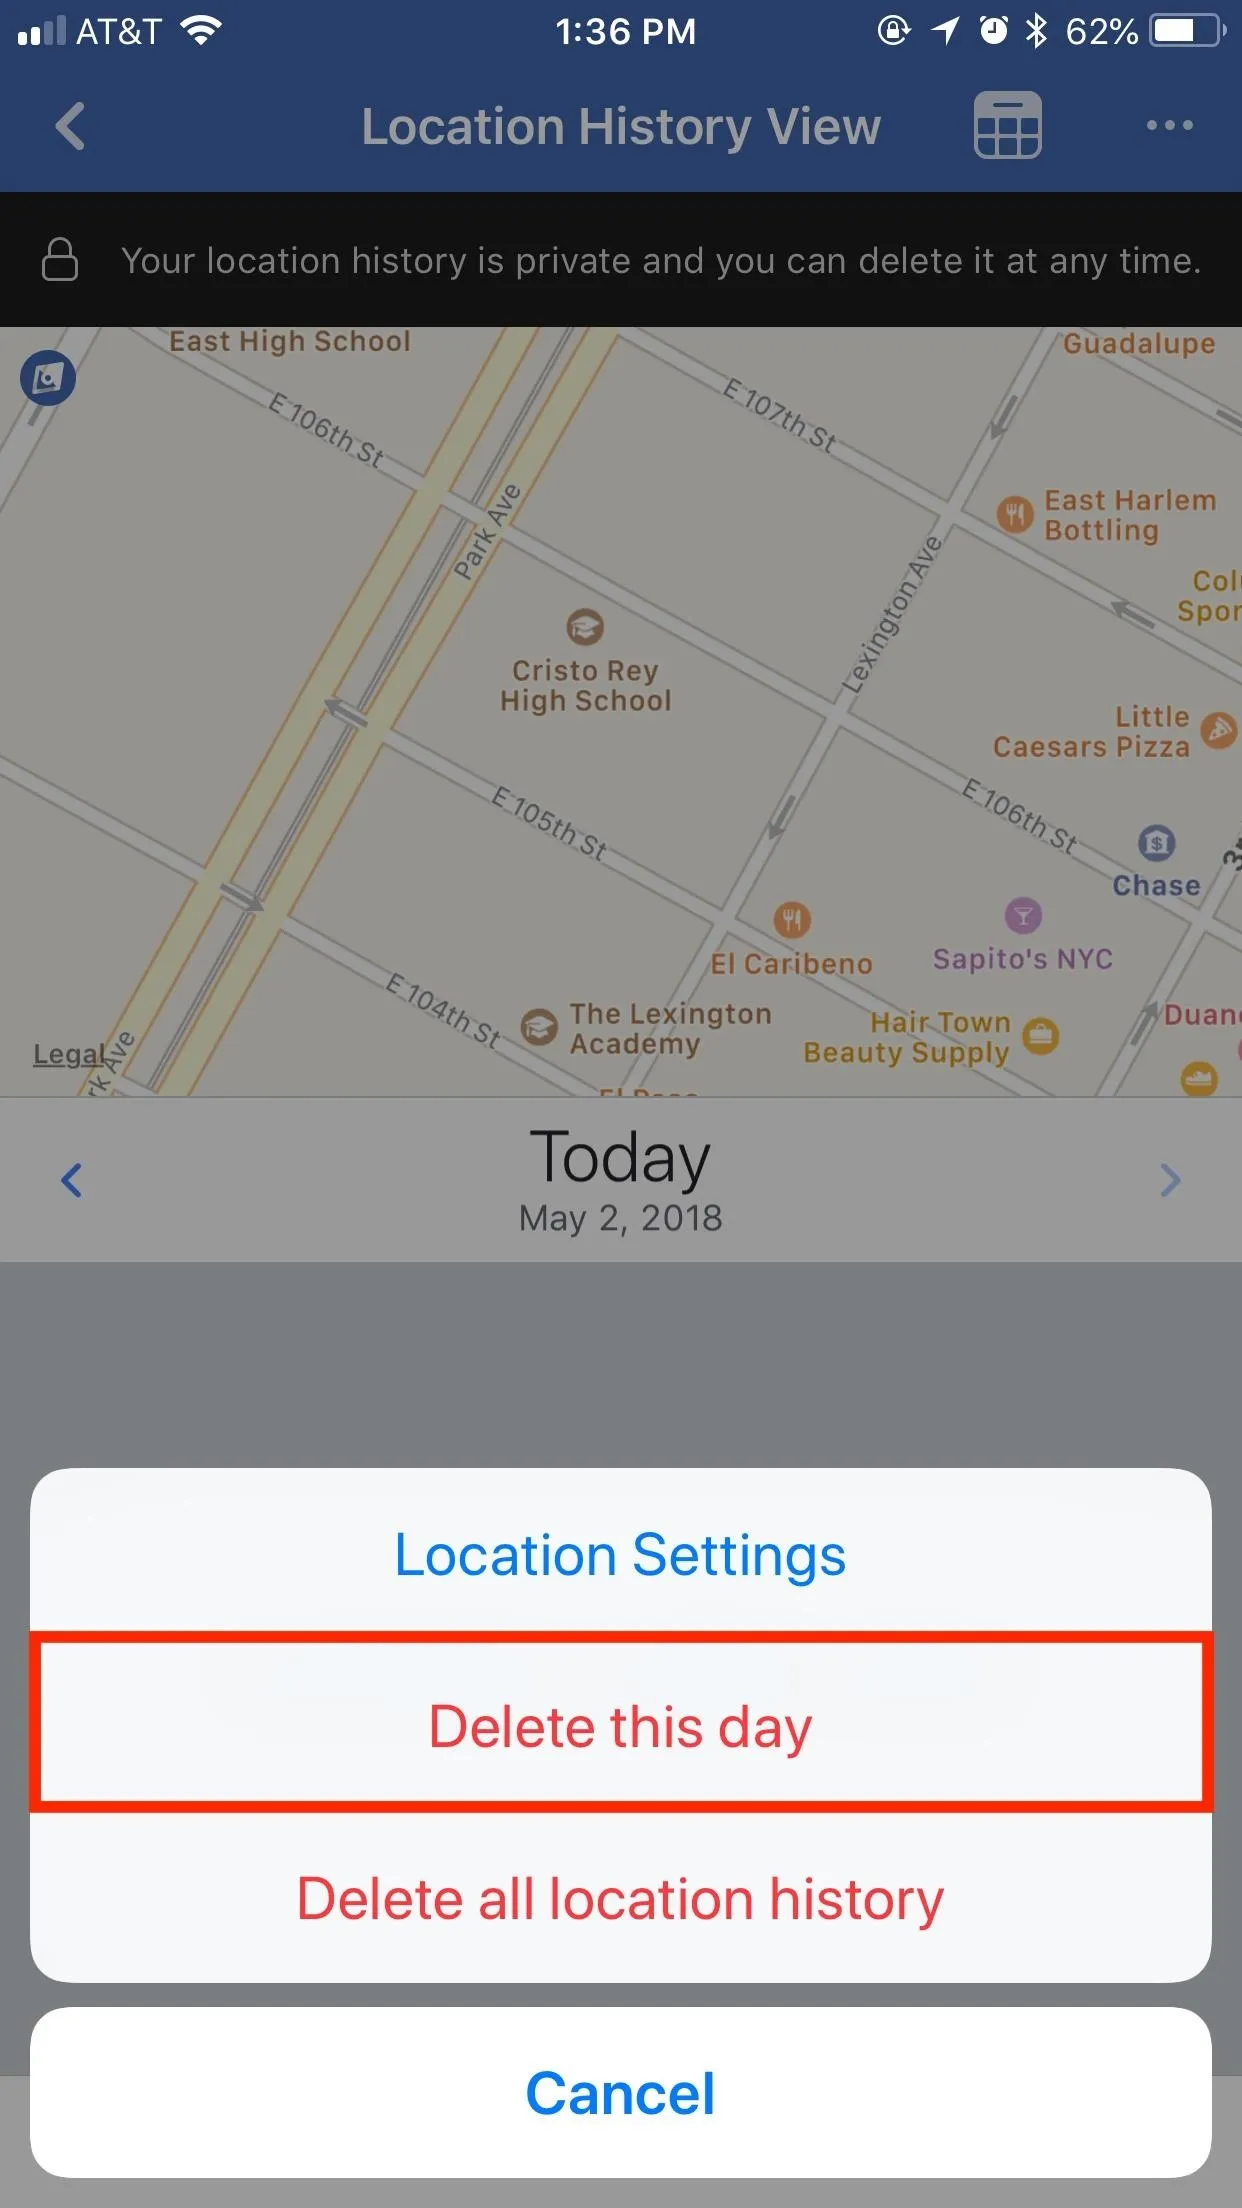
If you'd like to go the extra mile and delete all of your saved location data, that's just as easy. On whichever date you happen to be on, tap the ellipsis (•••), then tap "Delete all location history." When prompted, tap either "Delete all location history" (on iOS) or "OK" (on Android), and Facebook will clear all of it for you.
That's all there is to it. Just make sure "Location History" remains disabled before leaving these settings. Otherwise, Facebook will continue to track your location.
- Follow Gadget Hacks on Facebook, Twitter, YouTube, and Flipboard
- Follow WonderHowTo on Facebook, Twitter, Pinterest, and Flipboard
Cover image and screenshots by Jake Peterson/Gadget Hacks


Comments
Be the first, drop a comment!