


Before you go ahead and delete your Facebook — don't lie, you've been thinking about it — consider this. Facebook offers users a wide variety of privacy options to mess with, which can help you find a little control over your information. We're not saying this solves Facebook's privacy crisis, but it might be a more reasonable option than throwing in the towel entirely.
If you've never dived into Facebook's privacy settings before, they're very easy to find. To access all of the following settings, tap the hamburger icon in the bottom-right corner of the display (or top-right on Android and the mobile site), then head to "Account Settings."
Privacy Settings
Under "Account Settings," tap "Privacy." The layout of your privacy settings changes slightly depending on whether you're using the app or the mobile site, but the core items stay the same.
Manage Your Profile
You'll first want to double check who can see what's in your general Facebook profile. Tap "Manage your profile" and Facebook will take you to yours.
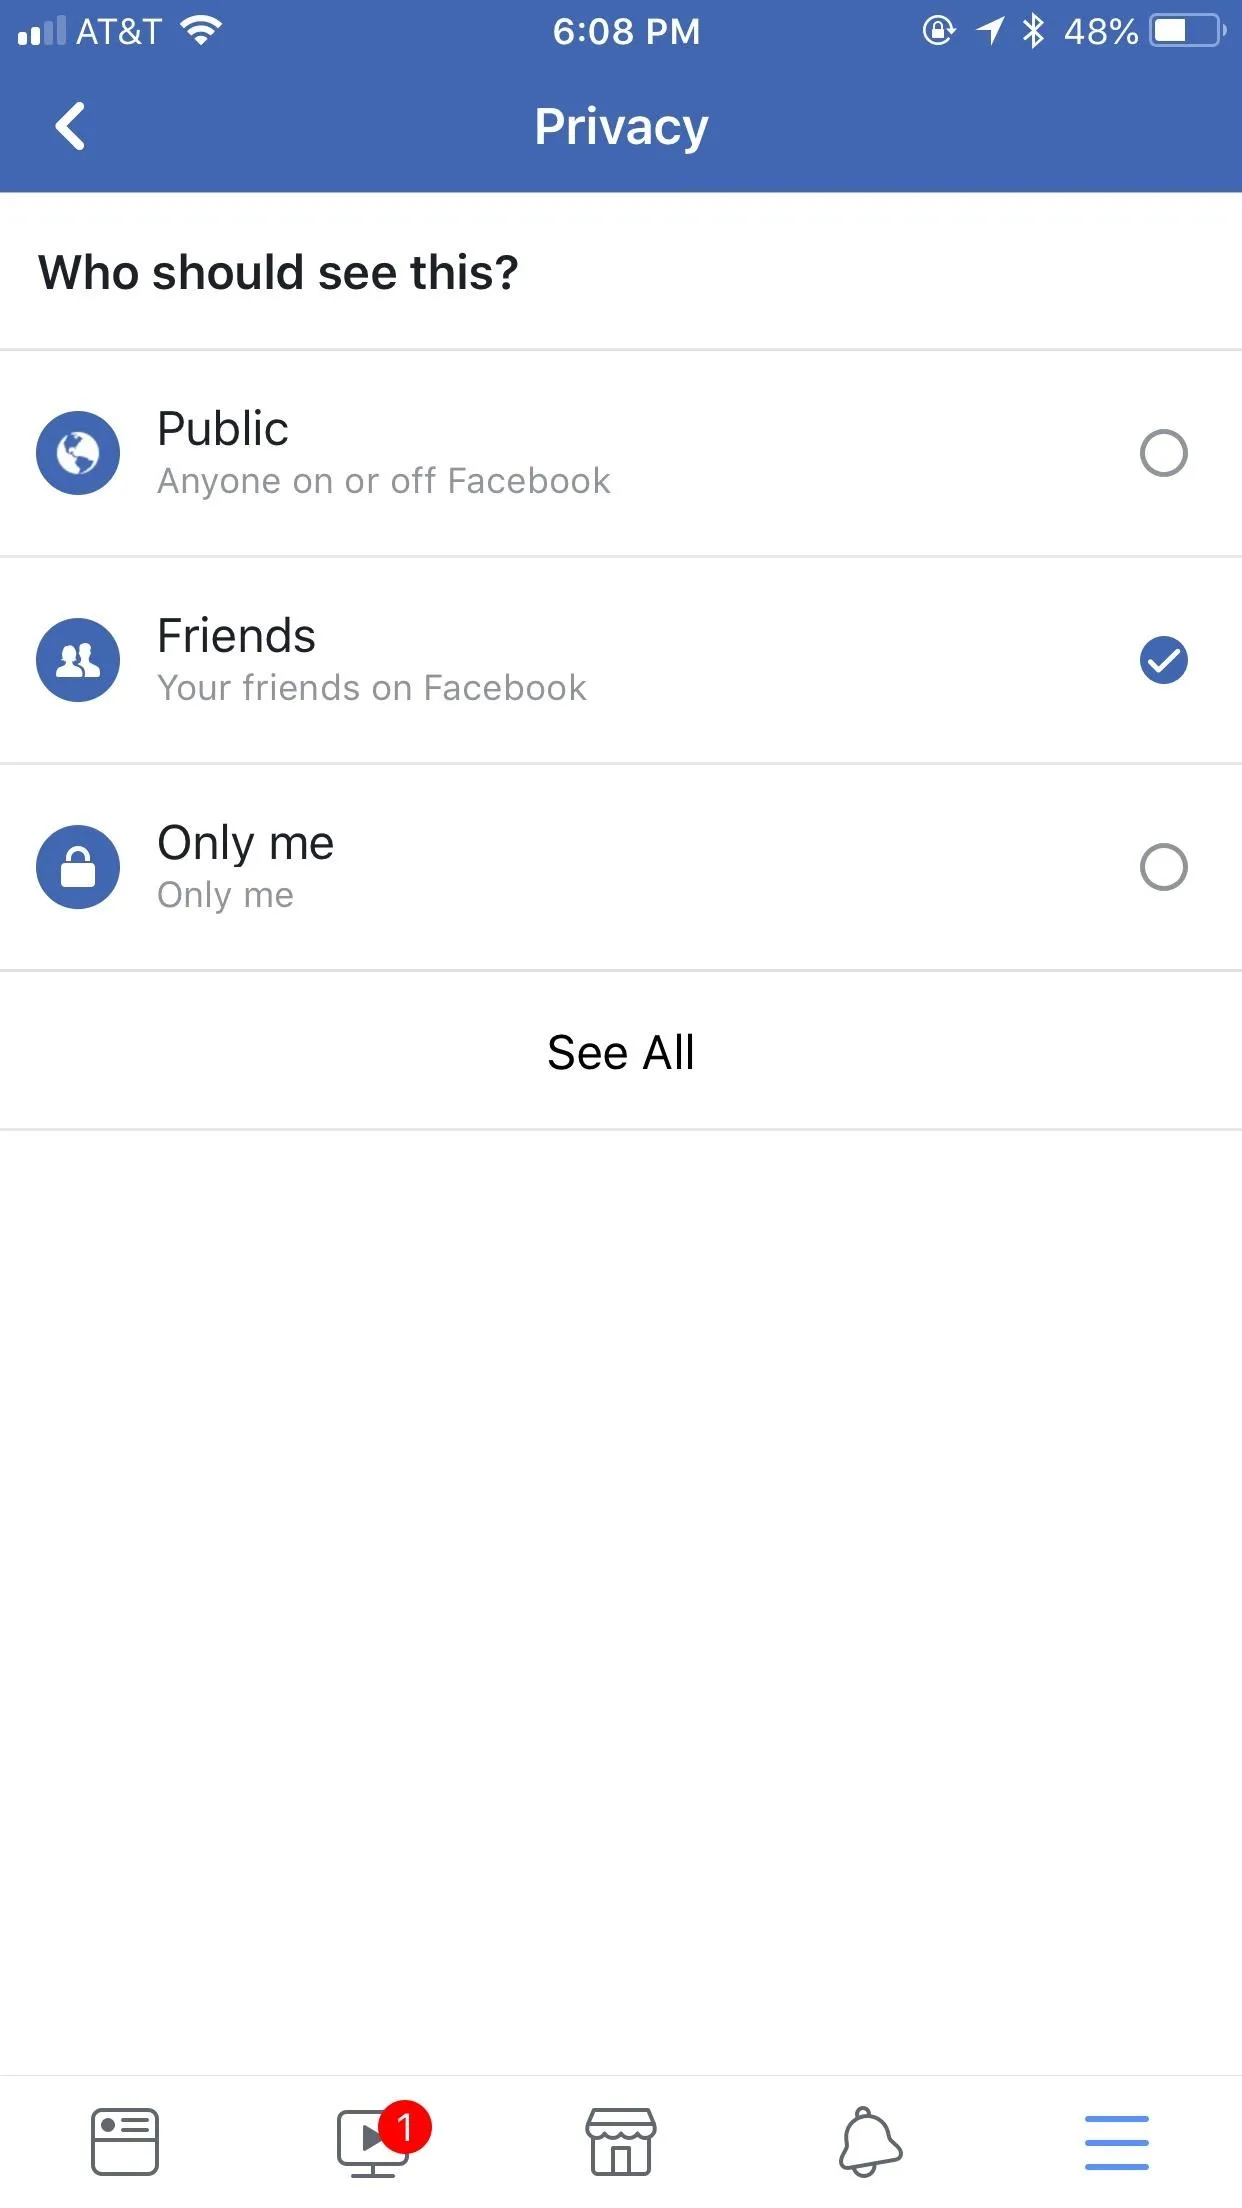
Under items such as "Work," "Education," or "Places You've Lived," tap the grey arrow then tap "Sharing with:" to change your privacy settings. Typically, you can choose between:
- Public: which allows anyone with or without a Facebook account to view your information.
- Friends: which restricts this information to only your Facebook friends.
- Friends except...: which allows you to restrict this information from certain friends by tapping the grey pencil icon, then by tapping the (–) next to the appropriate names. You can tap "Save" when finished.
- Specific friends: which allows you to make this information available to certain friends by tapping the grey pencil icon, then by tapping the (–) next to the appropriate names. You can tap "Save" when finished.
- Only me: which blocks all other users from seeing the information.

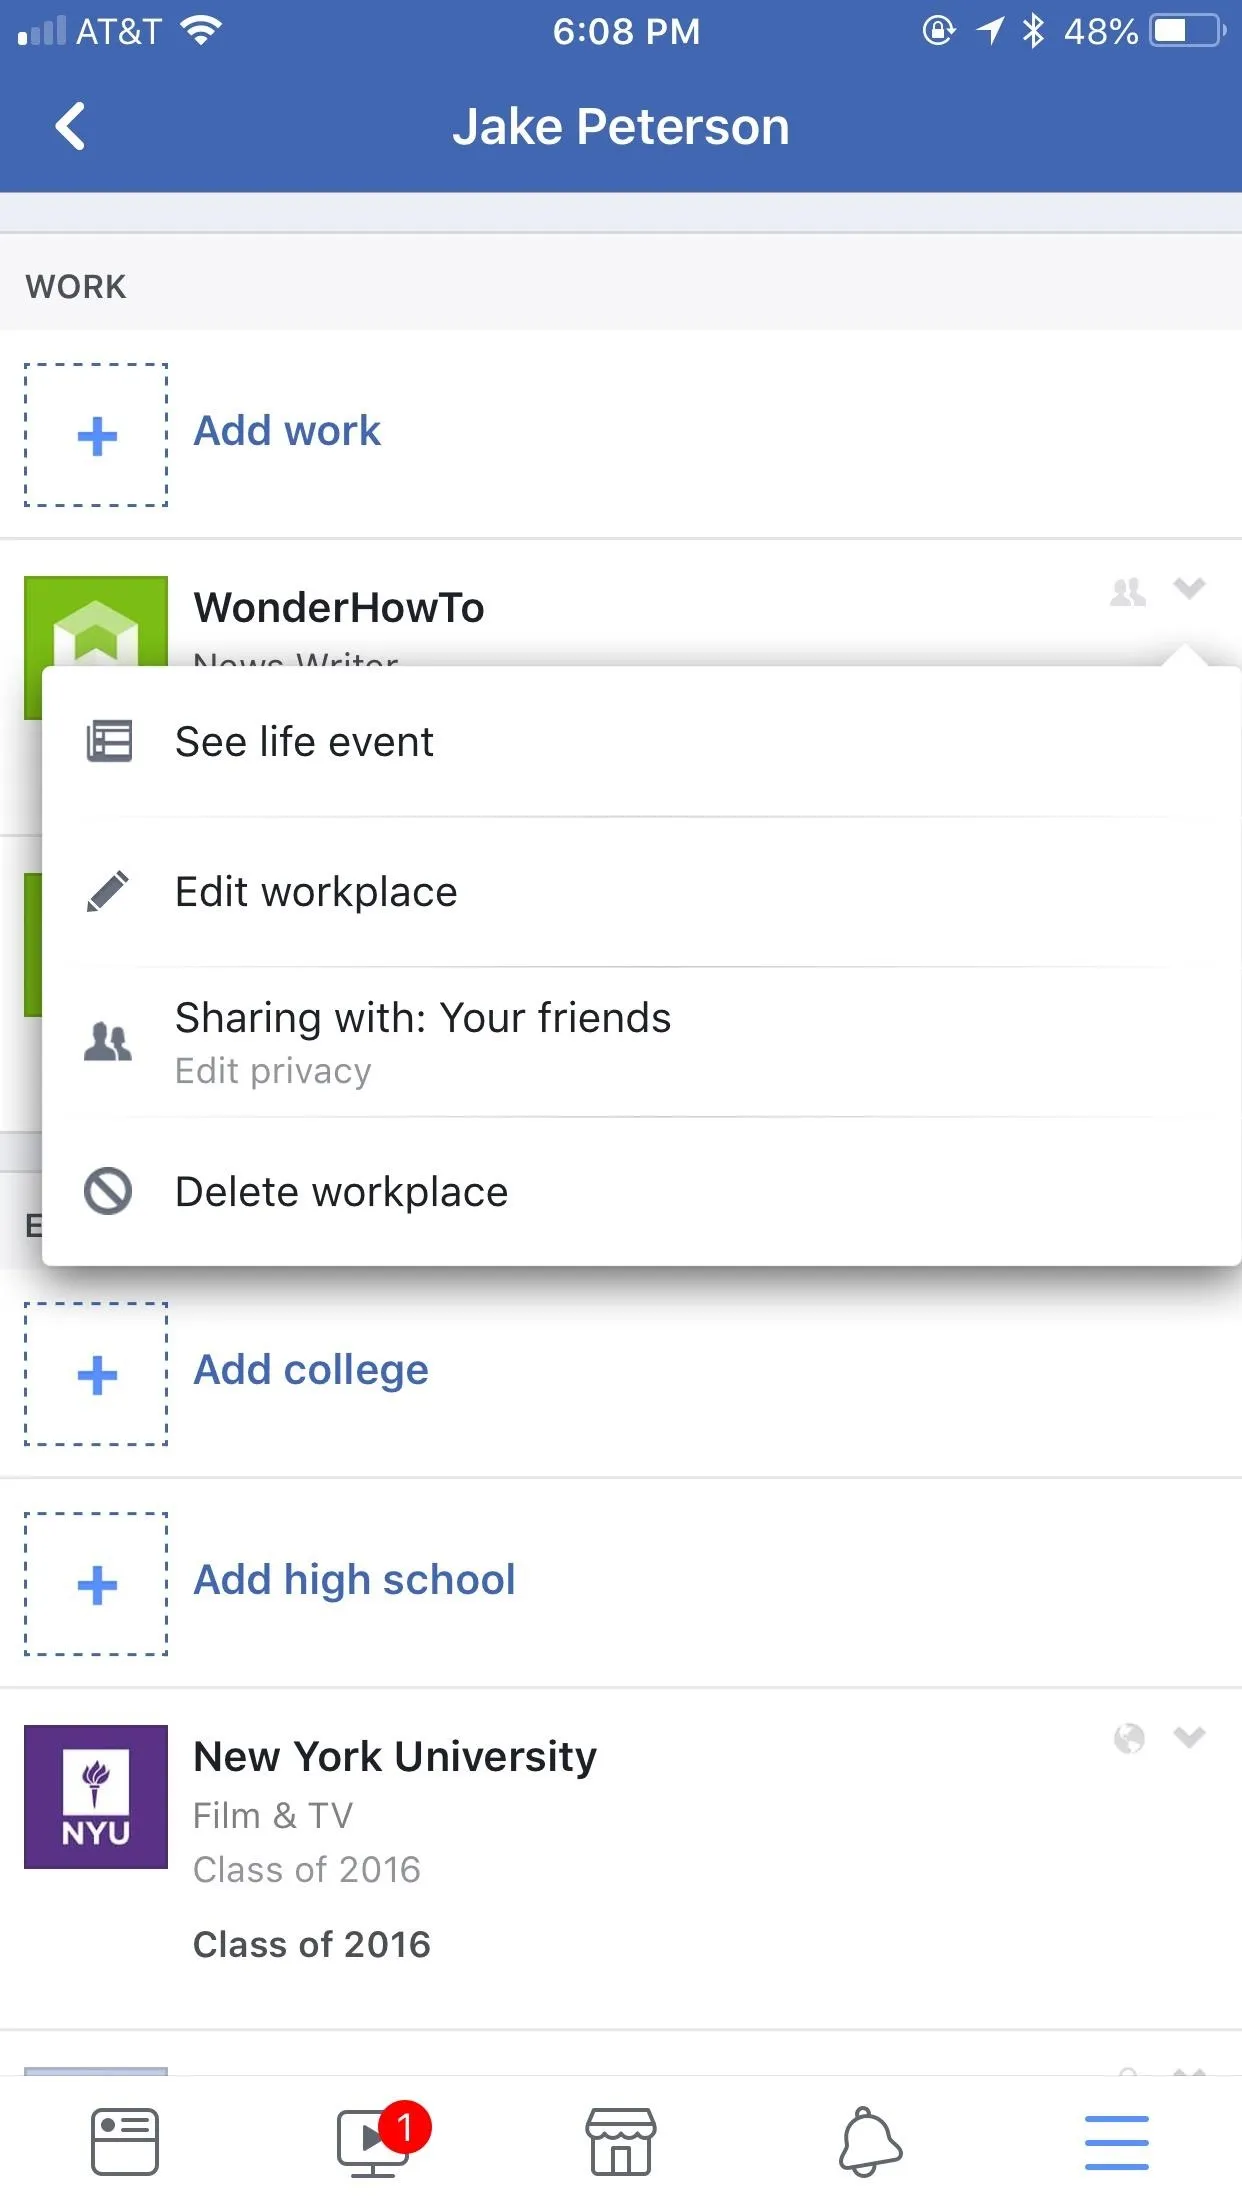
You can also choose to share this information with one specific network you're connected to. You can view these options by tapping "See More."
If you see a group of information with an "Edit" button, you'll need to tap "Edit" in order to access that information's privacy settings. From there, the process is the same as above.
Your Activity
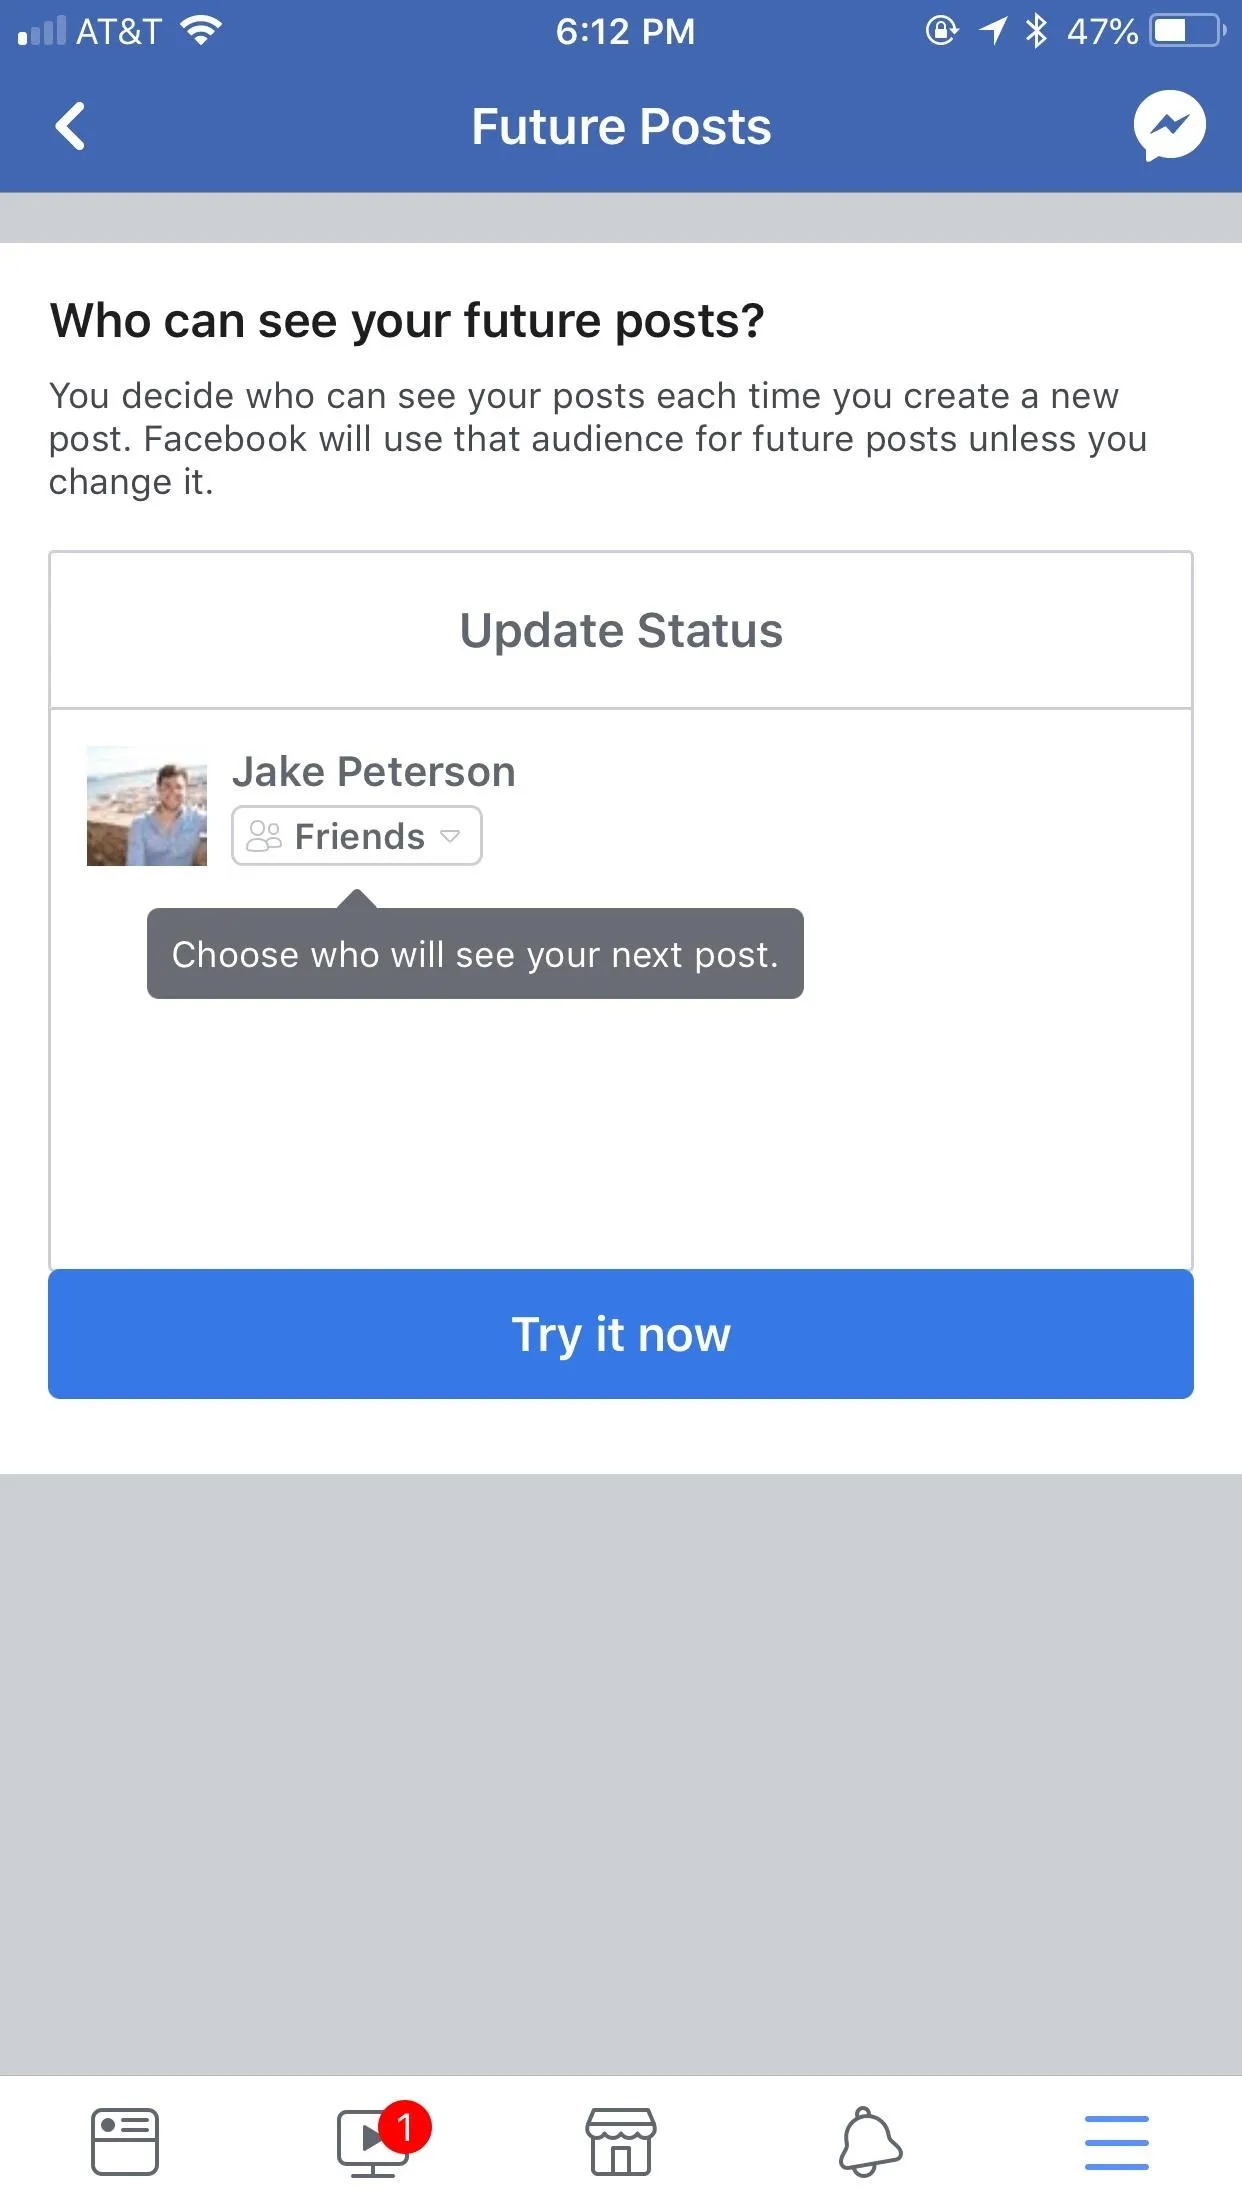
Back in the main Privacy Settings menu under the Your activity header, you can set "Who can see your future posts?" to "Friends," or "Only Me" if you want posts to remain private. You can also hide posts from specific accounts by tapping "Custom," entering names in the "Hidden from" field, then tapping "Save."
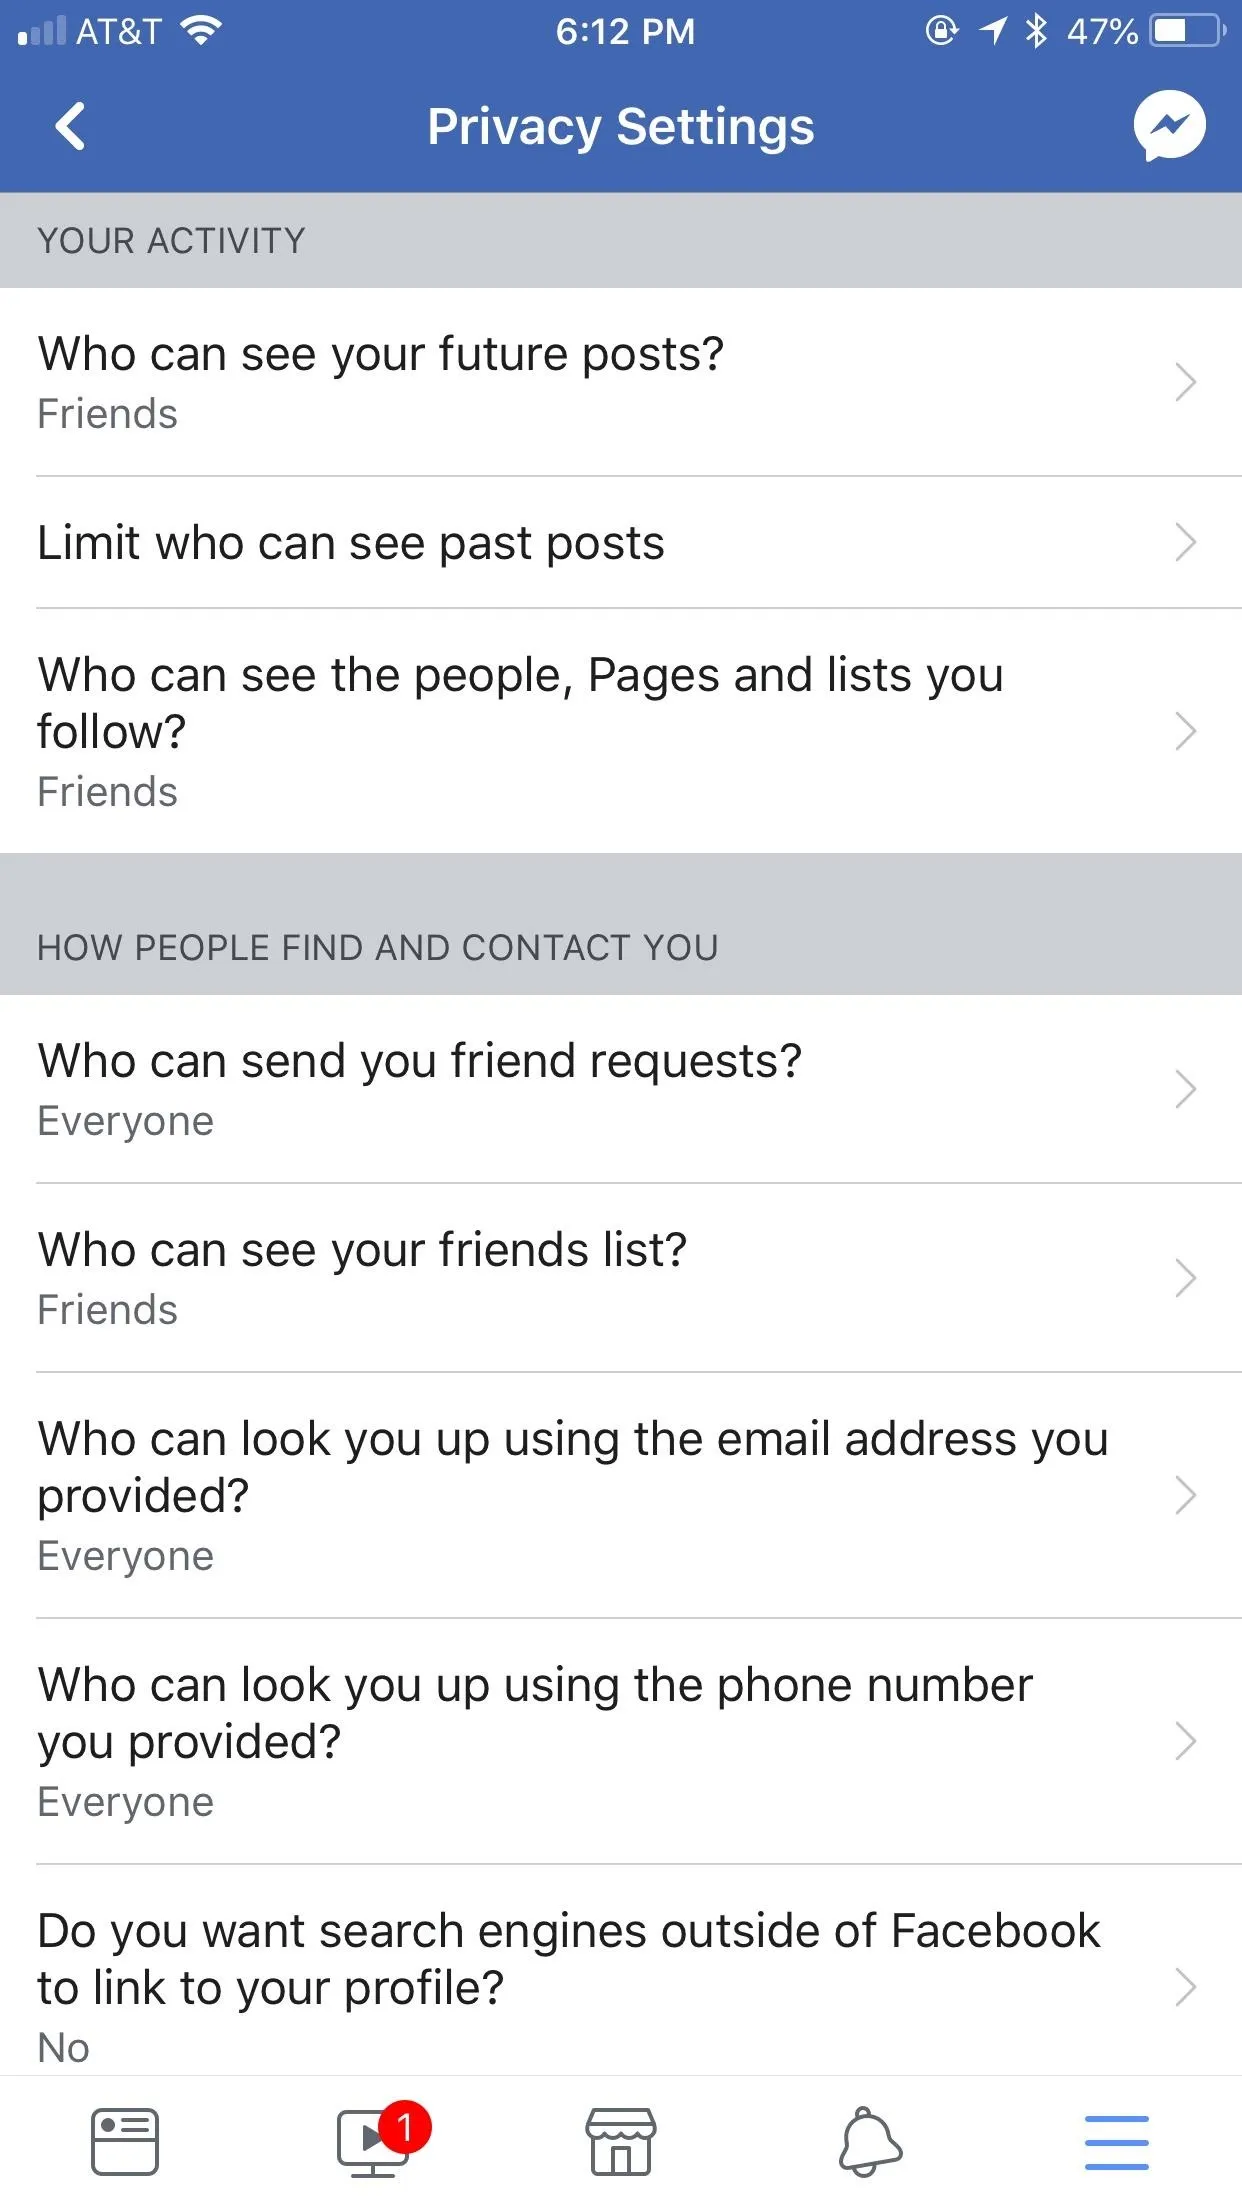
Facebook gives you the option here to retroactively turn all posts you've made into "Friends" only. Just tap "Limit the audience for posts you've shared with friends of friends or Public?" then tap "Limit Old Posts." On certain devices, this option may be back in the main Privacy menu under "Limit who can see past posts."
While you're still in main Privacy menu, you can set "Who can see the people, Pages and lists you follow?" to "Friends," or "Only Me" if you want this information to remain totally private.
How People Find & Contact You
Next up is the How people find and contact you header. Here's a rundown of the settings you'll find in this area of the main Privacy menu:
- Set "Who can send you friend requests?" to "Friends of friends" if it isn't already selected.
- Set "Who can see your friends list?" to "Friends" or "Only Me," if you want to keep your list private.
- Set "Who can look you up using the email address you provided?" to "Friends" for maximum security.
- Set "Who can look you up using the phone number you provided?" to "Friends" for maximum security.
From this page, you can block Facebook from linking your account to search engines outside of Facebook. Tap "Do you want search engines outside of Facebook to link to your profile?" then tap "Allow search engines out of Facebook to link to your profile" if it contains a checkmark. Tap "Confirm" to complete the process.
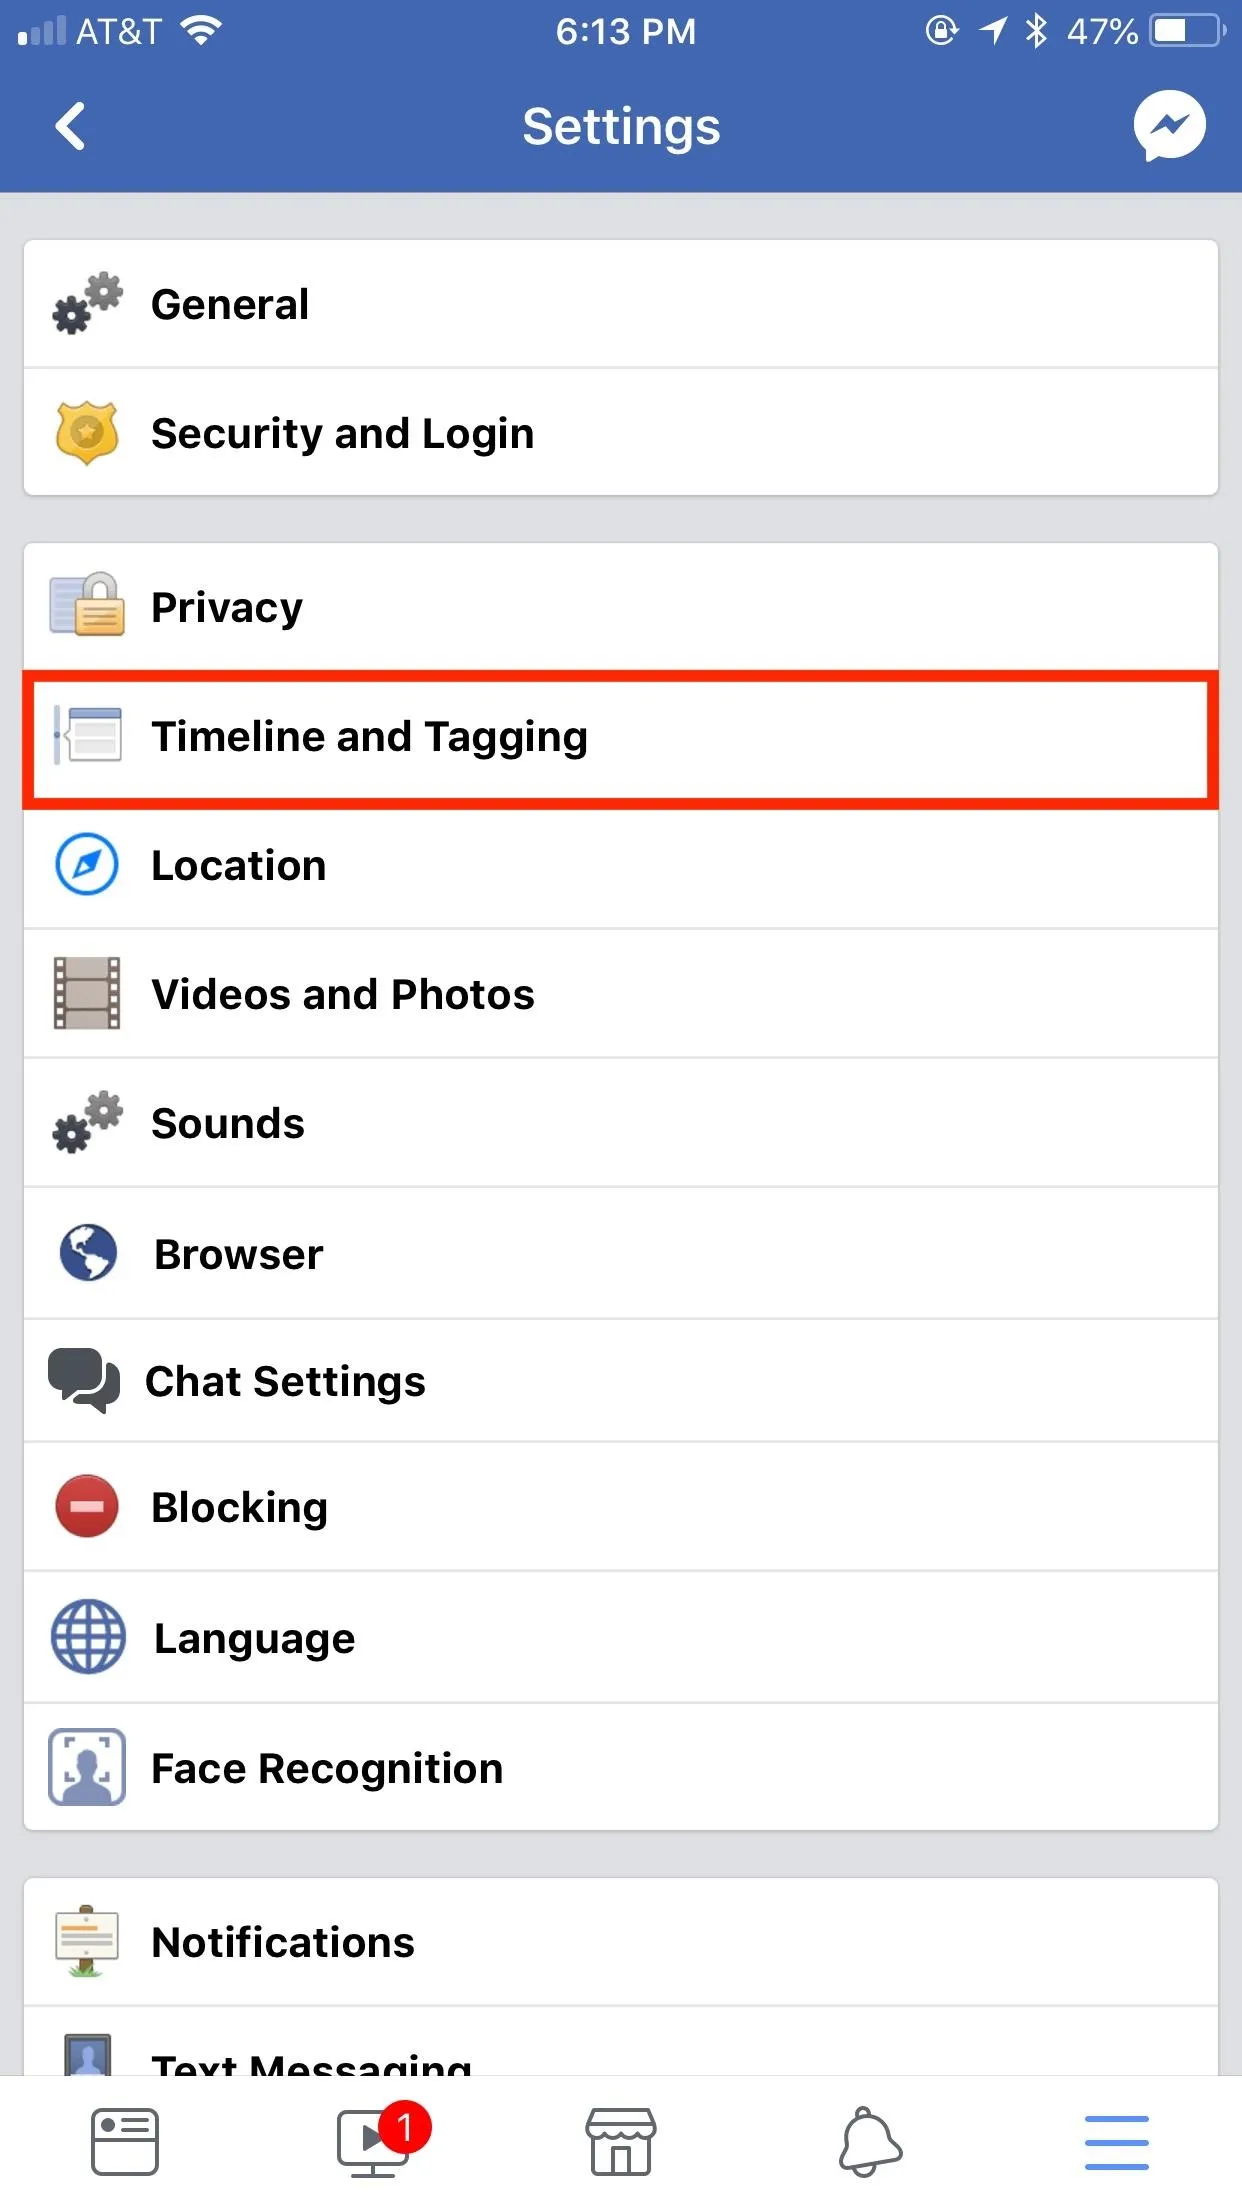
Timeline & Tagging
Next, head back out to the main "Account Settings" menu from Facebook's hamburger menu. From there, head to "Timeline and Tagging" to adjust two core functions of Facebook whose settings are definitely worth reviewing, plus an additional third set of options that can be helpful. This menu changes slightly depending on whether you're using the app or the mobile site, but the core items stay the same.
Timeline
Under the Timeline header on this next menu, there are two pertinent settings:
- Set "Who can post on your timeline?" to "Friends," or "Only me," if you want to keep others from posting on your timeline altogether.
- Set "Who can see what others post on your timeline?" to "Friends," or "Only me" if you want to stop everyone from seeing what's on your timeline.
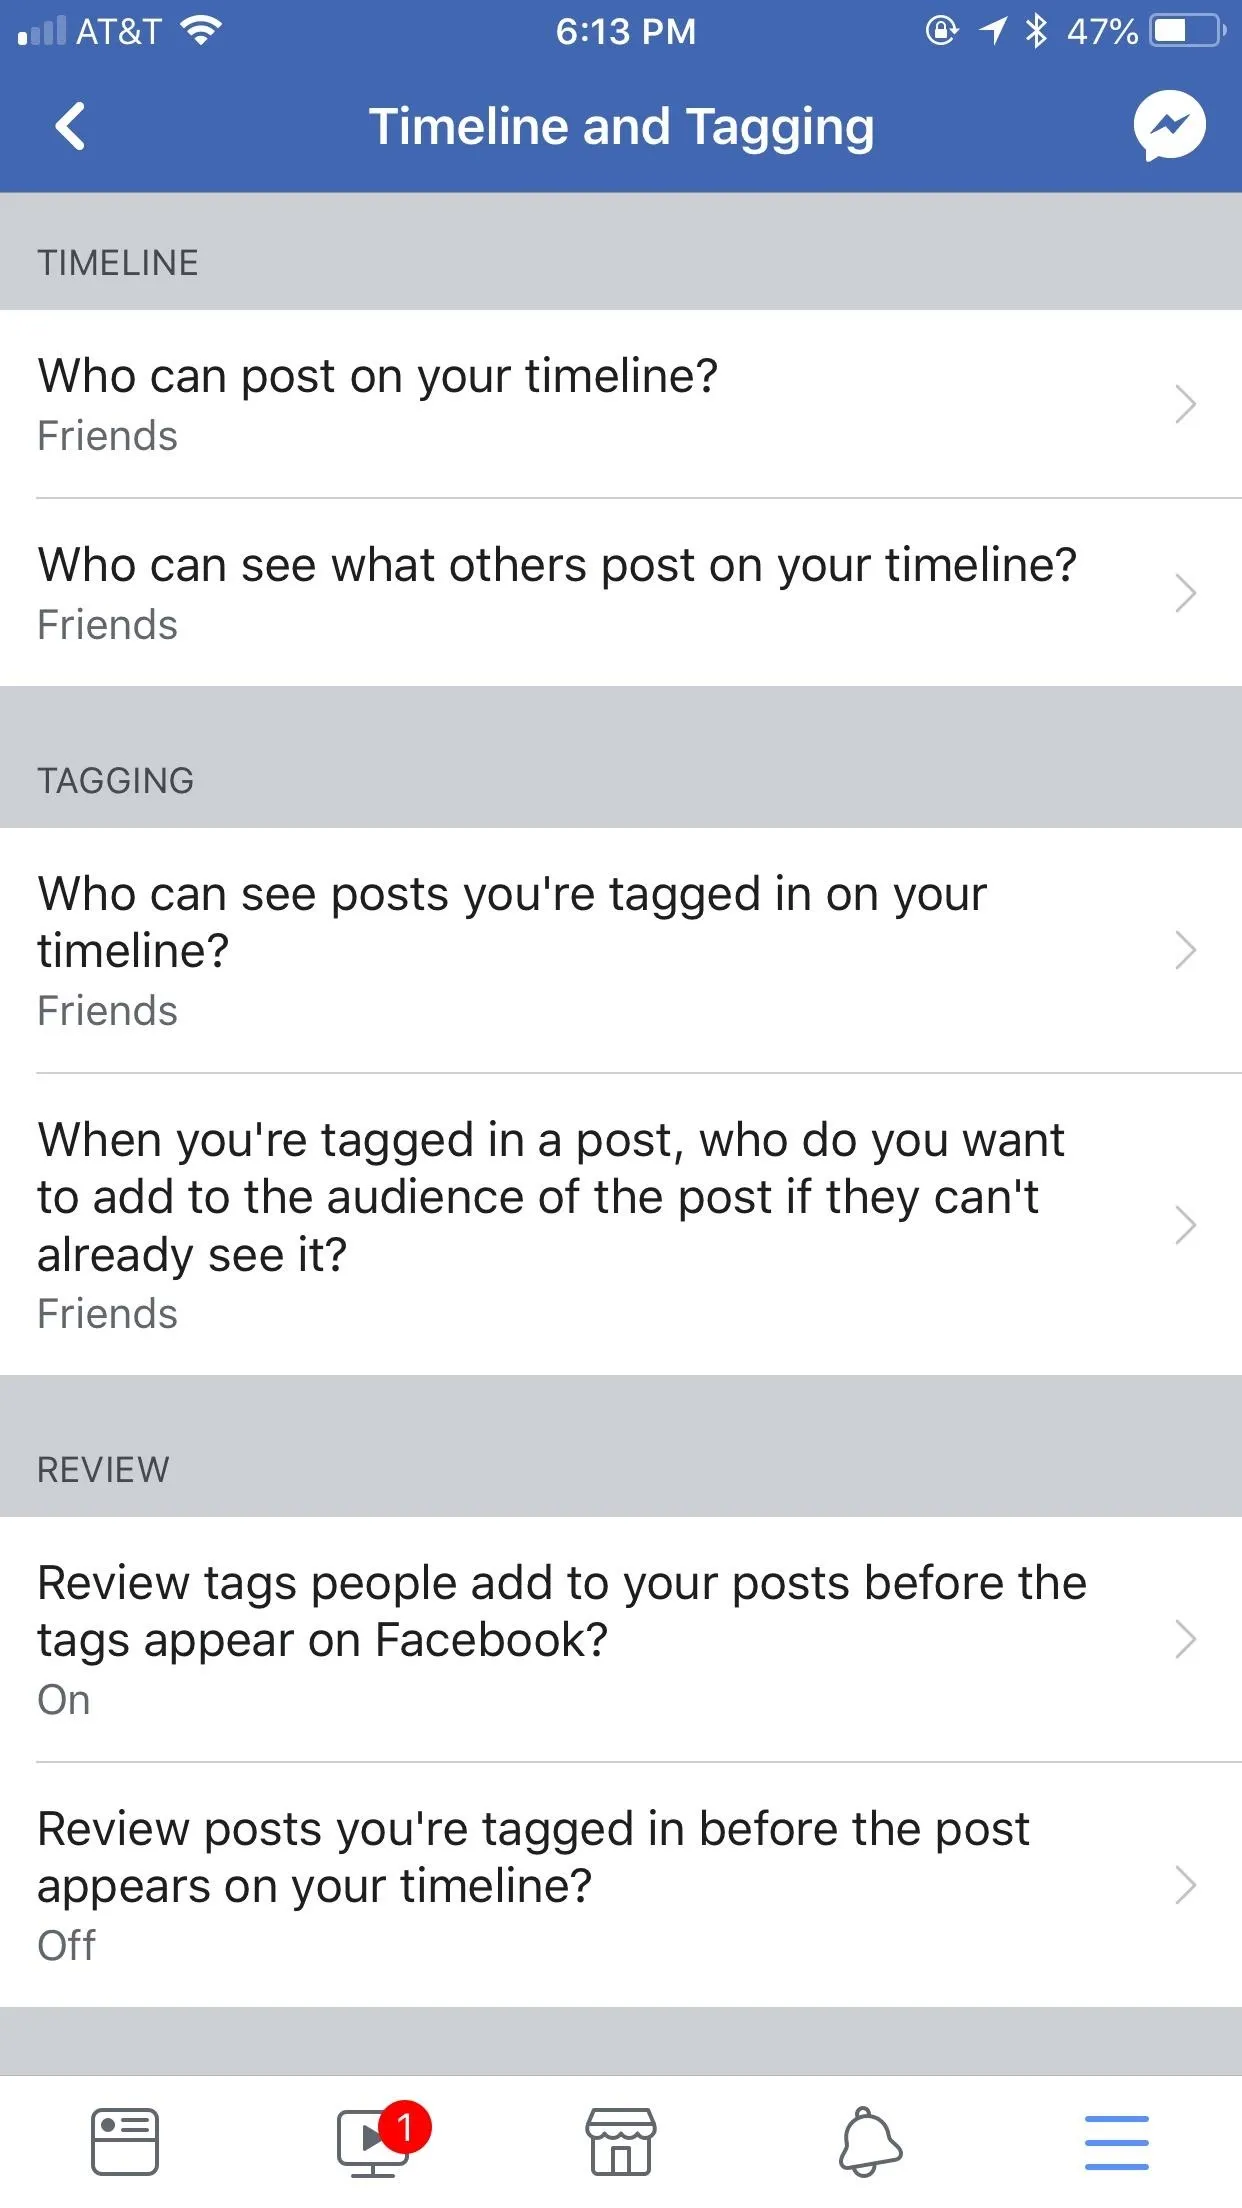
Tagging
Next, under the Tagging header in this menu, there are again two options to consider:
- Set "Who can see posts you're tagged in on your timeline?" to "Friends," or "Only Me," if you want to block all users from seeing these posts.
- Set "When you're tagged in a post, who do you want to add to the audience of the post if they can't already see it?" to "Friends," or "Only me" if you want no one to see these posts.
Review
Finally, there's the Review header. This gives you a chance to look over tags other people have made that could pertain to your personal info.
- Enable "Review tags people add to your posts before the tags appear on Facebook?" under "Tag Review."
- Enable "Review posts you're tagged in before the post appears on your timeline?" under "Timeline Review."
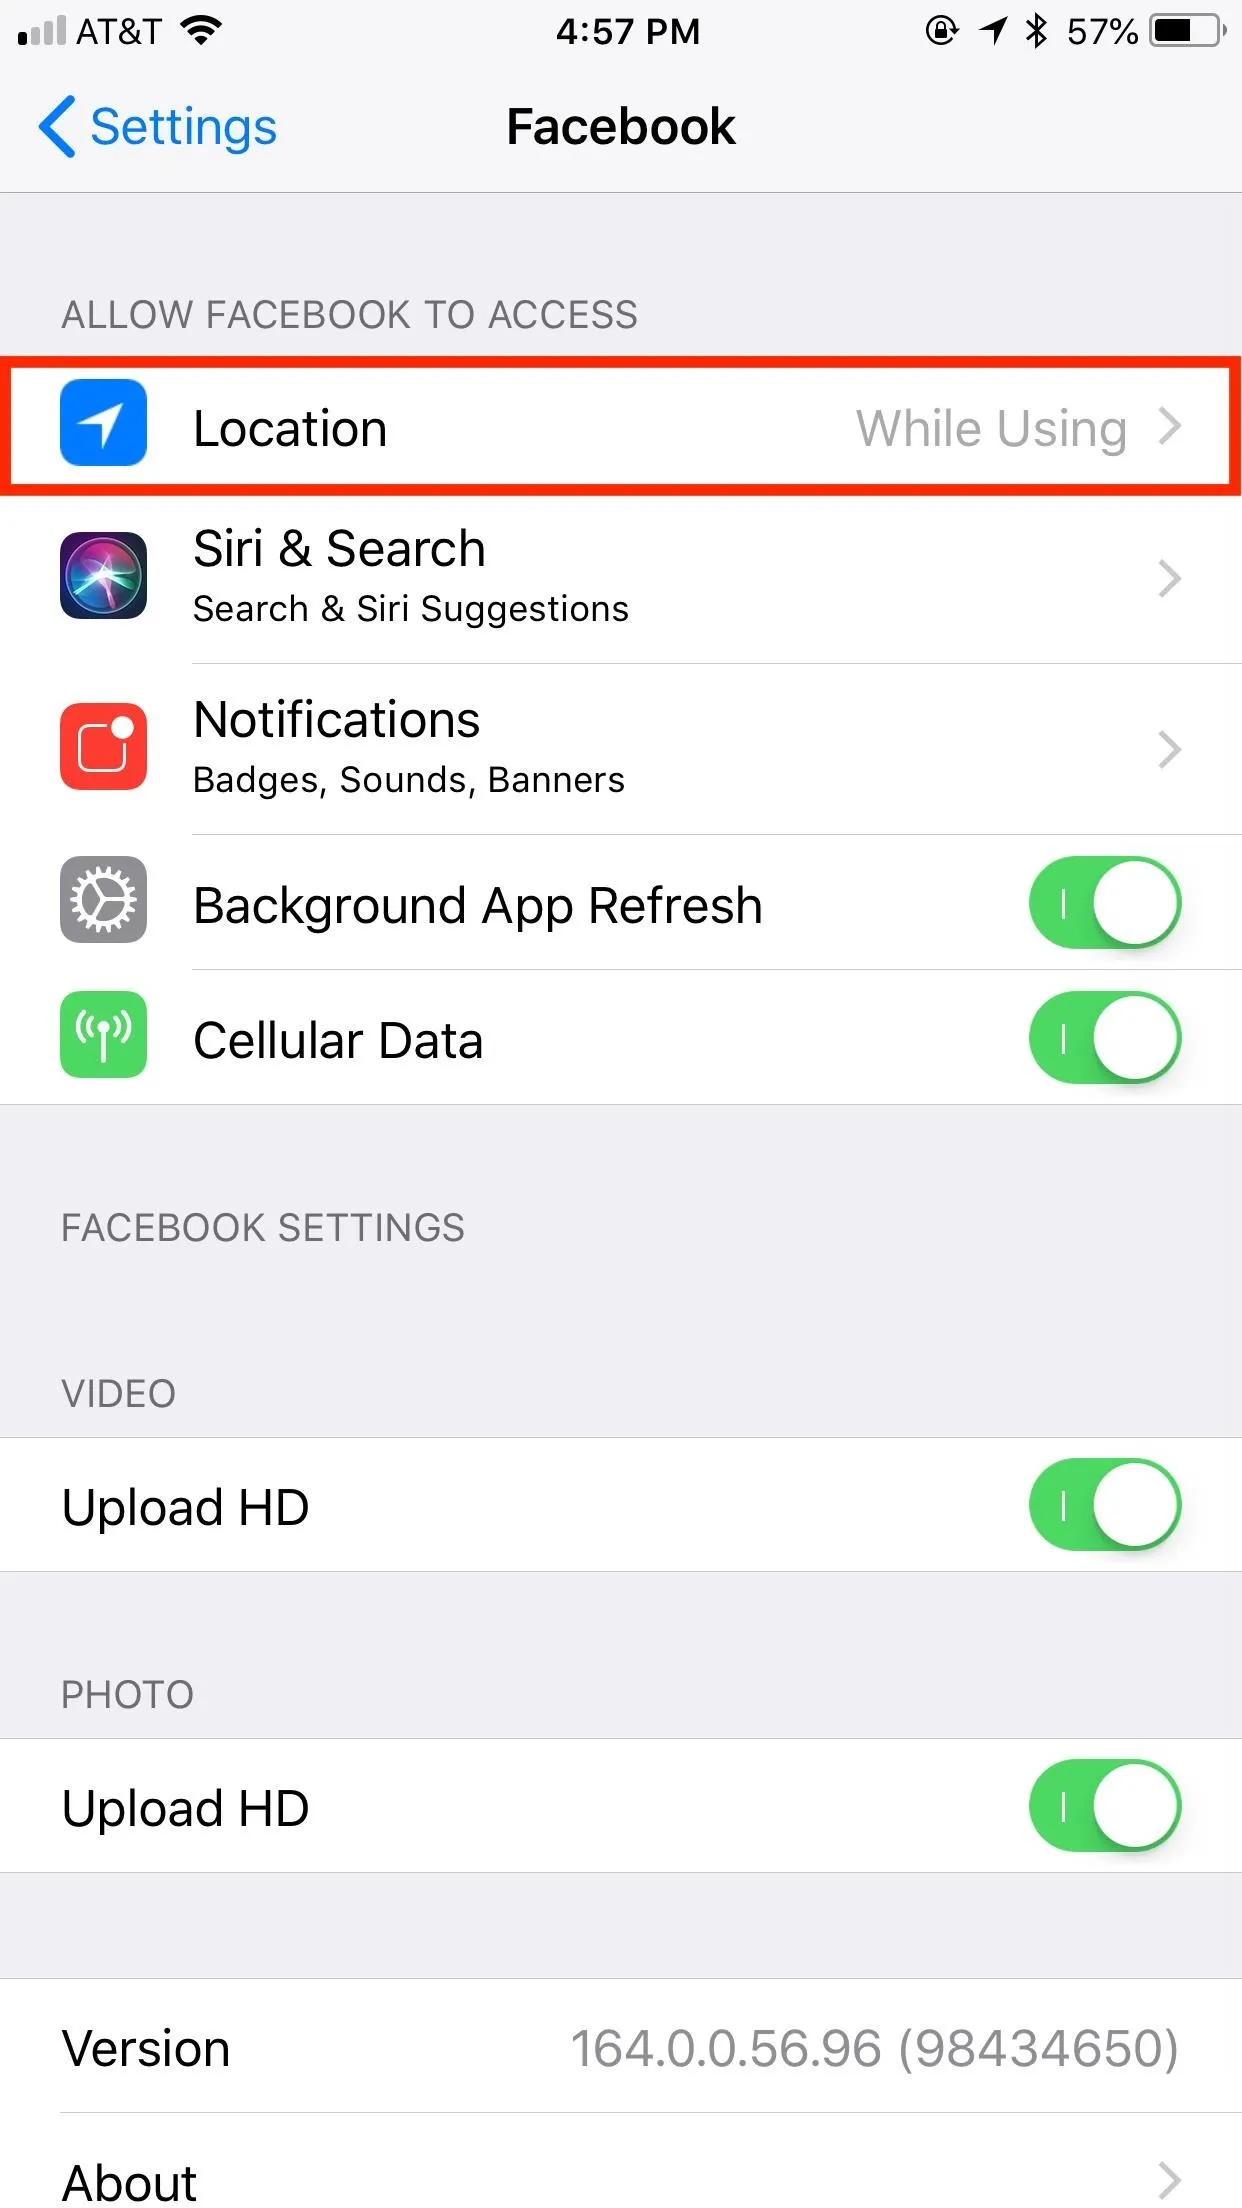
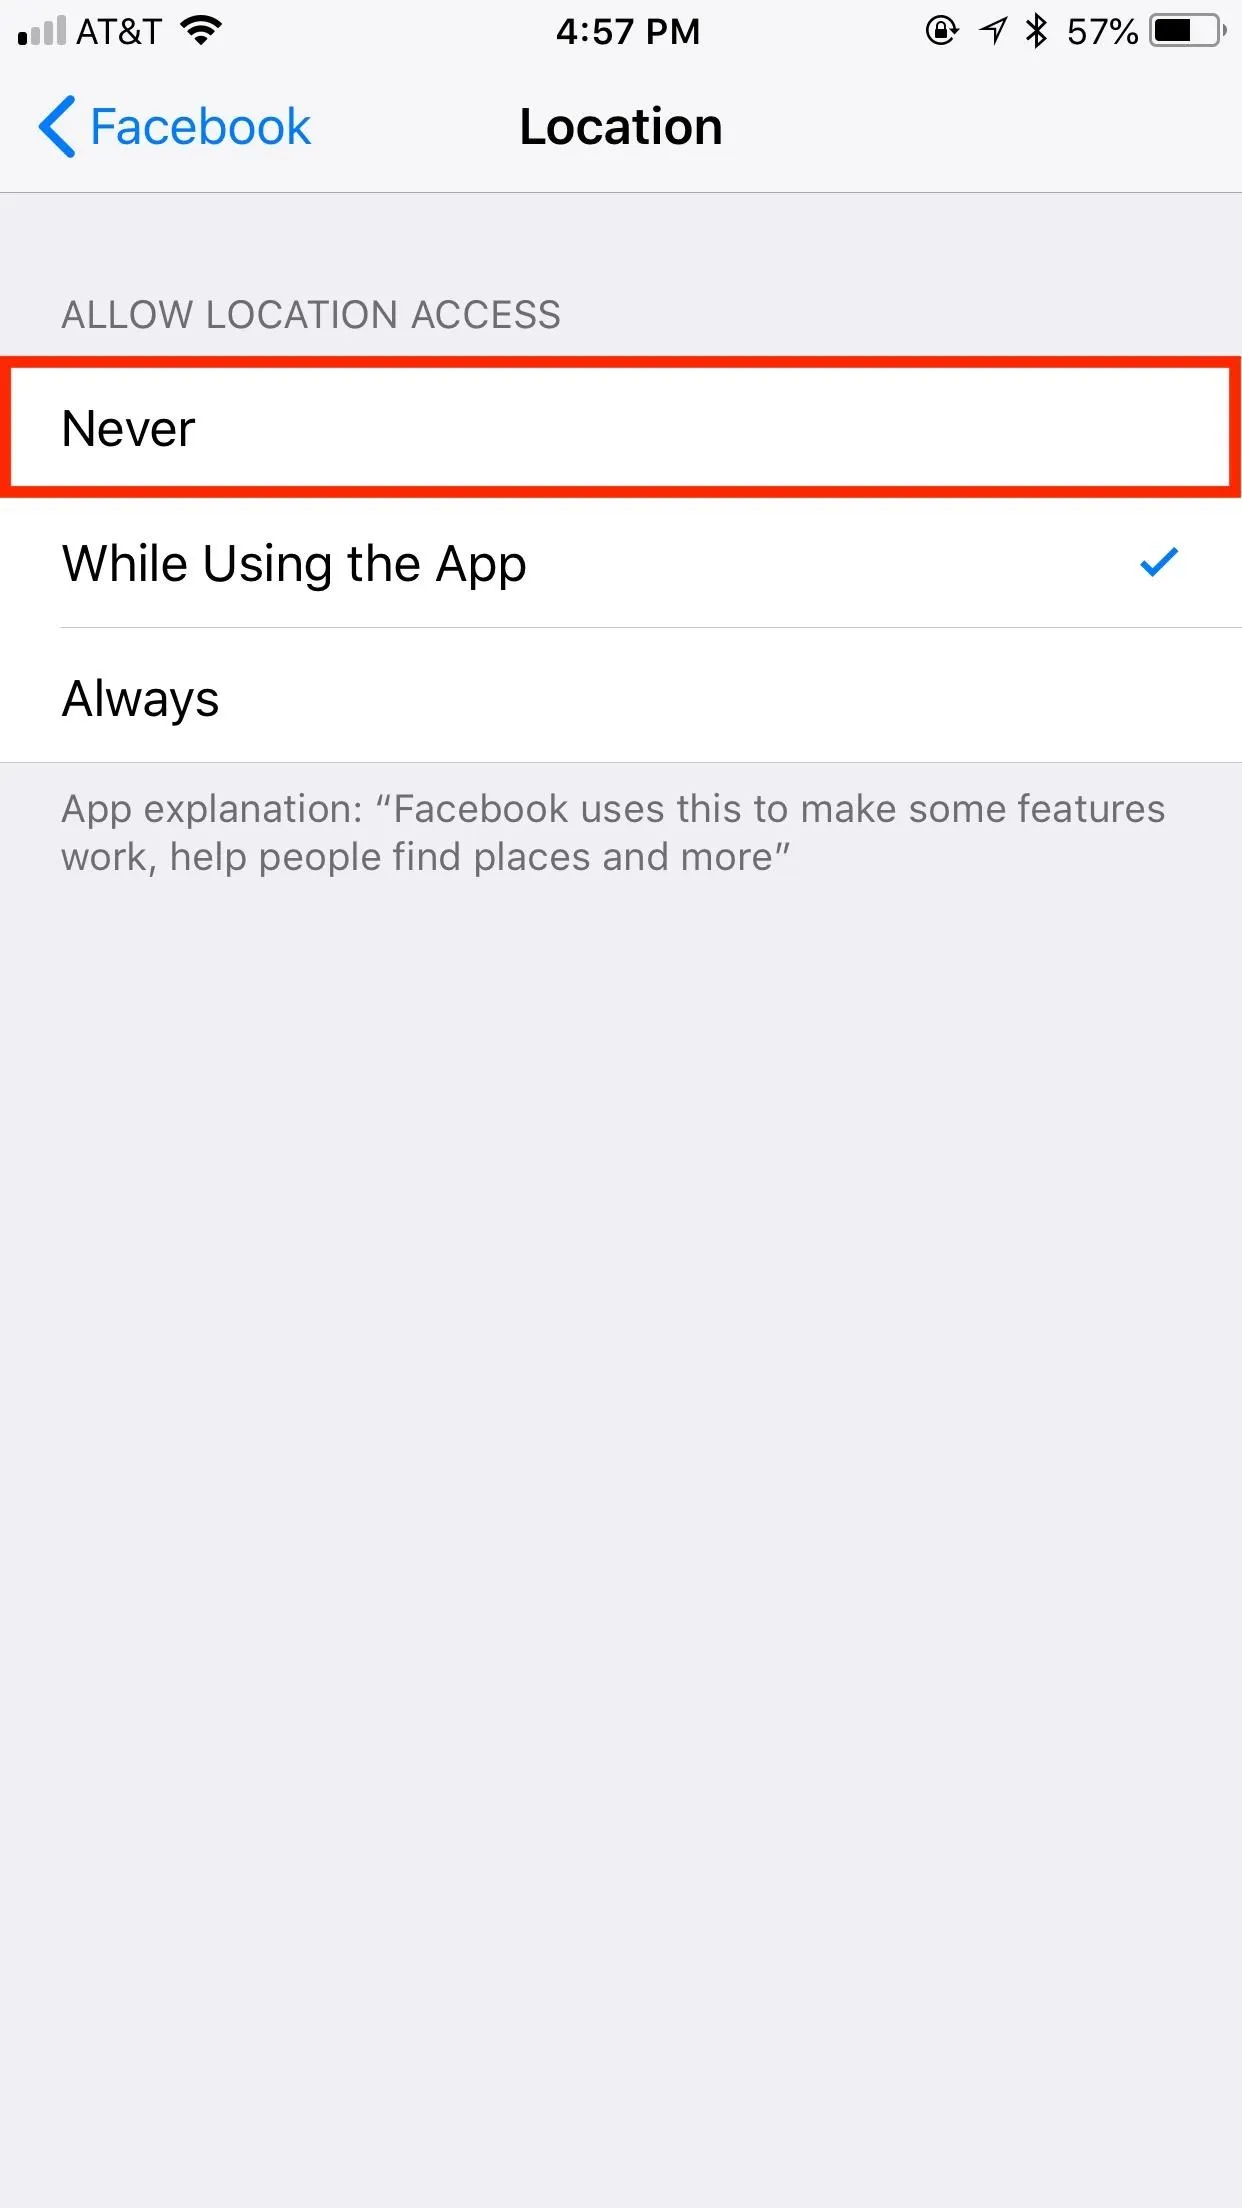
Location
While you're still in the main Account Settings menu, head to "Location Settings," then tap "Location" if you want to make sure Facebook does not have access to your location. Disable location permissions on iOS by tapping "Location," then by tapping "Never." On Android, simply disable the toggle next to "Use location."

Next, make sure "Location History" is disabled. This setting, as Facebook puts it, builds a history of your precise locations, which is quite the opposite of privacy. This will also disable features such as "Find Wi-Fi," which helps you locate free public Wi-Fi hotspots, and "Nearby Friends," which can show you which of your Facebook friends are in your area.
While useful, these features require Location History, so best not to use it if concerned about privacy.
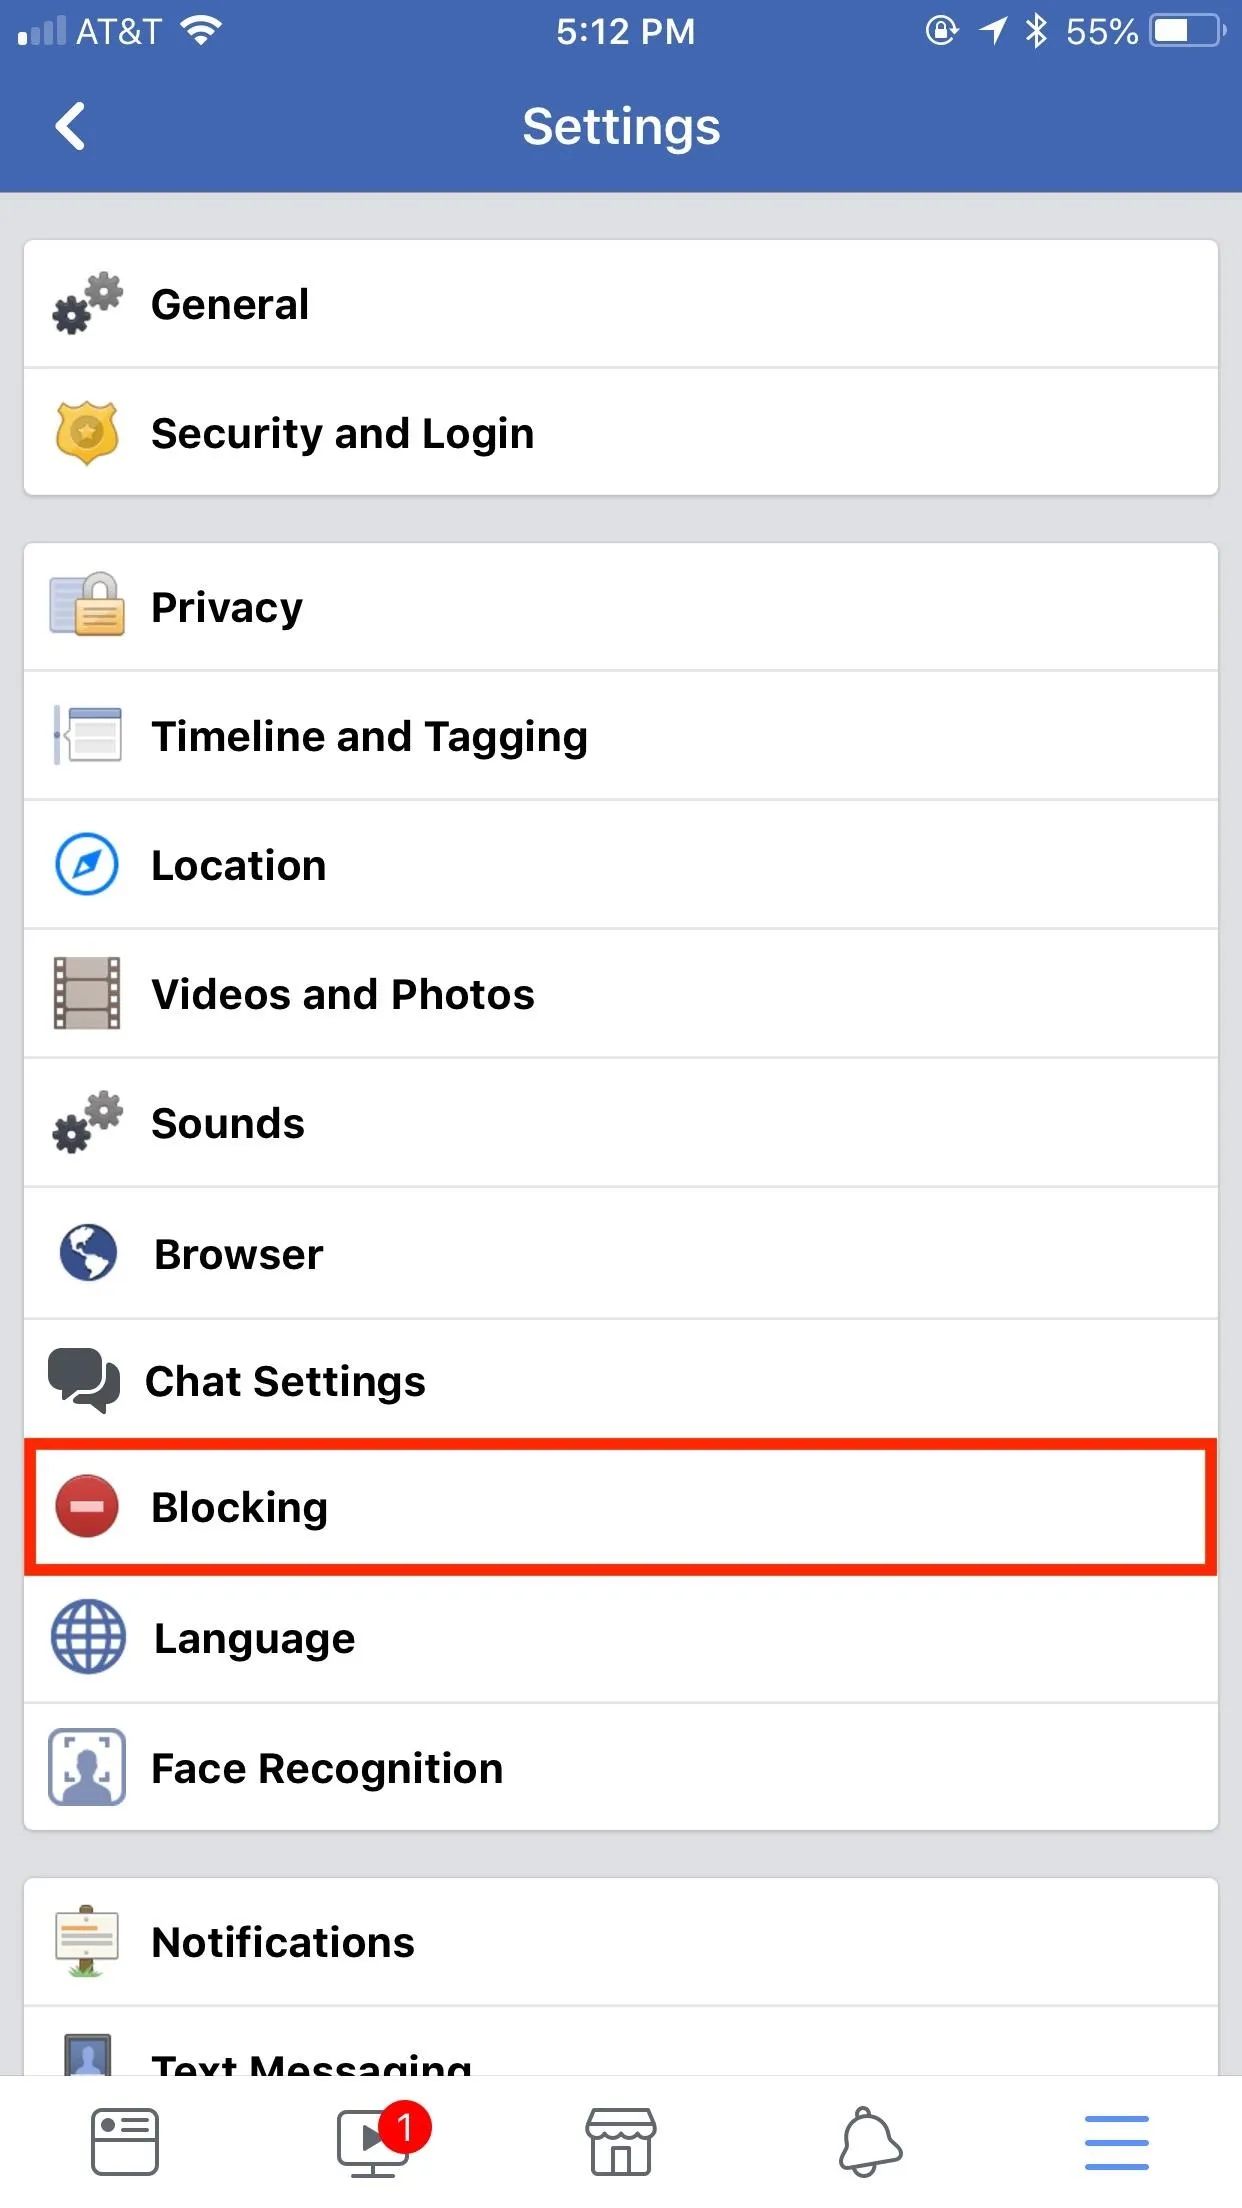
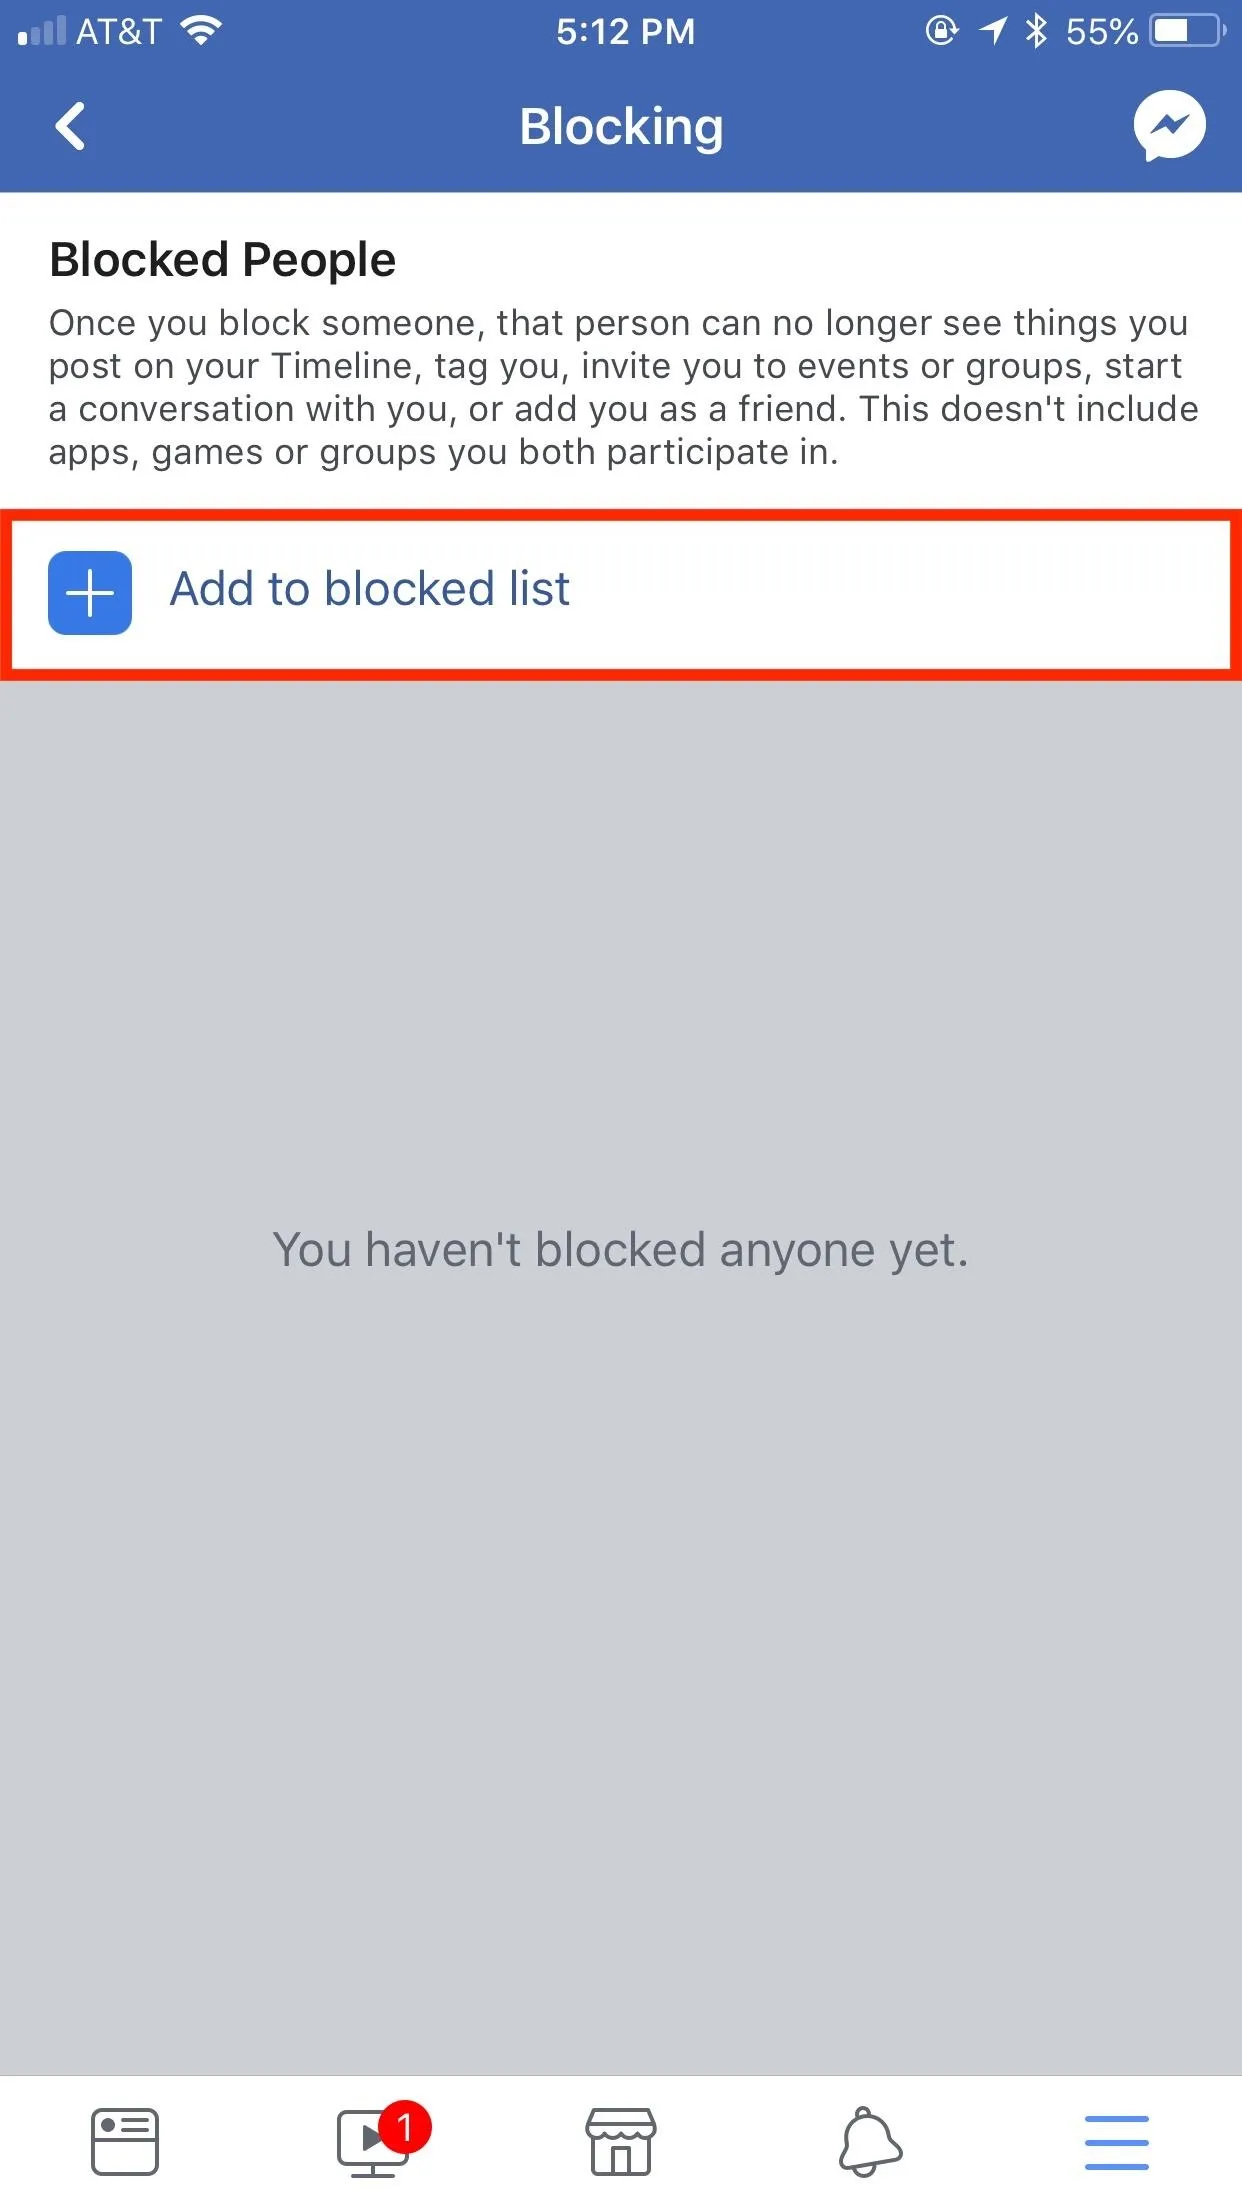
Blocking
If you know of any user accounts you want to keep from accessing your page altogether, you can easily add them to your blocking list. Tap "Blocking" under Account Settings, then tap "Add to blocked list" to search for users to add.
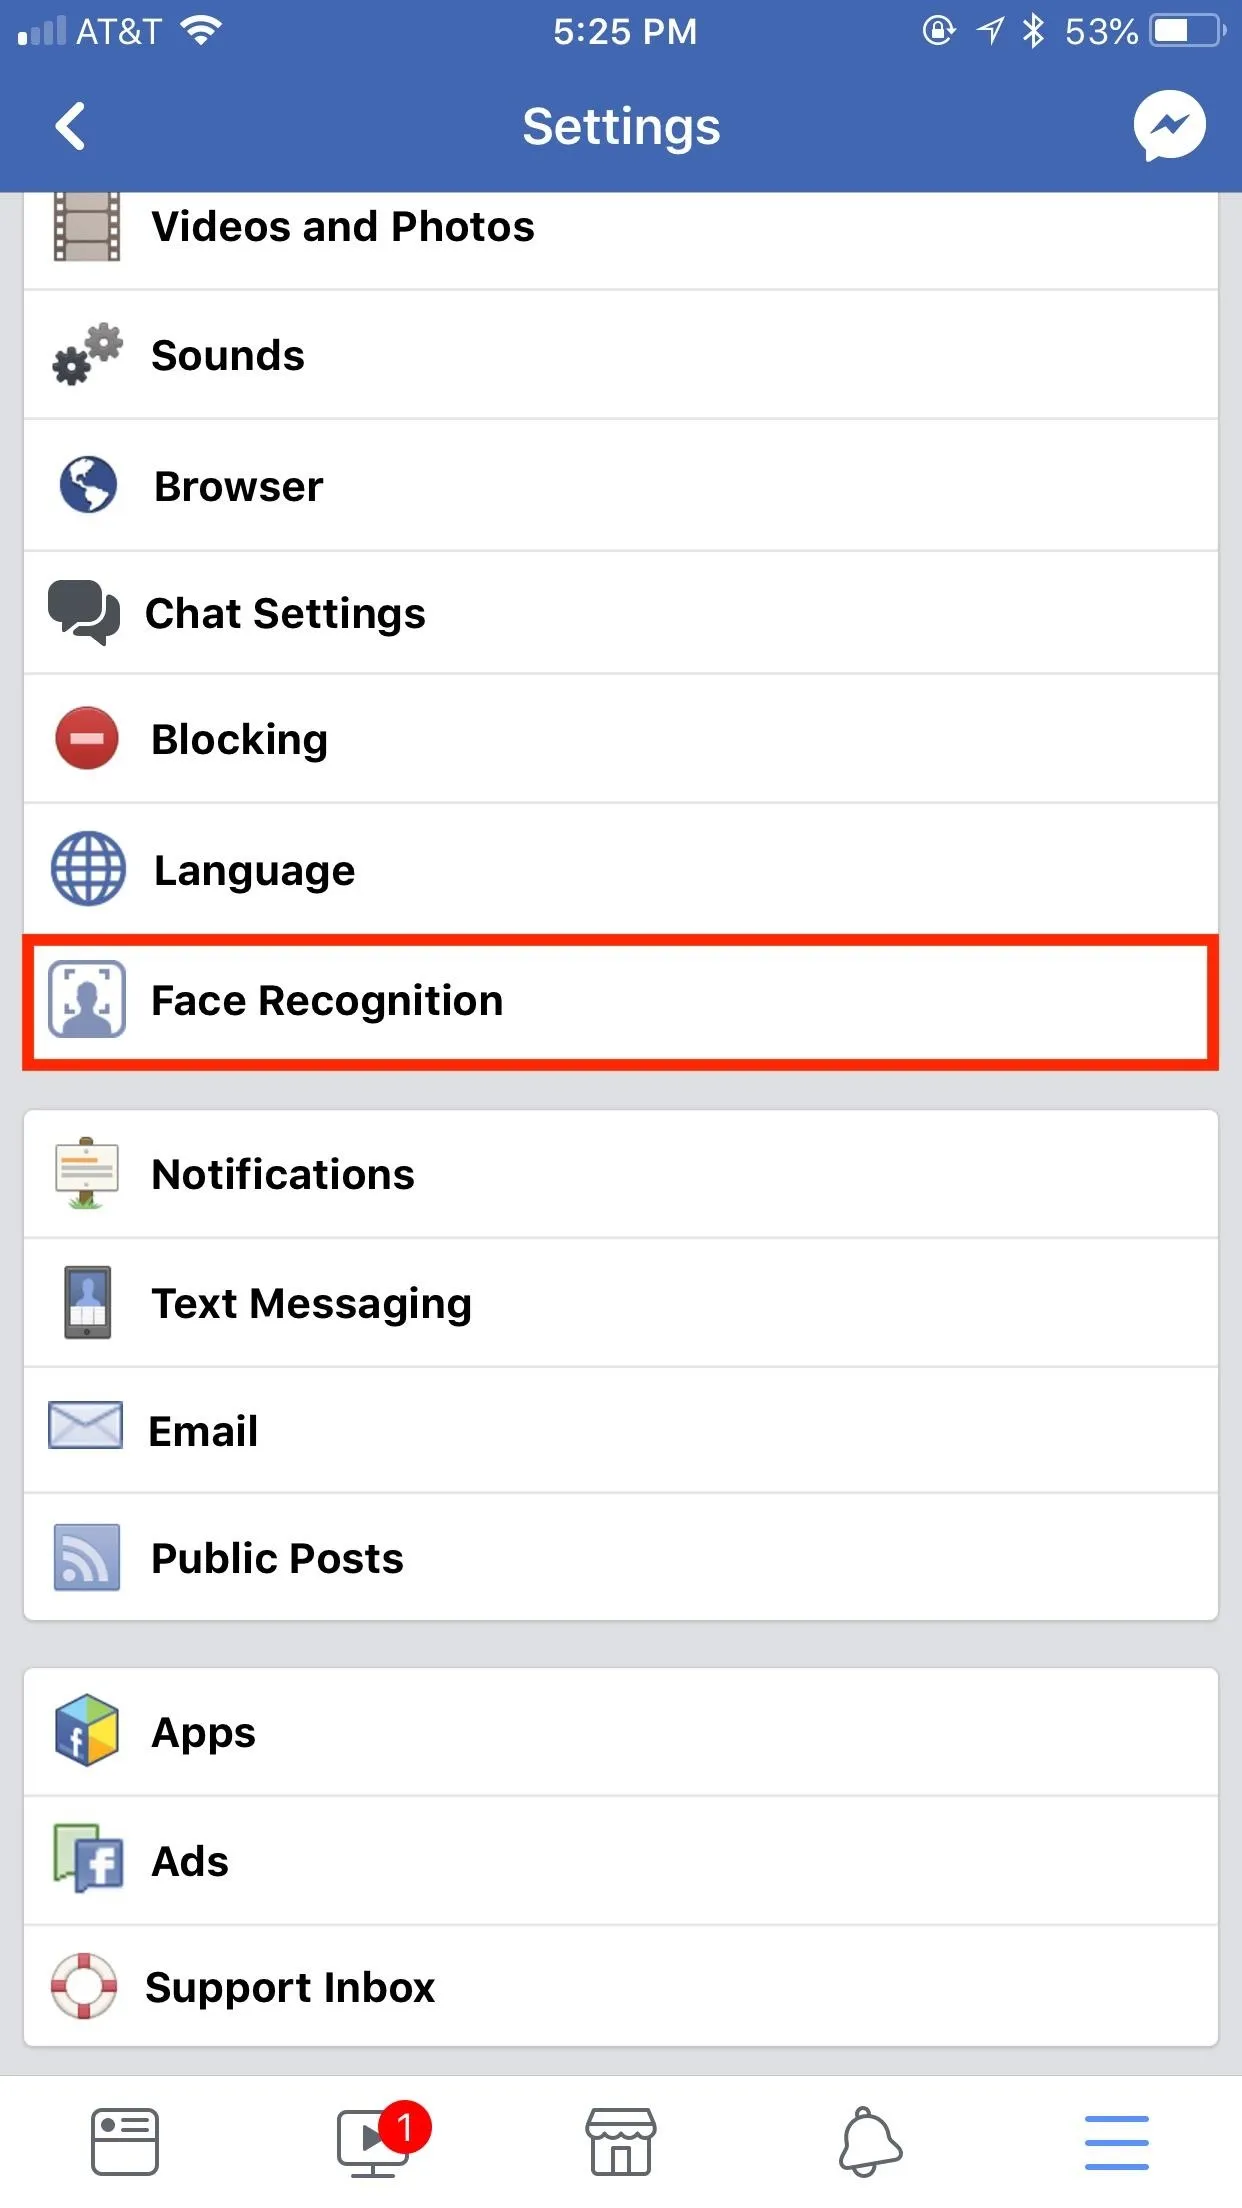
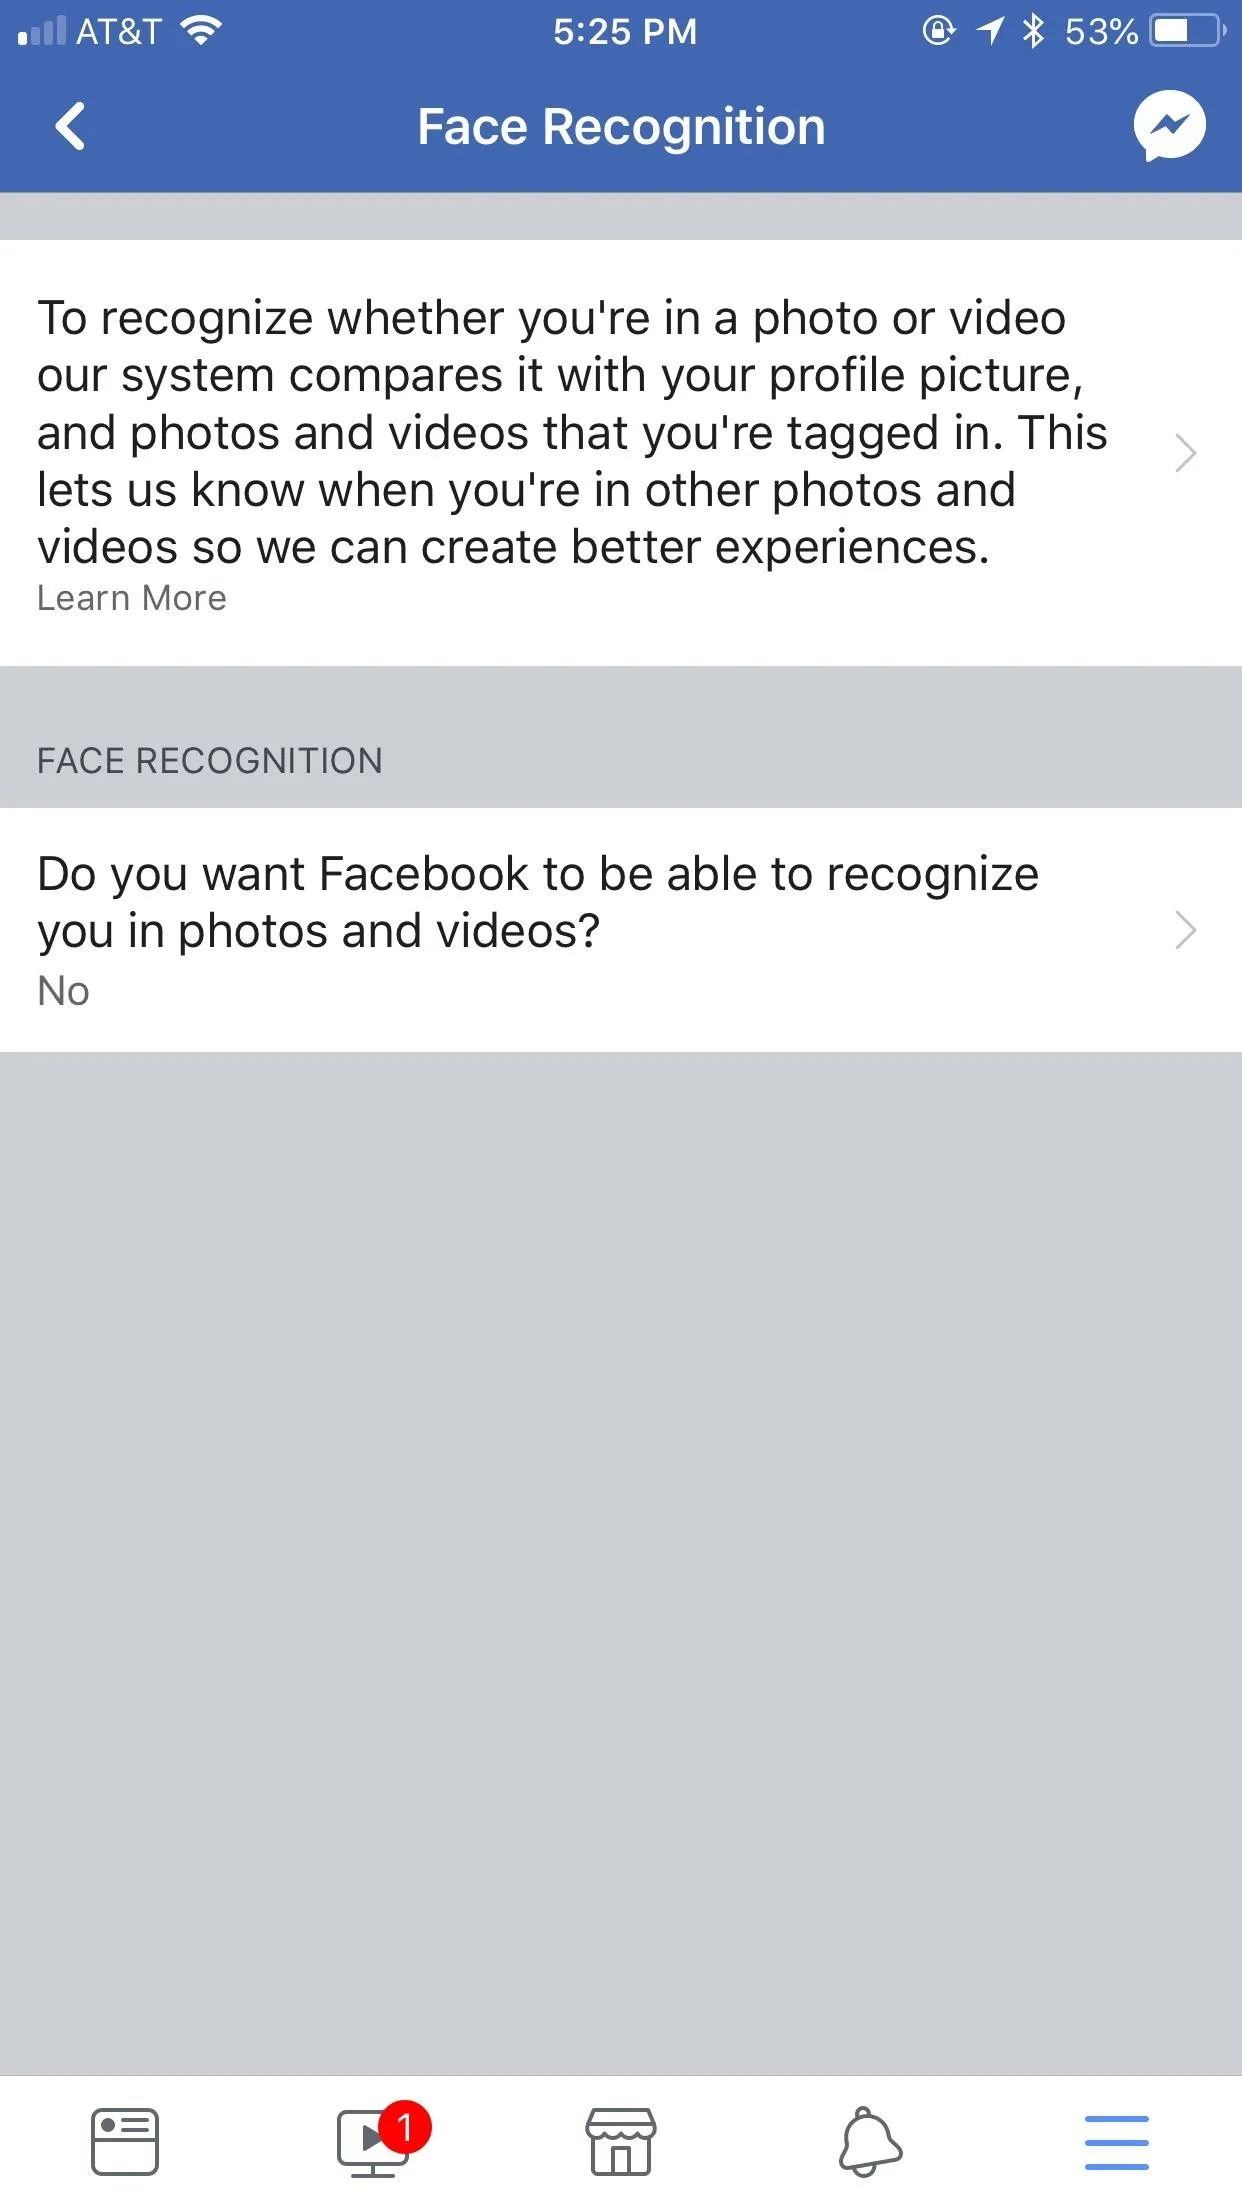
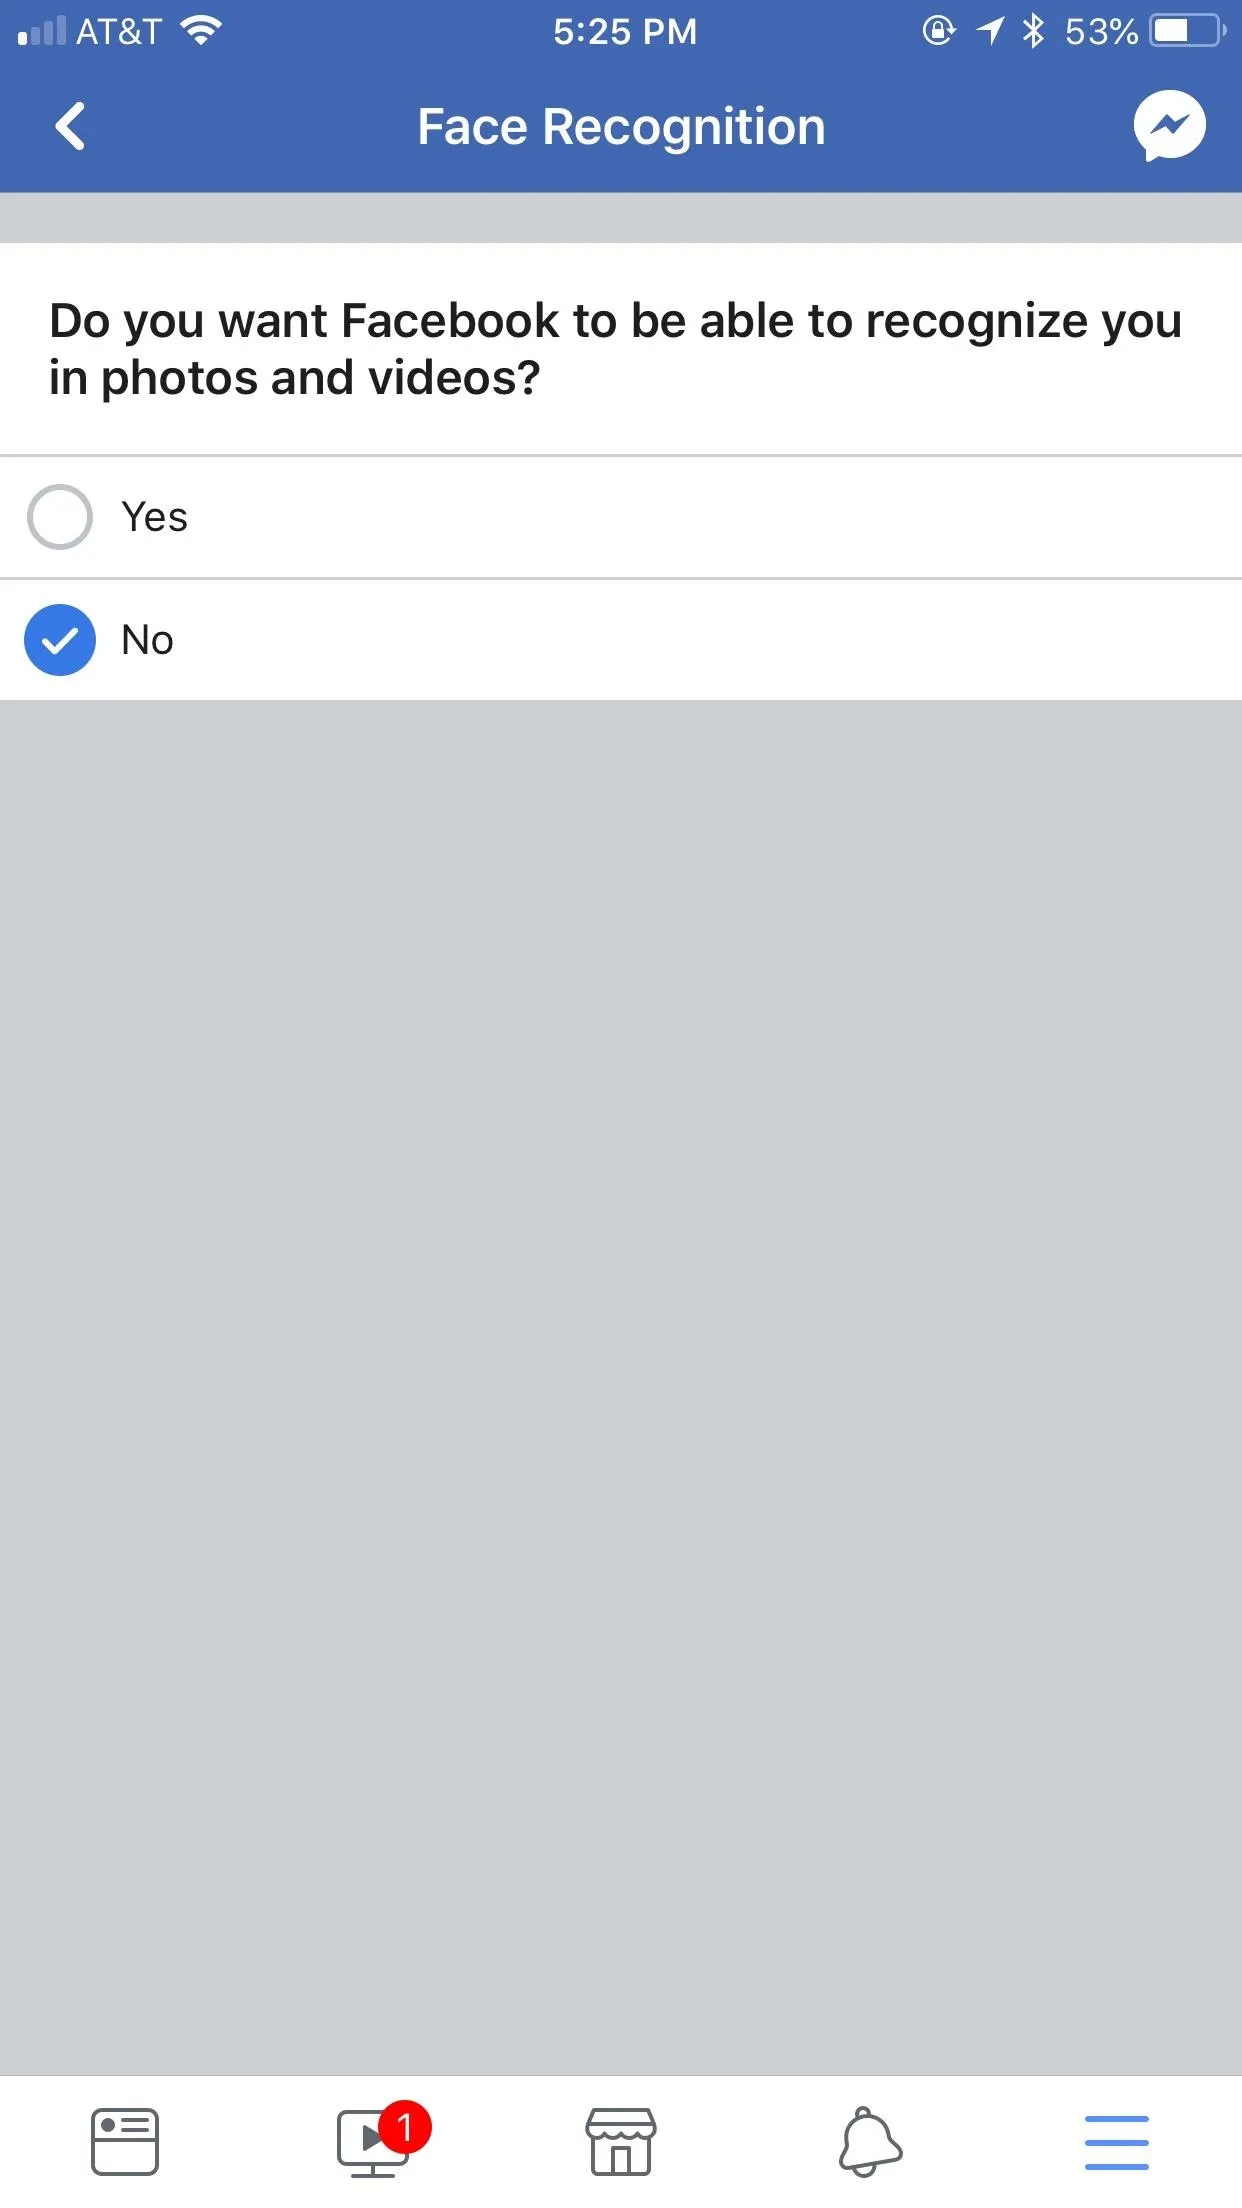
Face Recognition
Facebook claims it uses face recognition to find you in photos and videos you might not know are on Facebook. While that sounds like a security feature, those with privacy in mind probably don't want to give Facebook permission to scan their face.
Tap "Face Recognition" under Account Settings, then tap "Do you want Facebook to be able to recognize you in photos and videos?" Then, make sure "No" is selected."
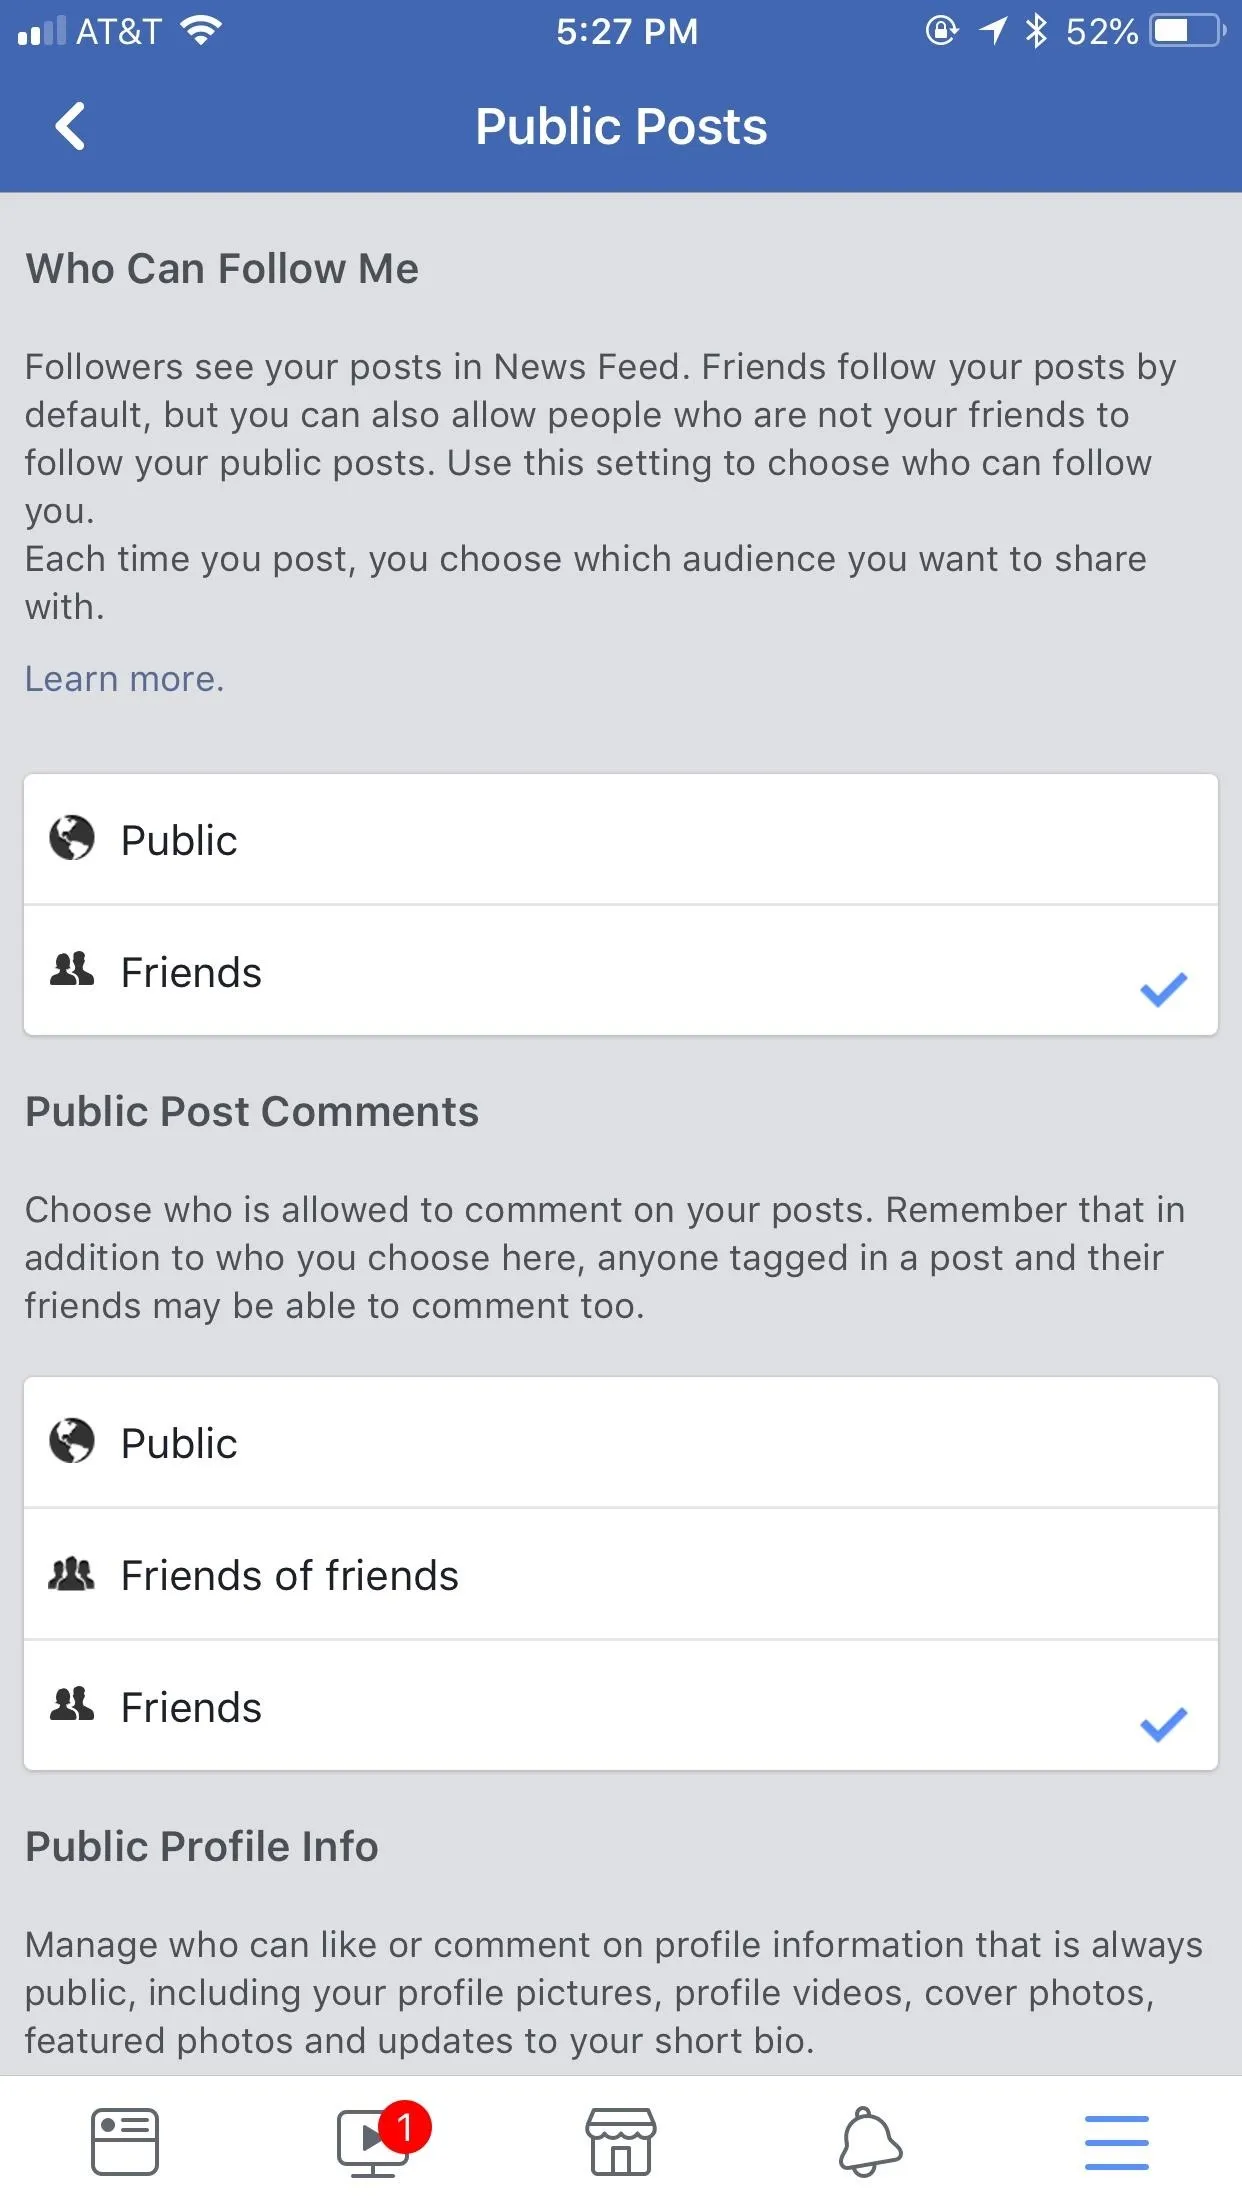
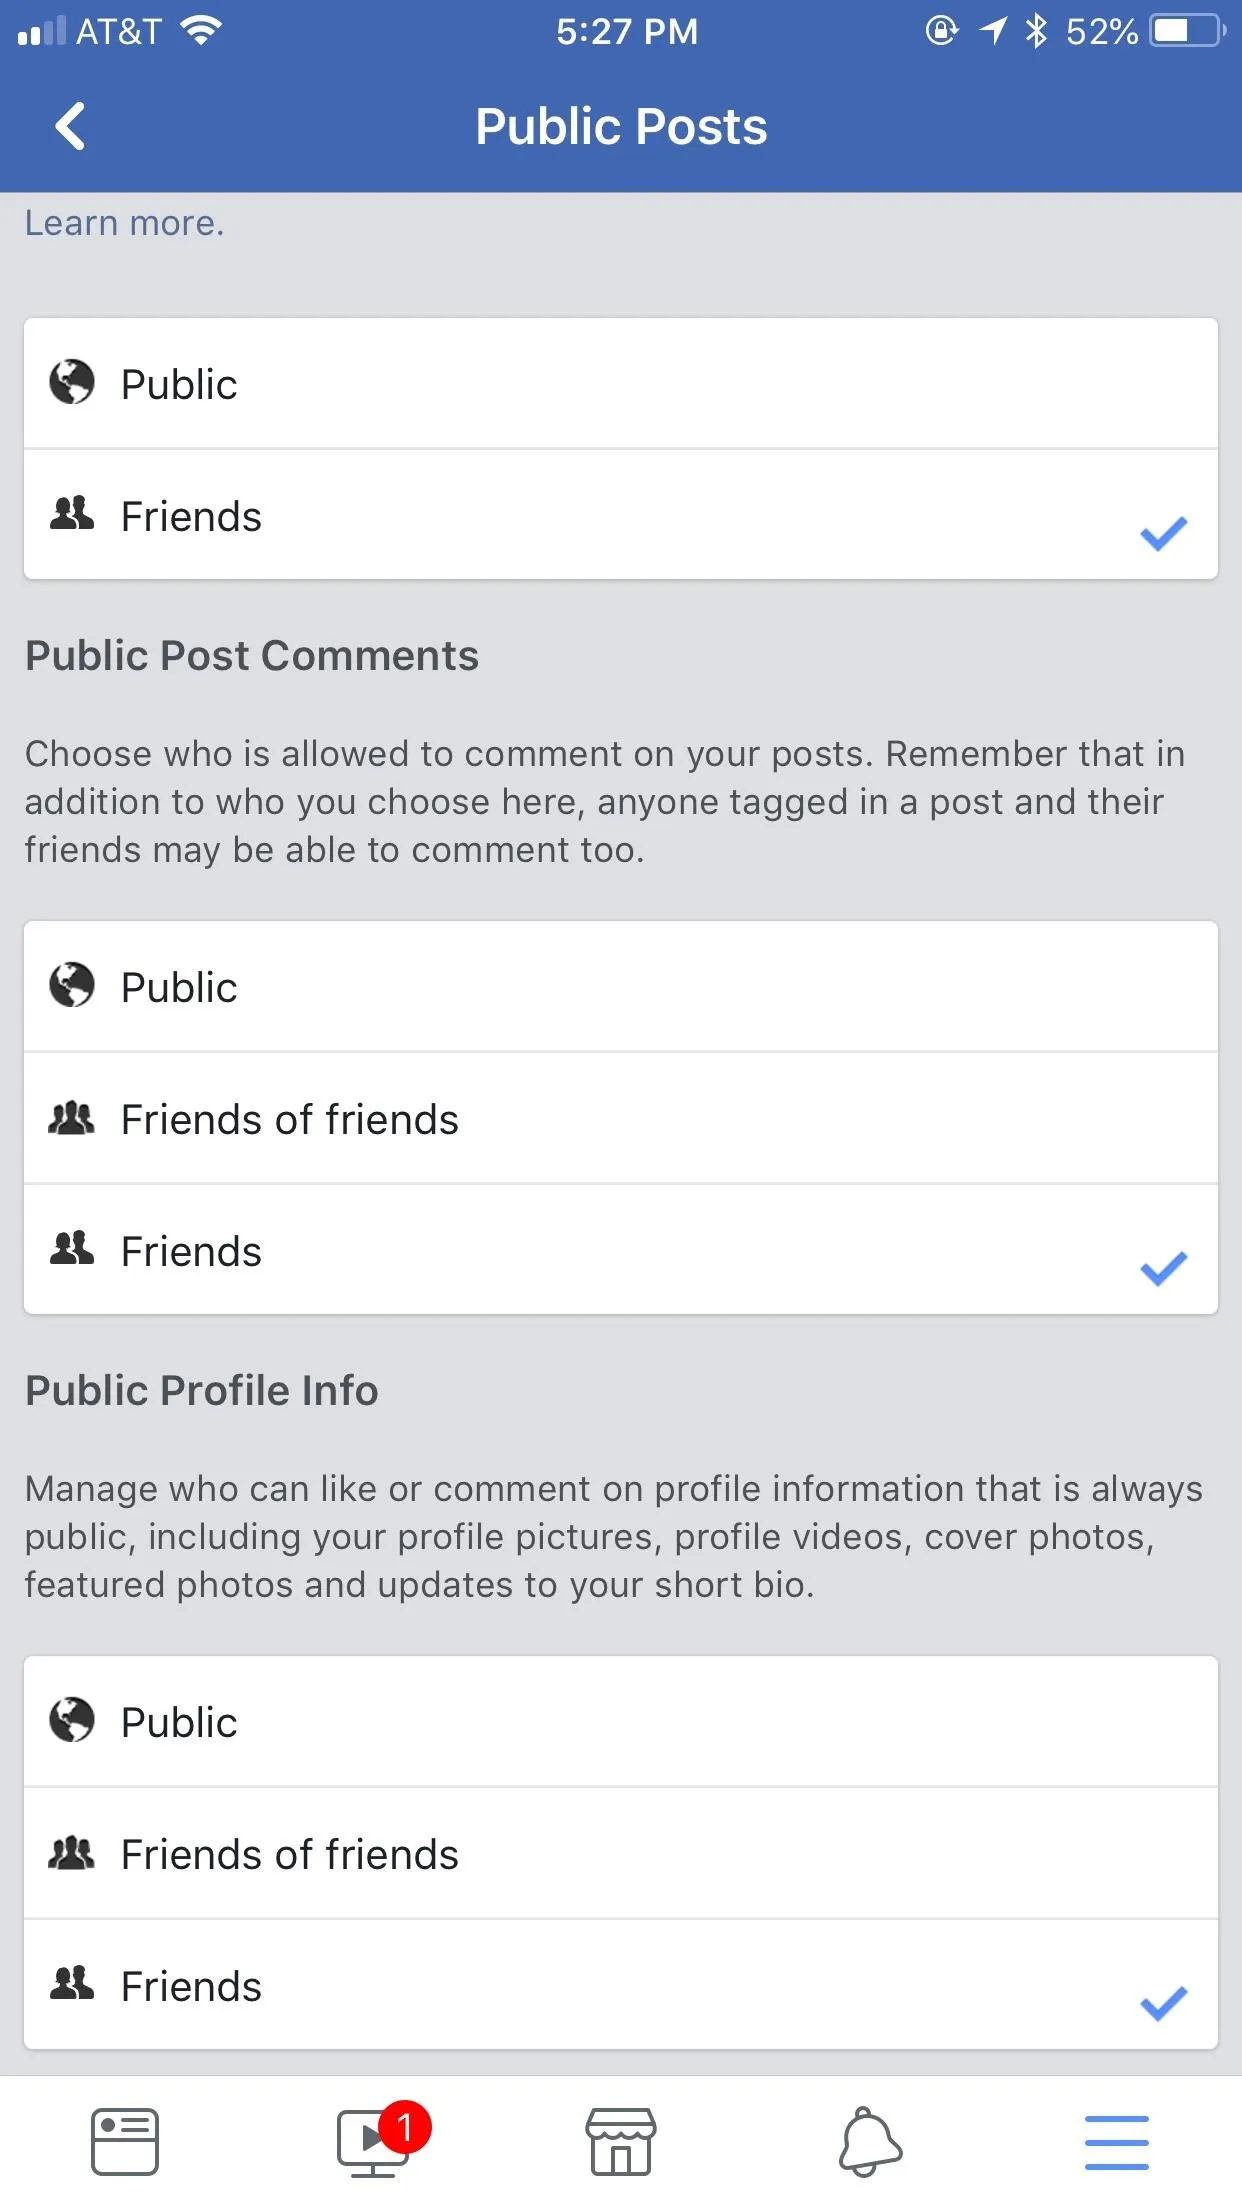
Public Posts
"Public Posts" under Account Settings gives you control over who can interact with your Facebook posts and activity. You can limit who gets to follow your account, as well as who can like or comment on your profile information.
- Set Who Can Follow Me, to "Friends."
- Set Public Post Comments to "Friends."
- Set Public Profile Info to "Friends."
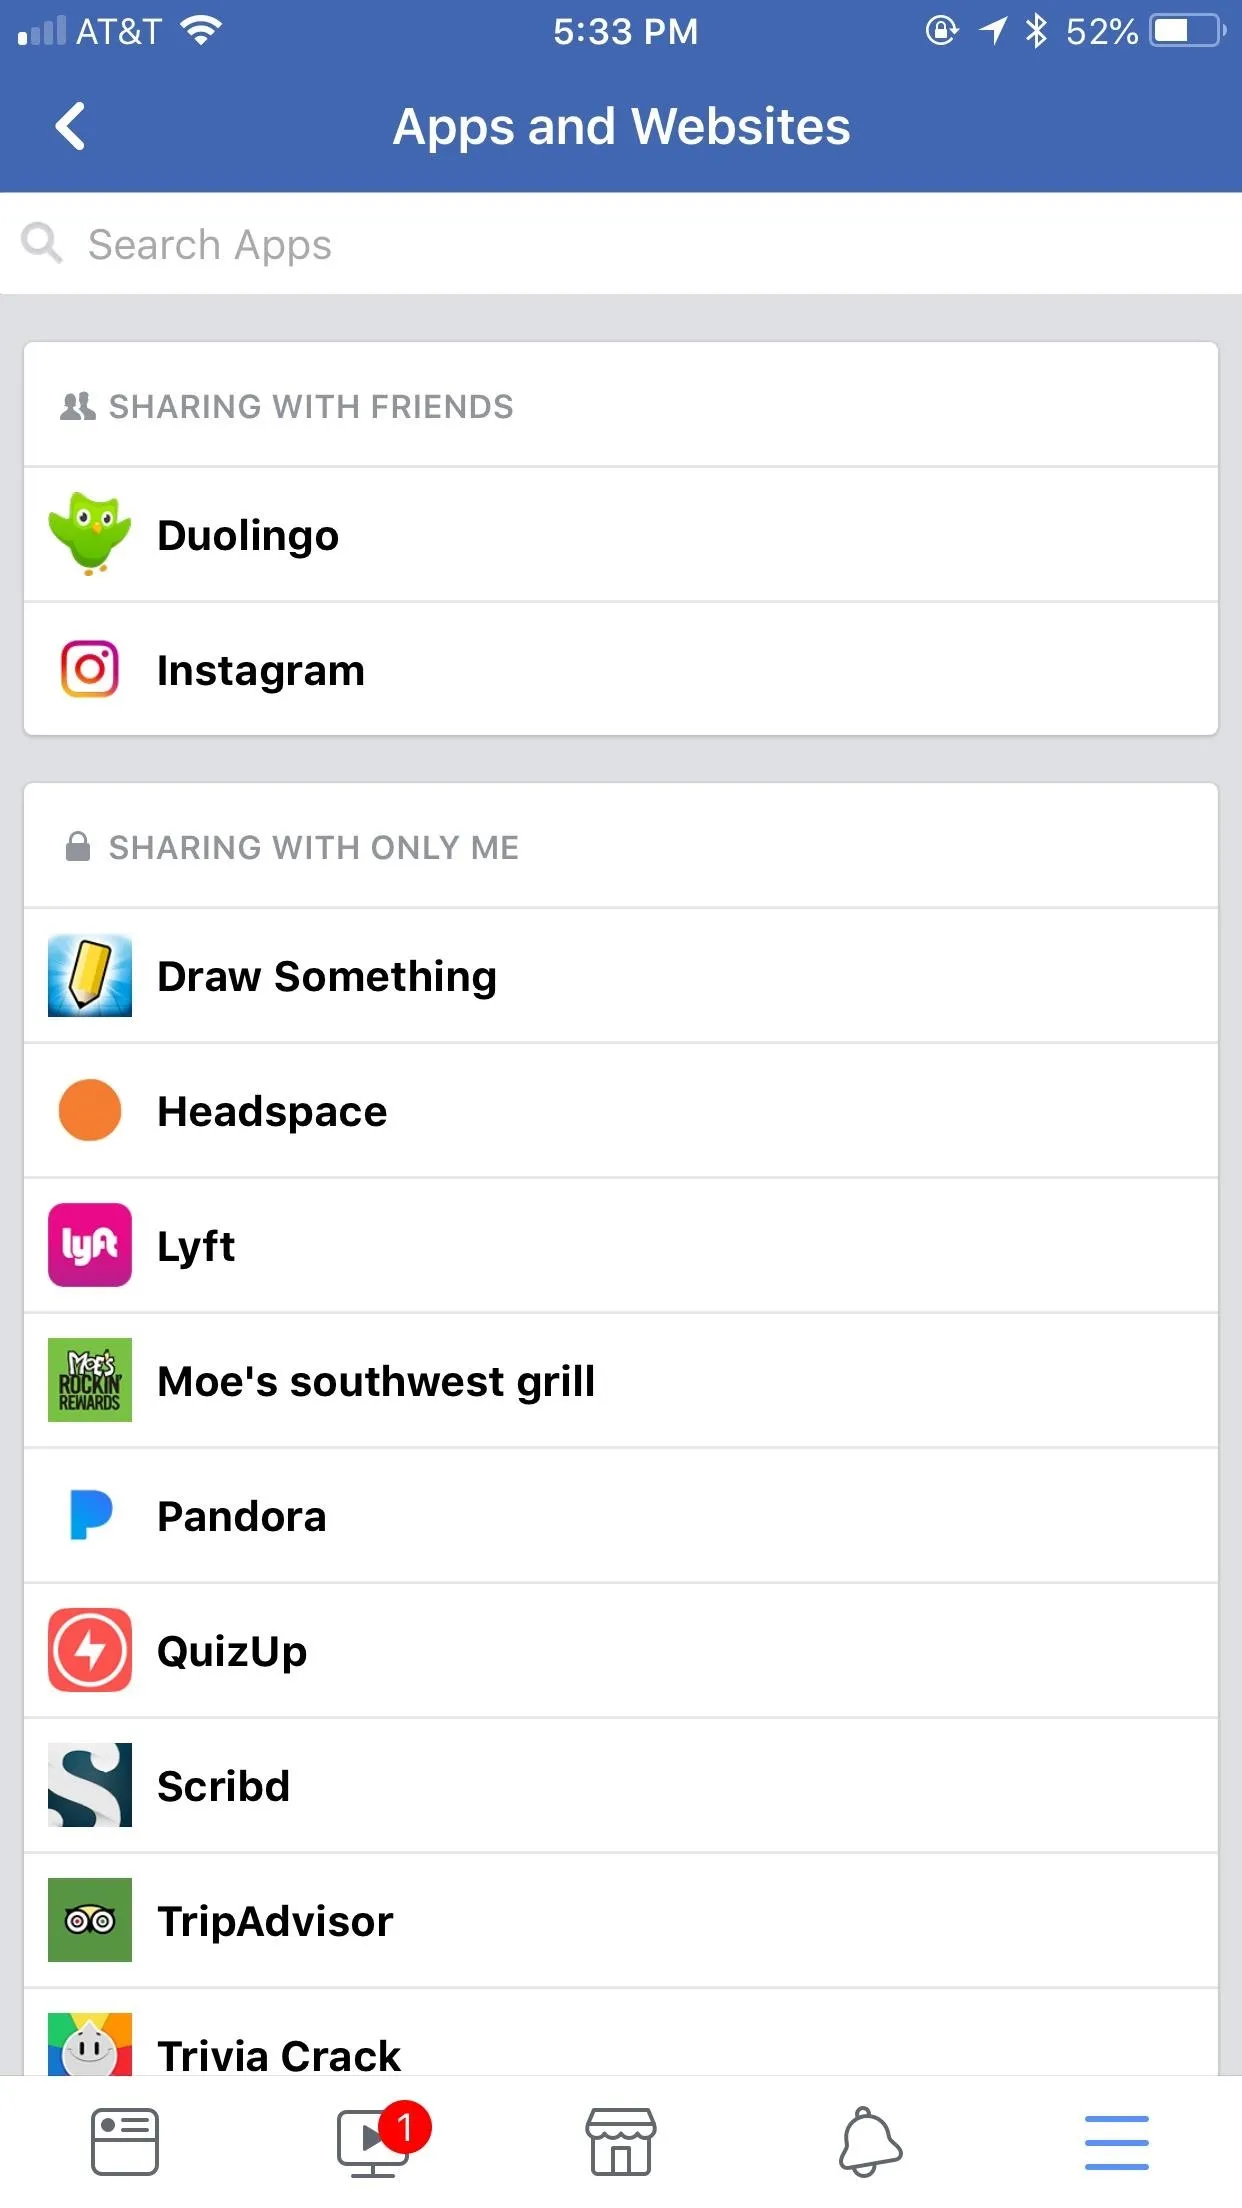
Apps
You might have used Facebook to sign into certain apps and services. As such, many of these apps might have access to some or all of your Facebook data. You can control that from "Apps" under Account Settings.
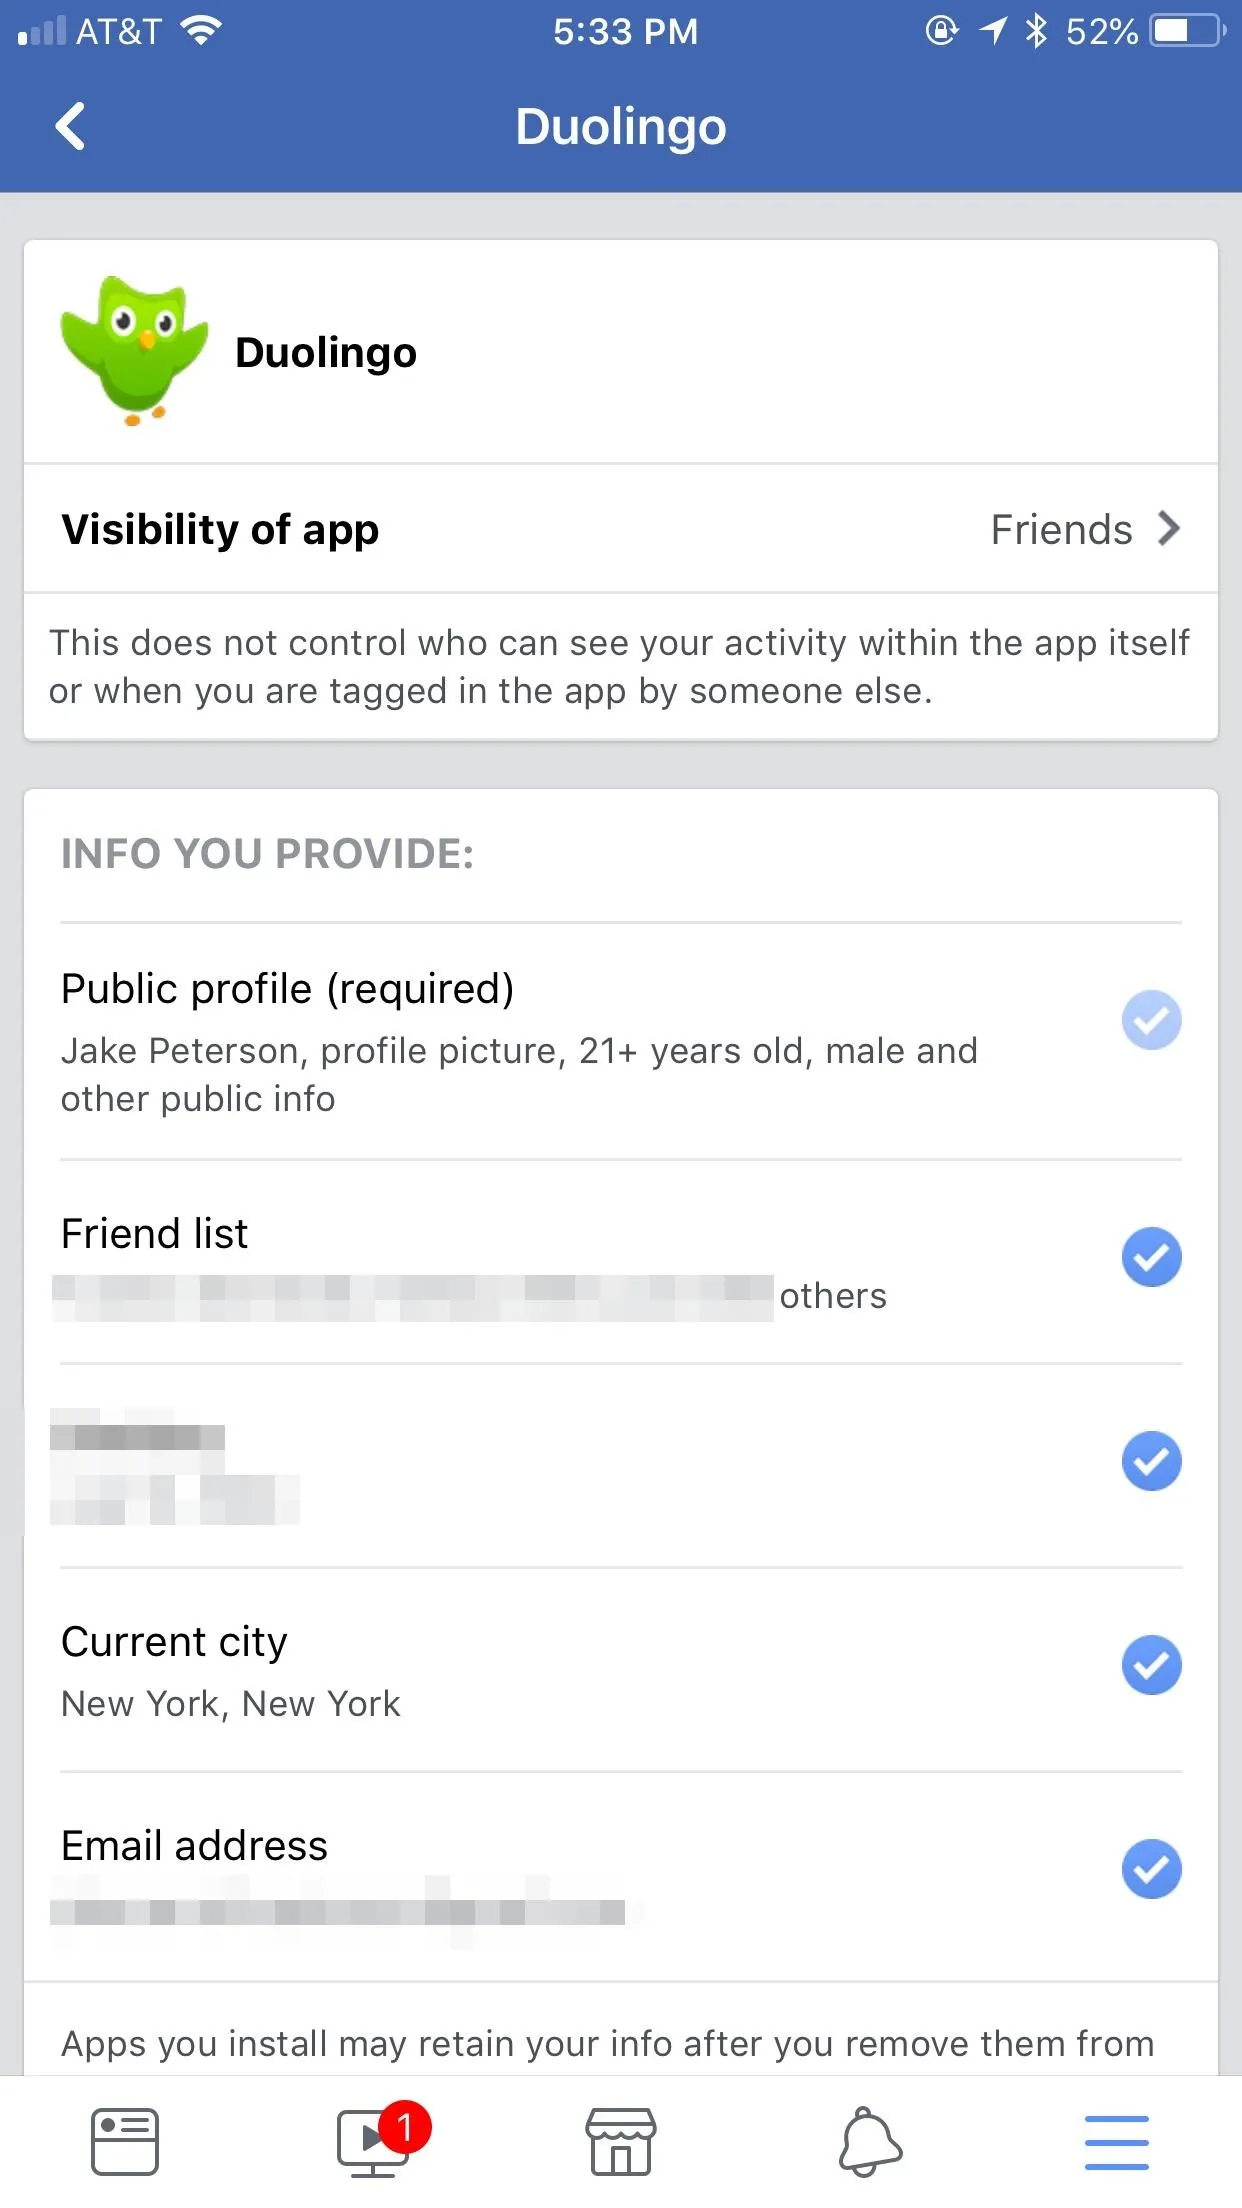
Logged in with Facebook
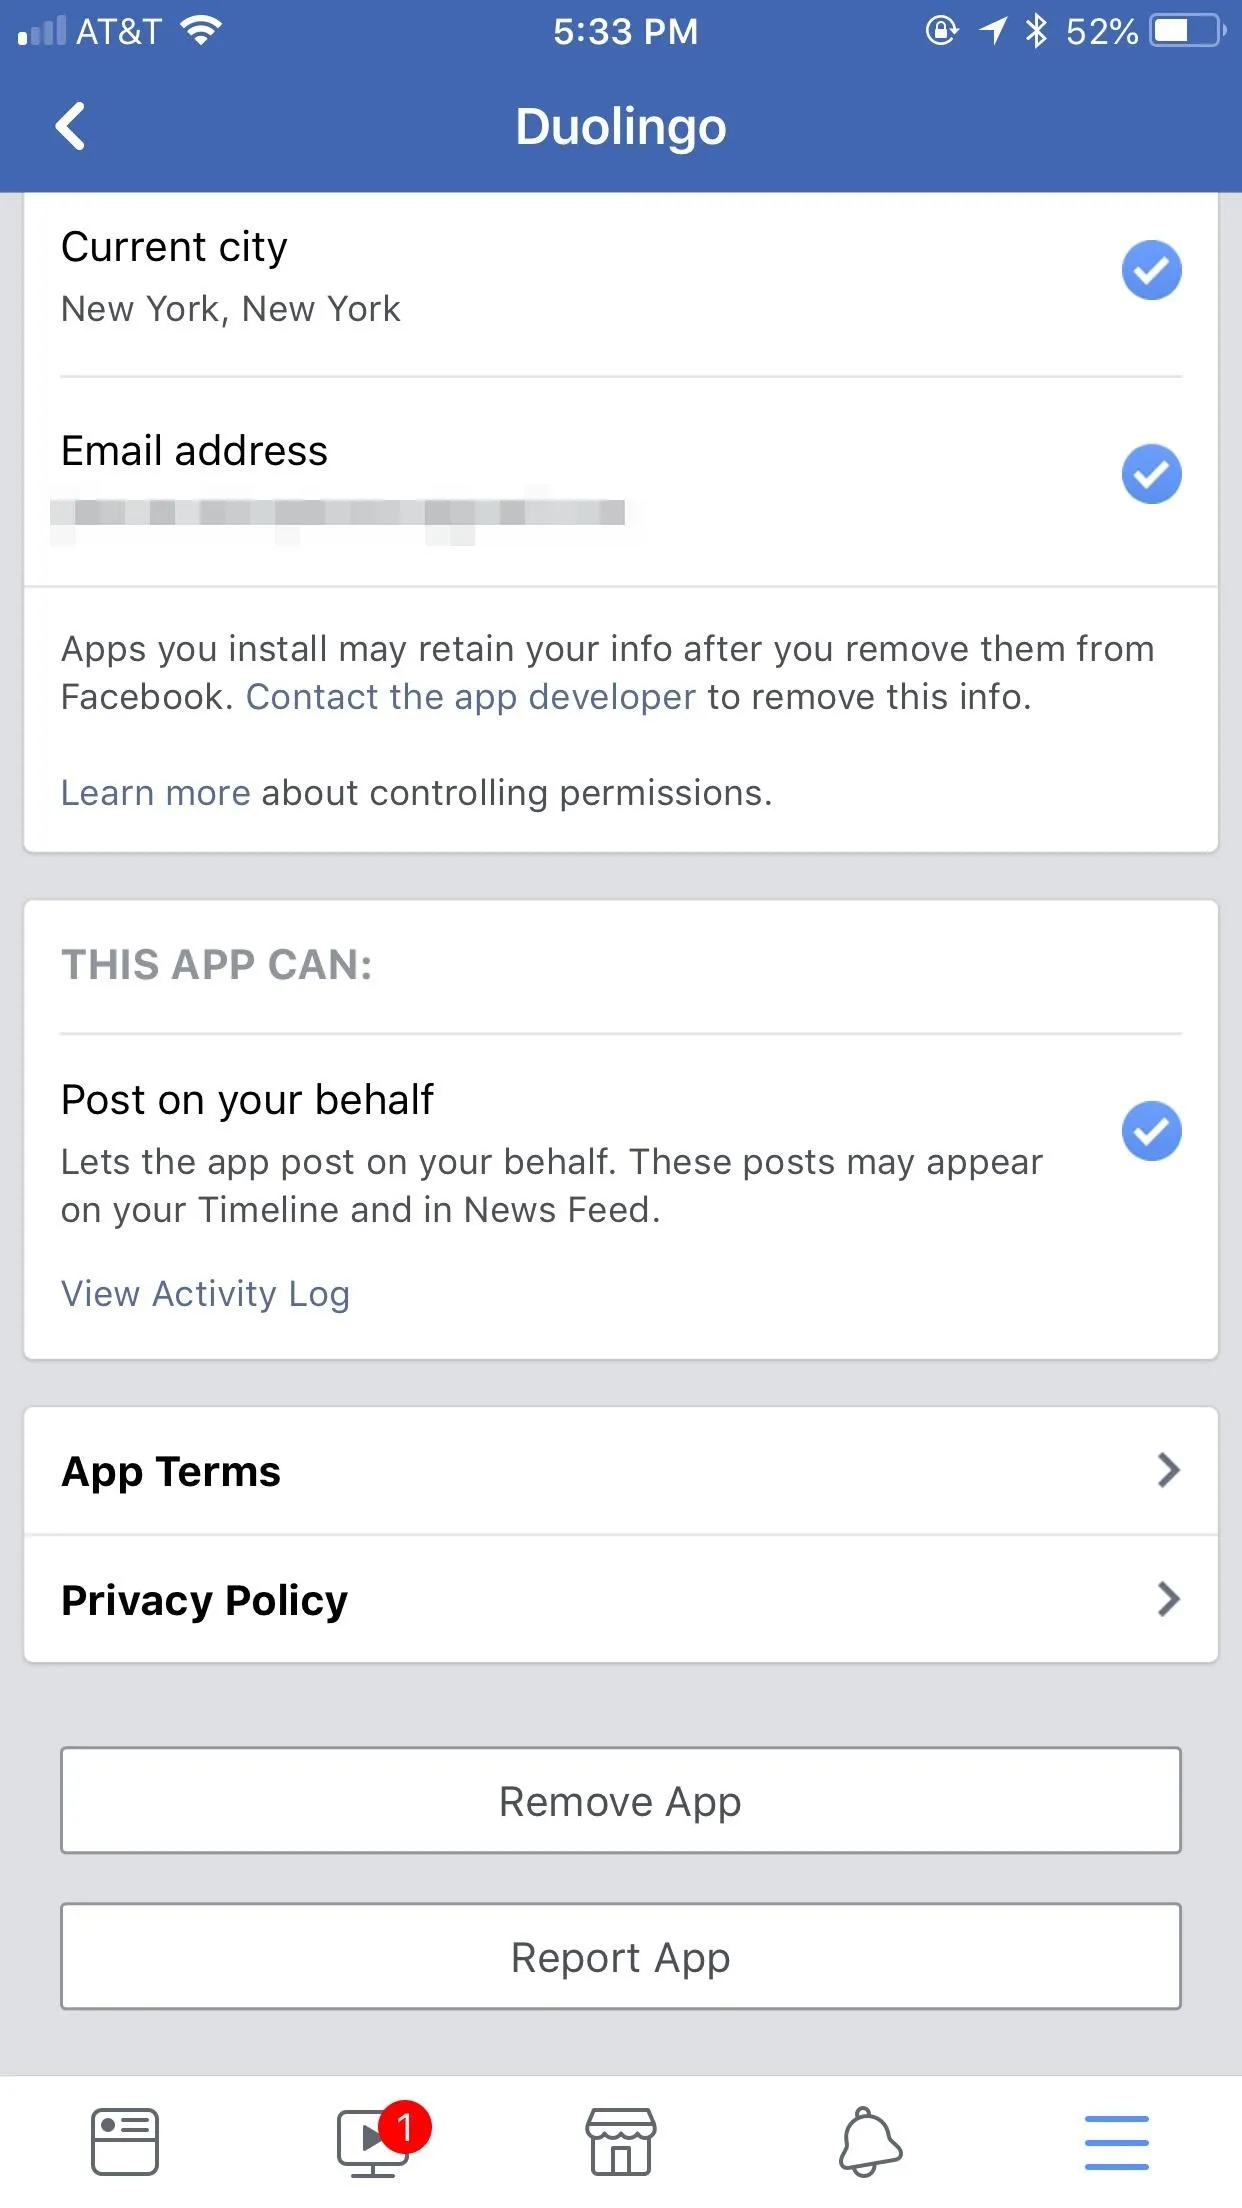
Here, you will find all the apps you've used Facebook to sign into. Tap on each to get a full readout of that app's permissions with Facebook. Make sure "Visibility of app" is set to "Friends" or "Only me" for maximum security. Deselect all permissions you can, too, as most are not required in order to use the app, including disabling "Post on your behalf."
If you want to delete the app from your Facebook account altogether, tap "Remove App" at the bottom of the display.
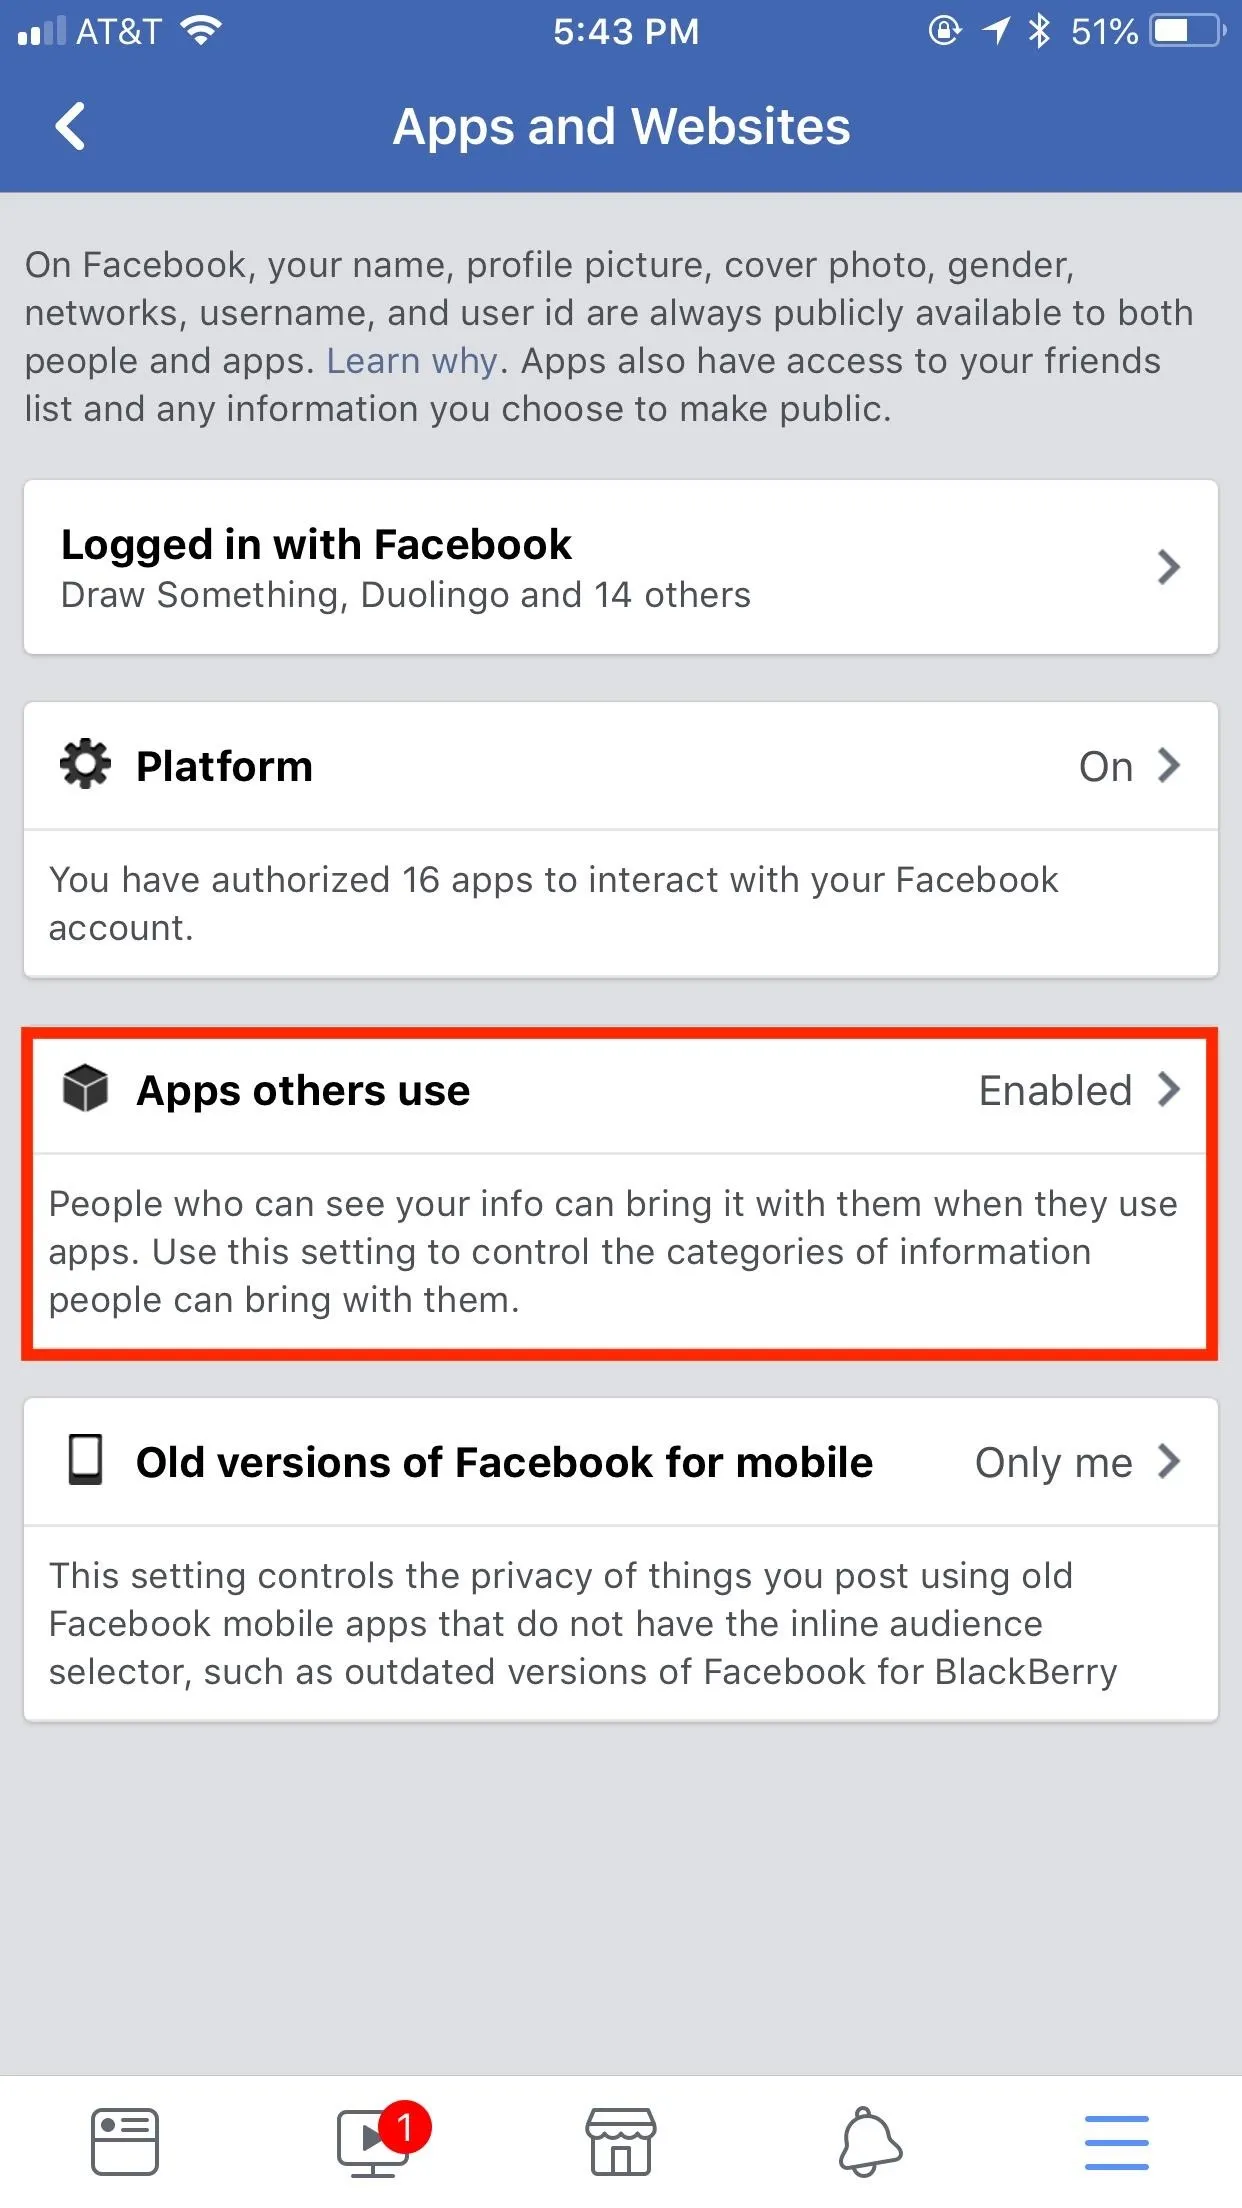
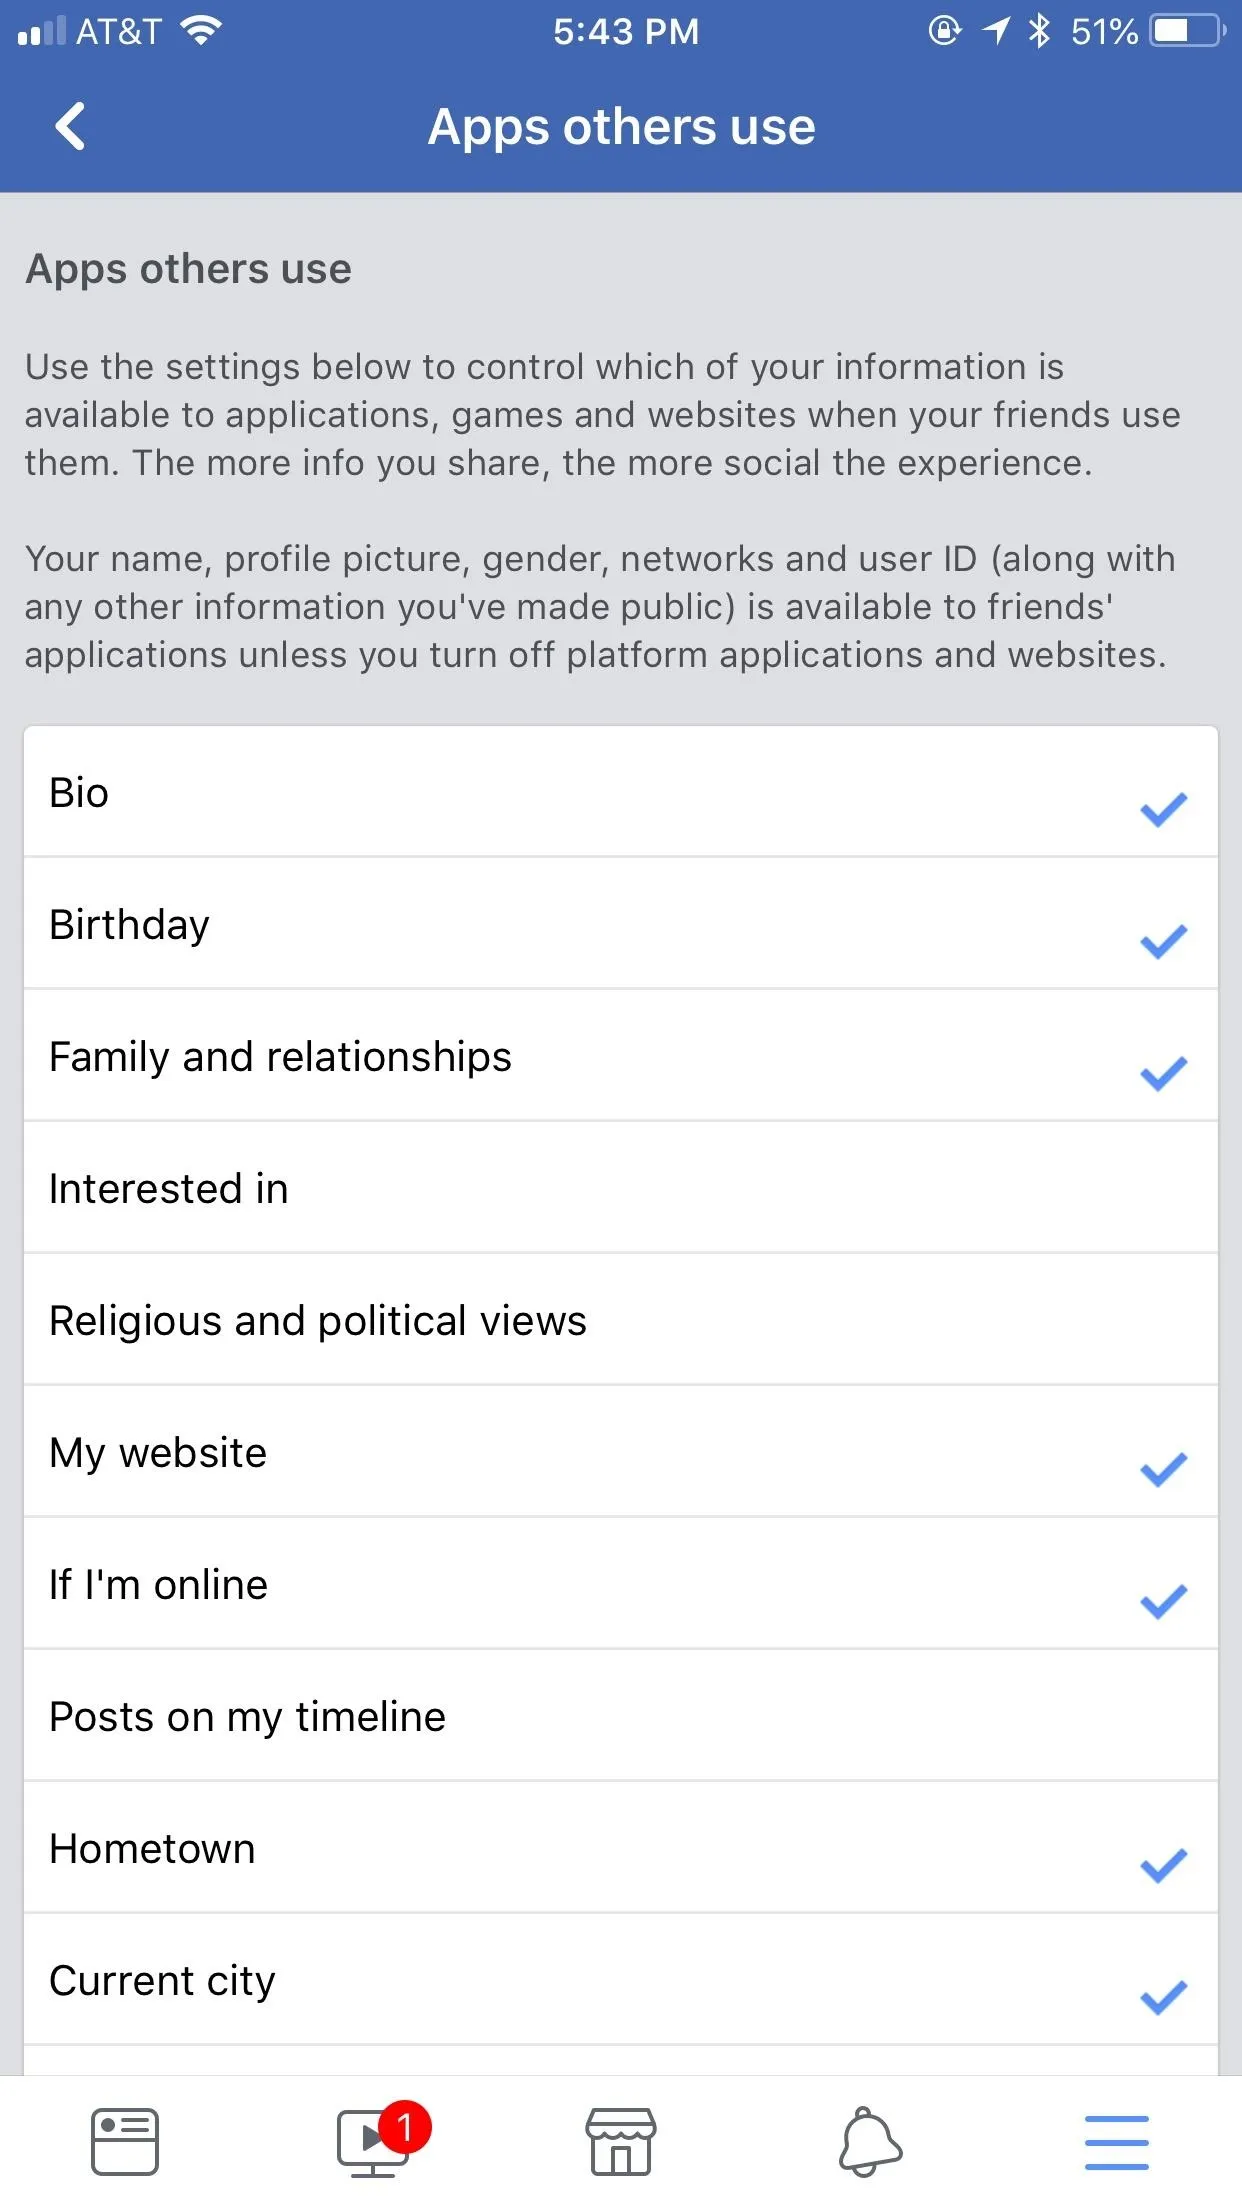
Apps Others Use
You probably don't realize it, but Facebook lets your friends' applications take your "approved" info. Under "Apps Others Use," you can disable all information you don't want to share with those apps. For many, that probably means none of this info.
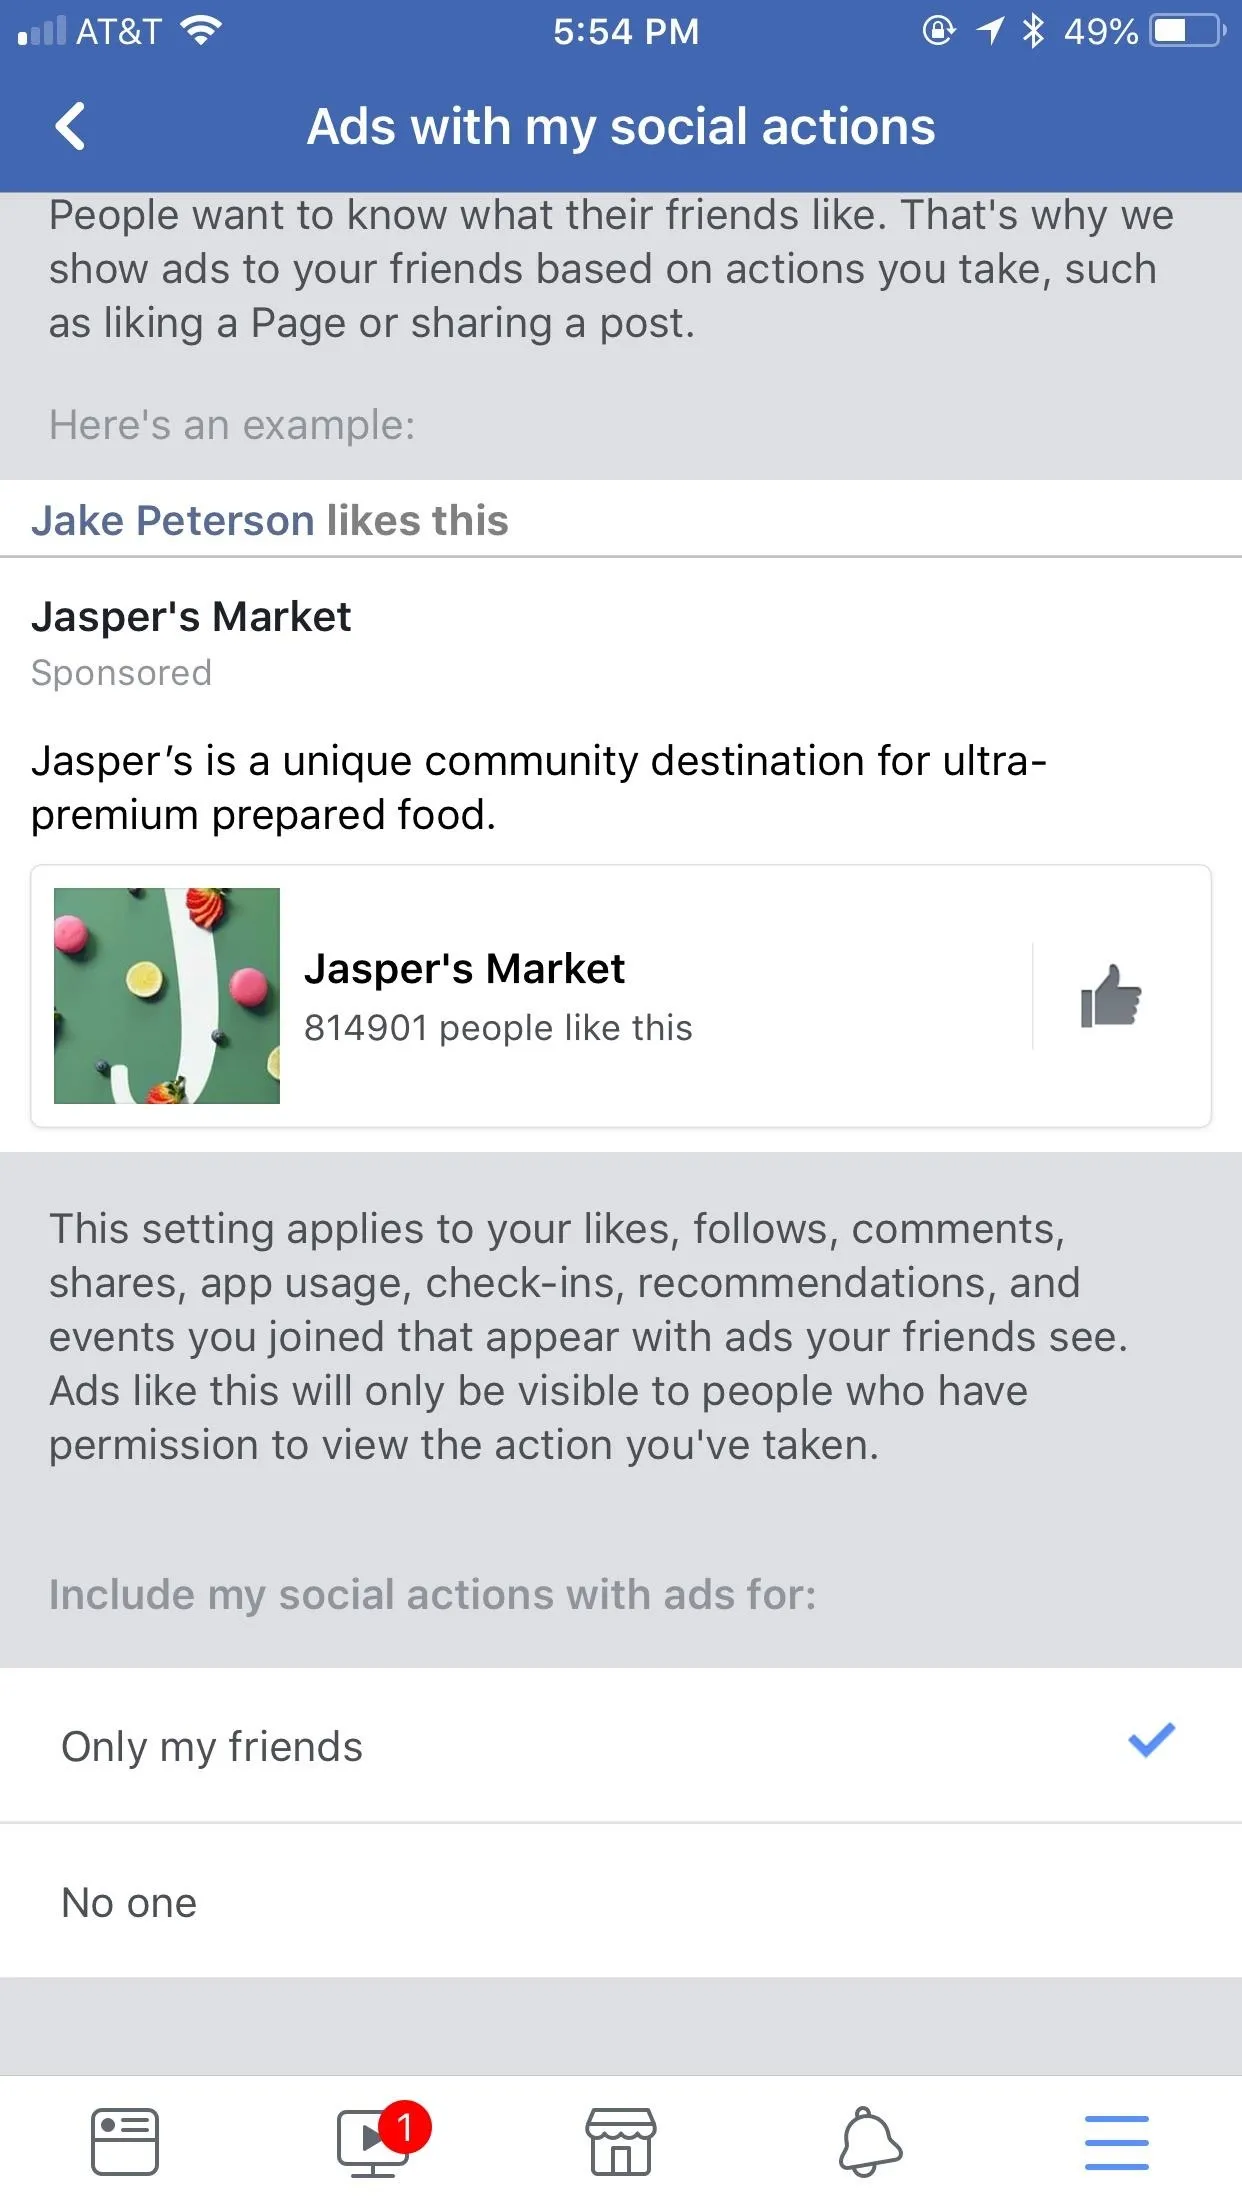
Ads
For all of Facebook's criticisms regarding advertisers and privacy, the company does give you some decent tools to constrict what those advertisers get to see. These tools are just very hidden, of course.
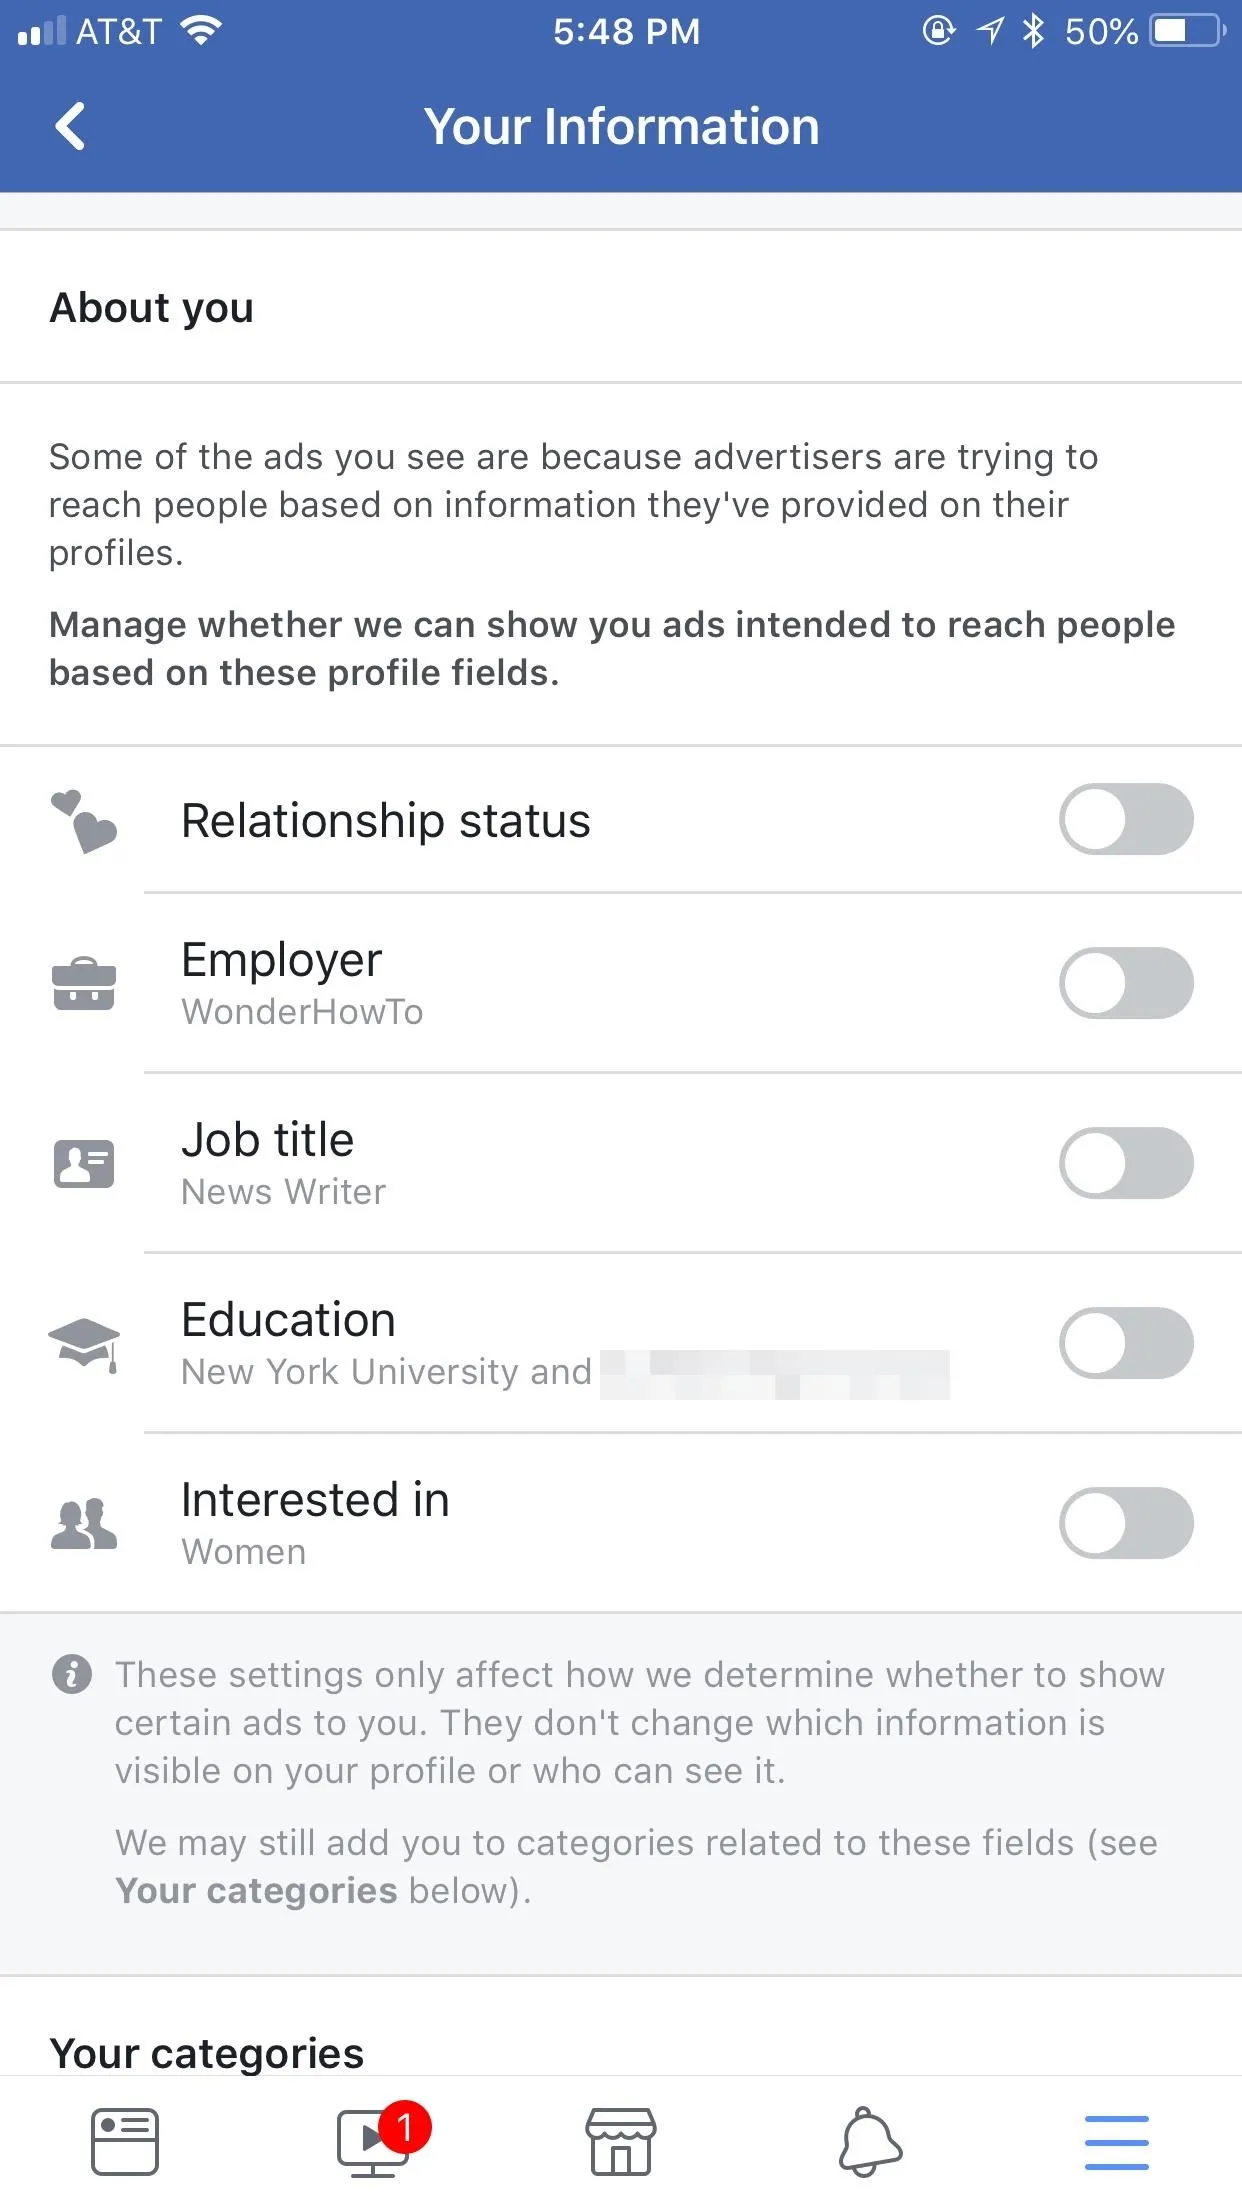
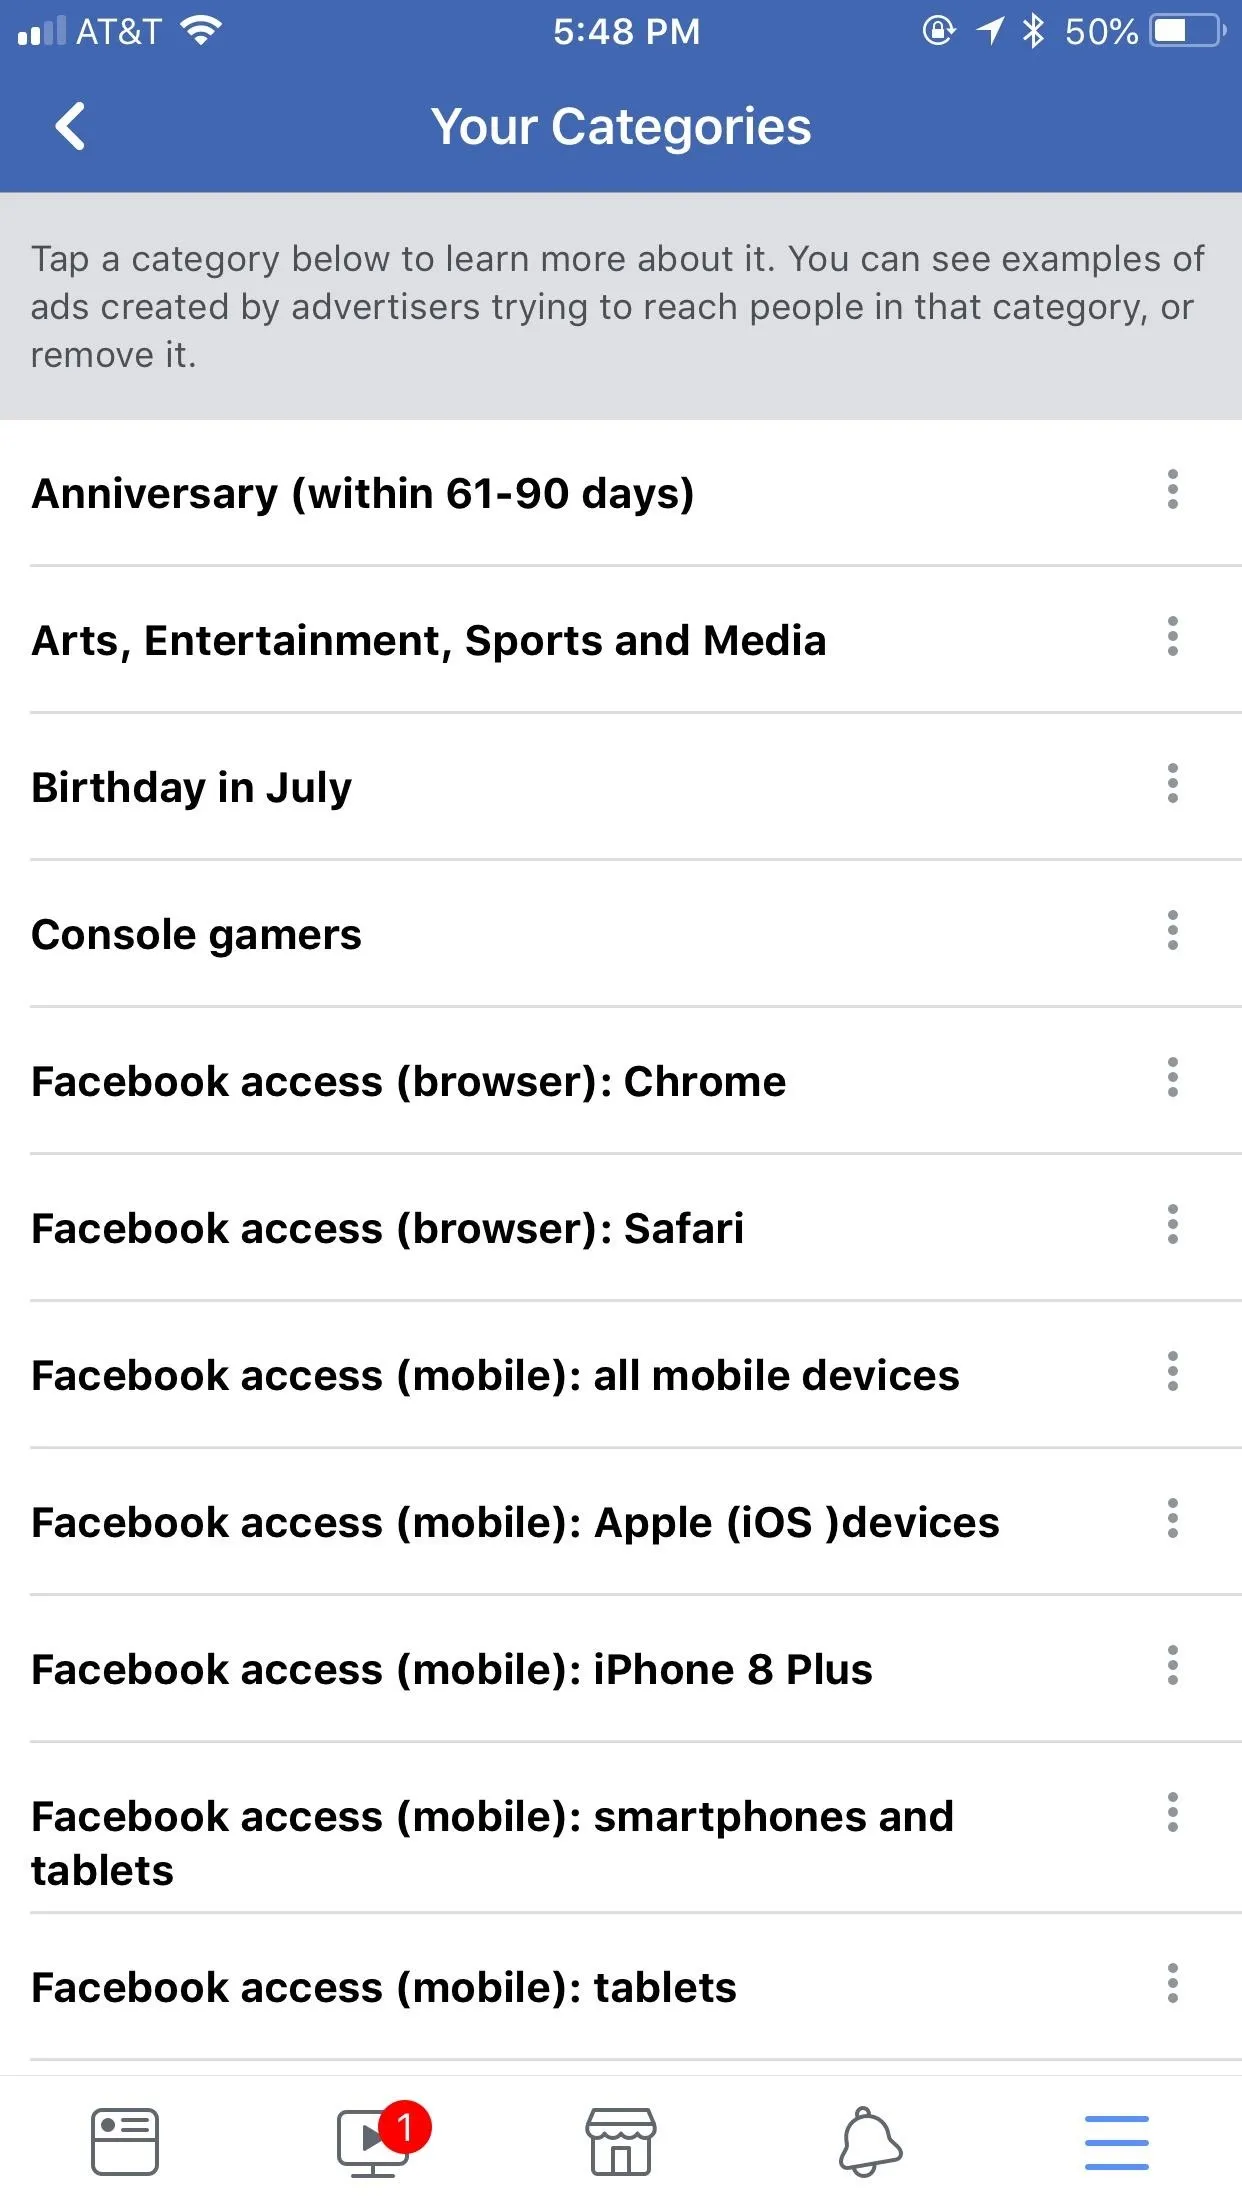
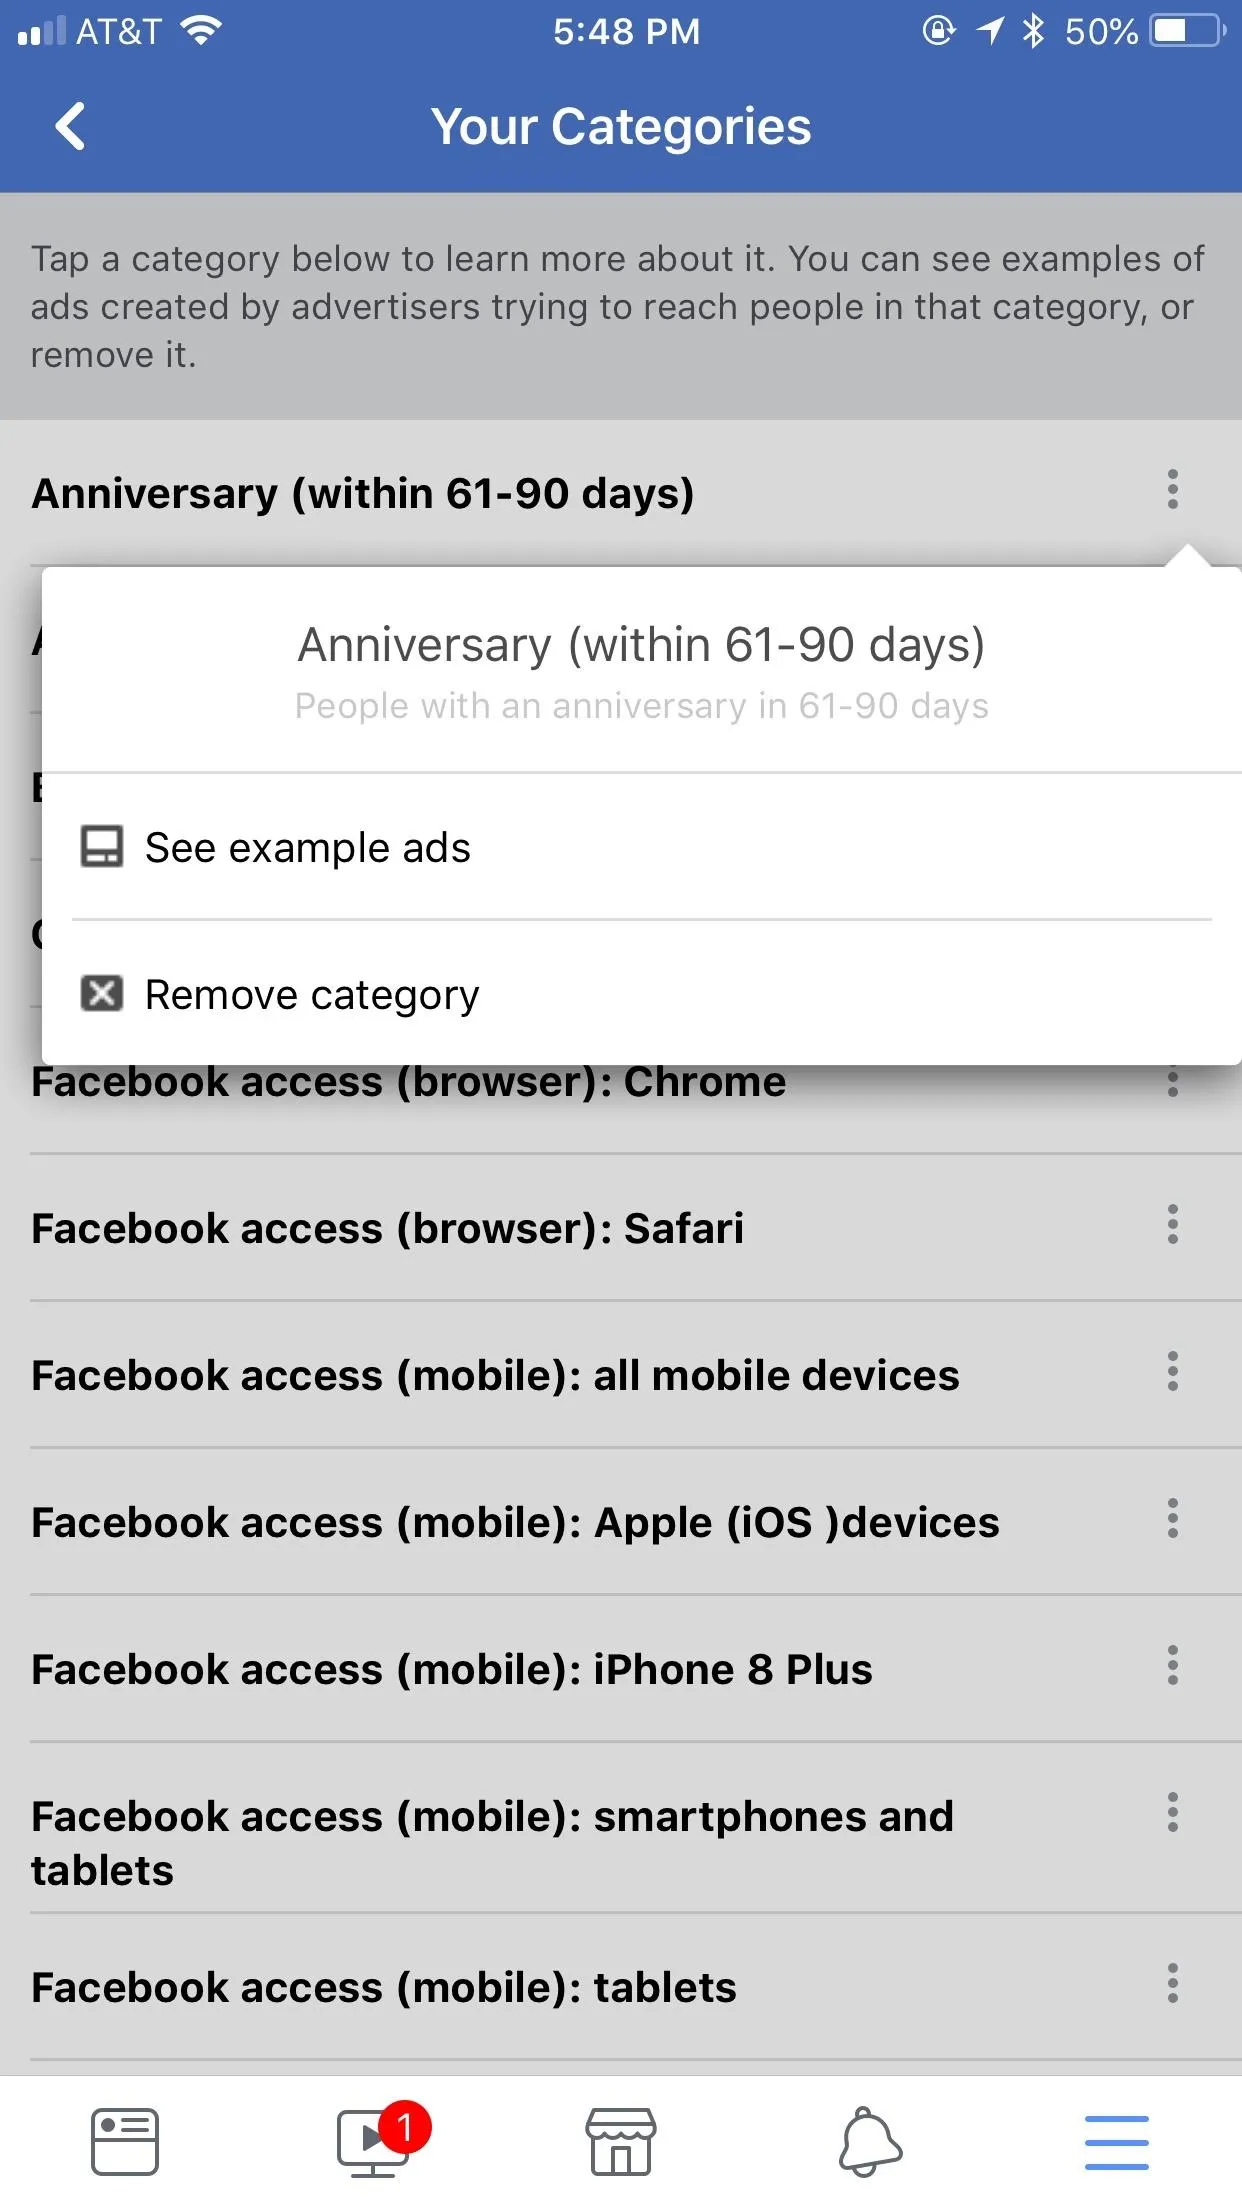
Under "Ads" in Account Settings, you'll find settings like "Your information," which shows you what parts of your profile are accessible to advertisers. Surprisingly, you can disable all of the options here. You can also view what "categories" advertisers have you in — which is actually a pretty enlightening experience — and choose which, if not all, you'd like to be removed from.
Under "Ad settings," you'll find options to disable ads based on your visited websites and apps, ads on apps and websites partnering with Facebook's ad network, and ads to other people based on your Facebook actions. You can and might want to disable them all for privacy's sake.
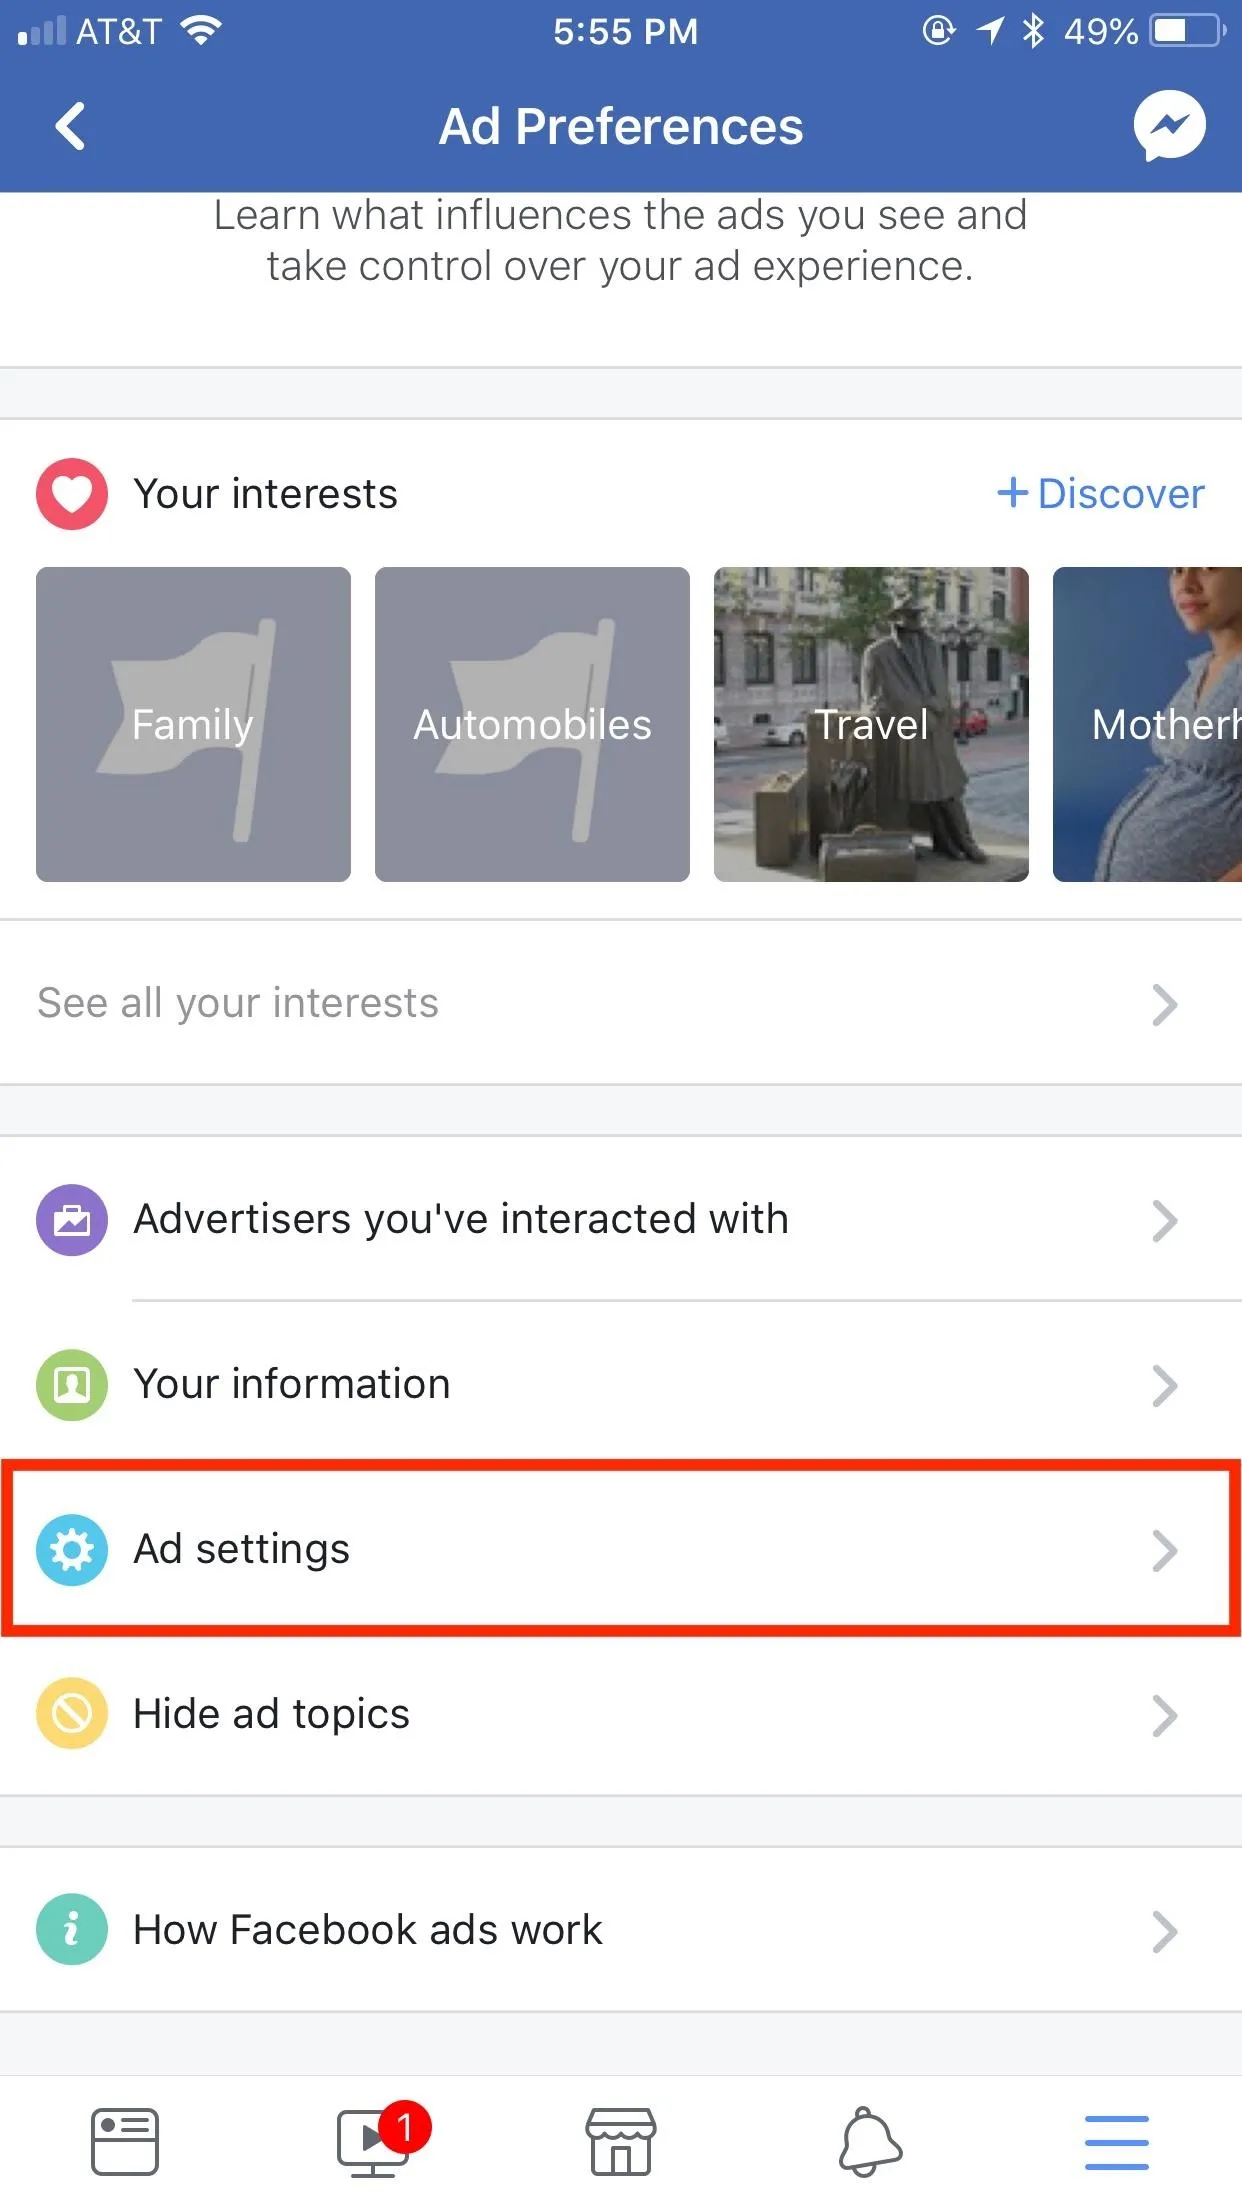

The only downside is less relevant ads, but hey, are they really that relevant to begin with?
- Follow Gadget Hacks on Facebook, Twitter, YouTube, and Flipboard
- Follow WonderHowTo on Facebook, Twitter, Pinterest, and Flipboard
Cover image and screenshots by Jake Peterson/Gadget Hacks


Comments
Be the first, drop a comment!