


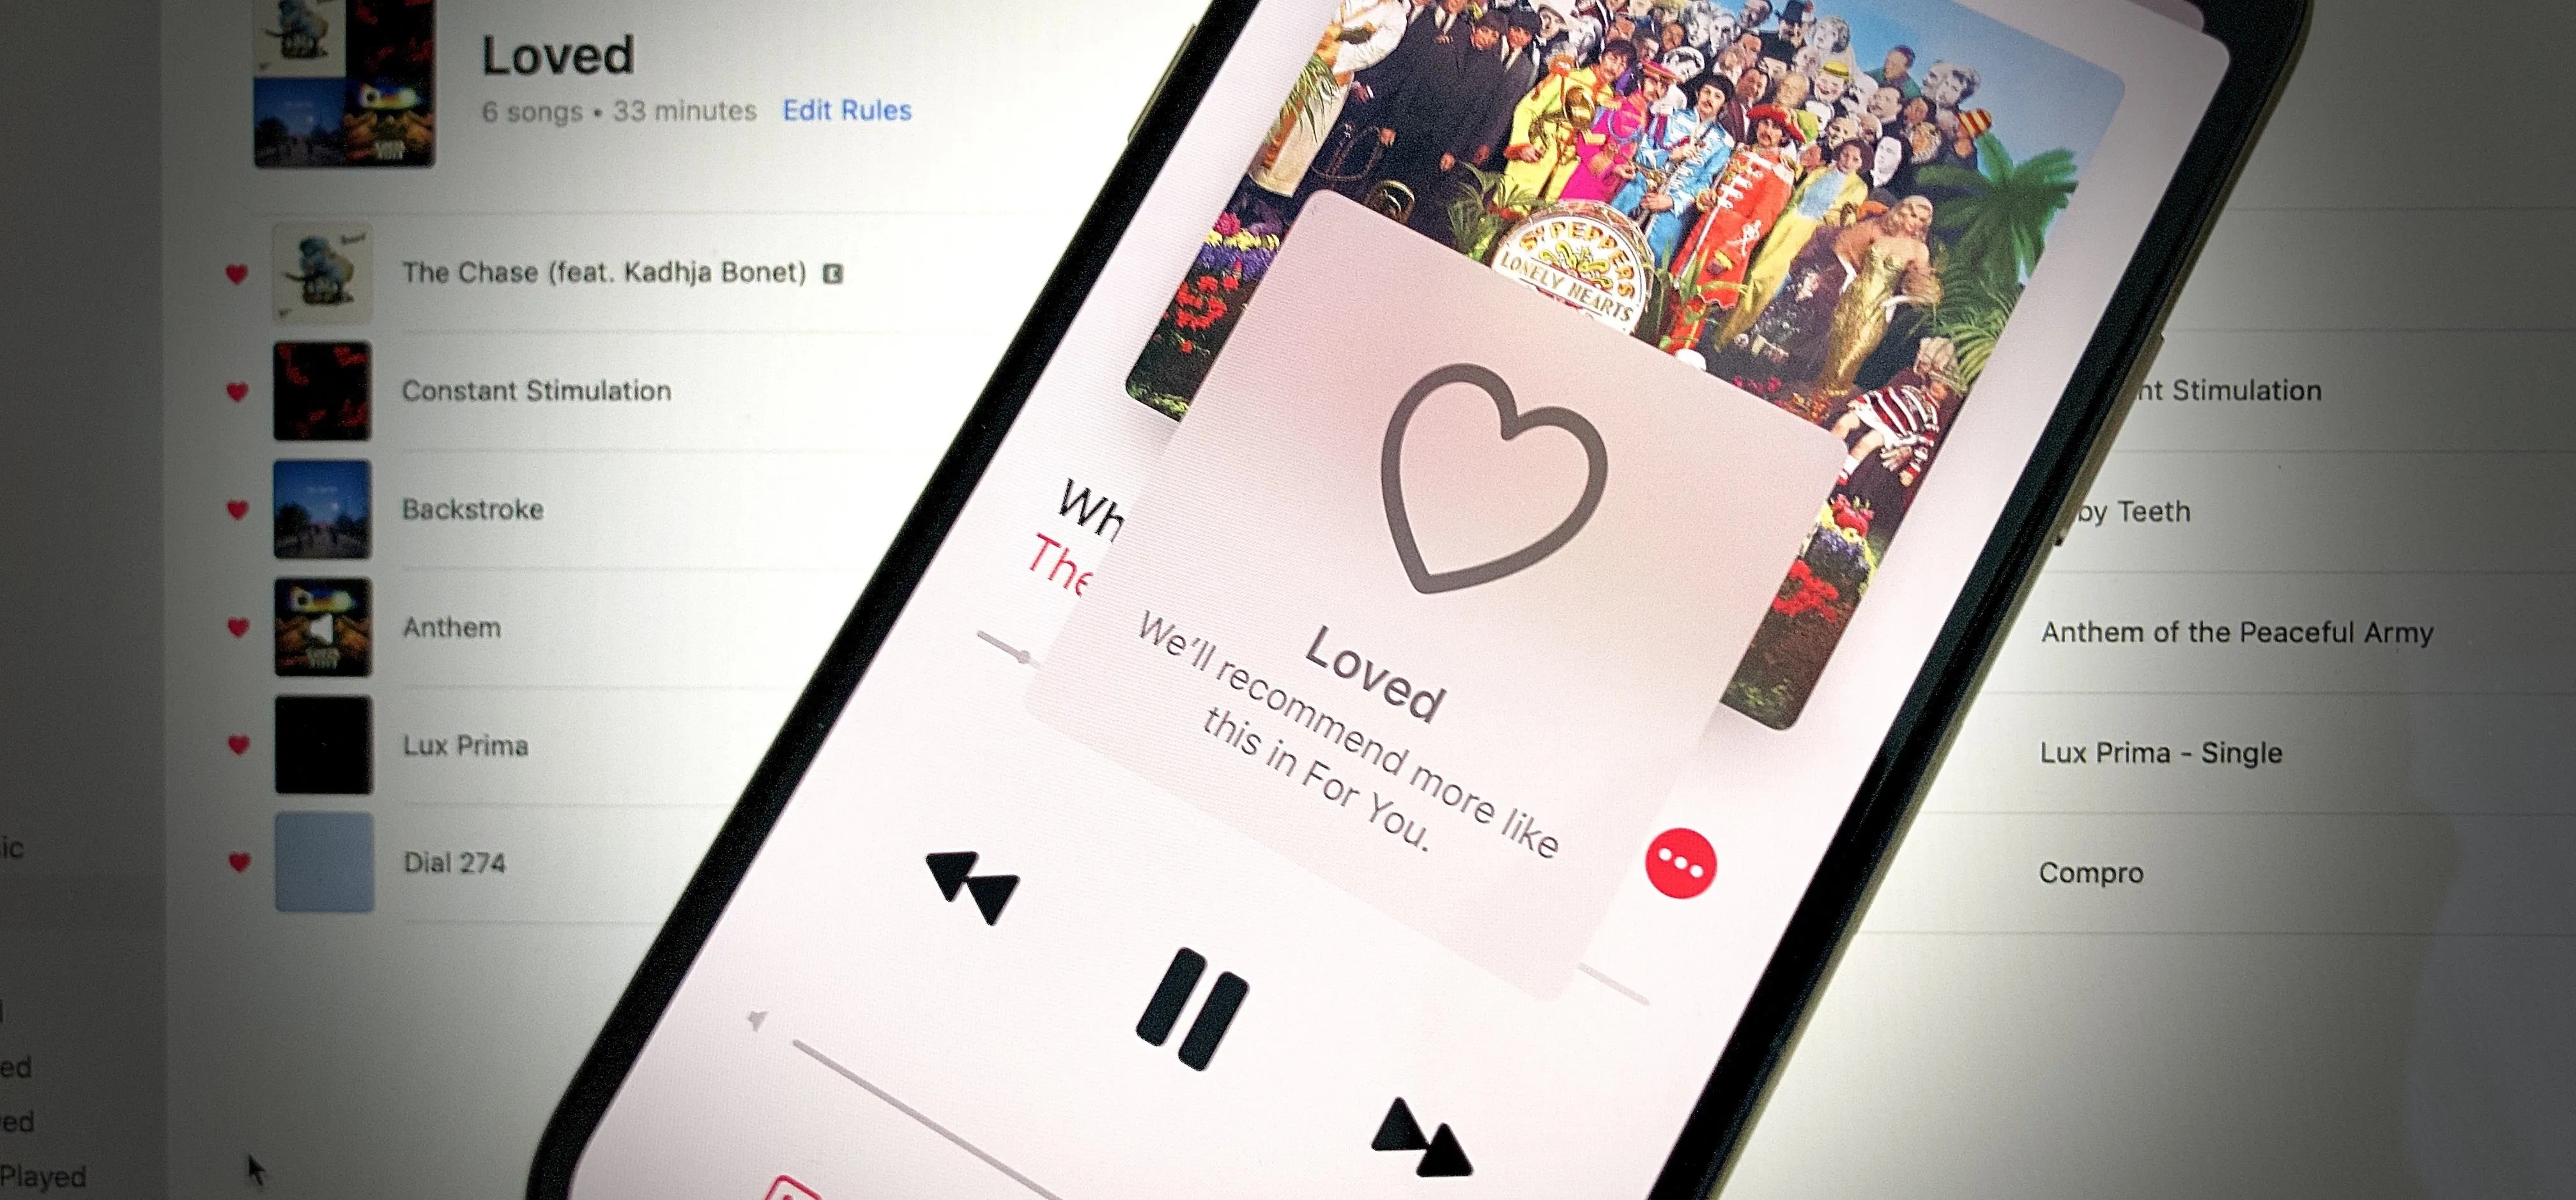
In Apple Music, loving and disliking songs is a great way to teach Apple's subscription service what type of tunes you like and which you don't. While it also seems like it should be an excellent way to keep track of songs you enjoy in the wild, there's no clear way to view all of your loved tracks in one convenient list. There is a way, however, but easy it is not.
For some strange reason, Music's mobile app doesn't show you a list of your loved songs anywhere. Not on iPhone, and not on Android. There also isn't a default playlist for loved songs in the iTunes or Music app on Mac or PC, though, you can sort all songs so that all your loved tracks appear first.
Overall, it seems that Apple wants to use this feature exclusively for algorithmic purposes, to provide "personalized music recommendations and mixes" to you from its subscription service in the "For You" tab. But for those of us who want to keep track of these songs, we can take one of two roundabout options; One for those of you who add all your loved songs to your library, and one for those who don't.
Use a Smart Playlist for Your Library
The easiest way to keep a collection of your loved songs is to create a Smart Playlist on your computer. That way, you can make iTunes or the Music app automatically add loved songs to it whether they're downloaded tracks or in iCloud Music Library.
There is a catch, however. This option only works for songs you already have in or have added to your library. You can love songs on Apple Music without adding them to your library, and you can even add those songs to playlists, but unless you add them to your library, the Smart Playlist won't grab those songs.
If you add every song you like to your library, then I'd suggest the Smart Playlist route. Fire up iTunes on macOS or Windows. If you're running macOS 10.15 Catalina or higher, iTunes doesn't exist, so open up Music instead — the process is the same as in iTunes, so there are no changes aside from the app name.
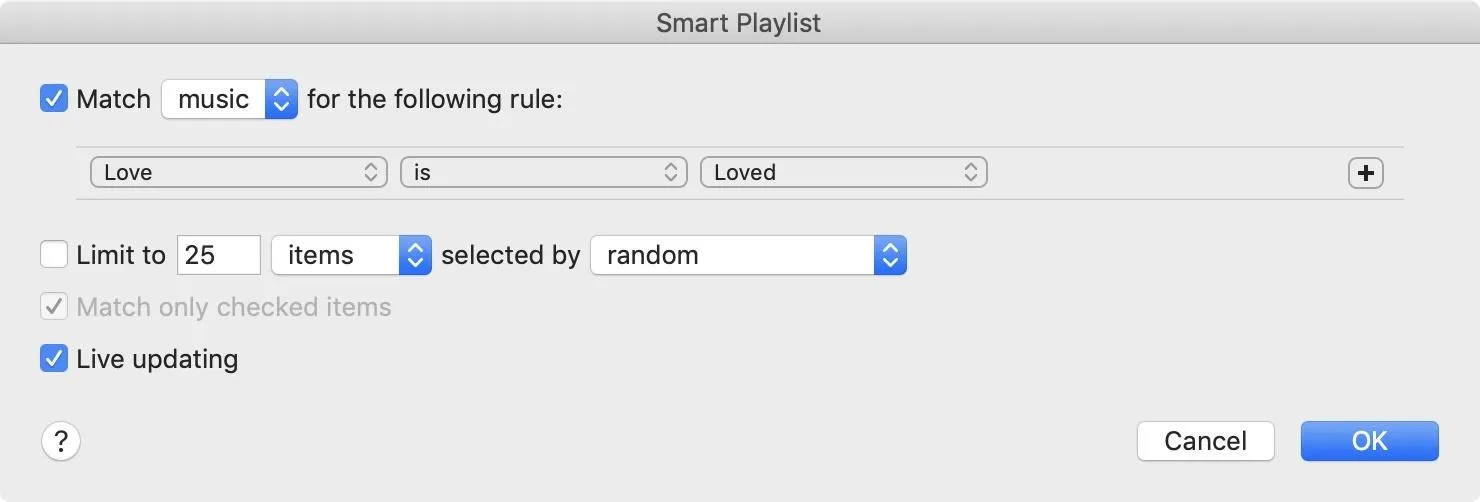
Next, click "File" in the menu bar, then "New," and "Smart Playlist."

Next, ensure the checkmark next to "Match" is enabled, then choose "music" from the dro-down. You can keep it at "all media" too, but music videos may also appear in your playlist. Afterward, click "Artist" (the first drop-down in the first and only rule) and make sure "Love" is selected instead. Ensure "is" is chosen in the middle drop-down and "Loved" drop-down on the right.
You can choose to limit how many items appear in the playlist, but the goal here is to keep track of all loved songs, so it would not provide a clear picture of all loved songs. Also, make sure "Live updating" is checked so that the Smart Playlist updates every time a new song is loved or changed from loved to dislike. Now, click "OK."
Once you complete this process, iTunes (or Music) will open up your new Smart Playlist, and you'll be able to change the name of the playlist if you want. Any songs you both loved and added to your library will appear here, with a little heart next to each.
You can also choose to add custom cover art for the playlist by clicking on the art and selecting from default images, recent pictures, or from anywhere else on your hard drive.
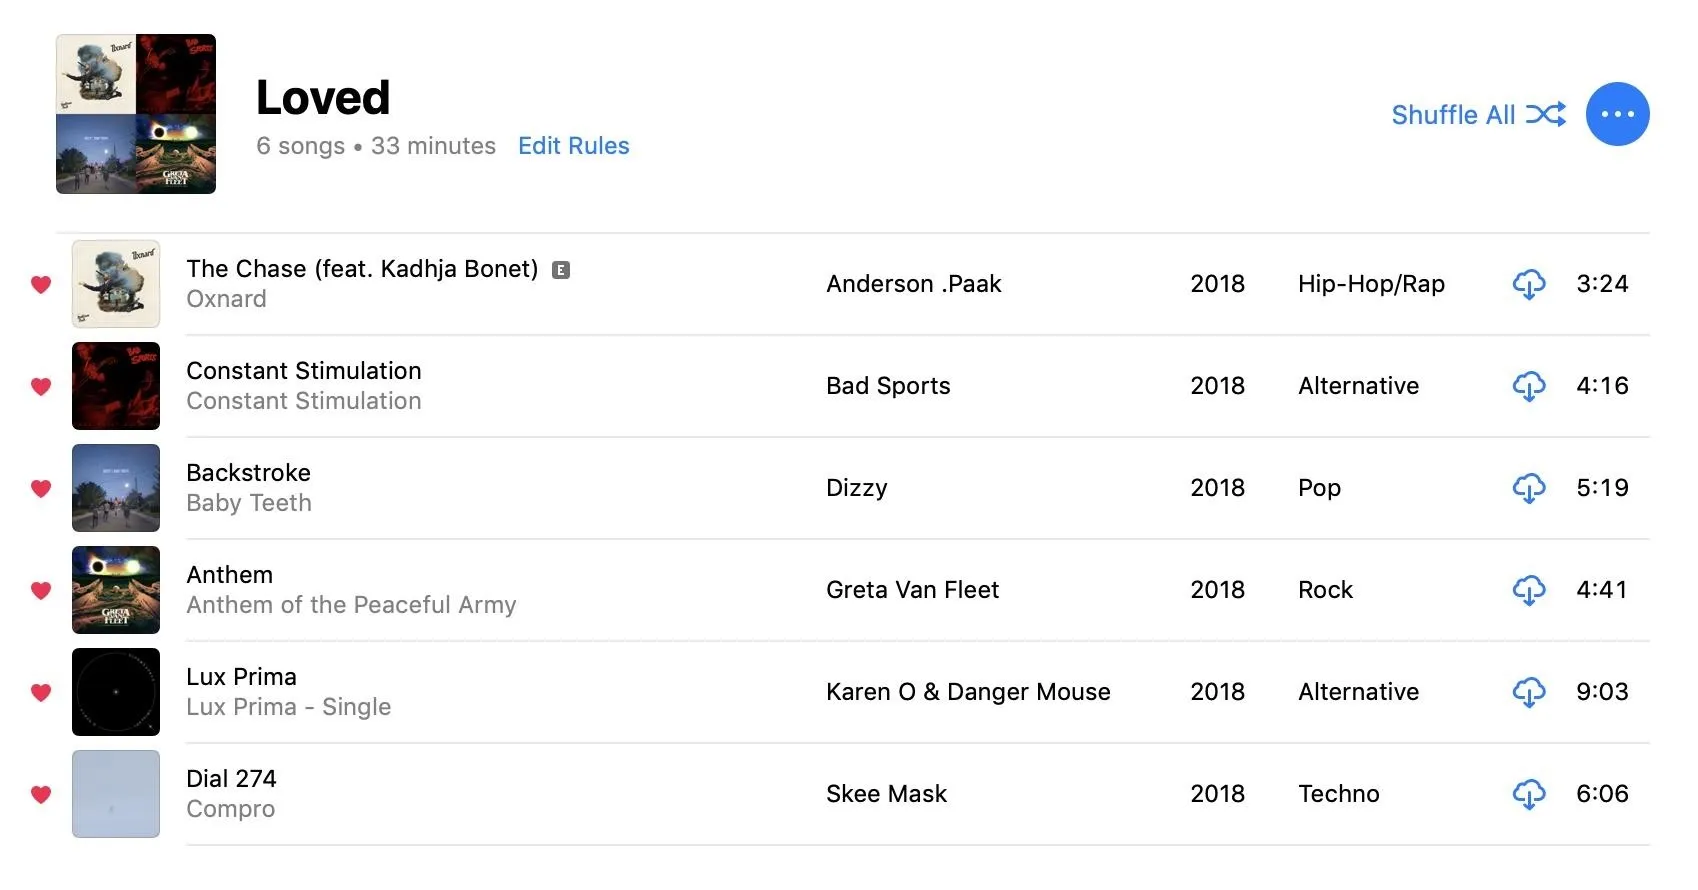
Since you're an Apple Music subscriber with iCloud Music Library enabled (you can't add tracks to your library without it), your new Smart Playlist will sync to all your logged-in devices, so you should be able to see it on your phone right away.
Request Every Single Loved Song from Apple
If you're someone who doesn't like adding songs to your library, Option 1 isn't going to cut it. While we can only hope that Apple has a more comprehensive playlist plan in the works, you can request some hard data to find out every song you've ever loved in Apple Music.
To do this, you need to request to see your personal data from Apple's servers, which allows you to see more than just your small collection of loved tracks. For example, you can request your entire Apple Music listening history, the closest thing we Apple Music users have to Spotify Wrapped. While you don't need a computer to request the data, you will need one to view it.
Request Your Information
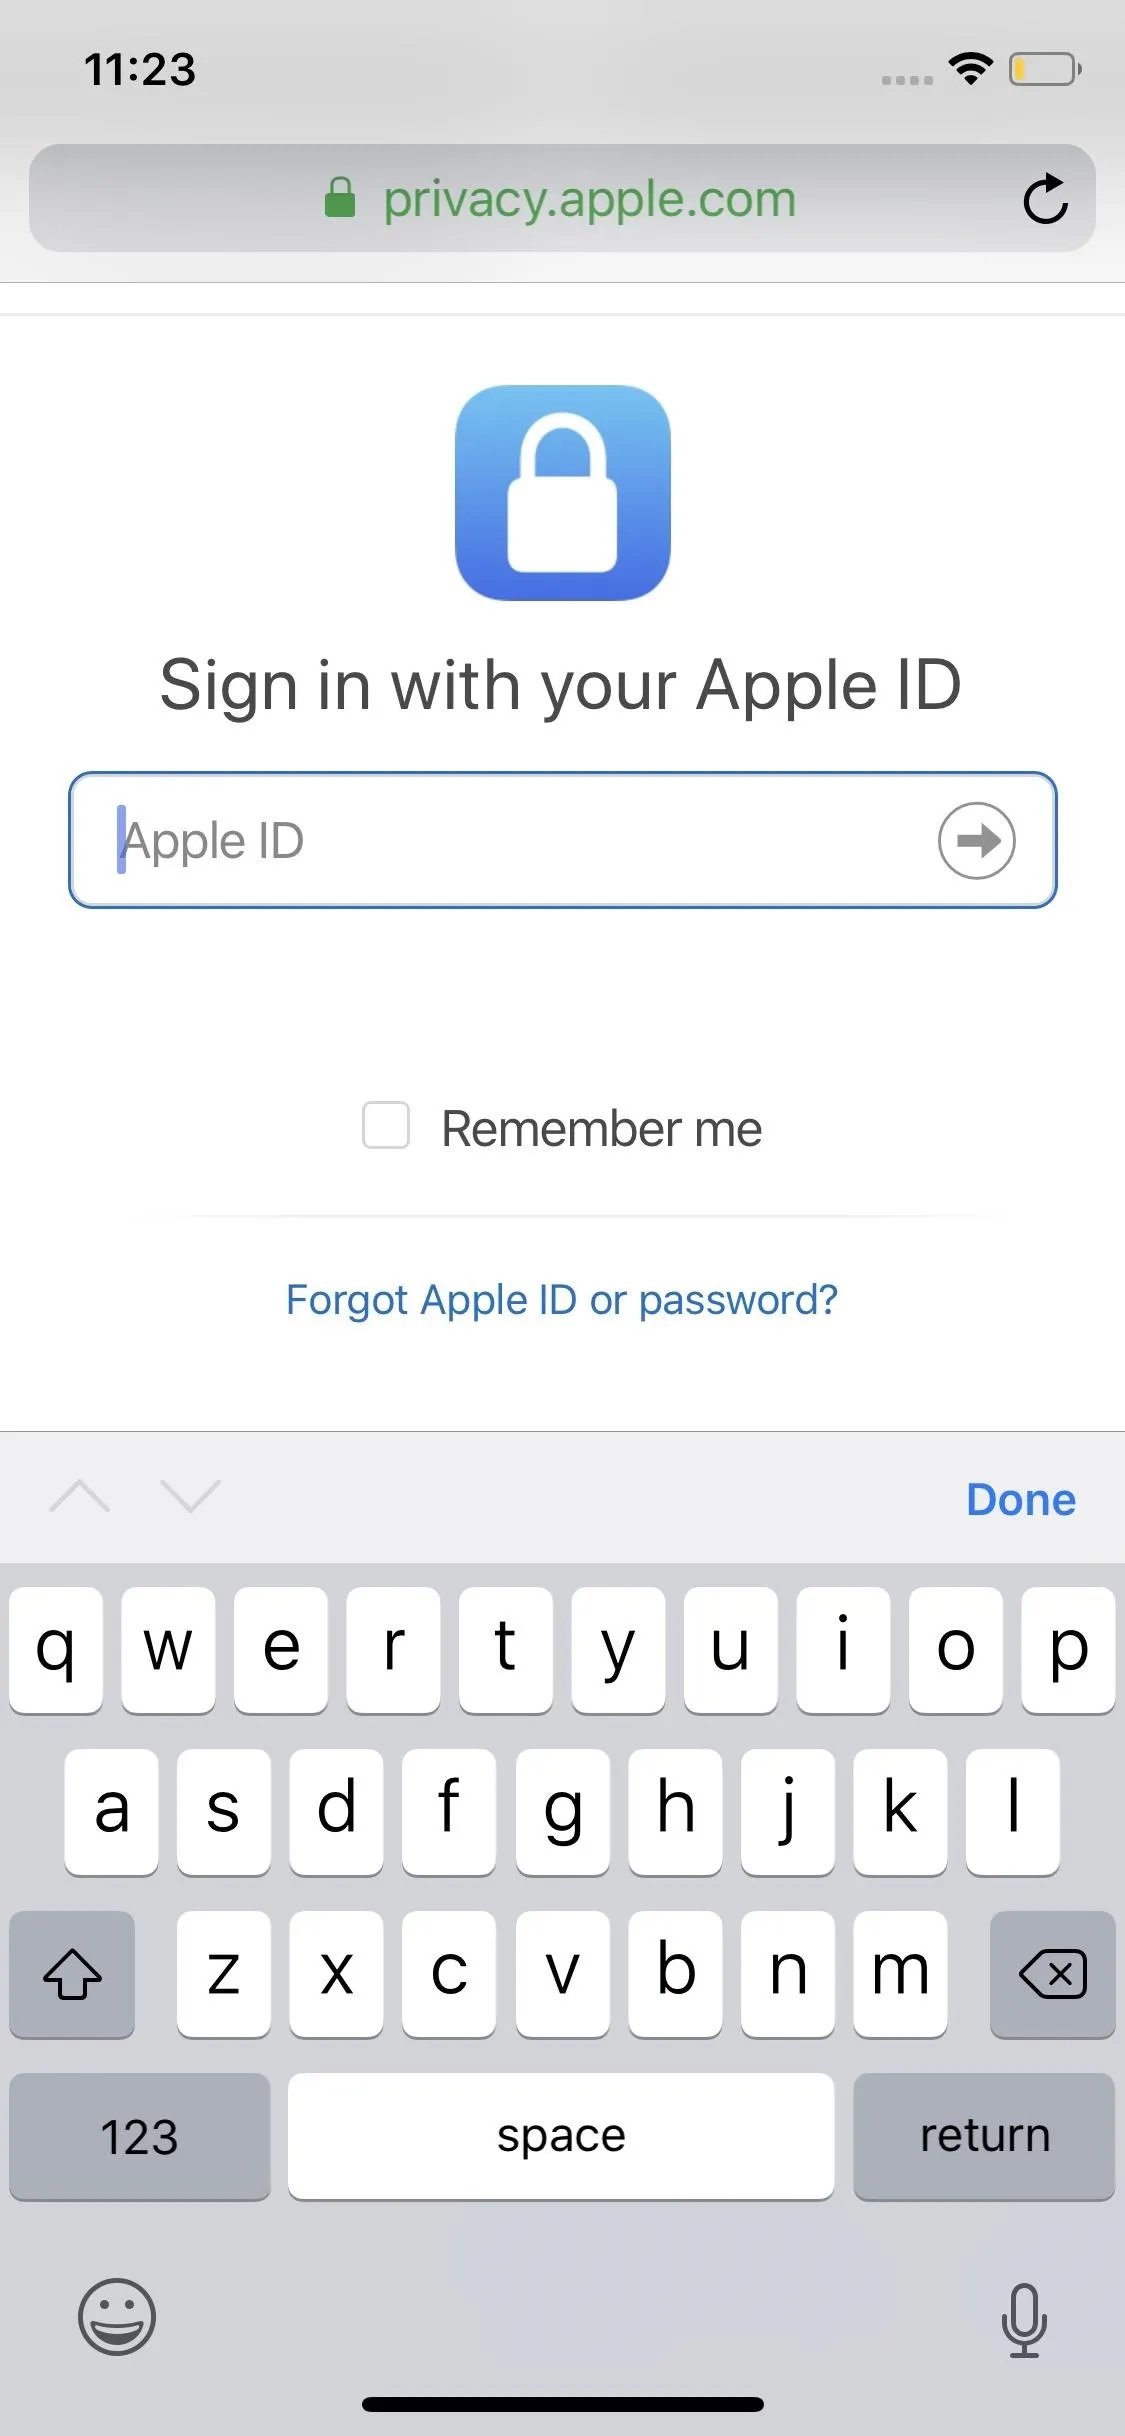
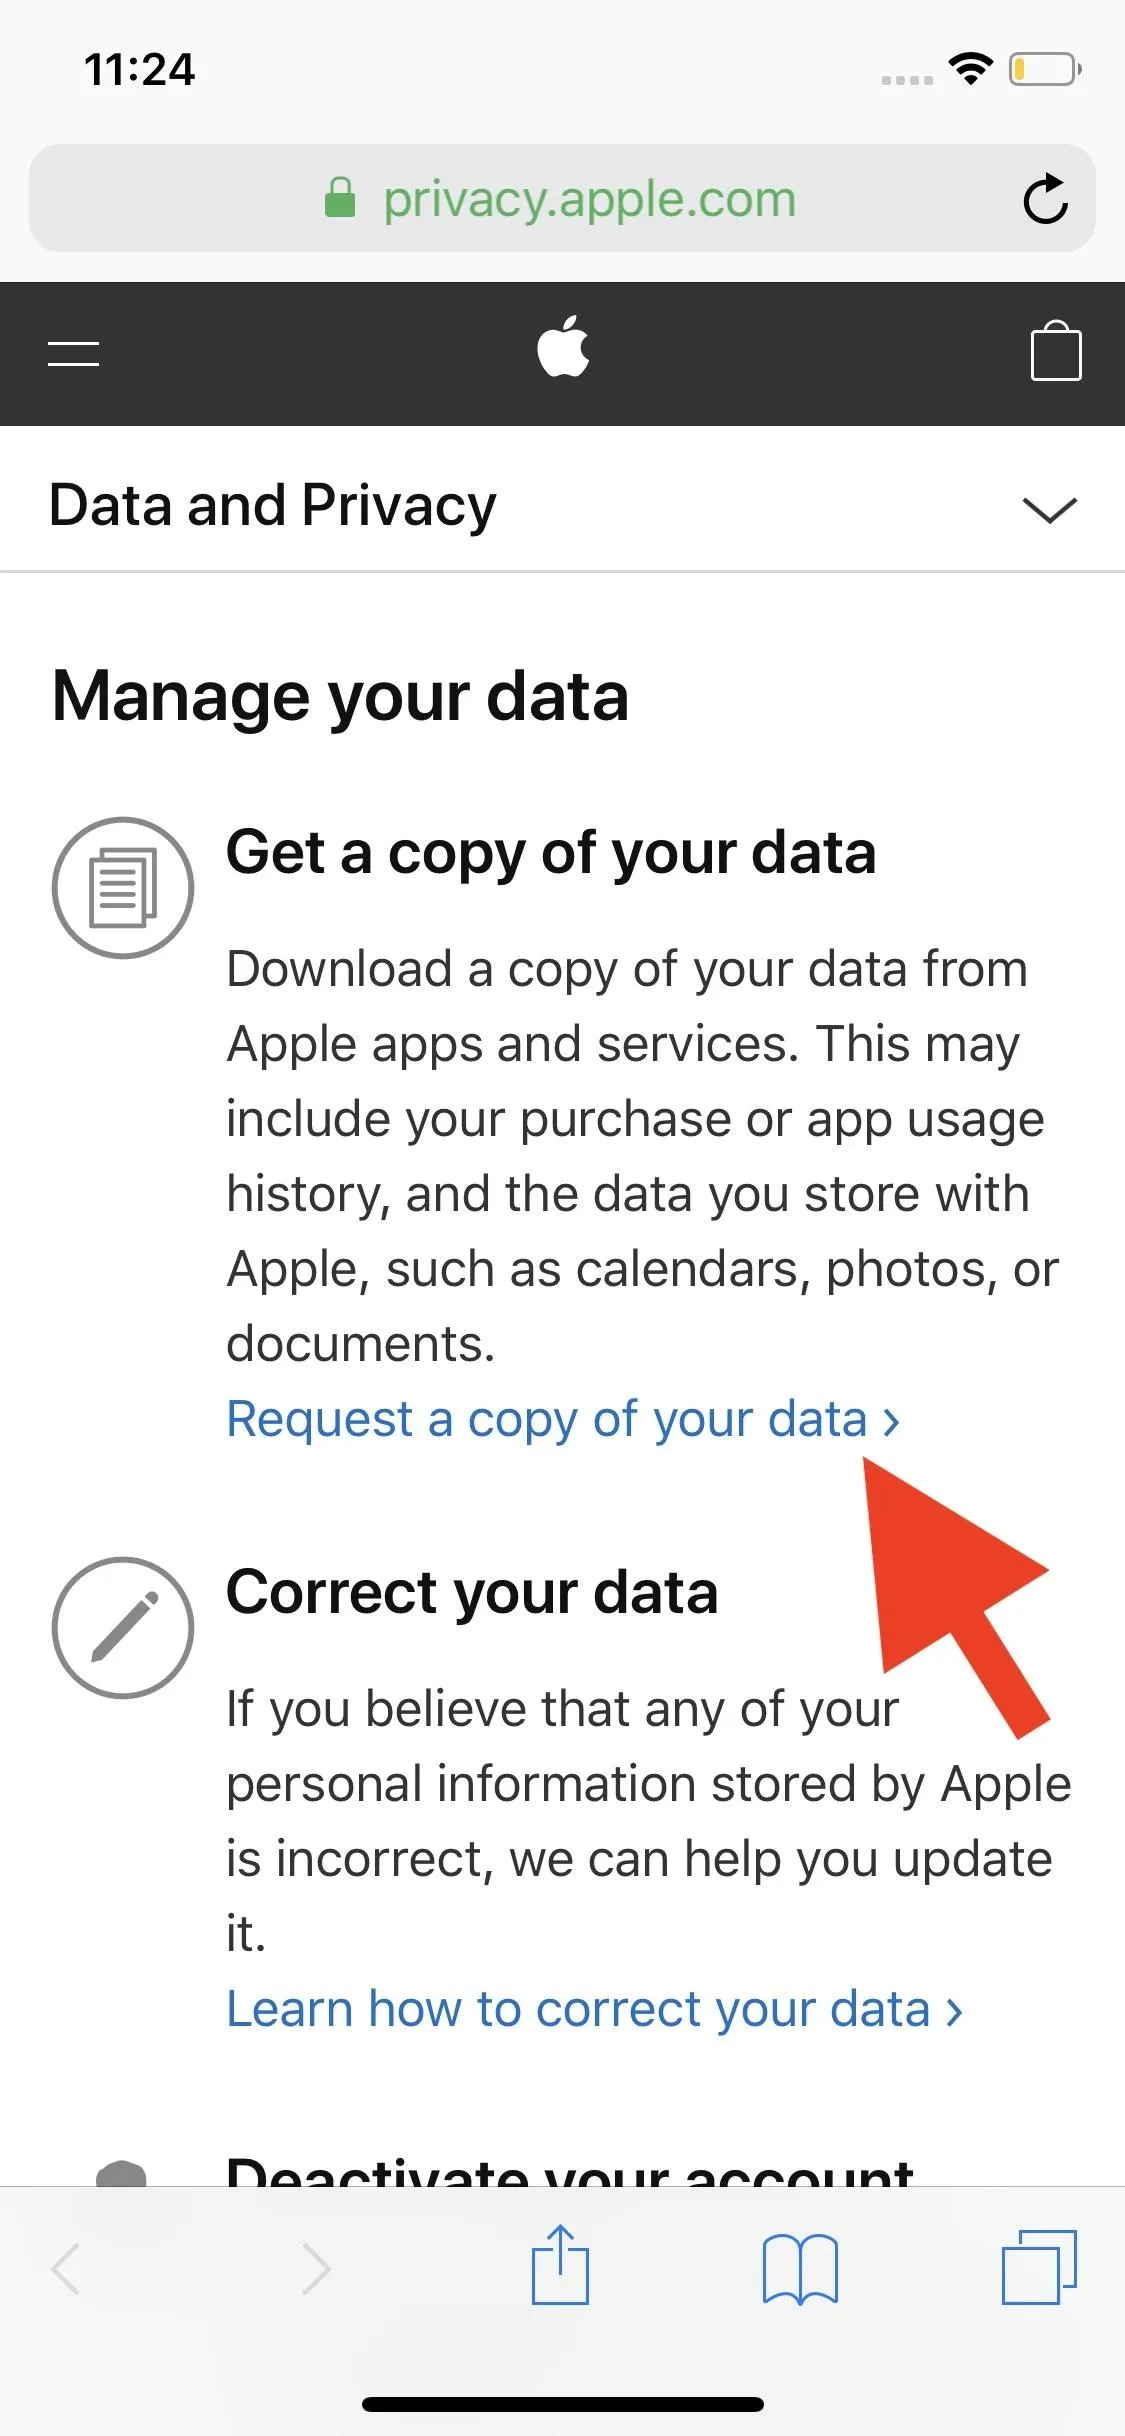
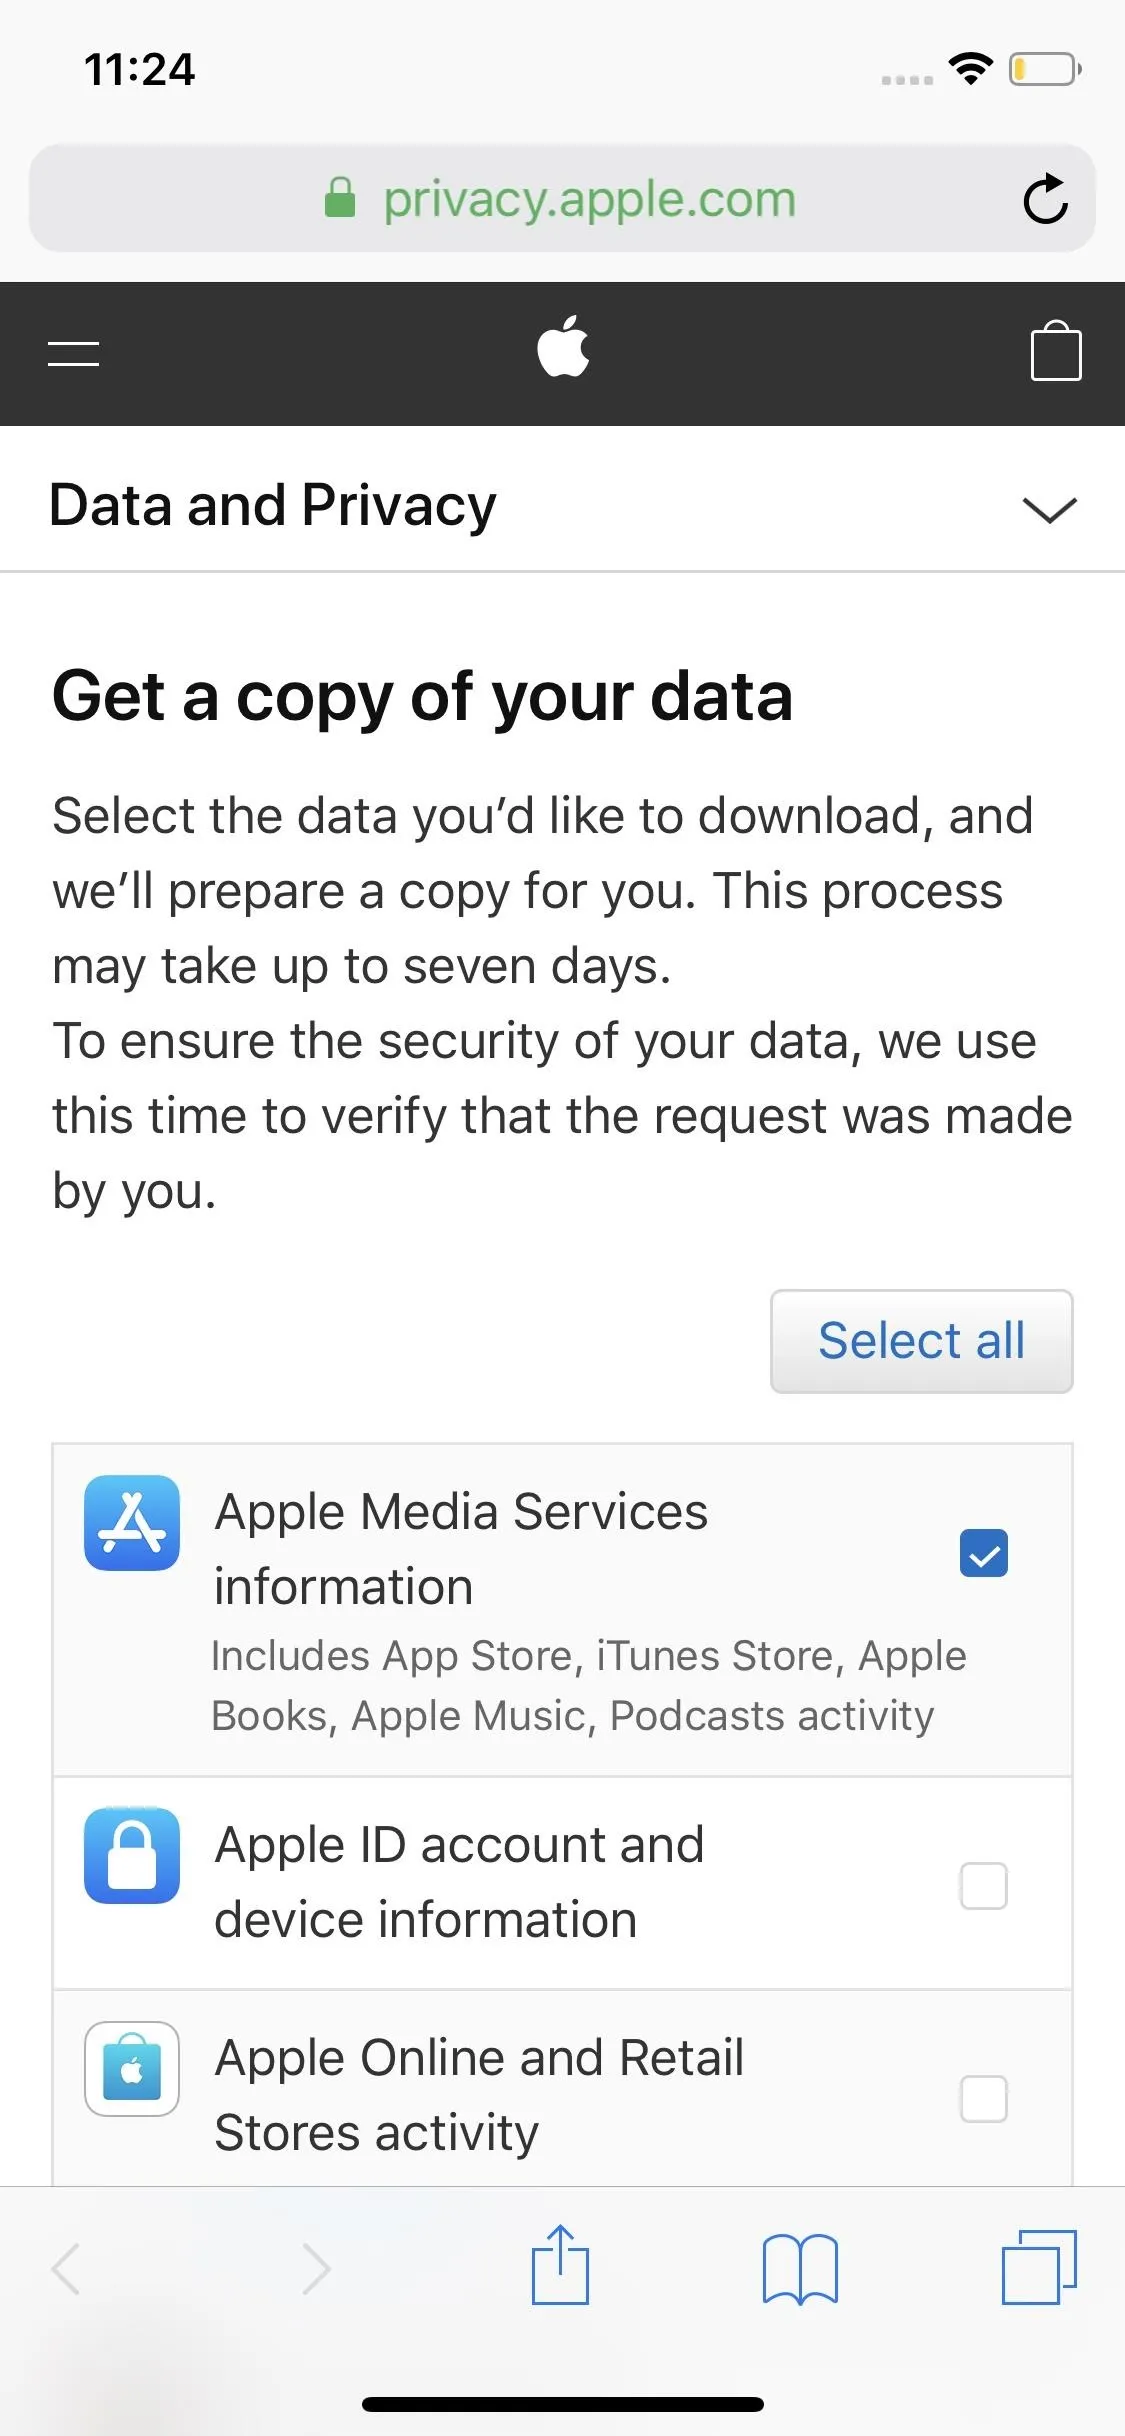
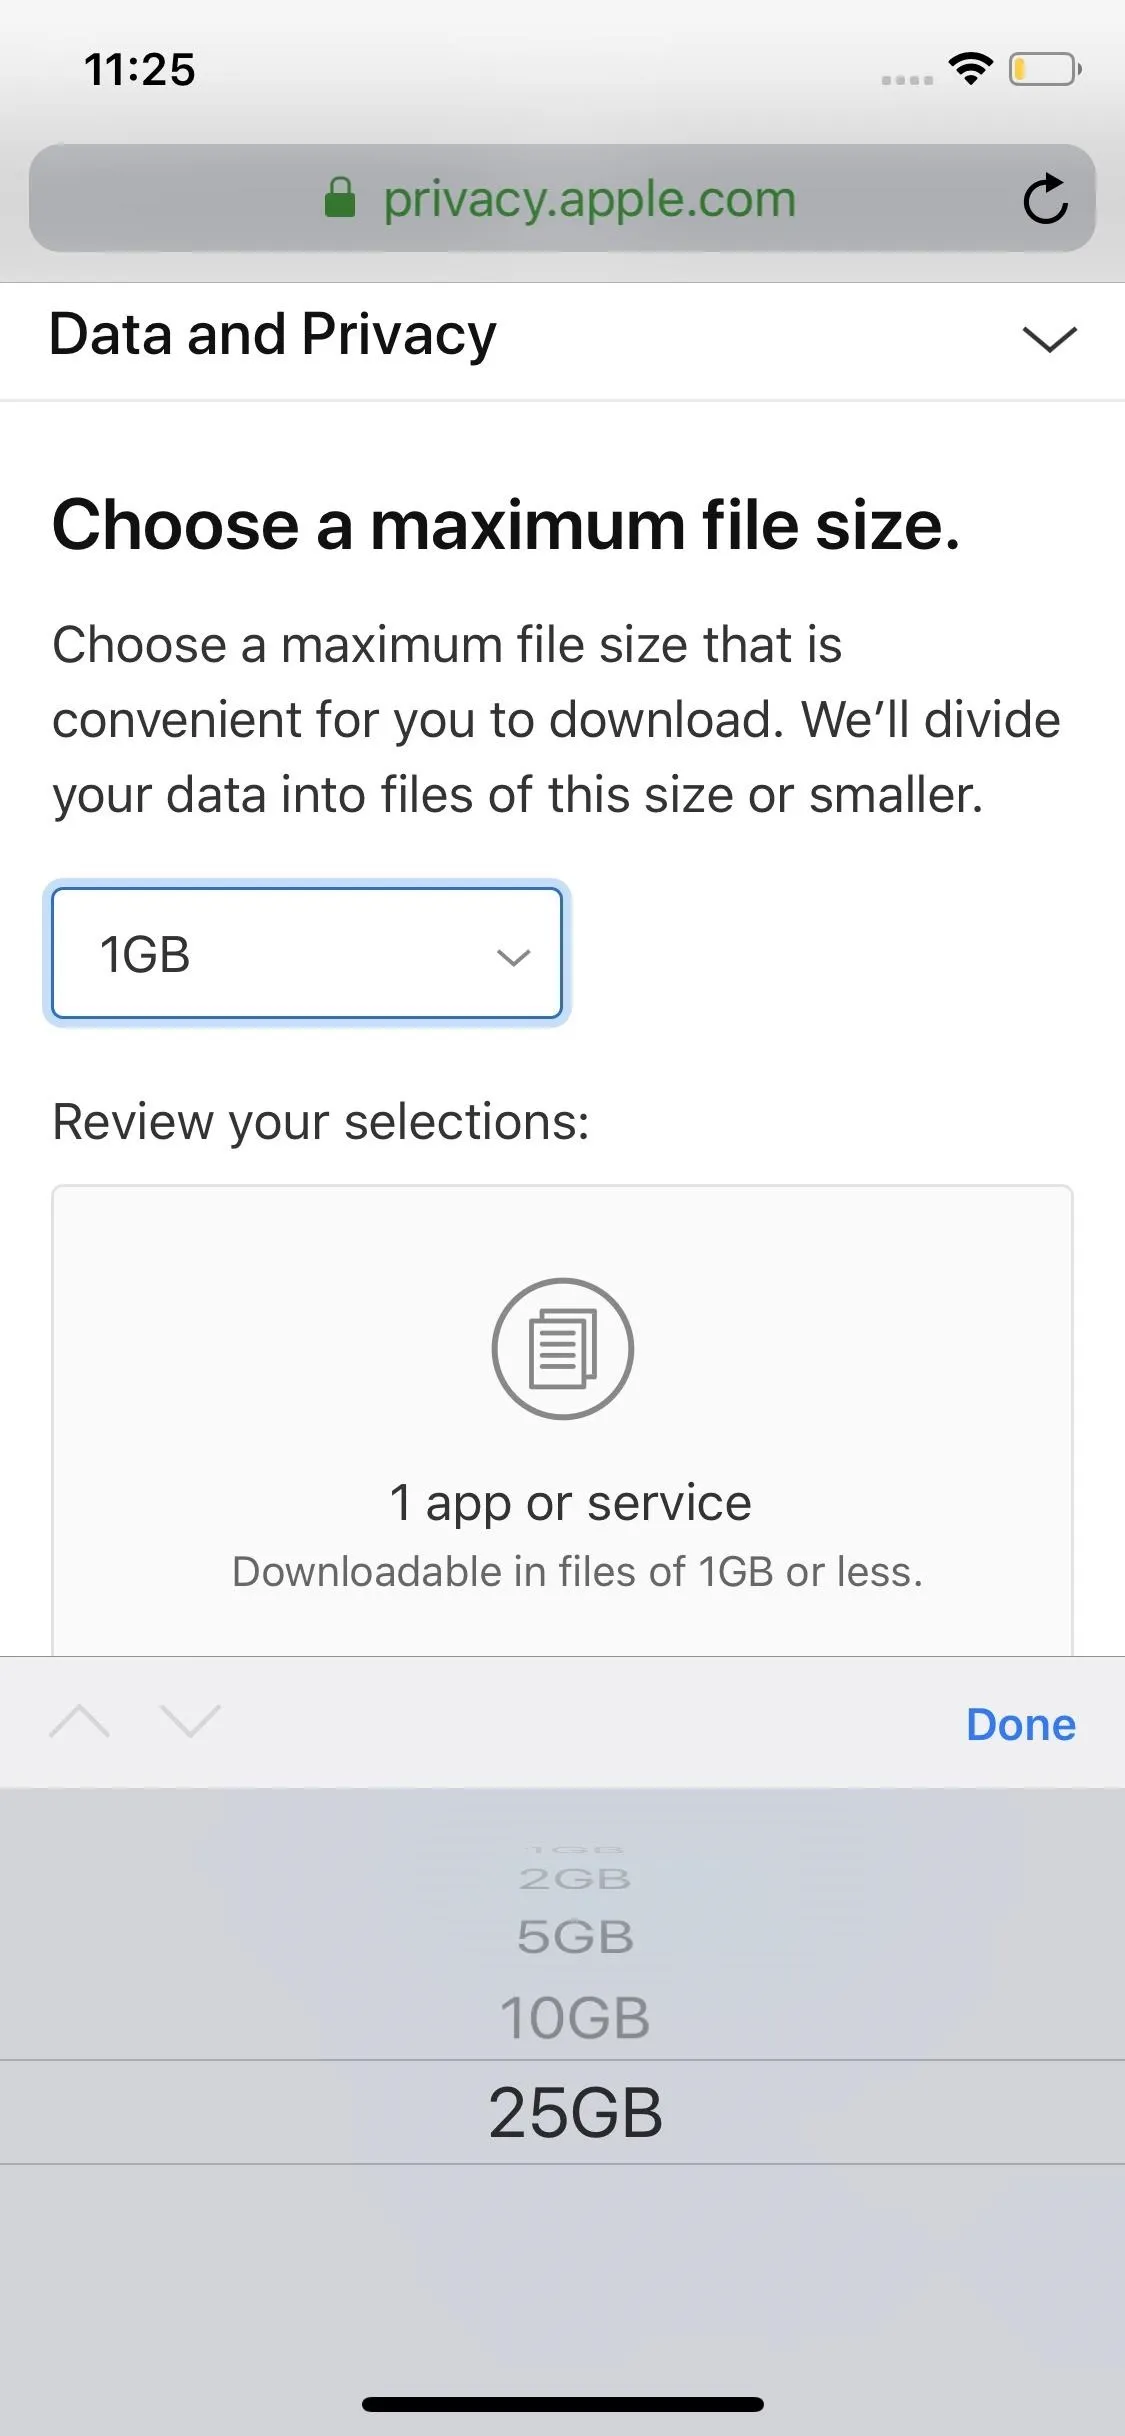
To get started, head over to privacy.apple.com. Sign in to your Apple ID, and complete any authentication steps required. Next, select "Request a copy of your data" under "Get a copy of your data," then choose "Apple Media Services information." While it includes your Apple Music information, it's also going to come with data about the App Store, iTunes Stores, Apple Books, and Podcasts activity, with no option to opt-out.
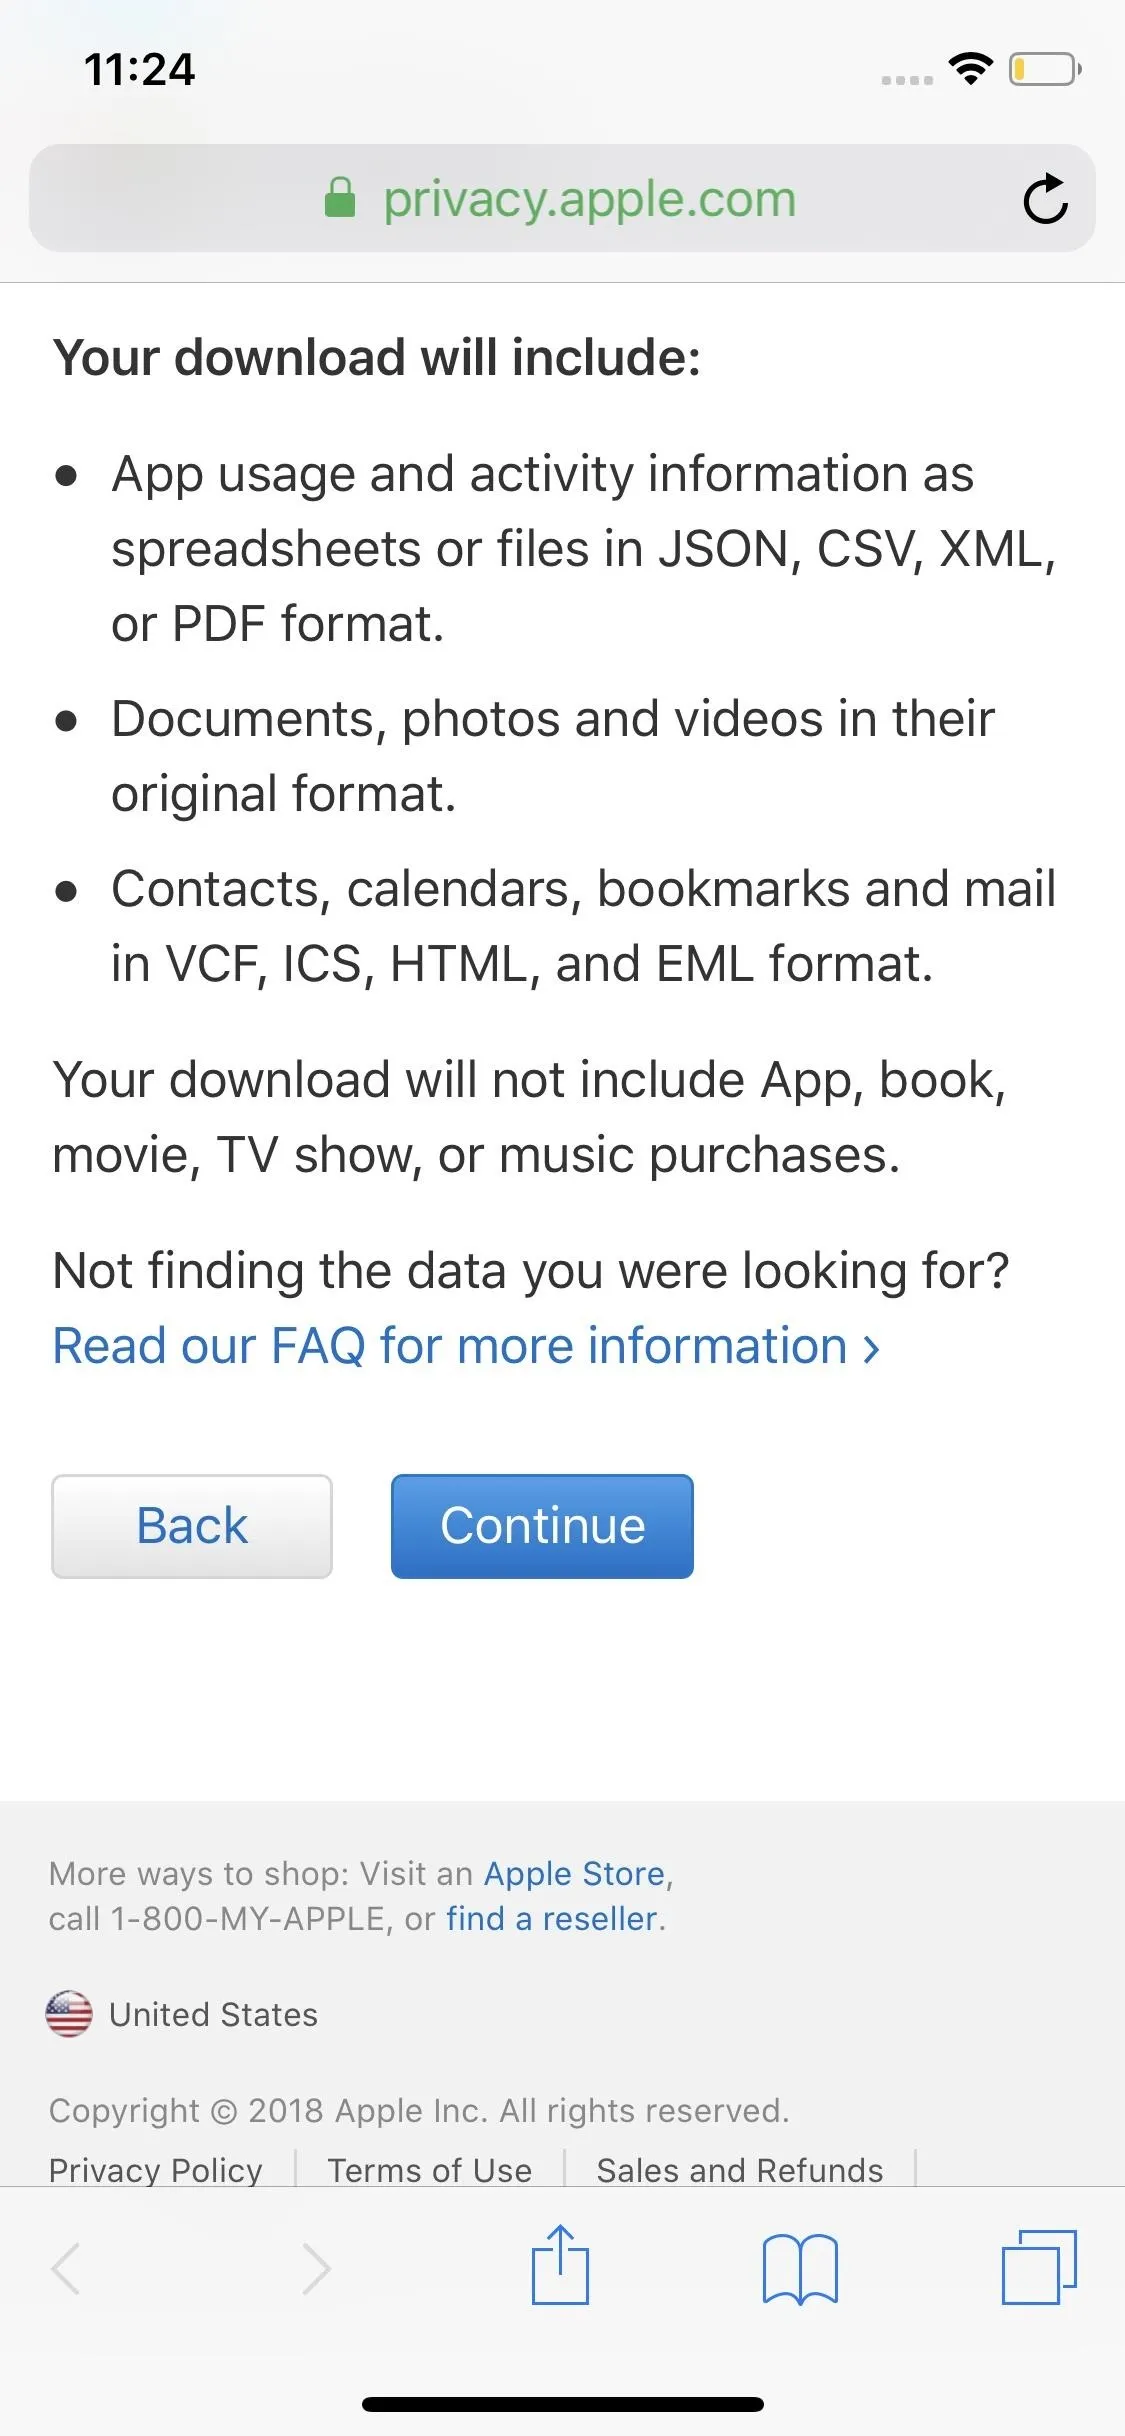
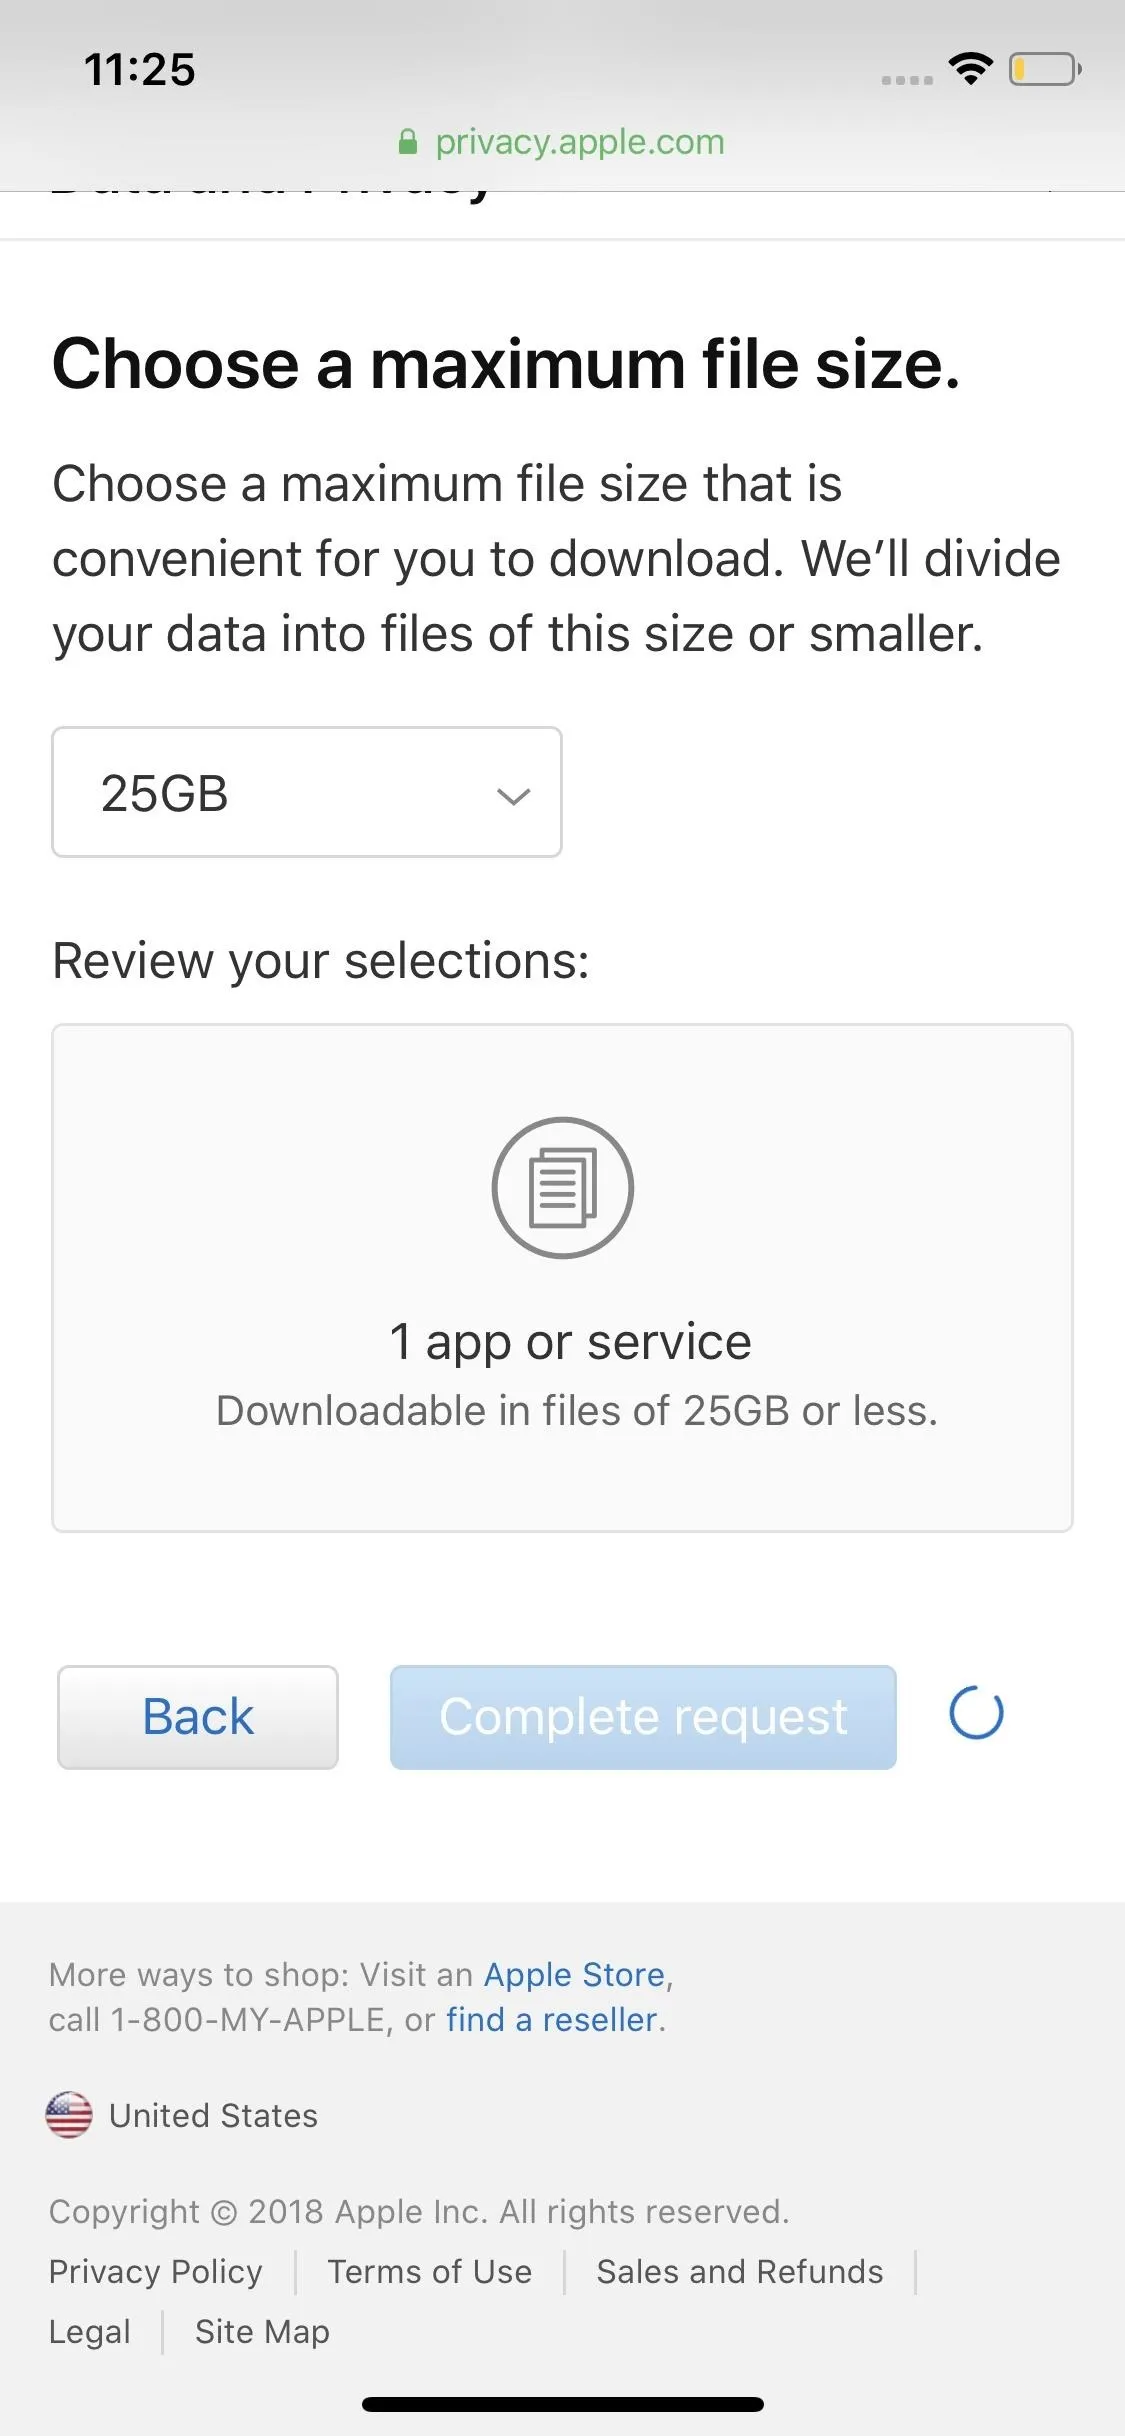
Scroll down to the bottom and choose "Continue." Now, select the maximum file size you want for your download. If you pick a file size smaller than the actual contents of your data, Apple will divide the files up into smaller bits. If you have plenty of storage and would prefer all information stay together, choose the largest file size available.
Once you choose, select "Complete request."
Download Your Information When Available
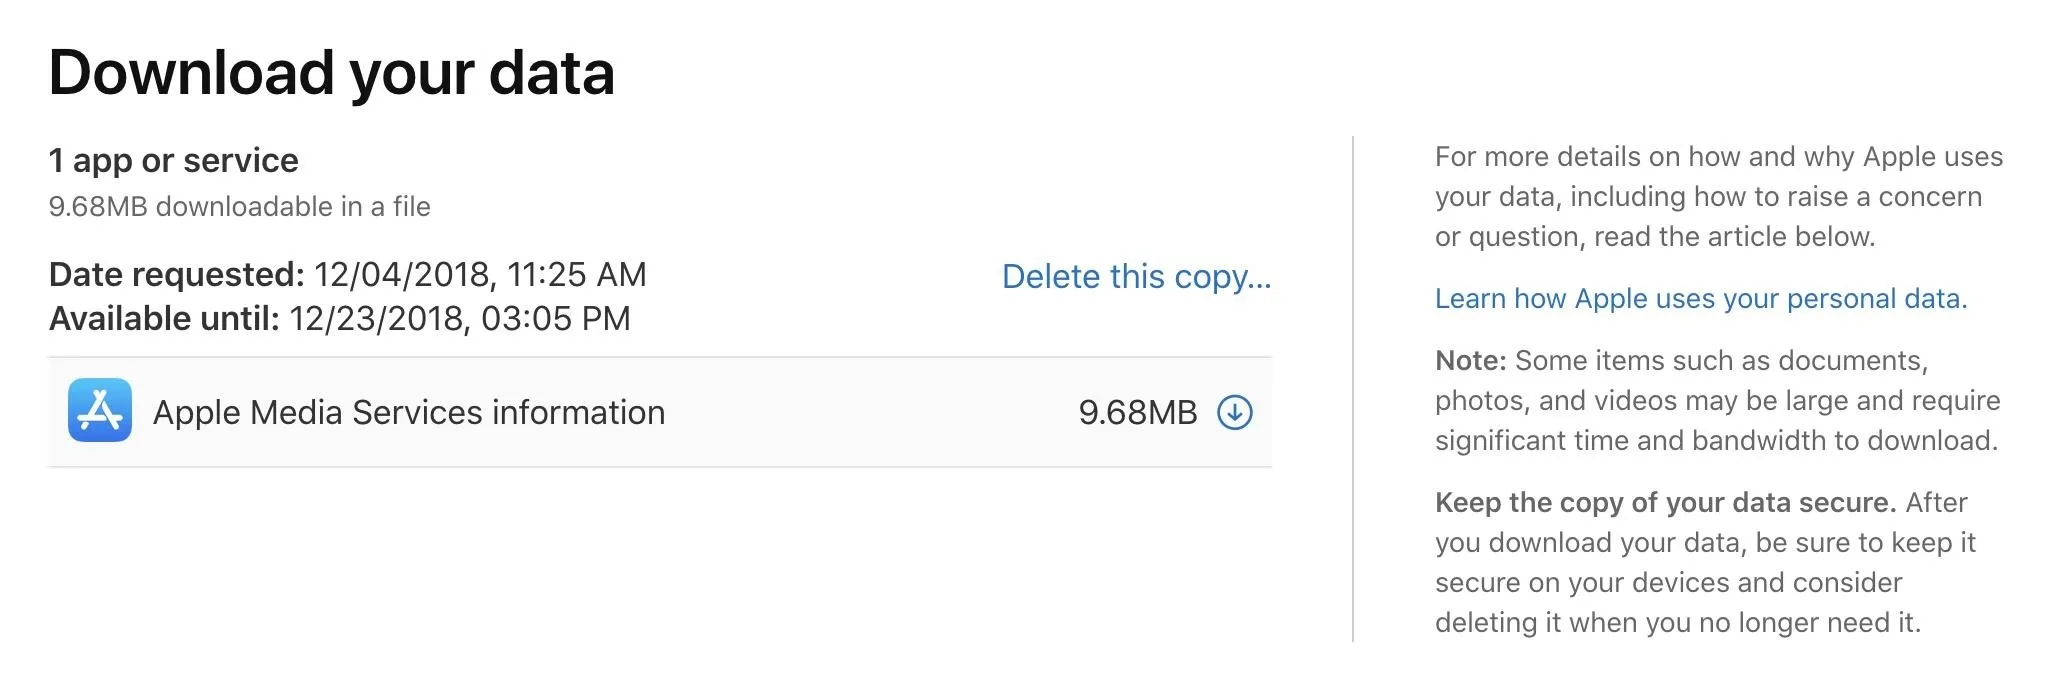
Look out for an email from Apple letting you know your files are ready to go. The email will contain information about your download sizes as well as the expiration date for your request. Again, this step requires a computer at this time.
Now, open the email, then choose "Get your data." Log in to your Apple ID — the one you request the information with — then select the download icon next to your information.
Locate Your Loved Songs
You just downloaded a lot of raw information that needs to be sorted through. Open the ZIP file, then open the ZIP within entitled "apple_media_services.zip." In that archive, you'll find "Apple Music Likes and Dislikes.csv," a comma-separated values file. You can open it in Microsoft Excel, Apple Numbers, or a similar spreadsheet program. Once opened, you'll have a nice spreadsheet of all your loves and dislikes.
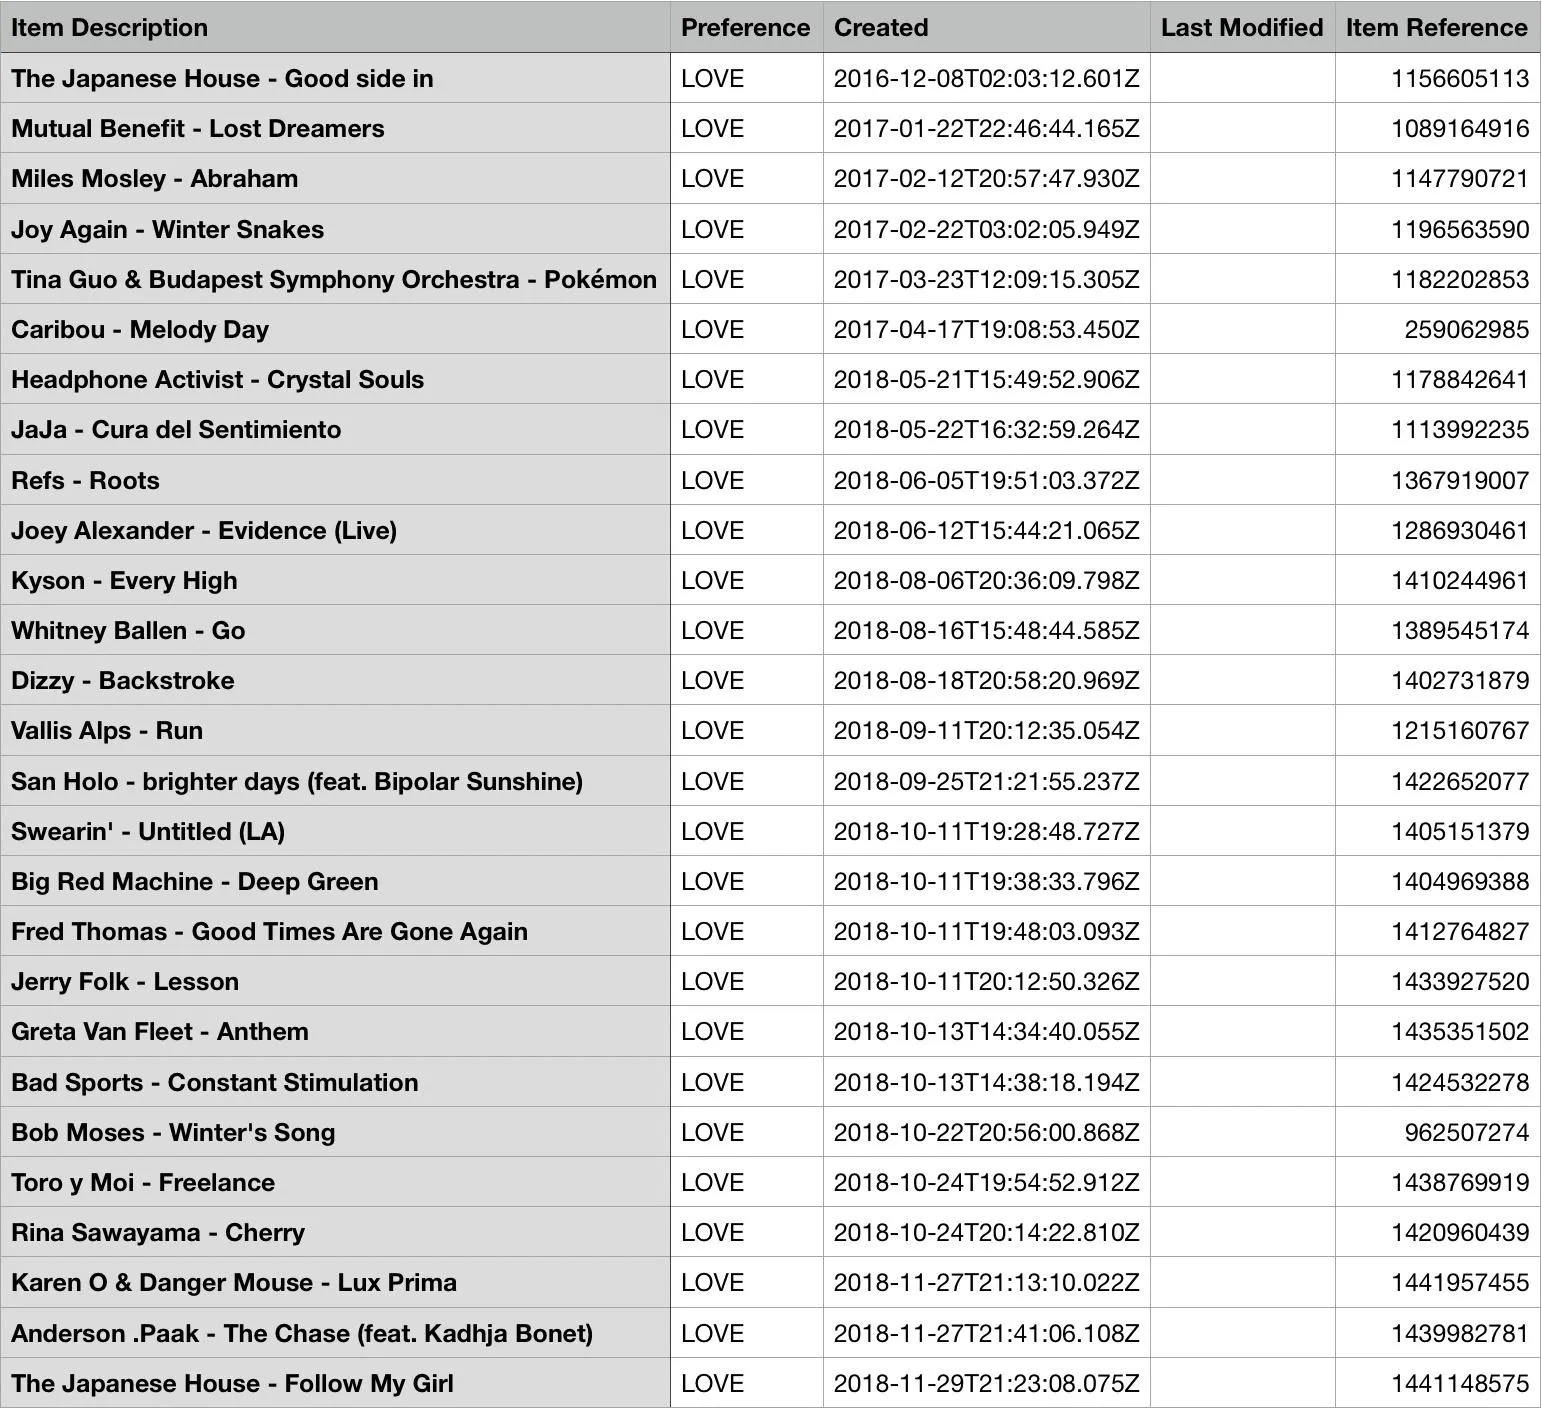
It's not as good as viewing a list natively in Apple Music would be, but it's not terrible. If you're like me, you don't follow up on a lot of the songs you end up loving, but now you have a list of songs to rediscover — even if you do need to search through the list manually.
I recommend uploading the CSV file to iCloud, OneDrive, or another cloud storage service so you can open it on your phone with Excel, Numbers, etc. to view when mobile. You can also store it on your device's built-in storage if that's what you want to do.
Also, if there isn't a ton, it'd be good to find them on Apple Music, if still available, and add them to your library. Once all tracks are added, you can then use Option 1 to keep track going forward. If you don't, you may have to request a newer copy of the CSV, and why would you want to do that?
This article was produced during Gadget Hacks' special coverage on streaming, listening to, and creating music and podcasts on your smartphone. Check out the whole Music and Audio series.
Cover image and screenshots by Jake Peterson/Gadget Hacks


Comments
Be the first, drop a comment!