


Adobe Audition, Audacity, and other audio editing software have tools to isolate vocals and instruments in regular songs so that you can get an instrumental track for karaoke, vocals for an a capella version, or solo drums, bass, keys, etc. that you can use to learn the song yourself. The software is mostly for desktop computers, and it doesn't always do a good job, but that's where Moises comes in.
In 2019, the research team at Deezer, the popular music streaming service, created Spleeter. It's an open-source, MIT-licensed tool to help with music information retrieval (MIR). In Deezer's own words, "it leverage[s] the power of a state-of-the-art source separation algorithm," and "comes in the form of a Python Library based on Tensorflow, with pretrained models for 2, 4 and 5 stems separation."
The tool uses advanced machine learning to separate tracks from a song into individual composite stems, such as drums, bass, keys, and vocals. Still, it's not something ordinary folks can use easily since it's geared toward MIR researchers and developers. While separating the sources from a song can be done with a single command line, it can be confusing to install and only works on computers.
Moises, developed by Geraldo Ramos, co-founder and CEO of Moises.ai, started as a web-based tool that leverages Spleeter's APIs to make source separation easy for the masses. And it came out just a week after Spleeter did! You could use the web app from any device, and you still can, but on Dec. 1, 2020, Moises got its own Android and iOS apps, making source separation even simpler.
By leveraging the Moises AI Platform on your smartphone, you can separate and master tracks to create remixes, samples, and mashups if you're a DJ or music producer. Also, as mentioned before, you can use the instrumental track for karaoke sing-alongs, and by removing just one track, you can create a "minus one" song to help you play along to the music with drums, guitars, bass, etc. It's also useful for active listening, education, transcriptions, and more.
Install Moises
Moises is available for both Android and iOS devices, and you can get it for free on your iPhone or Android smartphone using the appropriate link below.
It requires iOS 11 or later on iPhone, or Android 5.0 and later on Android, which is a bit surprising considering the app just came out in the U.S. on Dec. 1 and was only available in Brazil for a few weeks prior. So if you're on a much older device, you won't have any problems using the service.
- Play Store Link: Moises: AI Music Editor + Vocal/Instrument Remover (free)
- App Store Link: Moises: AI Music Platform (free)
While Moises is free to install and use, there are some limitations to a free account. For one, you can only process five different tracks each month, up to five minutes each song. Also, uploads are only stored for three days, MP3 downloads max out at 320 kbps, the five-track separation is off-limits, and some tools are limited to each track's first minute.
A premium subscription, which costs $3.99 per month or $39.99 each year (16% cheaper), will get you access to five-track separation, tracks up to 20 minutes long, unlimited uploads, high-frequency preservation, file storage forever, and more.
Create & Sign in to Your Account
The first time you open Moises, you'll be asked to sign in using your Google, Facebook, or Twitter account. On iOS, you can also choose Sign in with Apple, which can hide your email address for a little bit of anonymity. If you plan on using Moises across Apple and Android devices, you'll want to avoid Sign in with Apple since it'll be difficult to log in on Android.
If you don't want to use an existing social profile, you can choose "Use Email" to go the traditional route with an email address and password.
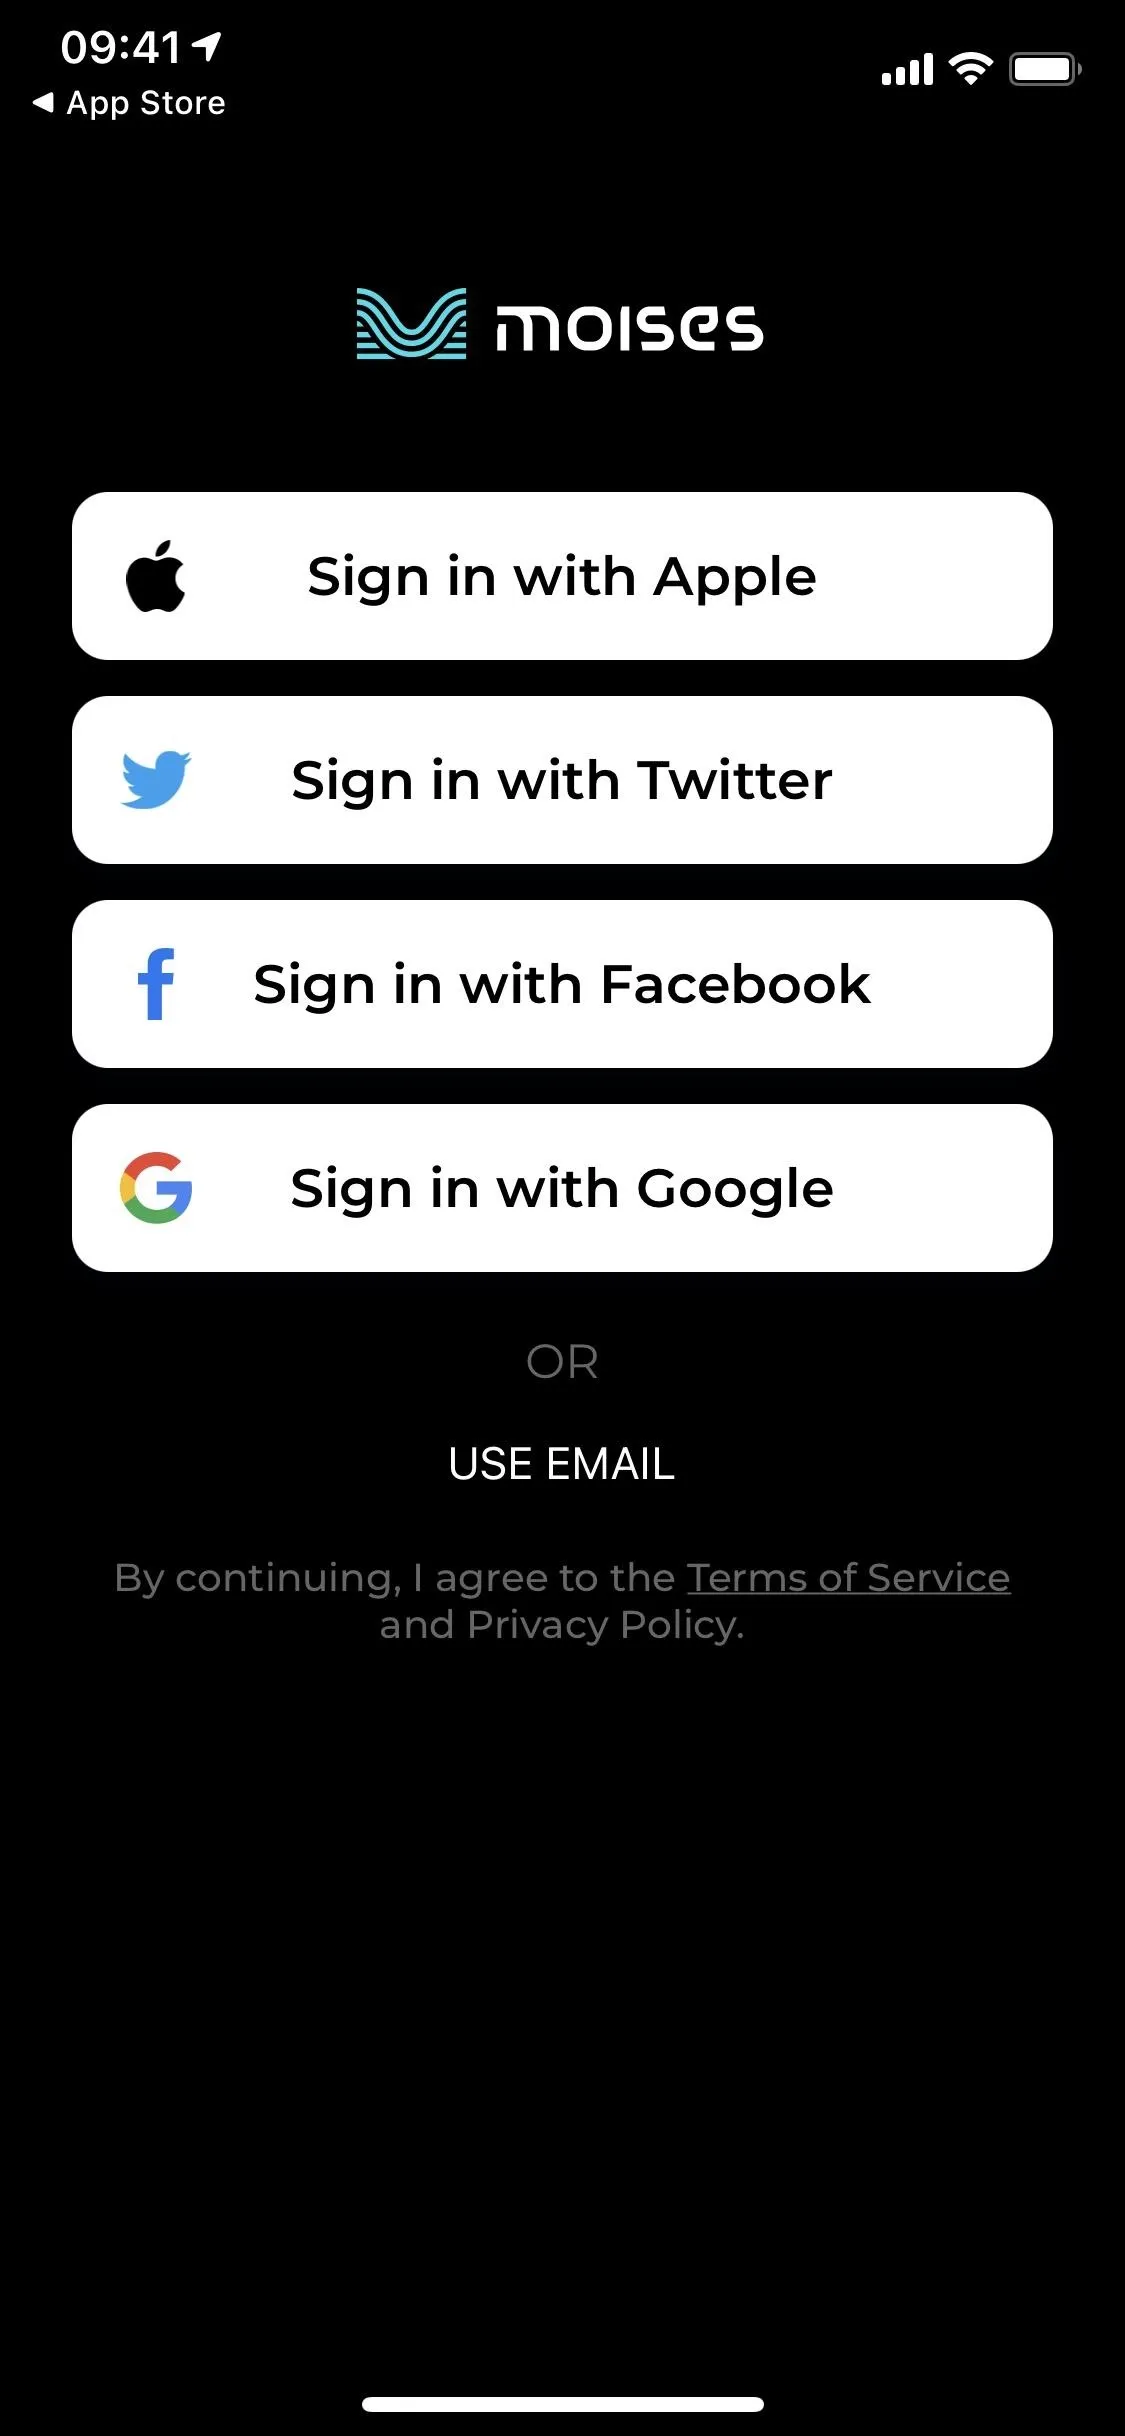
The sign-in options on iOS (left) and Android (right).
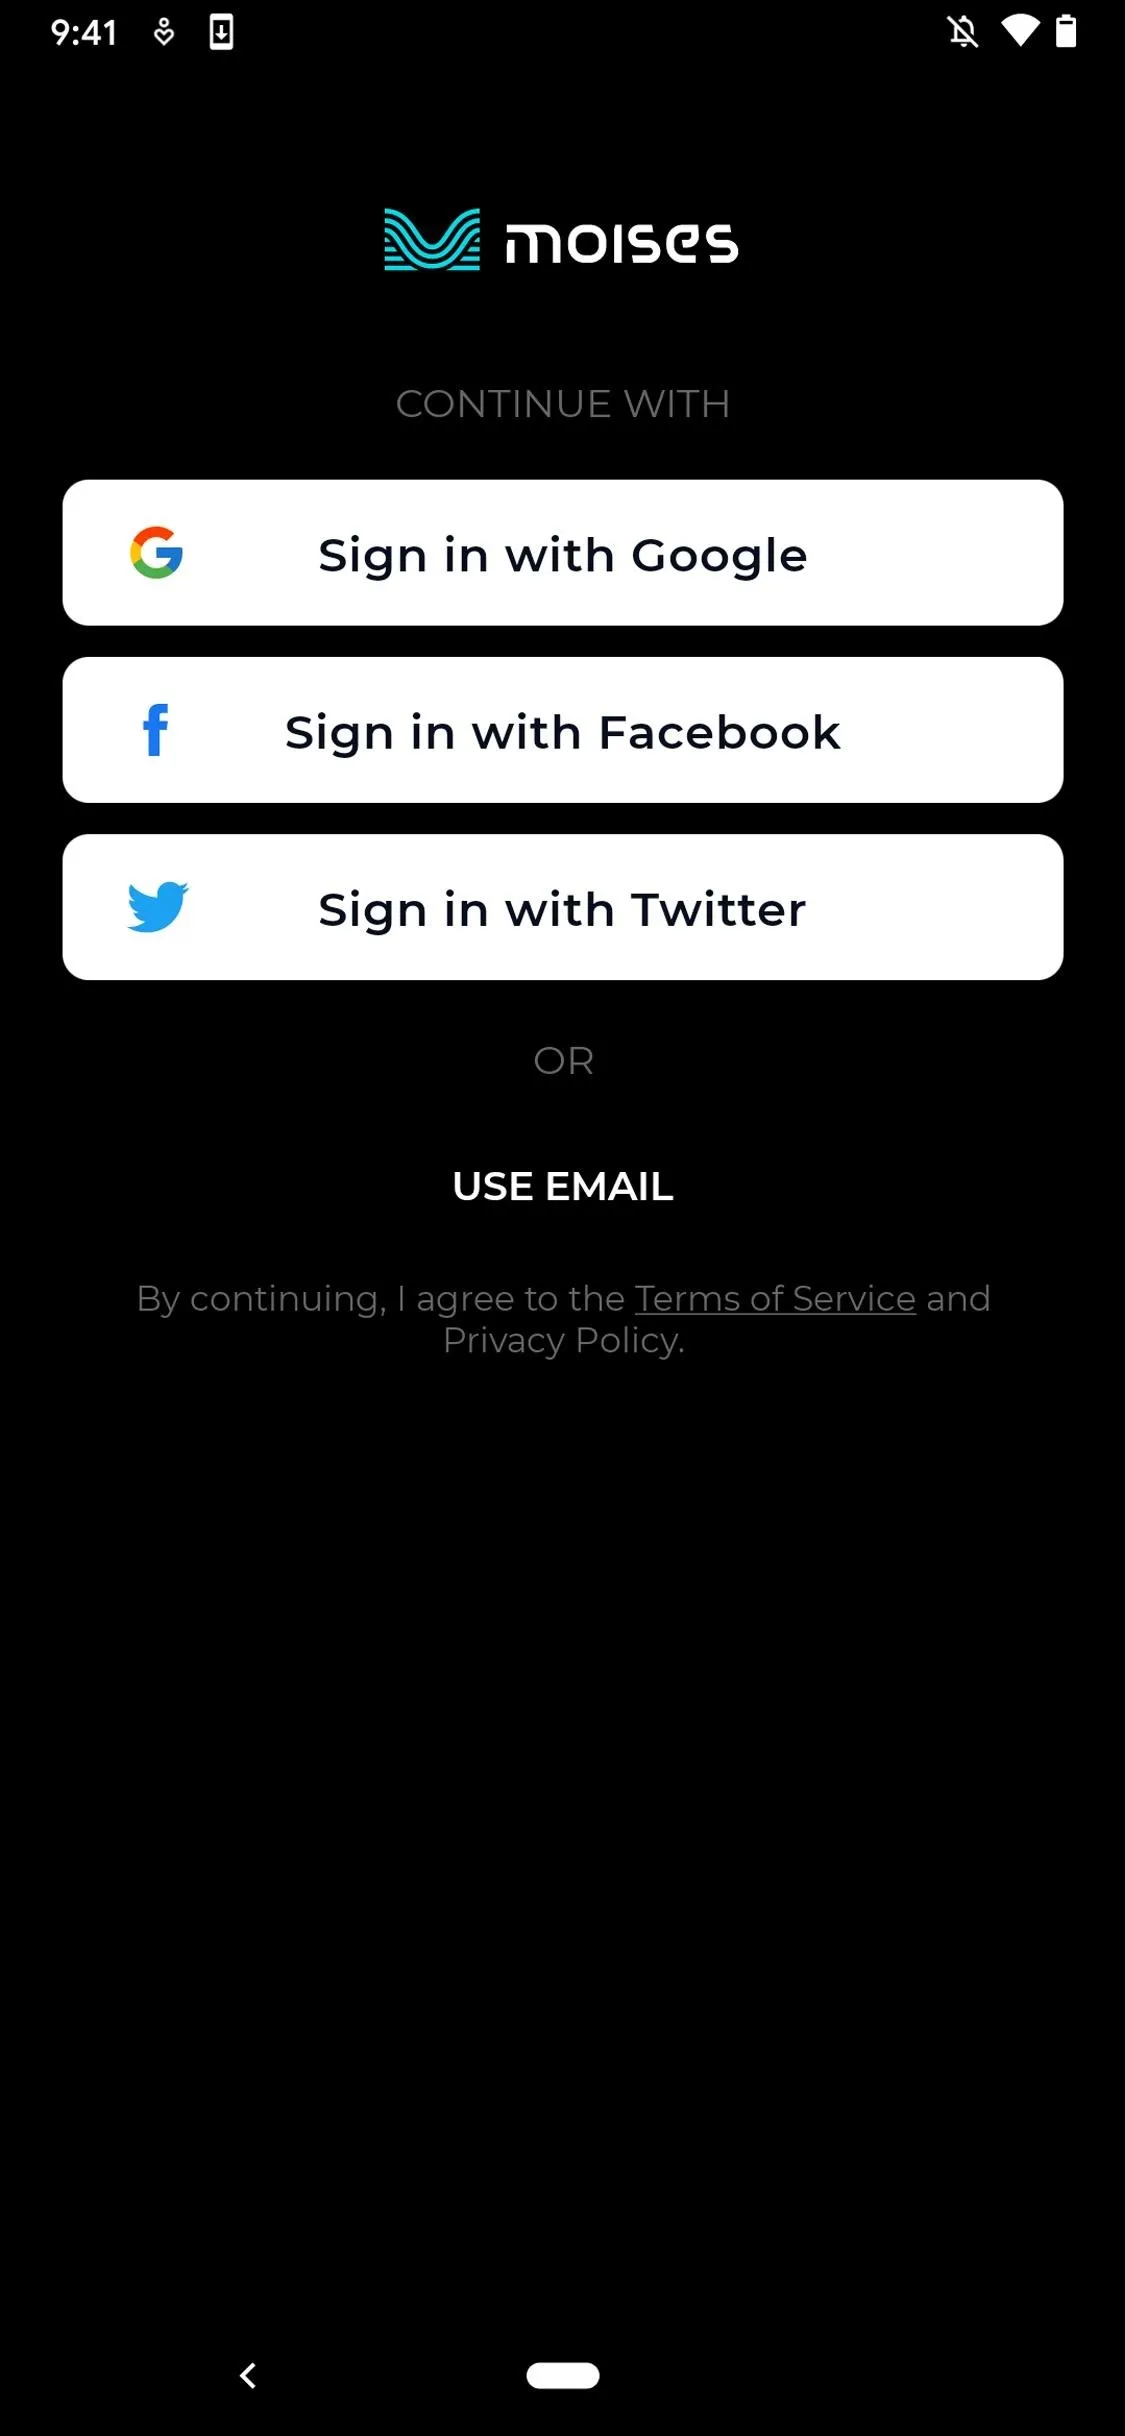
The sign-in options on iOS (left) and Android (right).
Upload Audio to Moises
Moises is split into three different sections: your profile, your library, and an about page. In Library (the home icon), there is a demo track available to play around with, but you can press the plus (+) button to upload a real track and begin the separation process.
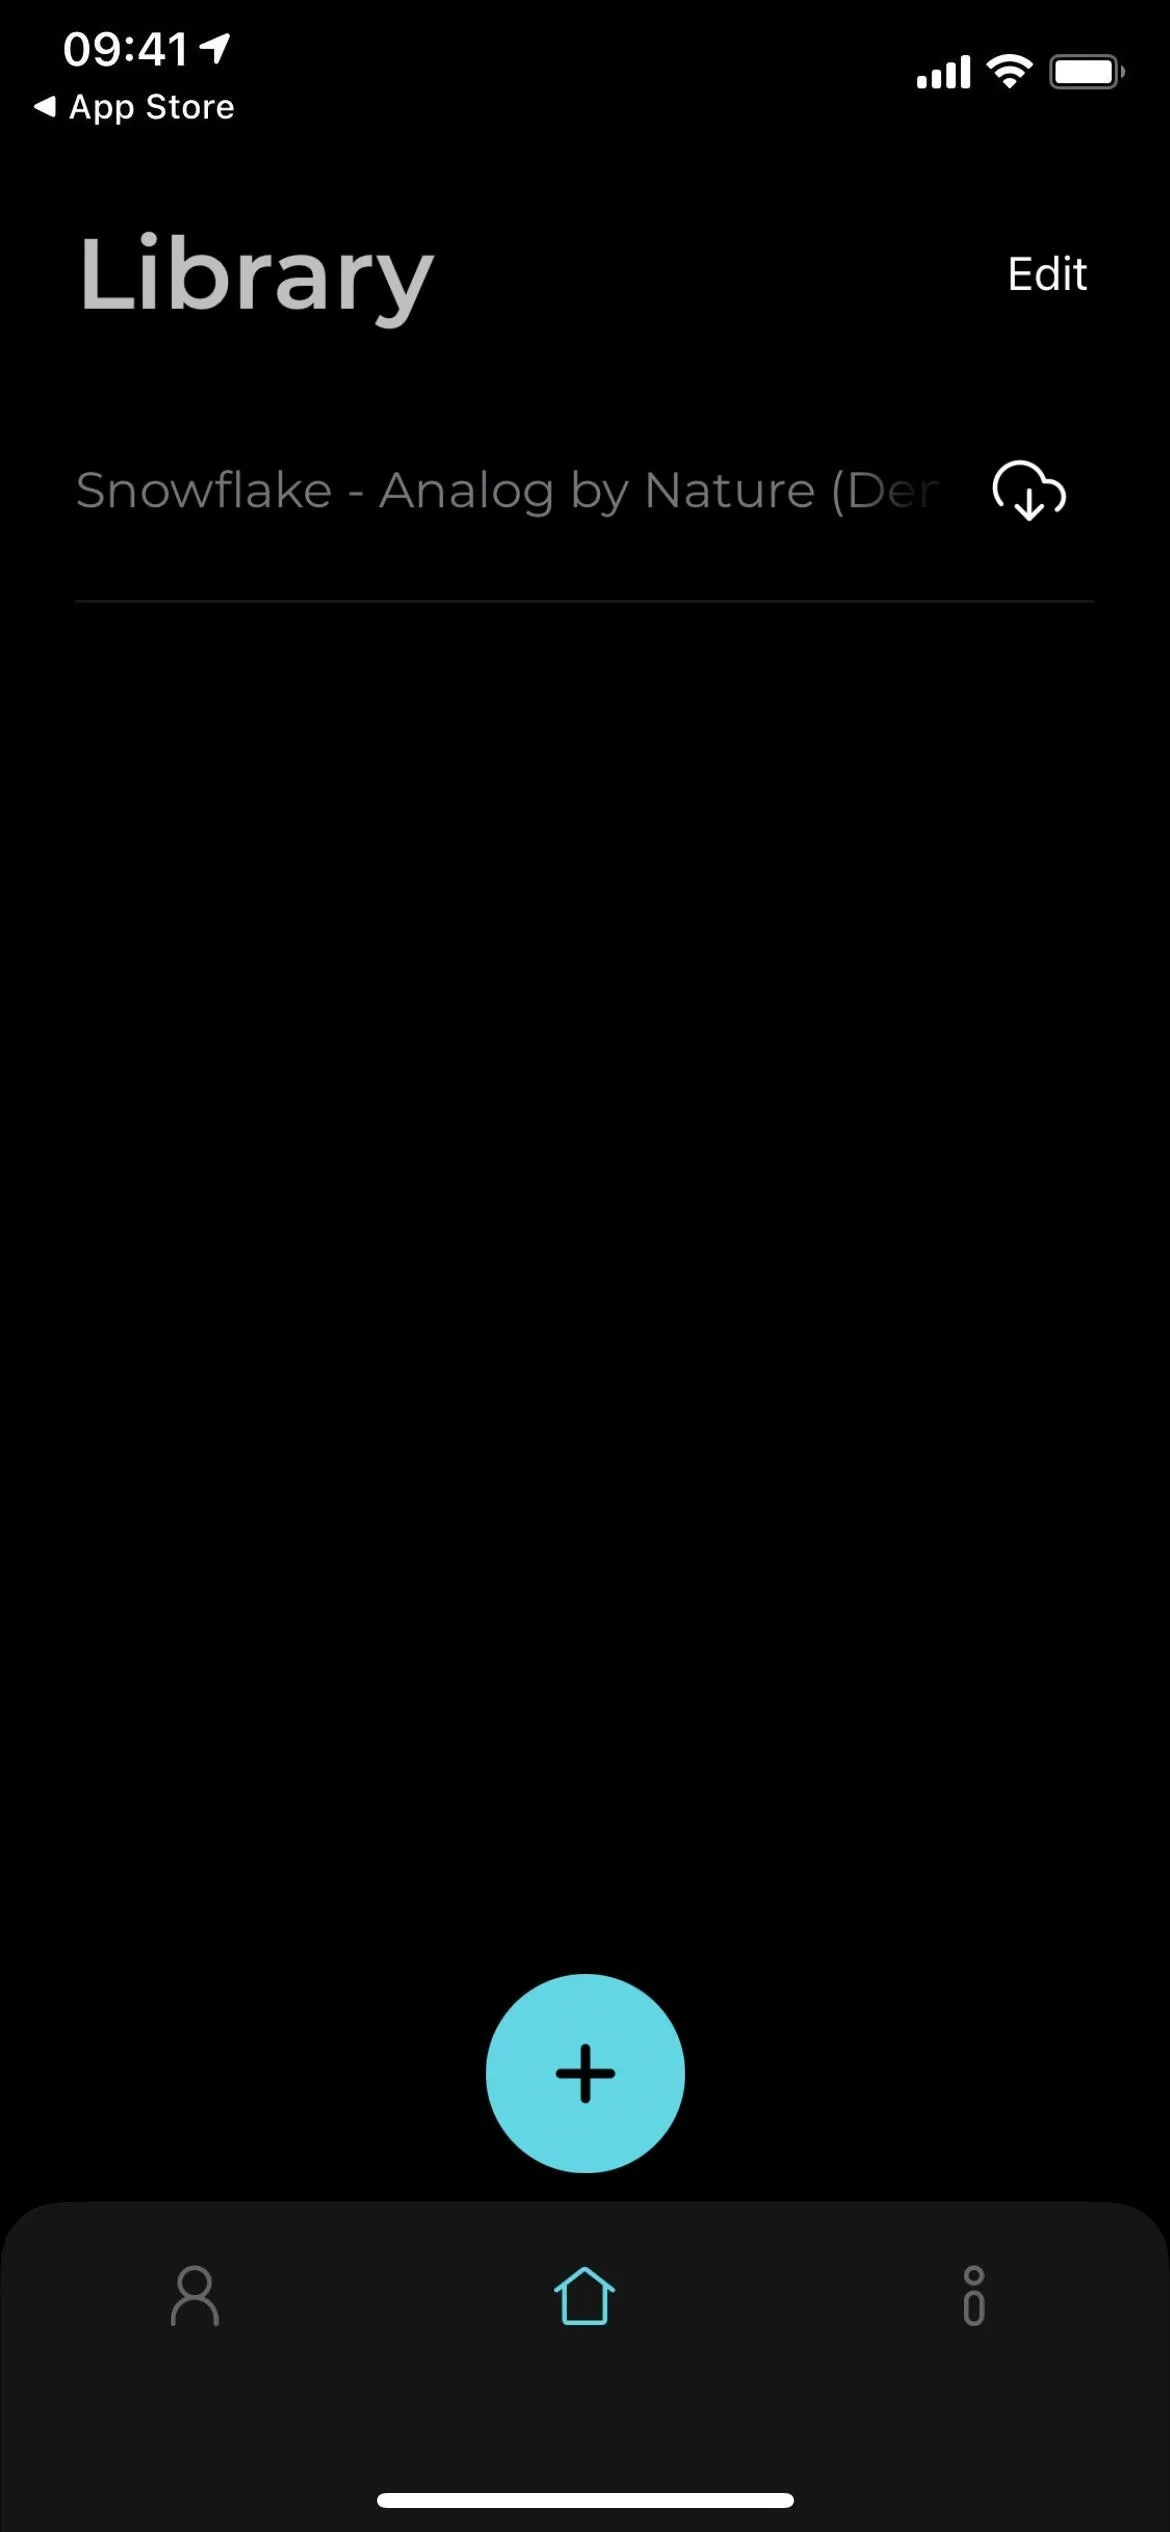
The Library tab on iOS (left) and Android (right).
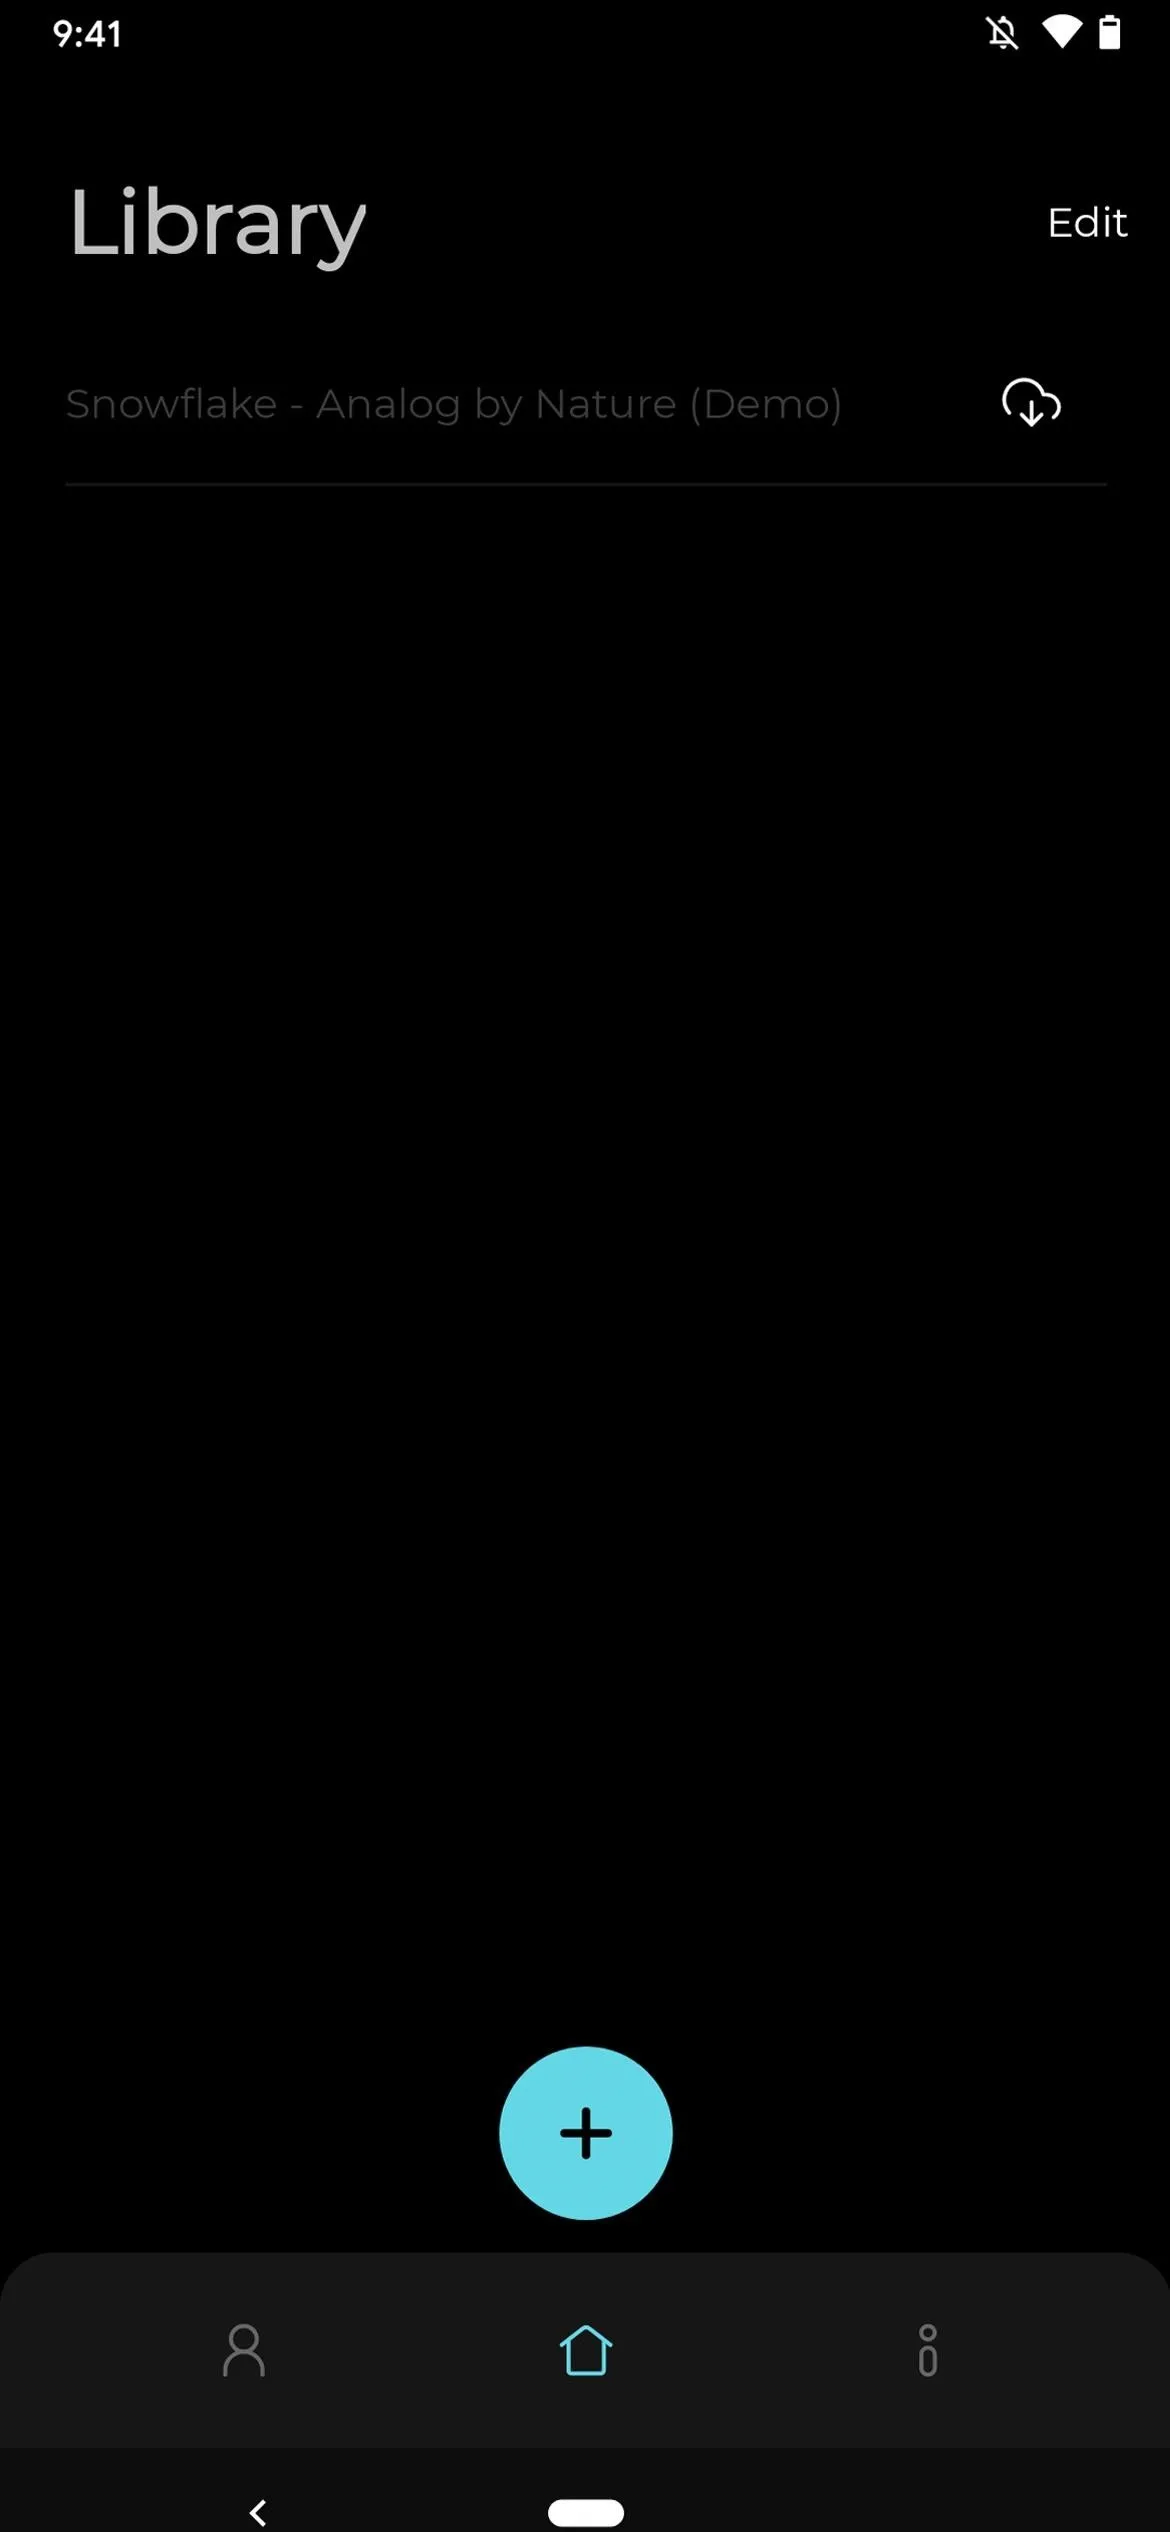
The Library tab on iOS (left) and Android (right).
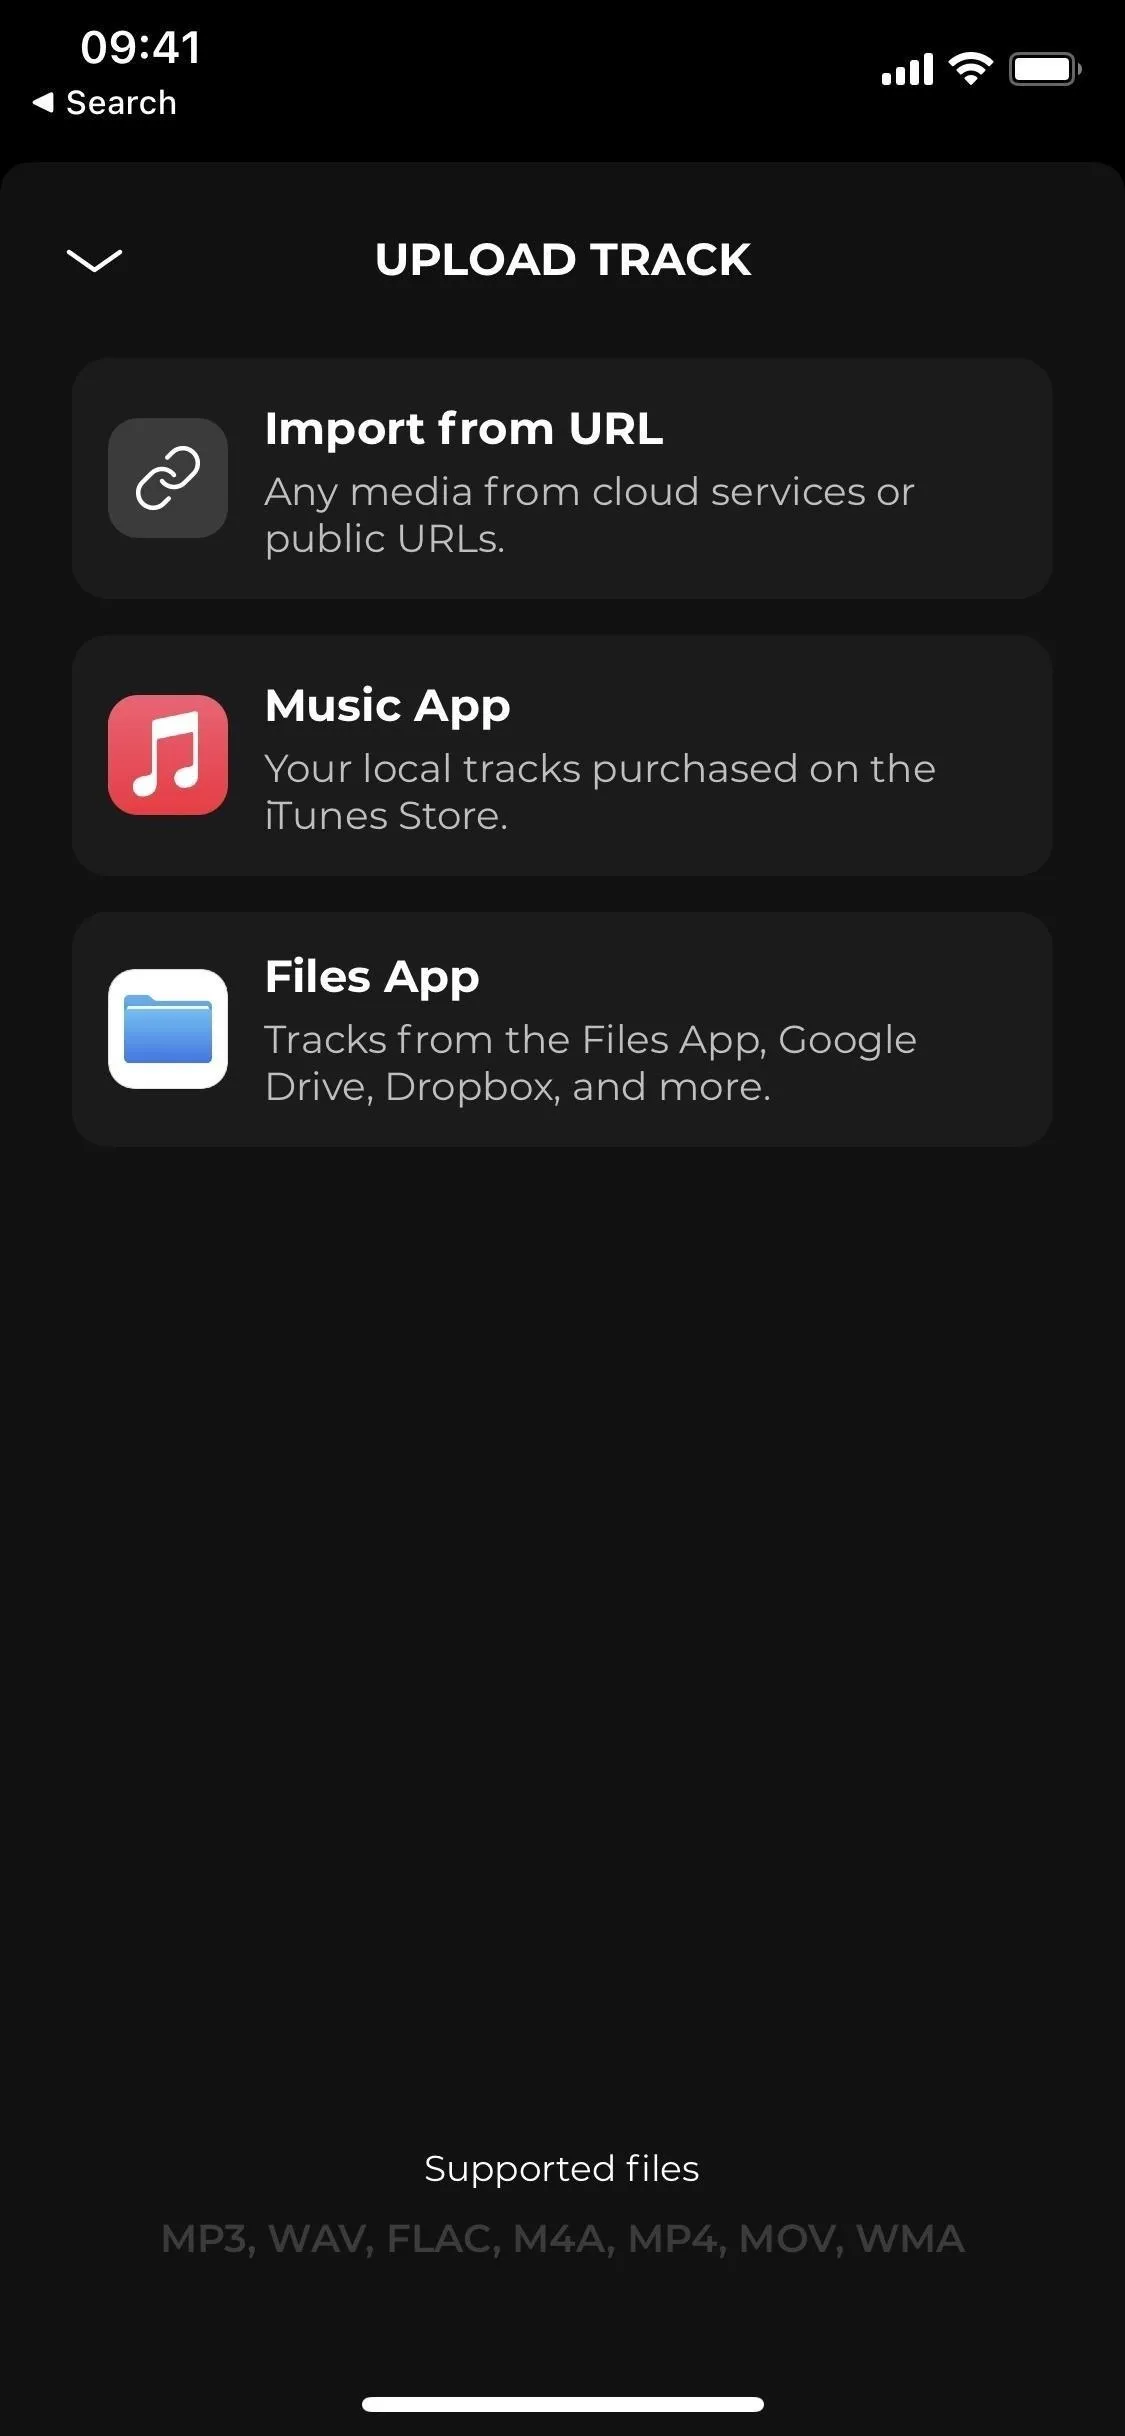
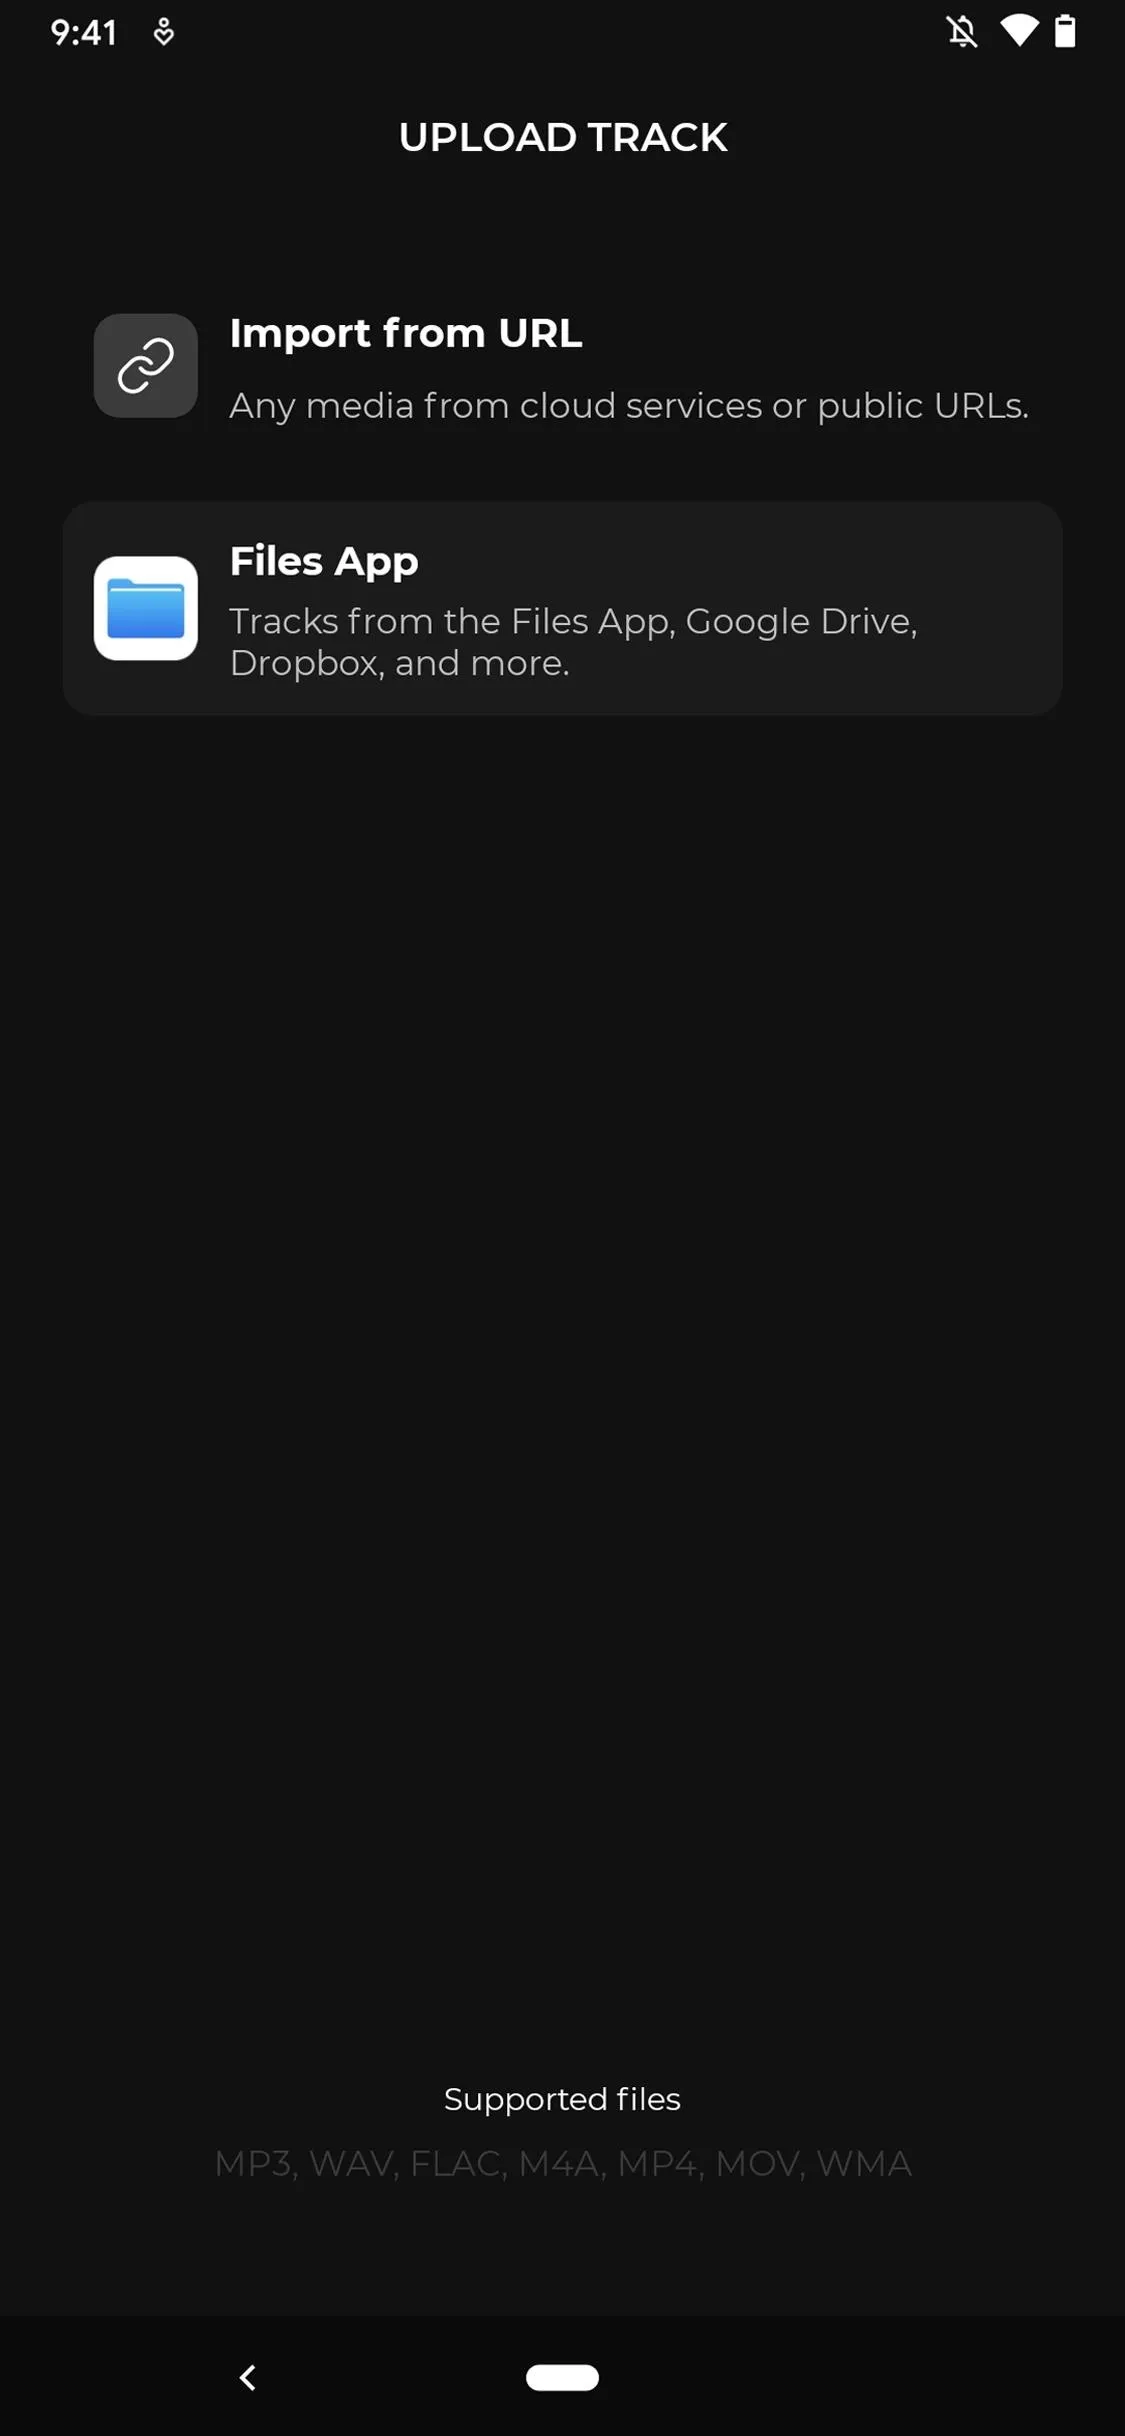
You can upload tracks via a song's URL or from your device's files manager or a cloud service. Supported file types include MP3, WAV, FLAC, M4A, MOV, and WMA. On iOS, you can also upload a track from the Music app. For that, you'll need to give Moises access to your Apple Music, music and video activity, and media library, so tap "OK" on the prompt to allow it.
- Import from URL: Copy a URL from a website or cloud service that contains media, such as YouTube, Streamable, Google Drive, Vimeo, and SoundCloud, and paste it in the box. Tap on "Process media" to load it.
- Music App (iOS only): Find music that has been locally stored on your iPhone in the Music app, whether tracks you synced from iTunes or Music, songs you've purchased from Apple, or tracks downloaded from Apple Music. Tap on a title in the song picker to select it.
- Files App: Shows recent files right away, and you can search your files manager for the file name directly. Also, you can choose a cloud service like Amazon Drive, Box, Dropbox, Google Drive, iCloud (iOS Only), Mega, Microsoft OneDrive, etc. Which cloud services you can see in your file manager will depend on your OS and which apps you have, which you're signed into, and which you've made visible. To see files on a cloud service, you may have to log in with your existing credentials. Tap on a title to select it.
The upload screen on iOS (left) and Android (right).
The upload screen on iOS (left) and Android (right).
Split the Track Up
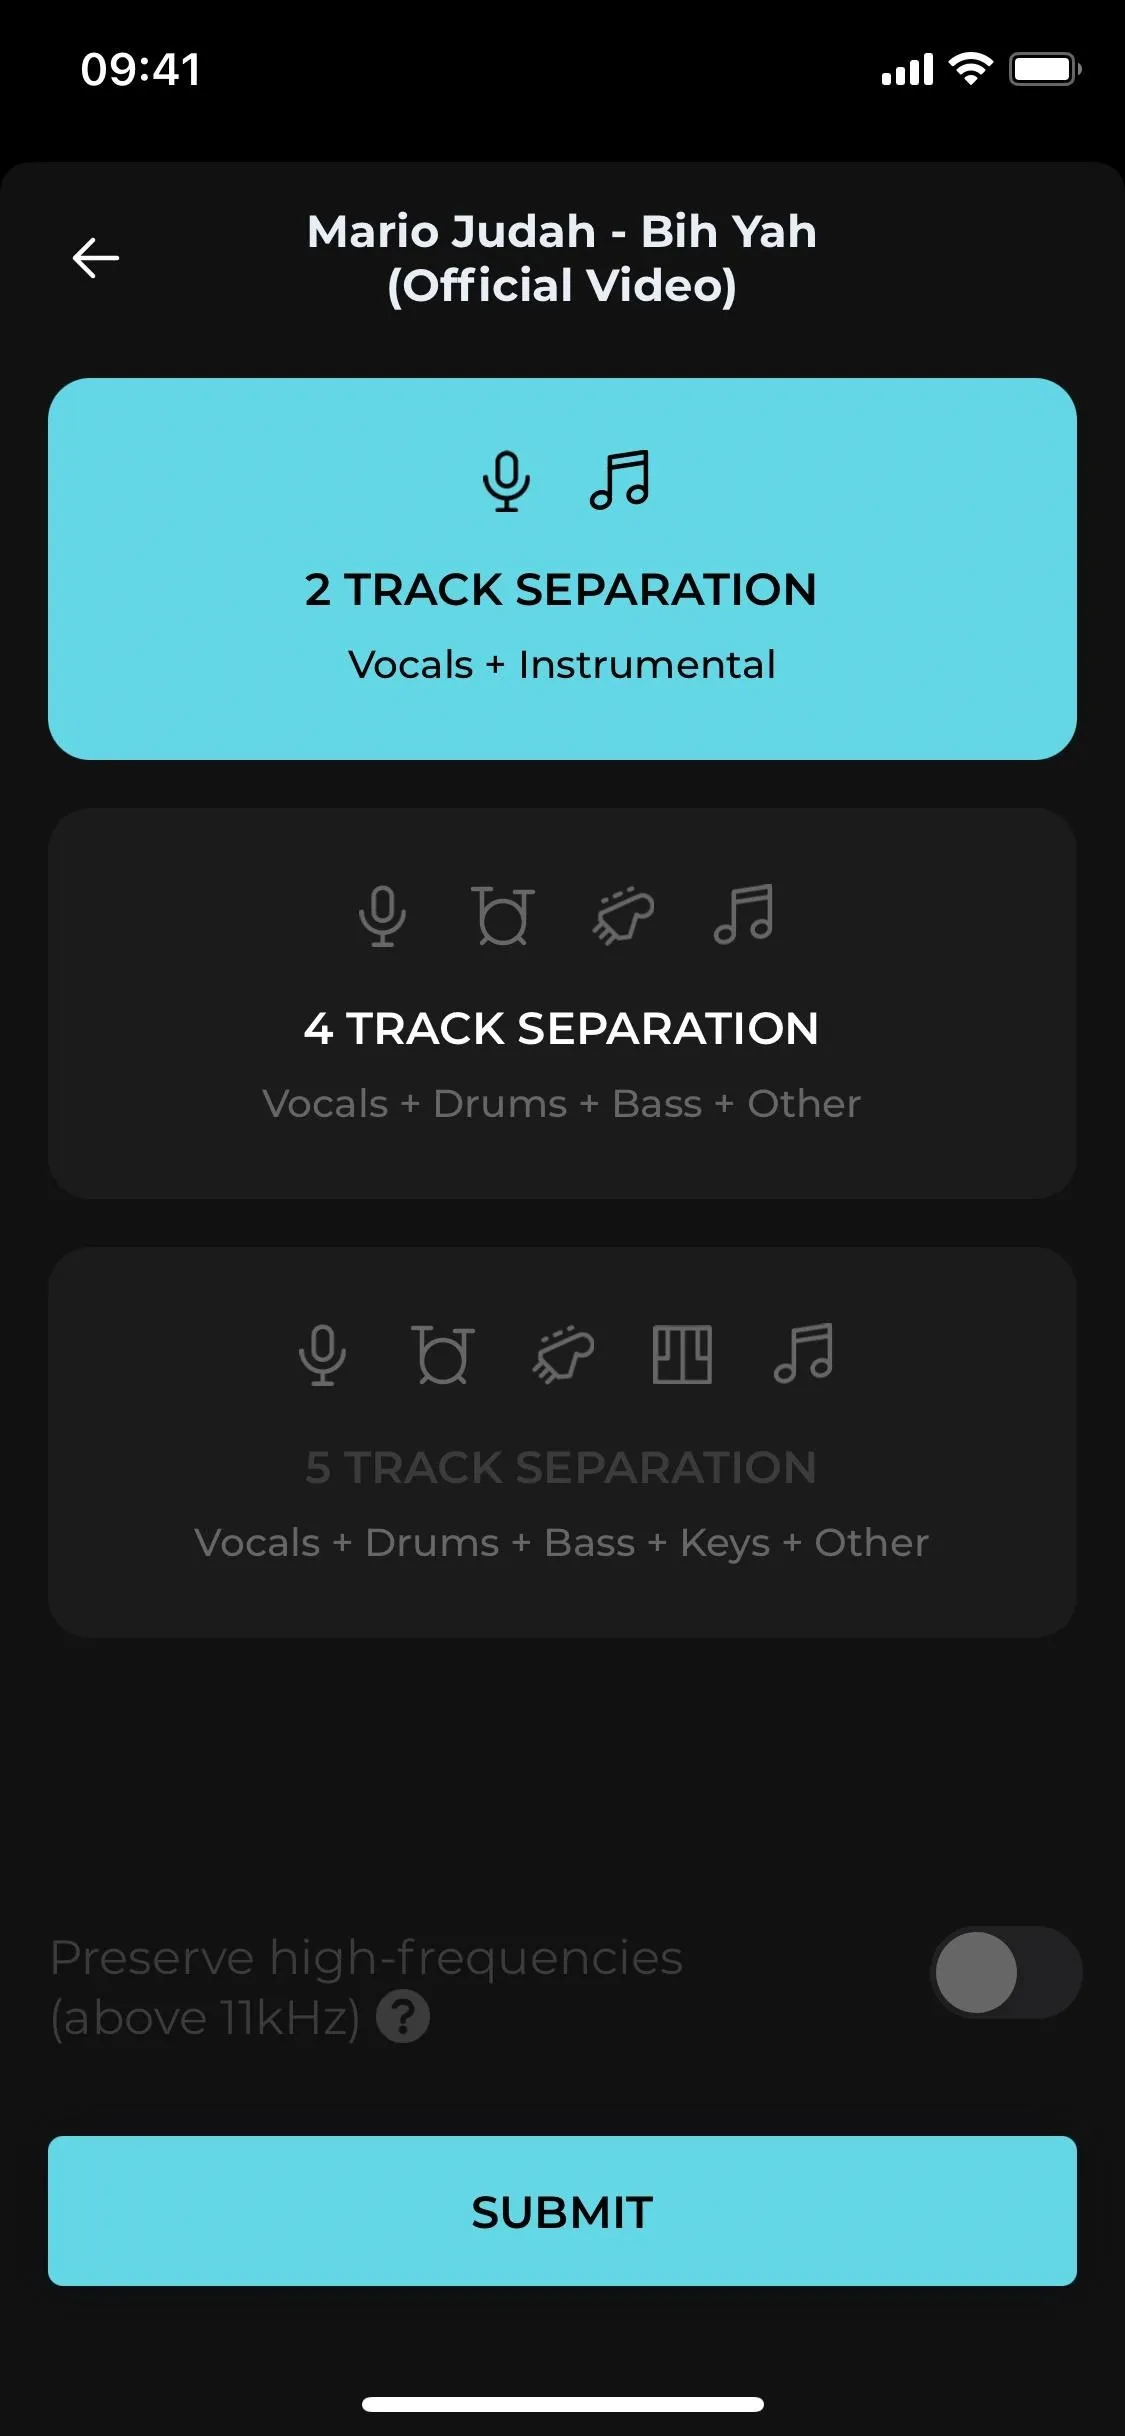
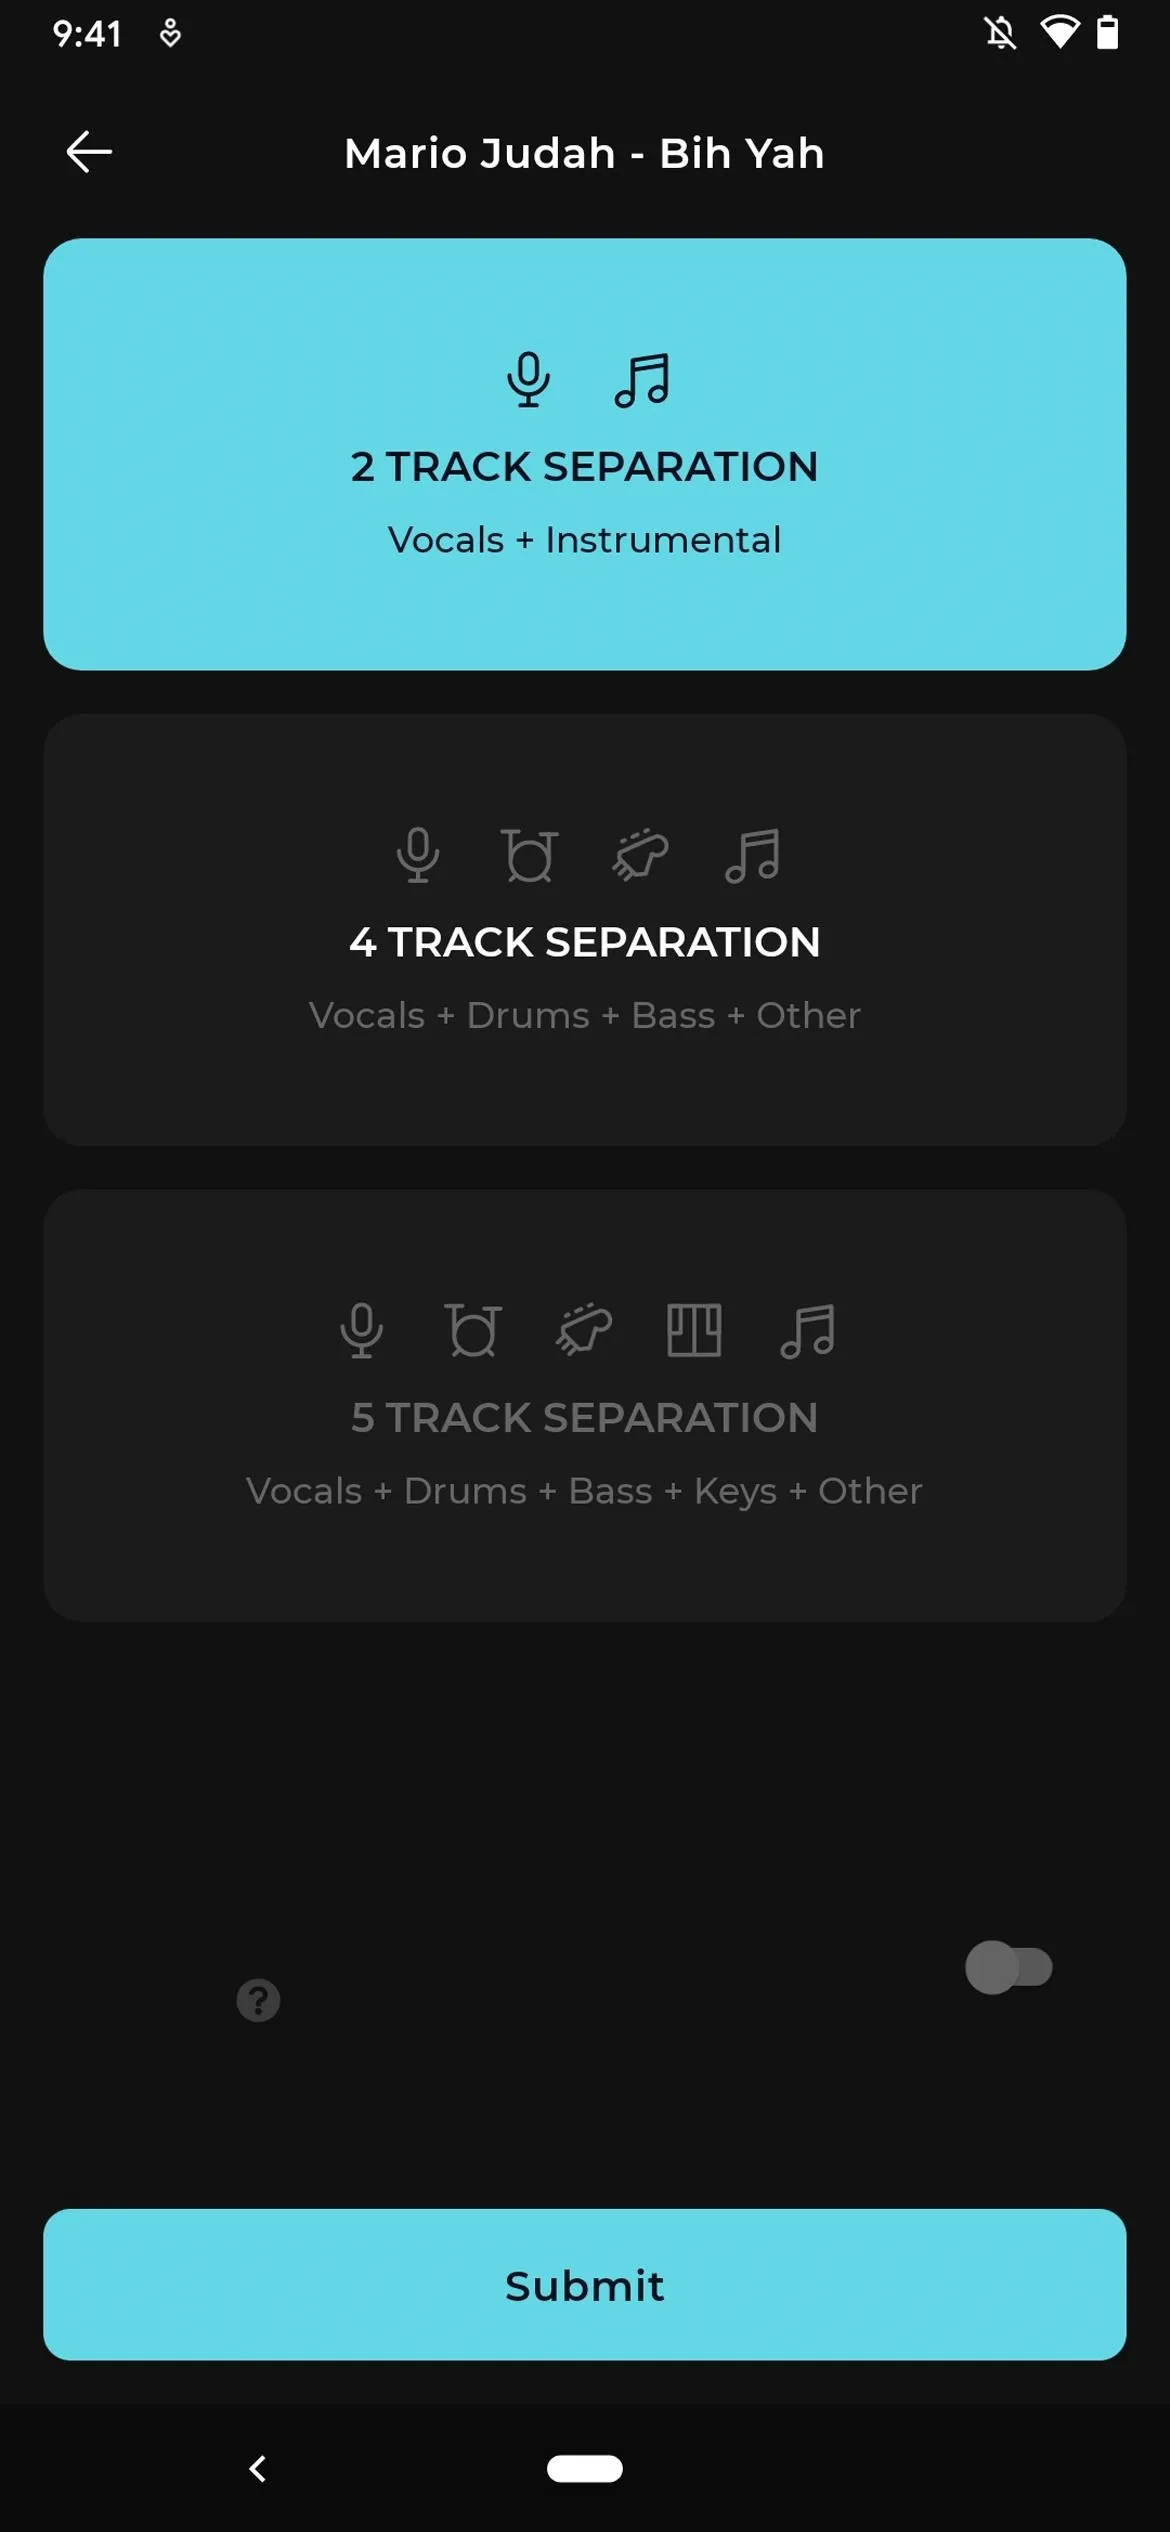
After you choose a song, you'll see its name or file name up top. Underneath that, you'll see three processing options you could choose from:
- 2 Track Separation: Vocals + Instrumental
- 4 Track Separation: Vocals + Drums + Bass + Other
- 5 Track Separation: Vocals + Drums + Bass + Keys + Other
The separation options on iOS (left) and Android (right).
The separation options on iOS (left) and Android (right).
You'll probably be using the two-track option the most, which separates the vocals from the instruments. However, if you plan on using the separate instrument and effects tracks for music production, the four- or five-track options may be worth checking out. The two- and four-track options are free to use, while the five-track one requires a premium subscription.
If you are a premium user, you can also toggle on the option to "Preserve high-frequencies (above 11 kHz)" before starting the separation.
Once you choose an option, tap on "Submit" to begin the extraction process. If your notifications are enabled, you'll be notified when the track is finished, which can take several minutes, depending on the song's makeup.
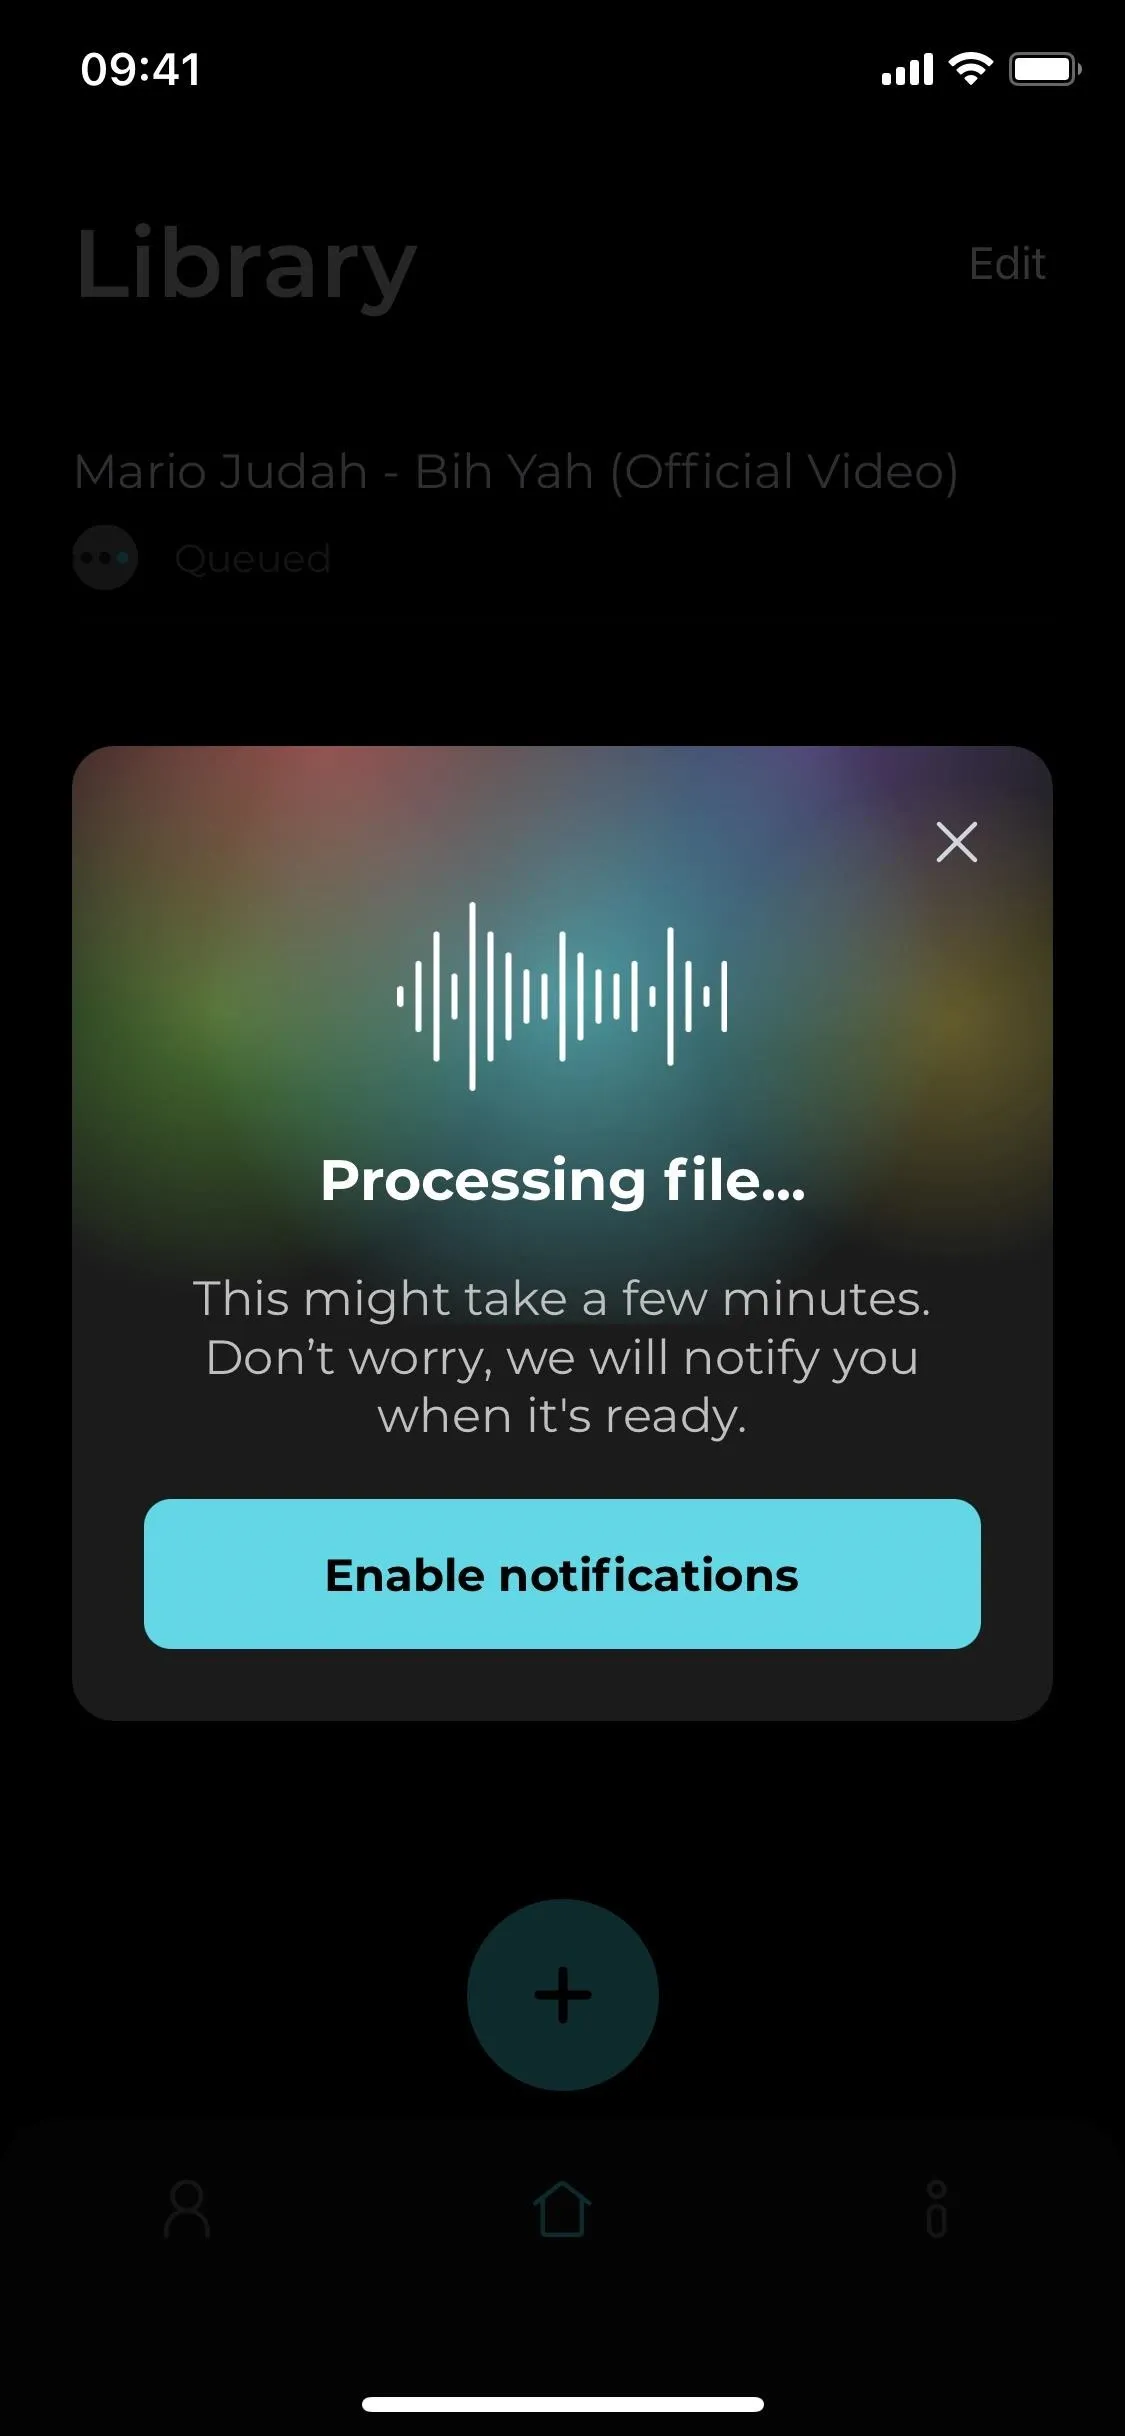
The processing screen on iOS (left) and Android (right).
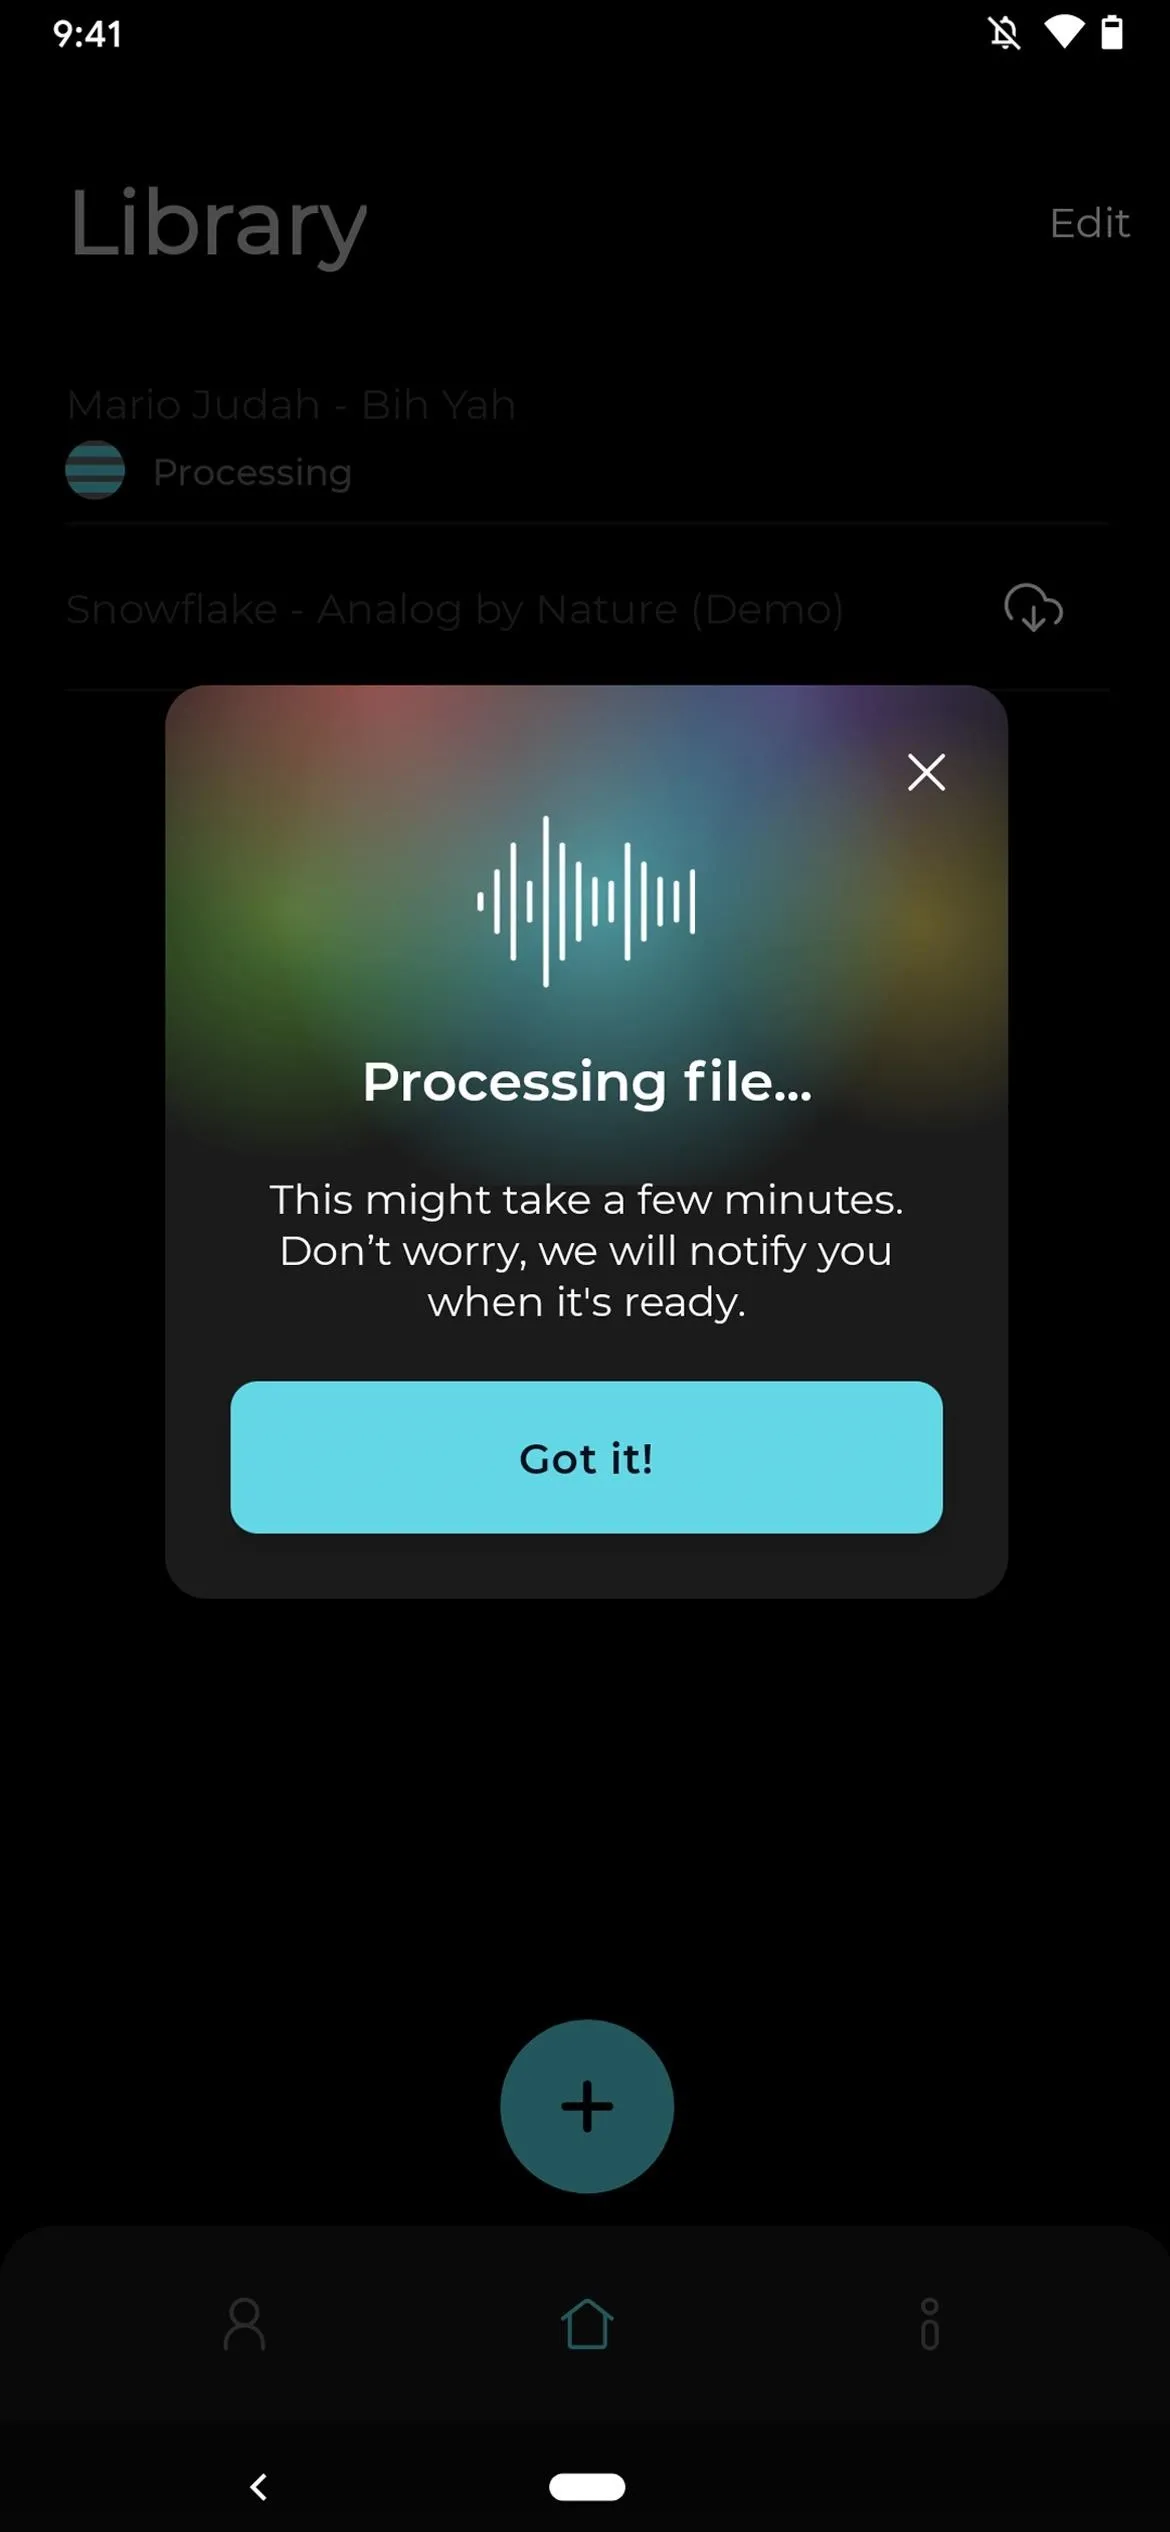
The processing screen on iOS (left) and Android (right).
Play the Song in the Mixer
When the track is done, you can tap it in the Library tab, and it'll download it from Moises' servers and start playing it automatically. In the Library tab, you can also tap "Edit" in the top right, which lets you choose songs to delete.
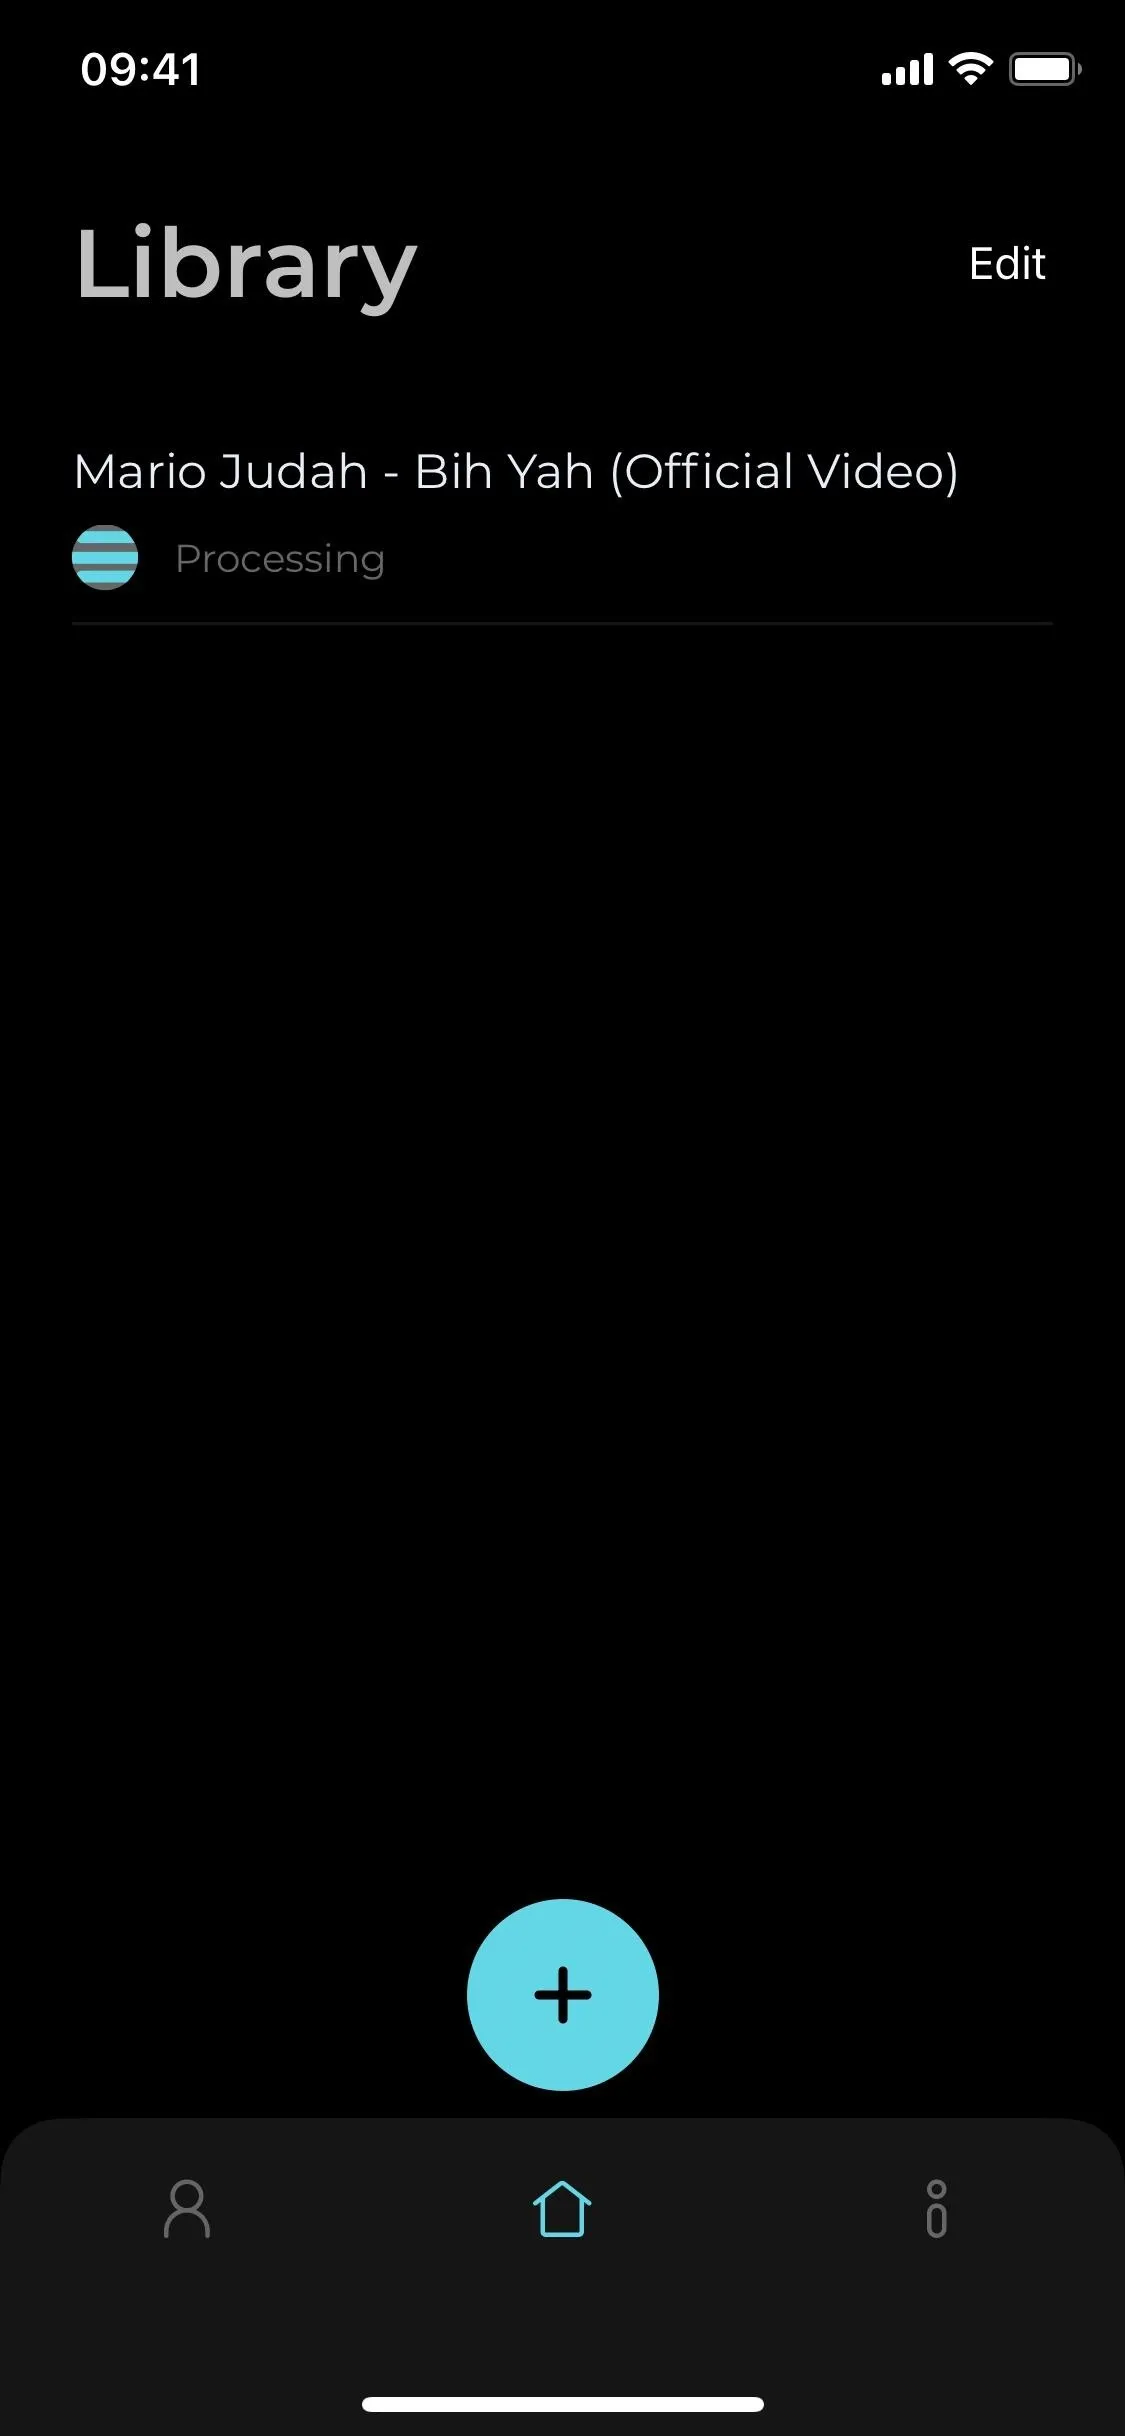
The song is still processing (left; iOS) and is already downloaded (right; Android).
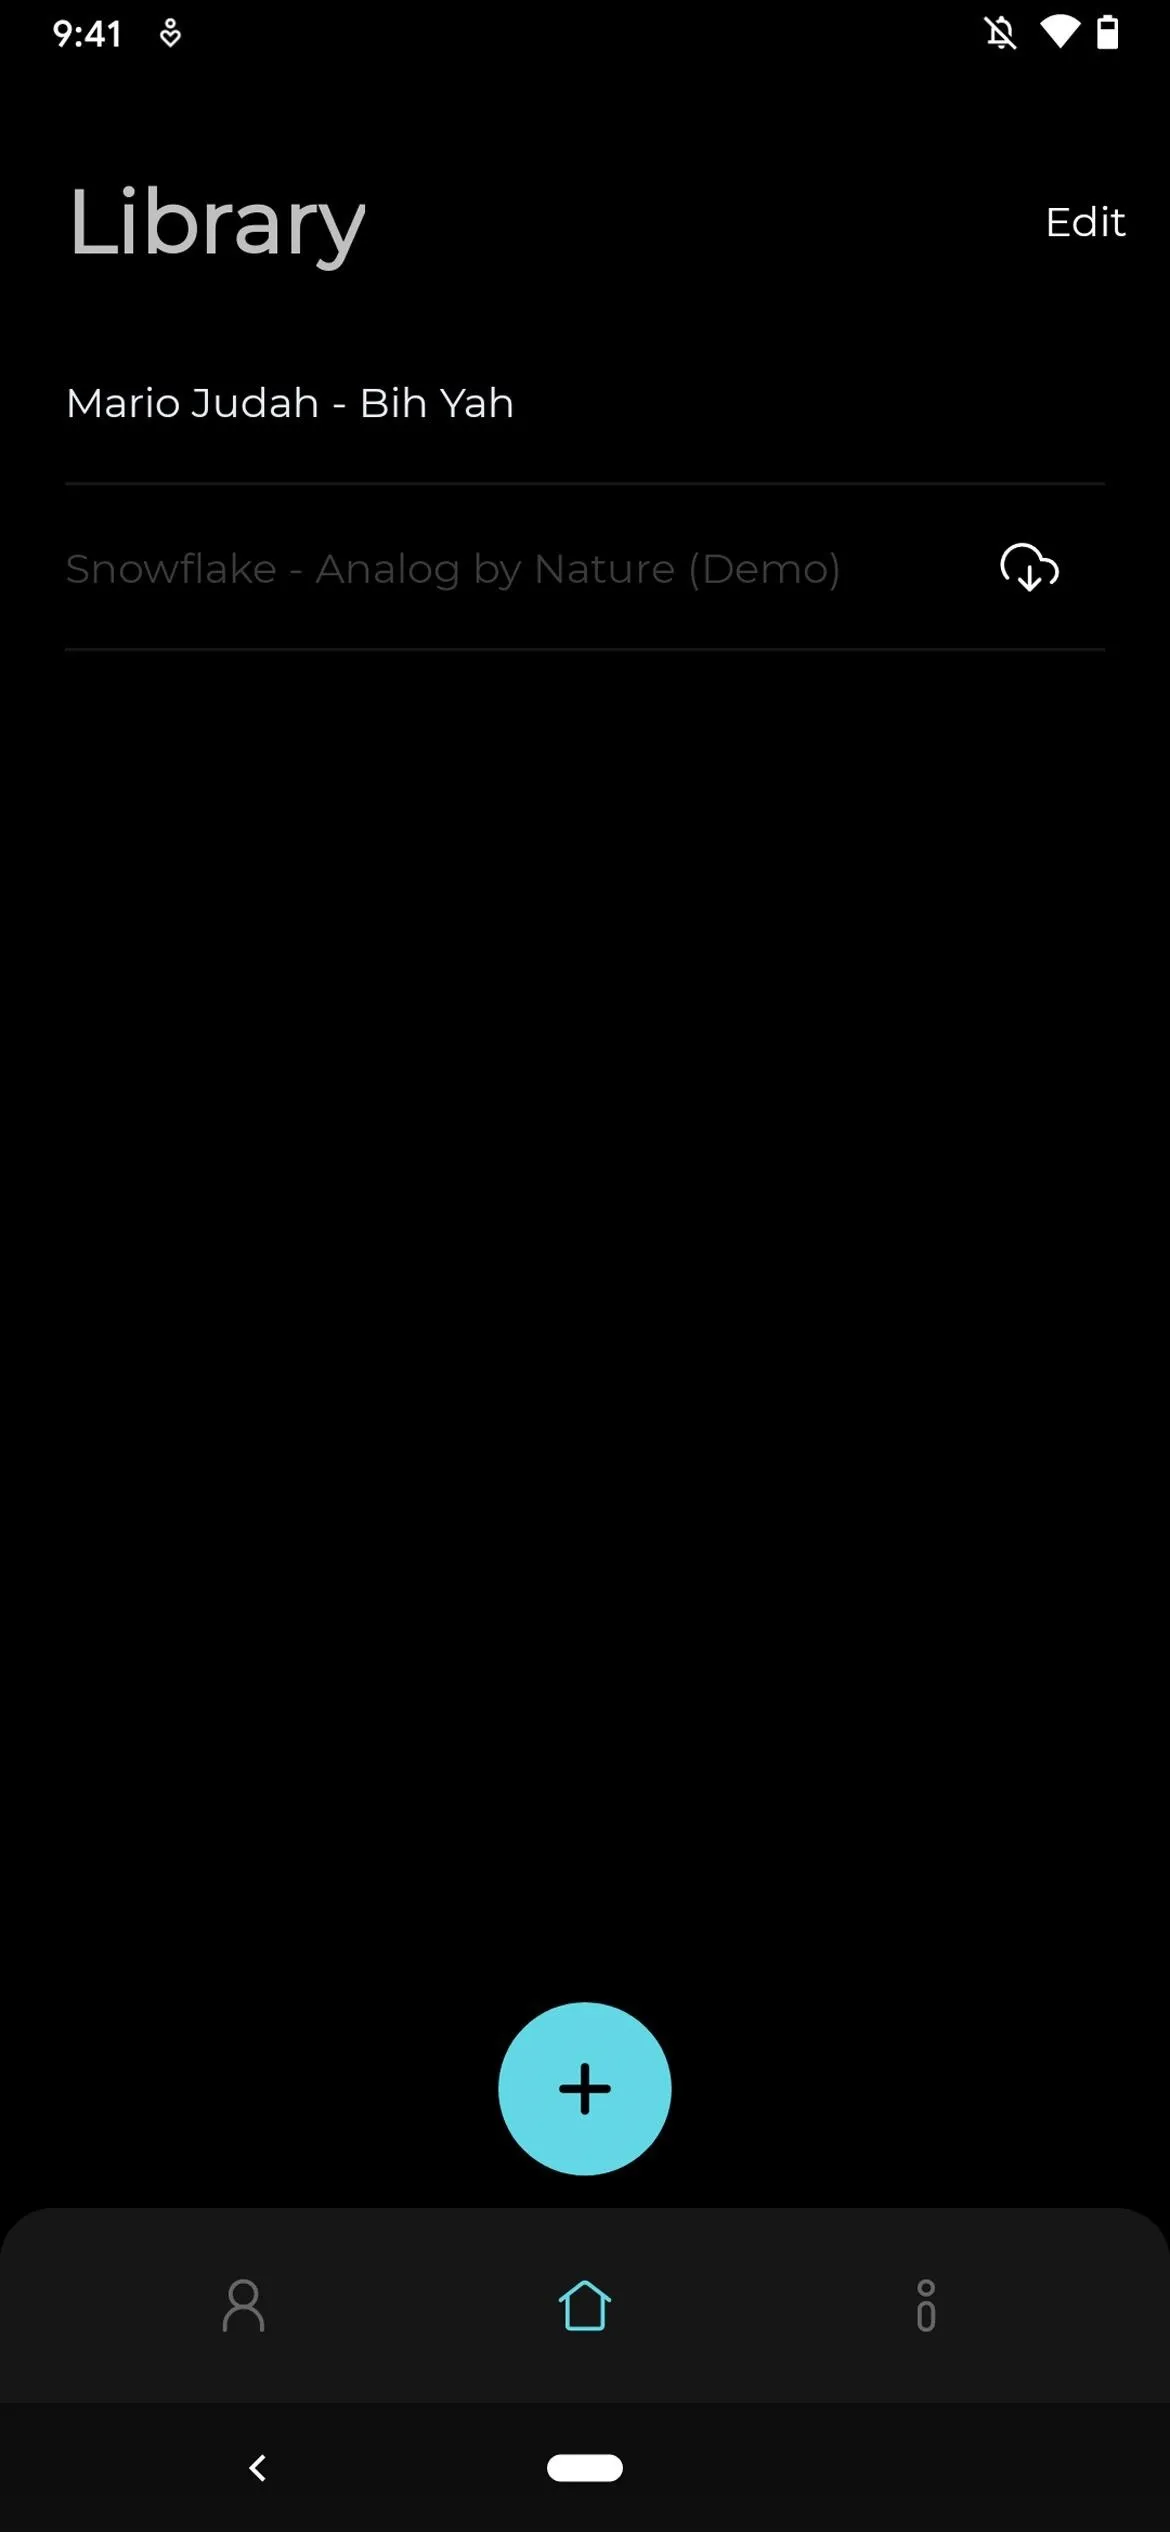
The song is still processing (left; iOS) and is already downloaded (right; Android).
If it's your first time using Moises, it'll show you briefly where the buttons are to change pitch, activate the metronome, and use the stereo controls. Moises recommends using headphones for the best experience.
While the song plays, you'll see chords at the top of the screen moving in sync with the song as the chords are heard in real time. This allows you to follow the notes and even play along with the song. For free users, chord detection is limited to one minute only.
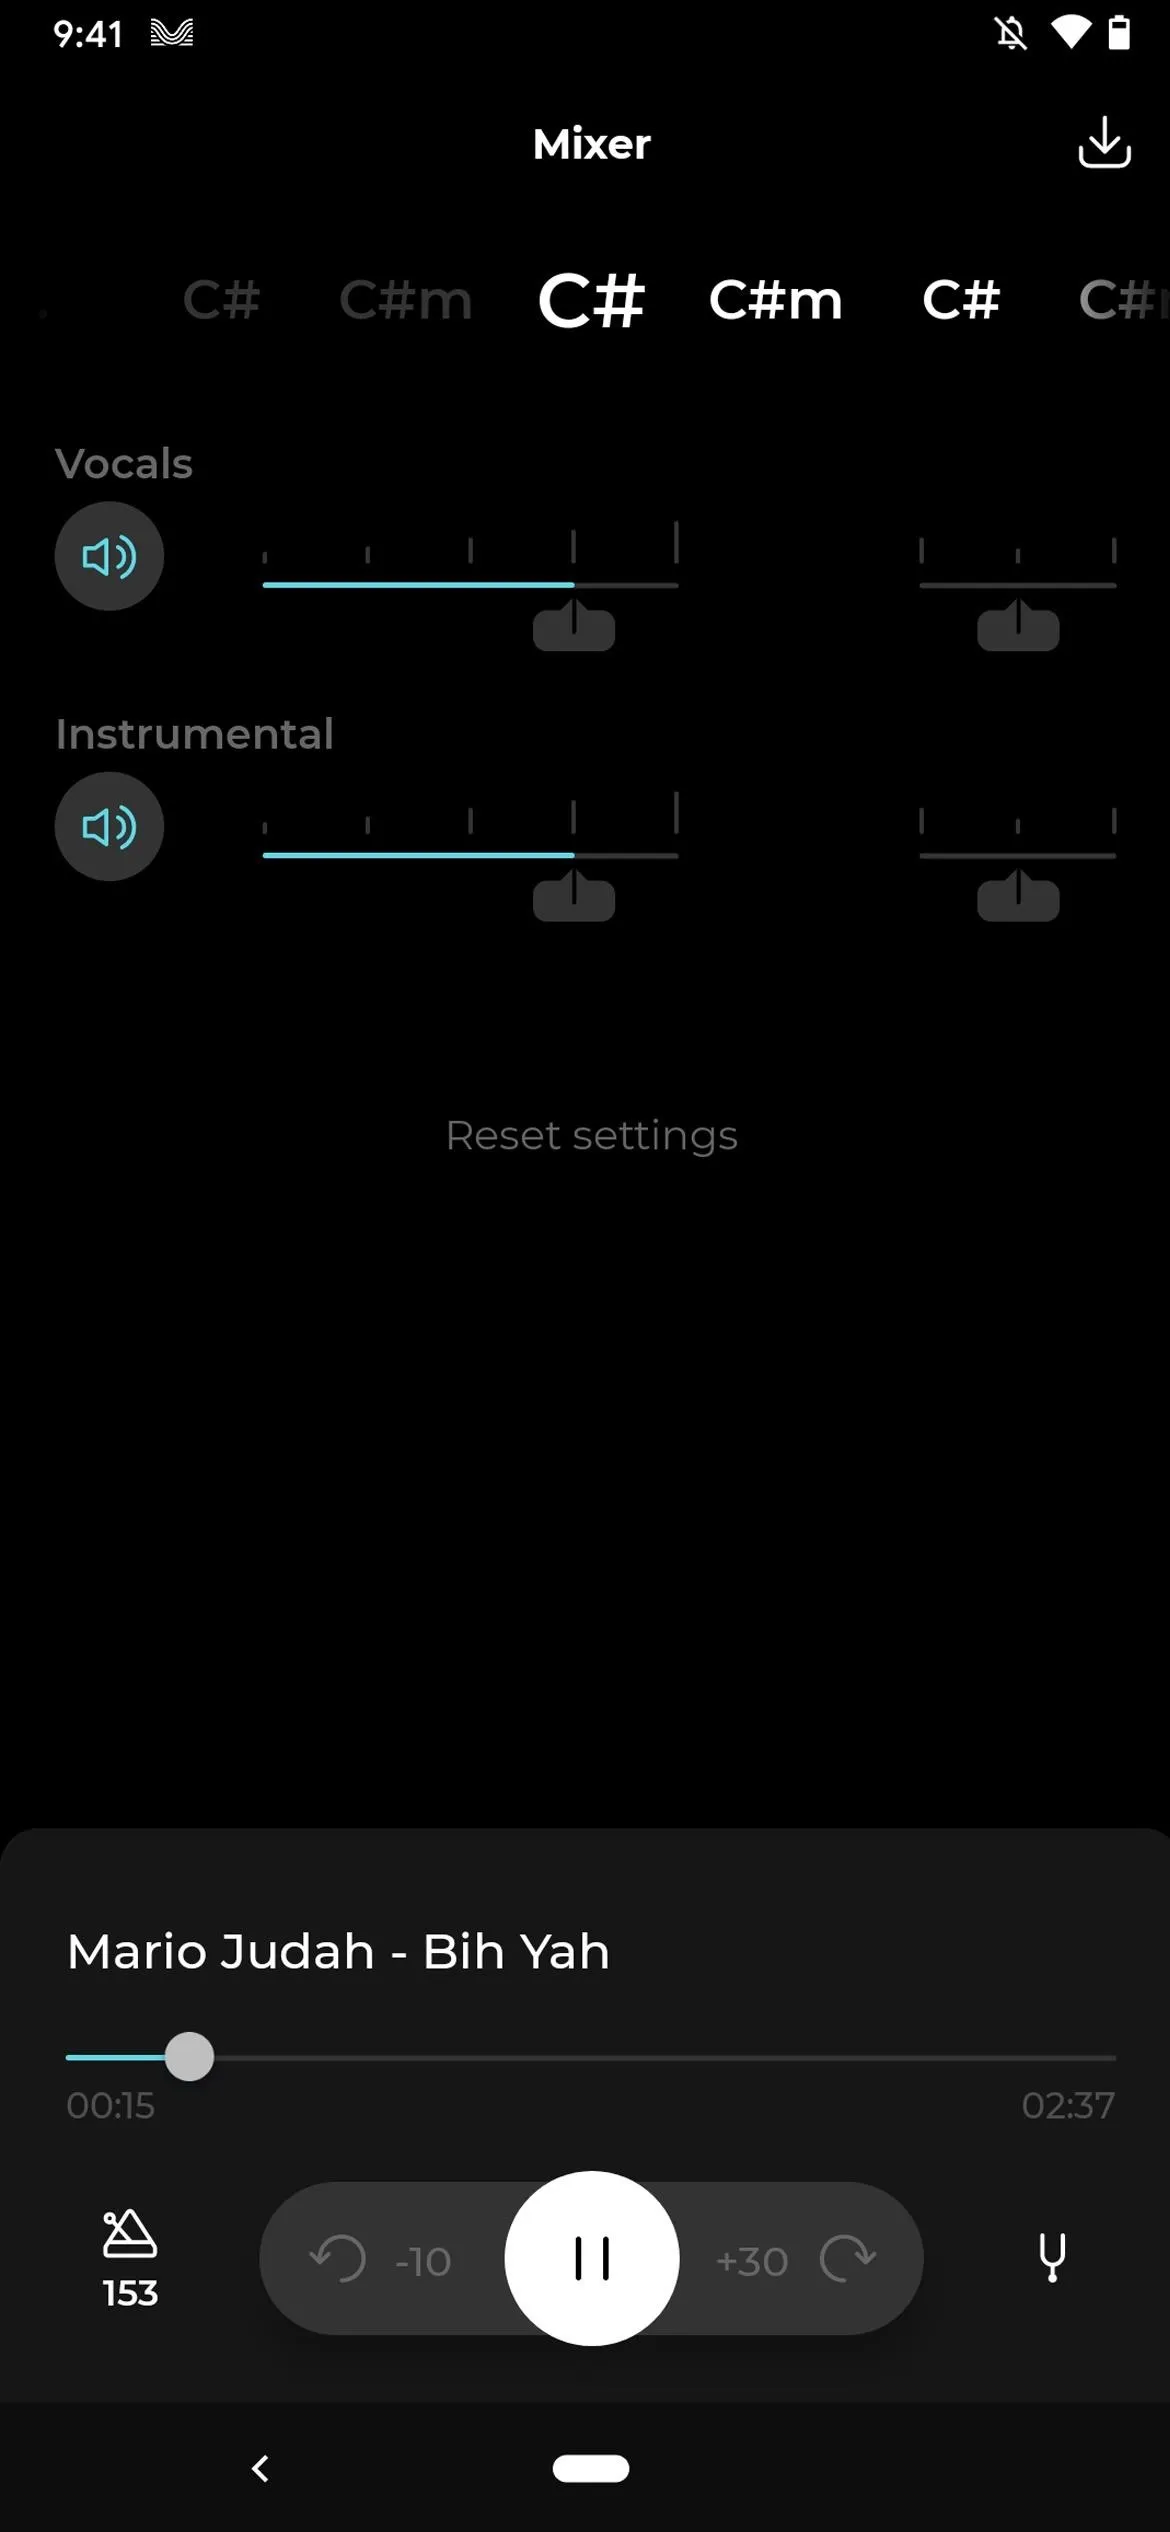
Underneath that, you'll find controls for each track created, which may be two, four, or five. You can then either mute a track, raise or lower each track's volume, or change left/right audio. If you want to go back to your regular settings, tap on "Reset settings" in the middle of the screen.
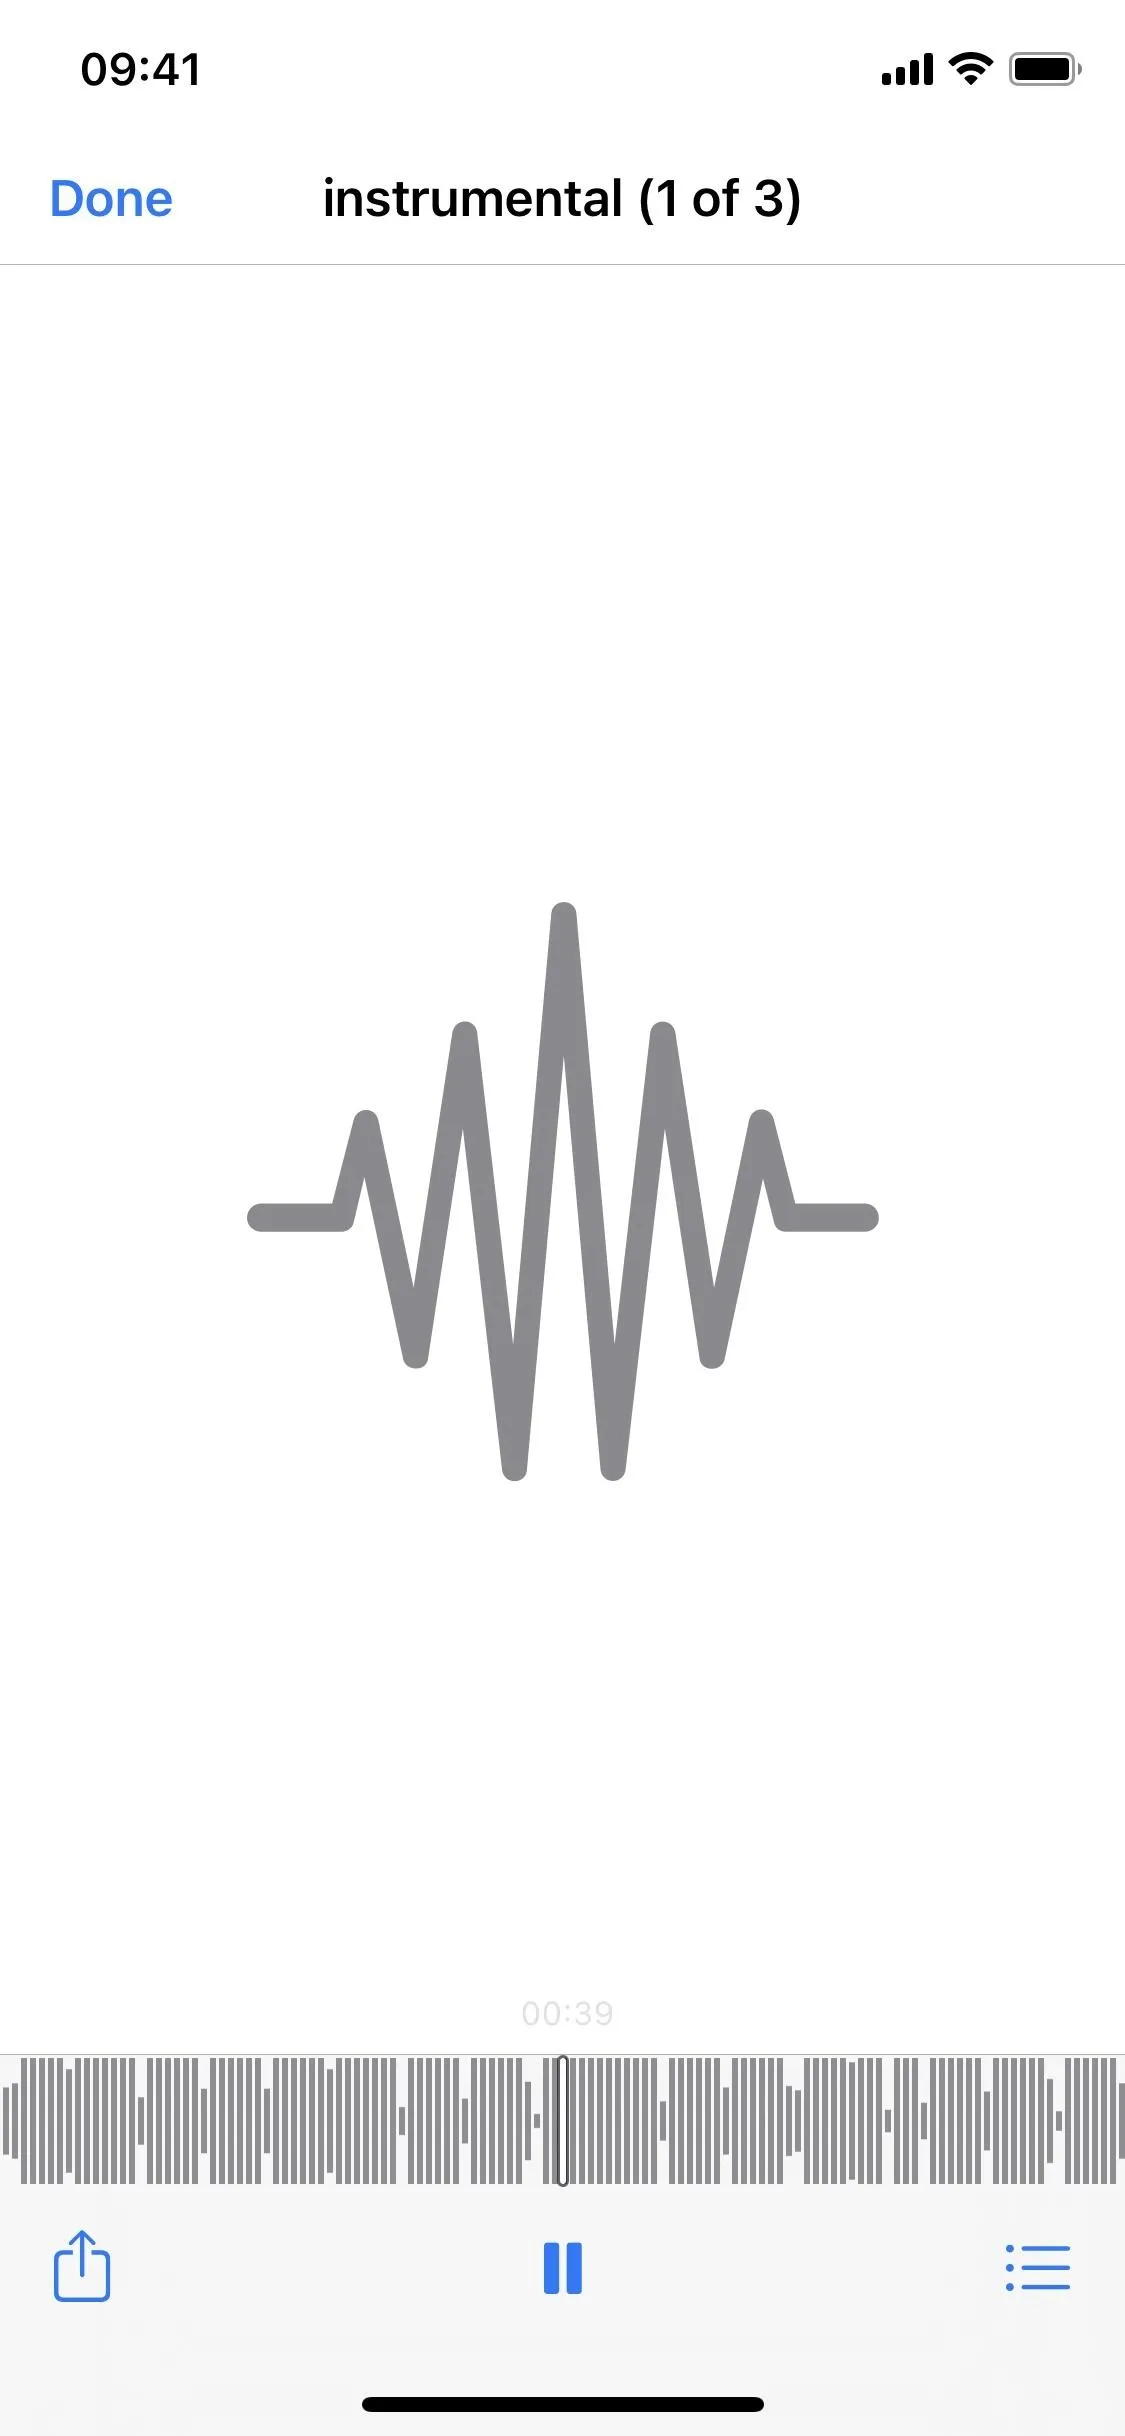
At the bottom of the page, you'll see play controls for the song, including a slider to go forward and rewind, as well as dedicated buttons to go back 10 seconds or go forward 30 seconds. To pause the song, simply tap on the big white pause button, and to play the song again, tap the play icon.
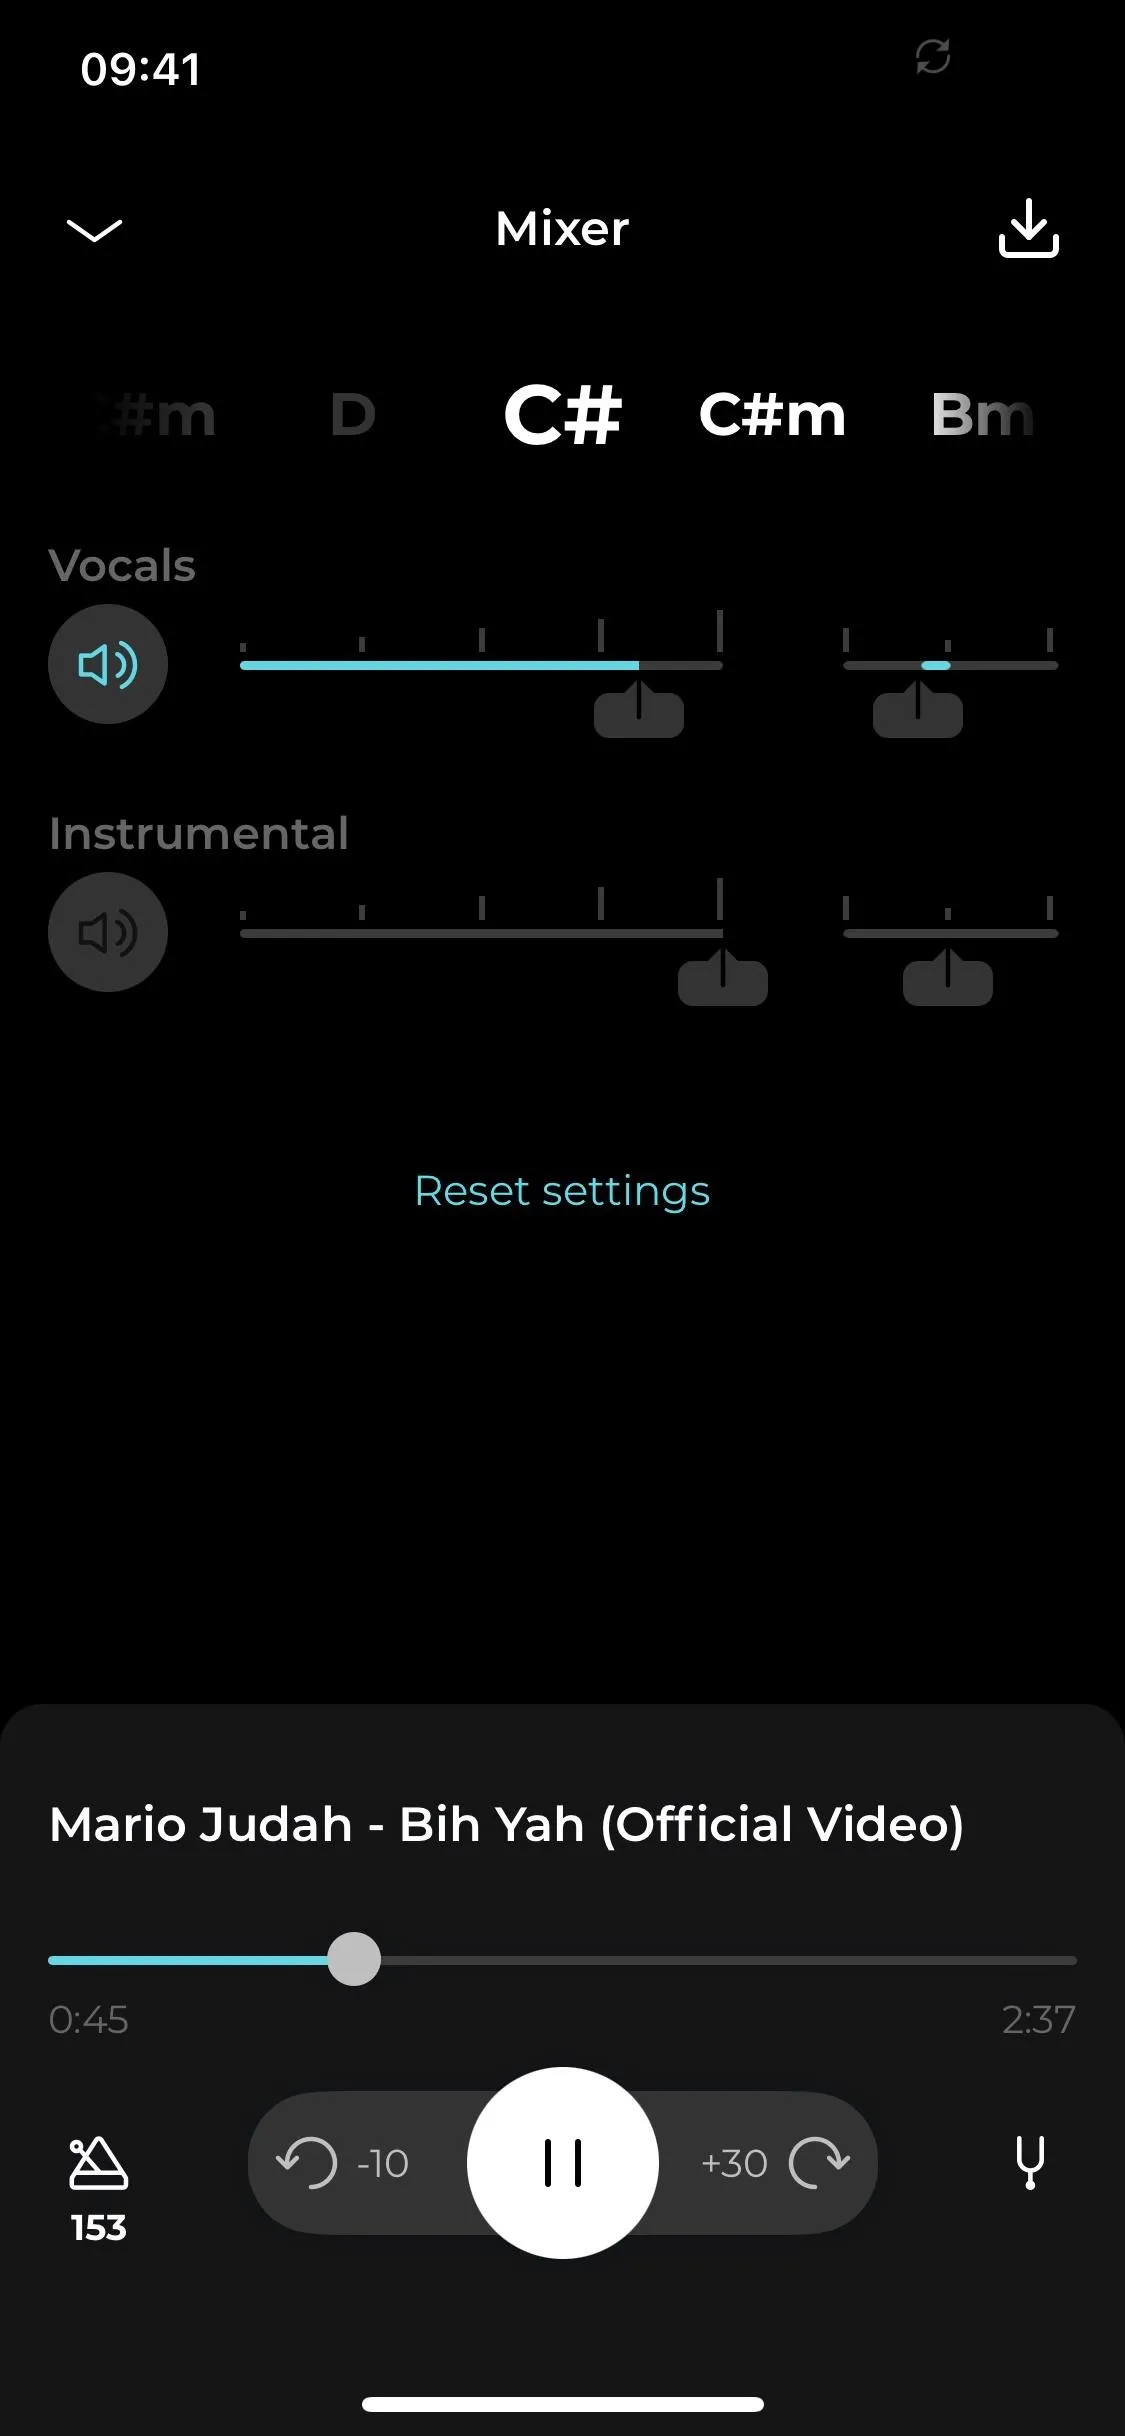
The mixer view on iOS (left) and Android (right).
The mixer view on iOS (left) and Android (right).
Adjust the Song (If Needed)
On each corner of the mixer, you'll have buttons to do various things. On the bottom left is the metronome and playback speed icon. You can activate the metronome, making it easier to play along with the track, and you can adjust its volume and whether you want it to play on your left or right speaker. Free users are limited to one minute only for the metronome.
You'll also see the playback speed tool when you tap the bottom left icon. You can use the plus (+) or minus (–) buttons or scroll the wheel to adjust the beats per minute (BPM) of the song. Free users can only speed or slow down the track by 10 BPM each way.
On the bottom right of the mixer is the pitchfork icon, where you can change the song's pitch. With the free version of Moises, you can only shift the pitch by one semitone, either up or down.
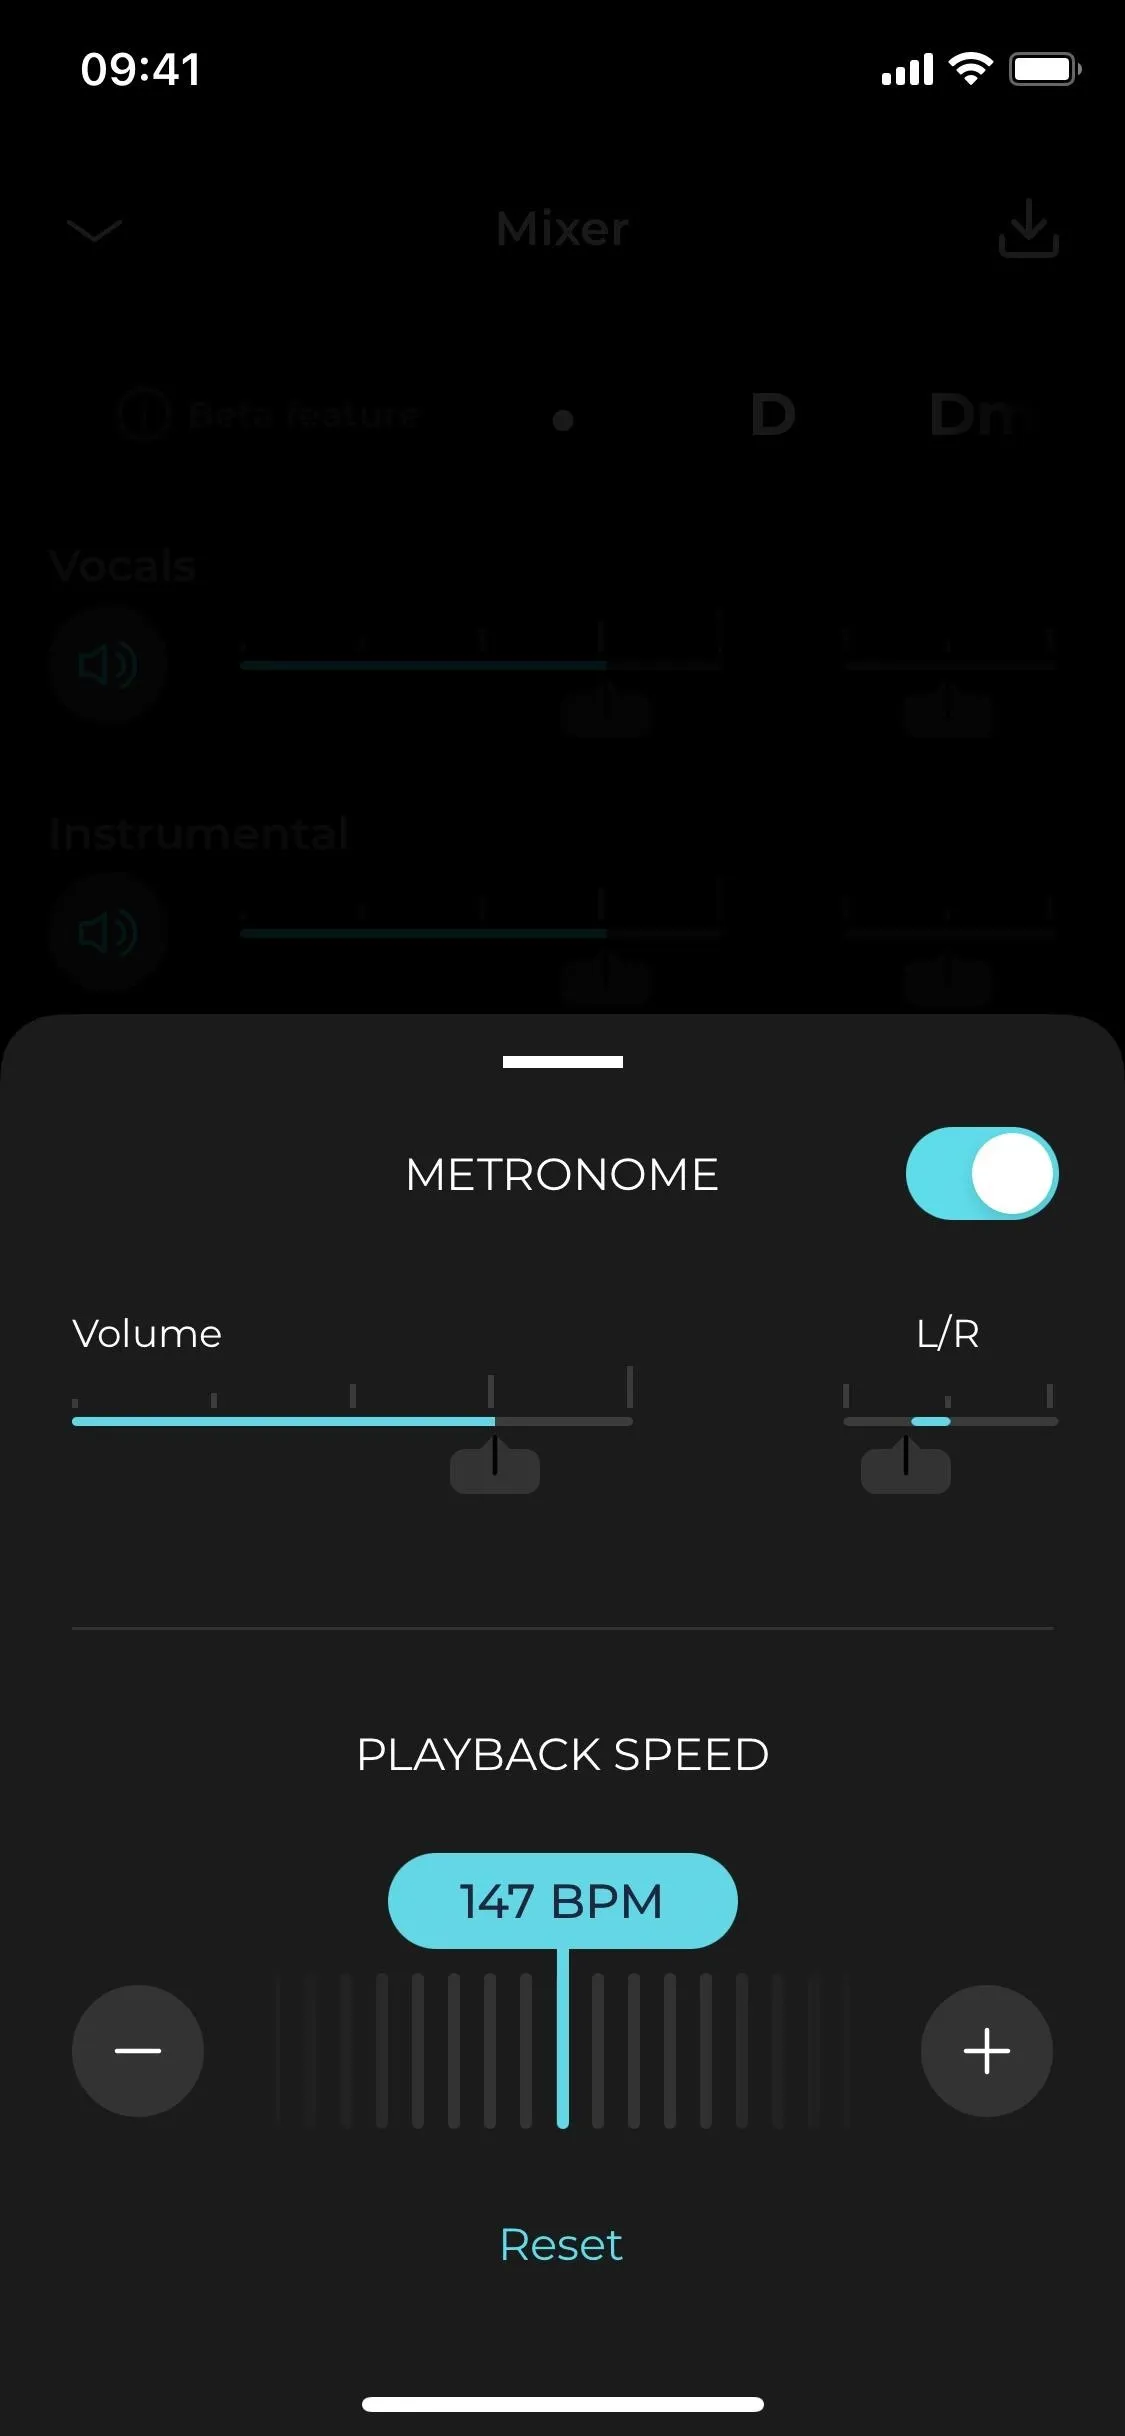
These tools look the same on iOS and Android.
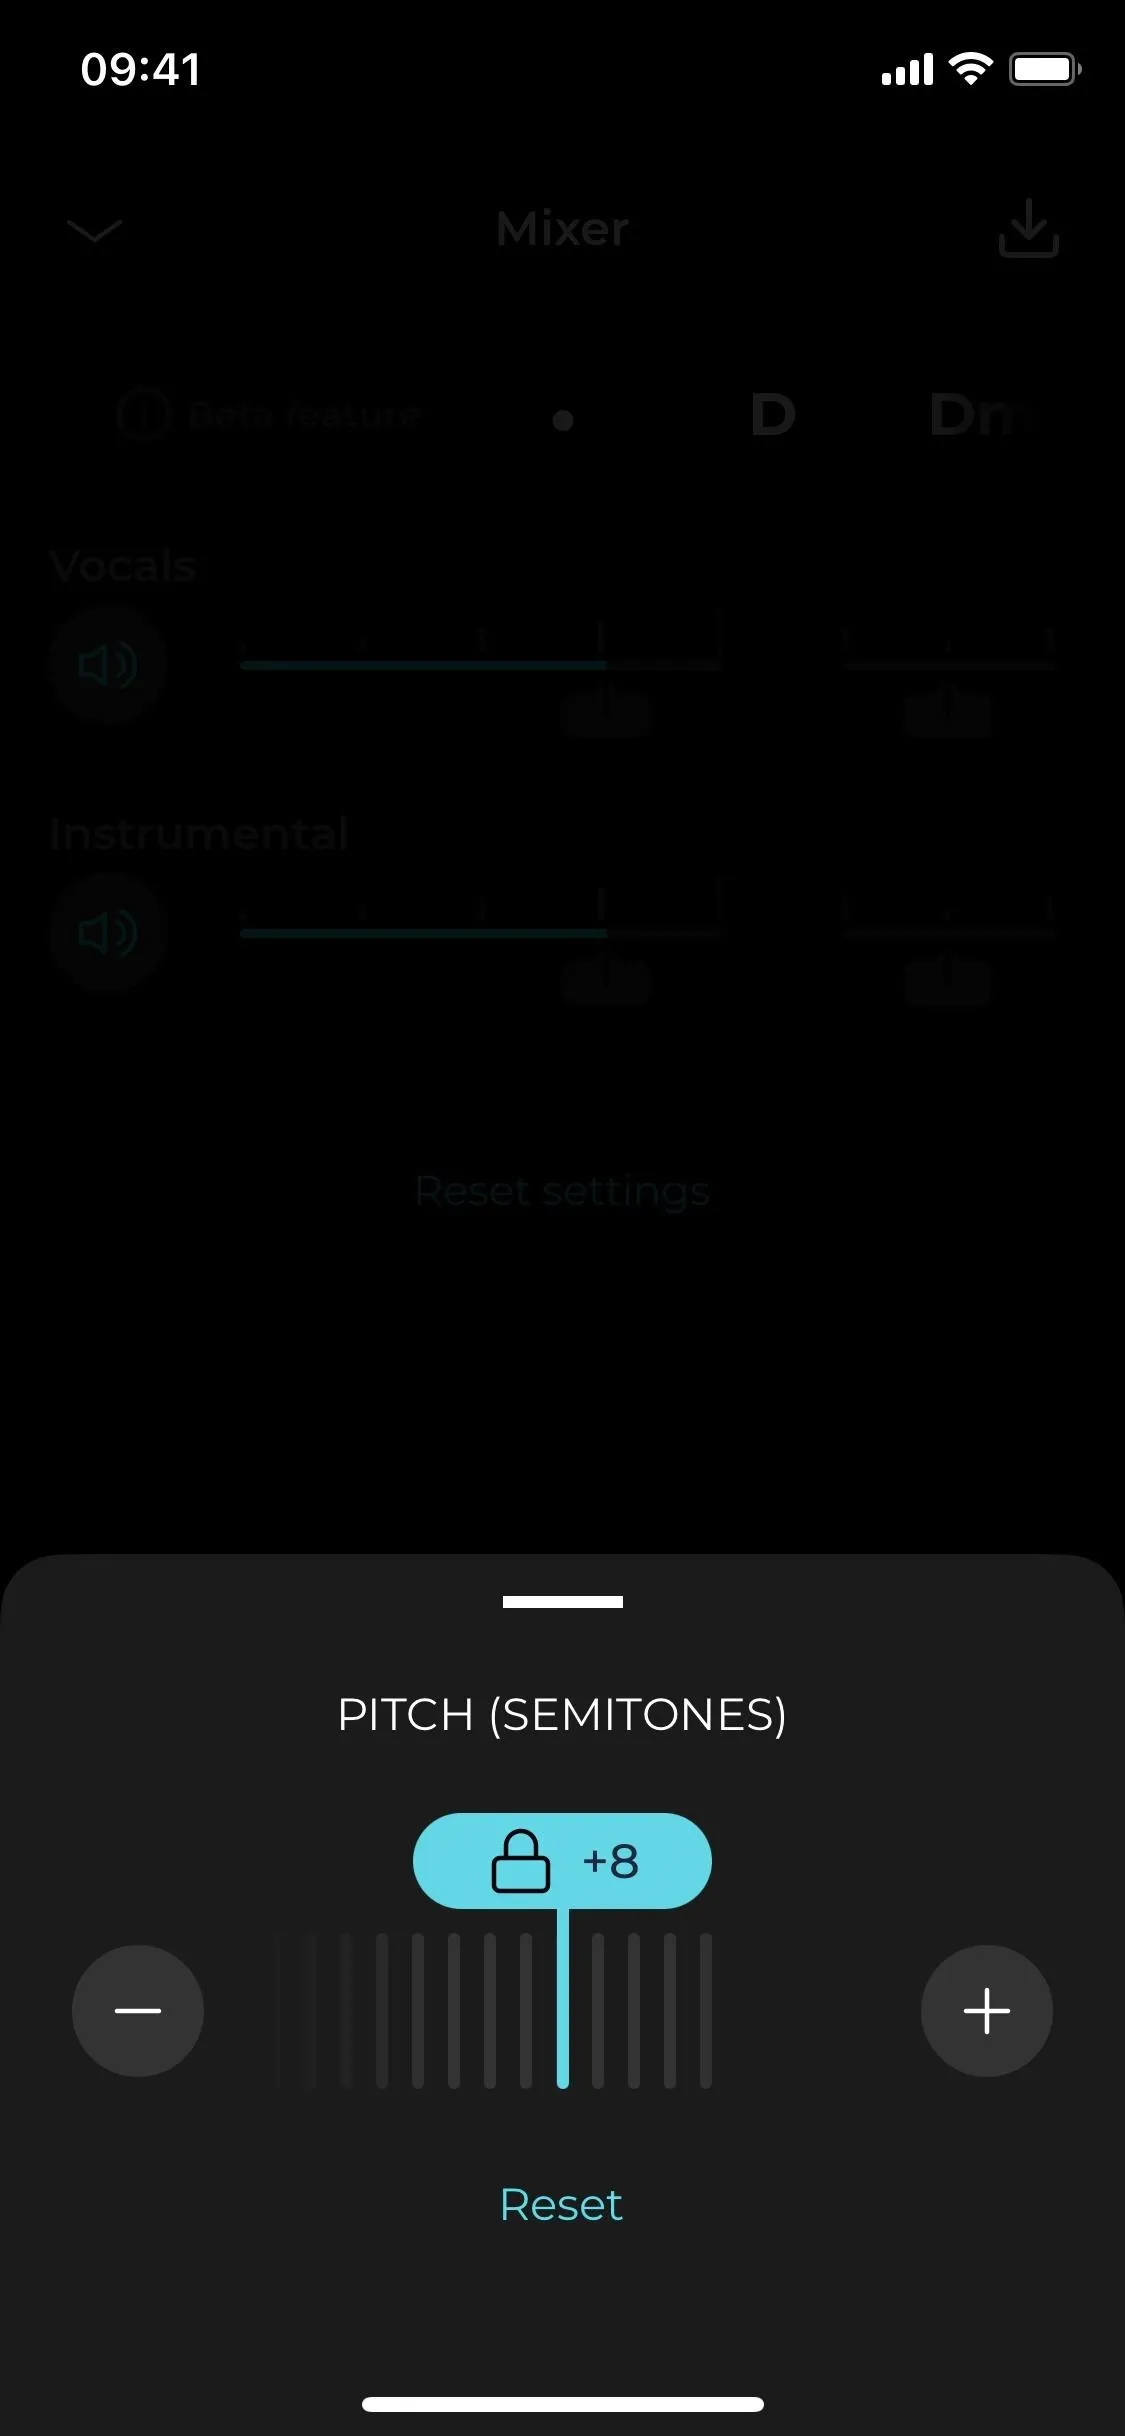
These tools look the same on iOS and Android.
If you want to go back to the Library screen, you can tap the back button on Android or the down arrow in the top left on iOS.
Save Separated Tracks or the Entire Mix
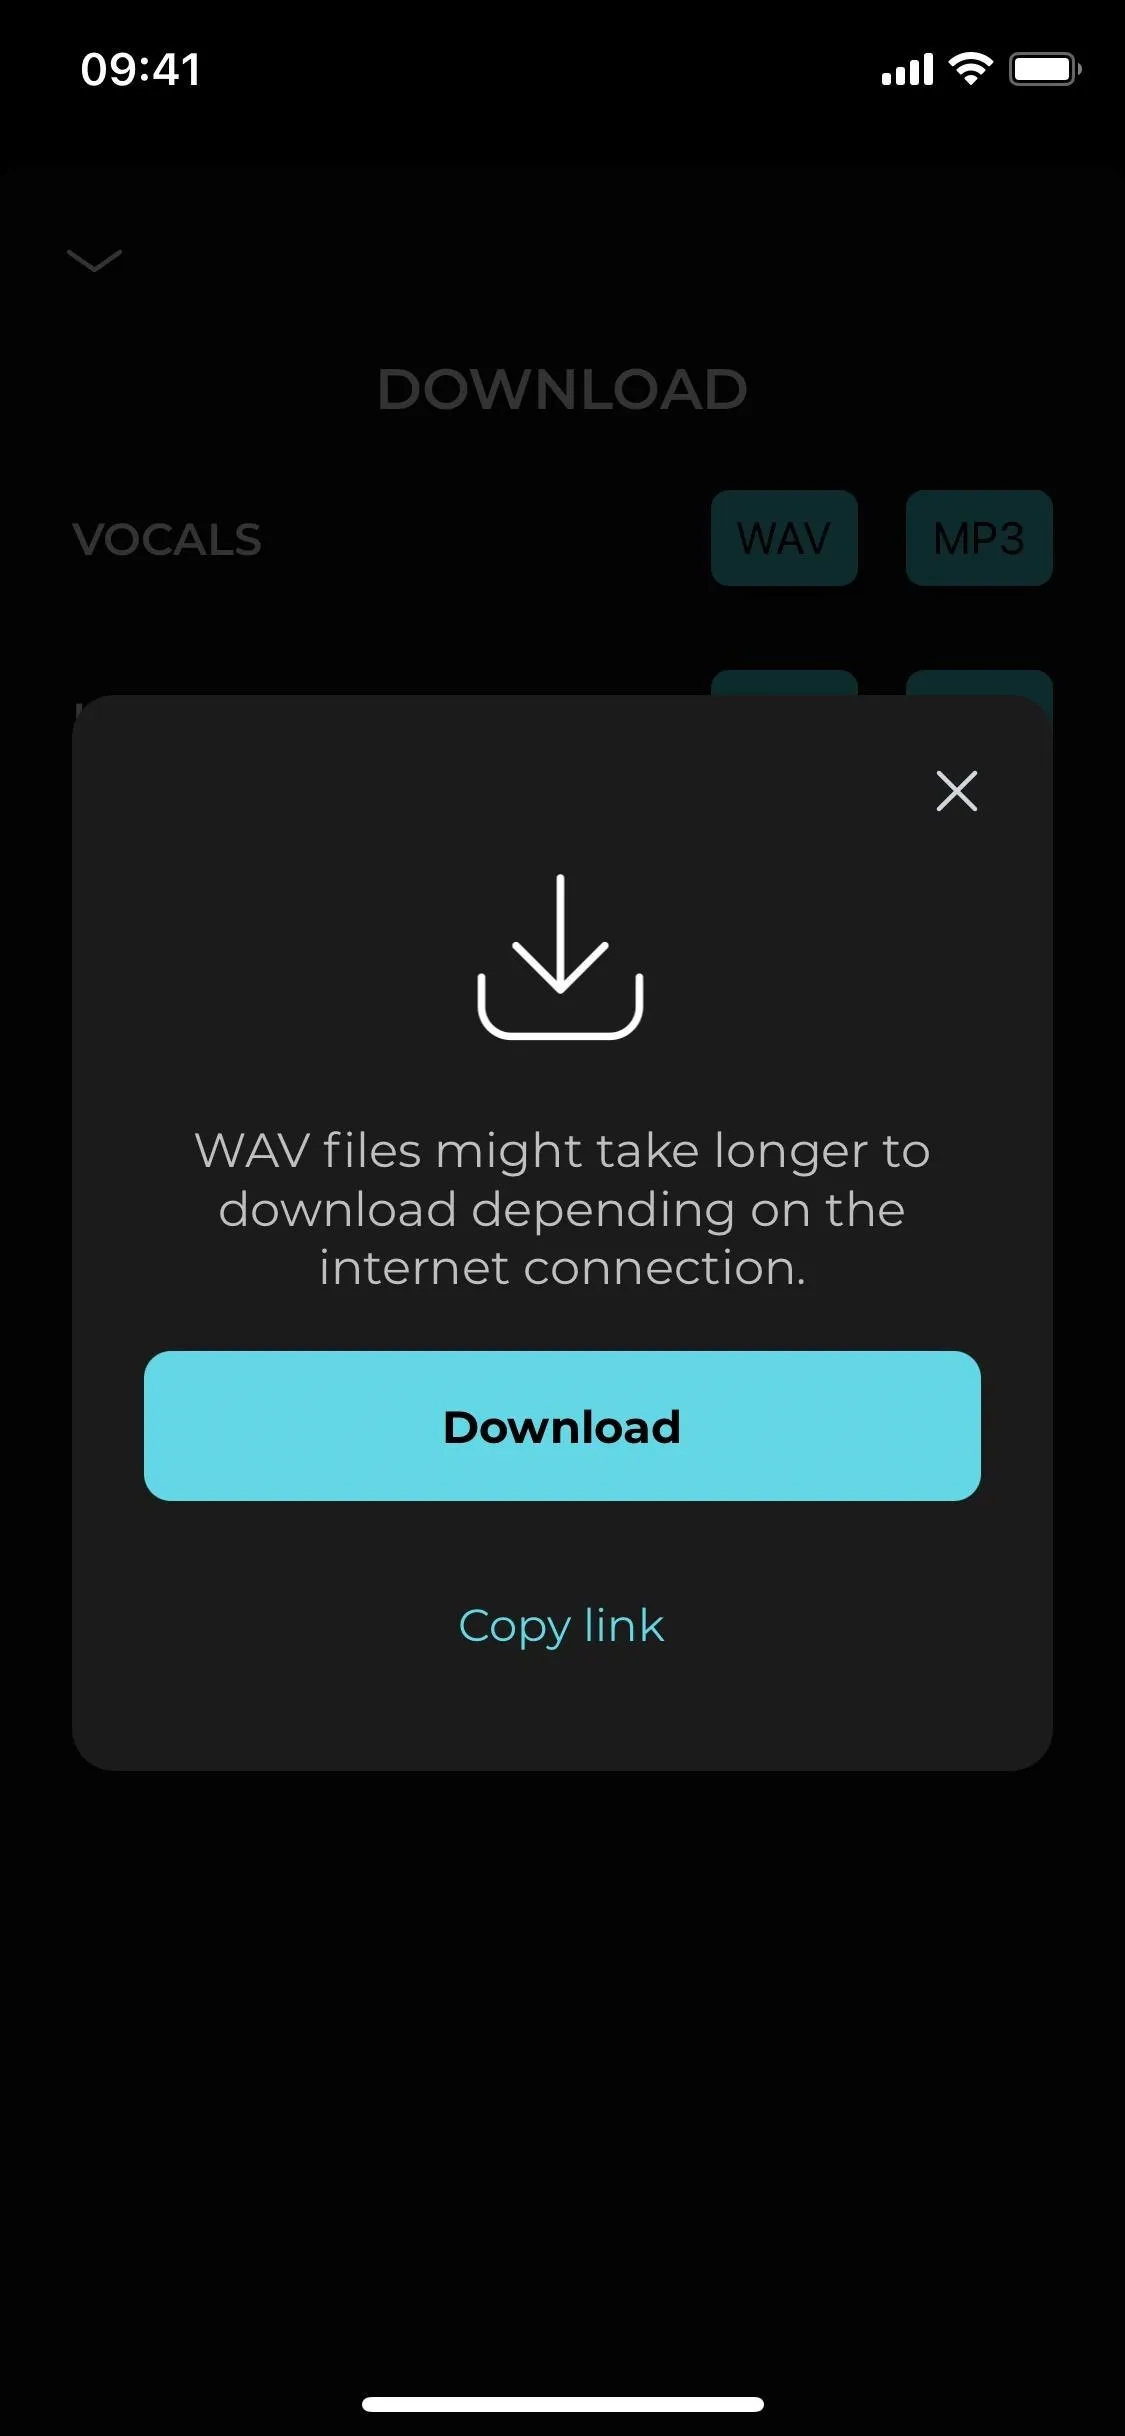
In the top right of the mixer, there's a download button. You can save each track or the entire mix to your phone. For each track, you can choose to export and save it as either a WAV (uncompressed, higher quality) or MP3 (compressed, lower quality).

These download options look the same on iOS and Android.
These download options look the same on iOS and Android.
If you choose WAV, a pop-up will appear to download the track or copy a link to it. As soon as you tap on "Download," the share sheet will appear, where you can then copy the track to your clipboard, save it to another app or service, send it via AirDrop (iOS) or Bluetooth/Nearby Share (Android), and more.
The MP3 option doesn't require a download before the sharing menu appears, but you can save or share the file to all of the same places you can for the WAV format.
If you pick "Export Mix," it'll mix the tracks into a single file. Once it's done, you'll see the share sheet open (on iOS), or you'll need to share it from a notification after it's done processing (on Android).
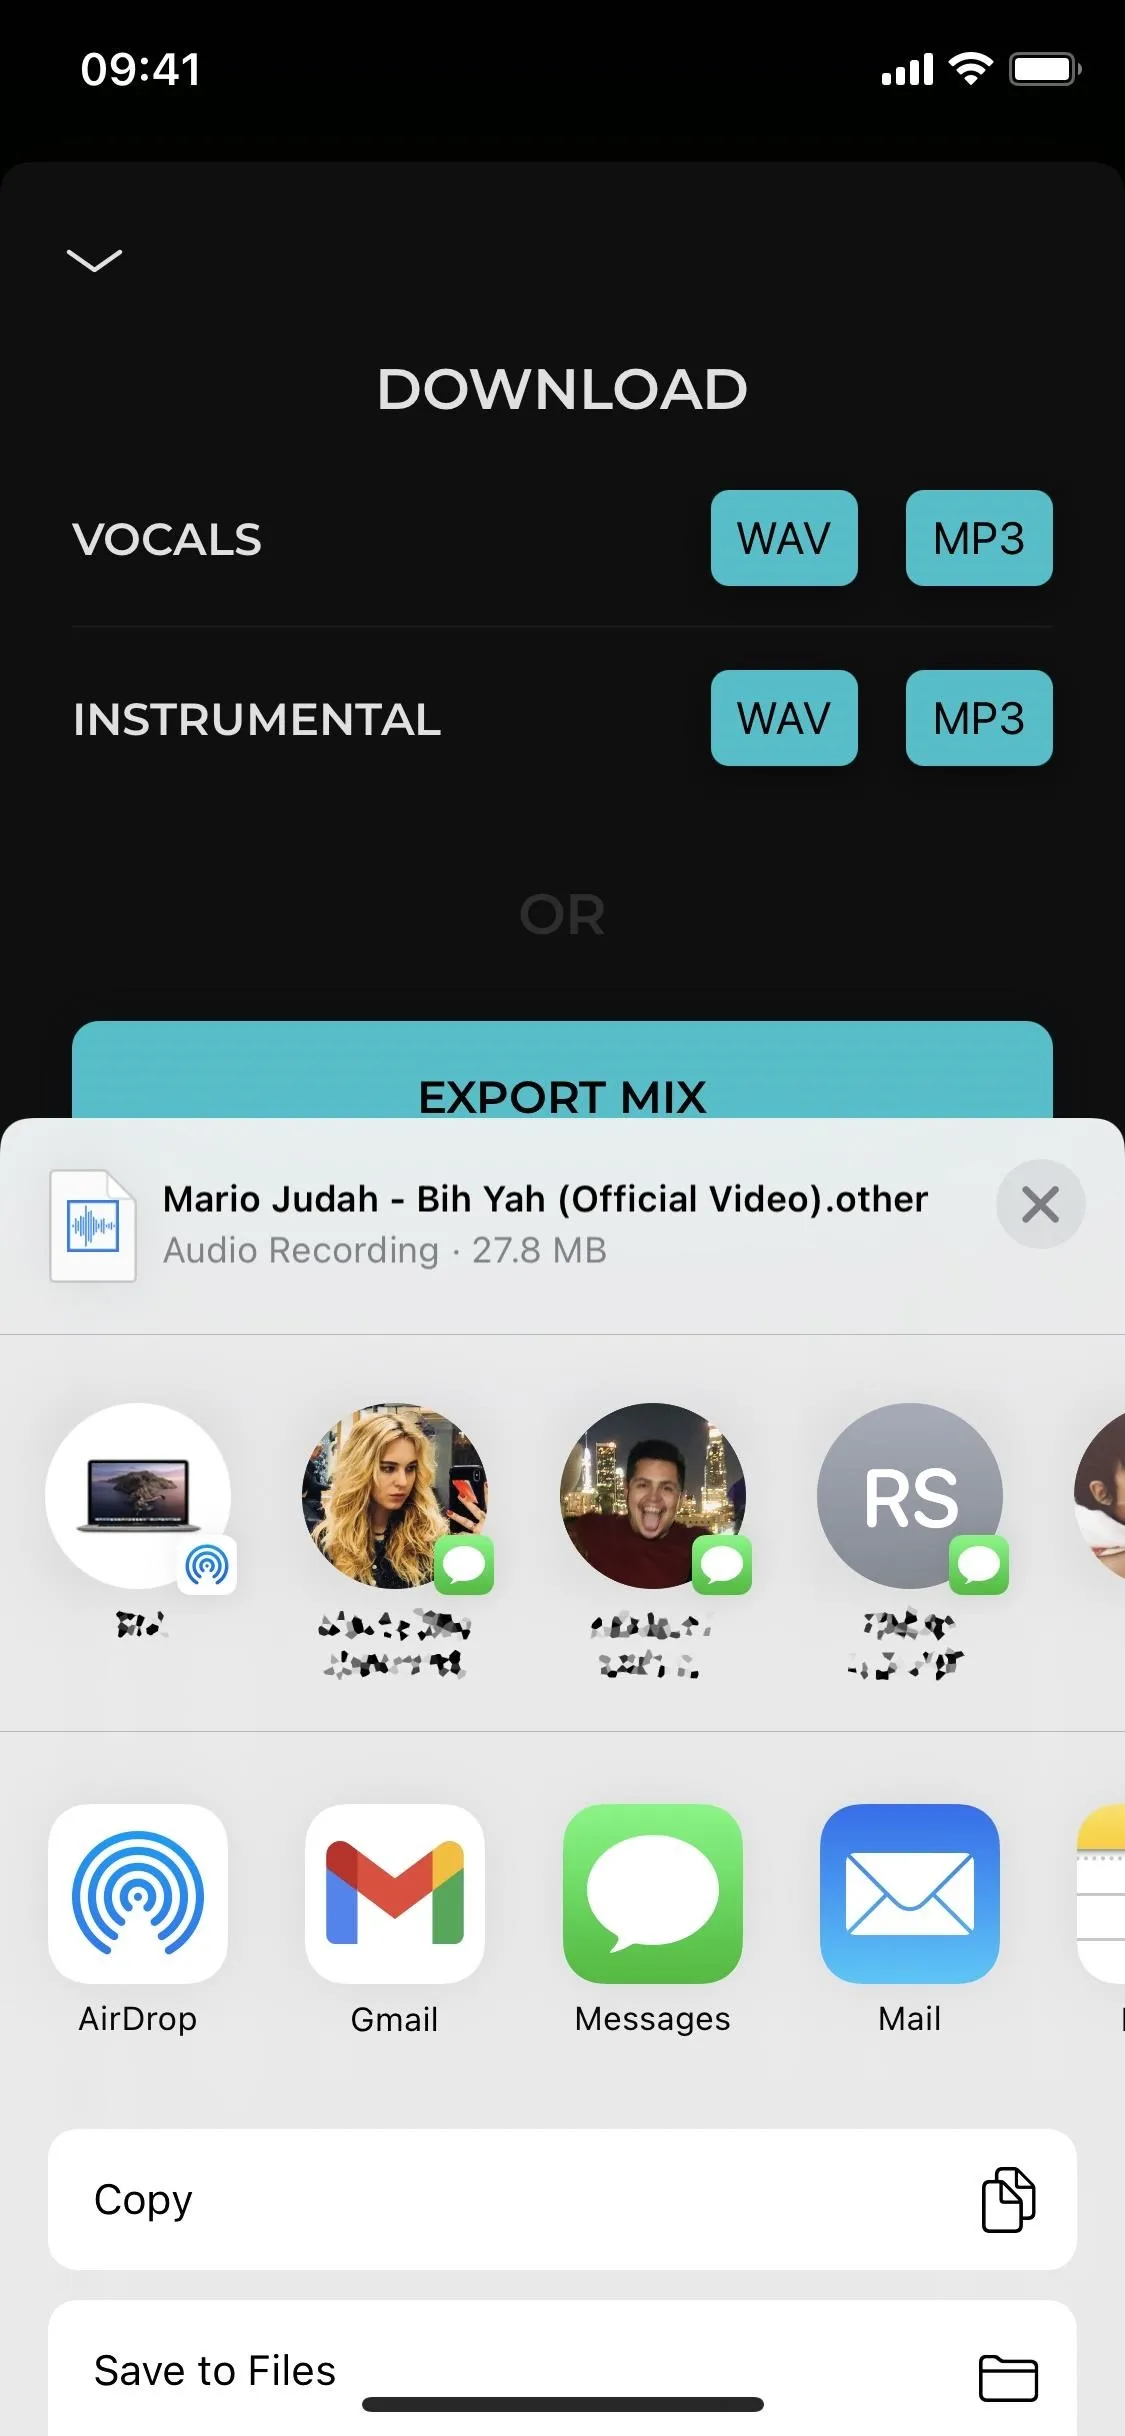
The share screen on iOS (left) and Android (right).
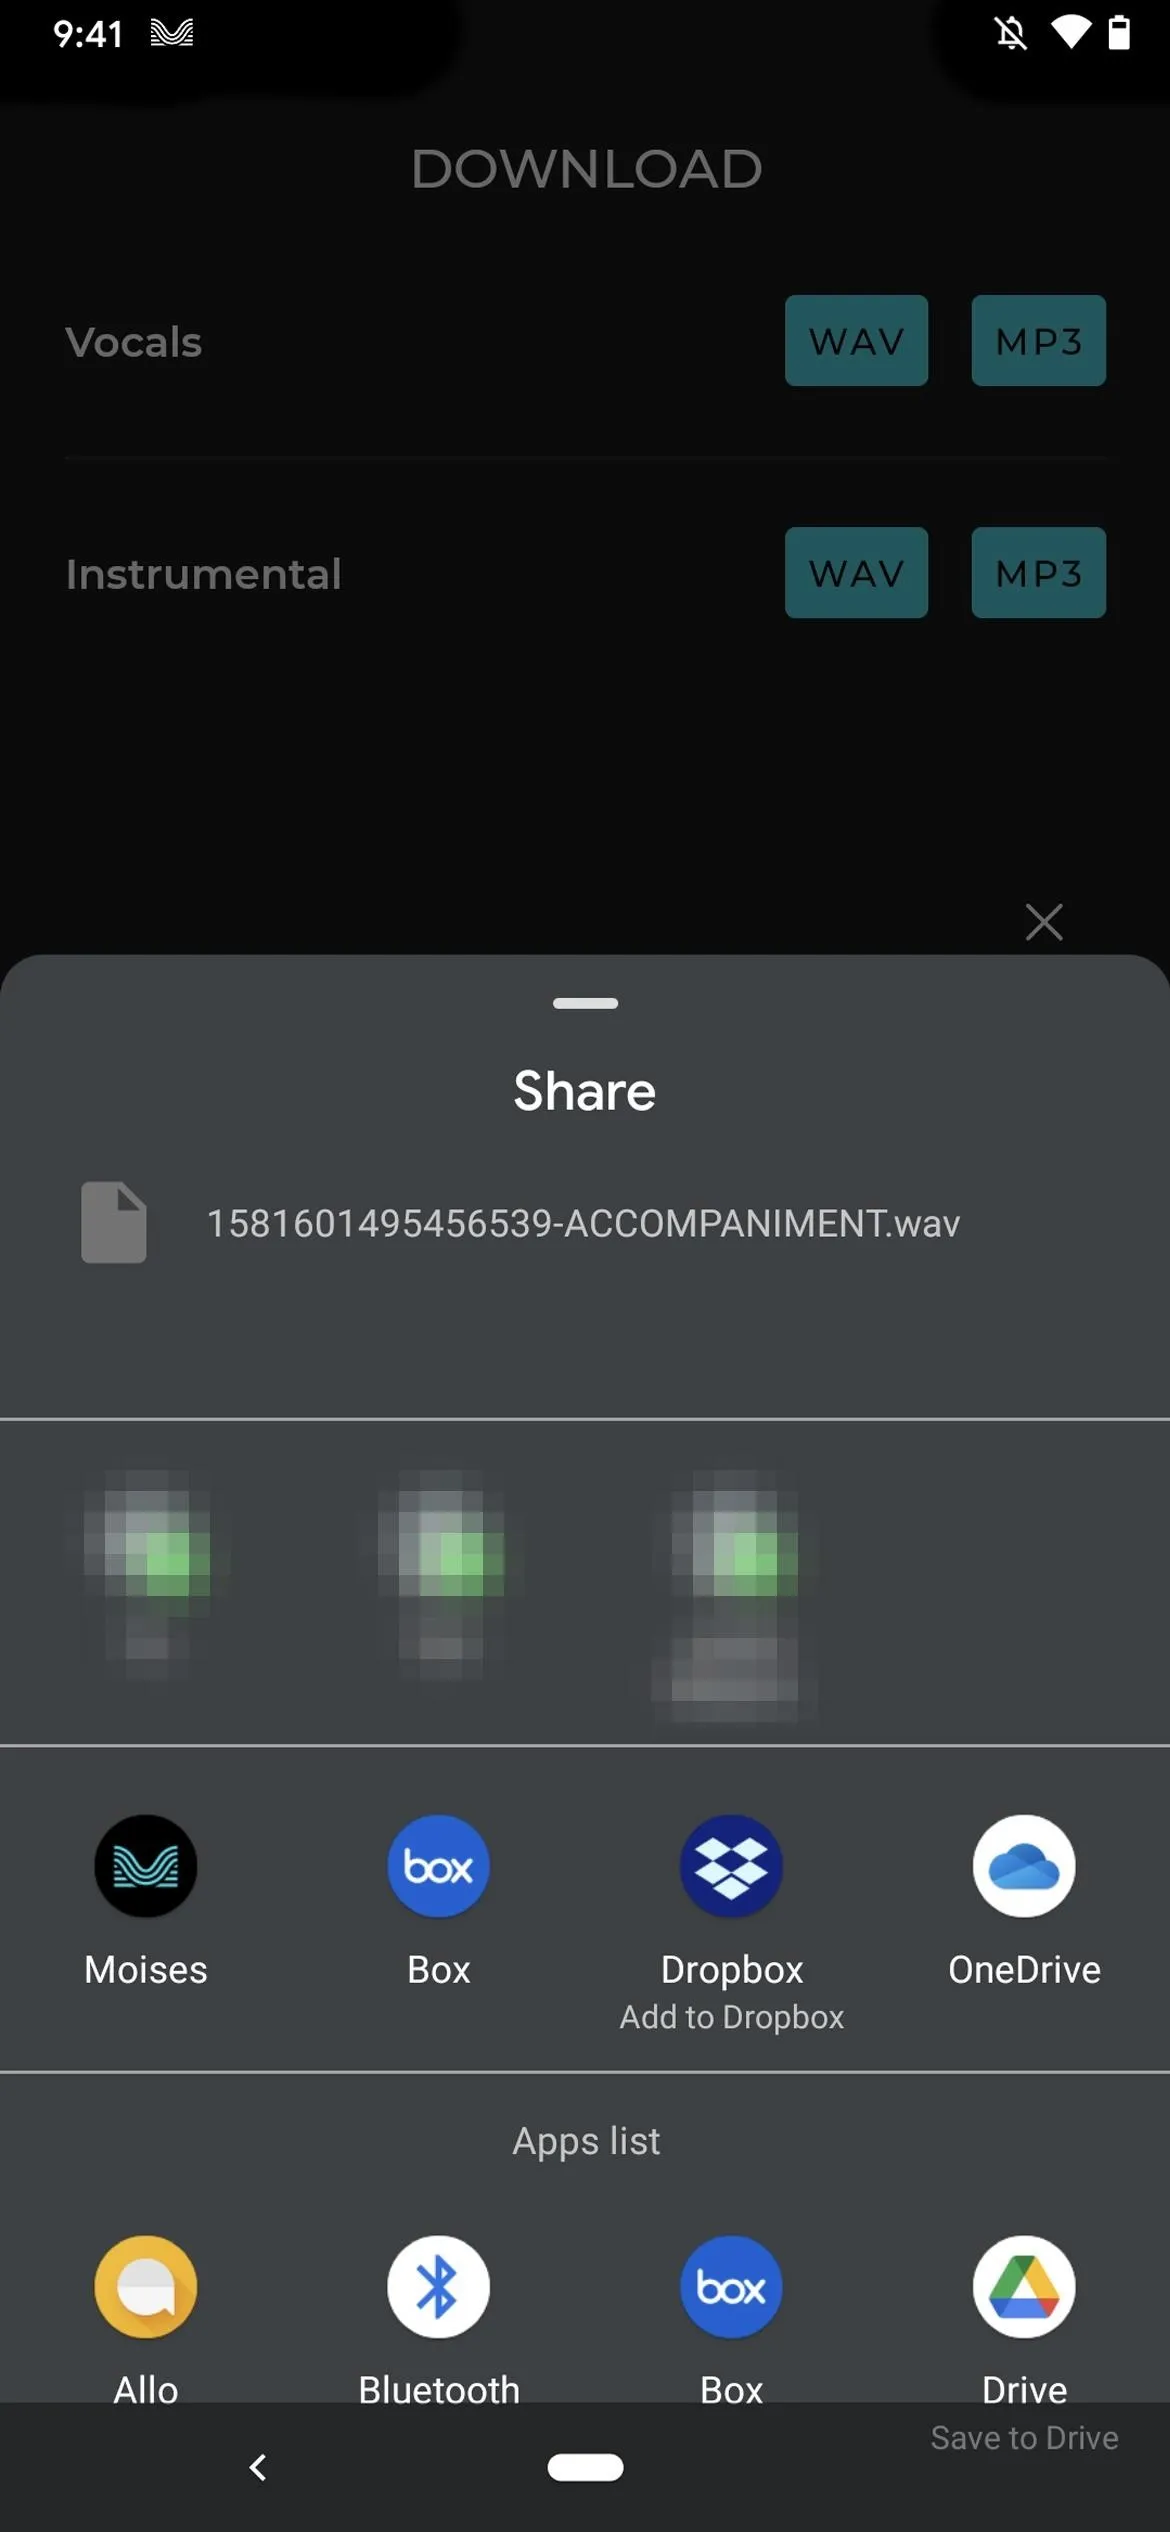
The share screen on iOS (left) and Android (right).
Find & Play the Tracks
If you use a cloud service like iCloud or Google Drive to save tracks to, you can access those tracks for any device or computer you own. To keep things tidy, create a folder for all your tracks and play them all from there. If you want to play them in your default music player, Android makes things easier since many apps let you upload or sync songs. On iOS, you'll want to download them to your computer, then upload them directly via the Music desktop app.
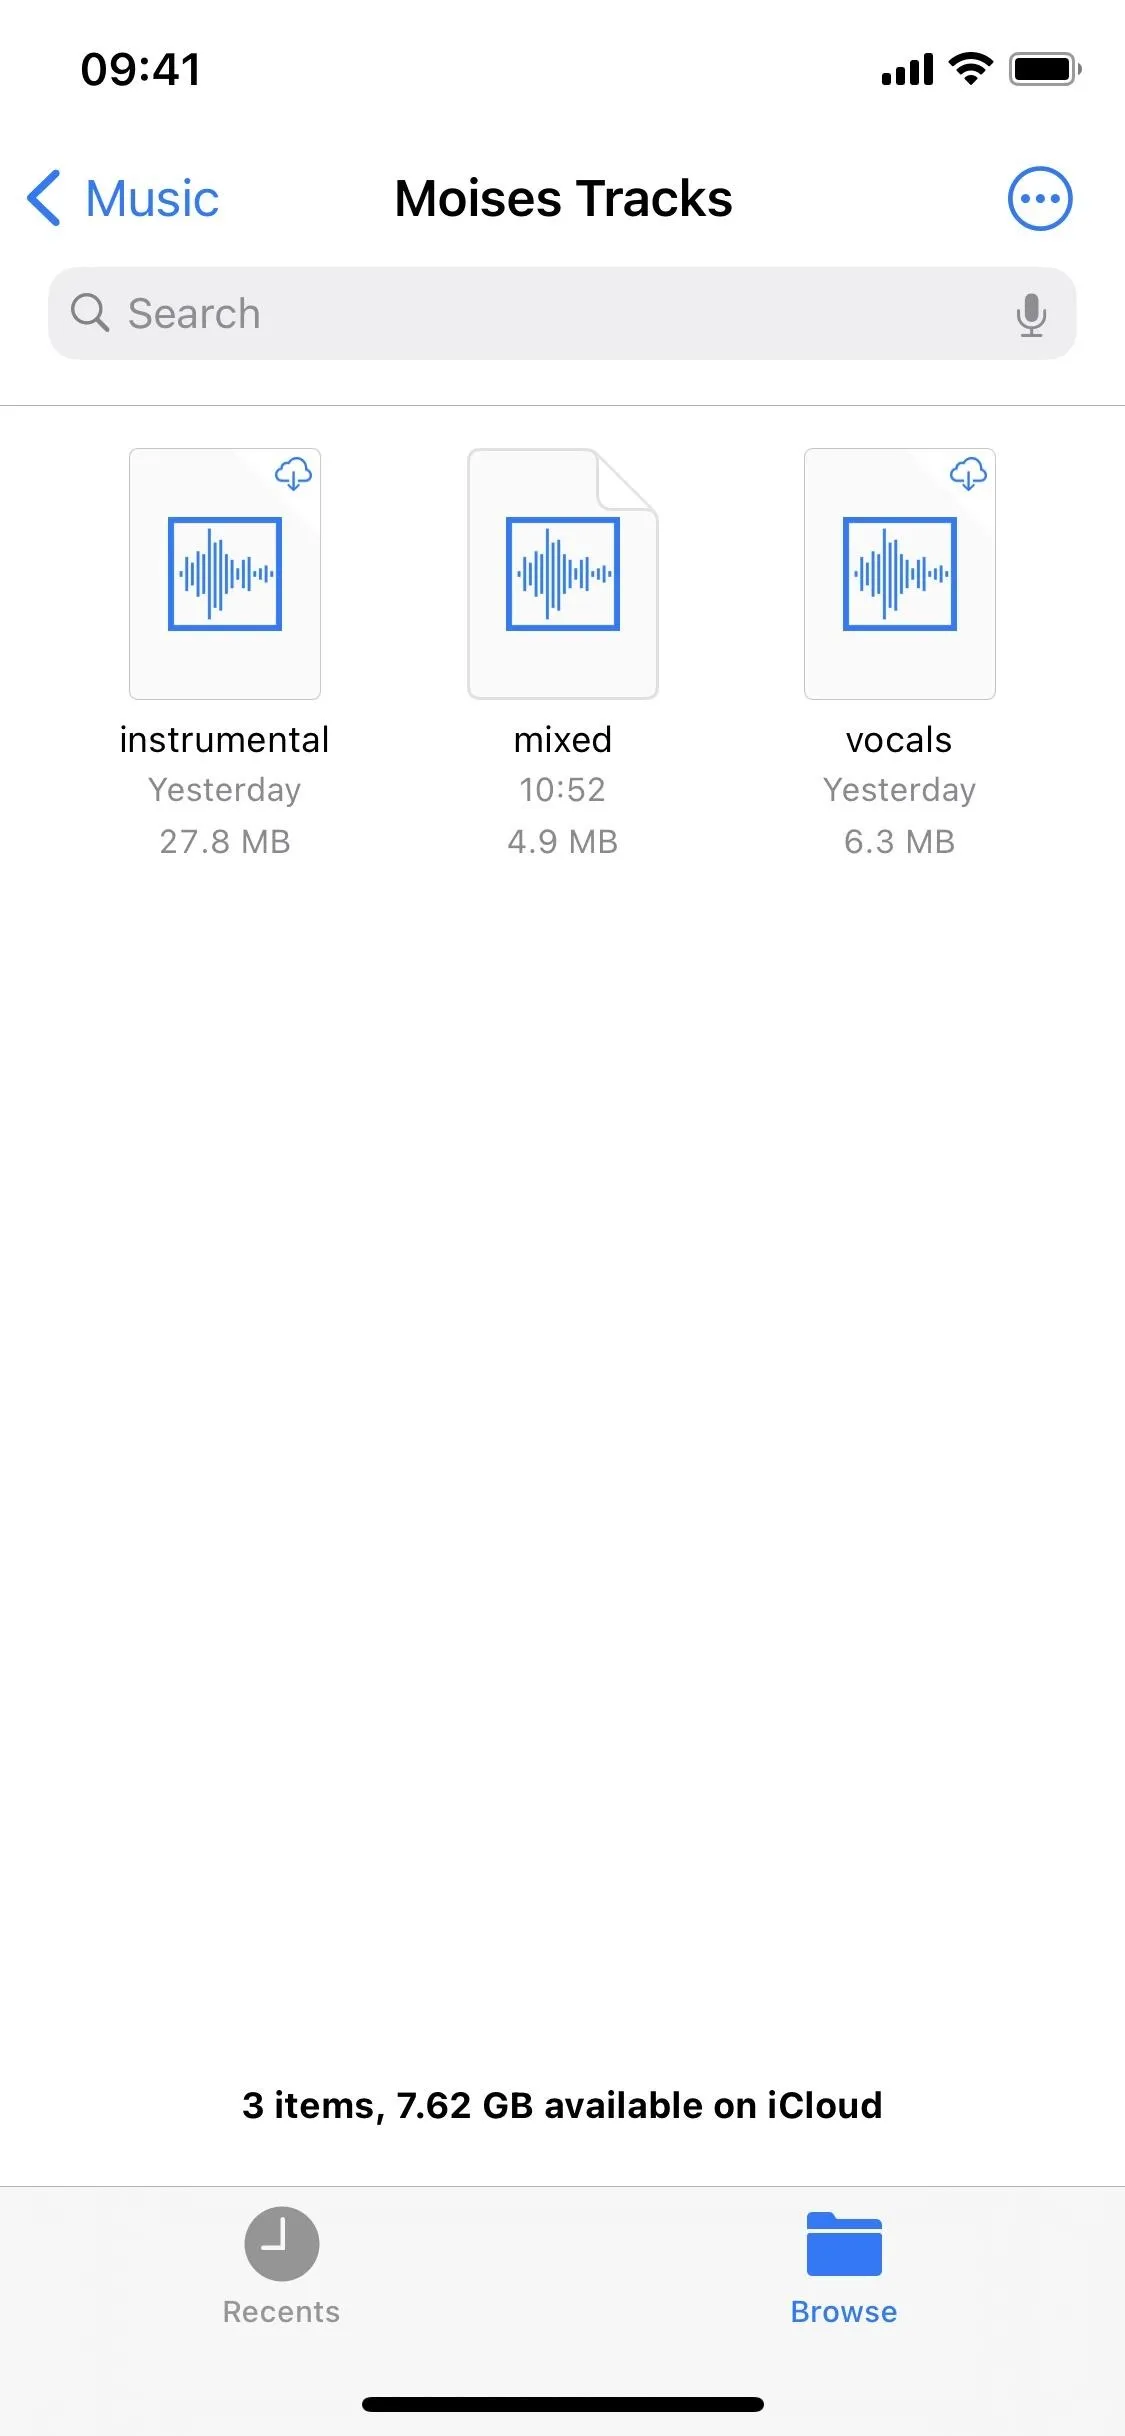
The Files app in iOS.
The Files app in iOS.
Cover photo and screenshots by Nelson Aguilar/Gadget Hacks


Comments
Be the first, drop a comment!