
By default, Slack optimizes the images you upload and send to other users in your workspace. Although optimization lowers the resolution of the image, it does send quicker, which is better if your internet service is poor. However, you may want to send the highest-resolution image possible, so how do you stop Slack from sending only optimized and lower-quality photos?
In Slack's settings on either your Android or iPhone, you can disable the feature that sends optimized images so that you get the highest resolution possible. The higher the resolution, the more detail the image has, which is necessary if the picture is going to be printed on a banner, featured prominently on a website, or any other scenario where it's going to be shown in a larger size than usual.
Disabling Image Optimization
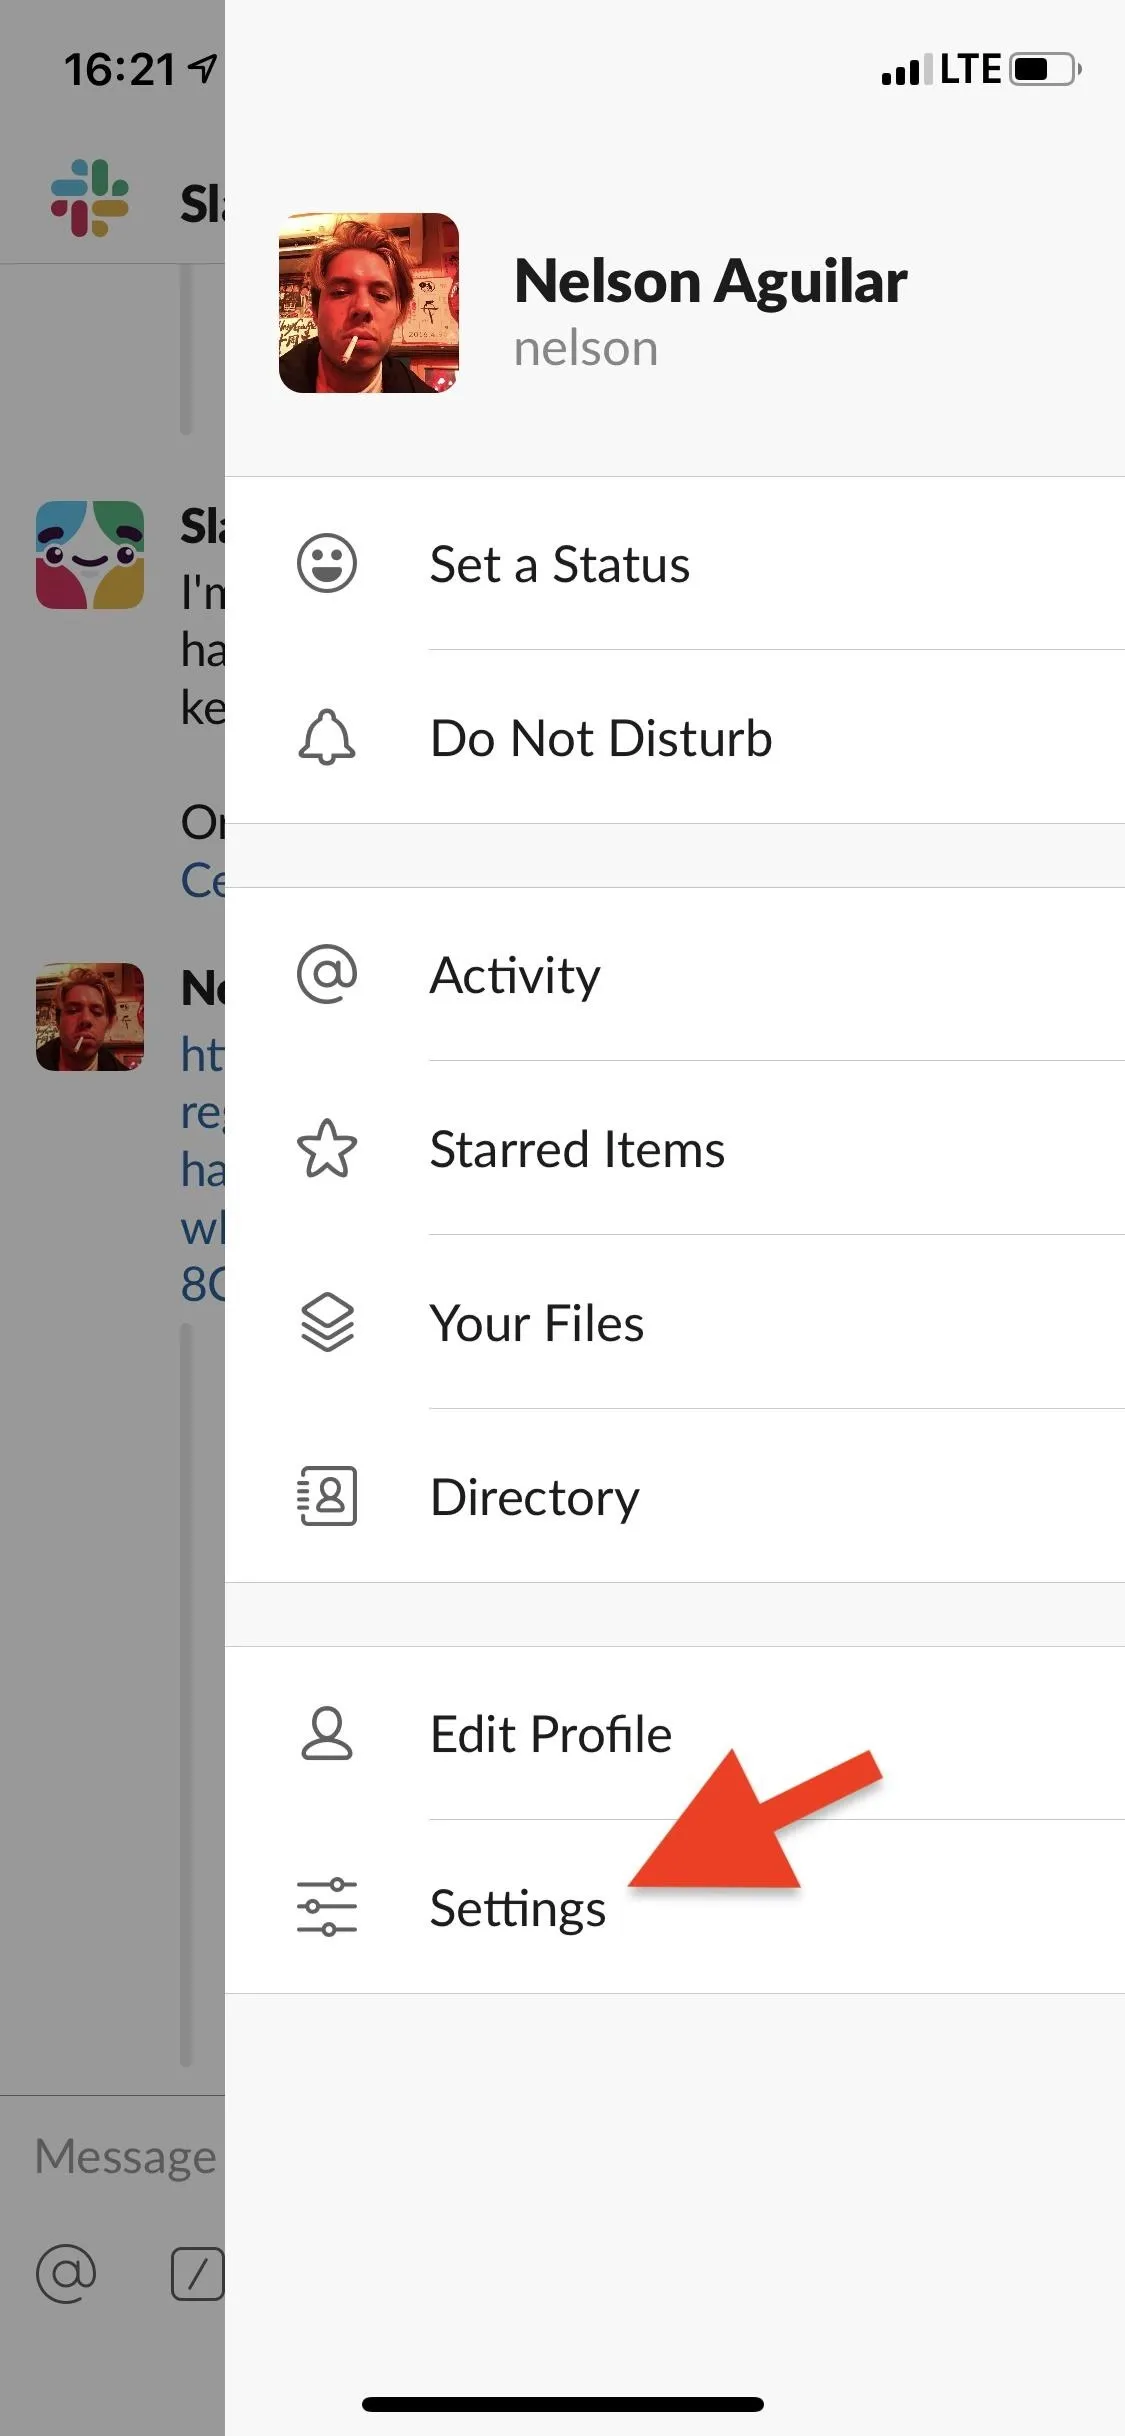
First, open the Slack app and go into any conversation. Tap on the three-dot menu in the top-right, then tap on the "Settings" option at the bottom of the menu that appears.



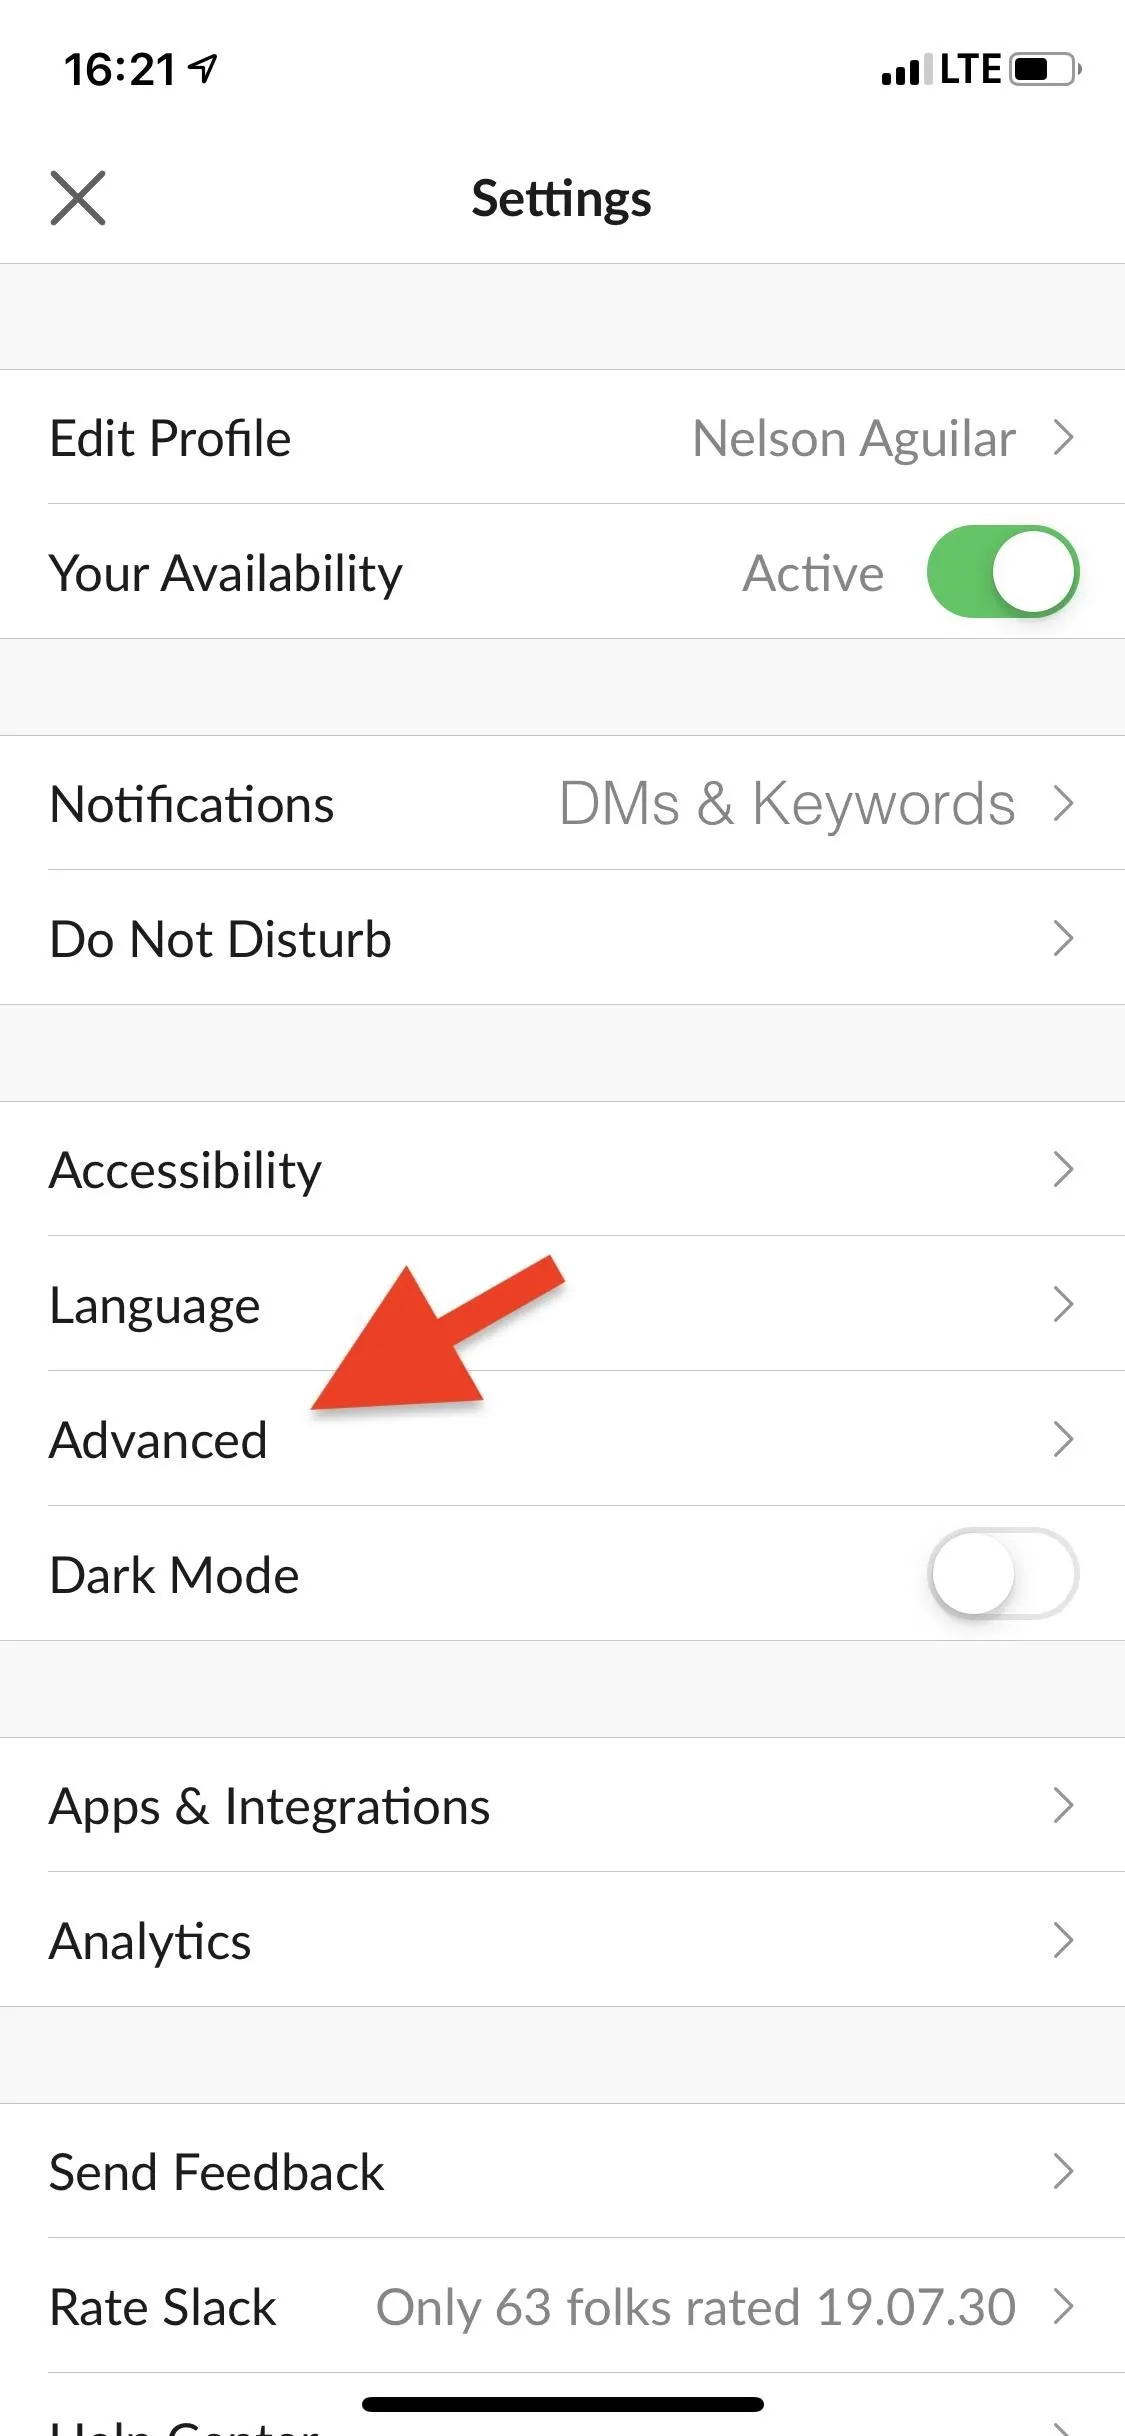
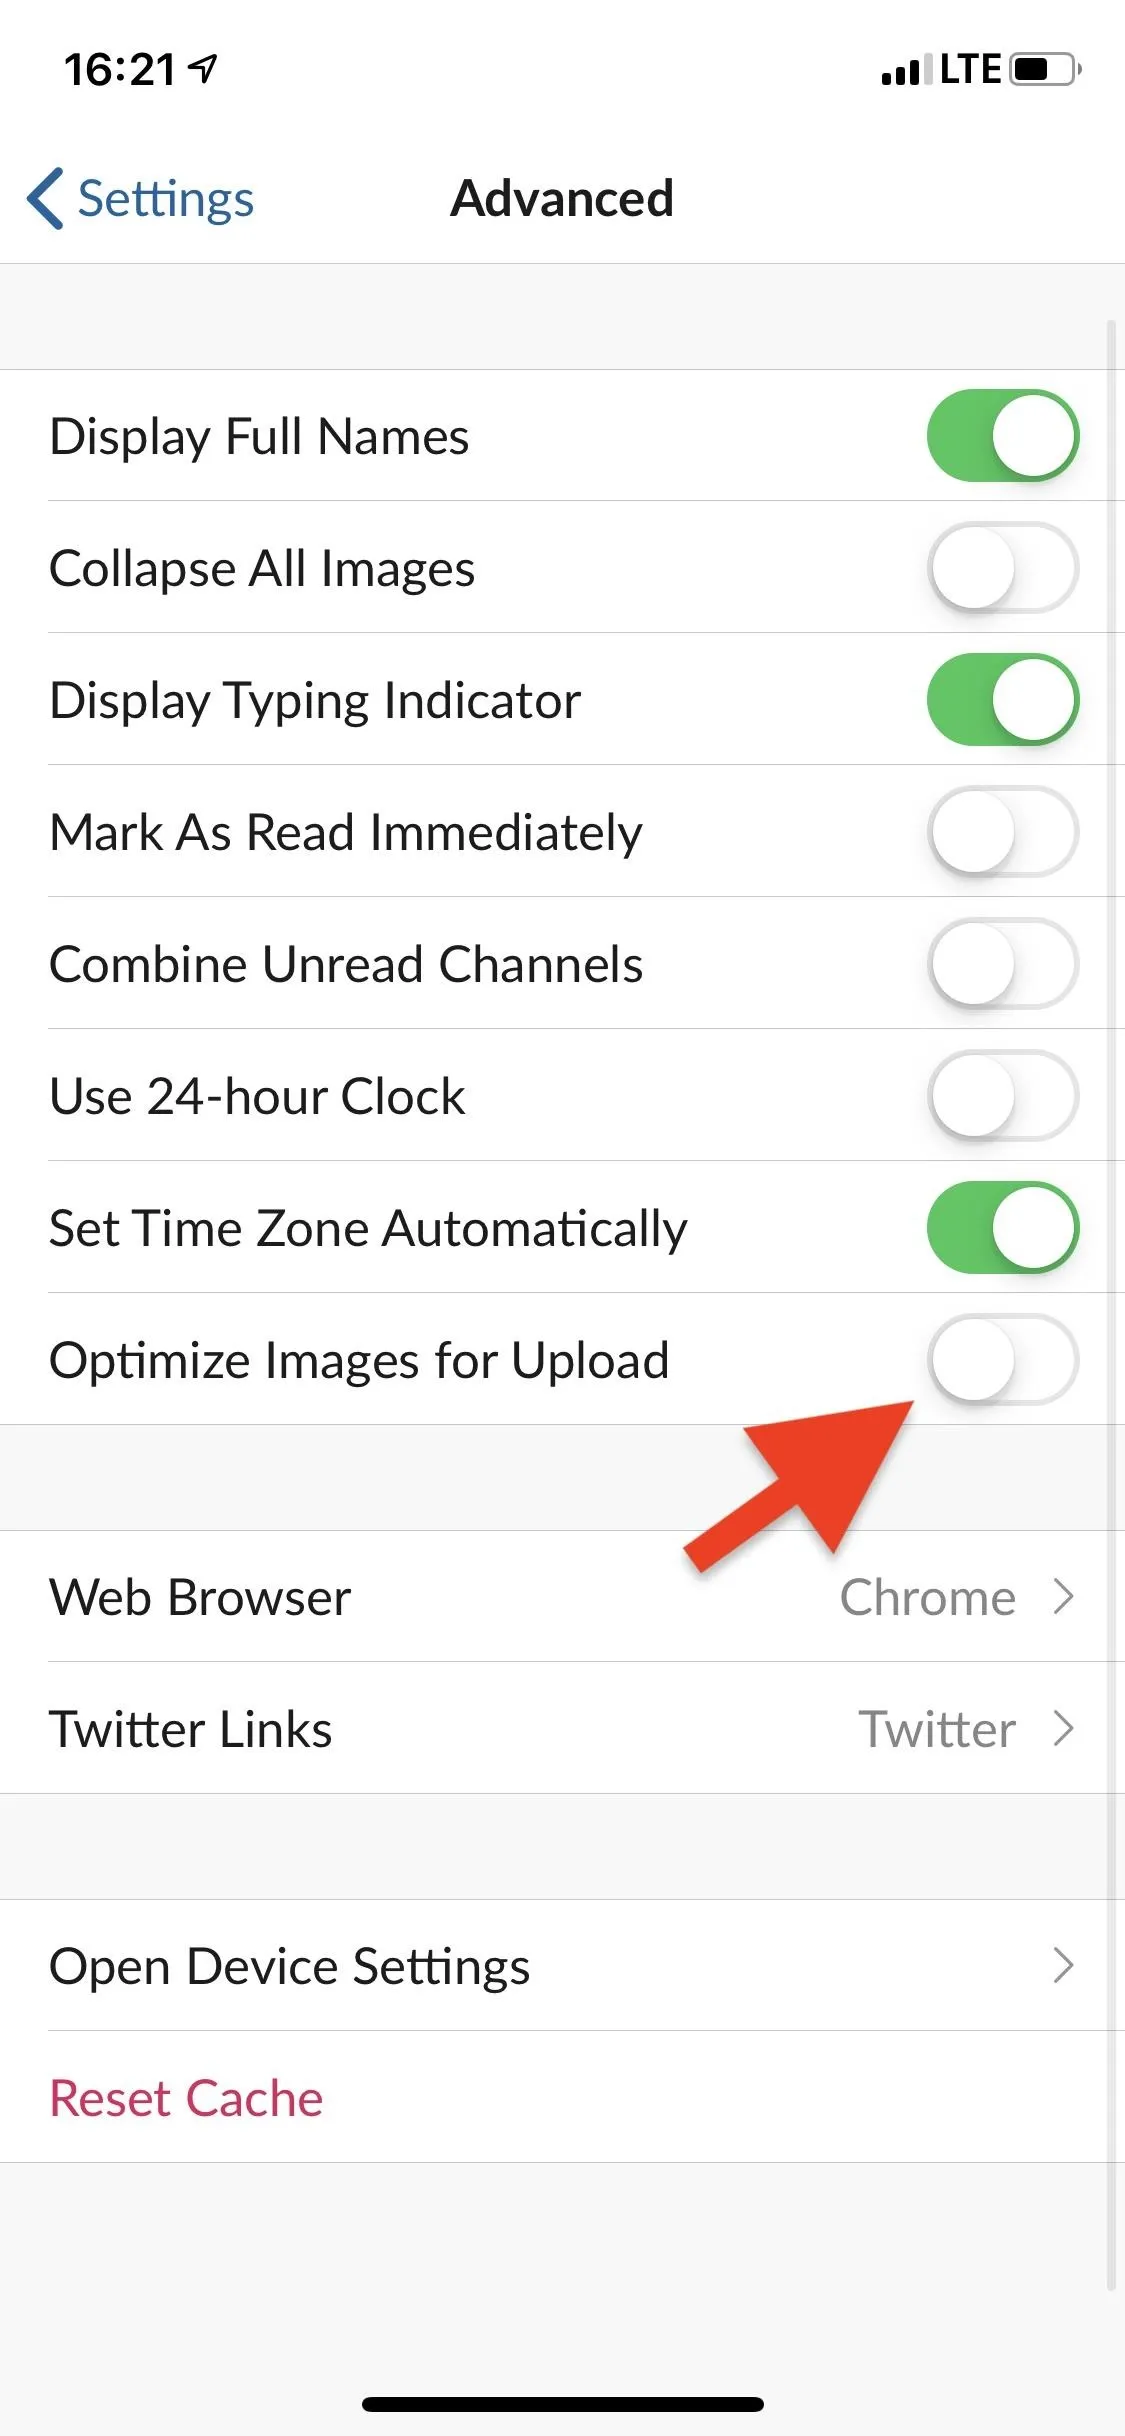
Now, go into "Advanced" and turn off the toggle next to "Optimize Images for Upload." Every image you now send will be sent at the highest resolution possible.


Difference Between Optimized & Full-Resolution Images
Just so you can get a glance at the difference between optimized and full-resolution images sent through Slack, below you can see the same image, in Slack, sent once with the Optimize image uploads setting toggled on (left) and off (right). As you can see, the optimized image is 2.41 MB, while the non-optimized image comes in at 3.09 MB.
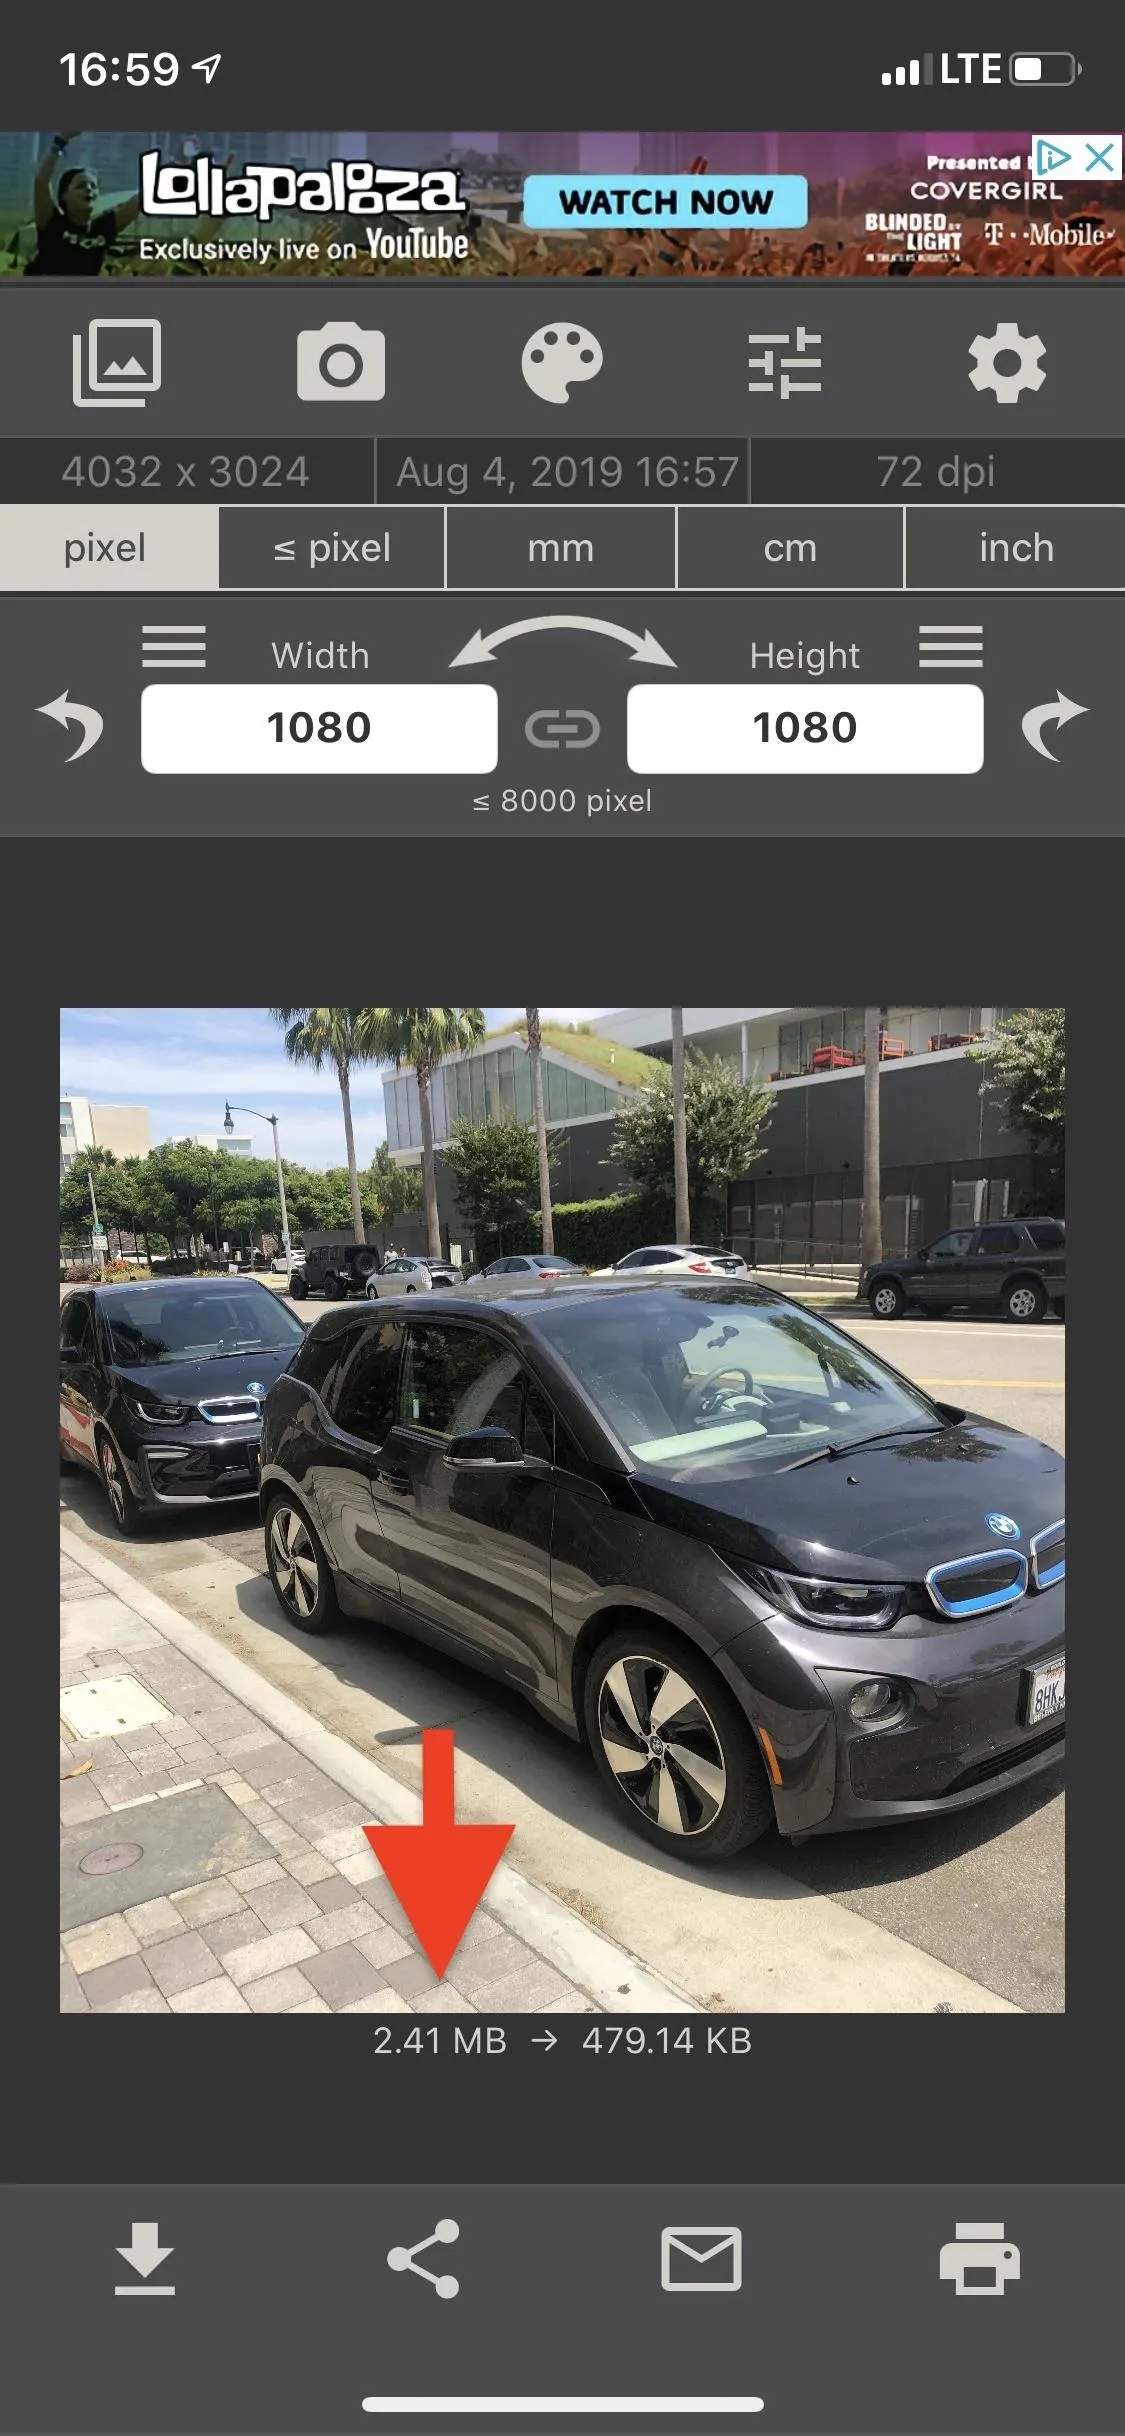
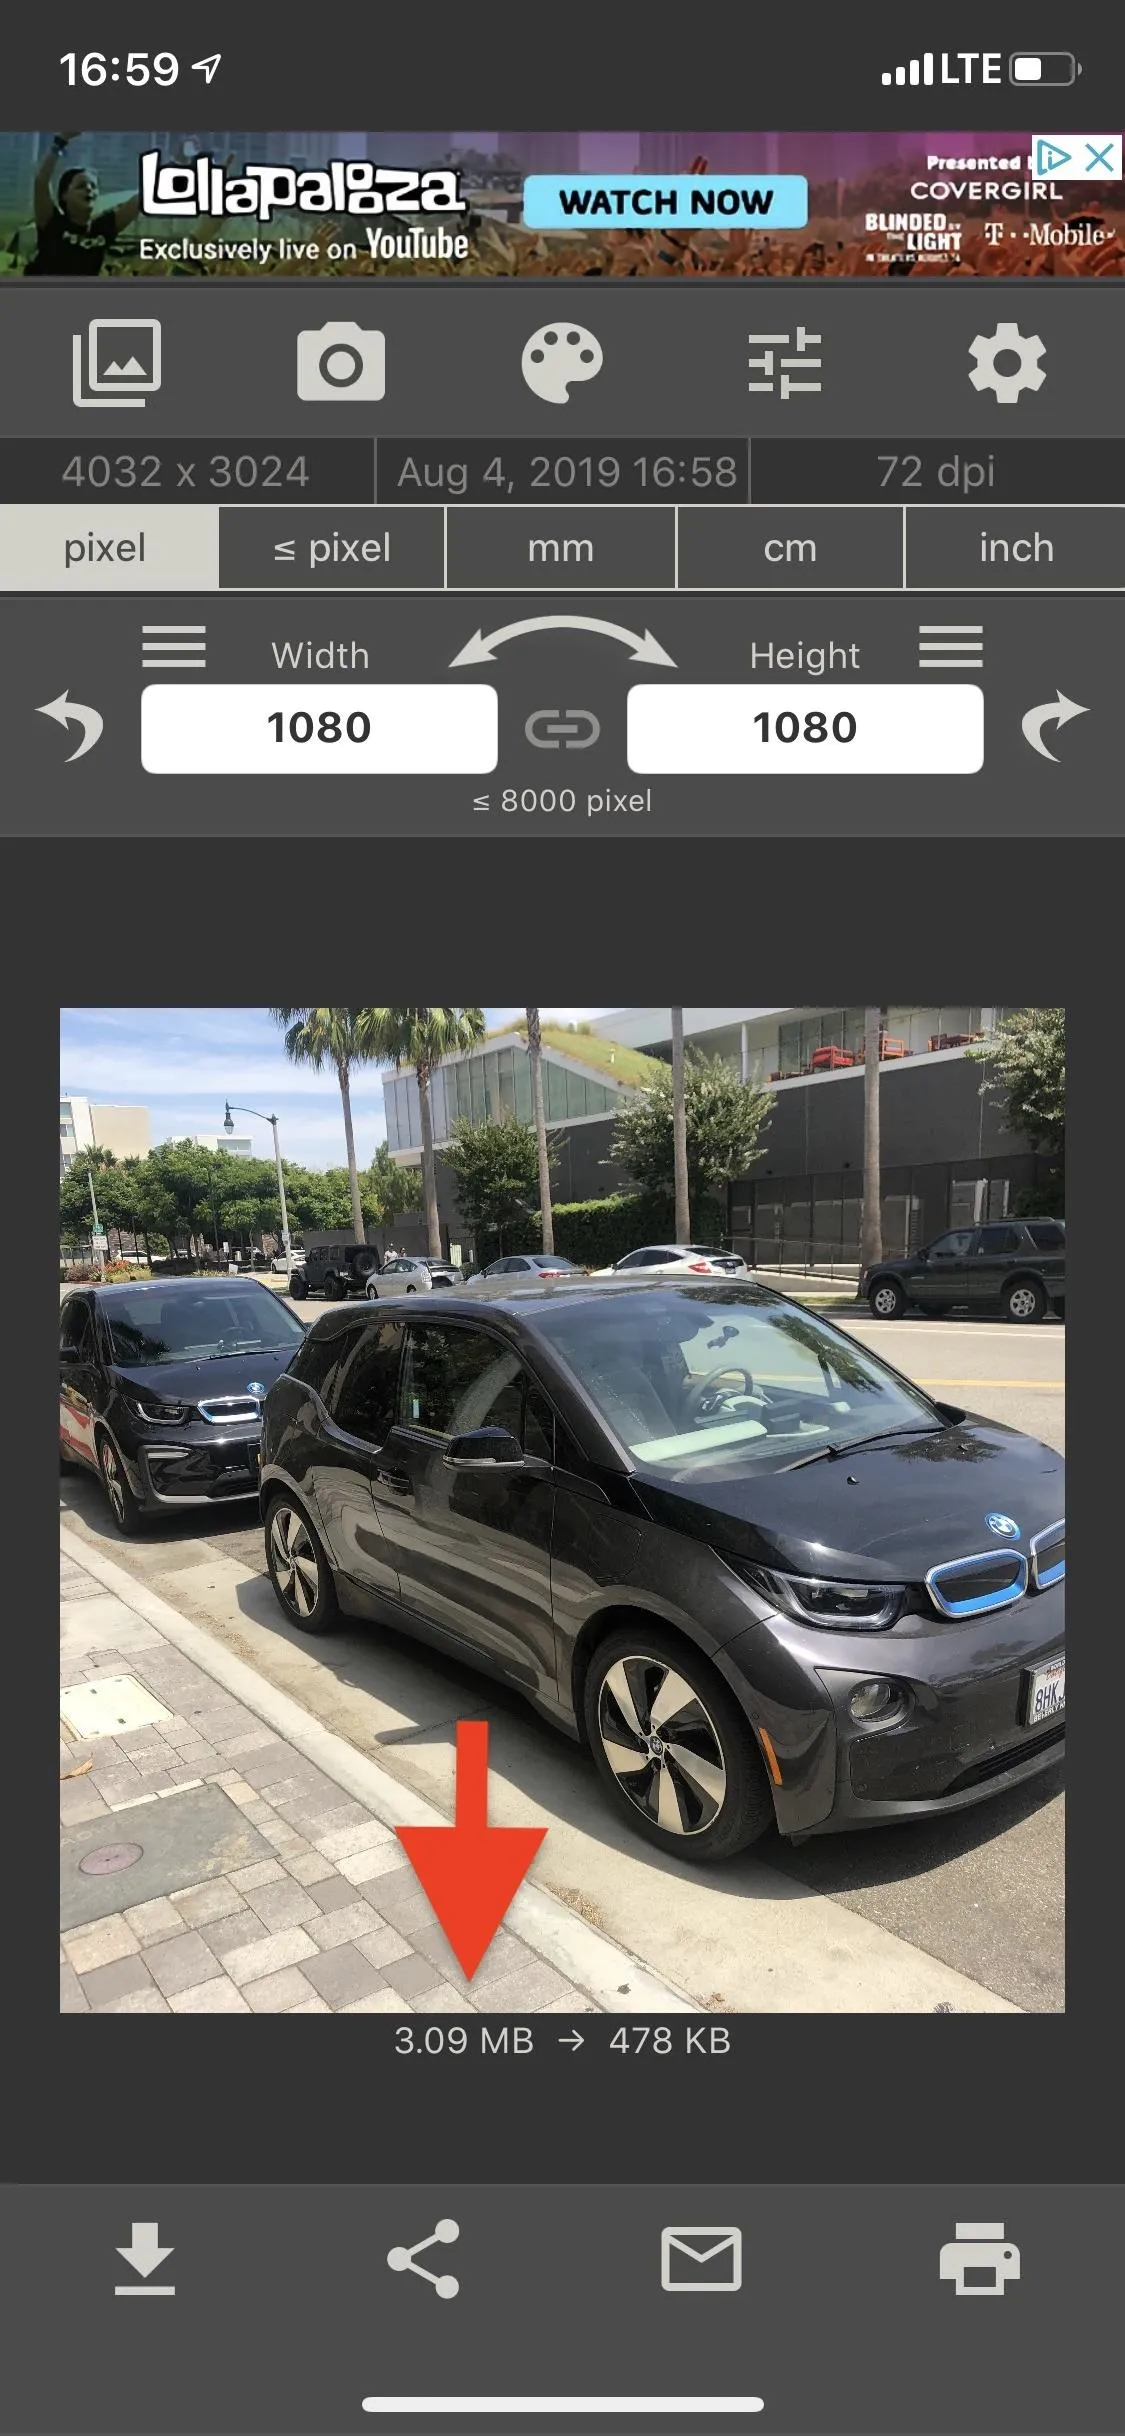


The image will take longer to send on Slack, but it's worth the few extra seconds of waiting if you need it to be high-res. Unfortunately, this doesn't work for images you receive. The sender must also have Optimize image uploads turned off in order for you to receive high-res photos from them.
This article was produced during Gadget Hacks' special coverage on using your smartphone to boost productivity. Check out the whole Productivity series.
Cover image and screenshots by Nelson Aguilar/Gadget Hacks





Comments
Be the first, drop a comment!