


The world around us keeps getting smarter. Not only do we have advanced AI services like the Google Assistant, but now we've got the Internet of Things connecting physical objects to the digital world. It's amazing when you think about it, but the real sci-fi stuff starts to happen when these two technologies intersect.
If you have access to the Google Assistant on Android, iOS, or through Google Home, you now have Star Trek-level power over the devices around you. Whether it's smart lighting like Philips Hue, a whole-home hub like SmartThings, or a complete home monitoring system like Nest, your Google Assistant can make controlling the world around you as easy as saying a phrase in plain English.
Really, the only thing you need to do to get started with home automation nowadays is to pair your smart devices with your Google Assistant, so below, I'll show you how to do exactly that.
Access the Home Control Settings
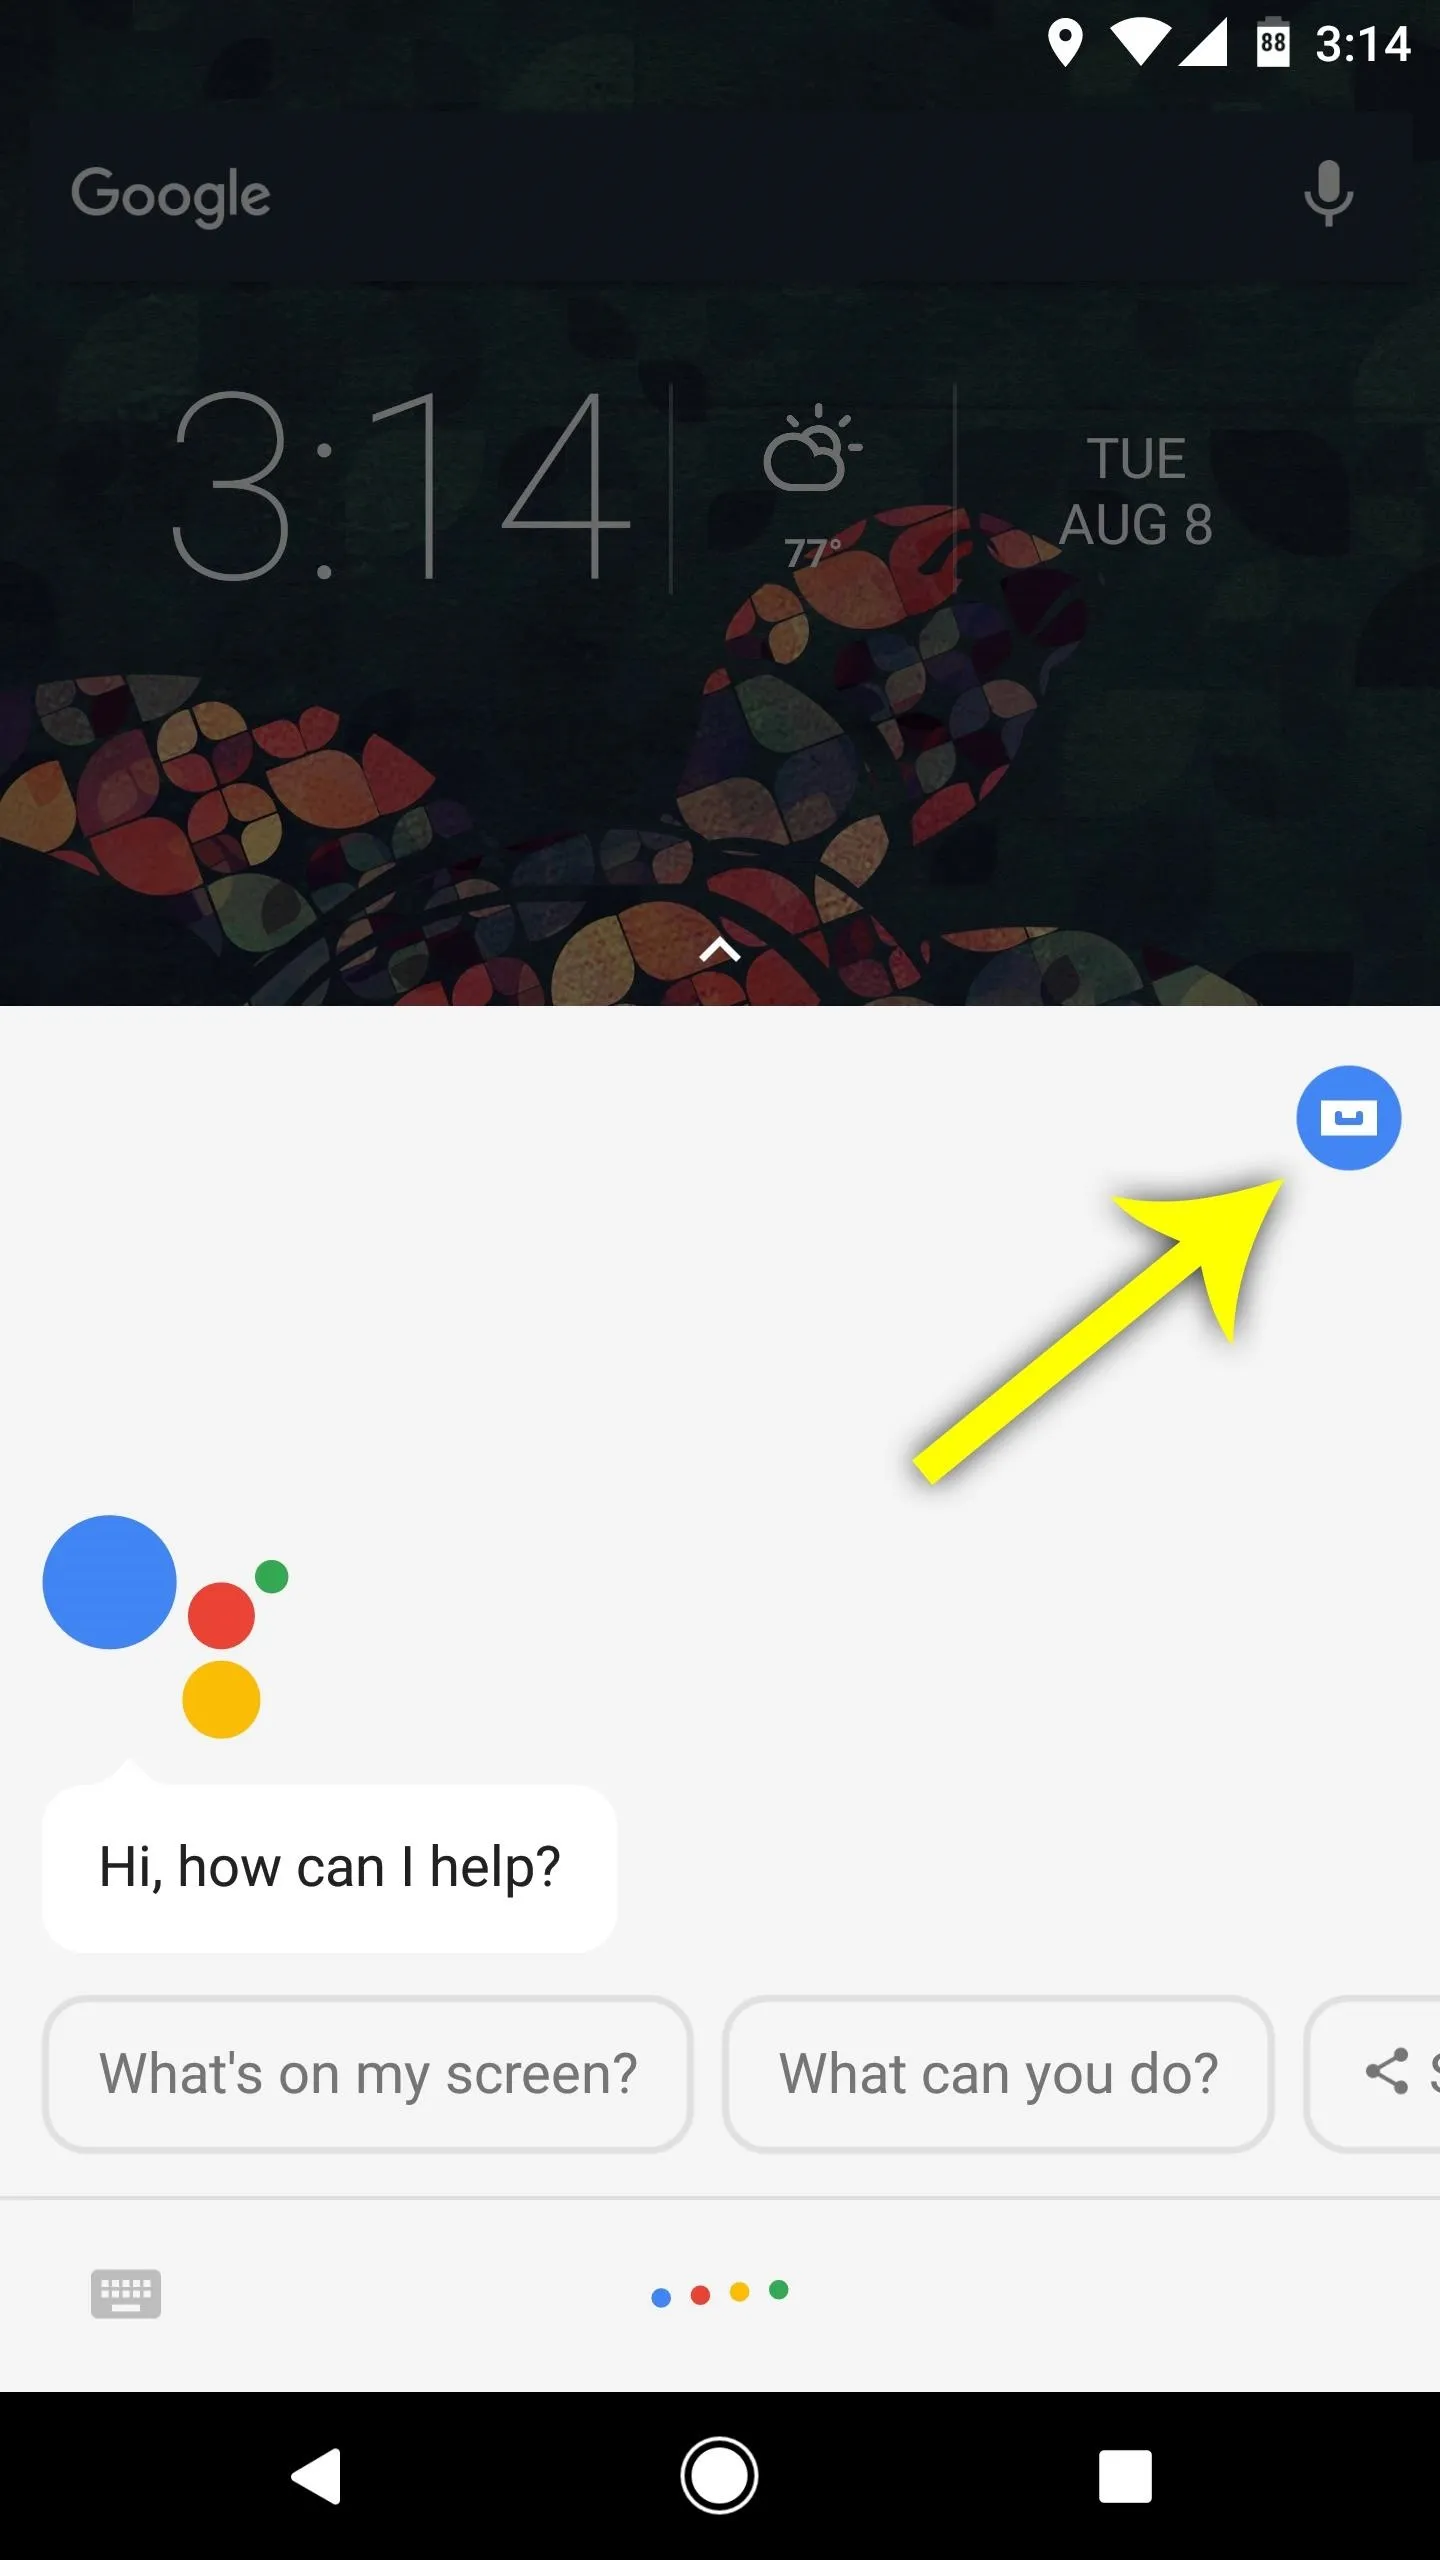
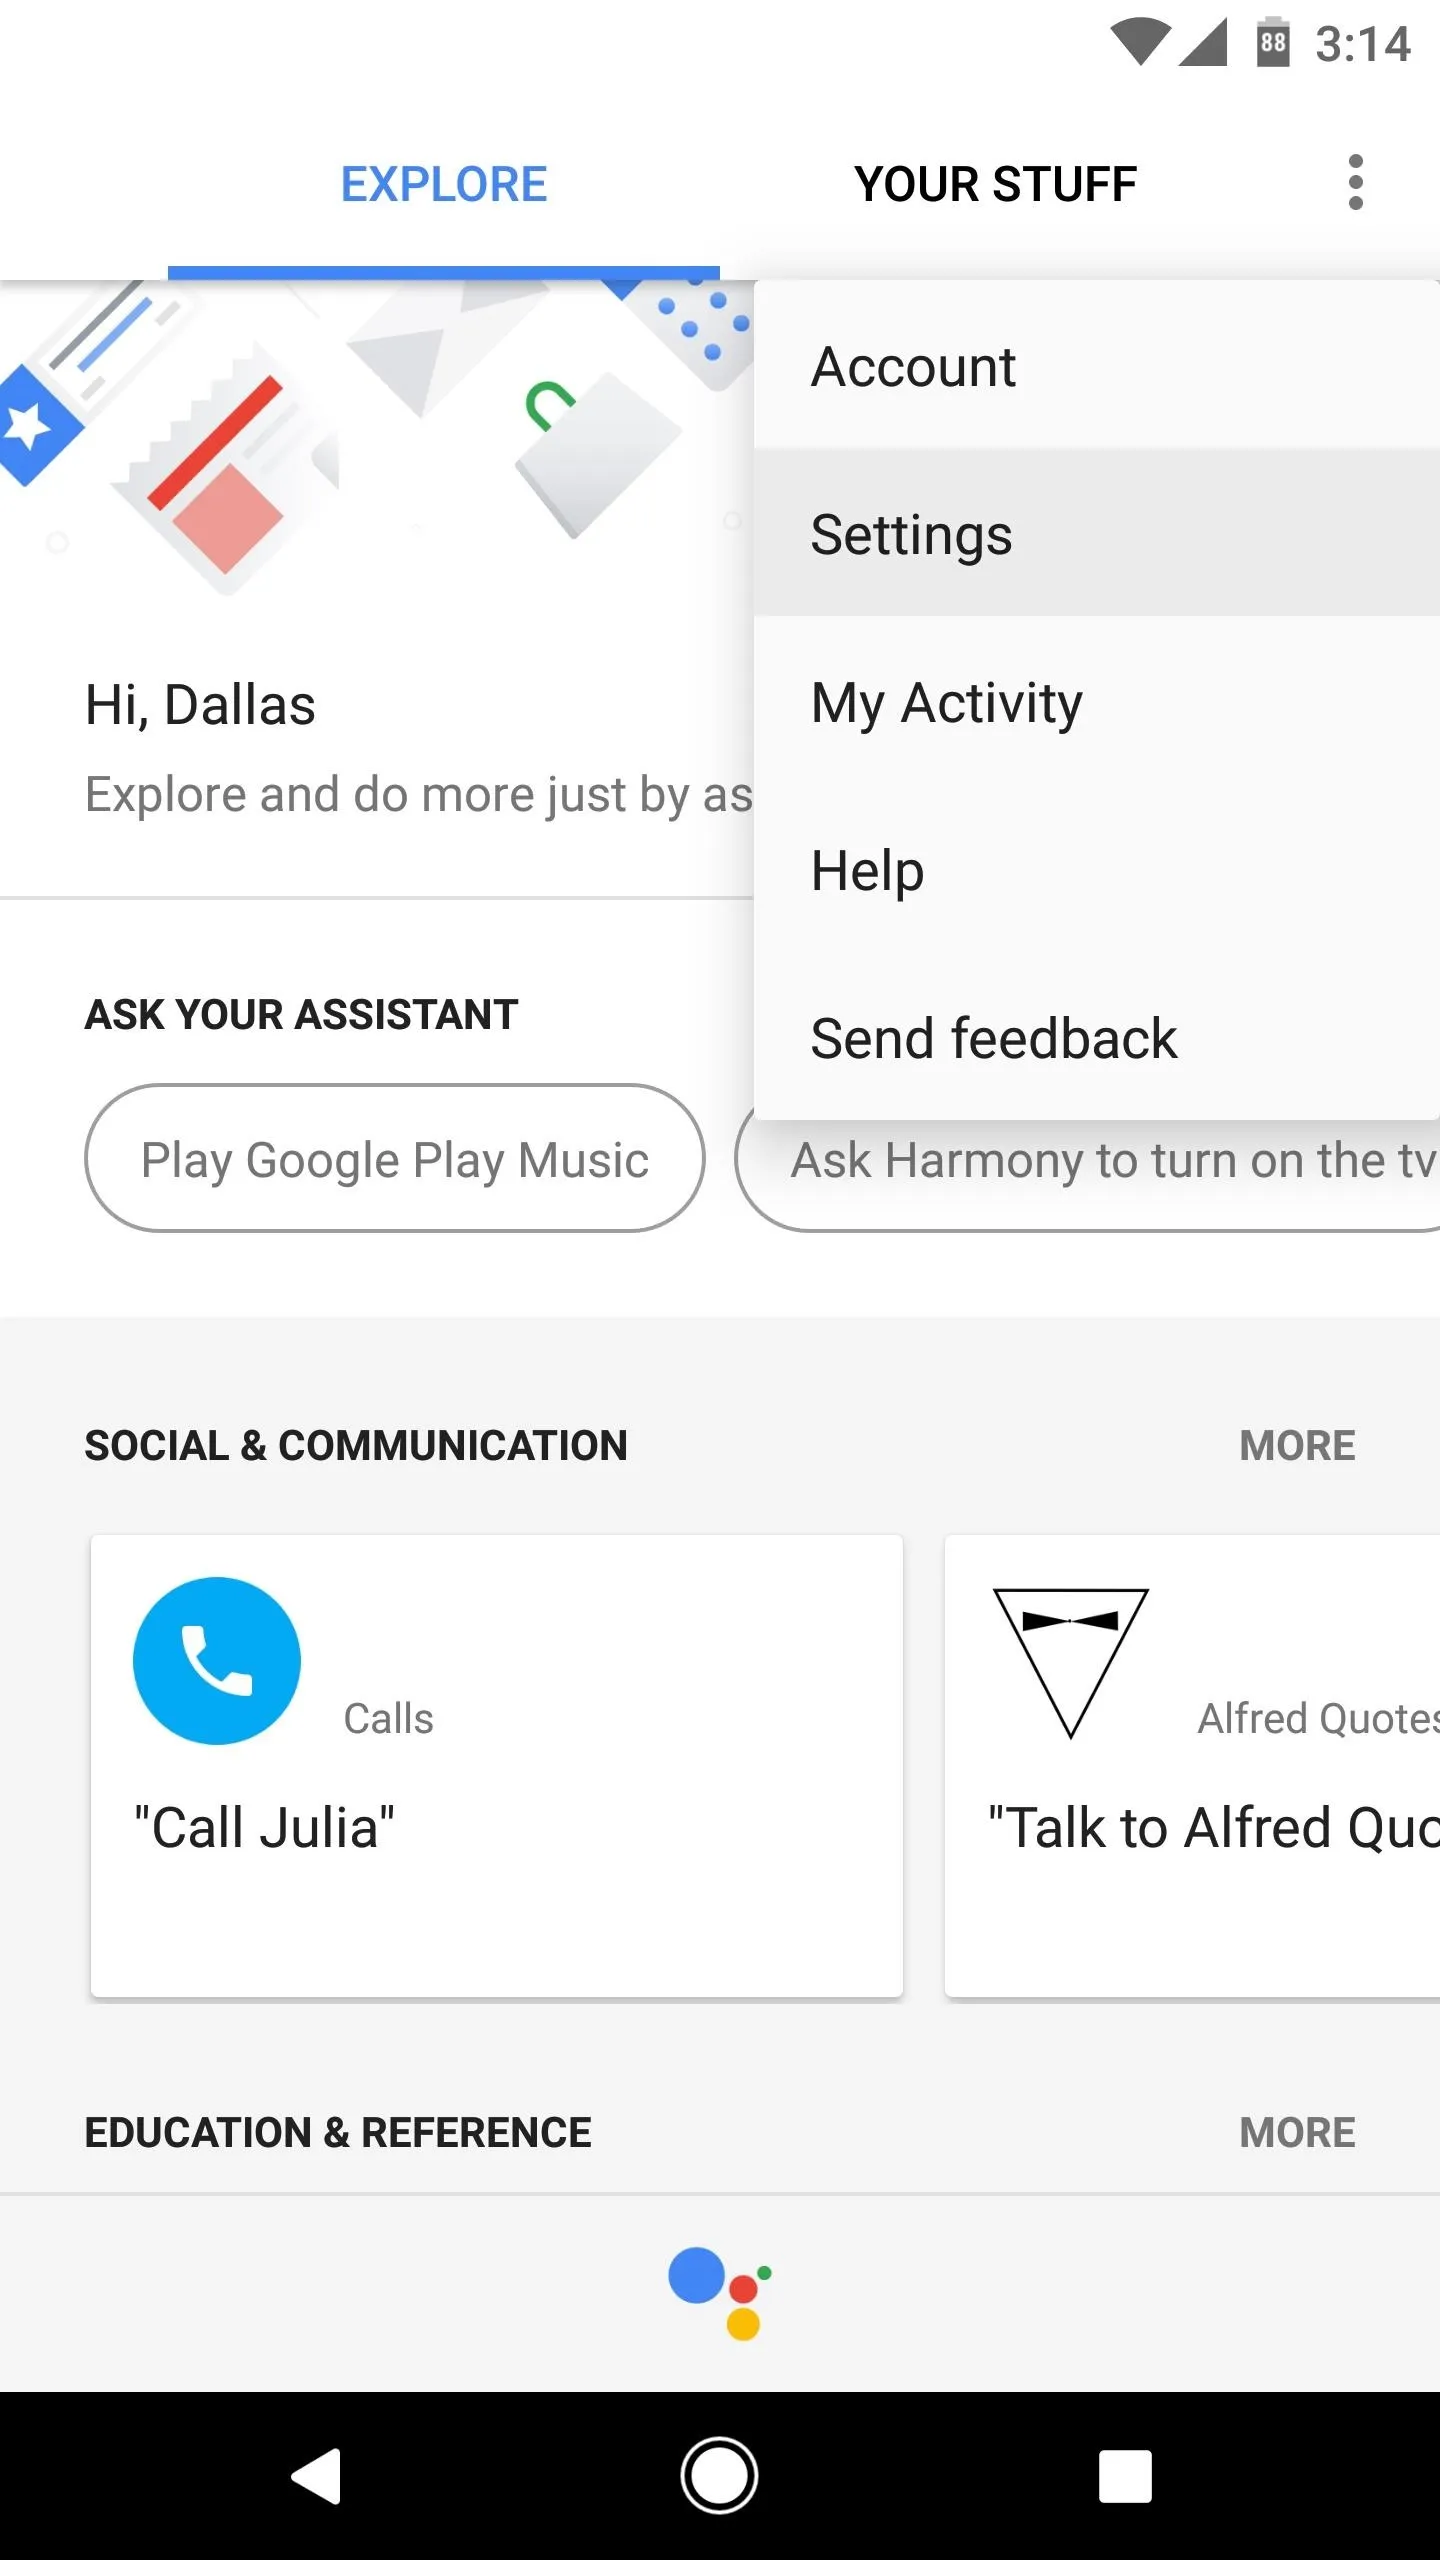
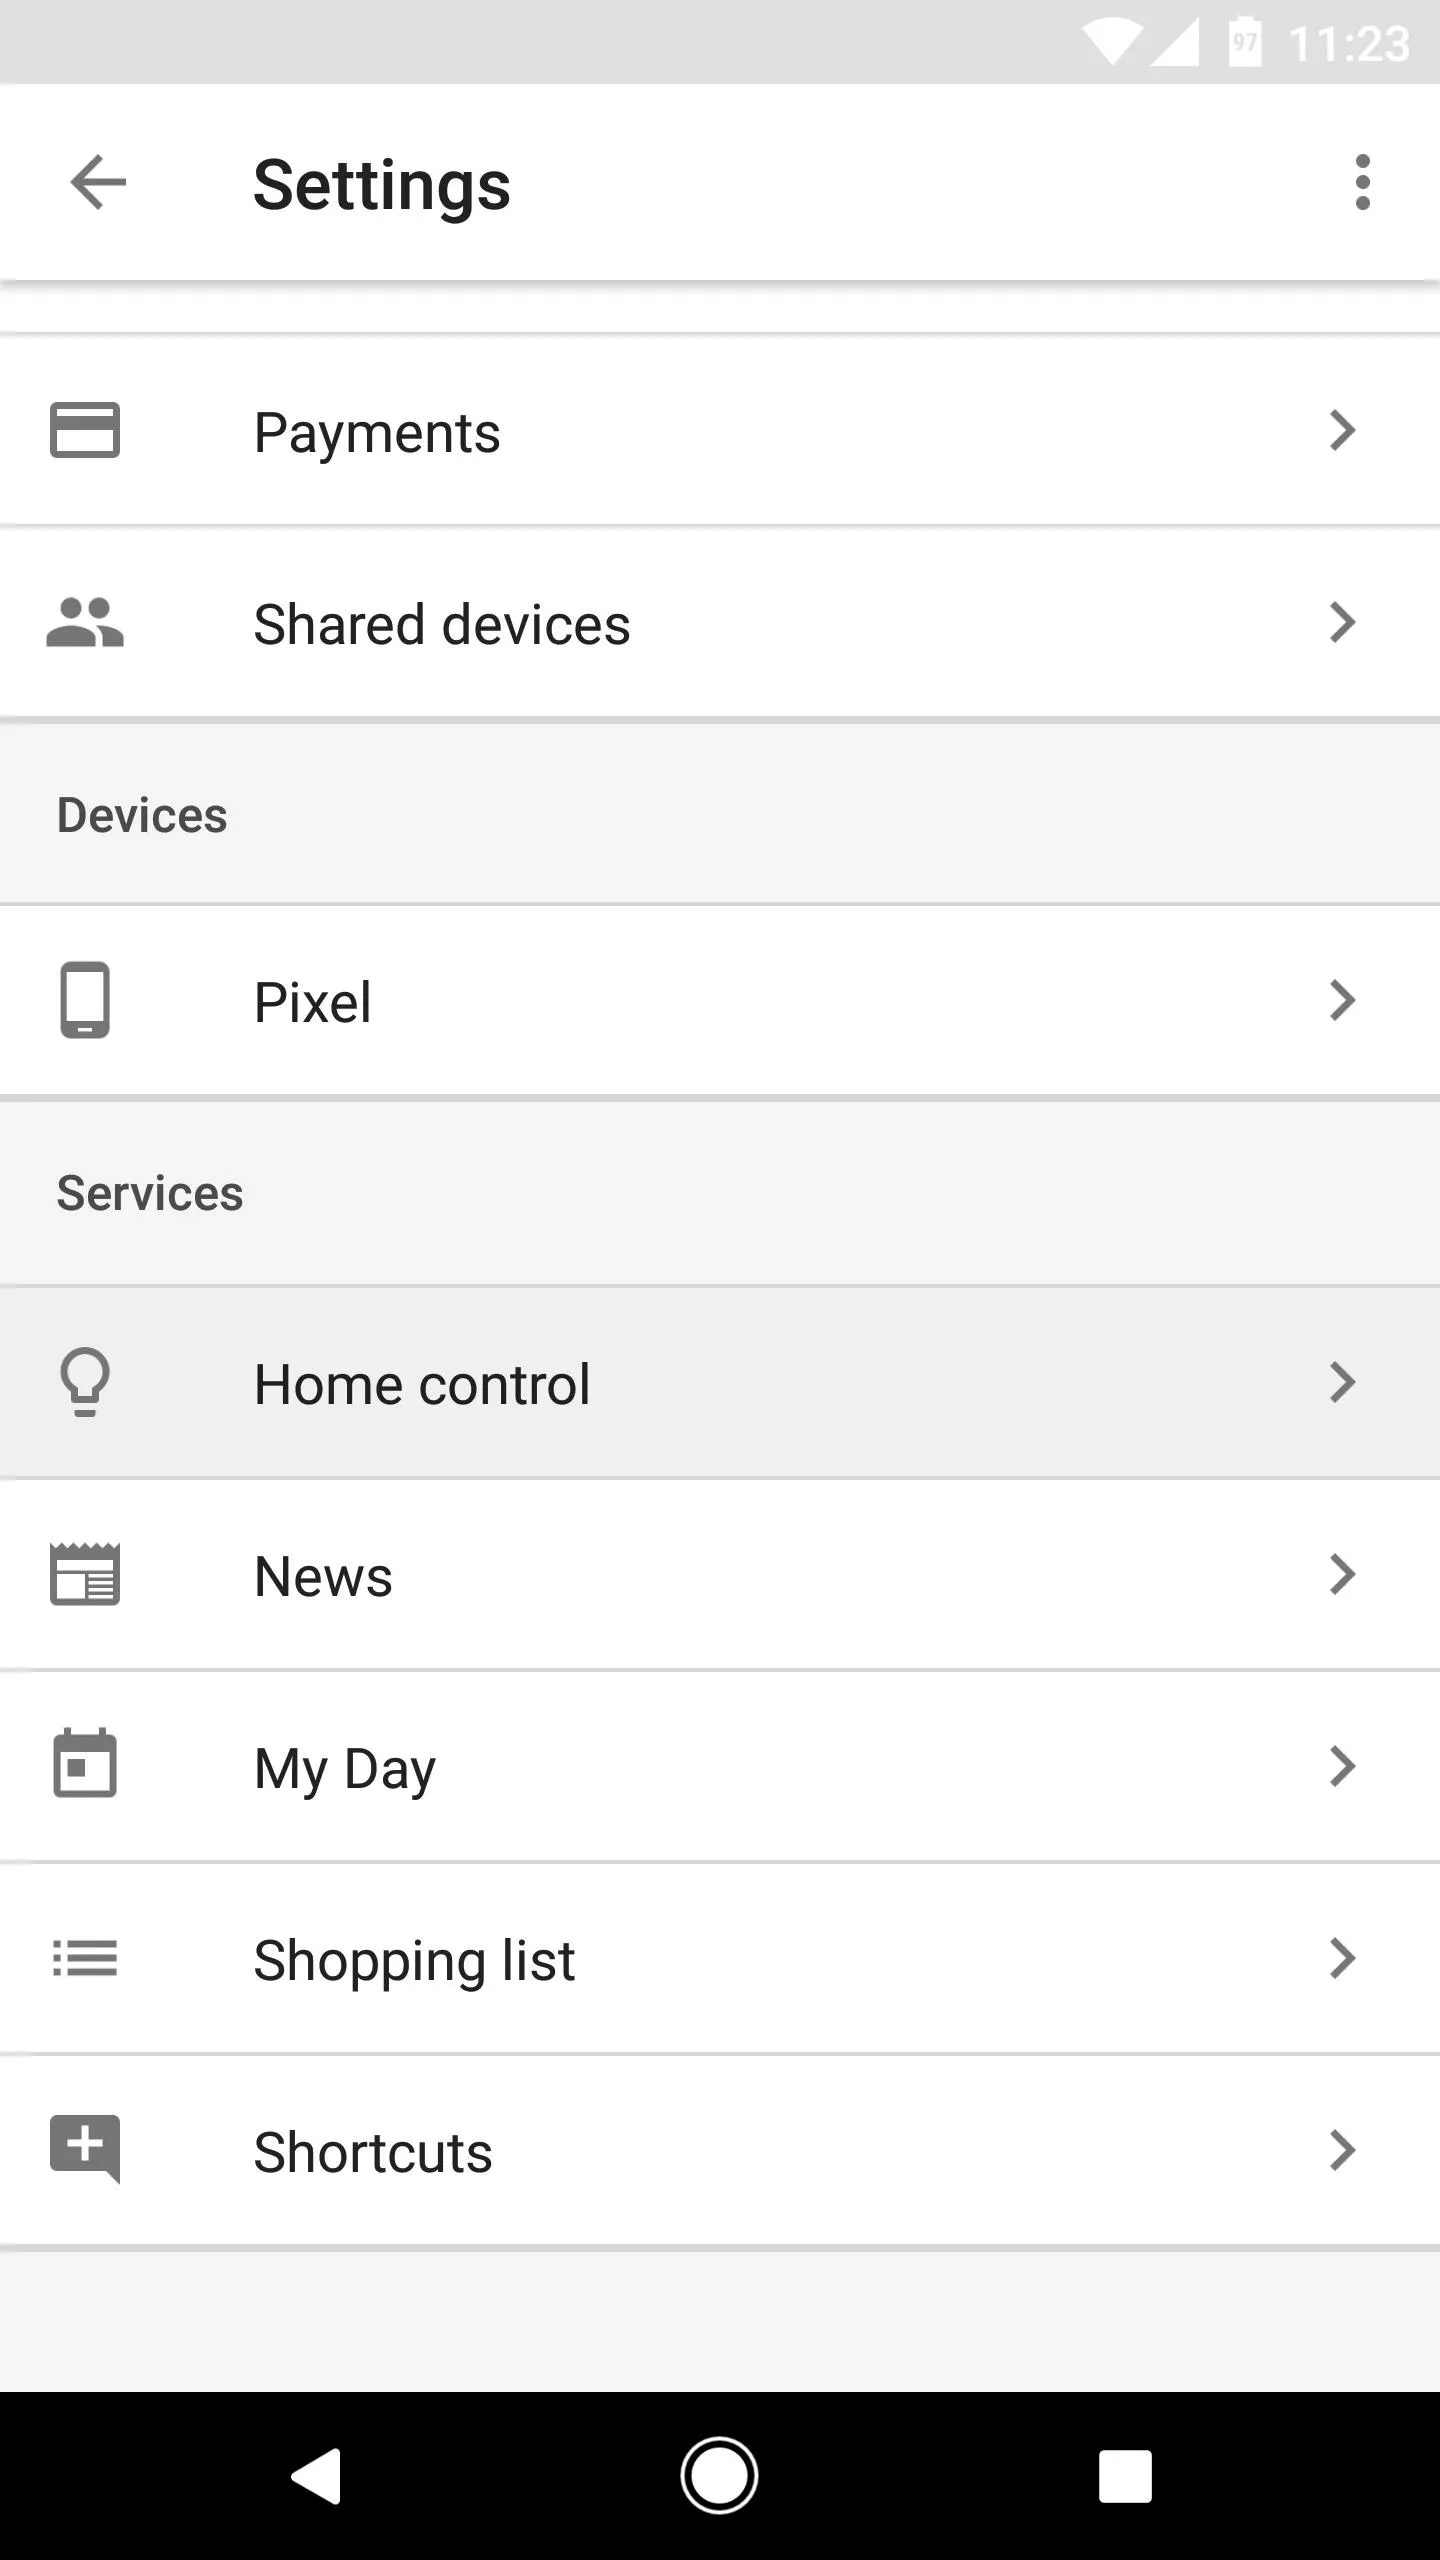
First up, trigger the Google Assistant by long-pressing your home button on Android, or by opening the Google Assistant app on iOS. From here, tap the blue menu button in the top-right corner of the interface, then press the three-dot menu button and choose "Settings." From there, select "Home control" under Services.
Note: If you're a Google Home user, tap the hamburger icon in the Google Home app for Android or iOS, then choose "More Settings" to find the Home control menu.
Connect Your Smart Home Devices
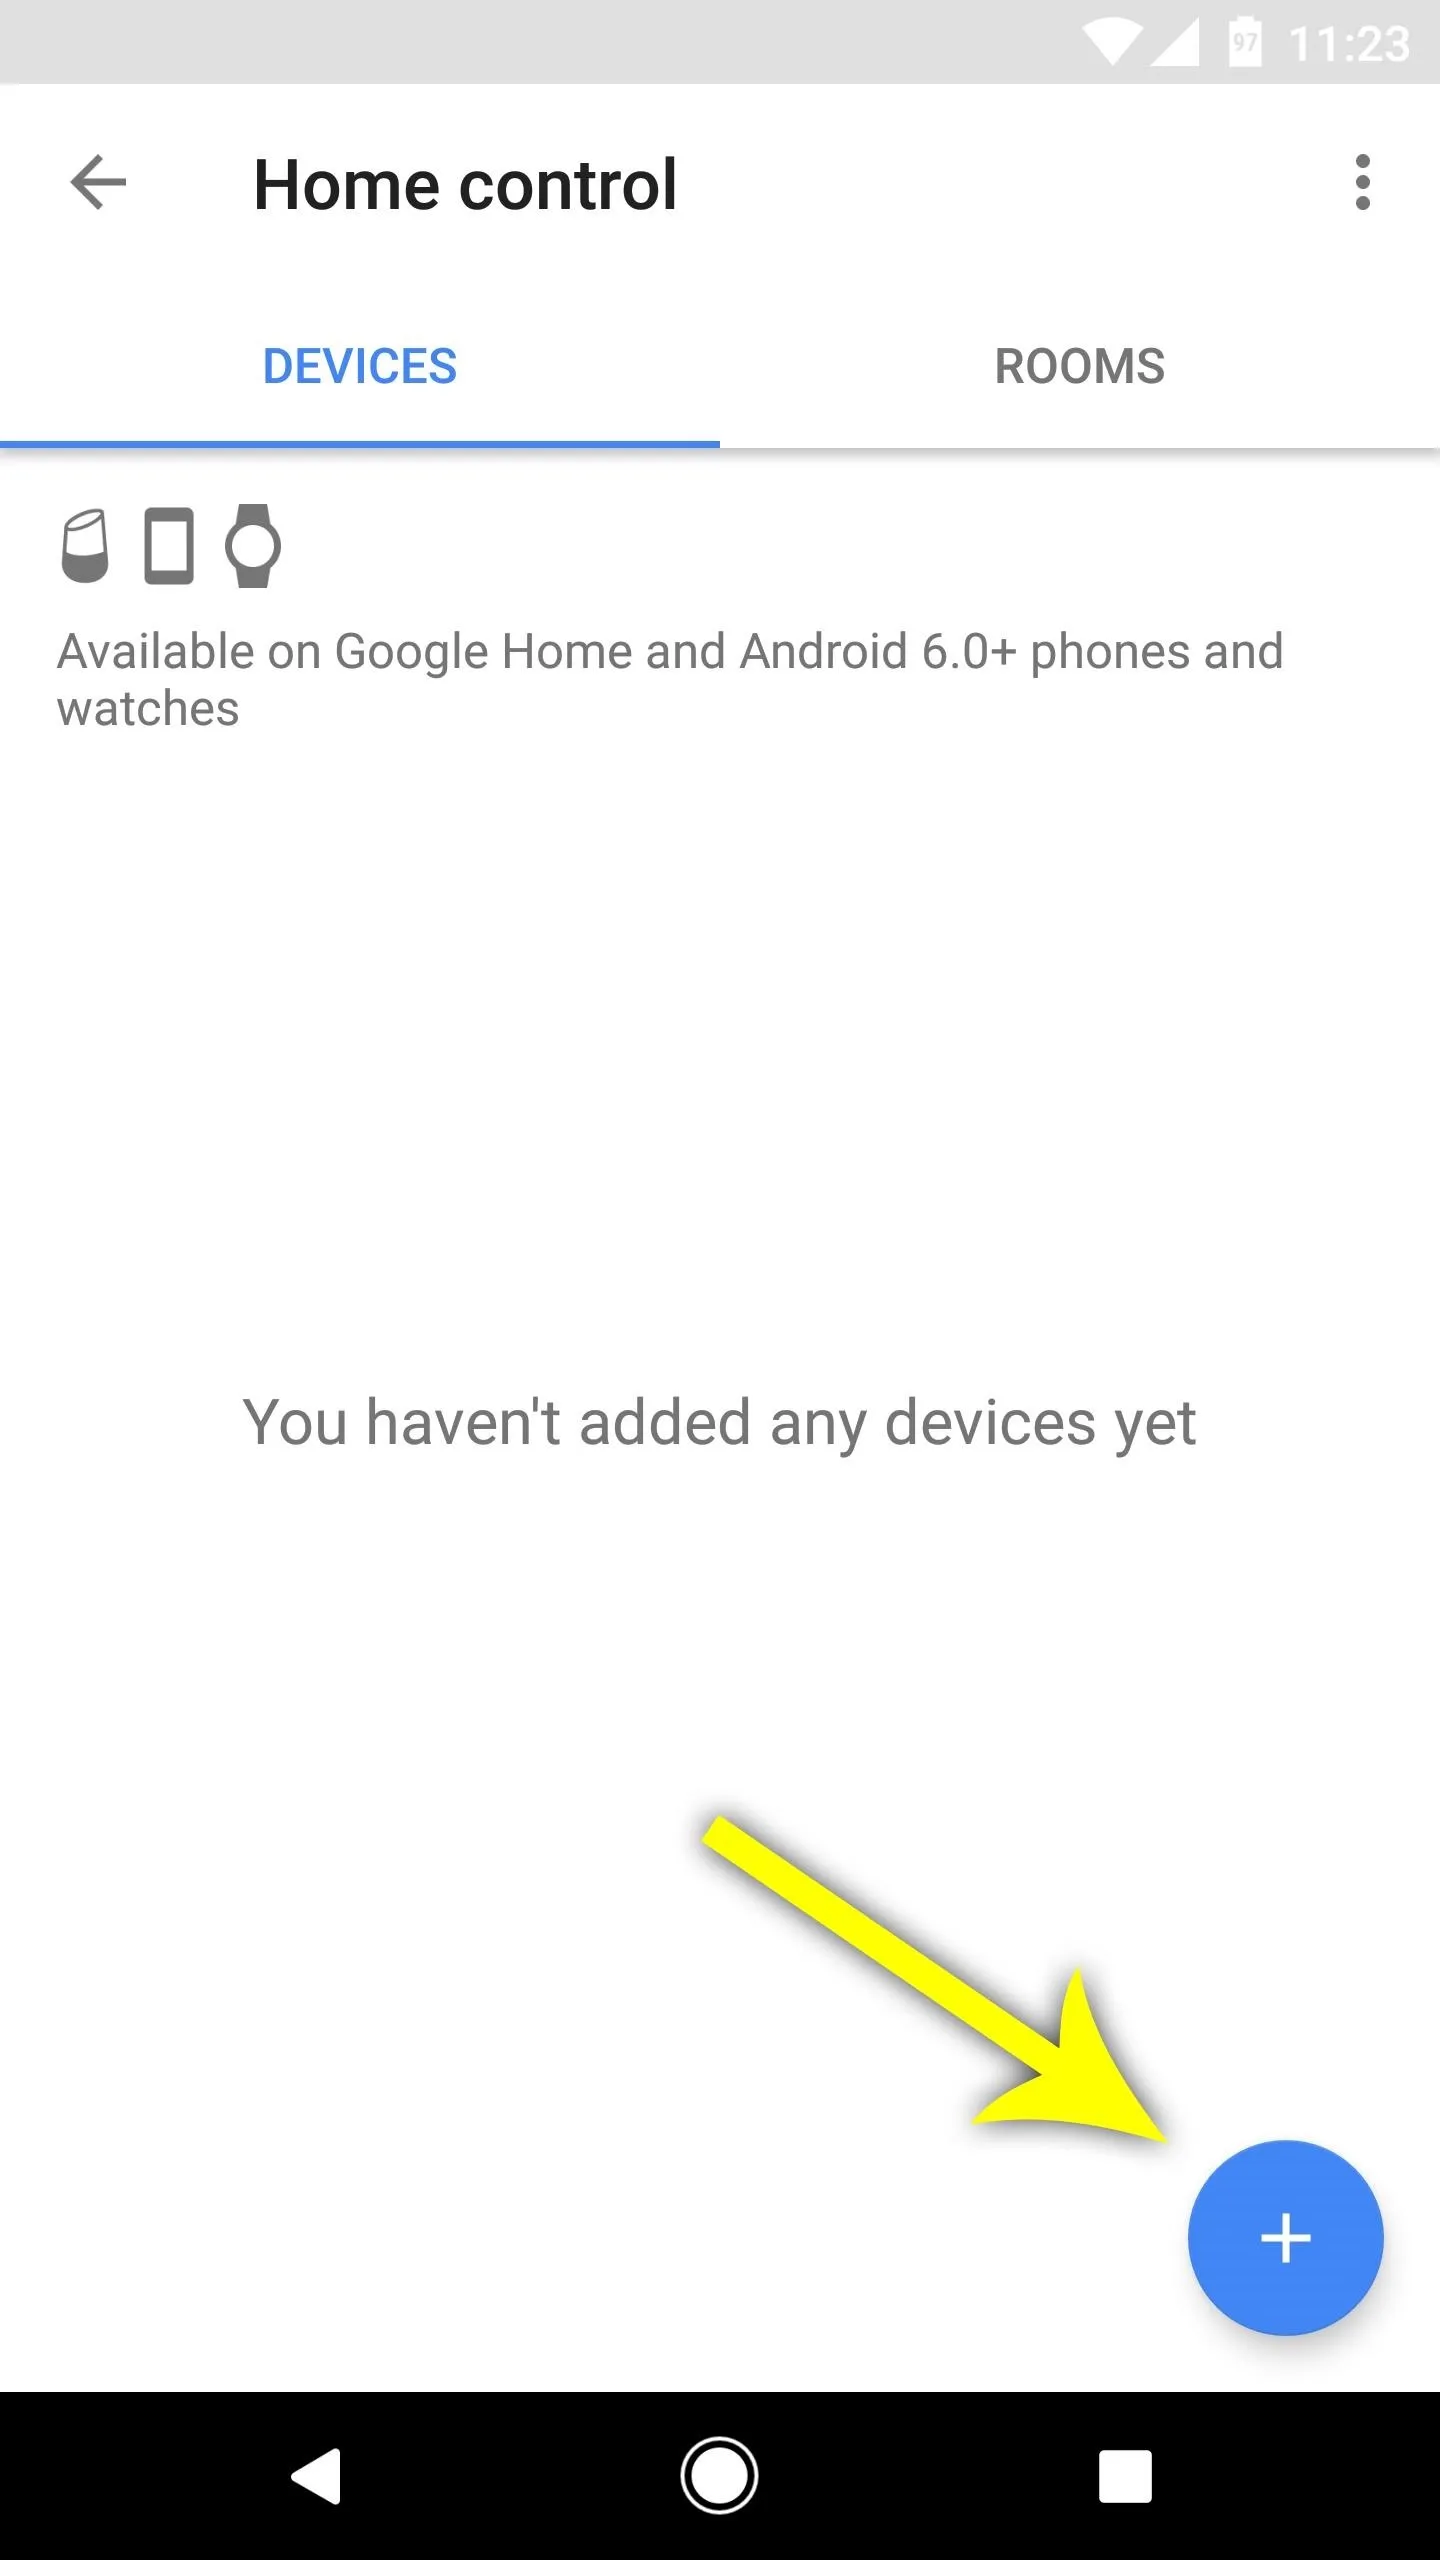
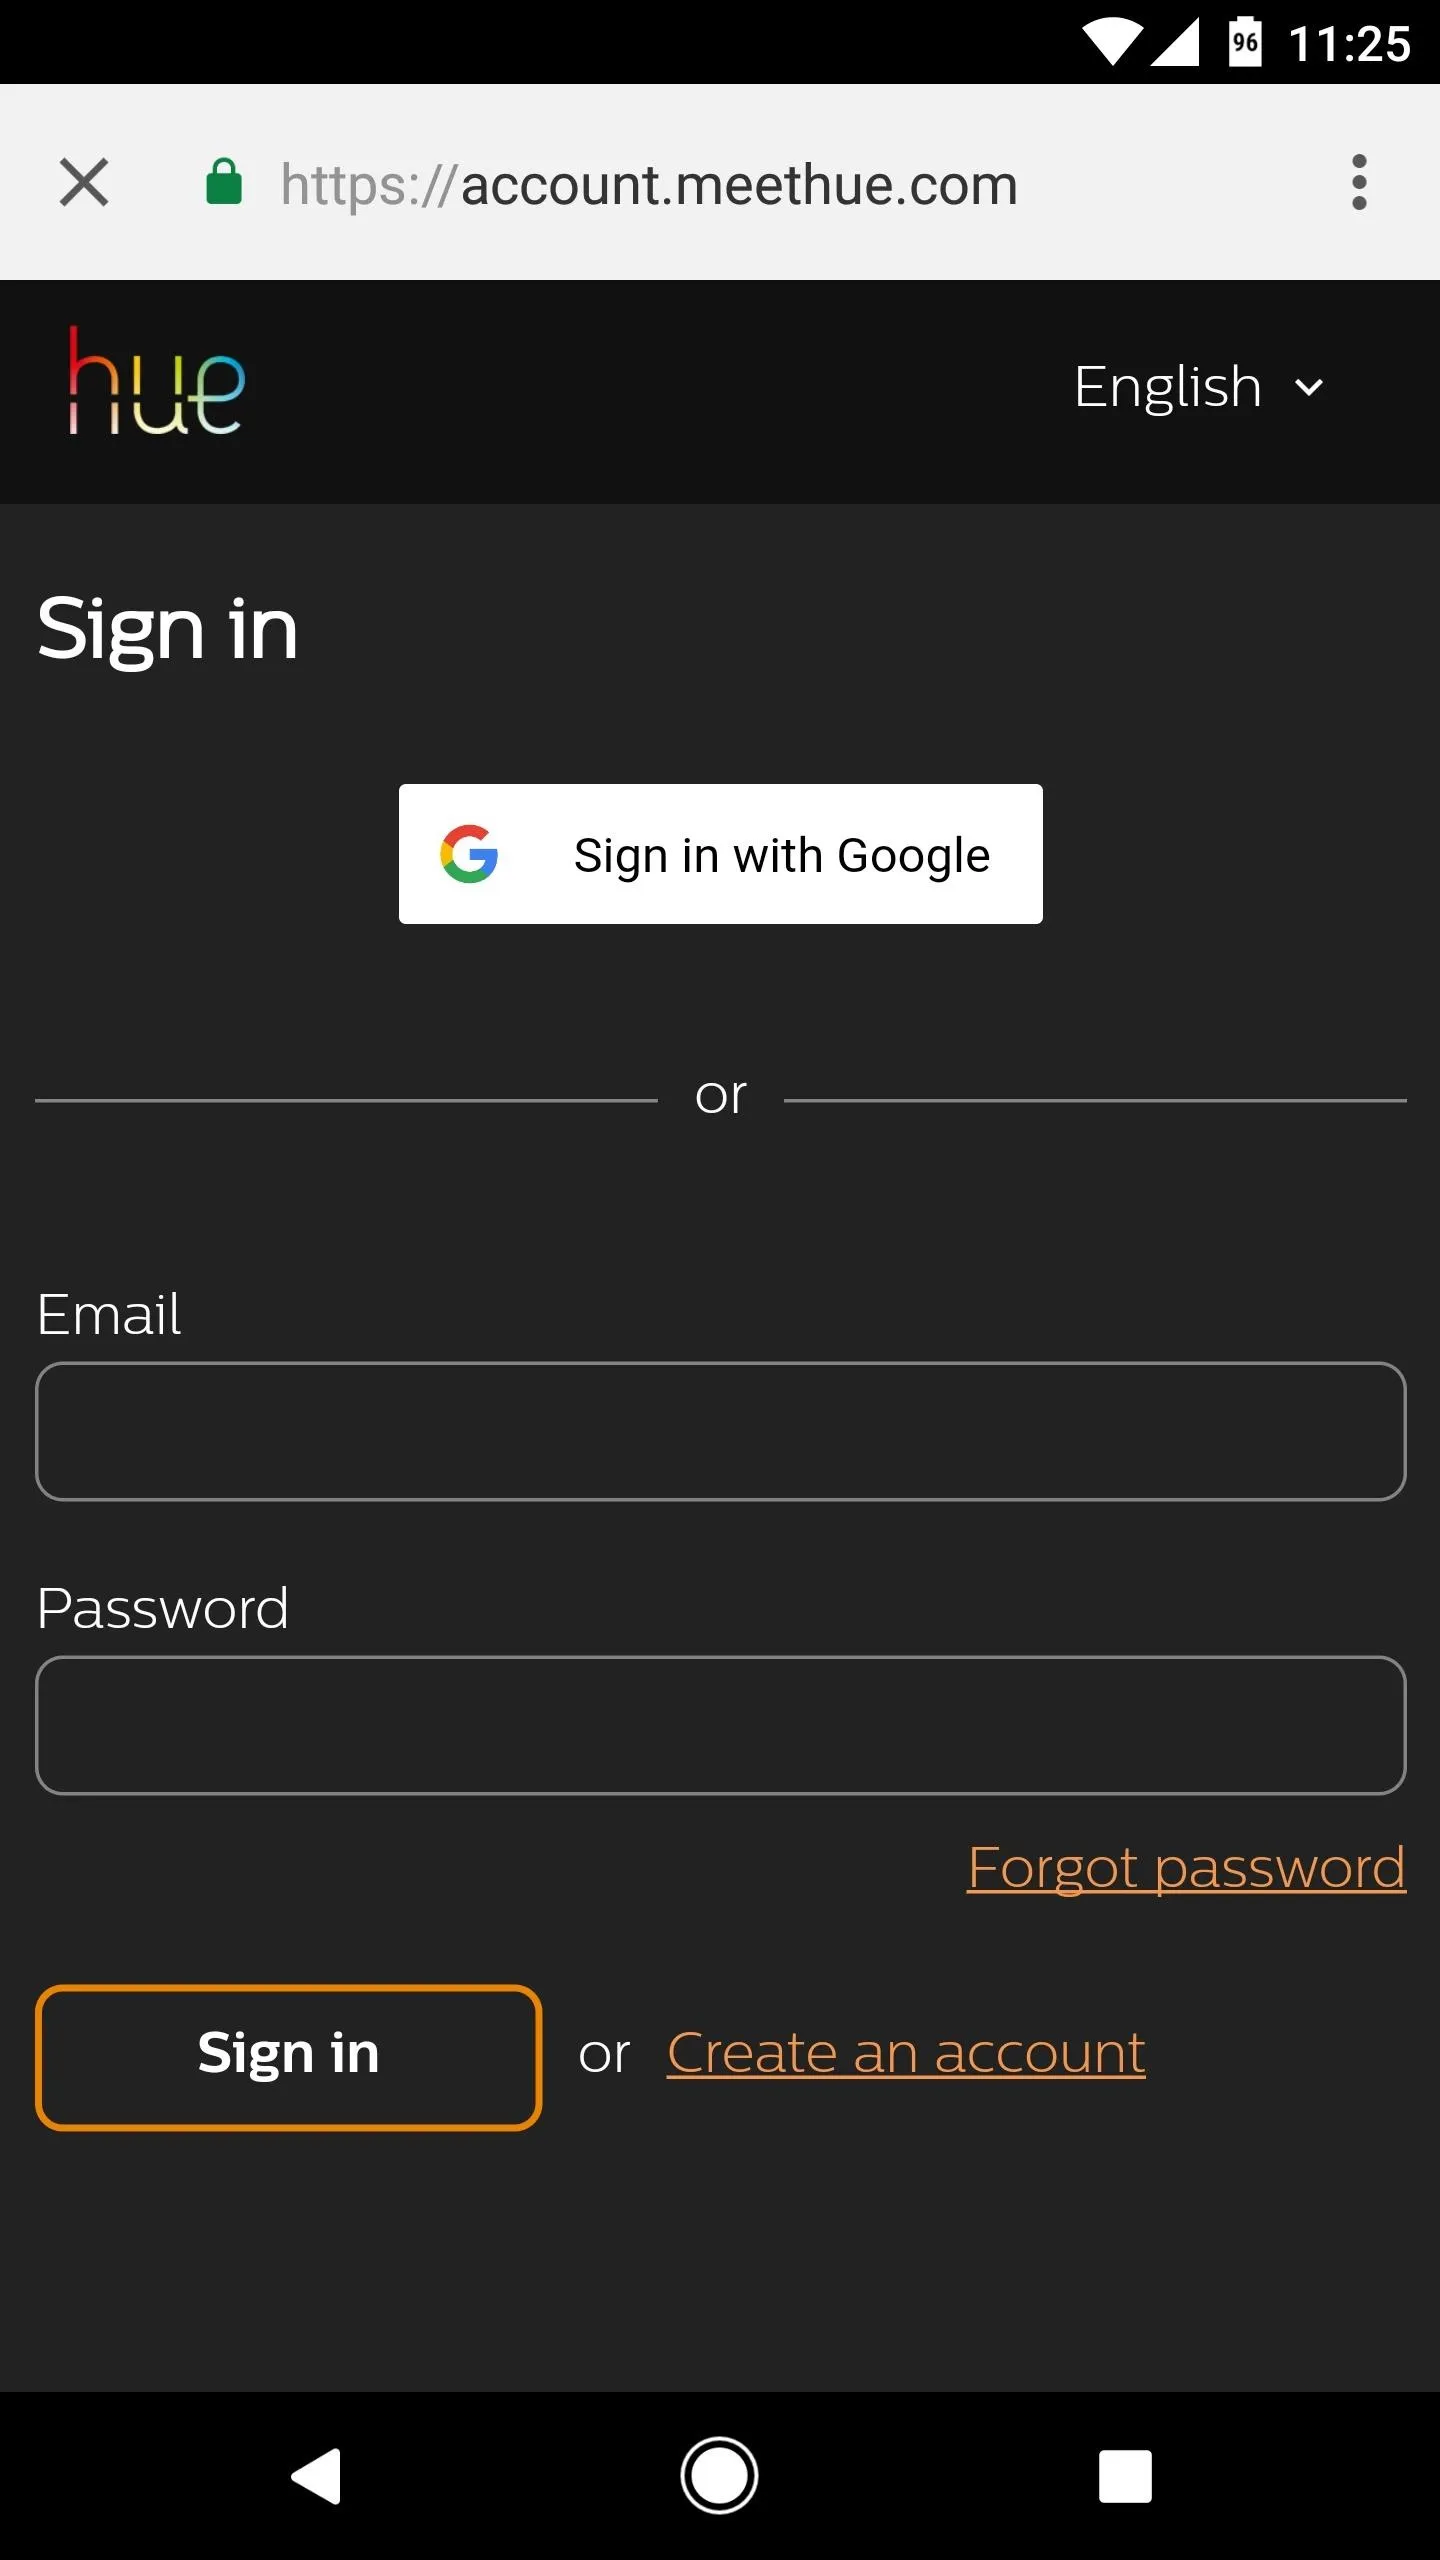
Next, from the Devices tab on the Home control screen, tap the blue + button in the bottom-right corner. This will present you with a list of all smart home devices that are directly compatible with the Google Assistant, so find your brand in the list and select it.

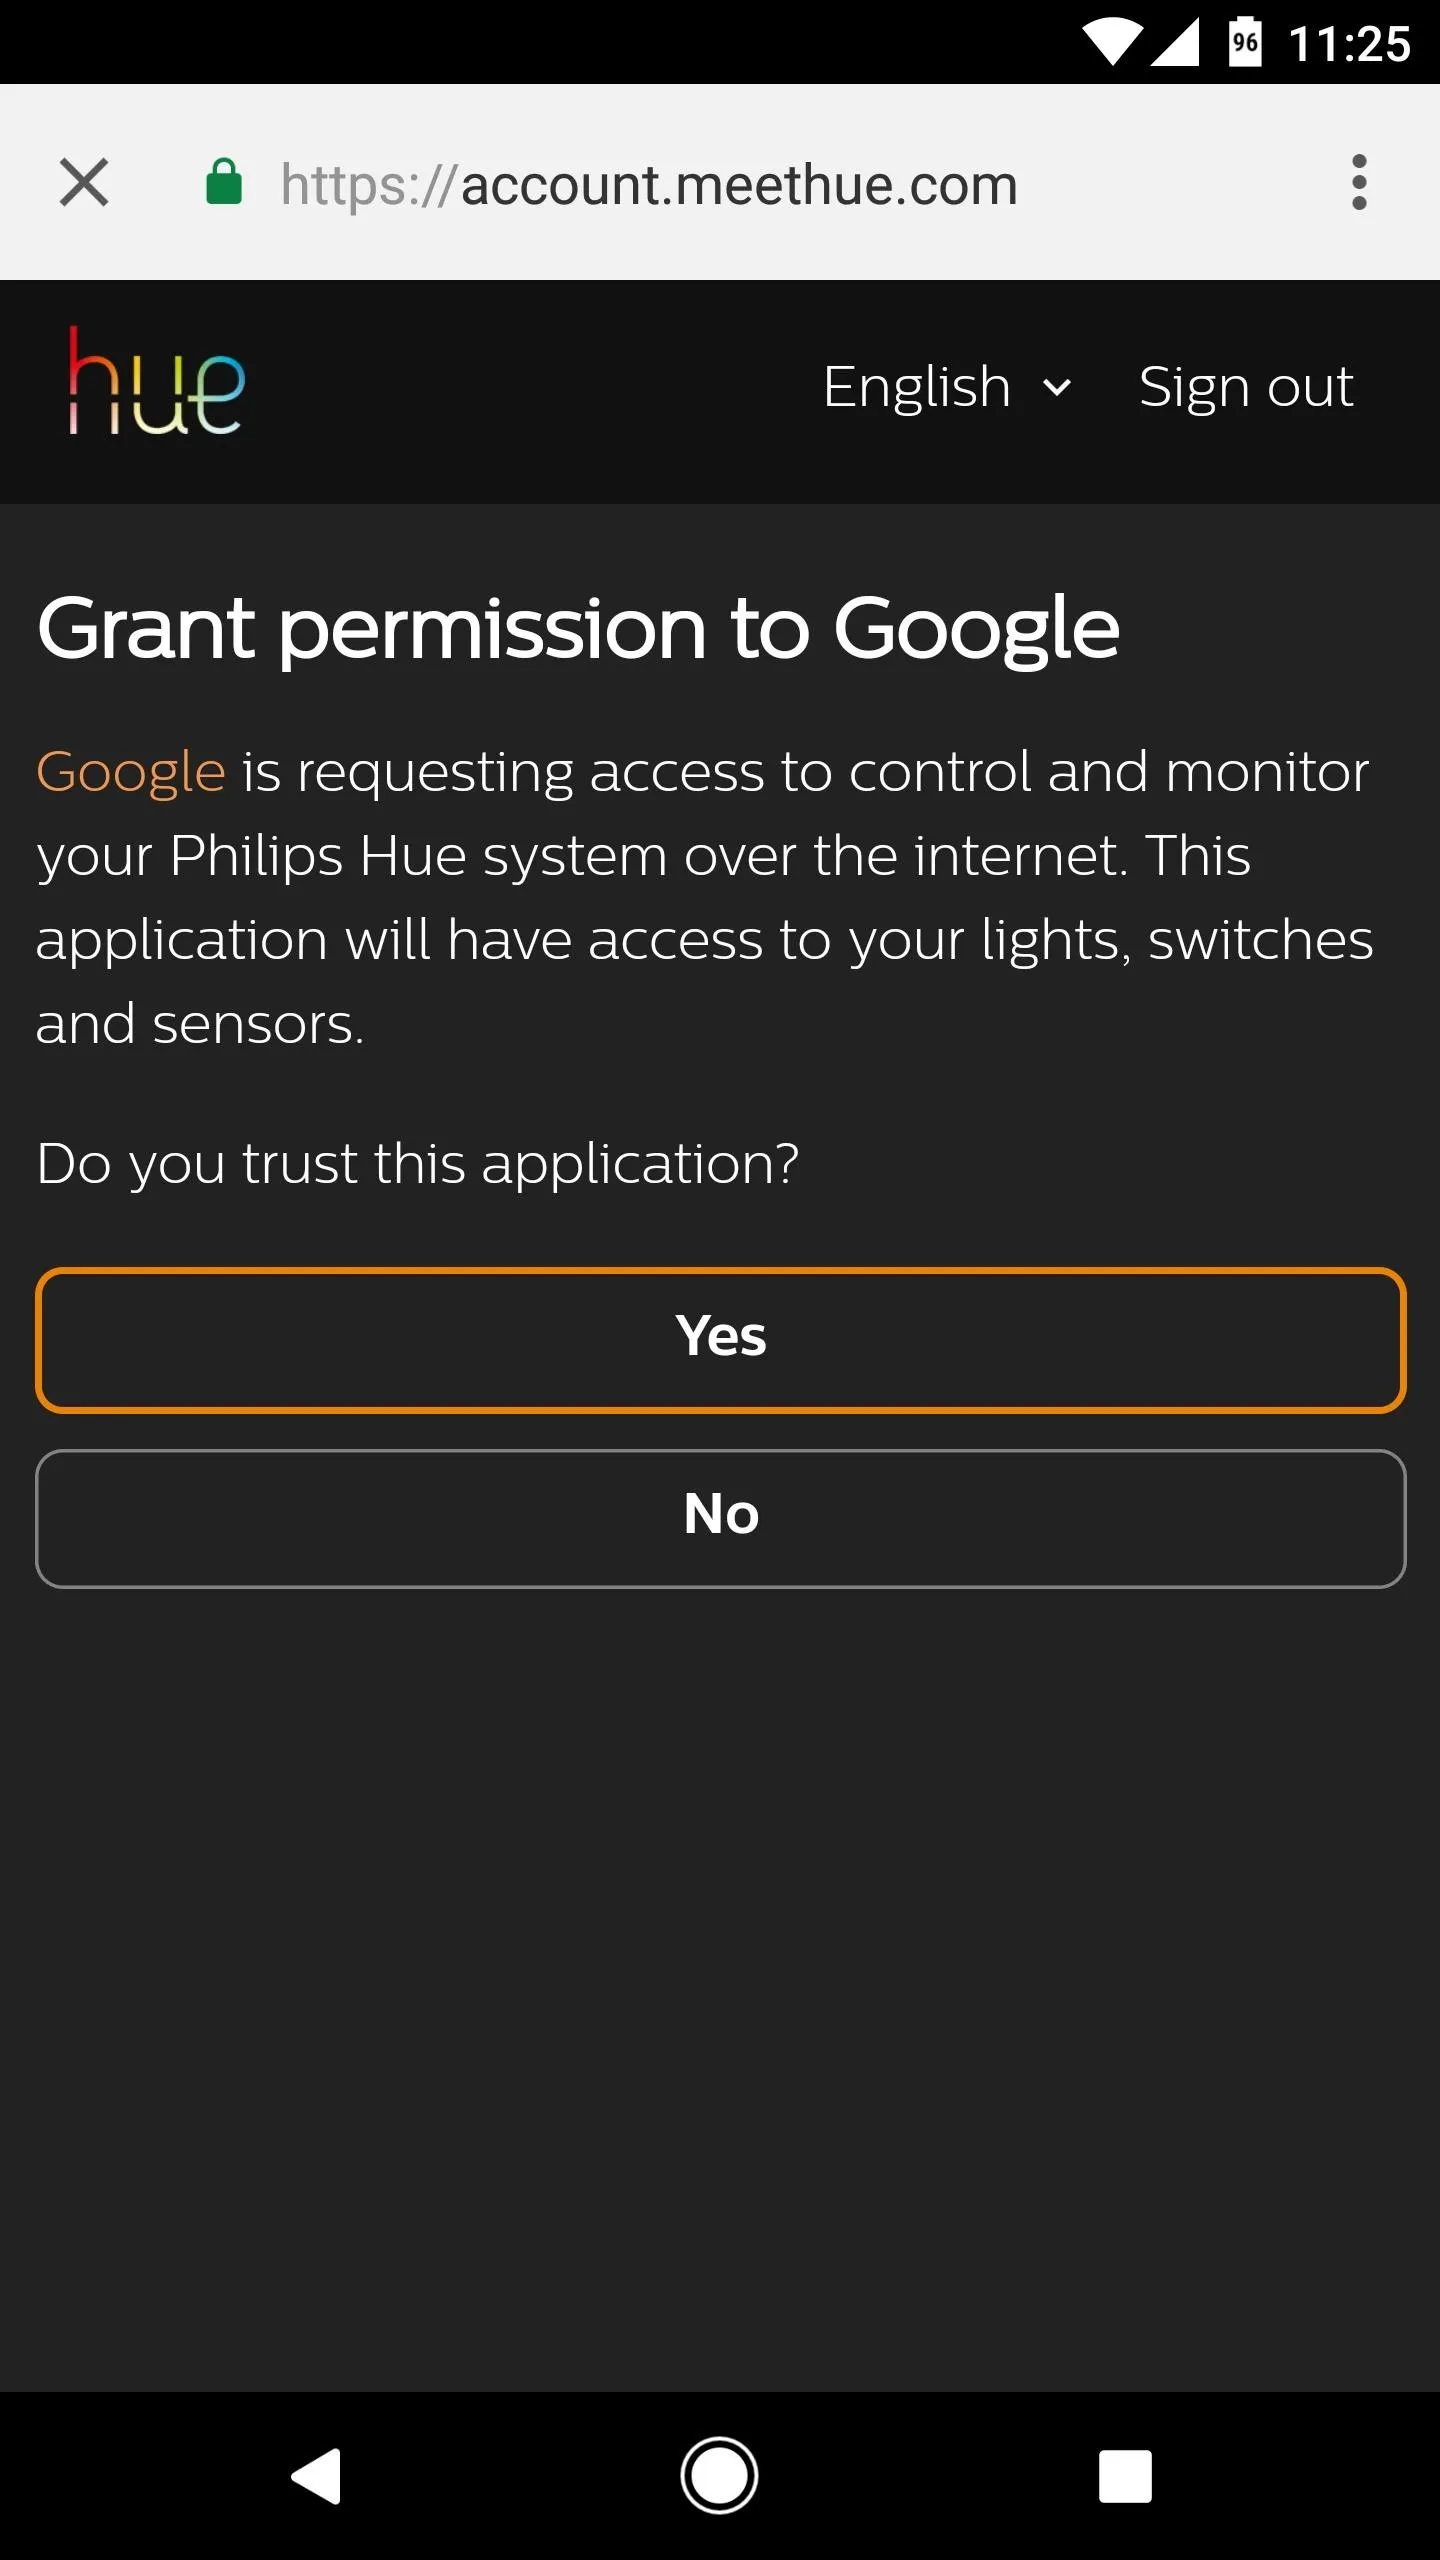
From here, the process will vary depending on which device you have, but what you'll need to do is grant Google Assistant the permission to access your smart device(s). For most models, this will involve signing in with the account you used to set up your smart device, then simply pressing "Yes" or "OK" when asked to grant permission to Google Assistant.
Other devices may ask you to press a physical "Pair" button on the smart device itself, but this should be equally easy. Just make sure to follow the on-screen instructions carefully.
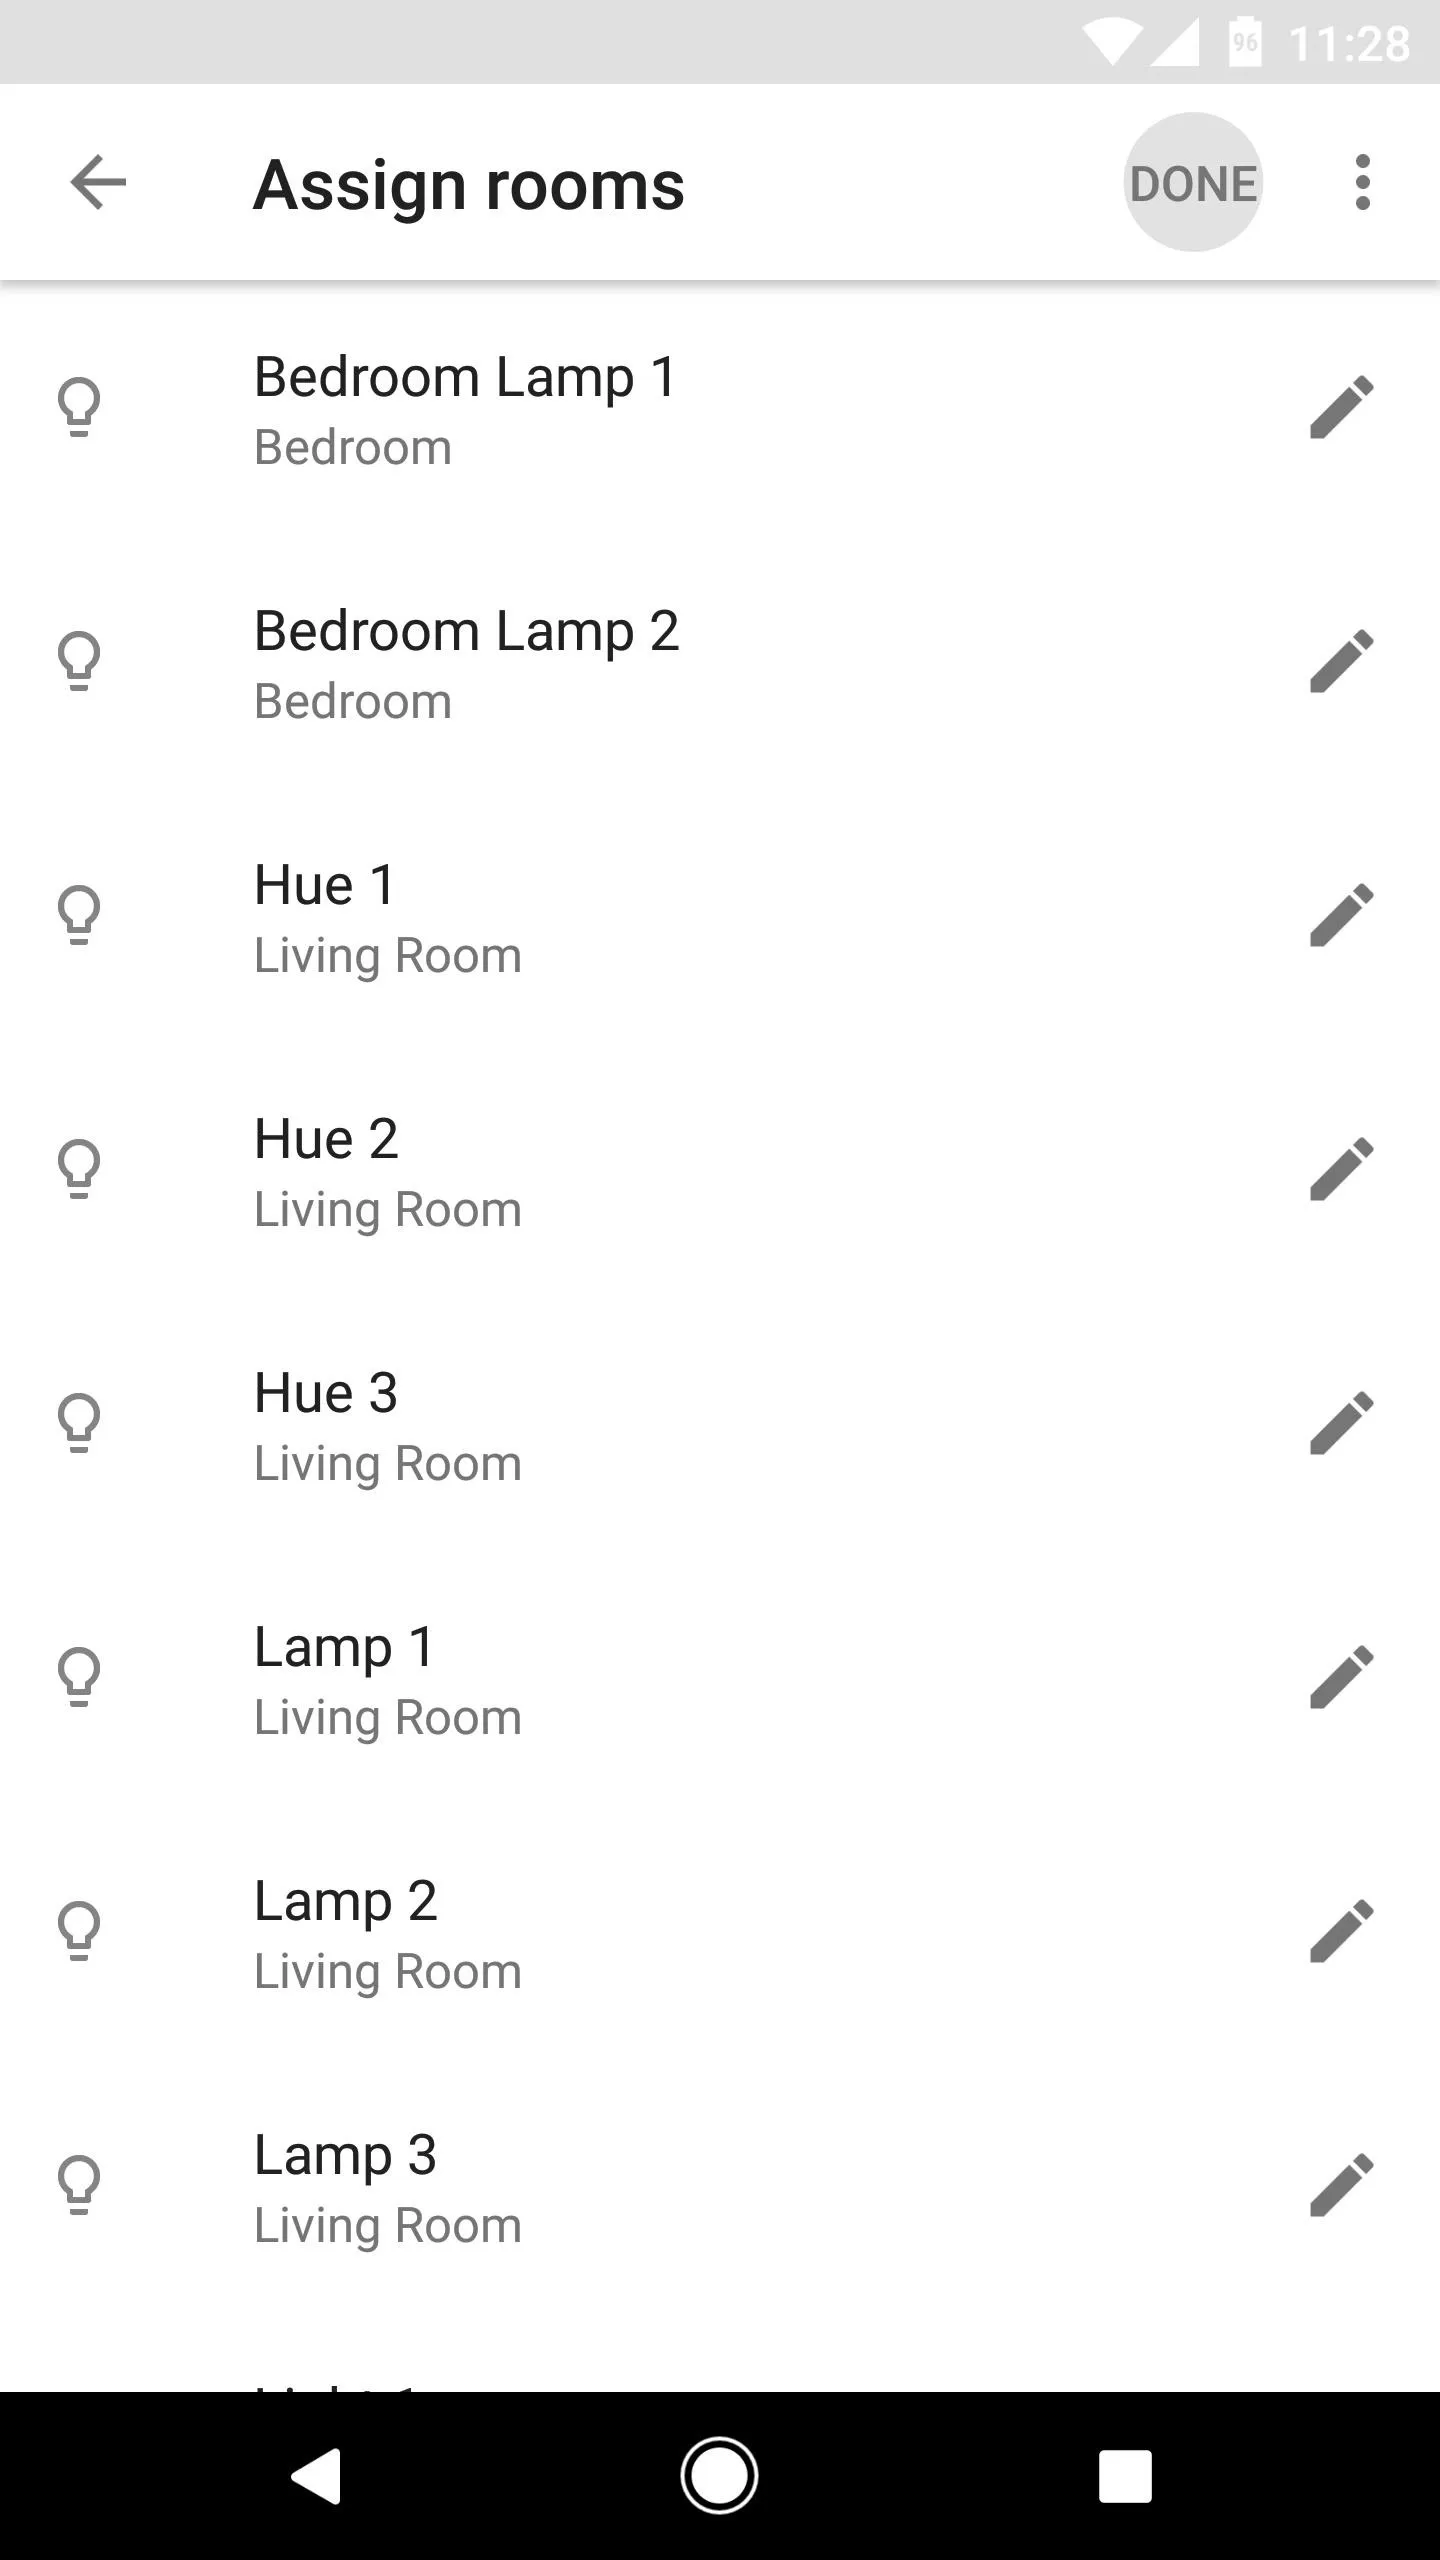
Assign Devices to Rooms
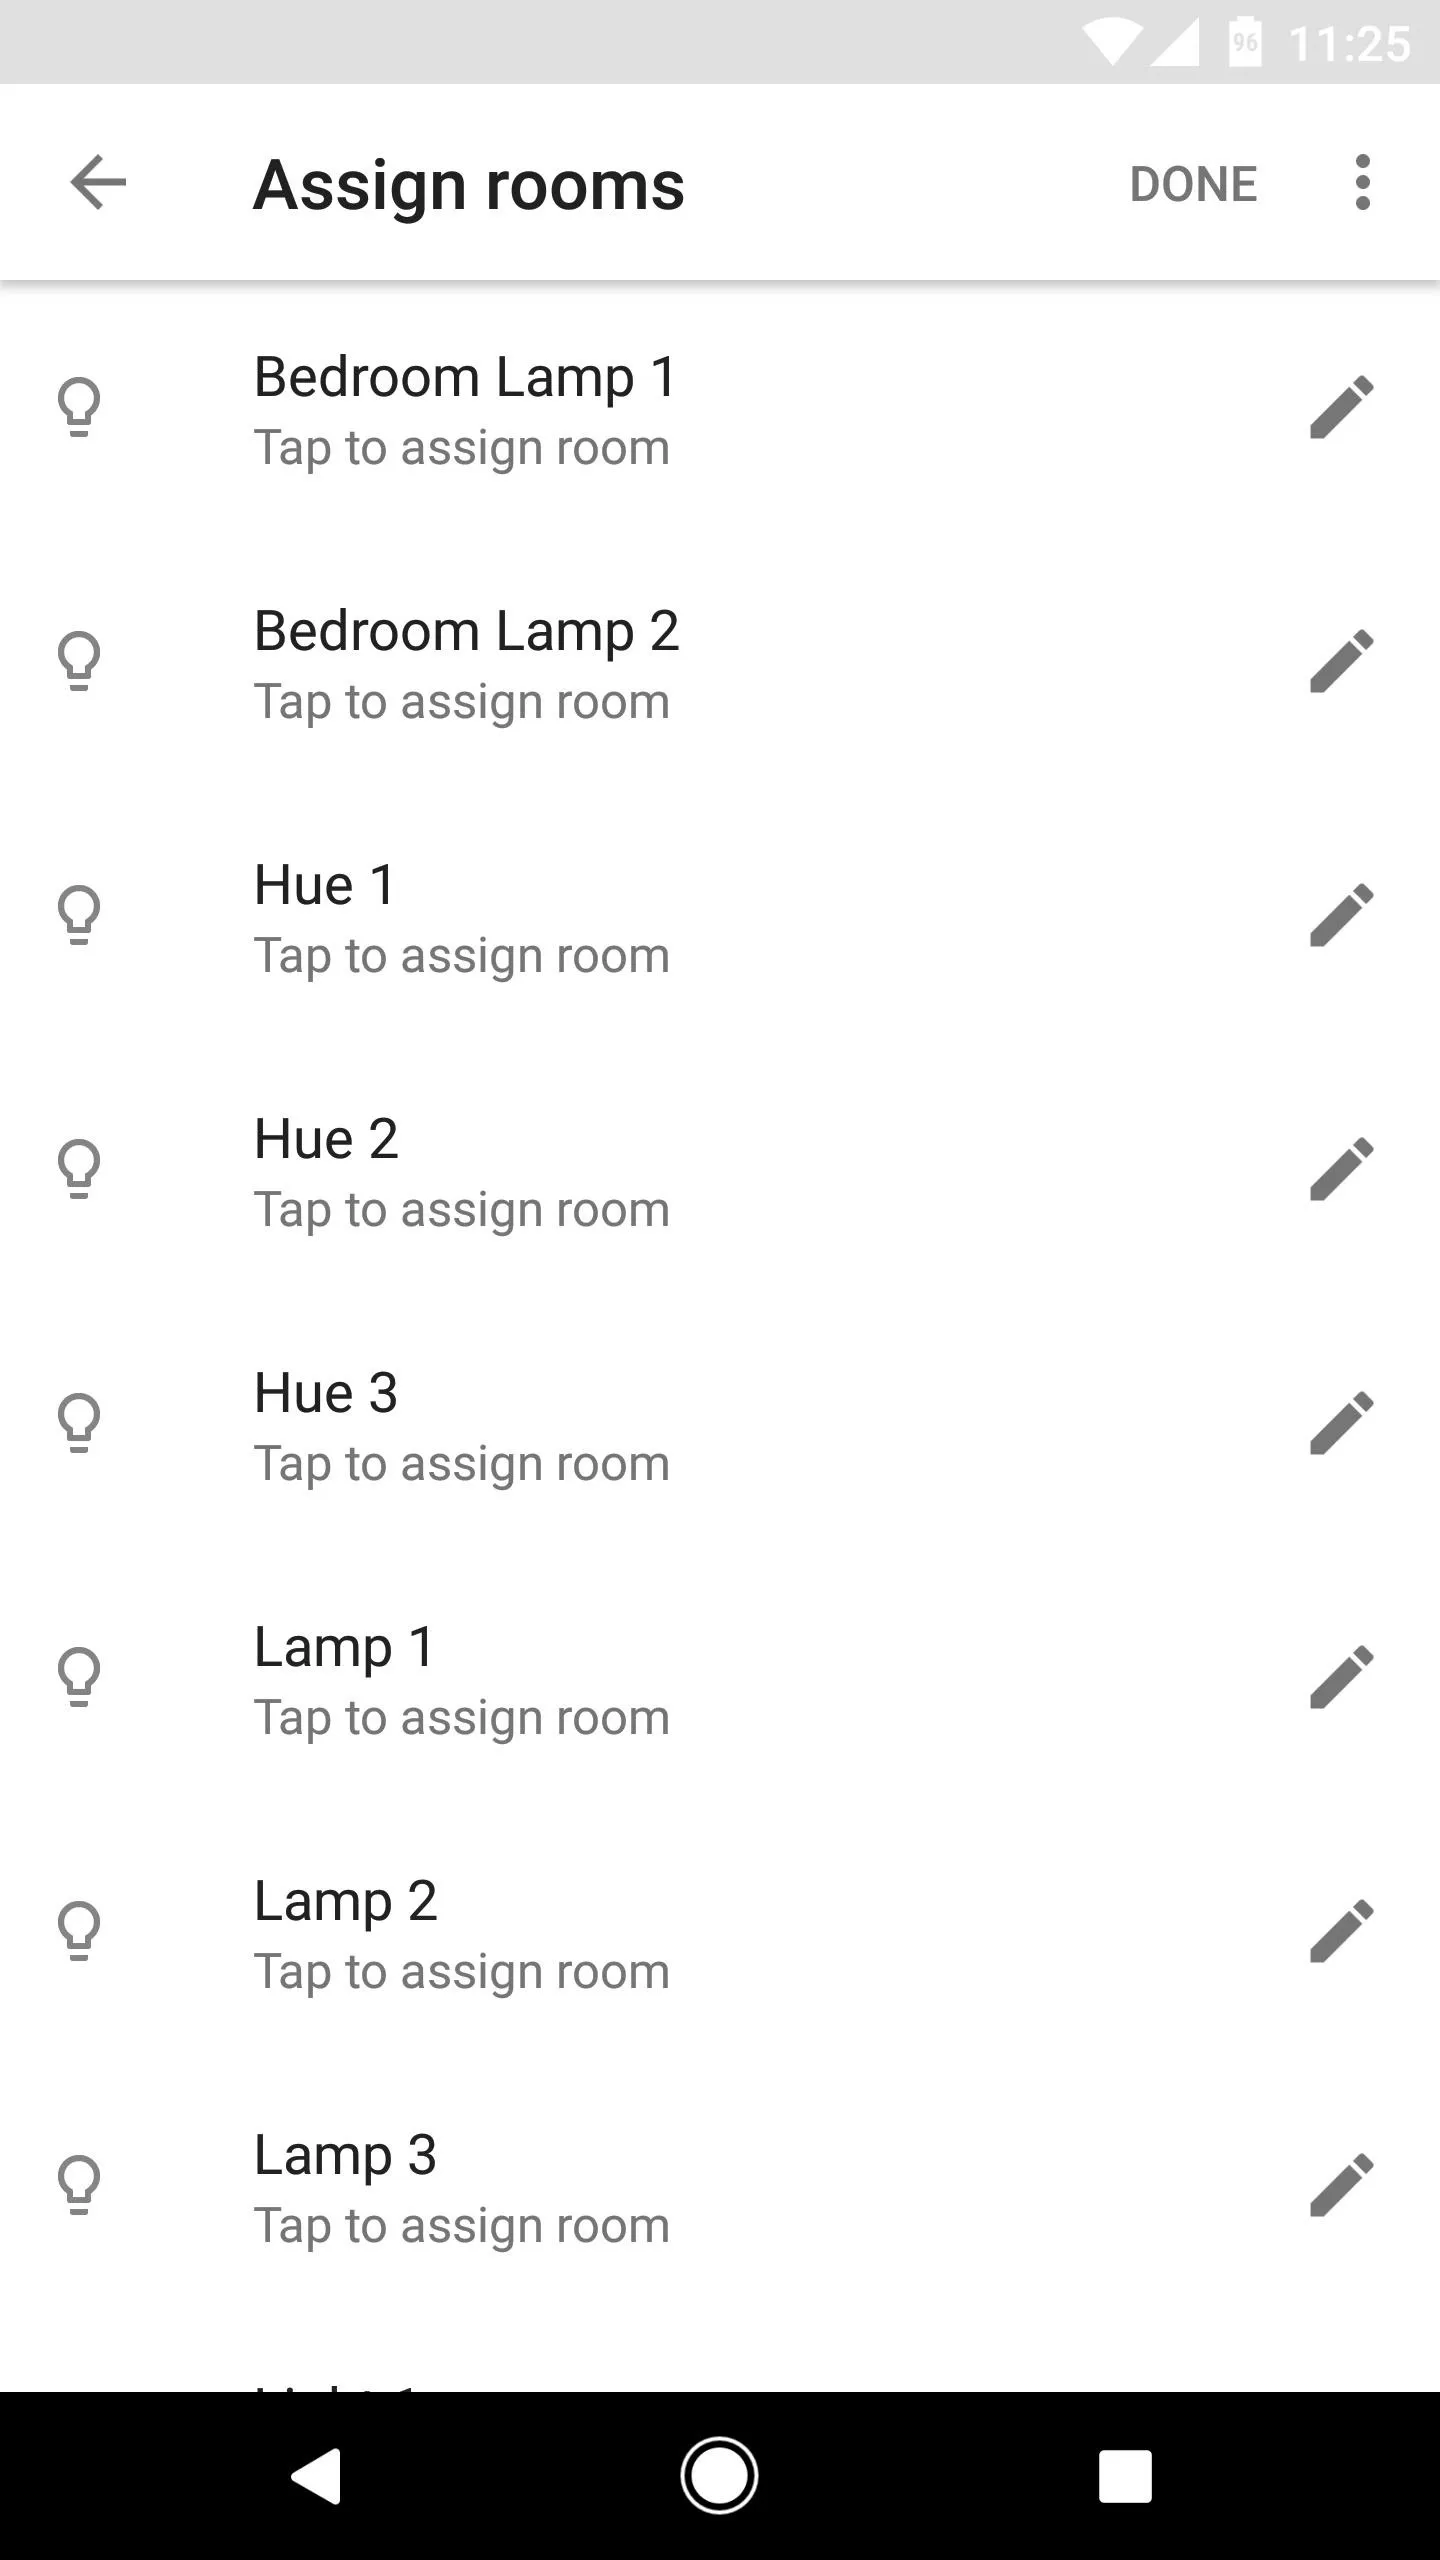
Immediately after you've paired your smart device(s) with Google Assistant, you'll be prompted to associate rooms with each device. This will be used to differentiate multiple devices when issuing voice commands — for example, "Turn off the bedroom lights" versus "Turn off the kitchen lights."
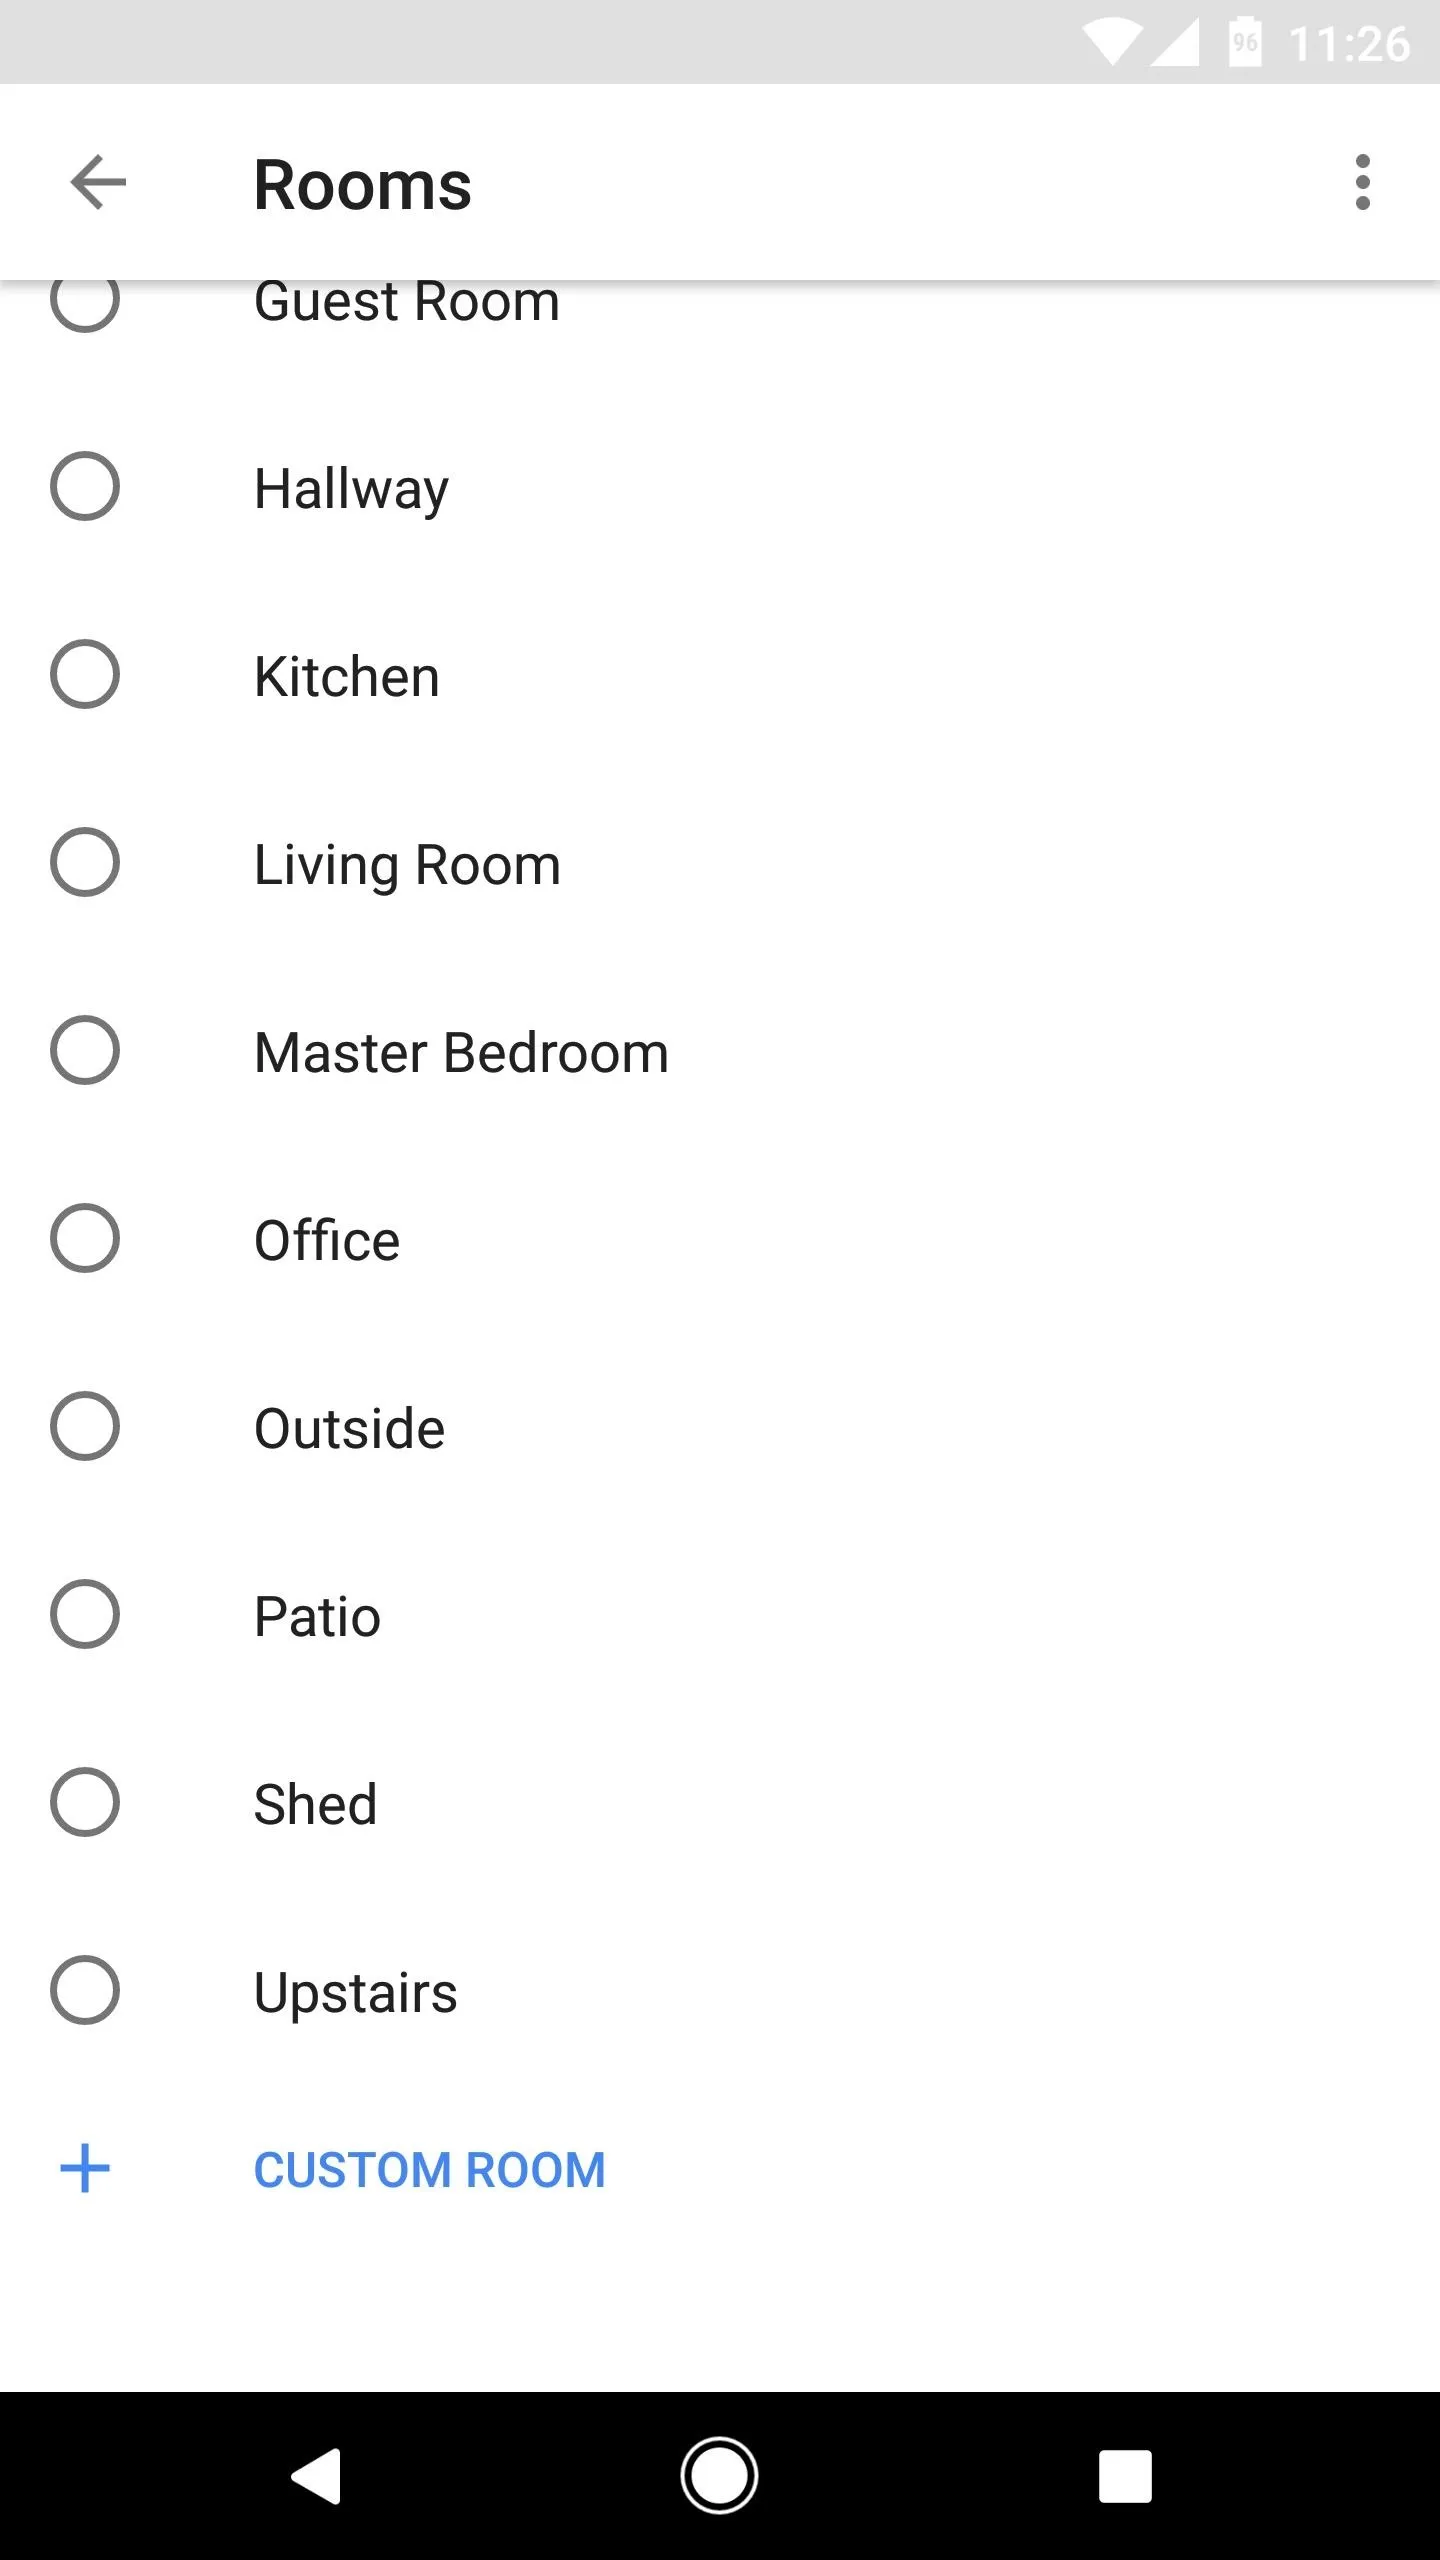
So tap the name of each device in the list, then choose a room on the following screen. Most common rooms names are provided by default, but if you want to put a device into a room that isn't listed, you can tap "Custom Room" at the bottom of the screen and enter a room name manually.
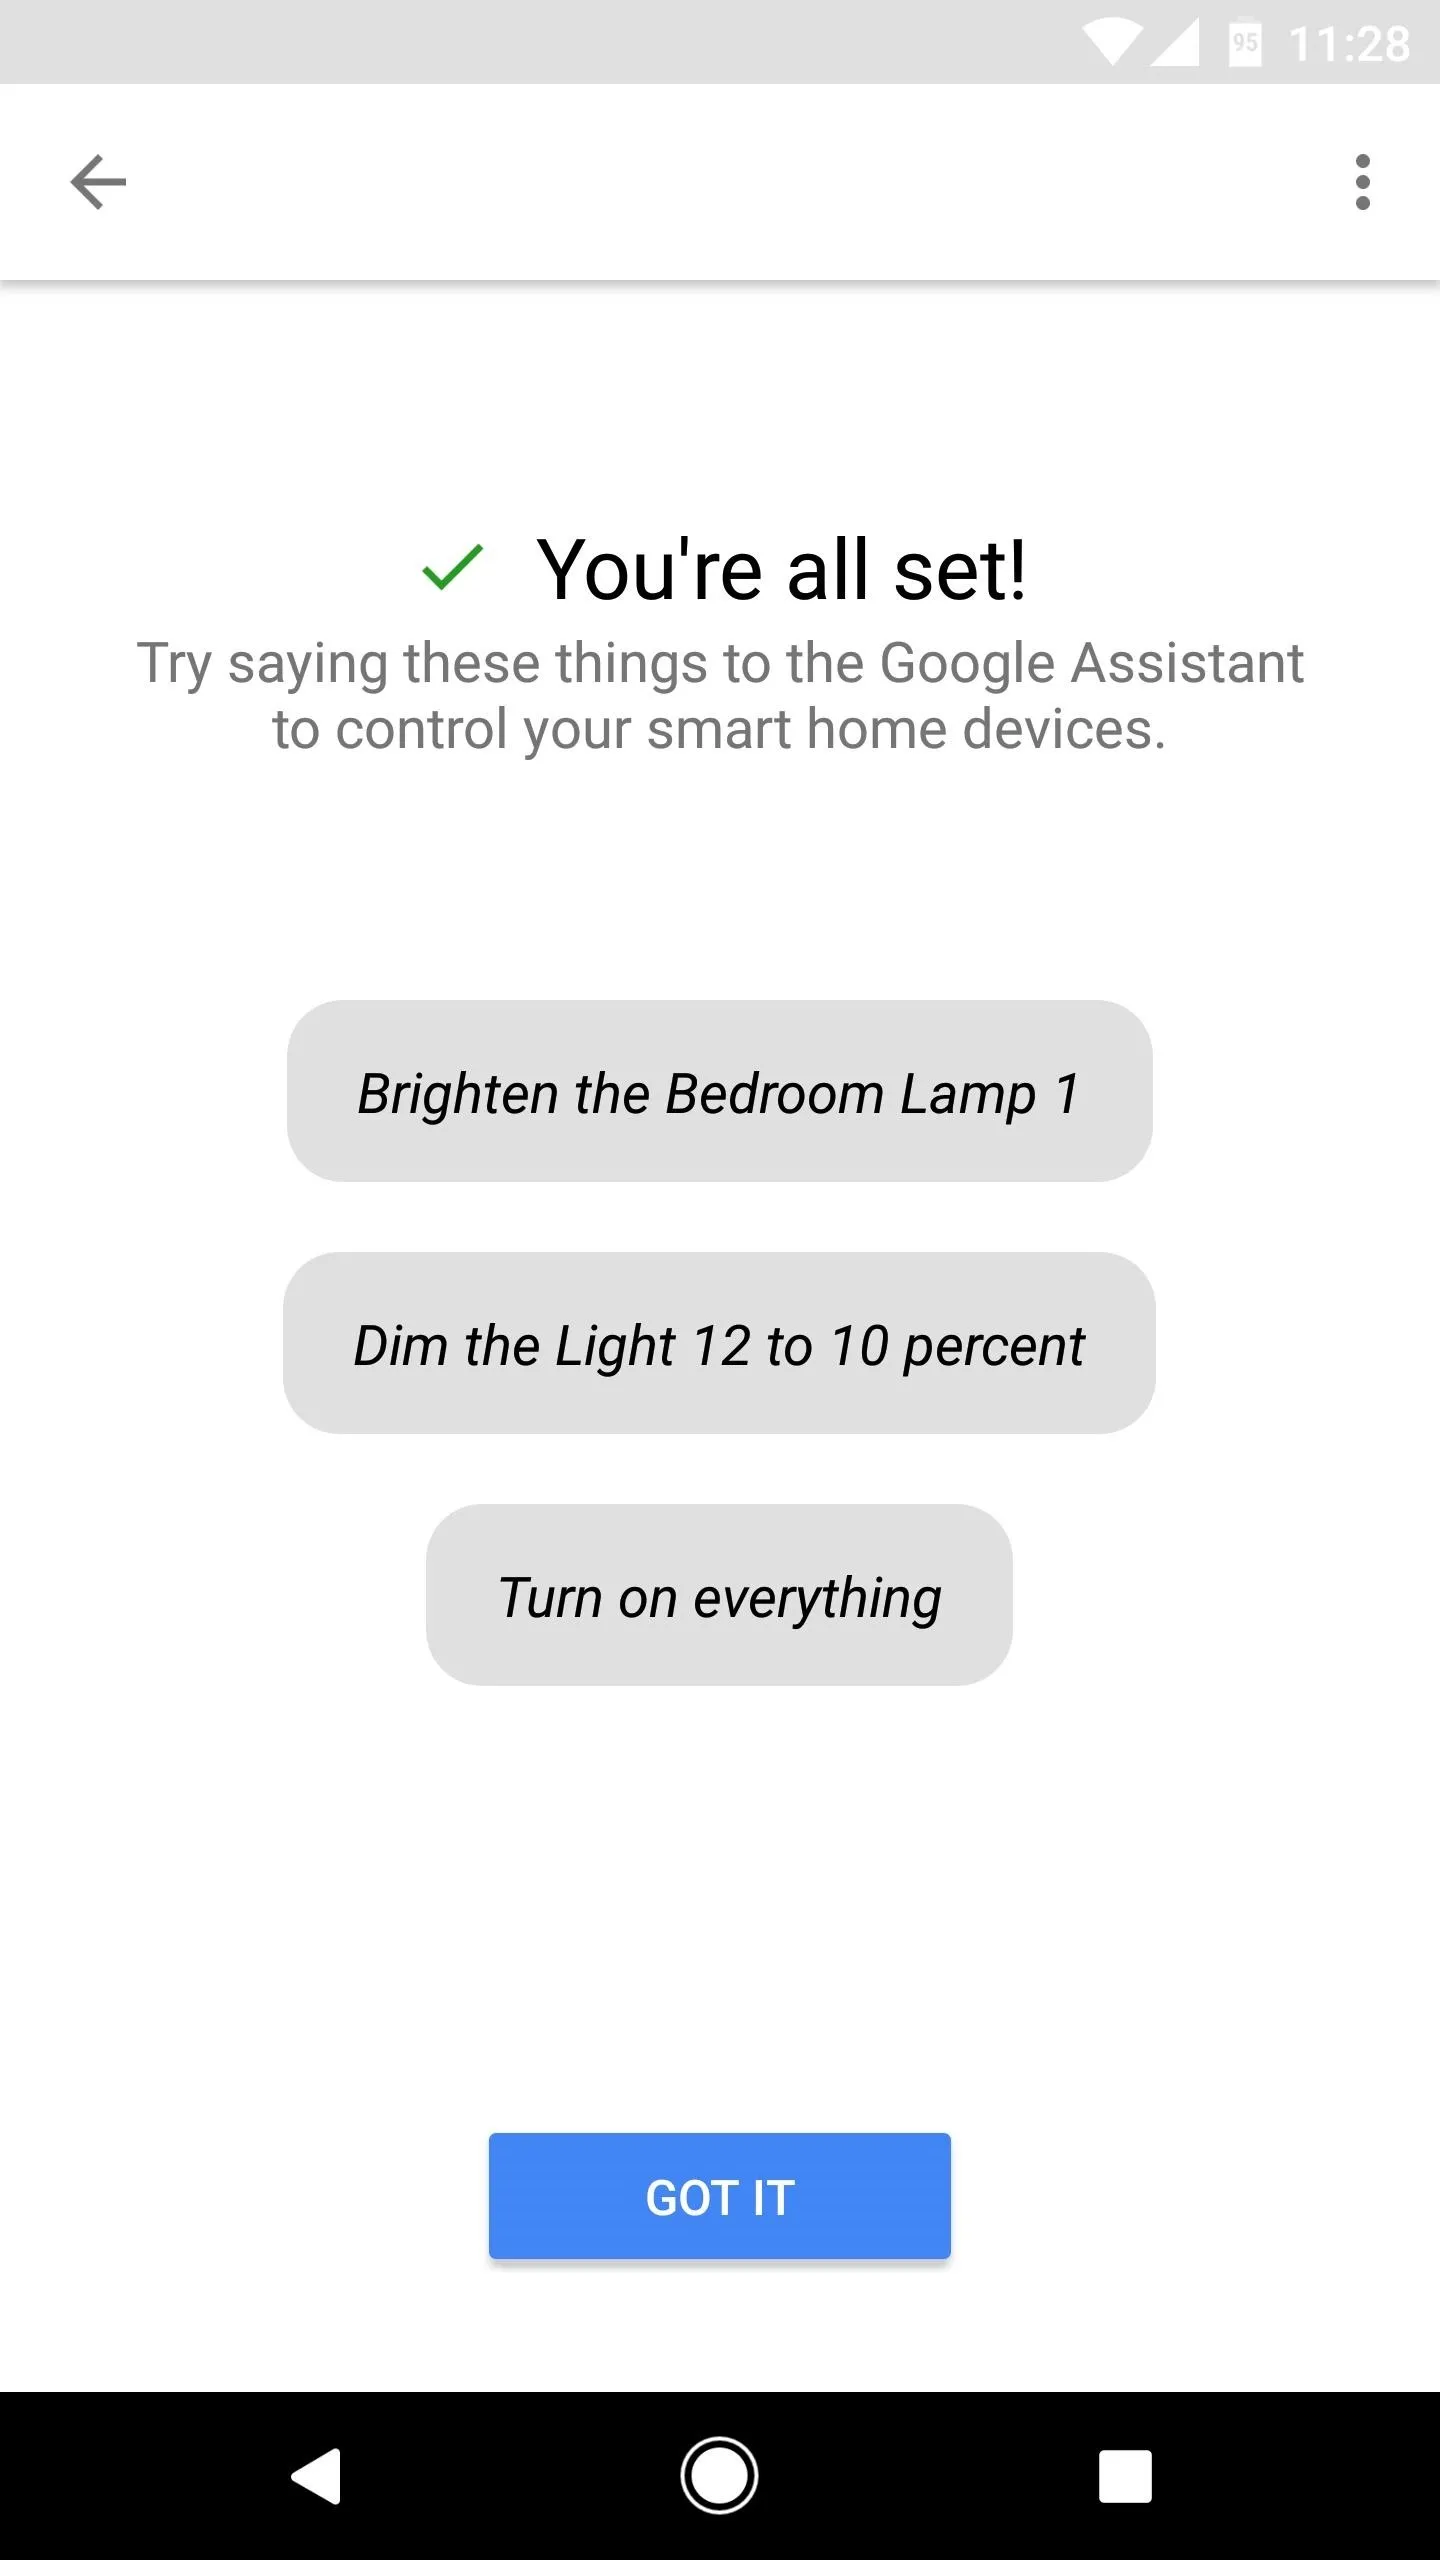
When you have each of the devices assigned to their appropriate rooms, make sure to tap the "Done" button at the top of the screen. At this point, you may see an error message, but if that happens, just tap "Done" again. When you make it to the You're all set! screen, that means the devices have been assigned to rooms successfully.
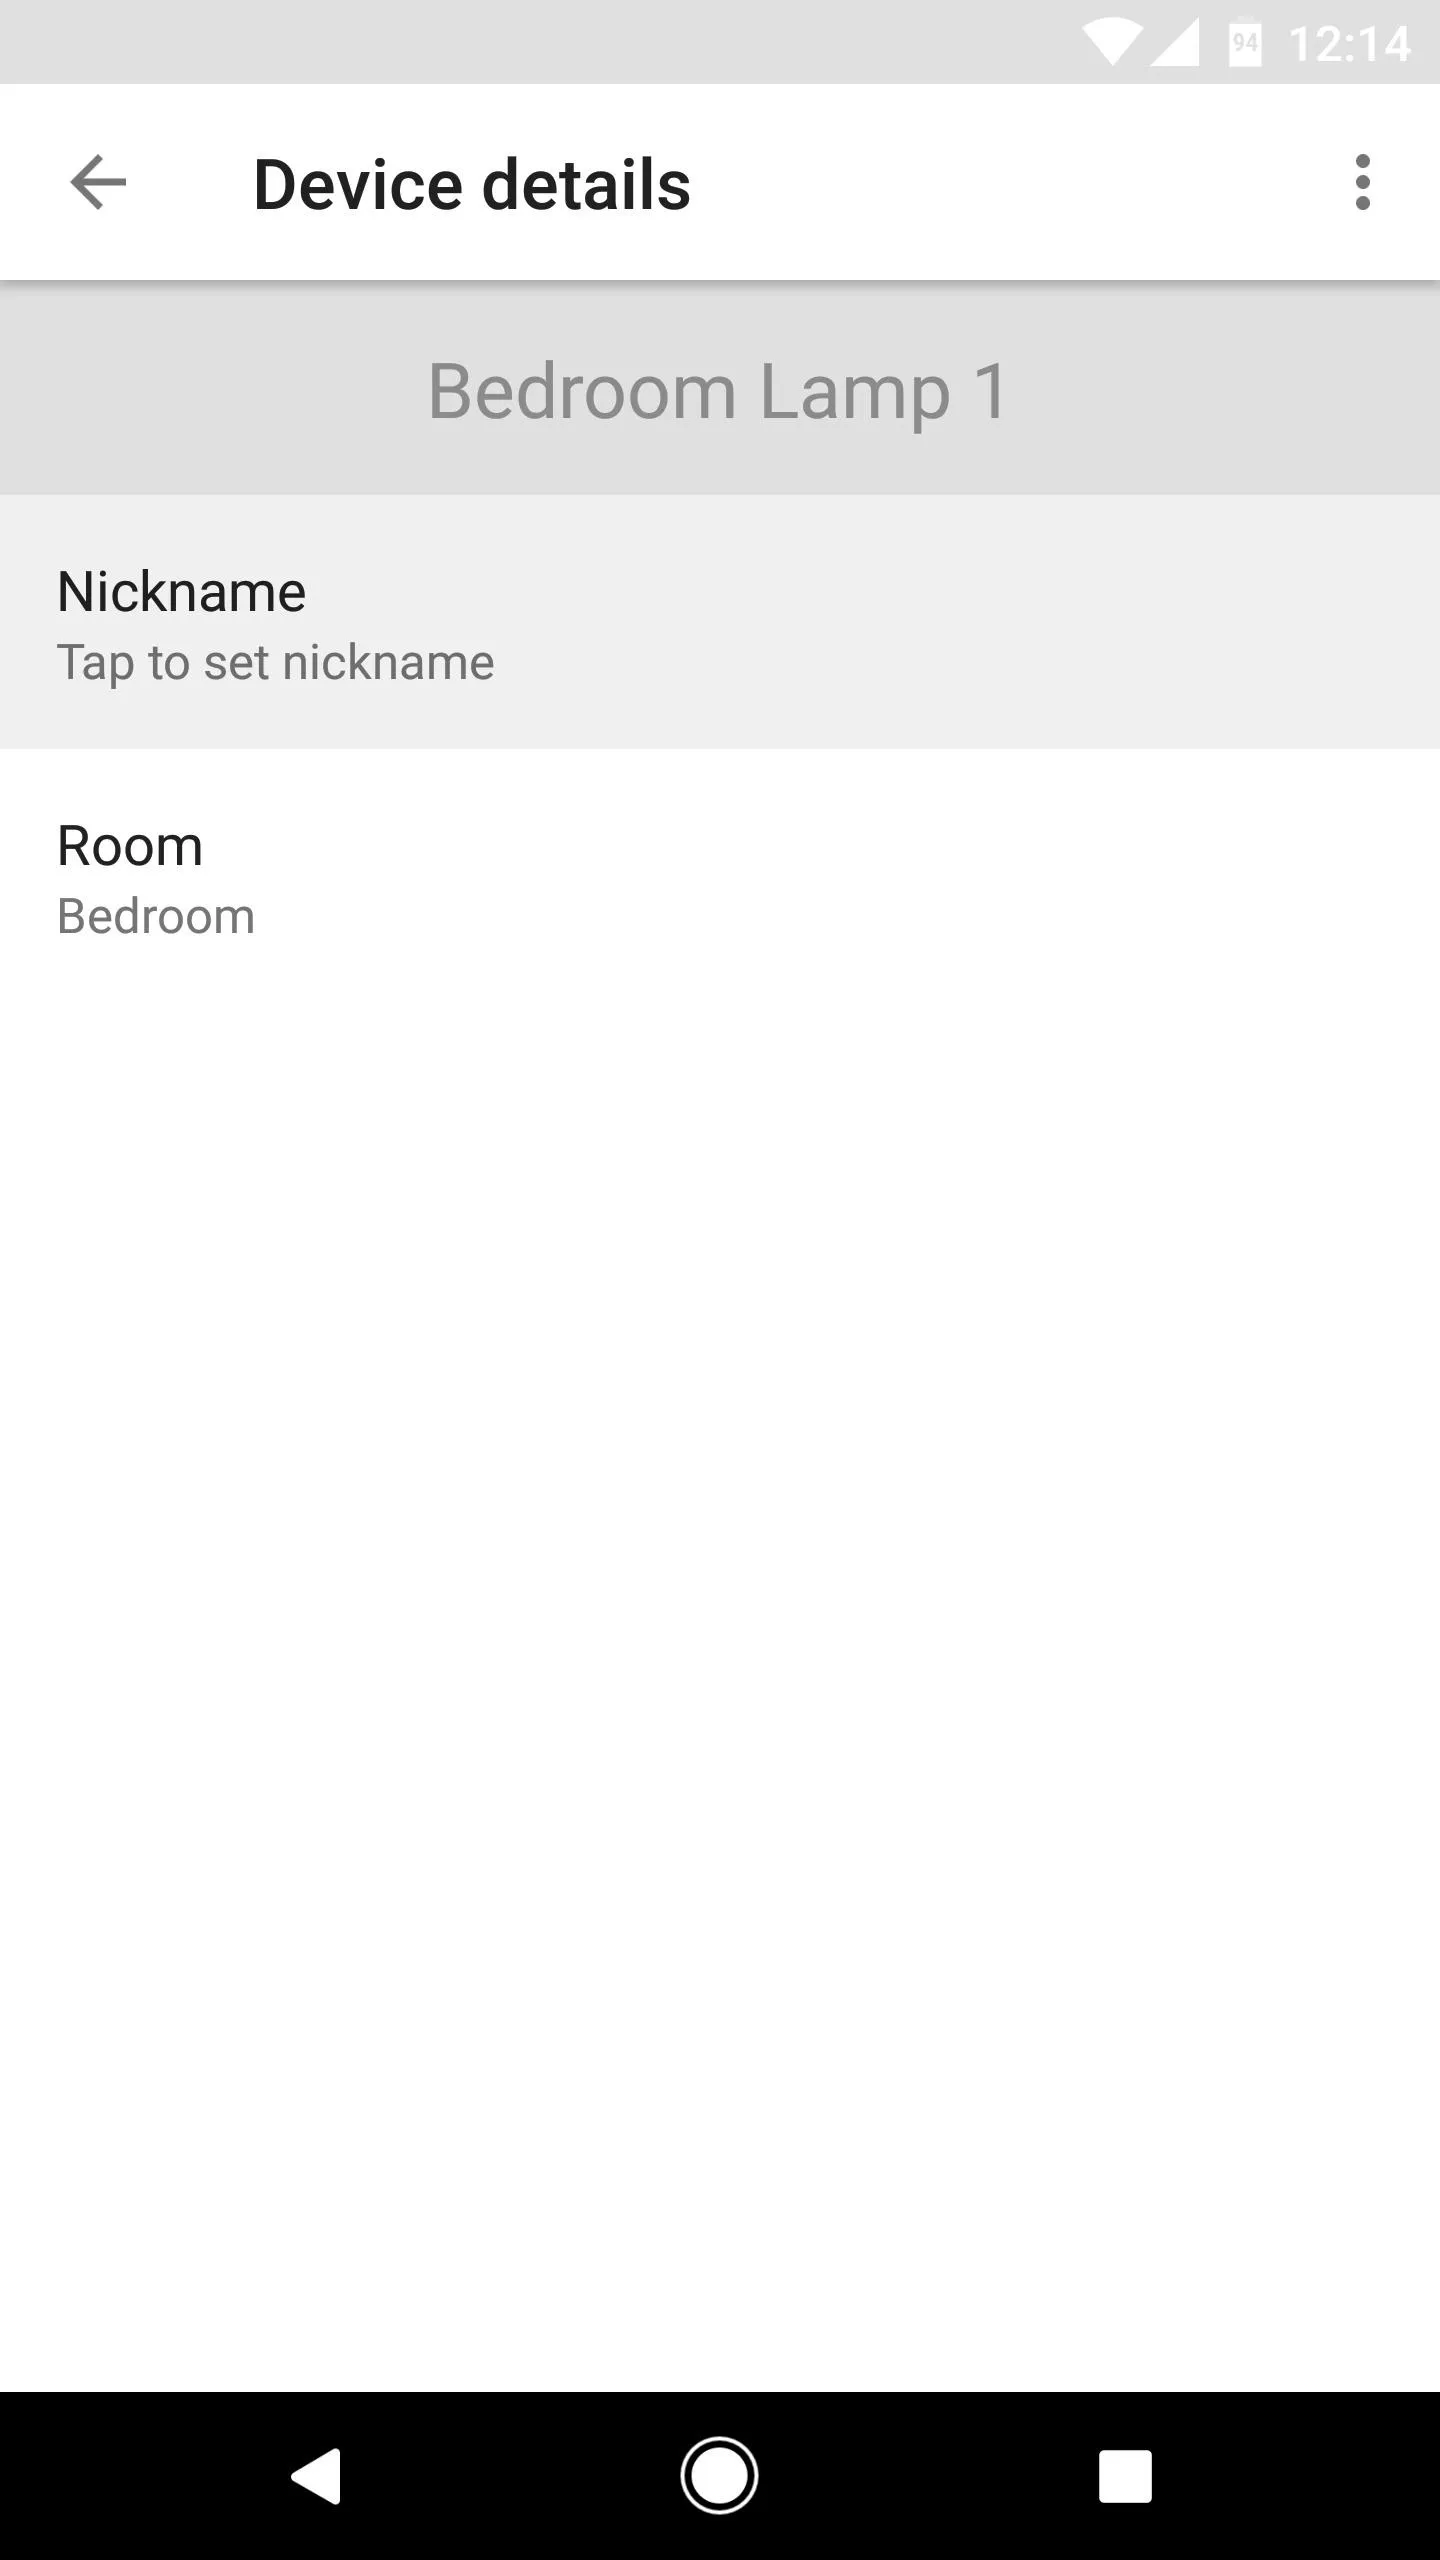
Assign Nicknames to Your Devices
As it stands, you'll be able to control the devices you've added by using the names that were imported from the service you connected in Step 2. However, depending on your setup, these might not be the most user-friendly names, so Google came up with a solution: Nicknames.
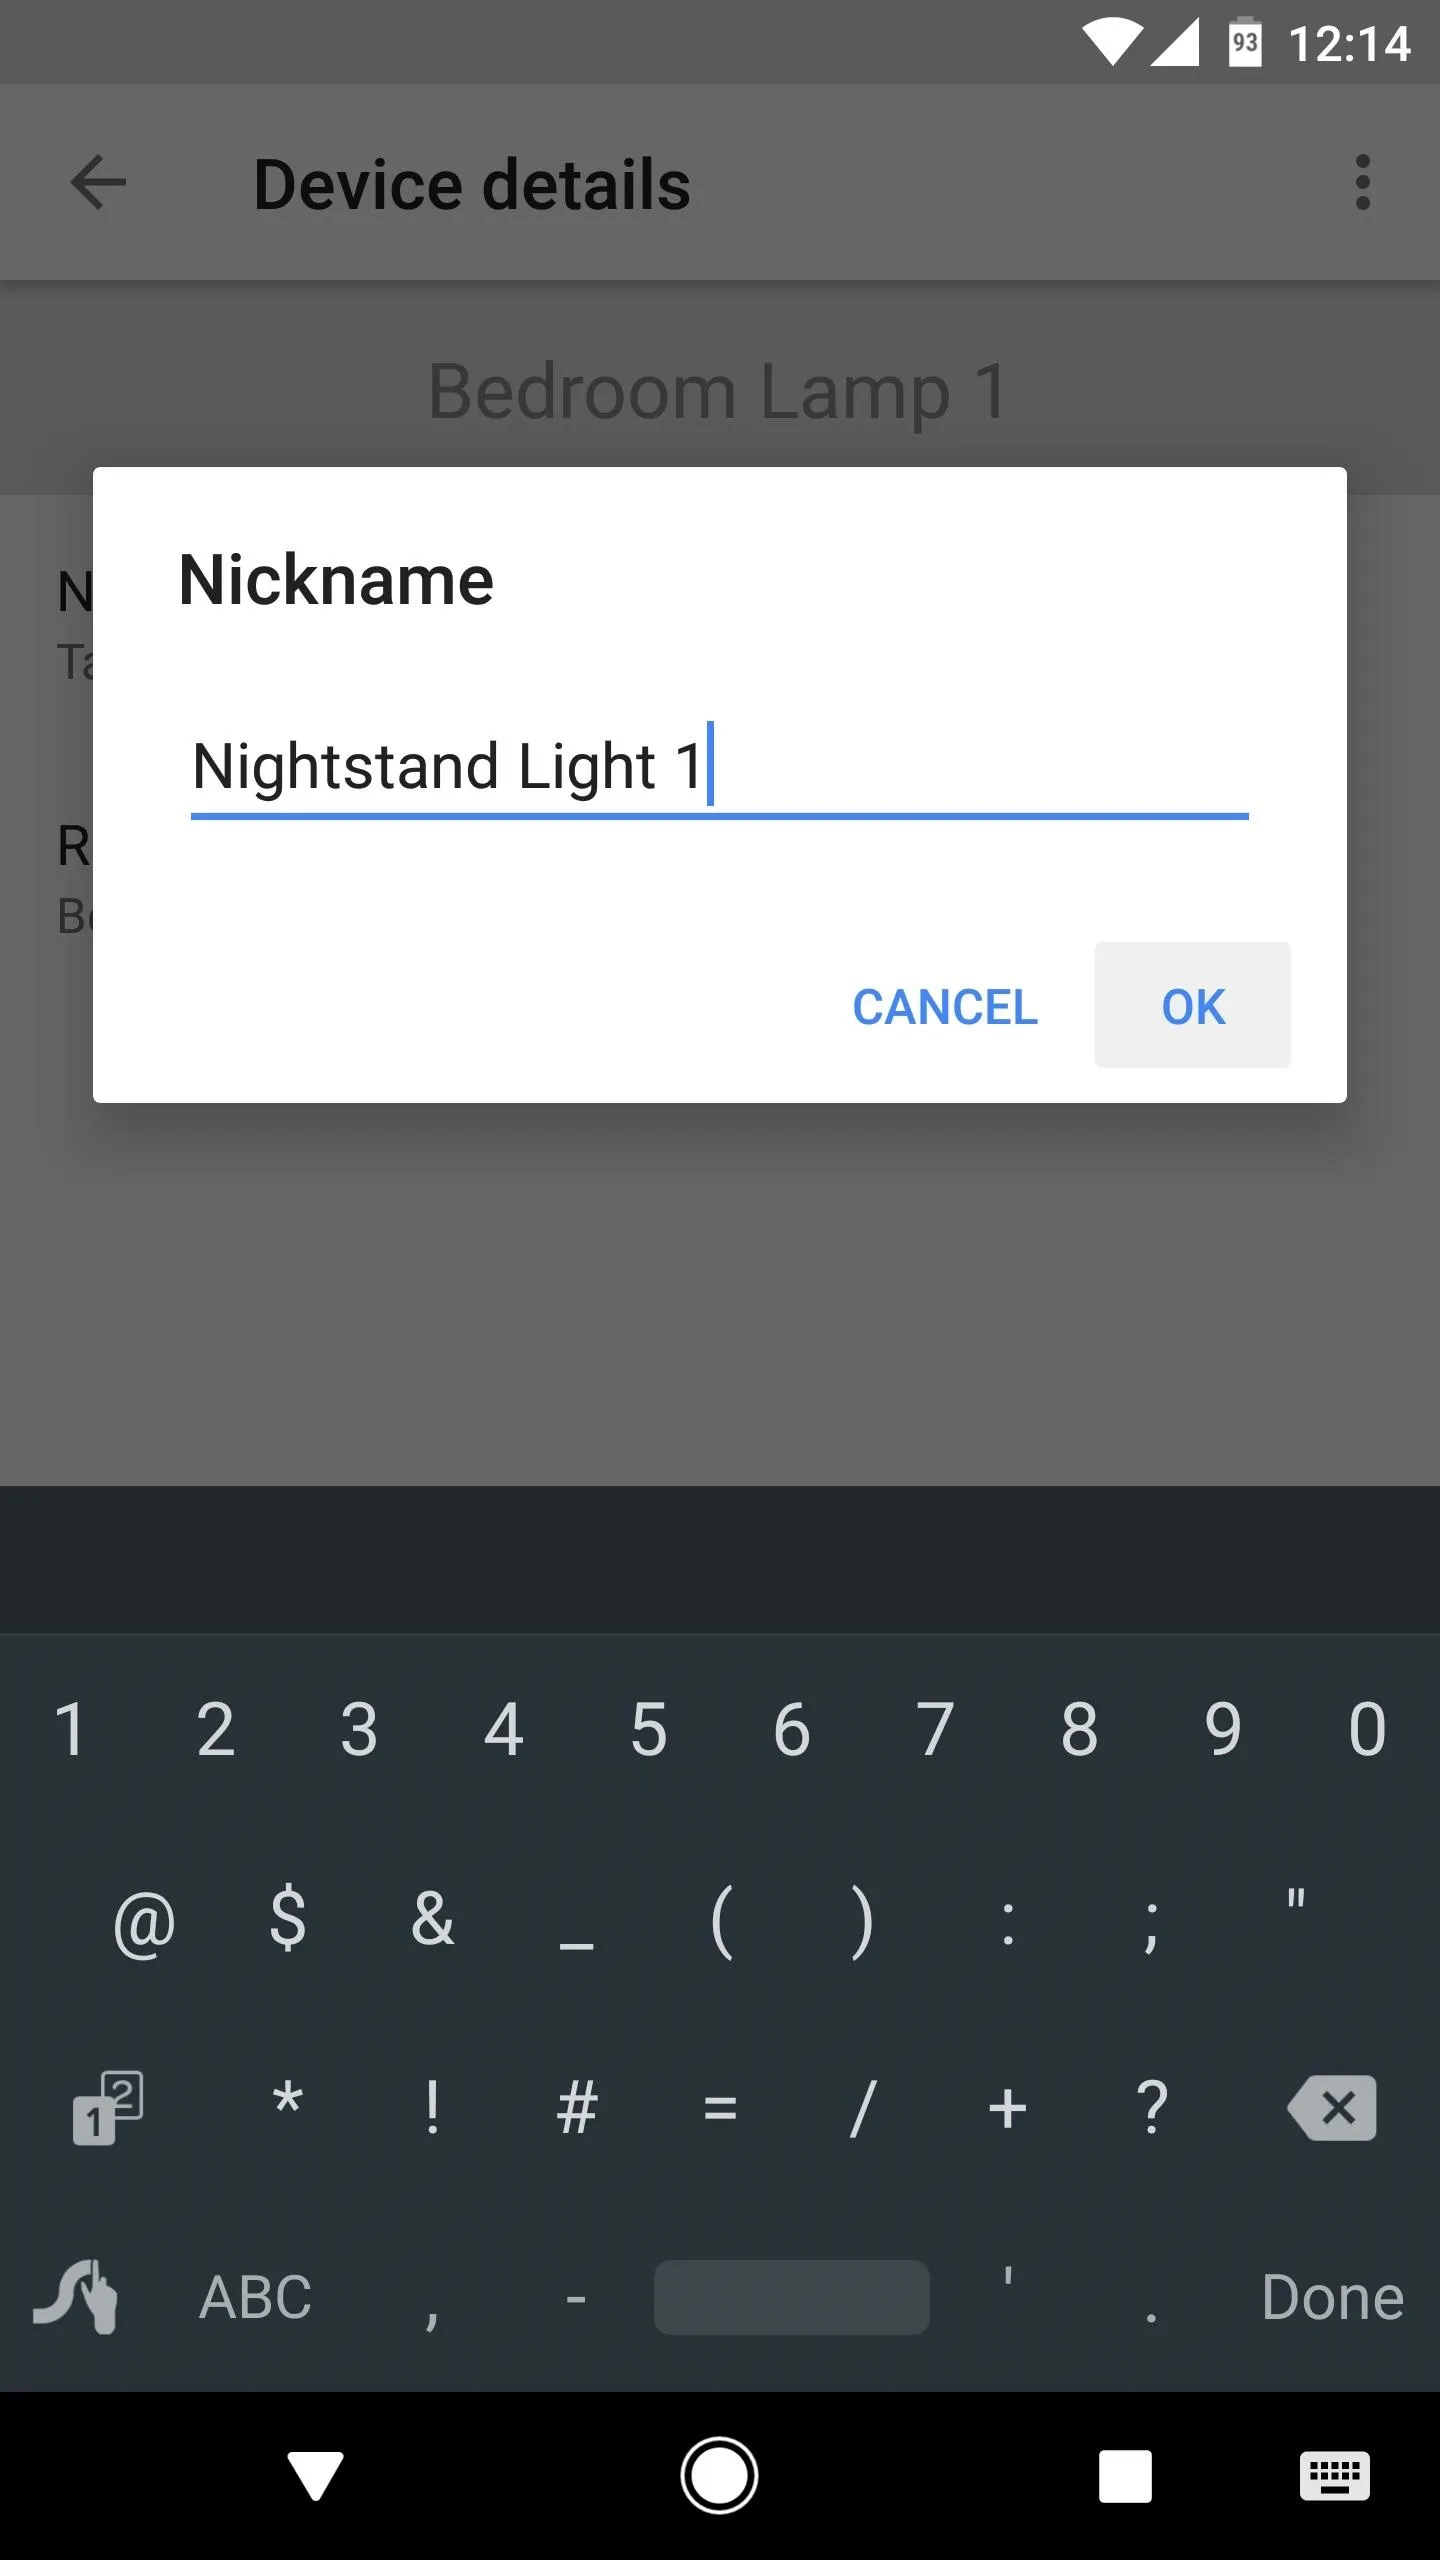
So to give your devices a second name that can be used in voice commands interchangeably, head to the Home control menu as depicted in Step 1, then tap each device one-by-one. From here, select "Nickname," then enter a more appropriate name into the field and press "OK."

Control Your Smart Home by Voice
At this point, you're ready to control your smart home devices by voice. To start, just say "OK Google" or tap the microphone button, then tell Google Assistant what you want it to do. If you want to turn up your smart thermostat, just say "Set the
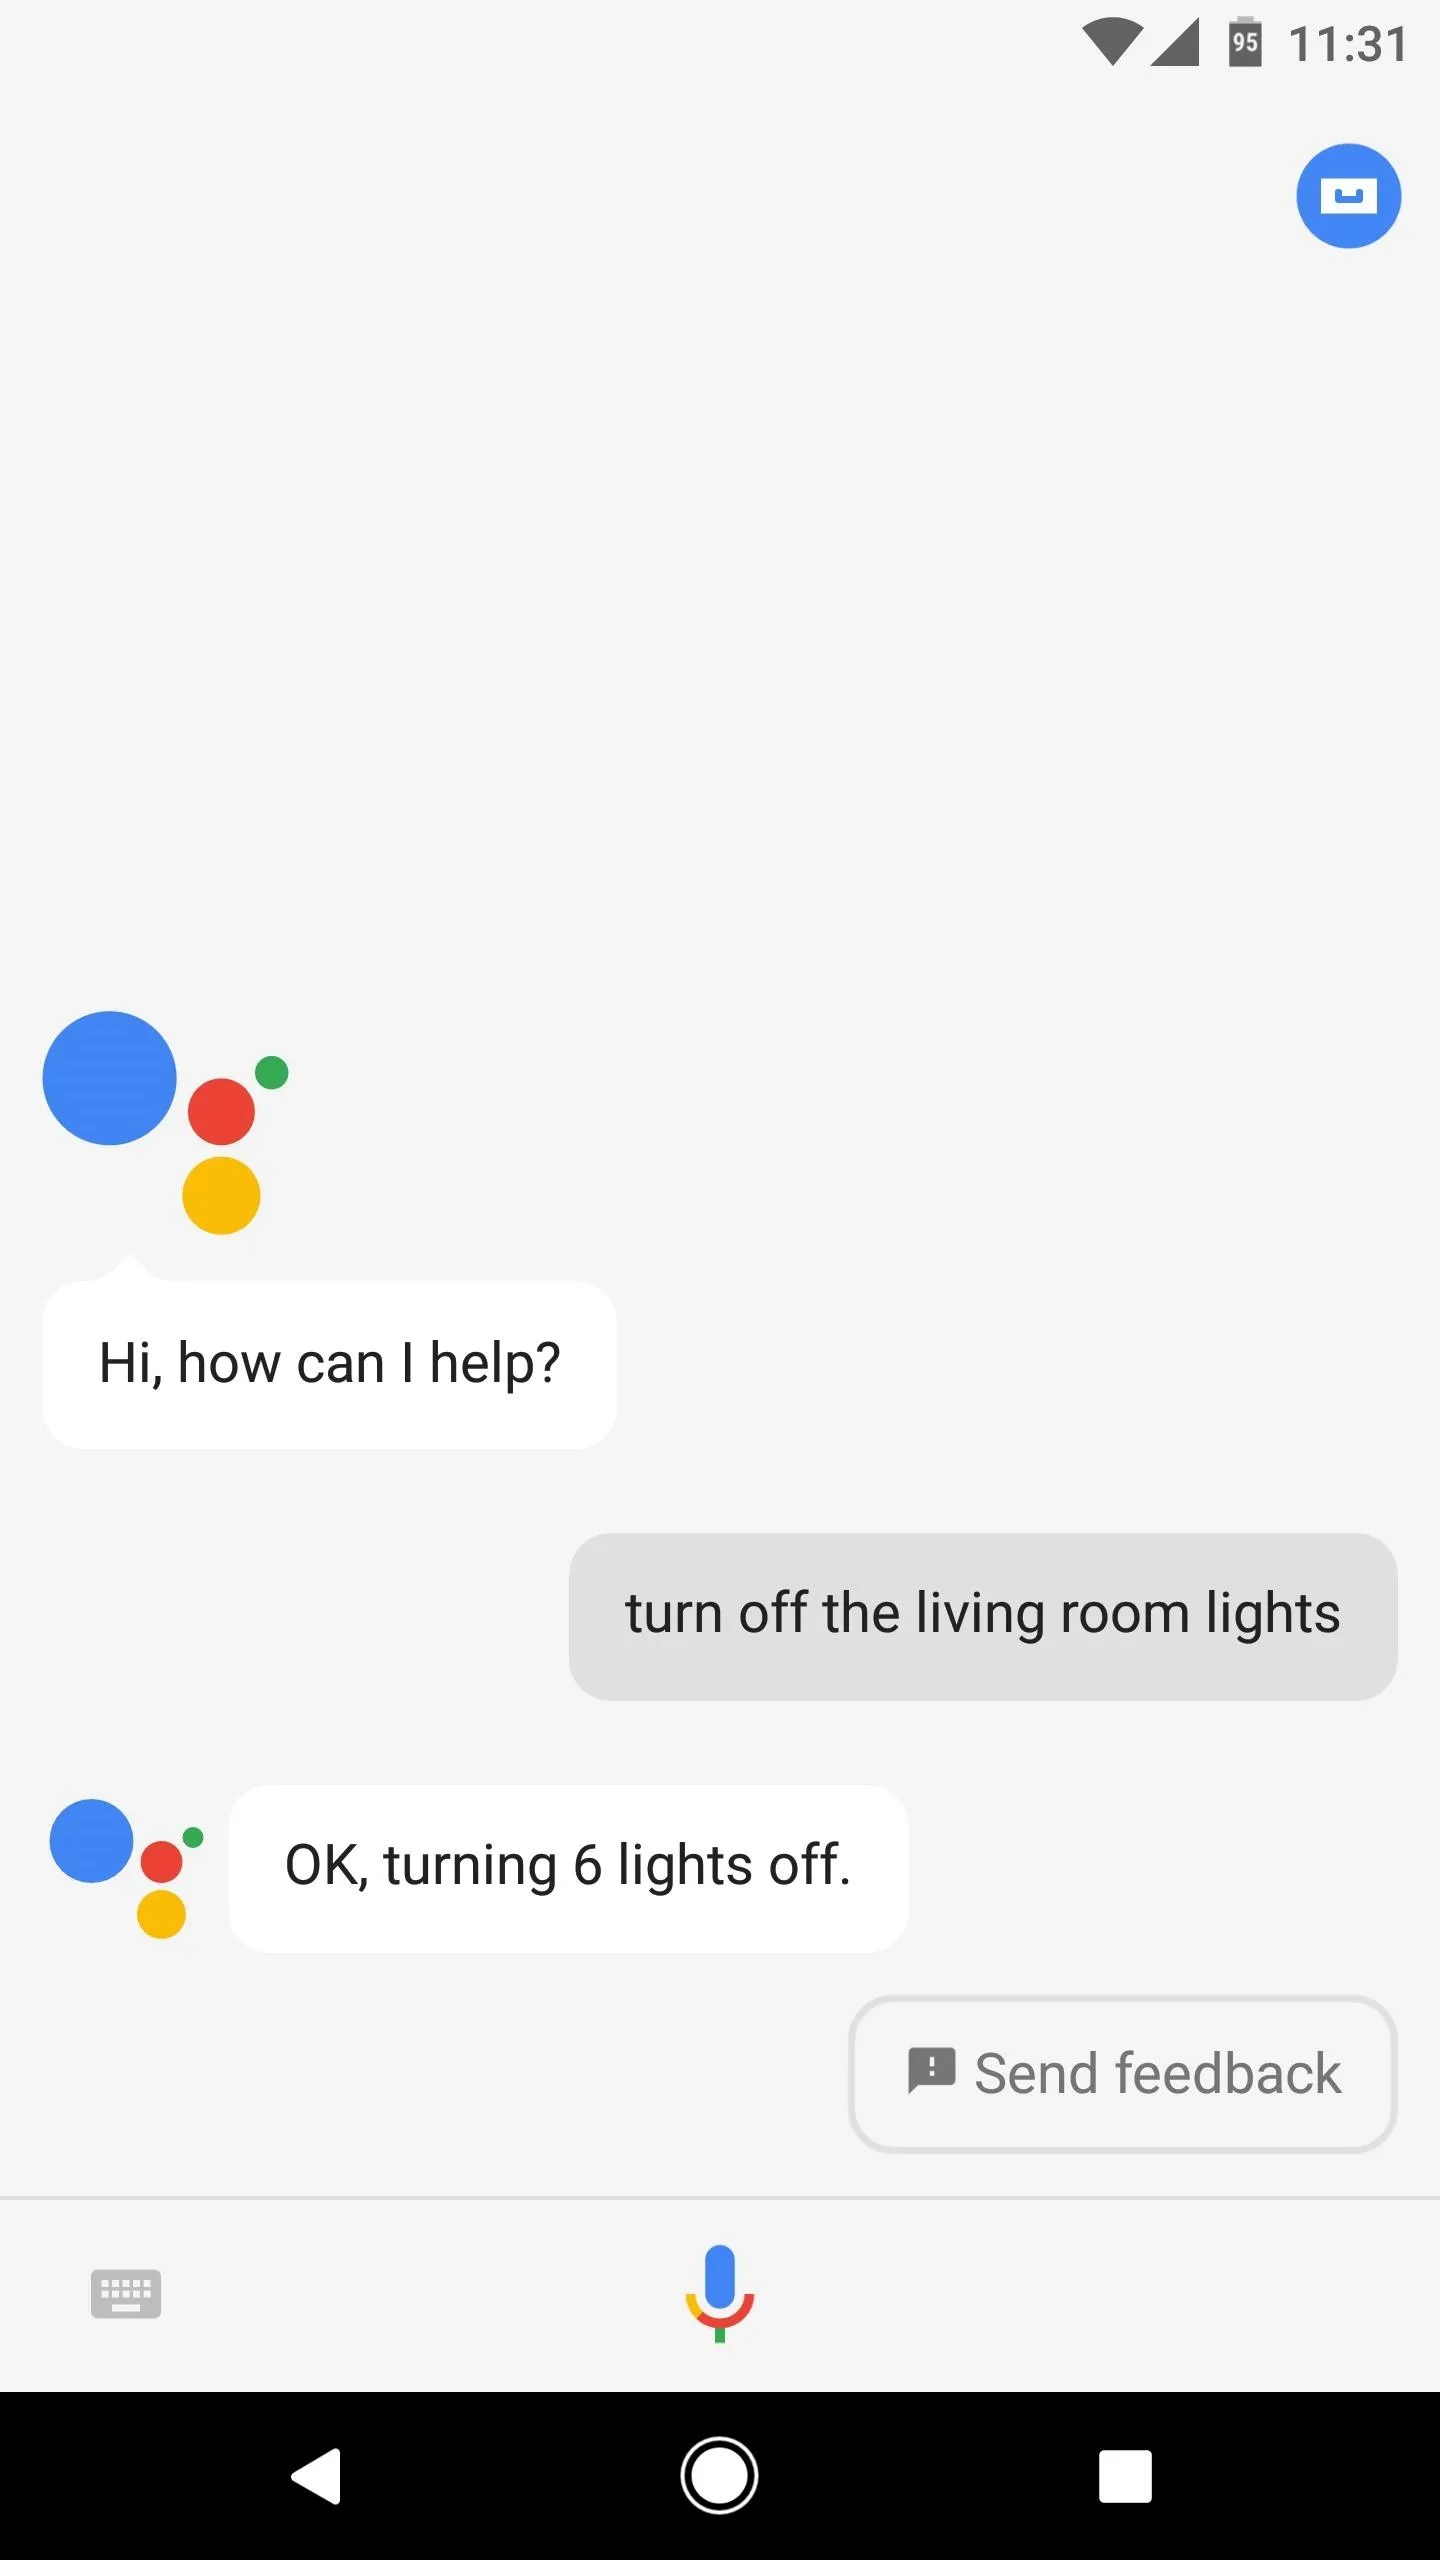
On top of that, you can control all devices in a certain room by saying something along the lines of "Turn off the bedroom" or "Turn the kitchen off." You'll have some leeway with these commands, as Google Assistant is very good at understanding what you mean. In other words, you don't have to say the commands in one exact way, so just talk to your Assistant however you'd like.

If you assigned the same nicknames to more than one of your devices, you can even control individual groups of smart appliances within one room. For instance, I have five smart light bulbs in my bedroom — three in the ceiling fan and two in bedside lamps. Since I nicknamed the lamps as "Nightstand Light 1" and "Nightstand Light 2," I can simply say "Turn off the nightstand lights," and the Assistant will only turn off the two lamps rather than all bedroom lights.
So ultimately, you can control smart devices based on the room, the device name, or the nickname(s), which means that there's a lot of flexibility in terms of what you can say to the Assistant. How has your smart home adventure gone so far? Tell us about it in the comment section below.
- Follow Gadget Hacks on Facebook, Twitter, Google+, YouTube, and Instagram
- Follow WonderHowTo on Facebook, Twitter, Pinterest, and Google+
Cover image and screenshots by Dallas Thomas/Gadget Hacks


Comments
Be the first, drop a comment!