Google Maps tracks everywhere you go with your smartphone, even when you're not using the app. Even if it's as mundane as your weekly grocery trip, Google Maps has it saved for you to see in its Android and iOS apps. And while it's mostly used for recommendations and your reference — you may not want Google Maps to keep such a rich location history.
Location History, as the feature is officially known, allows you to view everywhere you've been. It's perfect for trying to remember that restaurant you visited a few years back when you were out of town, but it's not always a good feeling to know that Google is always tracking you. Plus, if a malicious hacker ever breaks into your smartphone or Google account, they'll be able to track where you've been and where you might be headed next.
- Don't Miss: View & Manage Your Location History on Google Maps to Track Where You've Been & What You Were Doing
Luckily, you can easily go into Google Map's settings on your iPhone or Android phone and completely disable your location history. You can also delete all or chunks of your older location history while only keeping newer information. Even if you're not concerned with Google Maps tracking you, deleting your old location history can be beneficial so that you get better recommendations and tips, especially if you've recently moved.
Access Your Location History in Google Maps
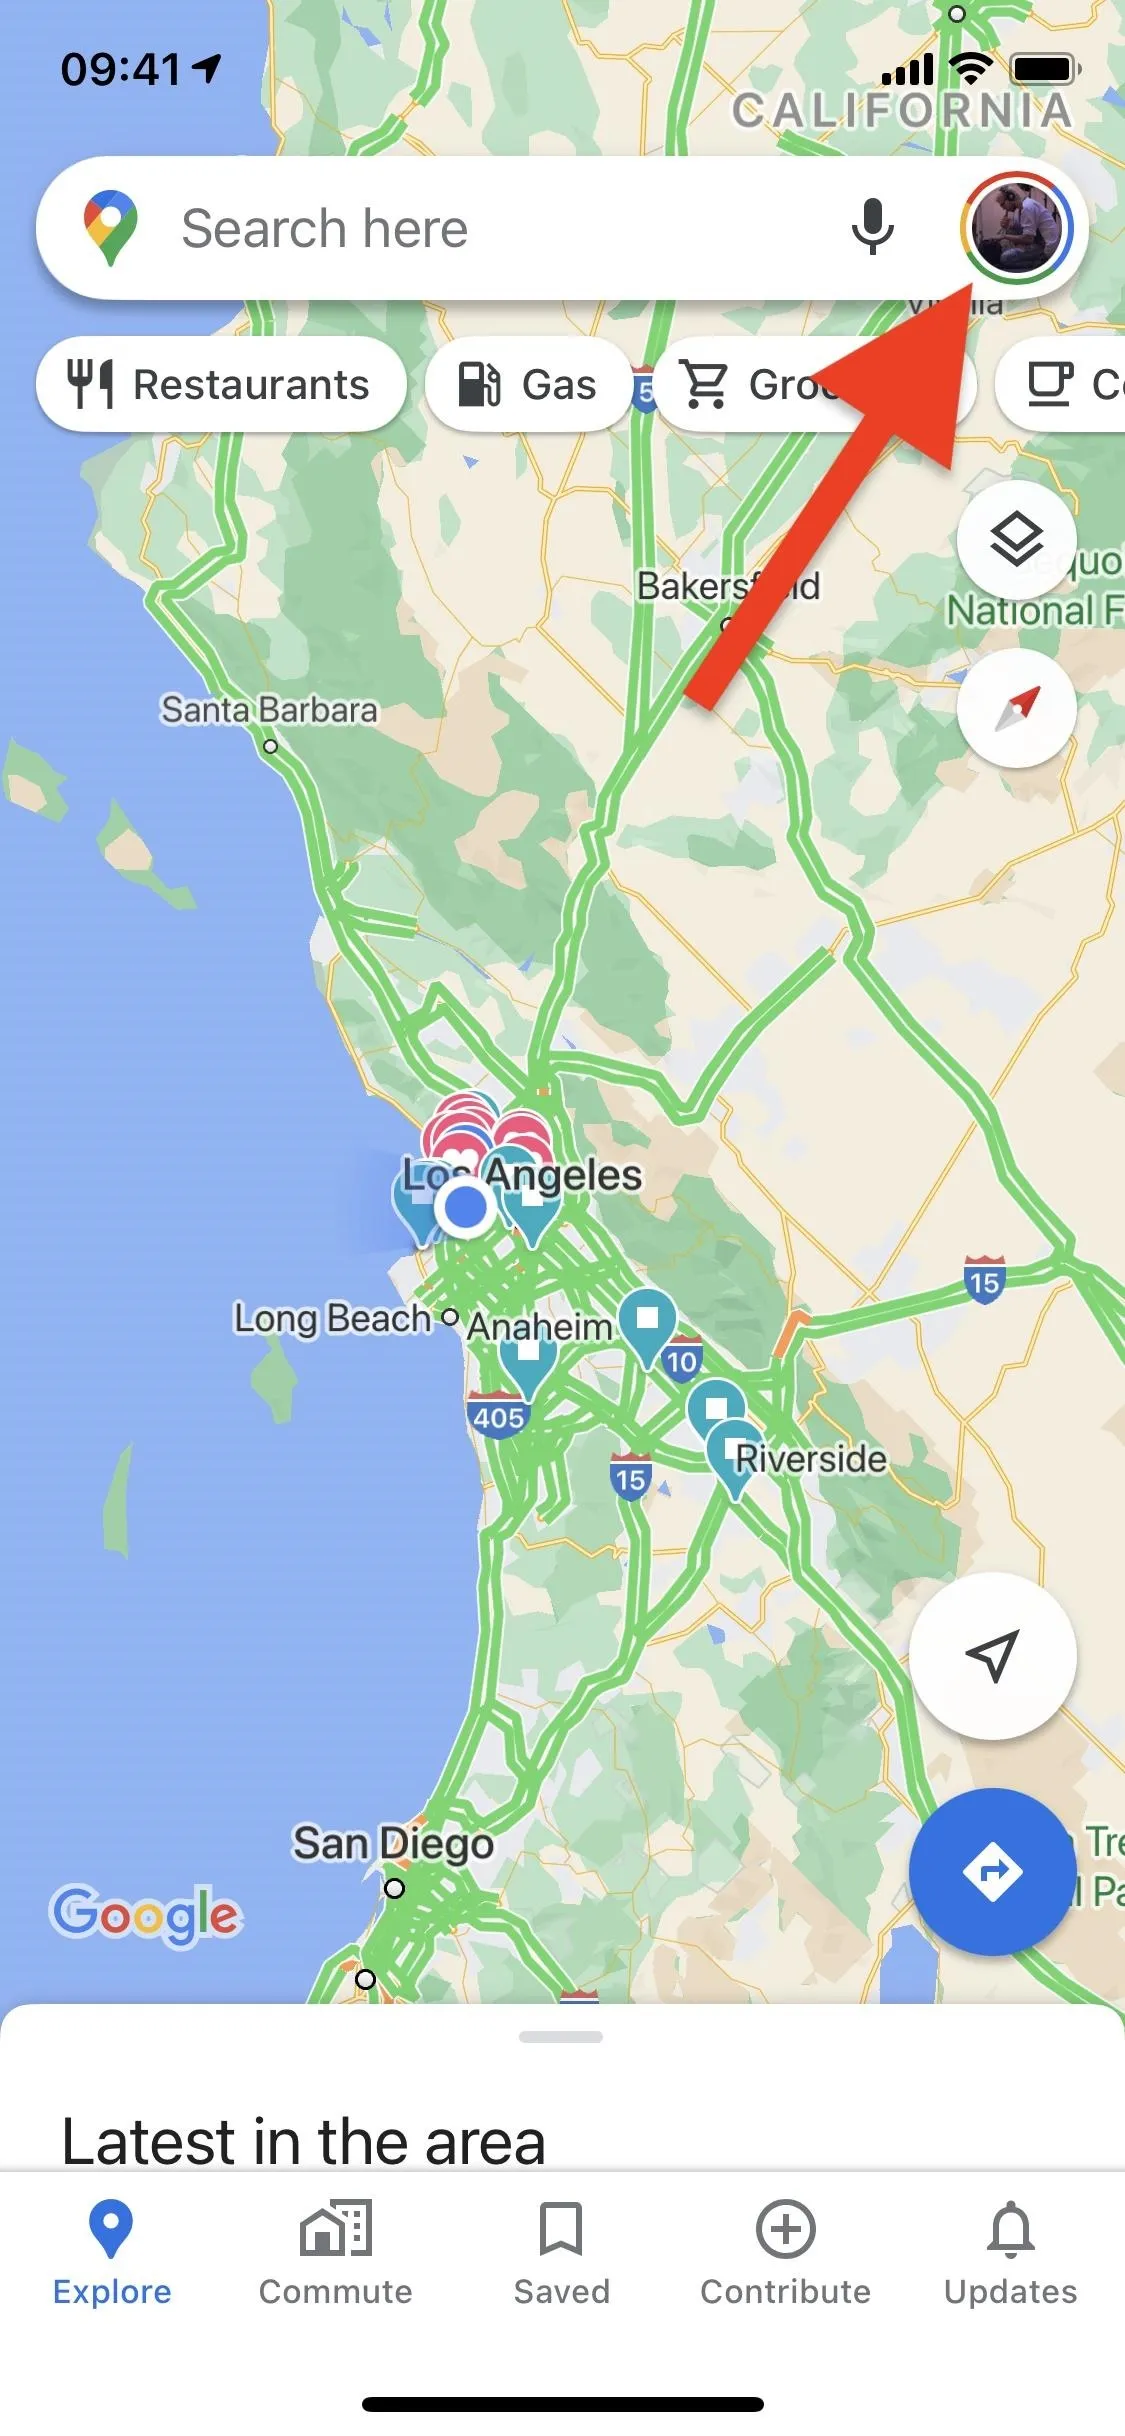
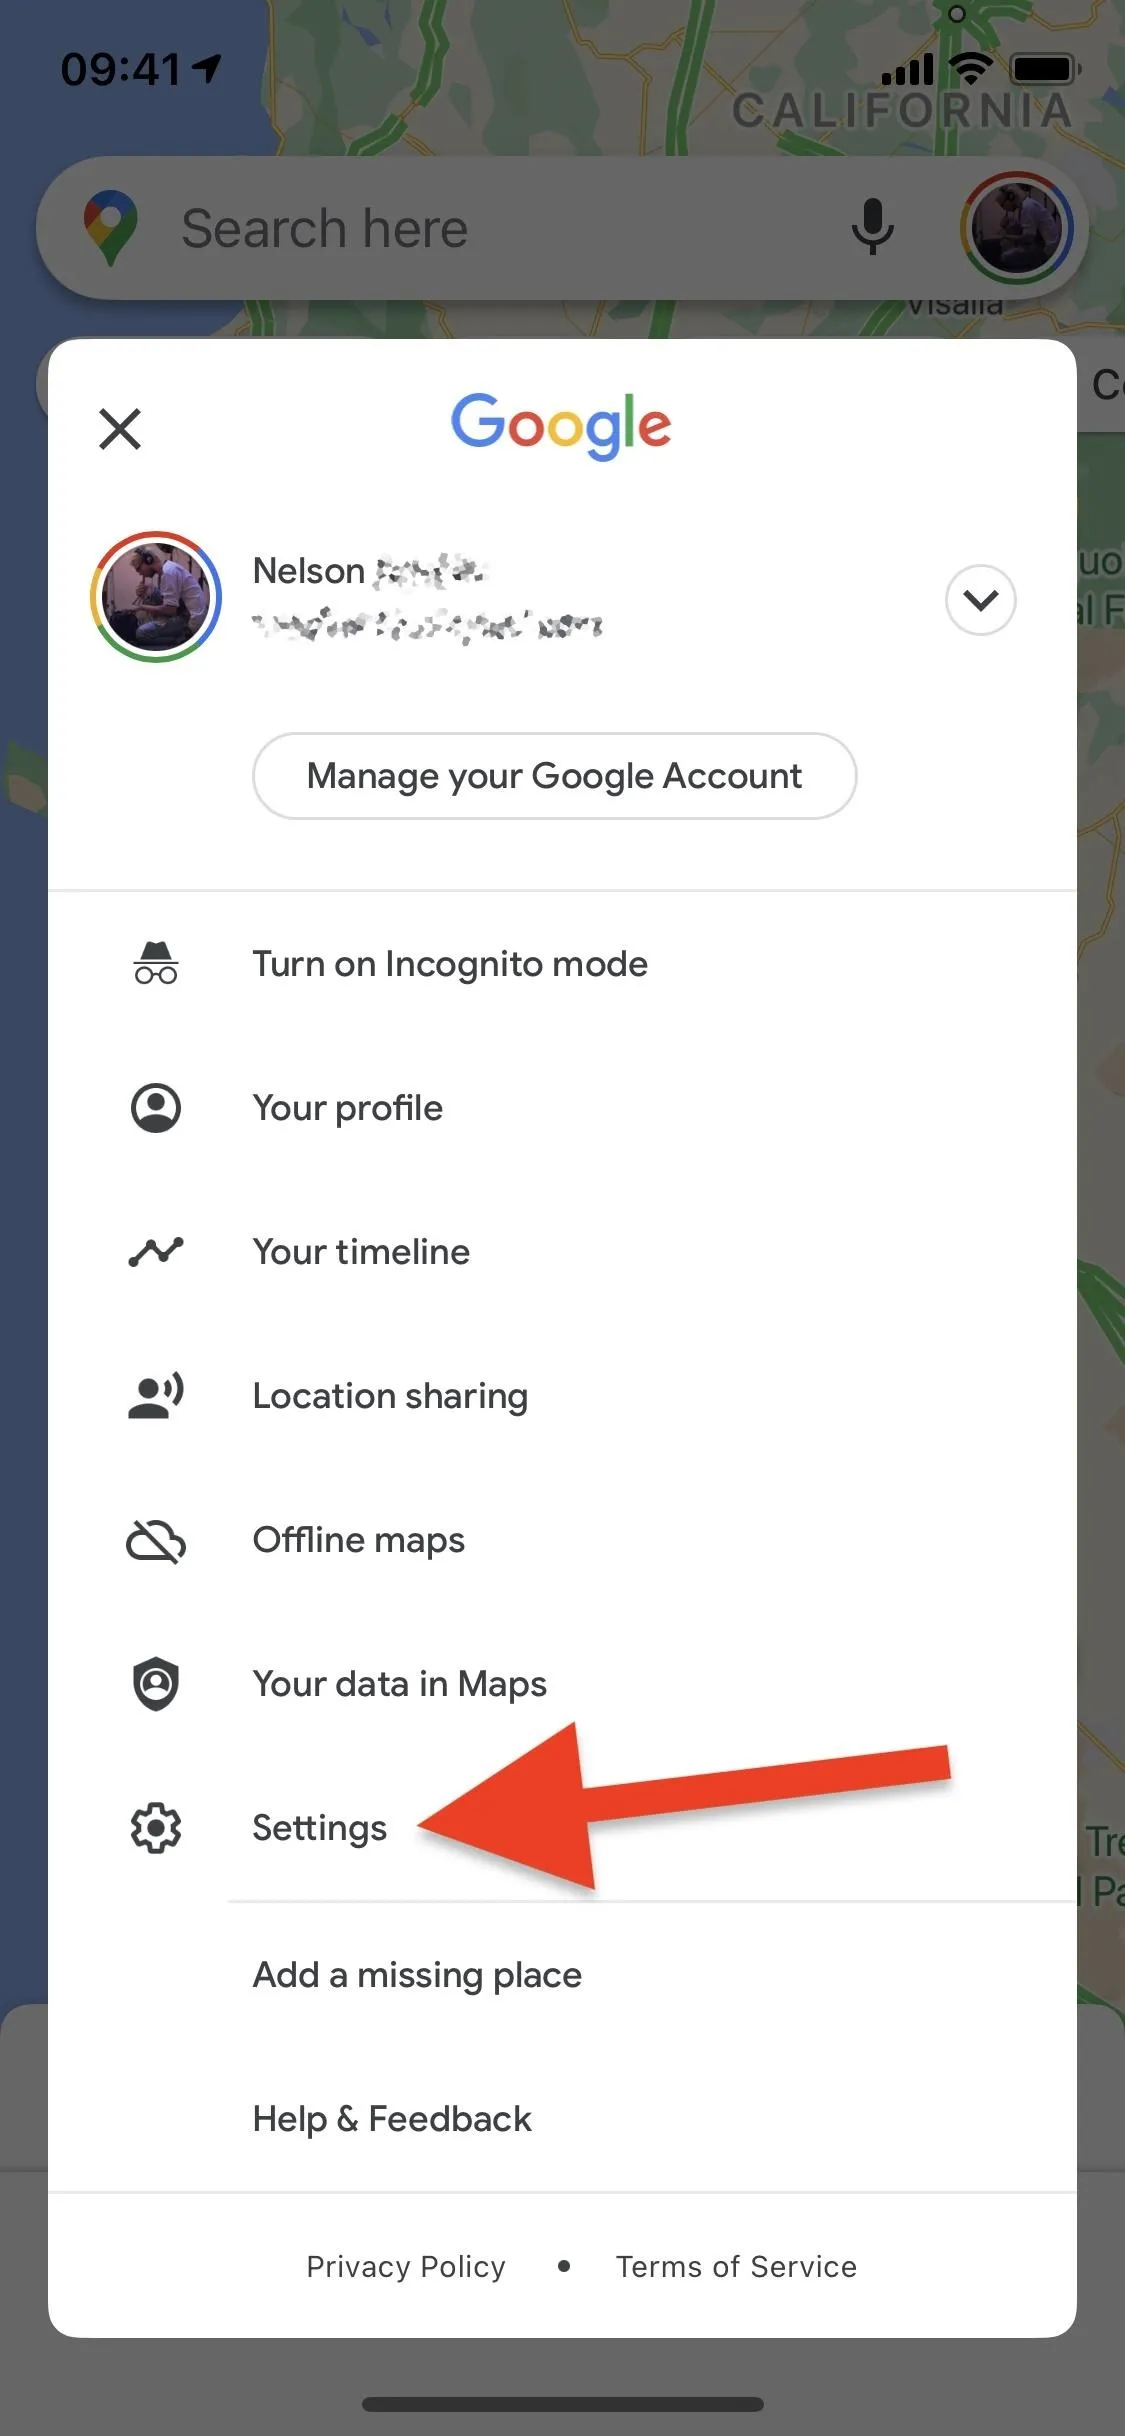
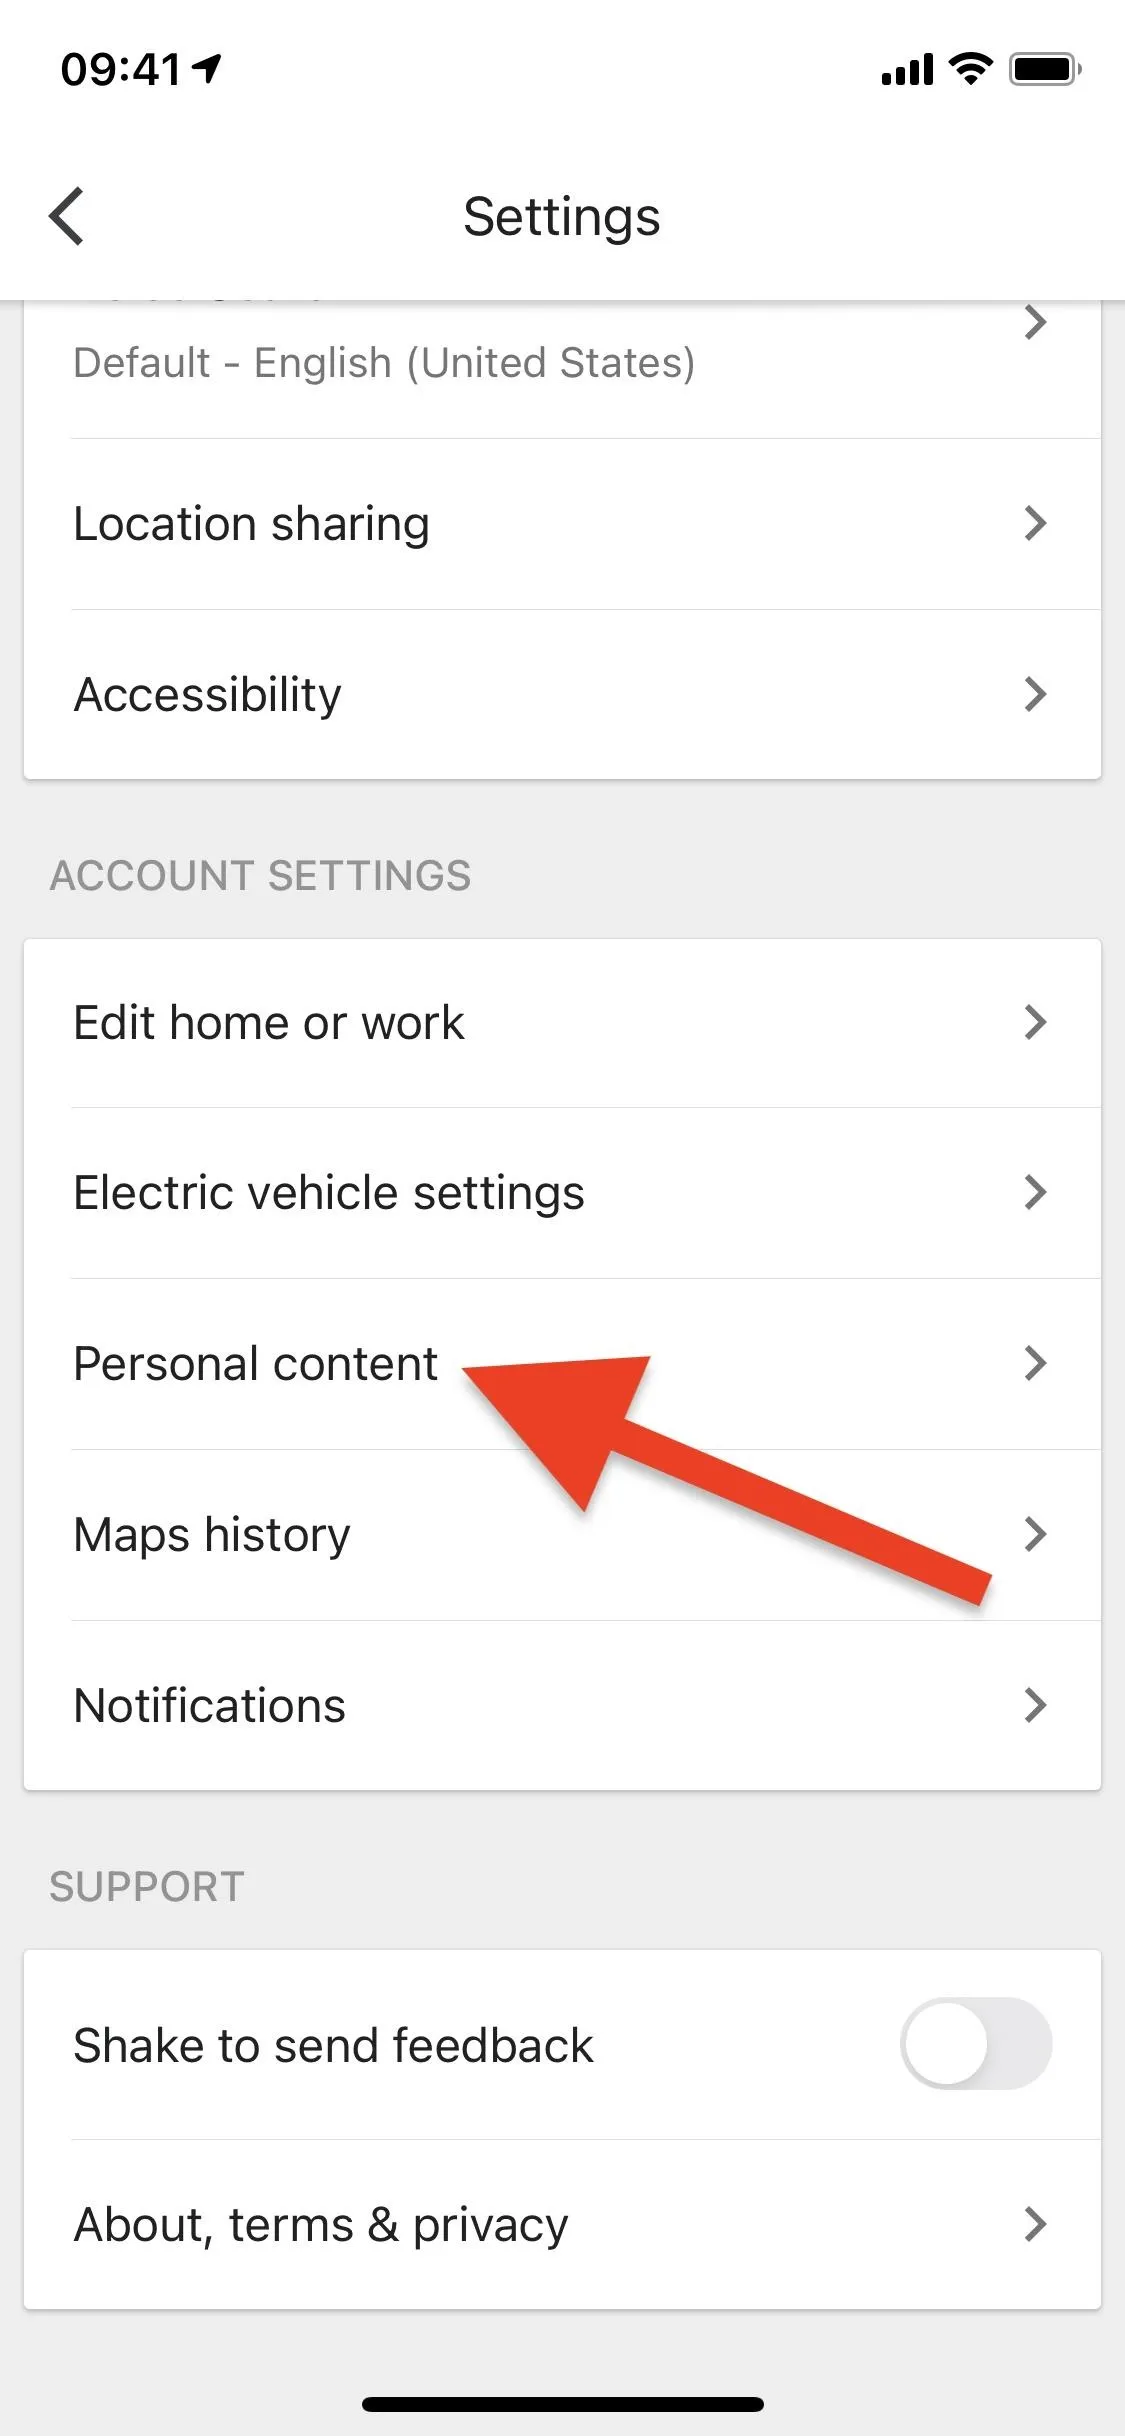
To access the various location history settings, launch Google Maps and tap on your Google account's profile image in the search bar. Next, tap on "Settings" in the menu, then find and tap on "Personal content" from the list.
- Don't Miss: How to View Your Location History in Google Maps


Disable Location History
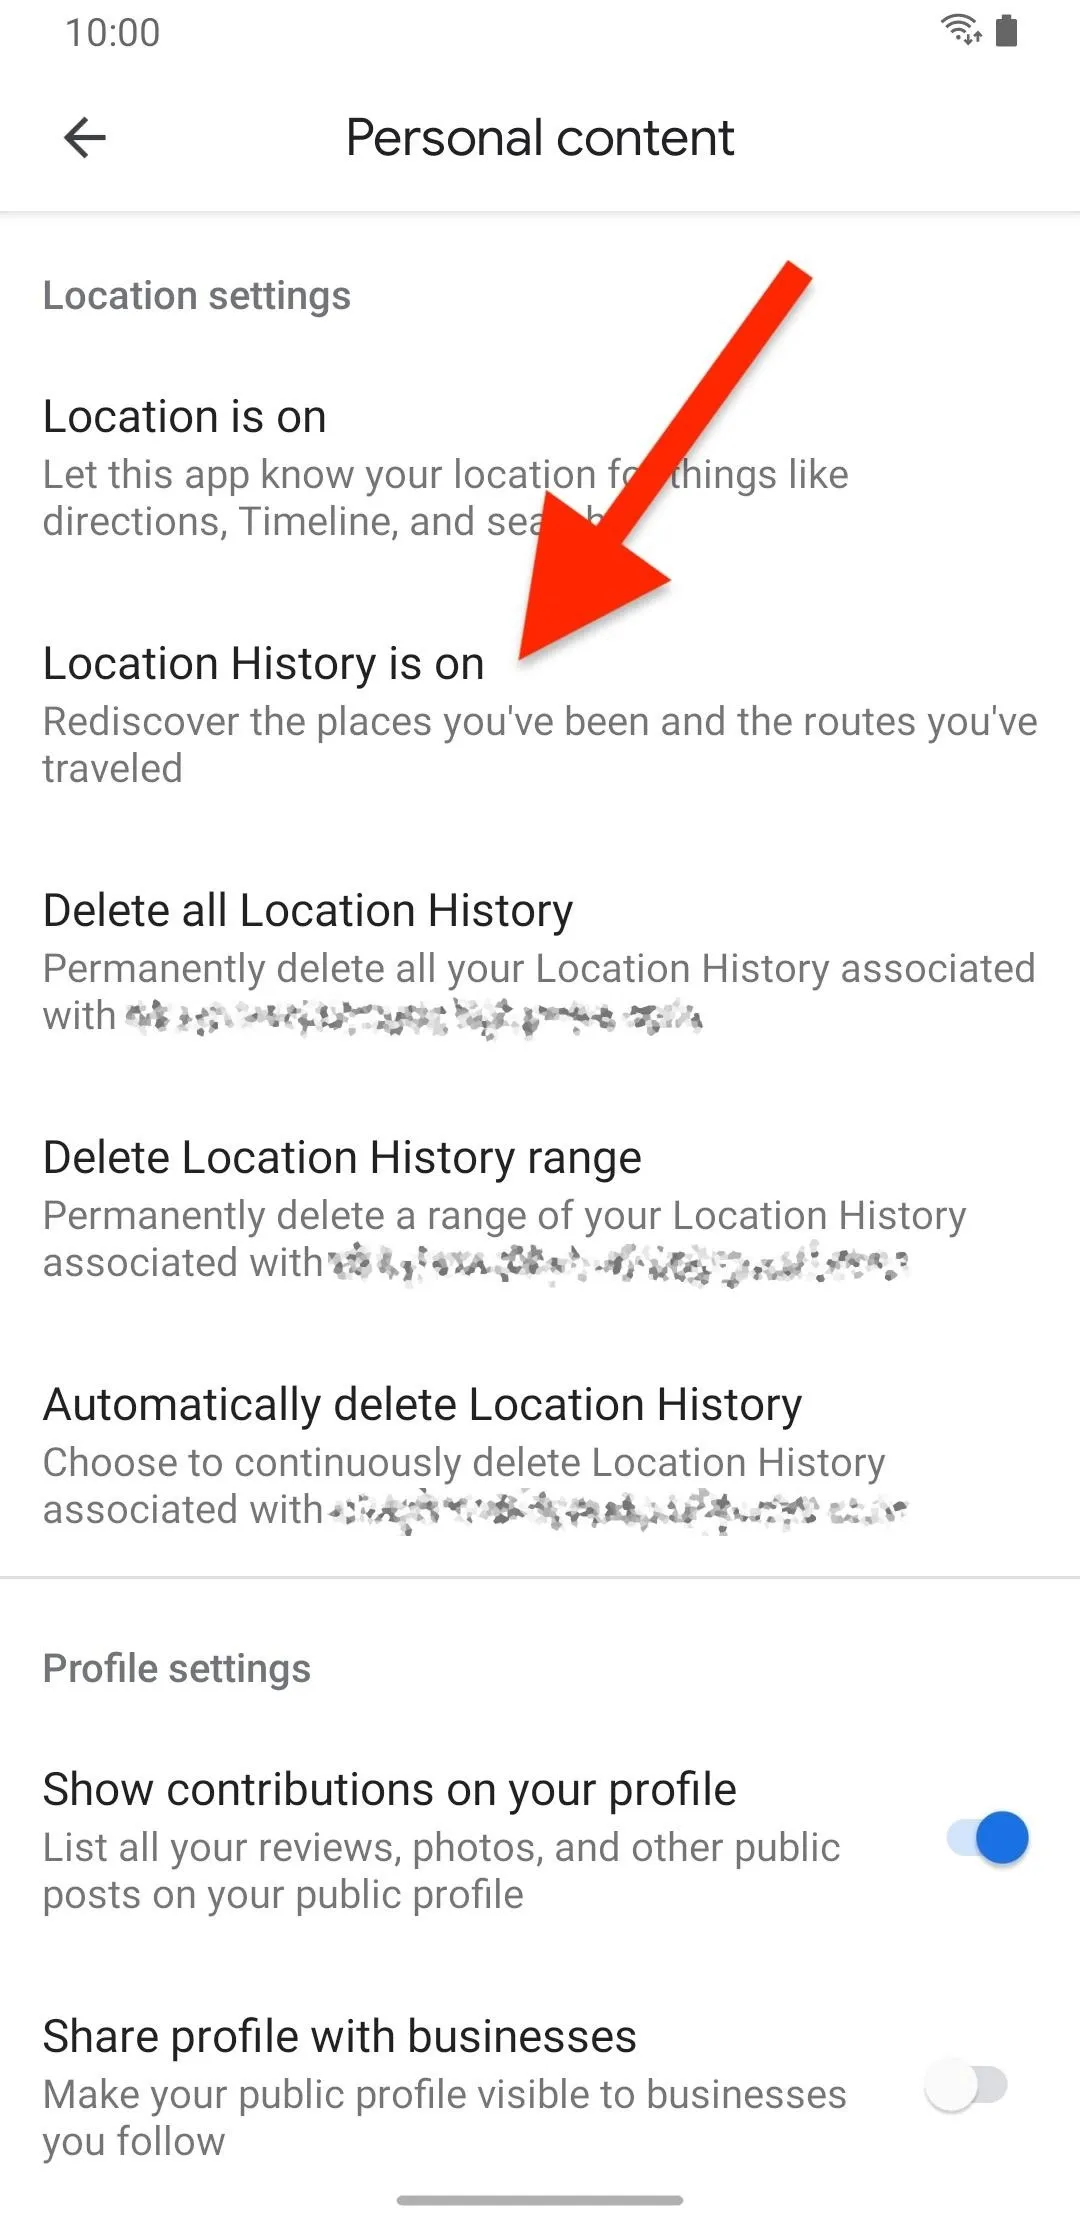
Your first option is to completely disable the logging of your travels, which is the harshest option but the only one that stops Google Maps from constantly saving where you go even when you're not using the app. Under the Location settings section, tap on "Location History is on." If you don't see that, tap on "Location History settings" instead.
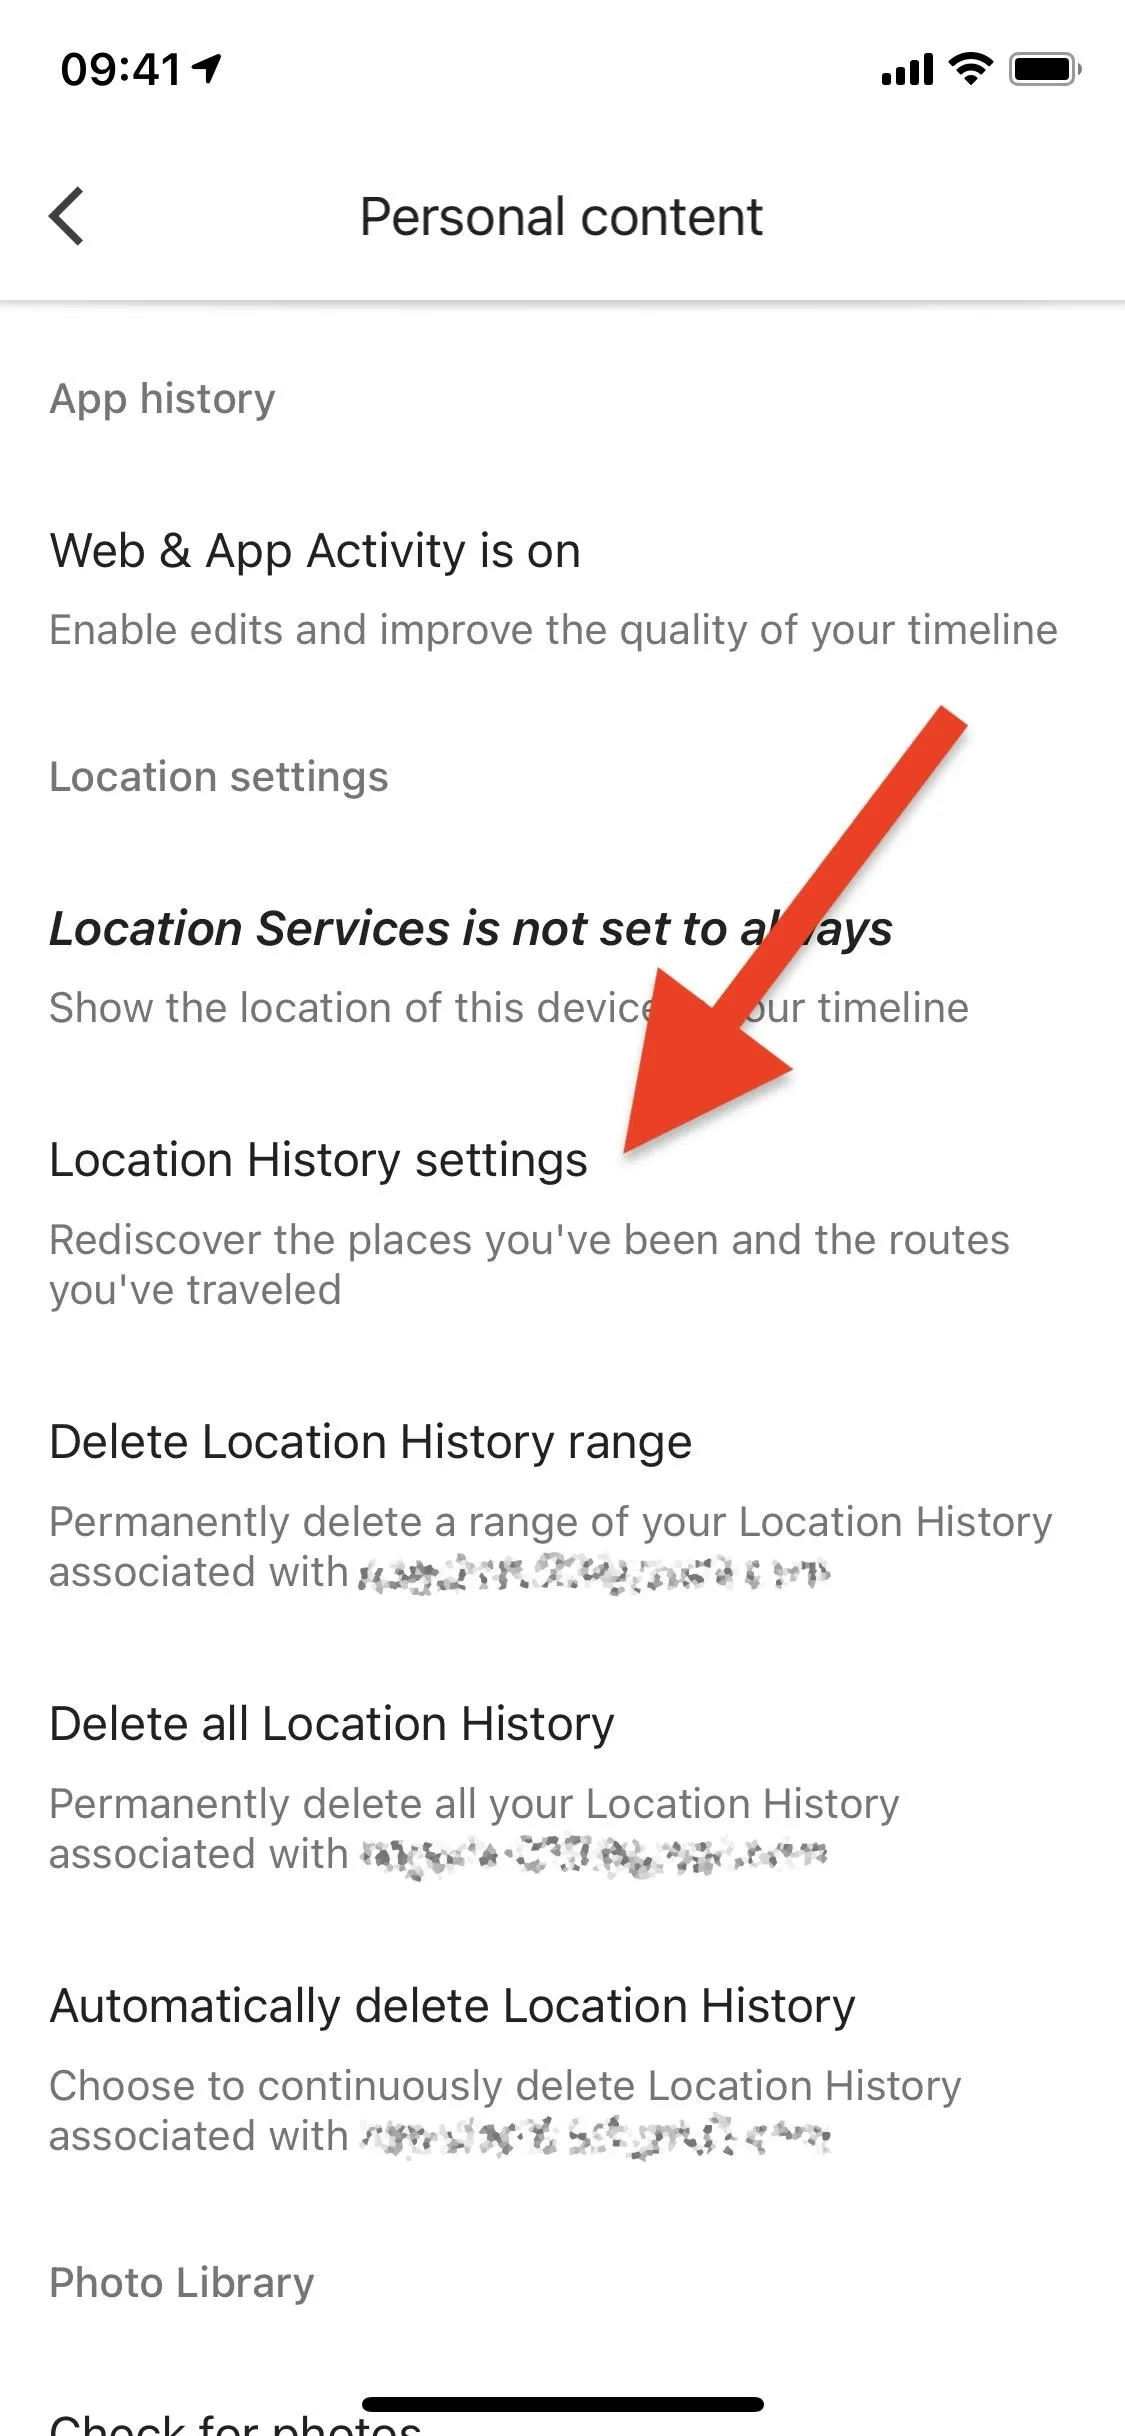


If you have more than one Google account on your device, you may be asked to select the one you want to change the settings for, so do that. If you tend to use all of them on your phone at one point or another, repeat this step for each account.
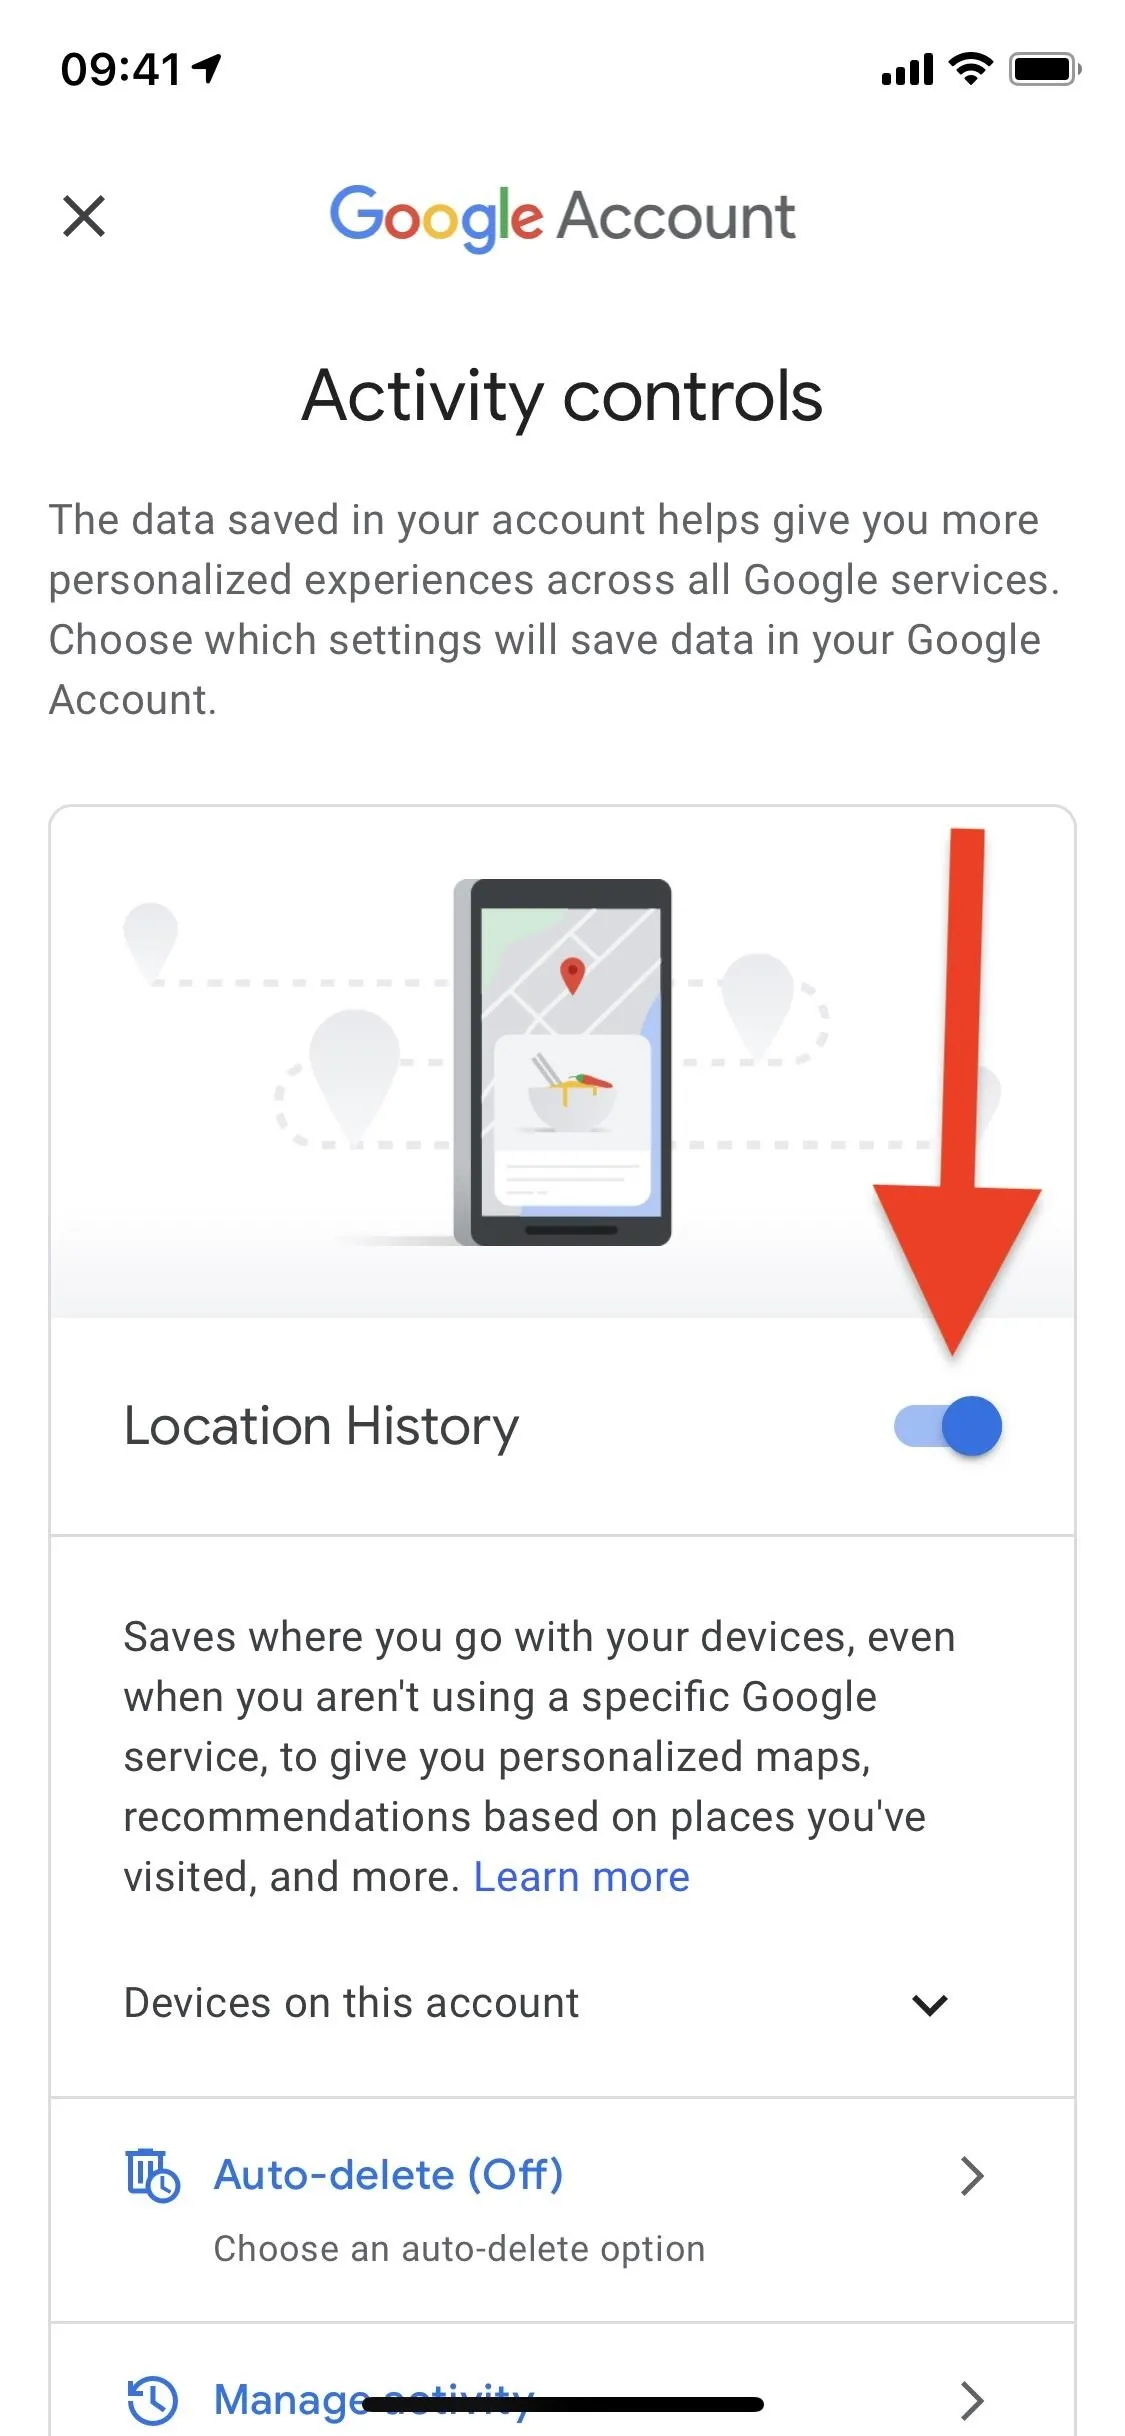
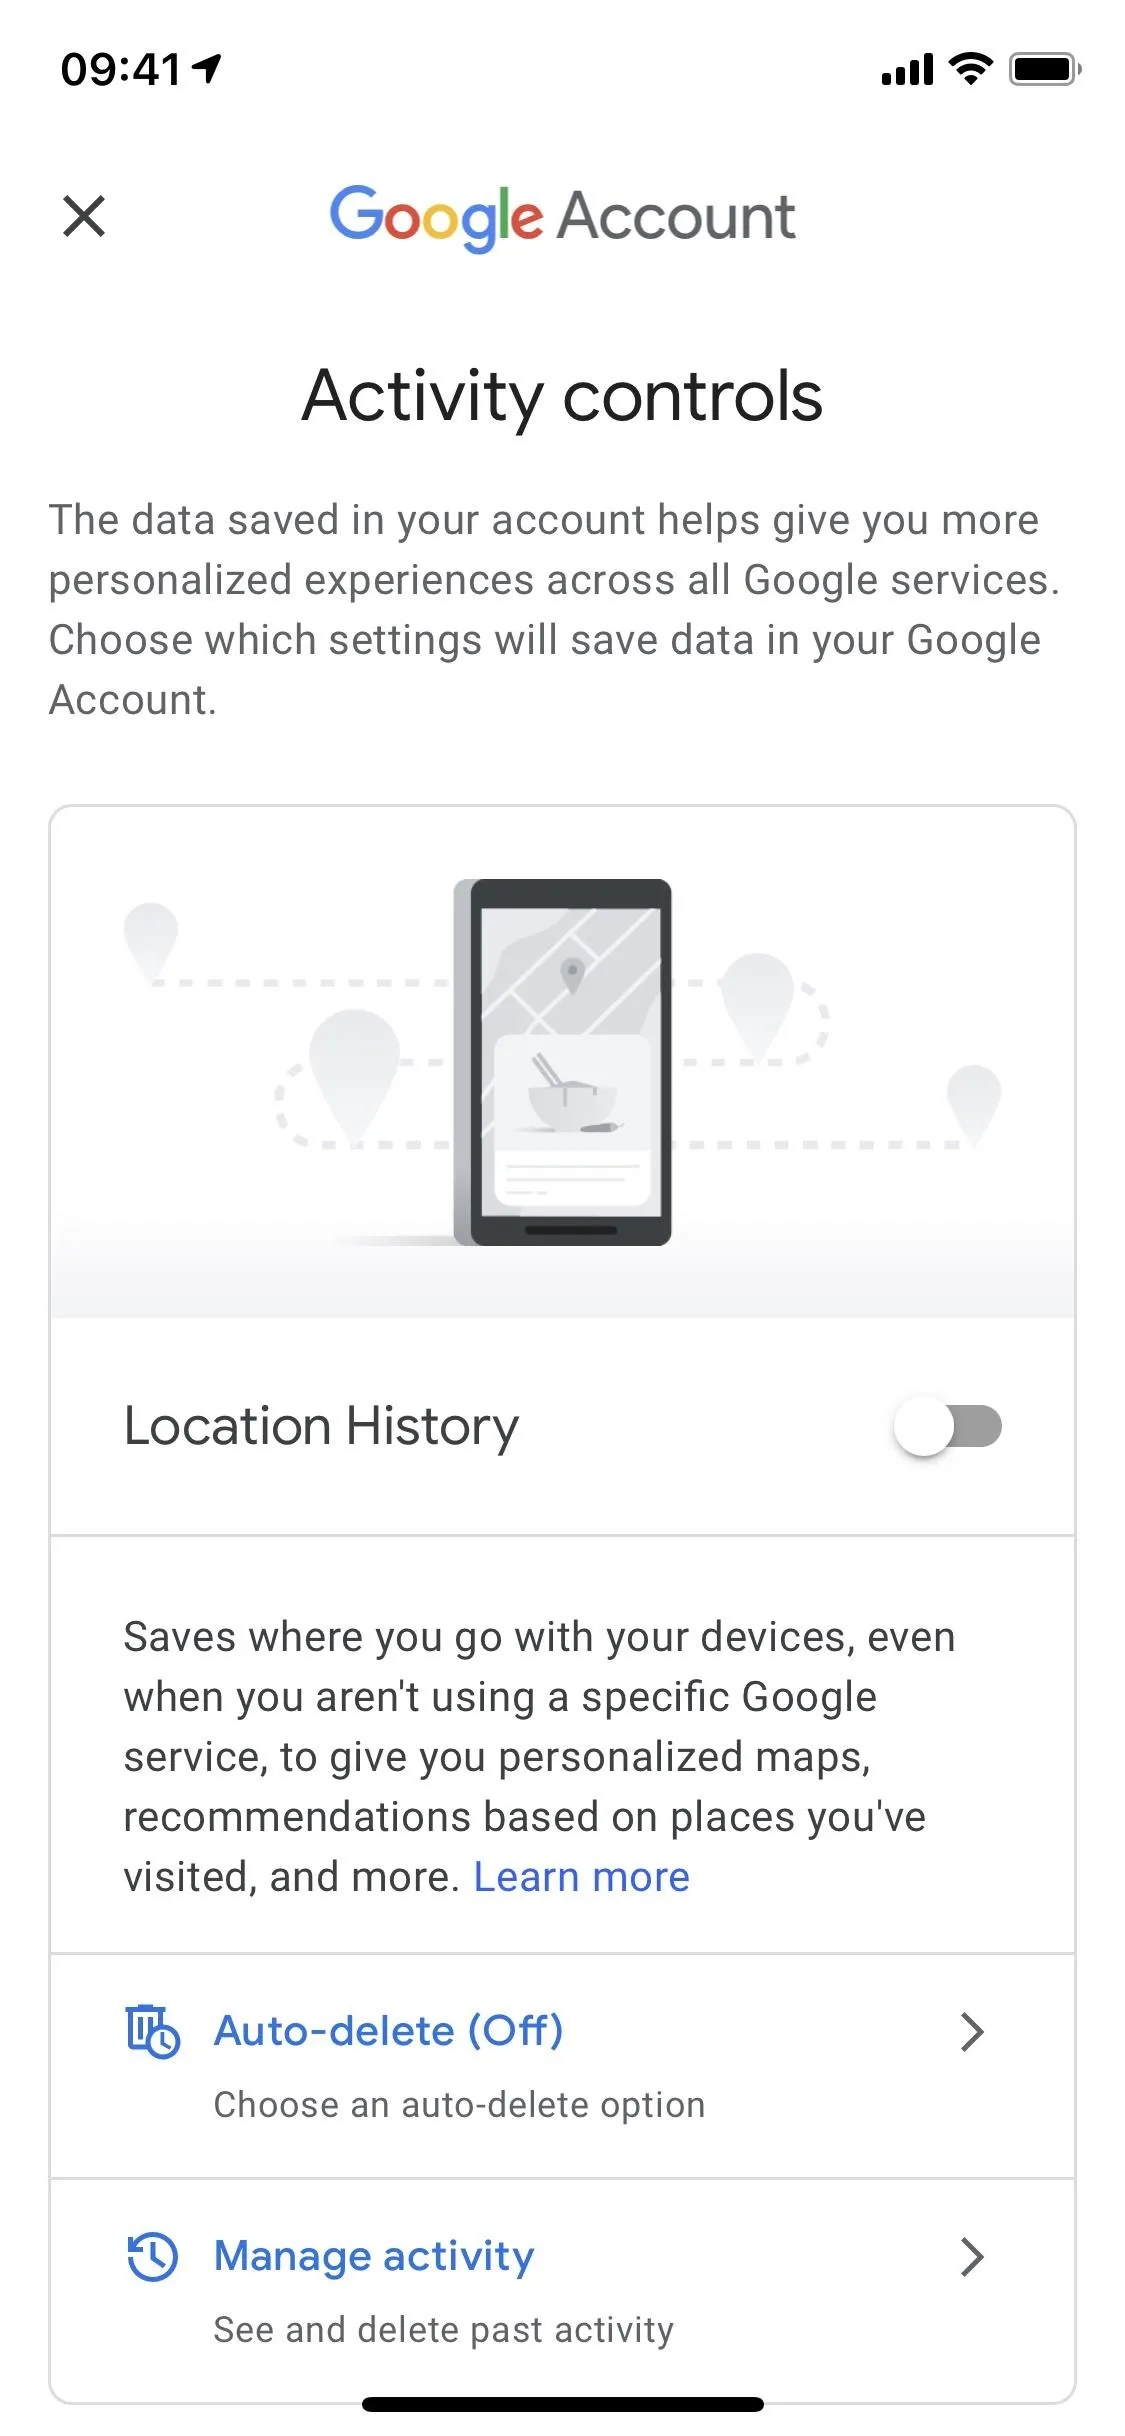
You should now be on the Activity controls page for your Google account. Here, you can simply toggle off the "Location History" switch to stop Google Maps from always tracking you.
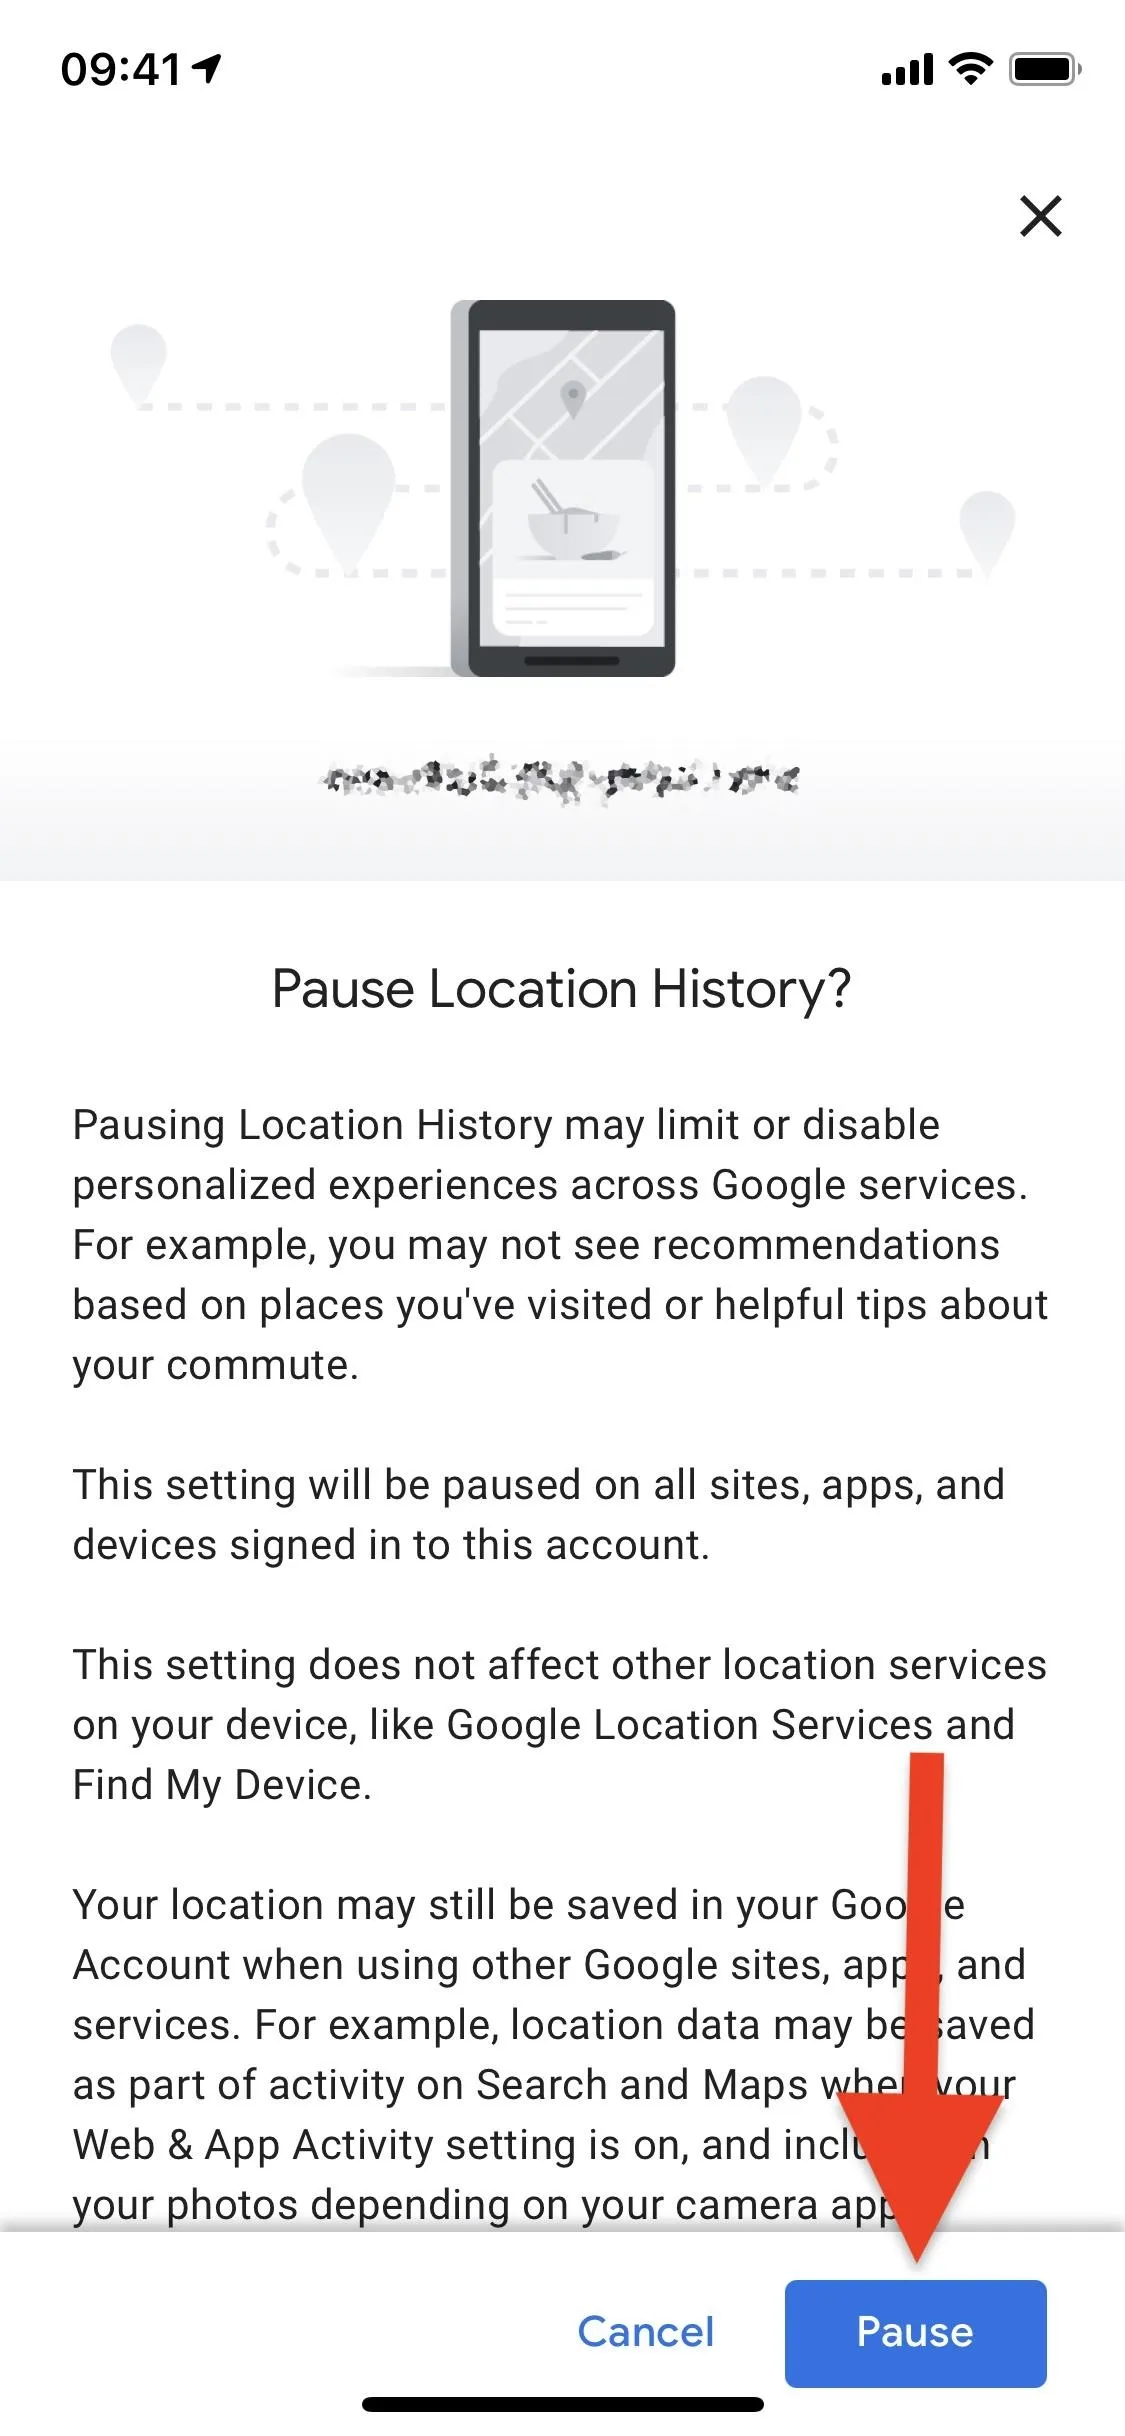
Once you toggle it off, Google will explain how "pausing" Location History may create limitations or completely disable certain features when using Google Maps. It won't affect your location services for other Google services. When you're ready, tap on the blue "Pause" button at the bottom, and your Location History will then be disabled.


Delete a Location History Range
If you don't want to turn off Location History, you can at least delete a portion of it that you don't want to be saved anymore. For example, if you visited a location you don't frequent, and now you're getting recommendations for the place, you can remove the dates you were there to stop that. If you went somewhere you don't want anyone to ever know about, that would be another reason to delete the history from that time frame.
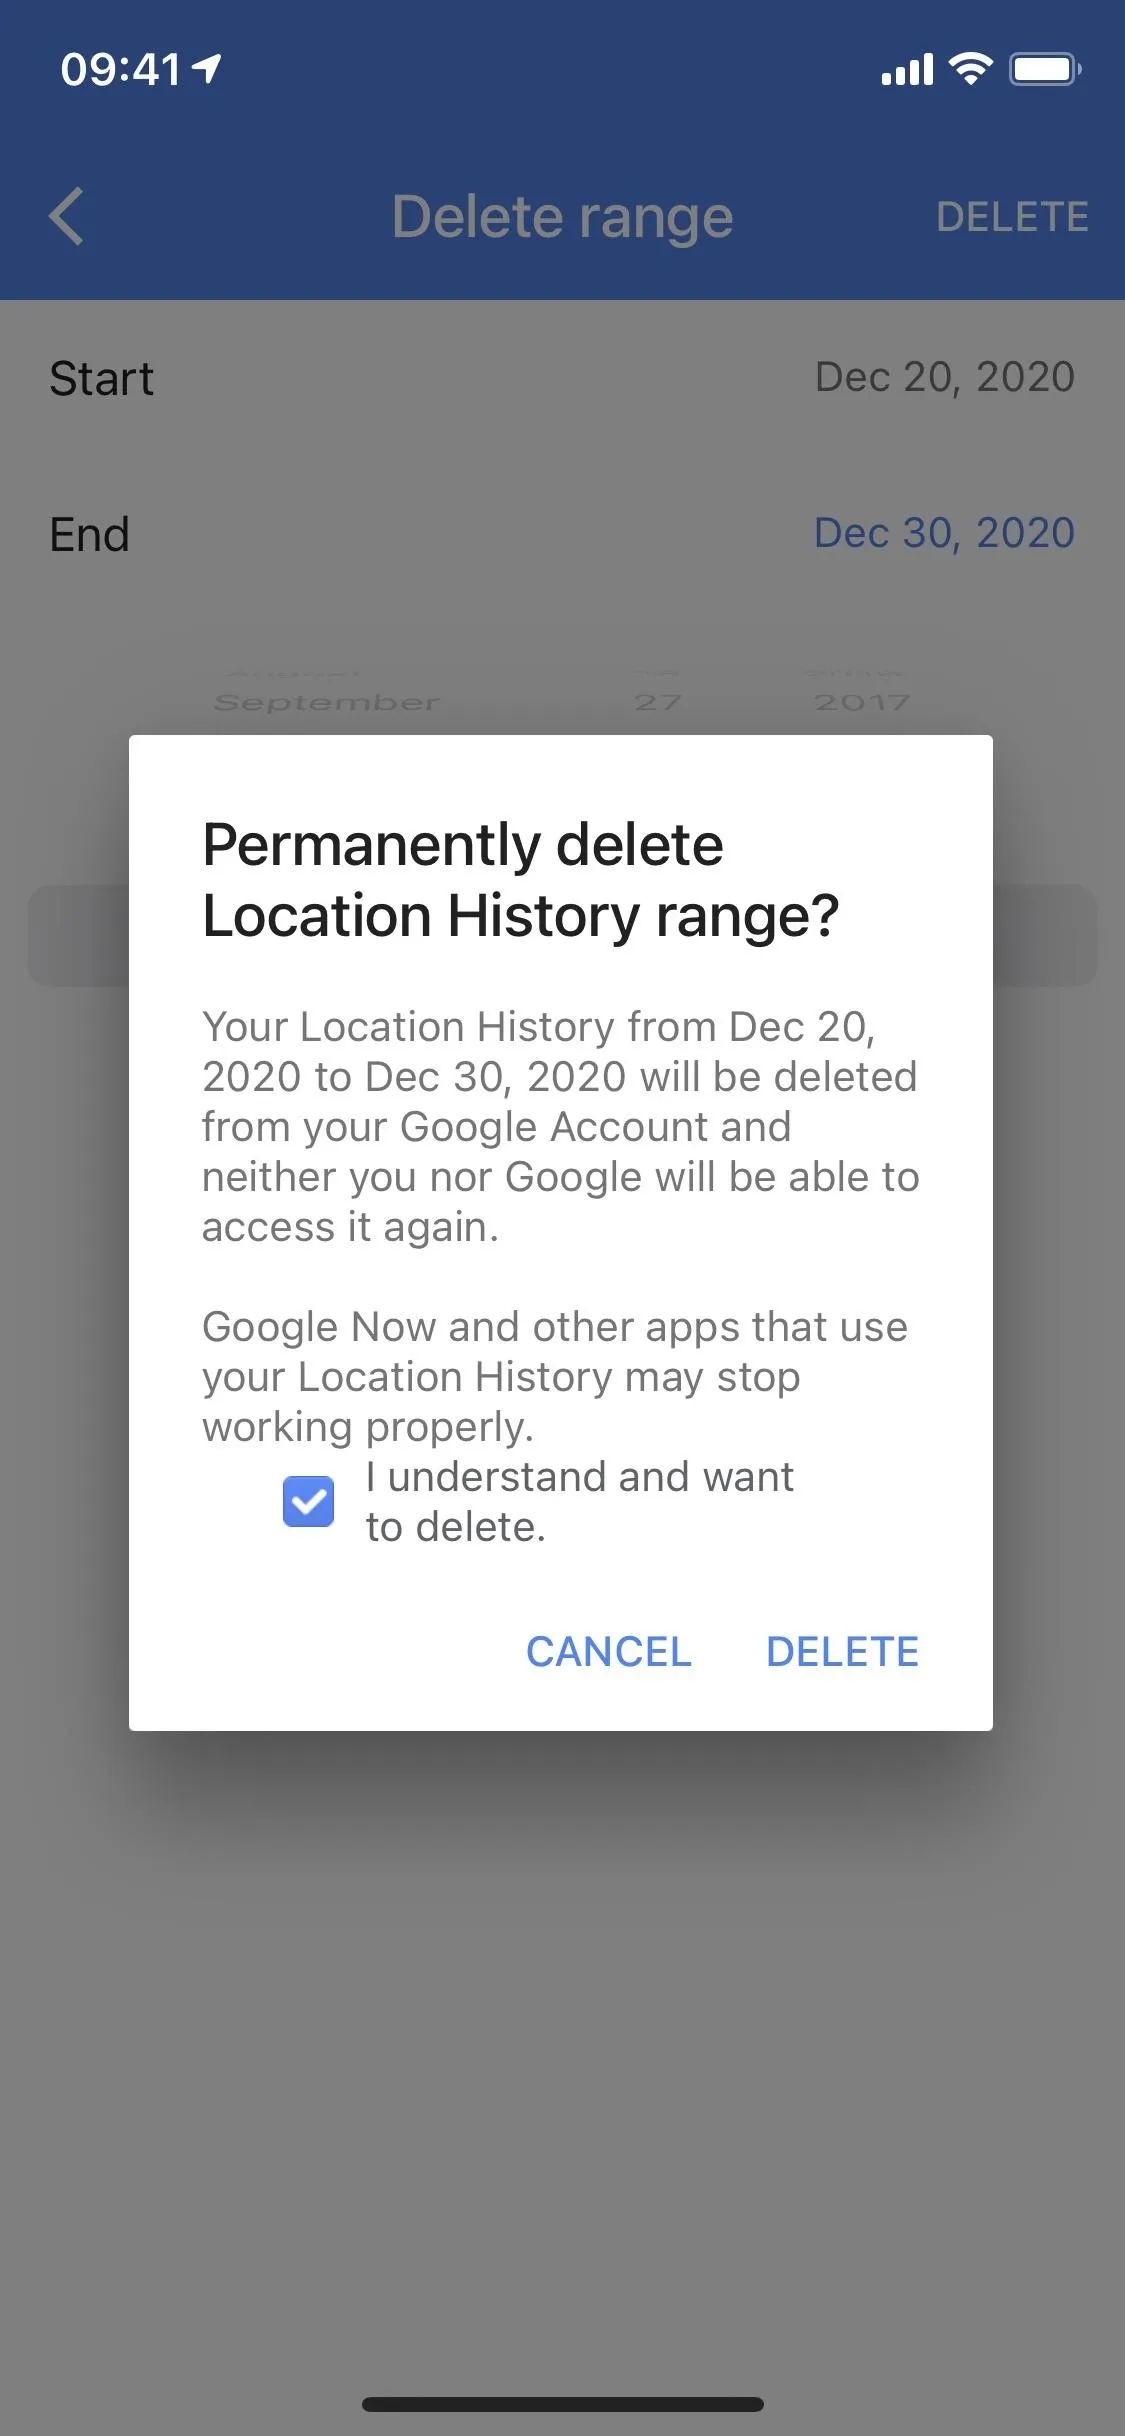
Back in the Personal content page, tap on "Delete Location History range." Then, choose a start and end date. Once you've selected the correct dates, tap on "Continue" (on Android) or "Delete" (on iOS). Google will confirm the dates you want to delete from the history and explain how this information will be removed from your Google account. Tap on "I understand and want to delete," then "Delete" to wipe the data.



If you're not sure which Google account you were logged into for Google Maps during the duration of your deleted range, switch accounts in Google Maps and repeat this option for each account. You can switch accounts from your profile image in the search bar (tap the drop-down icon next to your account and choose another).
Delete the Whole Location History Manually
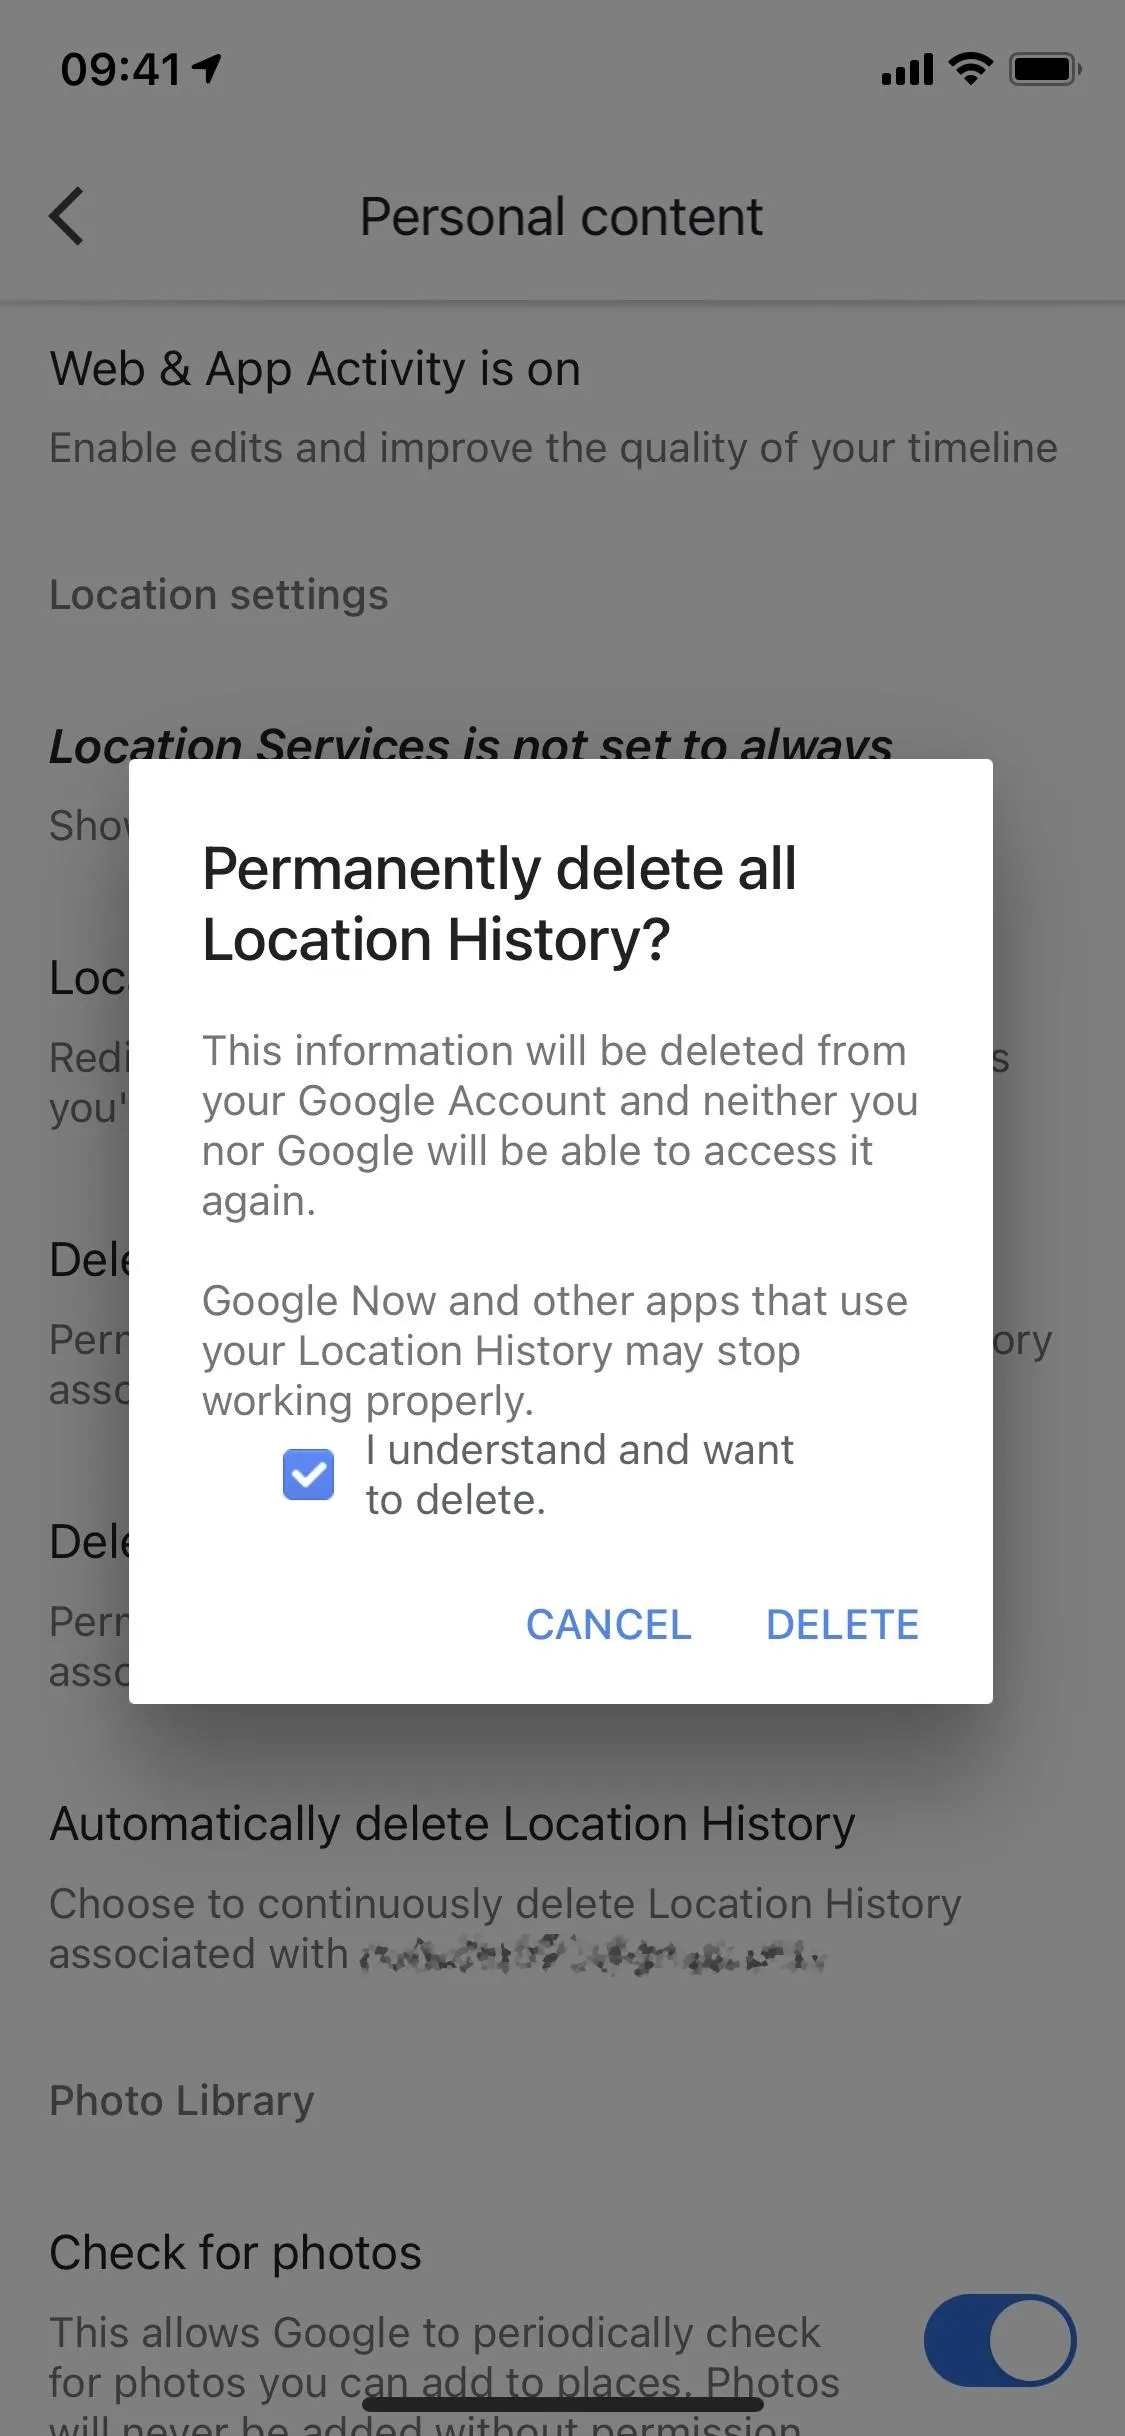
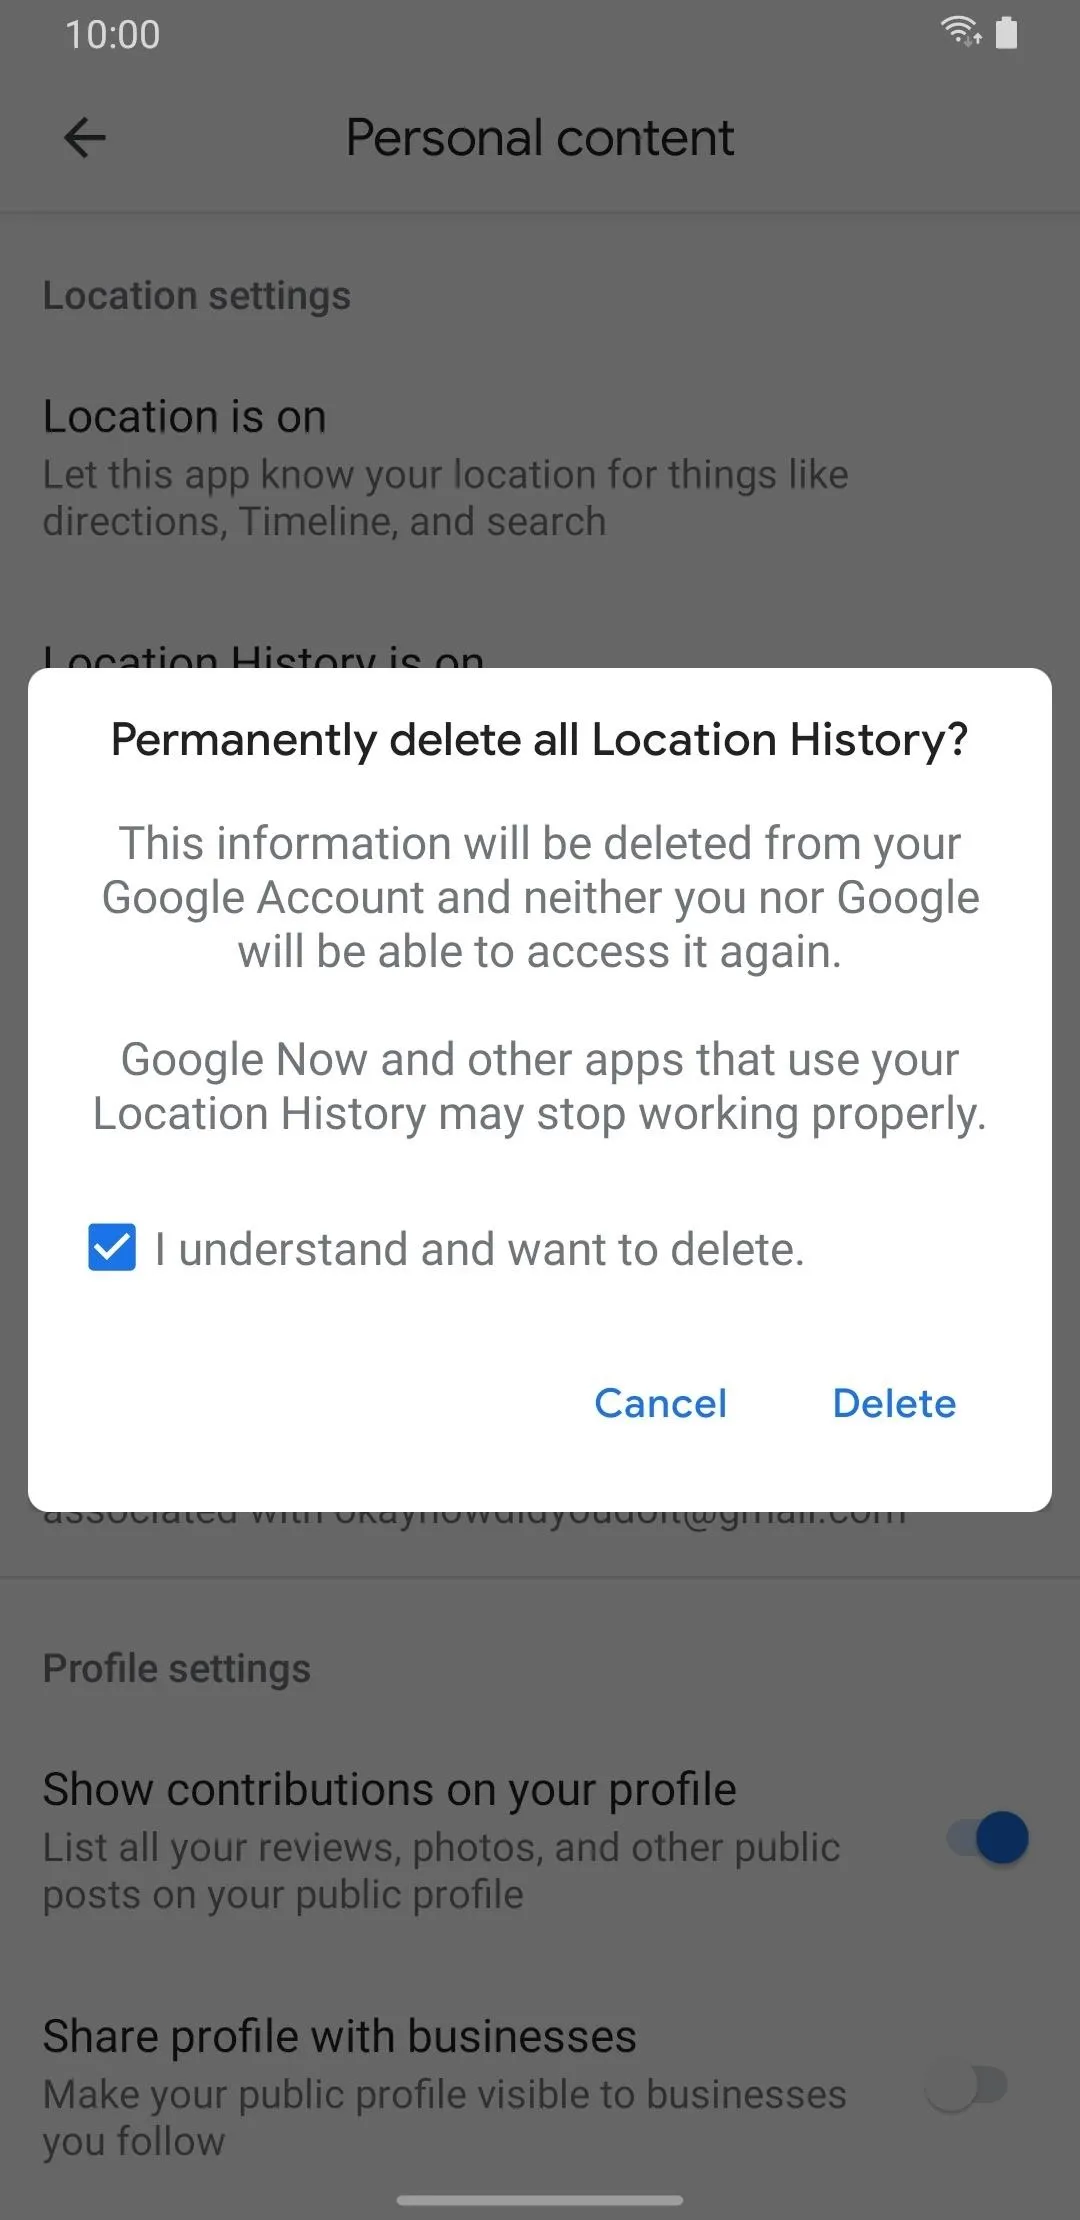
If you want to continue using the Location History feature but want a clean slate — because maybe you moved — you can manually delete your Location History. In the Personal content page, tap on "Delete all Location History," and a pop-up will appear. Again, Google will warn you that deleting your location history may affect how Google Maps works, but if you're fine with that, check the box next to "I understand and want to delete," then hit "Delete."


If you want a clean slate across all of your Google accounts, make sure to switch accounts in Google Maps and repeat this option for each account. You can switch accounts from your profile image in the search bar (tap the drop-down icon next to your account and choose another).
Delete Older Location History Automatically
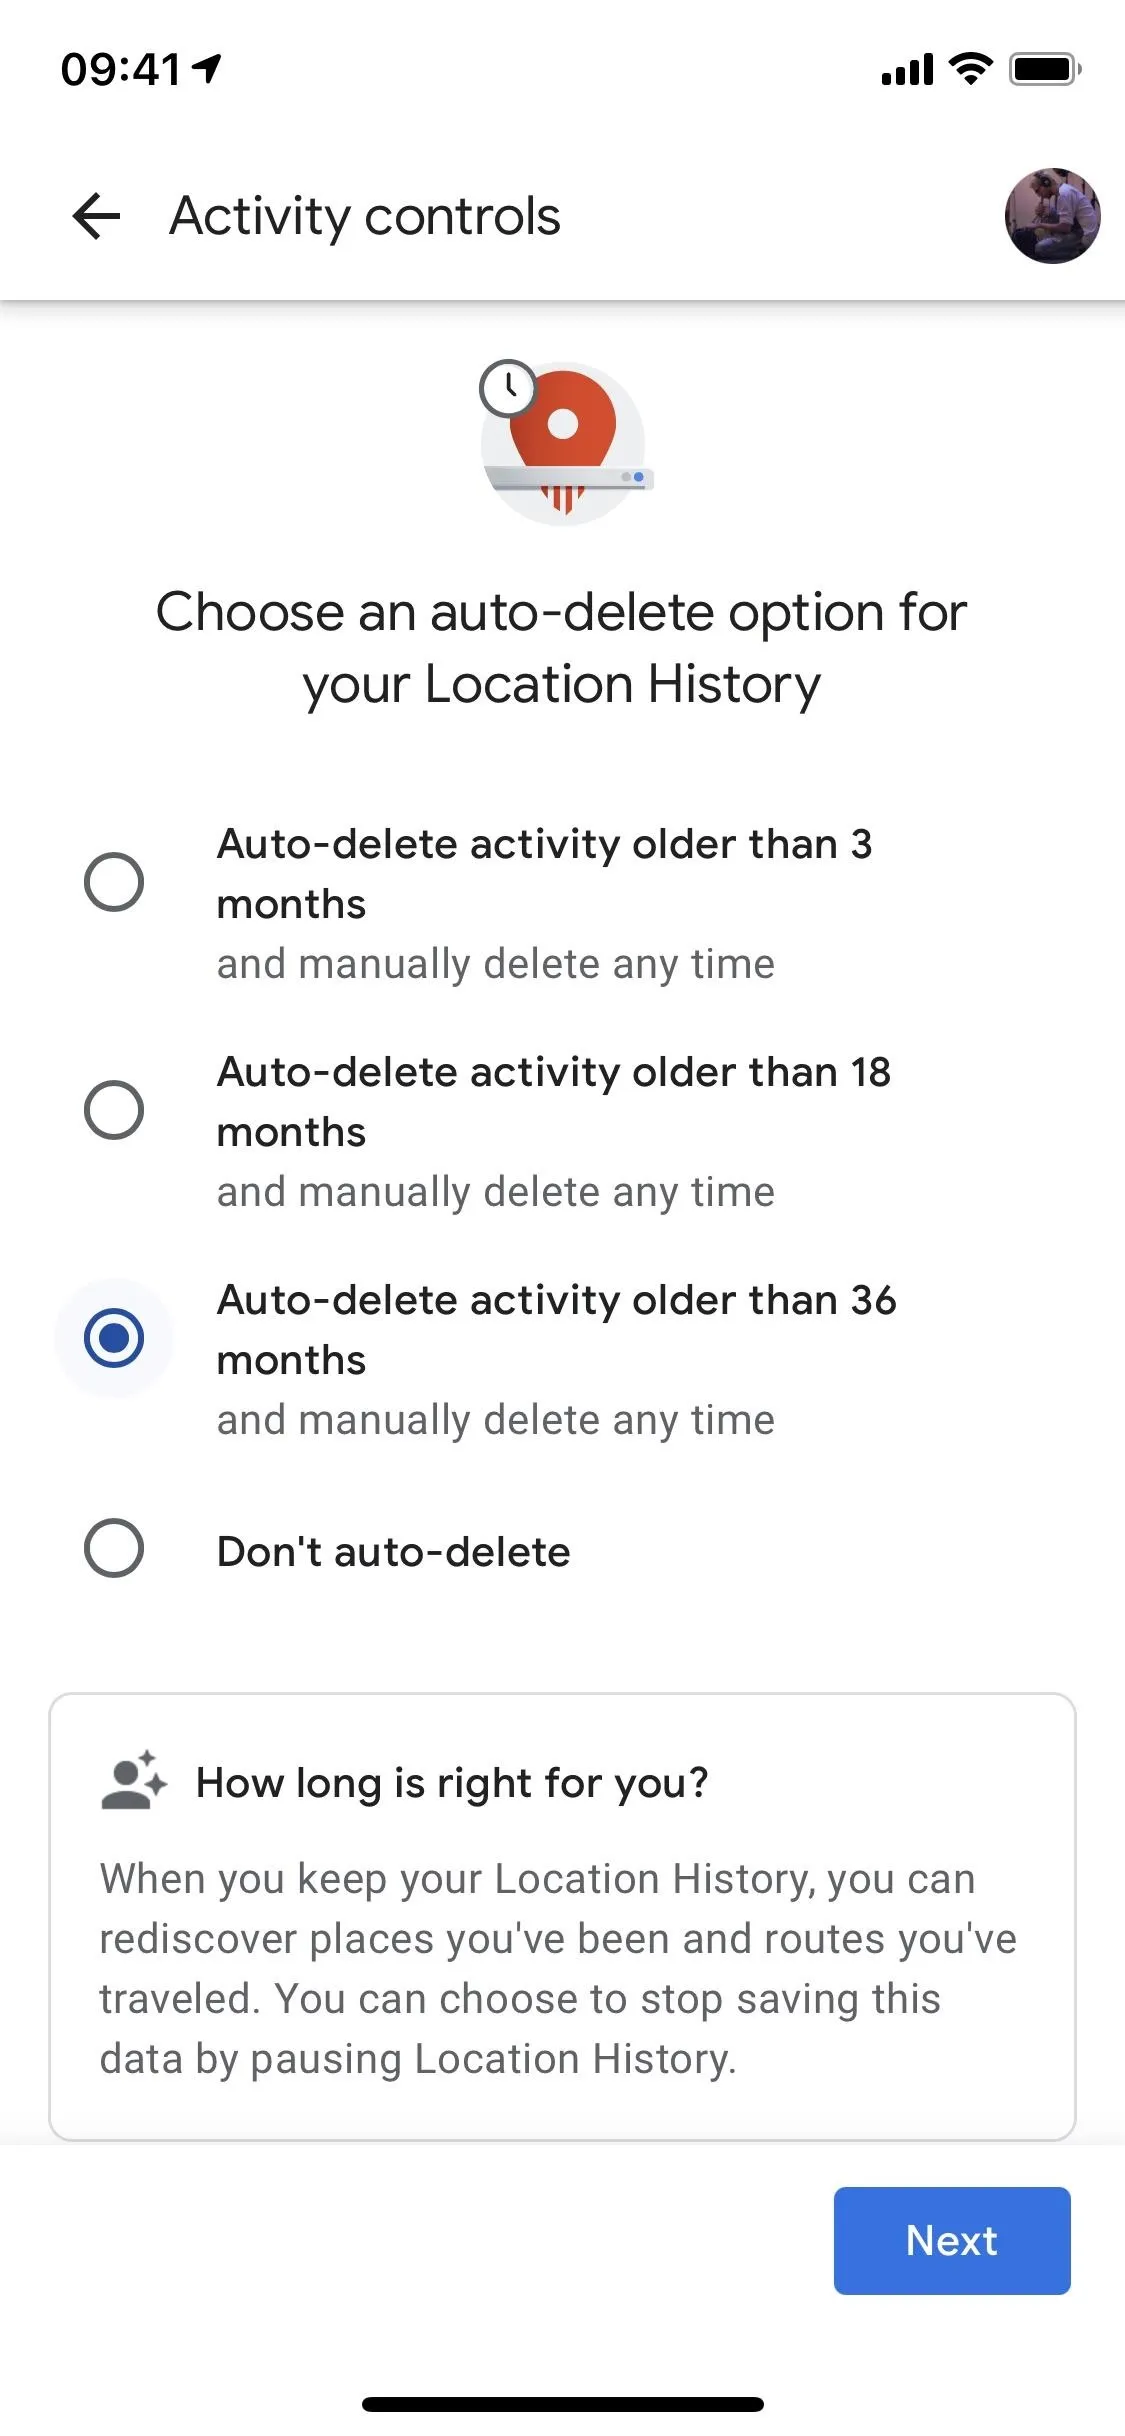
Finally, you can opt to have Google Maps delete your location history for you automatically. In the Personal content page, tap on "Automatically delete Location History" to bring up your options. You'll see three different options to choose from:
- Auto-delete activity older than 3 months
- Auto-delete activity older than 18 months
- Auto-delete activity older than 36 months
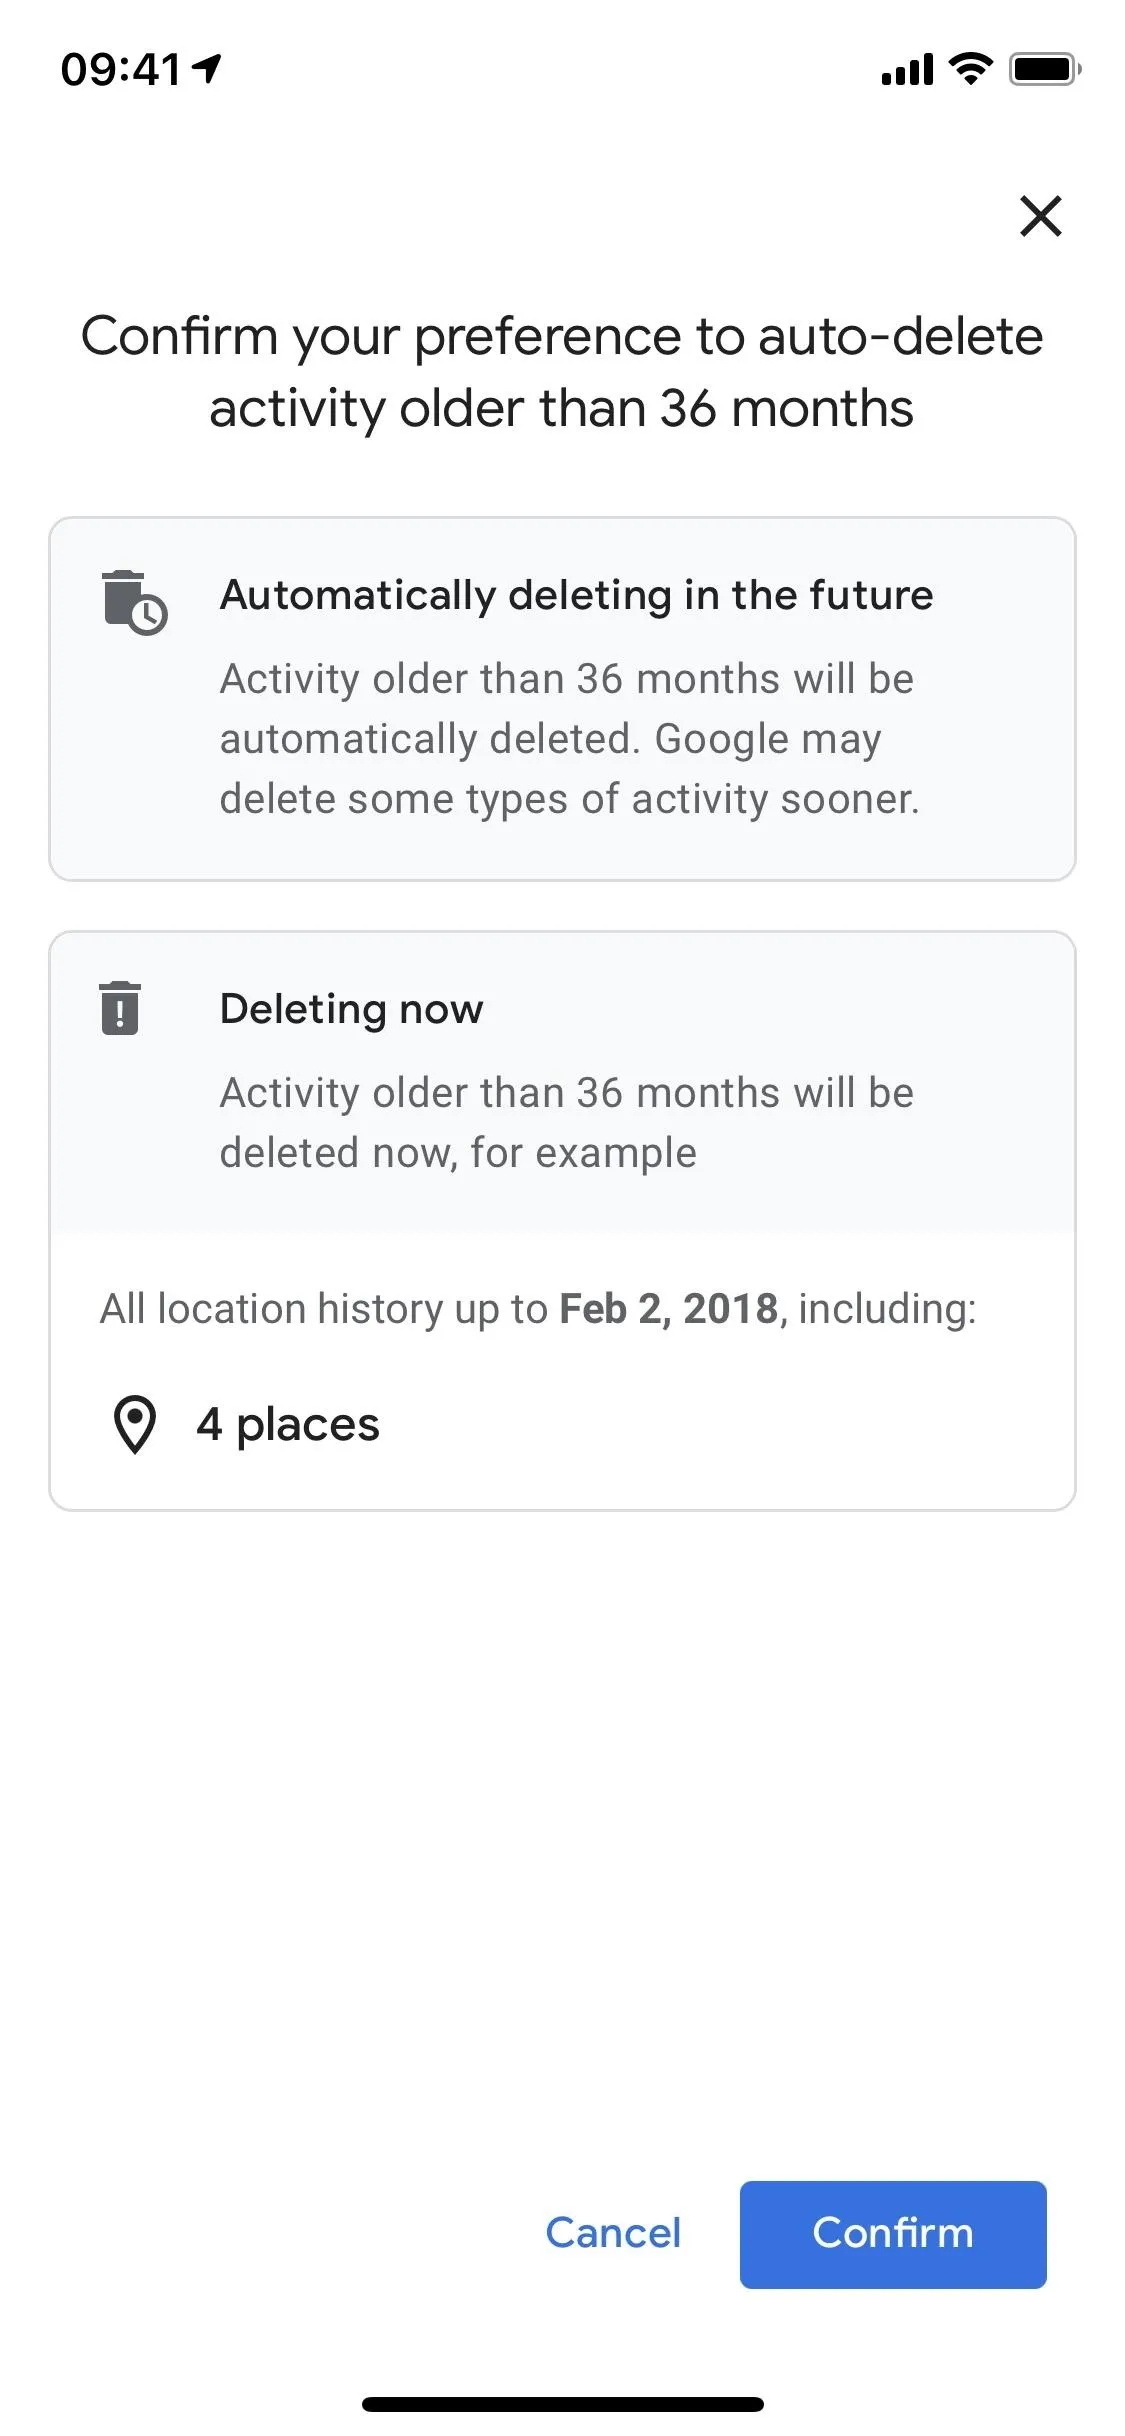
Depending on how much you move around or how much location data you feel comfortable storing, you might want your activity wiped every few months instead of every few years, but it's all up to you. Whatever option you choose, tap on "Next" in the bottom right, and confirm your auto-delete preference. The page will show you up to which date your Location History is being deleted and give you the number of places that'll be deleted.


Likewise with all of the other options, if you want do this across all of your Google accounts, make sure to switch accounts in Google Maps and repeat this option for each account. You can switch accounts from your profile image in the search bar (tap the drop-down icon next to your account and choose another).
Cover photo and screenshots by Nelson Aguilar/Gadget Hacks










Comments
Be the first, drop a comment!