


The "Zoombombing" trend is still strong on the Zoom video meetings service, despite security measures Zoom put in place to stop it. That's why it's up to you, as either a host or co-host, to be proactive about preventing Zoombomber harassment, as well as stopping it whenever it slips through the cracks.
Just in case you've someone missed what Zoomboming is, it's when someone, usually a random, unsuspected guest, enters a meeting and disrupts it using racial slurs, pornographic videos, vulgar language, hate speech, graphic images, inappropriate websites, and... well, you get the picture.
The main issue that let these trolls into people's video chats is that many hosts would create unprotected meetings so that anyone with the link or meeting code could join. Sometimes, someone in the meeting would screenshot and share their in-progress session to highlight something, unaware that they were giving not only the meeting code away but the password for it too.
If you don't want this to ever happen to you and the meetings you start, whether they're video conferences for work, classes for students, chats with family and friends, or something else, keep reading to see what you can do to protect your Zoom video calls.
We've broken it up into two sections: one with prevention tips and the other with ways to stop Zoomboming in its tracks during a live video meeting. And we discuss where you can find specific settings, which settings are on or off by default, and which preferences you need to turn off and on manually.
First Things First: Update Your Zoom App
Before we get to any of the specific tips, some of Zoom's new anti-Zoombombing features have been implemented in the latest versions of the Zoom Cloud Meetings app for iOS or Android. So make sure that you update the app on your iPhone or Android phone before continuing.
Where Most of the Settings Will Be Found
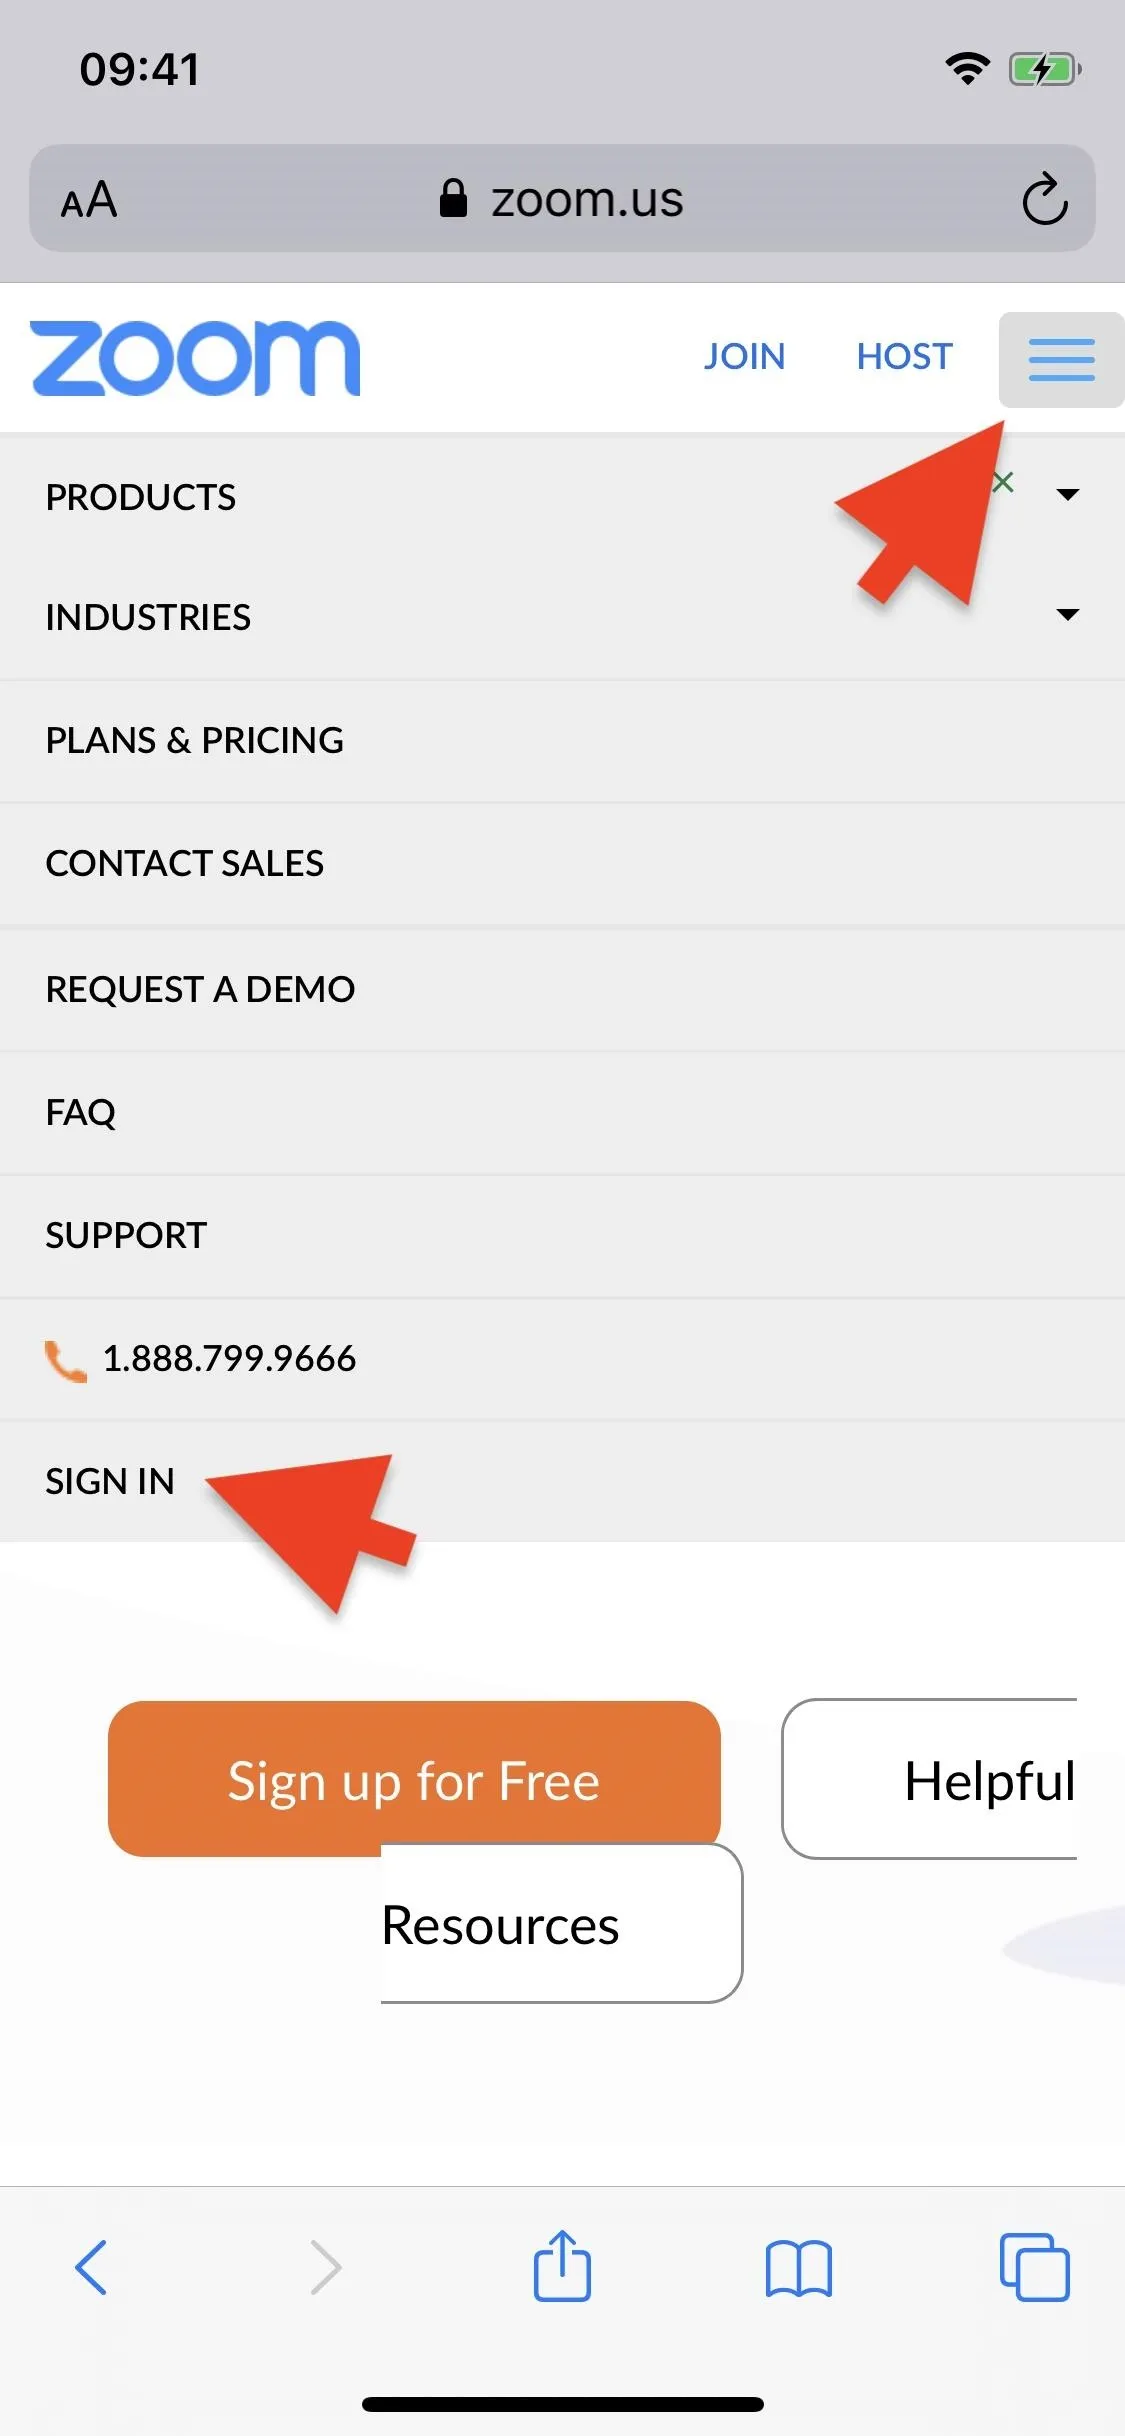
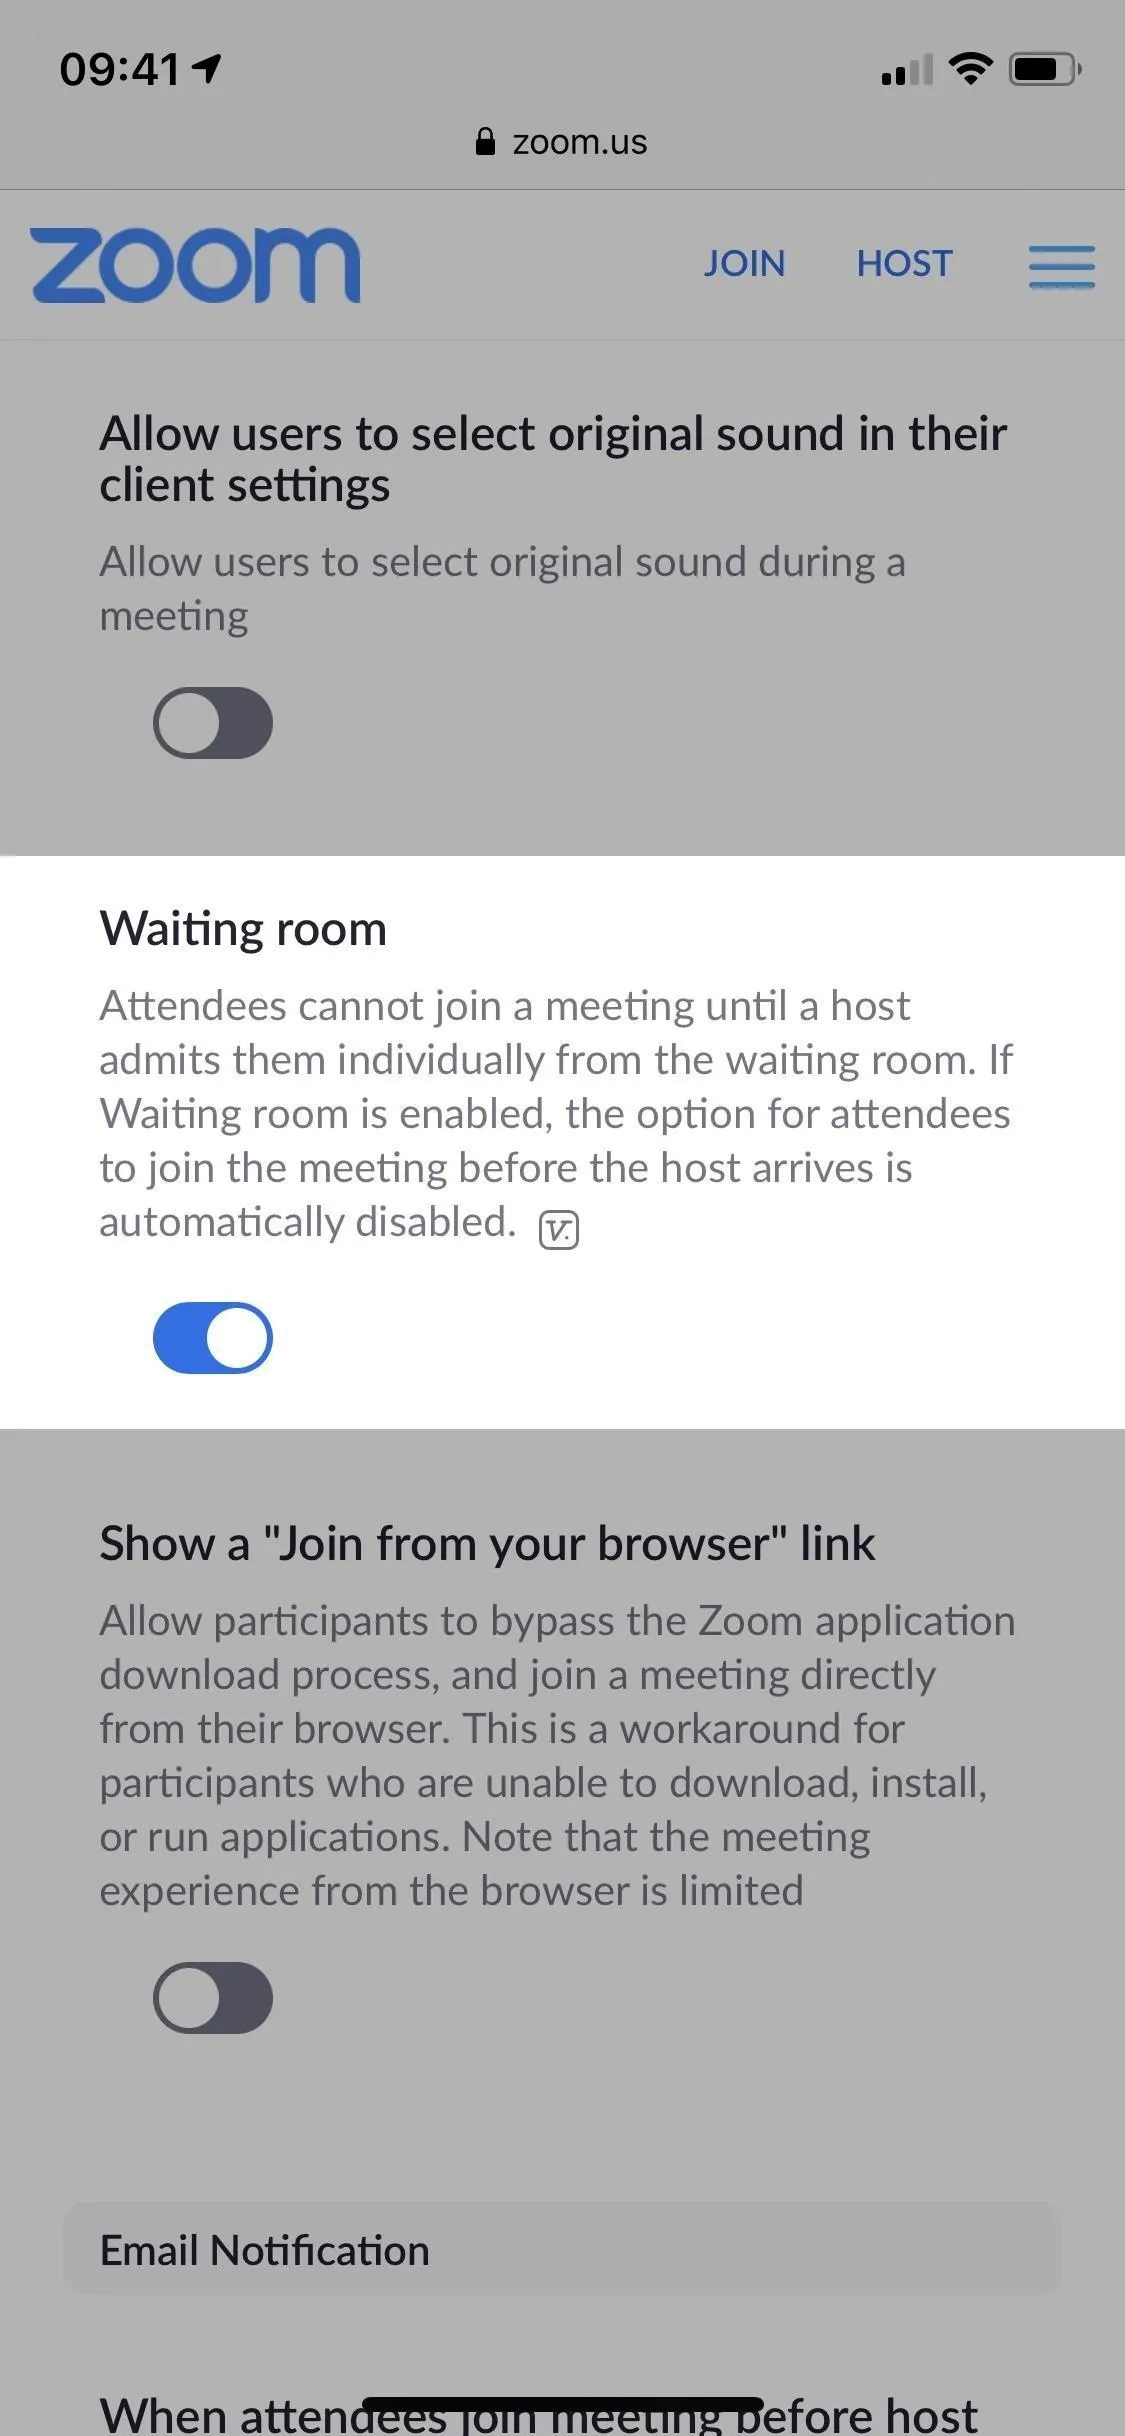
The majority of these settings are found on Zoom's website, which applies account-wide, so you'll need to open your mobile browser and sign in to Zoom from there to check or adjust things. You can open up the following URL in your web browser of choice, then log in to your Zoom account, to jump right to the right settings.
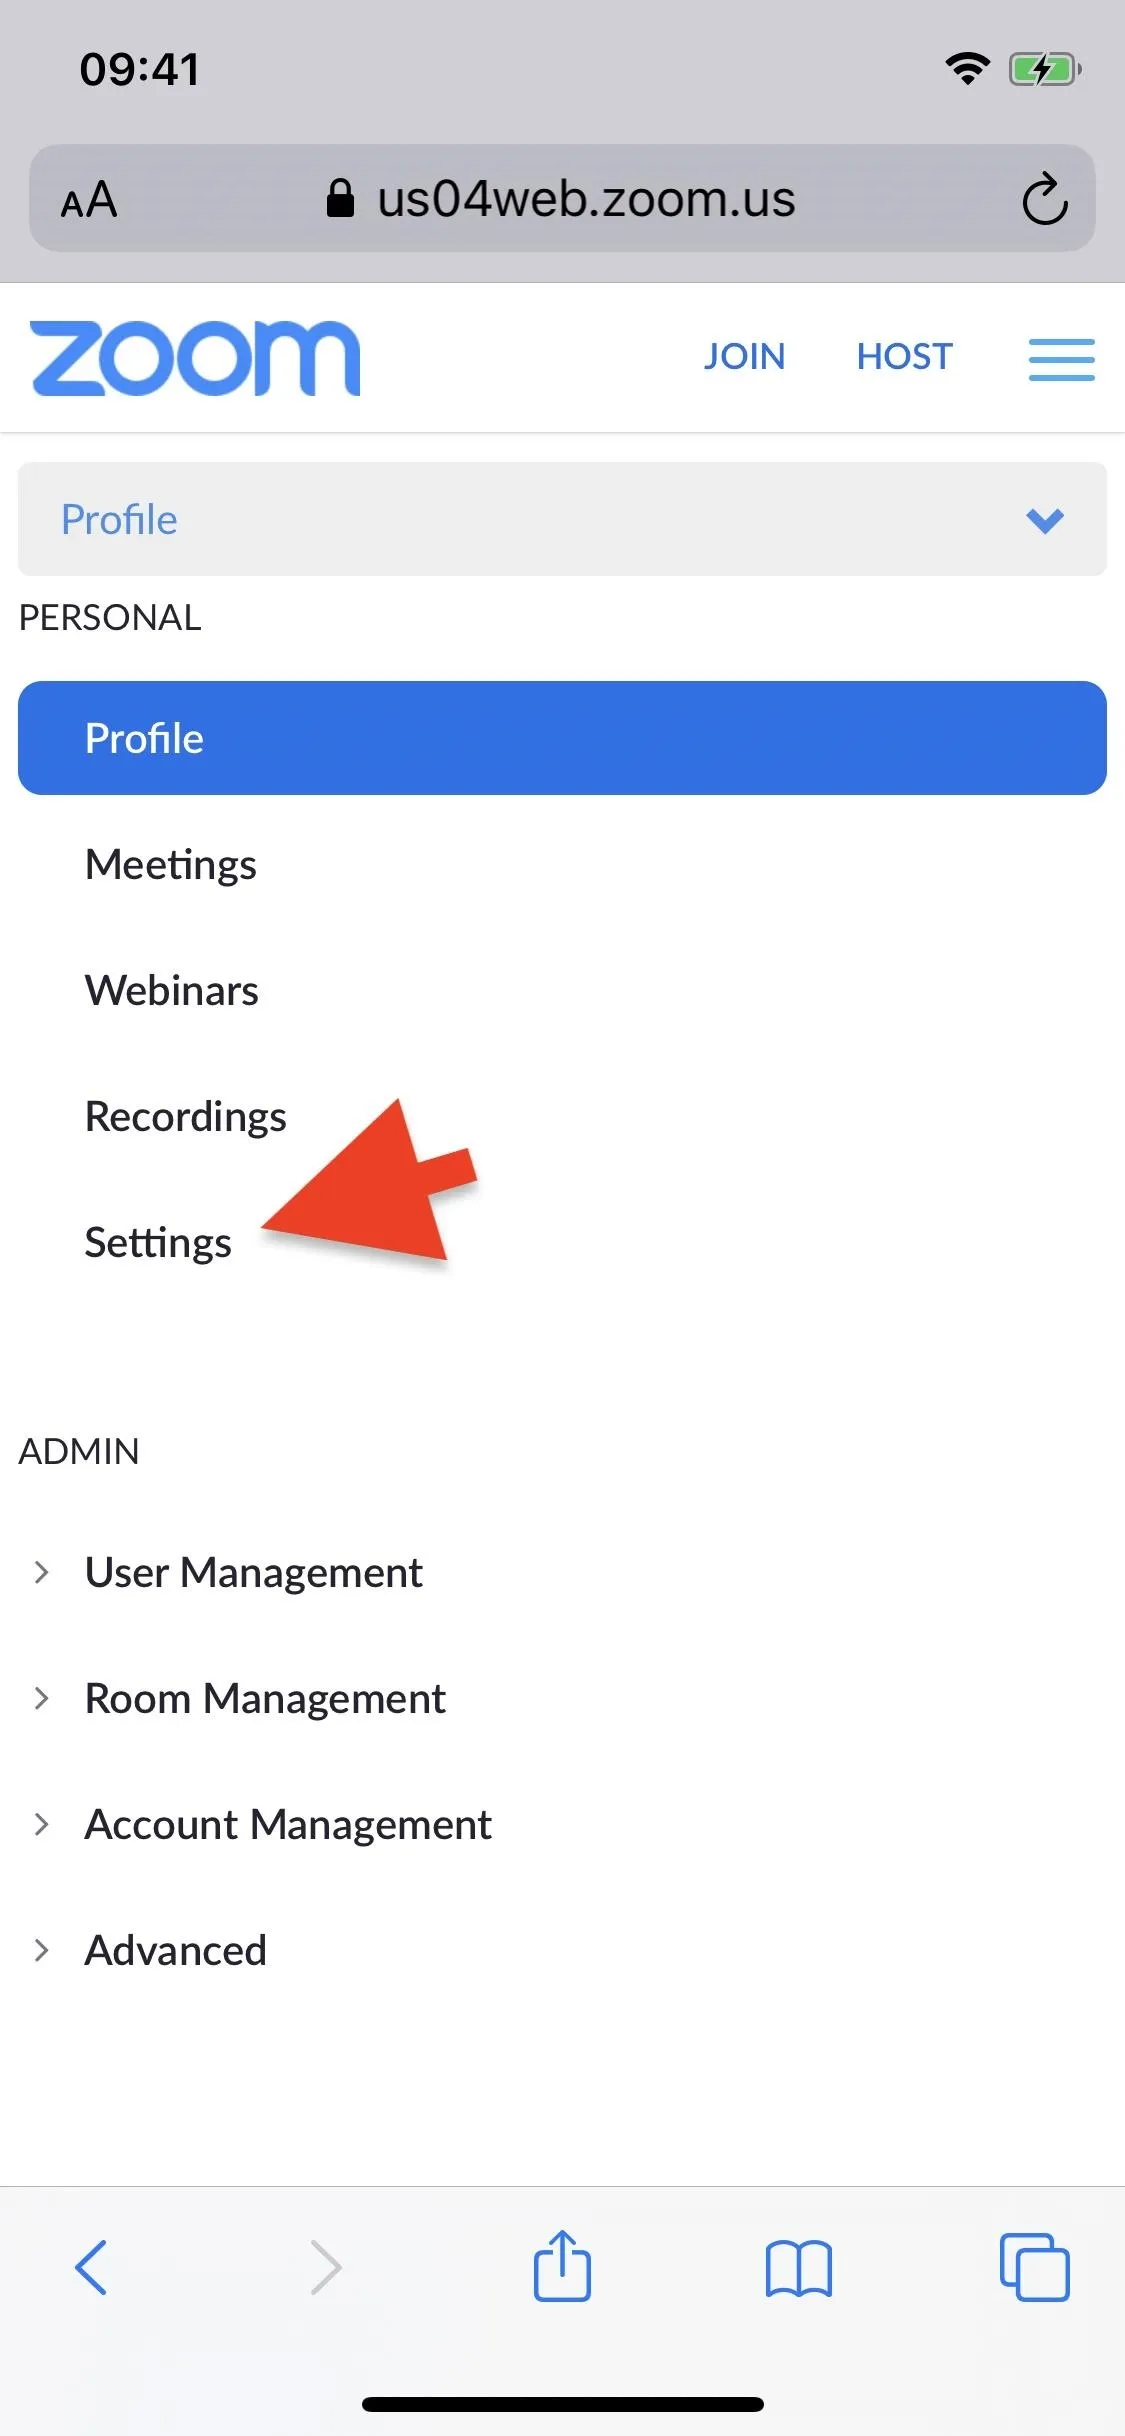
Alternatively, you can visit zoom.us in your browser, tap the three-lined menu icon in the top right, select "Sign In," then enter your credentials to log in. Next, navigate to your account settings; tap the gray drop-down box that says "Profile" and choose "Settings."
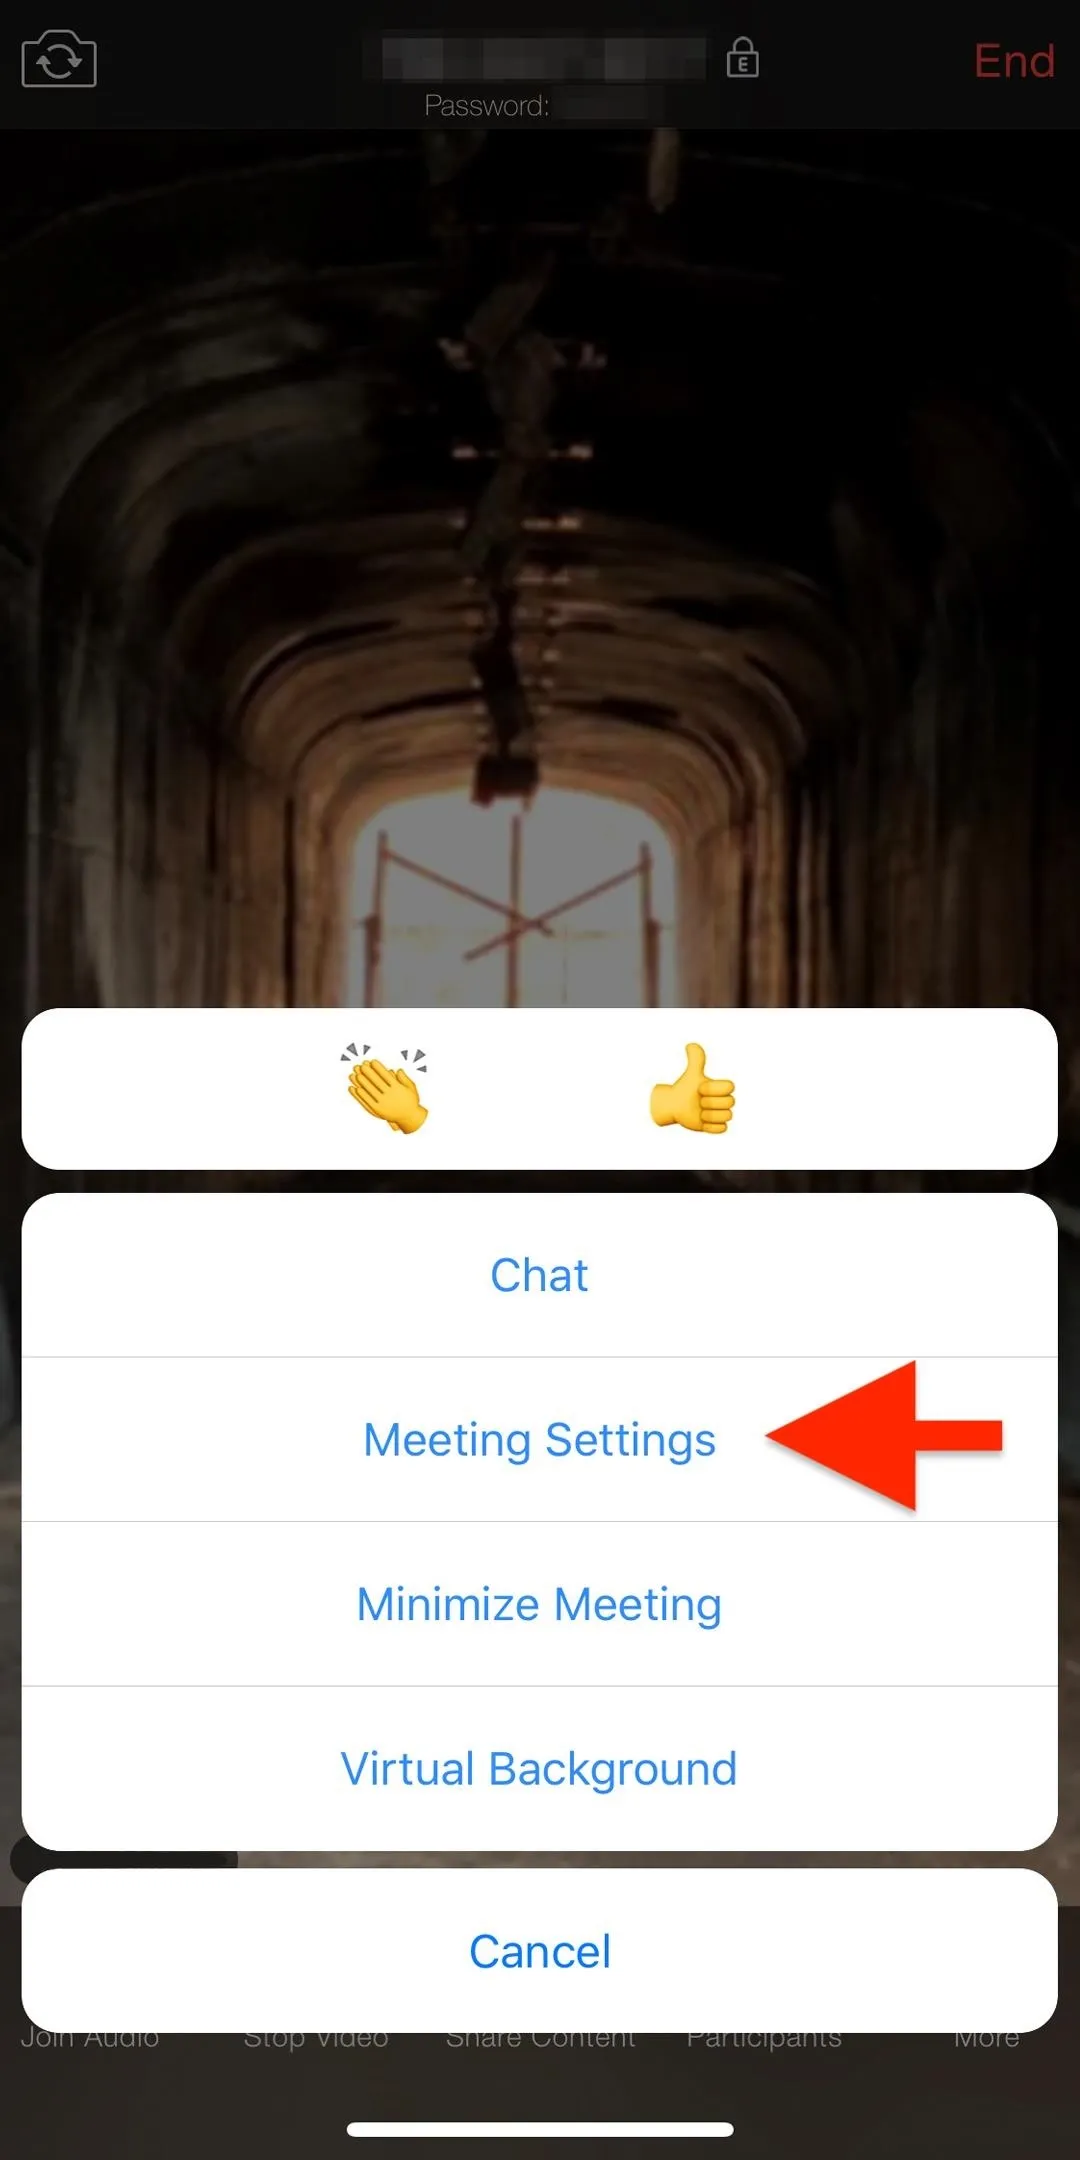
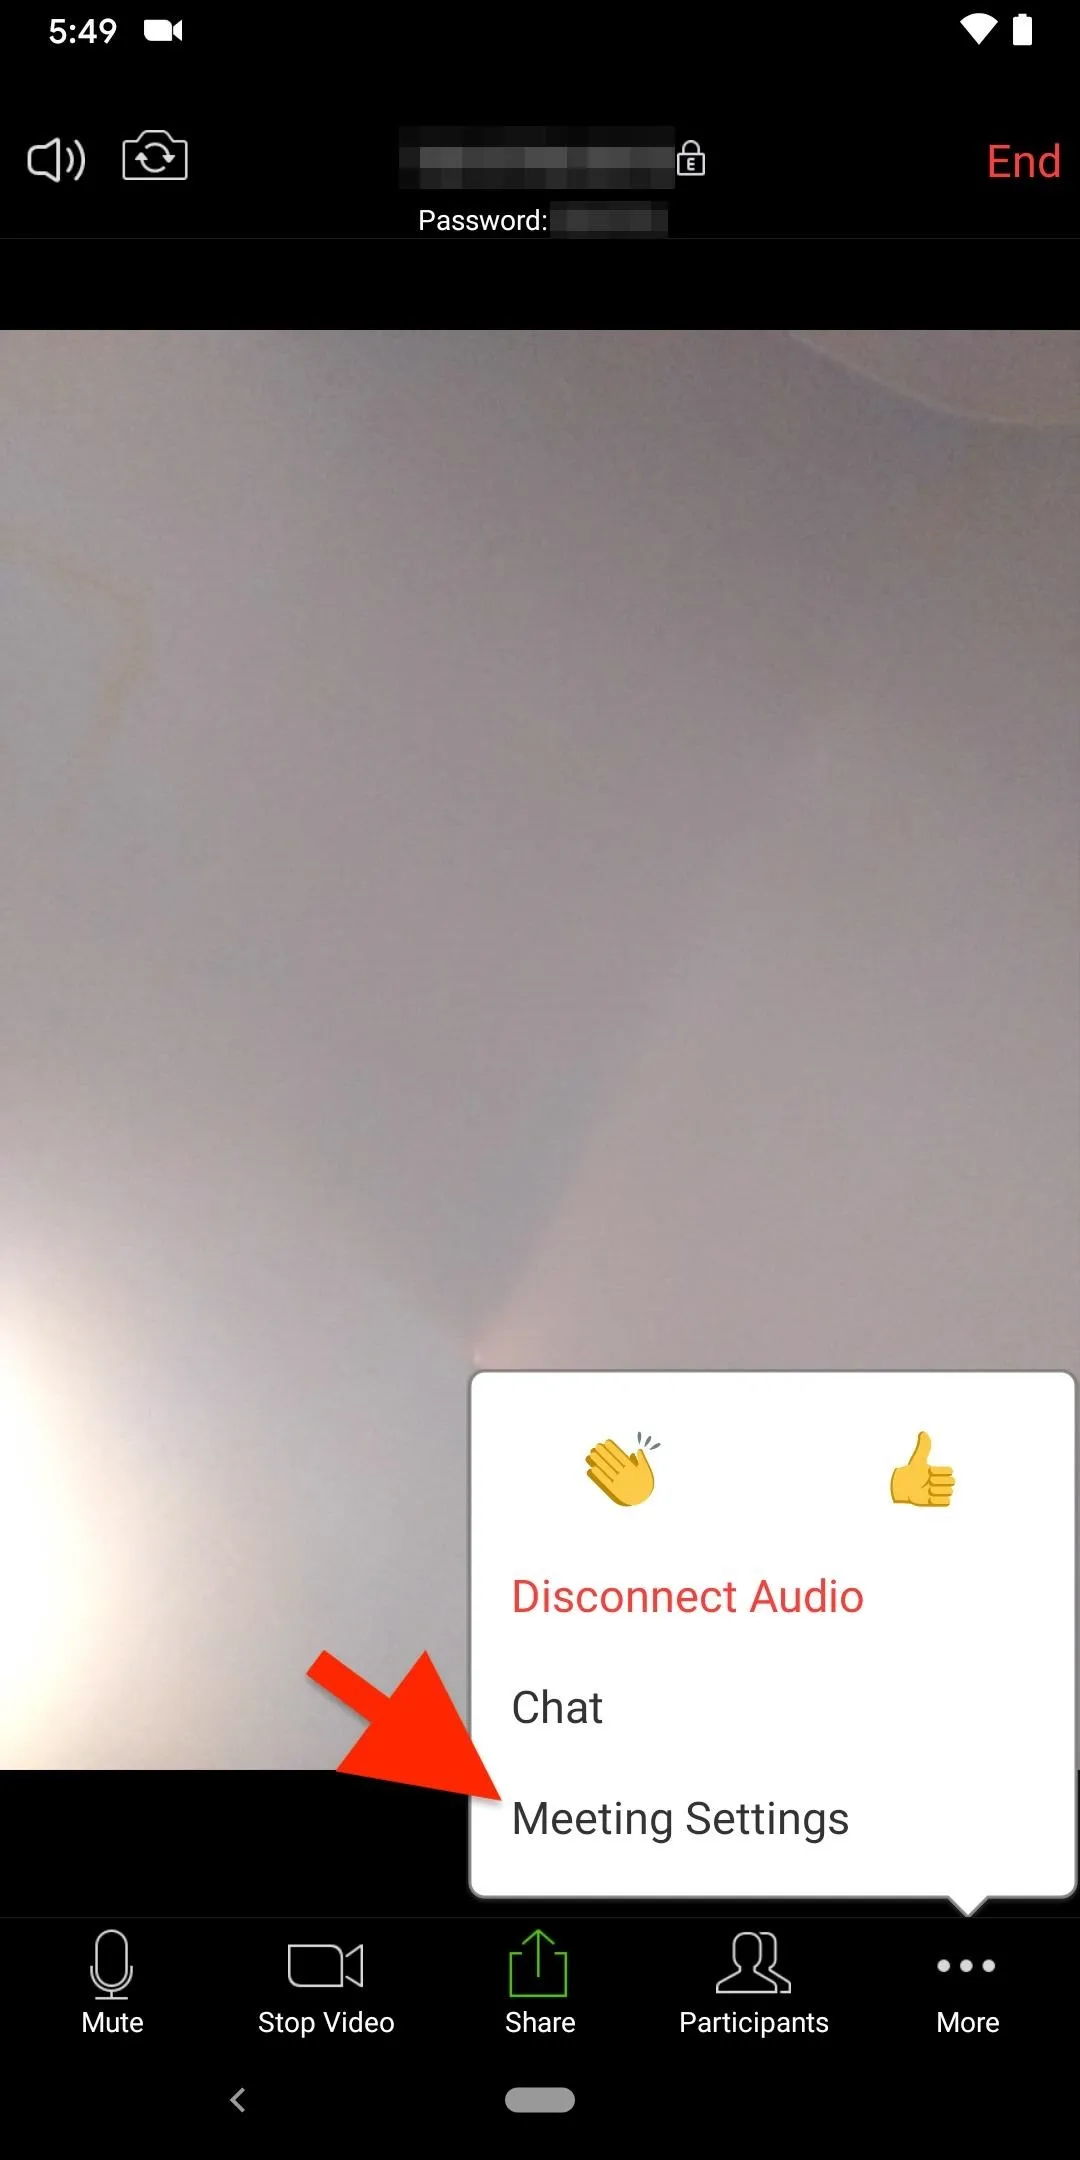
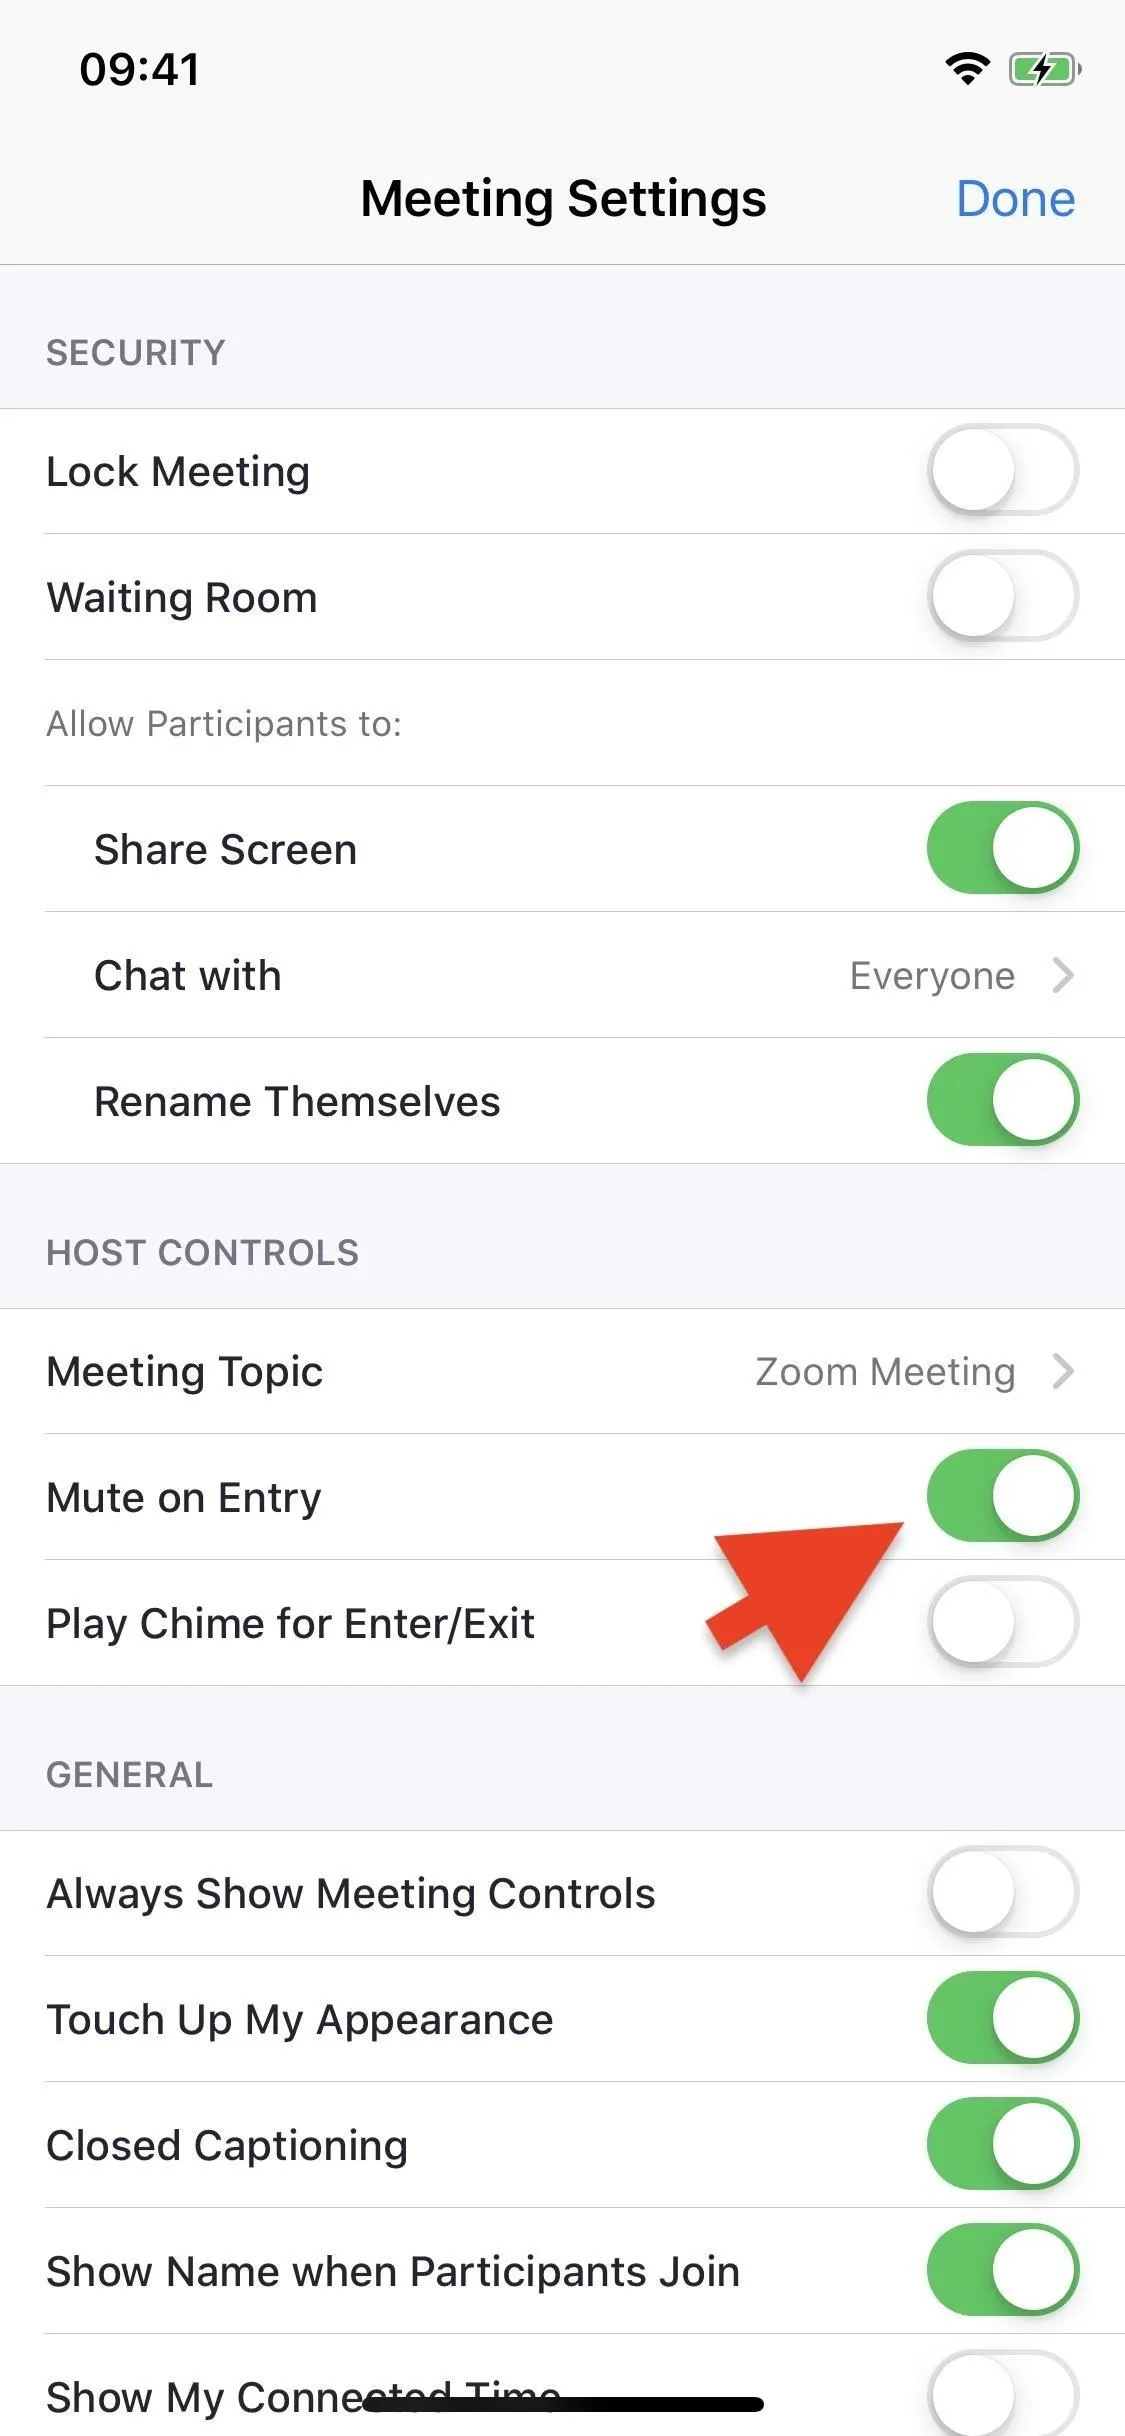
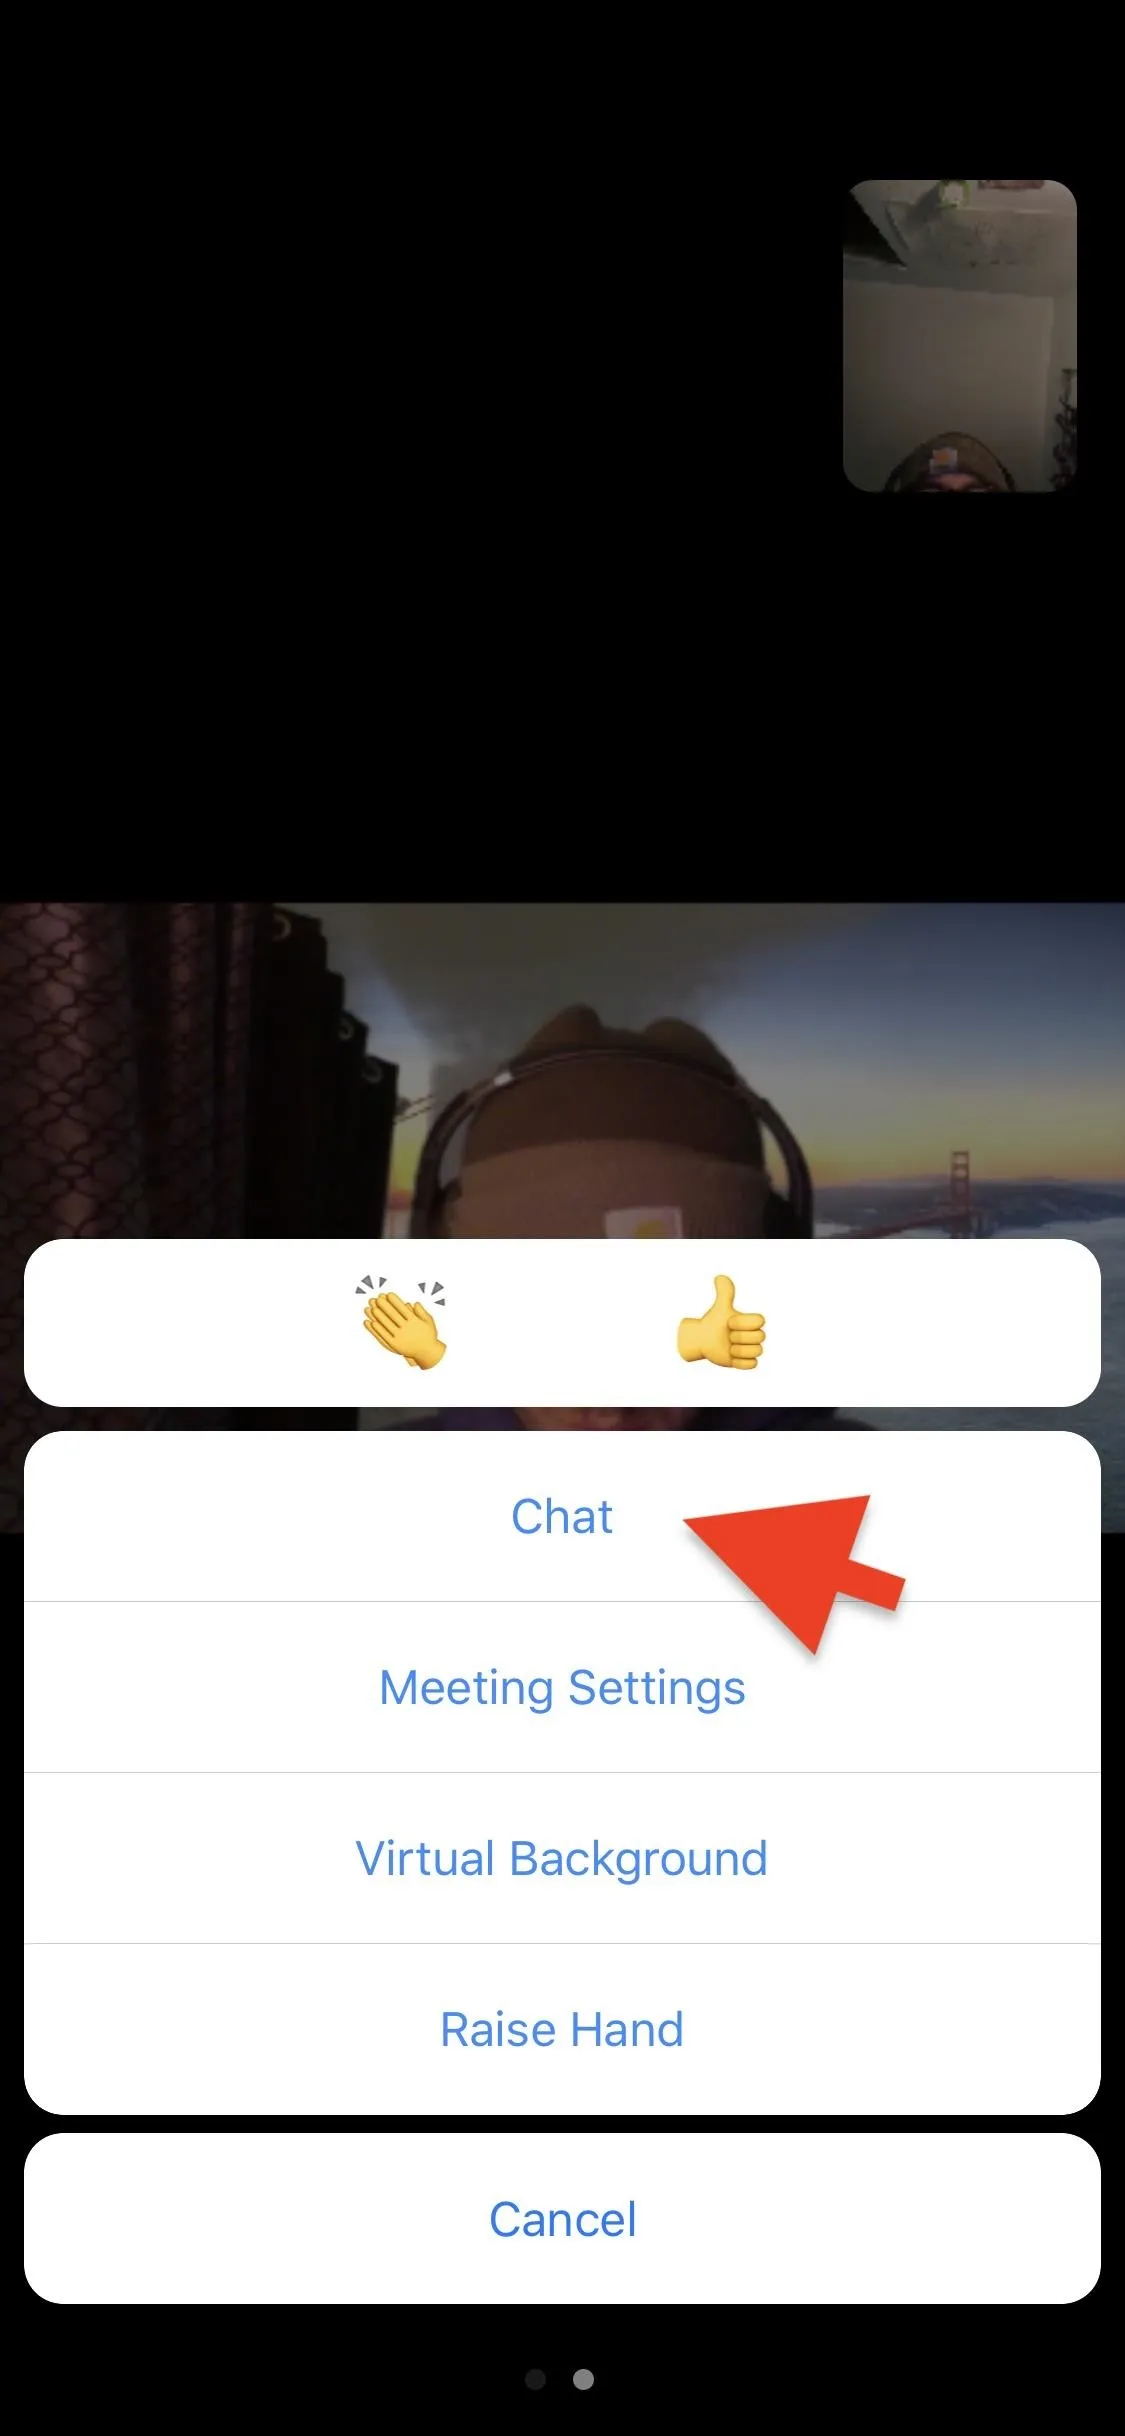
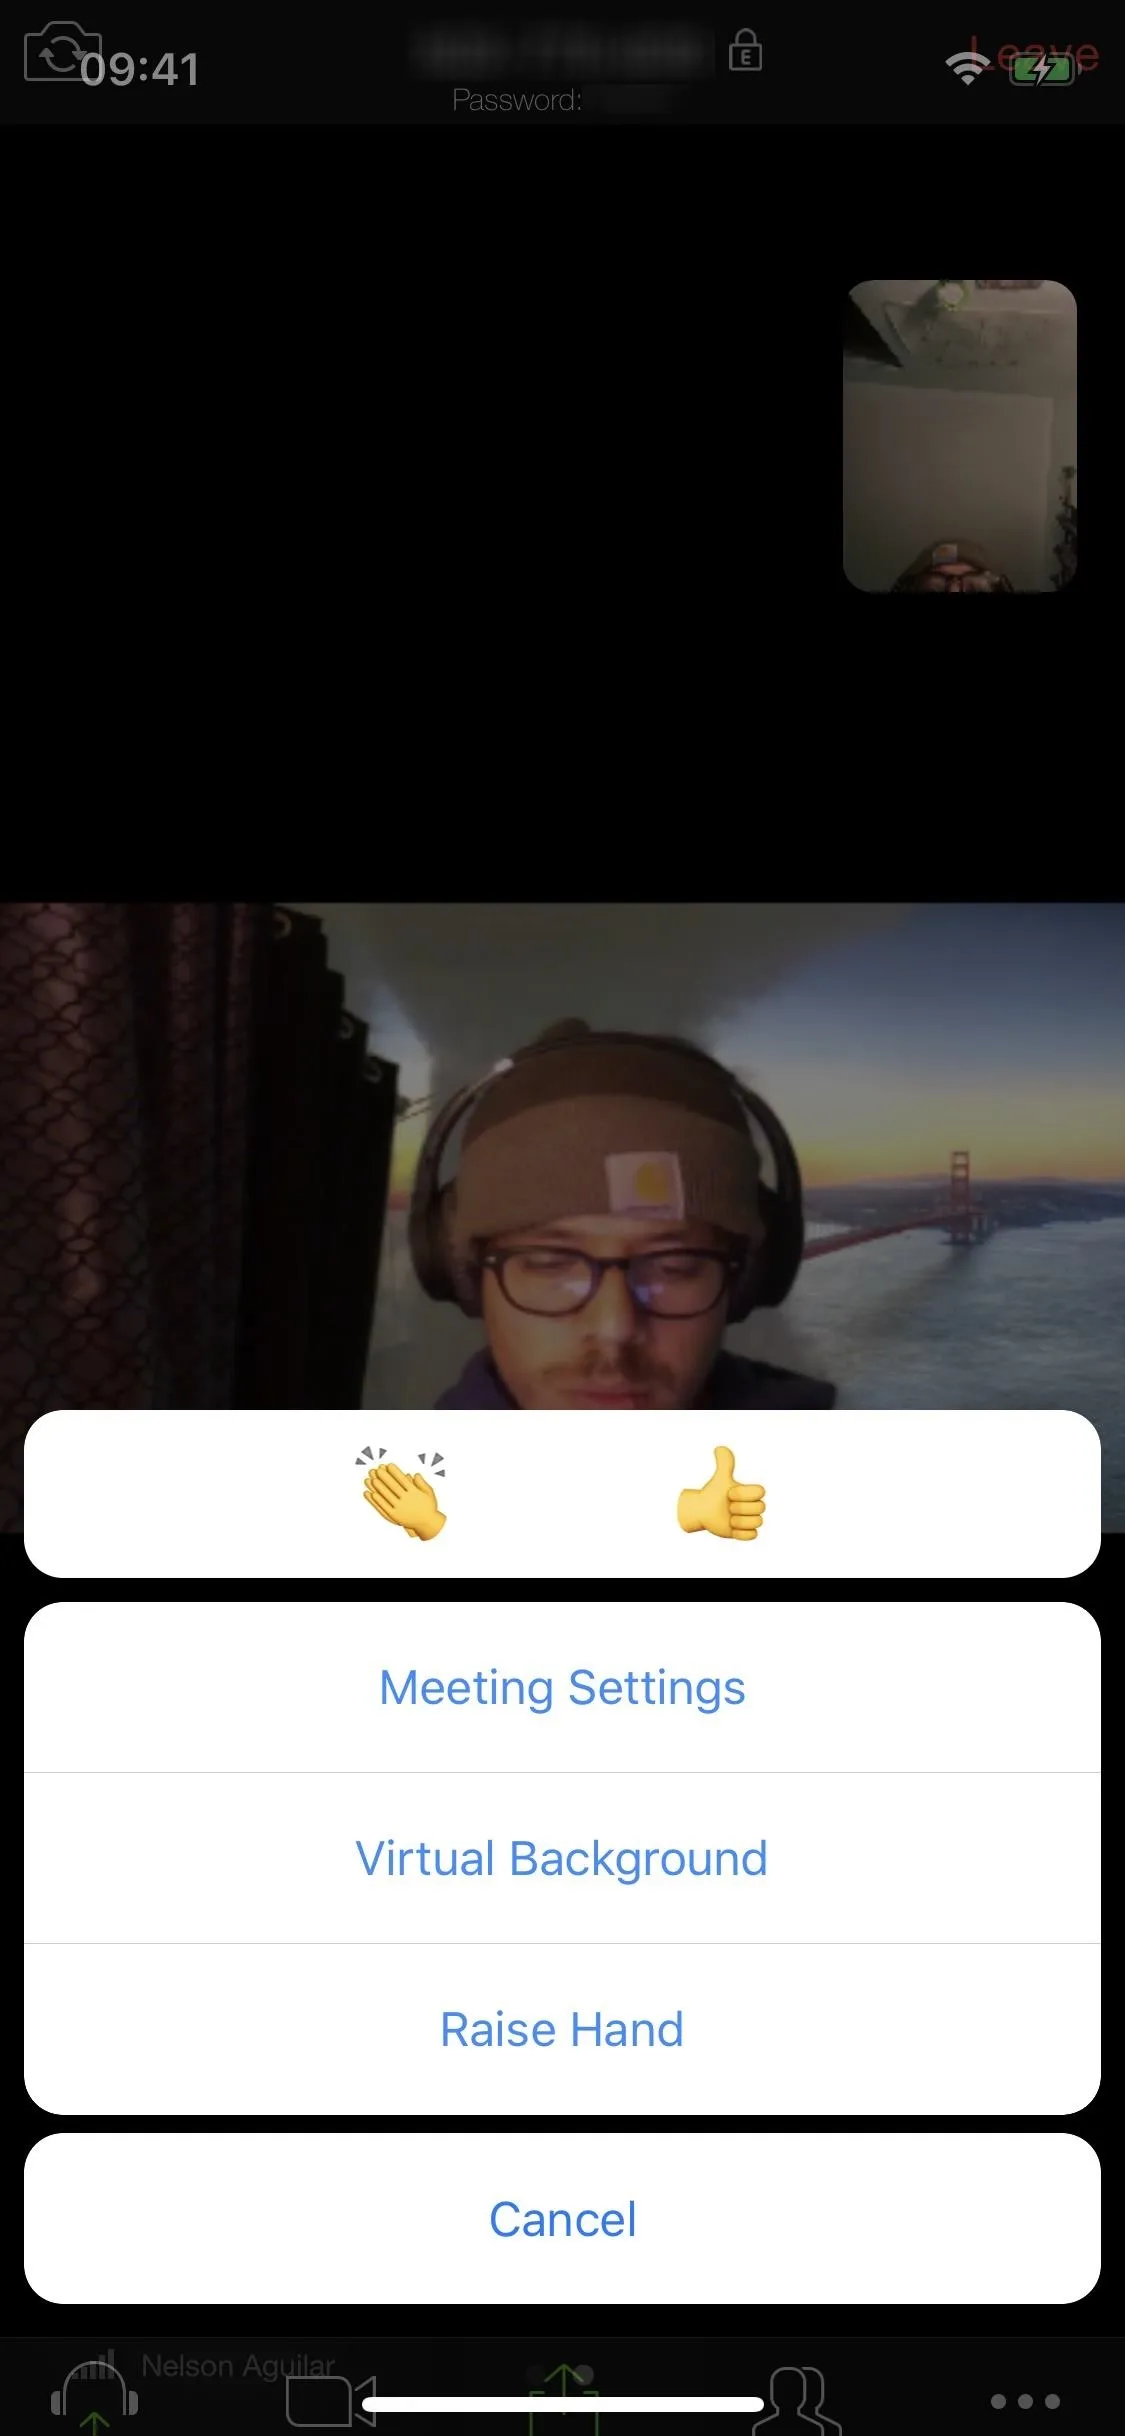
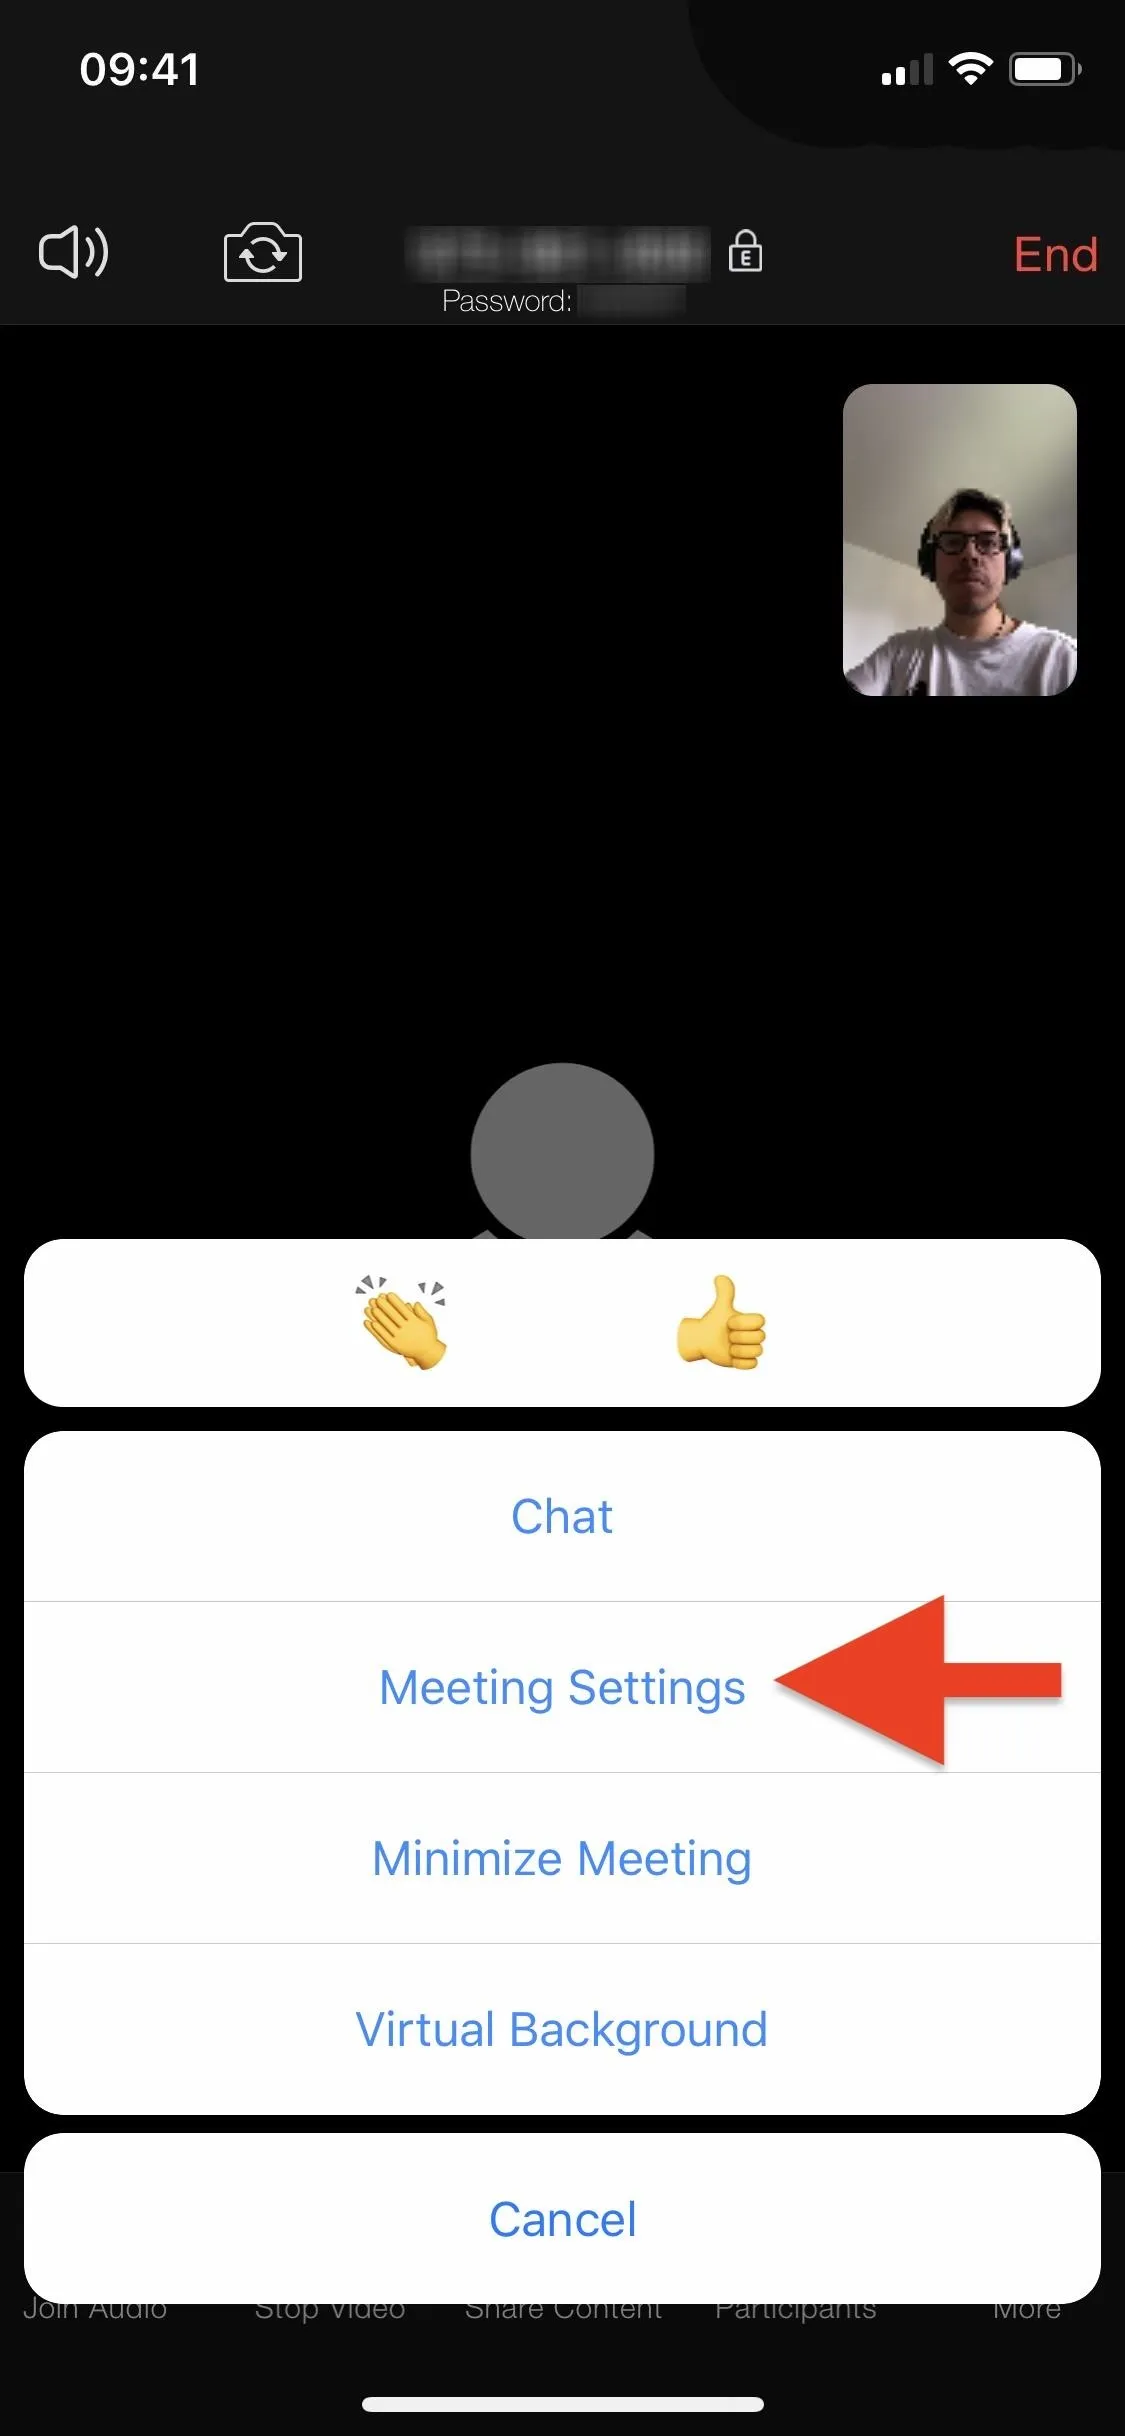
Some settings you may be able to change on a meeting-by-meeting basis within the Zoom mobile app directly. When hosting or co-hosting a meeting, you can find these settings by tapping "More" in the navbar, then "Meeting Settings."
Default Zoom Settings You Should Leave Alone
In light of all the negative Zoombombing issues, as well as other security and privacy concerns with the video conferencing software, Zoom has committed to "strengthening and improving" its service. That means new features and enhancements to existing ones to help prevent and stop meeting interruptions.
These features are enabled or disabled by default for maximum security, so you just need to leave them alone. However, if you have altered your meeting settings in the past, you will want to double-check these preferences and change or "reset" them appropriately if needed.
Send Participants to the Waiting Room Right Away
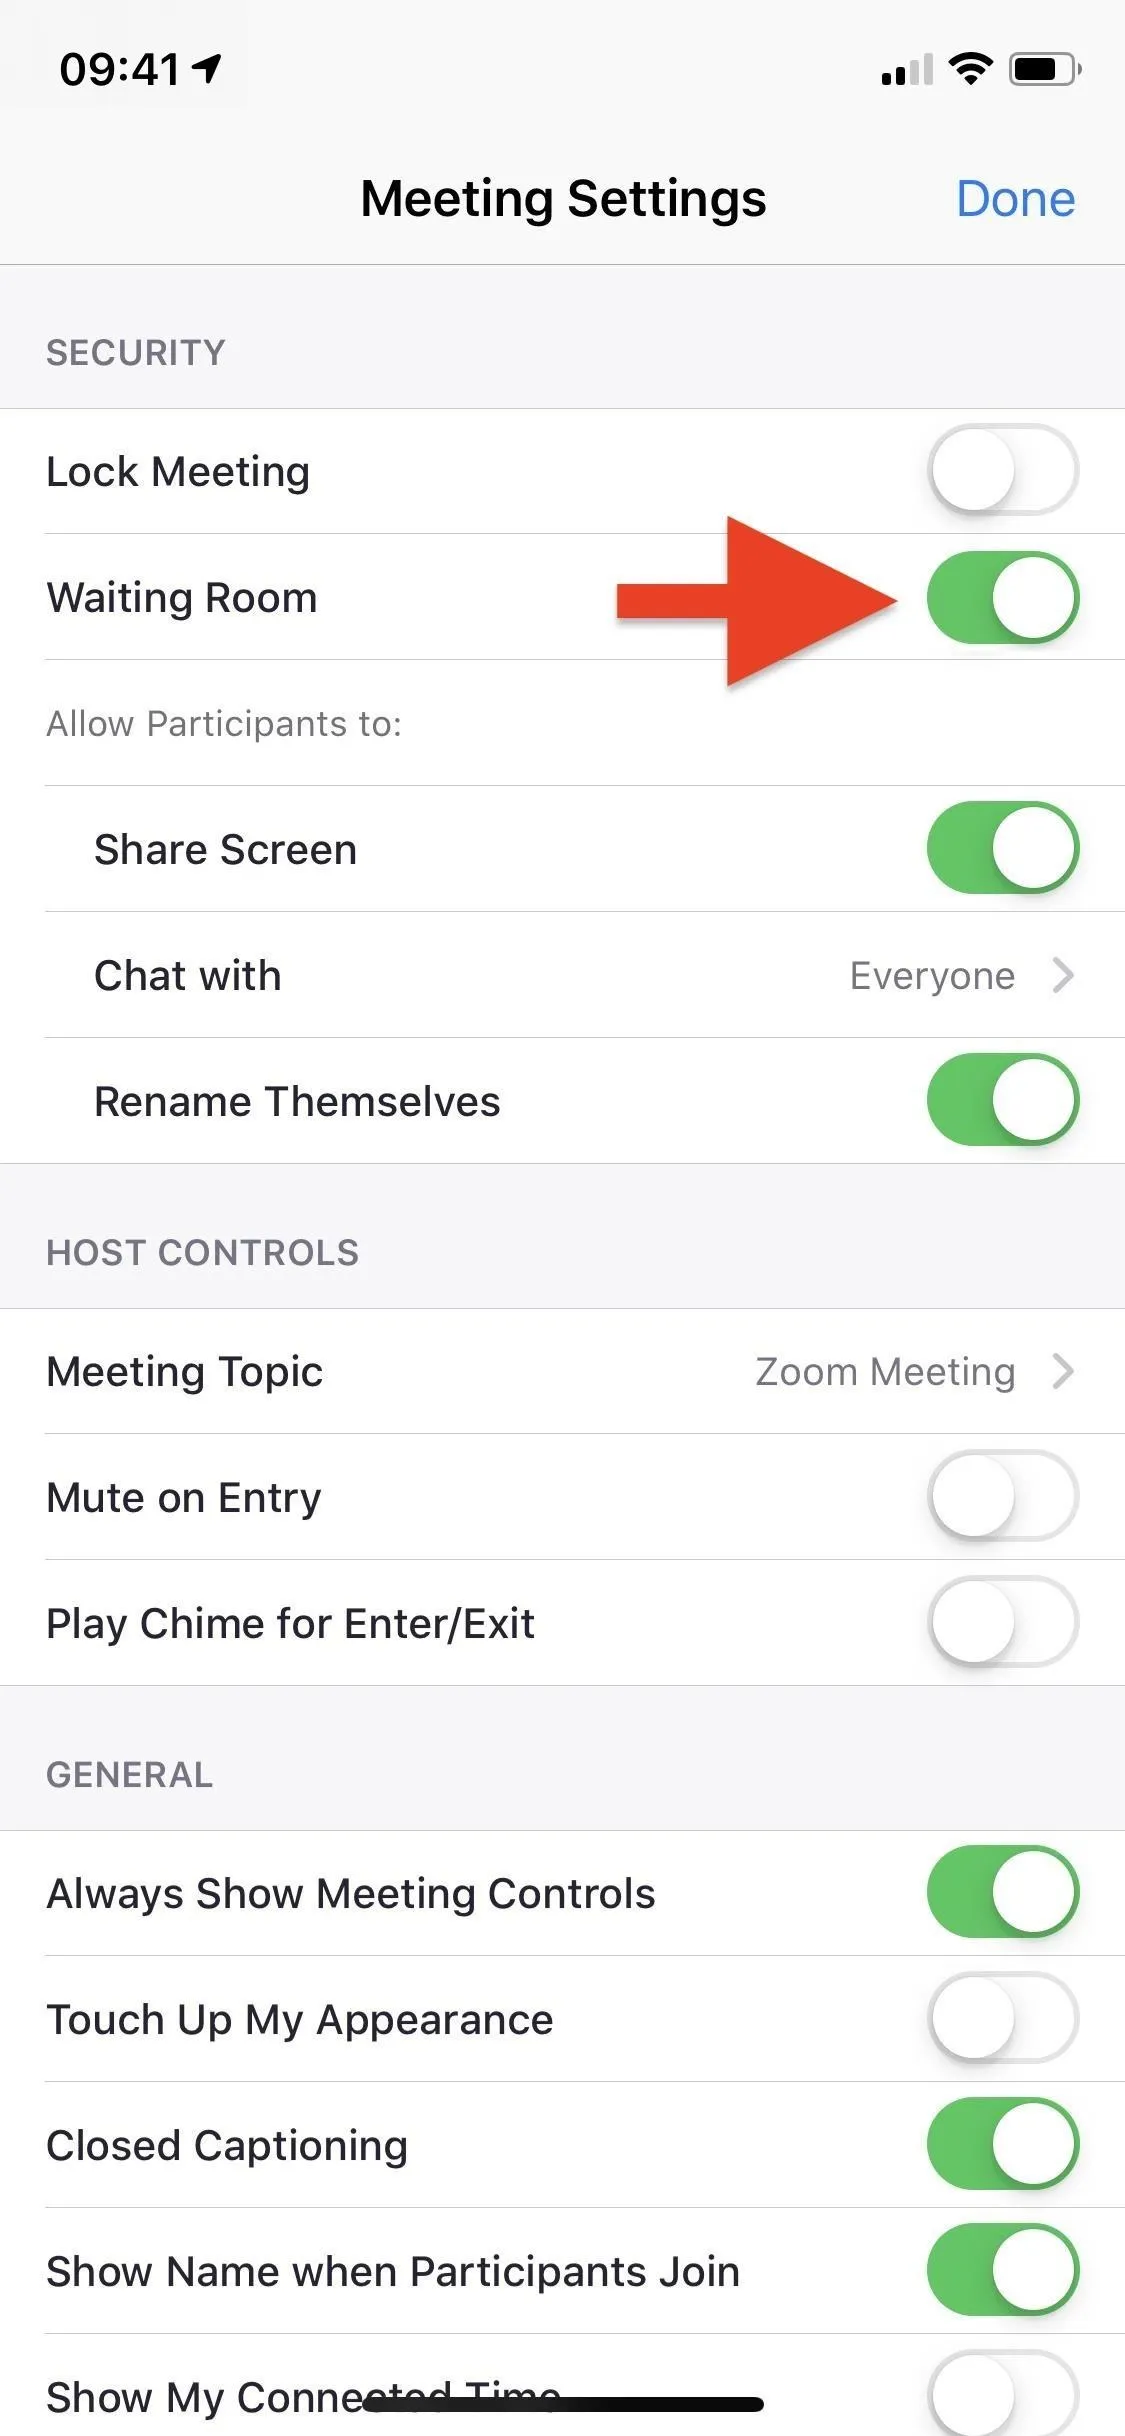
Find the "Waiting room" setting and make sure it's turned on. It's enabled by default. The waiting room is where participants wait before a meeting starts. In the virtual waiting room, users cannot share video or audio or even speak to each other, and they must wait for the host or co-host to let them into the meeting.
If the setting is disabled, you can turn it on for individual meetings in the iOS or Android app. You can find the "Waiting Room" option in "Meeting Settings," accessed via the "More" tab in the navbar during the meeting.
Require a Password for All Meetings
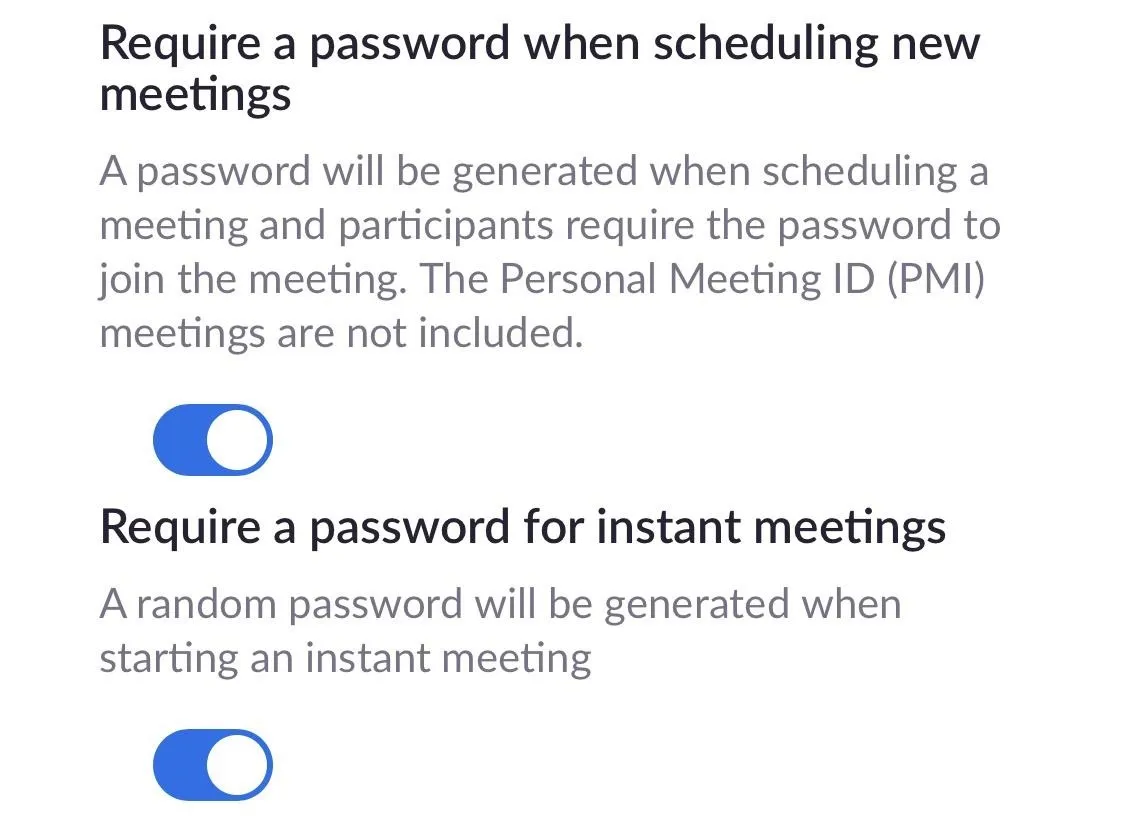
Locate both "Require a password when scheduling new meetings" and "Require a password for instant meetings," and make sure they are both turned on. They are enabled by default. All Zoom meetings require a password to join, except Personal ID Meetings (PMIs), unless you disable them manually. However, if you allowed the embedding of the password into meeting links, then those shareable links will auto-fill the password.
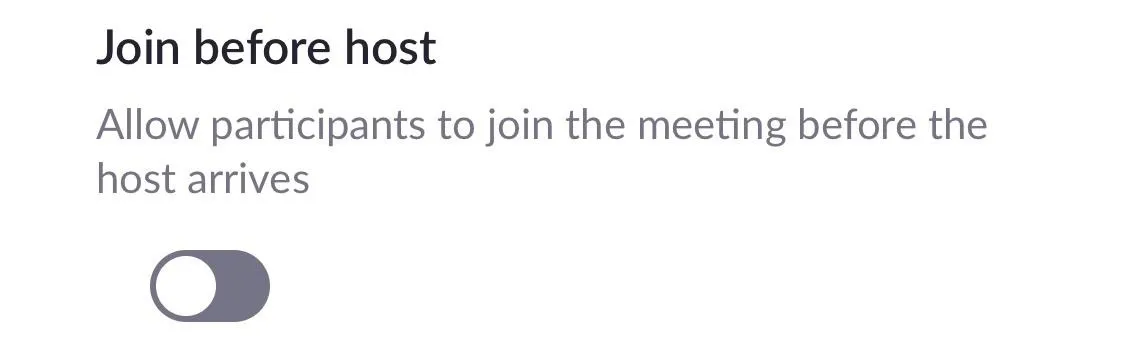
Block Others from Joining Before the Host
Look for "Join before host" and make sure it's turned off. It's disabled by default. If participants are allowed to join before the host is in the meeting, it could become a perfect window for distraction because there is no host to mute or kick people out.
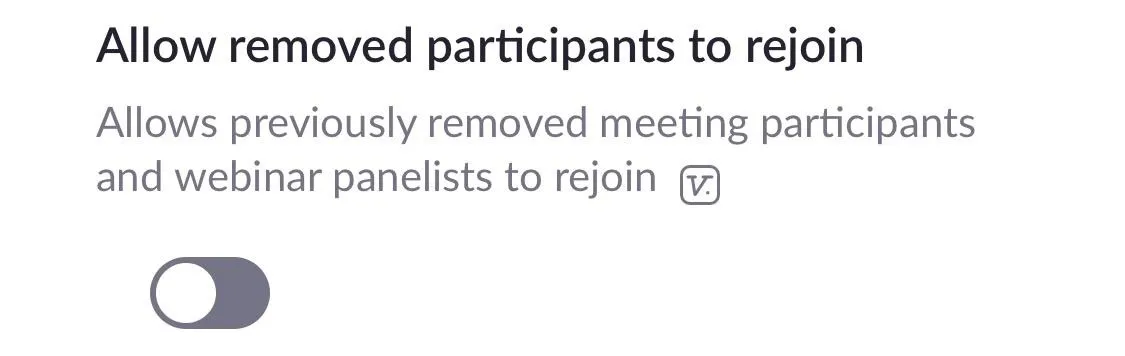
Block Kicked-Out Participants from Rejoining
Make sure the "Allow removed participants to rejoin" setting is off. It's disabled by default. If you kick someone out of a meeting, whether it's a regular video meeting or a panelist in a webinar, you probably don't want them to be able to rejoin.
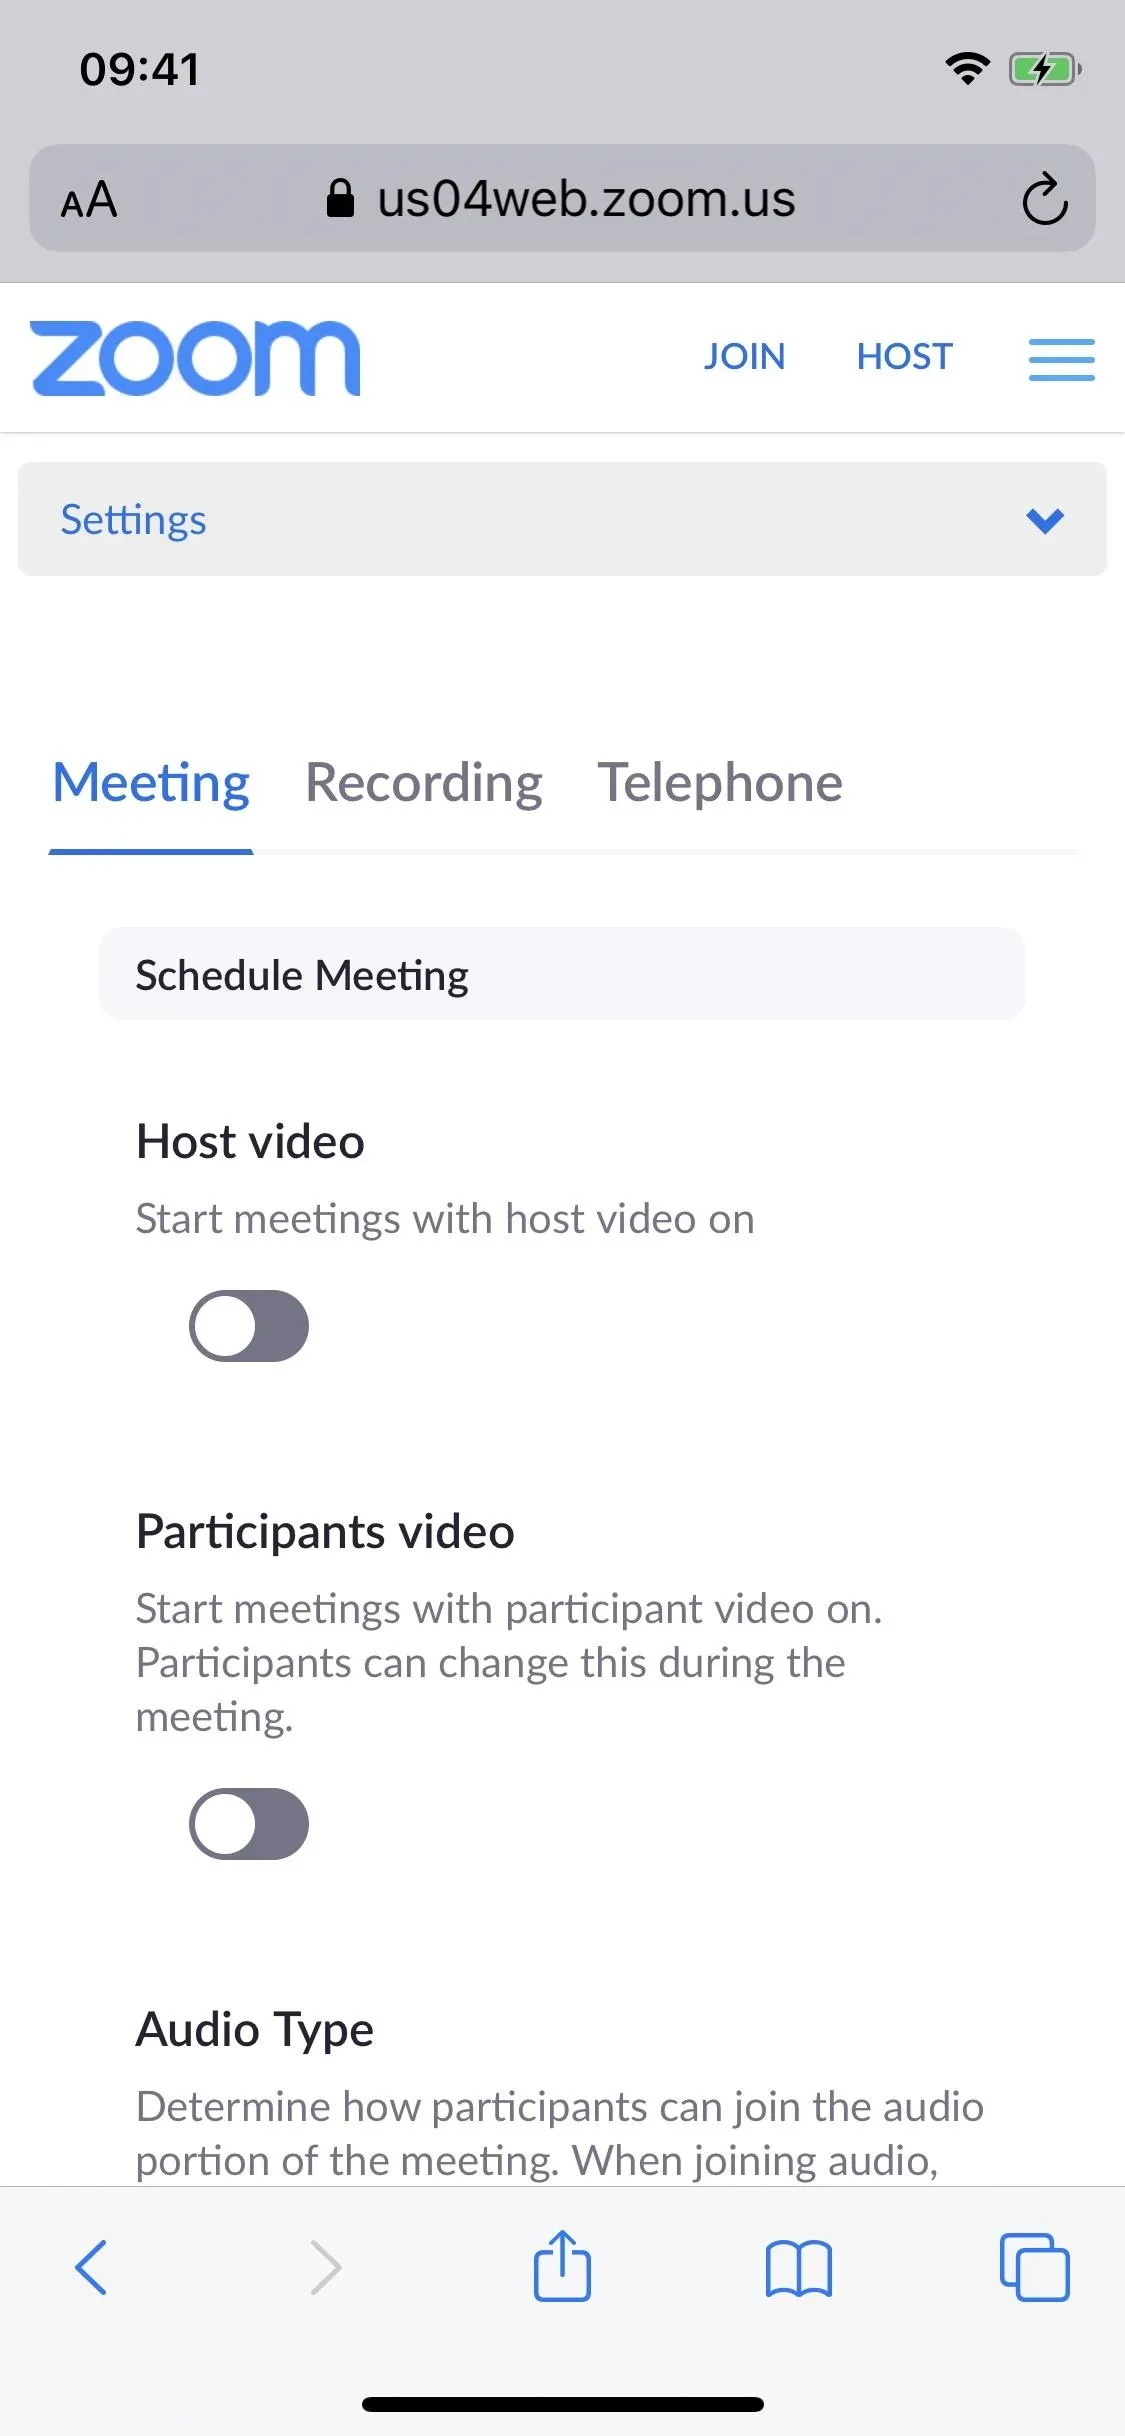
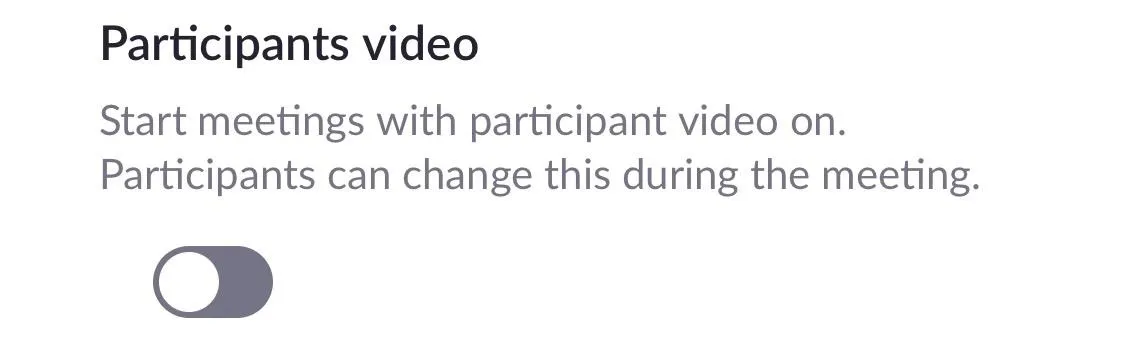
Disable Participants' Cameras from the Start
The "Participants video" preference should be turned off. It's disabled by default. That way, participants have to enable their video manually when they're allowed into a meeting. It gives them a few seconds to think about their environment and what's around them that might be a potential distraction to others.
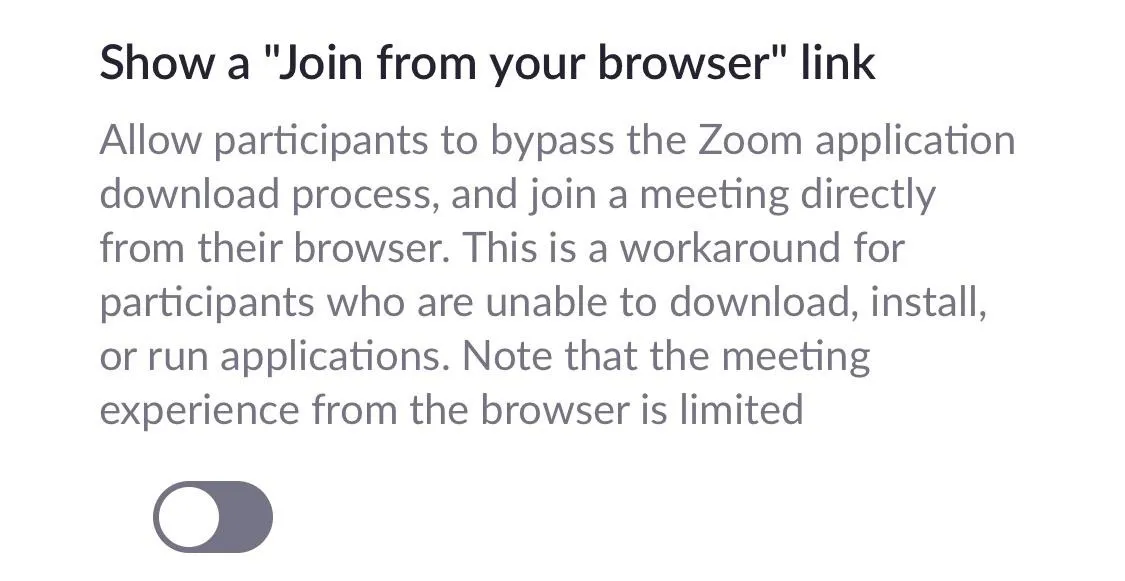
Disable 'Join from Your Browser' Links
Check that the "Show a 'Join from your browser' link" option turned off. It's disabled by default. If it's on, people can join without even using the Zoom app or Zoom web client. It's handy for people who can't or don't know how to install Zoom on their device, but it also makes trolling easier and more anonymous.
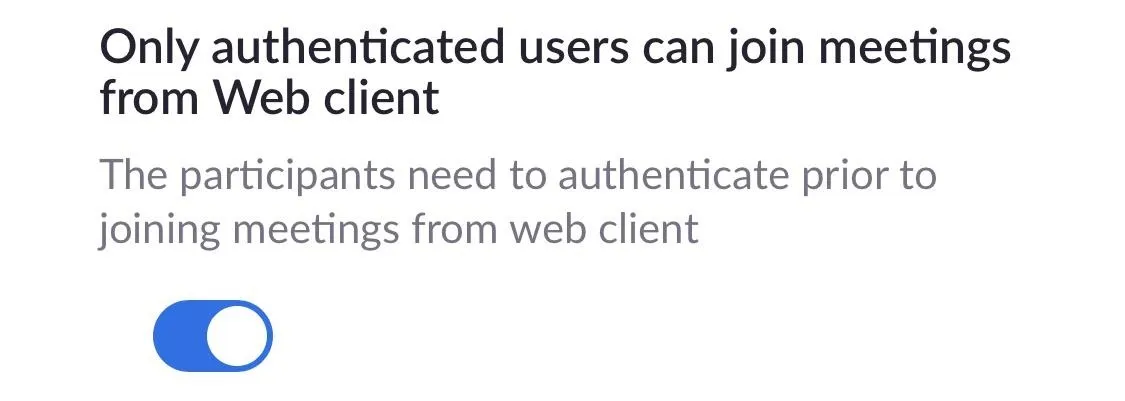
Allow Only Authenticated Users In
Confirm that the "Only authenticated users can join meetings from Web client" is turned on. It's enabled by default. That way, participants must be logged into their Zoom accounts to attend a meeting from their web client. Unfortunately, it only applies to the web client, either on desktop or mobile, which is what most trolls will use if they can join the meeting via a link since they can remain anonymous.
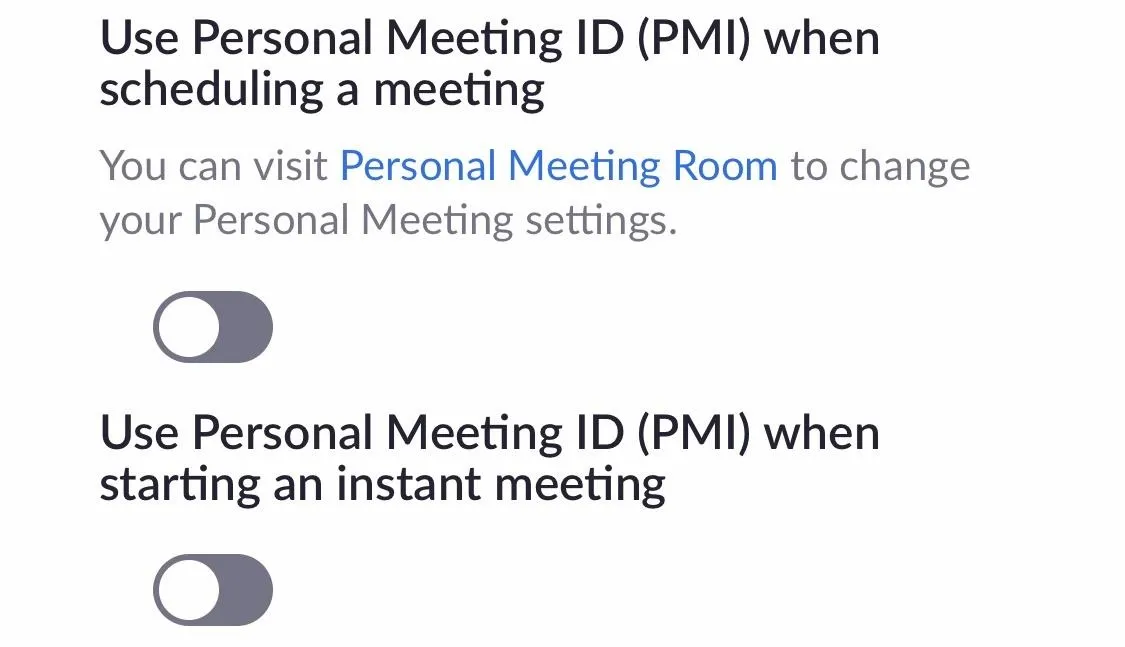
Don't Use Your Personal Meeting ID
Double-check that both "Use Personal Meeting ID (PMI) when scheduling a meeting" and "Use Personal Meeting ID (PMI) when starting an instant meeting" are turned off. They are disabled by default. A PMI means you'll always have the same meeting ID when you start a meeting, which makes it easier for others to learn your repeating ID and hijack your call. Avoid using a PMI unless you're sure it's secure.
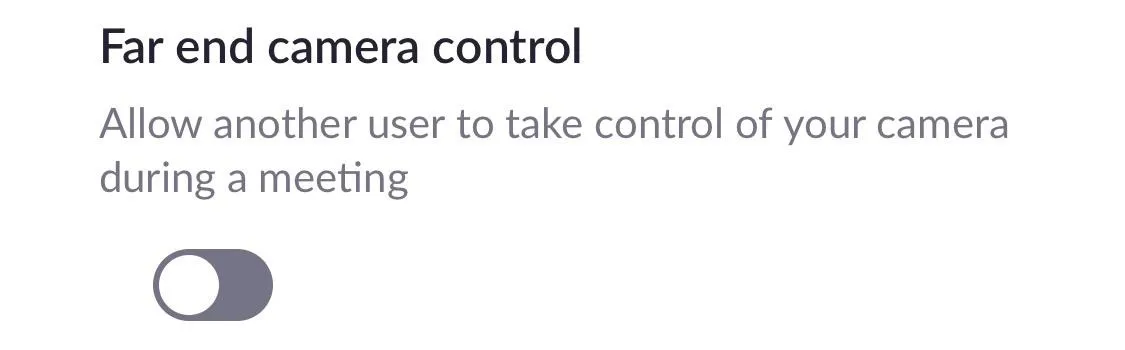
Don't Give Access to Control Your Camera
Find "Far end camera control" and make sure it's off. It's disabled by default. If it's turned on for some reason, anyone can control your camera during a meeting, which gives users the incentive to disrupt meetings childishly. Basically, don't give them something fun to play with.
Tips to Prevent Zoombombing Before It Happens
While the preferences above are set correctly by default, there are several options that you should change from their default on or off setting. The majority of the settings below are found in the meeting settings on the Zoom website. See the instructions above for getting there if you're not sure how to find them.
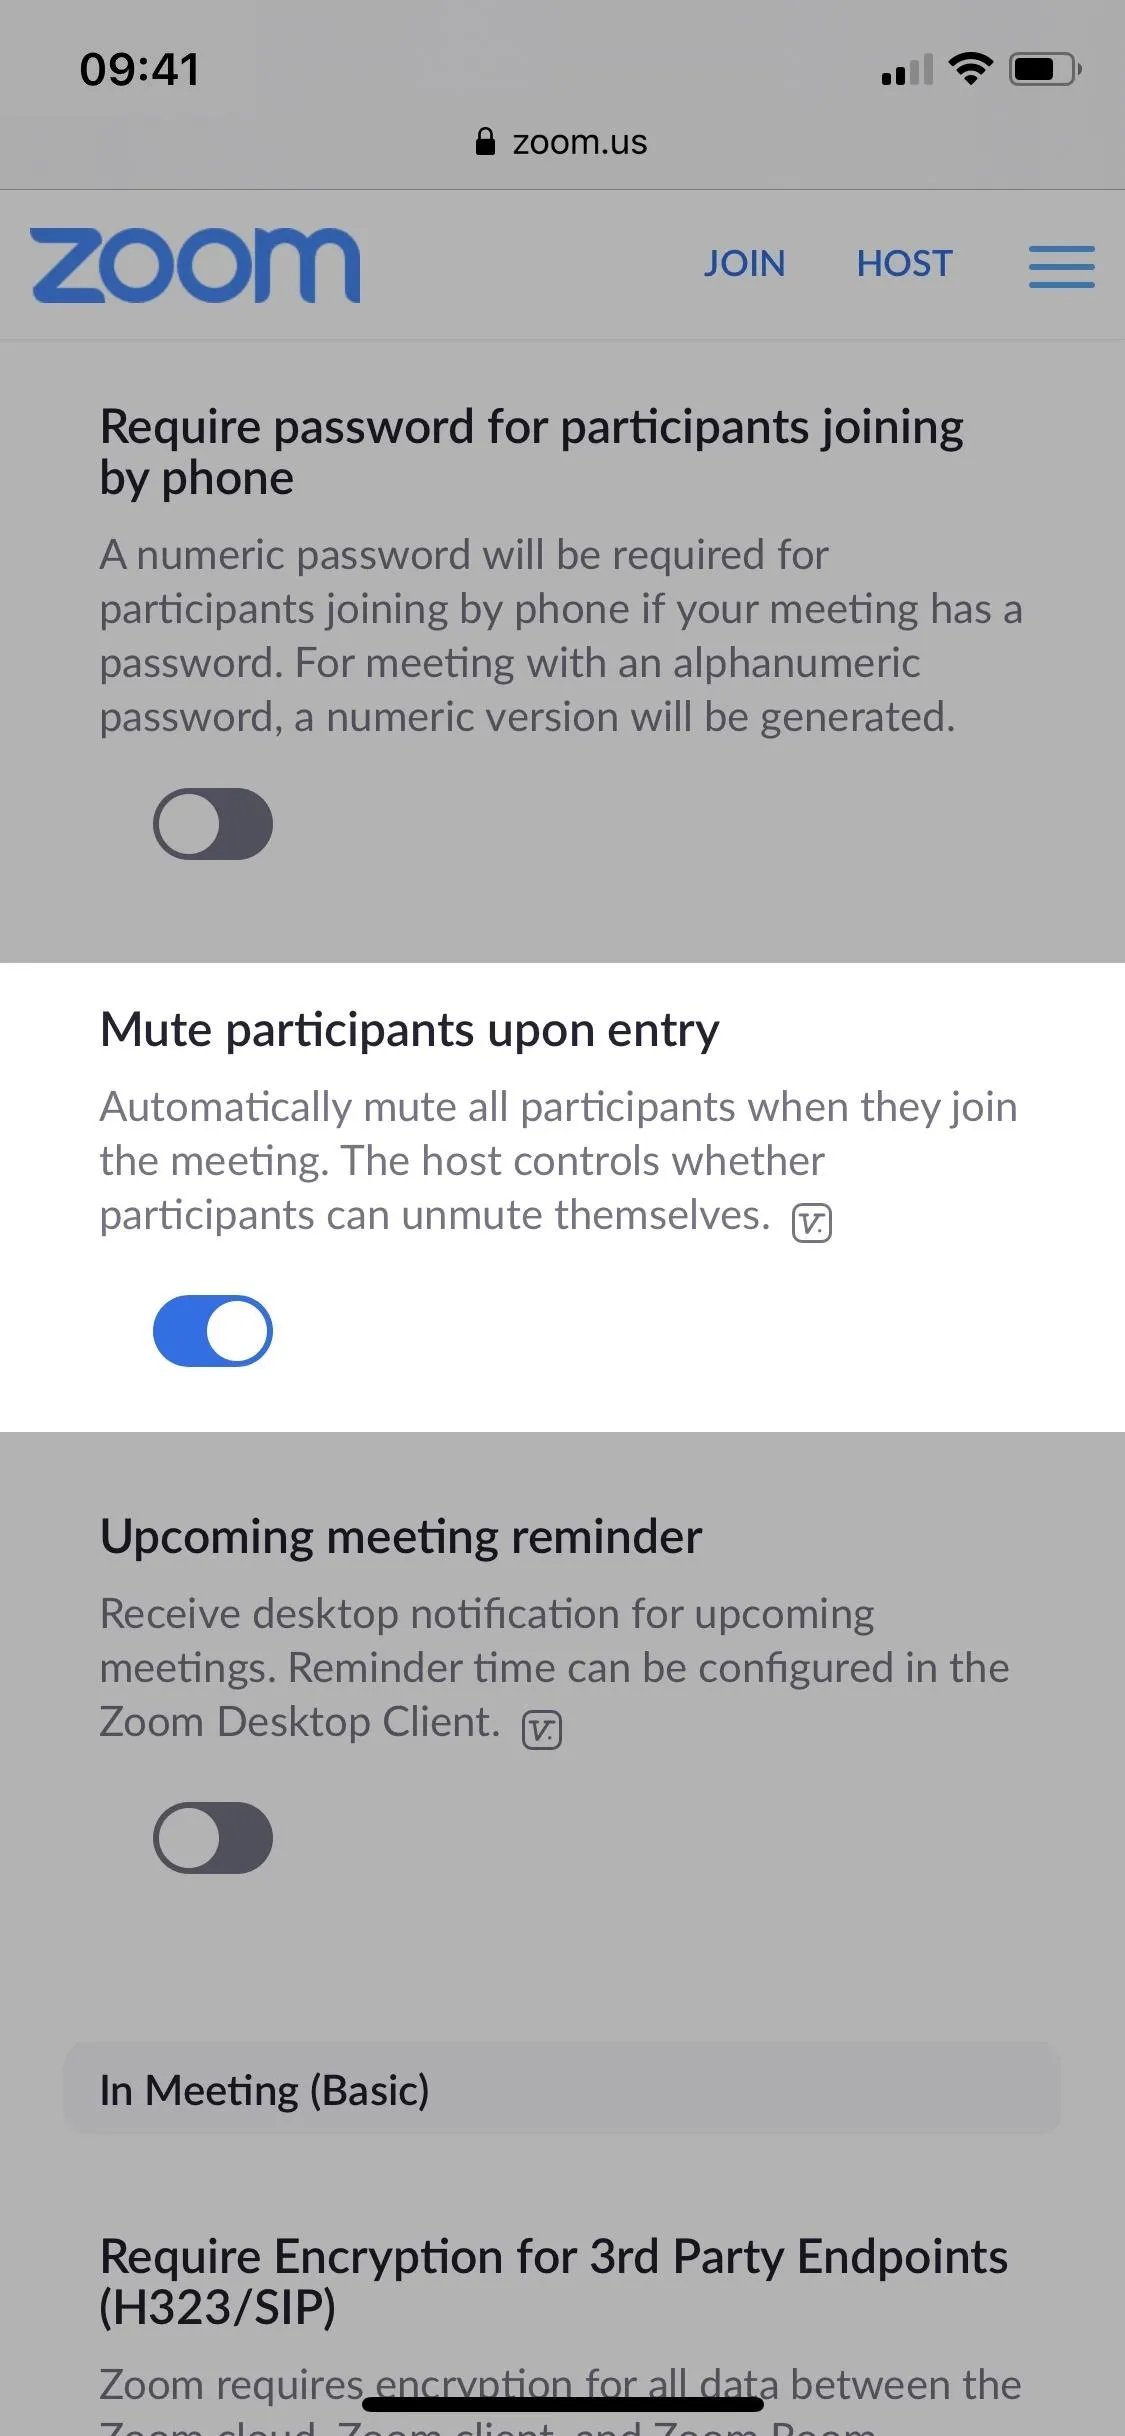
Mute Participants Upon Entry
You can mute participants during a meeting, but you can also turn off all of their microphones before they even join. It can be set either account-wide via the web settings or on a call-by-call basis in the mobile app during a live meeting.
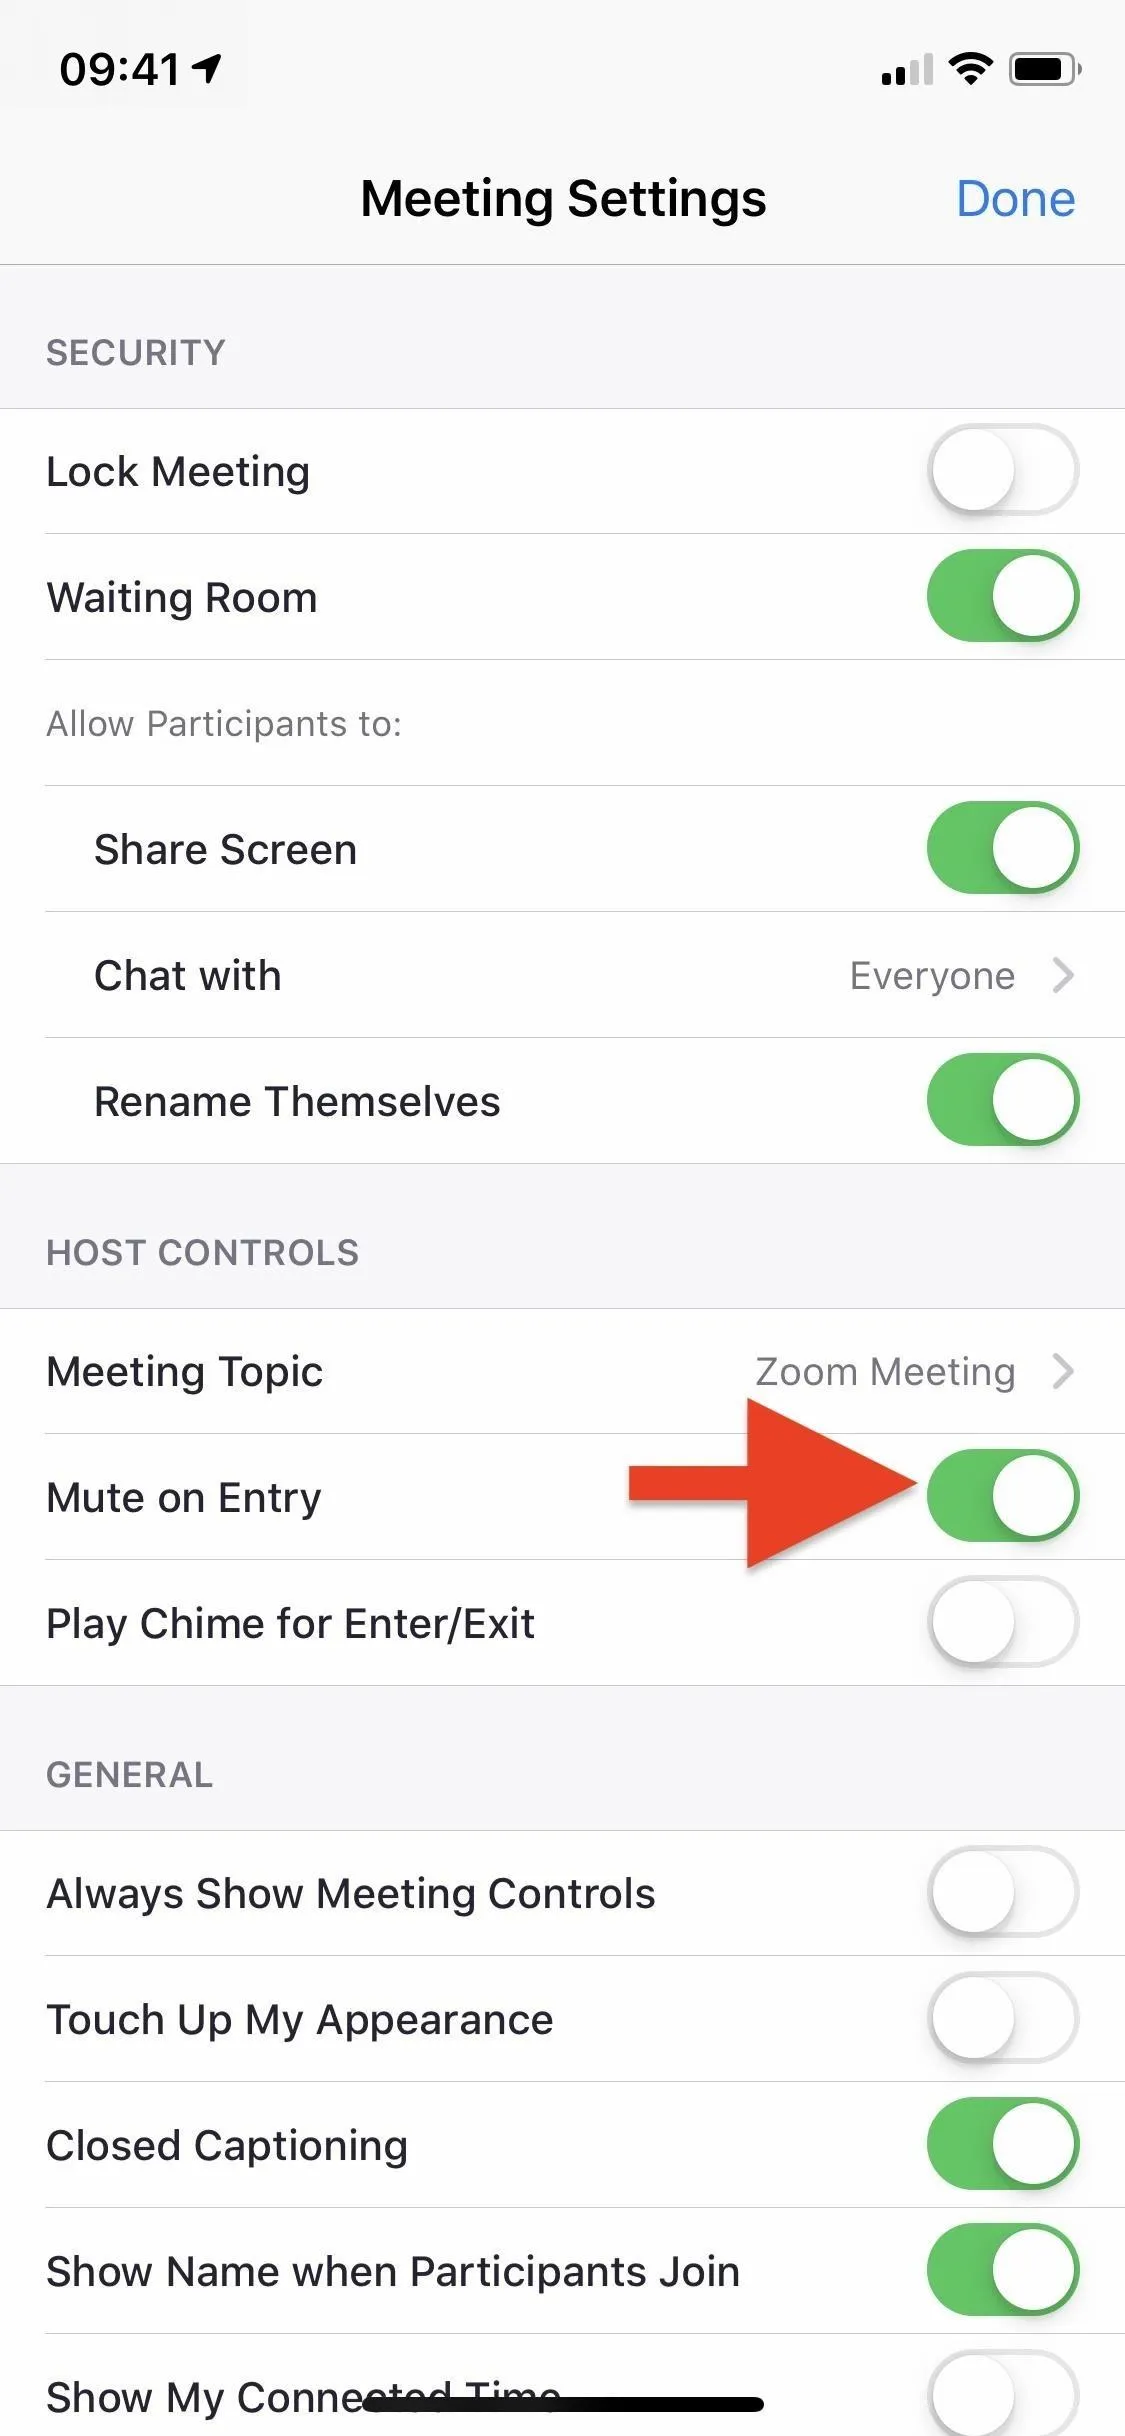
In the account-wide settings in the web app, make sure "Mute participants upon entry" is turned on. It's disabled by default. In the in-app settings during a live meeting, make sure "Mute on Entry" is toggled on. Unfortunately, participants can easily unmute themselves unless you take proactive measures to prevent them from doing so.
Disable or Restrict Screen Sharing
One of the ways that trolls take over a Zoom meeting is by sharing their screen, which could contain lewd or inappropriate images, videos, documents, and websites. Usually, anyone in the meeting can share things, but you can easily restrict or altogether disable sharing if you're the host or co-host.
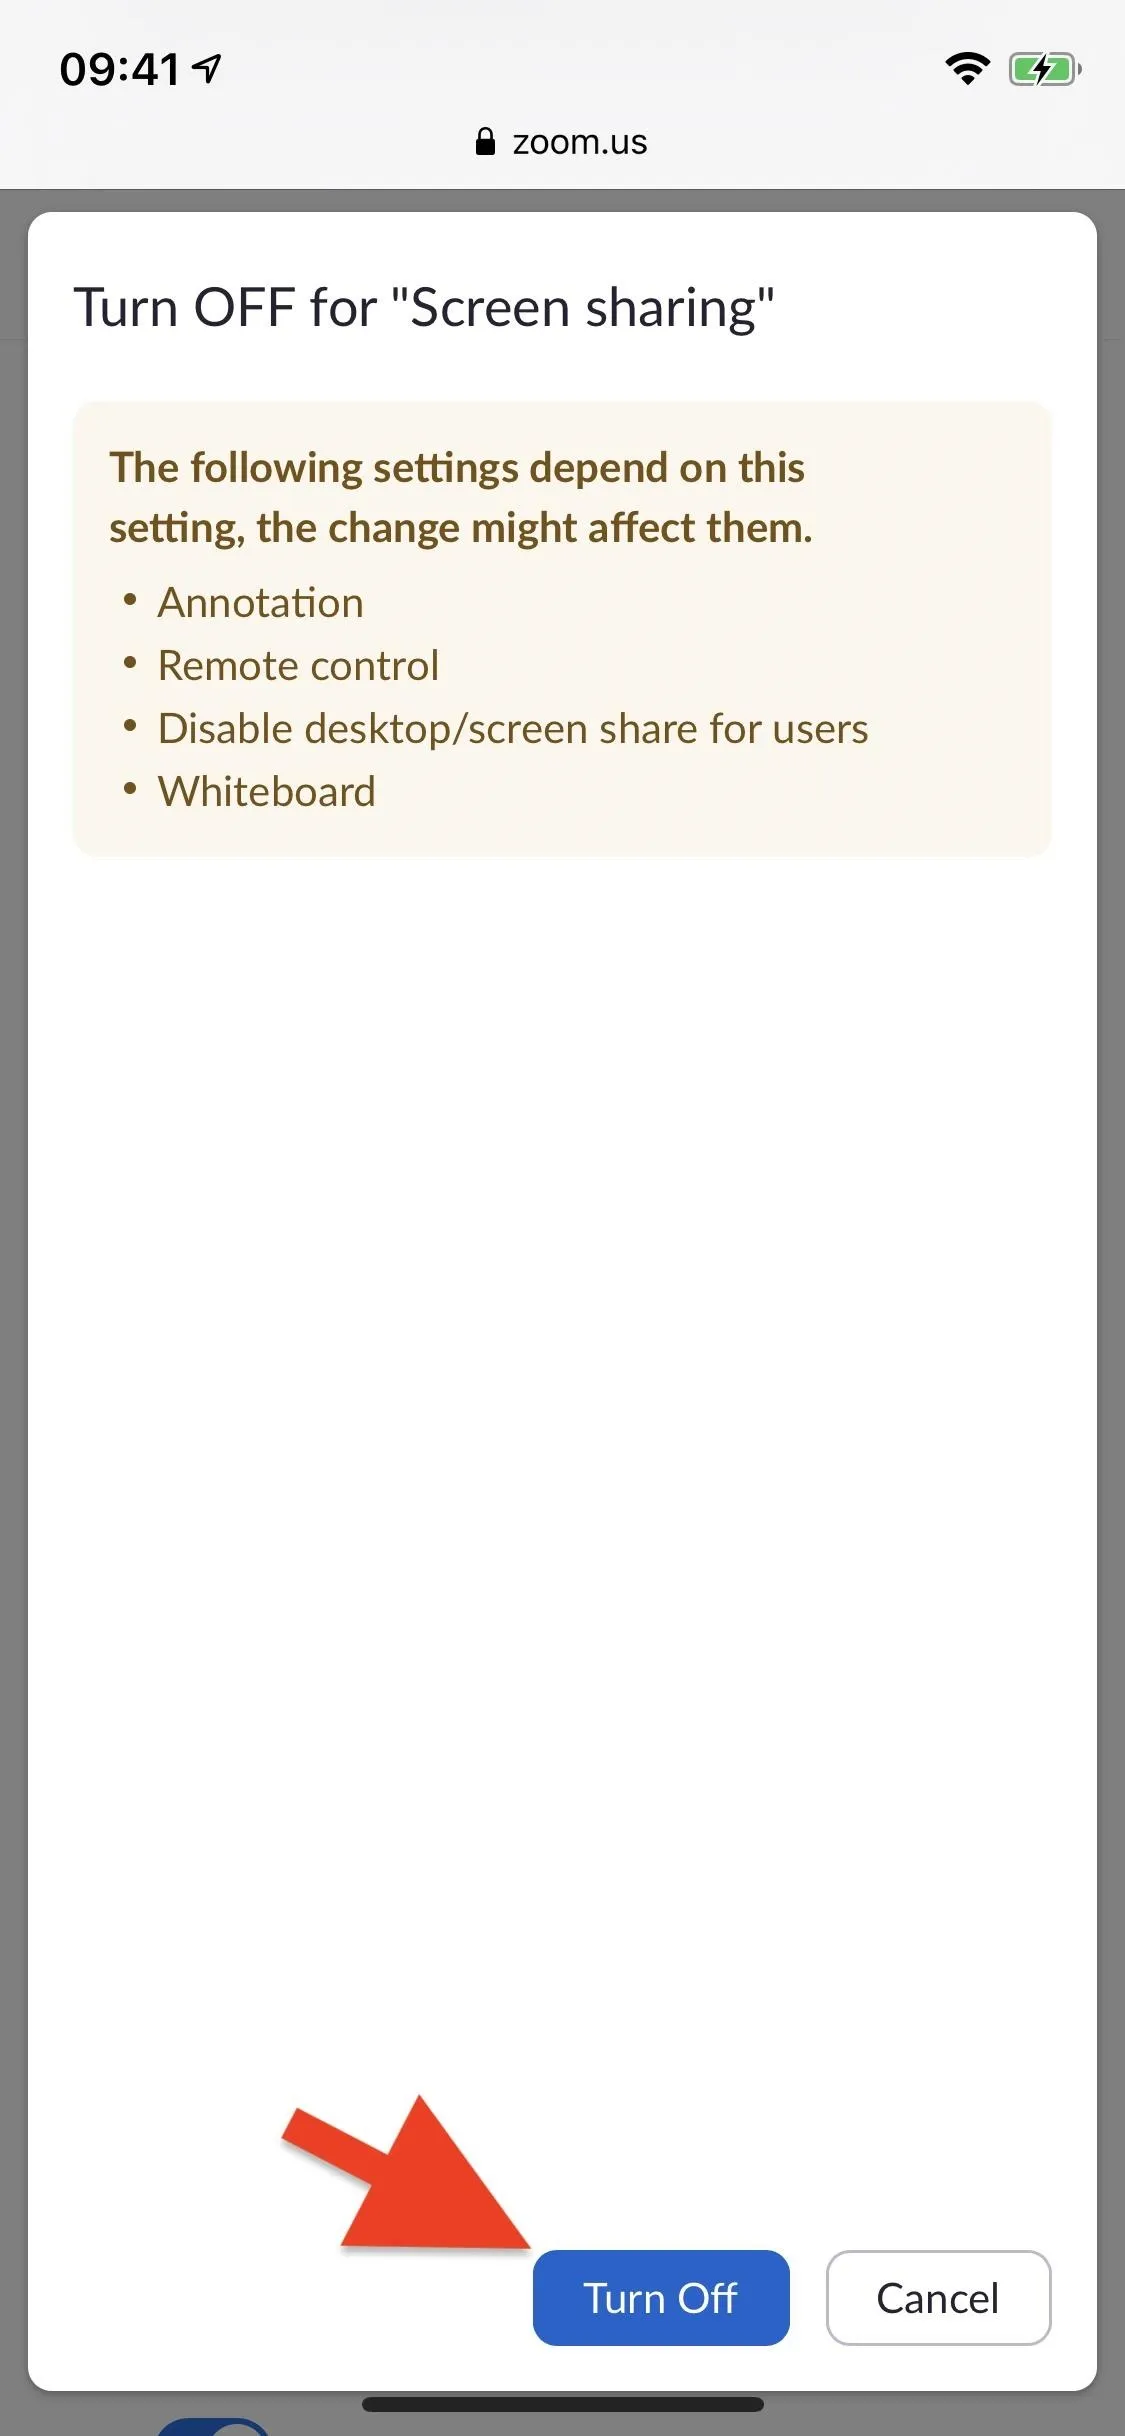
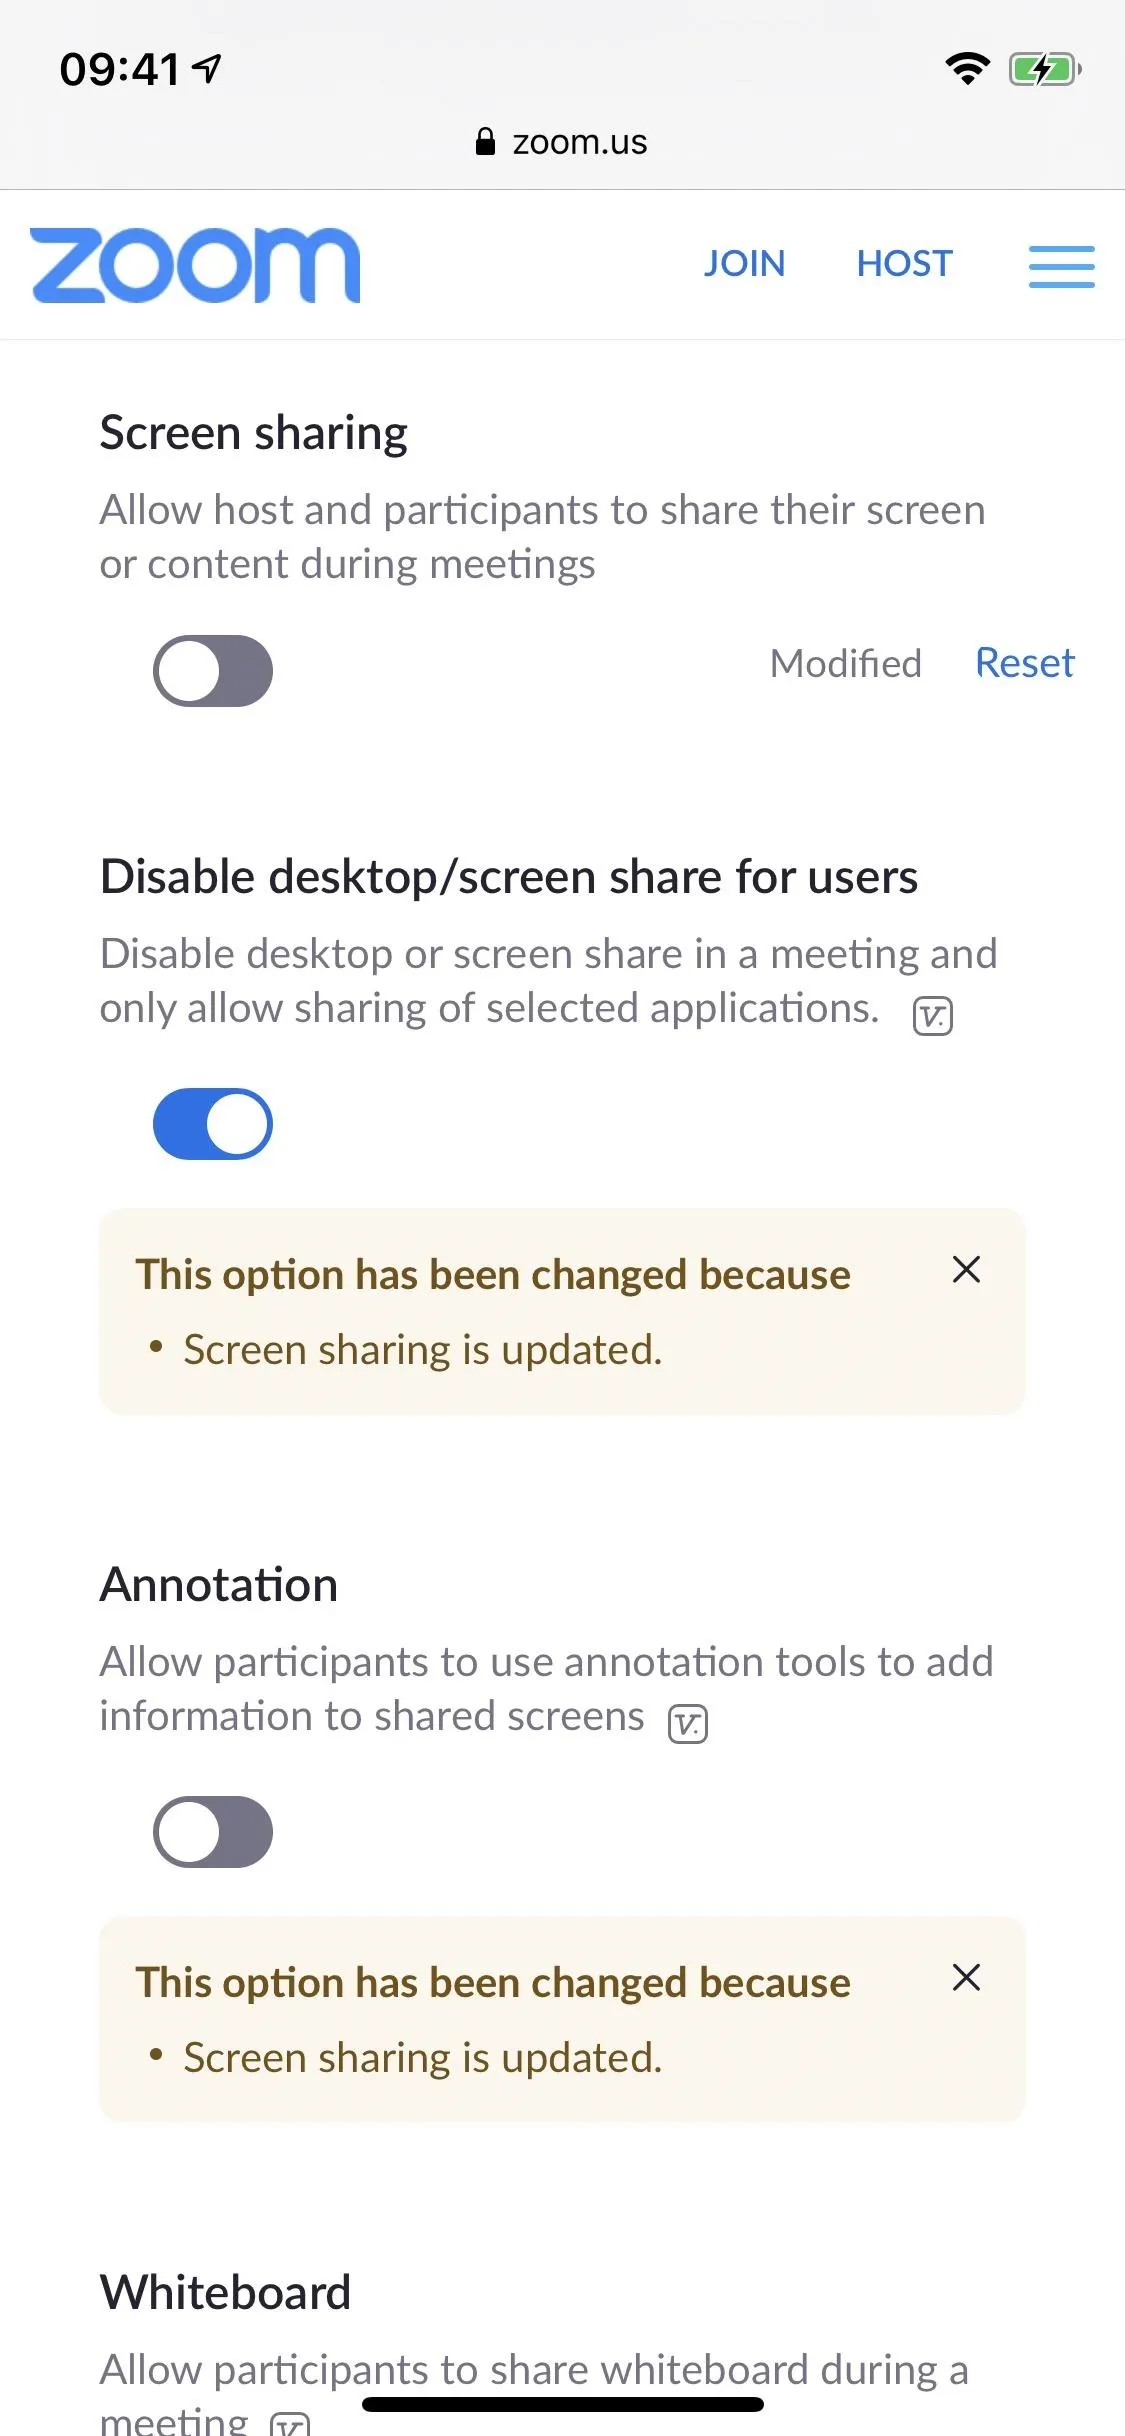
In the web settings, with "Screen sharing" turned on, choose "Host Only" for who can share. That way, only you can share media and files. By default, when "Screen sharing" is turned on, "Host Only" is turned on automatically. To disable sharing from everyone, including yourself, toggle off "Screen sharing." The setting below, "Disable desktop/screen share for users," will then turn on automatically, which stops screen sharing on desktop computers while allowing selected apps to work still.

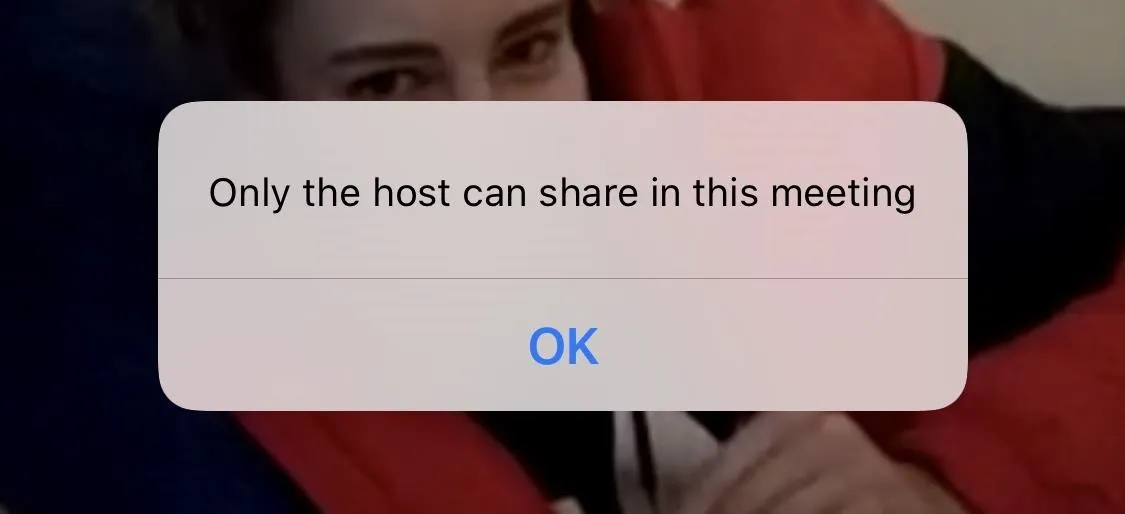
If a participant attempts to share something, they'll receive a notification that says only the host can screen share or that screen sharing is completely disabled in the meeting.
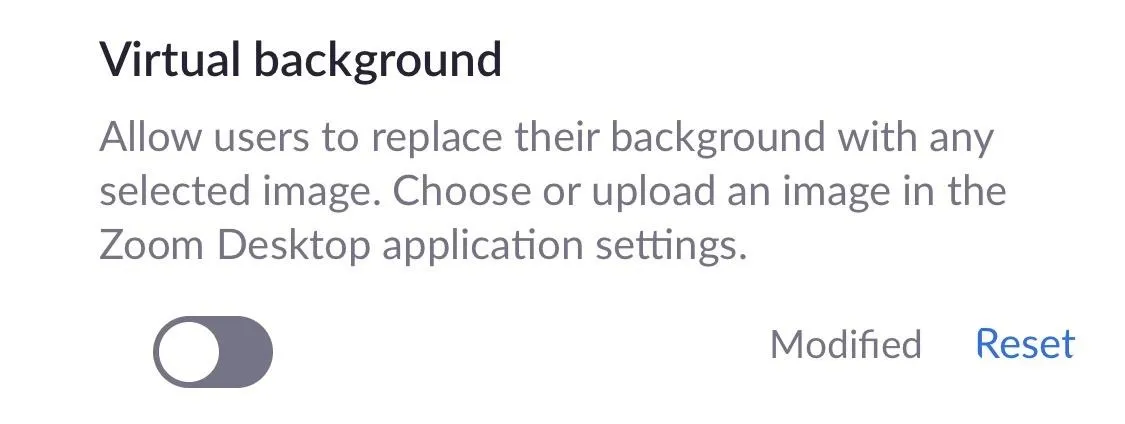
Disable Virtual Backgrounds
The virtual background feature is fun because it allows you to display an image or video (video option is desktop only) as your background in place of your usual background, whether it's a coffee shop, your home office, or your bedroom. People in a meeting, however, can use content with violence, nudity, or other inappropriate imagery as their virtual background, creating a distraction.
To altogether disable users from uploading a virtual background in your meetings, toggle off the "Virtual background" option in the web settings. Unfortunately, doing so only disables the virtual background feature for desktop users (their virtual background tab will disappear). Even with the setting turned off, iOS users can still upload a virtual background (backgrounds are not yet available on Android).
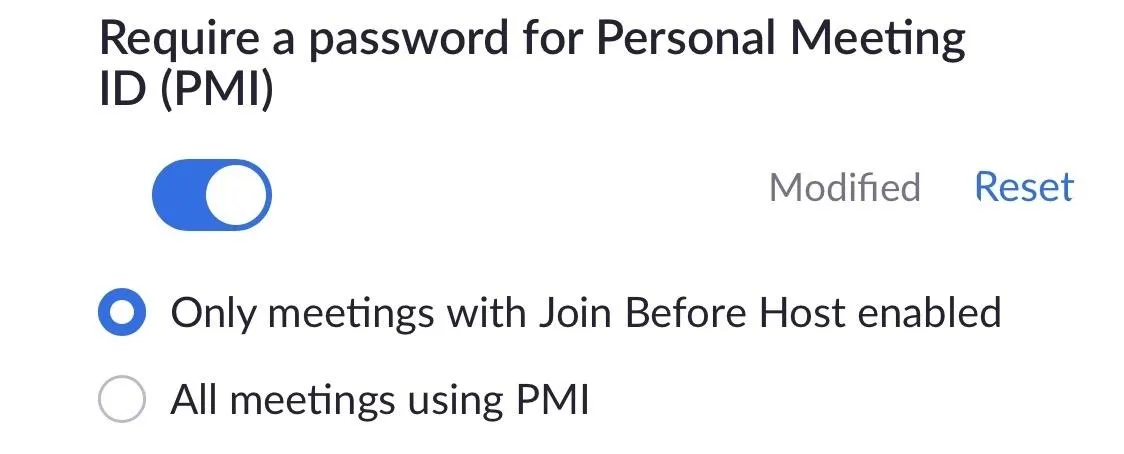
Require a Password for a Personal Meeting Room
Once you create a Zoom account, a personal meeting room is permanently reserved for you, one that only you can access using your Personal Meeting ID, or PMI. While a personal meeting room is ideal for people you know, it shouldn't regularly be used because once someone gets the ID, they can potentially join any future meetings.
However, you can protect yourself by requiring a password for your personal meeting room, which is off by default. Go to the "Require a password for Personal Meeting ID (PMI)" option in the web settings and toggle it on. You can then choose whether you want to require a passcode for "All meetings" (preferred) or "Only meetings with Join Before Host enabled." Now, anytime someone attempts to join your personal meeting room, they'll need to enter the passcode.
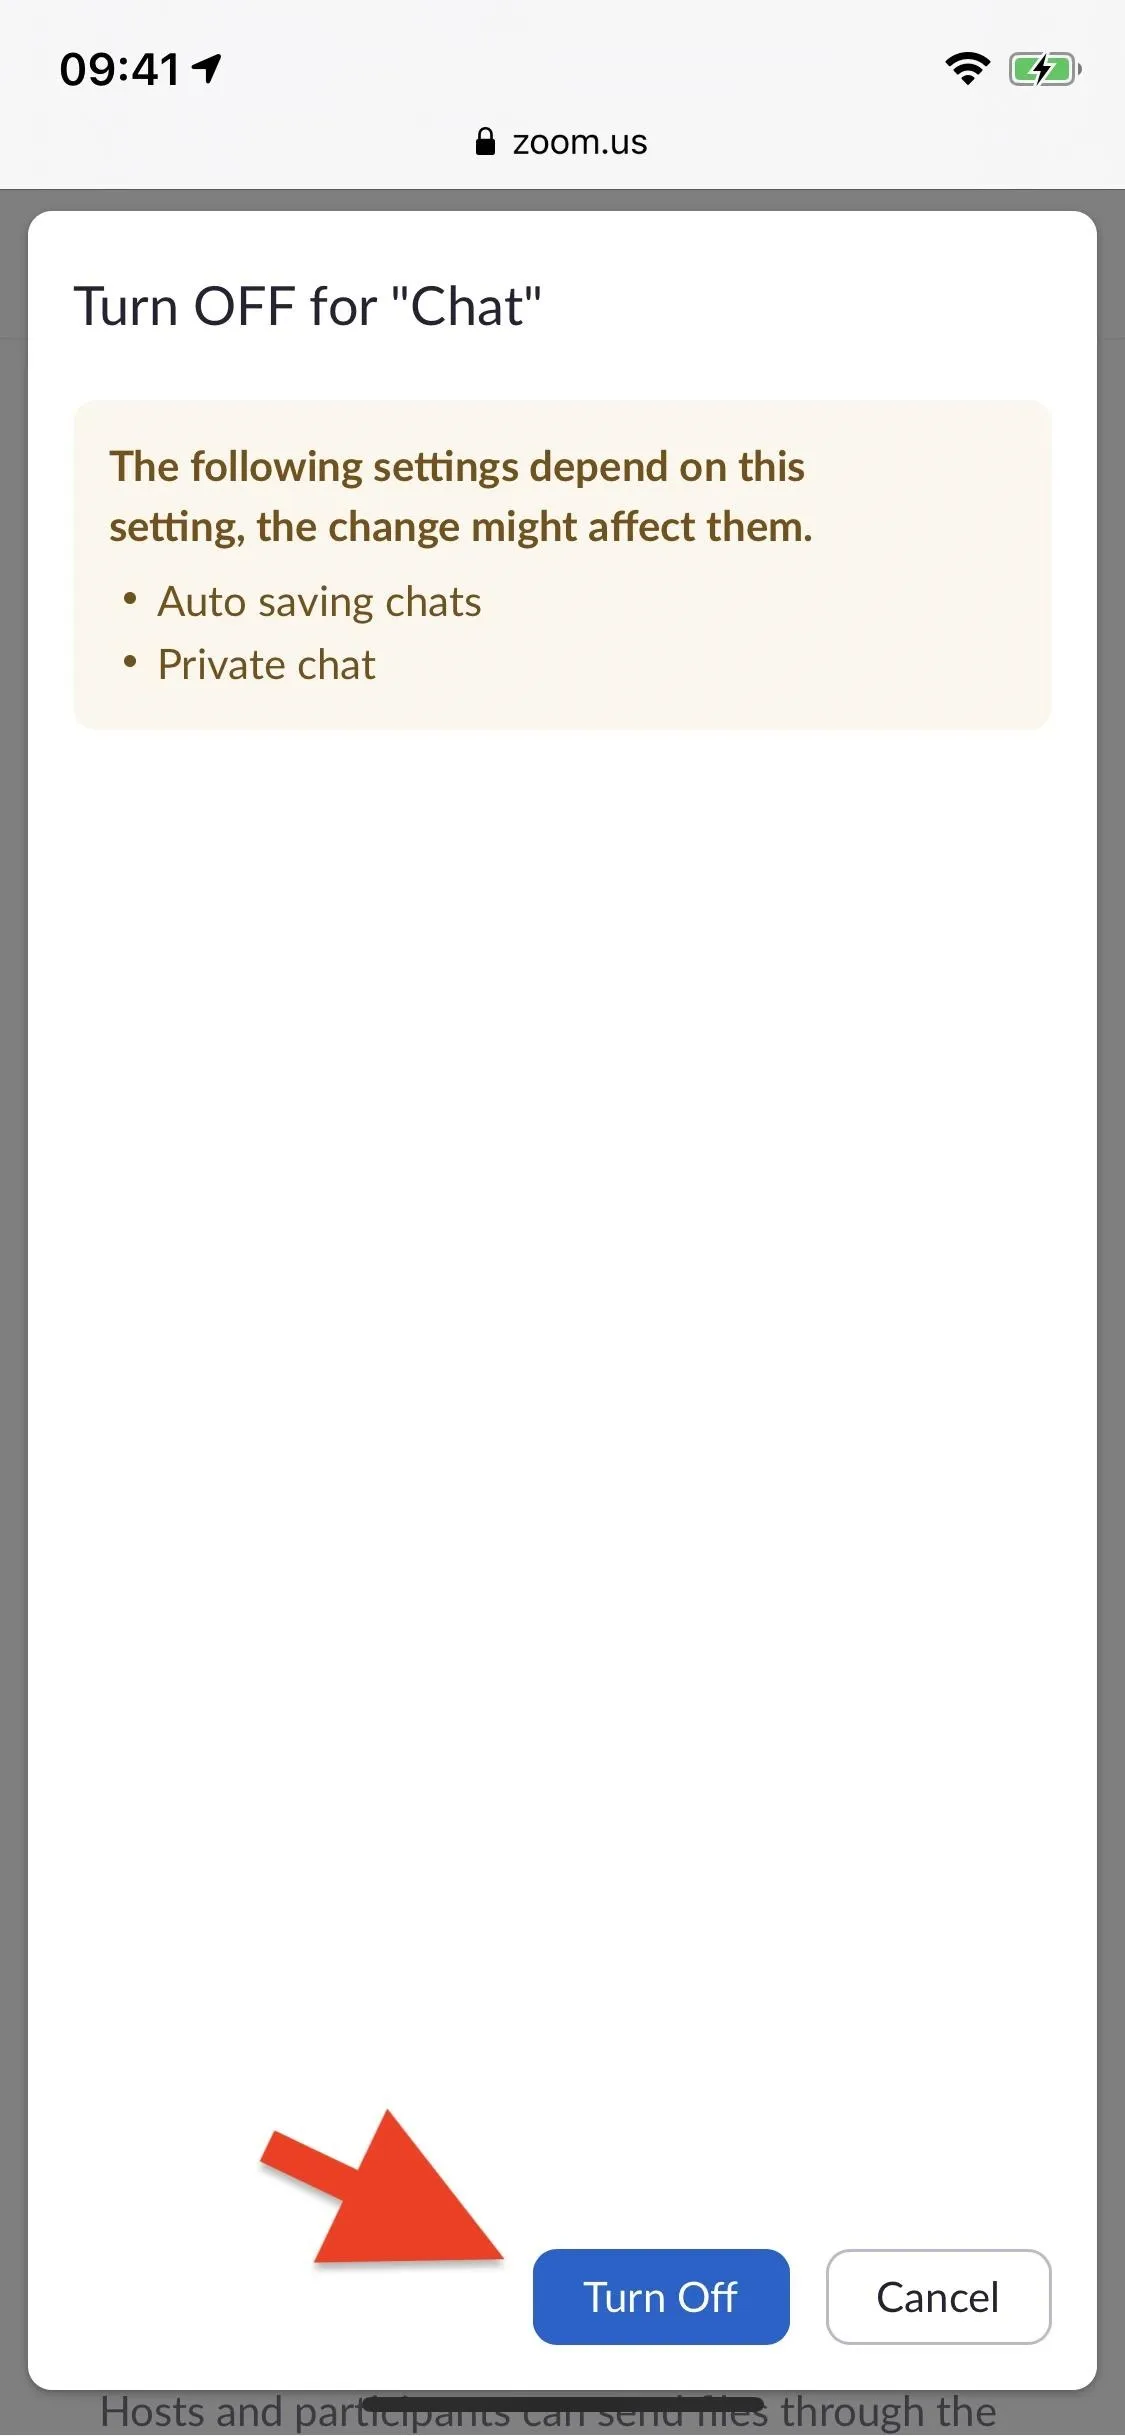
Disable Public & Private Chat
As long as you have access to a meeting, you can enter its chat and type whatever you want for the rest of the participants and hosts to see. If you're worried about someone going on a racist rant or messaging unsavory comments to other attendees during your meeting, you can get rid of chat completely. To disable it, toggle off the "Chat" option (which will also disable the "Private Chat" option) in the web settings.
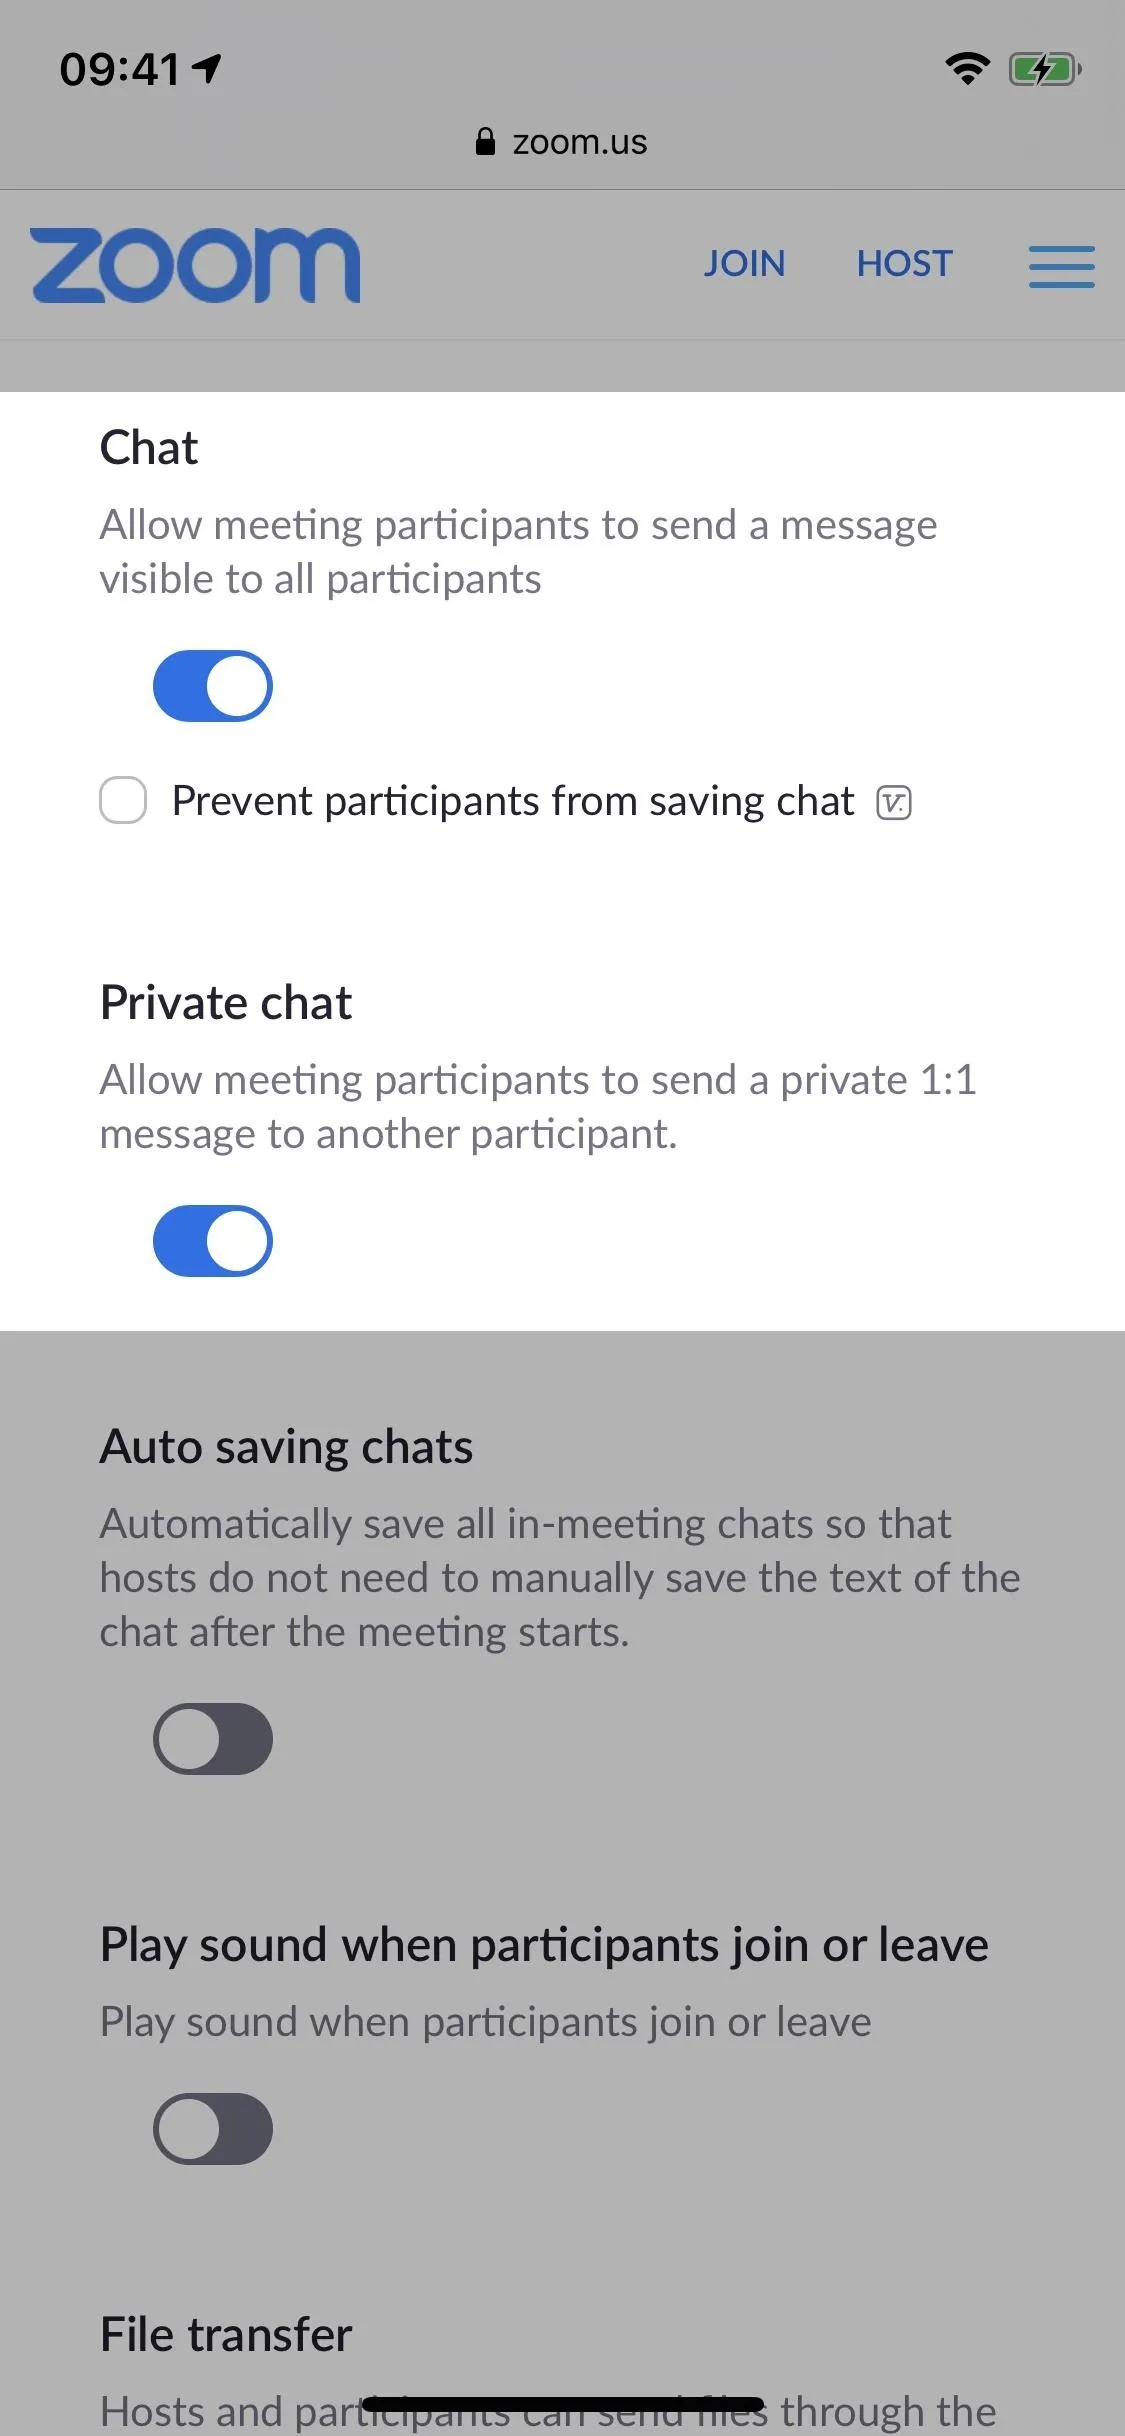
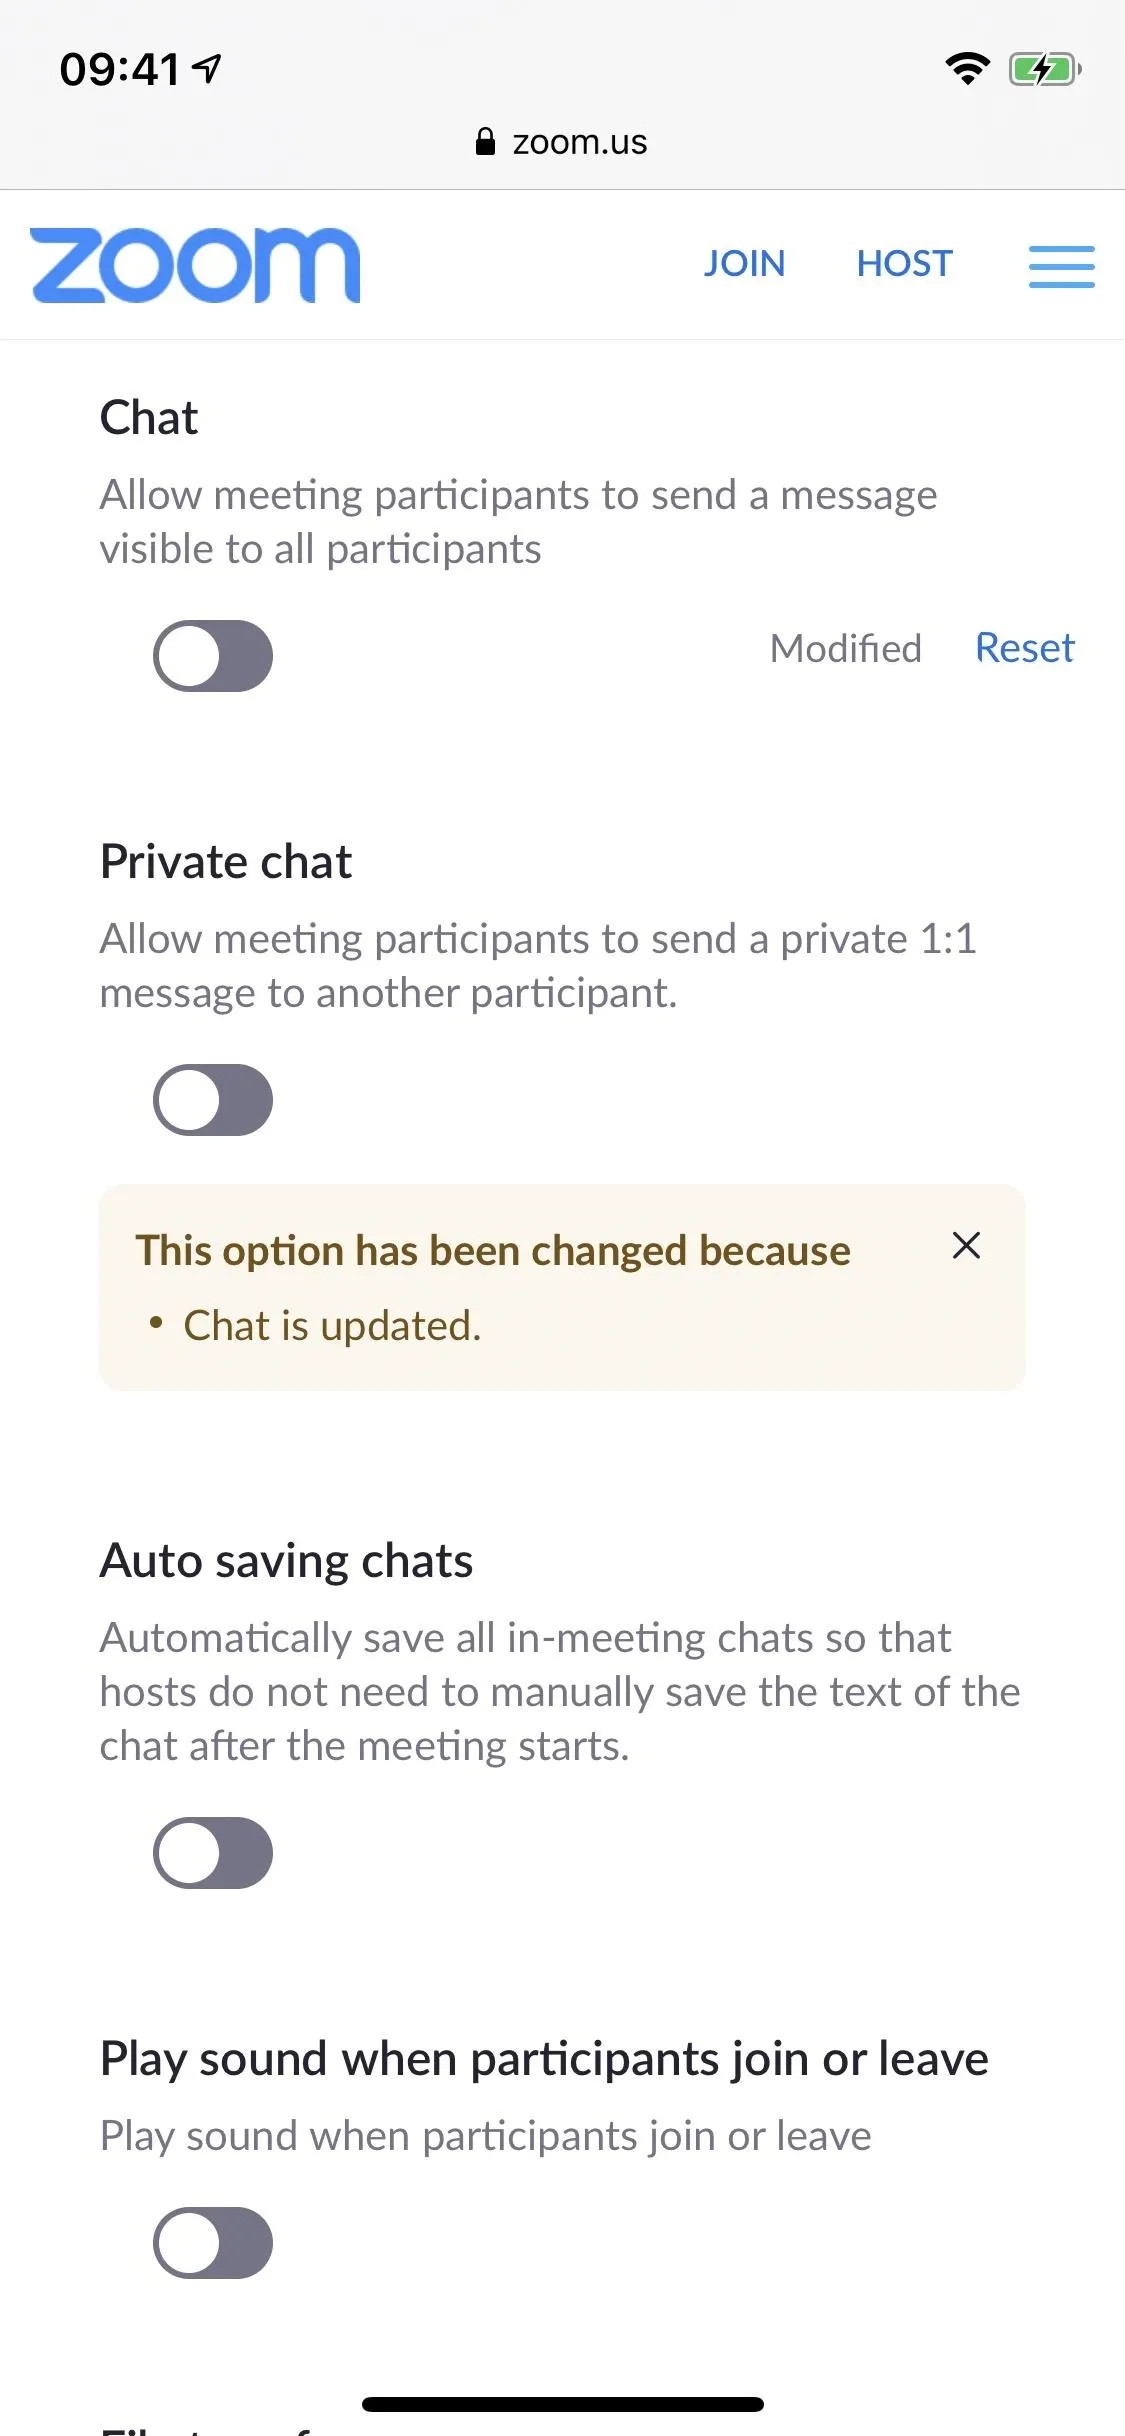
Usually, a participant can tap on "More" during a meeting and then on "Chat" to send a message to everyone or privately to a single person. When chat is disabled, the option disappears from the menu entirely.
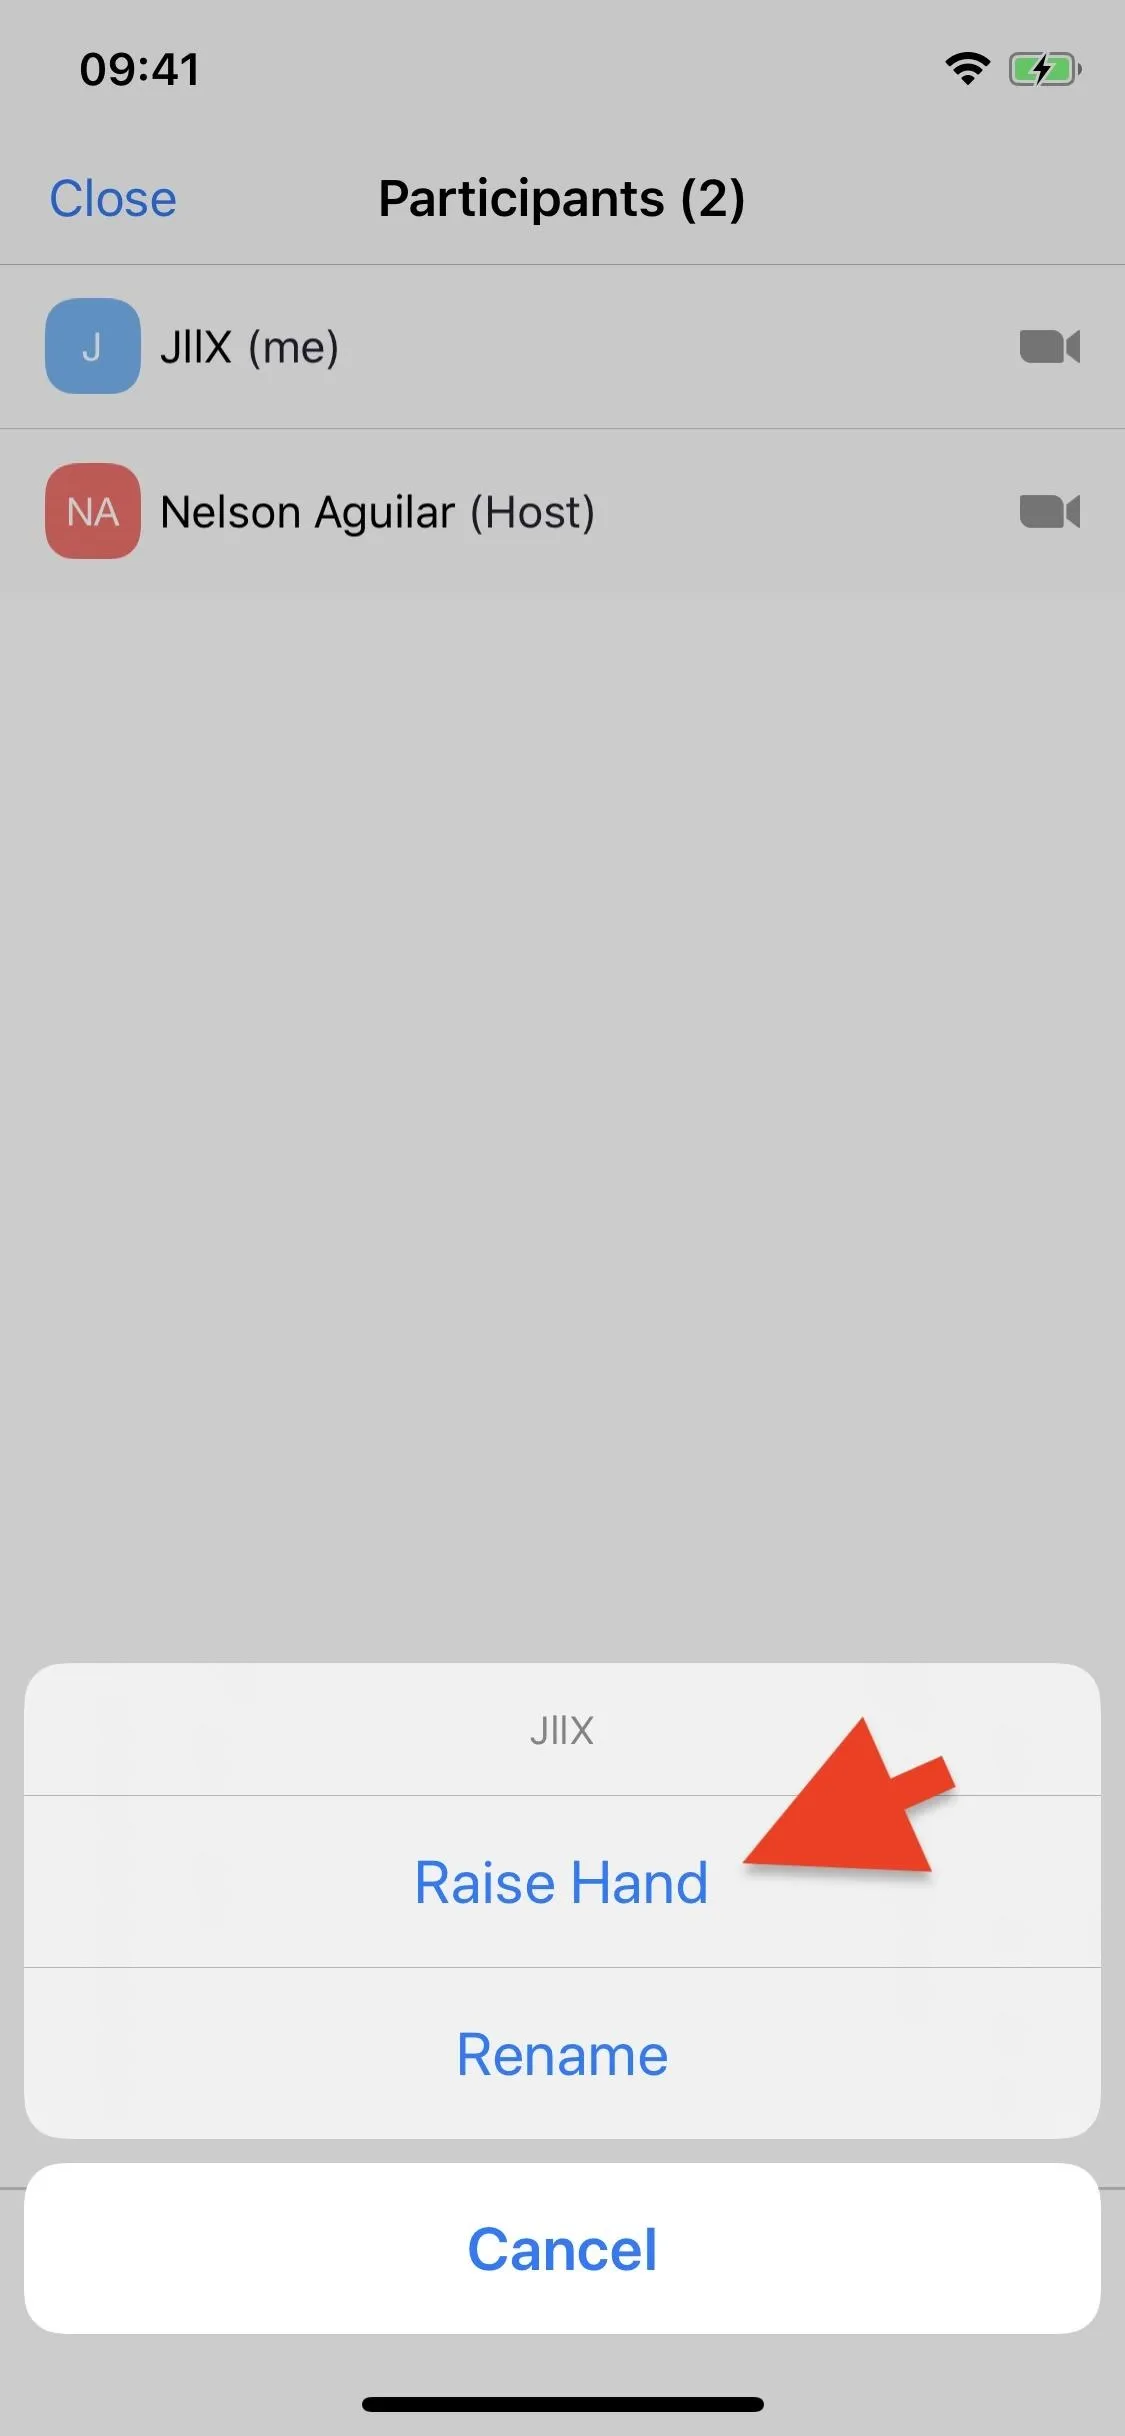
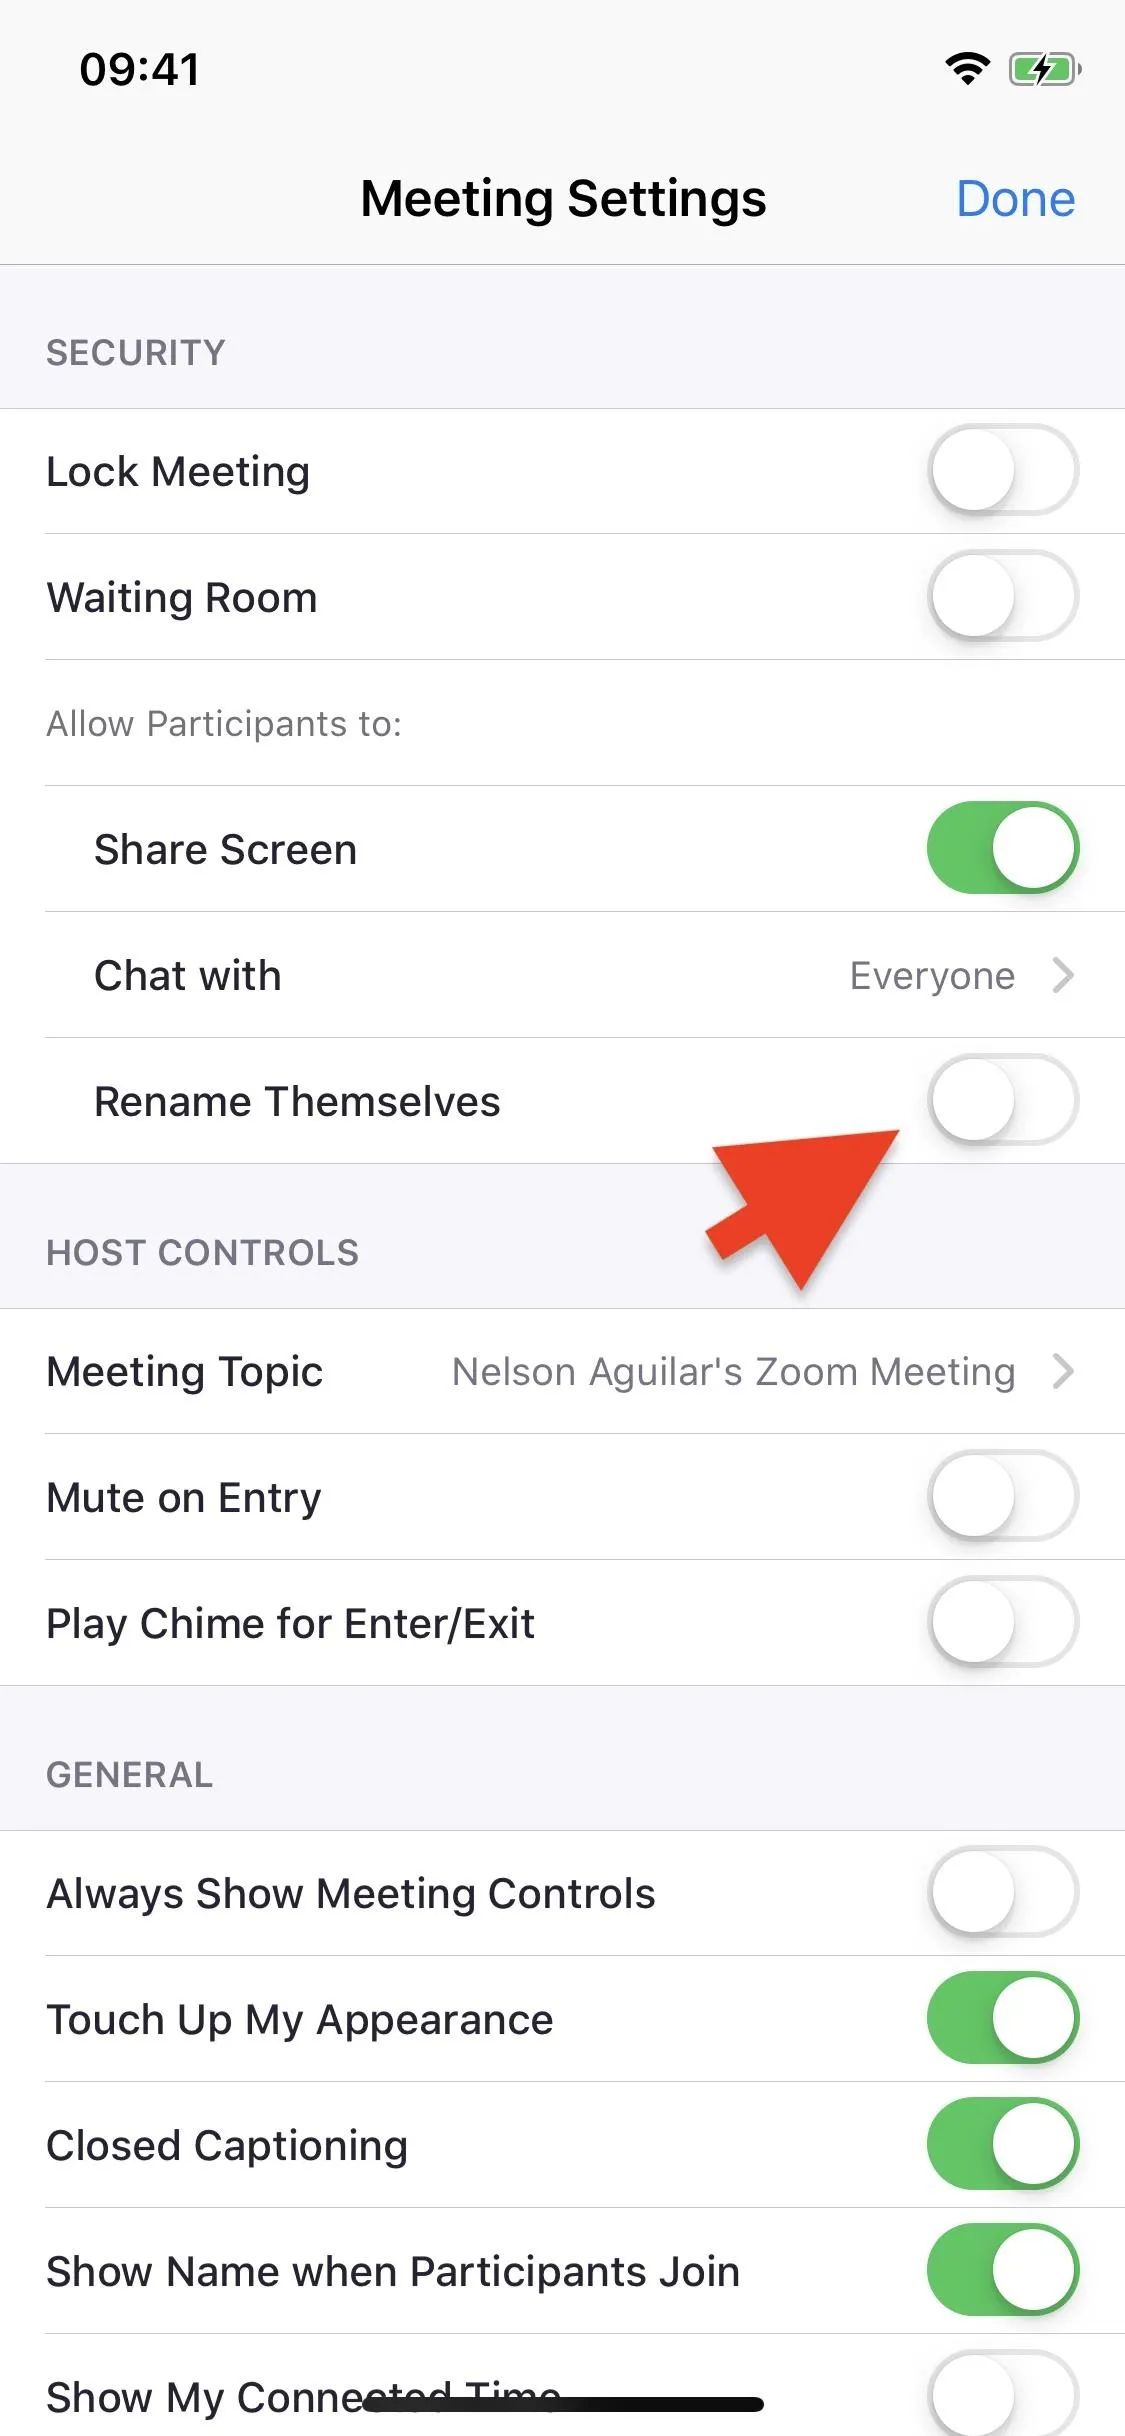
Don't Allow Participants to Rename Themselves
Give anyone an opportunity and they'll change their name to something funny, rude, or distracting while on a call, which is why you shouldn't allow meeting participants and webinar panelists to rename themselves. To stop people from renaming themselves, toggle off the "Allow participants to rename themselves" in the web settings. It's a new feature as of April 6, 2020.
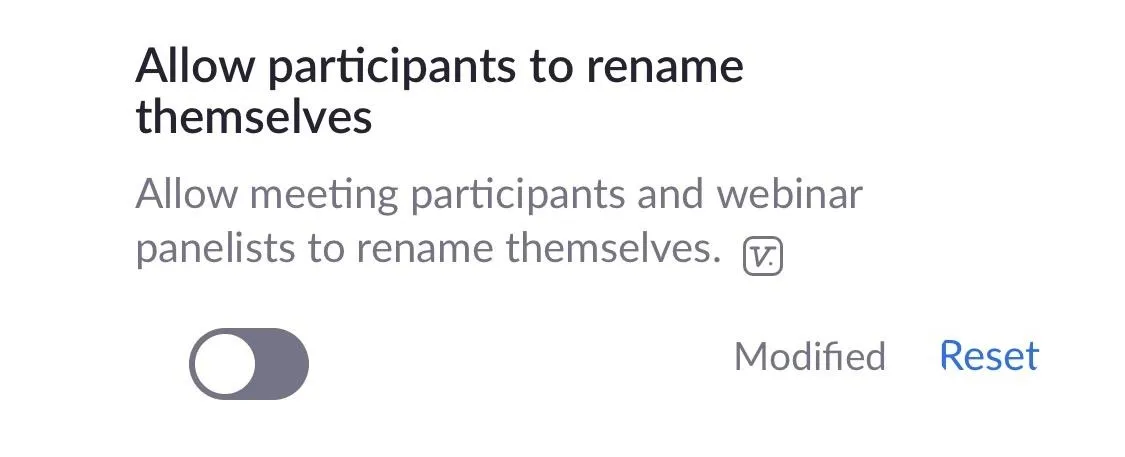
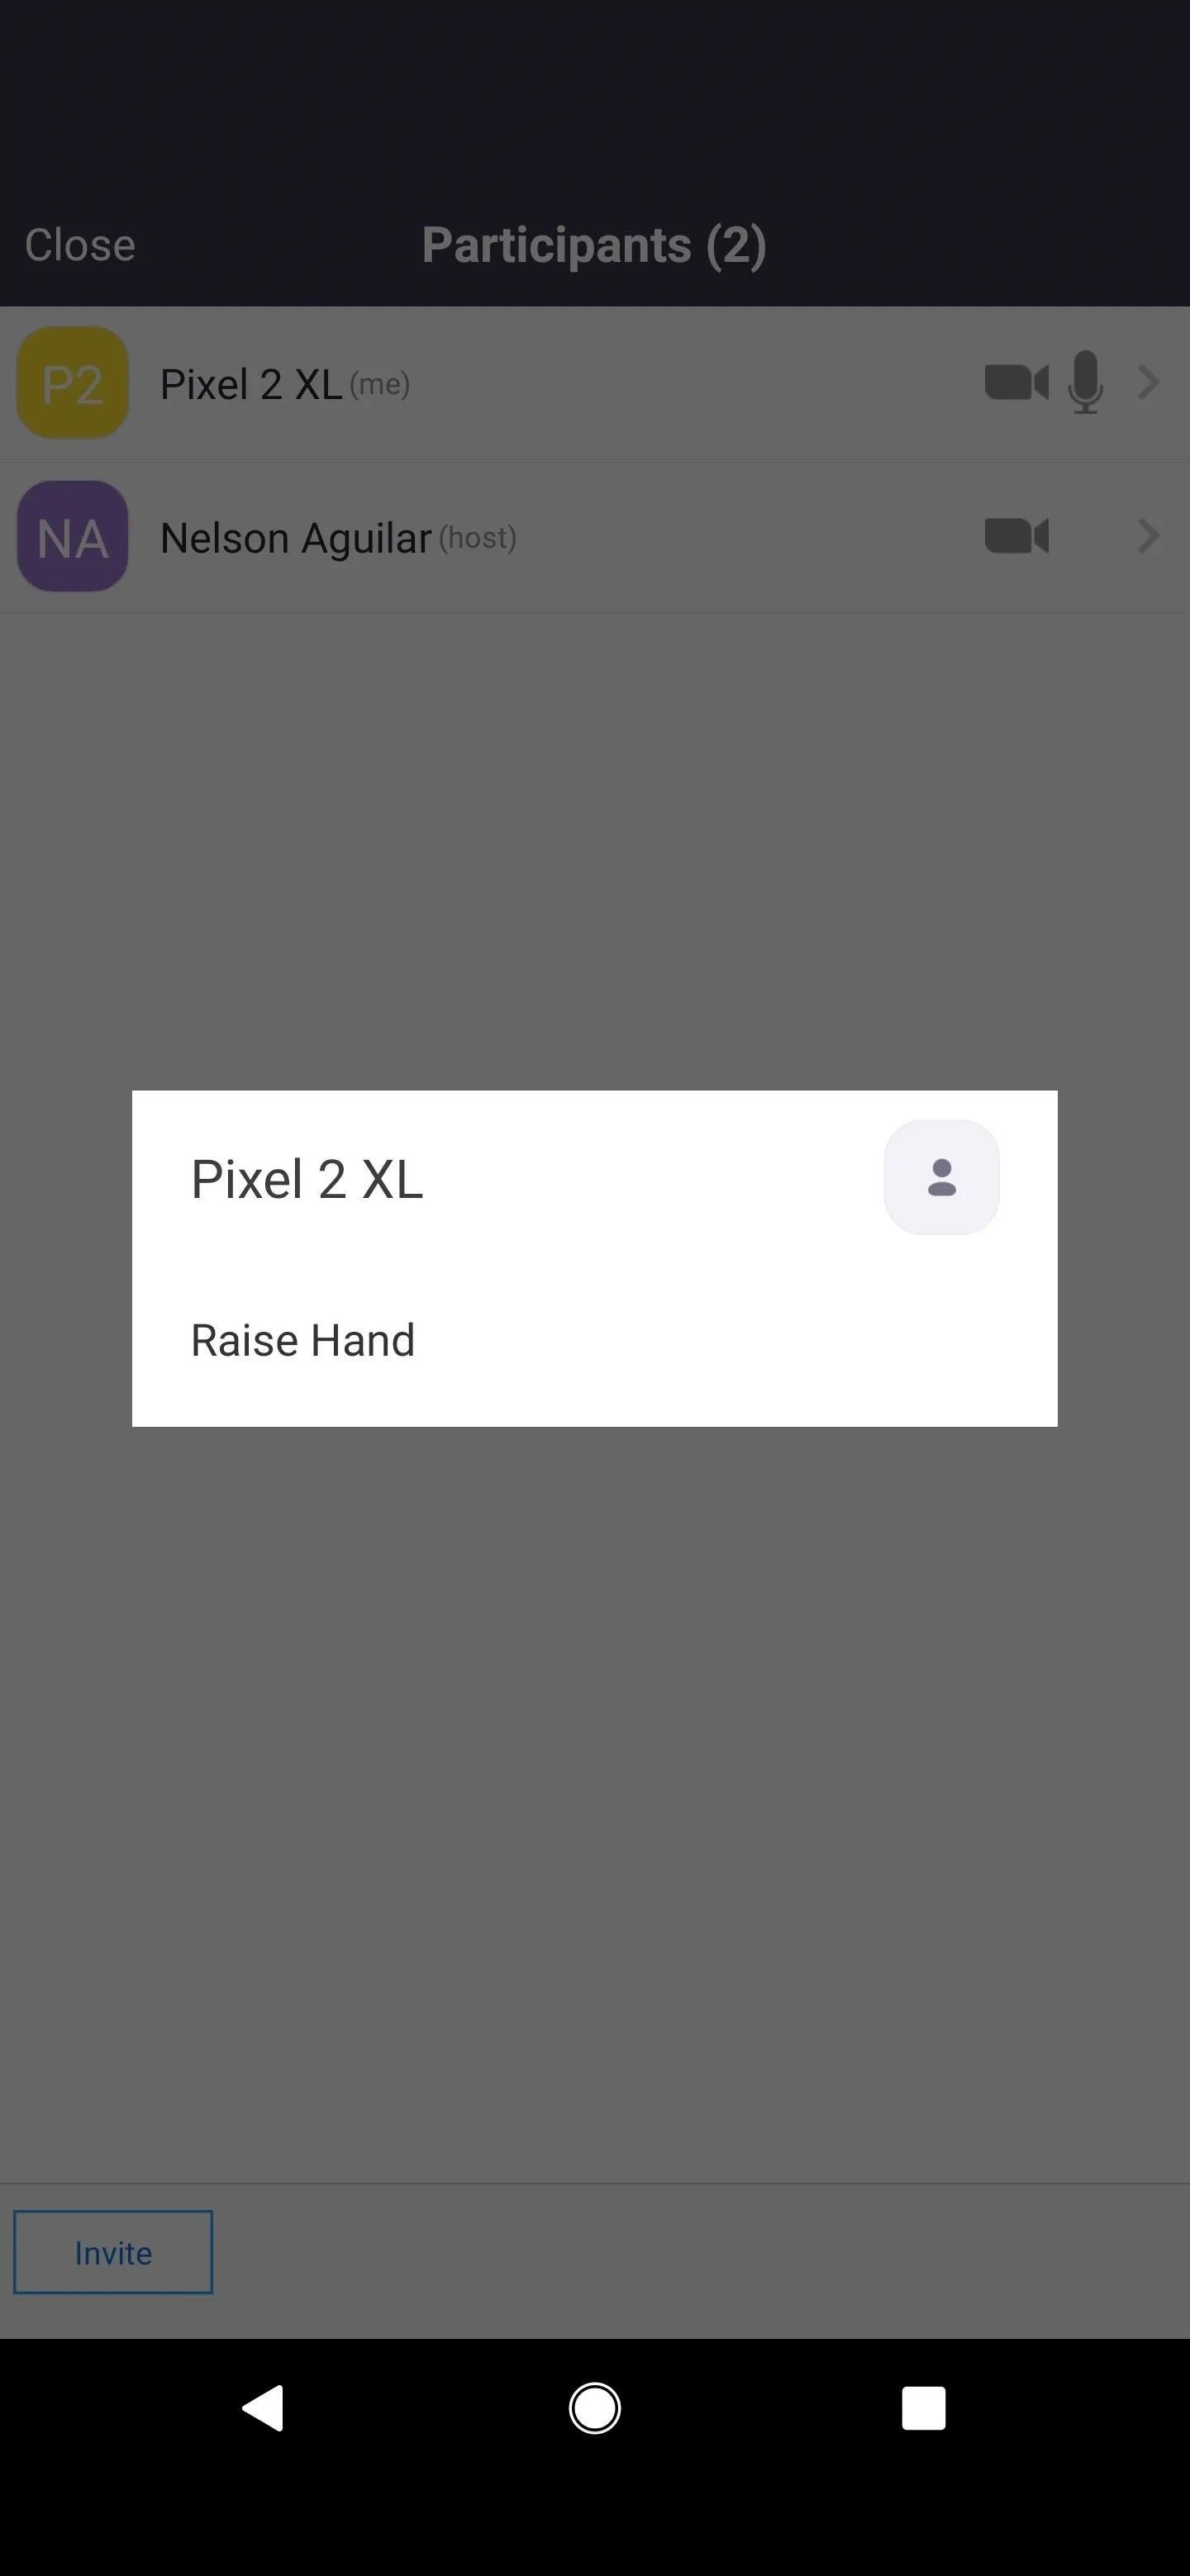
Typically, a participant or panelist can rename themselves by tapping on "Participants," their name, and then on "Rename." When the setting is disabled, the rename option disappears from the menu, leaving only the "Raise Hand" feature.
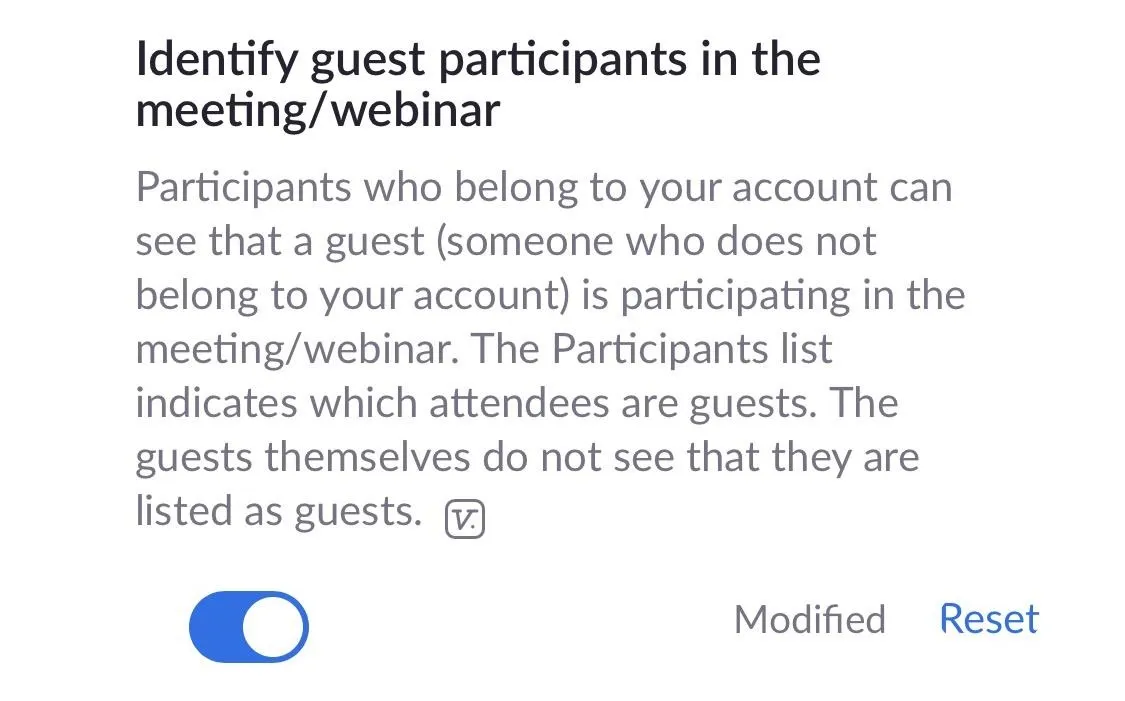
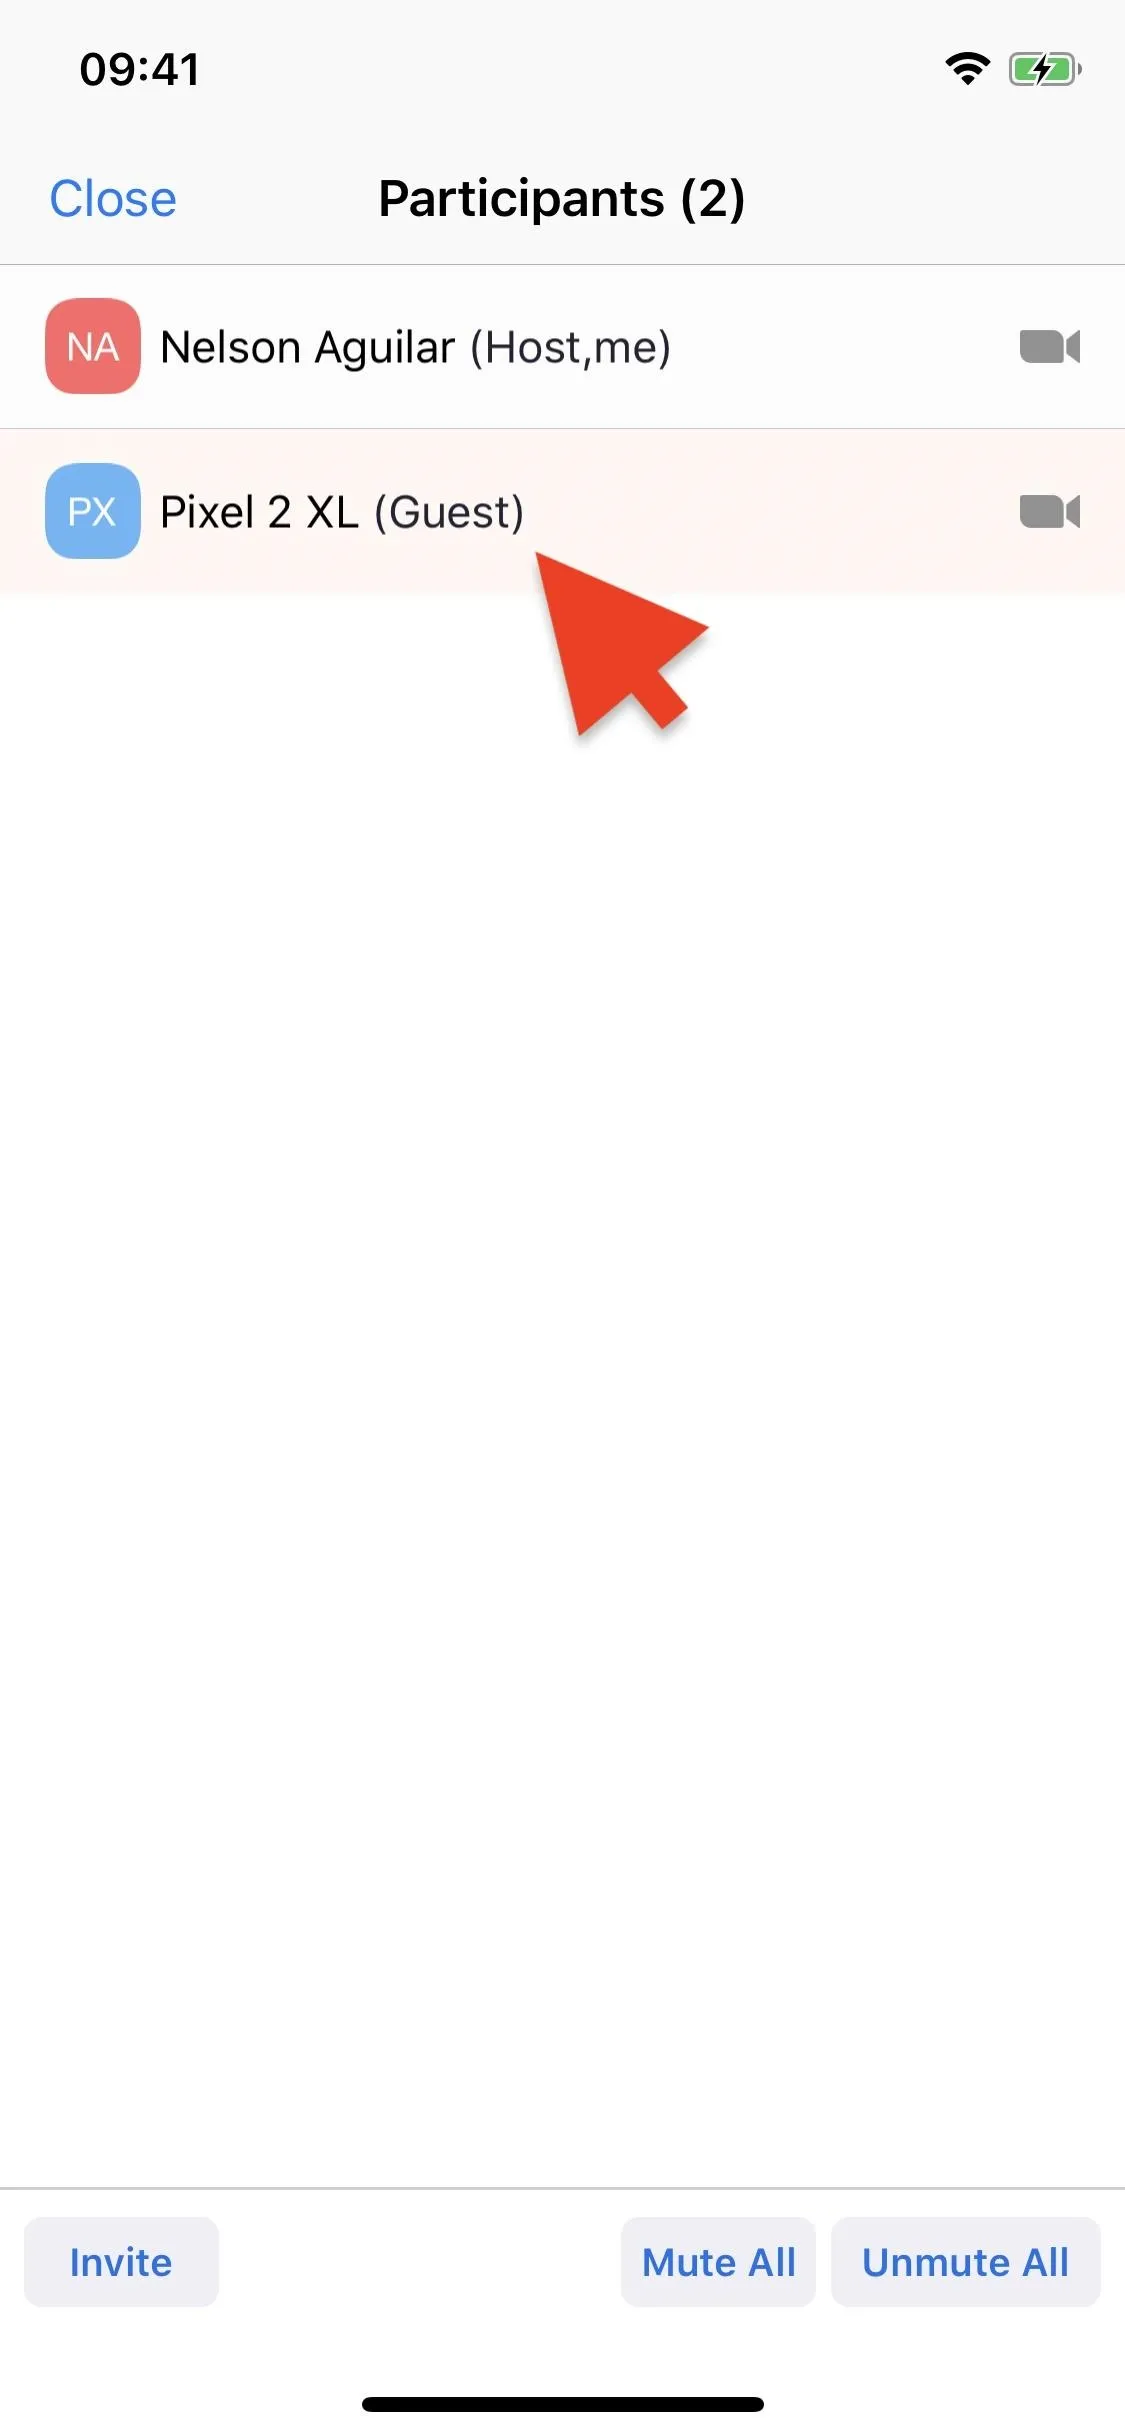
Identify Guest Participants in Meetings or Webinars
You may not be worried about the participants you know will be in the meeting, but it's the guests that can cause trouble. Luckily, you can quickly check who in your session is a guest and who isn't. A guest is anyone who is:
- not signed in
- signed in with email address that is not in the same account as the host
- signed in with an older version of Zoom
To see who is a guest, toggle on the web setting for "Identify guest participants in the meeting/webinar."
To view which participant is a guest during a meeting, tap on "Participants," and it should say (Guest) next to any person who is a guest. Below are two screenshots: one with the setting disabled (left), the other with the setting enabled (right).

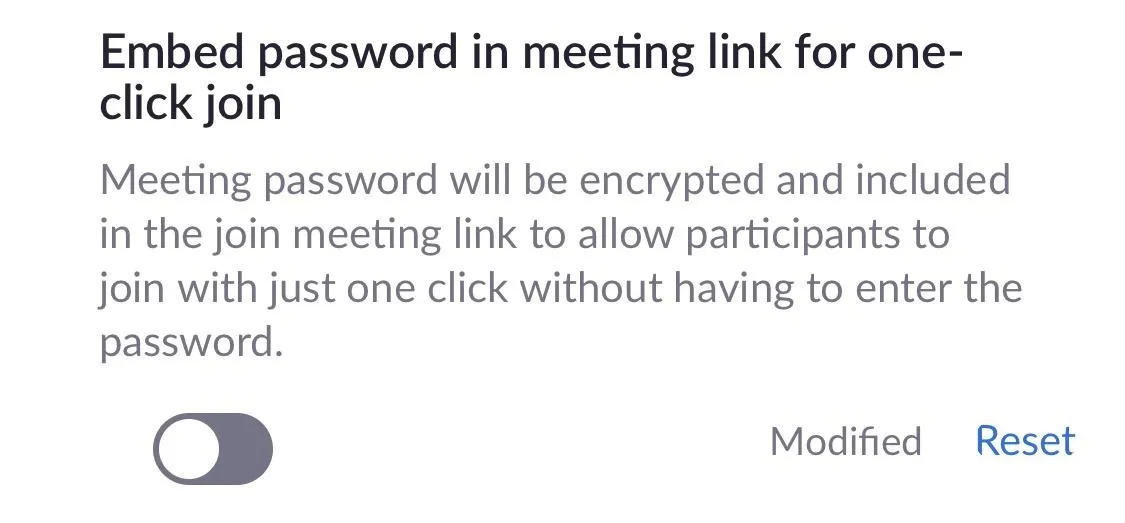
Stop Passwords from Embedding in Links
You can share out links to your meeting, which makes it easier for people to join since they can just tap the link, but passwords are embedded in that link by default. That means anyone can join with the link. You can disable the embedded password in the web settings. Just toggle off "Embed password in meeting link for one-click join." You'll then have to use a different way to get the meeting password to everyone who should be in the call, such as text or email.
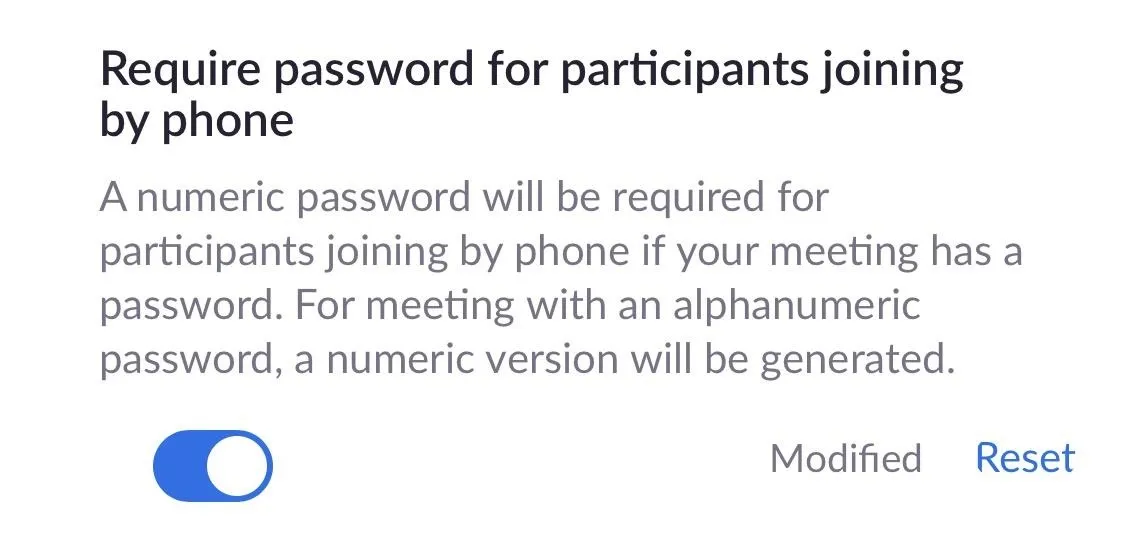
Require PINs for People Joining from a Dial Pad
People who can't use the app or web client but need to be in the meeting can still join by using their "Phone" app or even their landline phone at home or work. But they won't need a passcode or PIN to participate unless you enable that. Otherwise, Zoombombers can still call in and disrupt the meeting with audio only. In the web settings, toggle on "Require password for participants joining by phone."
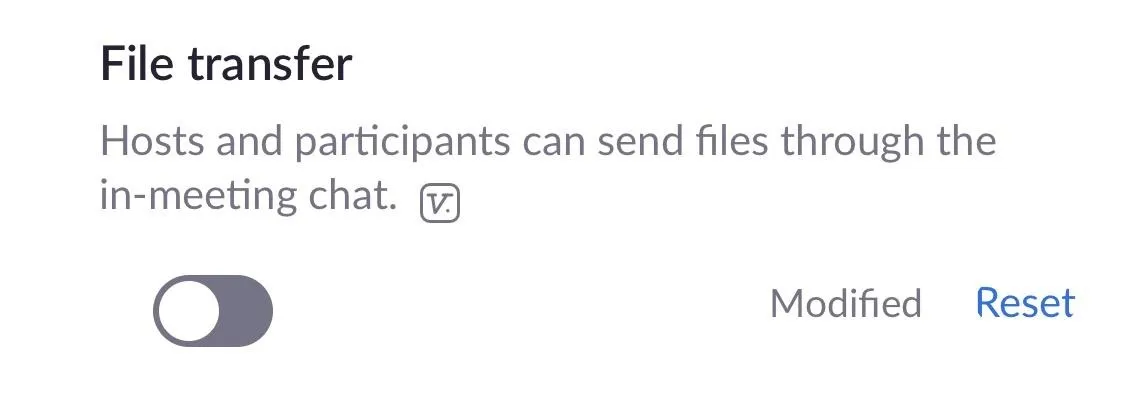
Prevent People from Sharing Files in Chat
On the desktop web client, when all the right settings are in place, Zoom participants can send files to each other via the chat function. However, if a Zoombombers gets in, they can share all kinds of bad things. Fortunately, it doesn't apply to the mobile apps, but it's good to disable either way. In the web settings, toggle off "File transfer."
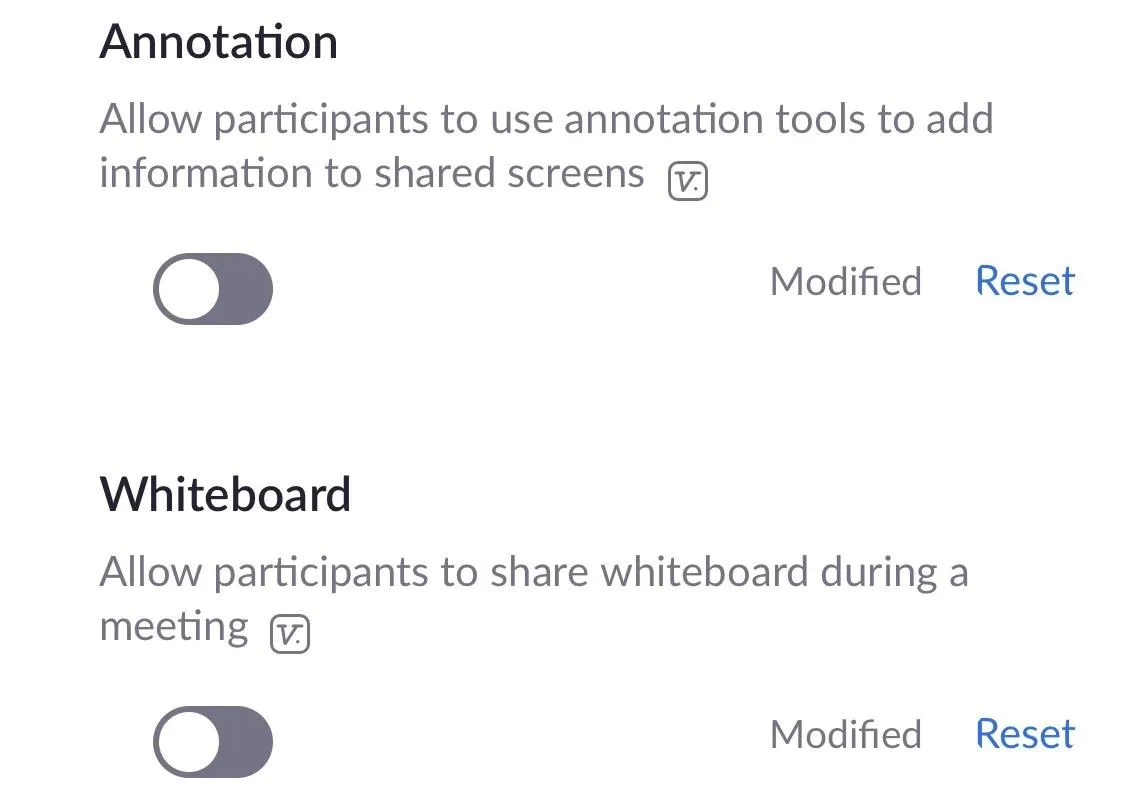
Disable Annotation & Whiteboards
If you didn't disable "Screen sharing" in tip 11 above, users can draw on top of screen shares and share whiteboards. Needless to say, Zoombombers could have fun with these features. If you need screen sharing on, at least disable "Annotation" and "Whiteboard" in the web settings.
Tips to Stop Zoombombing While It Happens
You can't always prevent Zoombombing, but you can sure as hell stop it — with the right tools. All of these tips, such as muting a participant's microphone or kicking a participant out of a meeting, are meant to help you when the Zoombombing is already taking place. All of the following settings can be found within the mobile Zoom app for iOS and Android.
Stop a Participant's Camera
Video is one of the easiest ways to be a distraction on Zoom, so it makes sense that you would be able to block a participant's camera during a call. To do so, tap on "Participants" in the navbar, tap on the participant's name, and then on "Stop Video." Once a participant's video is stopped, they won't be able to resume unless you grant them permission.


Mute a Single Participant's Microphone
Once you're in a meeting and everyone has their microphone on, you can go in and mute any participant that is being unruly or disruptive. To do so, tap on "Participants," the name of the person you want to silence, and then "Mute Audio" (iOS) or "Mute" (Android). Unfortunately, doing so only mutes a participant temporarily, as they can easily unmute themselves, but it works as a quick fix.


Mute All Participants' Mics at Once
Even if you don't enable the "Mute on Entry" setting before your meeting, you can mute everyone in a meeting your hosting (except yourself, of course) during the session. Again, go into "Participants," but this time, tap on "Mute All" at the bottom of the page. Then, uncheck the "Allow participants unmute themselves" and tap "Mute All," and now no one will be able to turn on their microphone unless you allow it.


Mute All Mics on Entry After Starting a Meeting
You can enable a setting that mutes all participants upon entering the meeting, as seen in tip 10 above, but it only works before the meeting starts. Even if you don't do use that setting, you can do so after you have started the meeting. In a meeting, tap on "More" and then "Meeting Settings." Toggle on "Mute on Entry," and that will turn off everyone's microphones upon entry (but they can unmute themselves).
Send a Participant to the Waiting Room
If you don't have the waiting room setting enabled by default (see tip 1 above), you can still send people to the waiting room once you start a meeting. While you're in a meeting, tap on "Participants," the person you want to silence, then "Put in Waiting Room." The person will have to stay in the waiting room until you admit them back to the meeting.


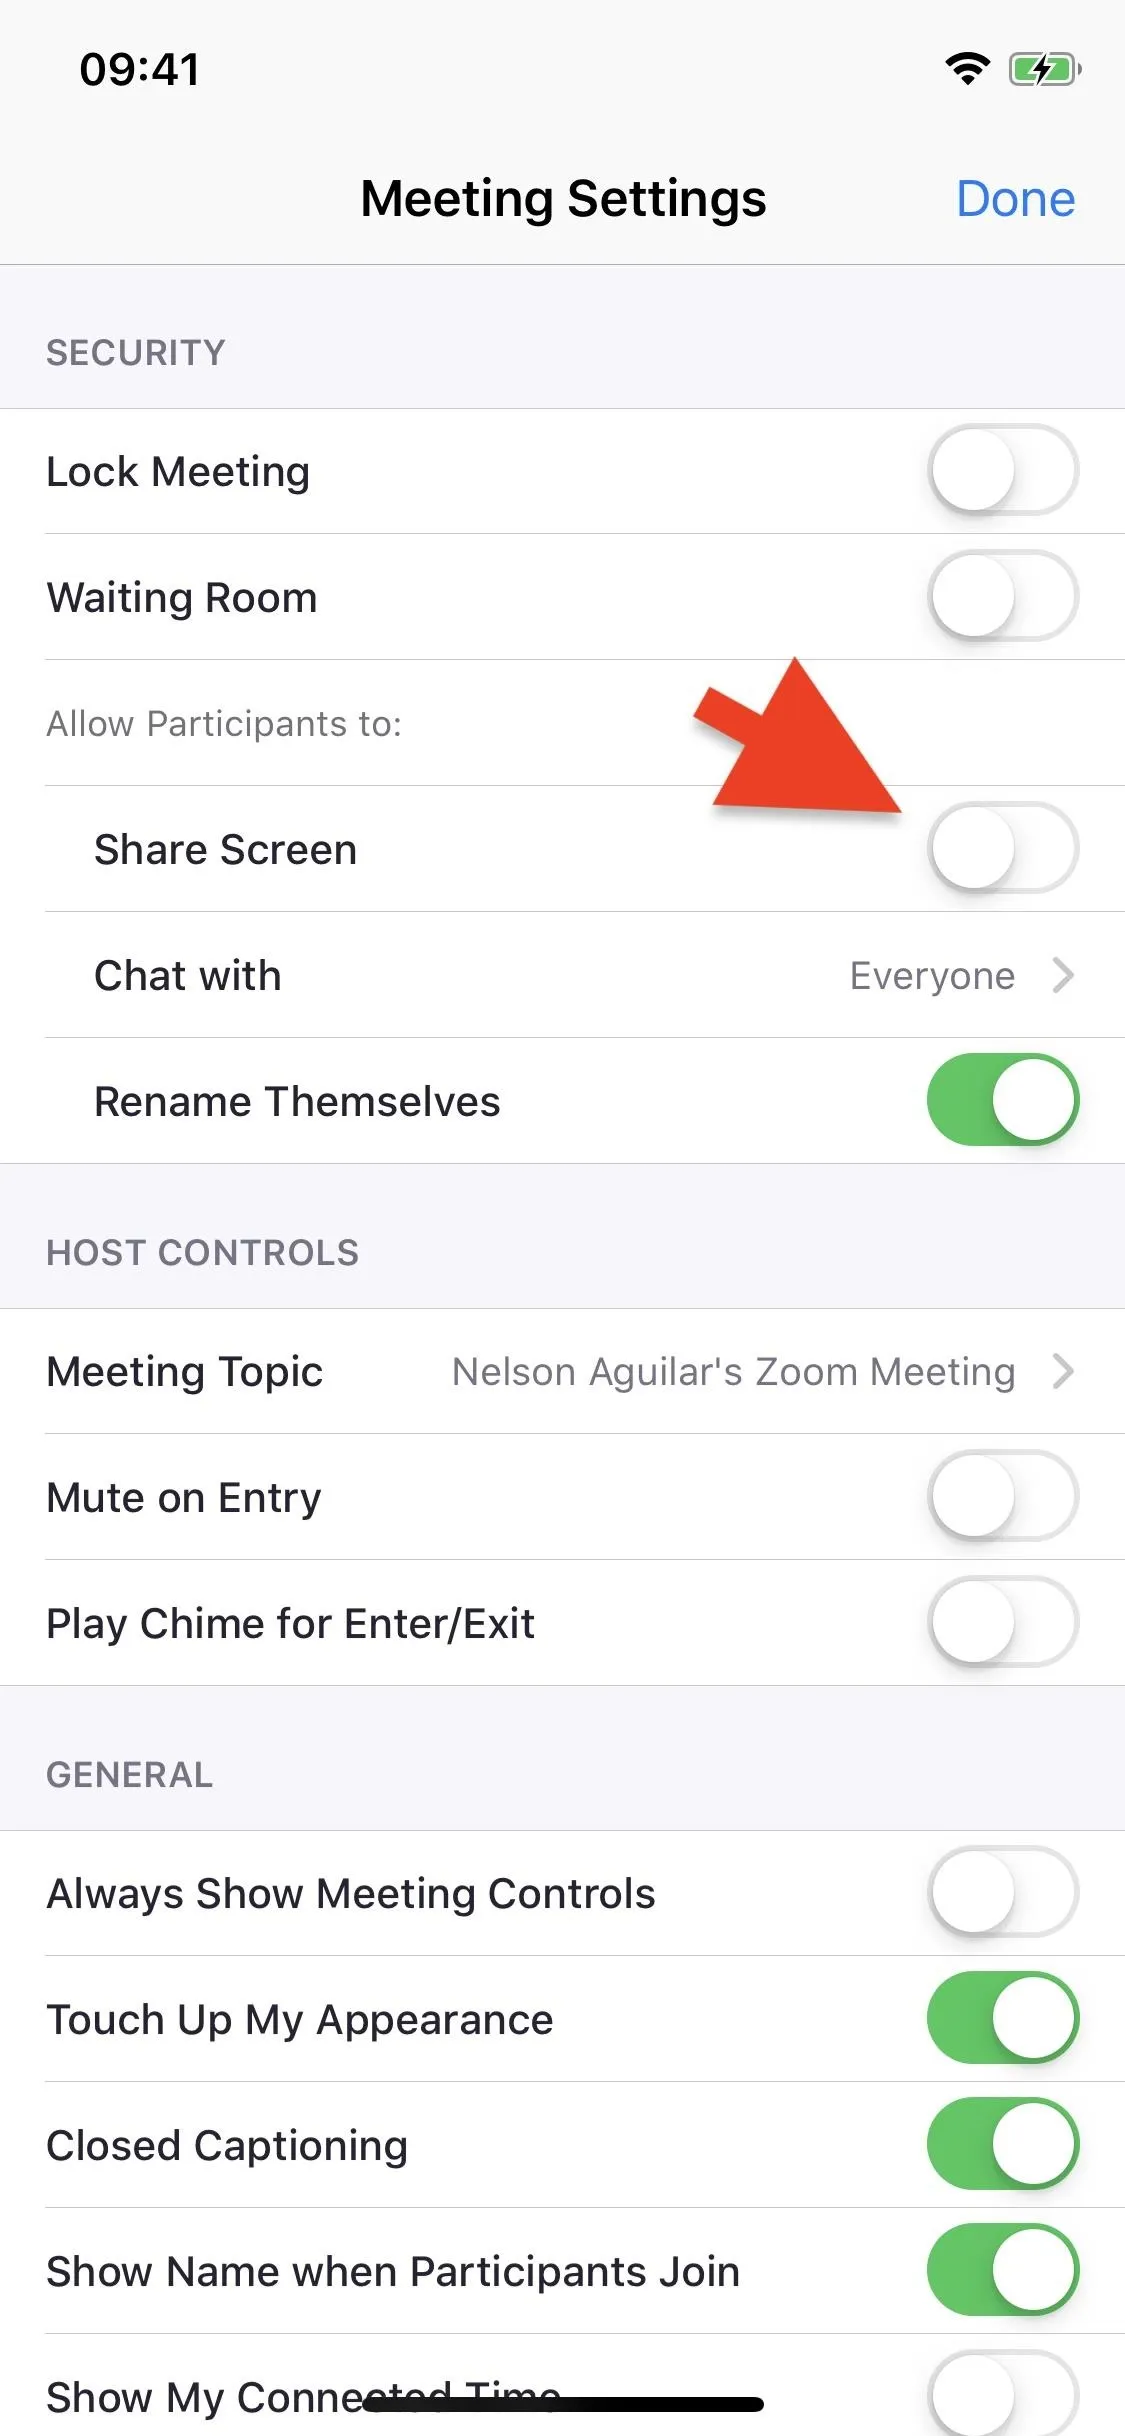
Stop Participants from Screen Sharing
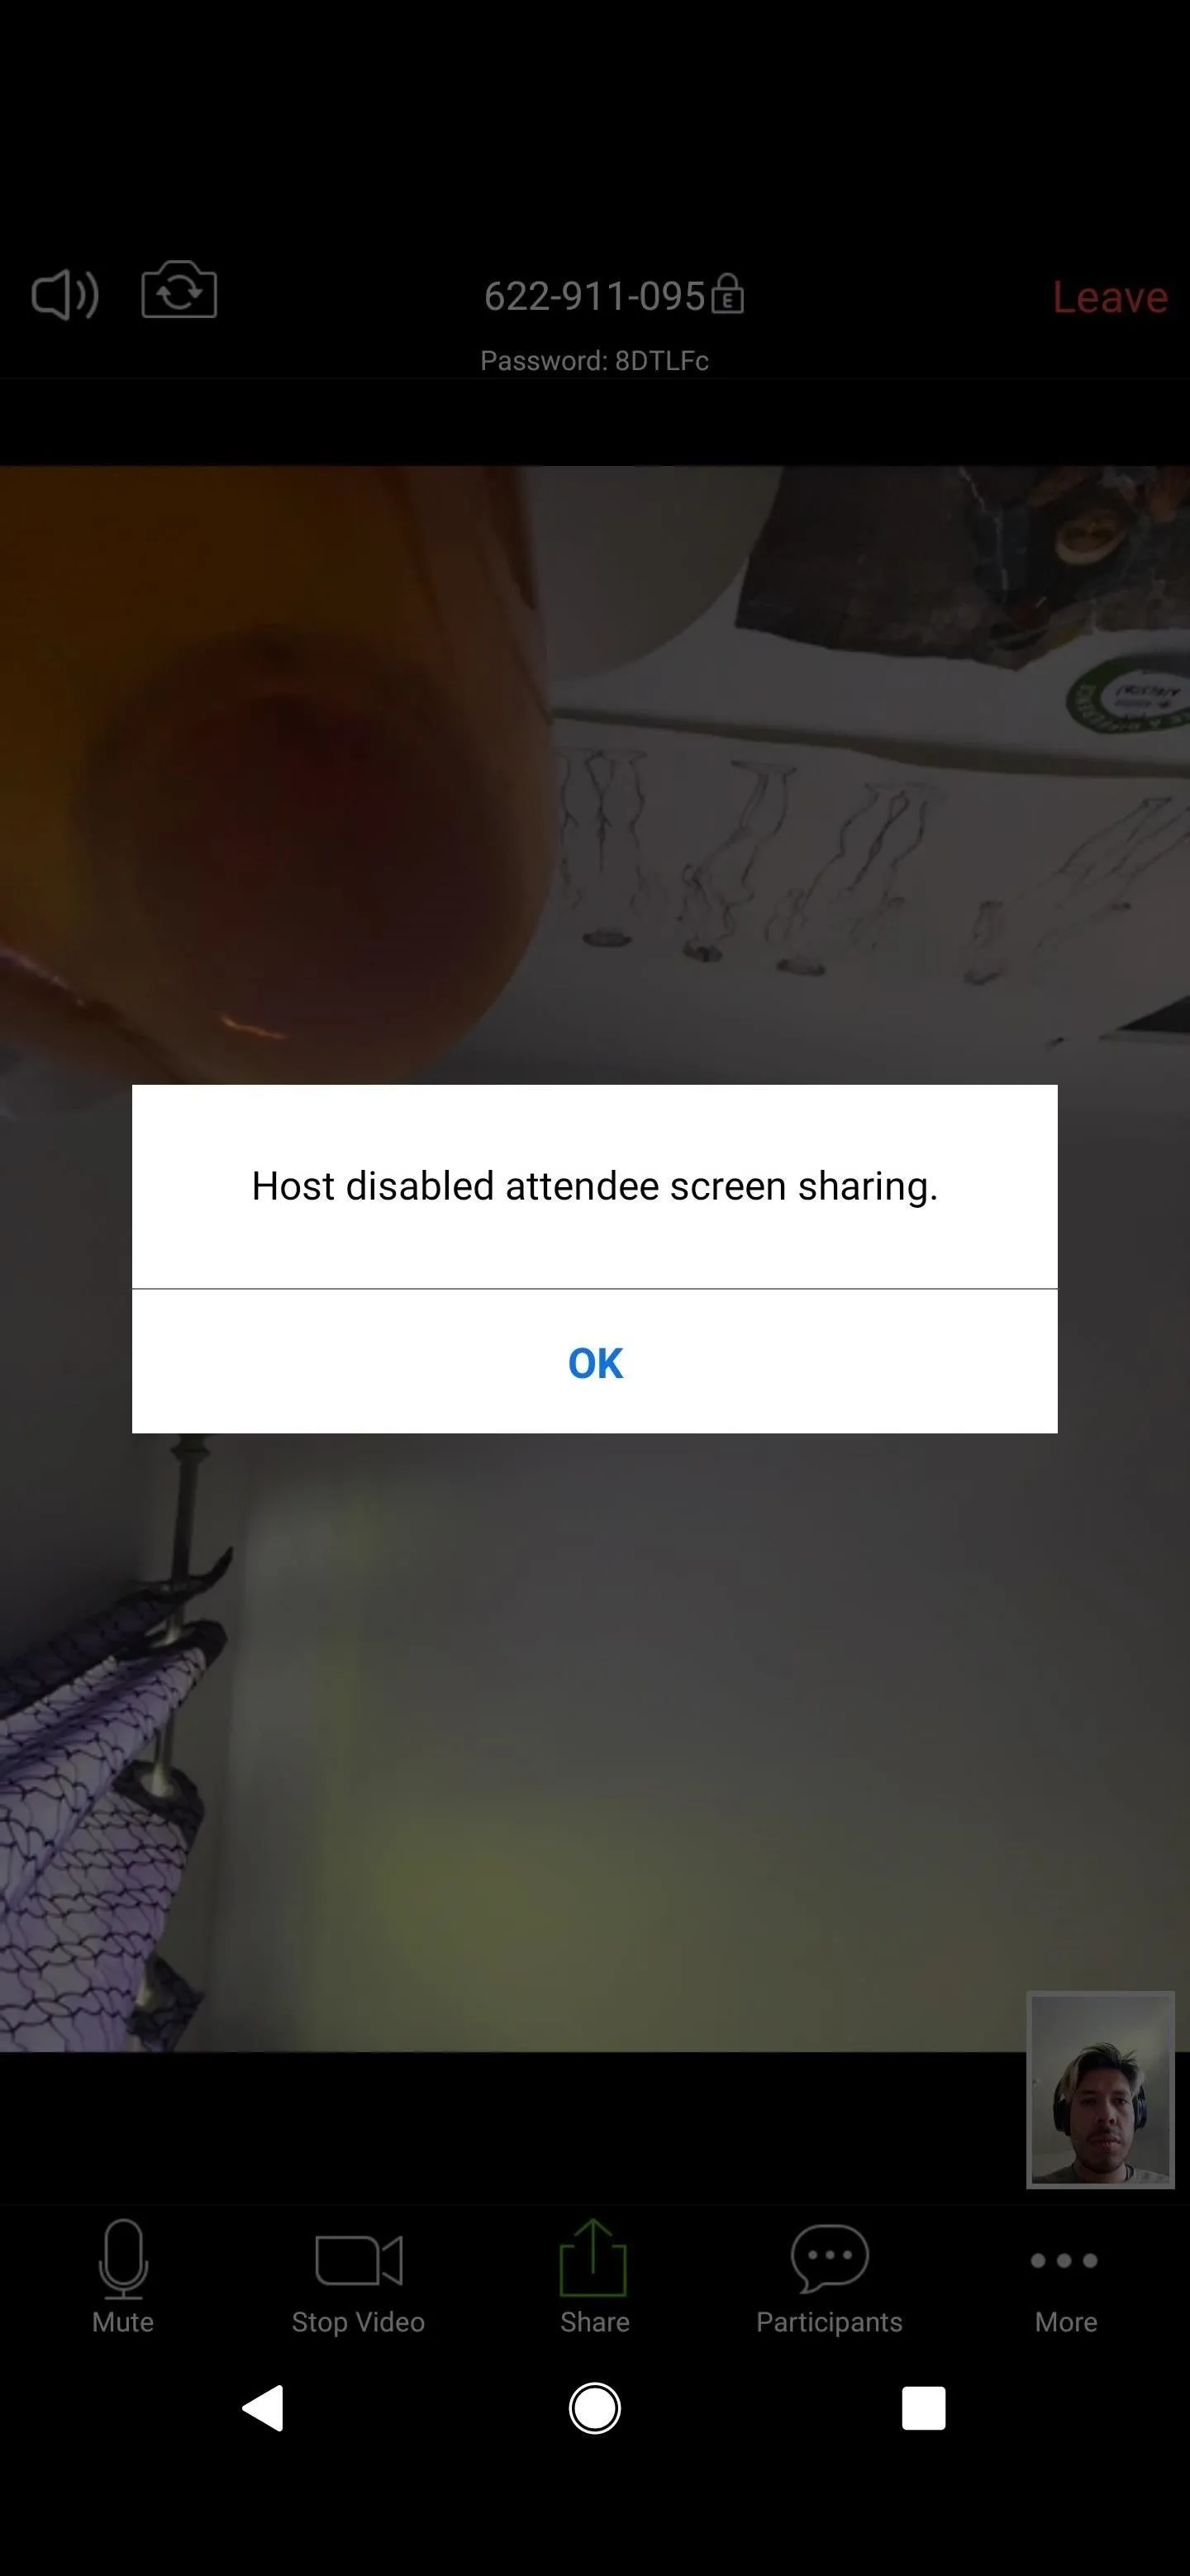
One of the easiest ways to Zoombomb is by sharing inappropriate videos and images via screen sharing. If that's the case, you can stop participants from screen sharing while you're already in a meeting. Tap on "More" and then on "Meeting Settings." Turn off the toggle next to "Screen Share" to stop attendees from sharing their screen. If they attempt to share their screen, they'll be greeted with the following:
Host disabled attendee screen sharing.
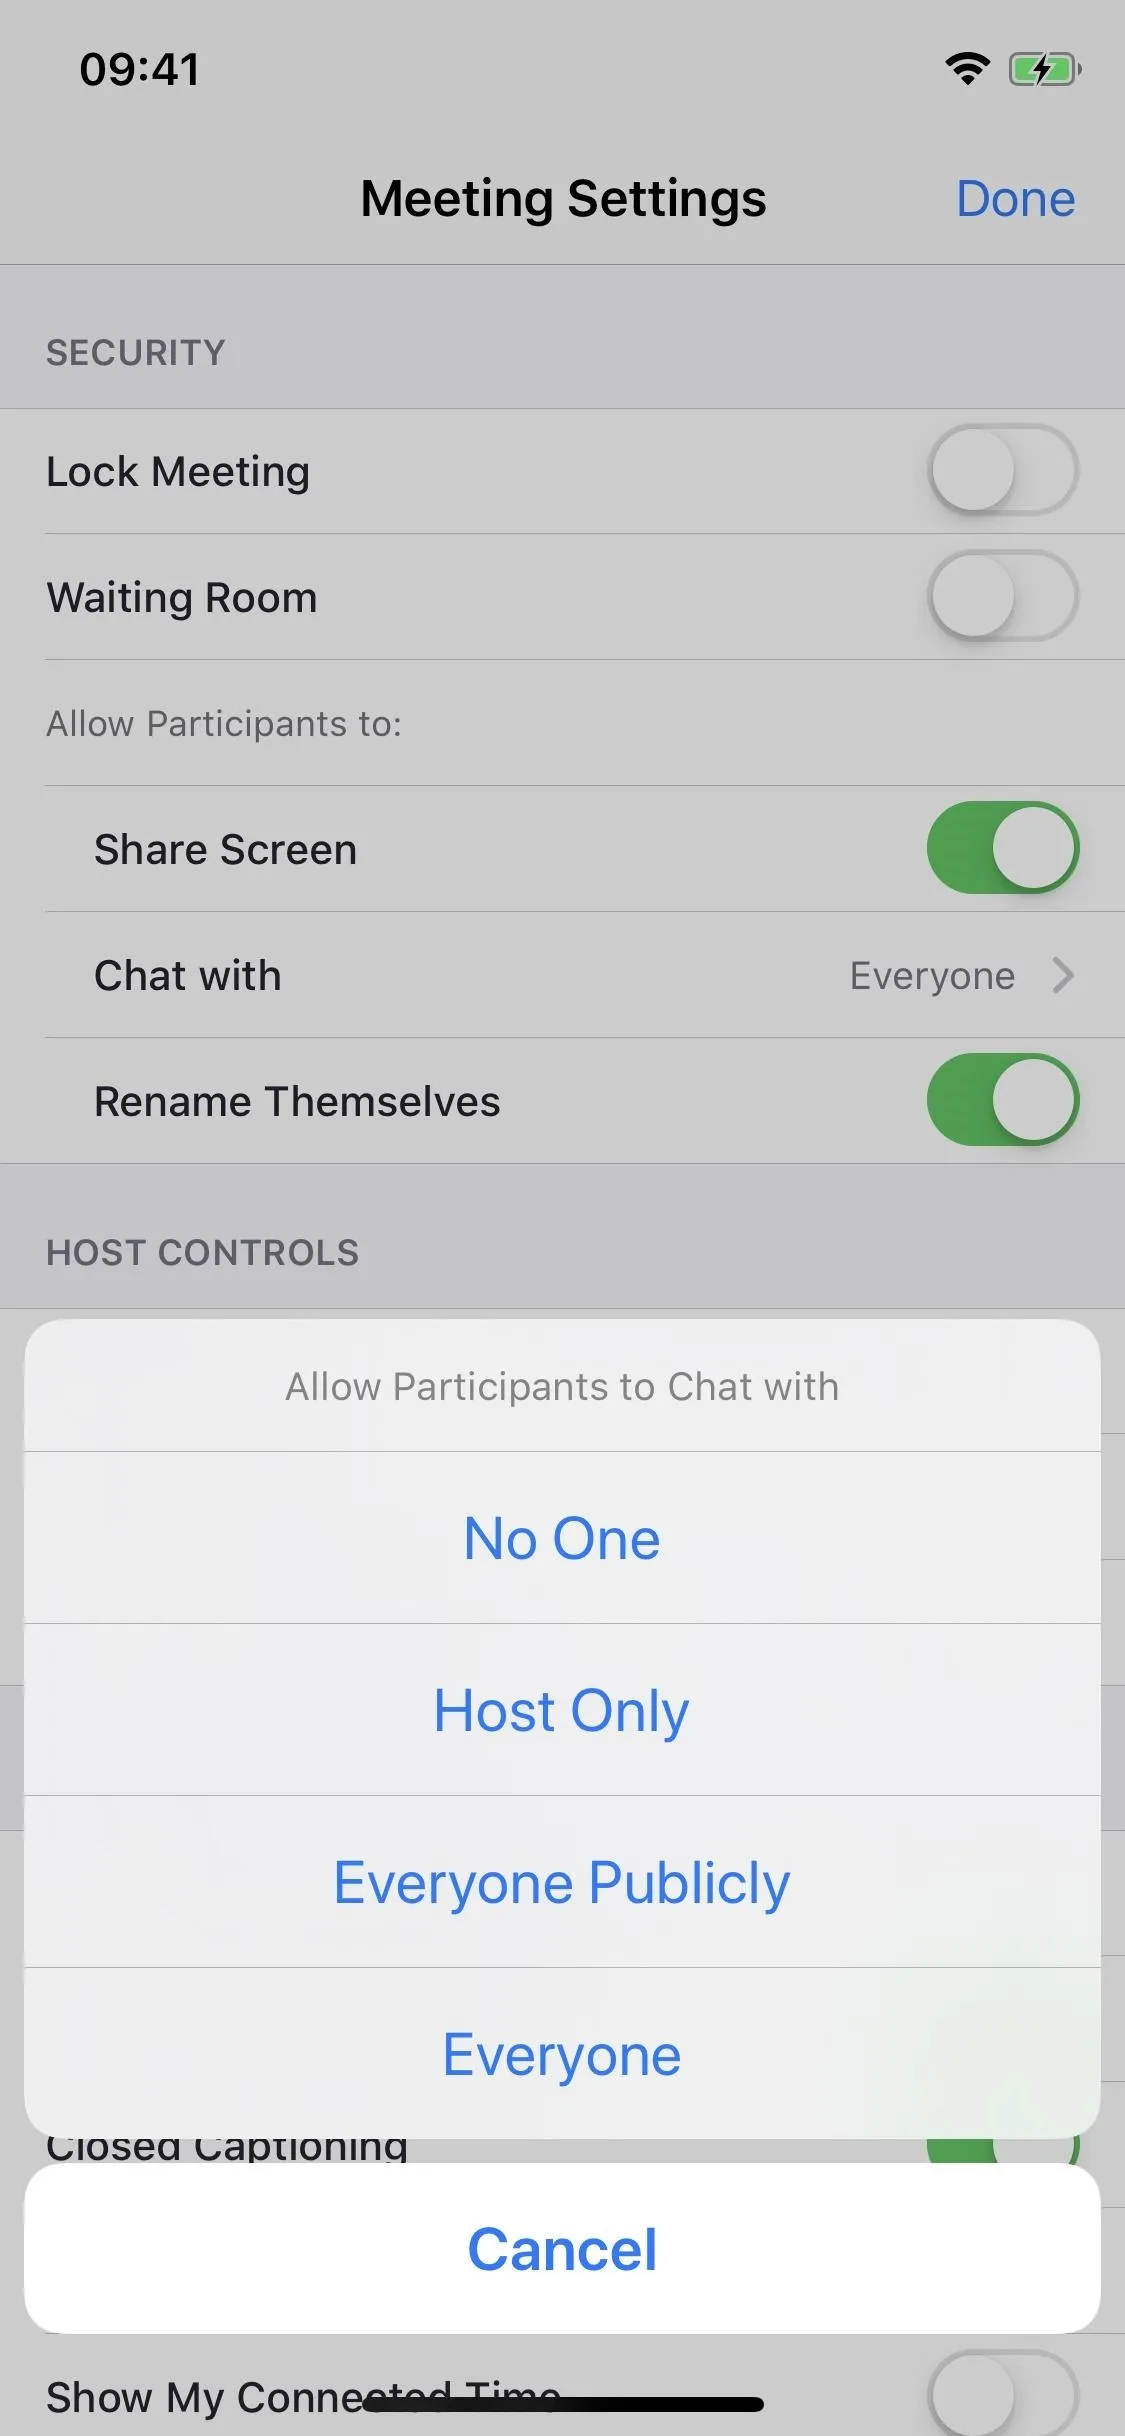
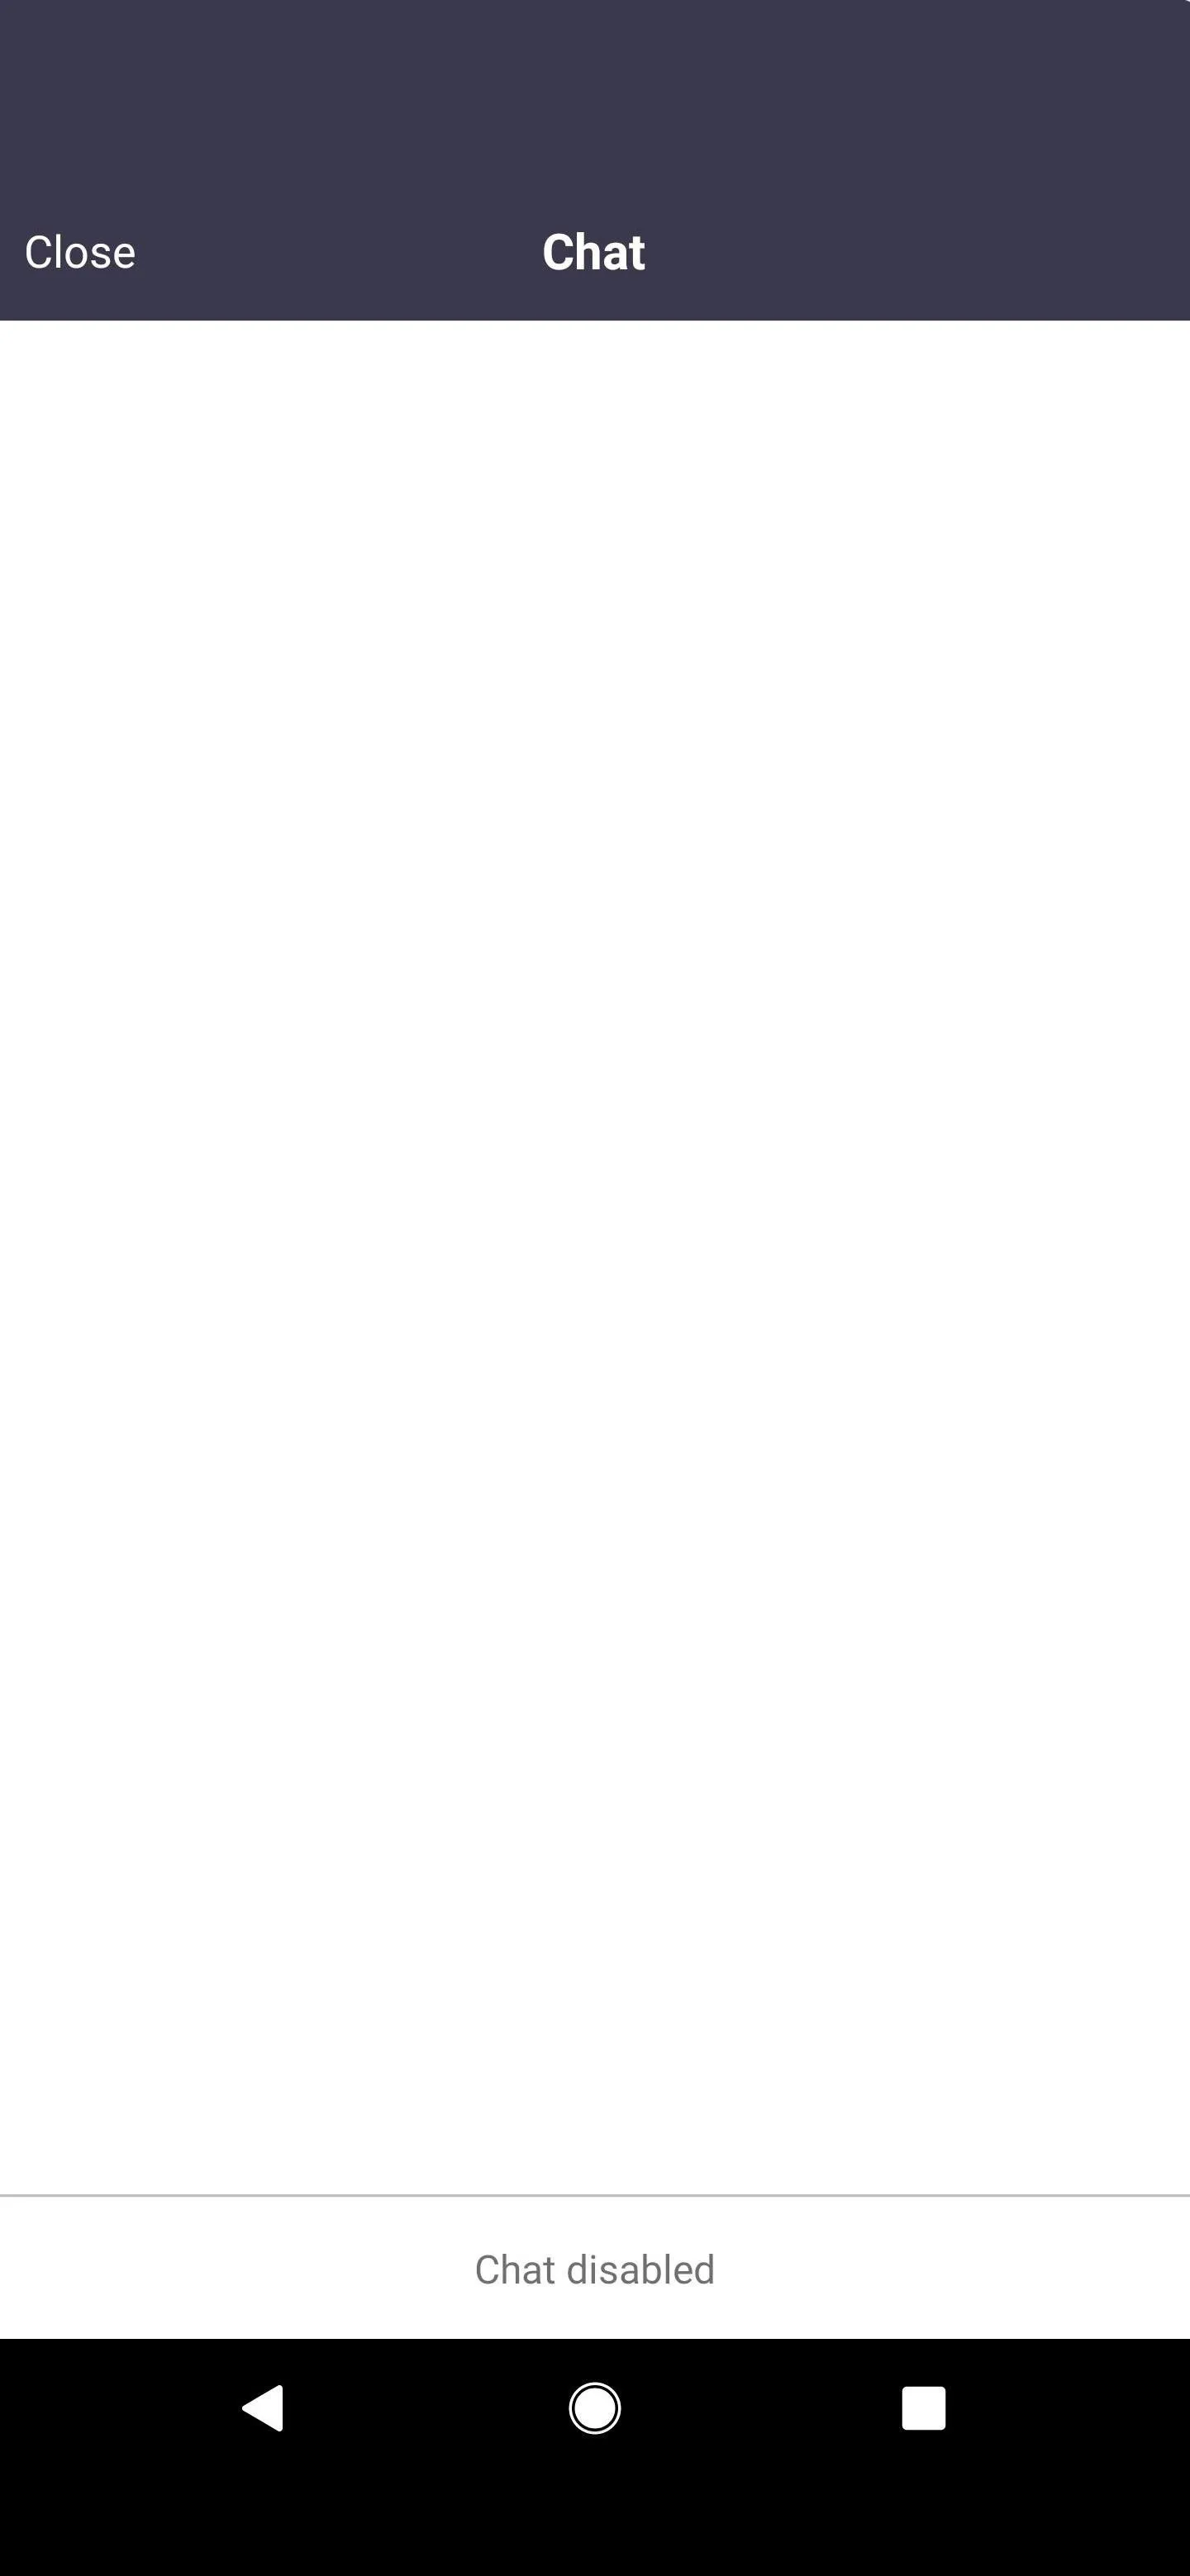
Disable Chat
If chat is enabled but slowly turns into a distraction, you can either restrict it or altogether disable it. In a meeting, tap on "More" and then on "Meeting Settings." Tap on "Chat with," and you should pick either of two options:
- No One: no one can receive or send messages
- Host Only: only the host can receive messages
If someone attempts to send a message, they see that chat is disabled.
Stop Attendees from Renaming Themselves
If you didn't disable attendees from renaming themselves before the meeting (in tip 15), you could do so during the video session. Tap on "More" in the navbar, then on "Meeting Settings." Toggle off the setting "Rename Themselves," and the option to rename yourself will disappear from the Participants section.
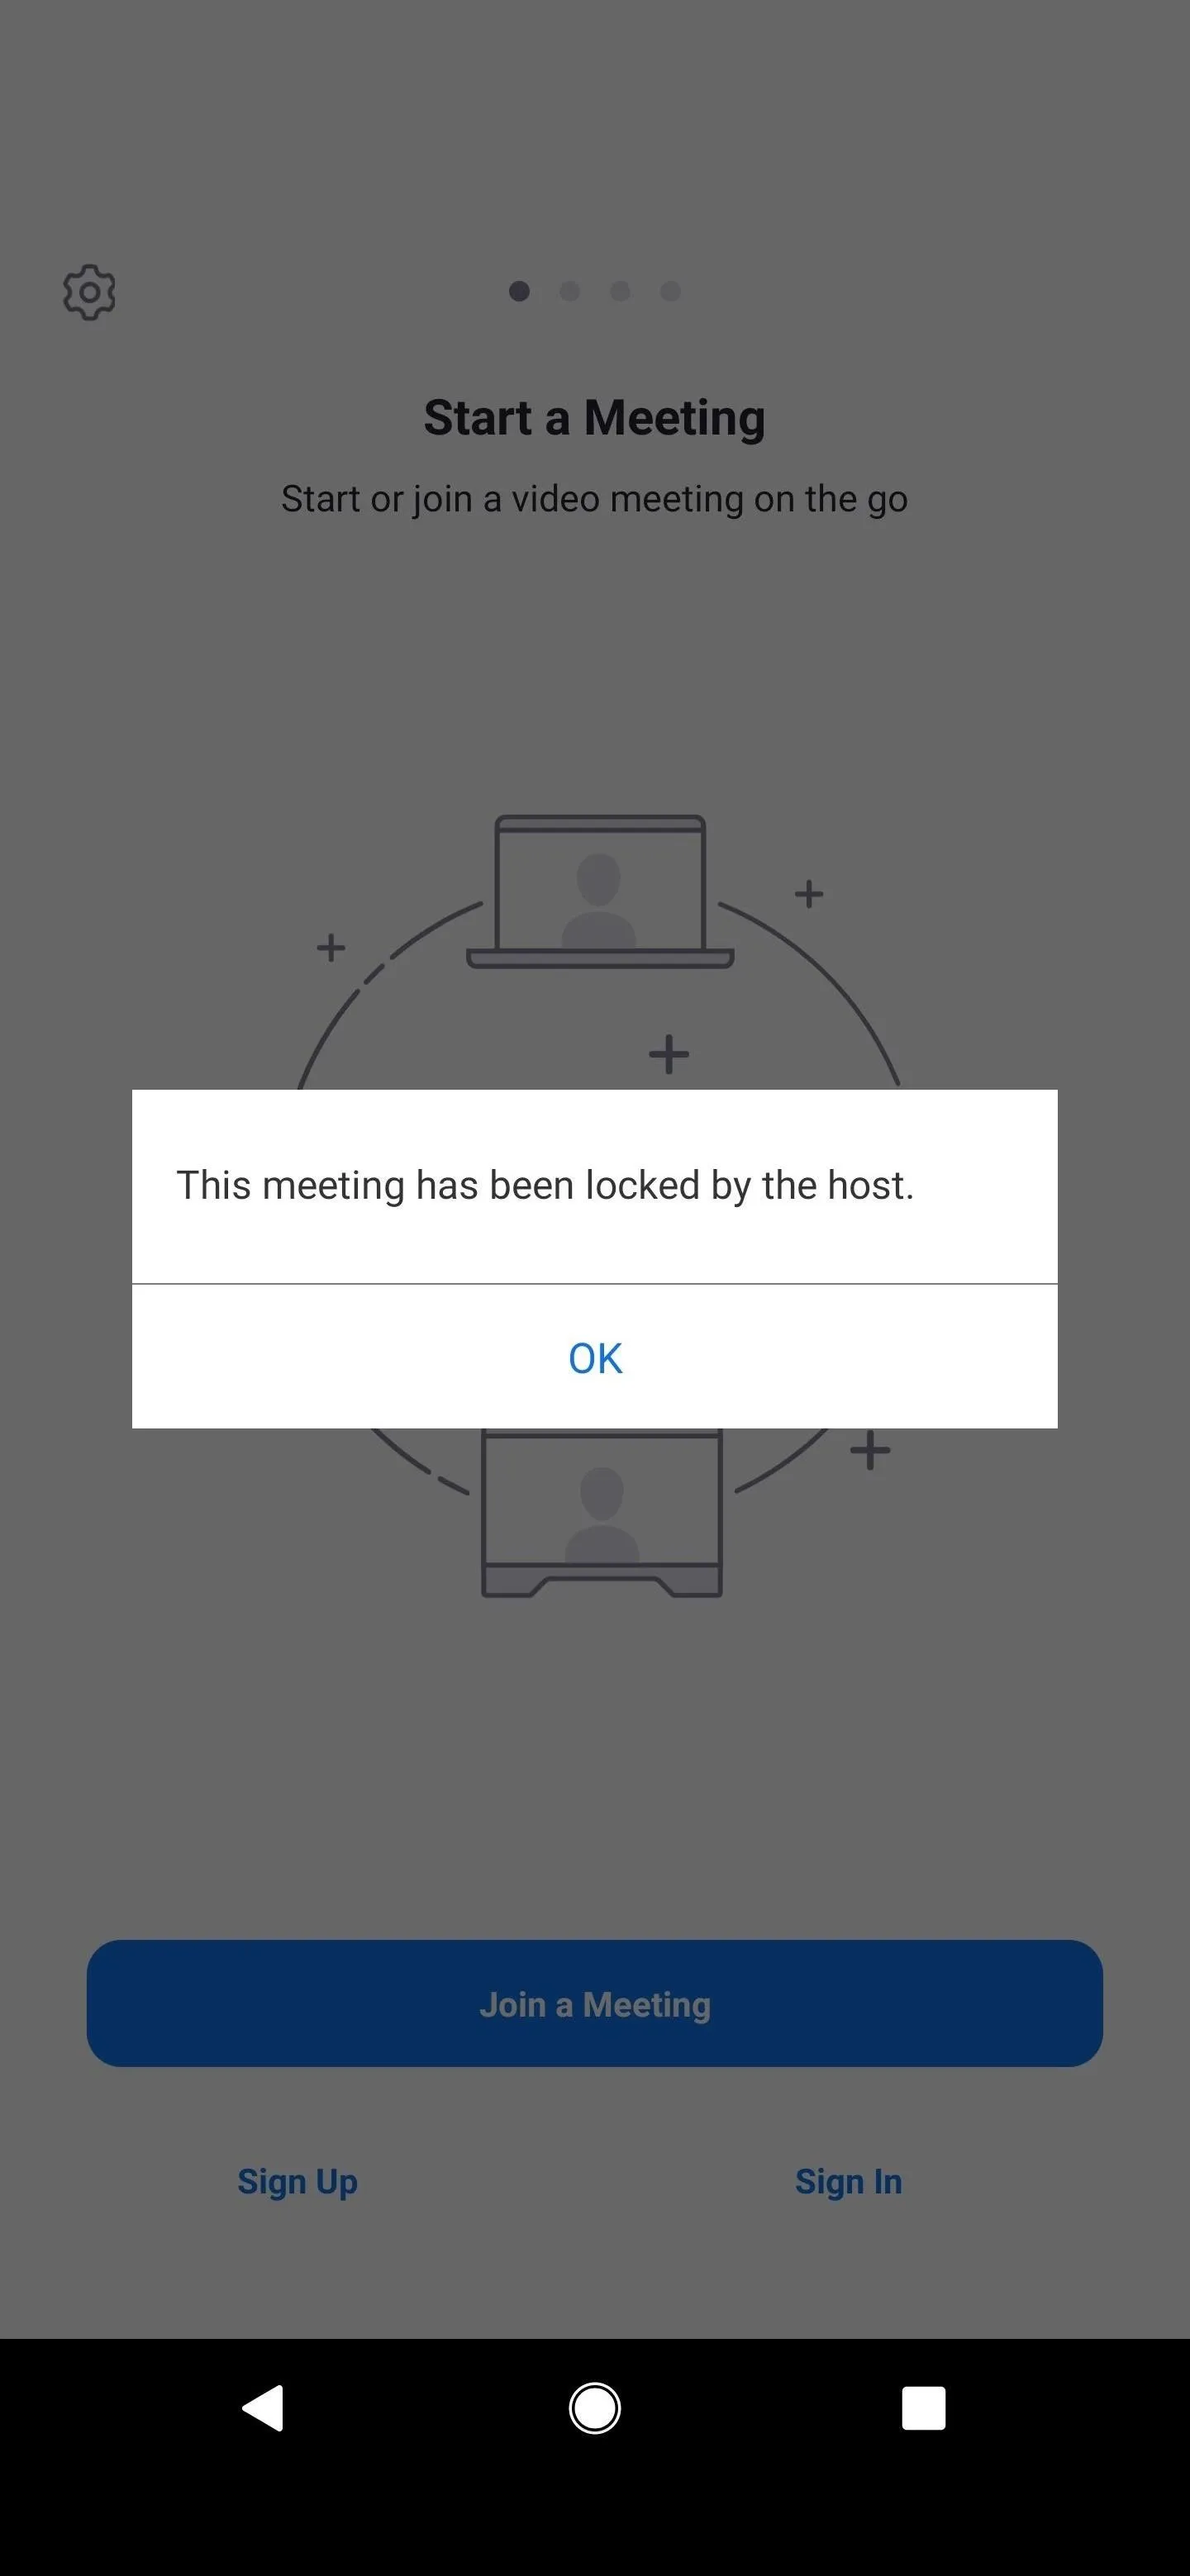
Lock the Meeting
Once a meeting has every participant connected, you can lock a meeting so that no one else can join. Tap on "More," then "Meeting Settings," and turn on the toggle next to "Lock Meeting." If someone tries to join the meeting, they'll see the following:
This meeting has been locked by the host.

Permanently Remove a Participant
If you've done everything you can, and a participant is still disruptive, you have no other option than to kick them out of the meeting permanently. And it's quickly done during the session. First, go to the "Participants" tab and tap their name. Next, tap on "Remove," and a pop-up will appear. Finally, tap on "Yes" (iOS) or "OK" (Android), and the person will be removed from the meeting, and they won't be able to join back.


Comments
Be the first, drop a comment!