
Fades are a classic video transition technique, either at the beginning or end of a scene. They can dramatically begin a film as the picture fades in from black, or they can slowly end the story as the screen moves into darkness. They can also be used within a movie as dramatic transitions to signify time has passed, but we won't cover that in this guide.
Okay, so you're probably not making something so dramatic. But you still want to add some fades into your video. No problem! Adobe Premiere Clip makes it easy to add fades to the beginning and end of your movie.
In order to add fade ins and outs, your video must be in the freeform editor. You can't add fades in the automatic editor. So make sure you've started a freeform project and have trimmed all your clips accordingly.
Adding fades to the beginning and/or end of your project is simple, whether on iOS or Android. The app doesn't do this by default, however, so you do need to head into the preferences of the app to get this set up.
- Tap the gear icon at the top of the display to open the Settings for the project.
- To add a fade in, toggle on "Fade in from black." This option will add a "fade in" to the very beginning of your project.
- To add a fade out, toggle on "Fade out to black." This option will add a "fade out" to the end of your project.
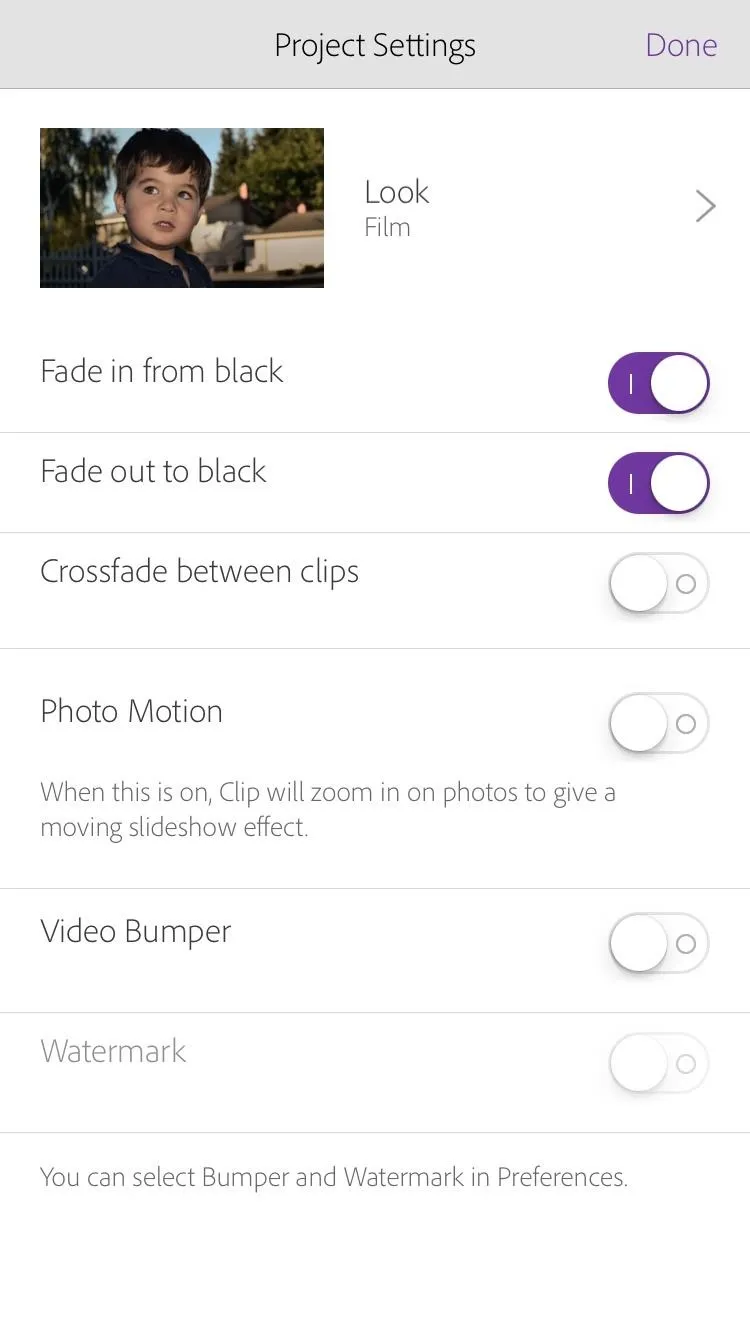
iOS
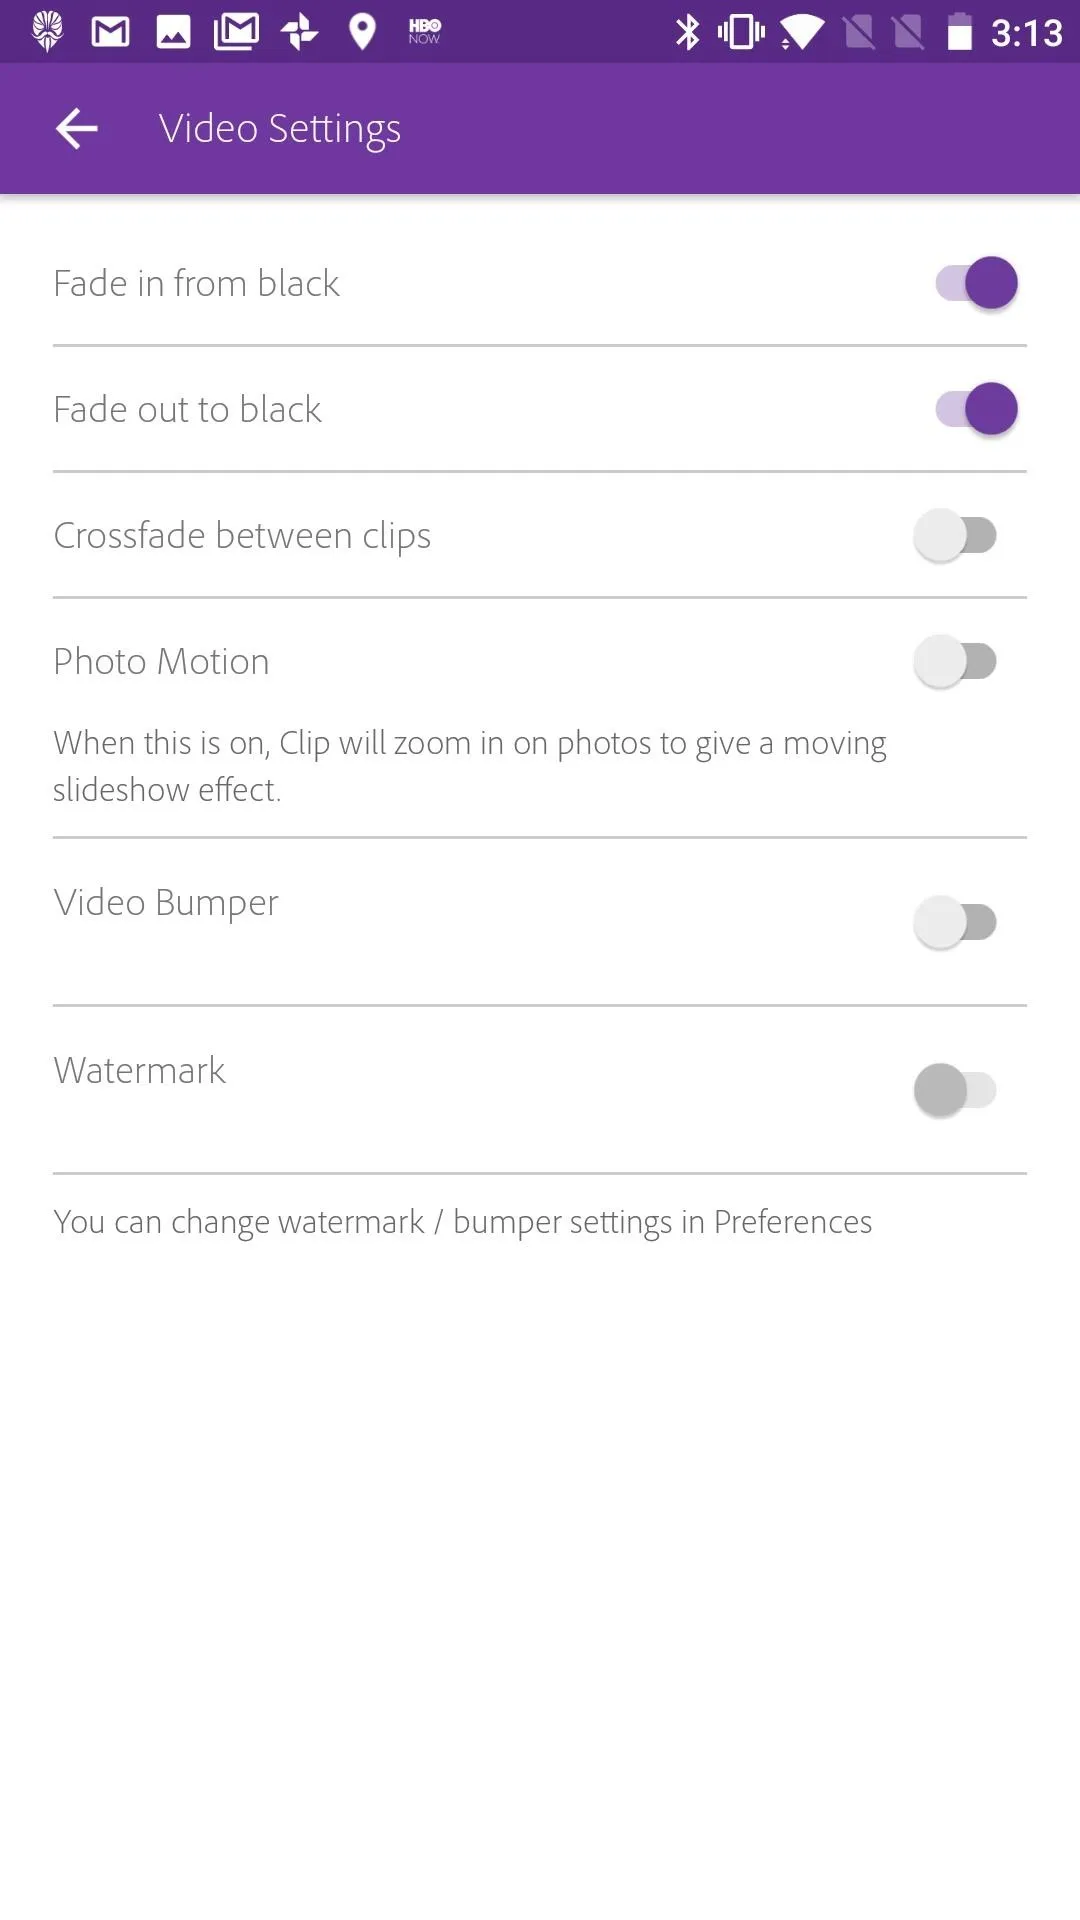
Android

iOS

Android
That's all there is to it. Your project now opens with a fade and ends with one too, if you chose to set both and not just one or the other. Your video has a touch of added production quality, and all it took was one or two taps.

A small video with a fade to black (left) and with no fade (right).


A small video with a fade to black (left) and with no fade (right).

This article was produced during Gadget Hacks' special coverage on smartphone-based video creator tips for filming and editing. Check out the whole Videography series.
- Follow Gadget Hacks on Pinterest, Reddit, Twitter, YouTube, and Flipboard
- Sign up for Gadget Hacks' daily newsletter or weekly Android and iOS updates
- Follow WonderHowTo on Facebook, Twitter, Pinterest, and Flipboard
Cover image, screenshots, and GIFs by Jake Peterson/Gadget Hacks








Comments
Be the first, drop a comment!