


Adobe Premiere Clip gives mobile video editors the tools they need to make some great looking projects from their iPhone or Android device. Editors need ways to organize and trim clips, edit the look of those clips, add music, and more. For a smartphone app, Adobe Premiere Clip has these features in spades.
So, you have the clips organized and trimmed the way you want them but now need to edit how they look. Well, Adobe Premiere Clip has you covered, since you can adjust the exposure of your video projects. To edit exposure, you'll need to have a project in Premiere Clip's freeform editor, not the automatic editor.
Accessing the Video Adjustment Options
If you're on an iPhone, select the video clip in your freeform project that you want to adjust the levels on, then just tap the lens icon in the bottom-left corner. The lens icon looks like a circle with lines inside spiraling inward to another circle. This will open the video adjustment options for that particular scene.
If you're using an Android device, in your freeform project's main screen, tap on the clip you want to adjust. Next, tap the lens icon in the top left to activate the video adjustment options for that scene.
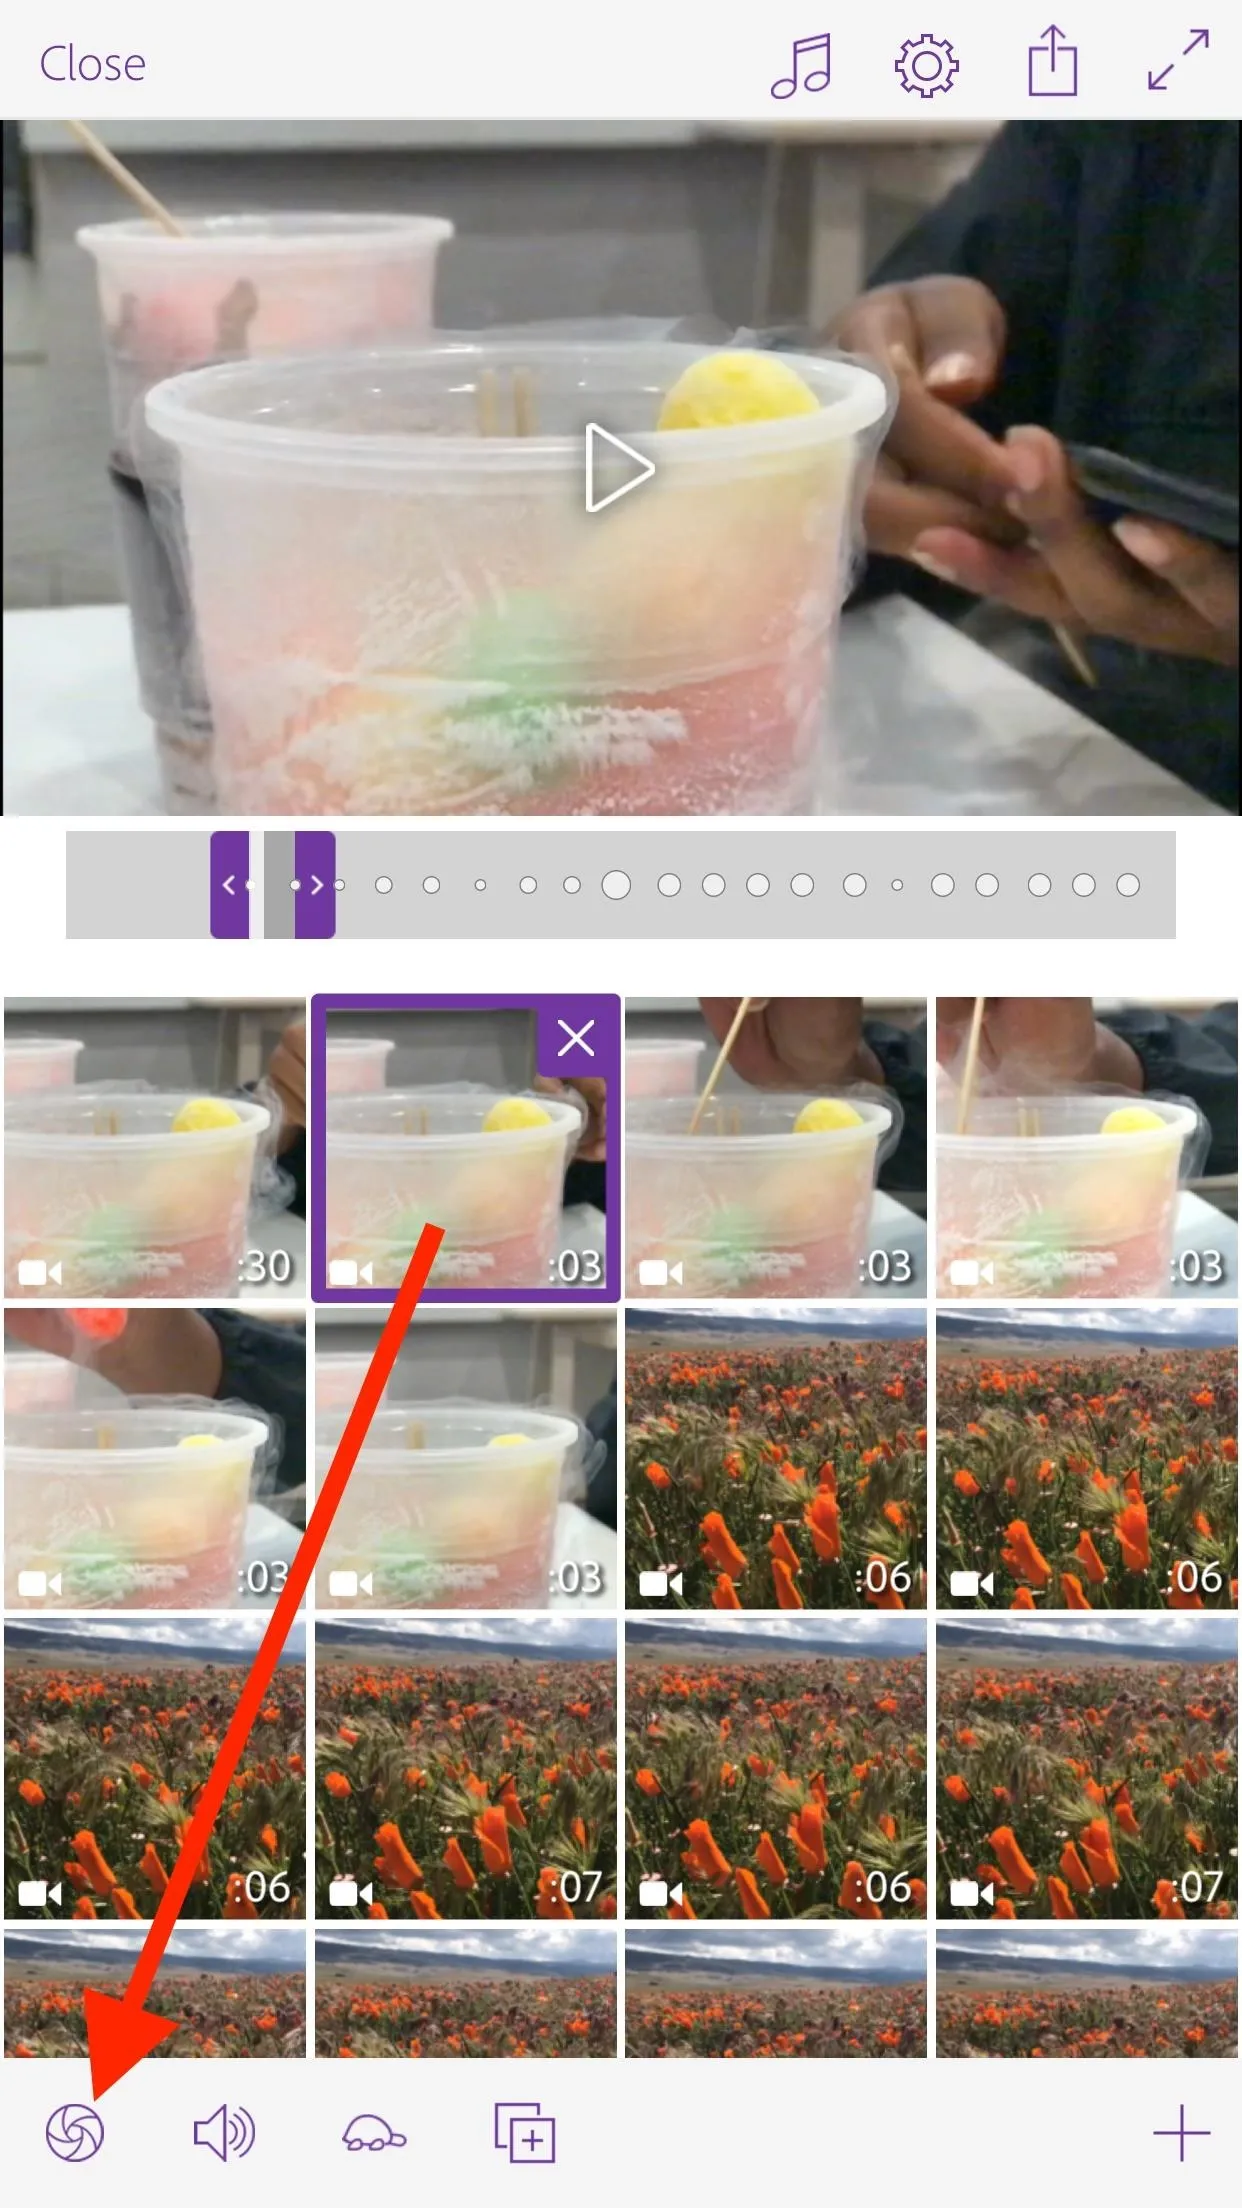
iOS (left) vs. Android (right).
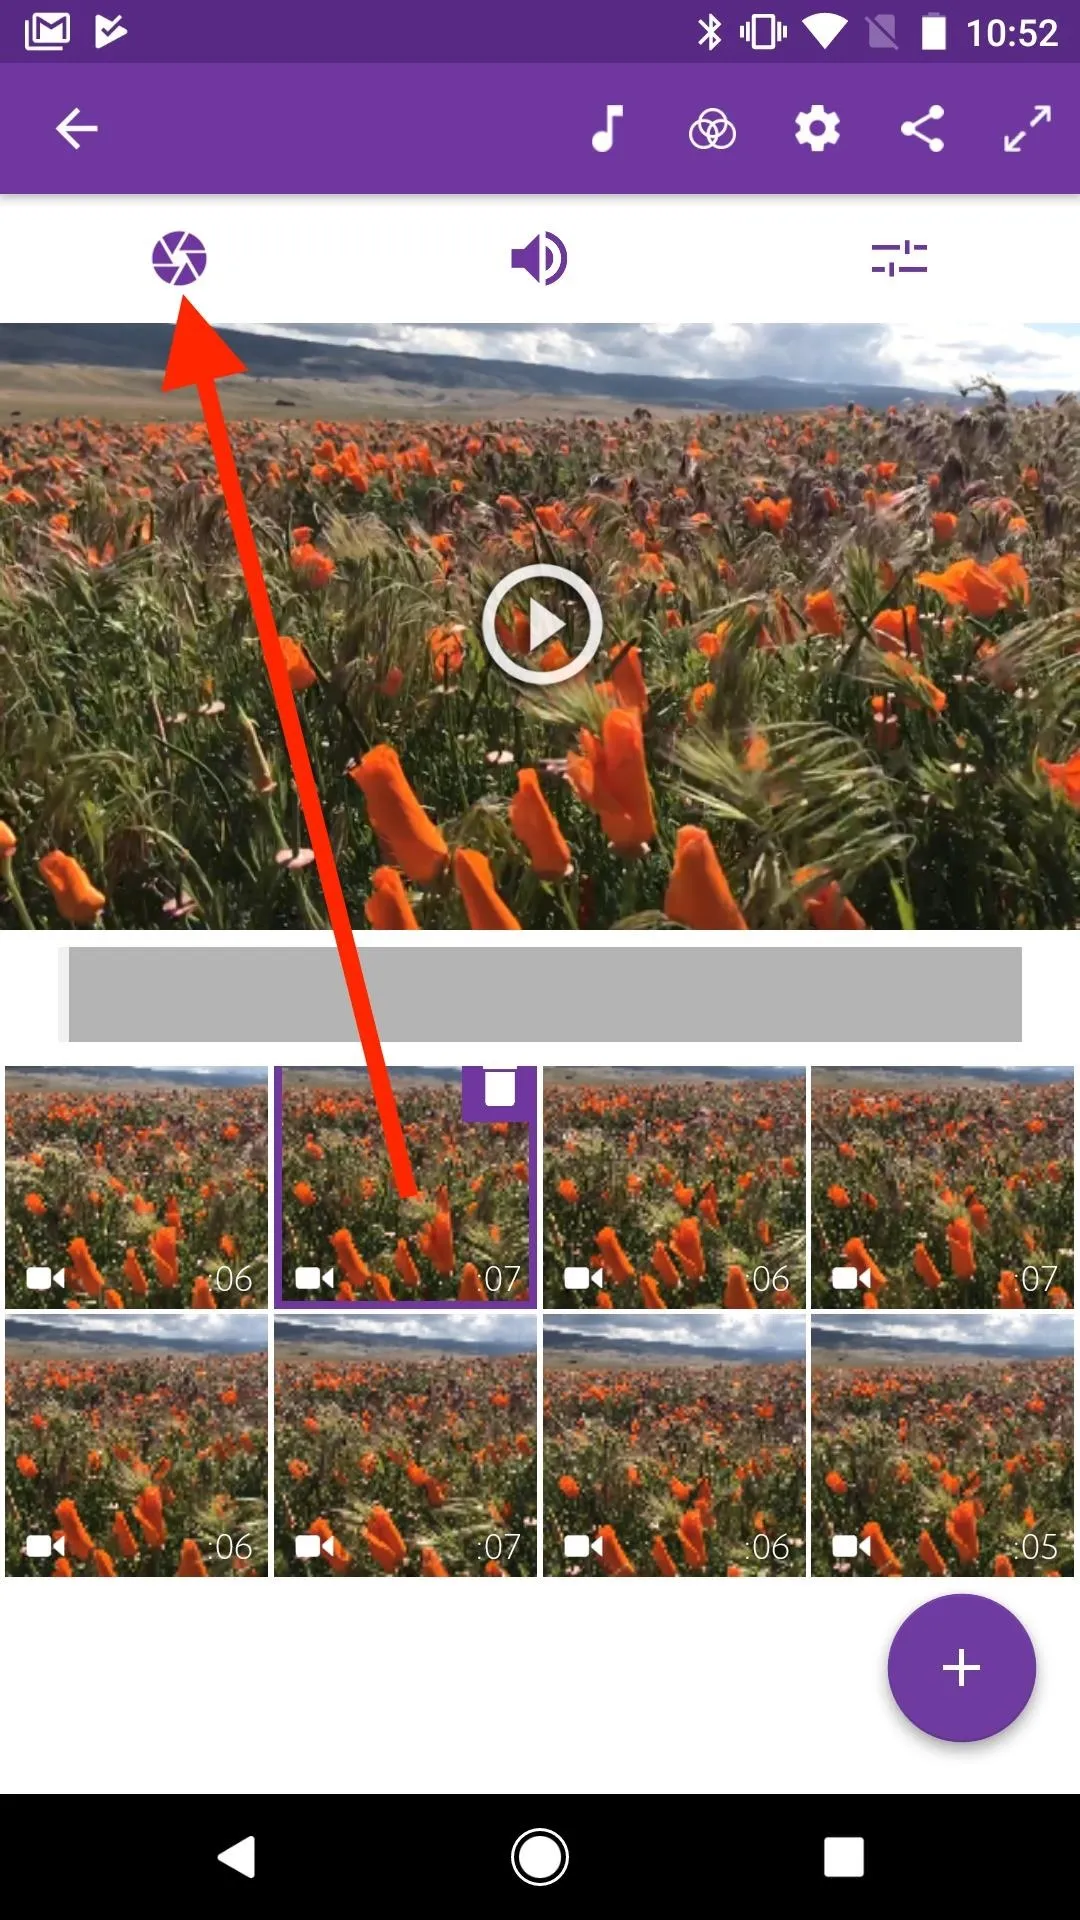
iOS (left) vs. Android (right).
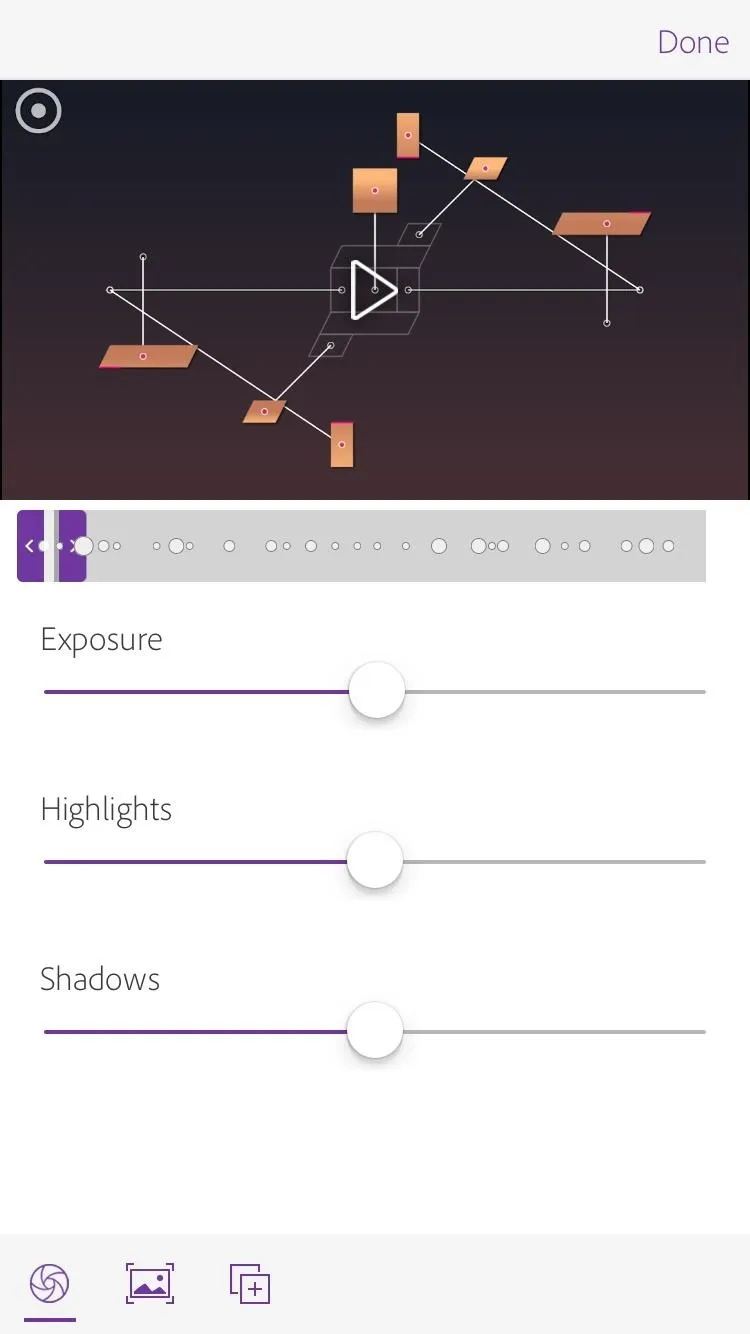
From here, you will be able to edit the exposure, highlights, and shadows.
1: Exposure
The exposure slider will adjust the intensity of the overall light in the image. If you slide it too far to the right, you will most likely notice your picture get blown out, or overexposed. Likewise, too extreme to the left, and your image may become too dark.
2: Highlights
Highlights are the brightest points in the image. Slide this to the left of the bright points in the picture seem too bright, or push it to the right if they seem a bit dark. Just keep in mind — the highlights won't control the brightness of the whole image, just the brightest points.
3: Shadows
Shadows are the darkest points in the image. Like editing highlights, where you slide the shadow slider depends on how bright or dark those points in the image are.

Adobe makes it pretty simple to get up and going with video adjustments. While you can't edit exposure, highlights, and shadows for your whole project at the same time, it would be a rare case if you decided to do so anyway. If you really wanted to do that, you could export your video project first, then upload that video to a new freeform project and make the adjustments all at once since it will be one big clip.
This article was produced during Gadget Hacks' special coverage on smartphone-based video creator tips for filming and editing. Check out the whole Videography series.
- Follow Gadget Hacks on Pinterest, Reddit, Twitter, YouTube, and Flipboard
- Sign up for Gadget Hacks' daily newsletter or weekly Android and iOS updates
- Follow WonderHowTo on Facebook, Twitter, Pinterest, and Flipboard
Cover image and screenshots by Jake Peterson/Gadget Hacks


Comments
Be the first, drop a comment!