


Waze is the go-to navigation app for millions of drivers, and it's easy to see why. Benefits such crowd-sourced traffic data, police trap locations, and road work avoidance are just the tip of the iceberg. It can almost be overwhelming, but with these simple tips, you'll master Waze and start navigating like an expert in no time.
As intuitive as Waze is to use on iPhone and Android, there might be some features that you've overlooked and would like to learn more about. As such, we put together a list of seven tips that should help familiarize you with Waze and some of the features it has to offer.
1. Set a Custom Voice (Or Record Your Own)
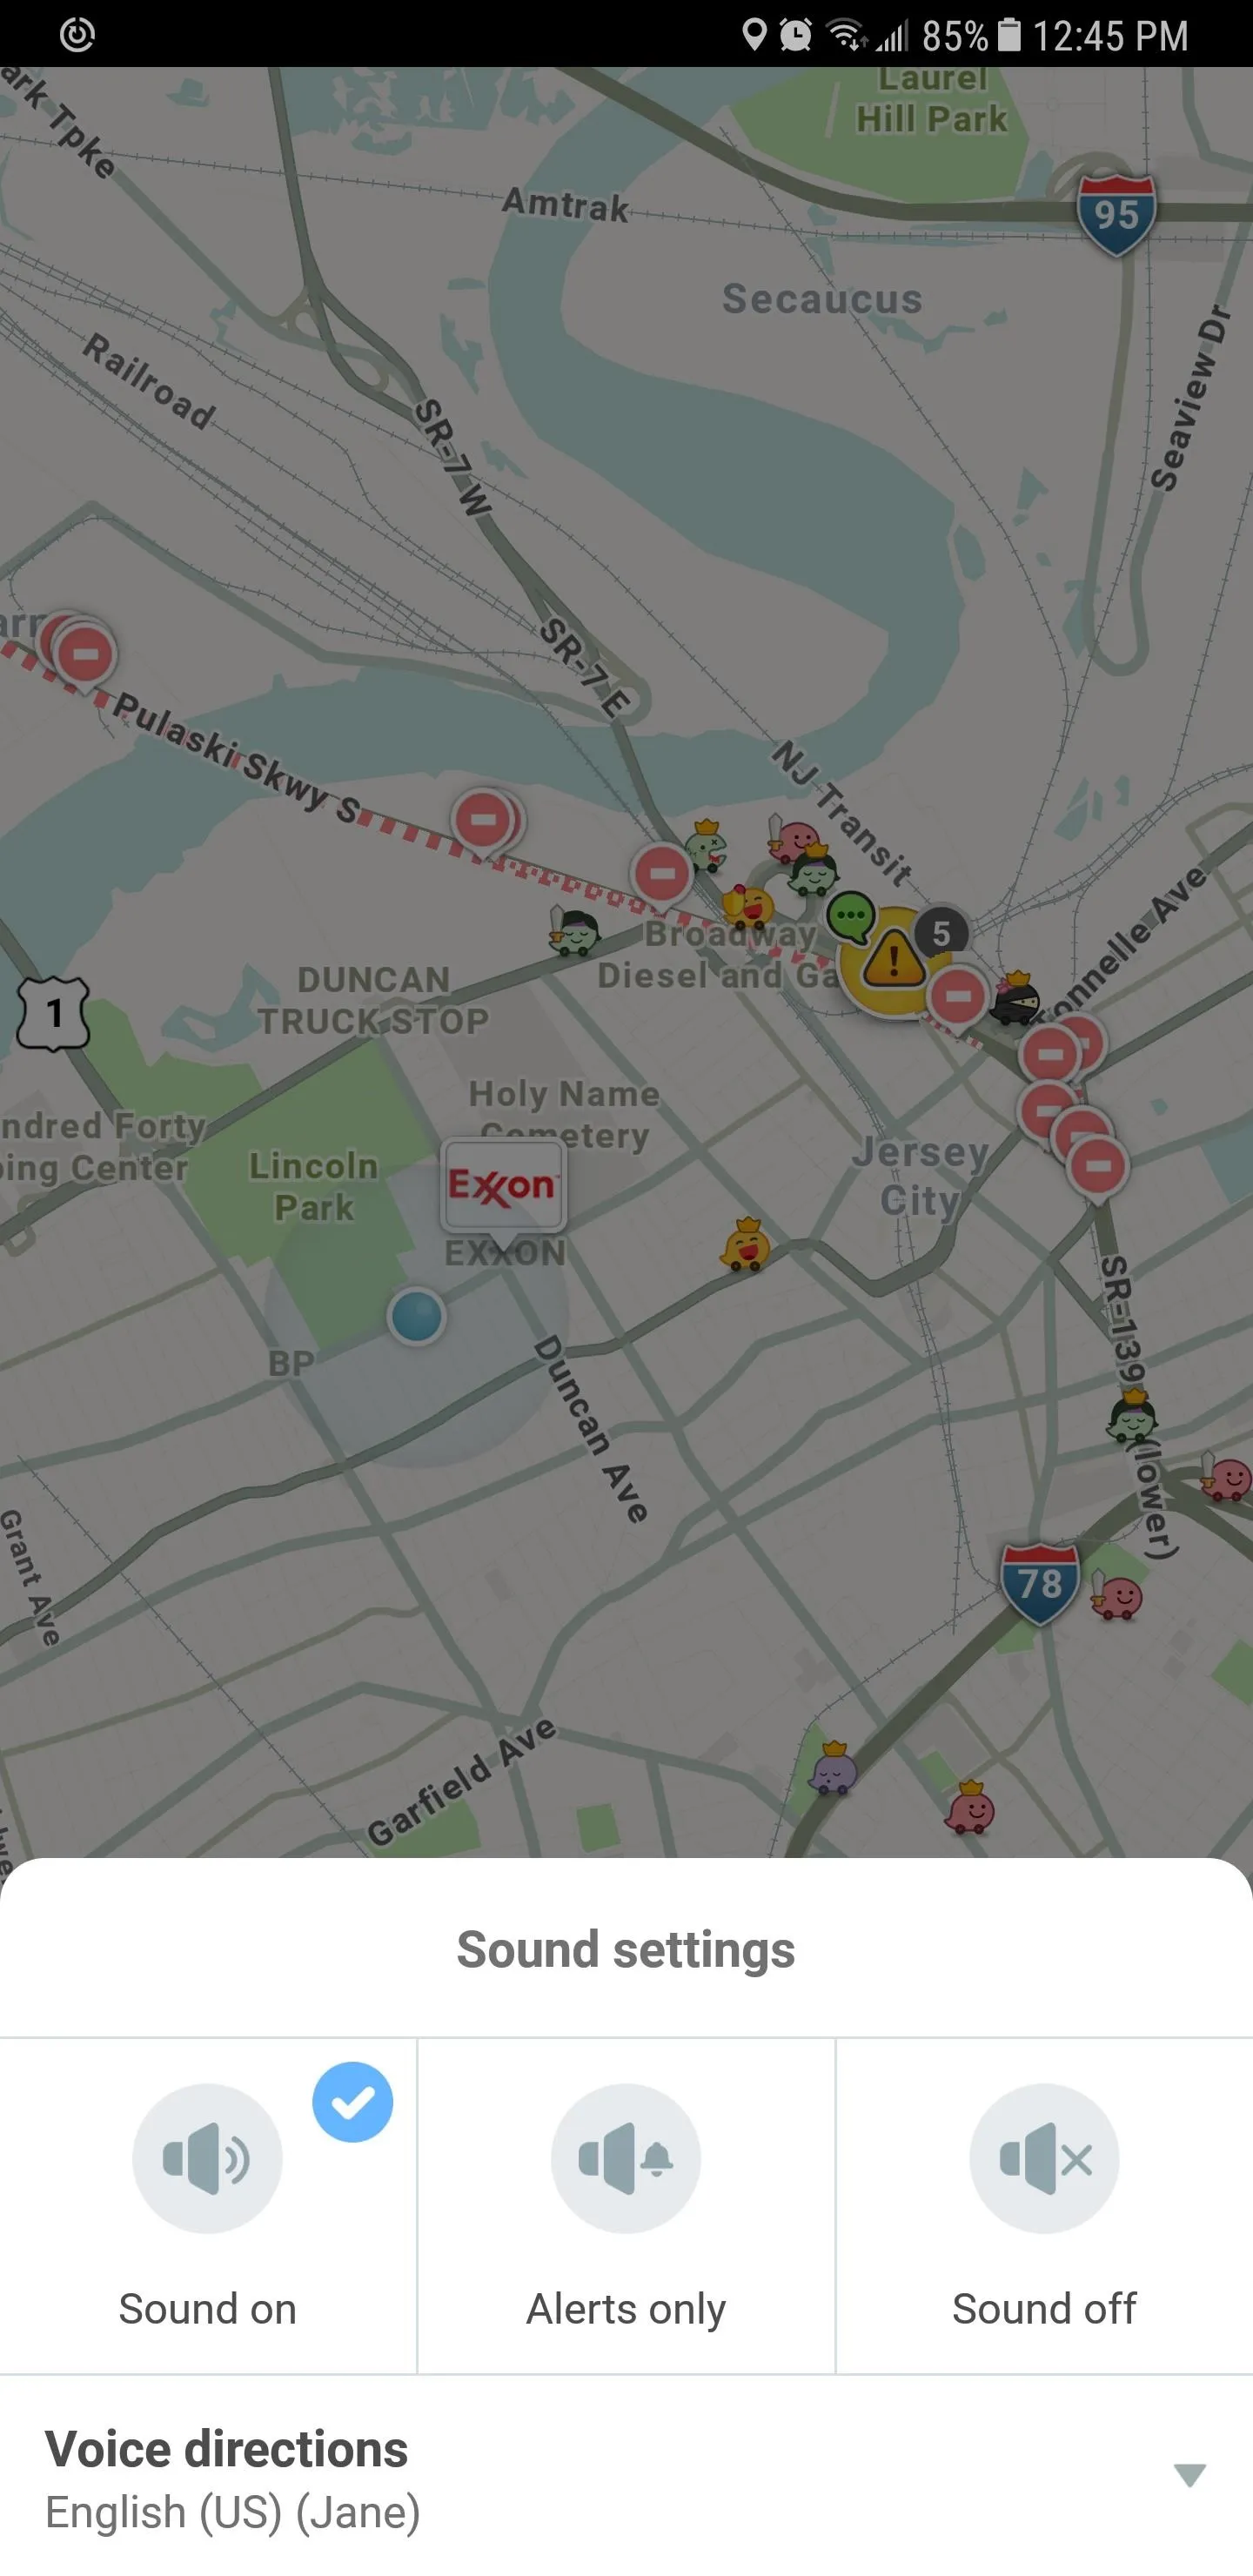
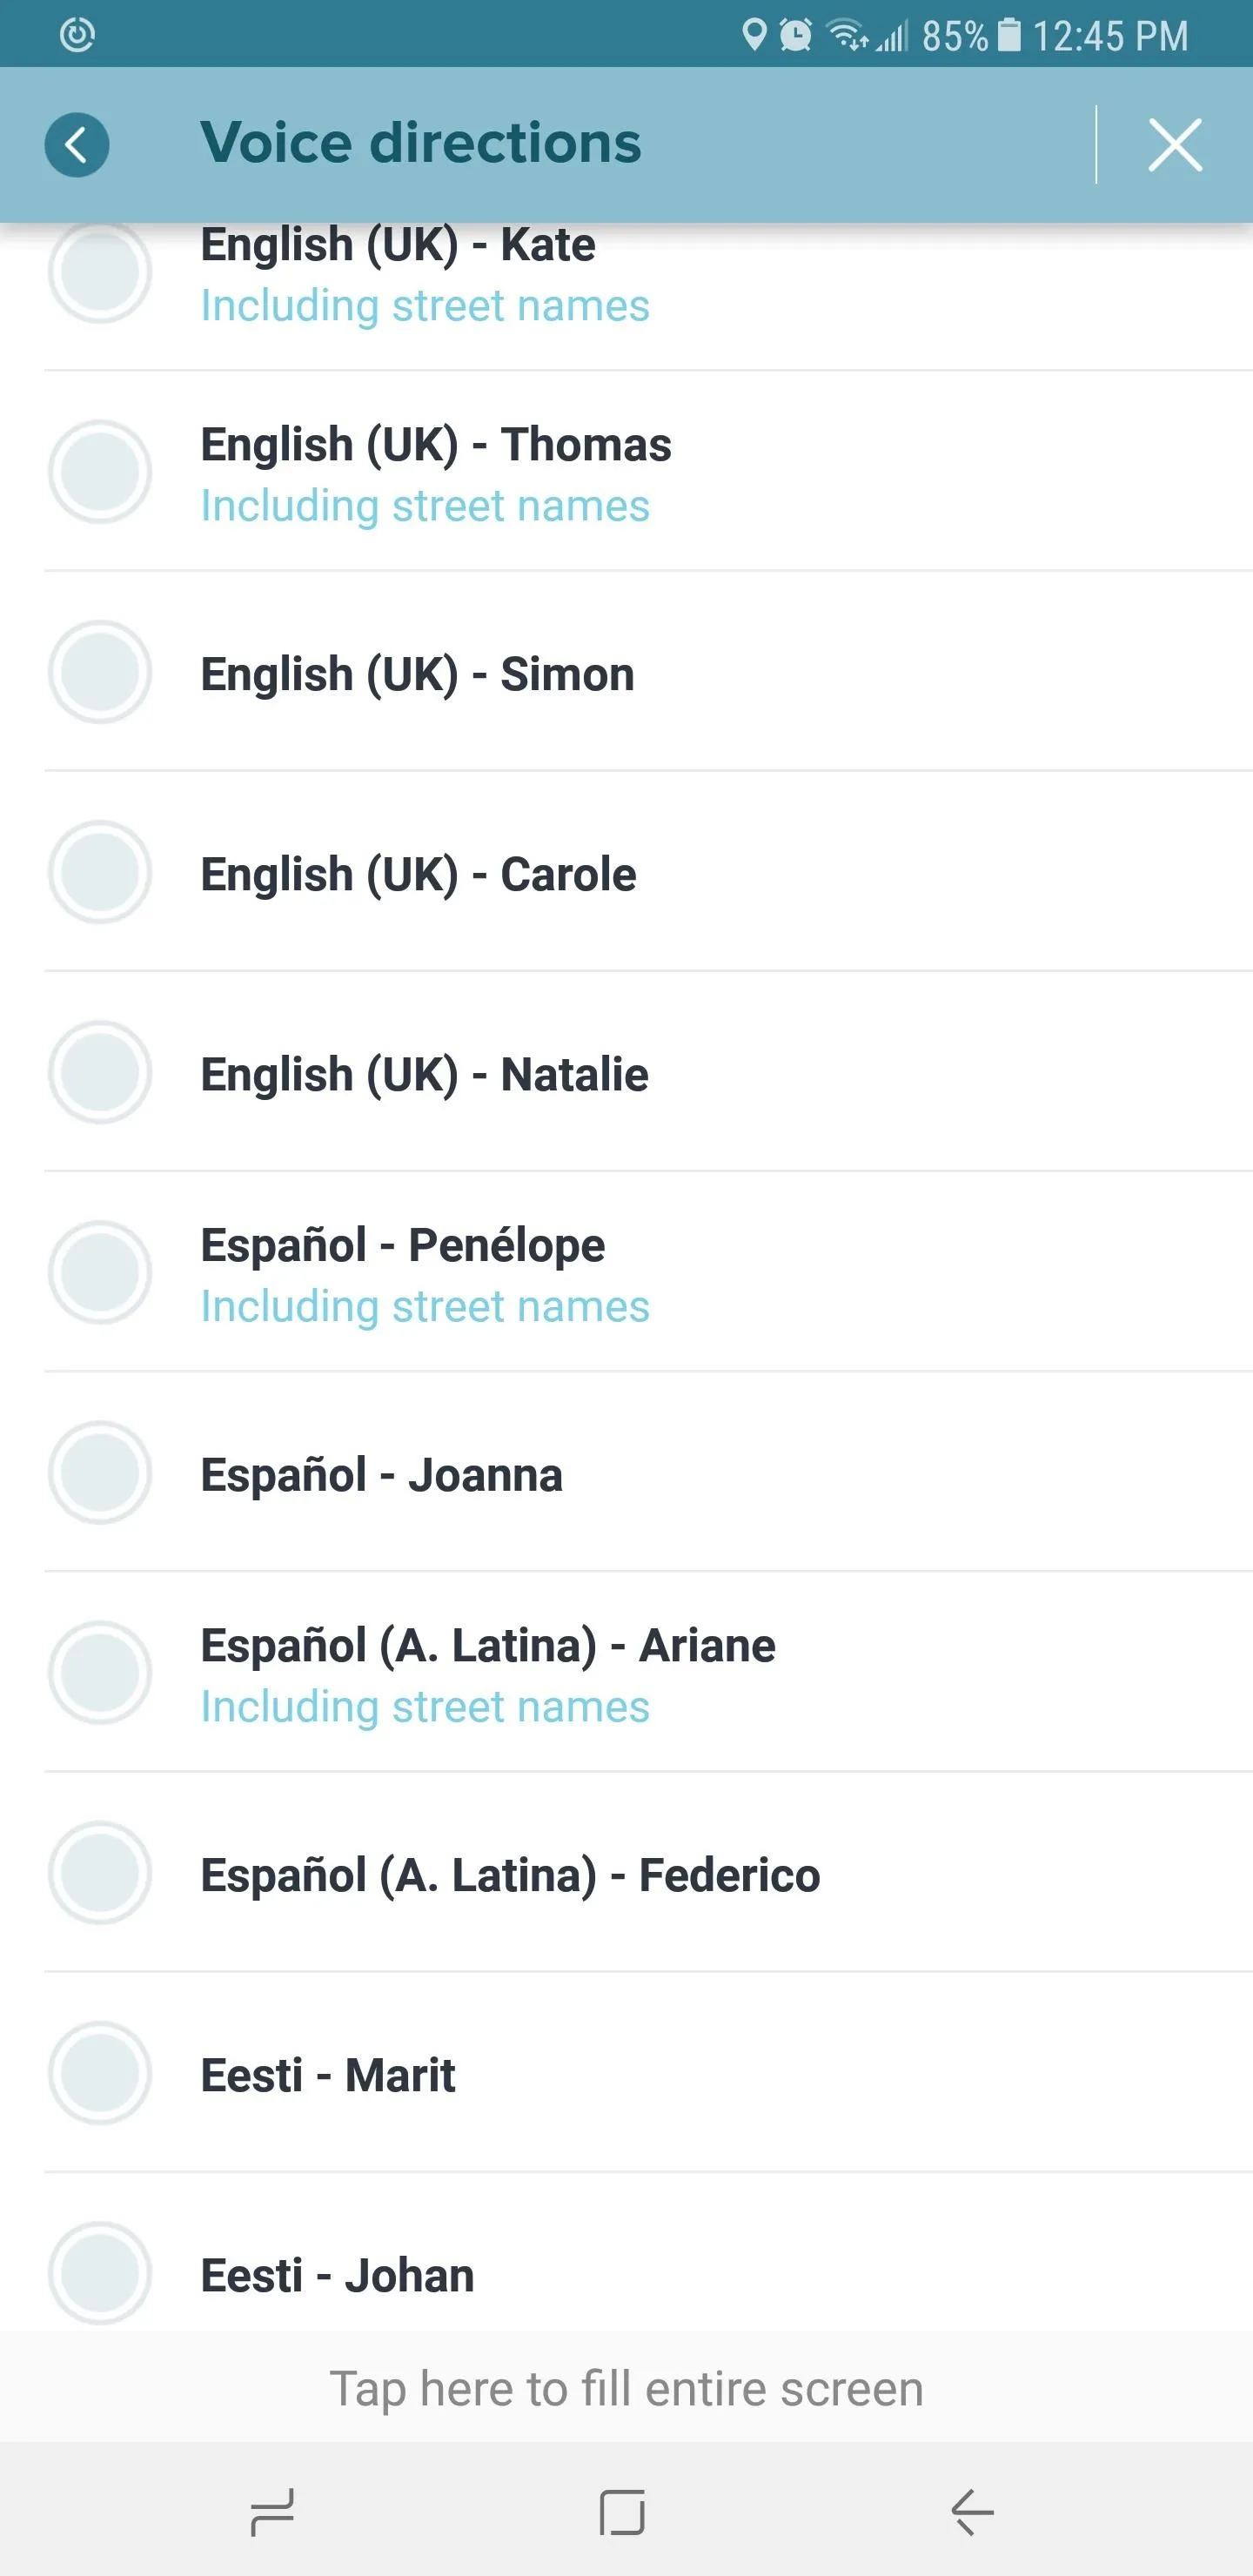
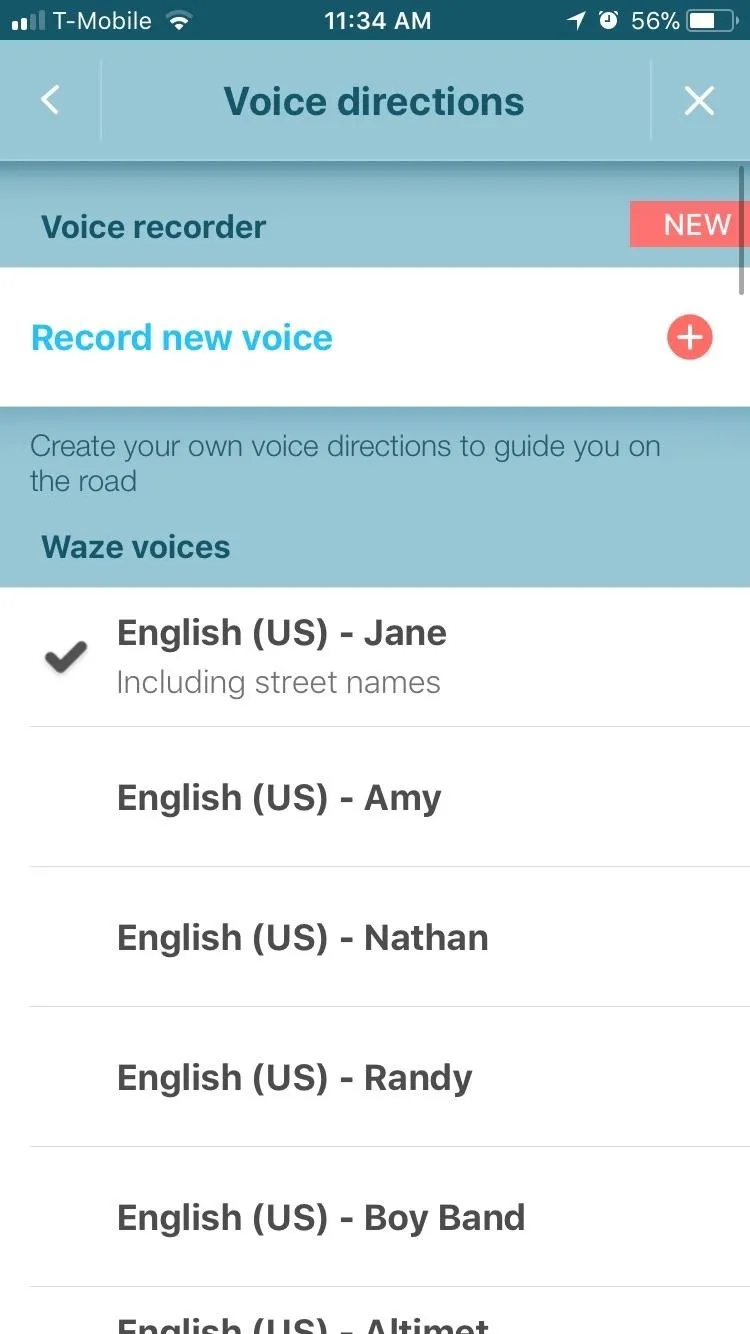
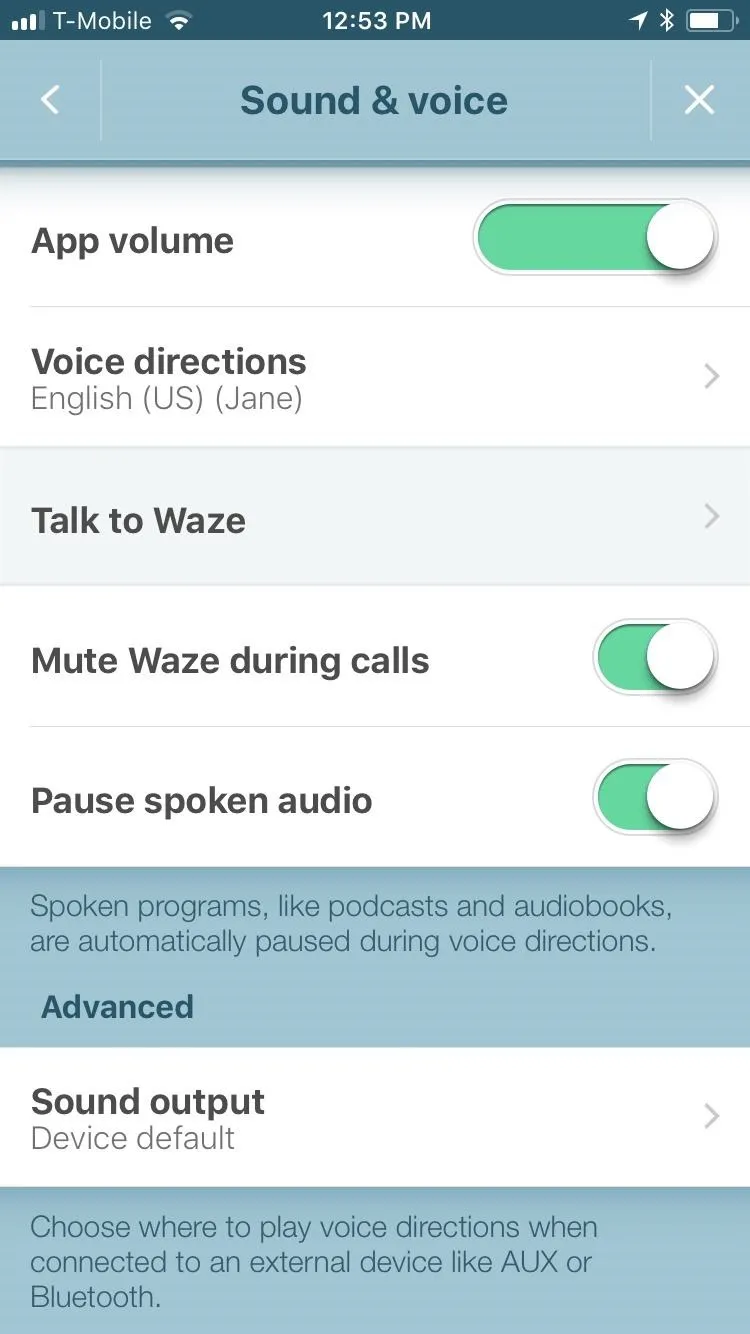
Waze has a wide selection of voices that you can choose from. Setting a custom navigation voice for Waze is incredibly simple — to begin, just tap the speaker button in the lower-right corner of the screen to pull up the "Sound settings" tab.
Select "Voice directions" next, then choose which language and voice you're most comfortable with. You'll notice that some voices will also verbalize street names, which is a great bonus and ensures smooth navigation.
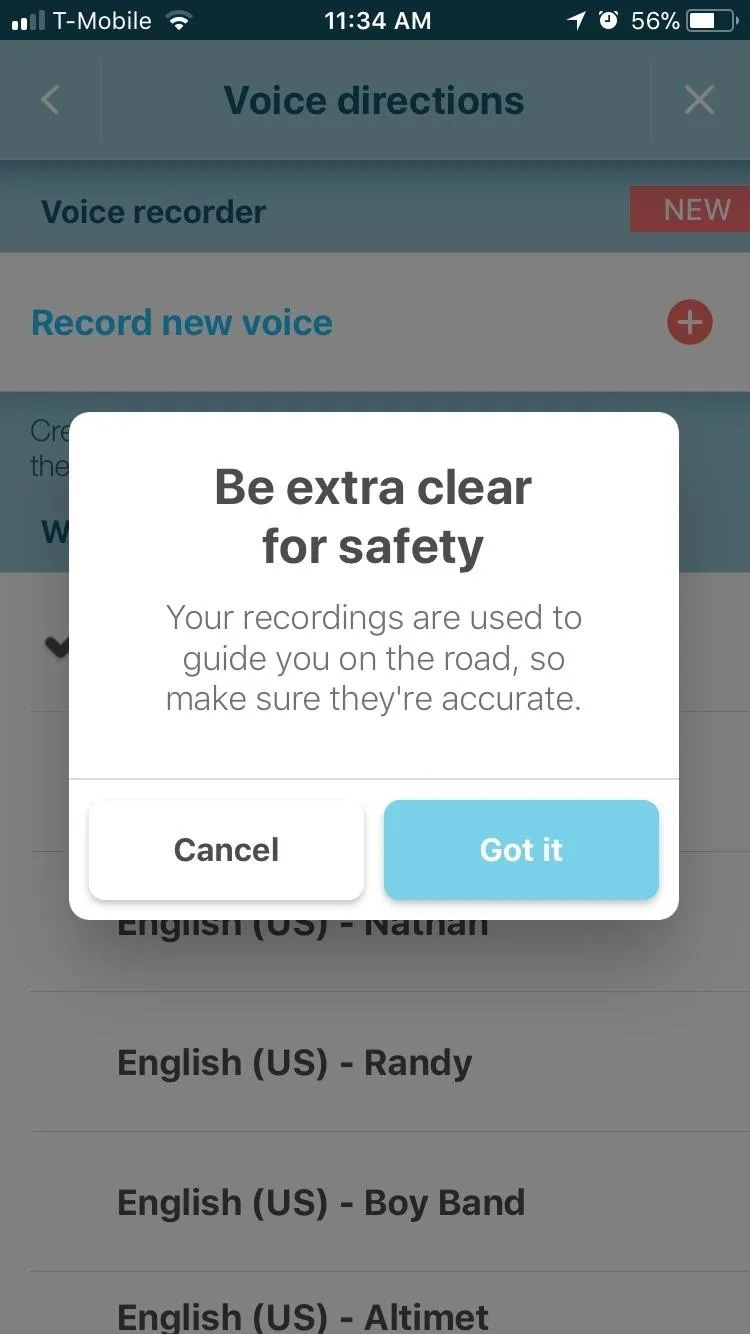
You can even record your very own custom voice to use on Waze, which can be done by simply tapping the "Record new voice" button within the "Sounds settings" tab, then following the prompts.

2. Never Pay Tolls Again
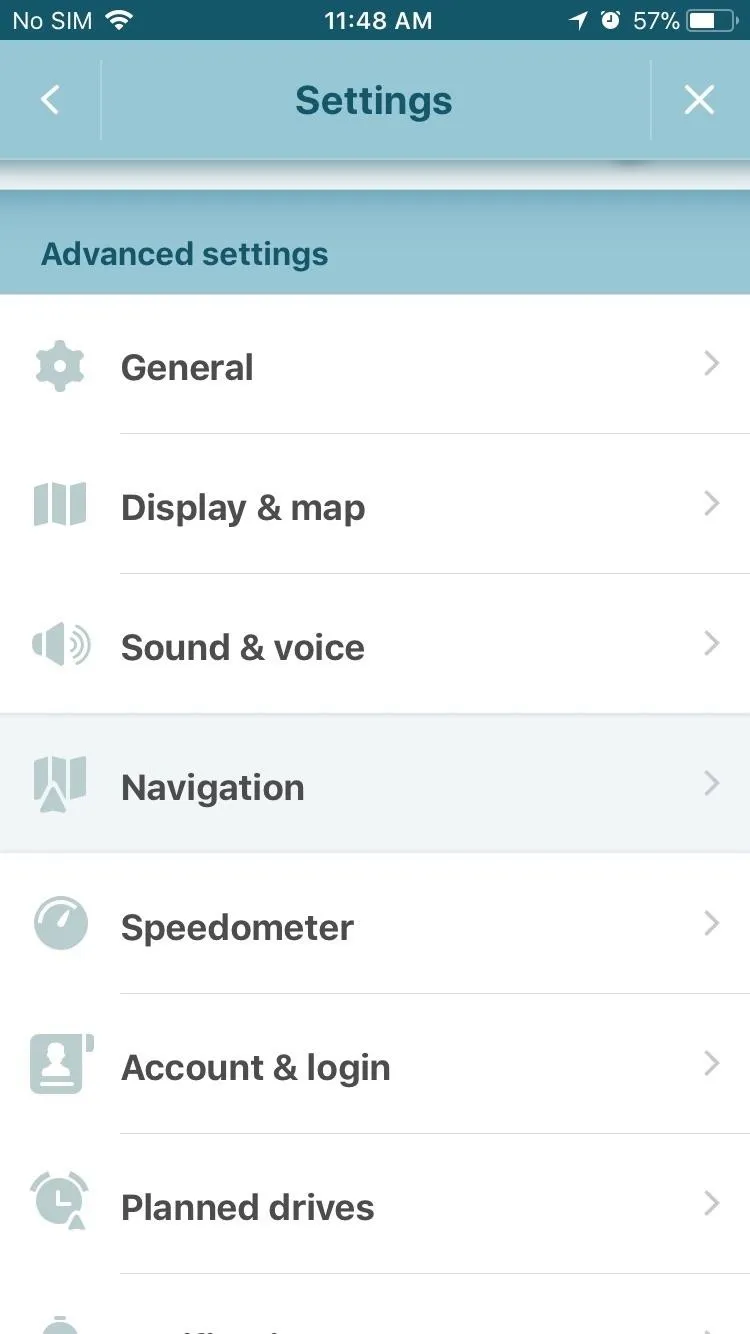
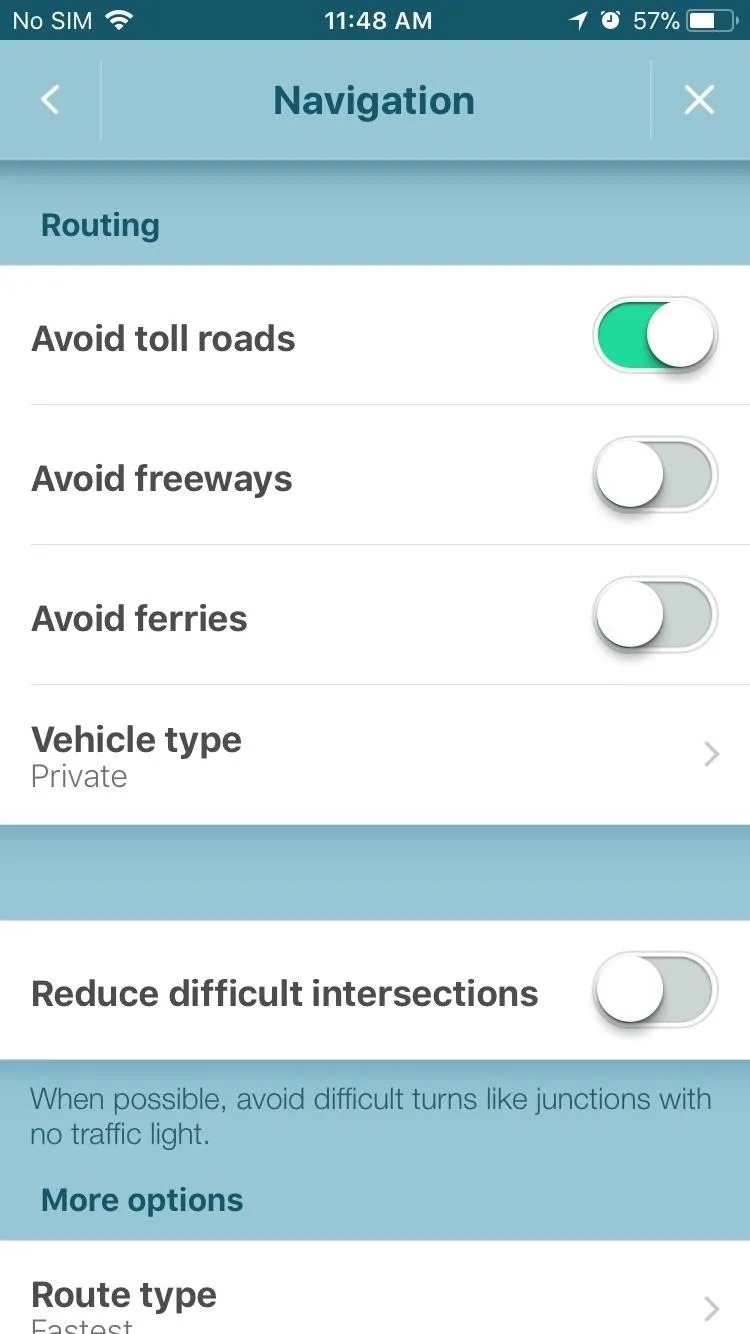
Being stuck on a toll road unexpectedly is never fun, but fortunately, you can set Waze to never give you directions that include toll routes. To start, swipe in from the left edge of the screen to pull up the side menu, then tap the cog-shaped settings button in the upper-left corner.
Inside the settings page, scroll down and tap on "Navigation," then just toggle on the "Avoid toll roads" option. Once you've turned the setting on, you can exit the settings page and input your destination in Waze, and only toll-free routes will now automatically generate for you to choose from.

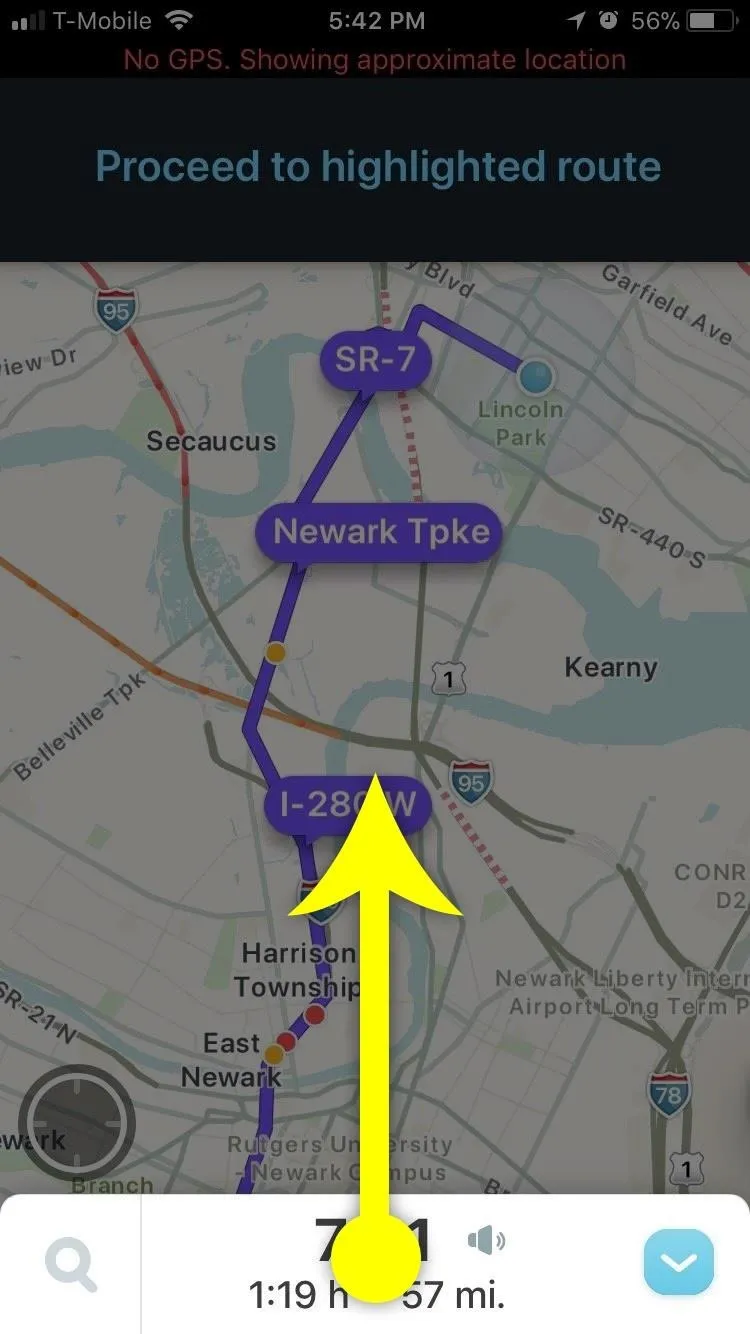
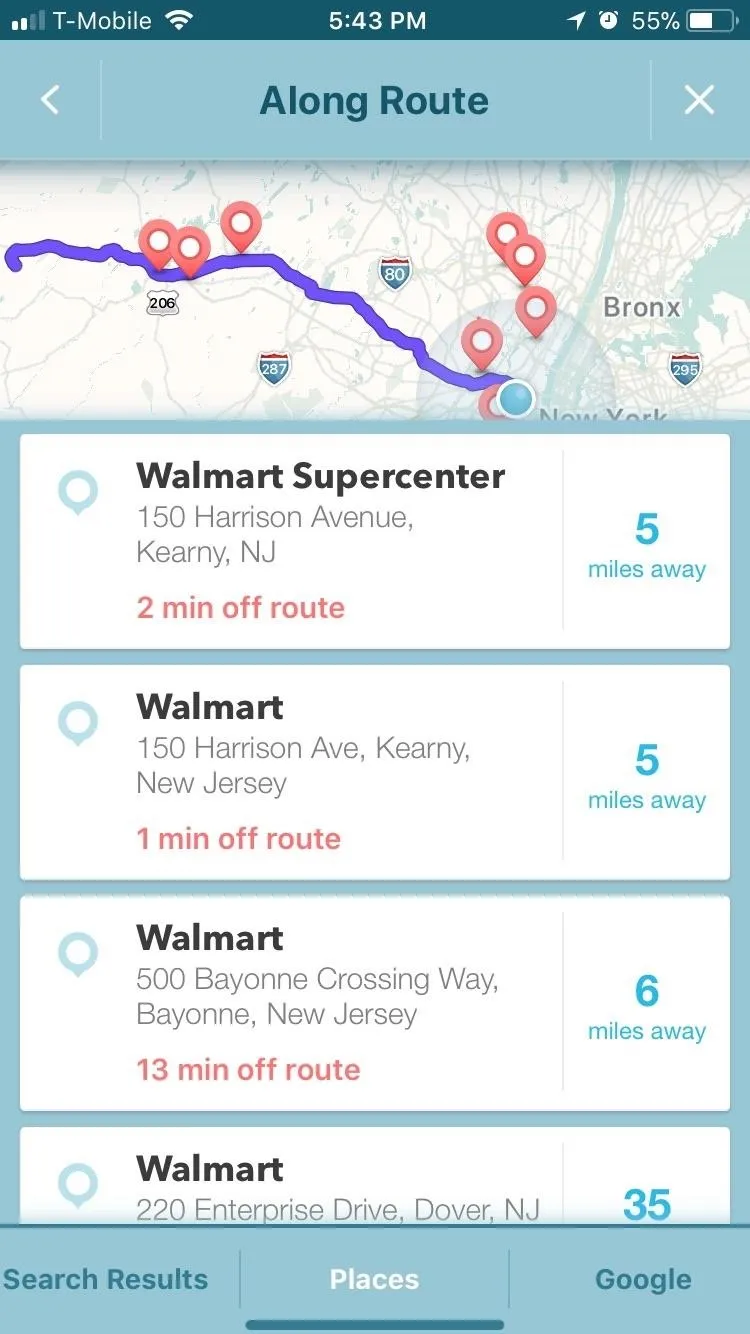
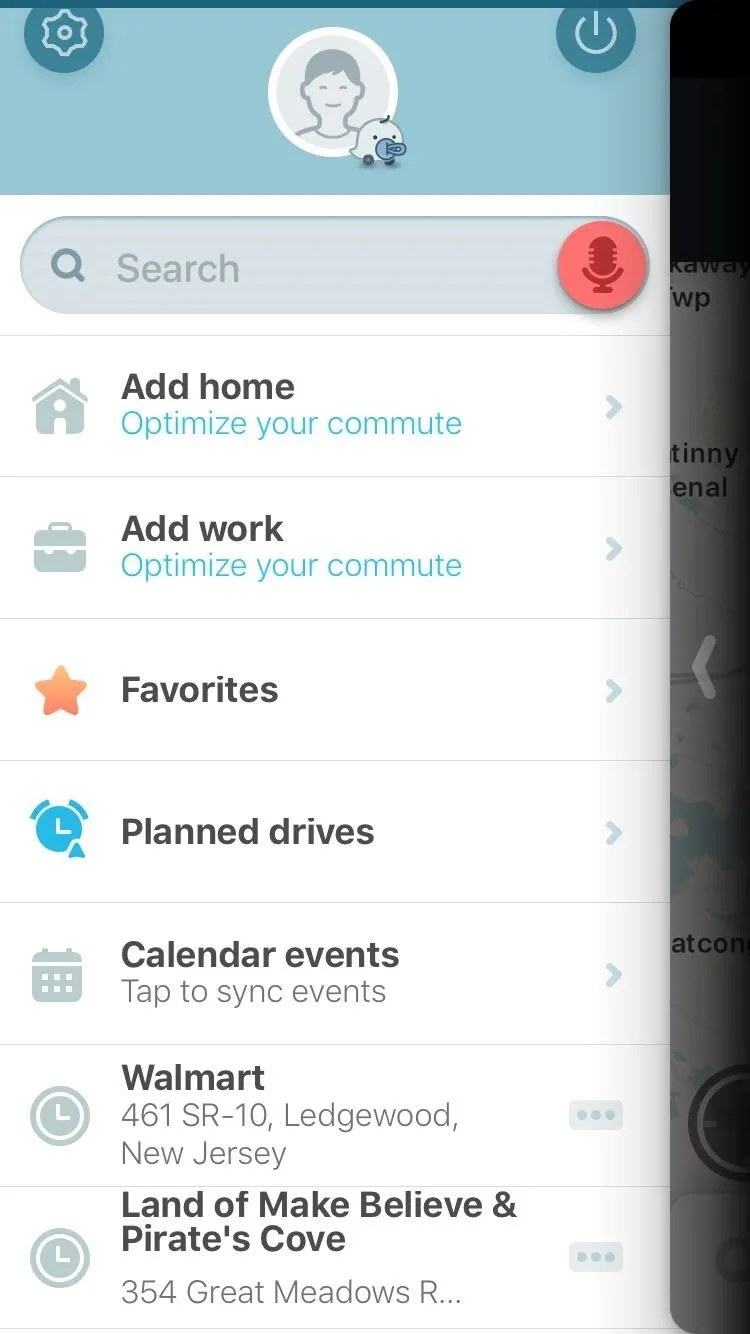
3. Add or Remove Stops While You're Already Navigating
Even in the midst of a road trip, Waze lets you seamlessly add a pit stop to your current navigation to minimize any potential delays. Adding a stop is easy.
While you're in navigation mode, swipe up from the bottom of the screen to see your trip's summary tab. From there, if you're on iOS, you can choose what kind of stop you'd like to add by tapping the corresponding icon. Otherwise, just search for a specific business or location using the provided field. From there, tap on your desired stop once you've found it, and it'll automatically be added to your route.
Adding a stop on iOS
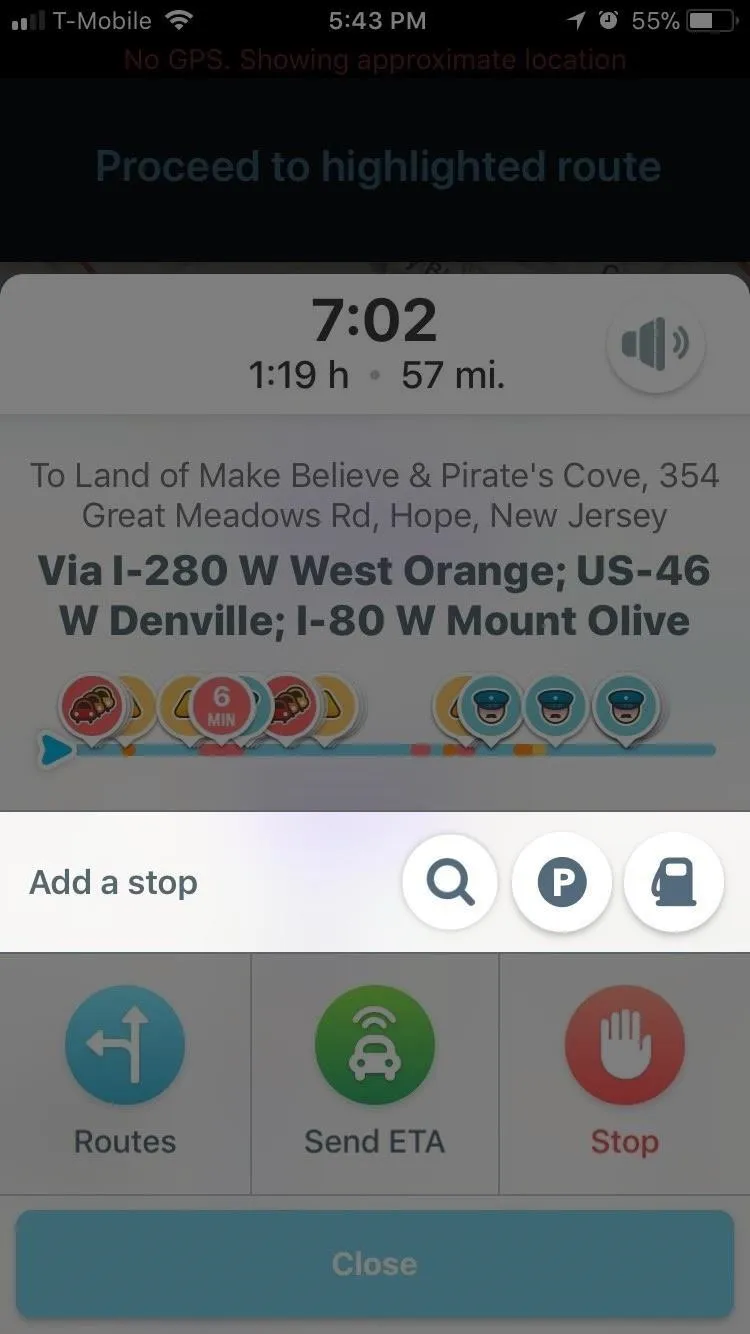
Adding a stop on iOS
Removing a stop is just as easy — swipe in from the left edge of your screen to access your Waze dashboard, tap on the stop you wish to delete, then select "Remove" to get rid of it.

Please note that Waze only allows one stop to be added to any current route, so if you want to add another stop on top of the pit stop you already have, you'll either need to arrive at your pit stop, remove it from your current route, or create a separate route for it.
4. Go Hands-Free with 'Okay Waze' Voice Commands
For those of us who puts safety ahead of everything else with regards to driving, Waze has a nifty hands-free feature that lets you issue voice commands for navigation and traffic info, leaving you free to focus on the road ahead.
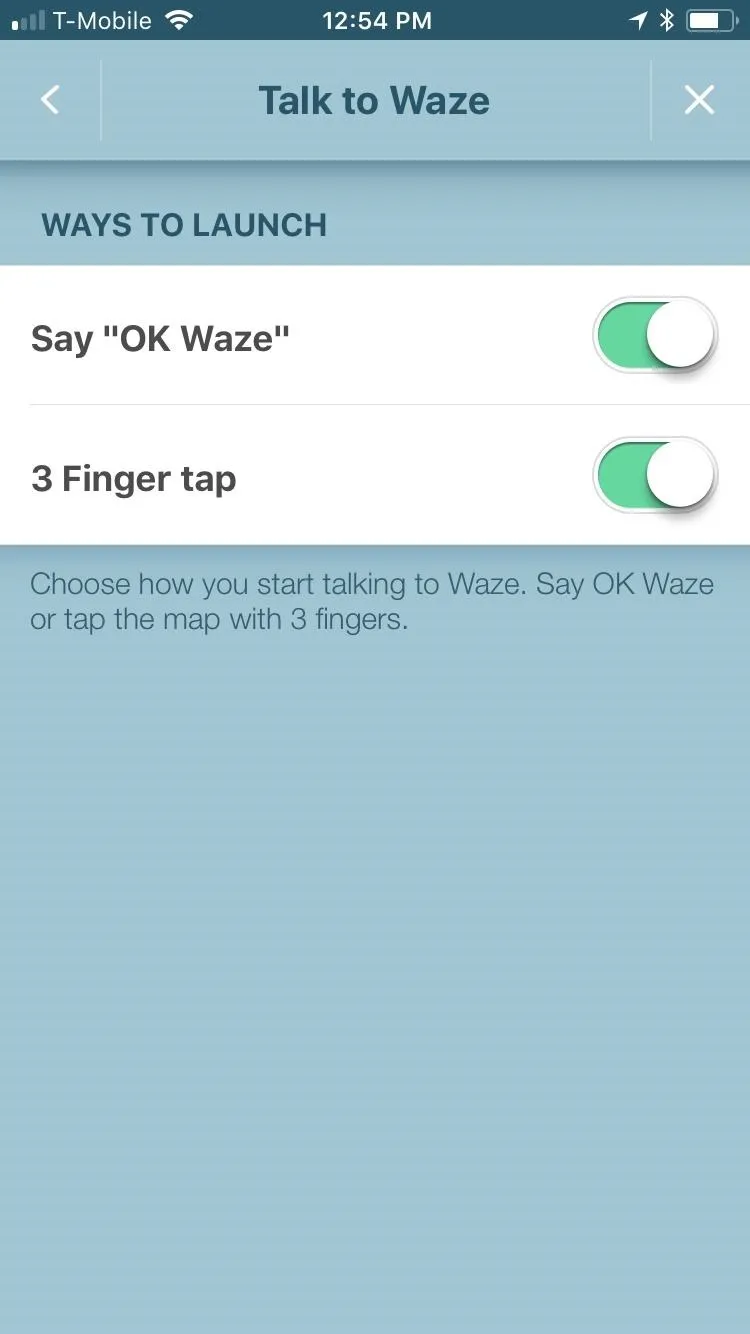
Hands-free mode is incredibly easy to enable. Start by swiping in from the left edge of your screen to open the side menu, then tap the settings cog and choose "Sound & Voice." From there, tap on "Talk to Waze," then tap on the toggle next to "Okay Waze" to turn the feature on, granting permission for the app to use your phone's mic along the way if prompted.

Now you can access almost any feature in the app when you're on the road by simply saying "Okay Waze," followed by a command such as "drive home." You can even use this feature to report issues with traffic, hear your next turn, or see how long it's going to take to get to your destination.
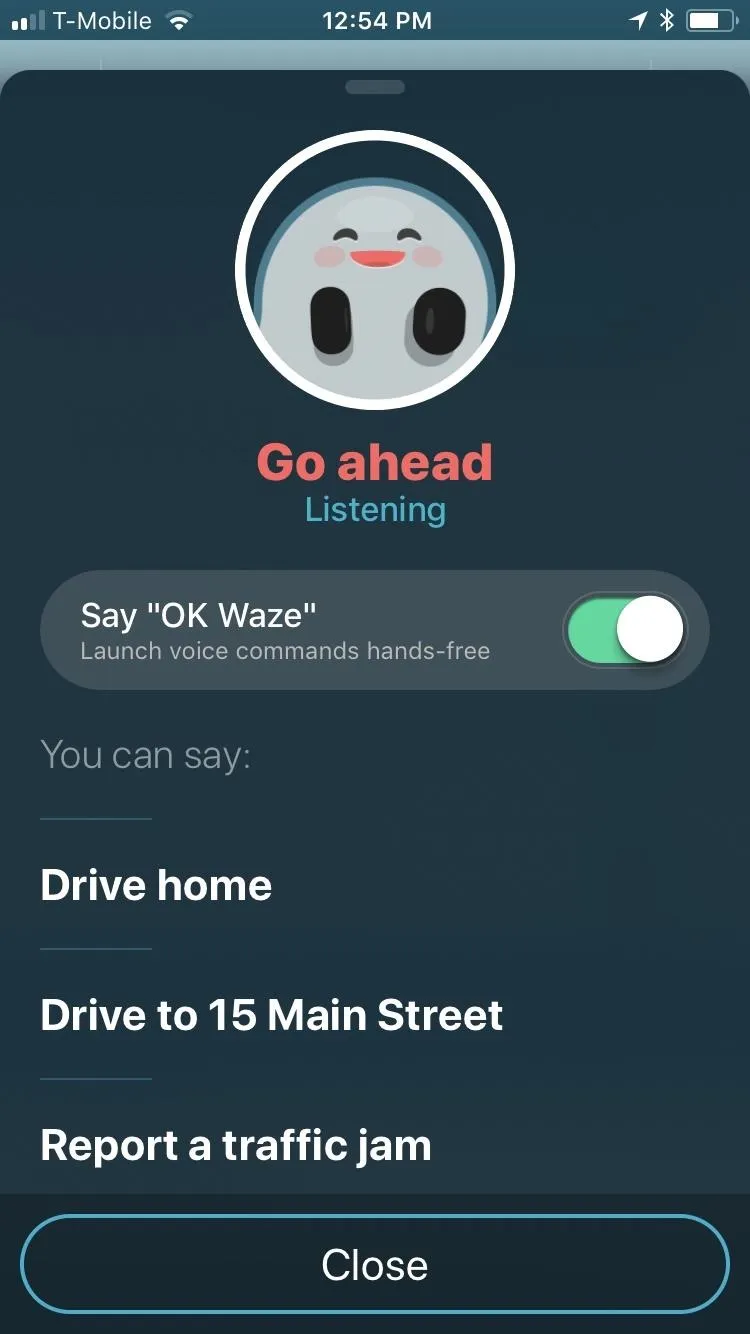
It's worth mentioning that you will still need to tap on your device to confirm your target destination after voicing your command, and that the "Okay Waze" feature won't work if it's running in the background. Still, it's a better alternative than constantly finagling with your phone while driving
5. Download Routes for Offline Use (Android Only)
If you're using an Android device, Waze lets you download routes that are then saved in the app's cache as a backup. This means that maps can be automatically retrieved by Waze when you encounter an area with poor cellular service, keeping your navigation smooth and relatively uninterrupted. Because it does away with the need to stop mid-trip to manually retrieve an offline route, Waze's offline feature makes for a much safer trip overall.
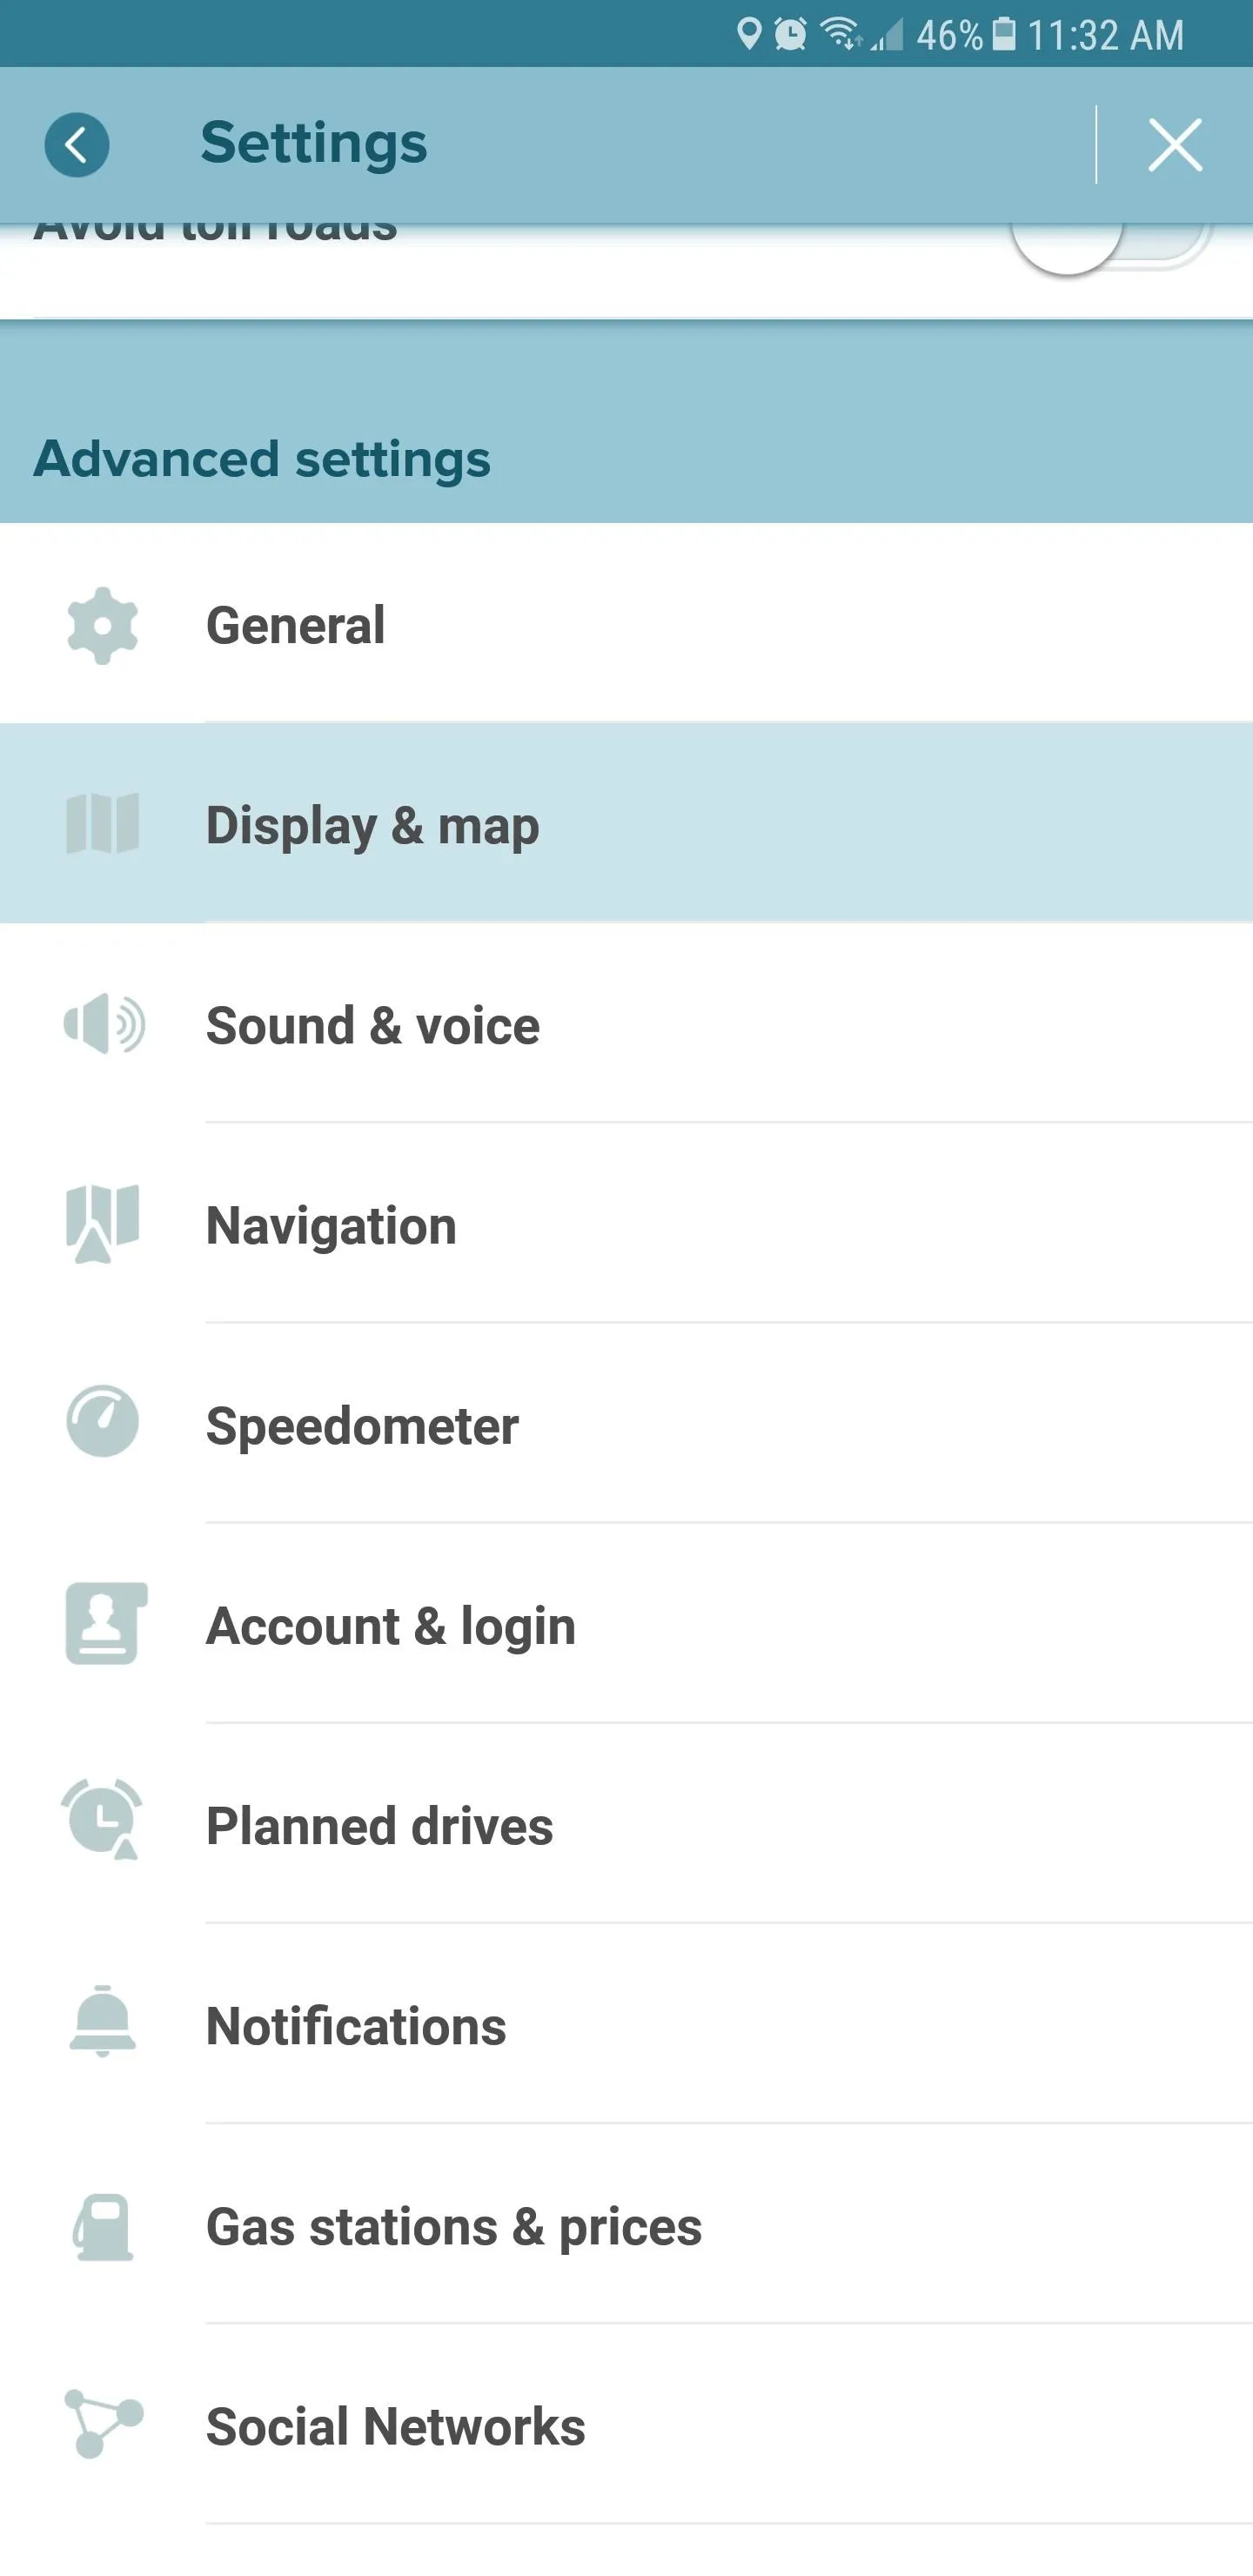
Waze's offline feature is easy to enable, and is accessed through the app's settings page from within the side menu once navigation has started. Once inside, select "Display & Map" under Advanced Settings, then tap on "Data Transfer" all the way at the bottom. Once inside the page, tap on "Download traffic info" to turn the feature on.
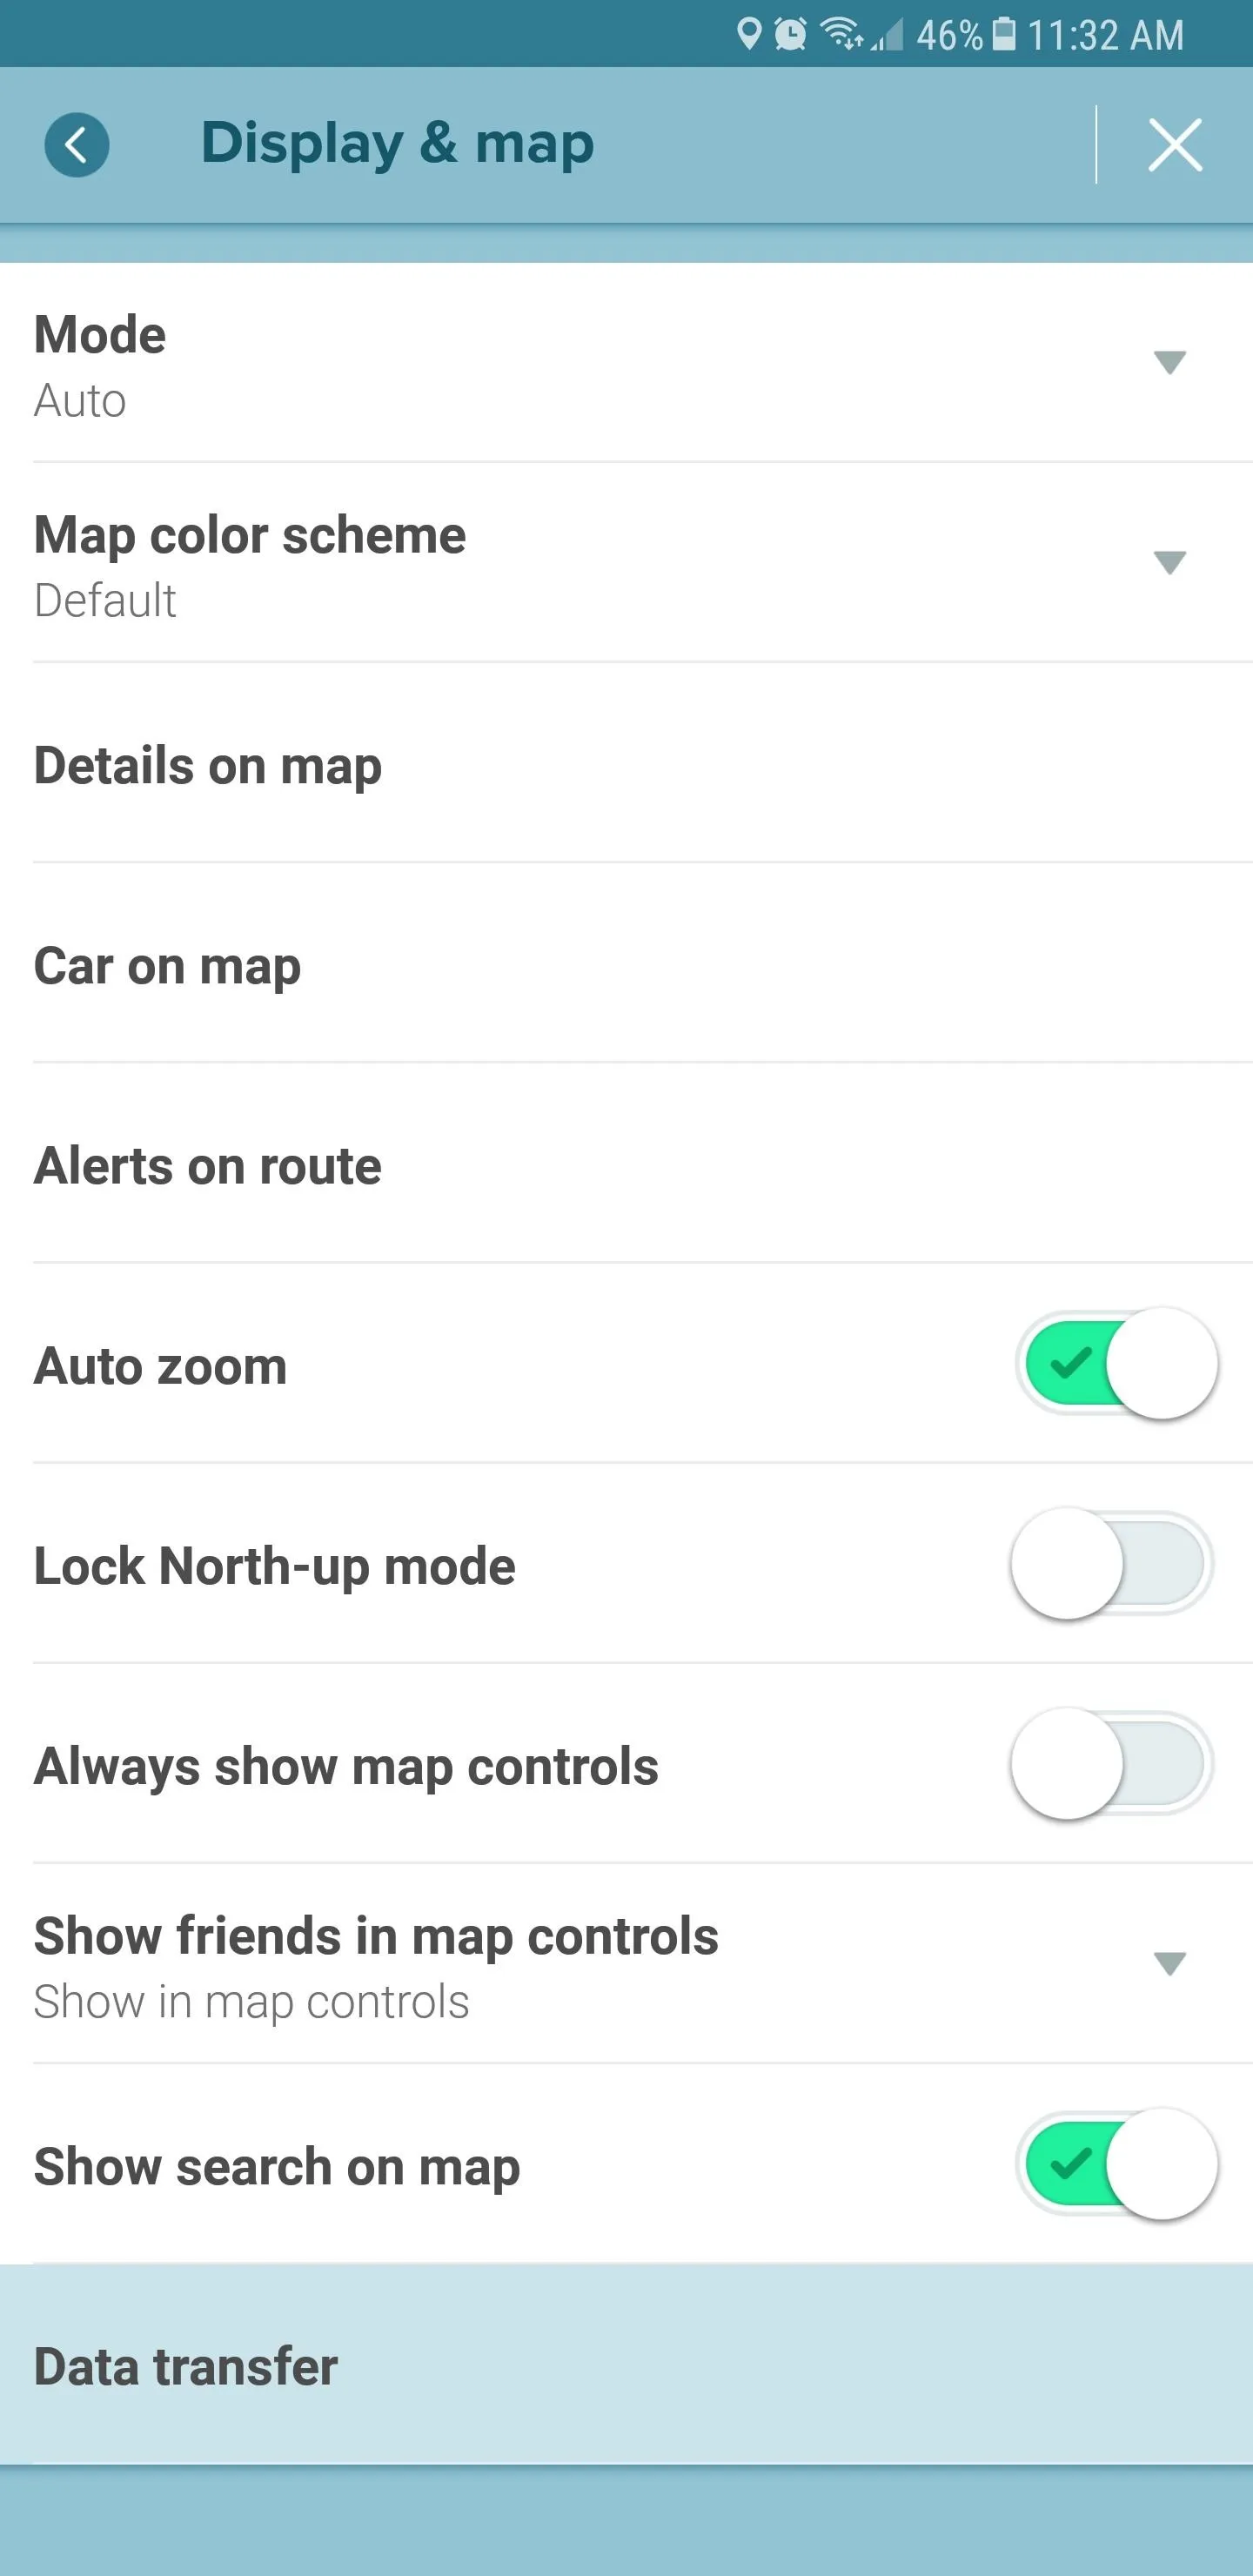

With "Download Traffic Info" set, Waze will automatically download your navigation routes and will keep navigating even if you run into spotty cellular service. It's worth noting, however, that vital traffic updates, such as accidents, police traps, and roadwork, will not function without cell service, as the app depends on an internet connection to provide real-time data.
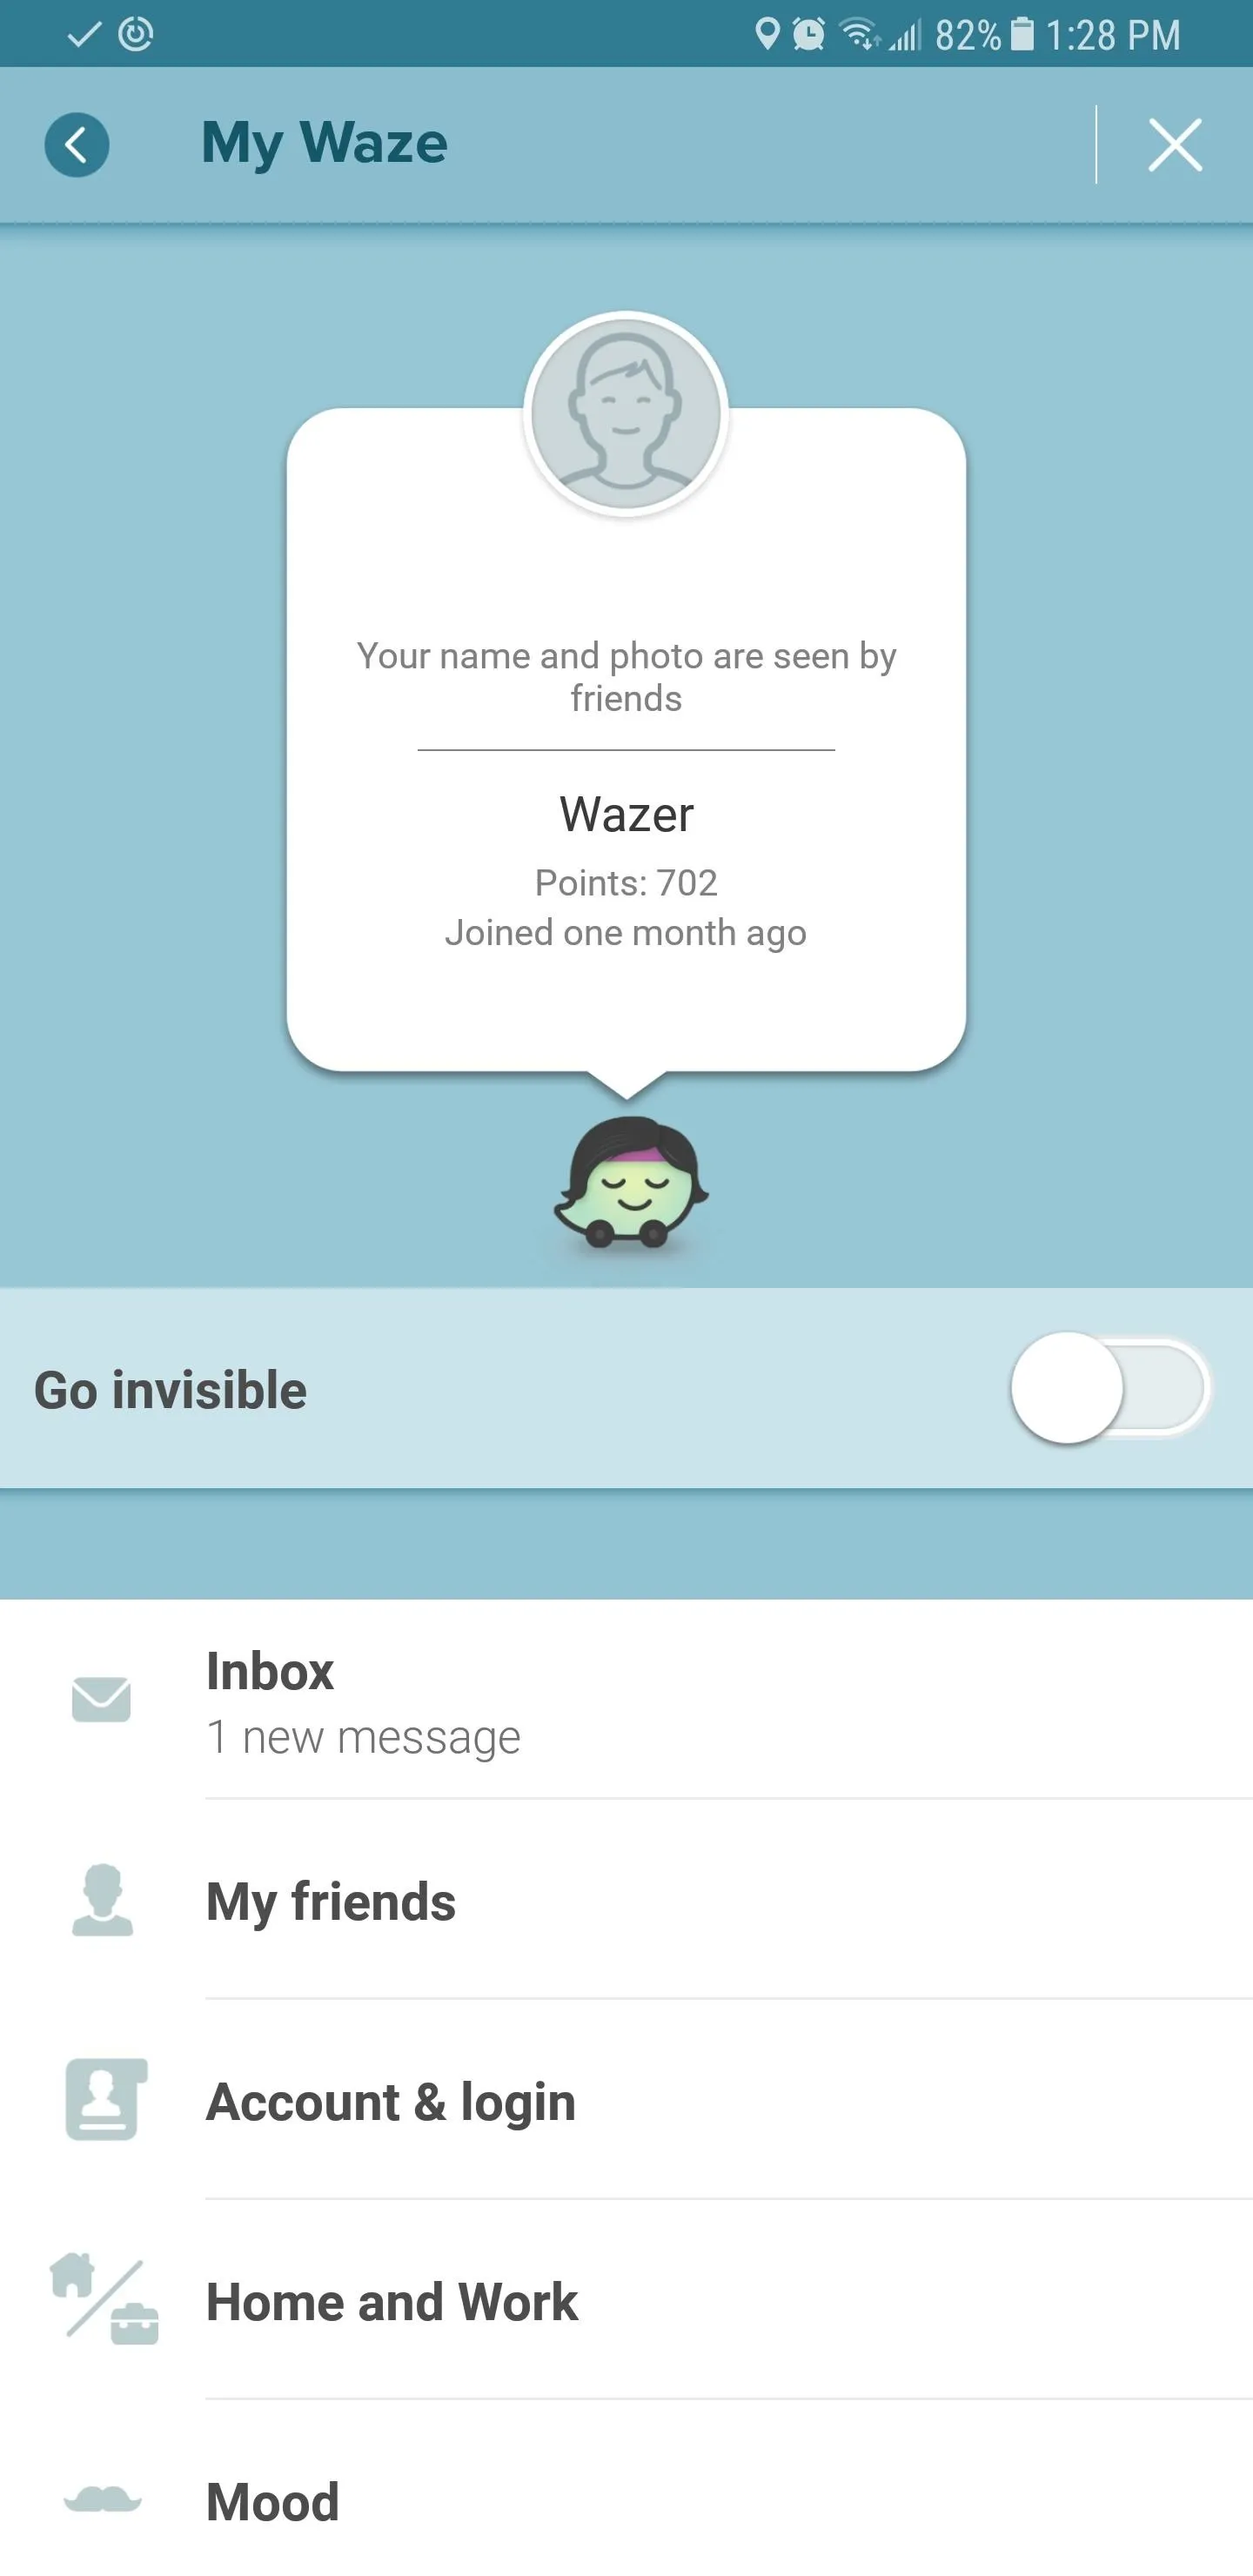
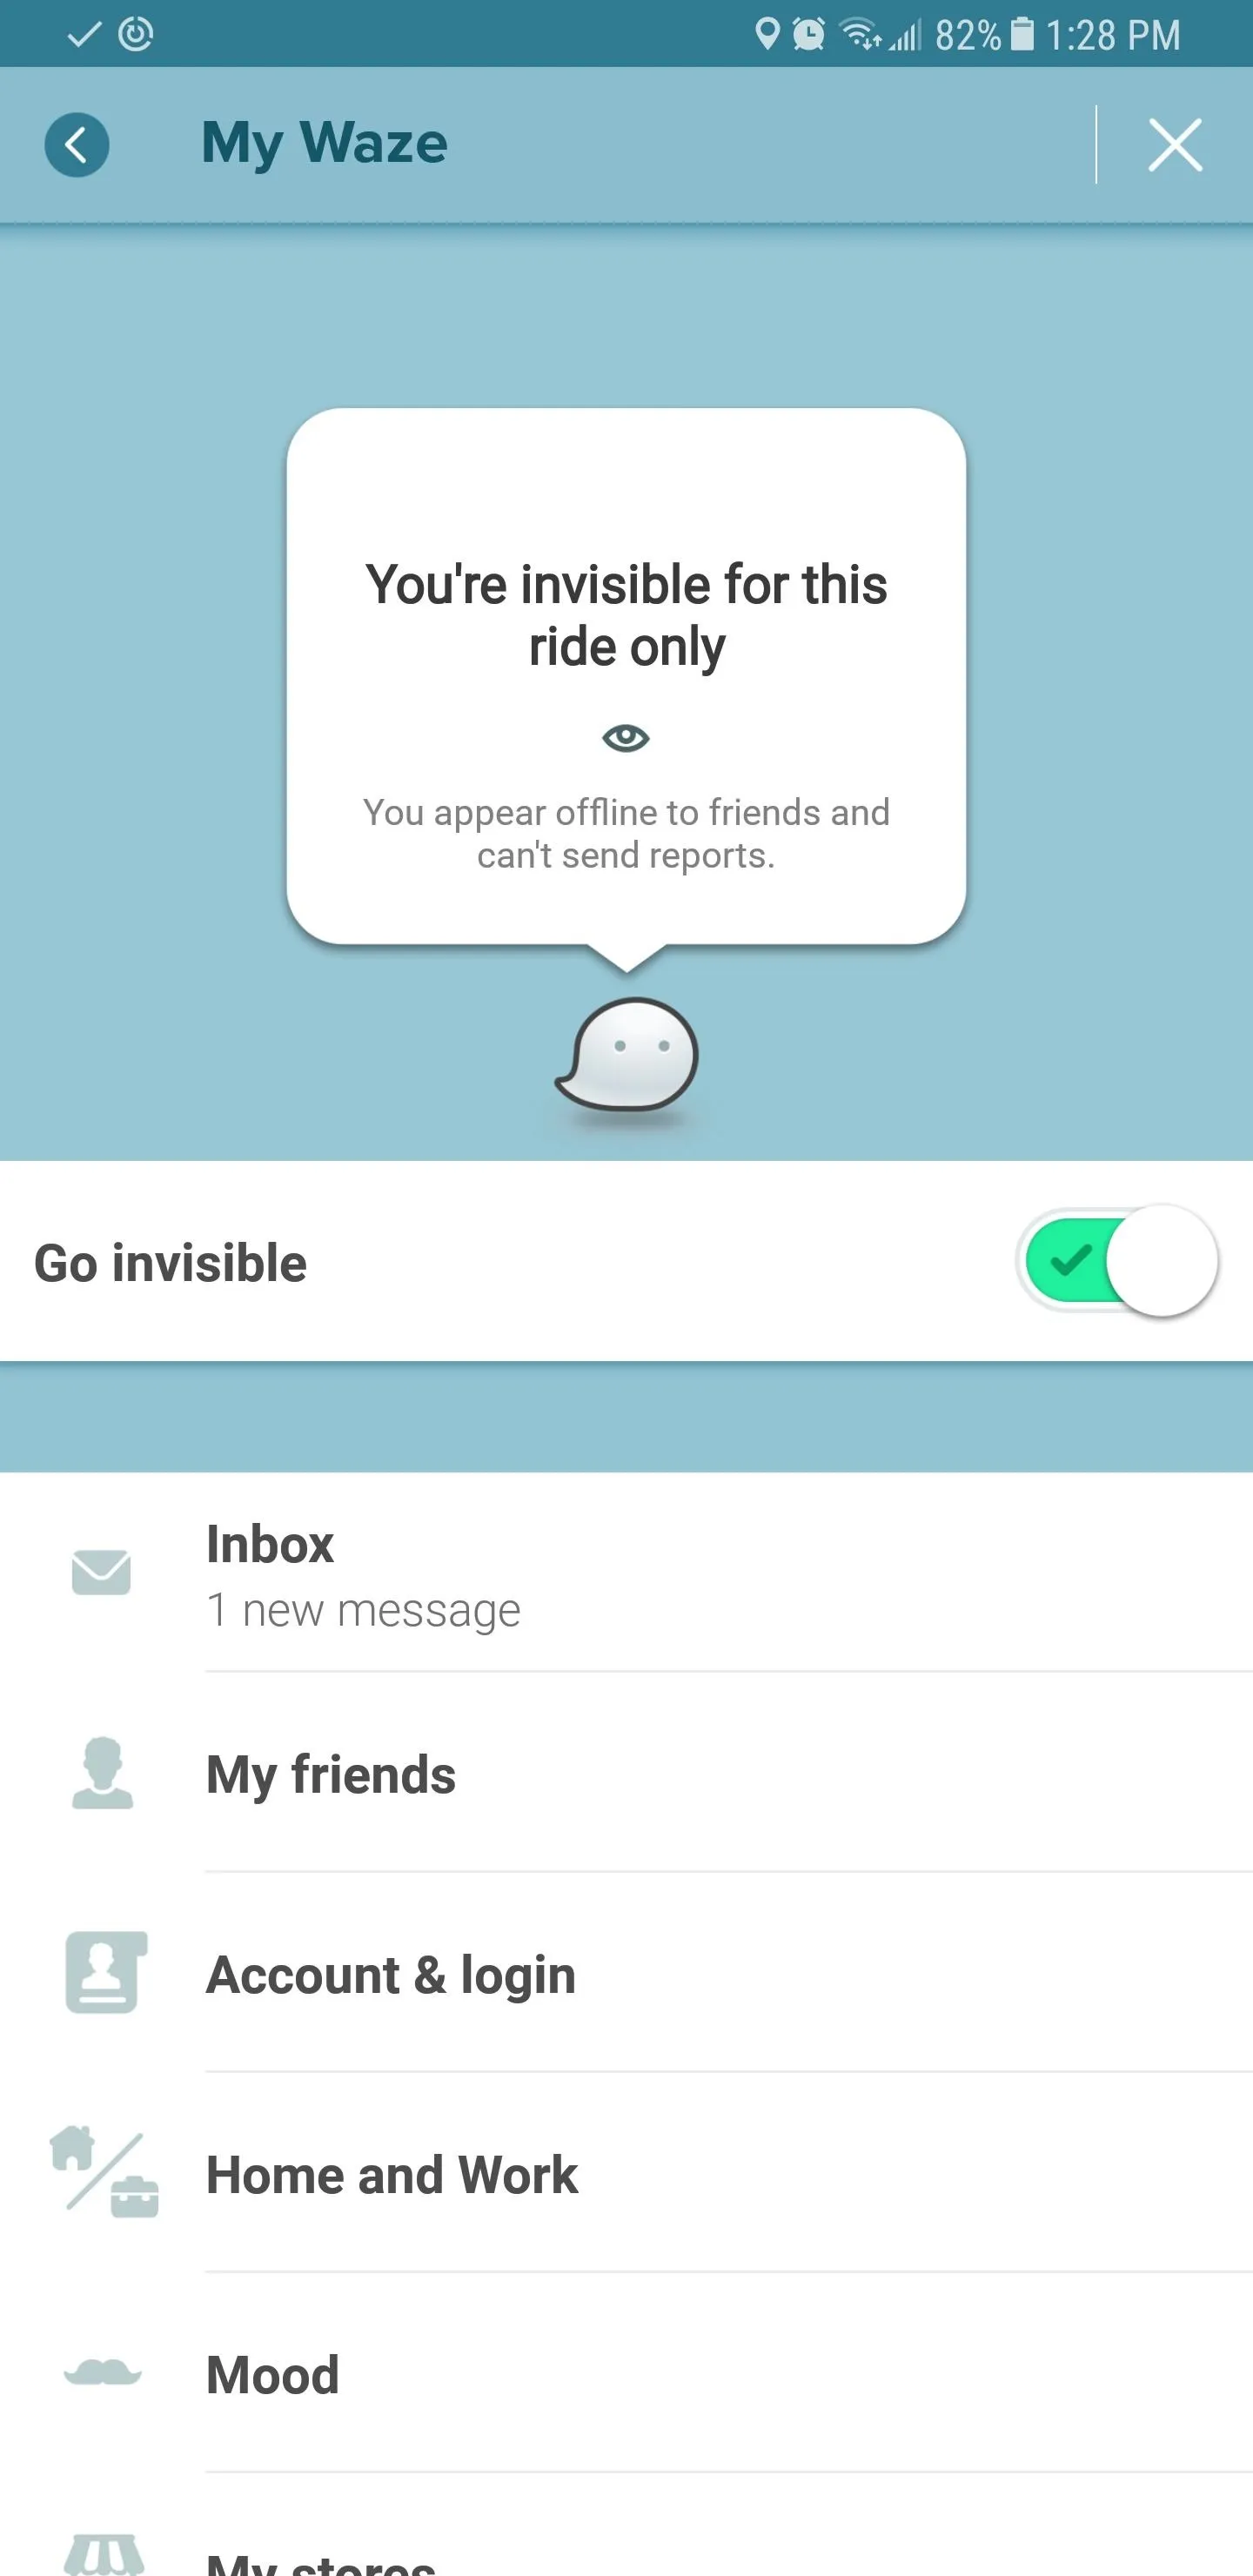
6. Go Incognito to Avoid Prying Eyes
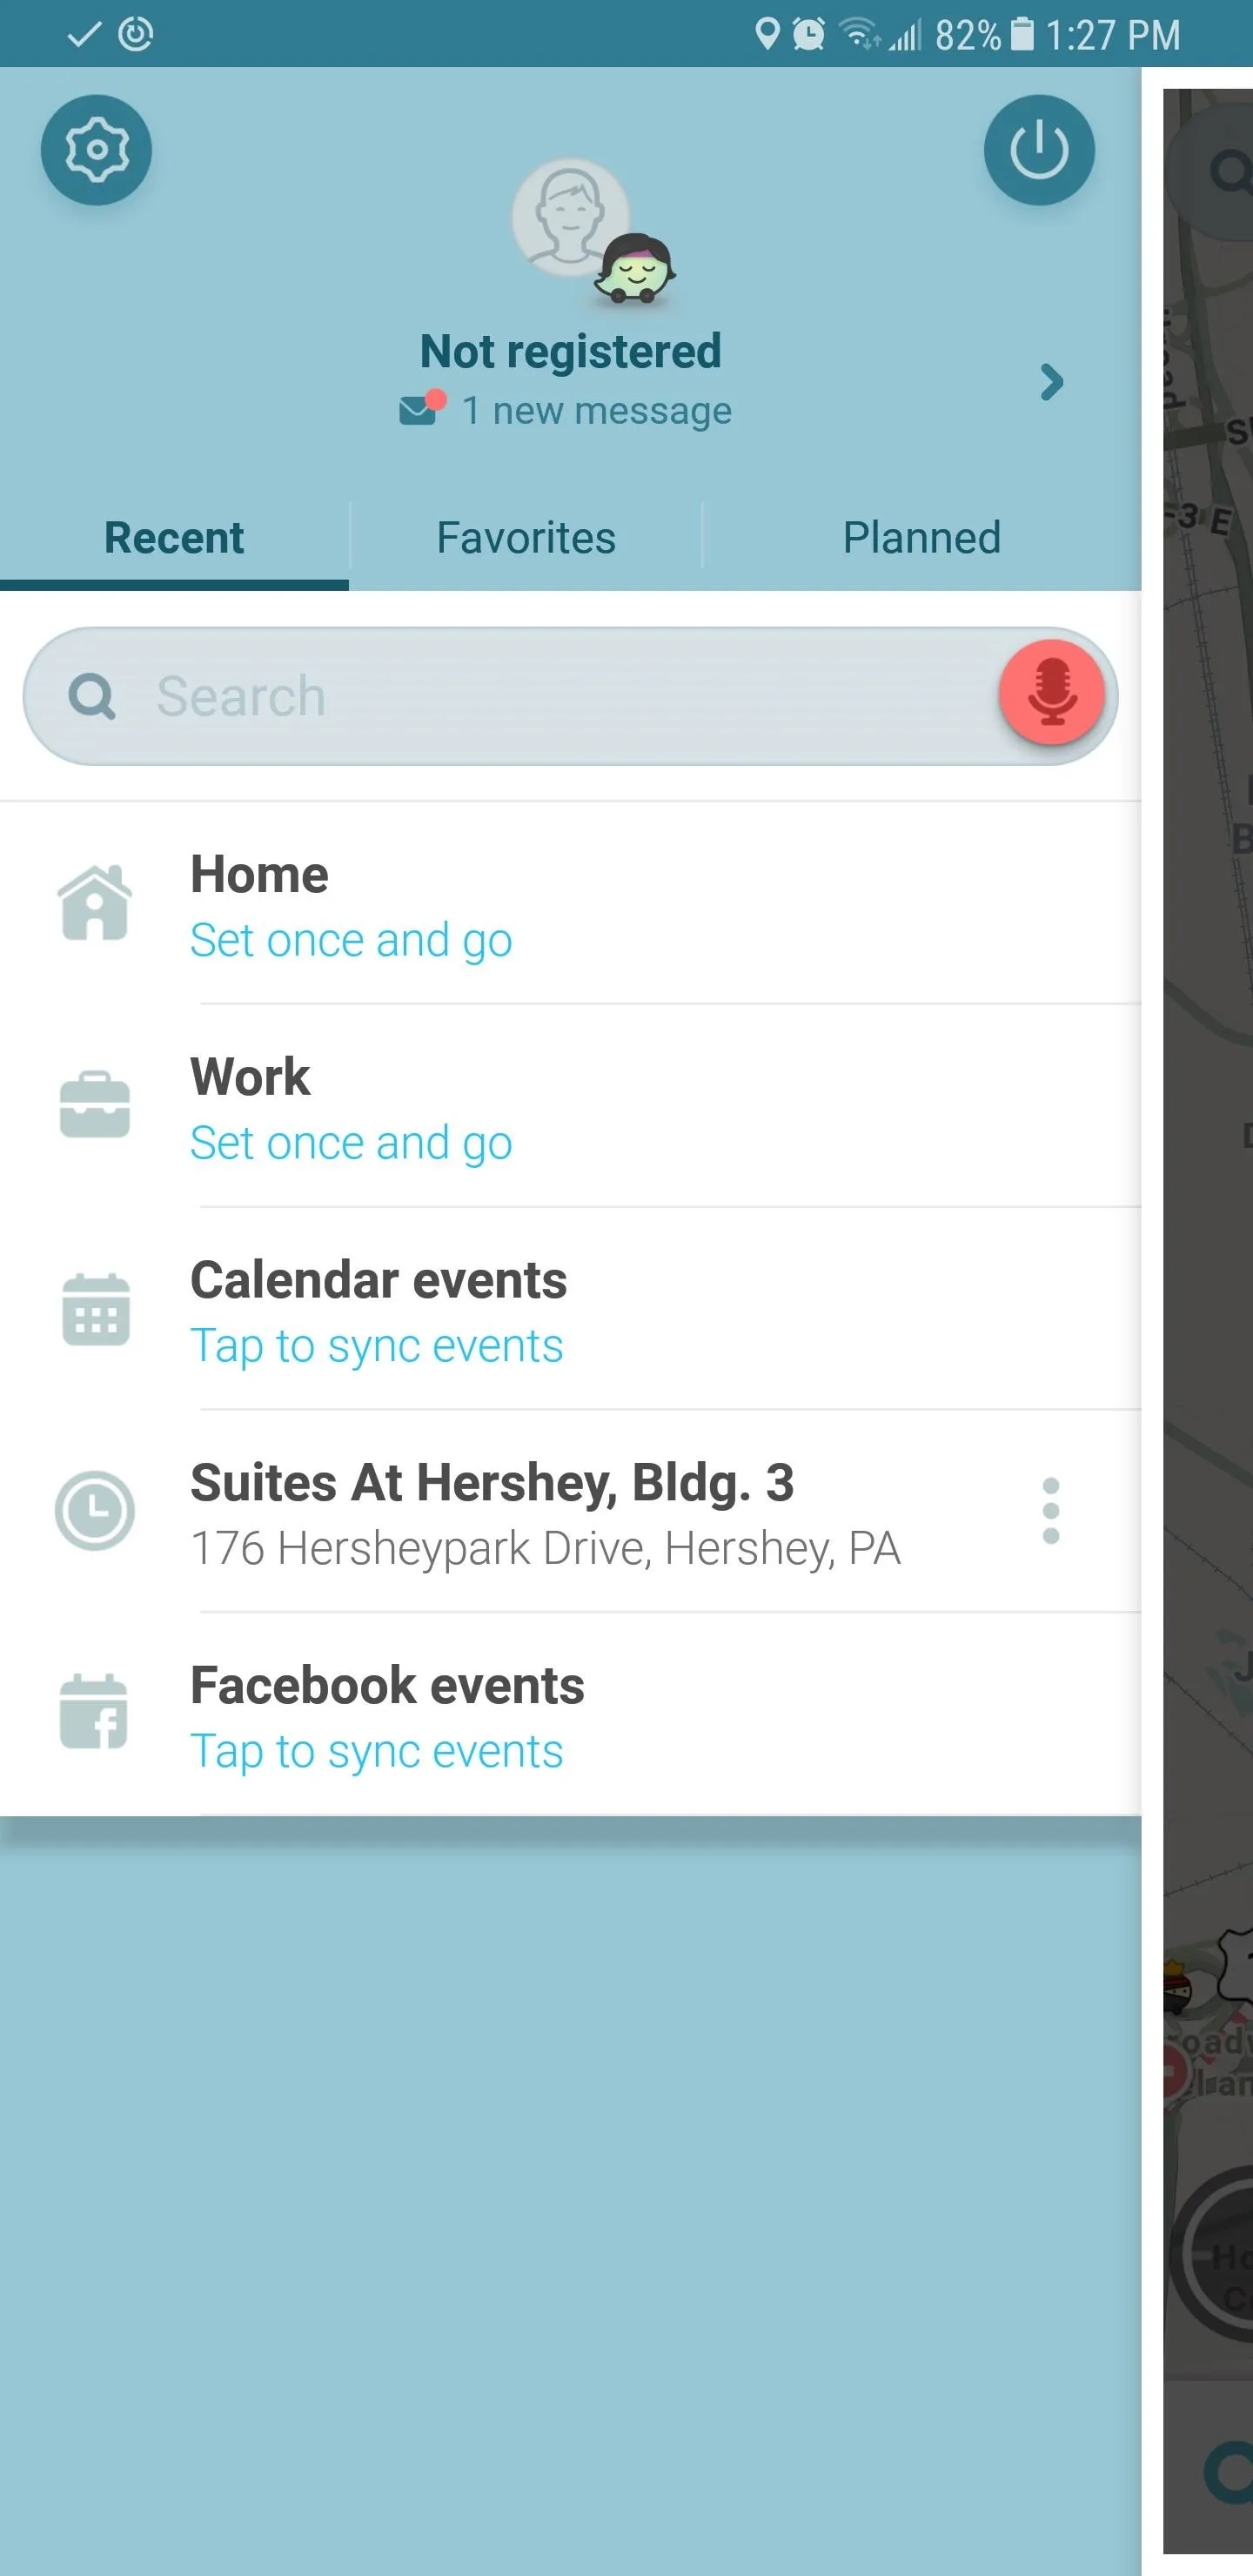
For those of us who value privacy and would rather not broadcast our location for everyone to see, Waze has a simple solution: An option of rendering us invisible to other users. So if you're morally okay with not contributing traffic data (as going incognito disables this feature) you can go under the radar simply by opening your profile page from within the side menu, then tapping on the "Go invisible" toggle to turn it on.
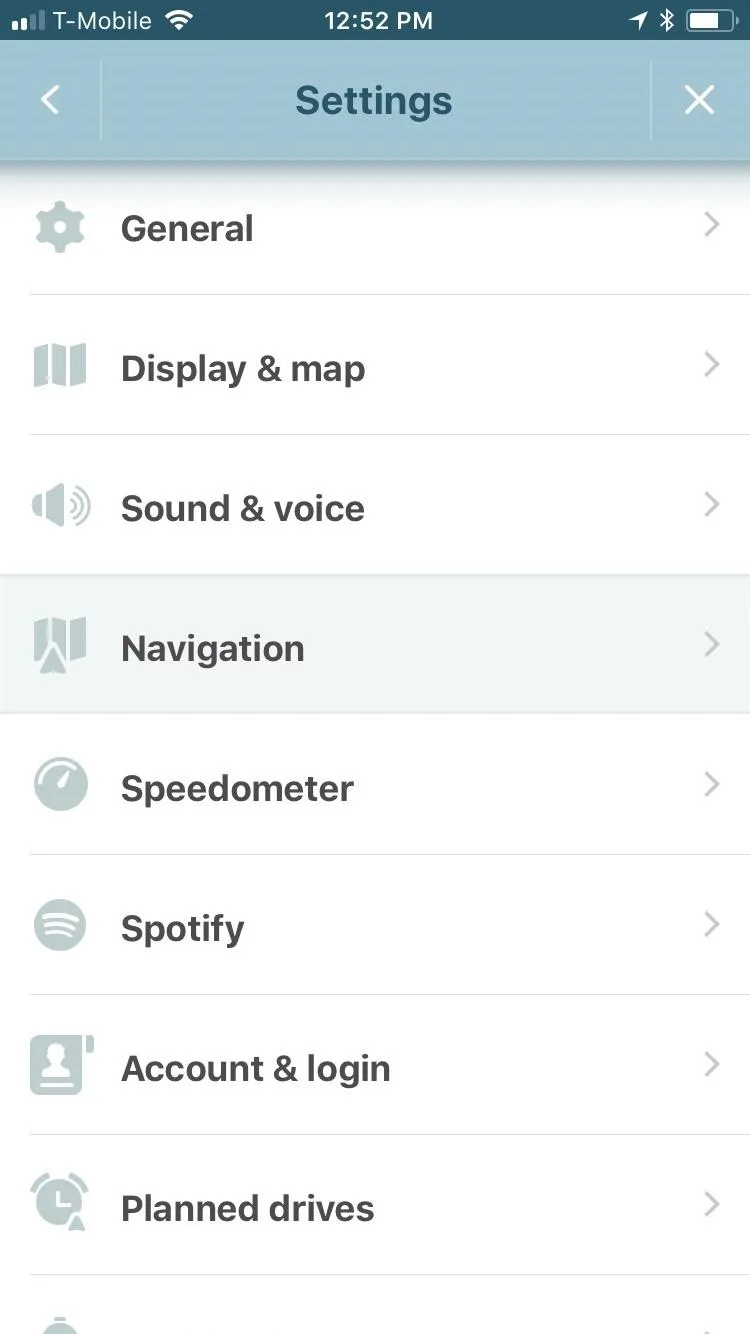
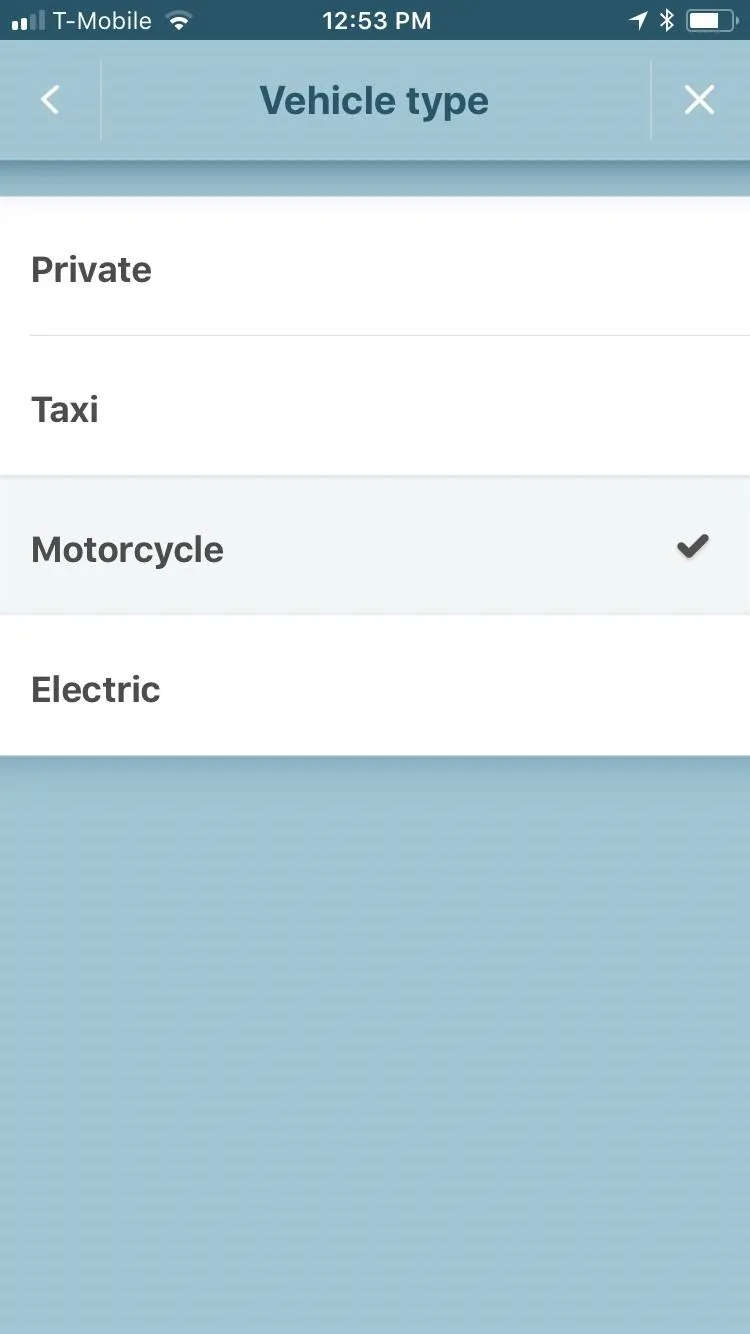
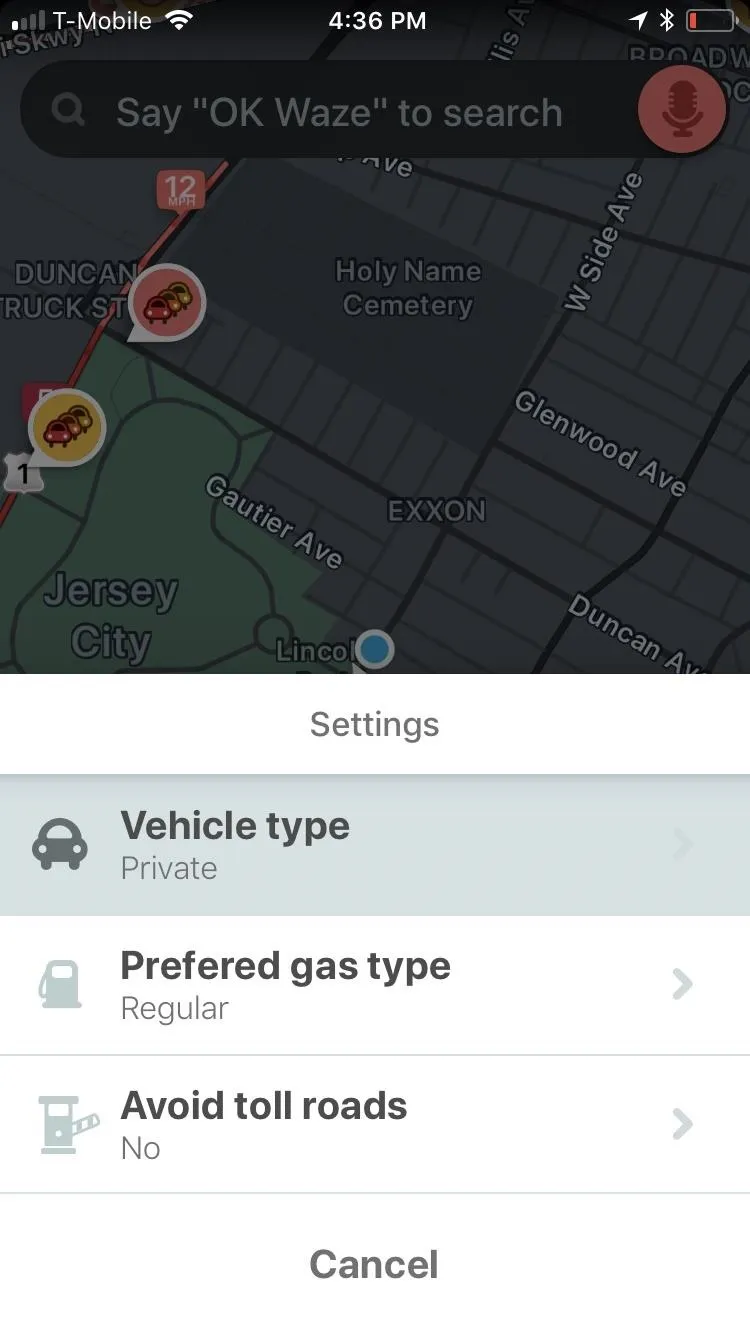
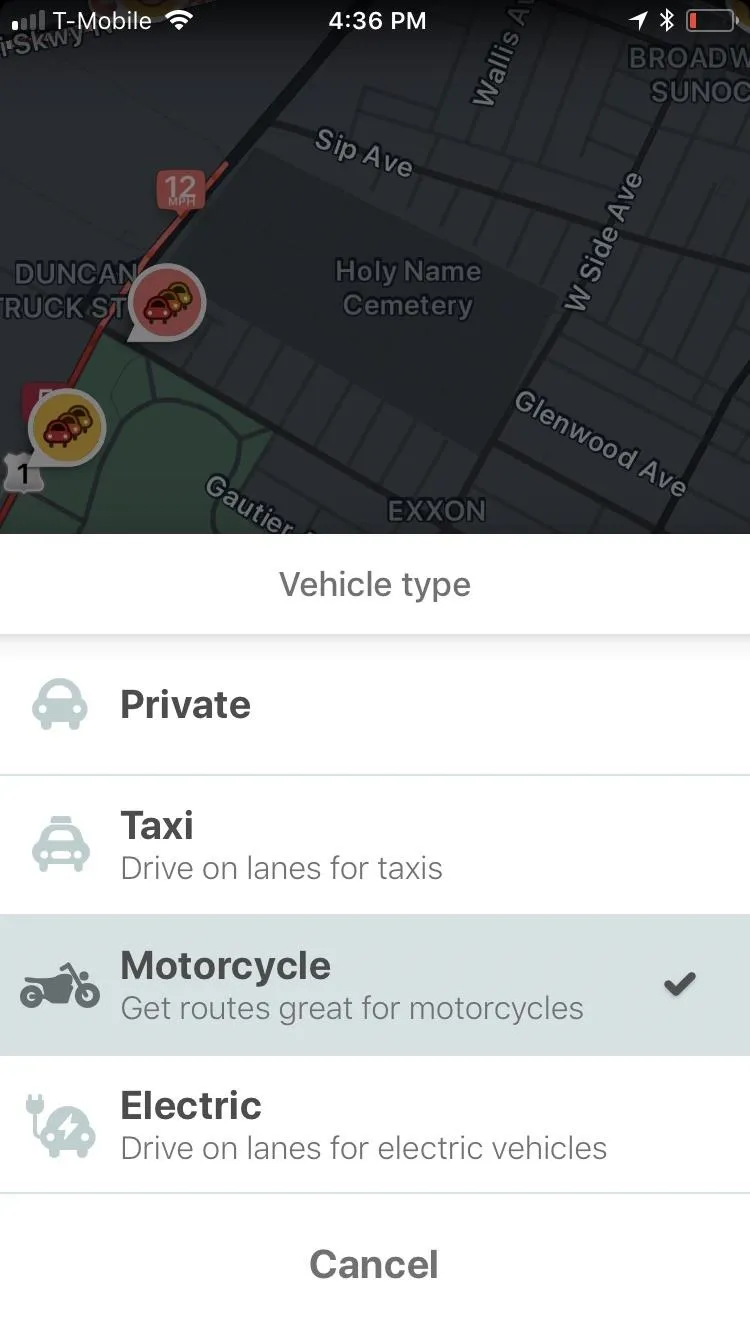
7. Motorcycle-Friendly Navigation
In many ways, traveling on a motorcycle is different from four-wheeled navigation. In addition to faster travel times, bikes have the ability weave in and out of traffic a lot easier than regular cars and SUVs. With that in mind, Waze has a feature provides motorcycle-friendly routes to ensure efficient navigation while riding a Harley or a super bike.
The feature is easy to enable, and basically involves going into Waze's side menu to access its settings, then tapping on "Navigation" once inside. From there, simply select "Vehicle Type" and tap on "Motorcycle" to enable two-wheel mode. With it set, Waze will always look for the most motorcycle-friendly routes whenever you ask for directions.

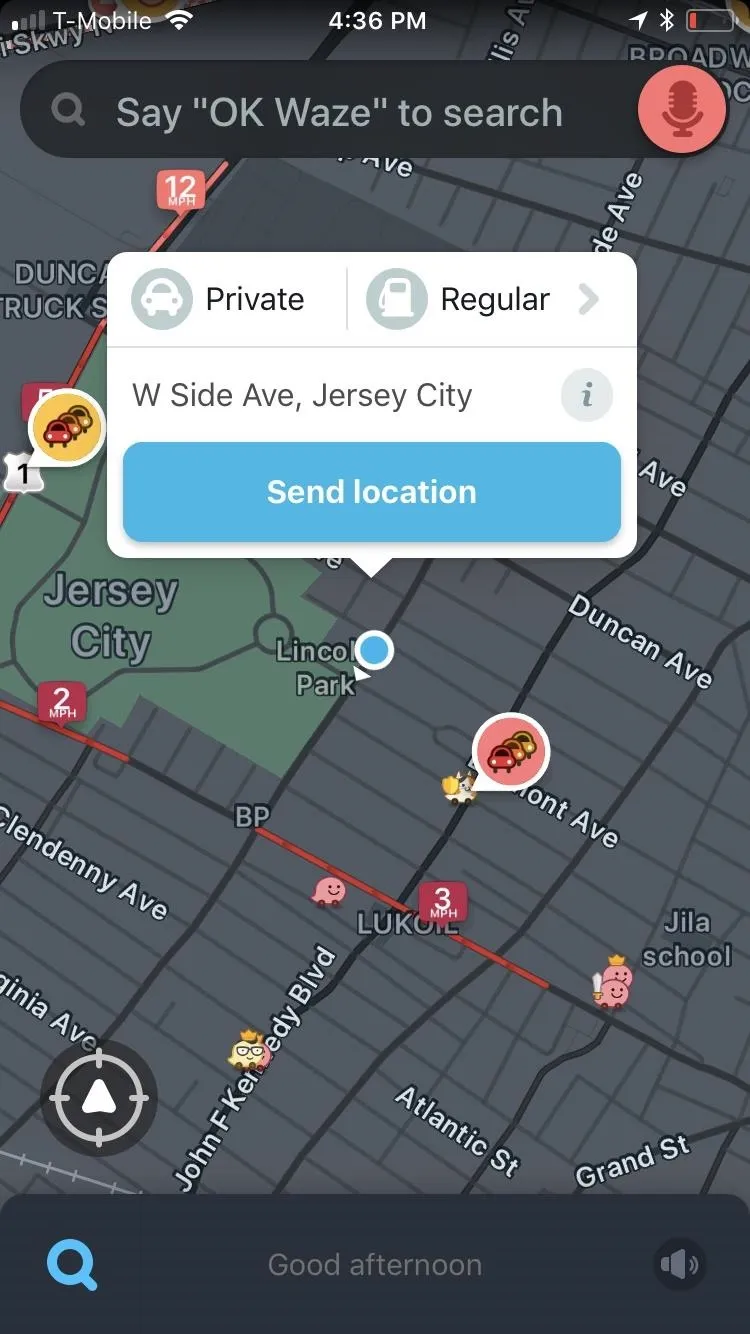
If you frequently switch between your car and motorcycle, you have the added ability to quickly set your vehicle type, regardless of whether you've started navigation or not. To quickly set your vehicle type, simply tap on your location pin on the map to reveal and access your info card. You can then toggle your vehicle type between private and motorcycle by tapping on the vehicle tab in the upper-left corner of the card.
Of course, we'll be sure to post more tips on Waze as more features roll out in the future. Until then, be sure to share your thoughts in the comment section below and let us know what other features of Waze you'd like to learn more about.
- Follow Gadget Hacks on Facebook, Twitter, YouTube, and Flipboard
- Follow WonderHowTo on Facebook, Twitter, Pinterest, and Flipboard
Cover image and screenshots by Amboy Manalo/Gadget Hacks


Comments
Be the first, drop a comment!