There's a feature in the Gboard keyboard that enables people who cannot talk, type, or swipe normally to still have a way to communicate in the digital age on their smartphones. While it's mainly an accessibility feature for those who actually need it, it's a good way for anyone to learn or brush up on their Morse code skills — and it works on both Android and iOS.
Google first revealed the new Morse code keyboard on May 8, 2018, at its Google I/O conference. At first, it was limited to Android users only who signed up for the Gboard beta, but since then, it's been released on the stable versions of both Android and iOS, with iPhone users first seeing it on July 12. Android users must be running Android 5.o and later, while iPhone owners will need to have iOS 10 or later.
Note that as of right now, the Morse code keyboard is available for English only.
- Don't Miss: 19 Tips to Help You Master Gboard for iPhone
Install or Update Gboard
If for some crazy reason you don't have Gboard on your iPhone or Android phone, you can install it using one of the links below. For those of you who do already have it, make sure you're updated to the latest version to take full advantage of everything the Morse code keyboard has to offer.
- iPhone Users: 'Gboard' | iOS App Store
- Android Users: 'Gboard - the Google Keyboard' | Google Play
For those of you who just installed it, make sure to give it all the permissions it needs and set it as your default keyboard on your iPhone or Android phone.
Add the Morse Code Keyboard
We'll show you Android first, but just jump down to iOS if you're an iPhone user.
Adding the Morse Code Keyboard on Android
On your Android device, open up the device's Settings app. The following process will vary depending on the brand of Android phone you have, but it will be very similar. First, follow the menu items below to get to the Gboard options.
System (or General management) –>
Languages & input –>
Virtual keyboard (or On-screen keyboard) –>
Gboard –>
Languages –>
English (US)
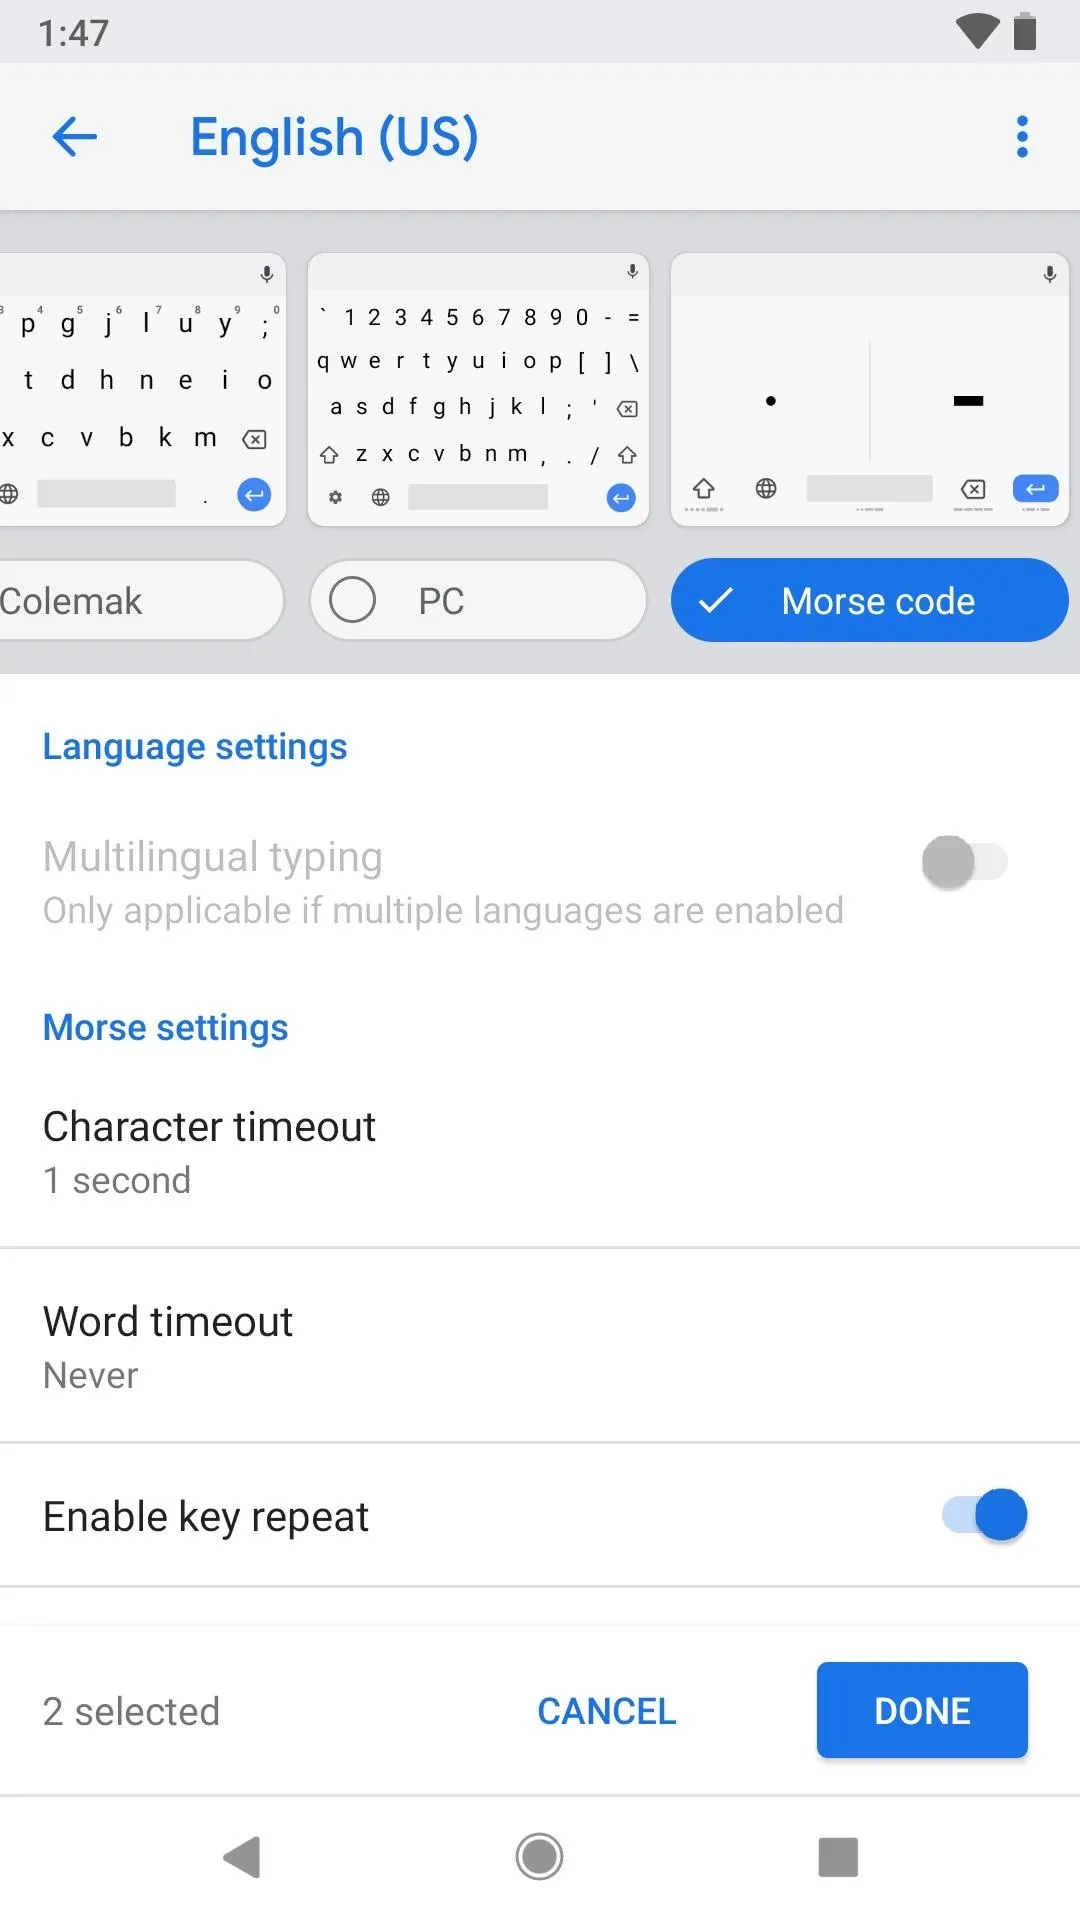
This will bring you to a row of options you can swipe through to add different keyboard types to Gboard. Swipe all the way to the far right on the row, then tap on "Morse code." More settings will appear for Morse code underneath it, and you can set things to your liking right away or just tap "Done" to finish installing the new Morse code keyboard. We'll discuss all of its settings later on in this article.


Adding the Morse Code Keyboard on iOS
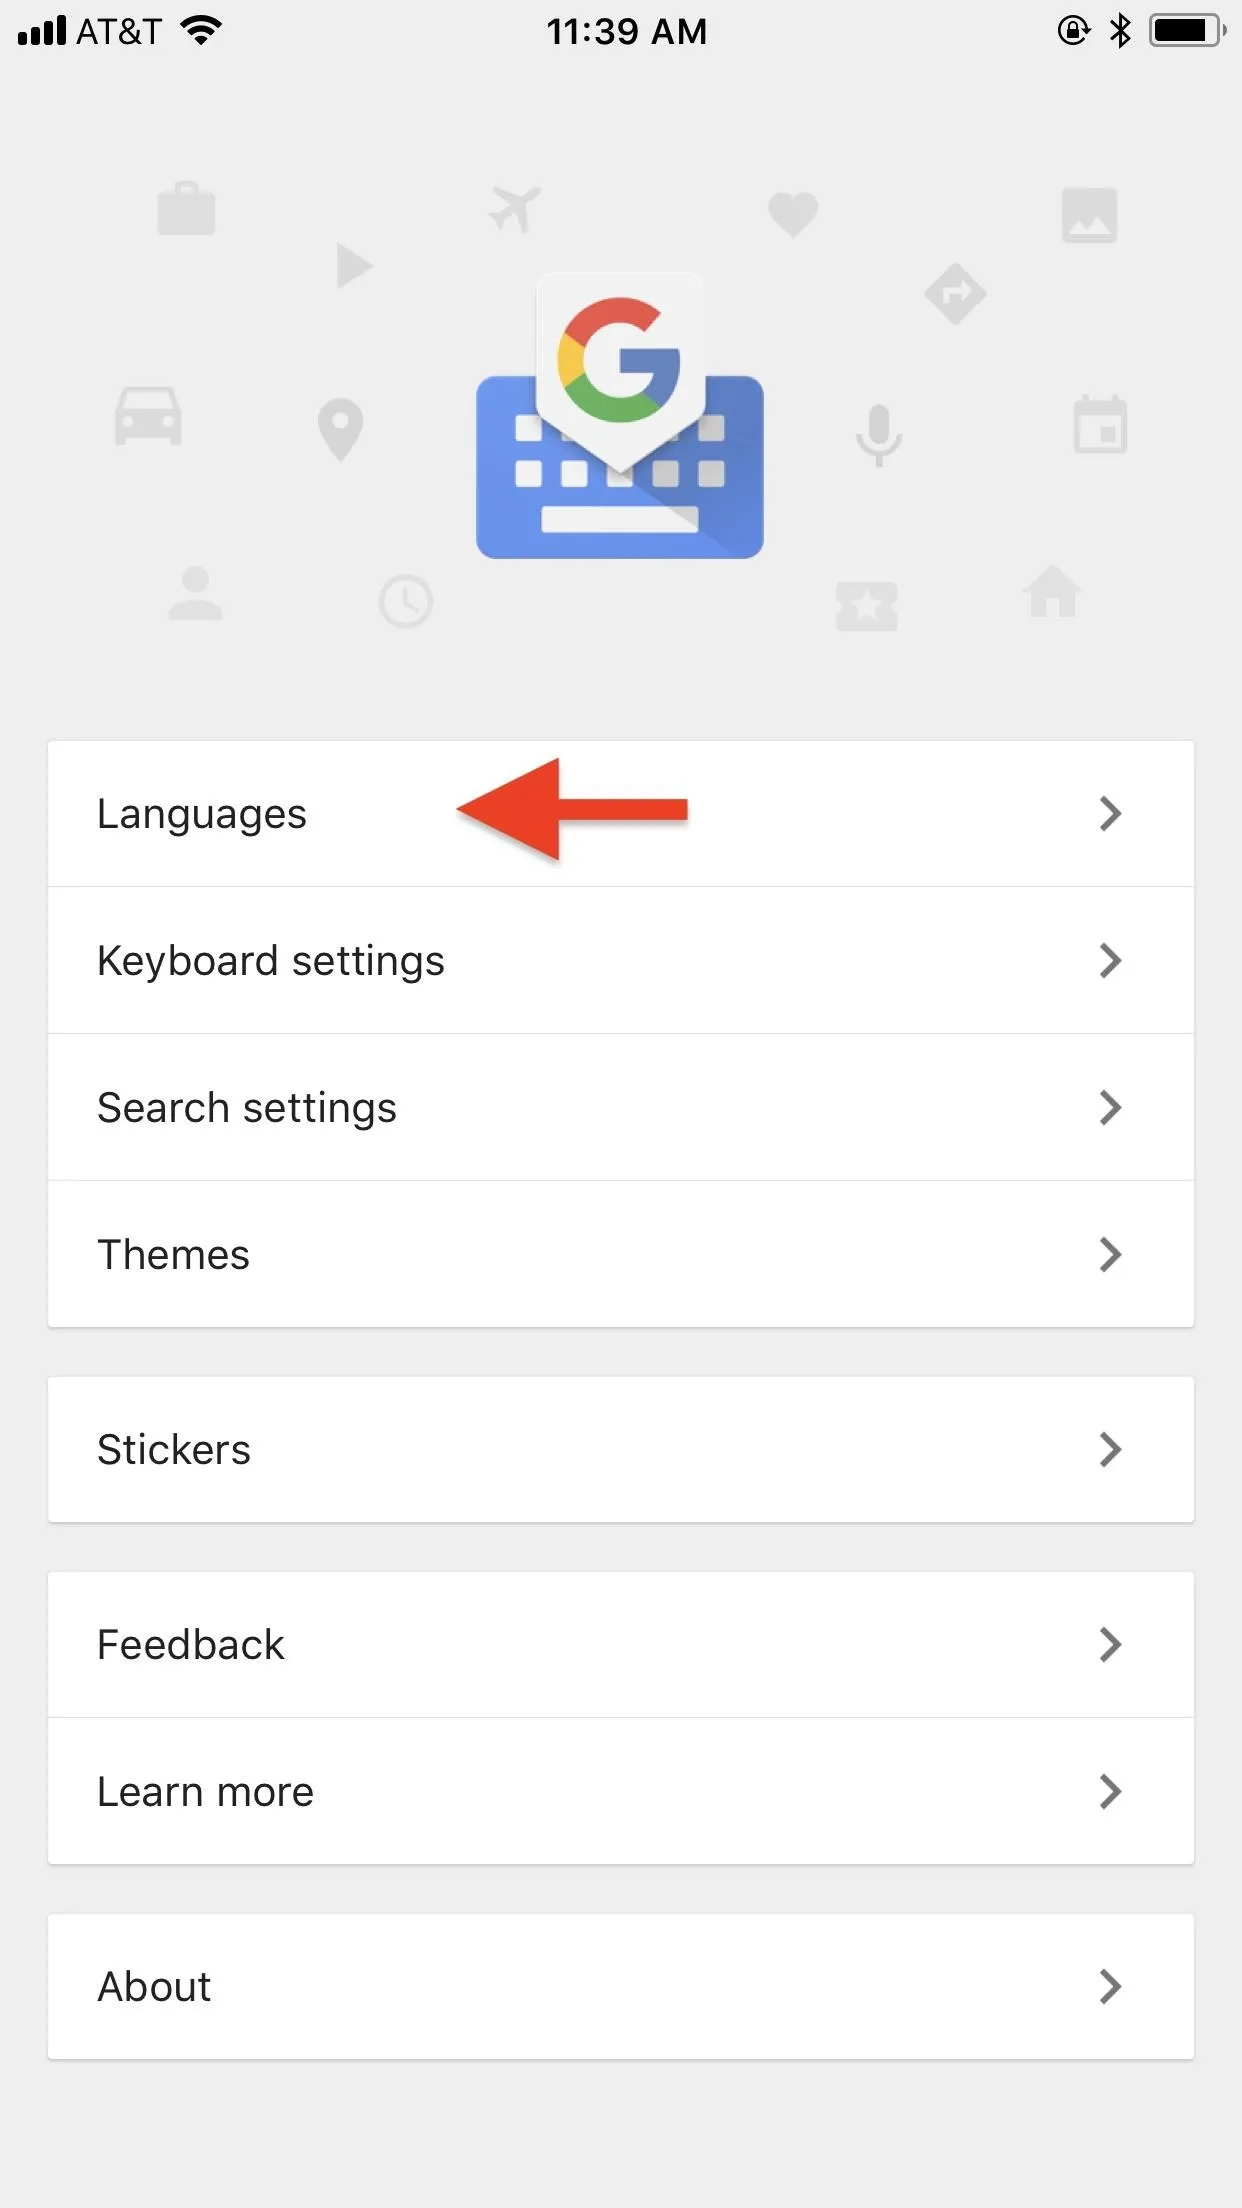
On your iPhone, open up the Gboard app, then follow the menu items below. As of right now, the Morse code keyboard does not seem to be available if you use Gboard through the Google app instead of directly through Gboard, but we expect an update to fix that very soon.
Languages –>
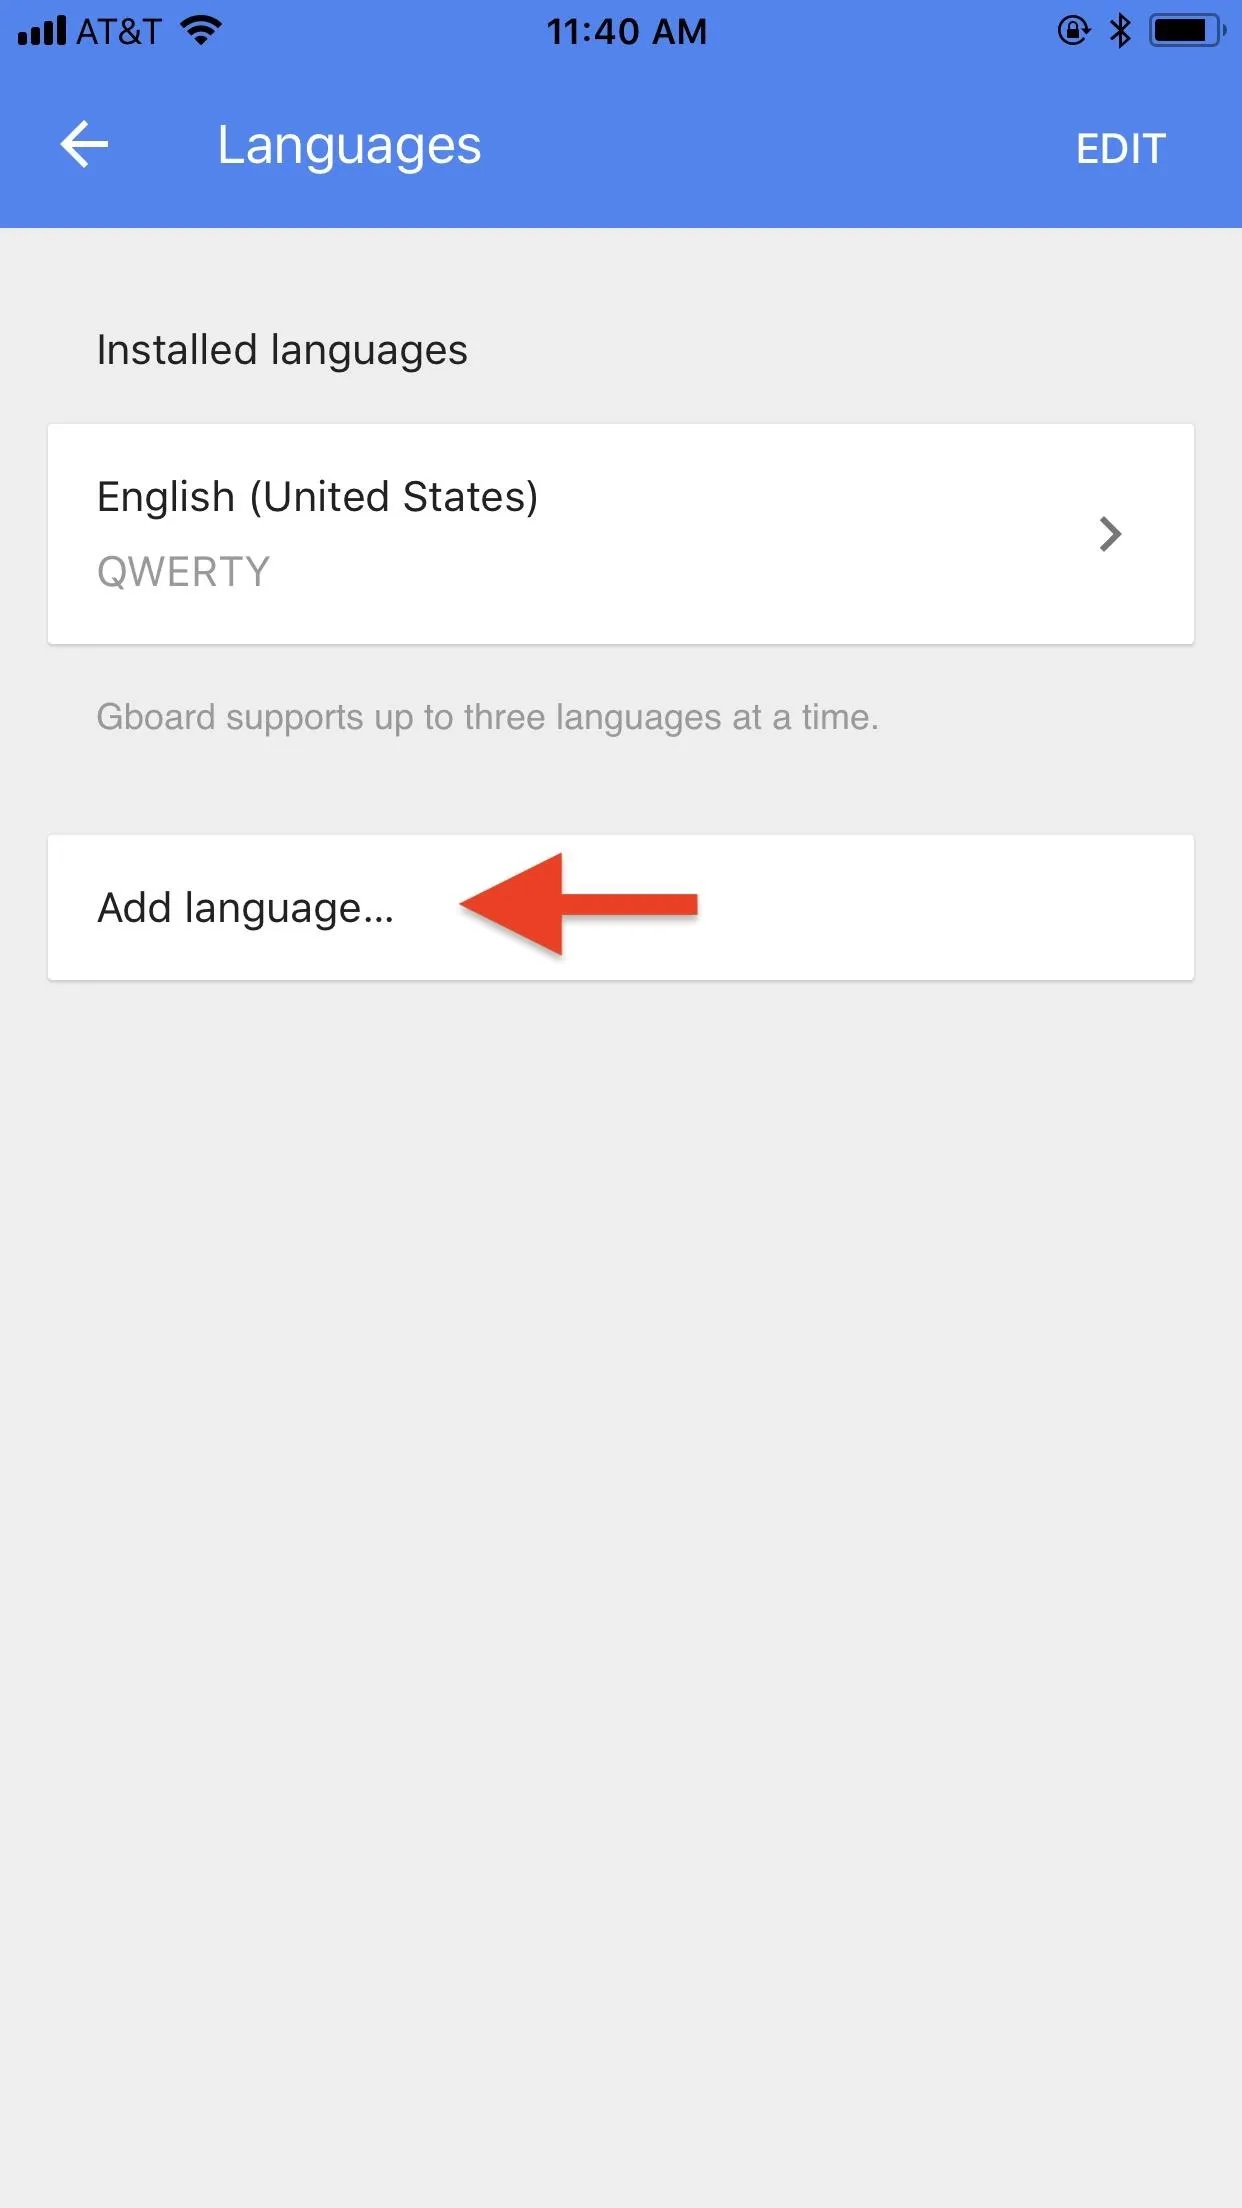
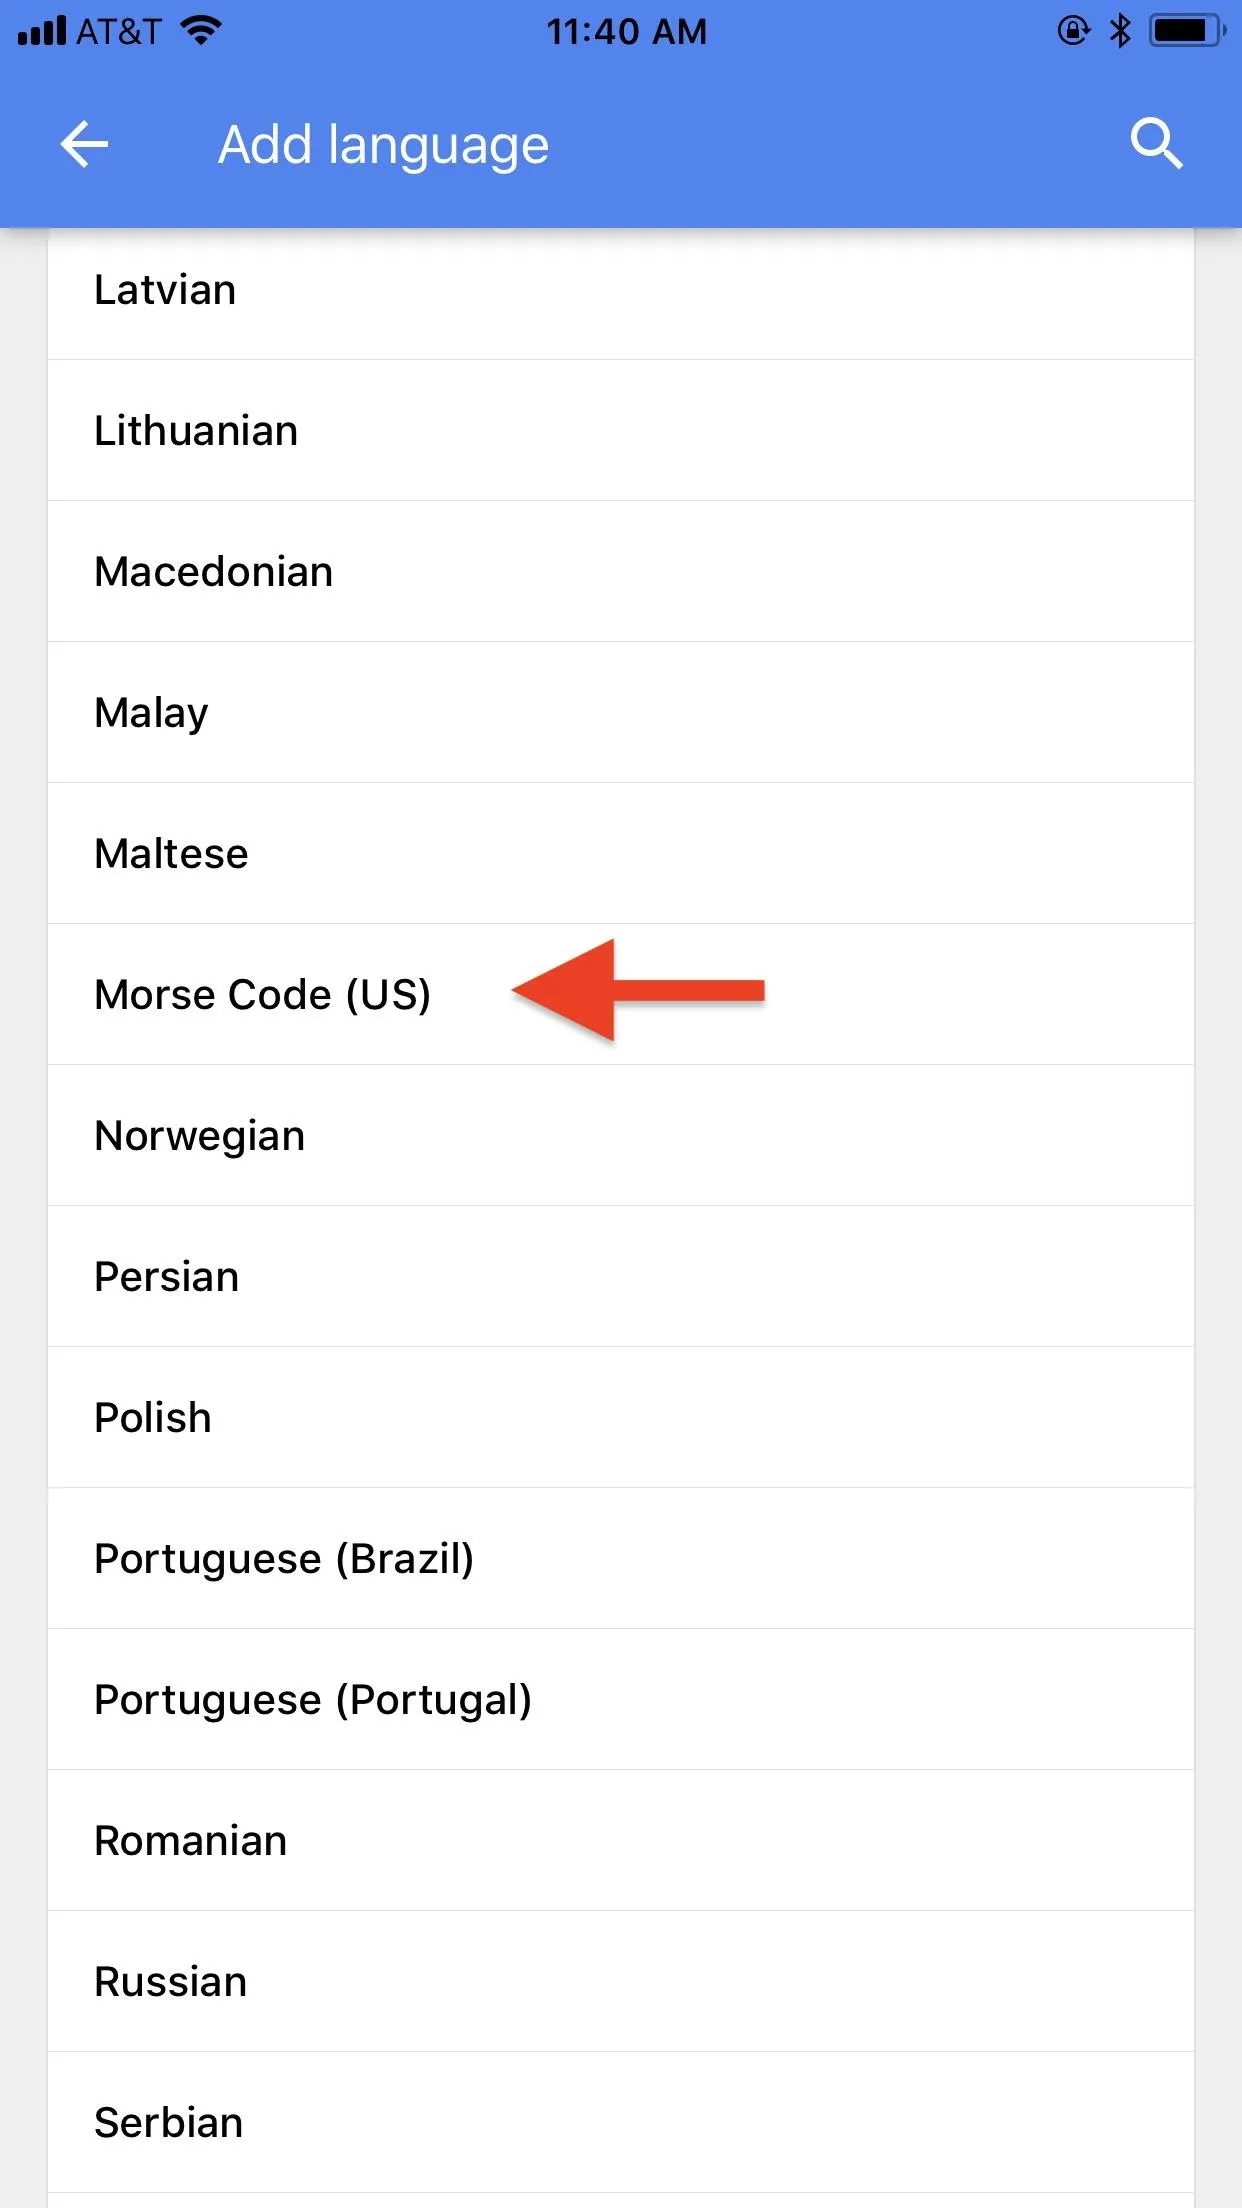
Add language –>
Morse Code (US)
And that's all there is to it. The iOS process is much easier than on Android.


Switch to the Morse Code Keyboard
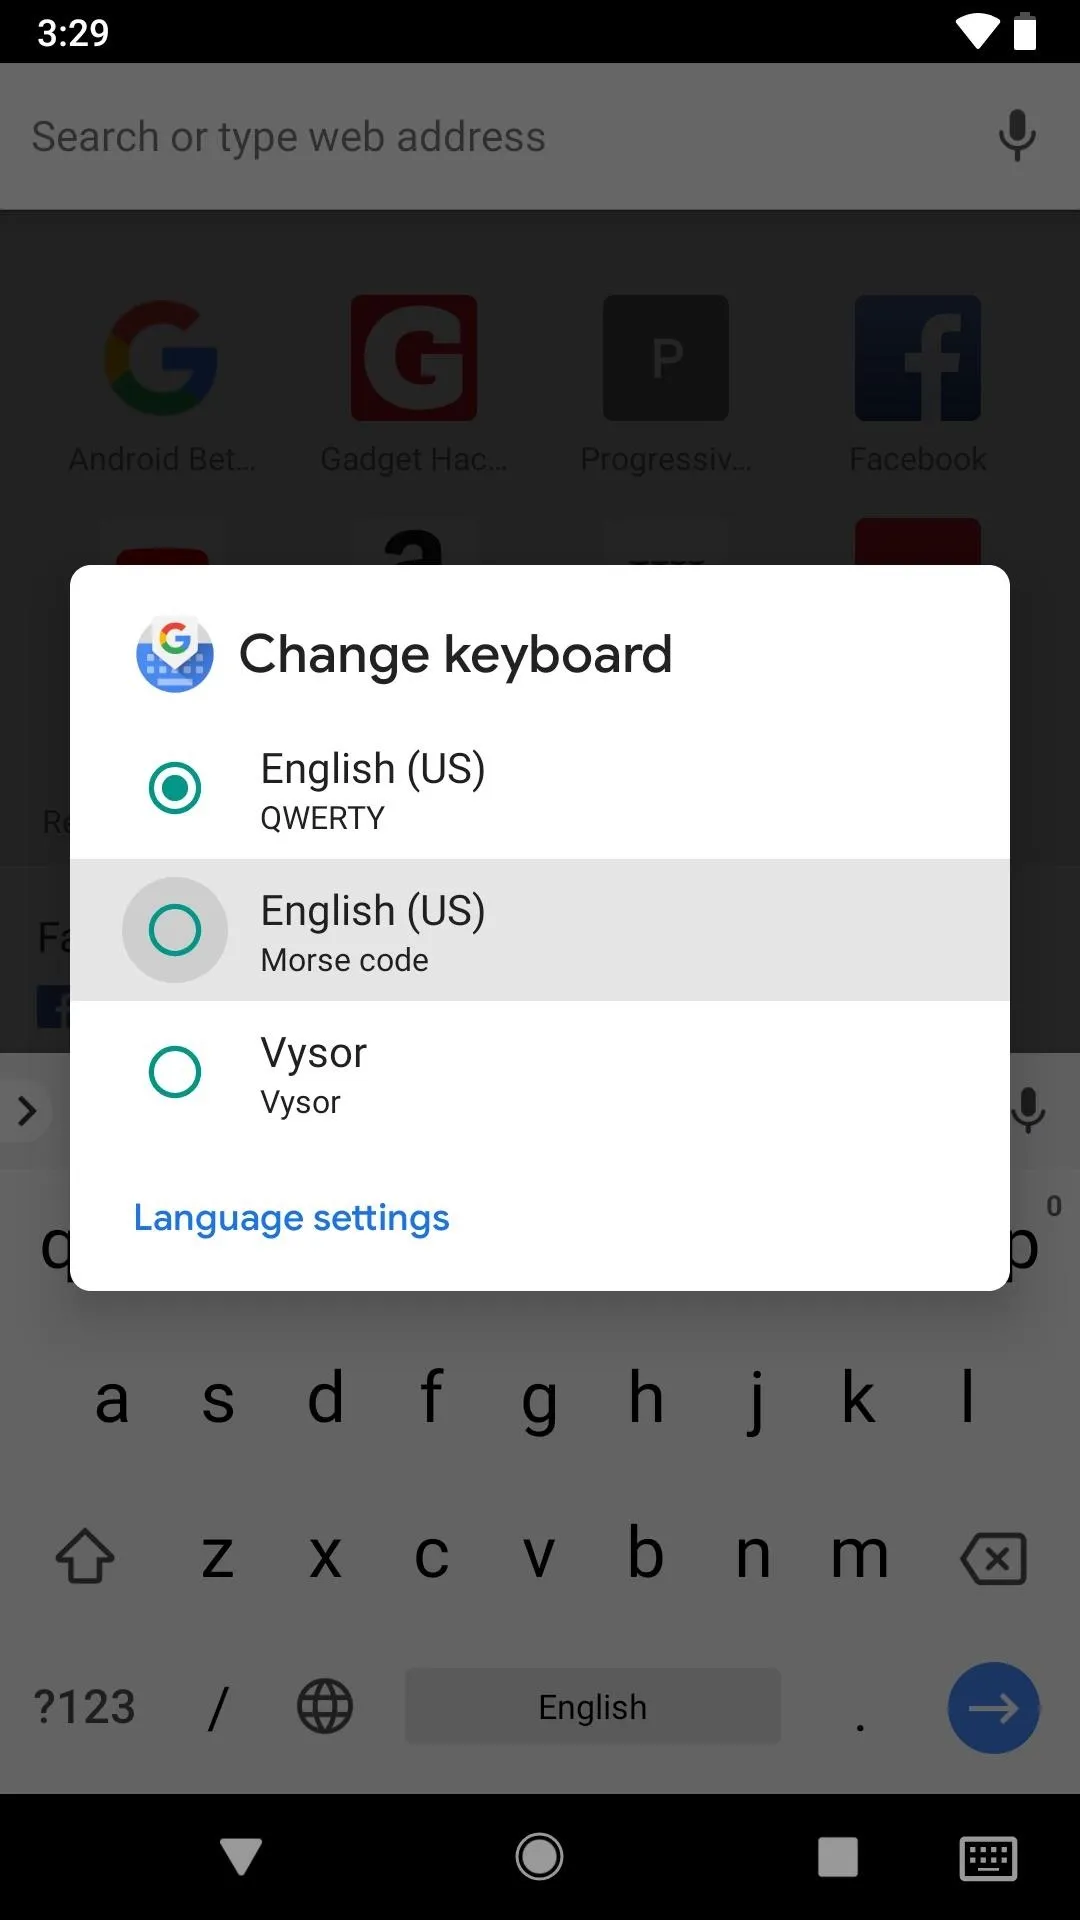
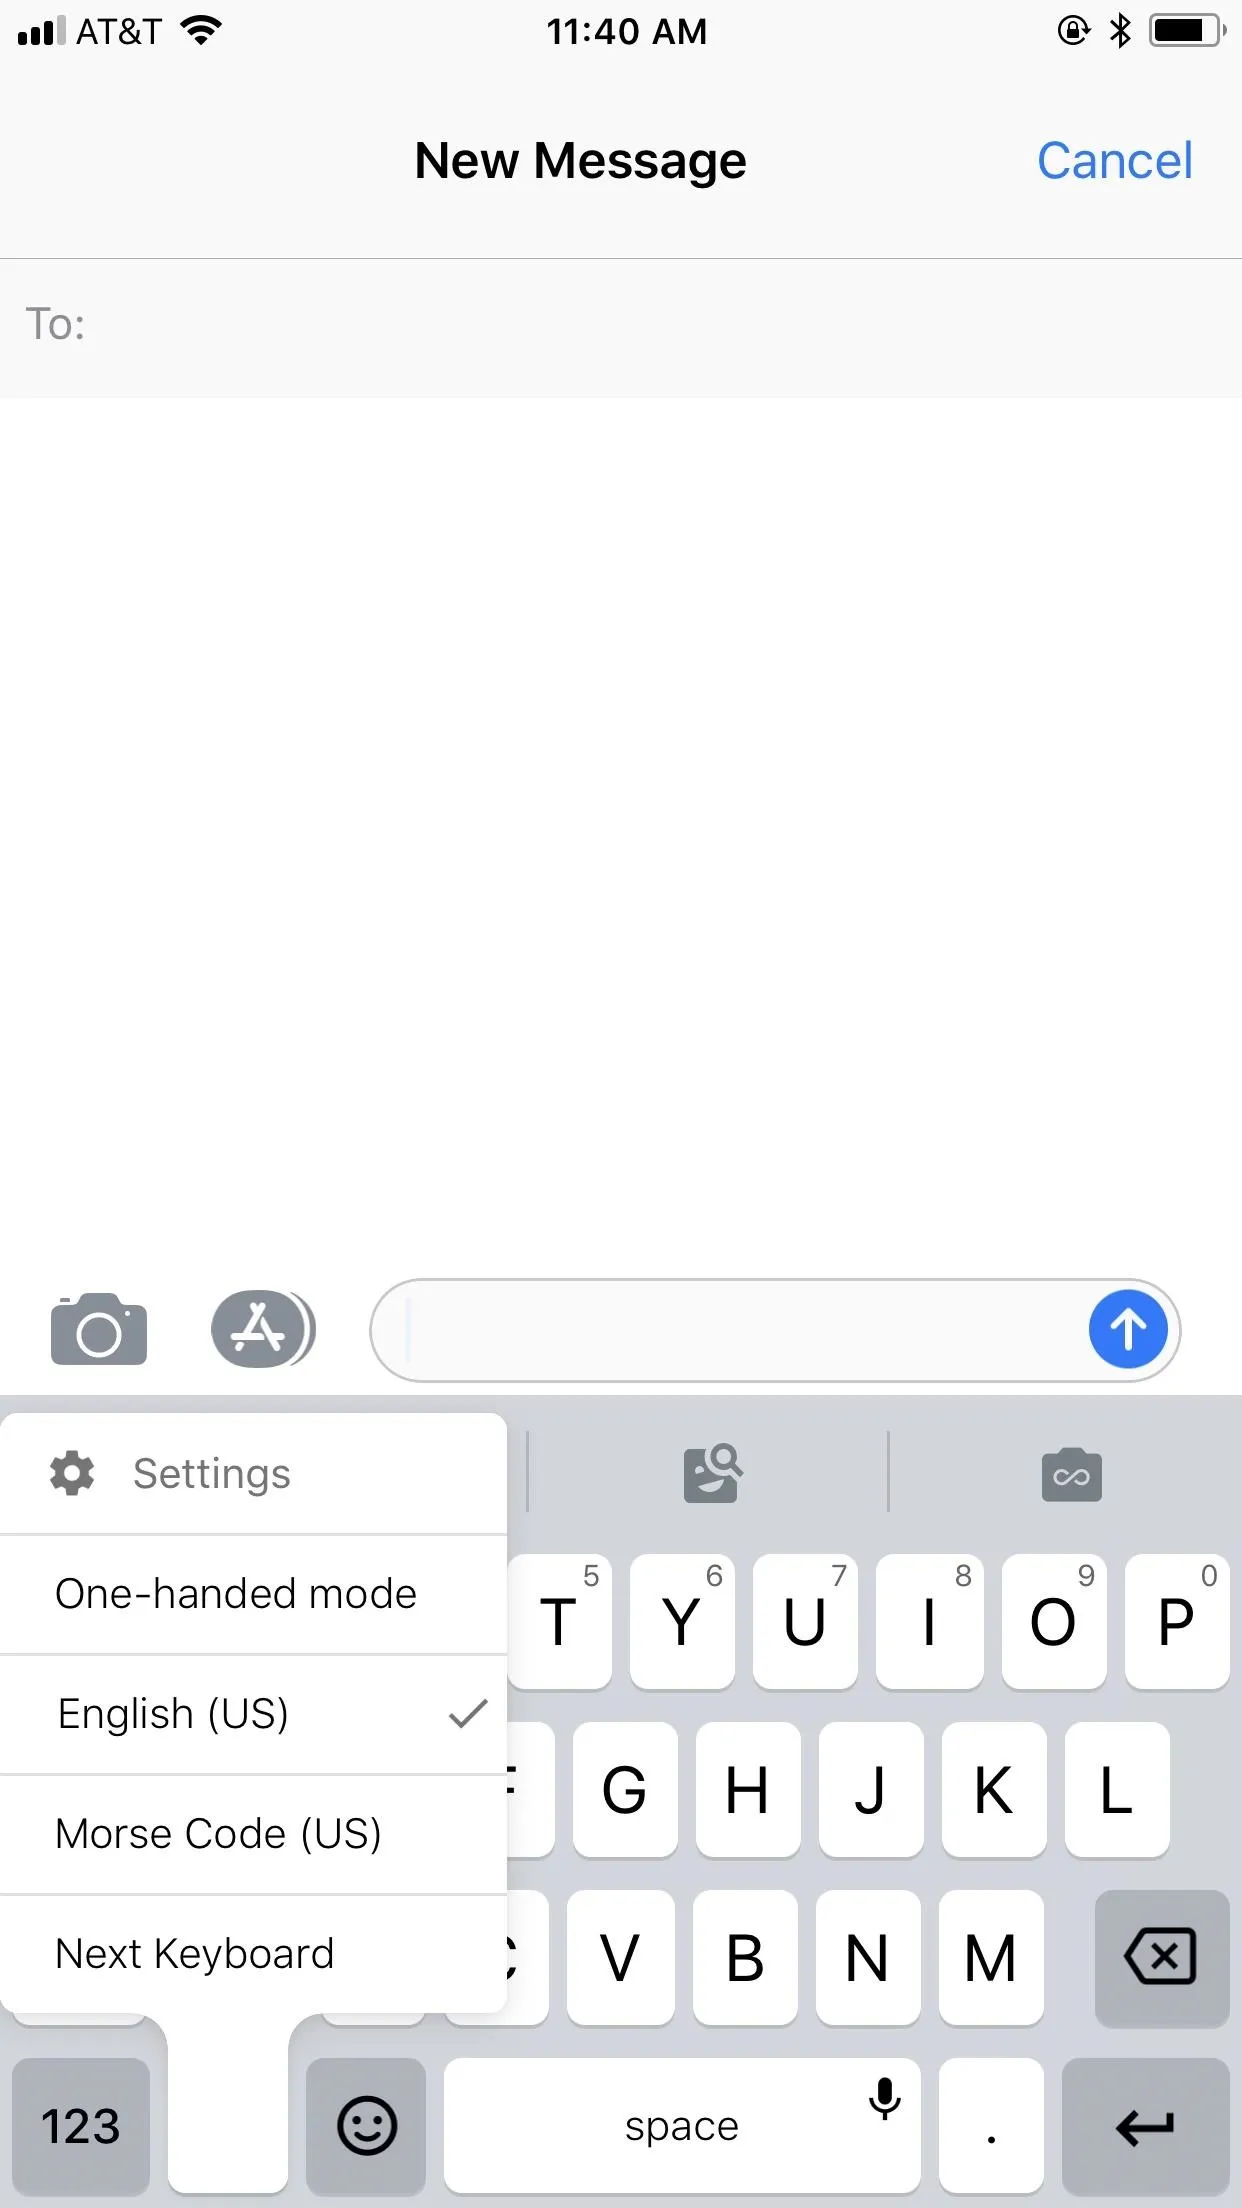
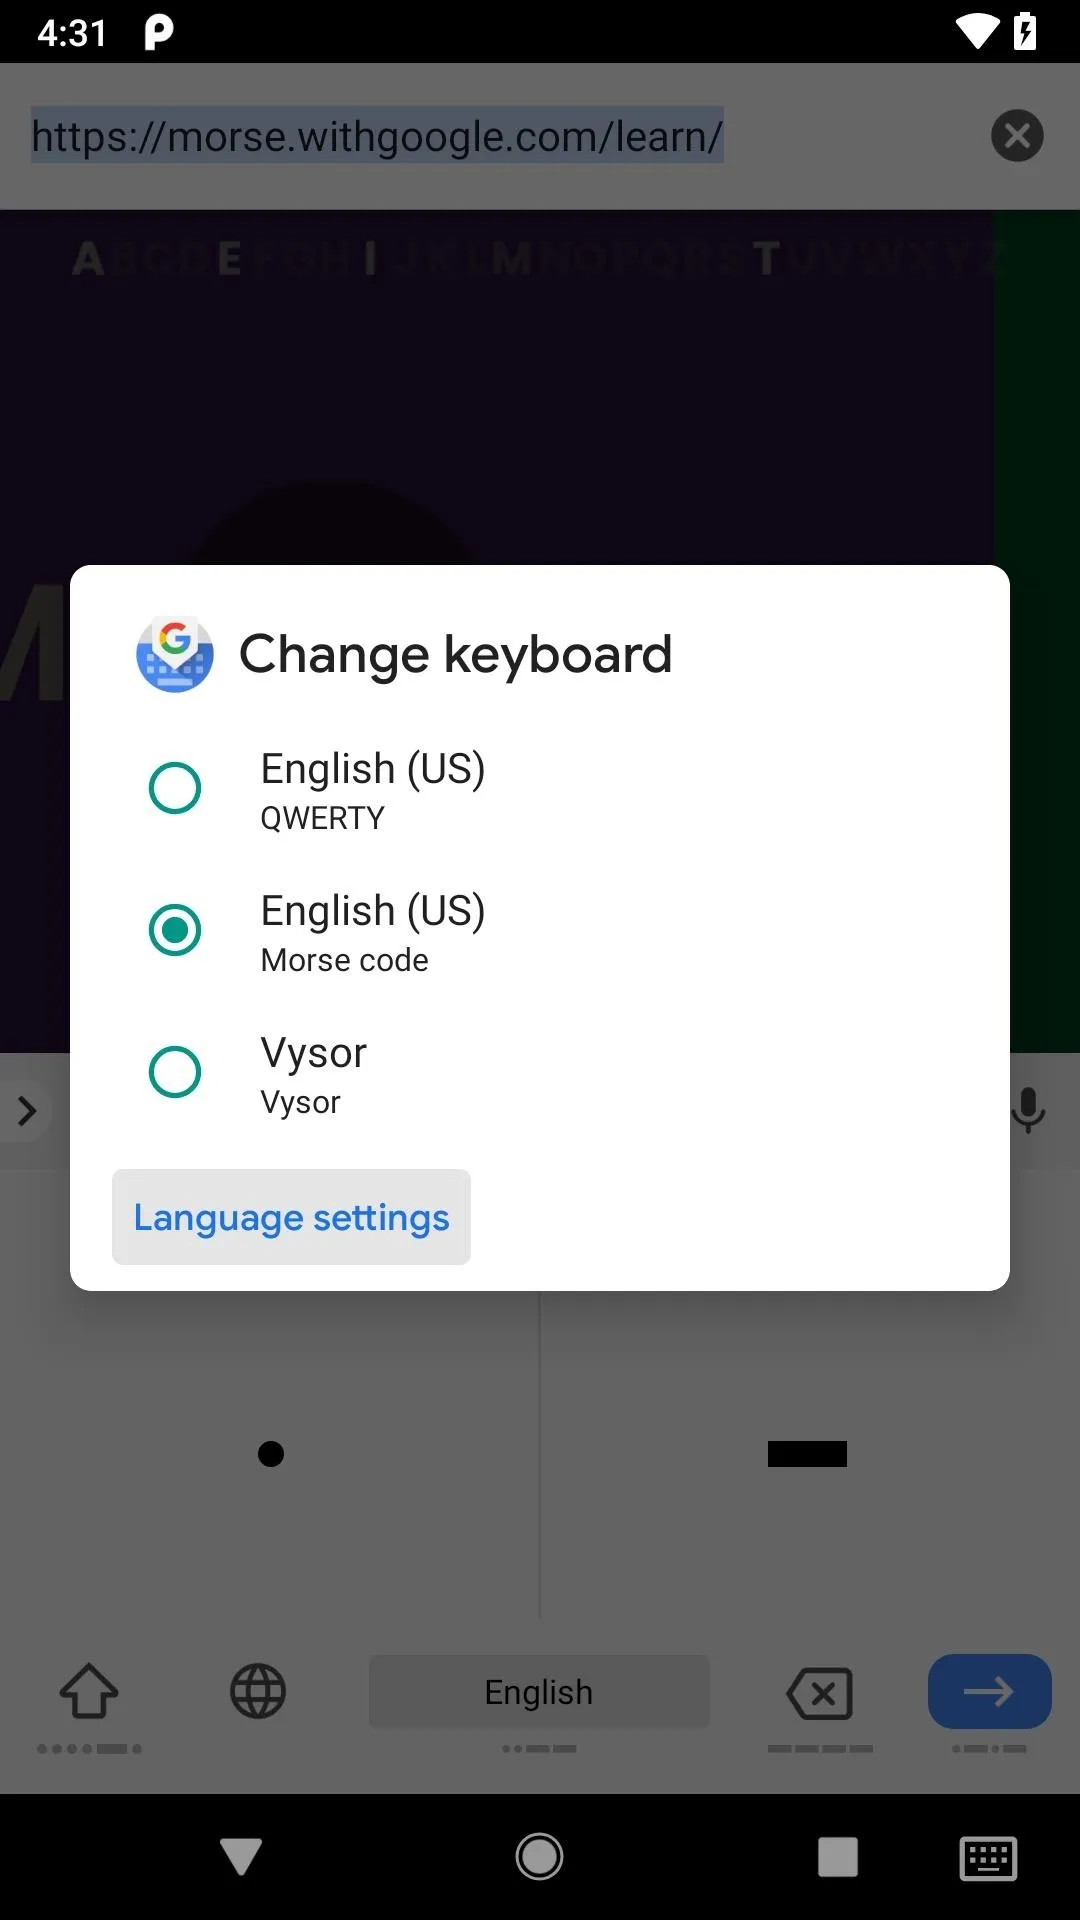
When you go back to Gboard — wherever it is that you use Gboard, be it a messenger, note-taking app, email app, etc. — tap on the globe icon to switch to the Morse code keyboard. You can also tap-and-hold on the globe (on Android, long-pressing the spacebar also works) to bring up the keyboard selector screen, then tap the "Morse code" keyboard to select it.


Use Morse Code to Type Out Words
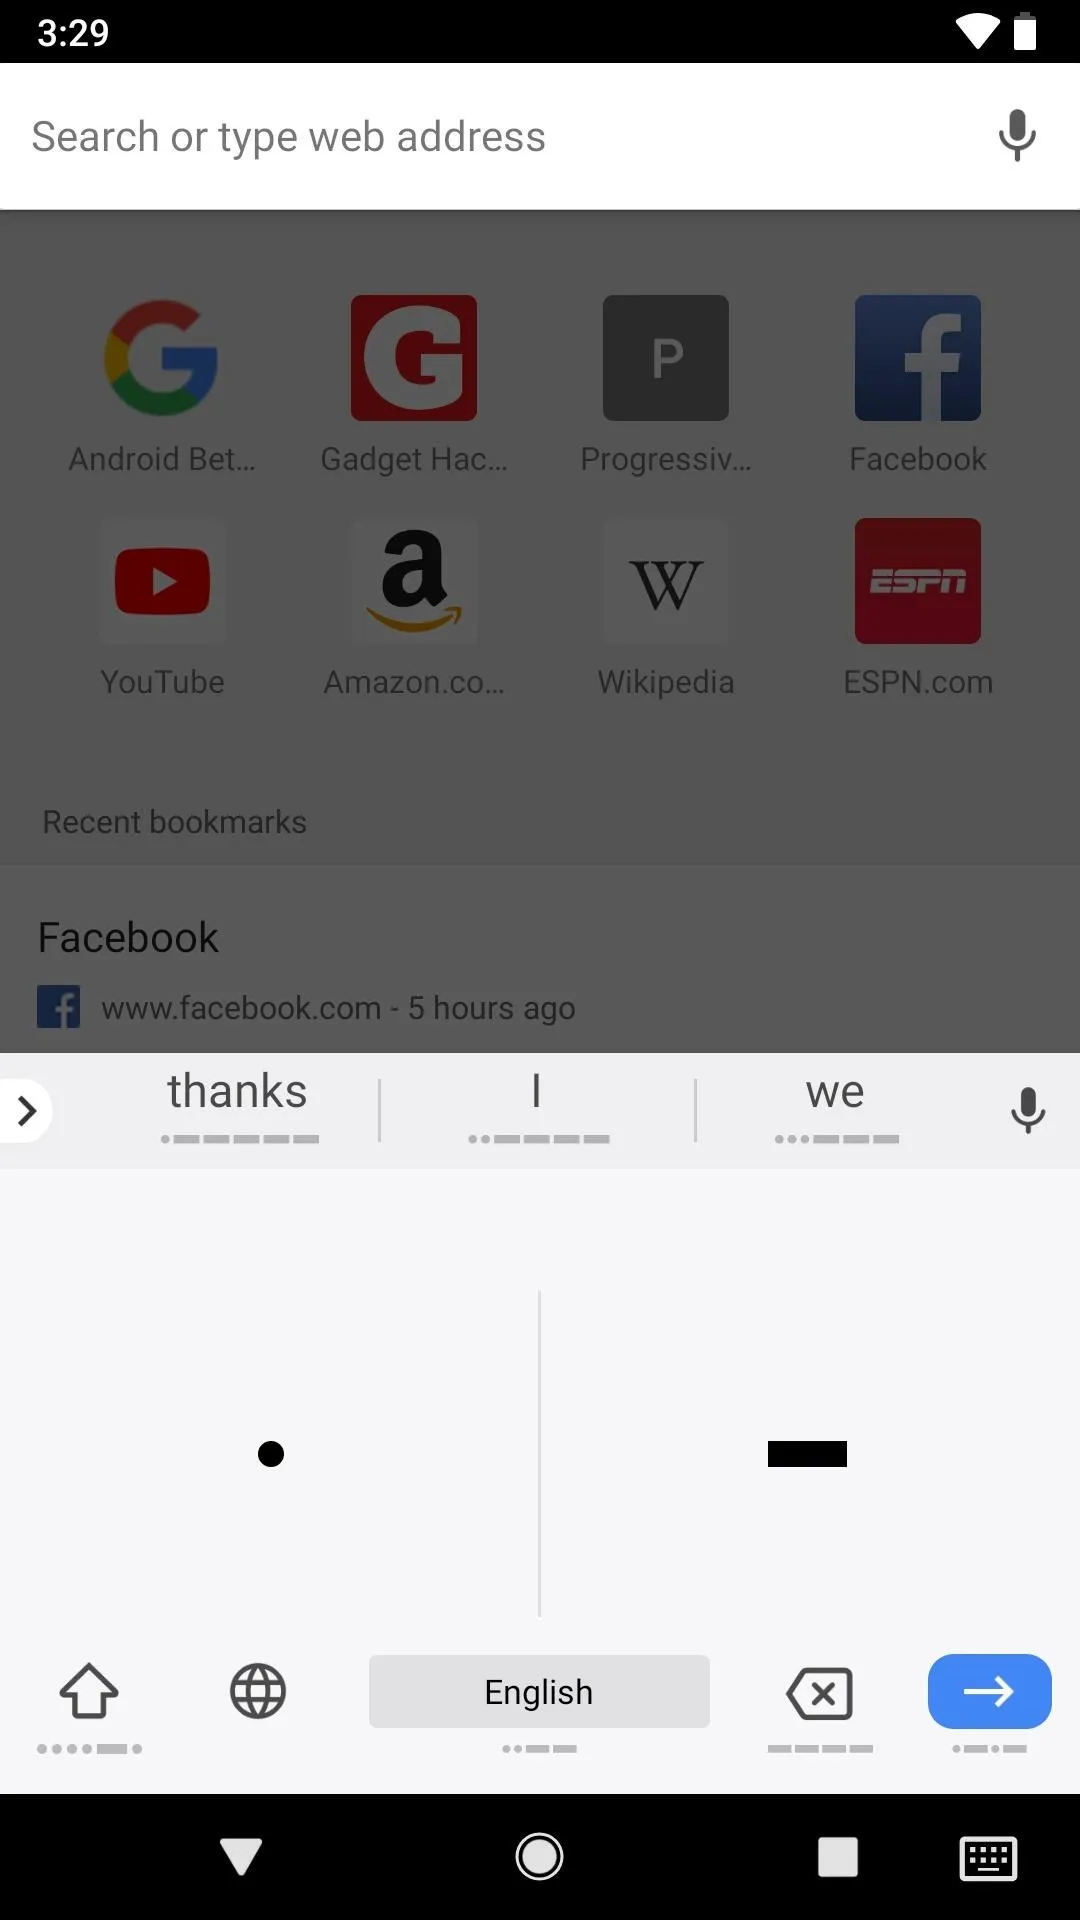
If you already know how to use Morse code, then you can begin typing away using the dot (.) and dash (-) keys to spell out words. Just tap on each button with your finger, then use the spacebar to input spaces. For those of you not familiar with Morse code but would like to learn, hit up the next step.
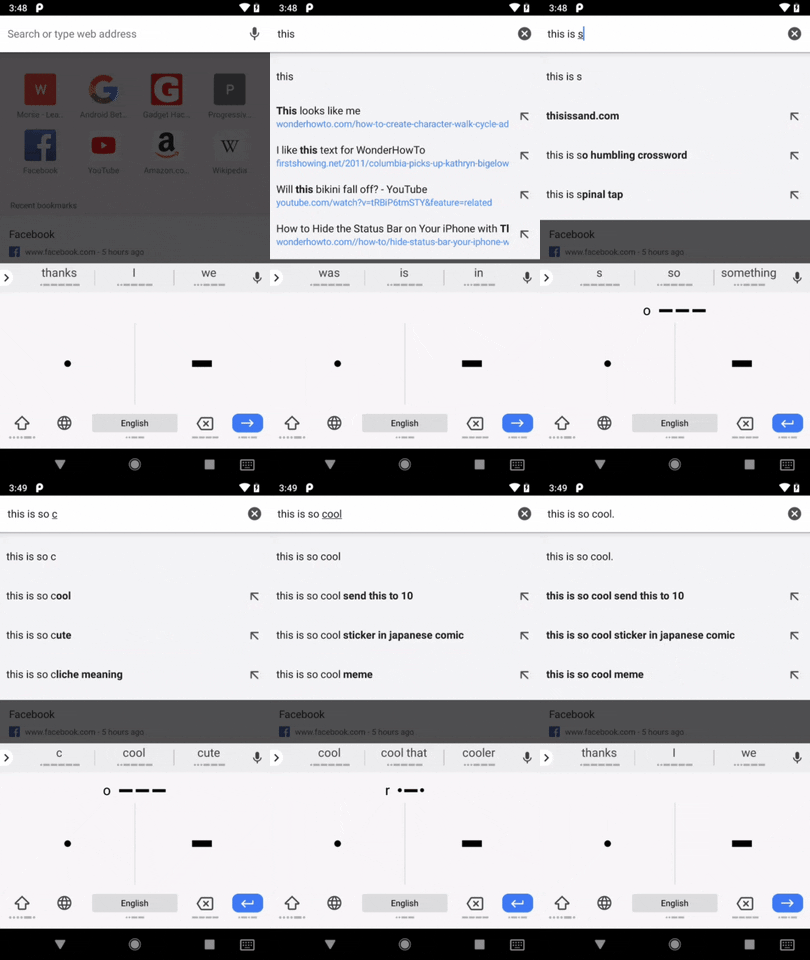


If you're already using an accessibility service on your Android phone, such as TalkBack, Switch Access, or Select to Speak, this Morse keyboard will work with all of them. For those using Switch Access, you'll need to configure your external switch so that the dot and dash characters will be assigned to the right keys.
Learn How to Use Morse Code (If You Don't Know Already)
If you're someone who has a hard time speaking or using small keys on the regular keyboard, then it's likely that you already know how to use Morse code. For those of you who want to learn how long-distance communications use to work way back in the day of the telegraph, need to learn to better communicate with those who use it daily, or just want to send an "SOS" message for fun, Google has you covered.
Just visit that link above on your iPhone or Android device, then tap "Have Gboard? Get started" to begin. You can also tap on the ? to read more about this tool, which was created by developer Tania Finlayson who has cerebral palsy and cannot speak — someone who used Morse code as a way to speak to others without the need of a large word board and head-mounted wanted.
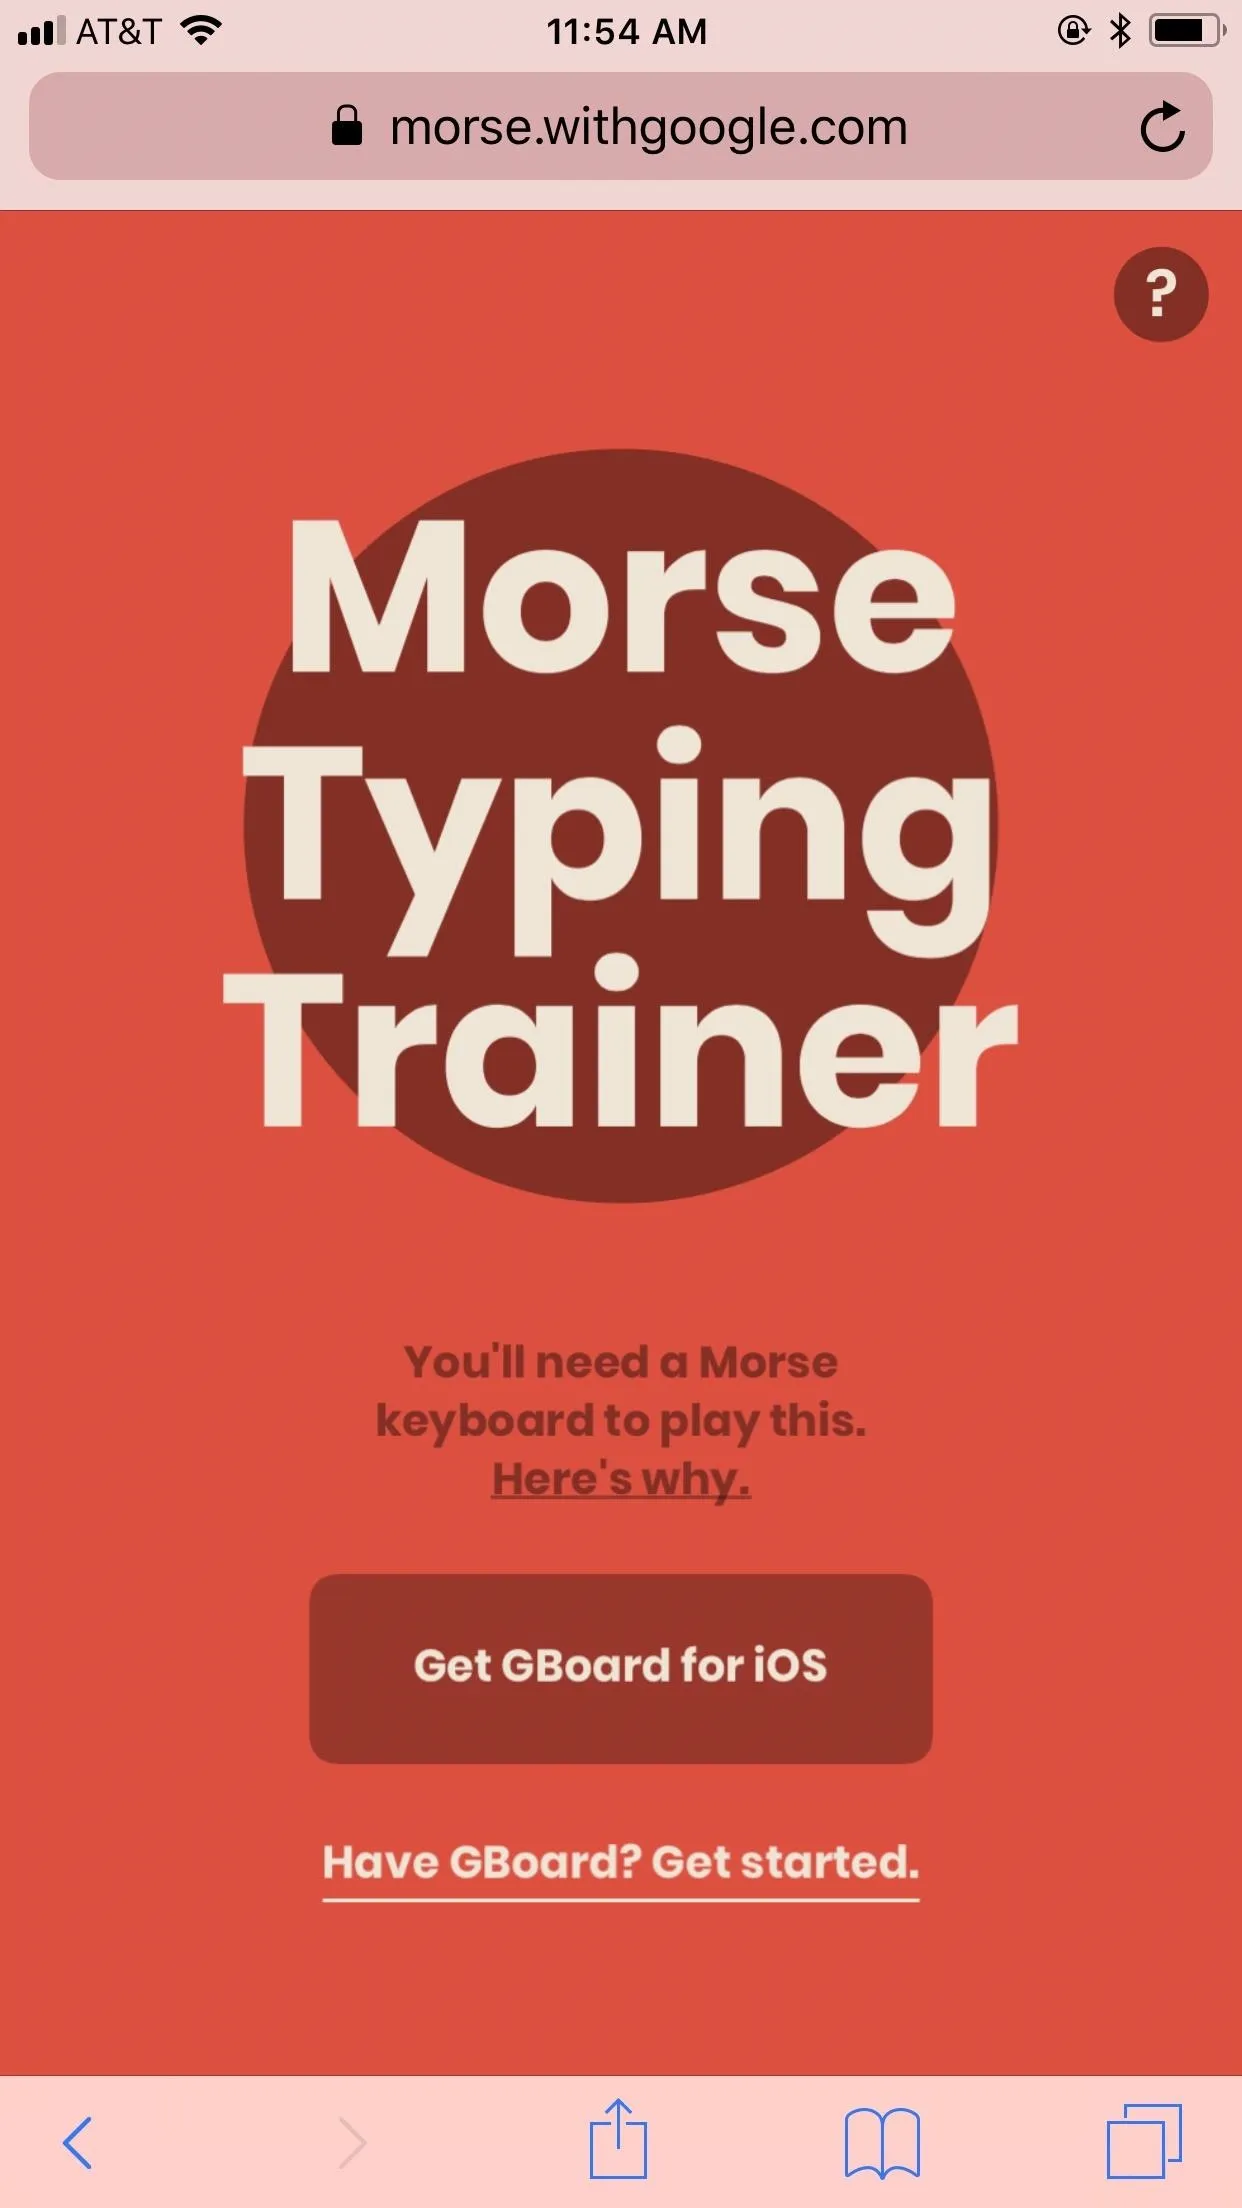
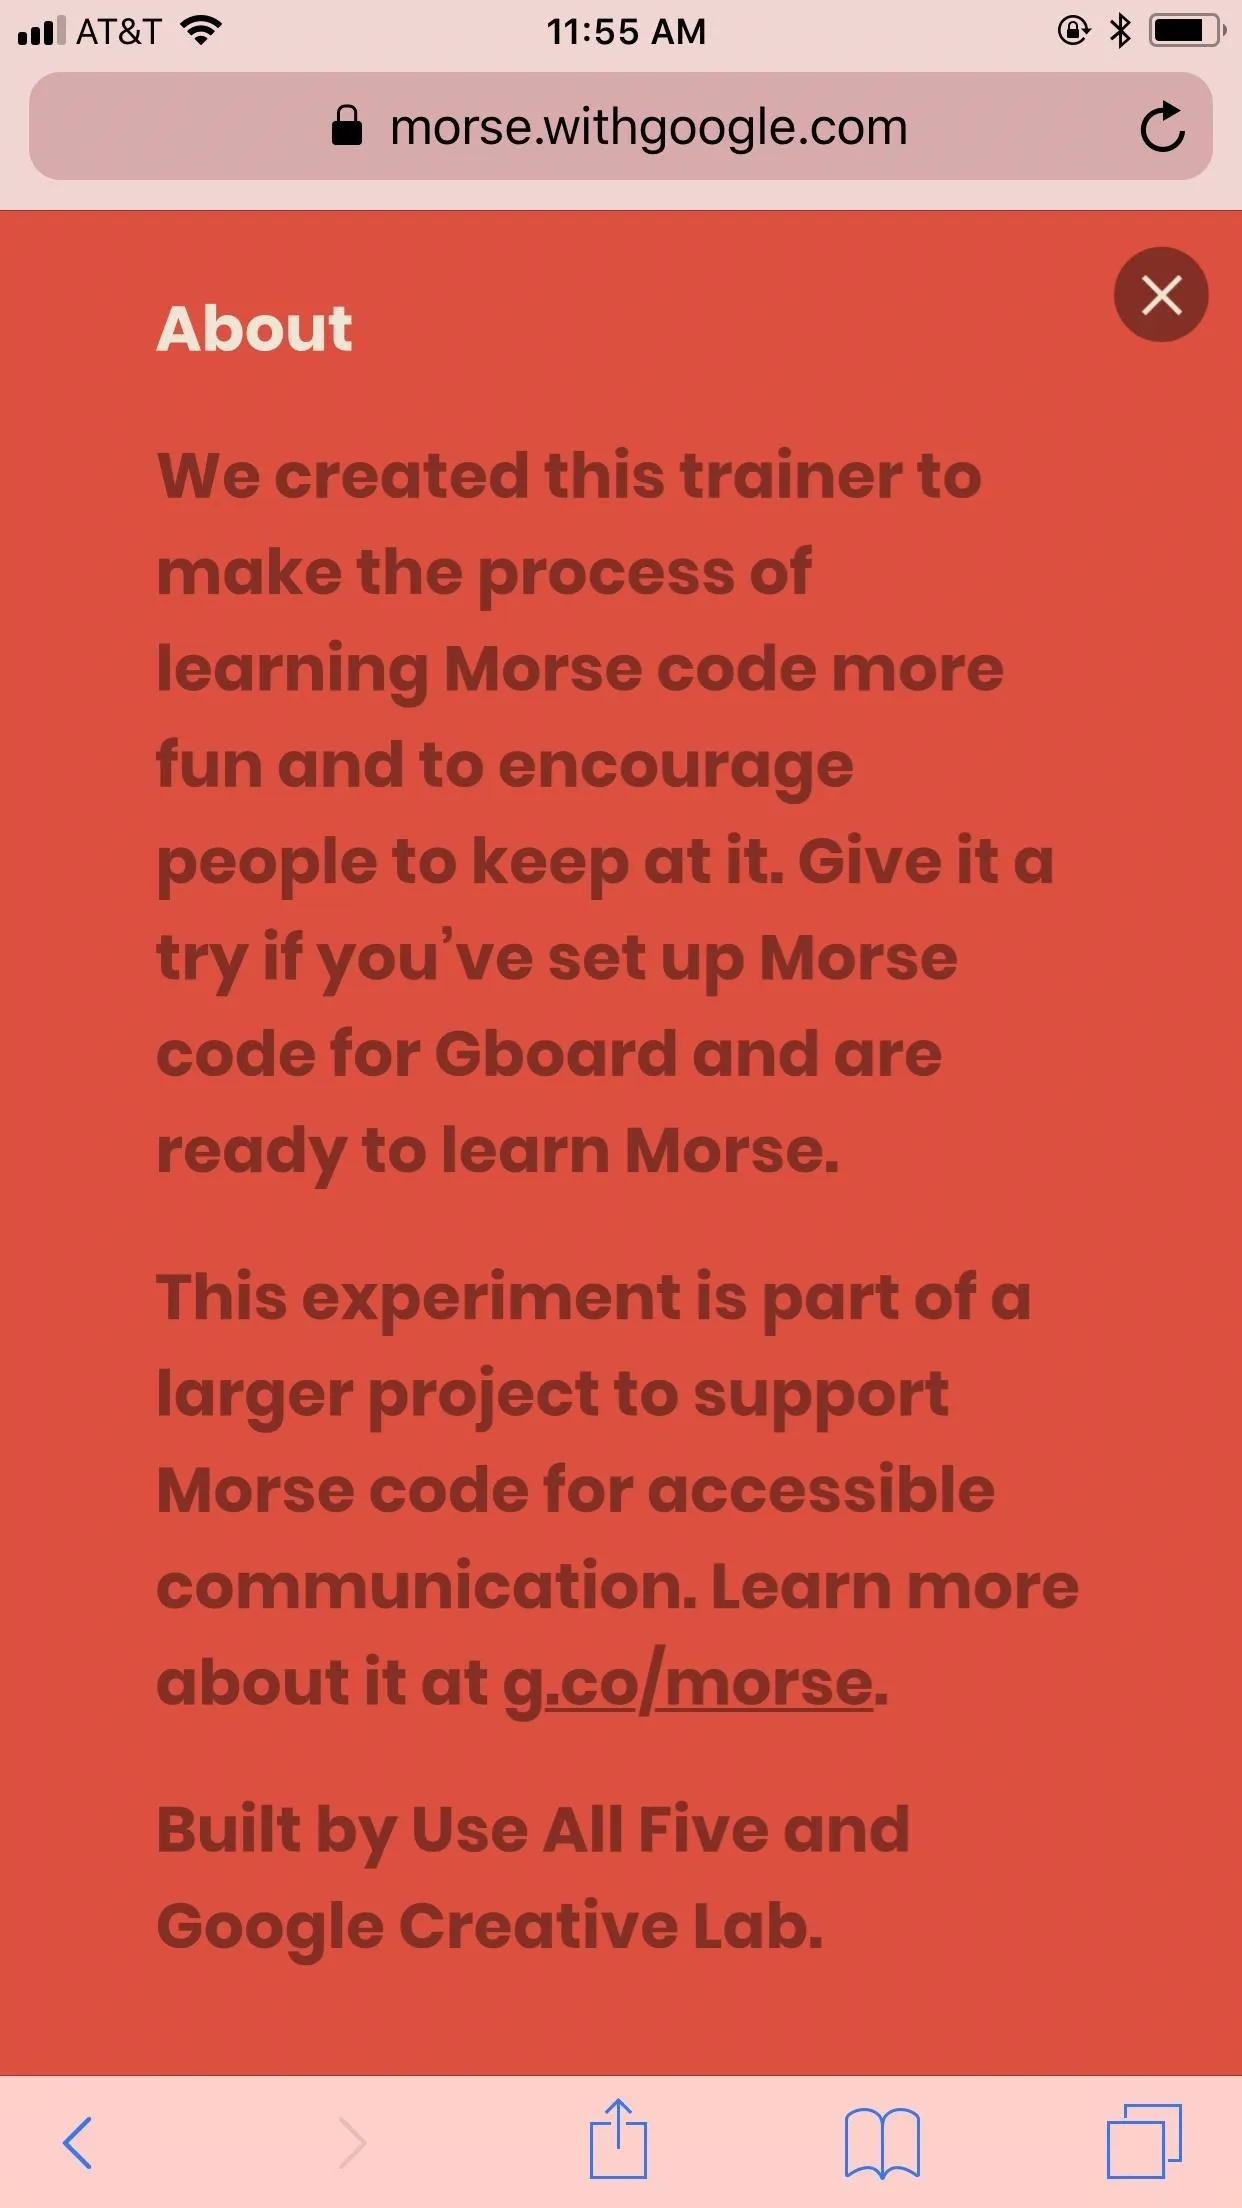


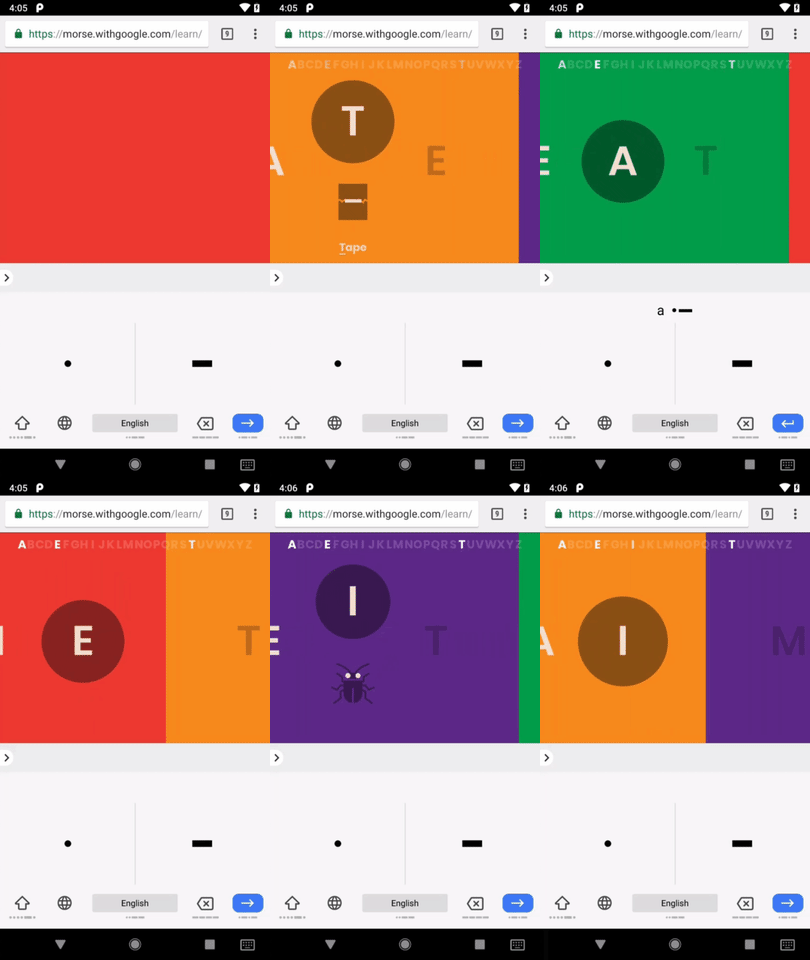
Once you tap on the screen to get started, you may see how the "Morse Typing Trainer" works. (Not everyone will see this.) Once you tap "Get Started" or "Skip," you'll start learning how to type out Morse code using pictographs that help associate the code to each letter, number, or symbol.



Adjust the Settings (Optional)
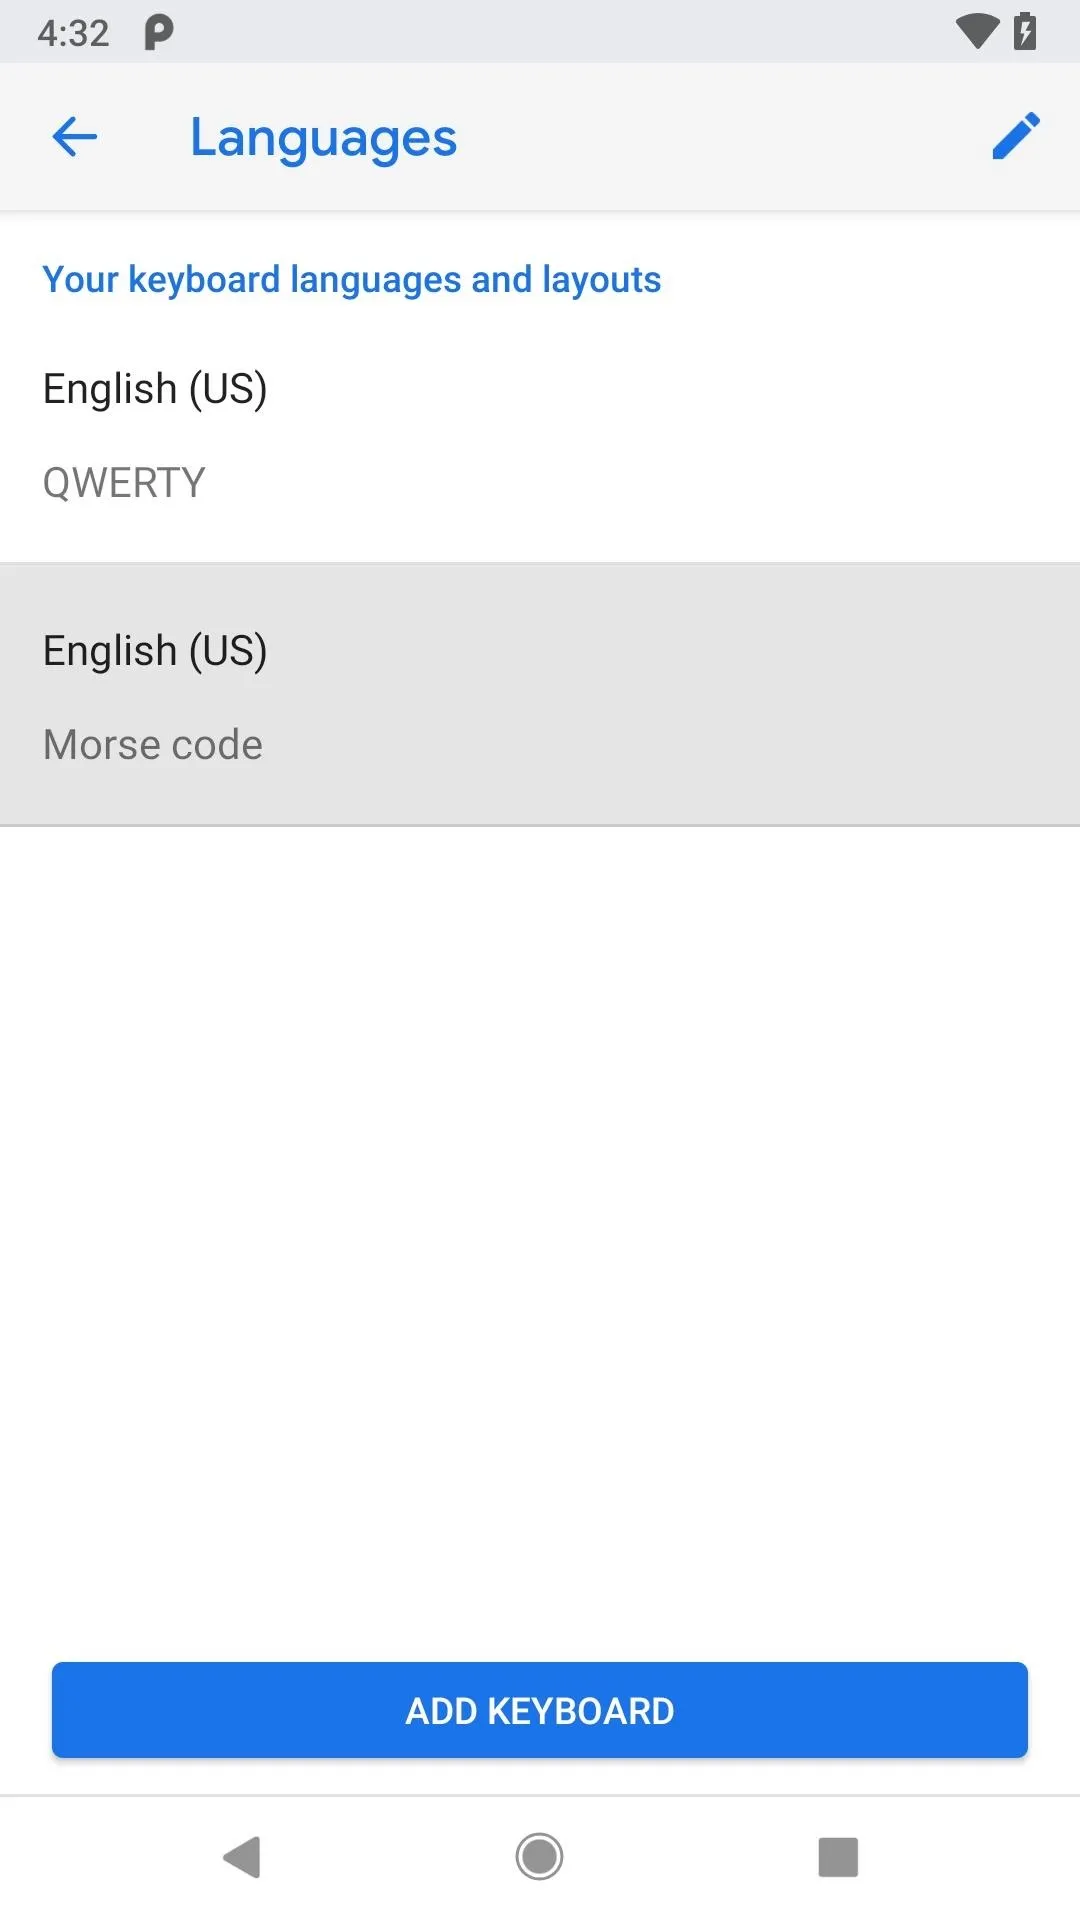
If you're an Android user, and you want to make any adjustments to how the Morse code keyboard works, you can tap-and-hold on either the globe icon or space bar in Gboard, then select "Language settings," and tap on "Morse code." You can also get there using the instructions from Step 2 above.


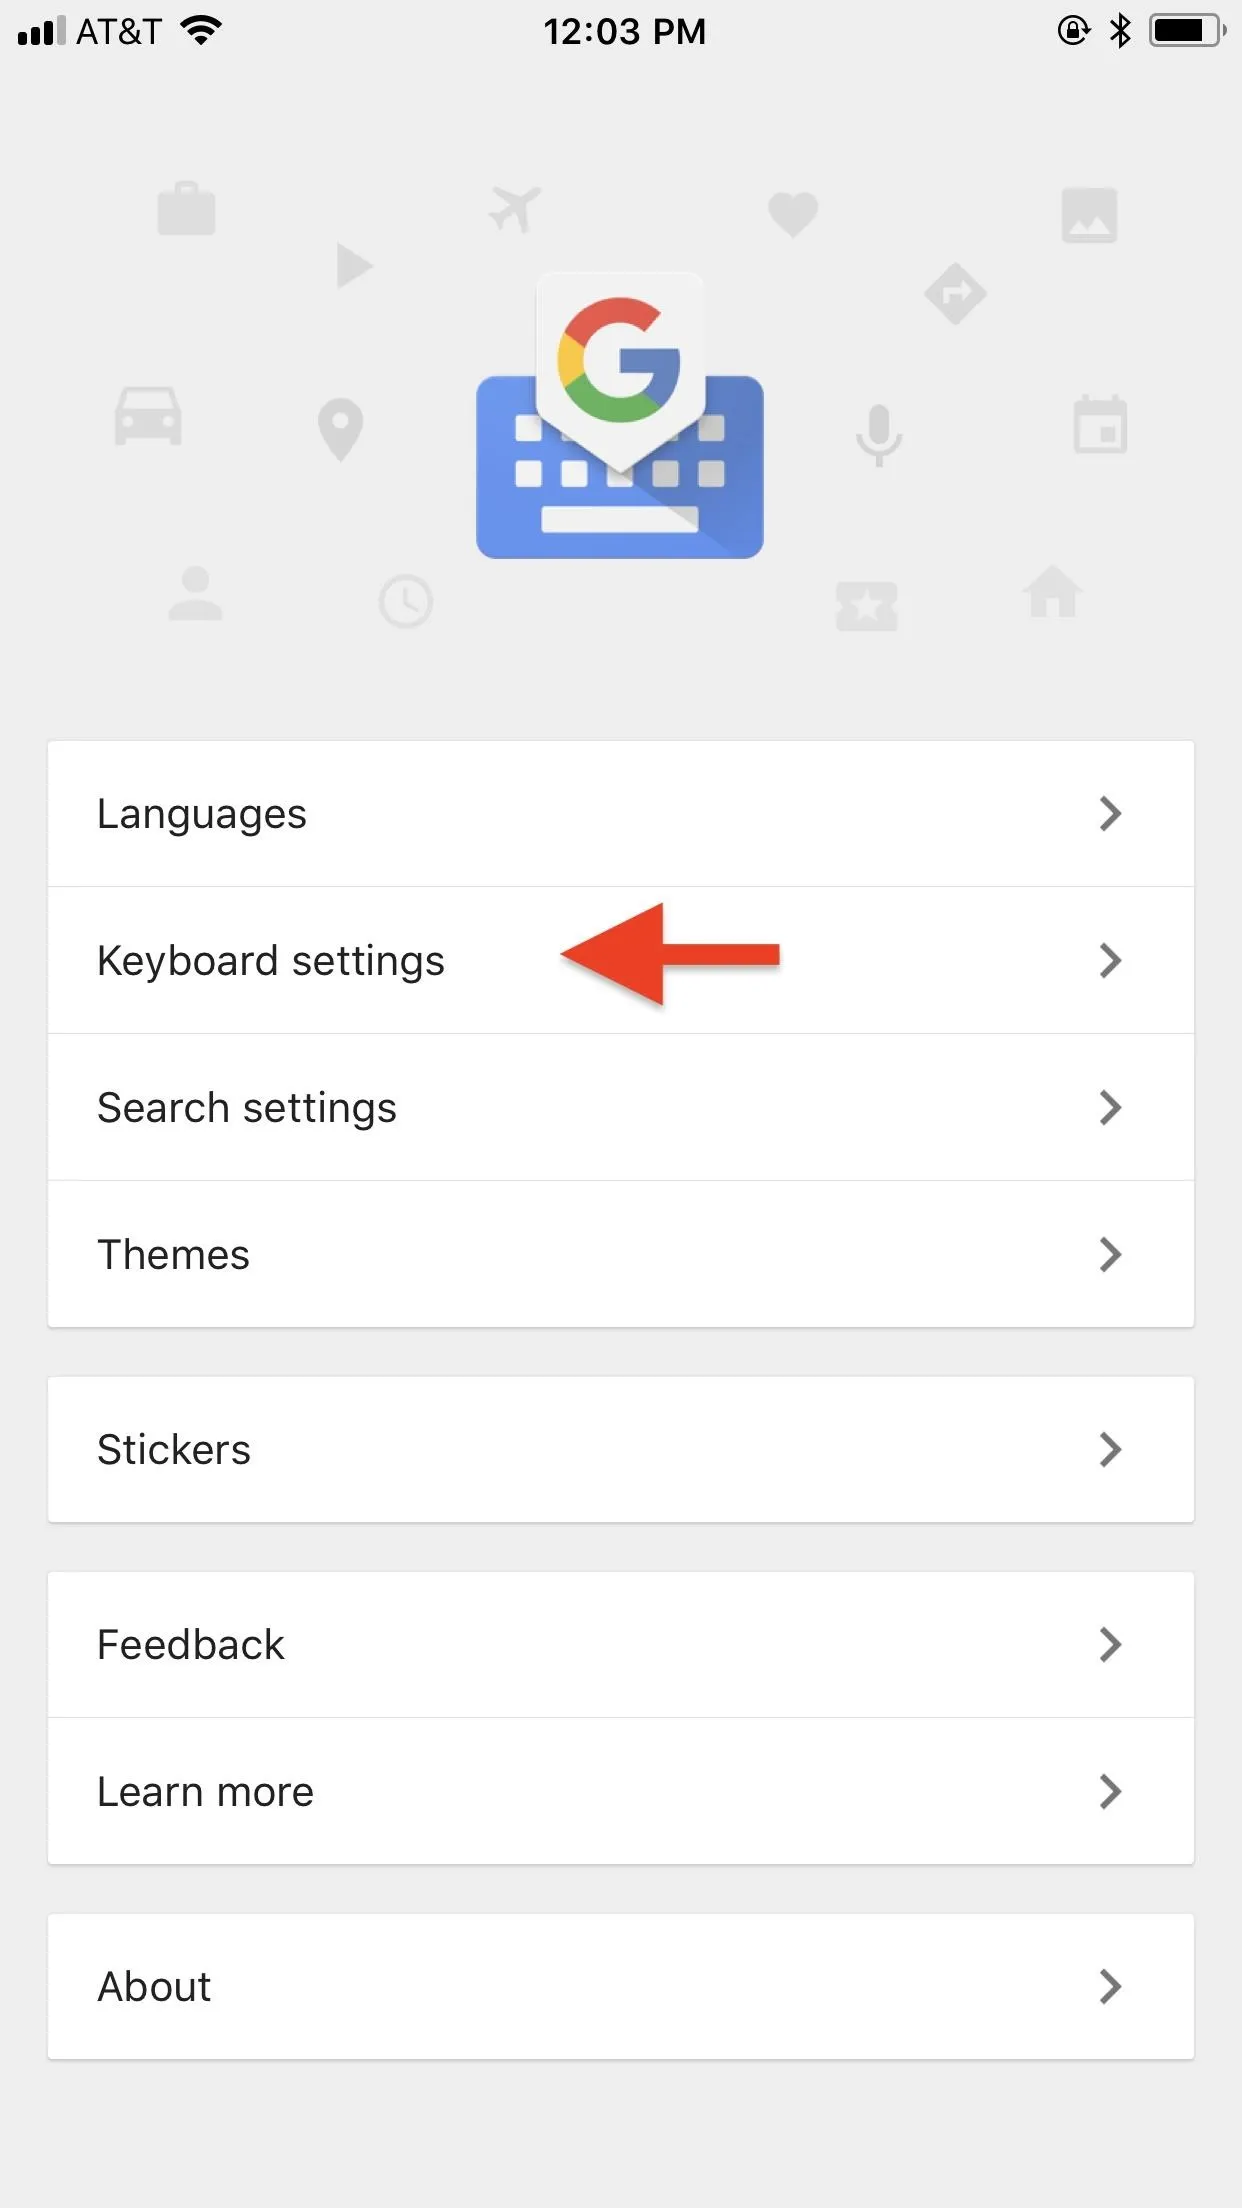
For iPhone users, to make adjustments to how the Morse code keyboard works, tap-and-hold on the globe icon, select "Settings," then "Keyboard settings." The options for Morse code will be after all the regular keyboard options. You can also get to these settings simply by opening the Gboard app and tapping "Keyboard settings."


Sound on Keypress (Or Morse Accessibility Tones)
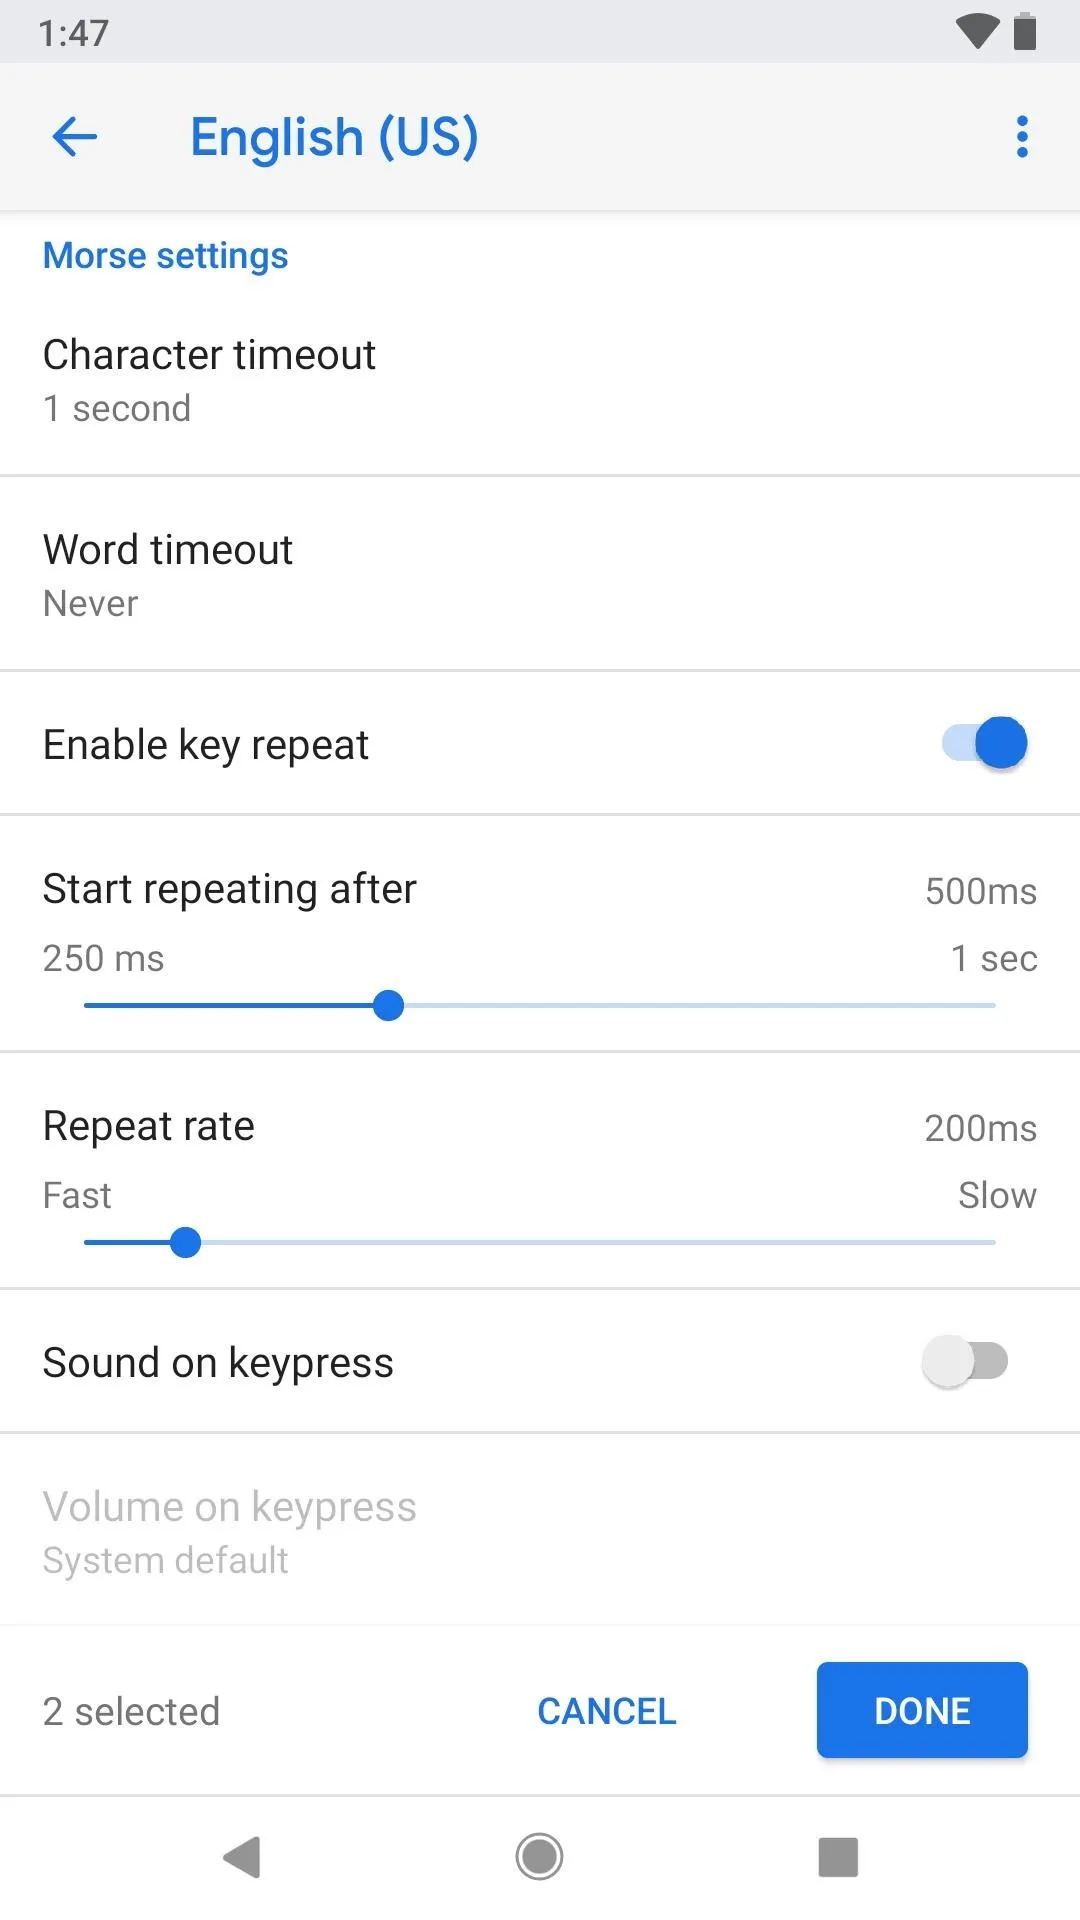
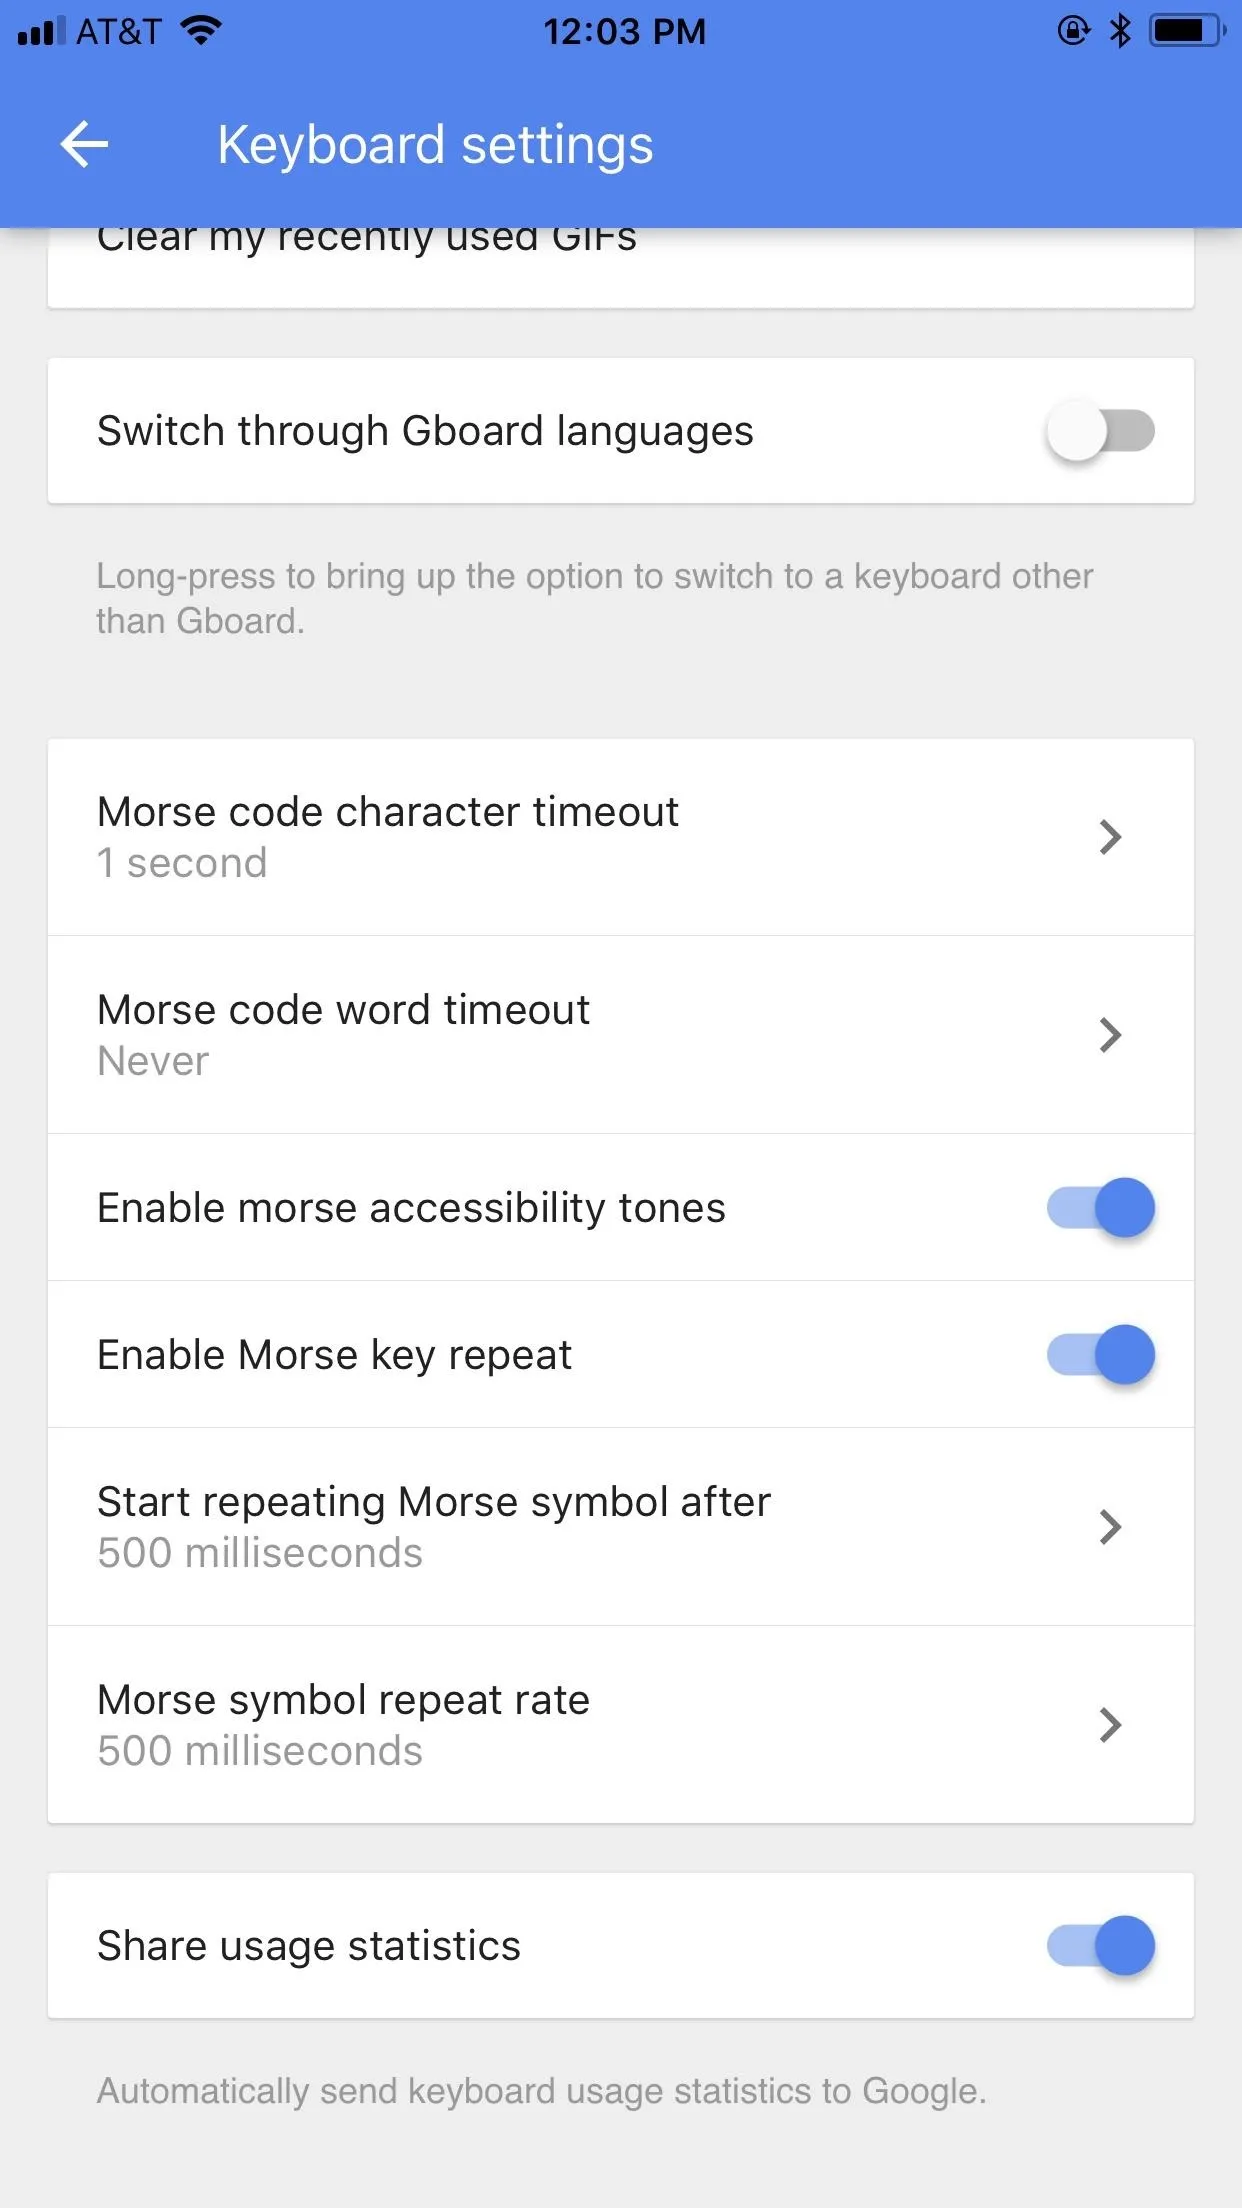
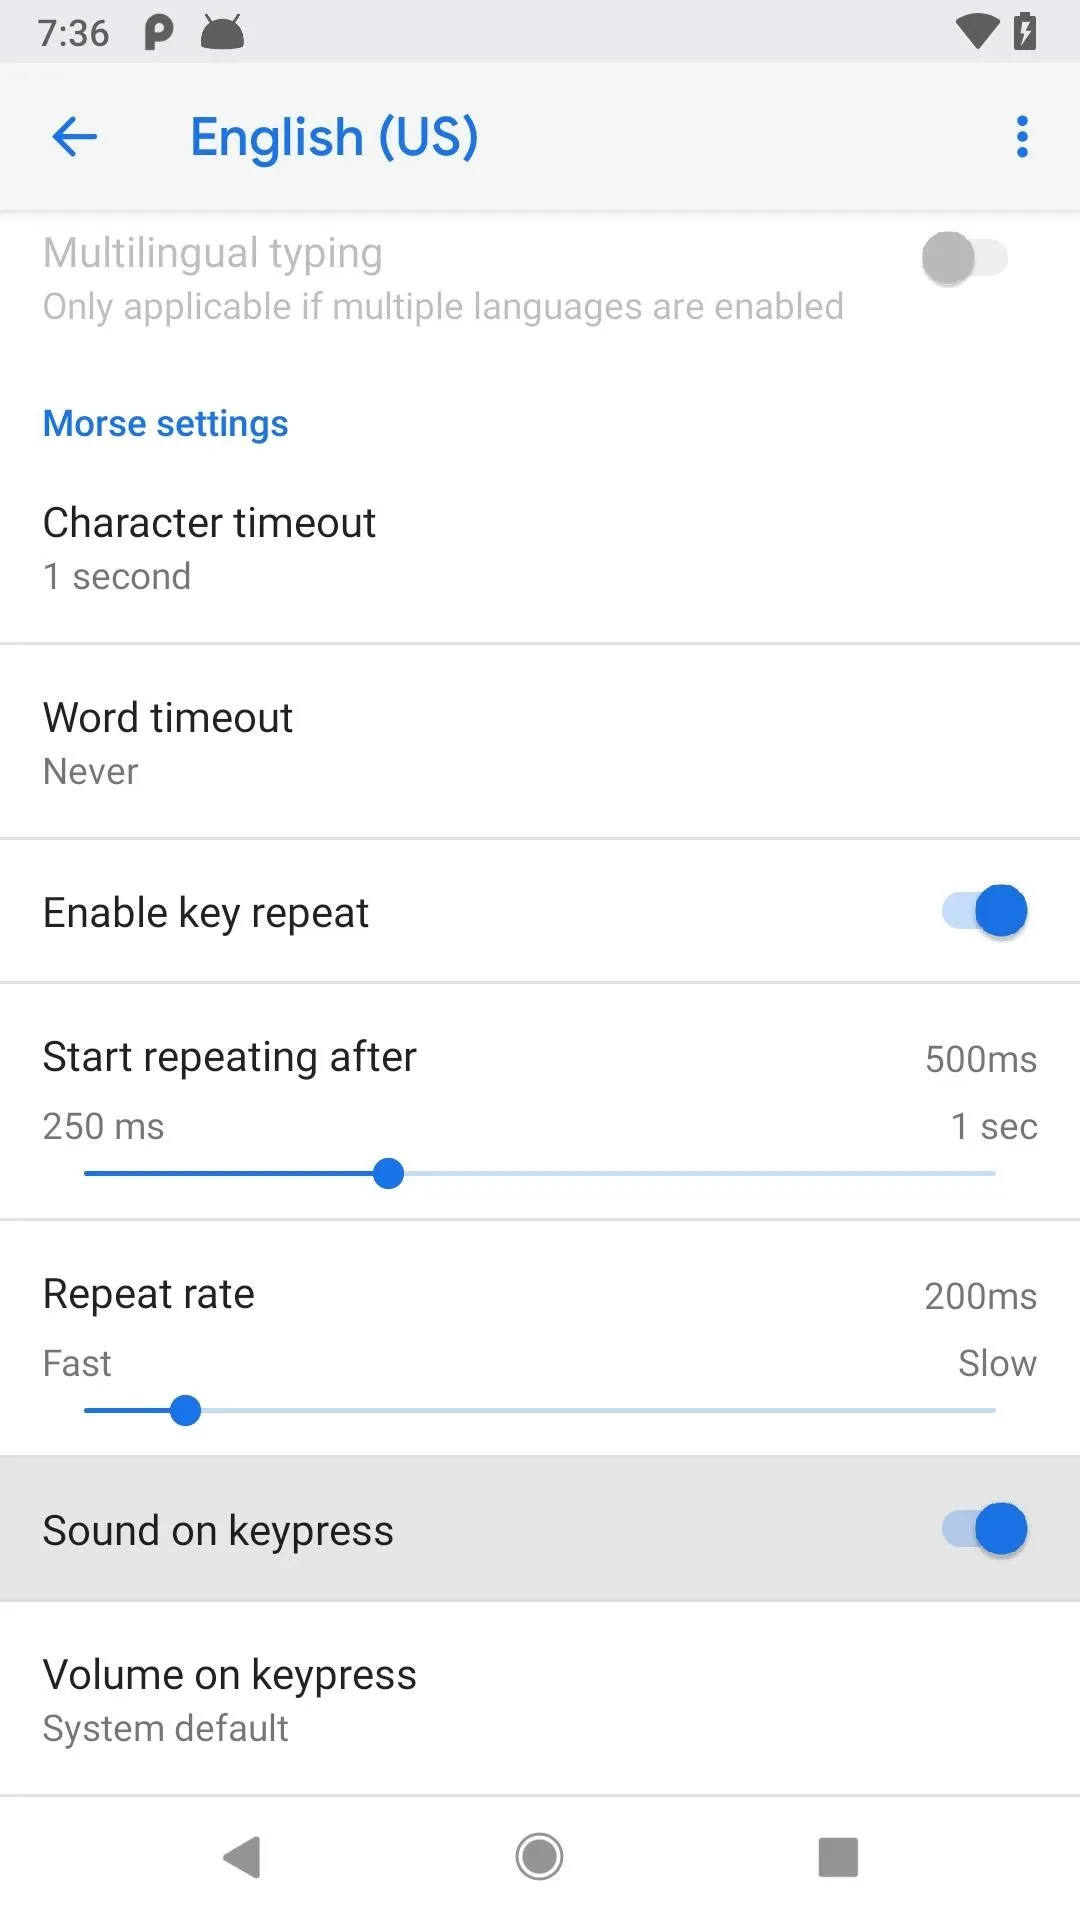
There are many things you can adjust in these settings. First, if the toggle is on for "Sound on keypress" (Android) or "Enable morse accessibility tones" (iOS), you'll hear sound feedback whenever you tap on a dash or dot. If you're new to Morse code, this is a great way to learn how to interpret Morse code tones into words in your head.
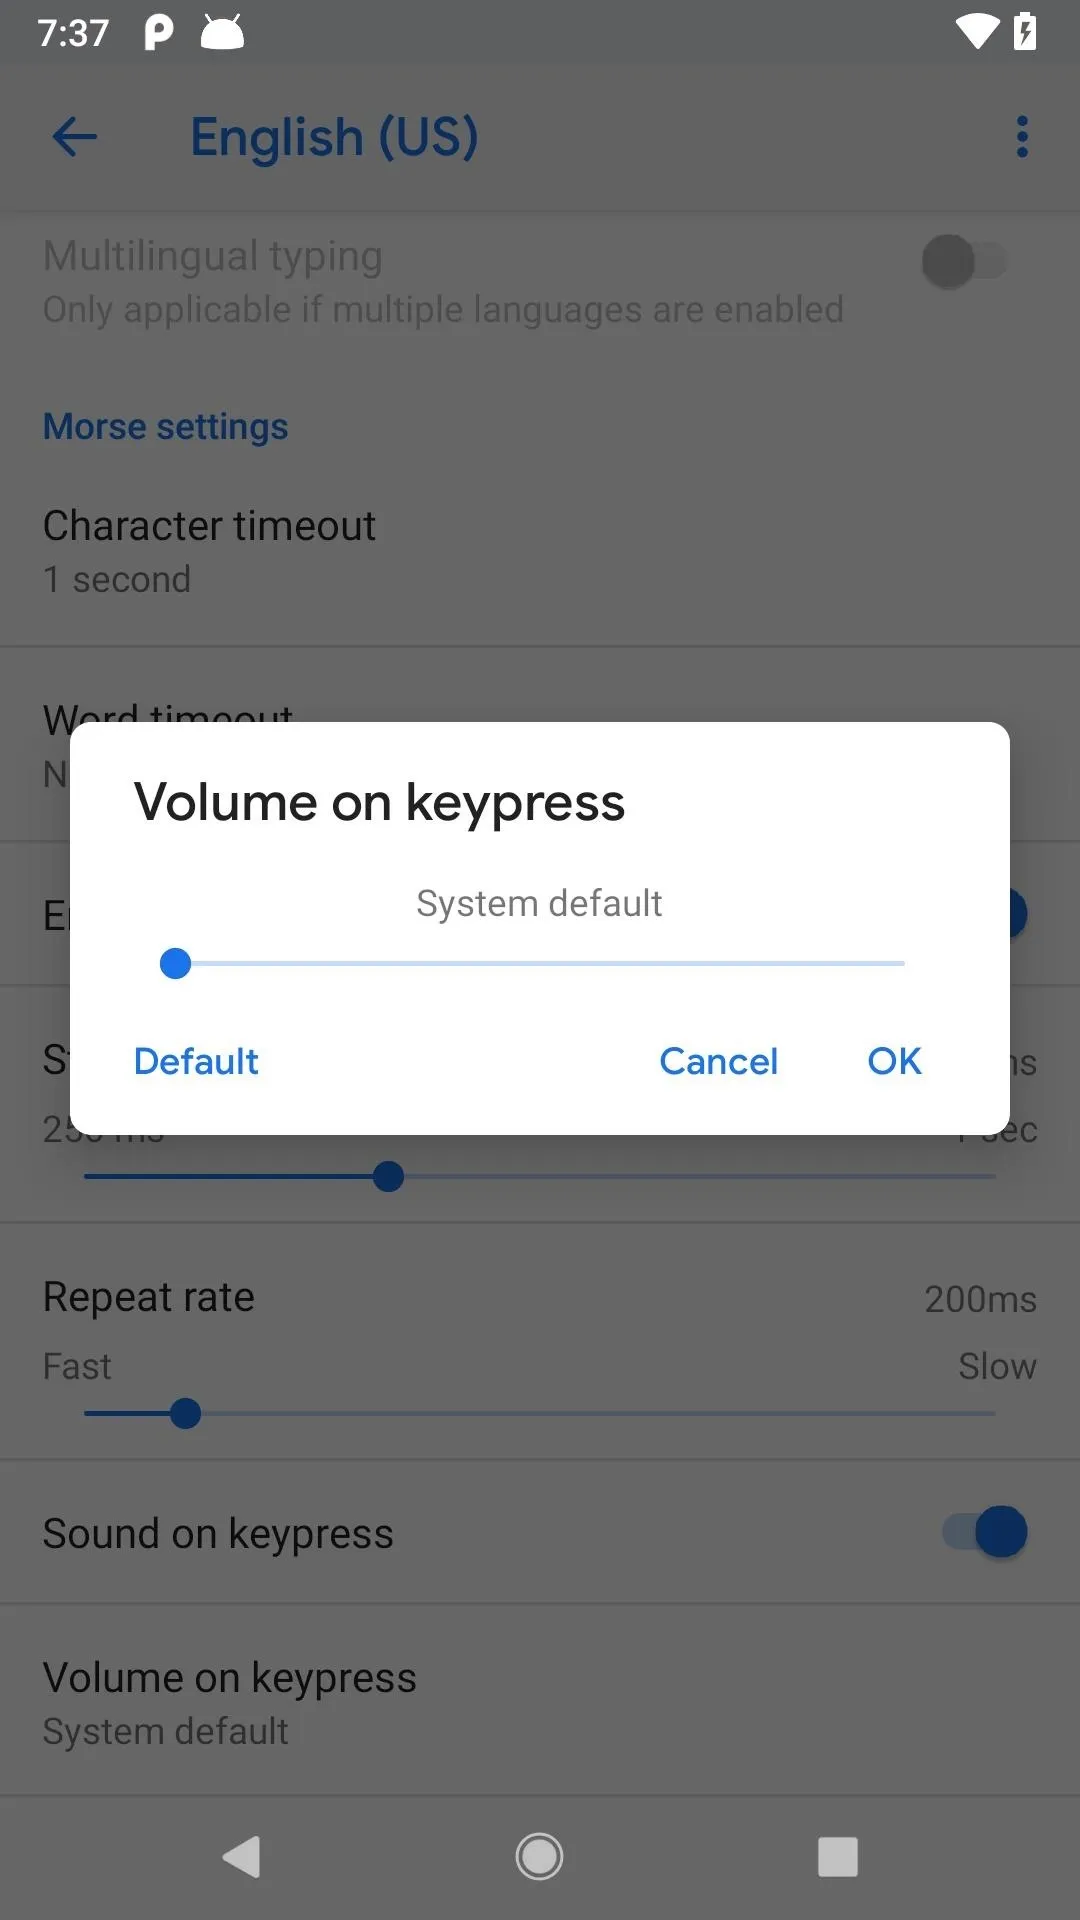
On Android, you can also tap "Volume on keypress" to adjust how loud tones are.


Character Timeout
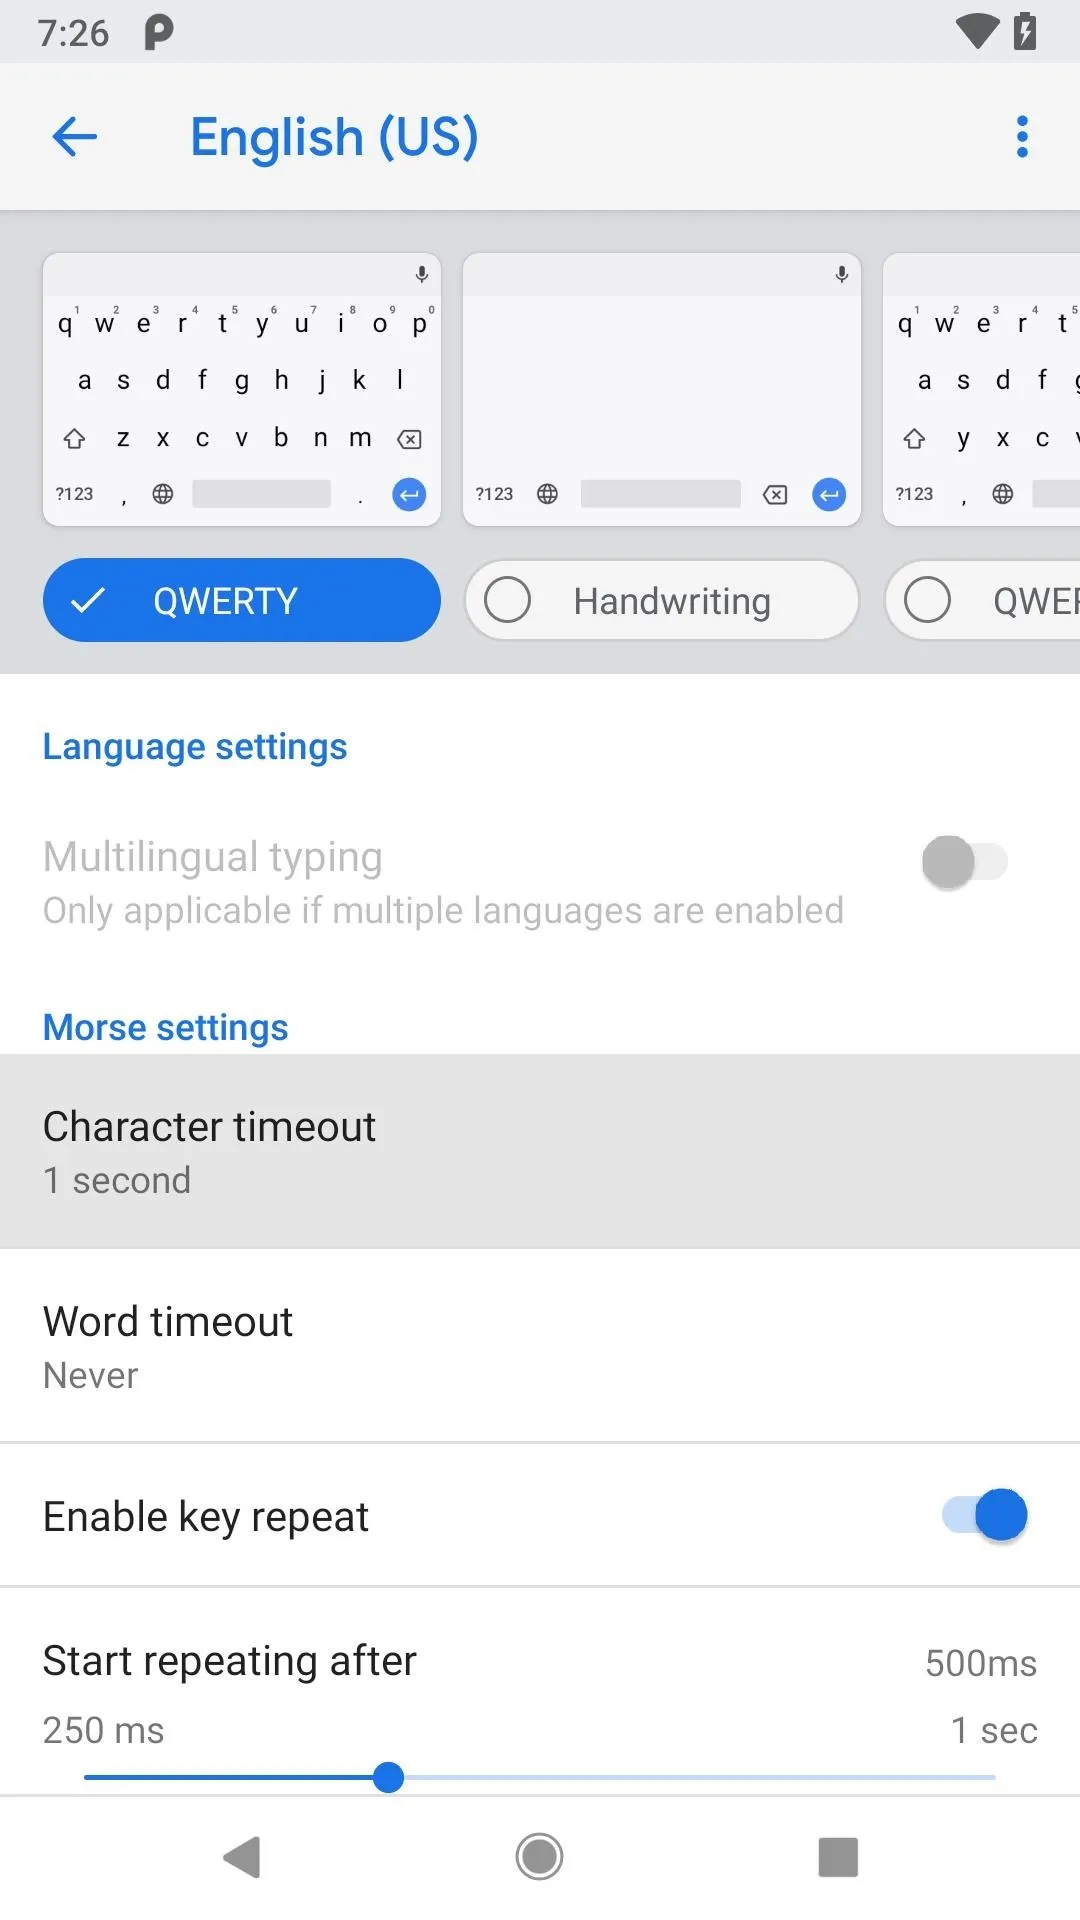
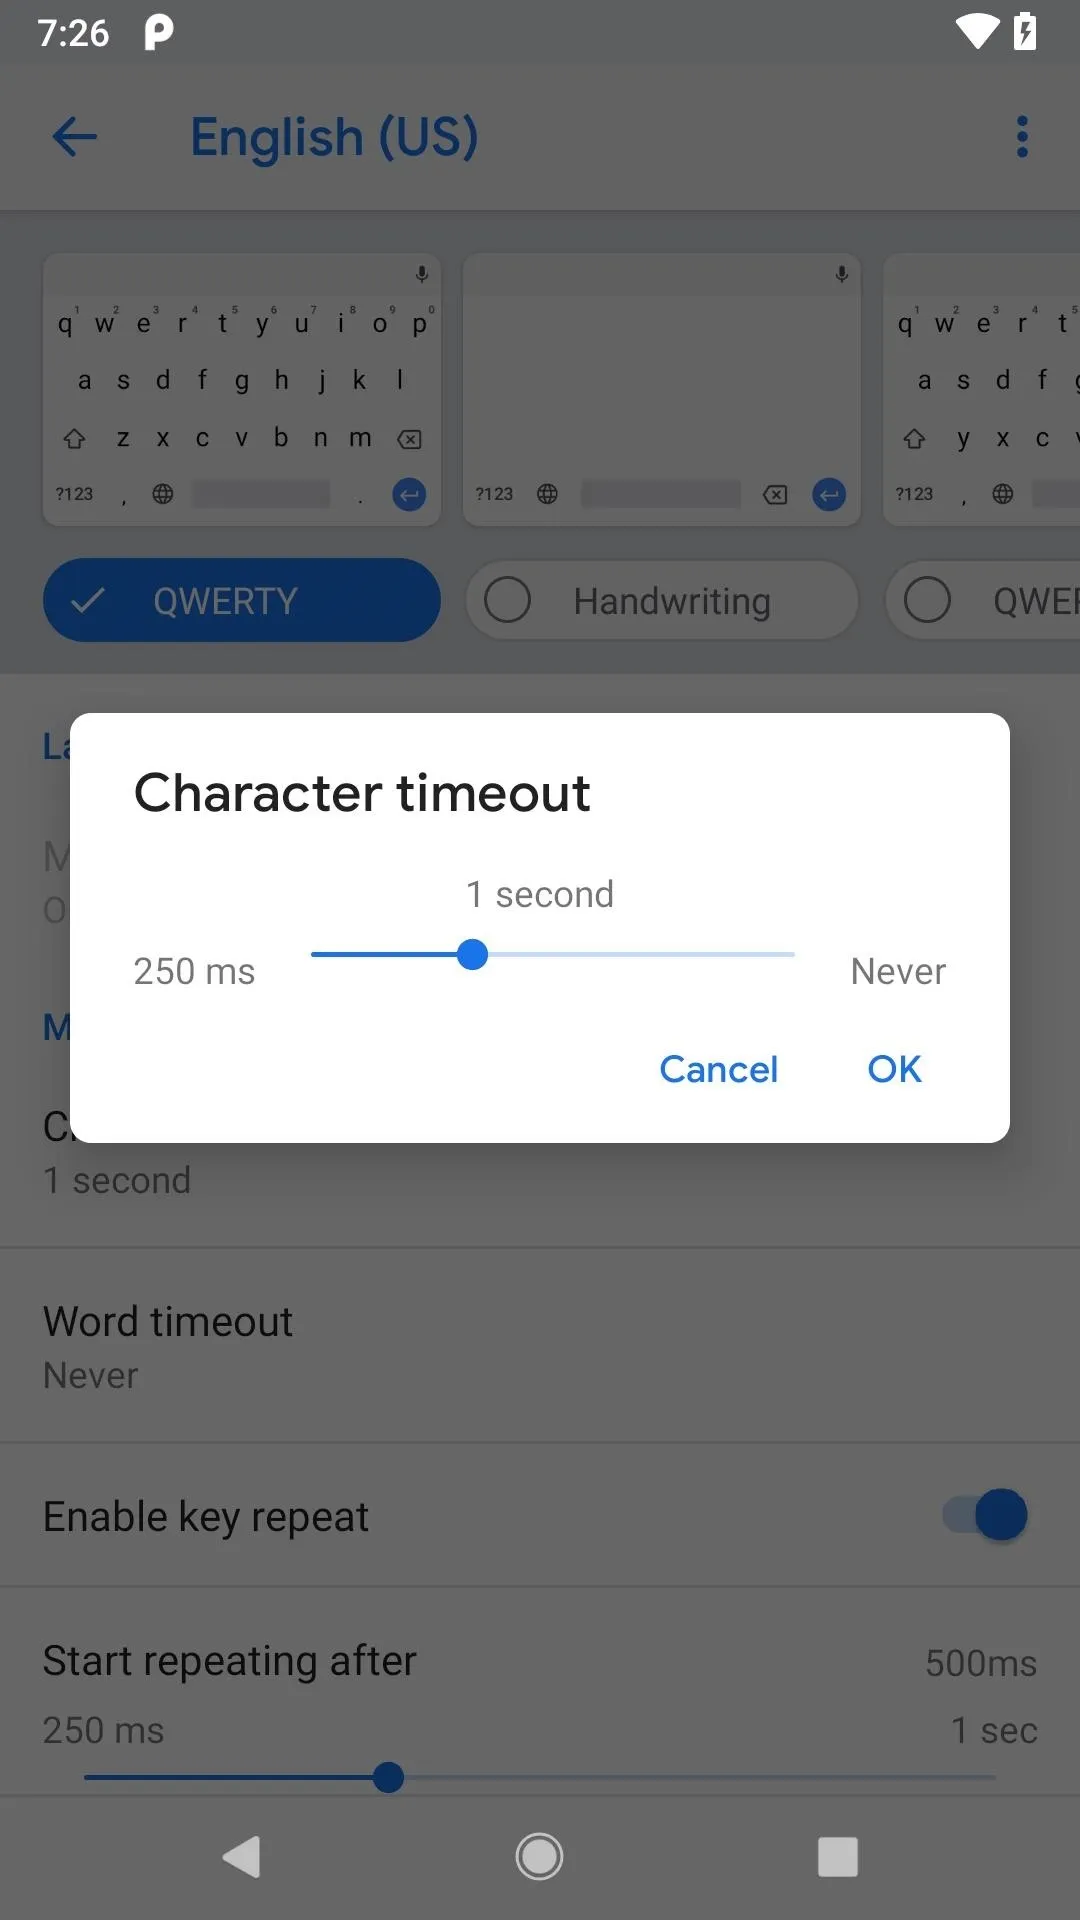
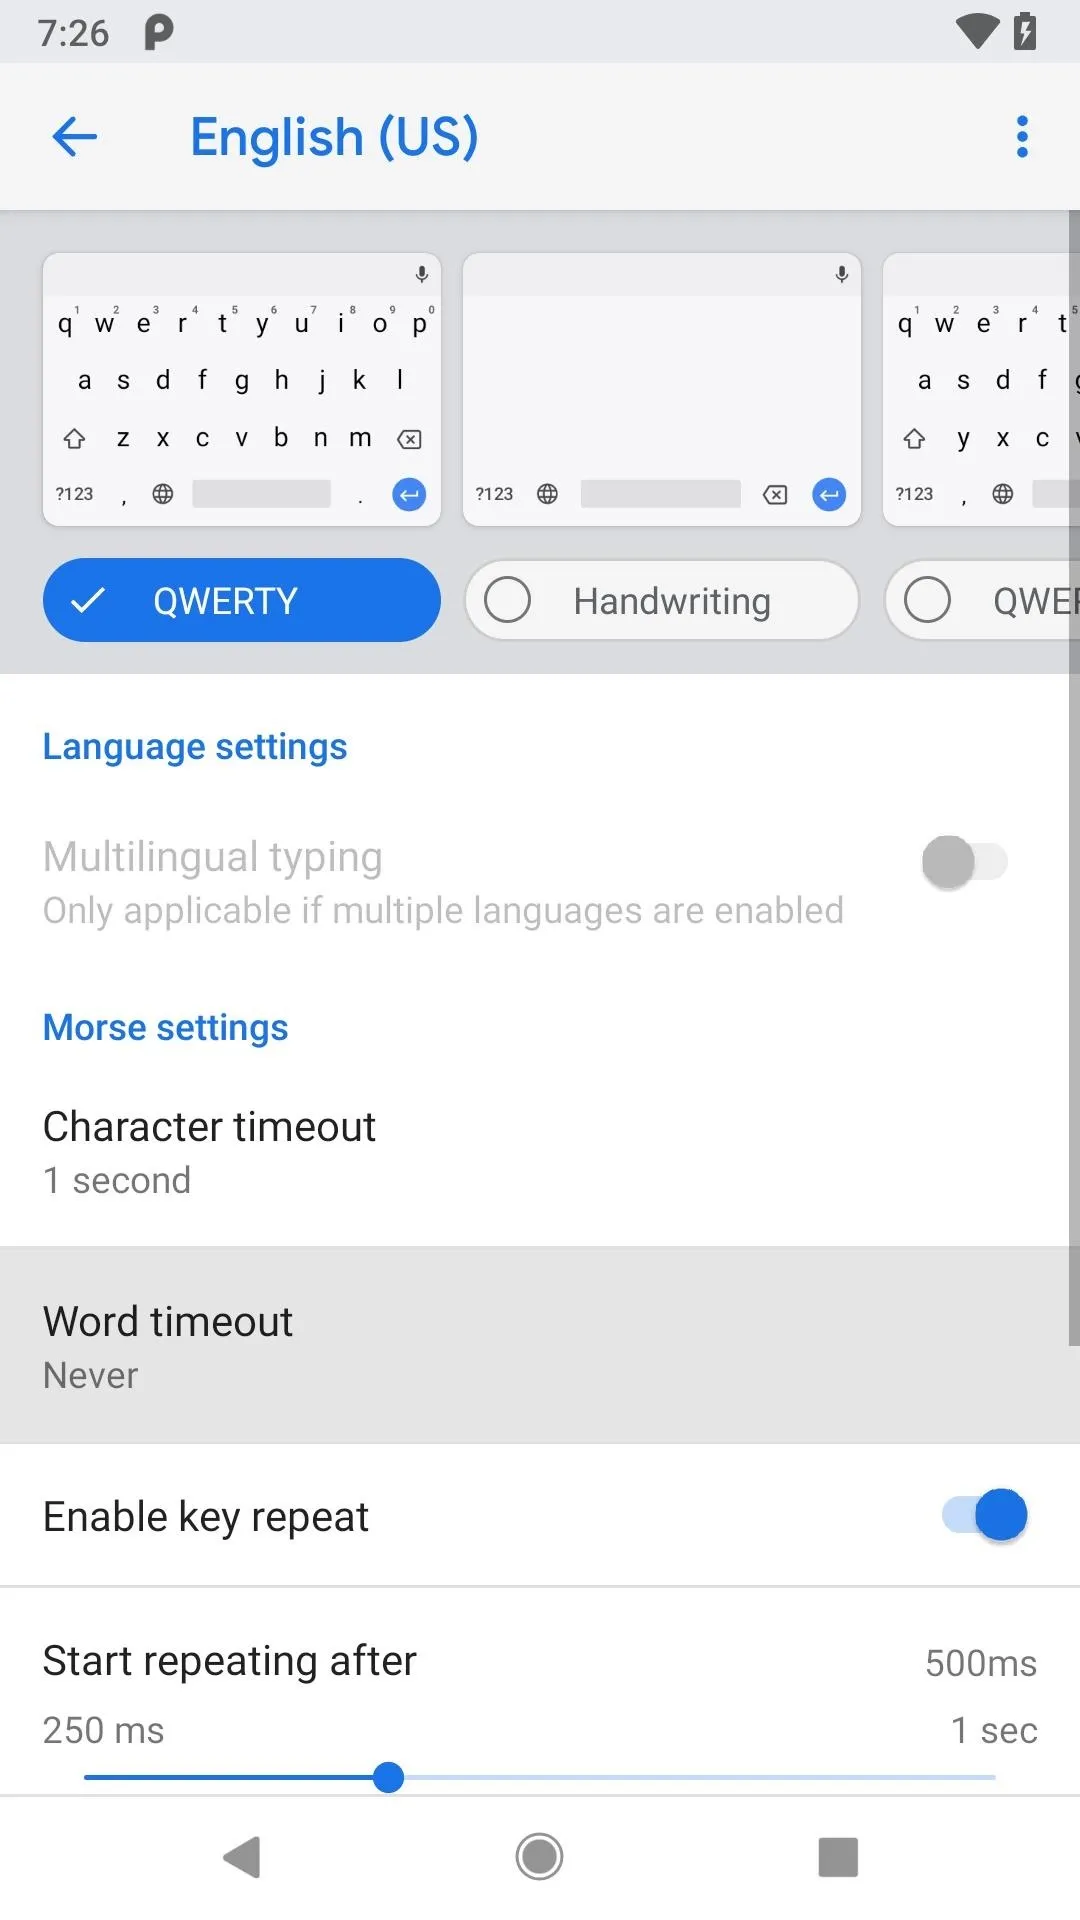
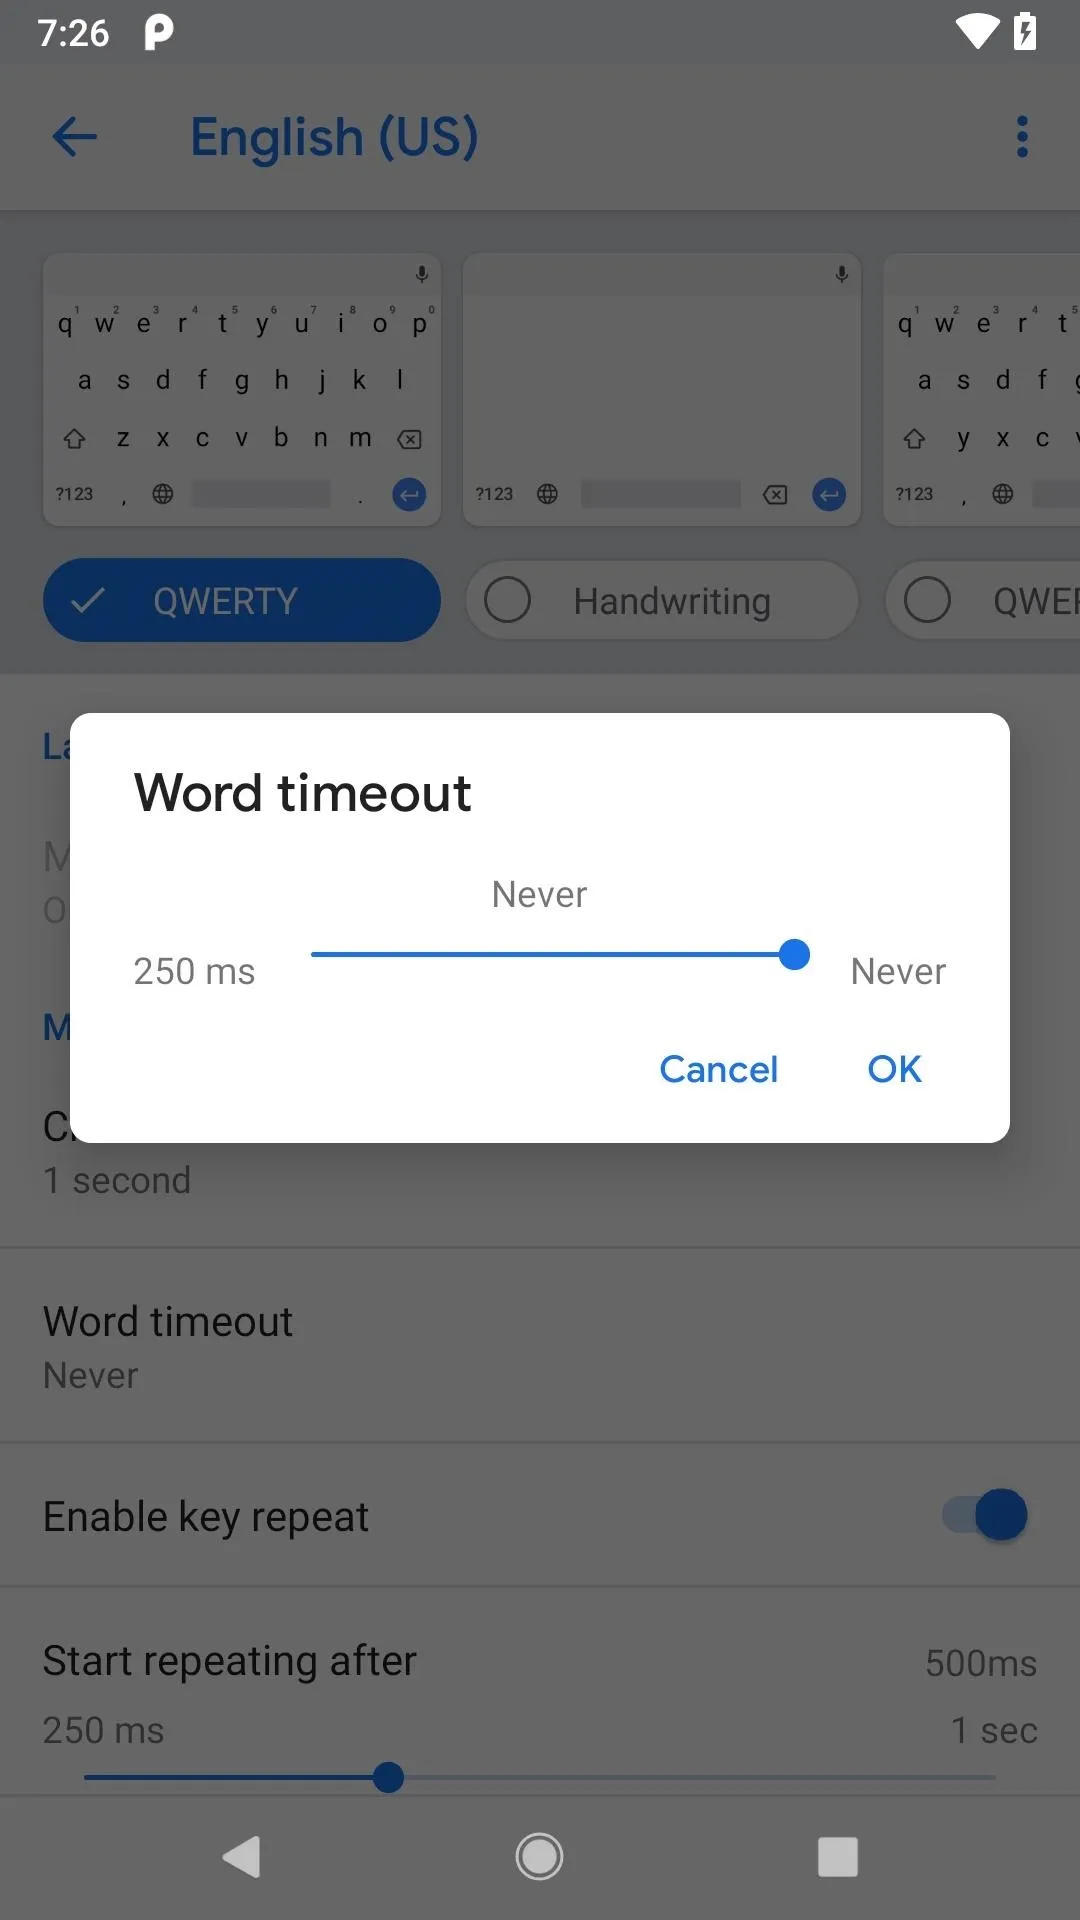
As for the other options, there's a "Character timeout" (Android) or "Morse code character timeout" (iOS) option which controls how long Gboard will wait before it turns a sequence of dots and dashes into a letter, number, or symbol. It's set to 1 second by default, but you can change it to anything in between 250 milliseconds and "Never."
If you're proficient with Morse code, a short time would be better, but if you're just learning, feel free to up it a bit to take in account all your learning pauses. If you set it to "Never," you'll have to hit the space bar or tap the Morse code word to turn the sequence into a character.


Word Timeout
By default, "Word timeout" (Android) or "Morse code word timeout" (iOS) is not turned on (it's set to "Never"), but if you decide to enable it, you can select between 250 milliseconds and "5 seconds." With a timeout set, Gboard will wait that long before it turns a series of letters into a word, followed by an automatic space. If you're not fast at typing Morse code out, you may want to keep this turned off or you'll end up with half words all over the place.
Note: With word timeout, Gboard autocorrects, suggests, and predicts words as usual. For example, if you enter "nam" and Gboard suggests "name," then the word "name" goes to the text field after the word timeout (as if you entered "nam" and then space bar).


Key Repeat
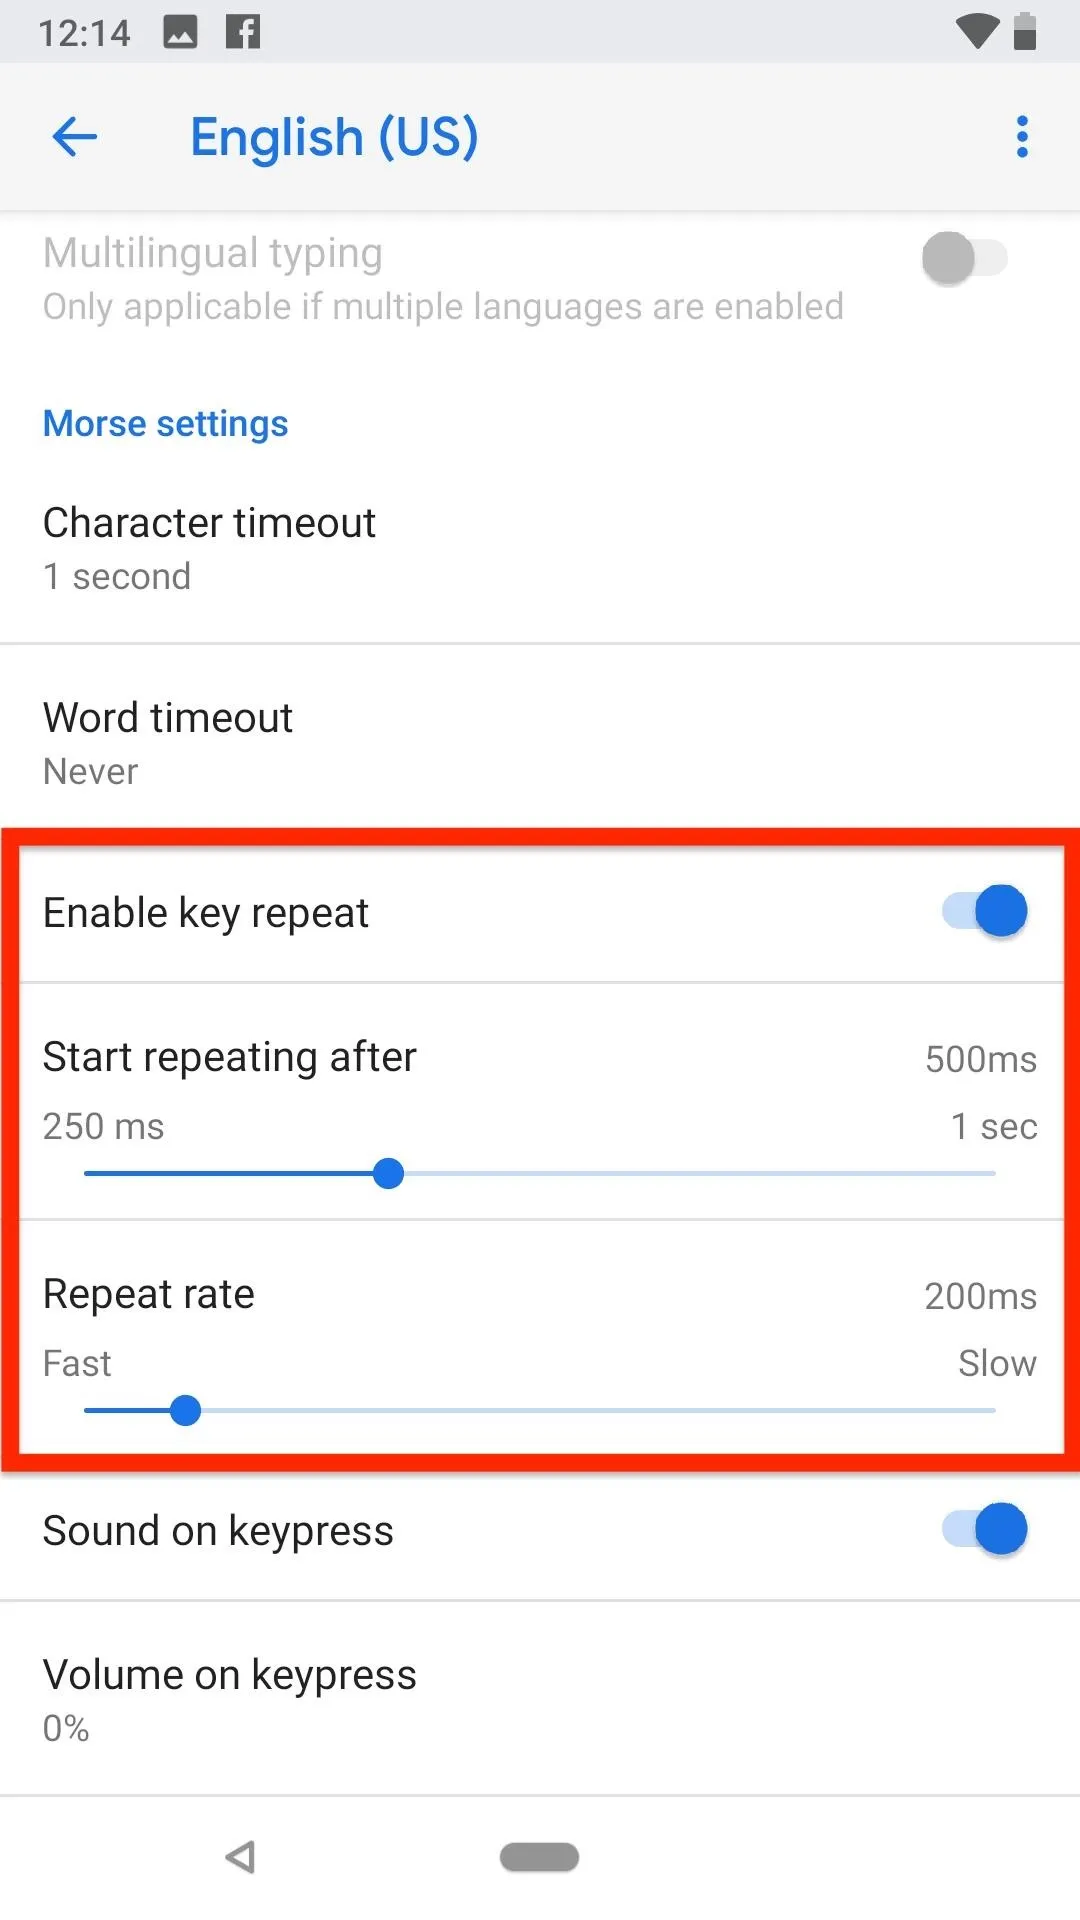
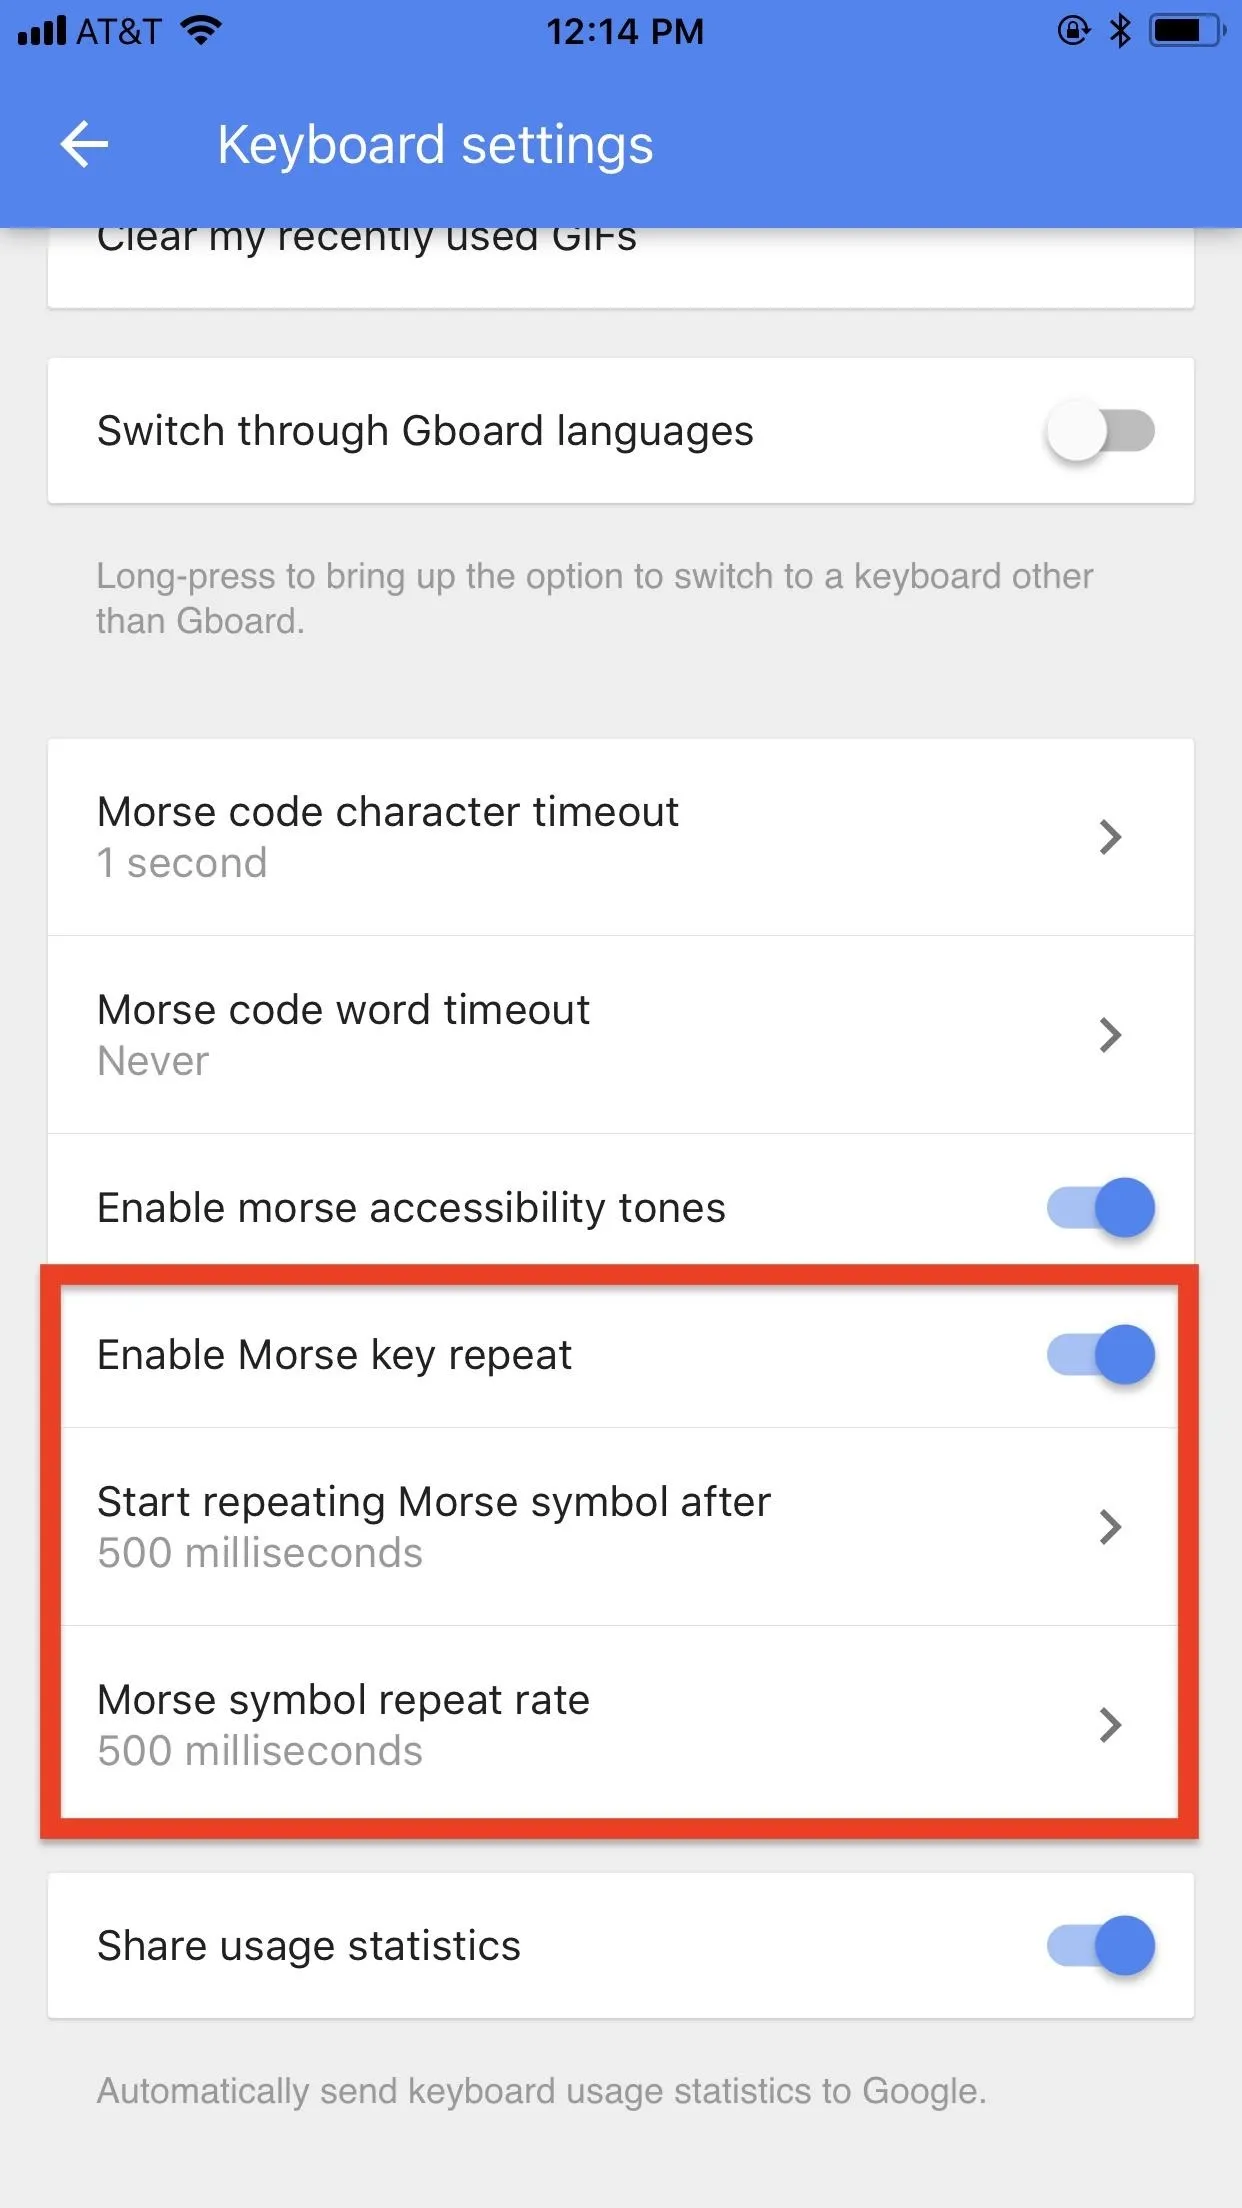
By default, "Enable key repeat" (Android) or "Enable Morse key repeat" (iOS) is toggled on, and what this does is let you hold down the dot or dash key to repeat the keystroke instead of tapping multiple times. It's automatically set to "Start repeating after" one second on Android and 500 milliseconds on iOS, and the "Repeat rate" is set to 200 milliseconds on Android and 500 milliseconds on iOS, but you can adjust each of these numbers or turn the feature off completely.


More About Gboard's New Morse Code Keyboard
If you want to learn more about this new More code keyboard, head to its Experiments with Google page. You'll see information about Tania, as well as a PDF that you can download and print out of the pictographs that are shown in the trainer in Step 5 above.
Developer Tania Finlayson found her voice through Morse code. Now she's partnering with Google to bring Morse code to Gboard, so others can try it for accessible communication.
Morse code for Gboard includes settings that allow users to customize the keyboard to their unique usage needs. It works in tandem with Android Accessibility features like Switch Access and Point Scan.
This provides access to Gboard's AI driven predictions and suggestions, as well as an entry point to AI-powered products, like the Google Assistant.
Overall, I think this is a pretty amazing project. In just a few minutes, I was able to start dotting and dashing words out like a pro, something I always thought was too complicated to even try. And this just adds on to all the cool things Gboard could already do before this.
- Follow Gadget Hacks on Facebook, Twitter, YouTube, and Flipboard
- Follow WonderHowTo on Facebook, Twitter, Pinterest, and Flipboard
Cover photo, screenshots, and GIFs by Justin Meyers/Gadget Hacks




Comments
Be the first, drop a comment!