


TikTok is all the rage right now, and its green screen effect is one of the more popular augmented reality tricks creators use to boost their viewership numbers. Now Snapchat has leveled the playing field by making it easier to access its own green screen effect.
Green or blue screens are typically used during filming when you want to replace those colors with something else, like another video or still image. While any color can work as the background, bright green or blue colors are the norm because they don't appear in most skin tones. As long as the subject you want to cut out of the footage is a different color than the background, any color could work.
- Don't Miss: Replace Video Backgrounds with the Green Screen Chroma Key Tool in Enlight Videoleap for iPhone
Advanced machine learning technology removes the need for a specific color or narrow range of colors to be present to key out the subject from the background effectively. This is the case for Snapchat's green screen effect, so you don't need a physical green or blue background to "cut" yourself out and superimpose your image onto another video or still image in real time.
You'll get better results with a solid color or a narrow range of colors behind your selfie photo or video that's far from the color of your skin, hair, and clothing, but it's surprising how well green screen effects work without it. To try it out on your iPhone or Android phone, update Snapchat to the most recent version for the best experience, then pick an option below.
Use Director Mode
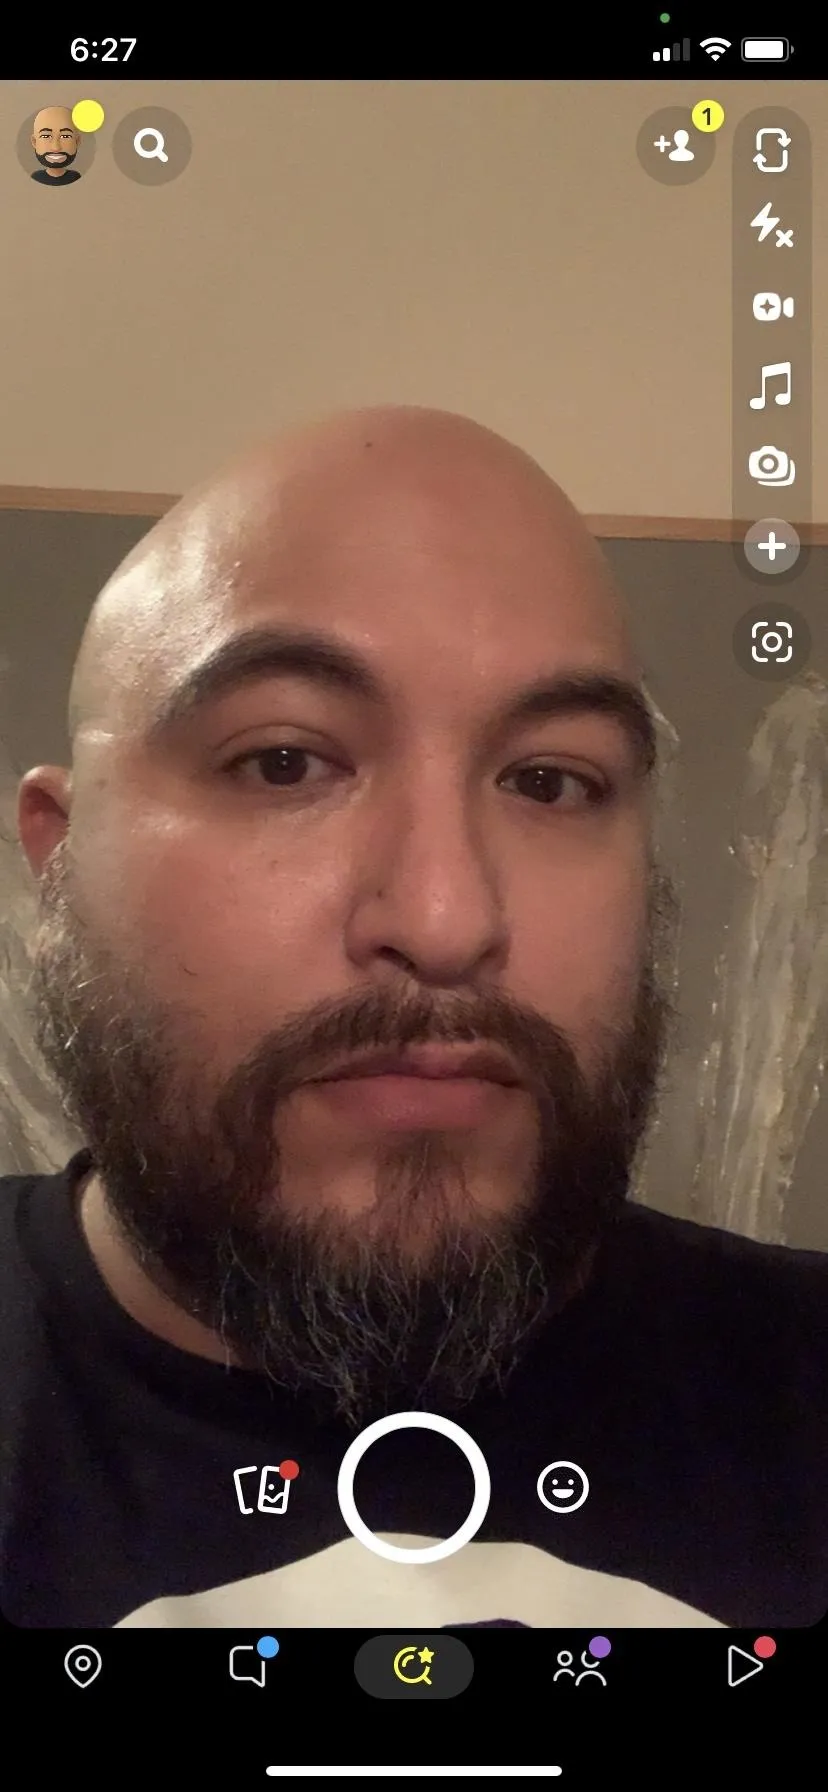
Snapchat released a new feature called Director Mode on Oct. 27, 2022, which includes a Green Screen effect right in the options list. It's available on iOS and is slowly rolling out to Android devices. If you're on Android and don't see it yet, skip to Option 2 below for another Snapchat green screen feature with even more control.
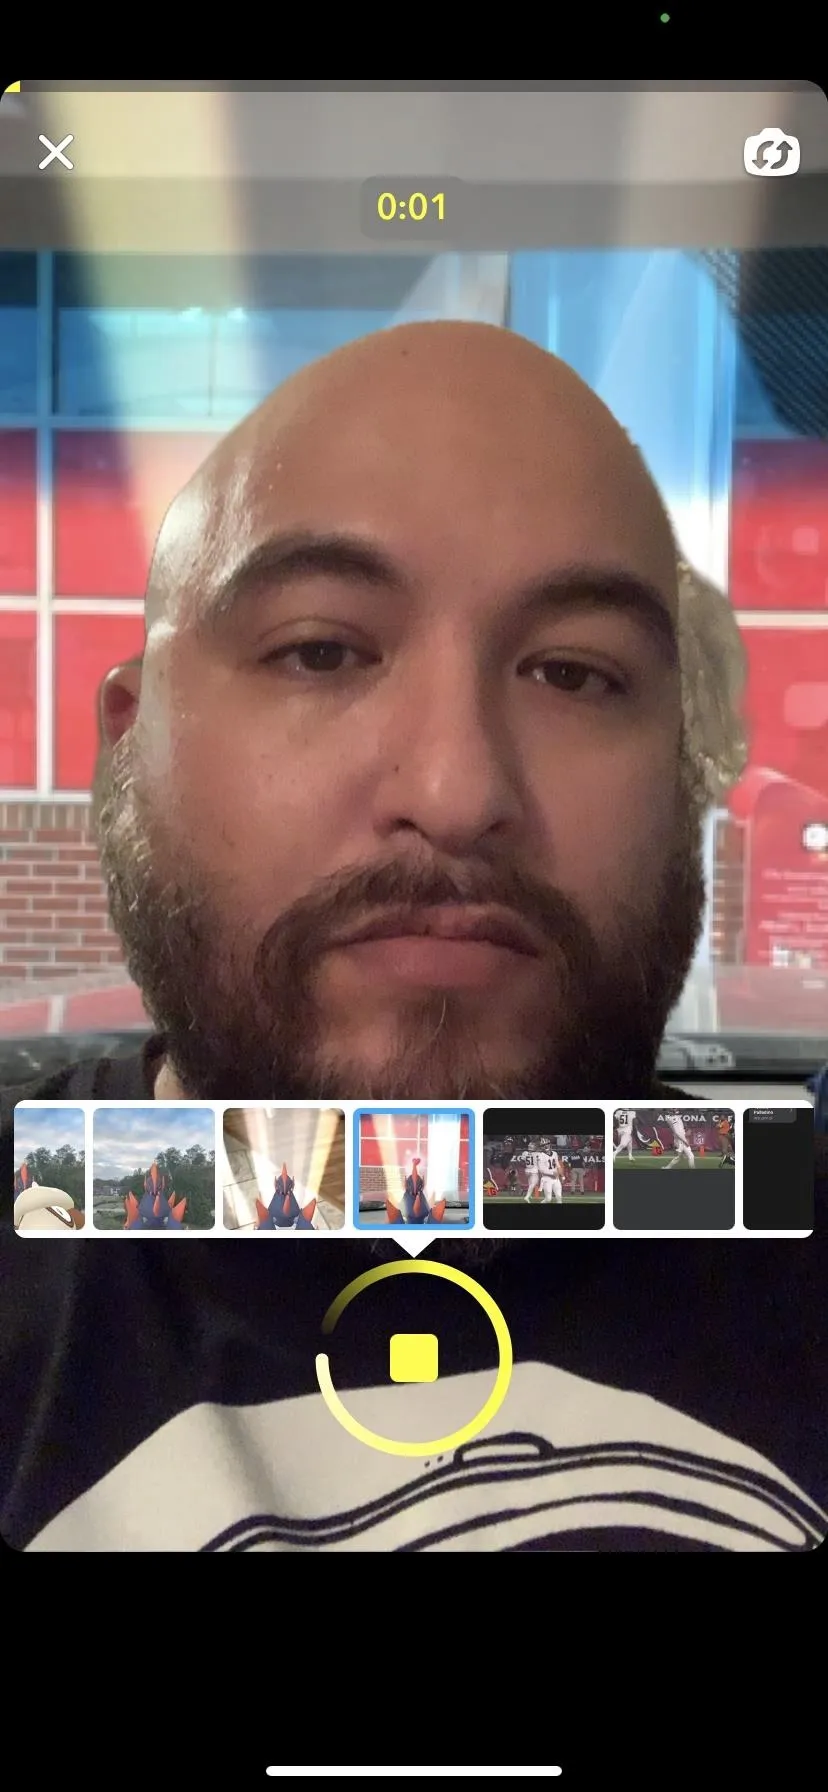
With the camera open, tap the icon of a video camera with a star (third from the top in the left screenshot below) from the toolbar to open Director Mode. Then, tap the Green Screen option from Director Mode's toolbar (fifth from the top in the right screenshot below).
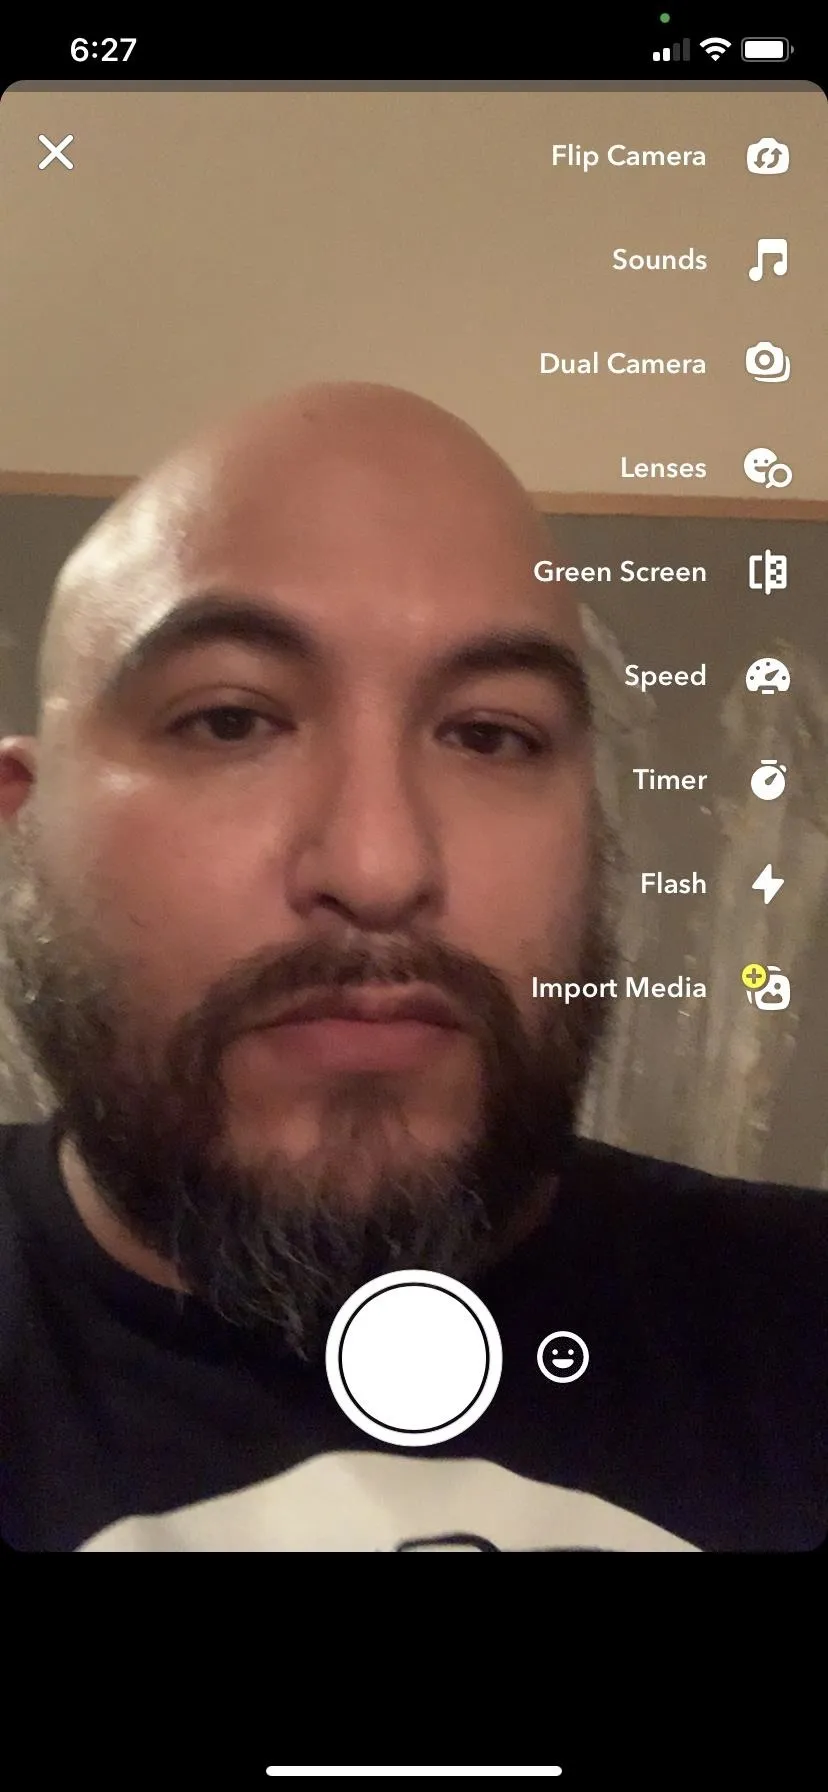
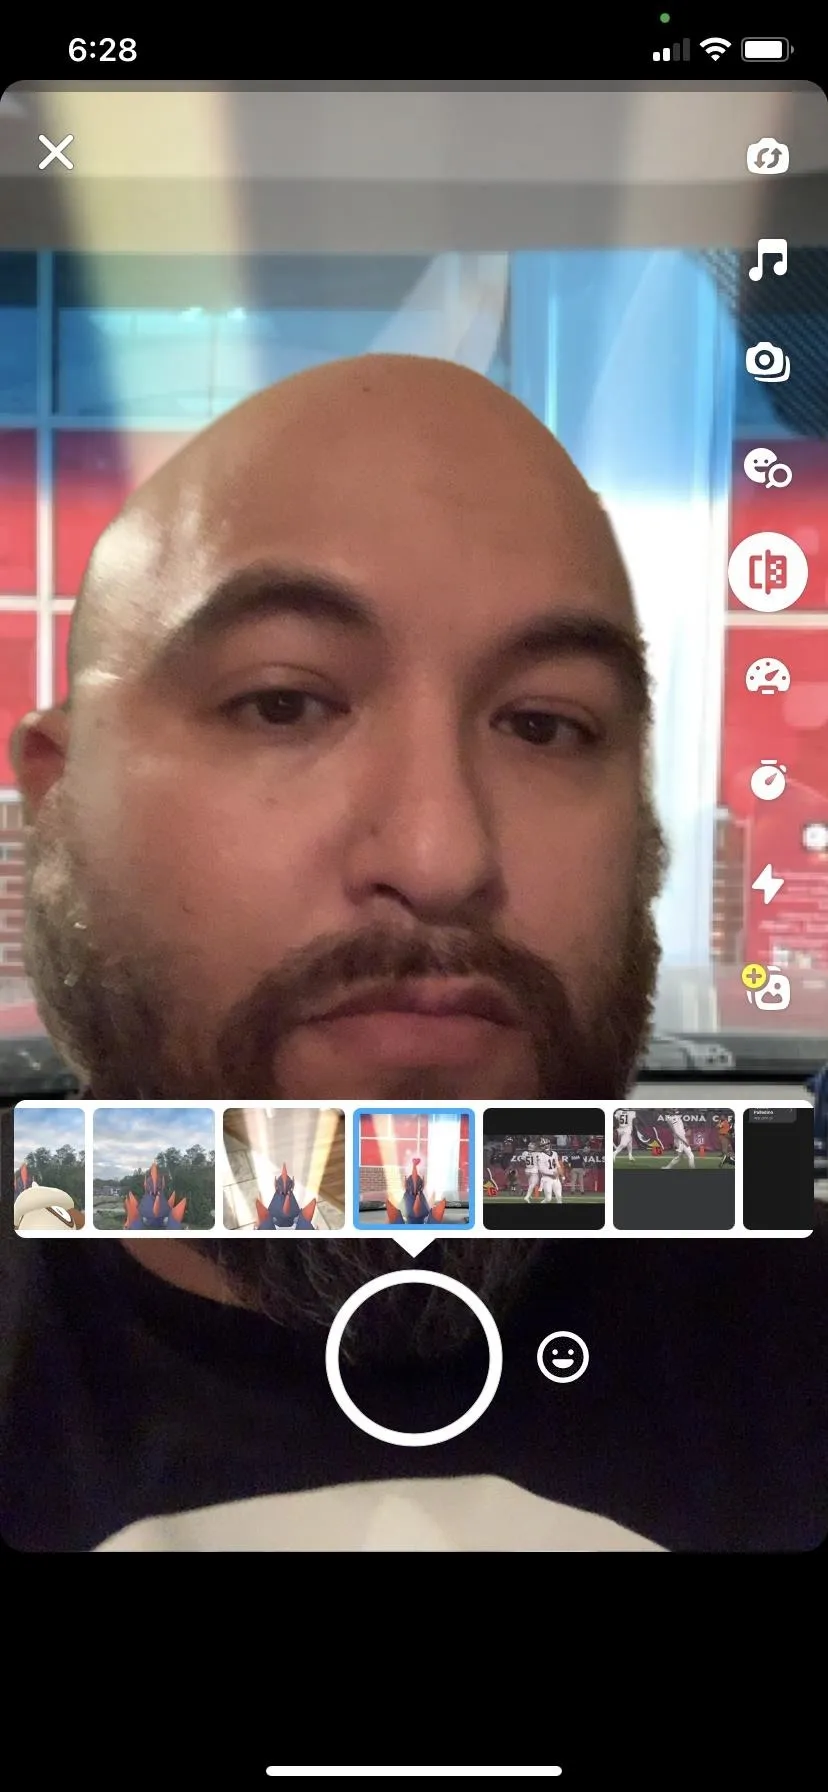
In Green Screen, you'll find a carousel of images and videos from your camera roll. Swipe to select the photo or video you want to use for the background, and your face will remain in the foreground.
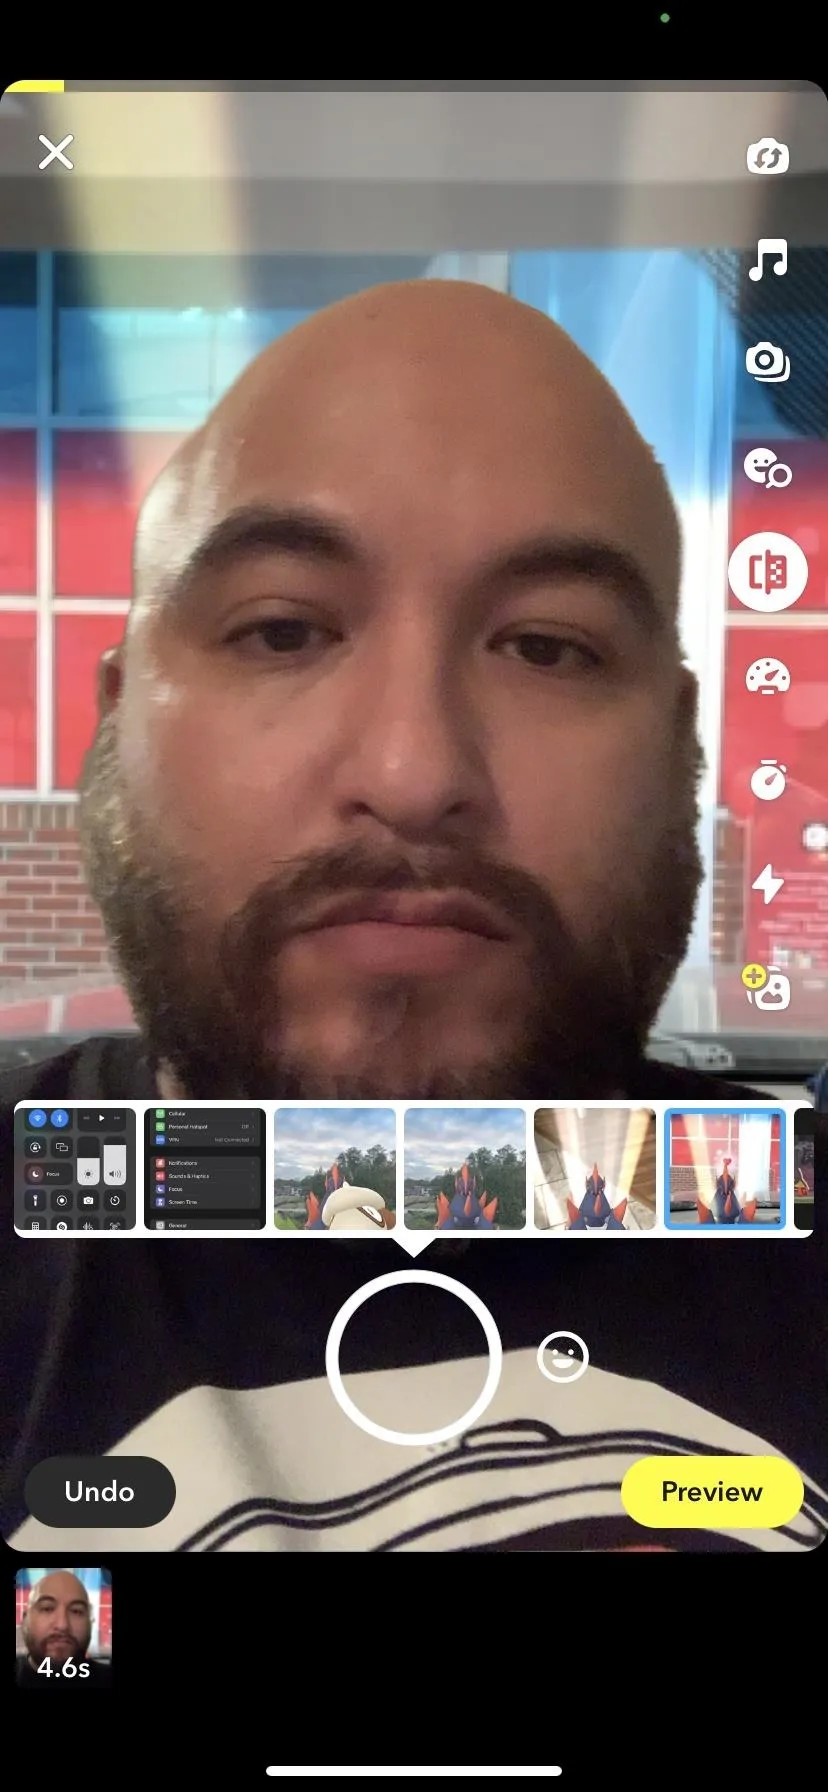
As opposed to the standard camera mode, the shutter button in Director Mode only shoots video. Tap the shutter button to begin recording, then tap it again to stop. Your clip will appear in the timeline below. And you can keep shooting and adding clips to the timeline until you're ready to edit it.
Green Screen Video and Photo Lens
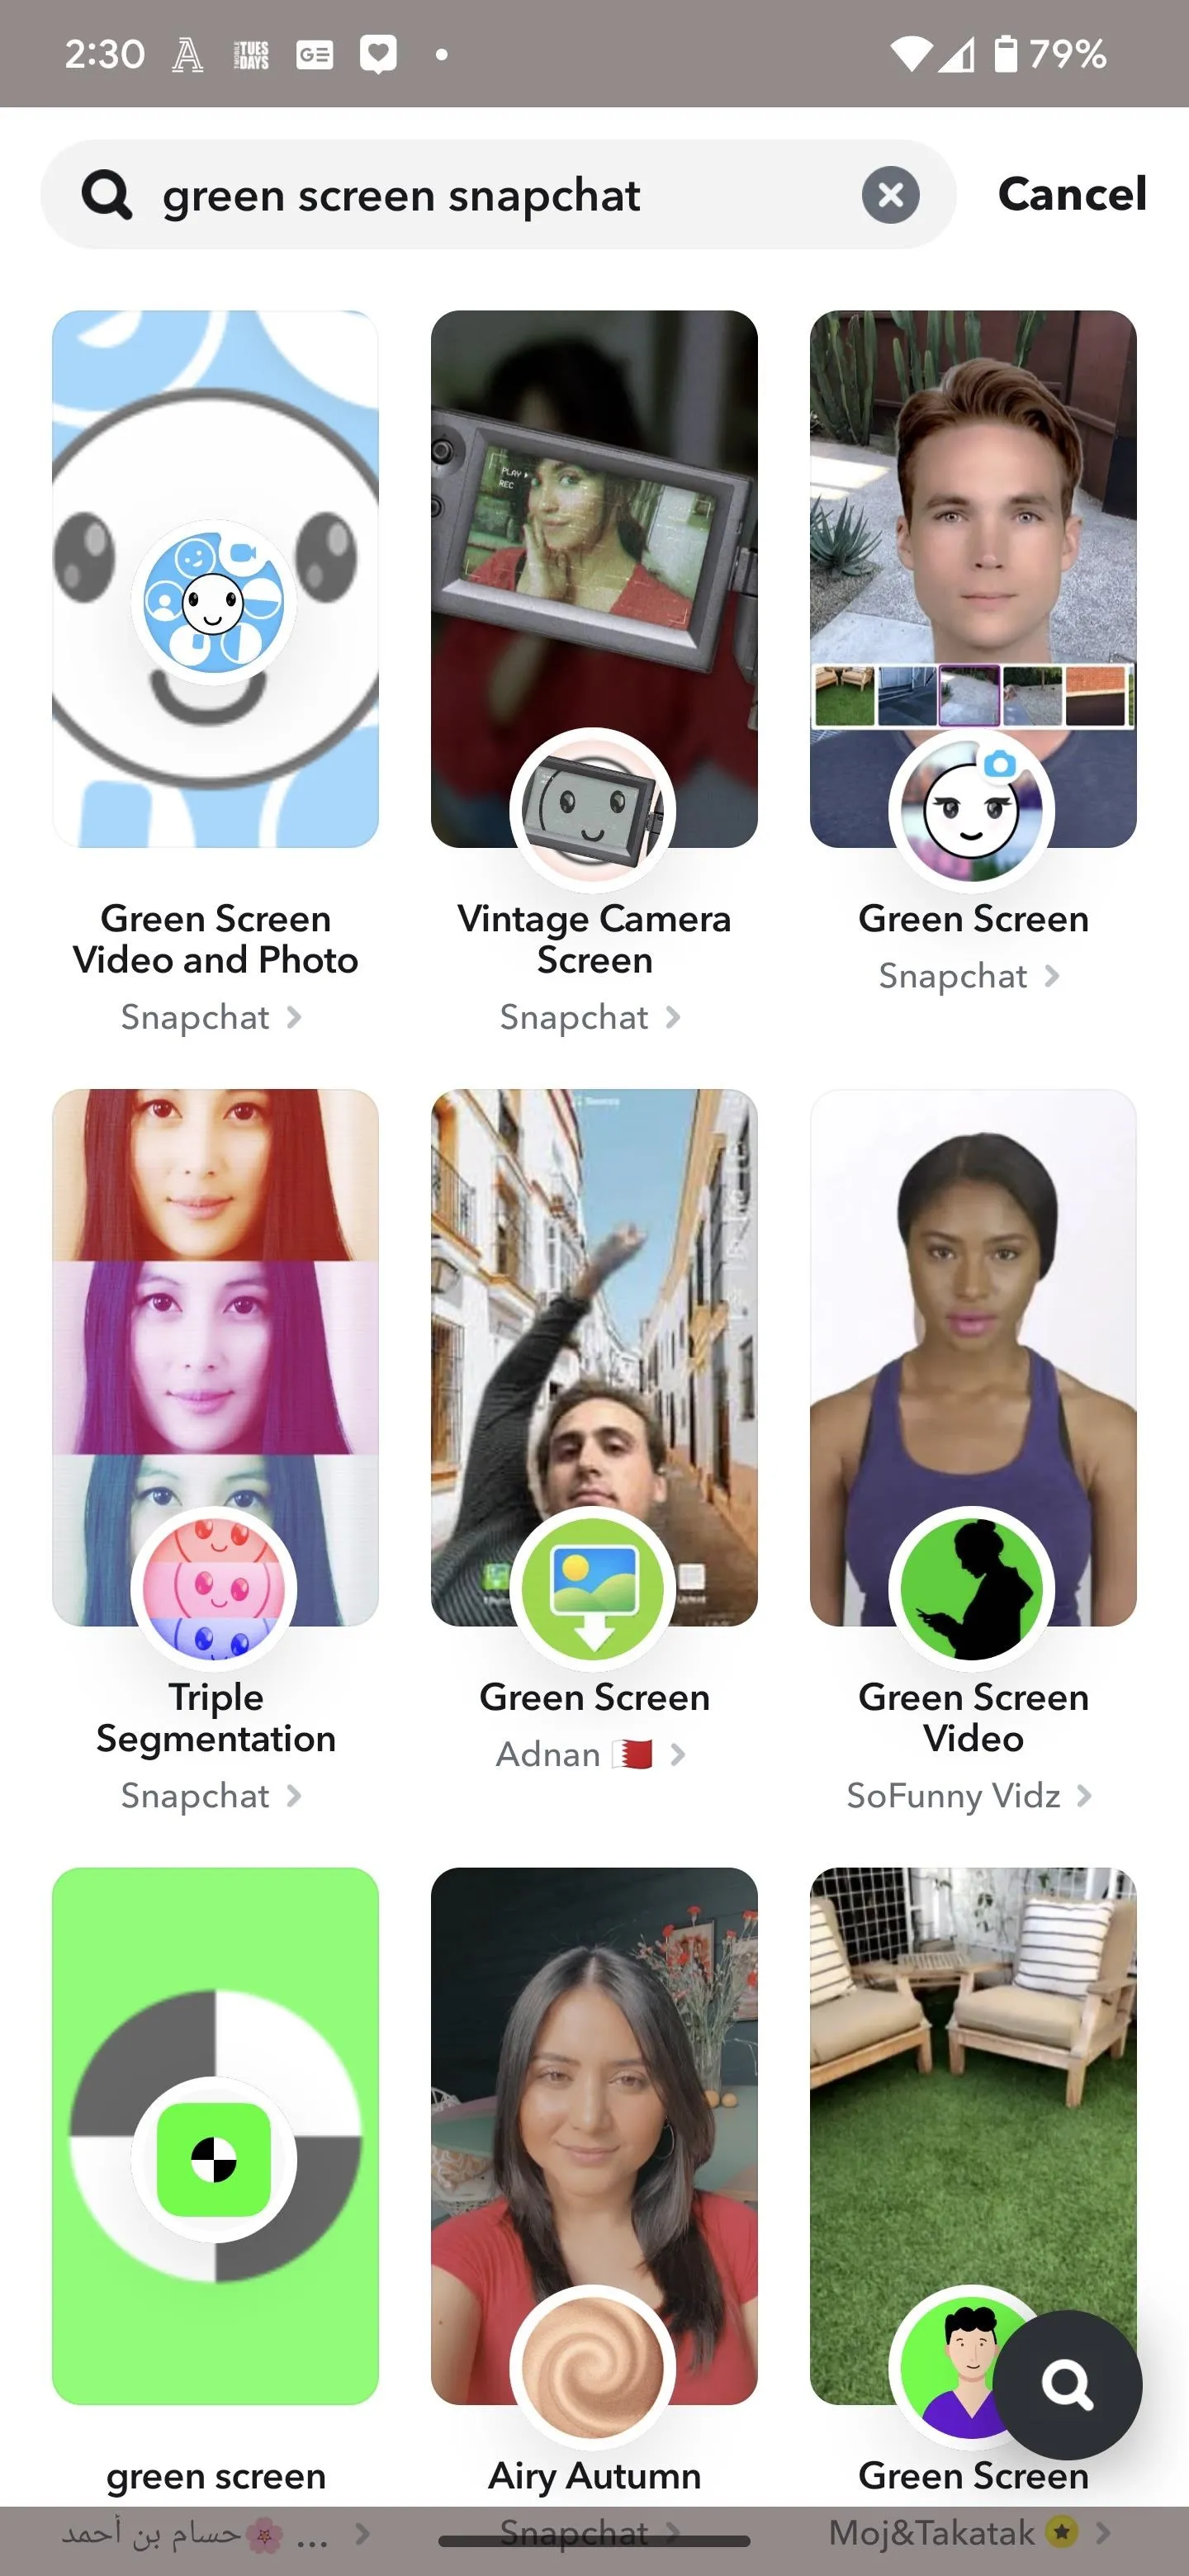
If you don't have Director Mode yet or want to try out Snapchat's other green screen option, tap the yellow magnifying icon in the bottom toolbar to access Lens Explorer. Then, search for "green screen snapchat" to narrow down to the green screen filters provided by Snapchat rather than the creator community.
You're looking for a Lens called "Green Screen Video and Photo," so find that and tap on it to open the AR lens in the camera view. You can use the link I've included above if you can't locate it.
Like Director Mode, you can select an image or video from the photo roll carousel. Scroll to find and choose the image or video you want to use.

This lens gives you a set of five configurations that aren't currently available in Director Mode, and you can find them via the toolbar at the left of the screen. Starting at the top, your options are:
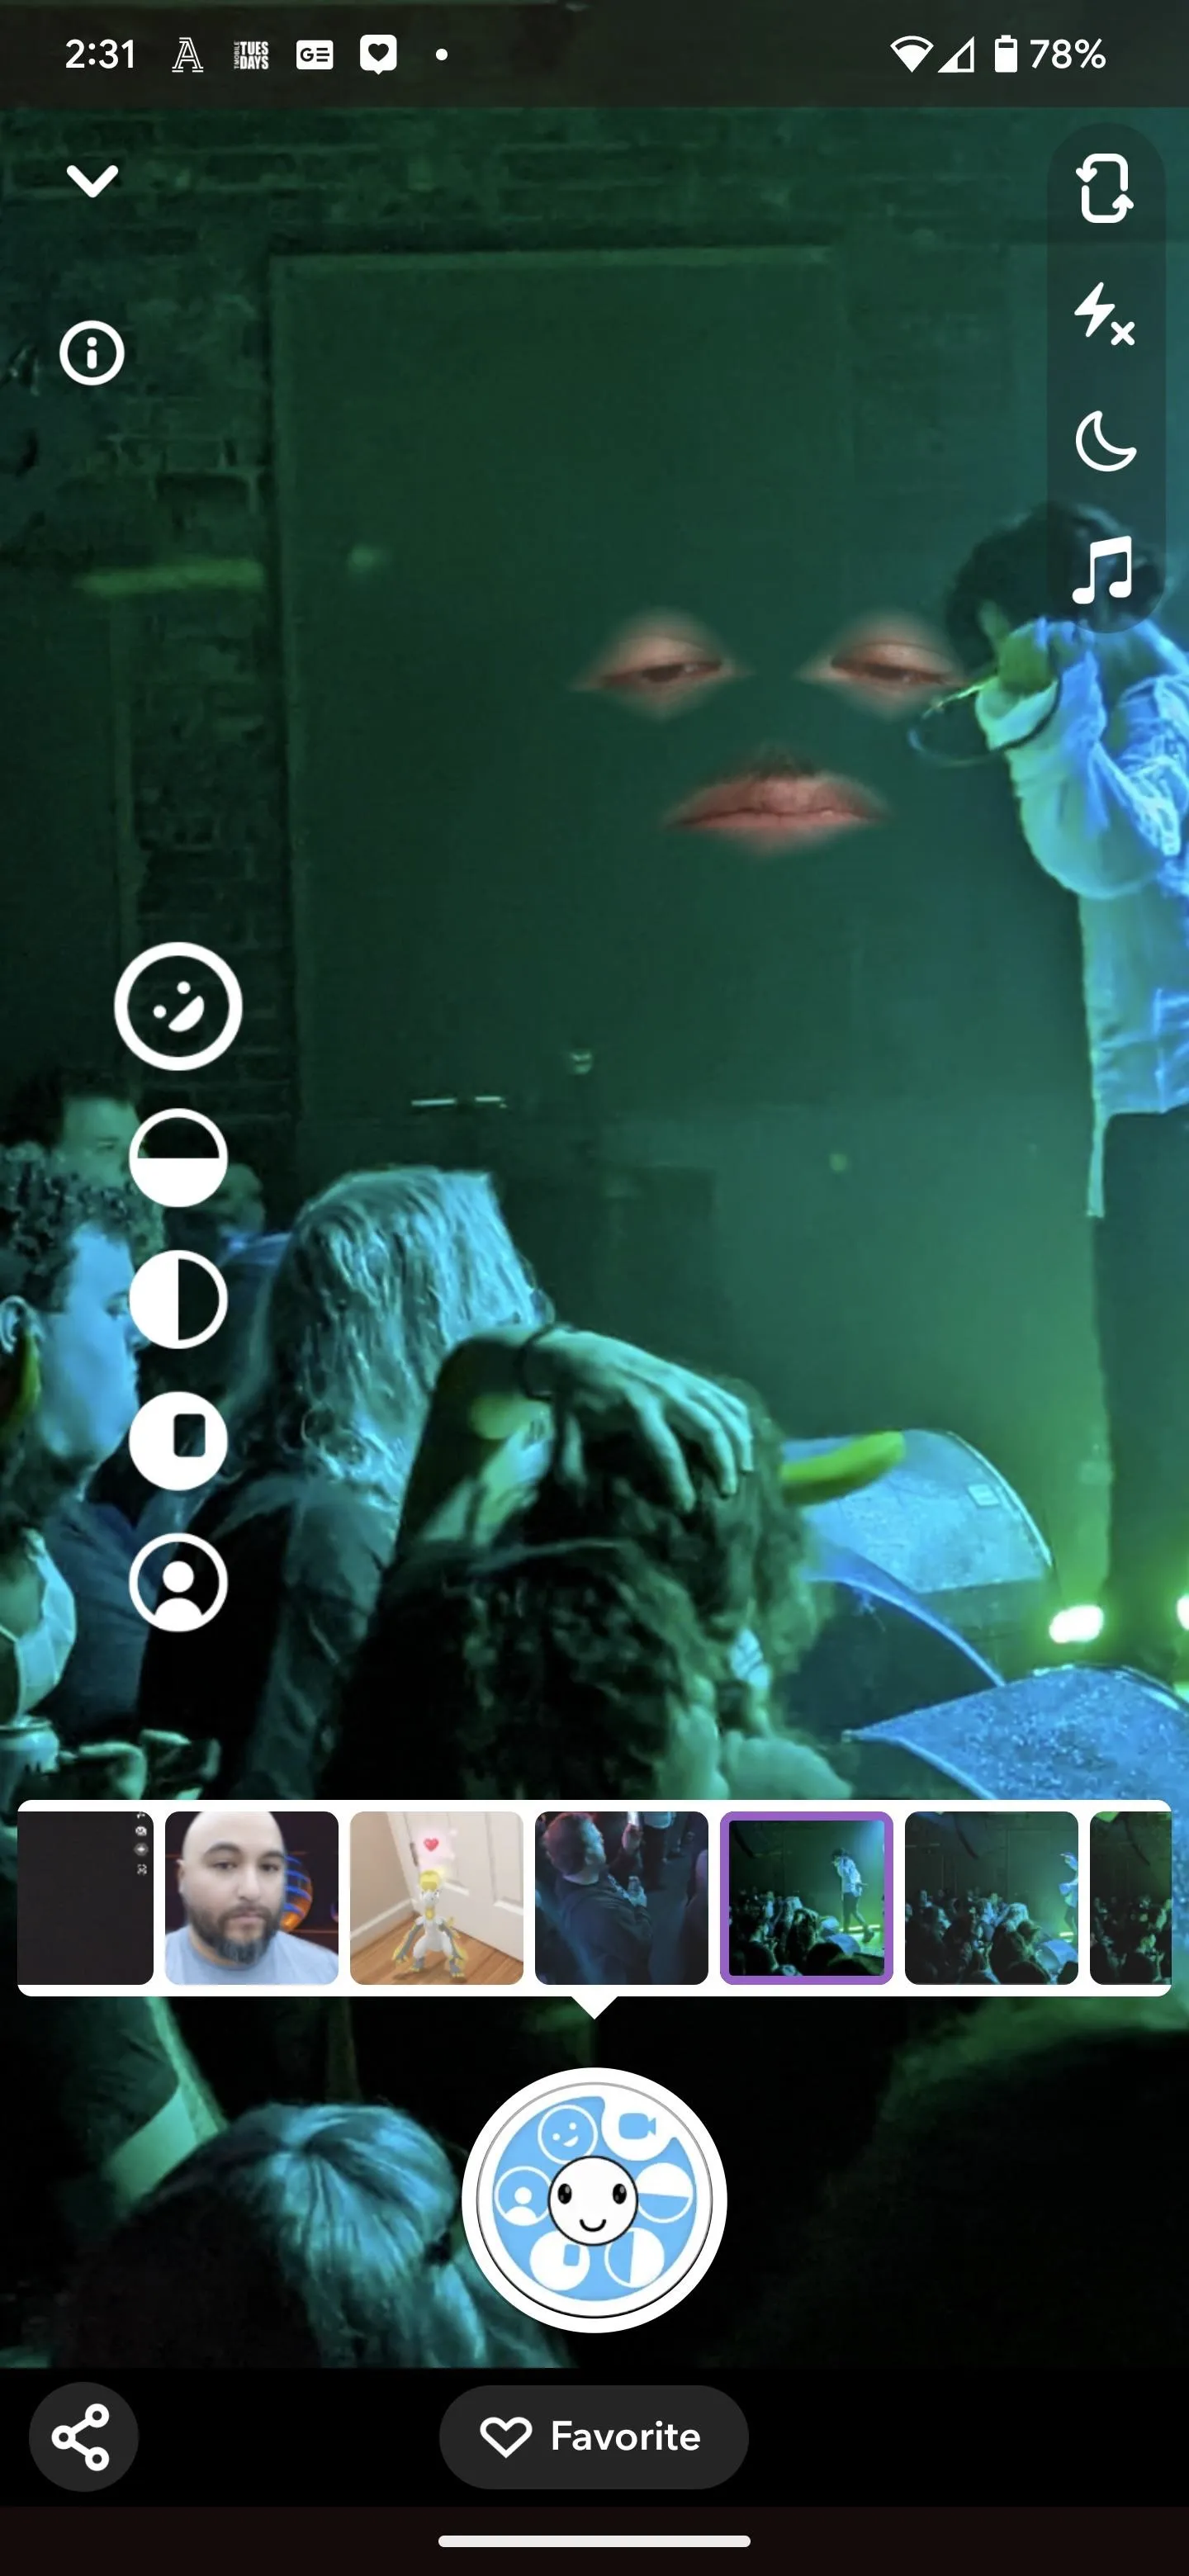
- Mask: Your chosen image takes over the screen and masks your face except for your eyes and mouth.
- Vertical Split Screen: Your image fills the top half of the screen, with the camera view covering the bottom half.
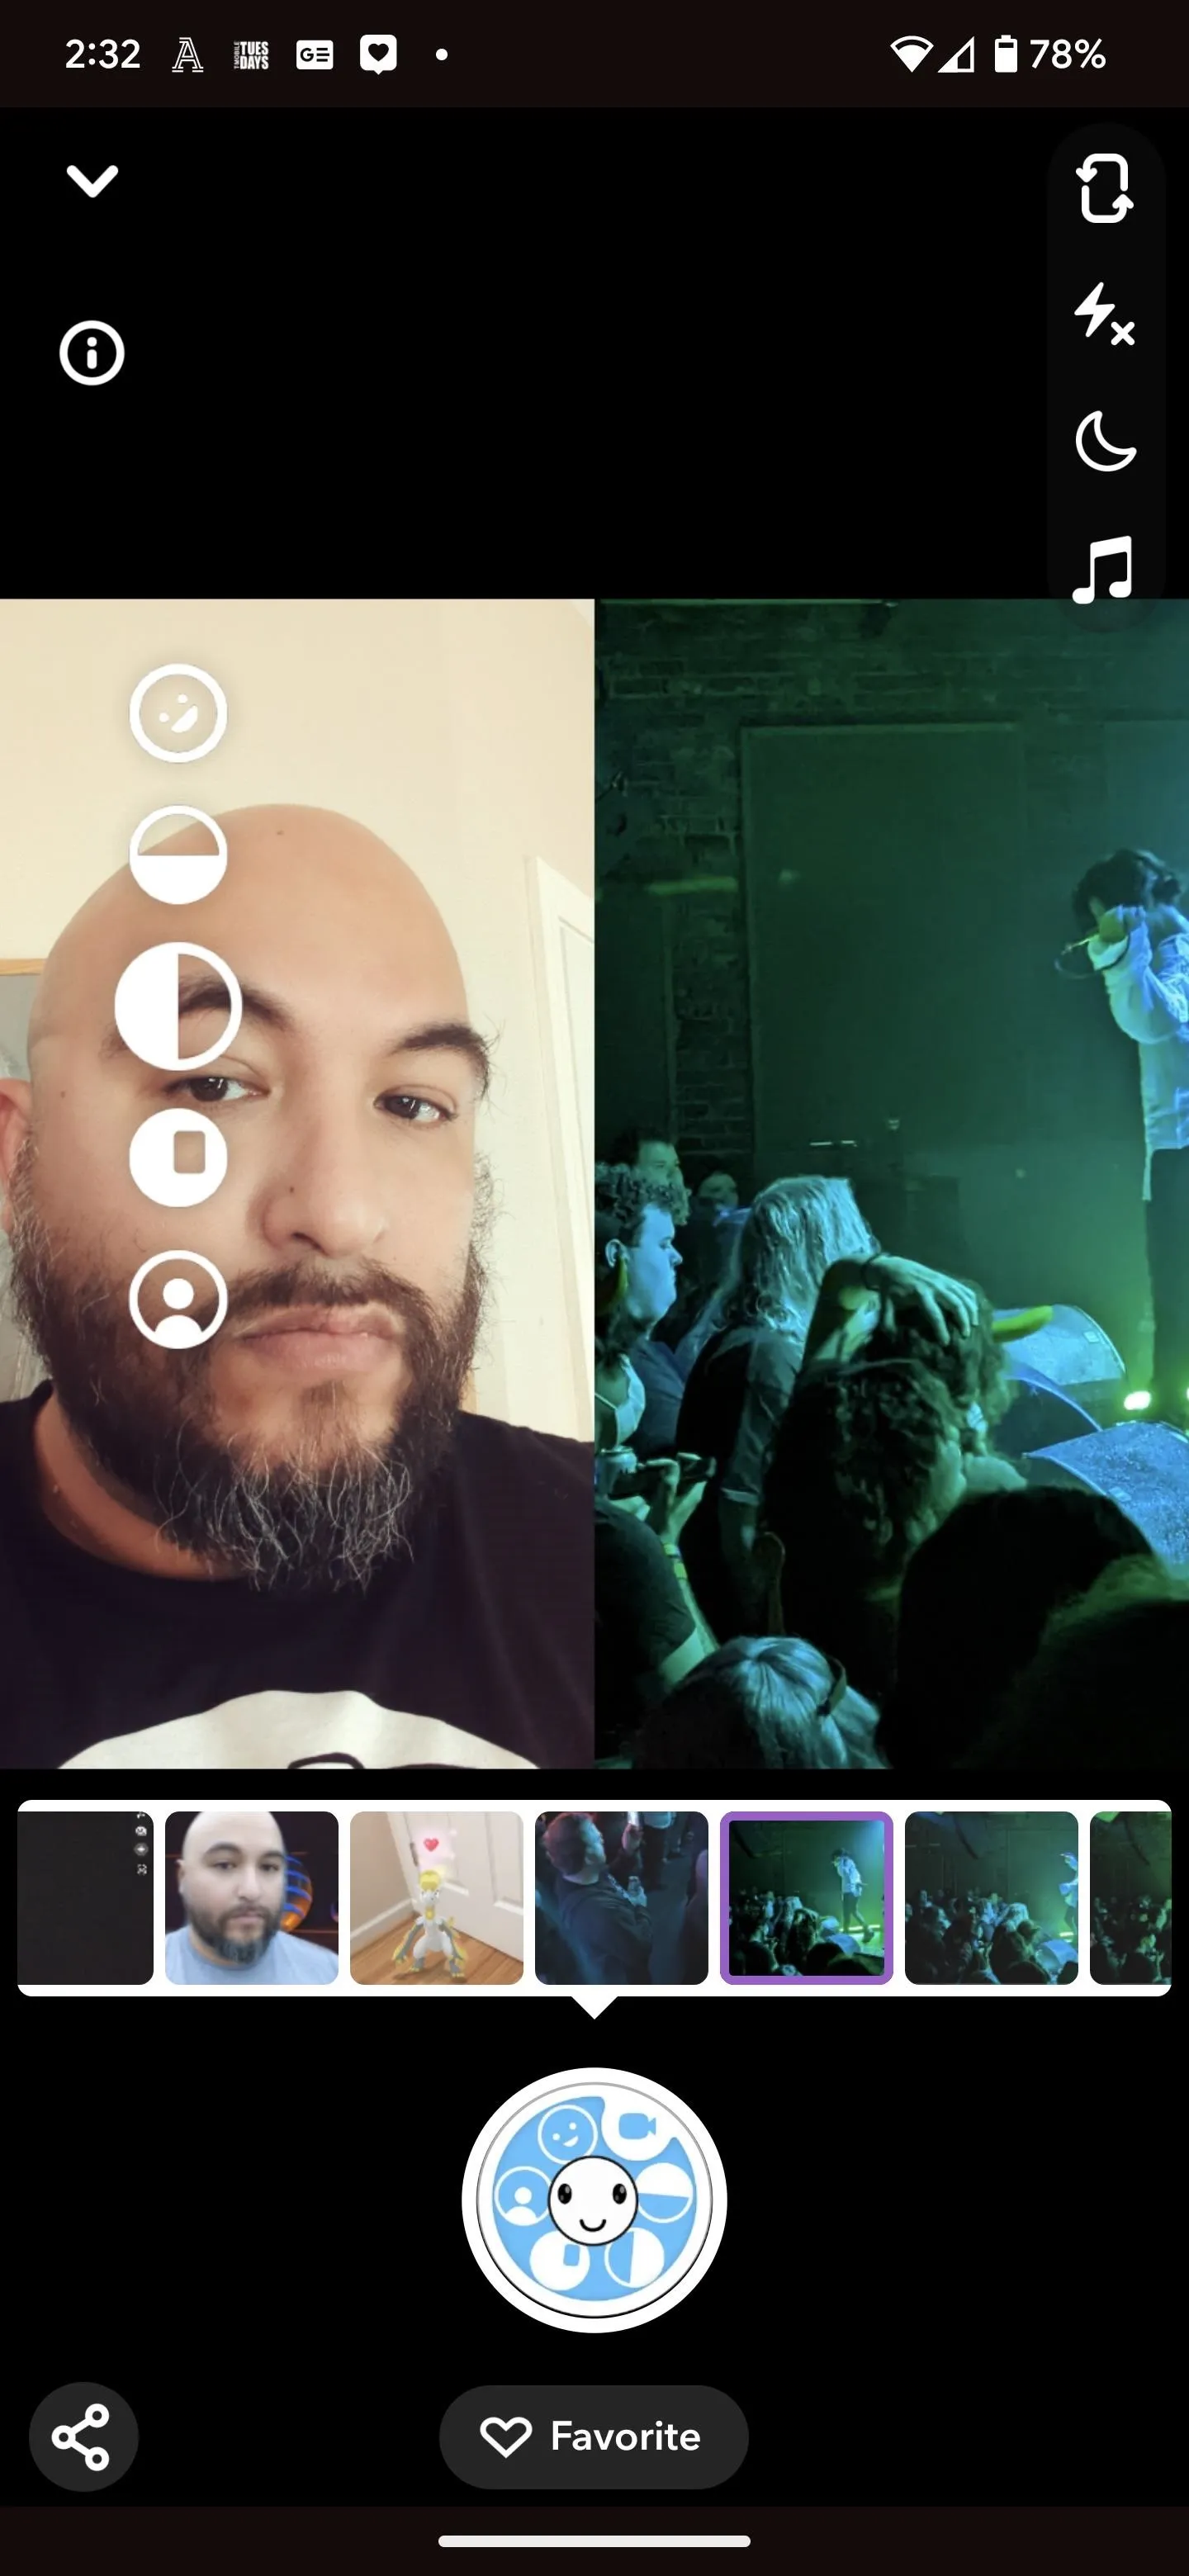
- Horizontal Split Screen: Your image takes over the right half of the screen, with the camera view maintaining the left half.
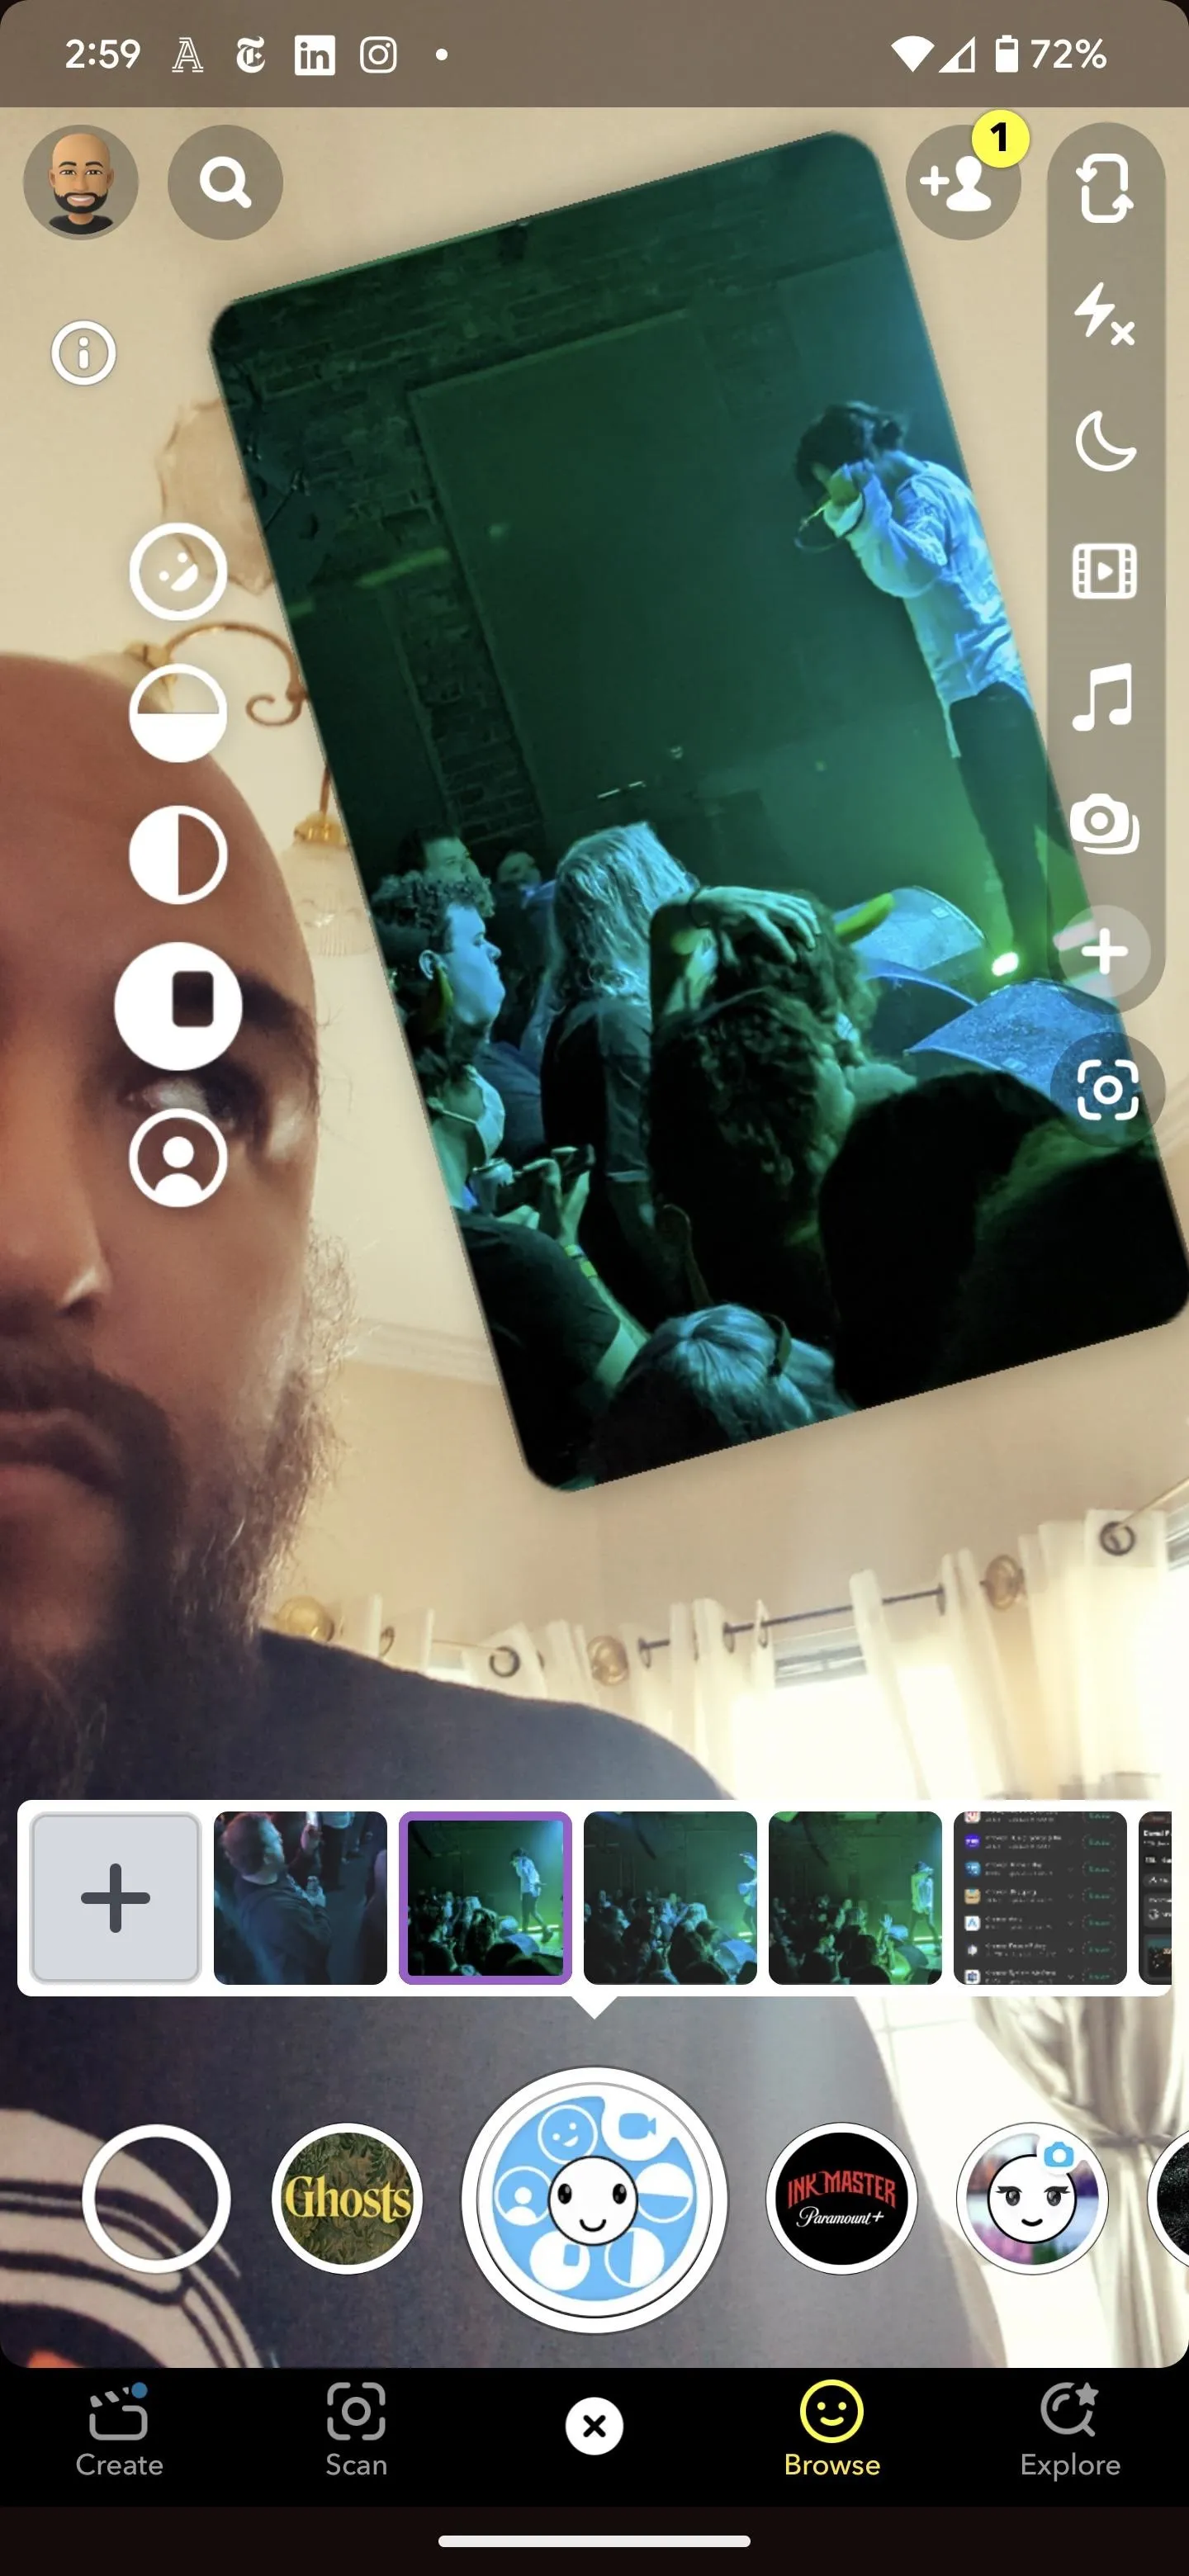
- Picture-in-Picture: Your image will appear in a smaller rectangle. You can move it around the screen, resize it, and modify its orientation with touch gestures.
- Standard: Your image takes over the background with a cutout of your face in the foreground.

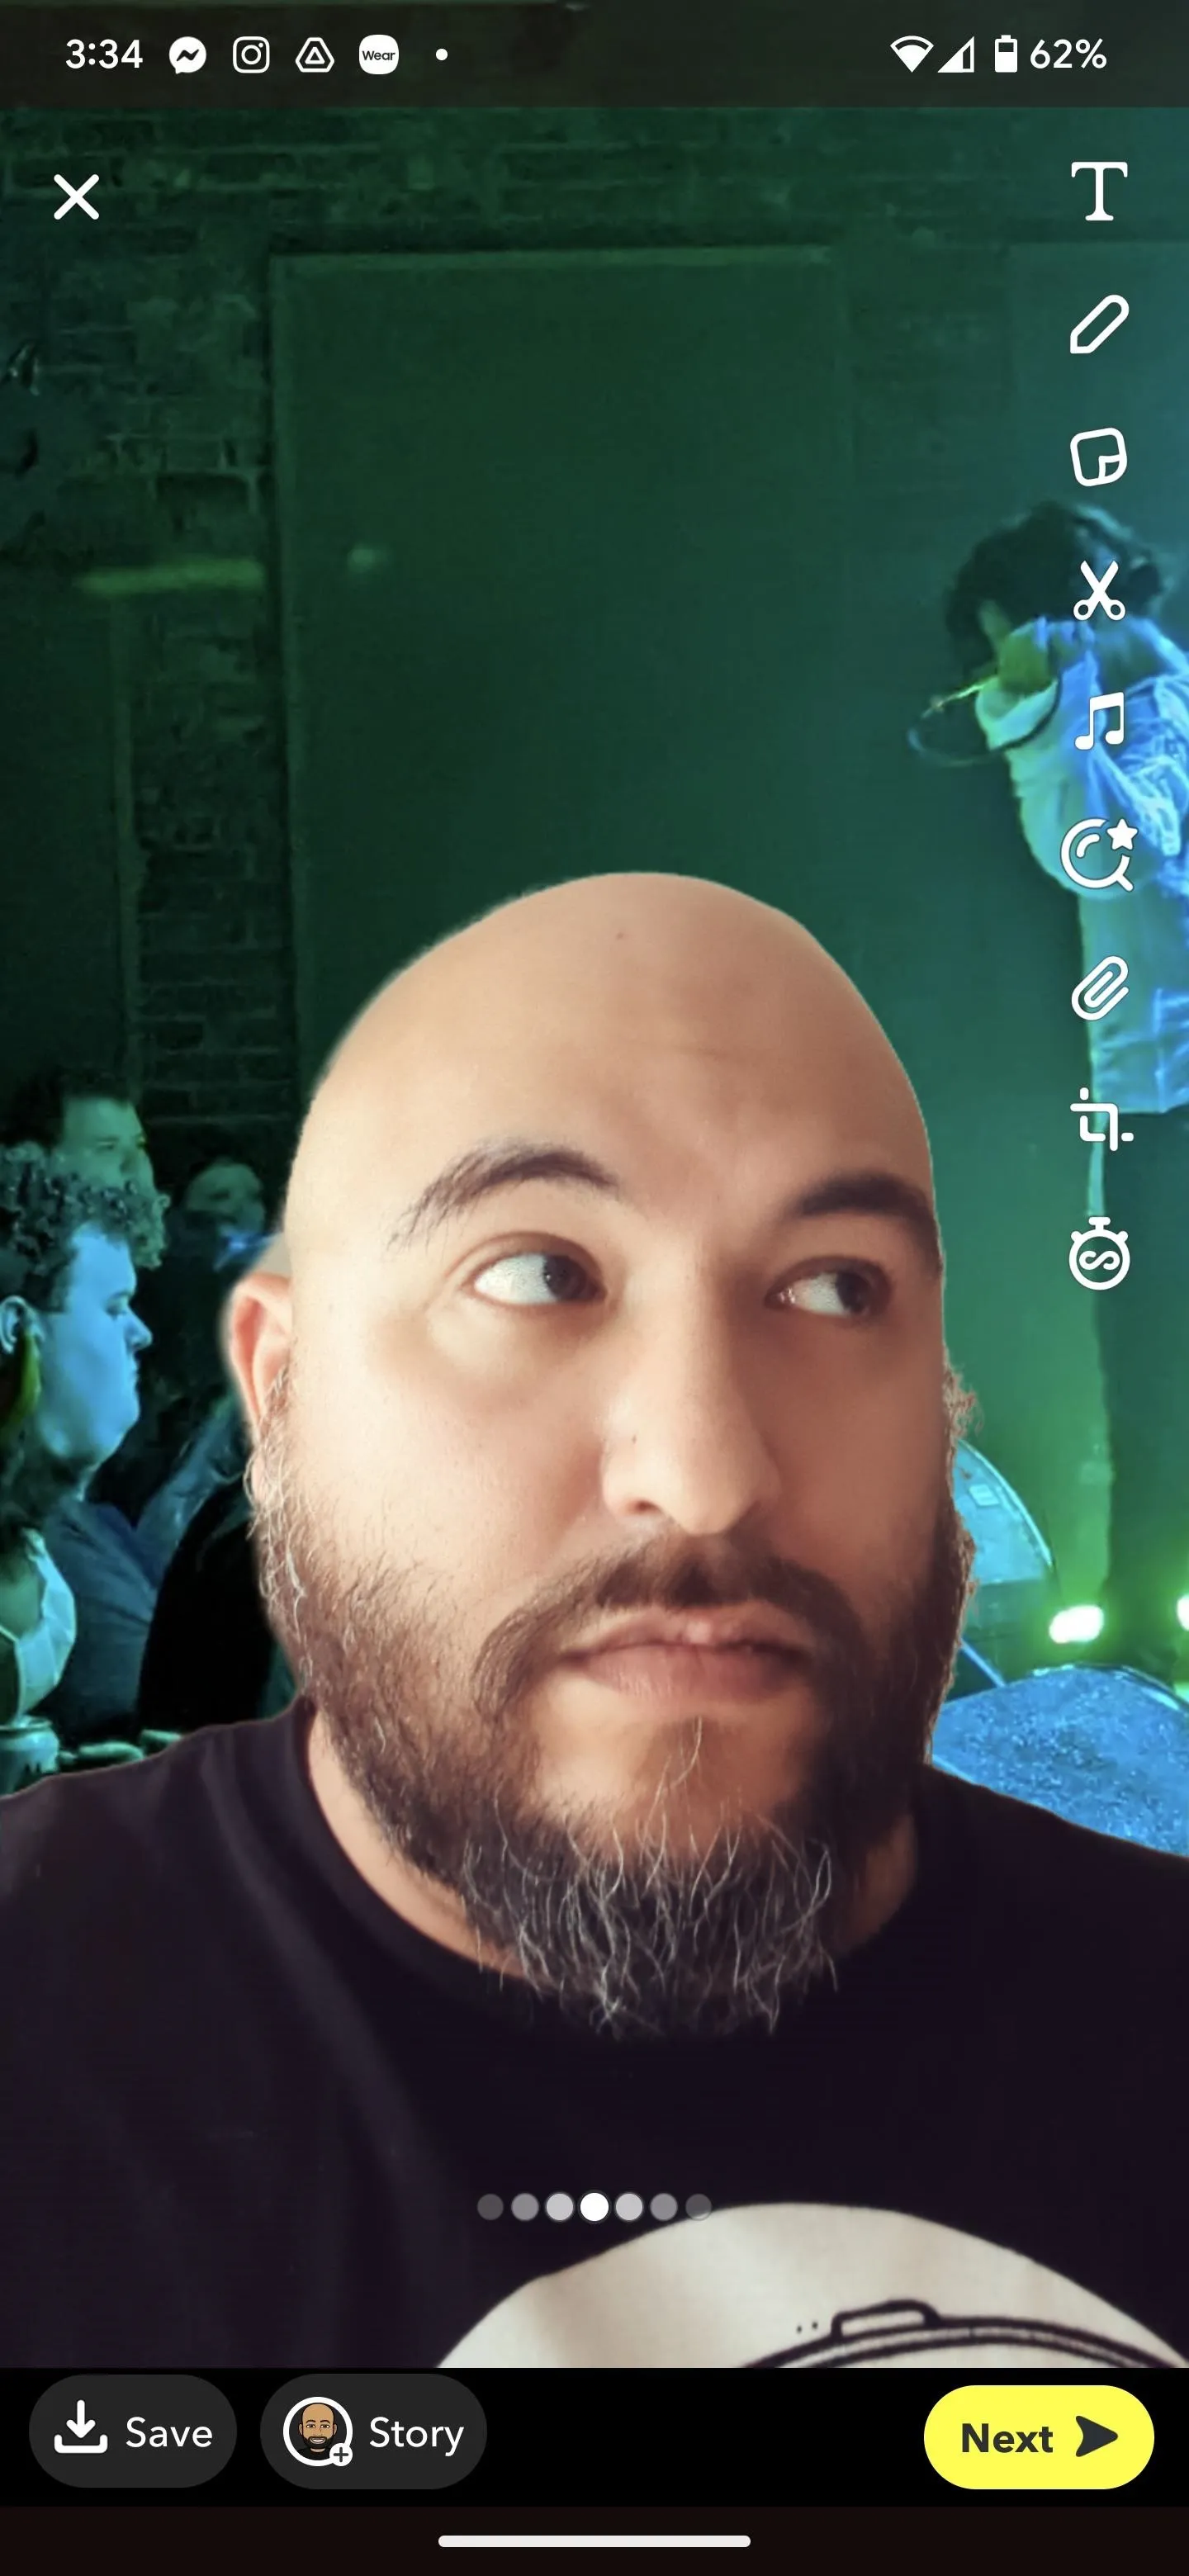
You're now ready to take a photo or video! You can use the toolbar to the right to add additional effects, such as text. However, you won't get a timeline like in Director Mode or when using the regular Snap camera to upload or record videos, so you'll only be able to take one image or video clip.
When satisfied with the result, you can tap "Save" to download it to your local gallery, "Next" to share it with others on Snapchat, or "Story" to add it to your story.
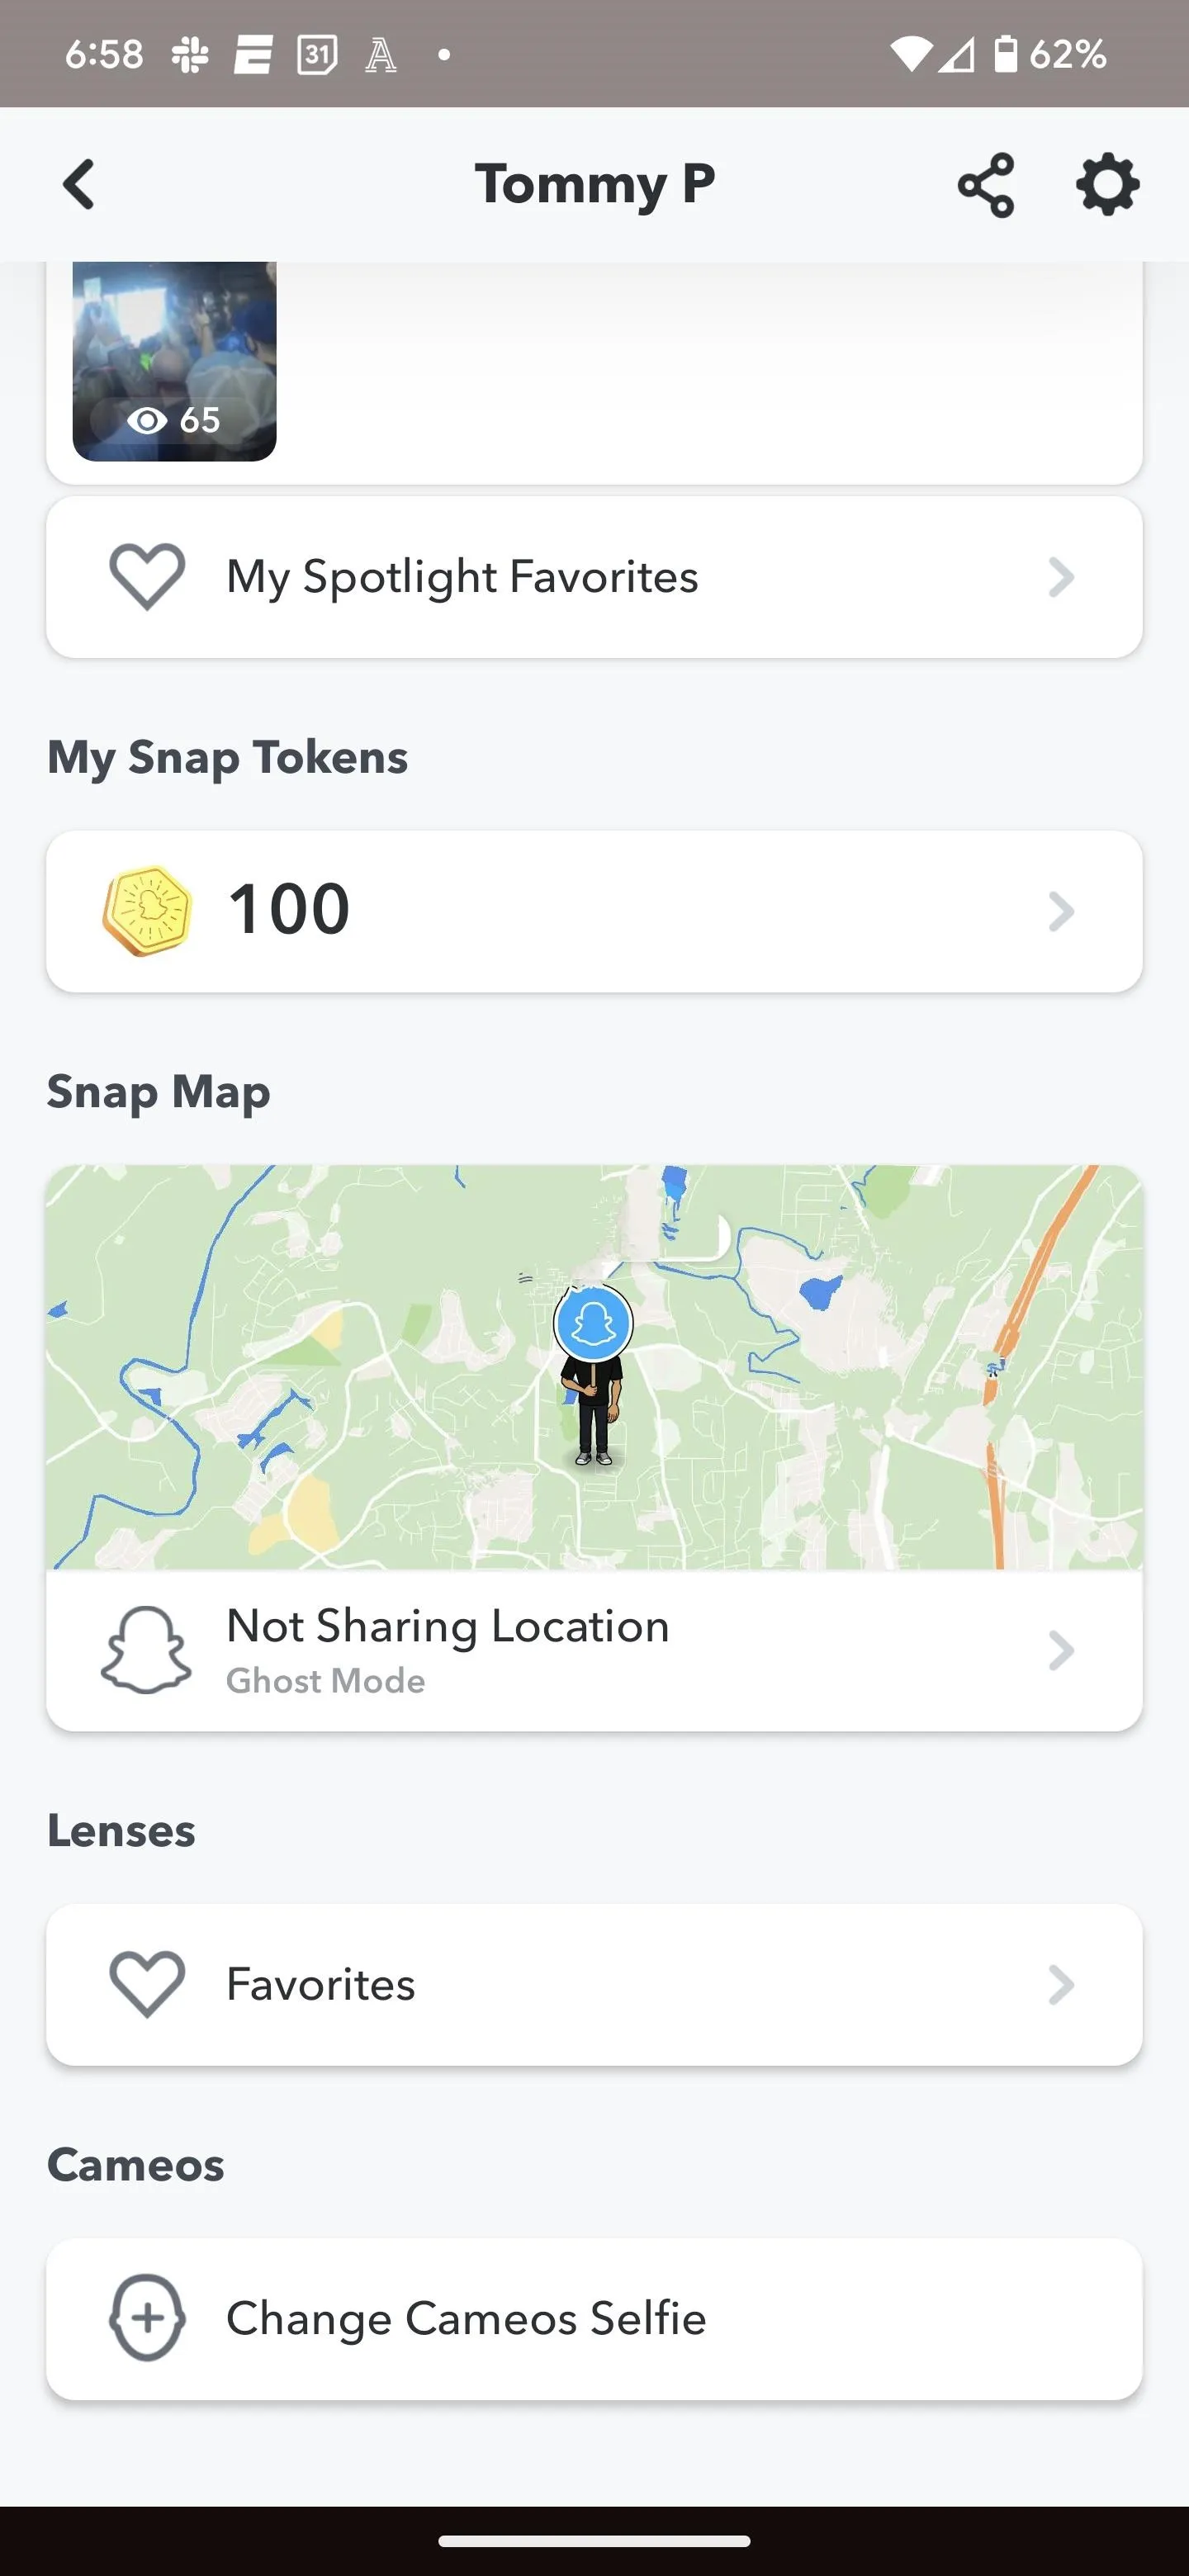
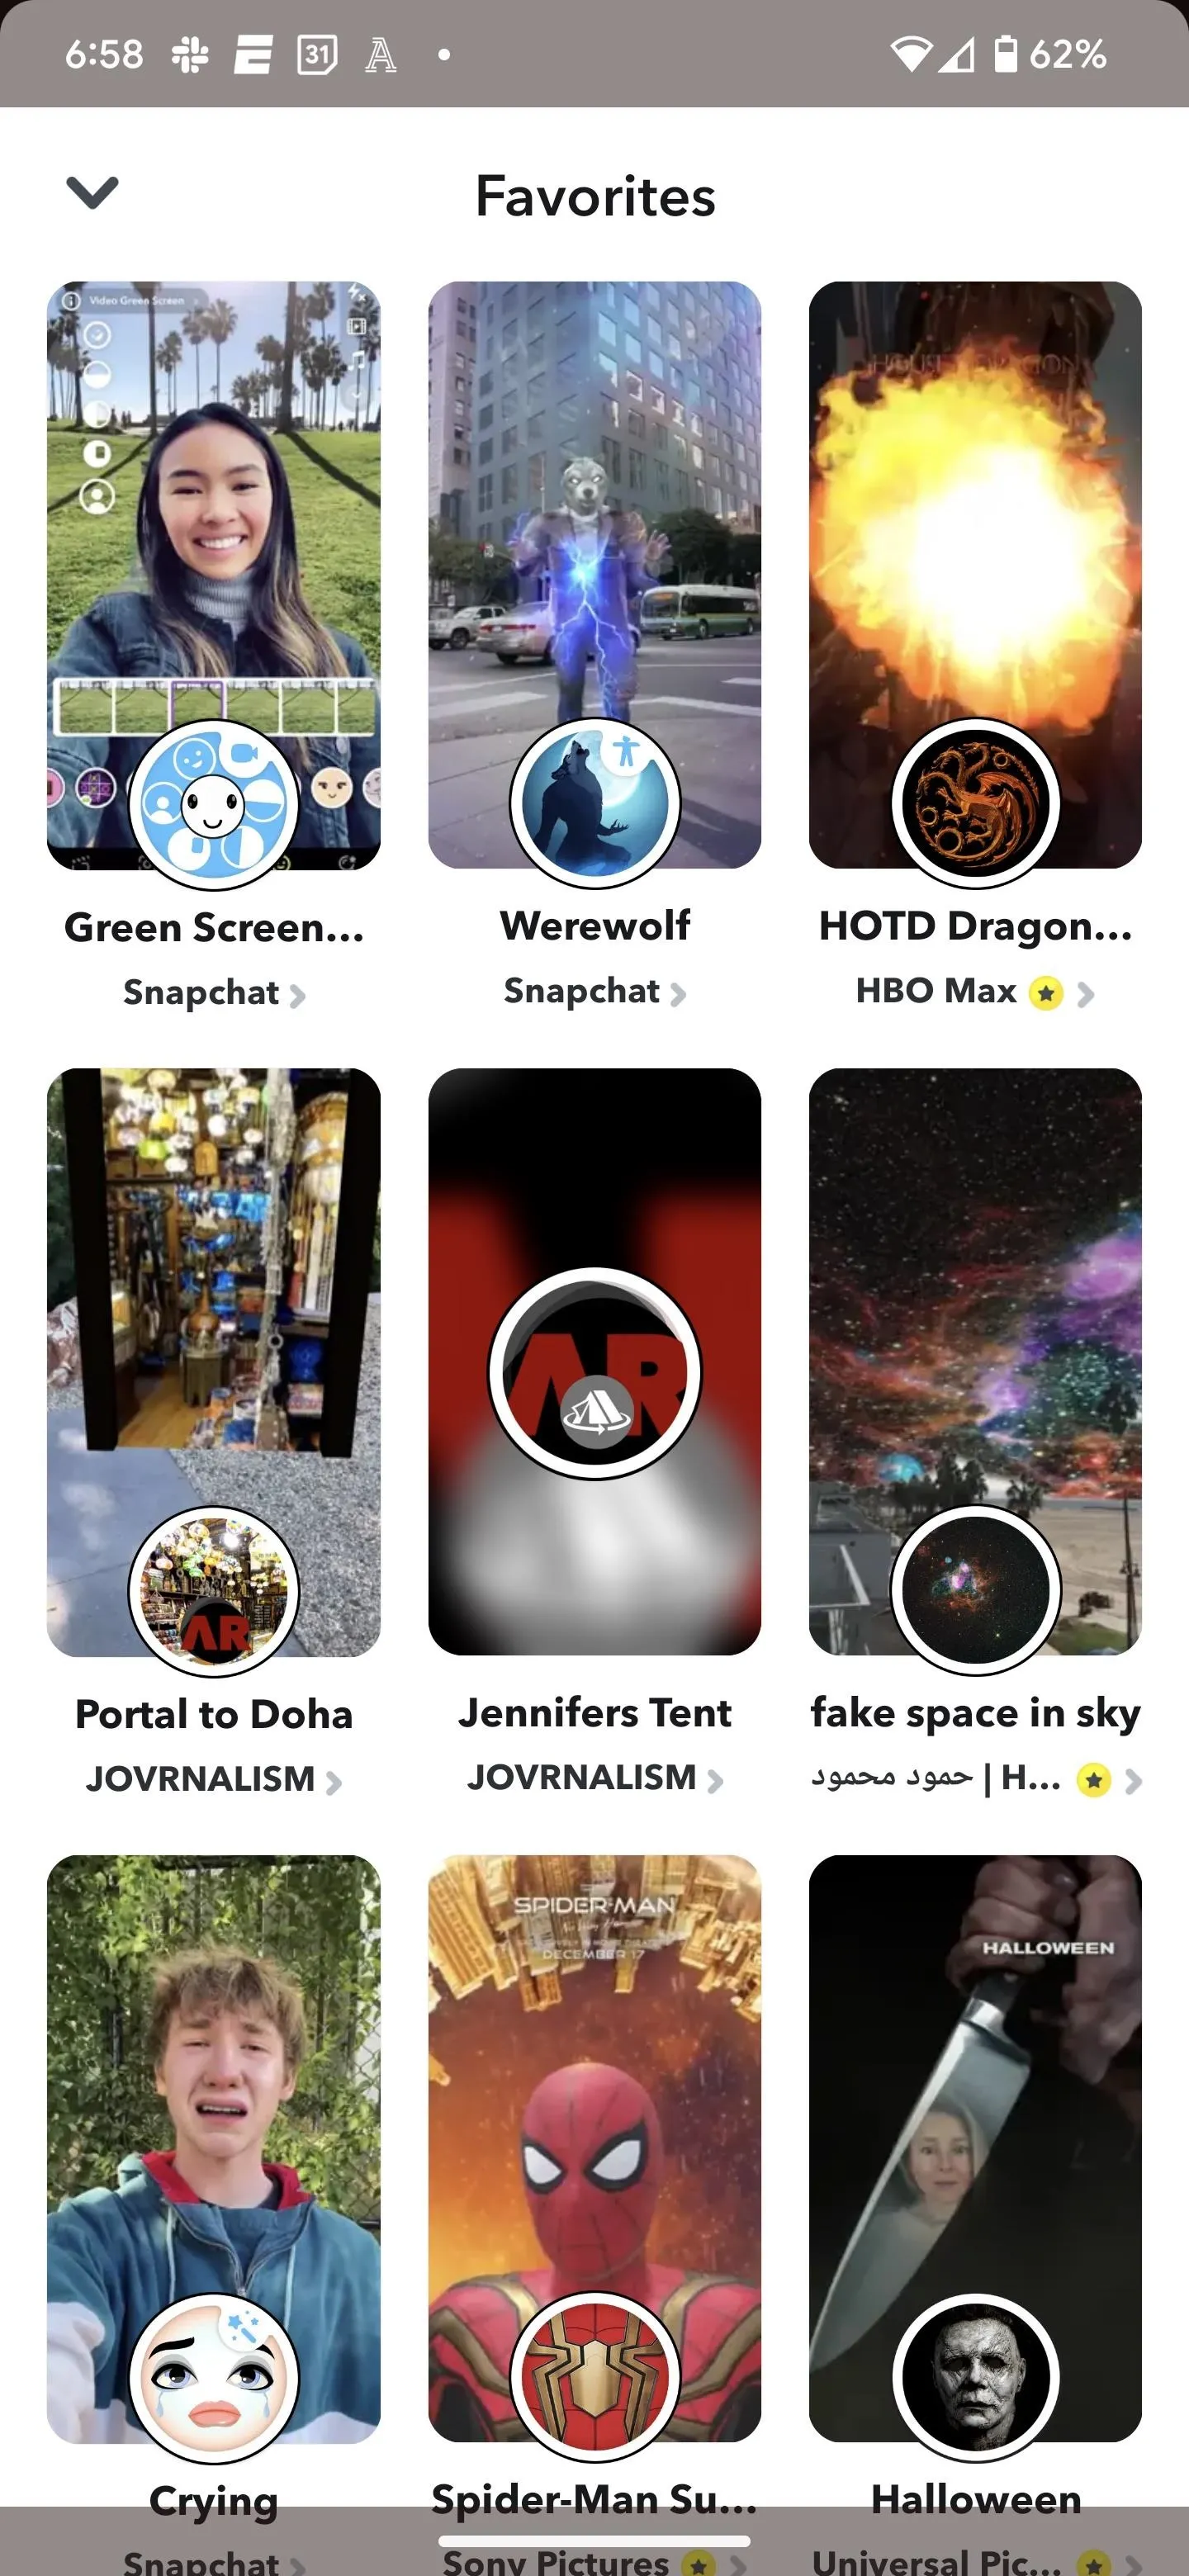
For faster access to the green screen effect next time, tap the Favorite (heart) button. Then, you'll see it at the top of the Lens Explorer screen with all your other favorite lenses. You can also tap your profile icon on the camera screen to access your profile, then scroll down and select "Favorites," where you'll also find it available.
So Which Is Better?
Director Mode certainly gives quicker access to Snapchat's green screen effect and lets you shoot videos with a timeline for editing. However, if you want more configuration effects and a photo option, you'll want to take the extra steps to access the AR lens.
Cover photo and screenshots by Tommy Palladino/Gadget Hacks


Comments
Be the first, drop a comment!