


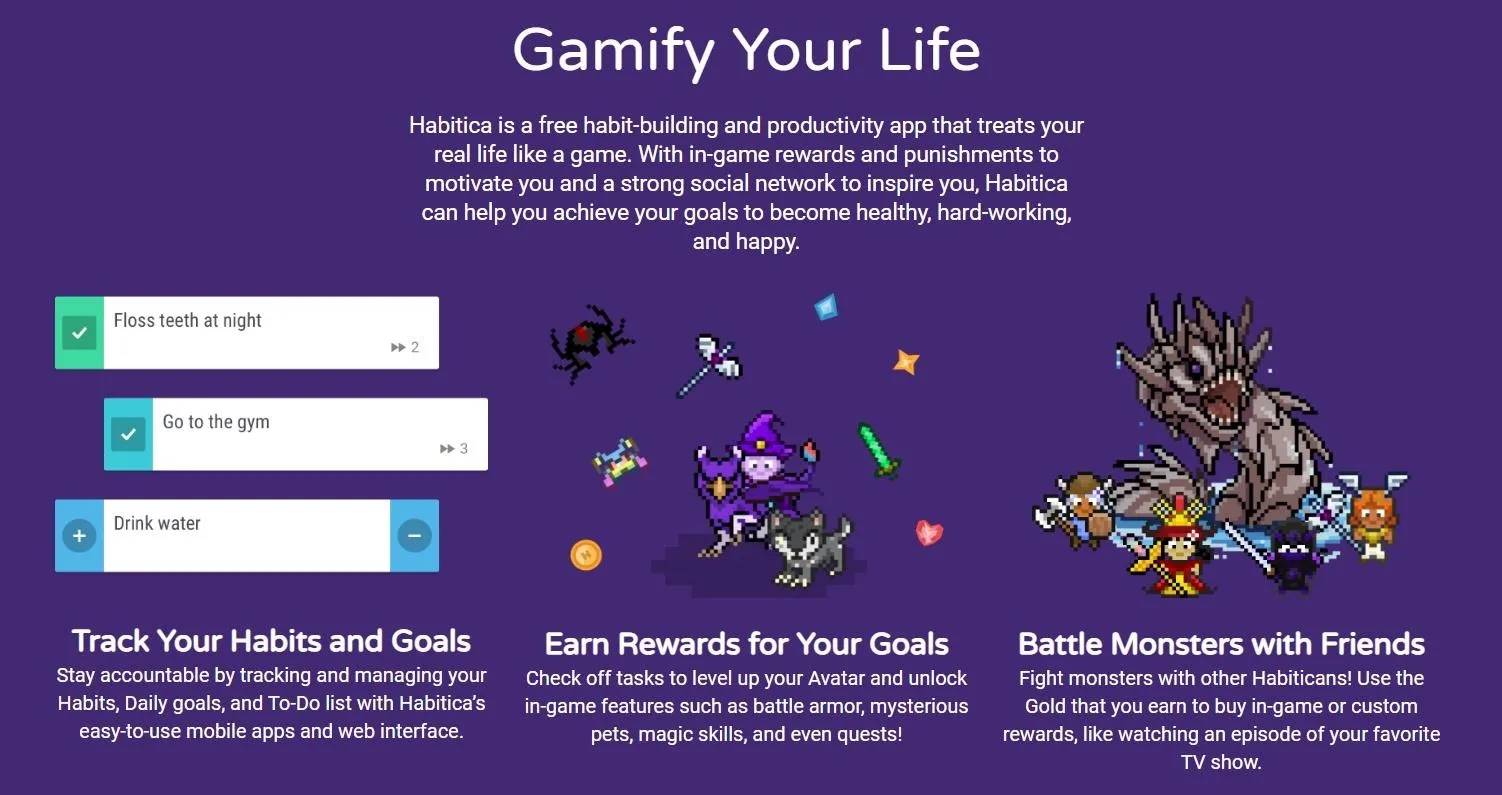
When you think about it, isn't life just one big open-world RPG just begging to be conquered? We all have a set number of specific tasks or chores we must complete every single day like clockwork. Sometimes, these items on our to-do list can become tedious and cause us to lose motivation. What if you could take those tasks and turn them into something awesome instead? Now you can.
With Habitica: Gamify Your Tasks, you'll finally be able to take your real-life chores and put an exciting RPG spin on them like never before. Rather than dragging your feet while you complete your dull and lifeless tasks, you can be thinking about your next one and what lies ahead. Create unique quest names, custom rewards, and even form parties online to help others achieve their goals as well.
Install Habitica
To get started on your new epic quest to better your daily life, you'll need to grab Habitica. It's available for both Android and iPhone, so head to one of the links below to get it installed.
Log in or Register a New Account
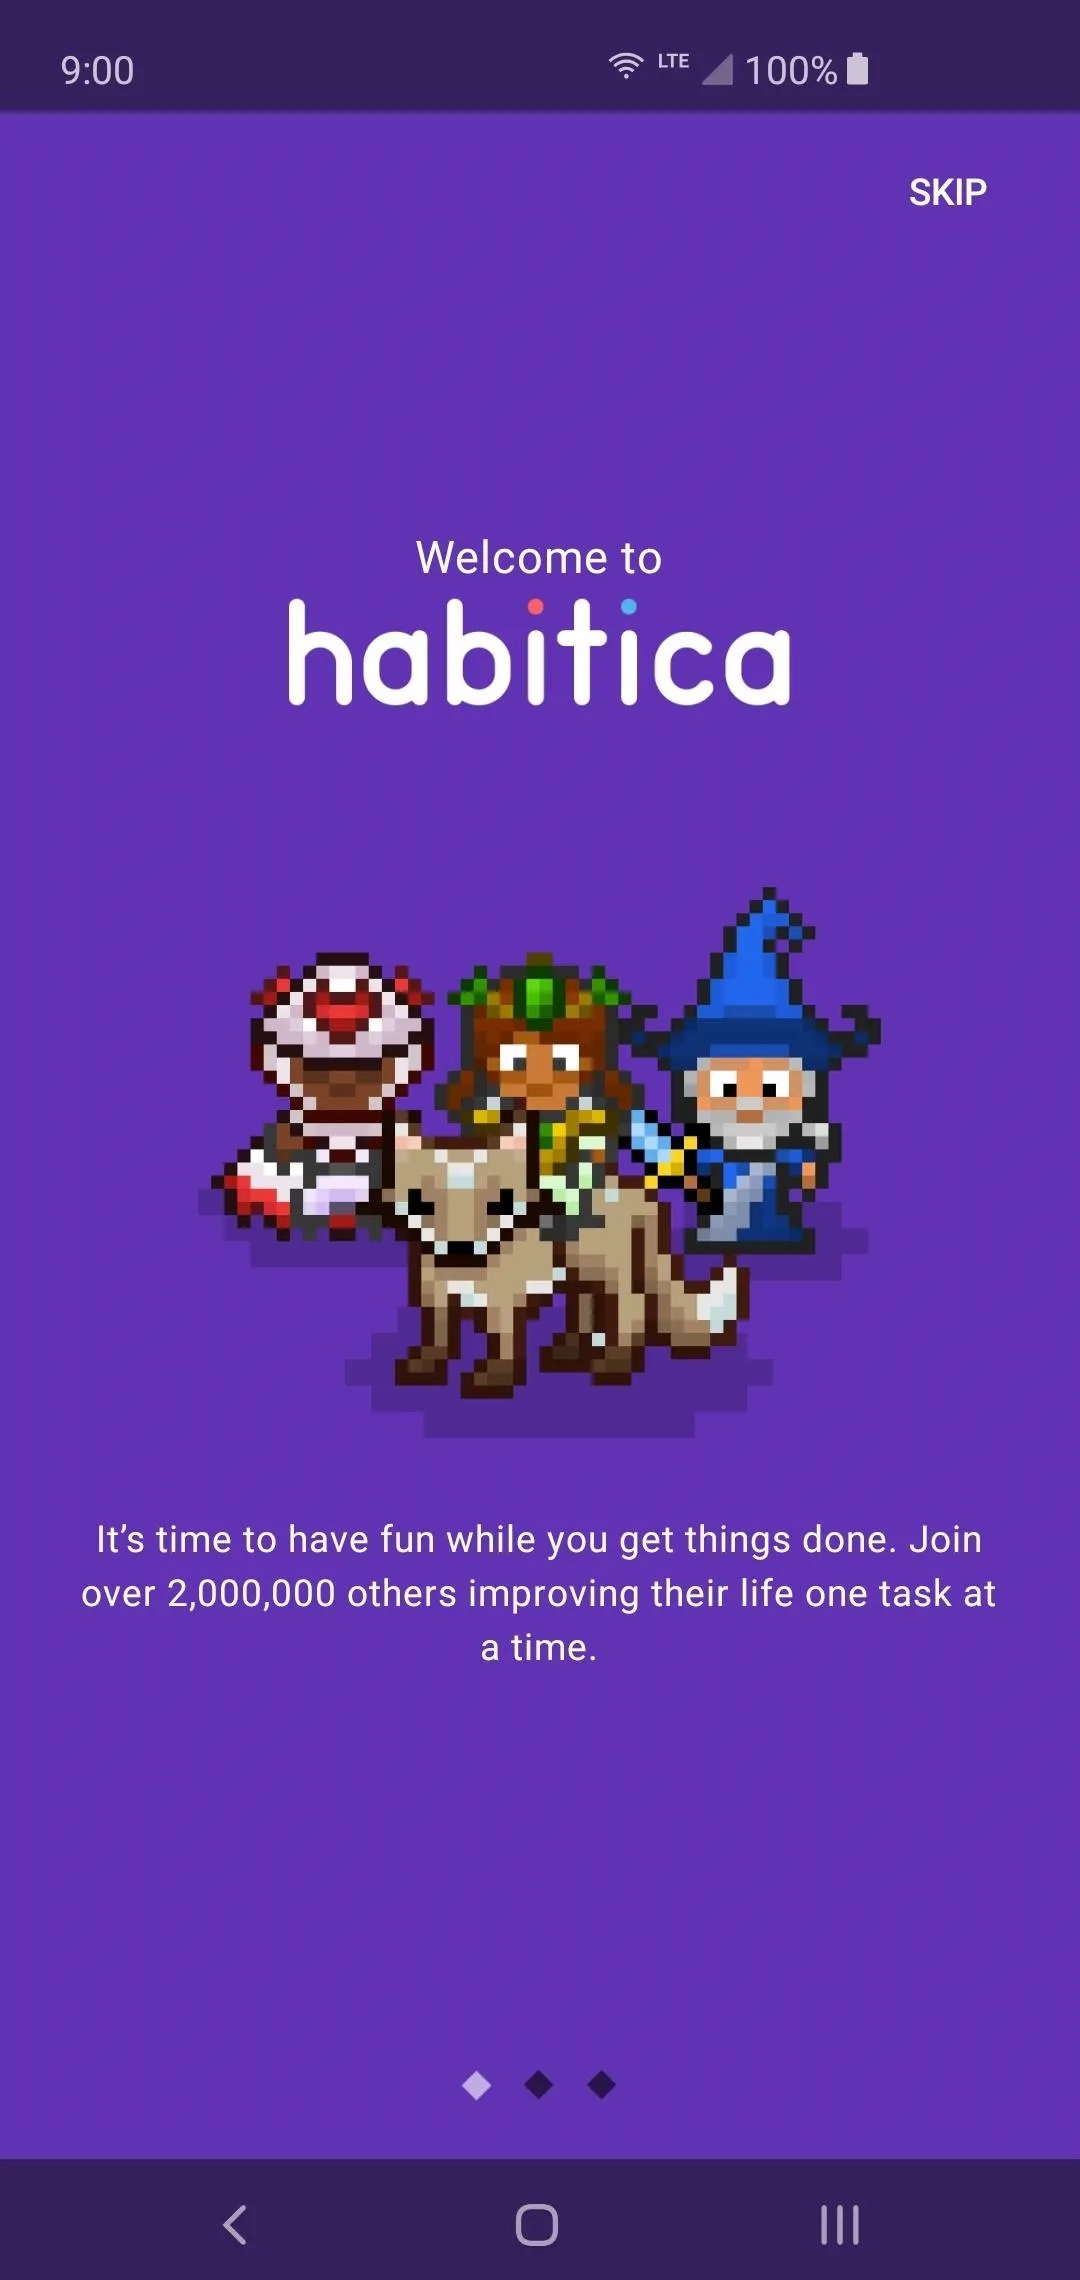
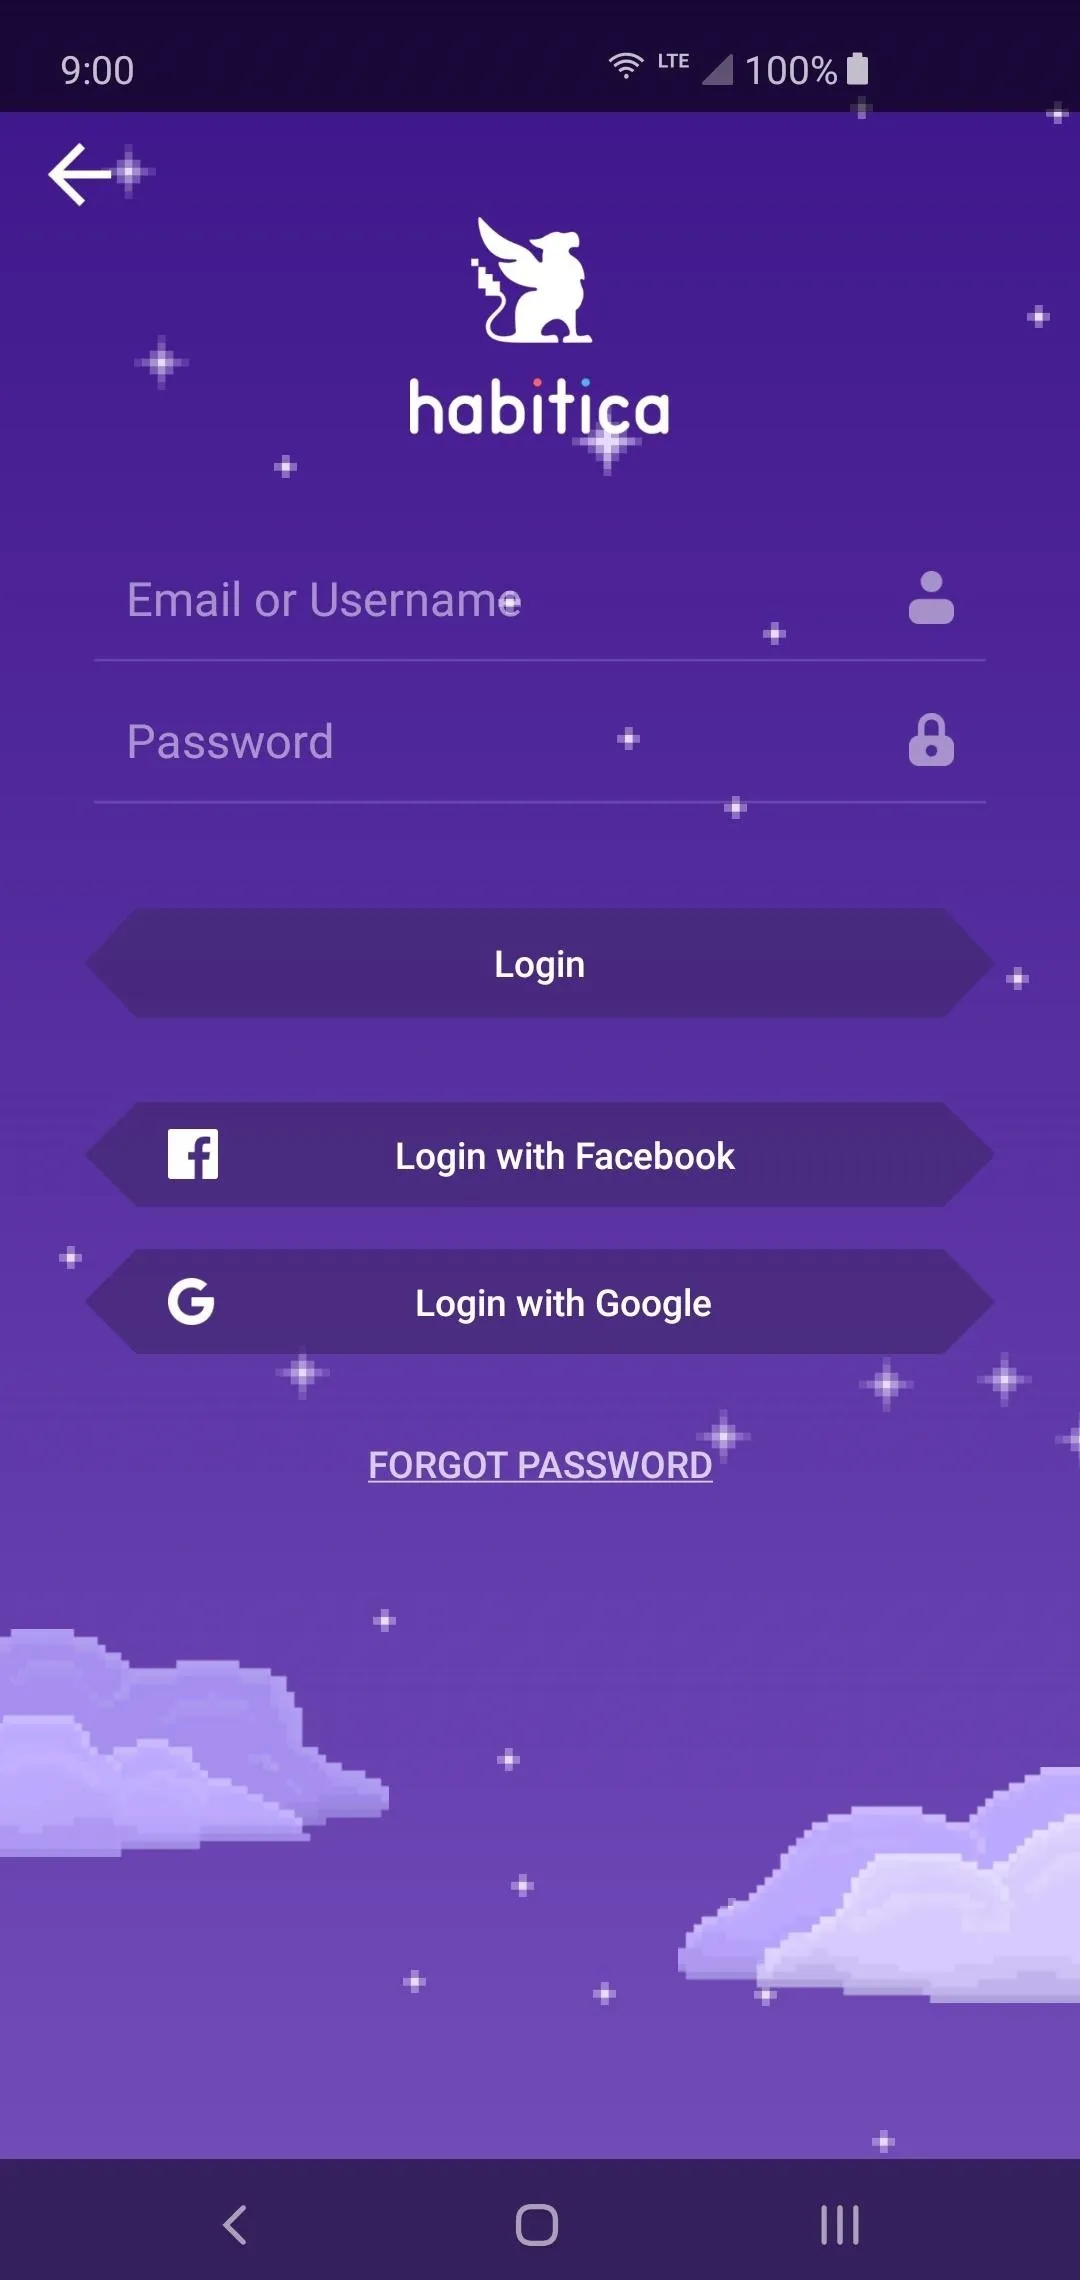
Once you open the app for the first time, you'll be presented with a welcome screen that you can scroll through or skip altogether. Once you get past this screen, you'll be sitting at the main login page where you can create your account. You can simply log in with your Google or Facebook account to get started right away. However, you can also set up an email account with them if you'd prefer.
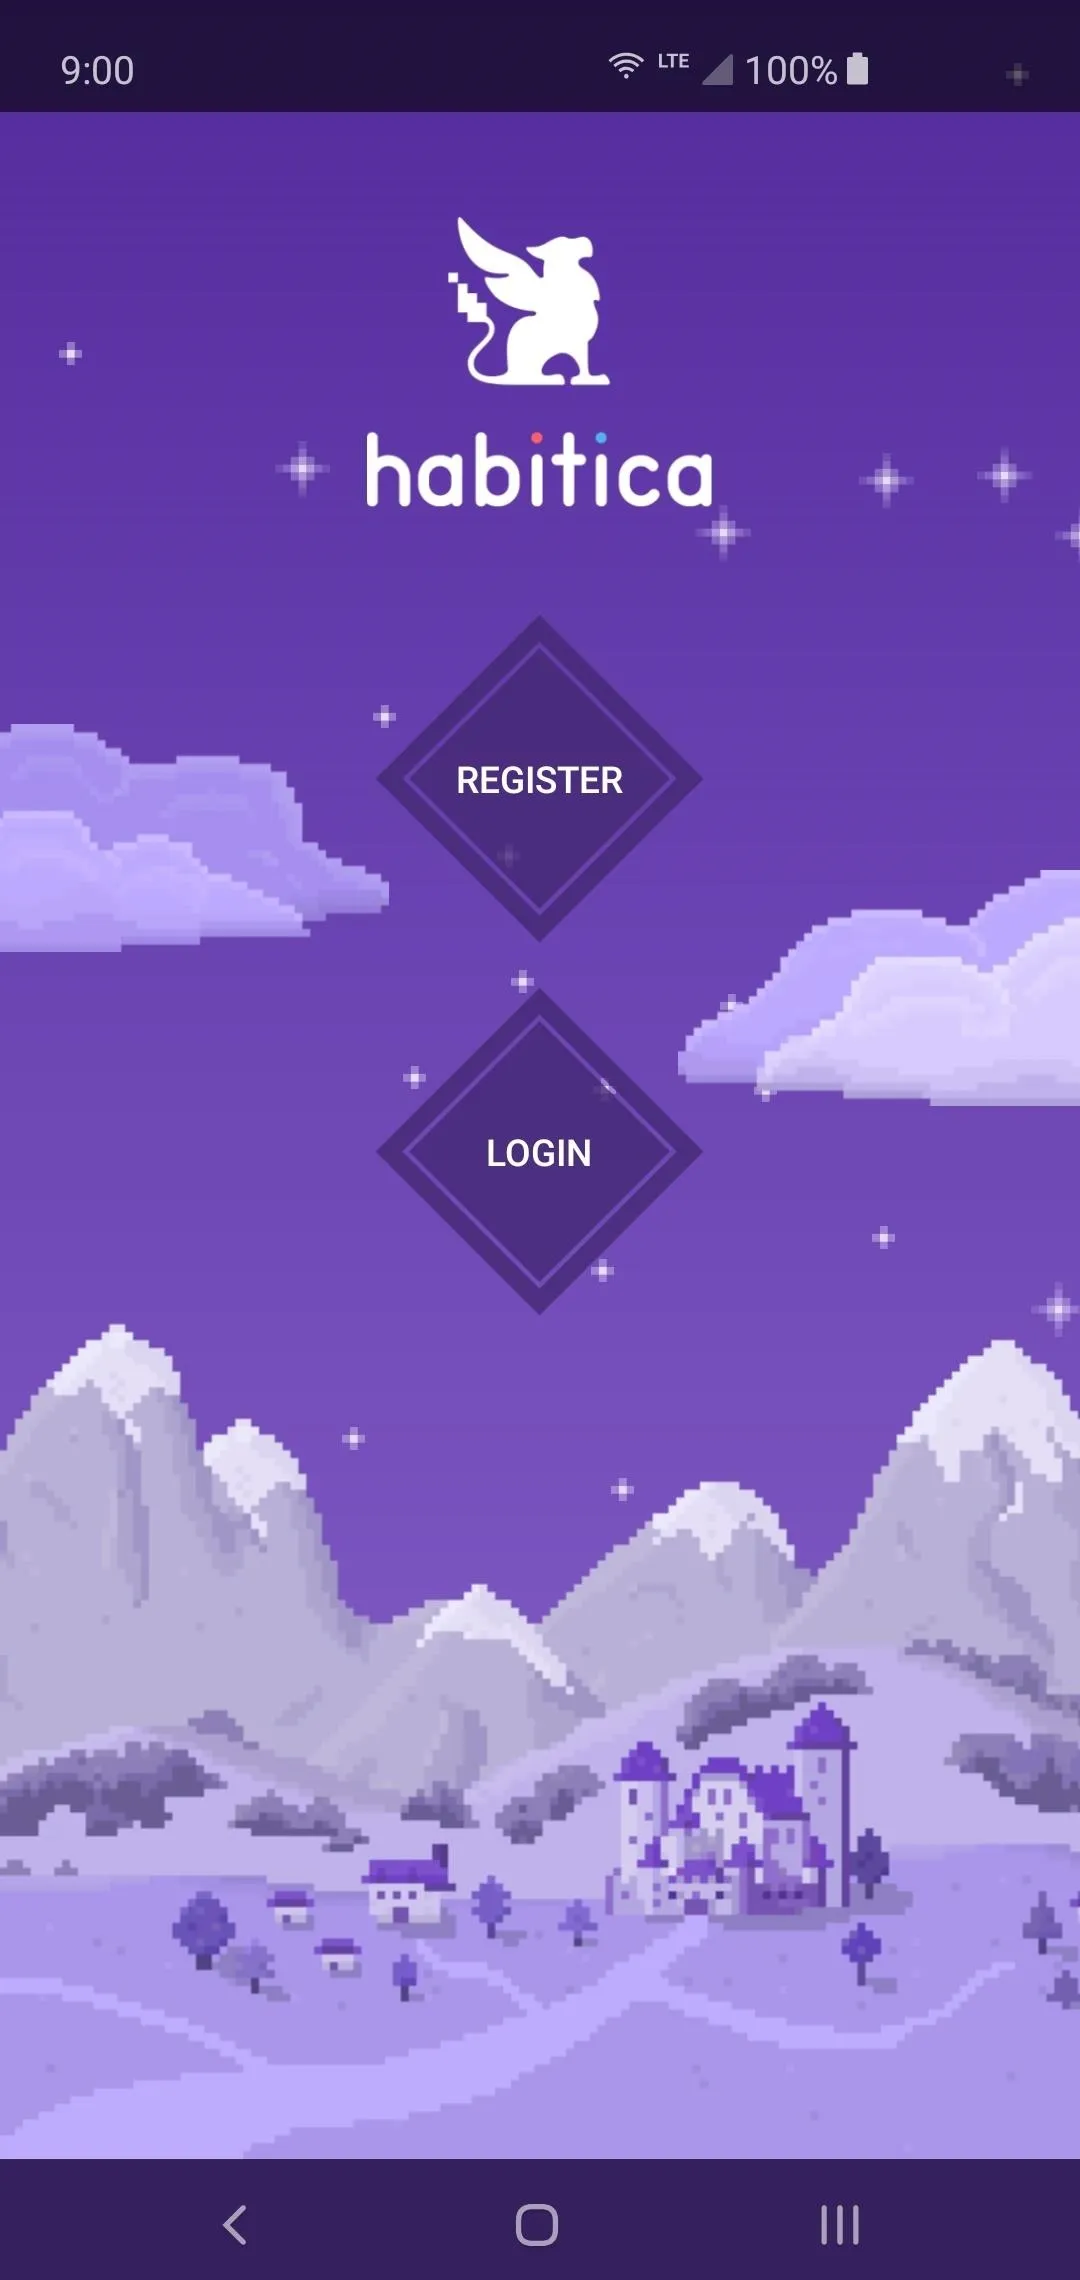
Creating an account not only allows you to save your progress, but it also allows you to use your character across multiple devices and platforms. Very useful for the convenience and ease of use factors!
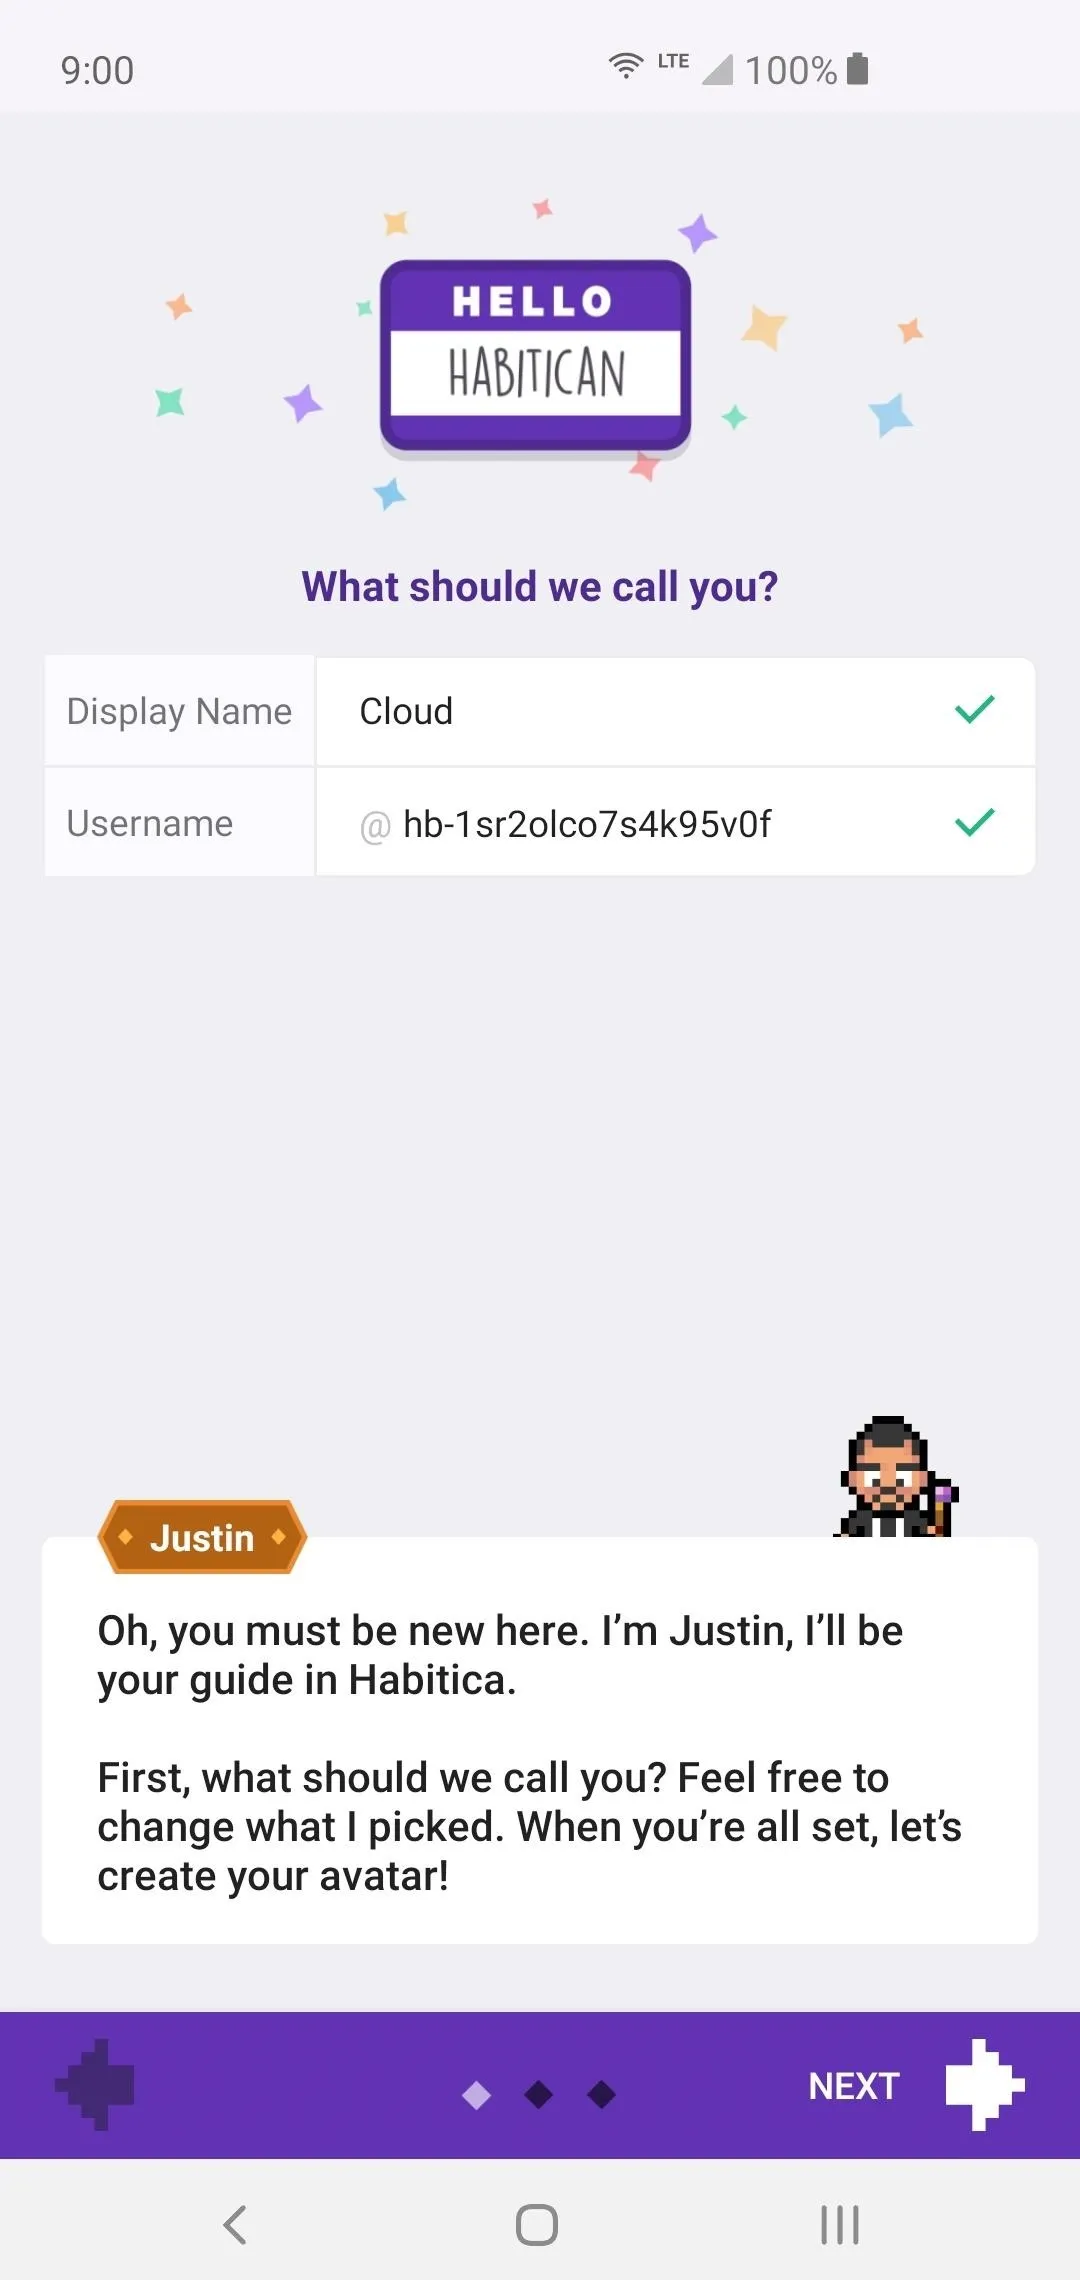
Create Your Hero
After signing in with your preferred method, you'll now begin setting up your hero profile. Choose your display name and username from here or leave them at their default values. These will be attached to your profile so you can connect to the online features with other party members. However, you can always change both of these names at any time if you wanted to do so. Tap "Next" to continue.
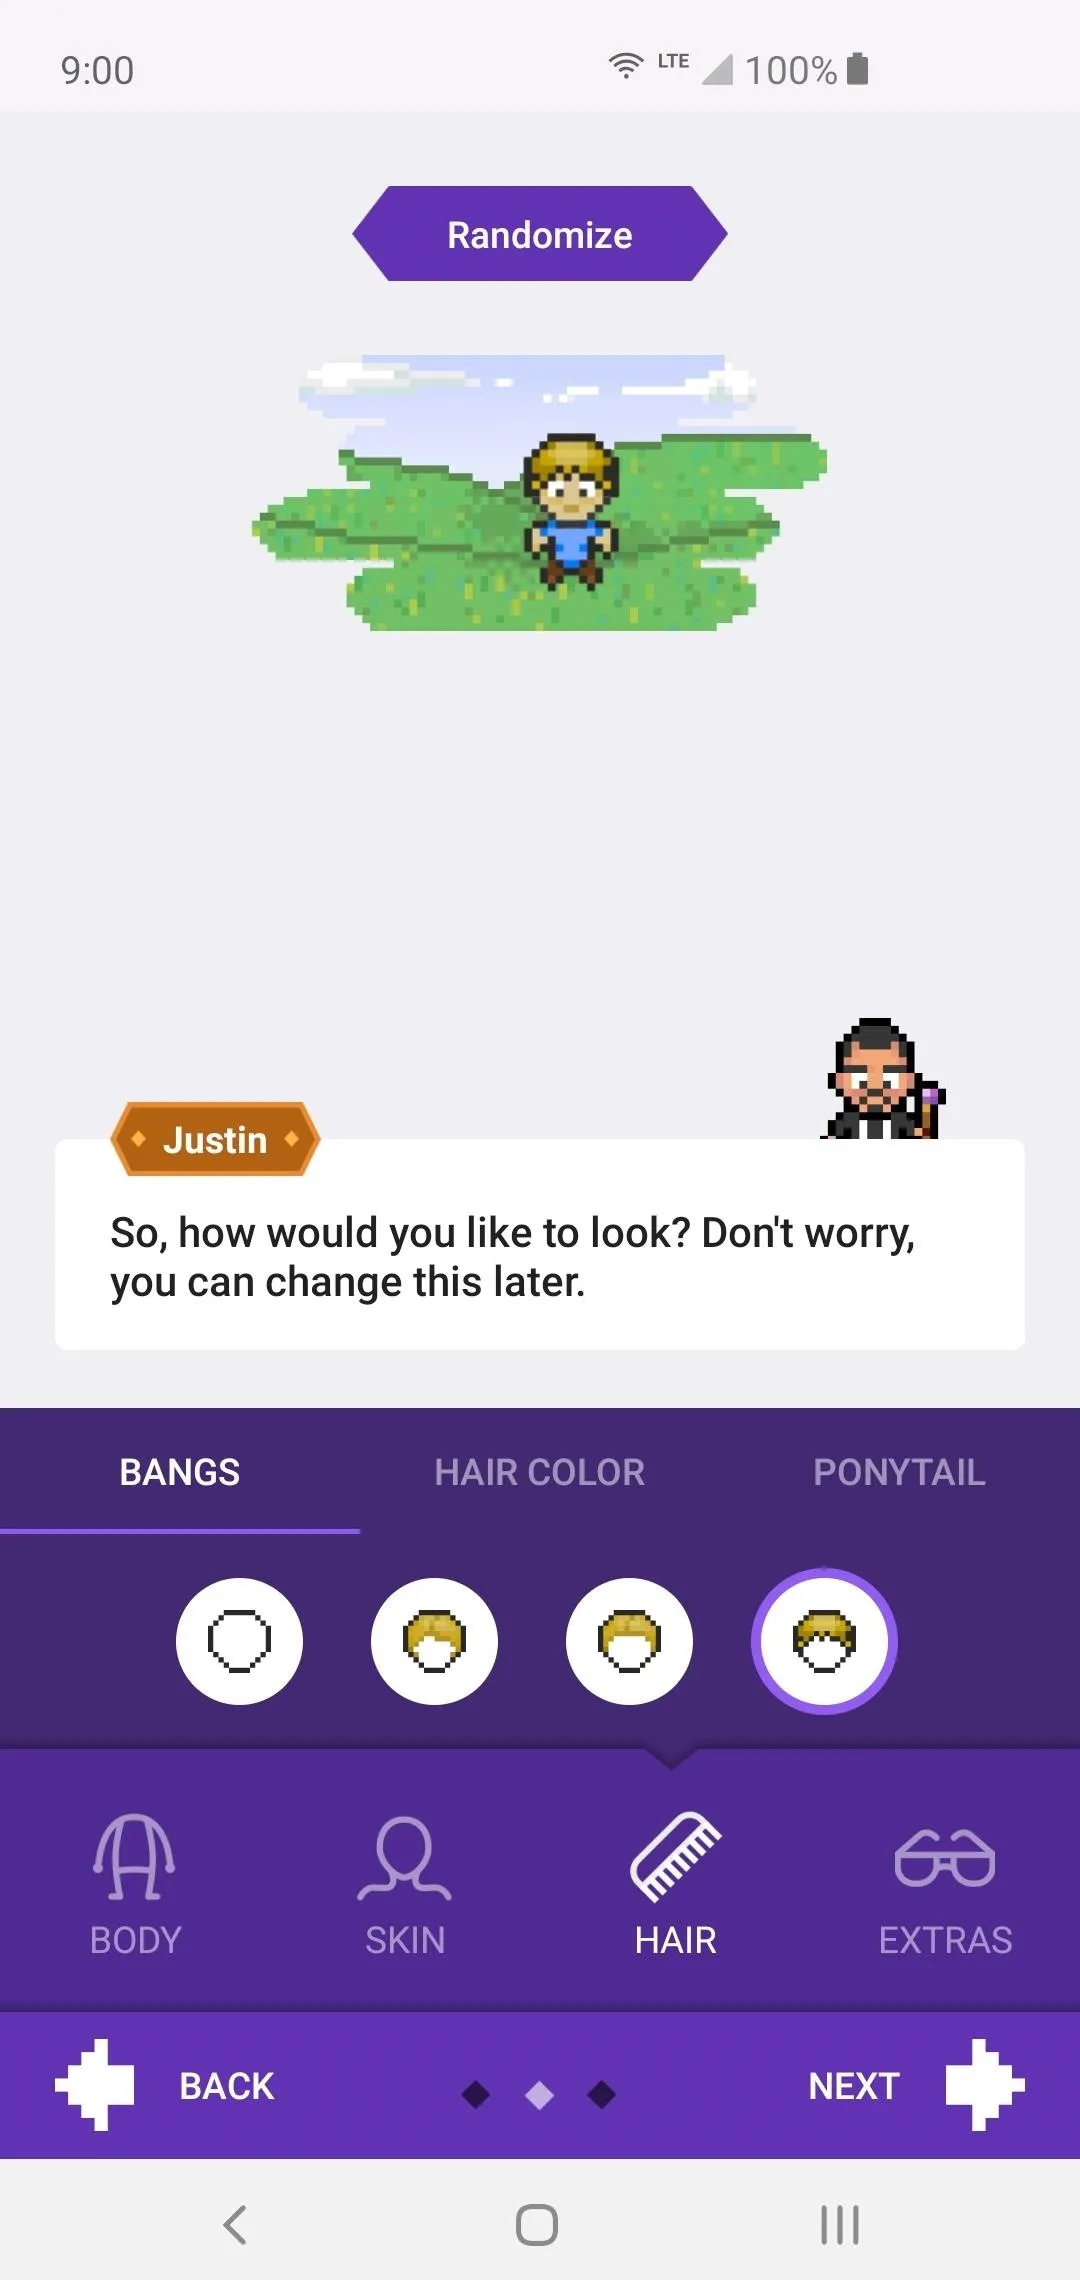
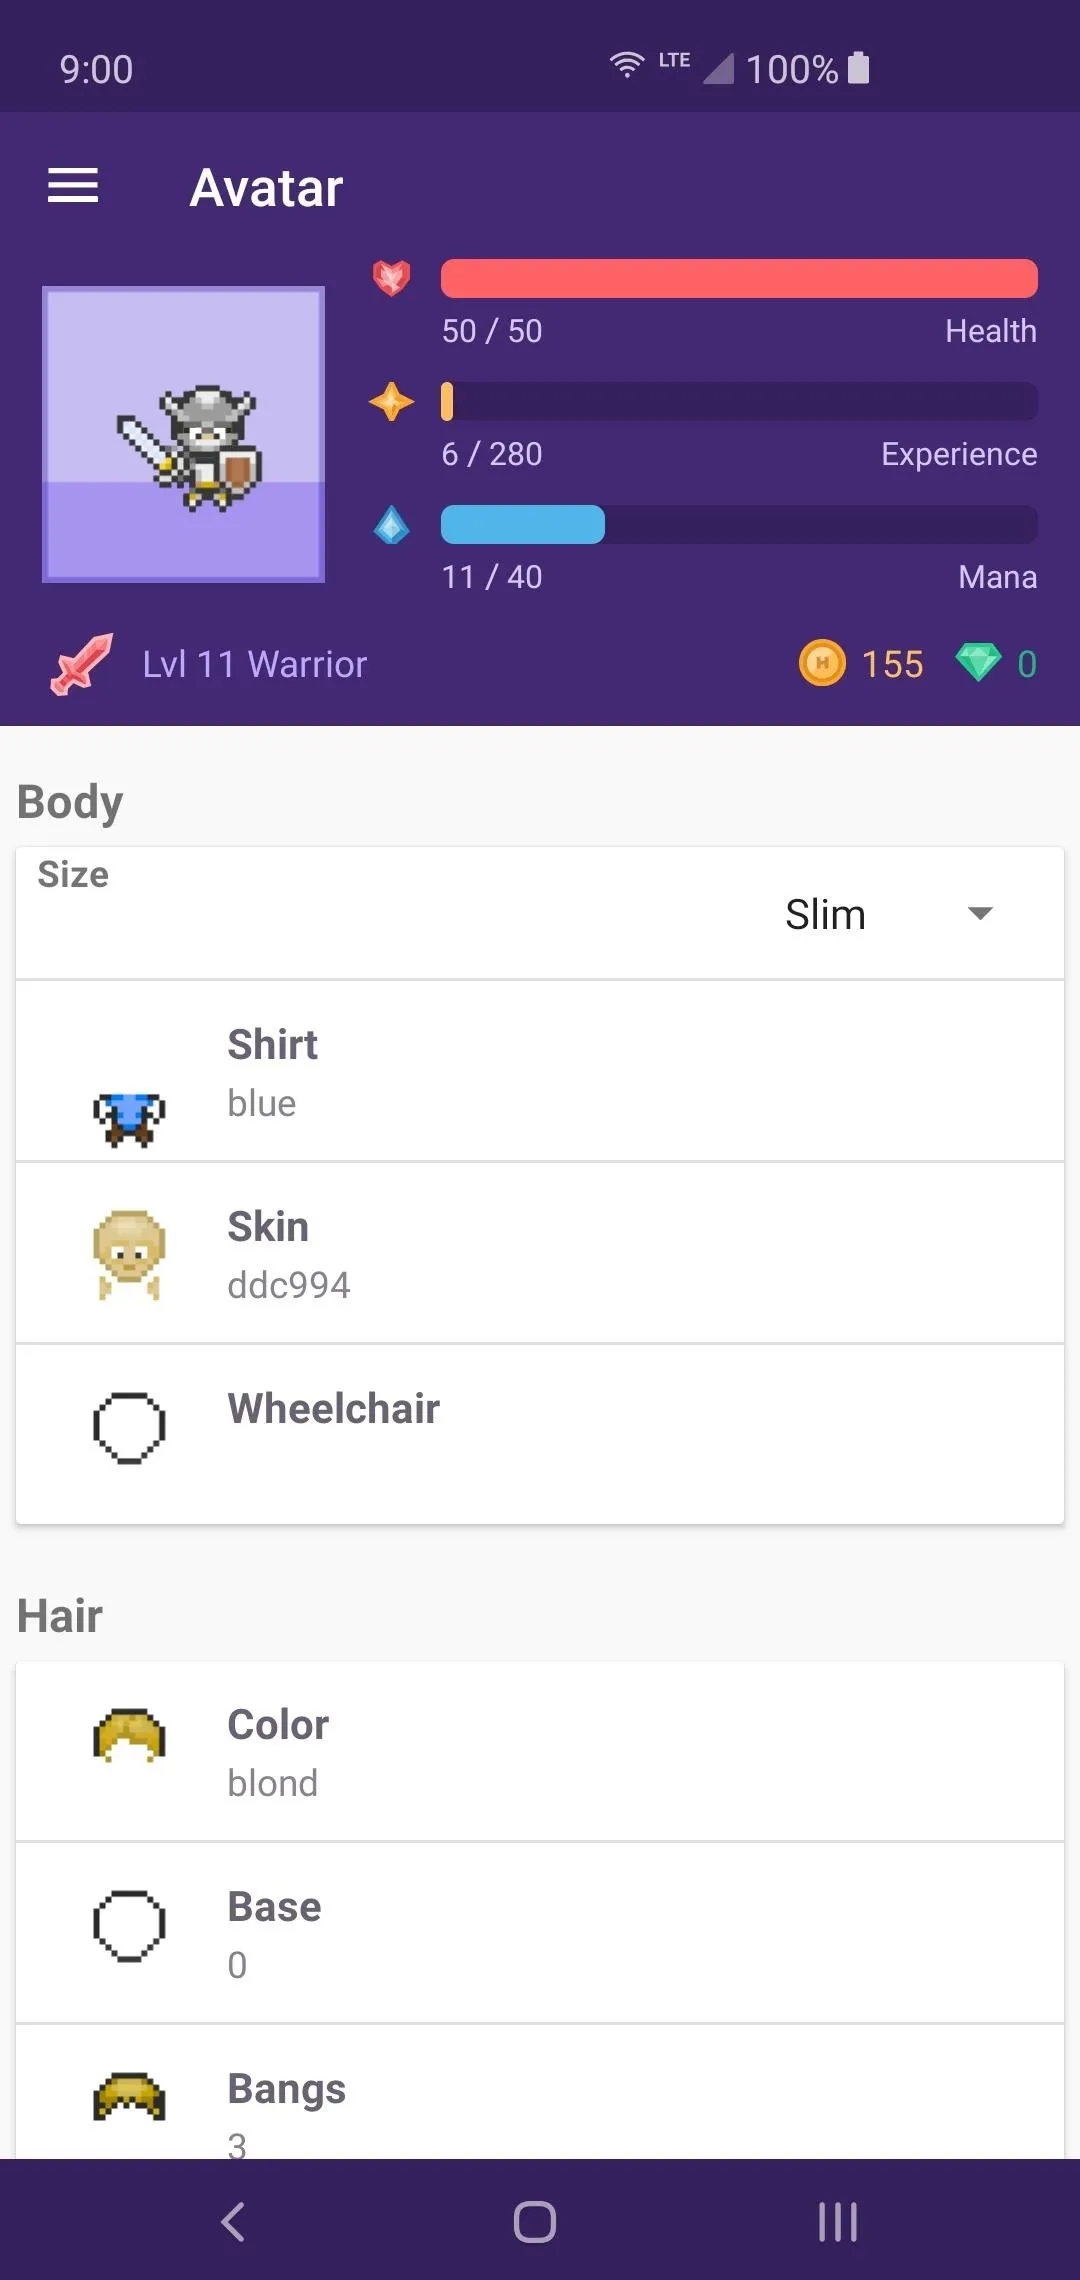
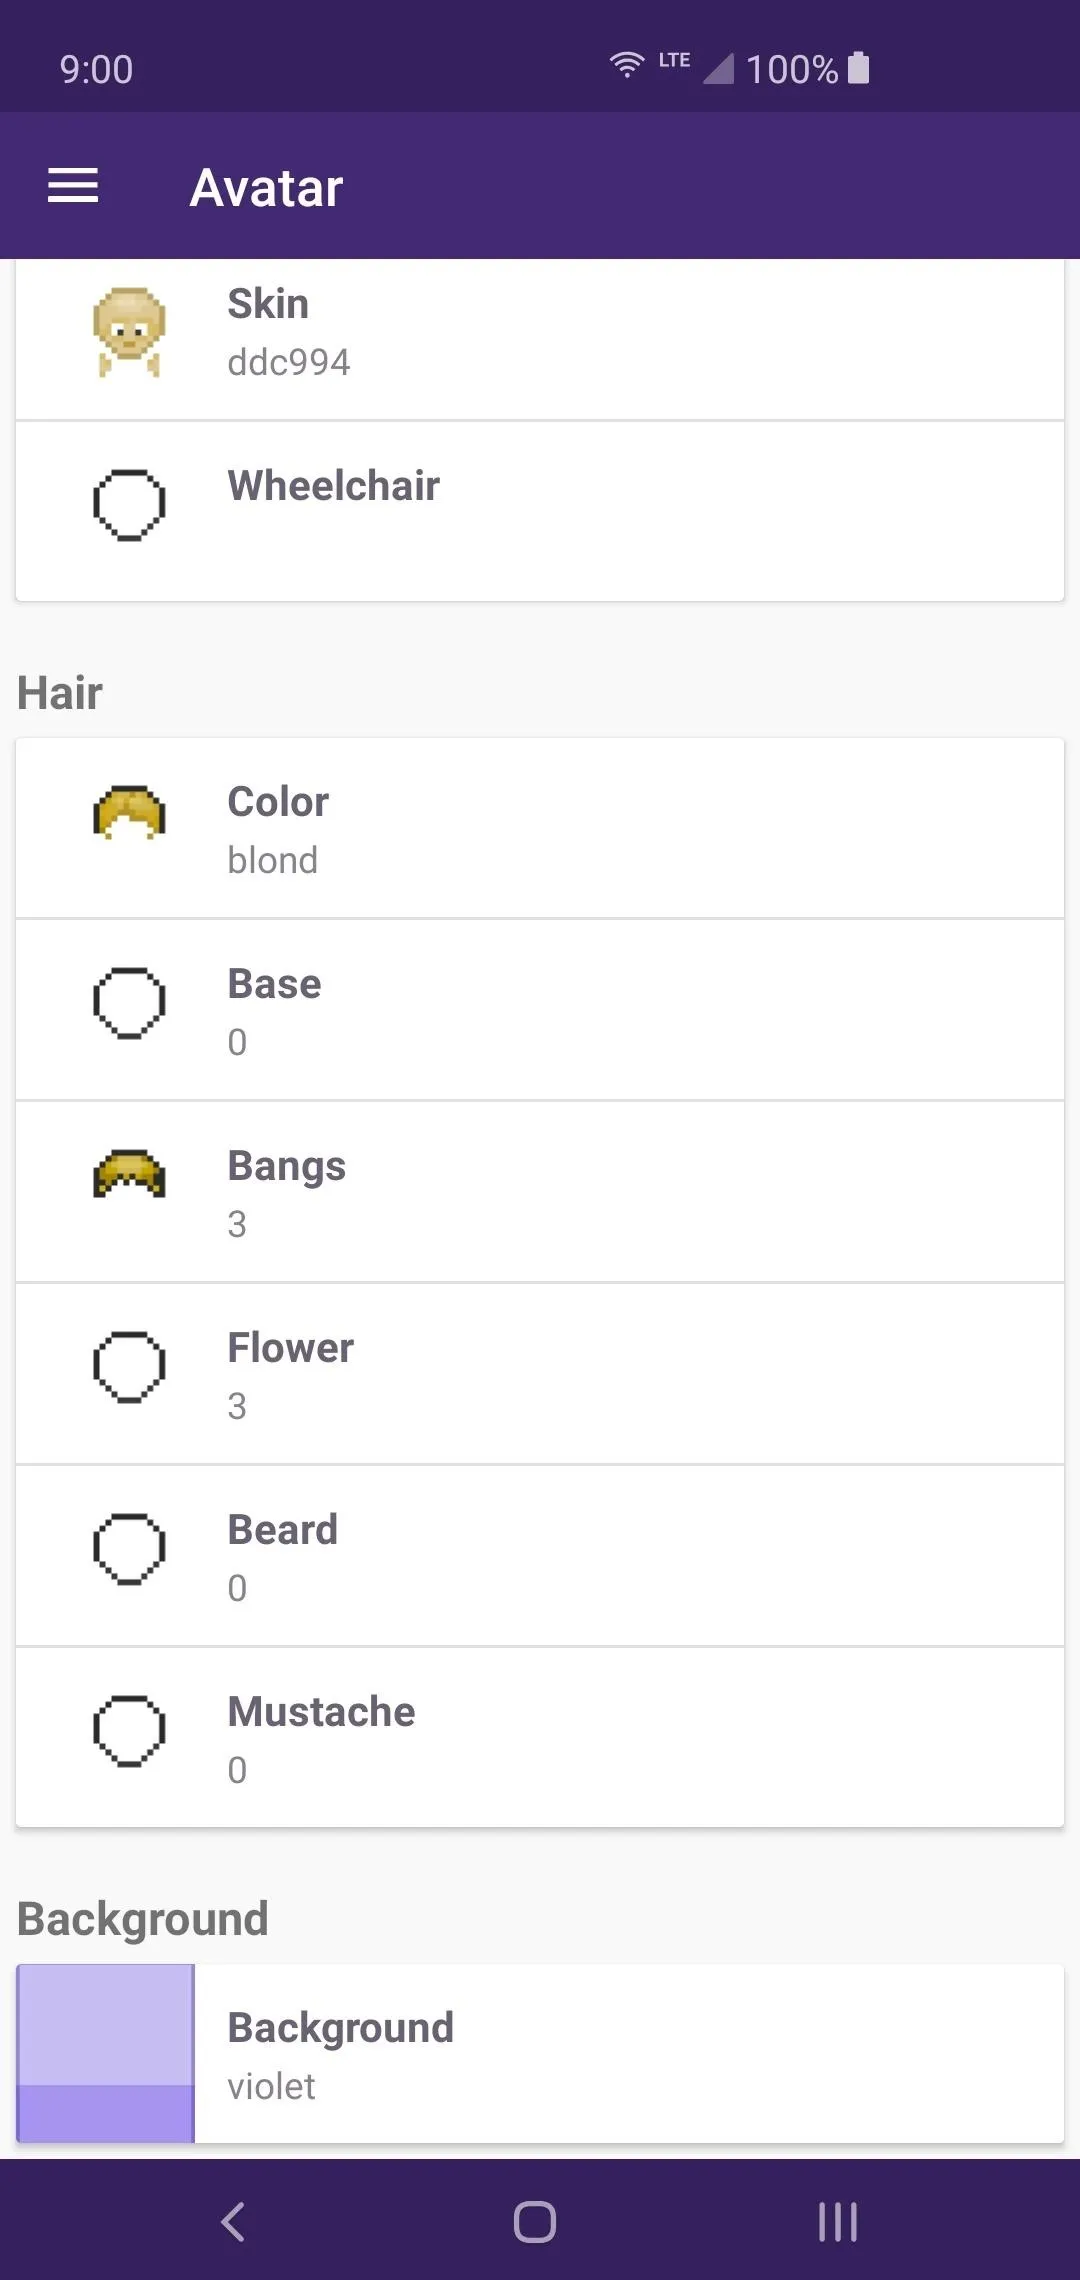
Now that your profile name is taken care of, it's time to set up the look of your hero. You can change the body size, skin color, hair type, hair color, add extra accessories, and alter the shirt color as well. If you wanted to, you could even hit "Randomize" to have it generate a look for you. There are also more premium options you can get later to level up your style. Tap "Next" to continue.
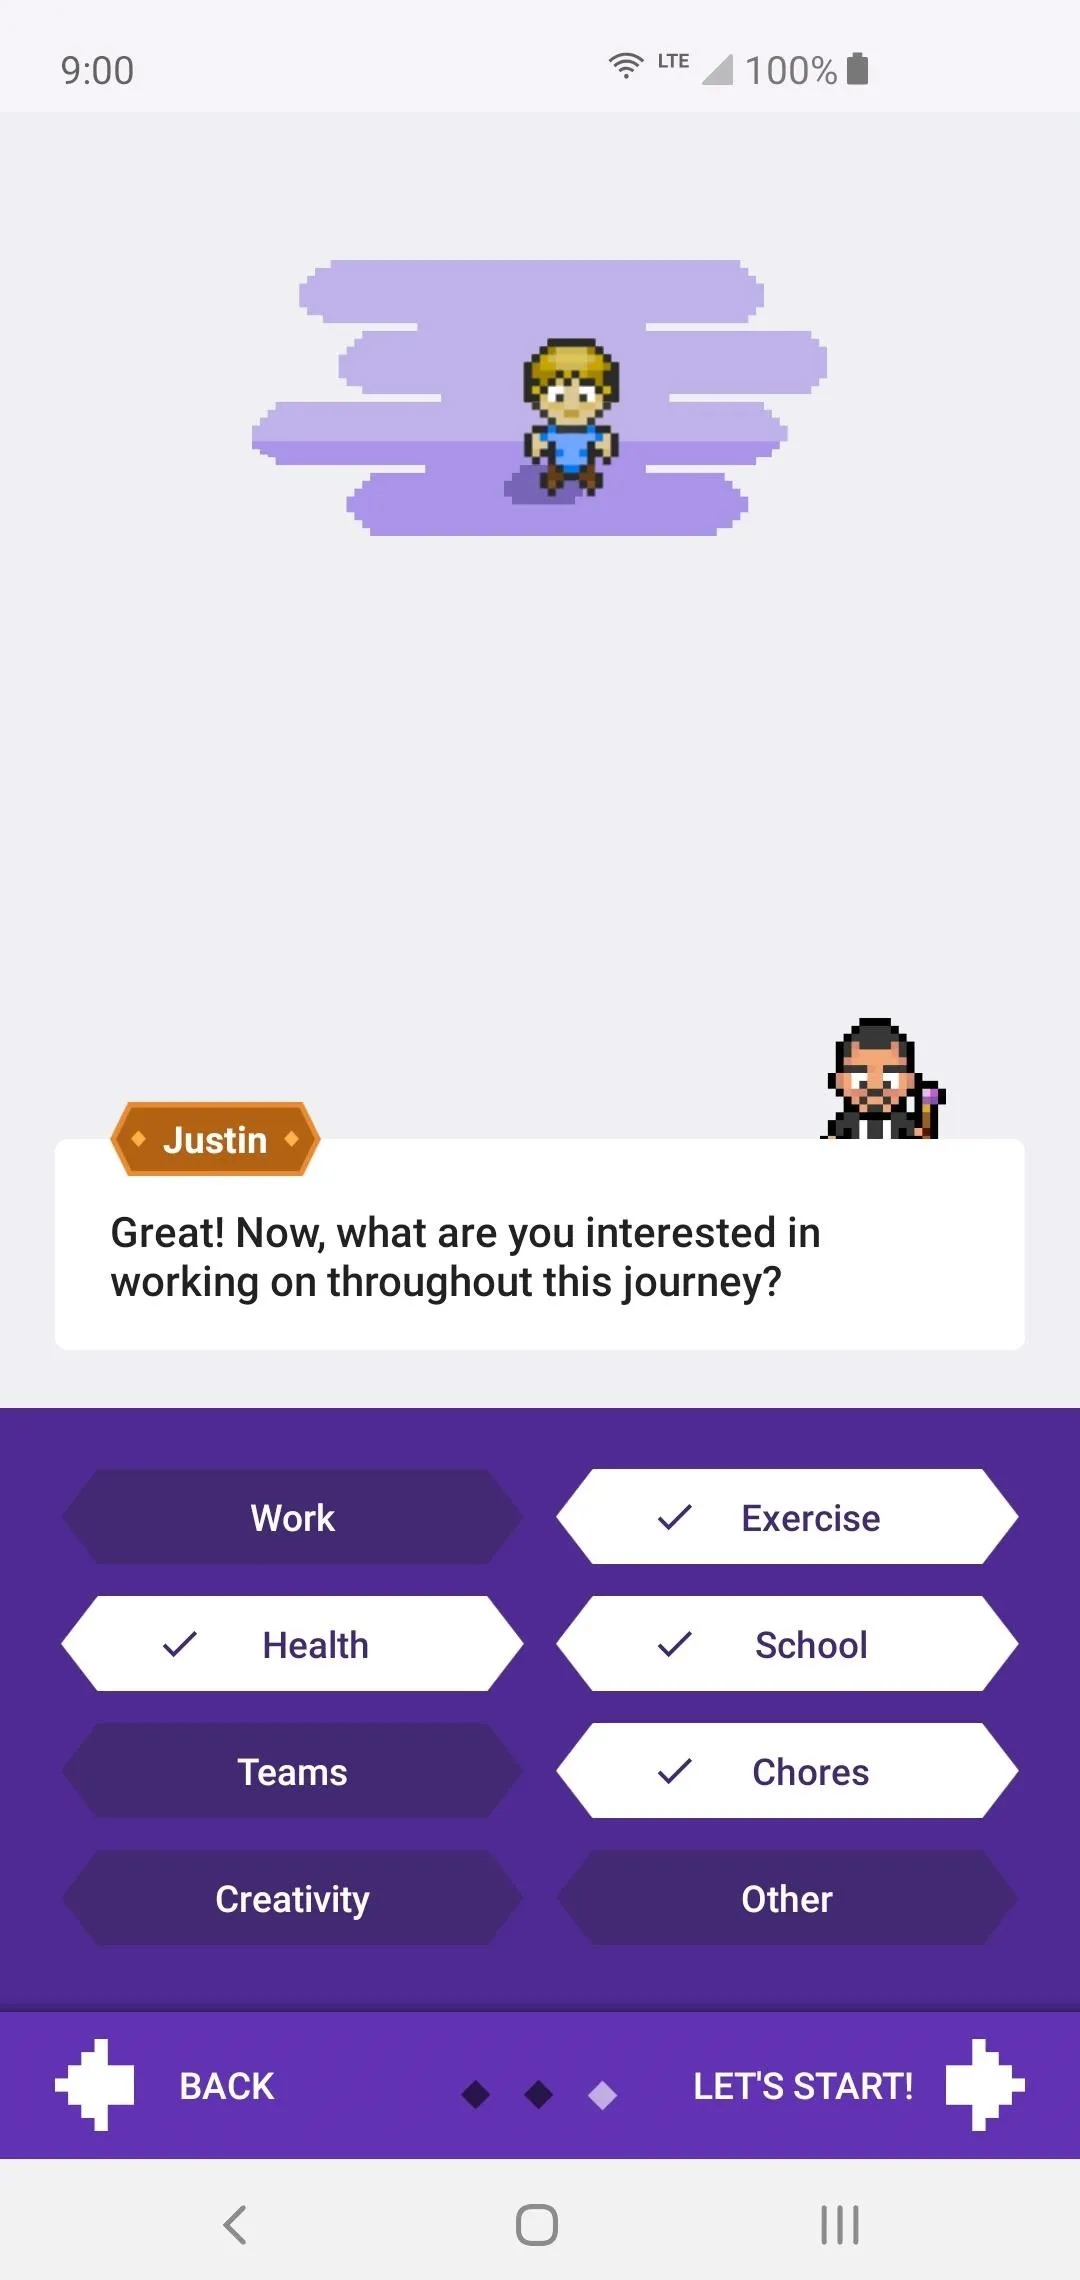
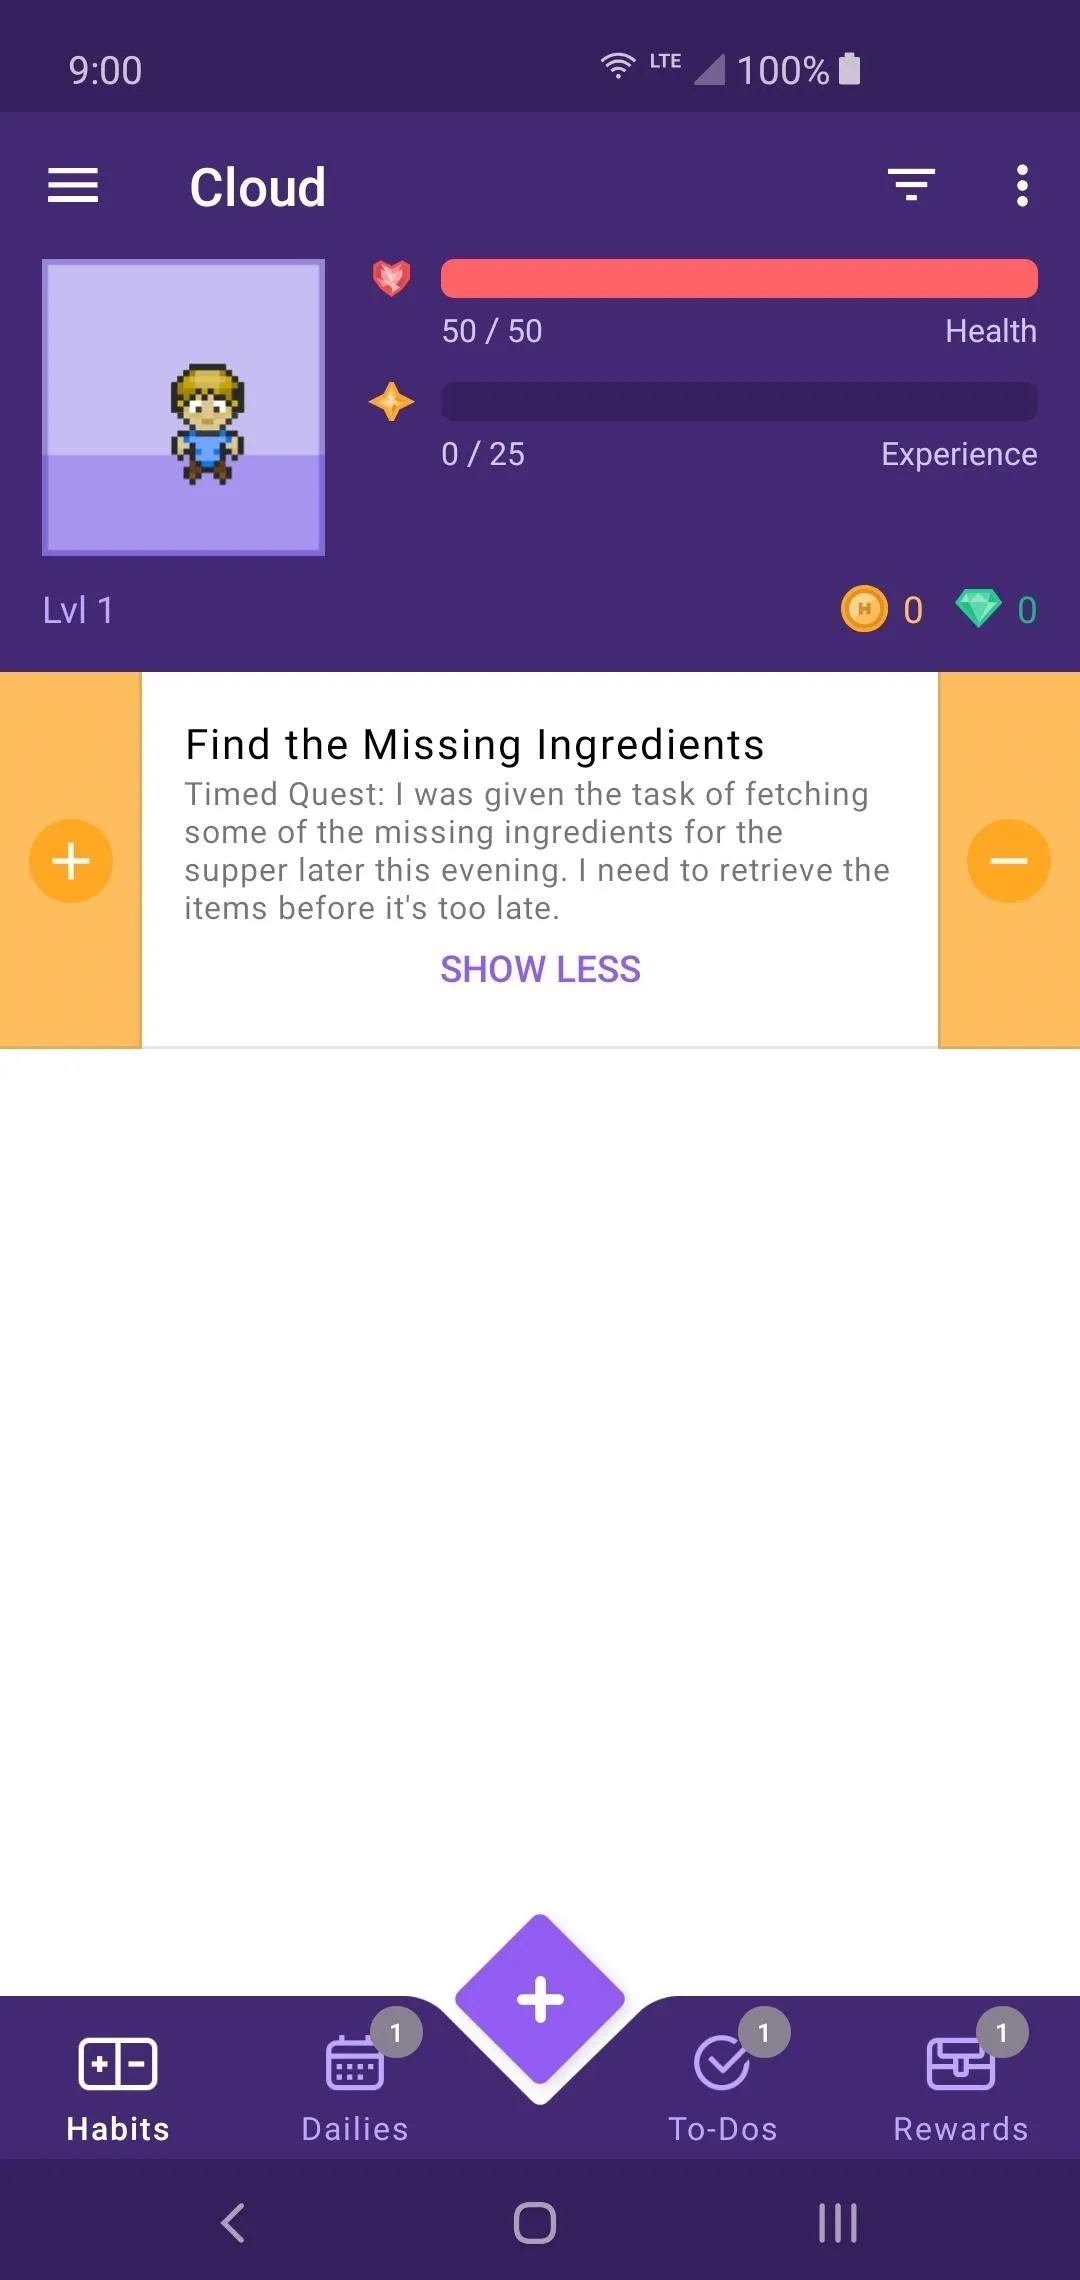
Since your hero's look is all set, you now get to choose the types of tasks or quests you'd personally like to tackle. For example, if you're trying to make sure you keep up on your homework from your classes, you'd definitely want to select "School." Pick all the items on the list you want to work on for your tasks, then hit "Let's Start" to begin your journey.
Create Your Main Tasks
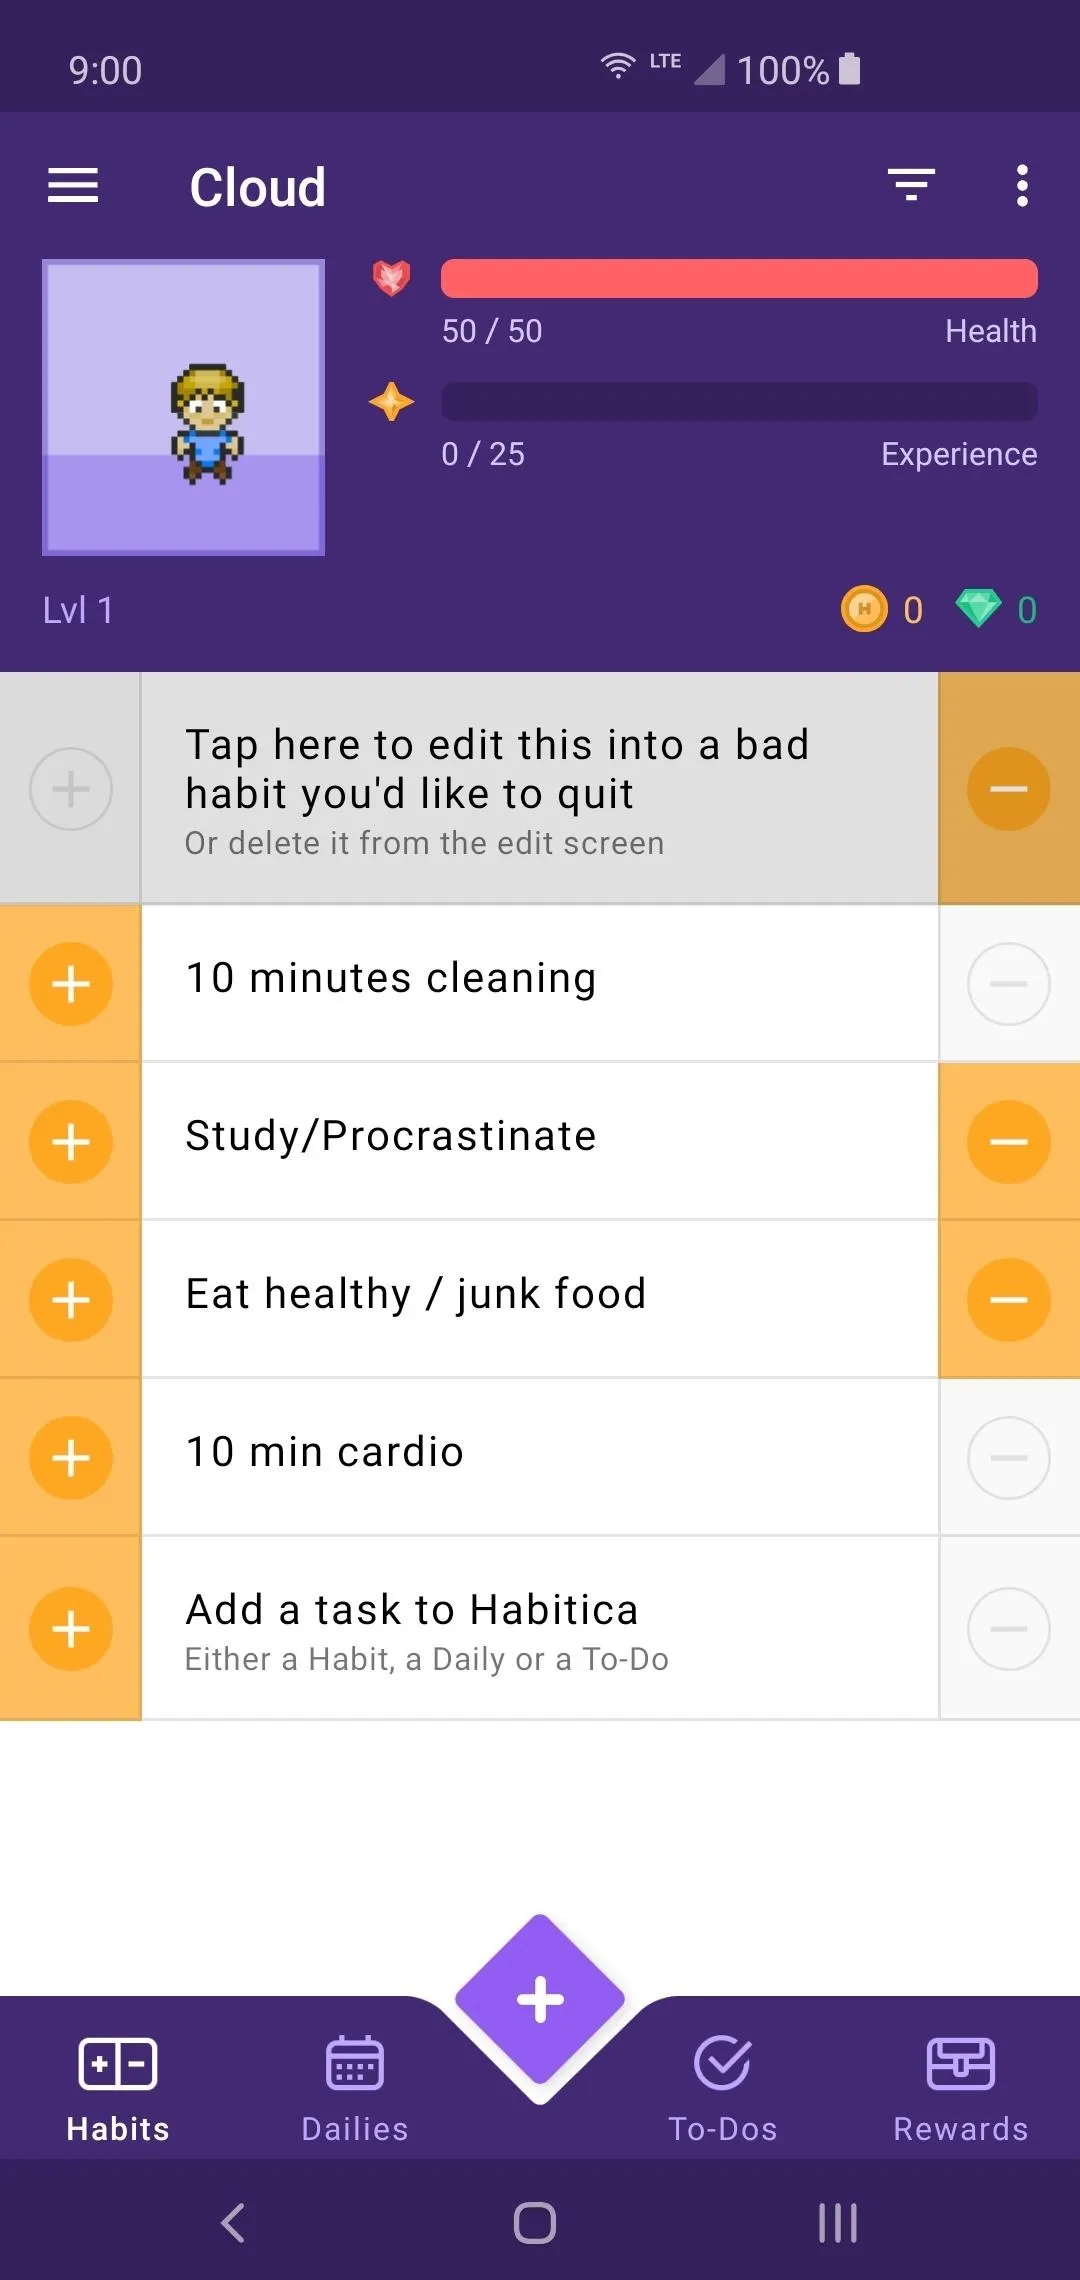
You will now be taken through the brief intro to Habits and what they are. Depending on which items you selected to work on, it will generate a quick list of example quests for you to look at, which they call "Habits." These are meant to be examples, but if any of them fit for your needs, you can keep them. In general, you'll be wiping them out and starting fresh with your own set of Habits.
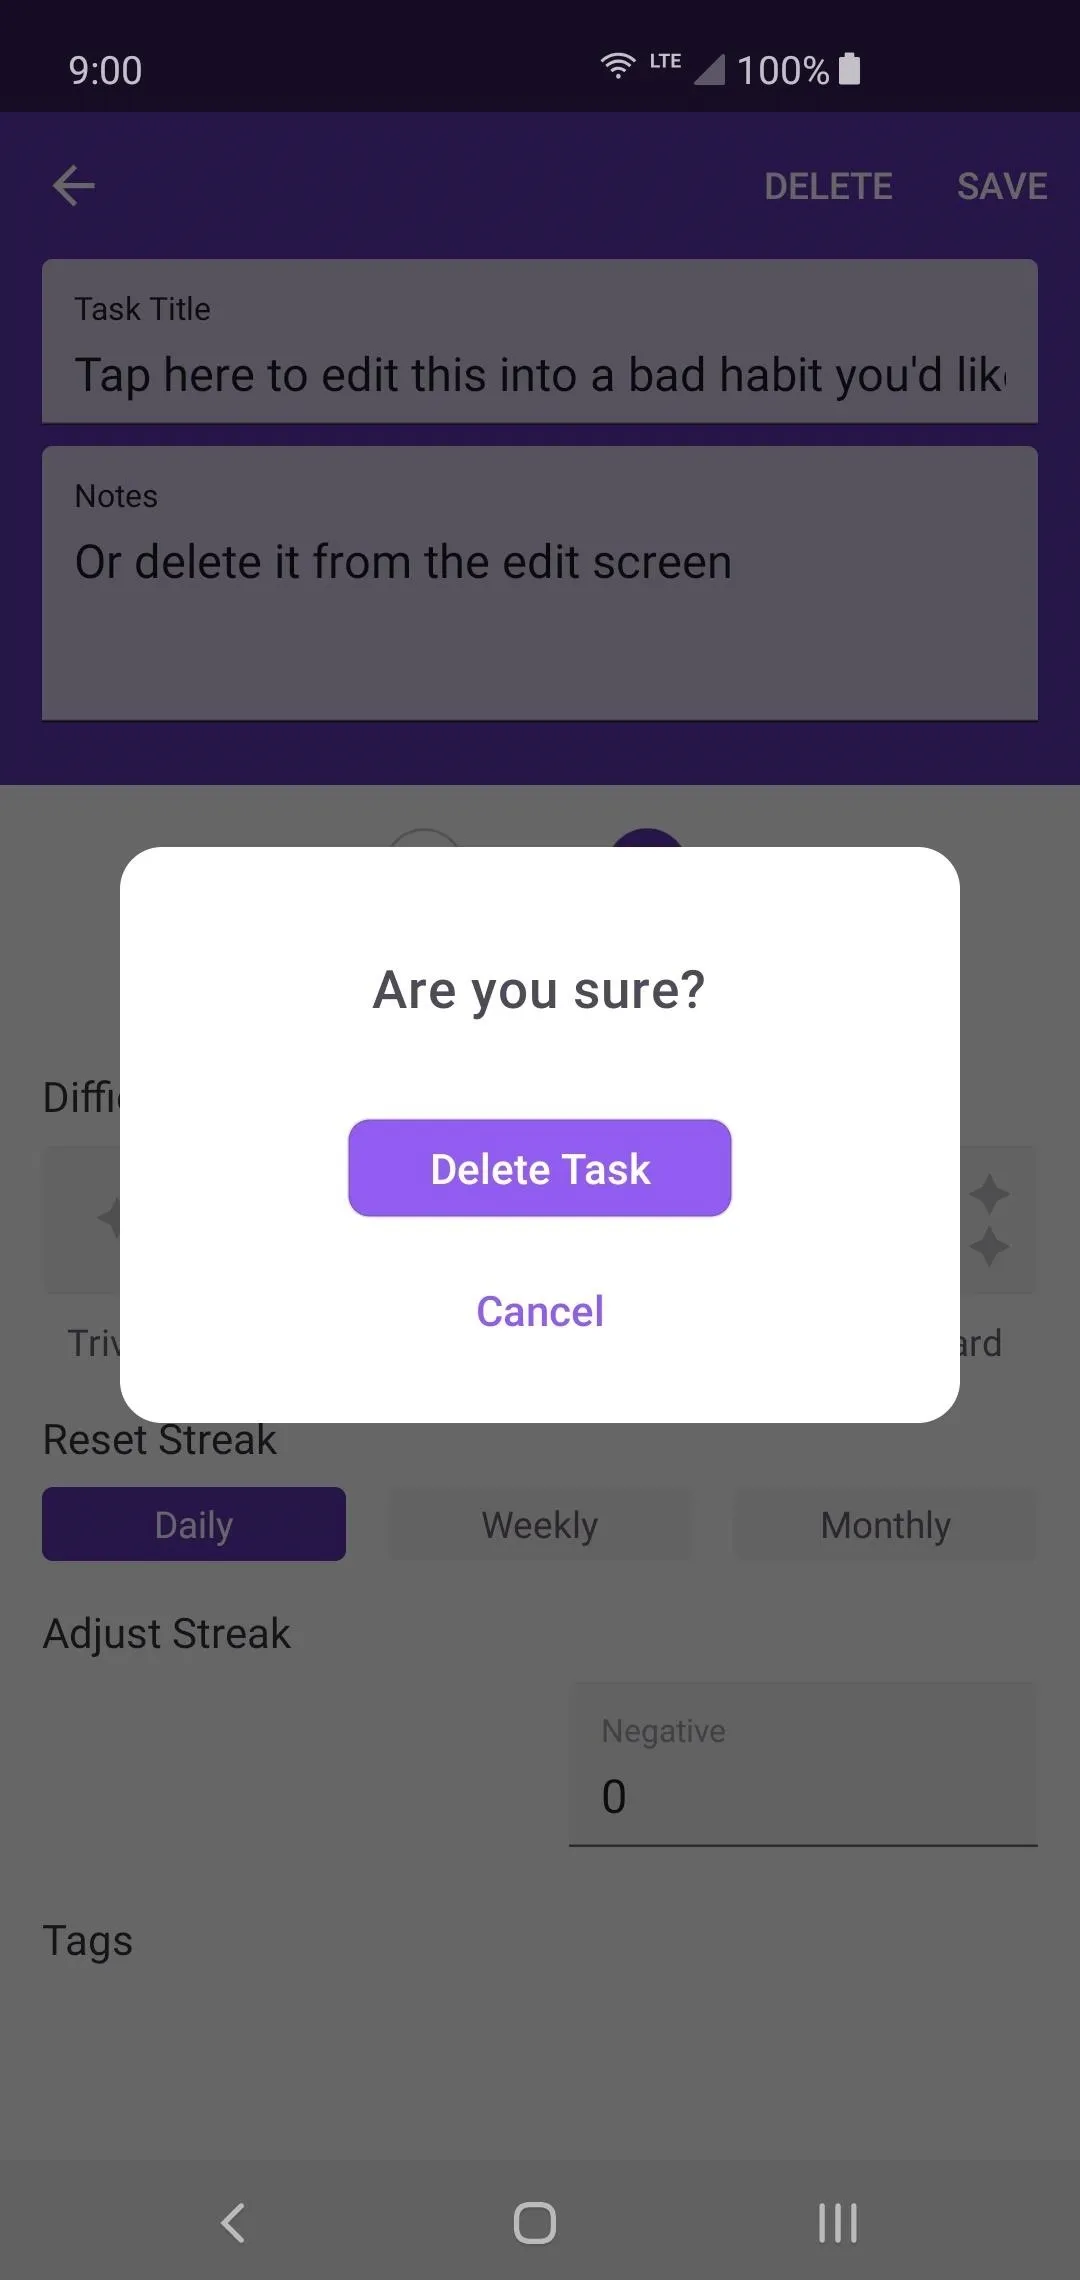
Tap any Habit you want to delete, then simply hit "Delete" in the upper-right, and finally "Delete Task" to wipe it off your list. Do this for all the pre-generated Habits you don't want to keep so that you can have a clean slate for your own tasks.

From here, you can begin adding your very own user-defined Habits by hitting the plus button at the bottom of the screen. This a one time task that only needs to be completed a single time. Give your quest a title of any kind and include any specific quest notes right below it if necessary. Get creative and think about some cool quest names from your favorite games to help motivate you even more.
Now decide if this Habit has positive or negative properties that can be assigned to it. For example, if you can miss or fail the task in some way, it should have both positive and negative qualities. This ensures you can have rewards for completing the task or get penalized for failing it just the same. After that, you can pick the difficulty level for the Habit, then select how often it resets.
Now, just hit "Create" to complete the process. Start out by adding a handful of basic tasks until you get the rest of the setup finished. Also, don't complete any of your tasks yet since you haven't set up your reward system with custom actions yet. Once you get familiar with everything, you can come back and dive into the nitty-gritty details with even more main tasks for you to take care of.

Create Your Daily Tasks
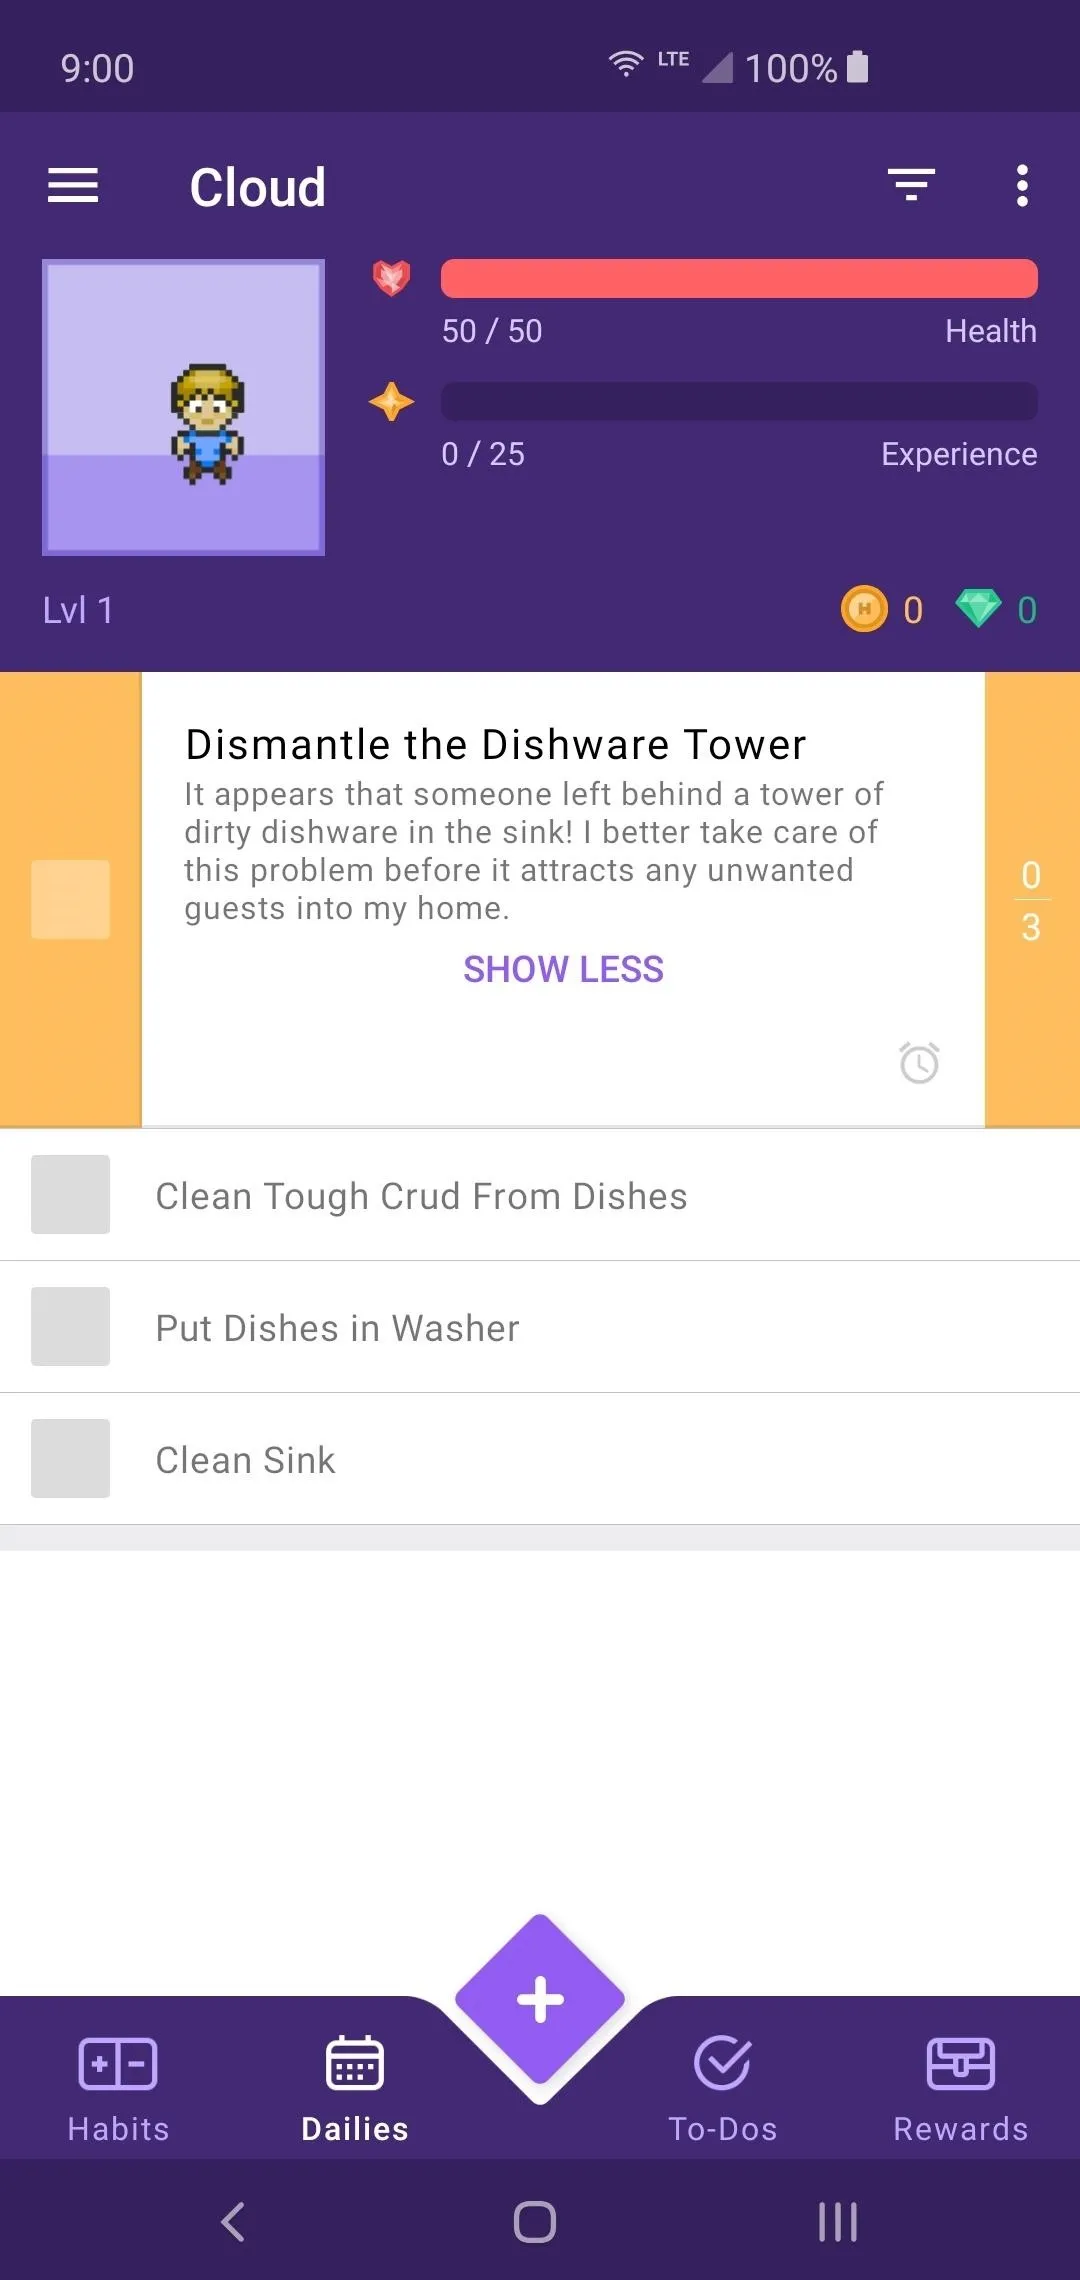
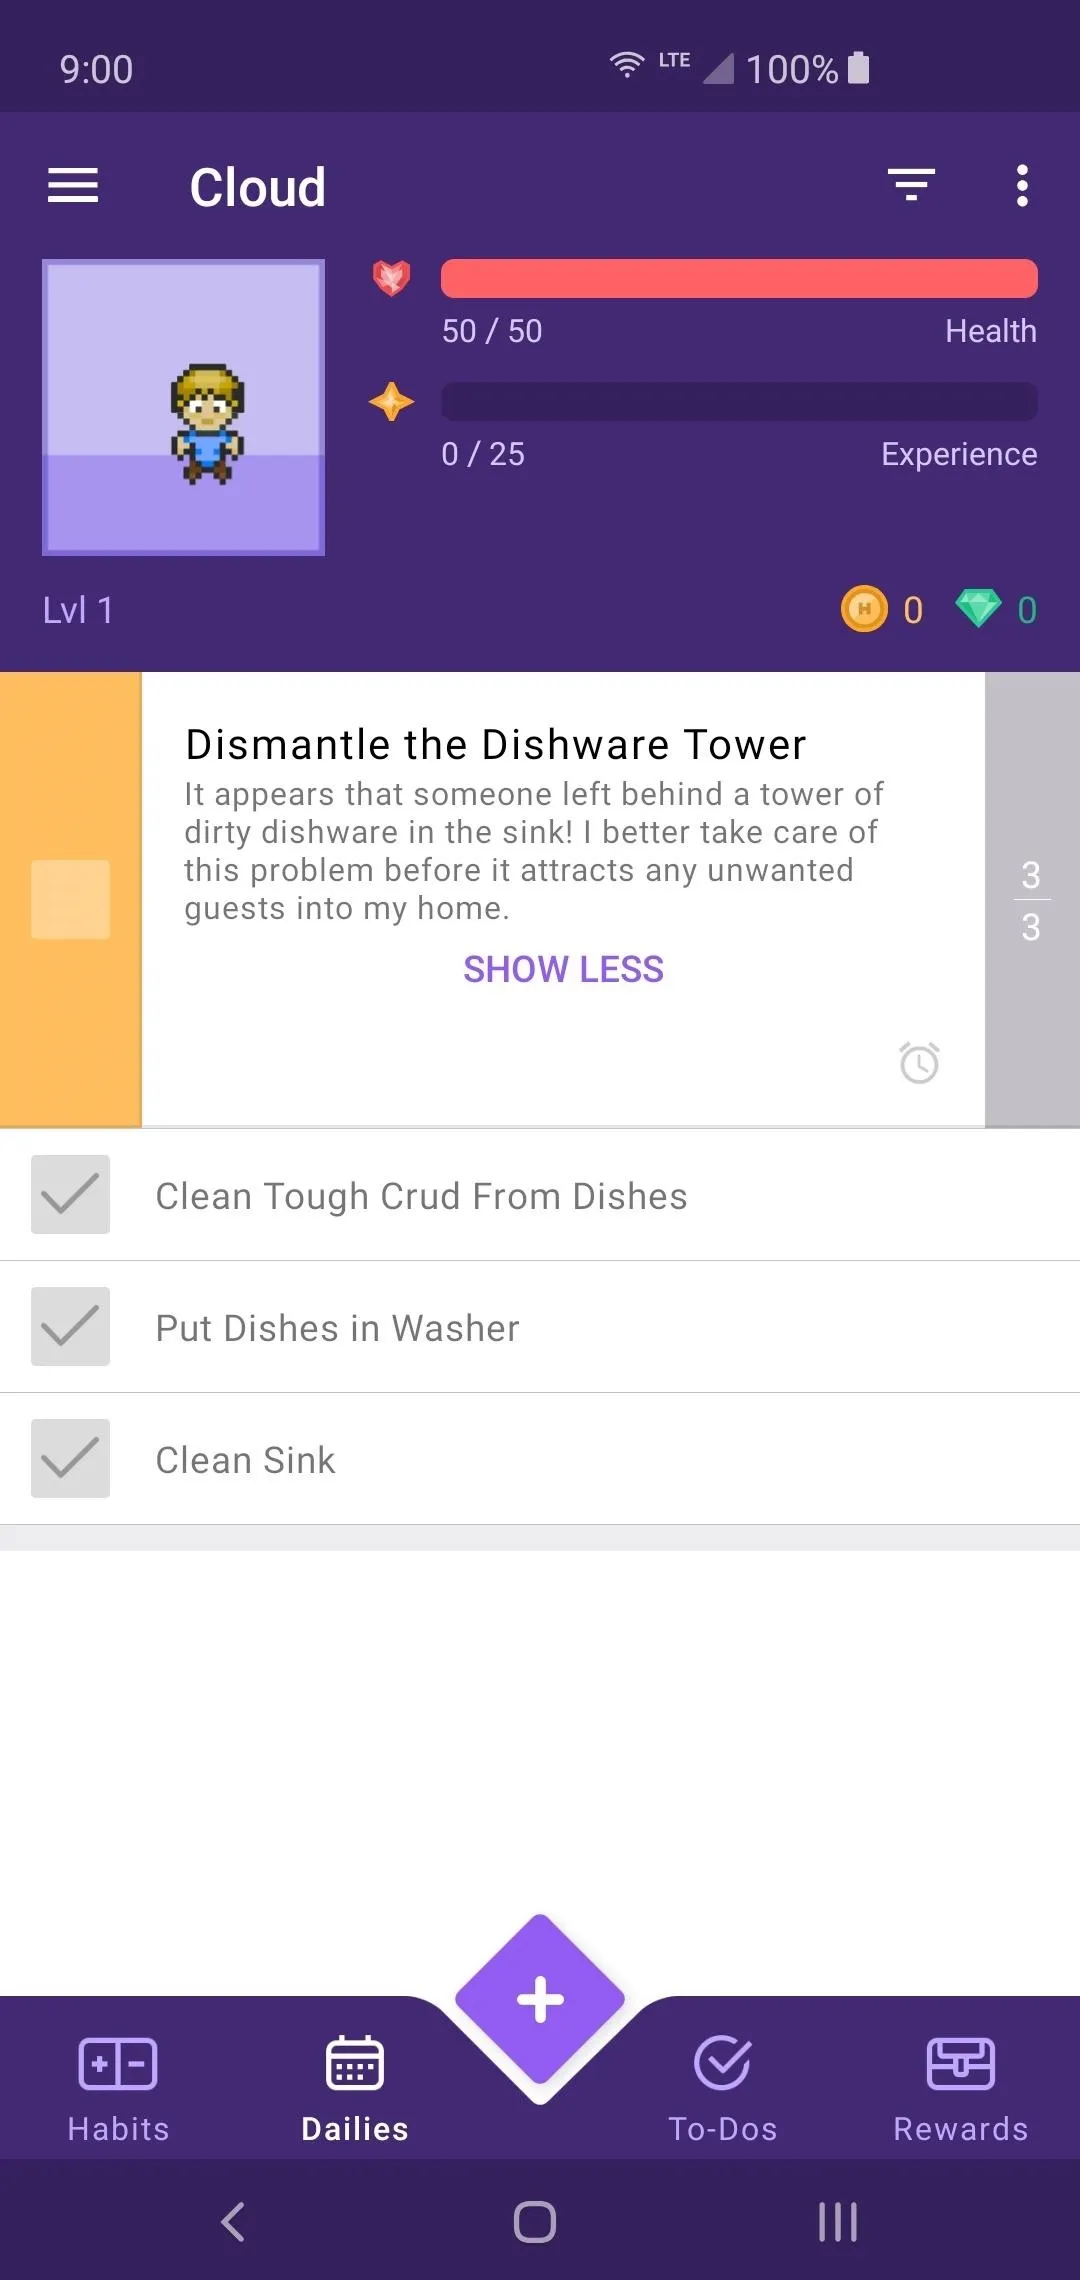
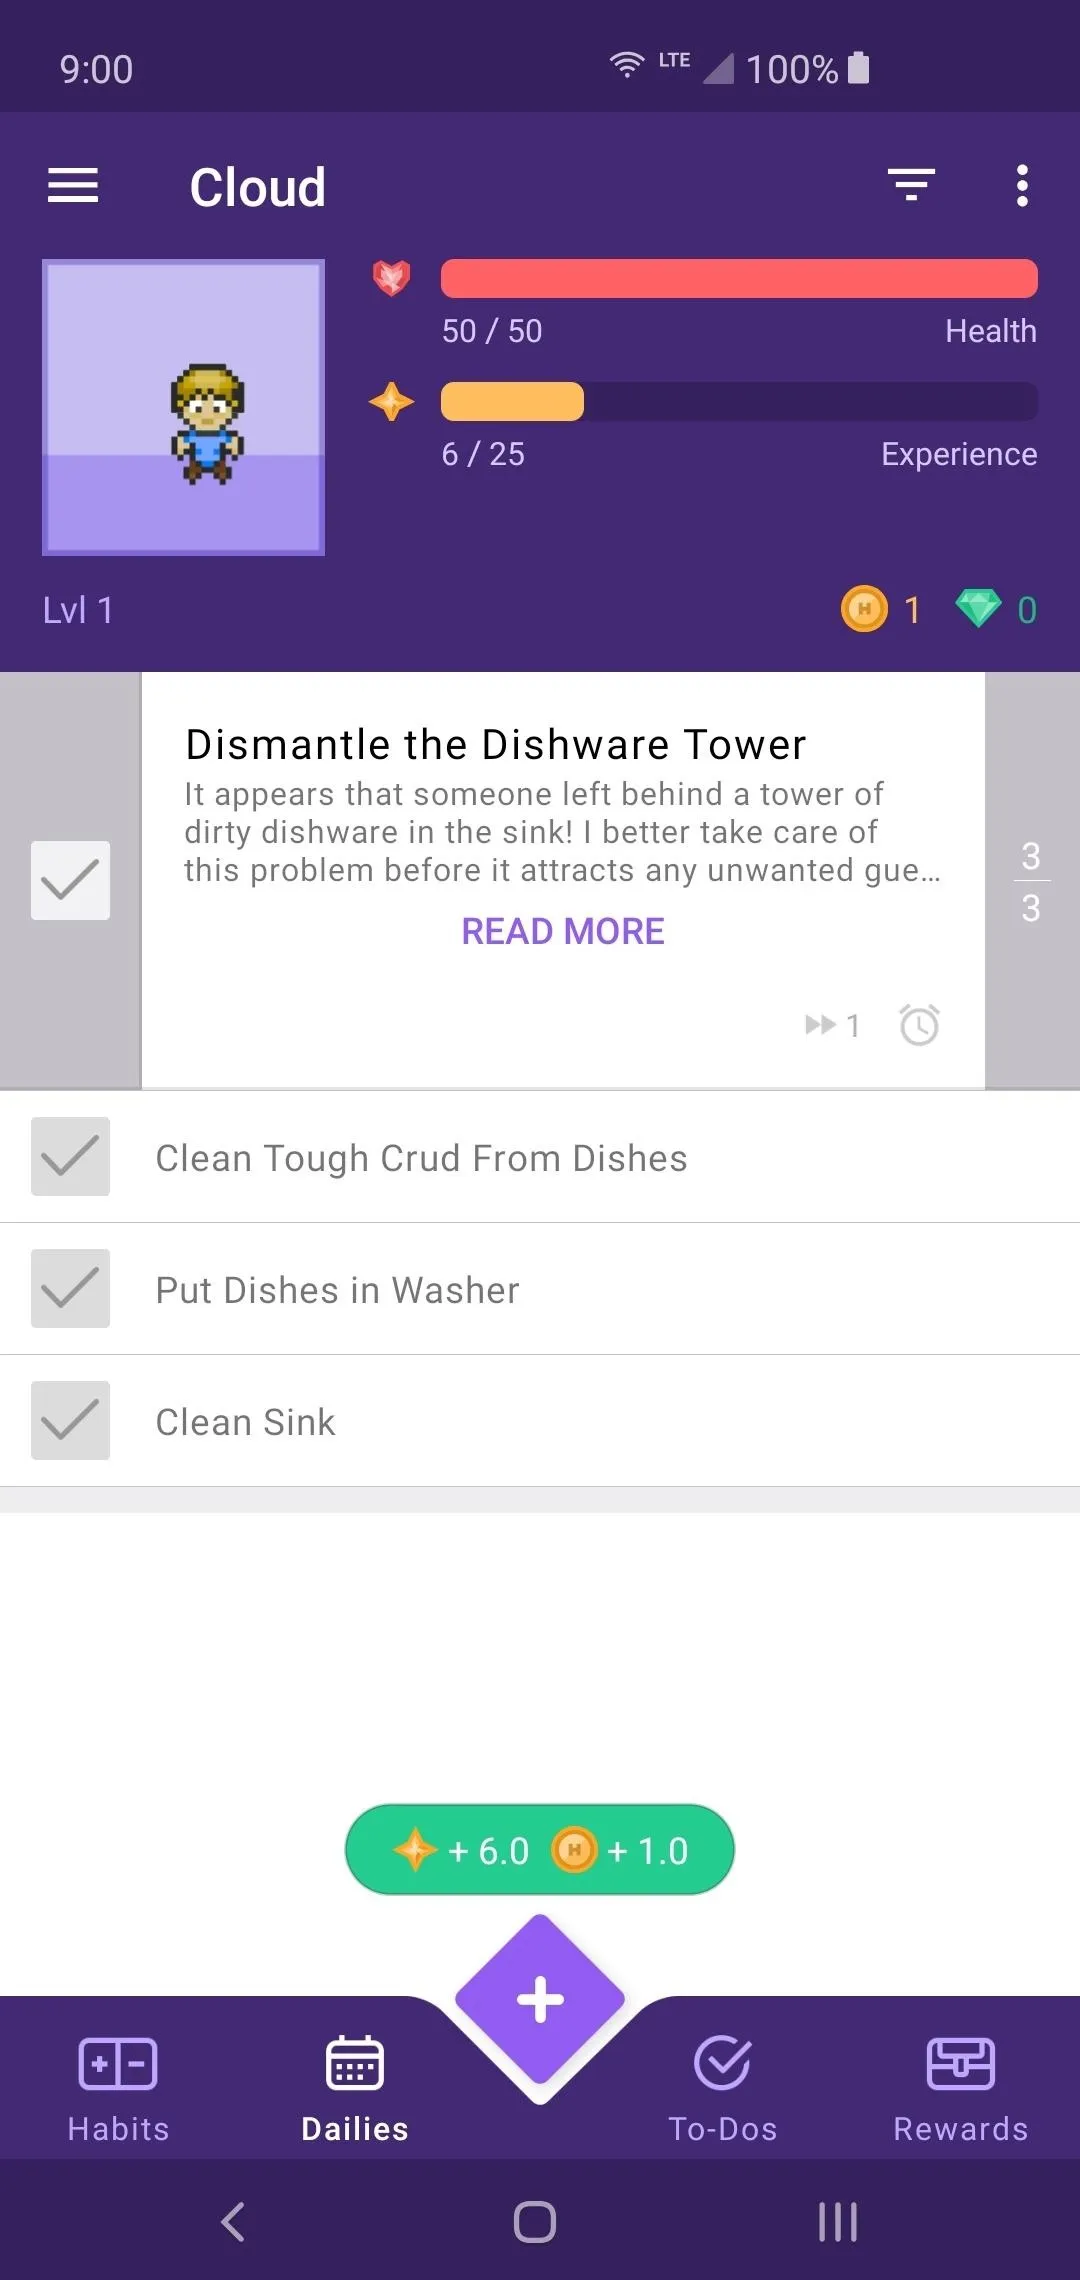
Tap the Dailies tab at the bottom, then you will get a basic tutorial of what this feature is. These are tasks that you would do daily, such as washing dishes. Just as with the main tasks from the Habits section, some basic tasks based on what you picked earlier will be generated here. If you need to delete them and start fresh, select the item, then hit "Delete" just as before.
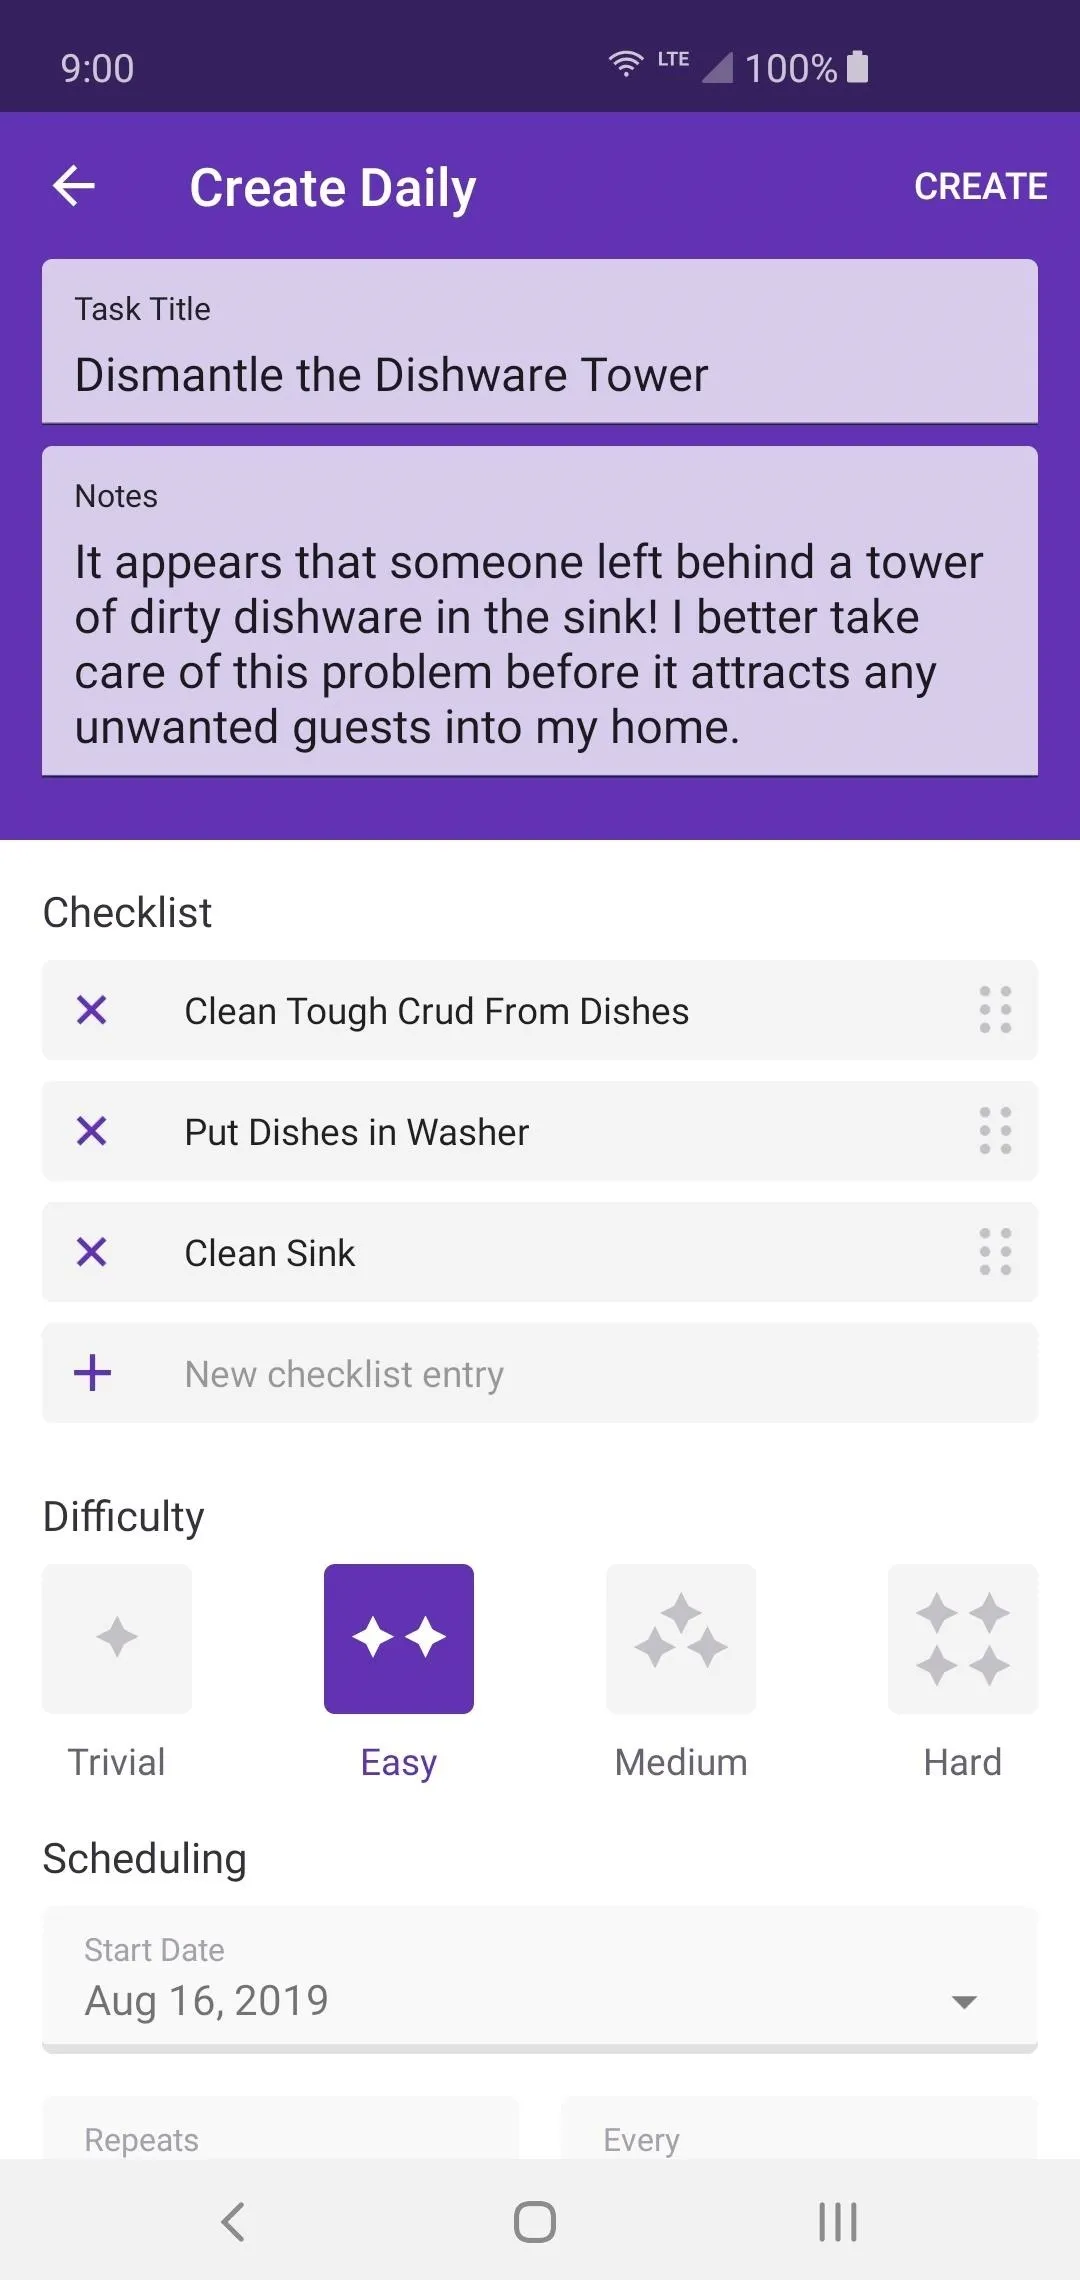
Now you can tap the plus button and begin setting up a handful of your daily tasks you want to add into your list. Just as before, try being creative with your titles and descriptions to make you smile every time for increased motivation. Works every time, trust me. With Dailies, you have a few more options to set up than with the main tasks from the Habits.
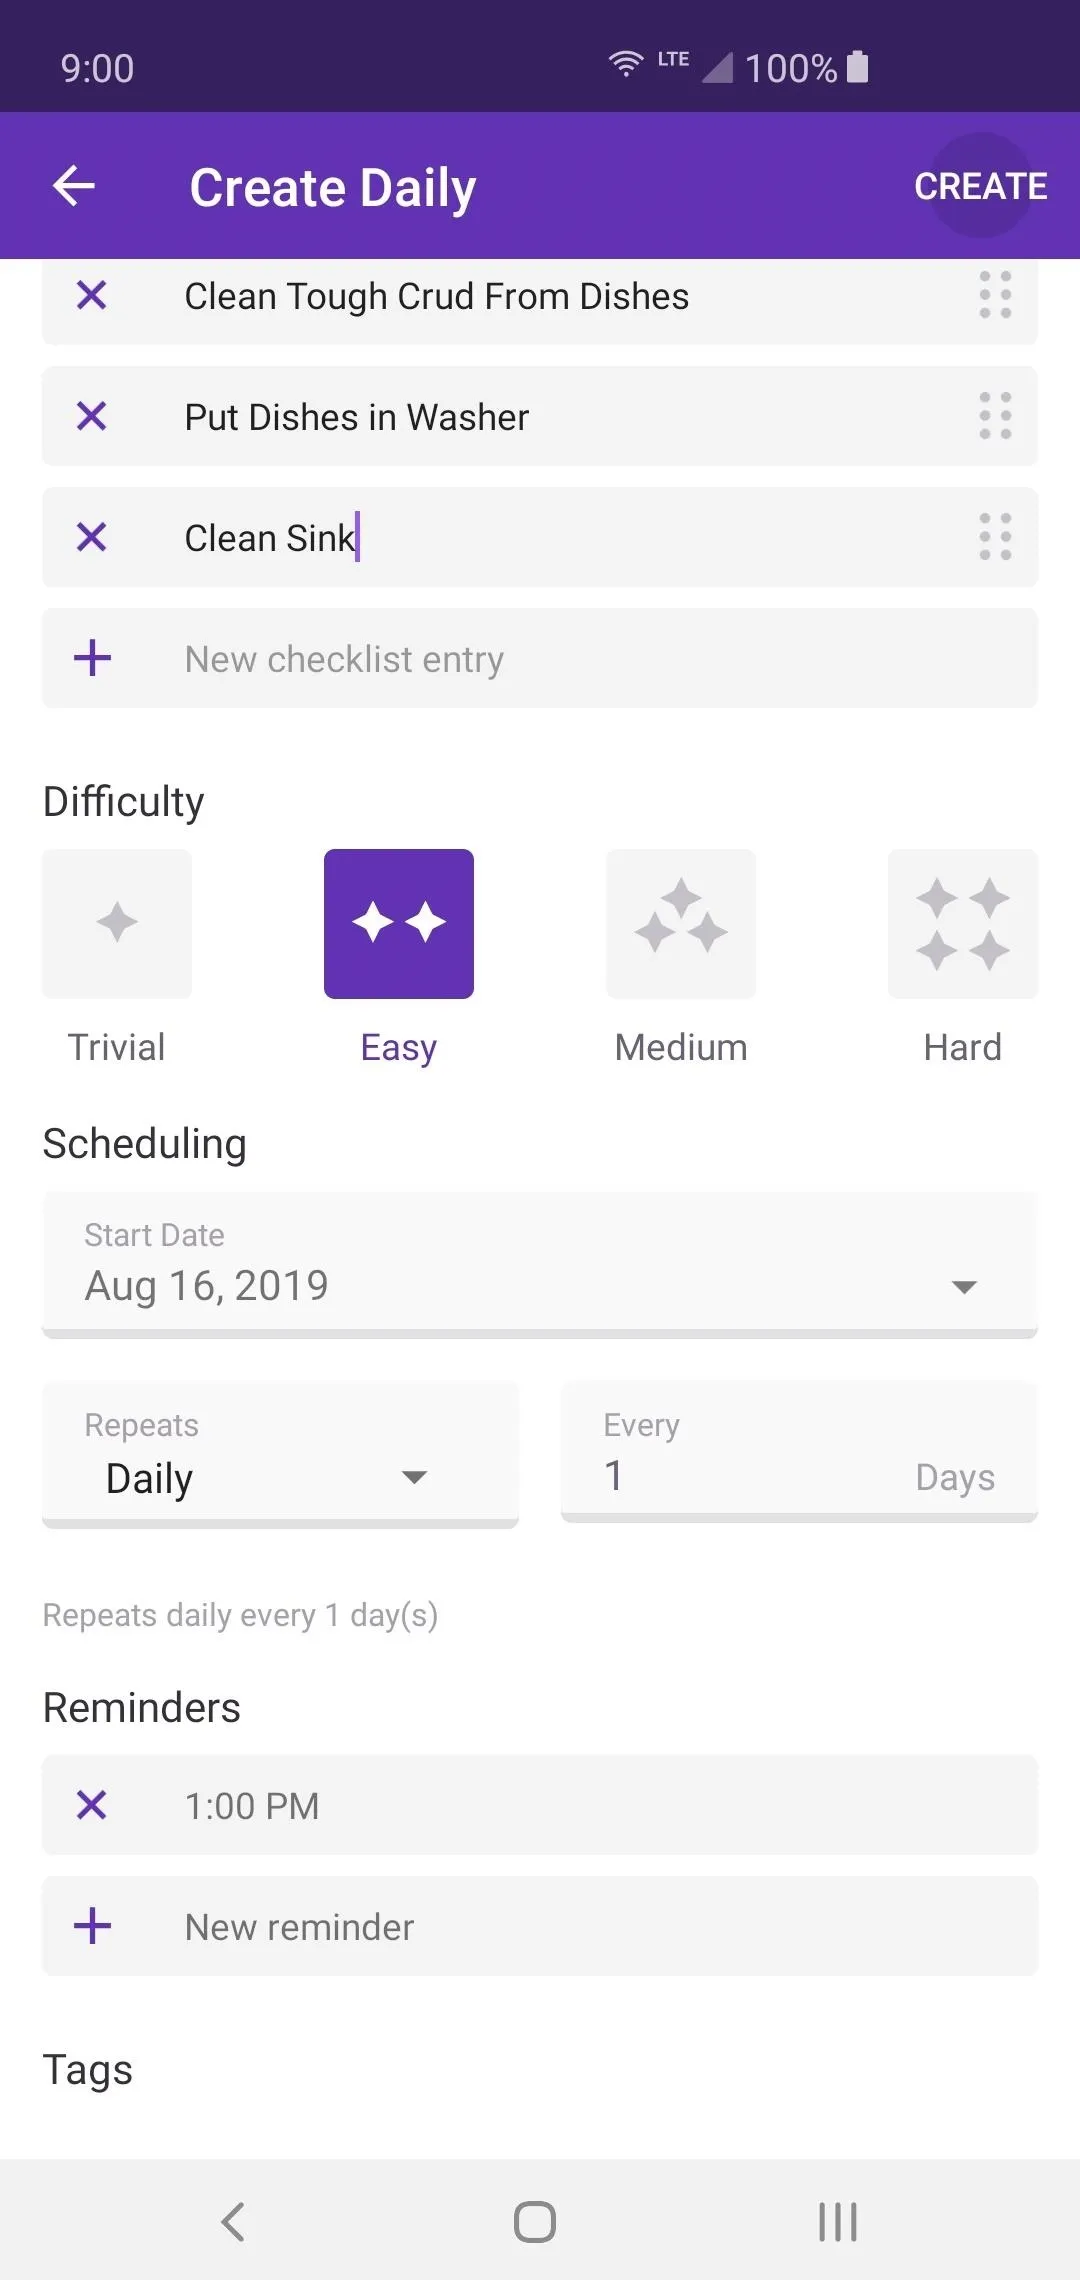
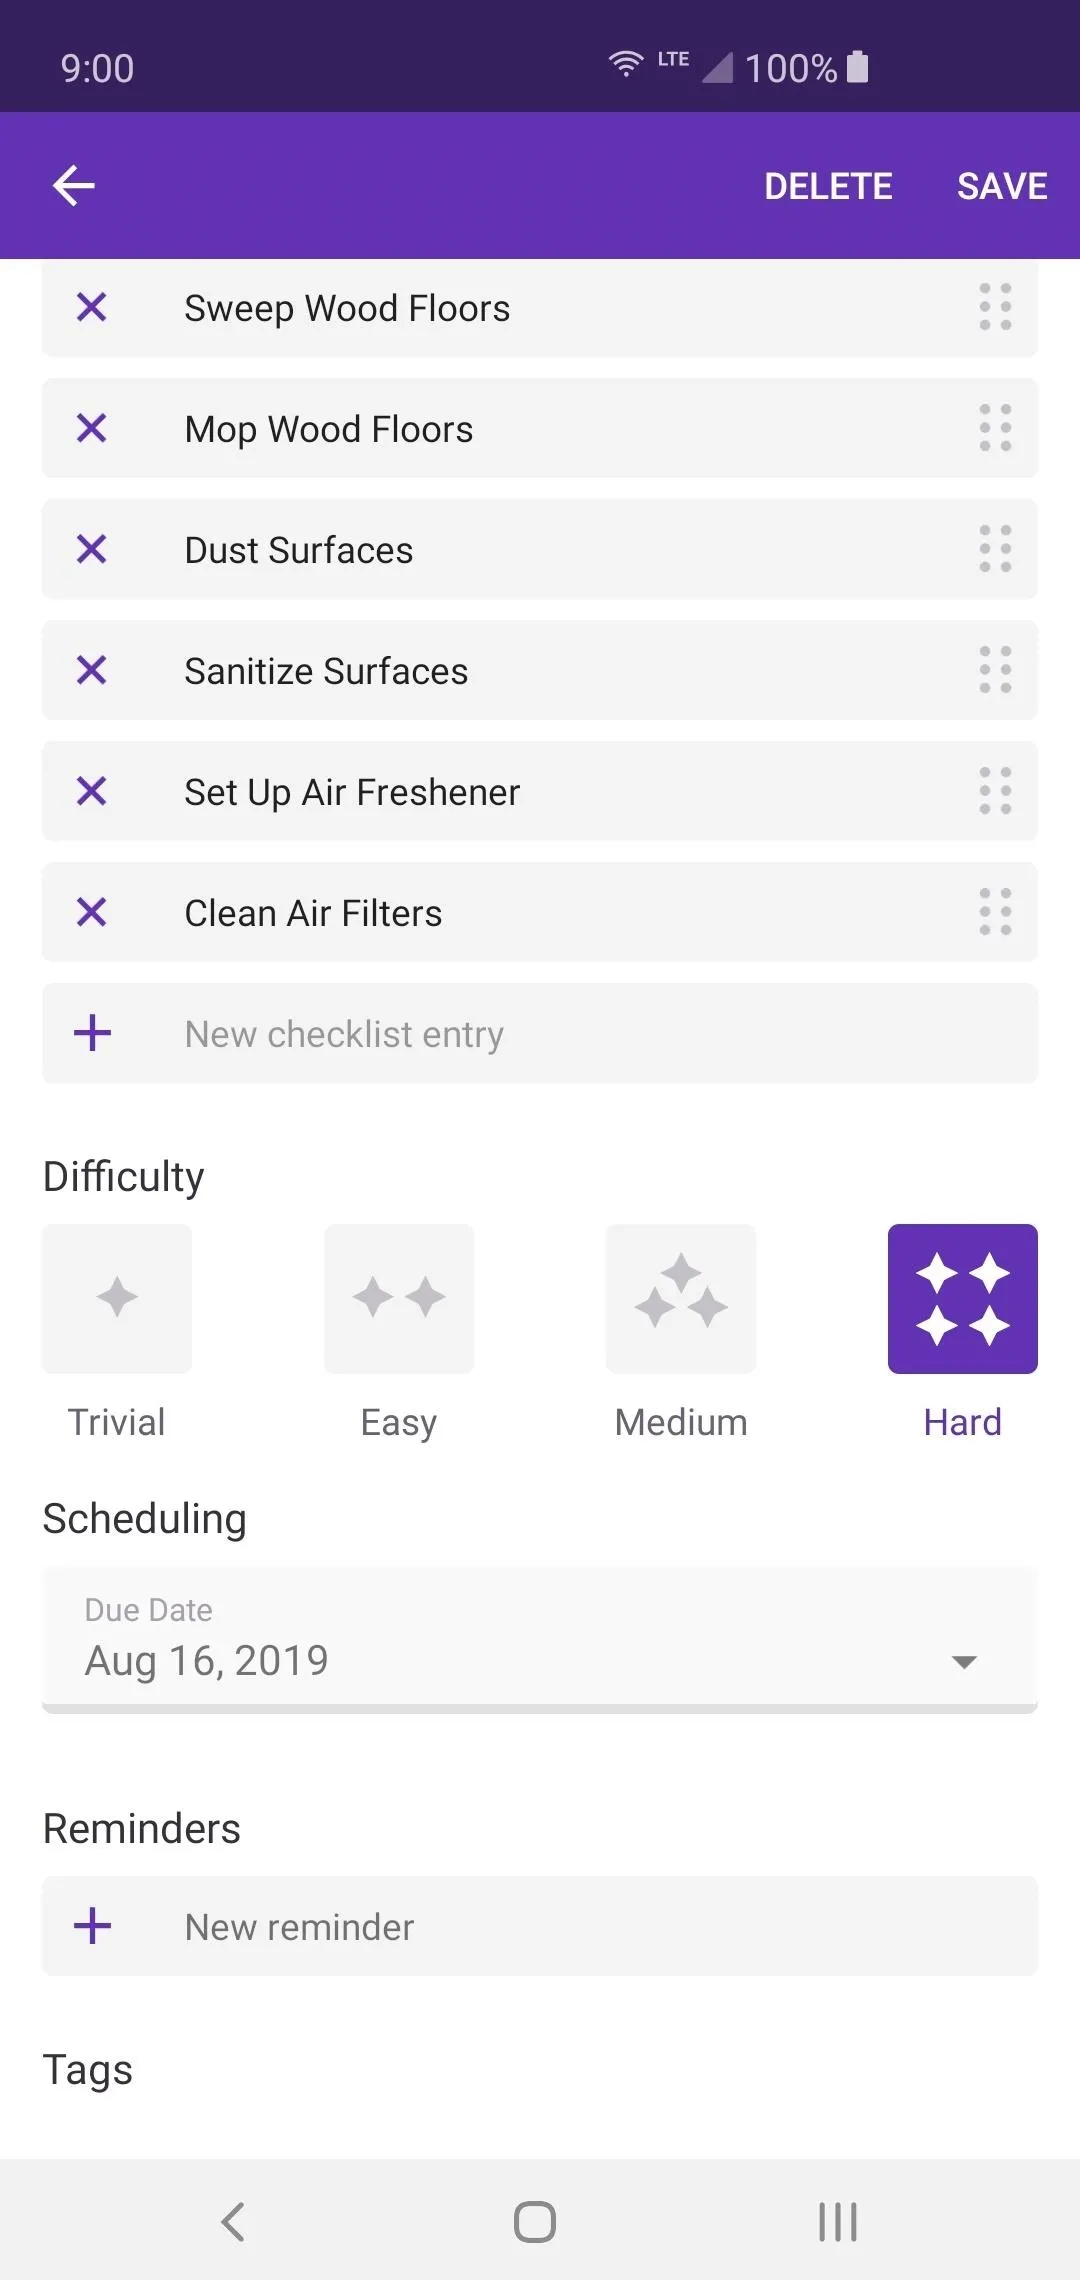
If you wanted to, you could add a checklist to your specific chore or task if it involves more than one thing. Tap the text box and type anything you want here, then it will automatically save to the list. You can rearrange the list order by tapping and dragging the six-dot icon on the right. You can also delete any item by tapping the "X."
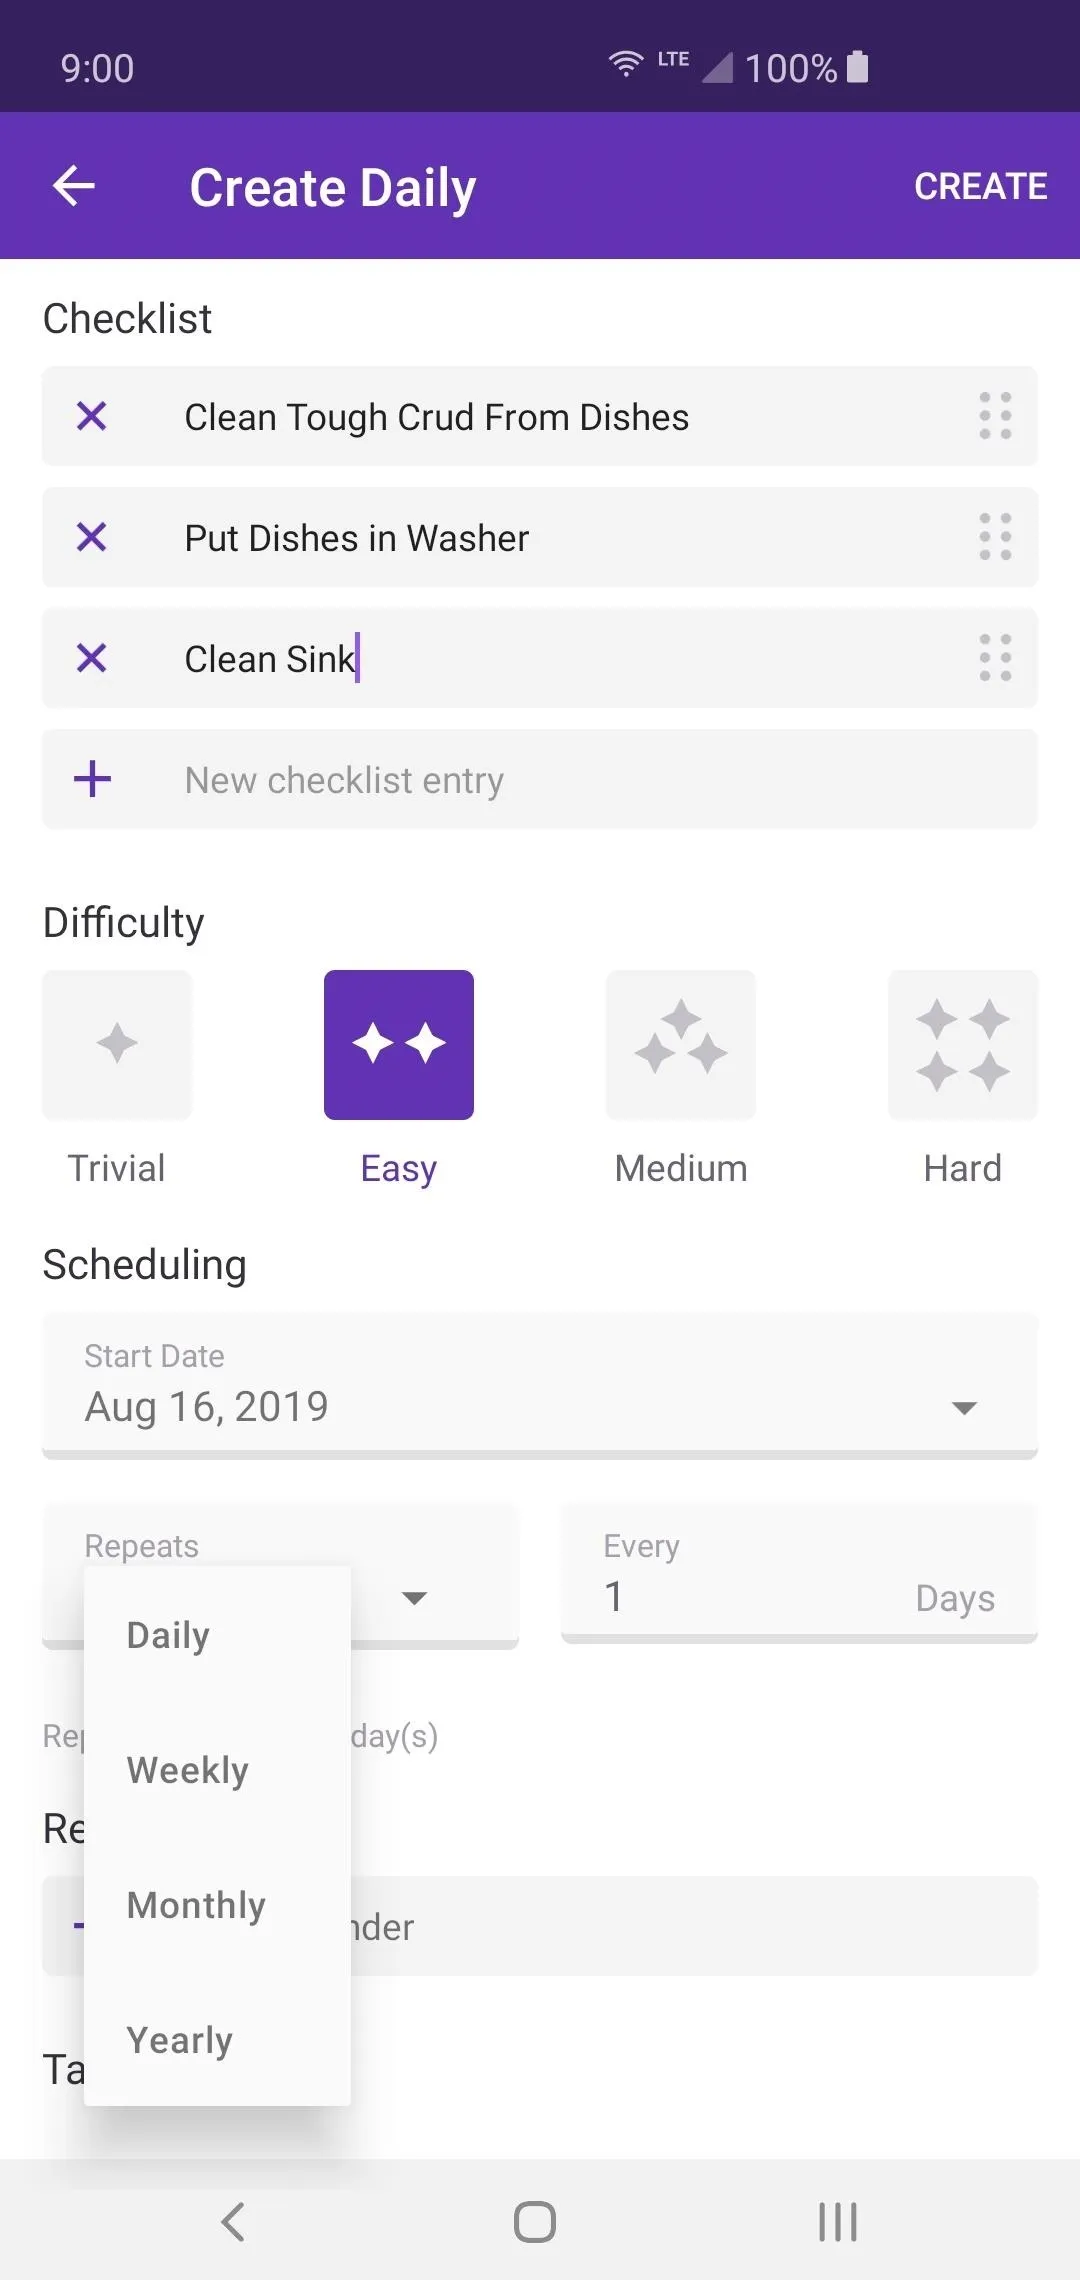
Select the difficulty of this specific task, then pick the scheduling system for it from there. Input your starting date, then choose how often you will be completing the task. If you select "Daily," then you can decide how many days you have to wait until you receive the quest for completion again. The same goes for the other time options as well, so go with what works for your personal tasks.
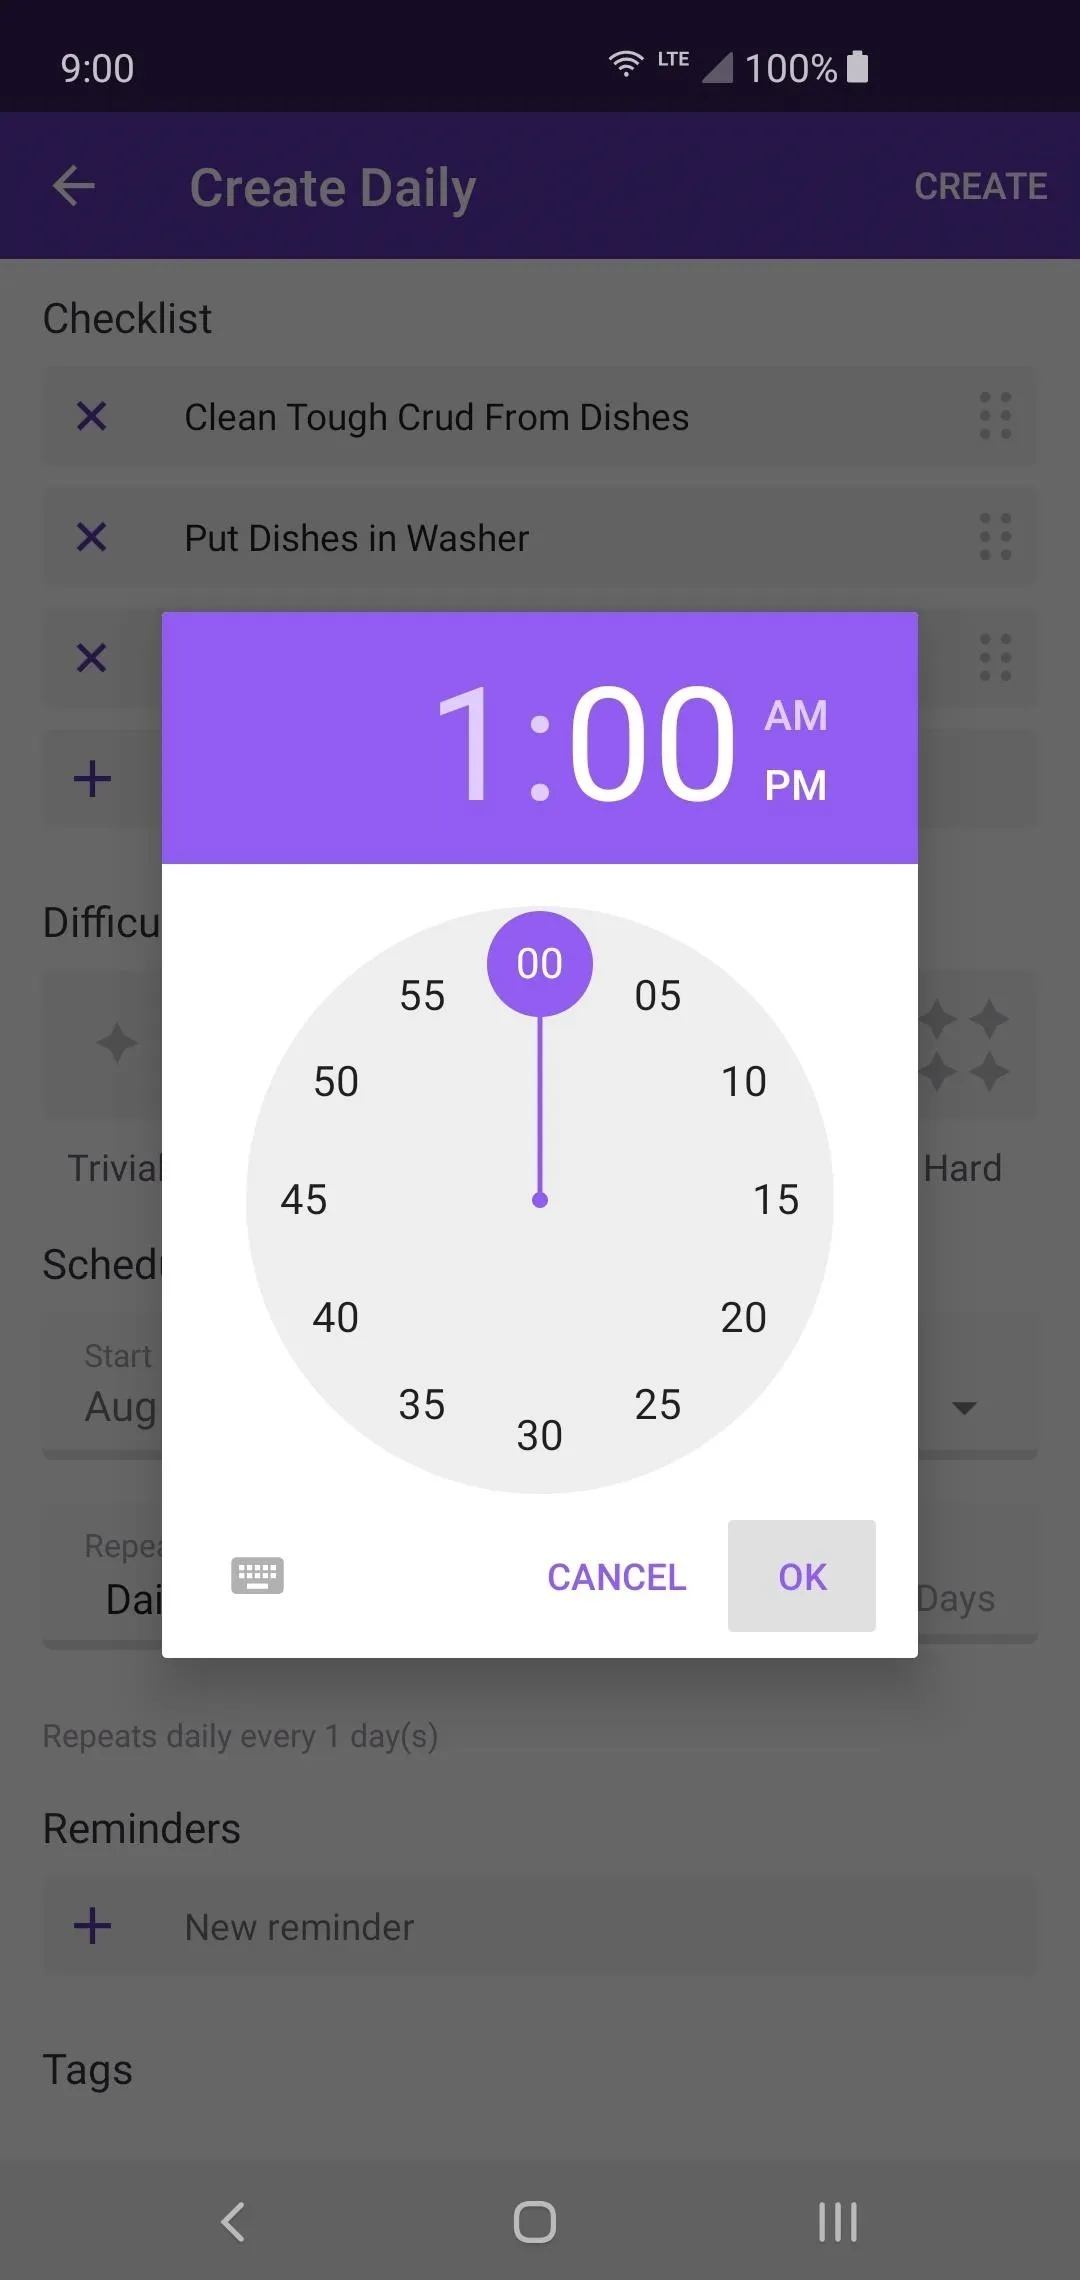
If you really want to make sure you never forgot to complete your daily tasks, you can also set up a reminder to alert you. You pick what time you want to get to the reminder, and it will be sure to let you know when it's time to complete that task. You can also add any tags you want as your list starts growing over time. Hit "Create" to complete the process.
Set Up Your to-Do Lists (As Needed)
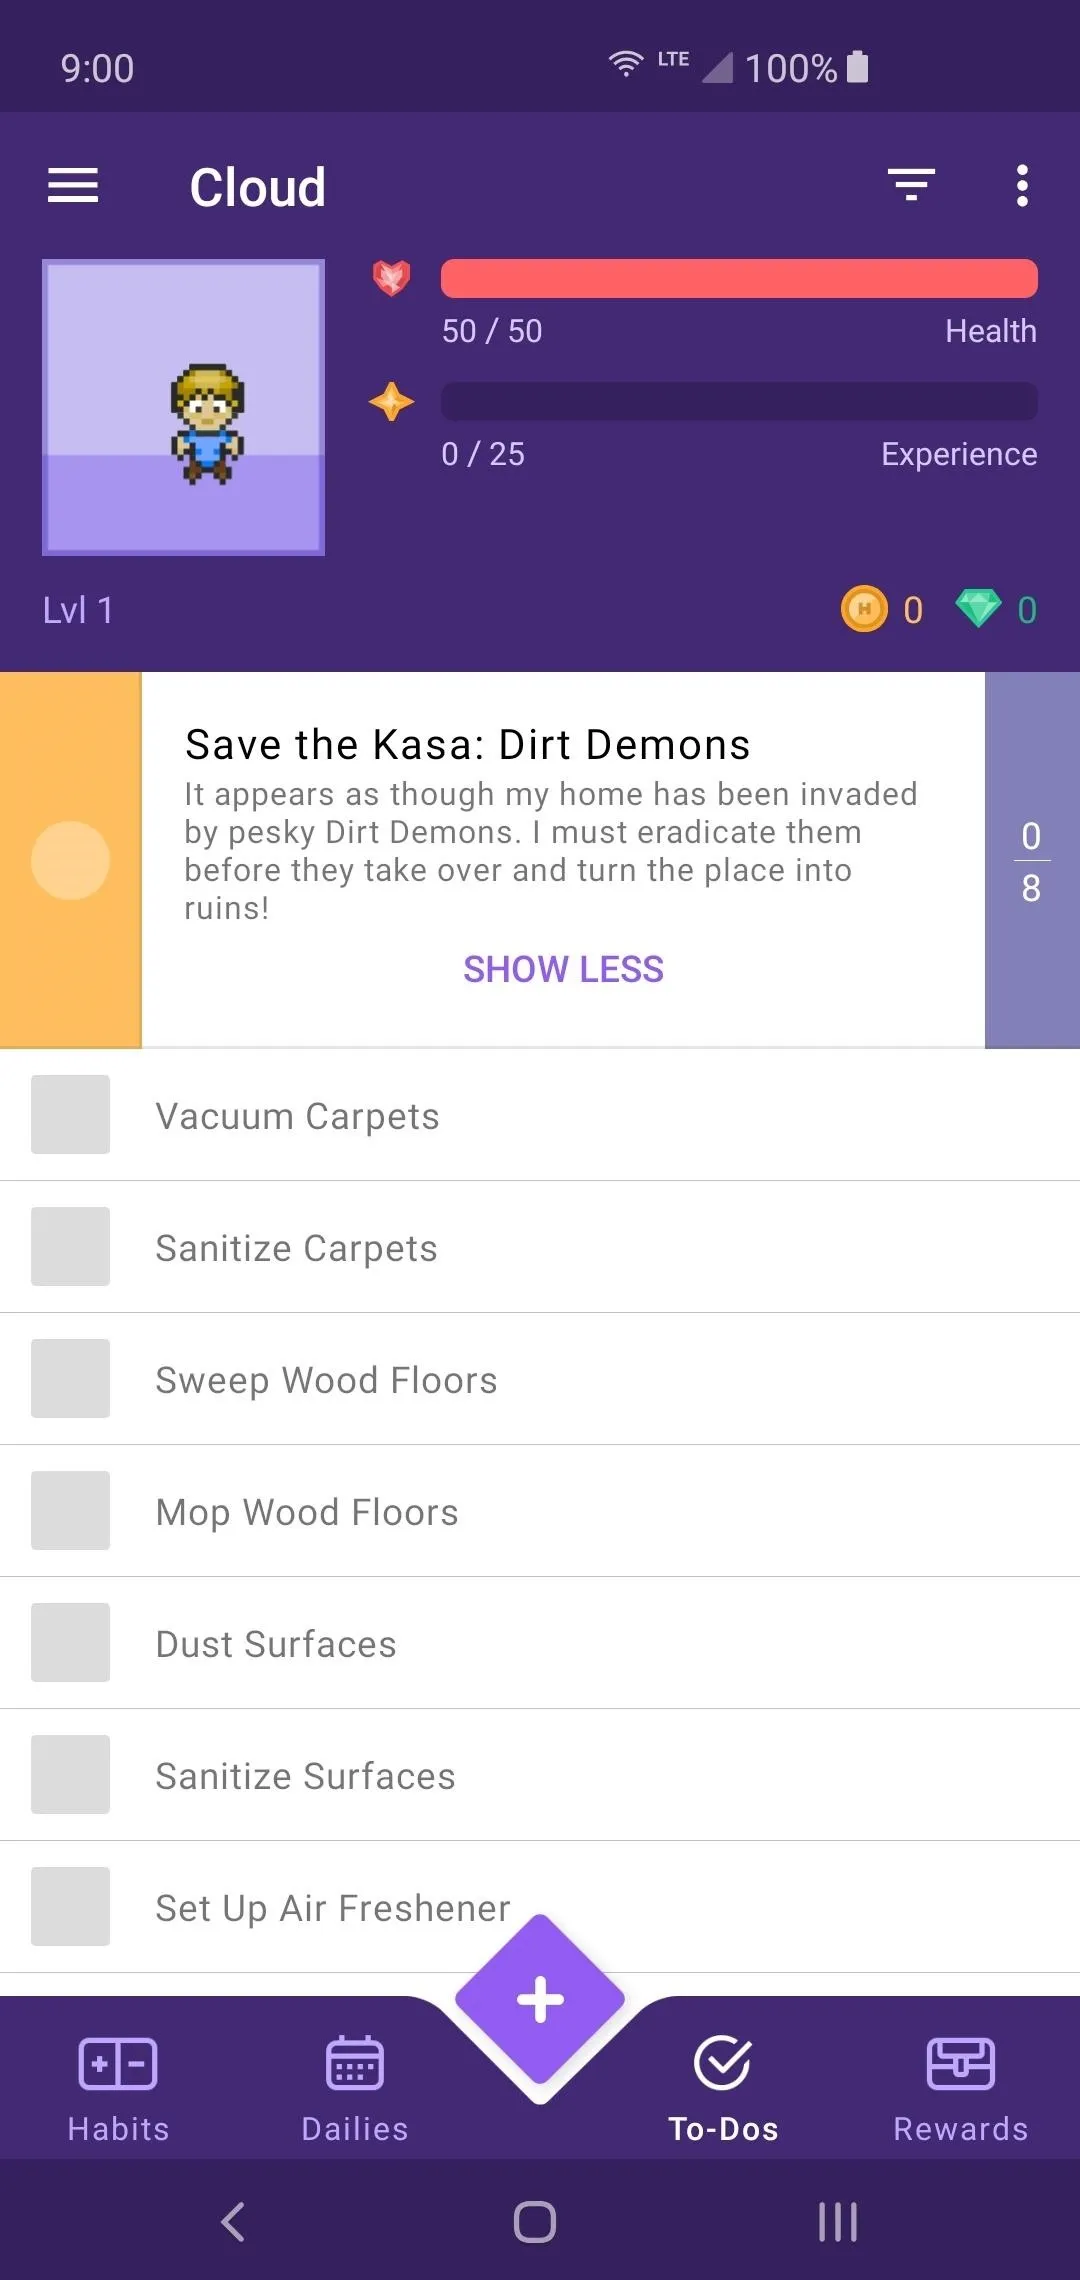
If you have a specific to-do list for the day that differs from both the other two list options, you can use the "To-Do" tab. Primarily, a to-do list consists of one-time tasks that usually need to be completed at a specific time and date. Consider Habits as your main story quests, Dailies as your required day to day tasks, and To-Dos as the side quests that randomly pop up as time goes on.
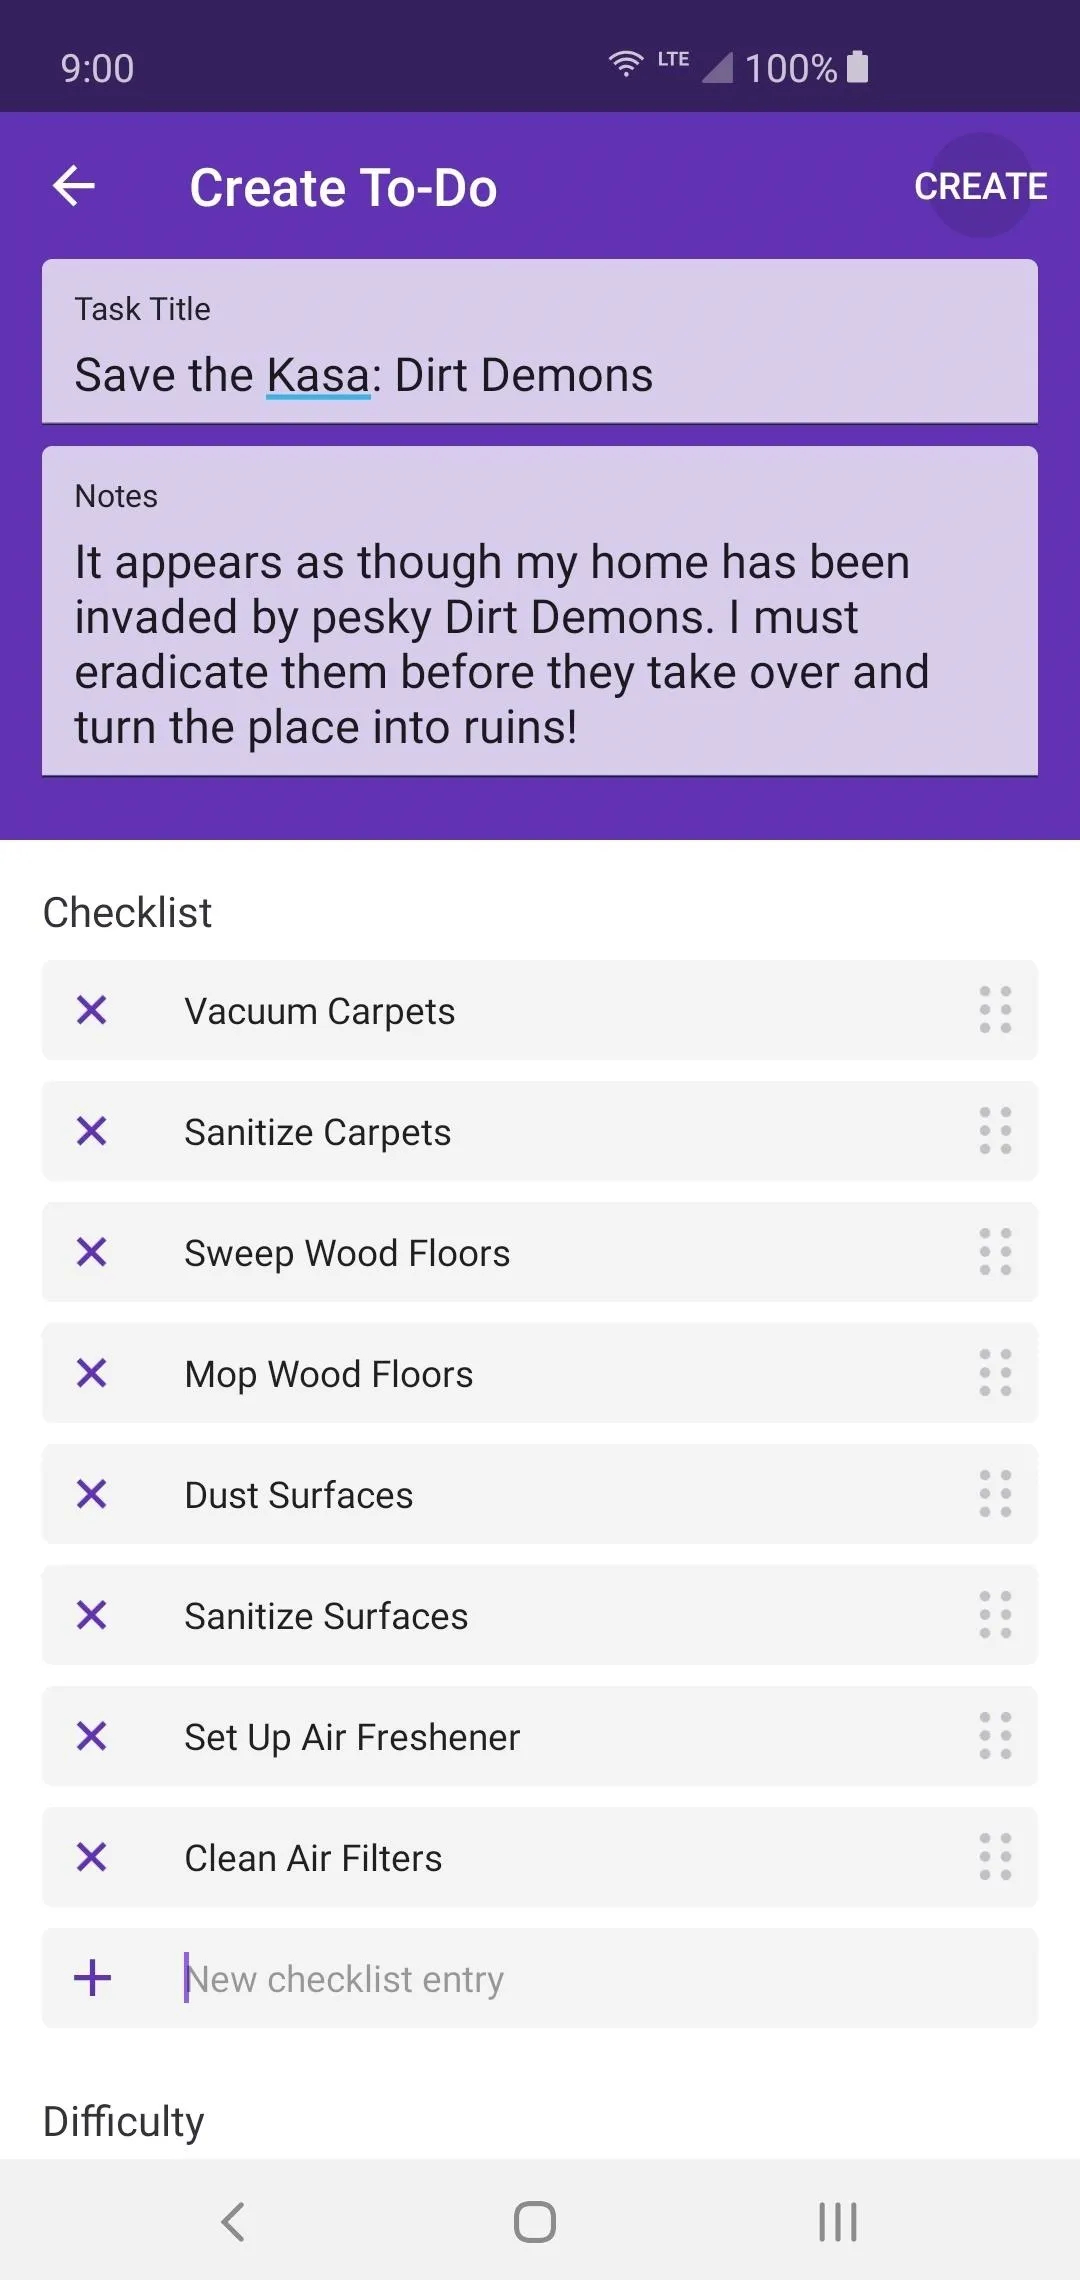
Delete any items on the pre-generated list, then tap the plus button to get started. When creating a To-Do list entry, it pretty much follows the same exact format as the Dailies. Go through and give your task a title and add in any notes that might be helpful for you. Create the checklist, set the difficulty, schedule a due date, then set any reminders. You can also add tags here as well.
Once your To-Do list is all set up and ready to be saved, tap "Create" to finish the process. You will now see the checklist of items you created and can tap each box as the tasks are completed. Once all items on the list are finished, your quest will be complete, and you can then receive any reward you have set. Again, don't start completing any tasks until your reward system is set up.
Set Up Your Reward System
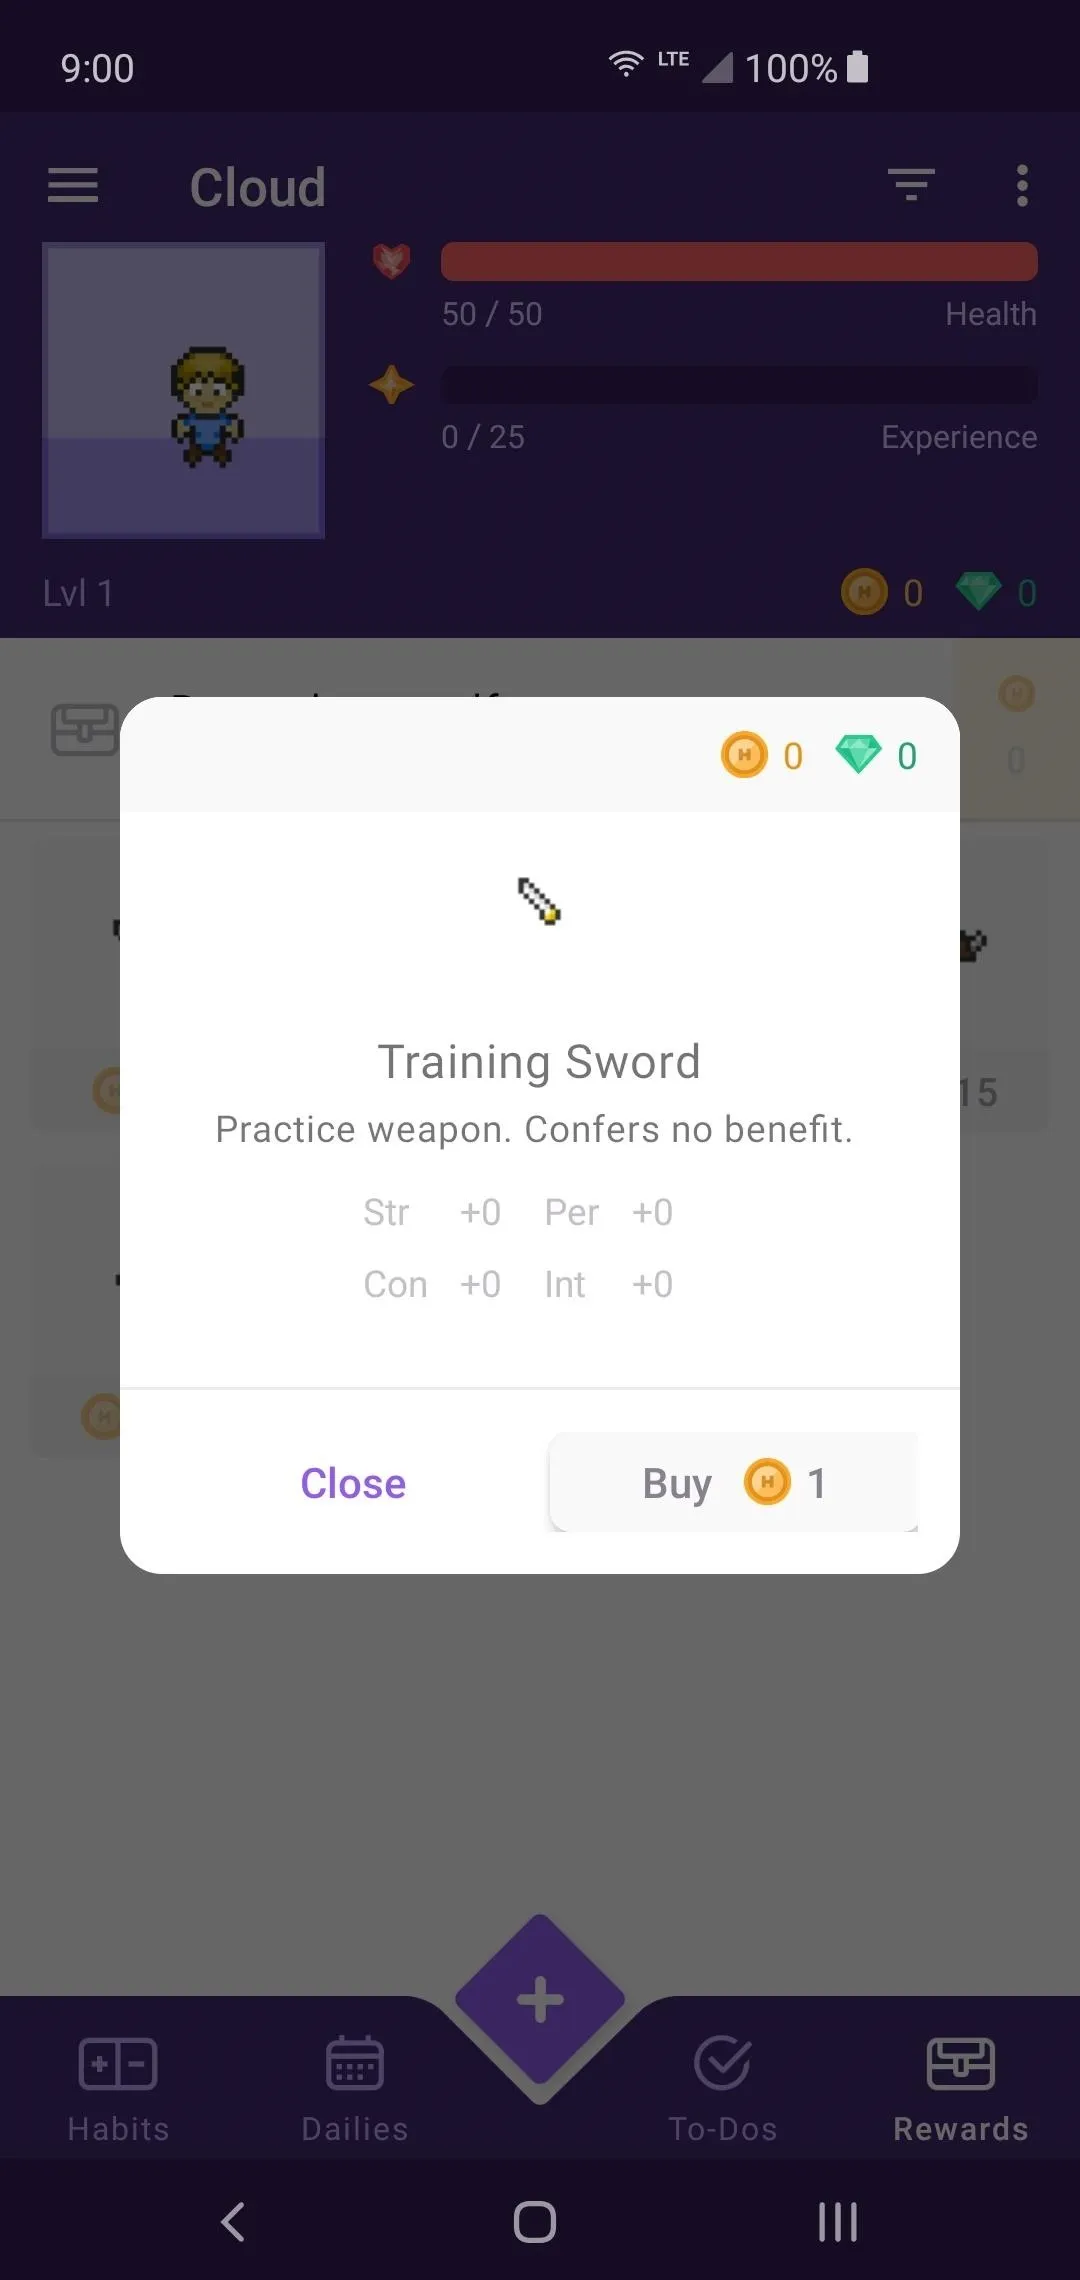
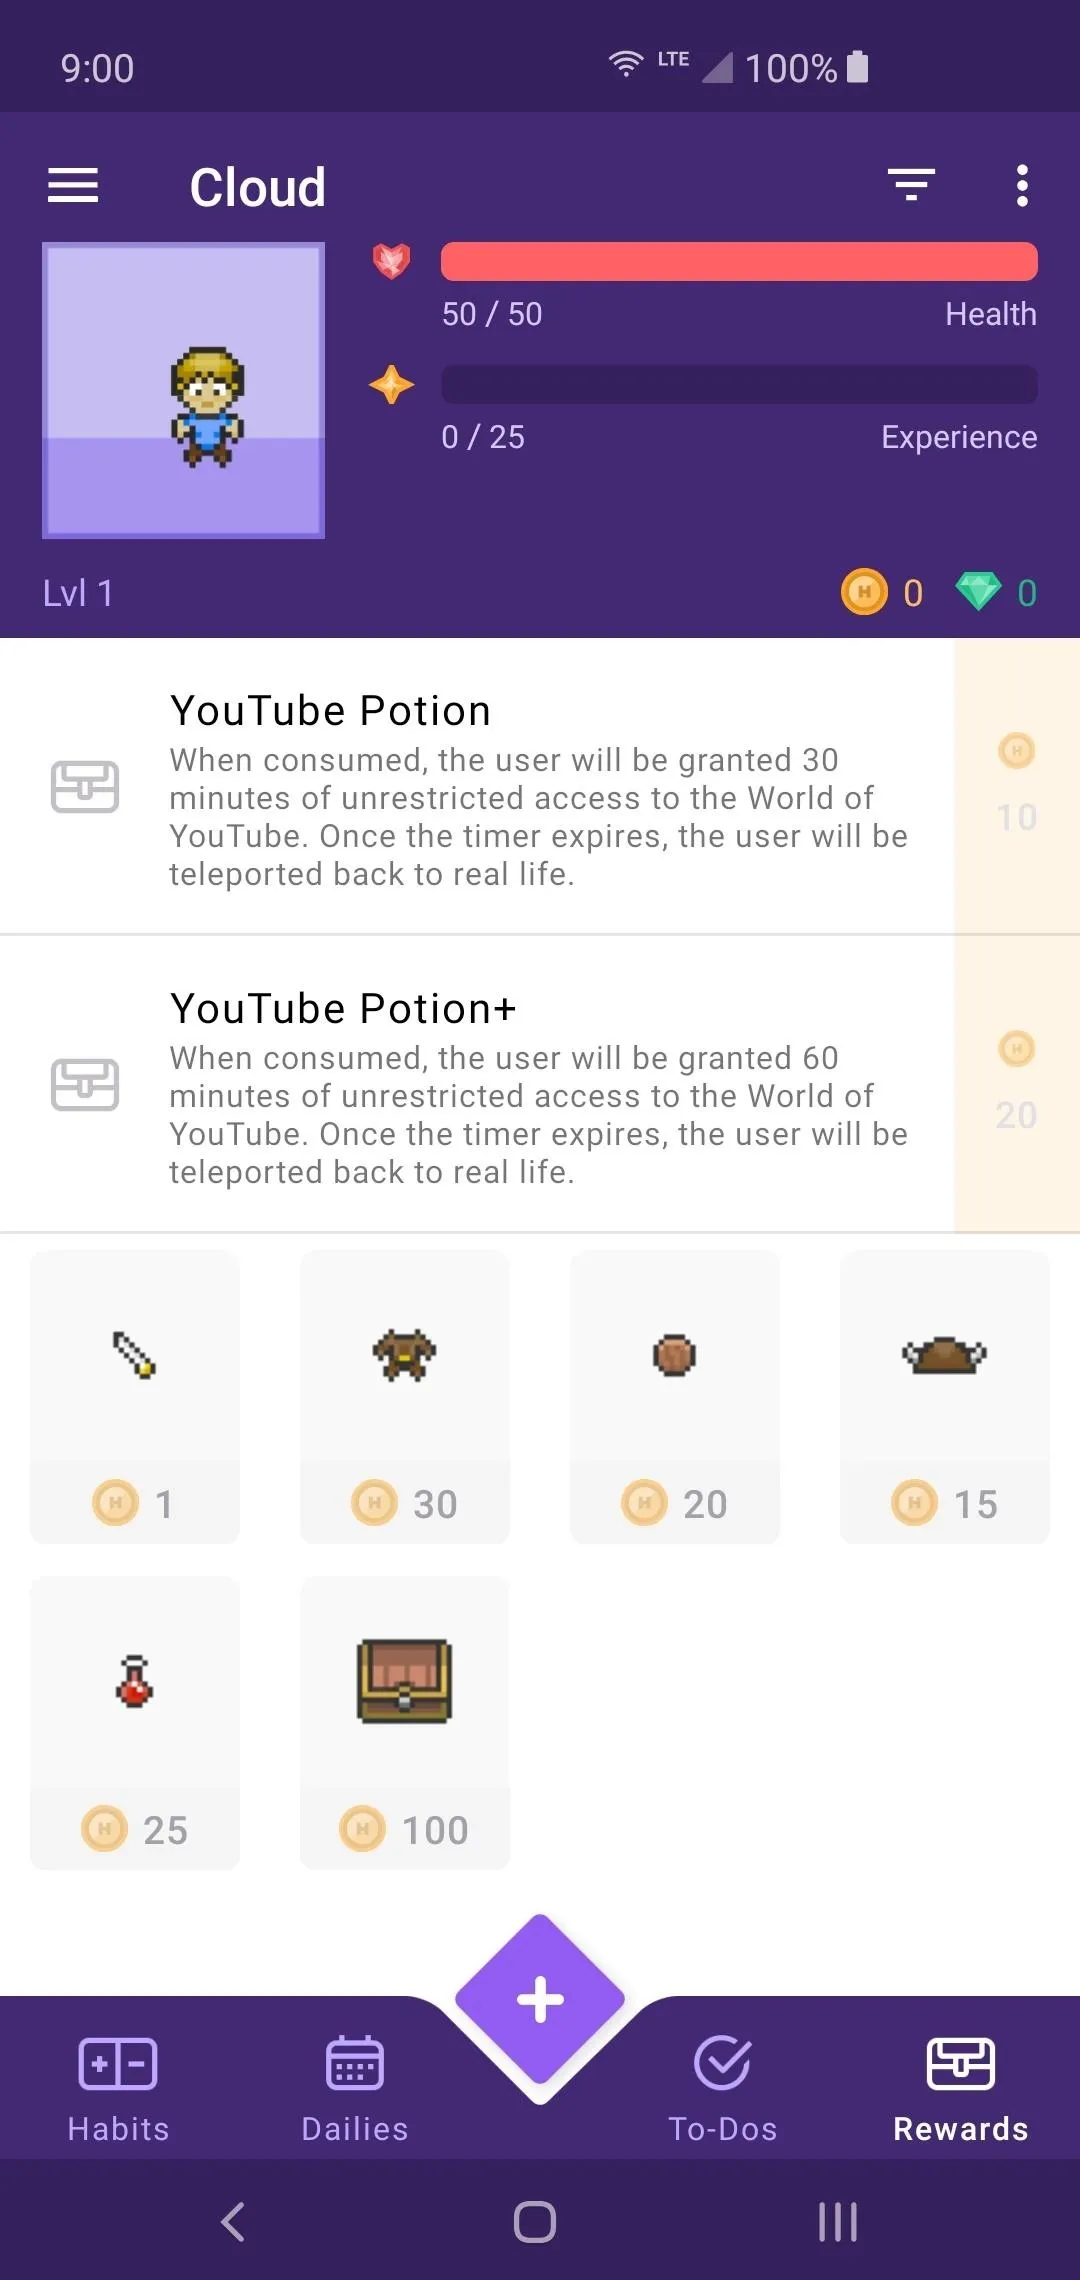
Finally, you can move onto the reward system to be used when you complete your quests! As you complete your chores and tasks, you will gain a certain amount of Gold to spend on rewards for yourself. By default, you can purchase equipment to use for building your character and making them stronger. Basic weapons, armor, and potions are available to help you get to get your journey started.
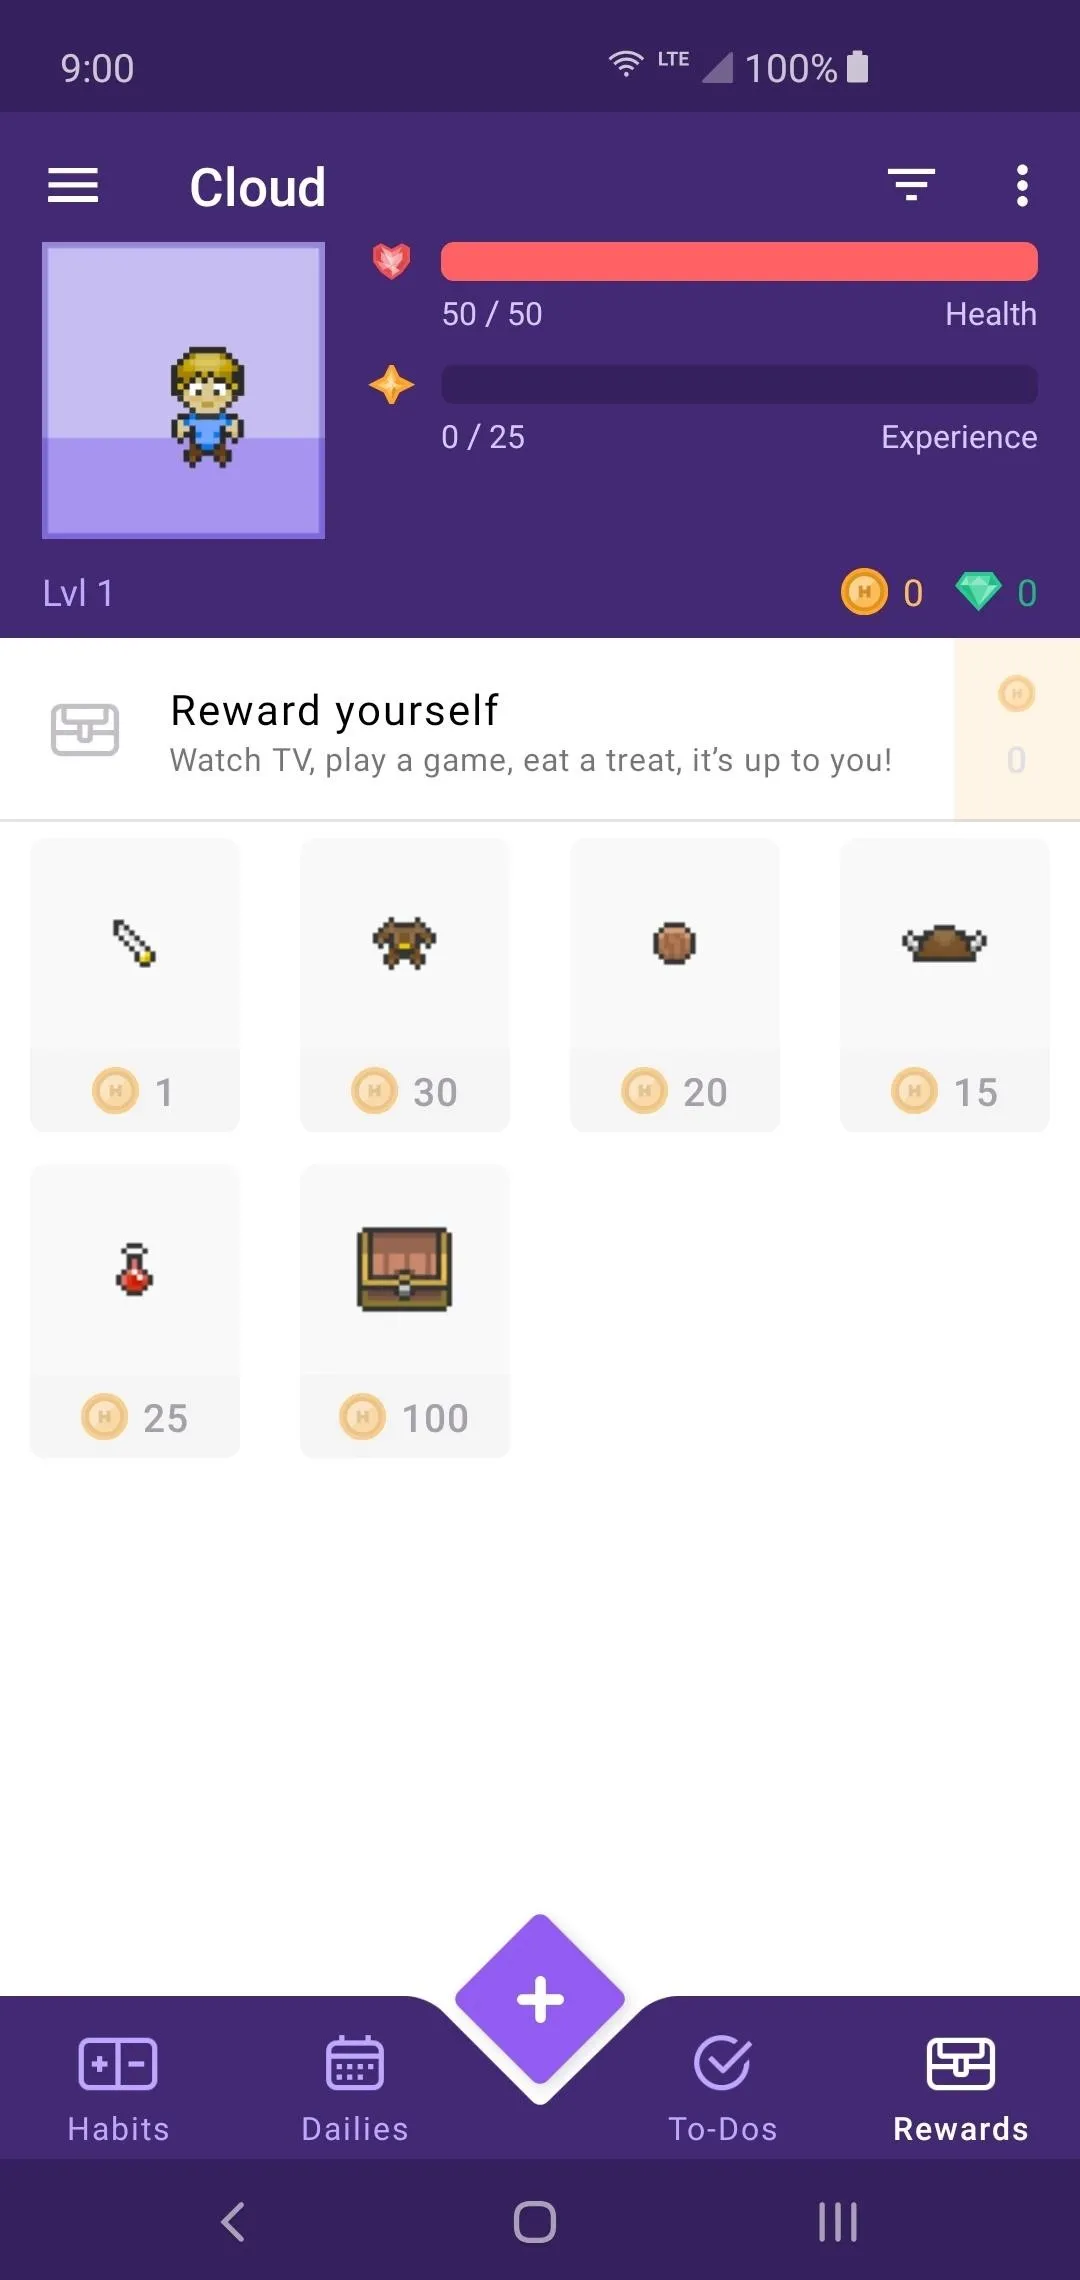
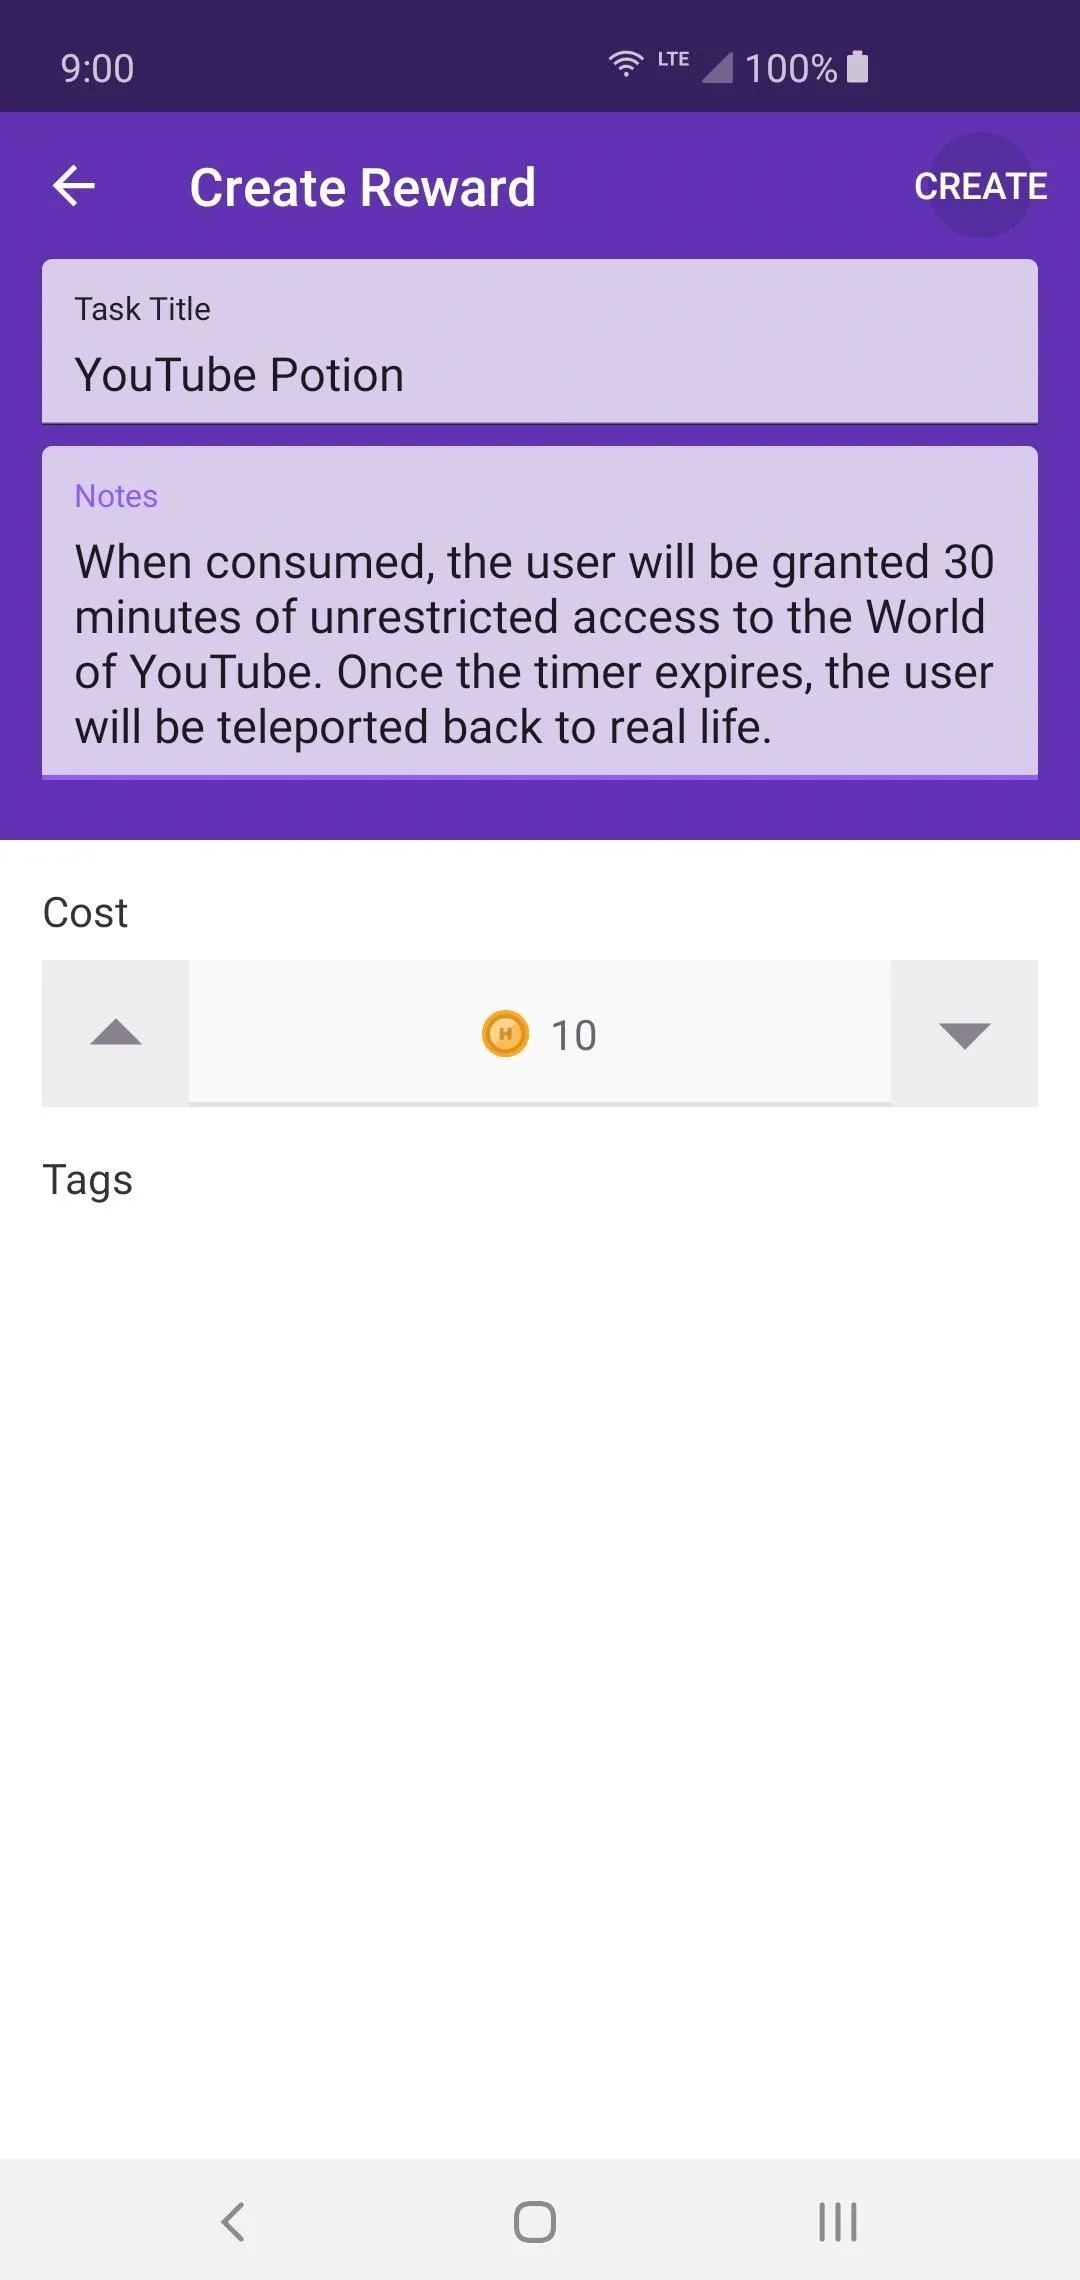
The real fun comes from creating your own set of rewards and setting how much Gold each one is worth. There should be a predefined reward item labeled as "Reward yourself." Tapping that entry will allow you to create your first custom reward and get to the good stuff.
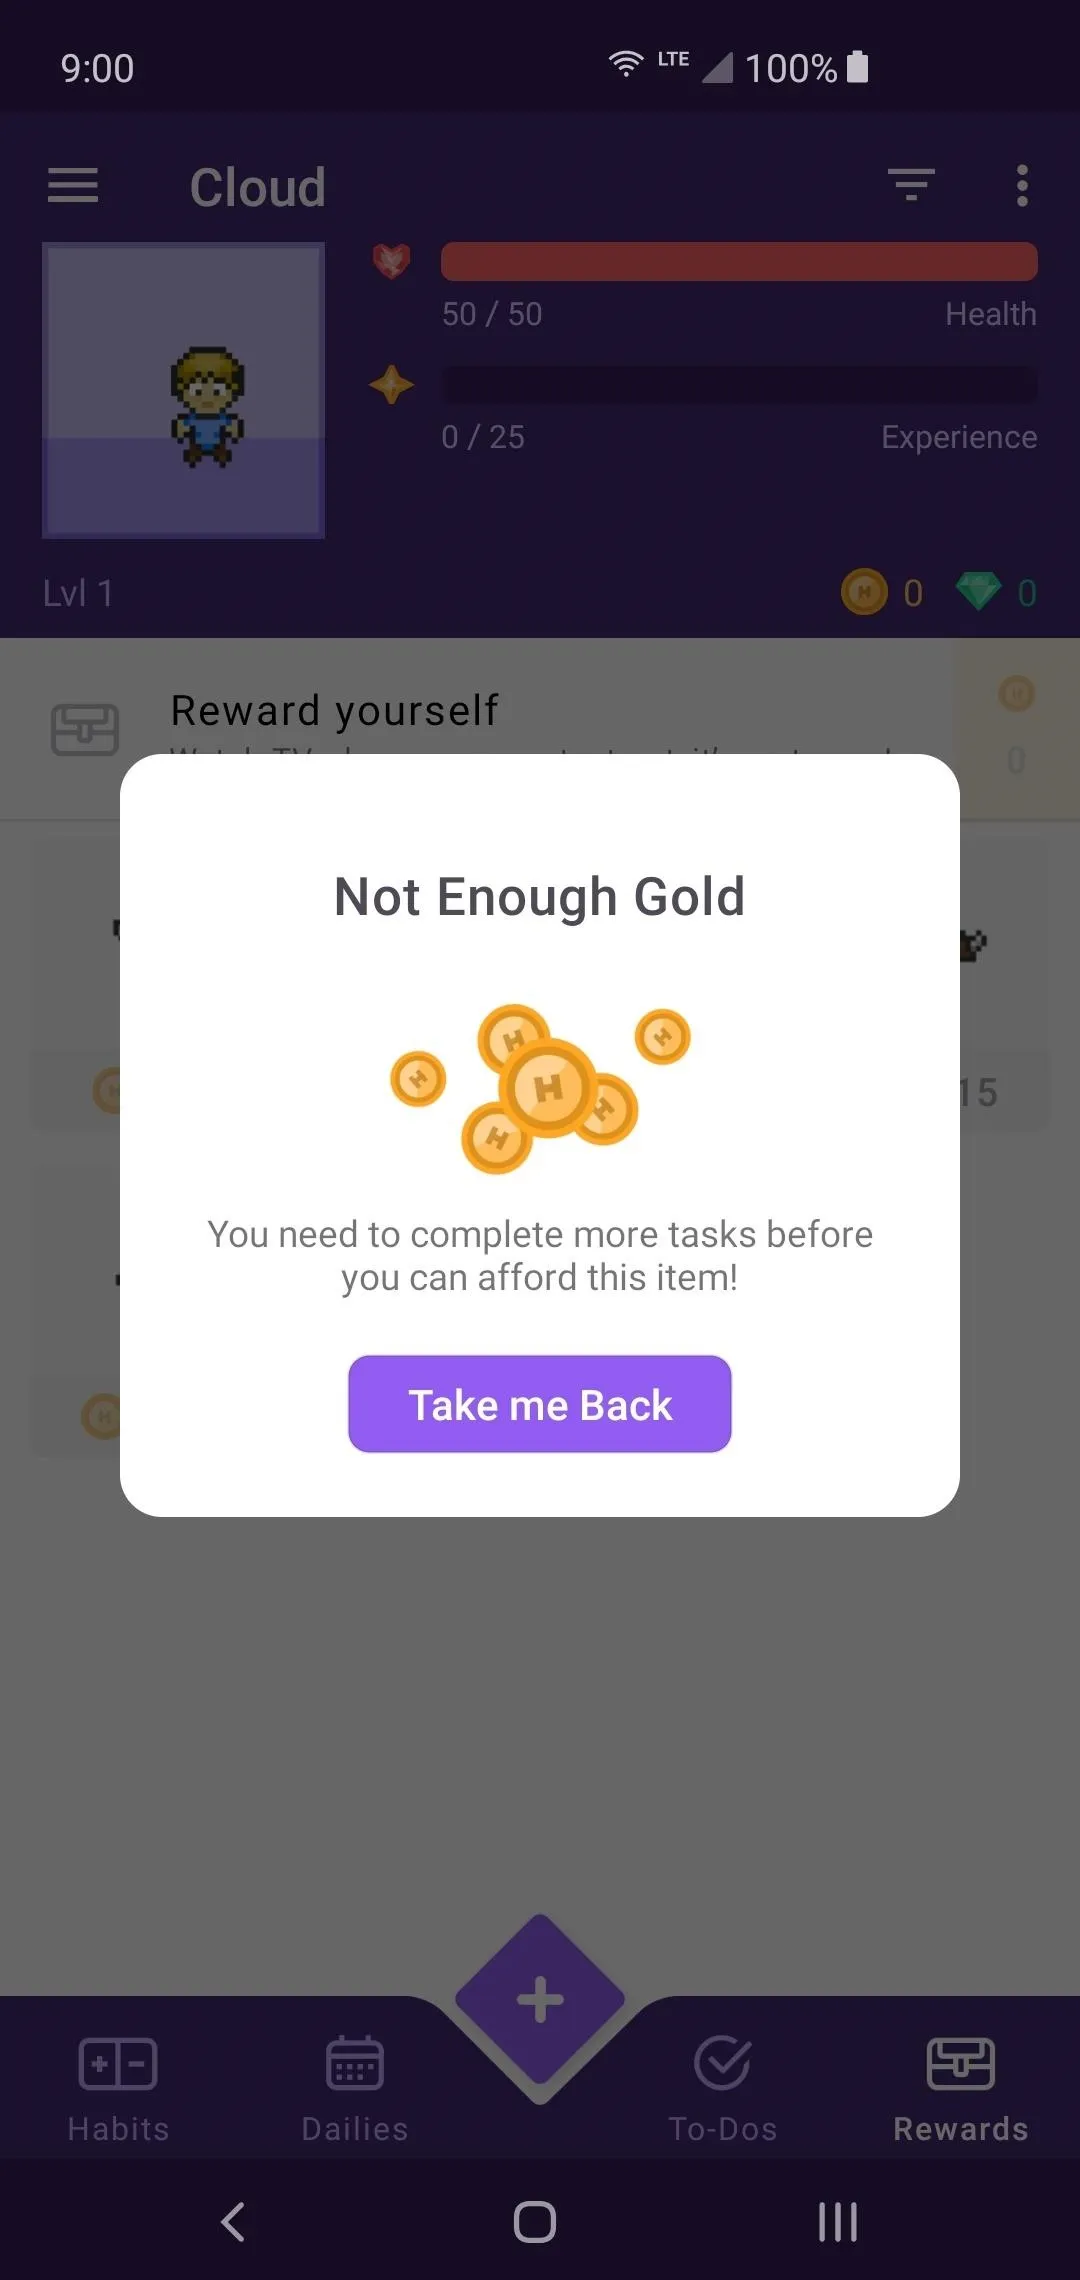
Add a title to your reward item entry and include any notes that might be helpful here. Under "Cost," you can pick how much Gold is required to purchase this reward. Don't set it too low or too high, but you might have to play around with this number and find a comfortable amount for future use. You don't want to steamroll through the reward system, so finding a perfect balance is essential.
Once you're satisfied with the reward title name, notes, and Gold cost, tap "Create" to finish up the process. Whenever you gain enough Gold by completing your custom quests and tasks, you'll be able to tap the Gold icon on the right to purchase the reward. That's all there is to it!
Start Completing Your Tasks
You now need to go back and start building out your quest lists and adding even more rewards. Once you have built out a decent number of tasks and rewards based on your own life, it's safe to begin tackling your quests one by one. Do your best to complete them on time and try not to cheat! Cheating will do nothing for your own self-confidence and will only hurt your personal development.
Once you complete a task on your list successfully, you'll tap the plus icon to complete it and get some experience points and Gold. If you missed the deadline or failed to complete a specific task, tap the minus to confirm the failed quest. You will lose a certain amount of HP whenever you fail a quest, so keep that in mind. Try to complete them as much as you can to stay alive!
This game is really quite expansive and offers a massive amount of content that goes beyond your basic to-do lists. From achievements to playing online with other party members, there's a lot you can do to shake things up even more. You don't have to do any of these things, of course, but the option is always there. As mentioned, you can simply stick to your tasks without all the extra fluff.
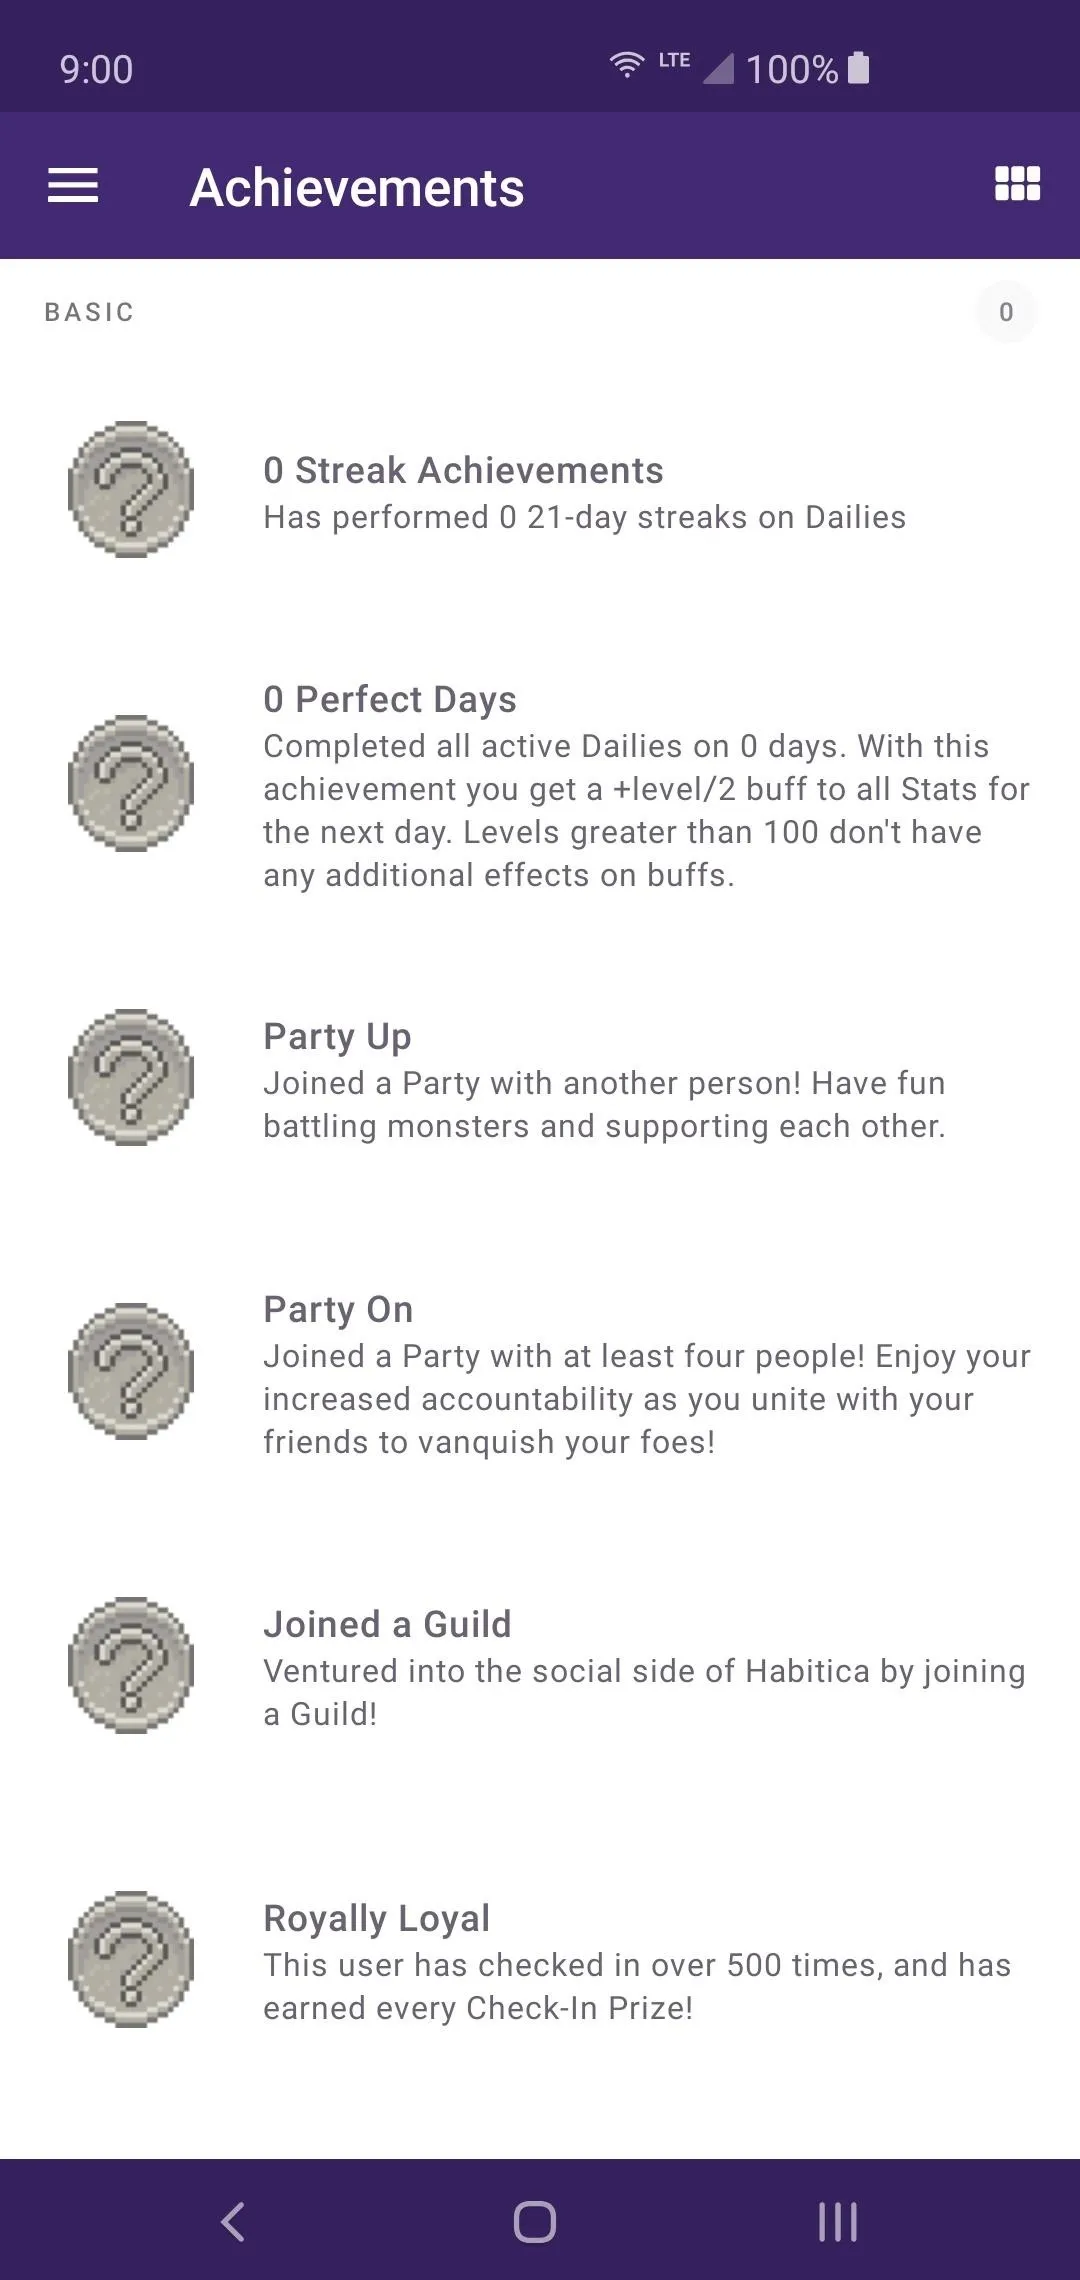
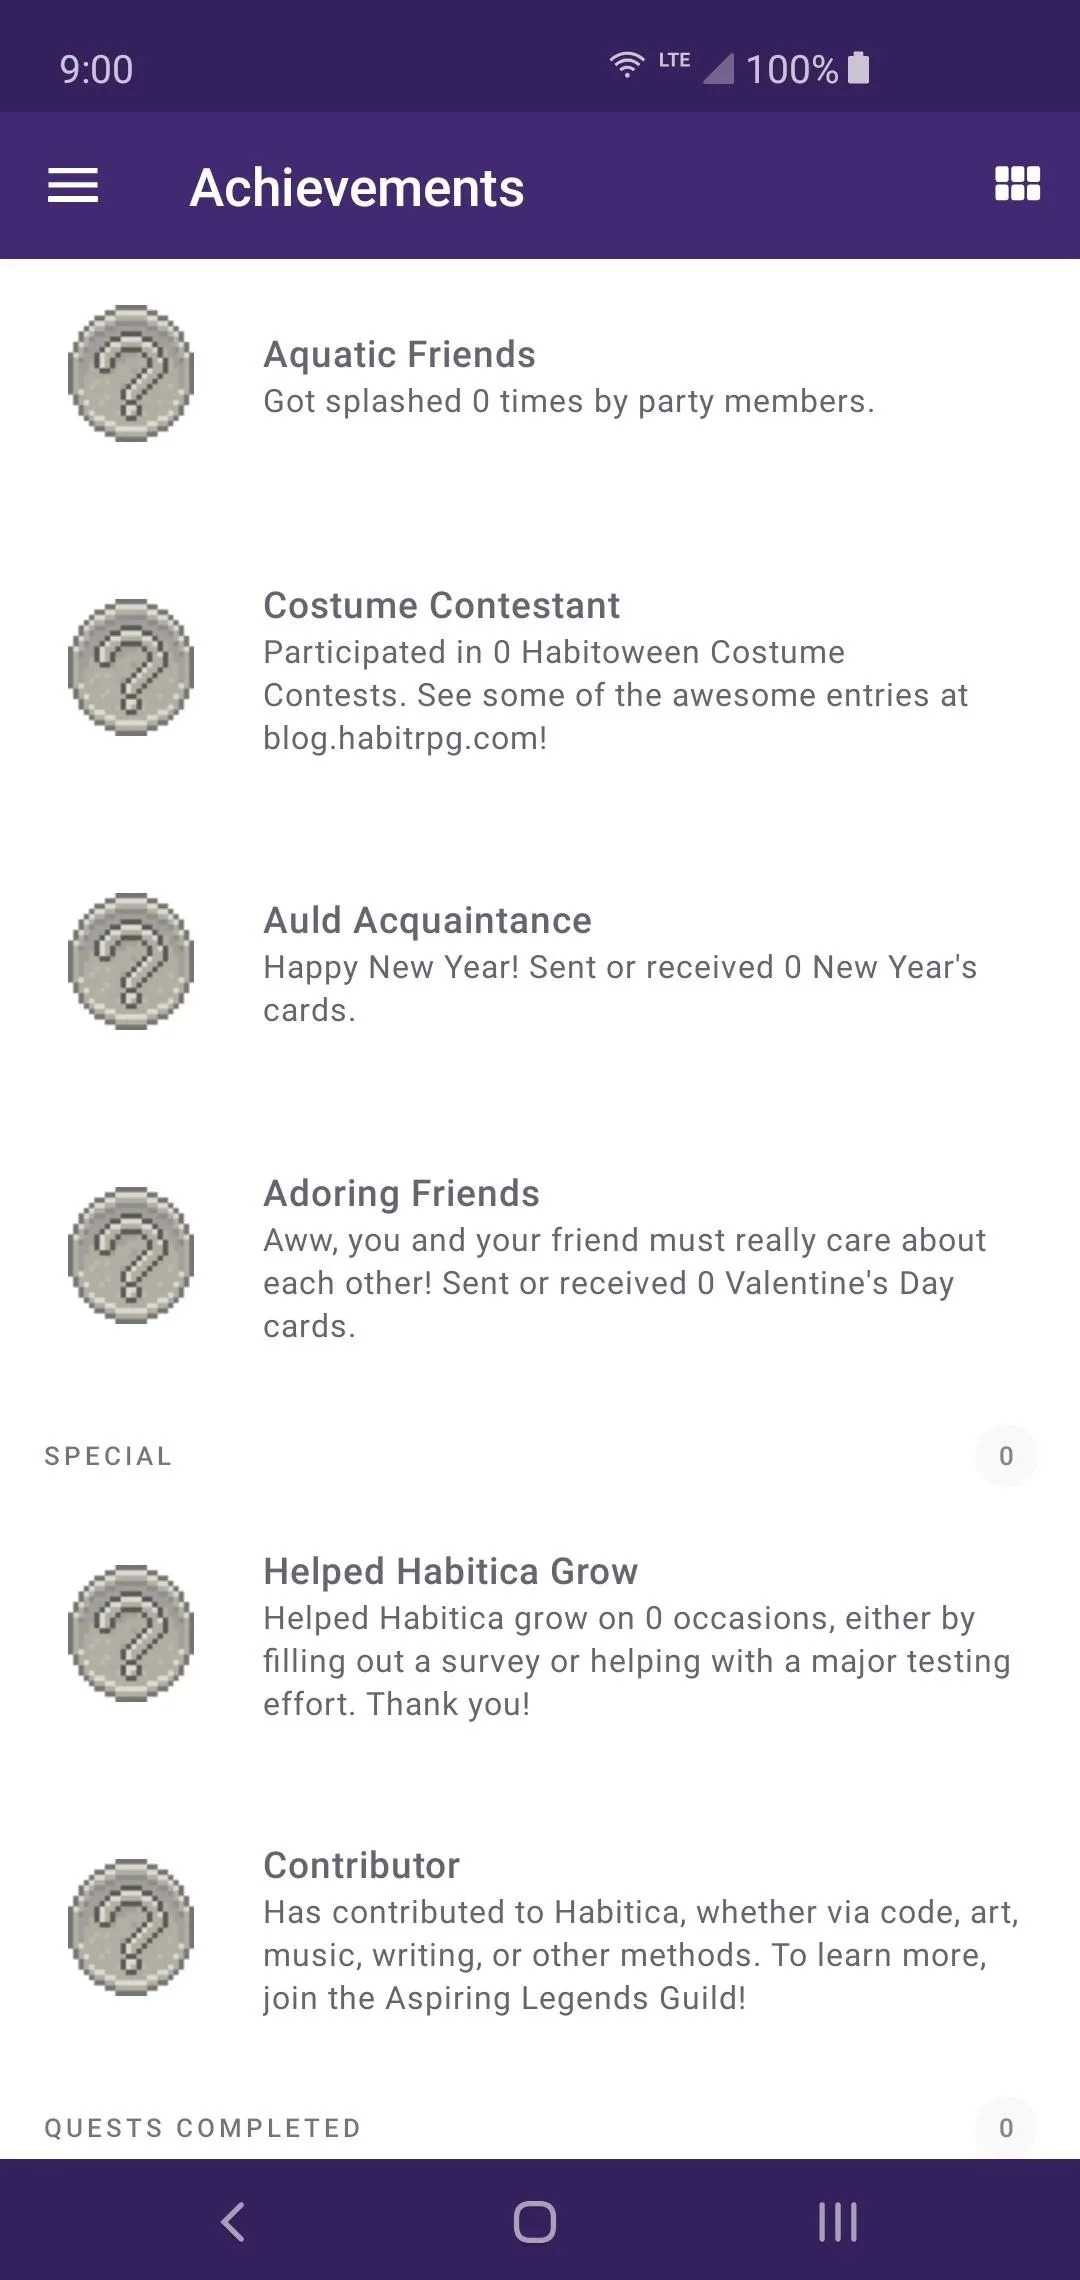
View Your Achievements (Optional)
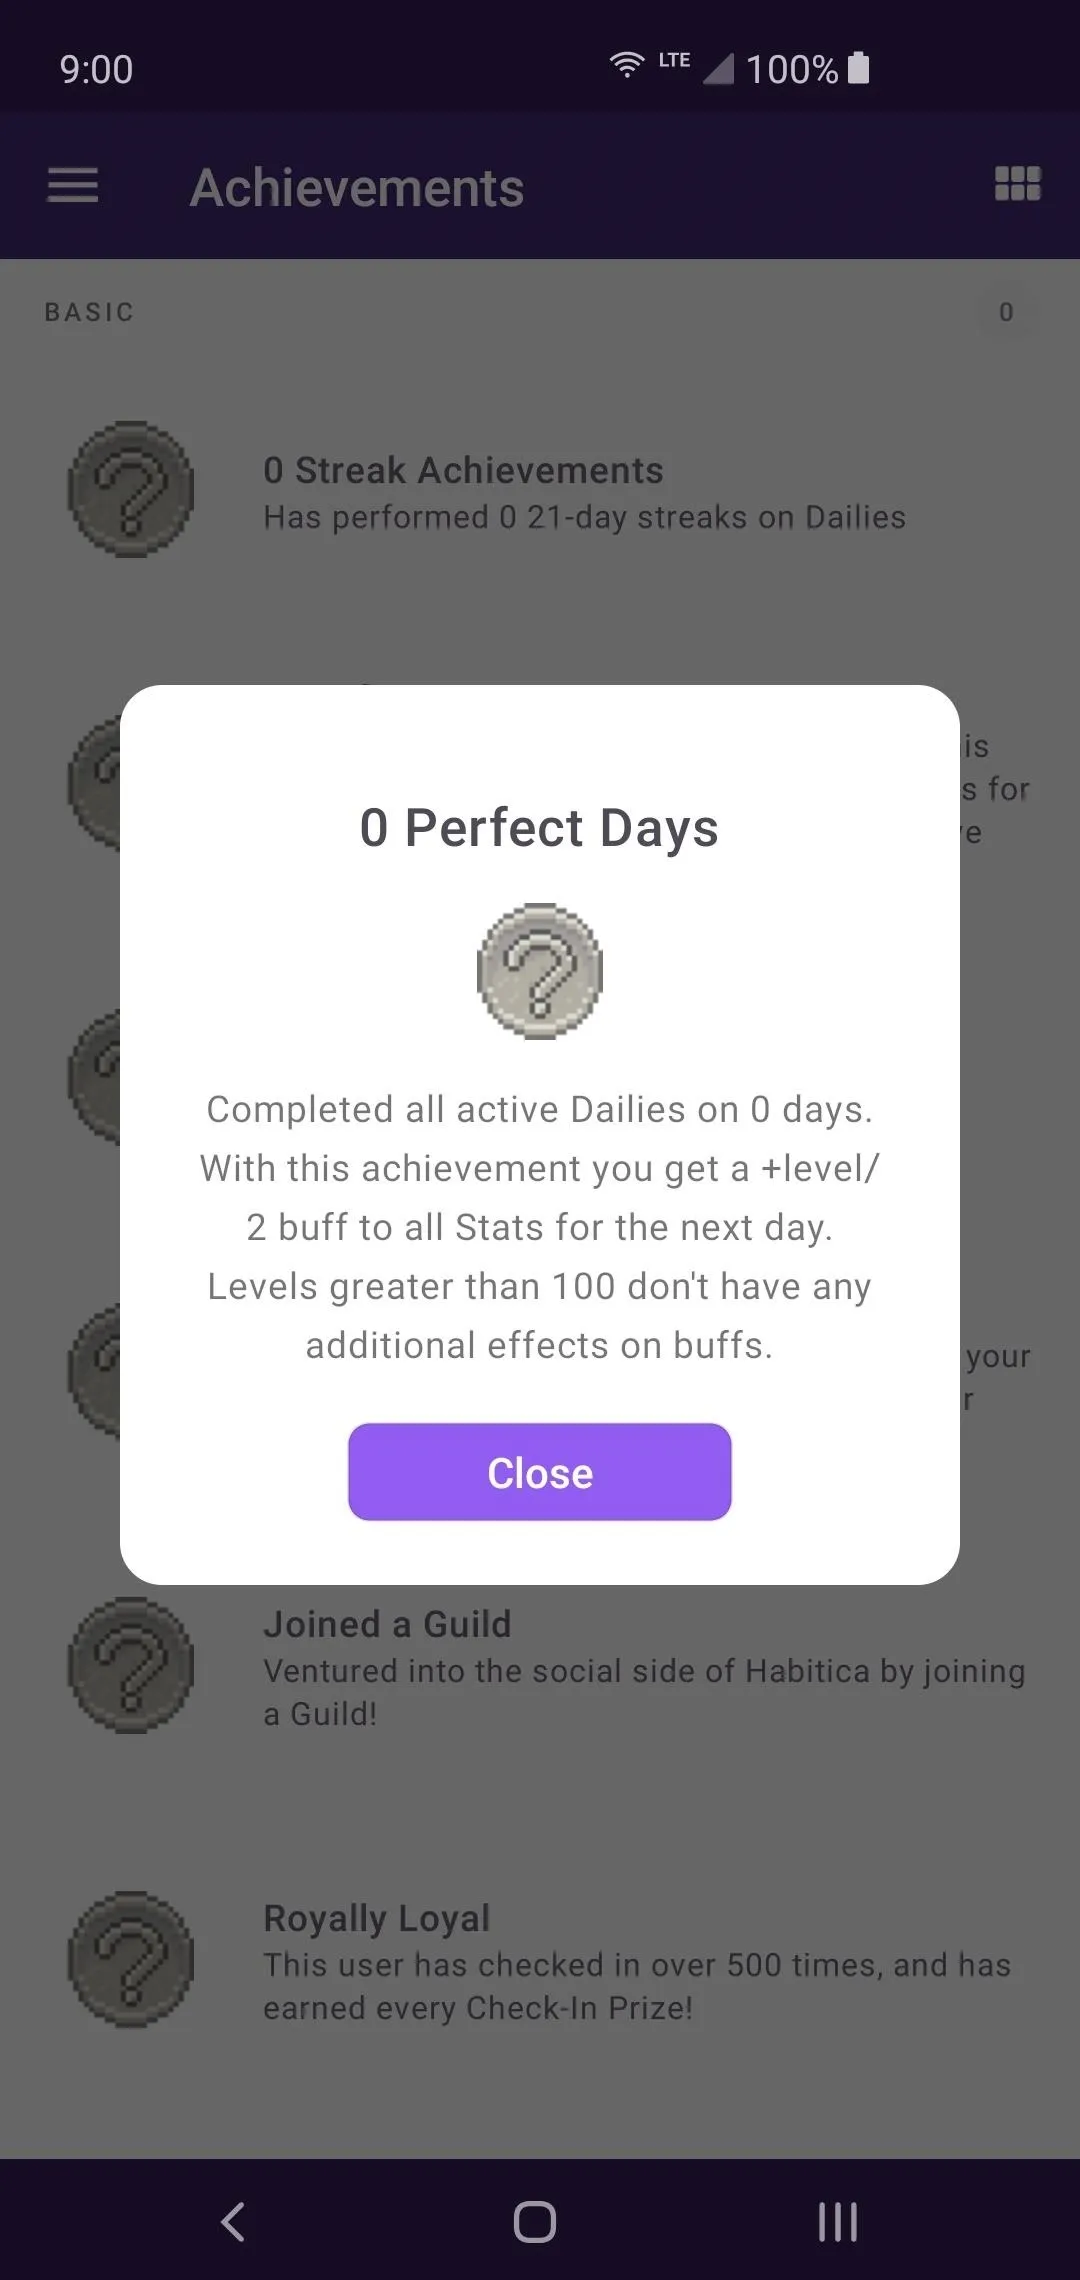
When it comes to achievements, there are plenty of them to grab by meeting specific goals. Tap the menu icon on the left and go to "Achievements" to view all of these specialized tasks. You might have to complete your tasks for a particular amount of days while others require you to collect certain items. Very few give extra rewards, so treat them more as cosmetics and focus on other things.
There are quite a few offline achievements, but there are also many online ones as well. If you plan on playing entirely offline, you don't feel like you're missing out too much since they are pretty much meant for bragging rights only. Do what you can whenever you can, but it's not a game-breaking deal if you choose to not bother with achievements at all either. It's up to you!
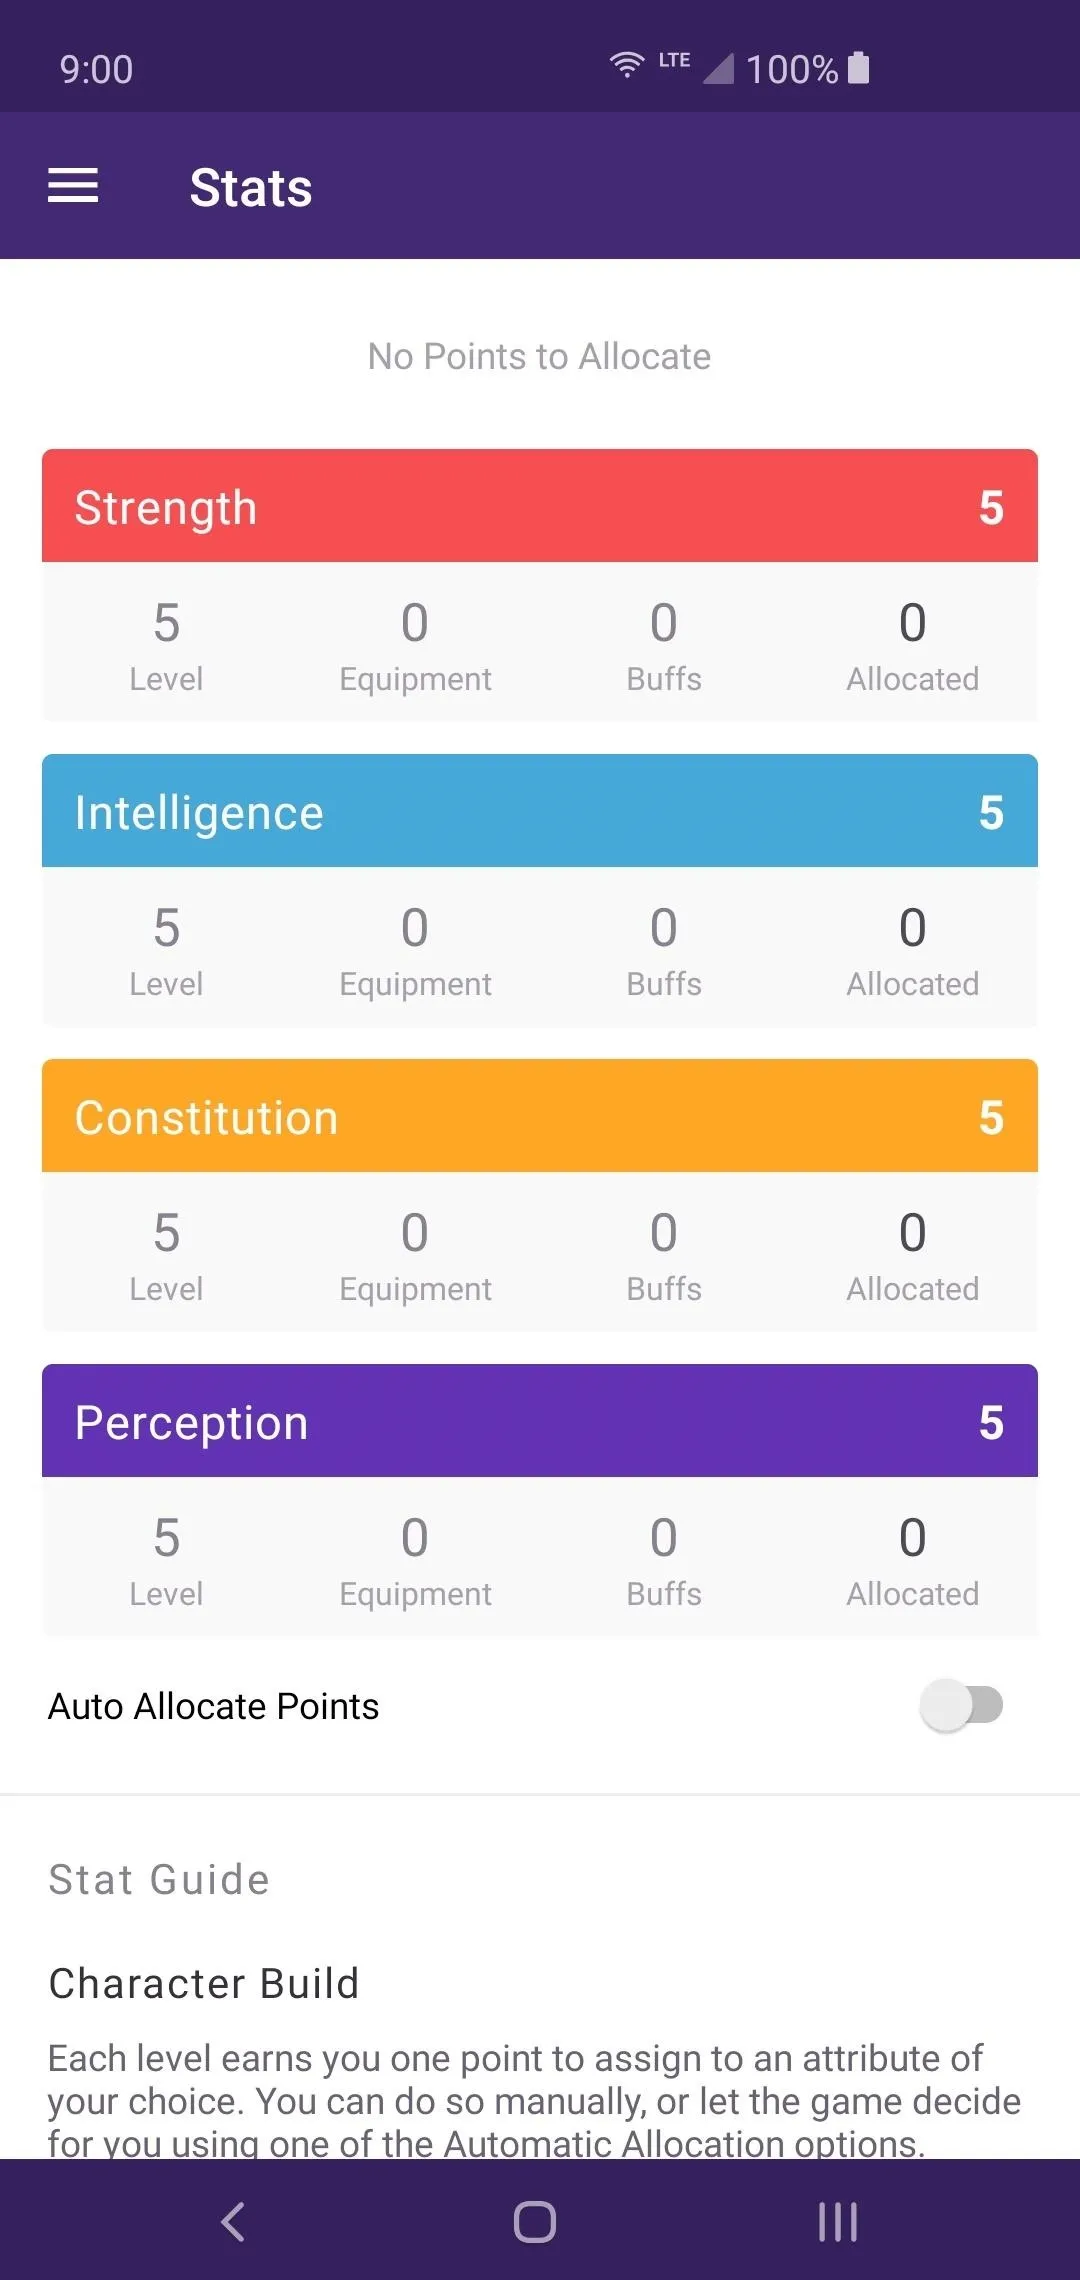
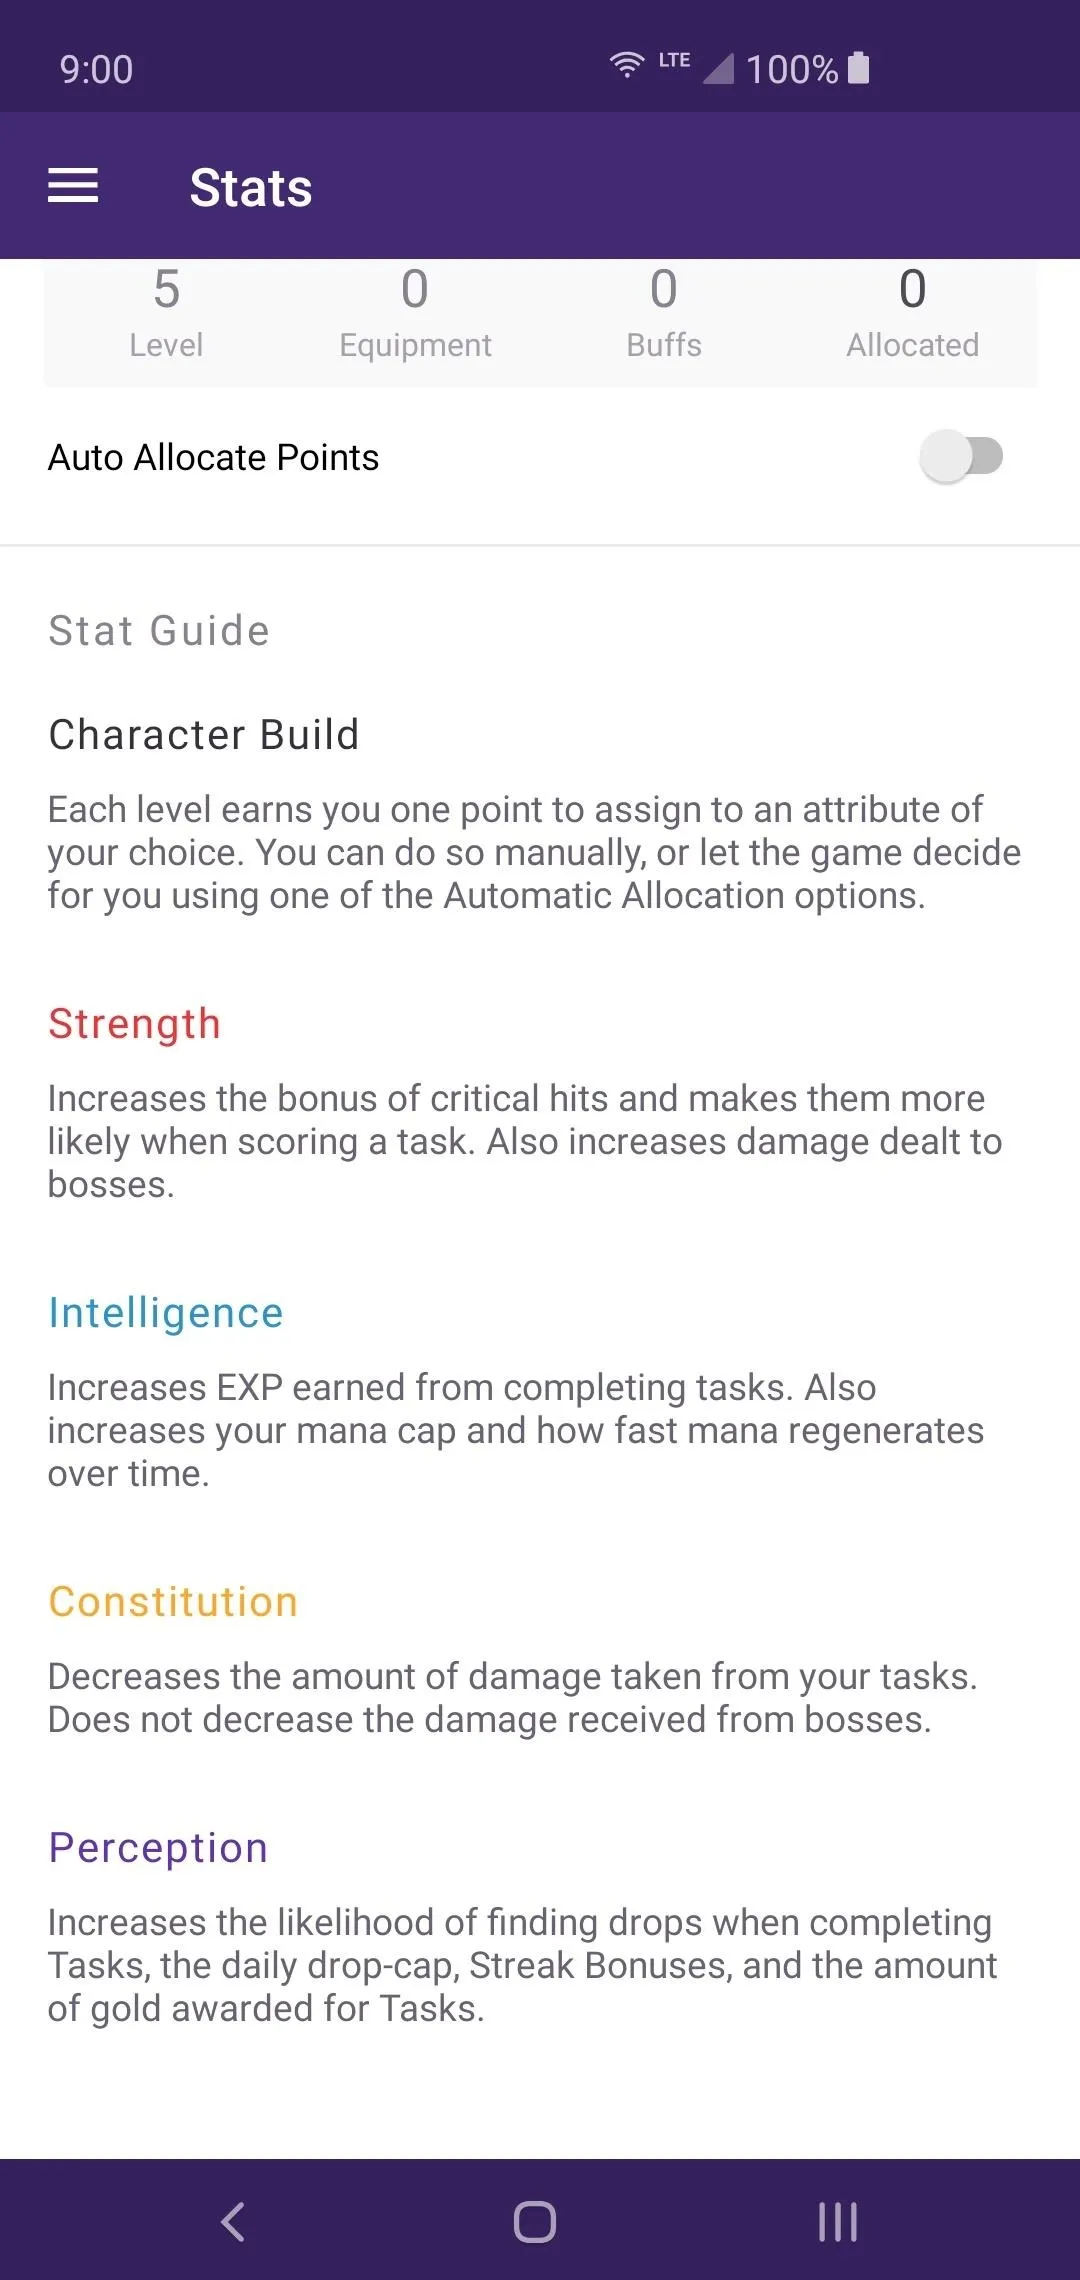
View Your Stats (Optional)
Tap the menu icon on the left and head to "Stats." As you complete quests and gain experience, your character will receive stat points after Level 10. These can be allocated to specific stats that can be customized to create a hero with a particular class type in mind.
There are four primary stats you will be able to choose from when building your character's abilities. They are Strength, Intelligence, Constitution, and Perception. For example, if you wanted to create a Mage-like character, then you would focus more on Intelligence over Strength.
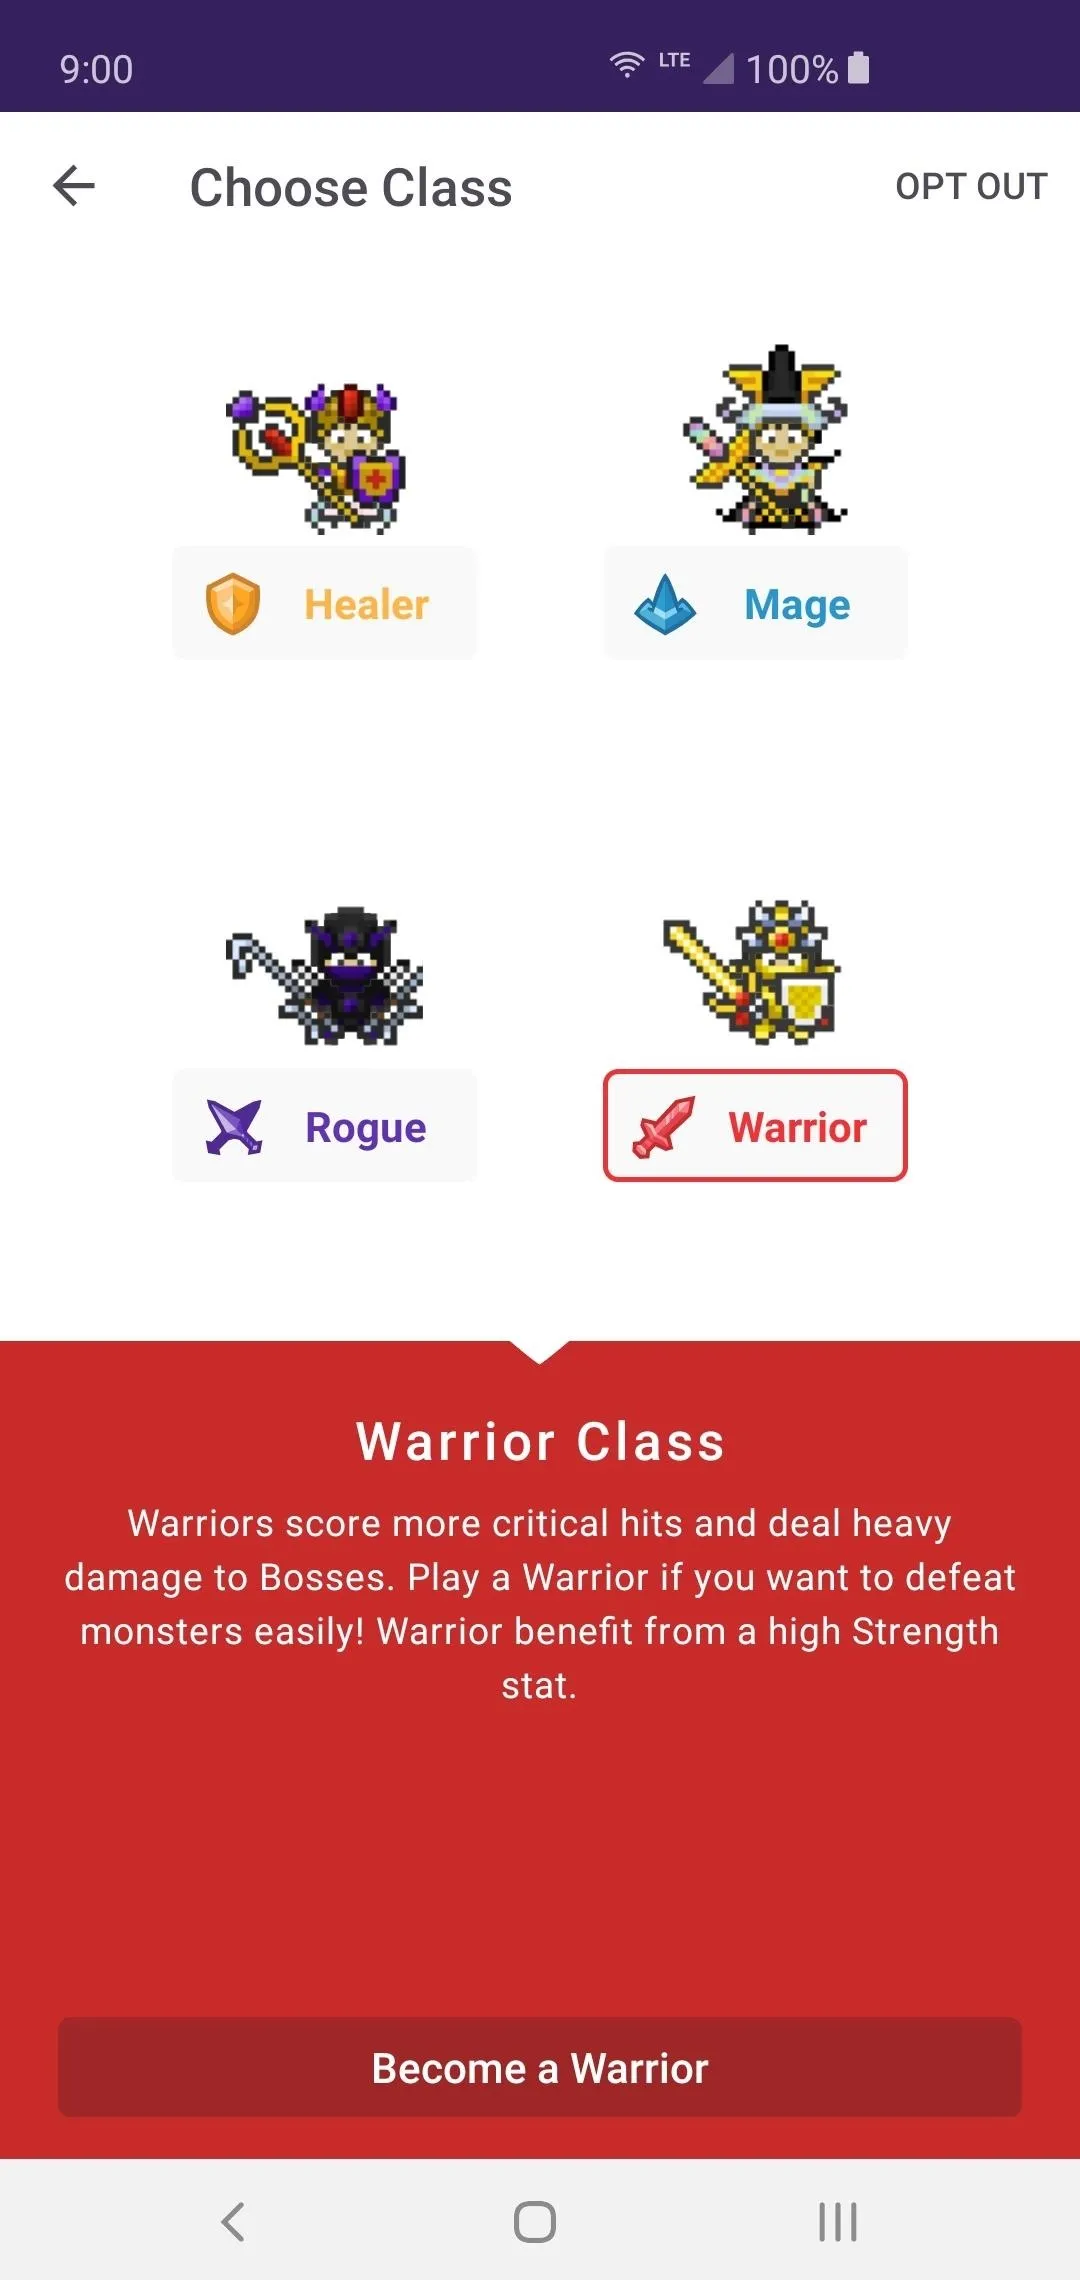
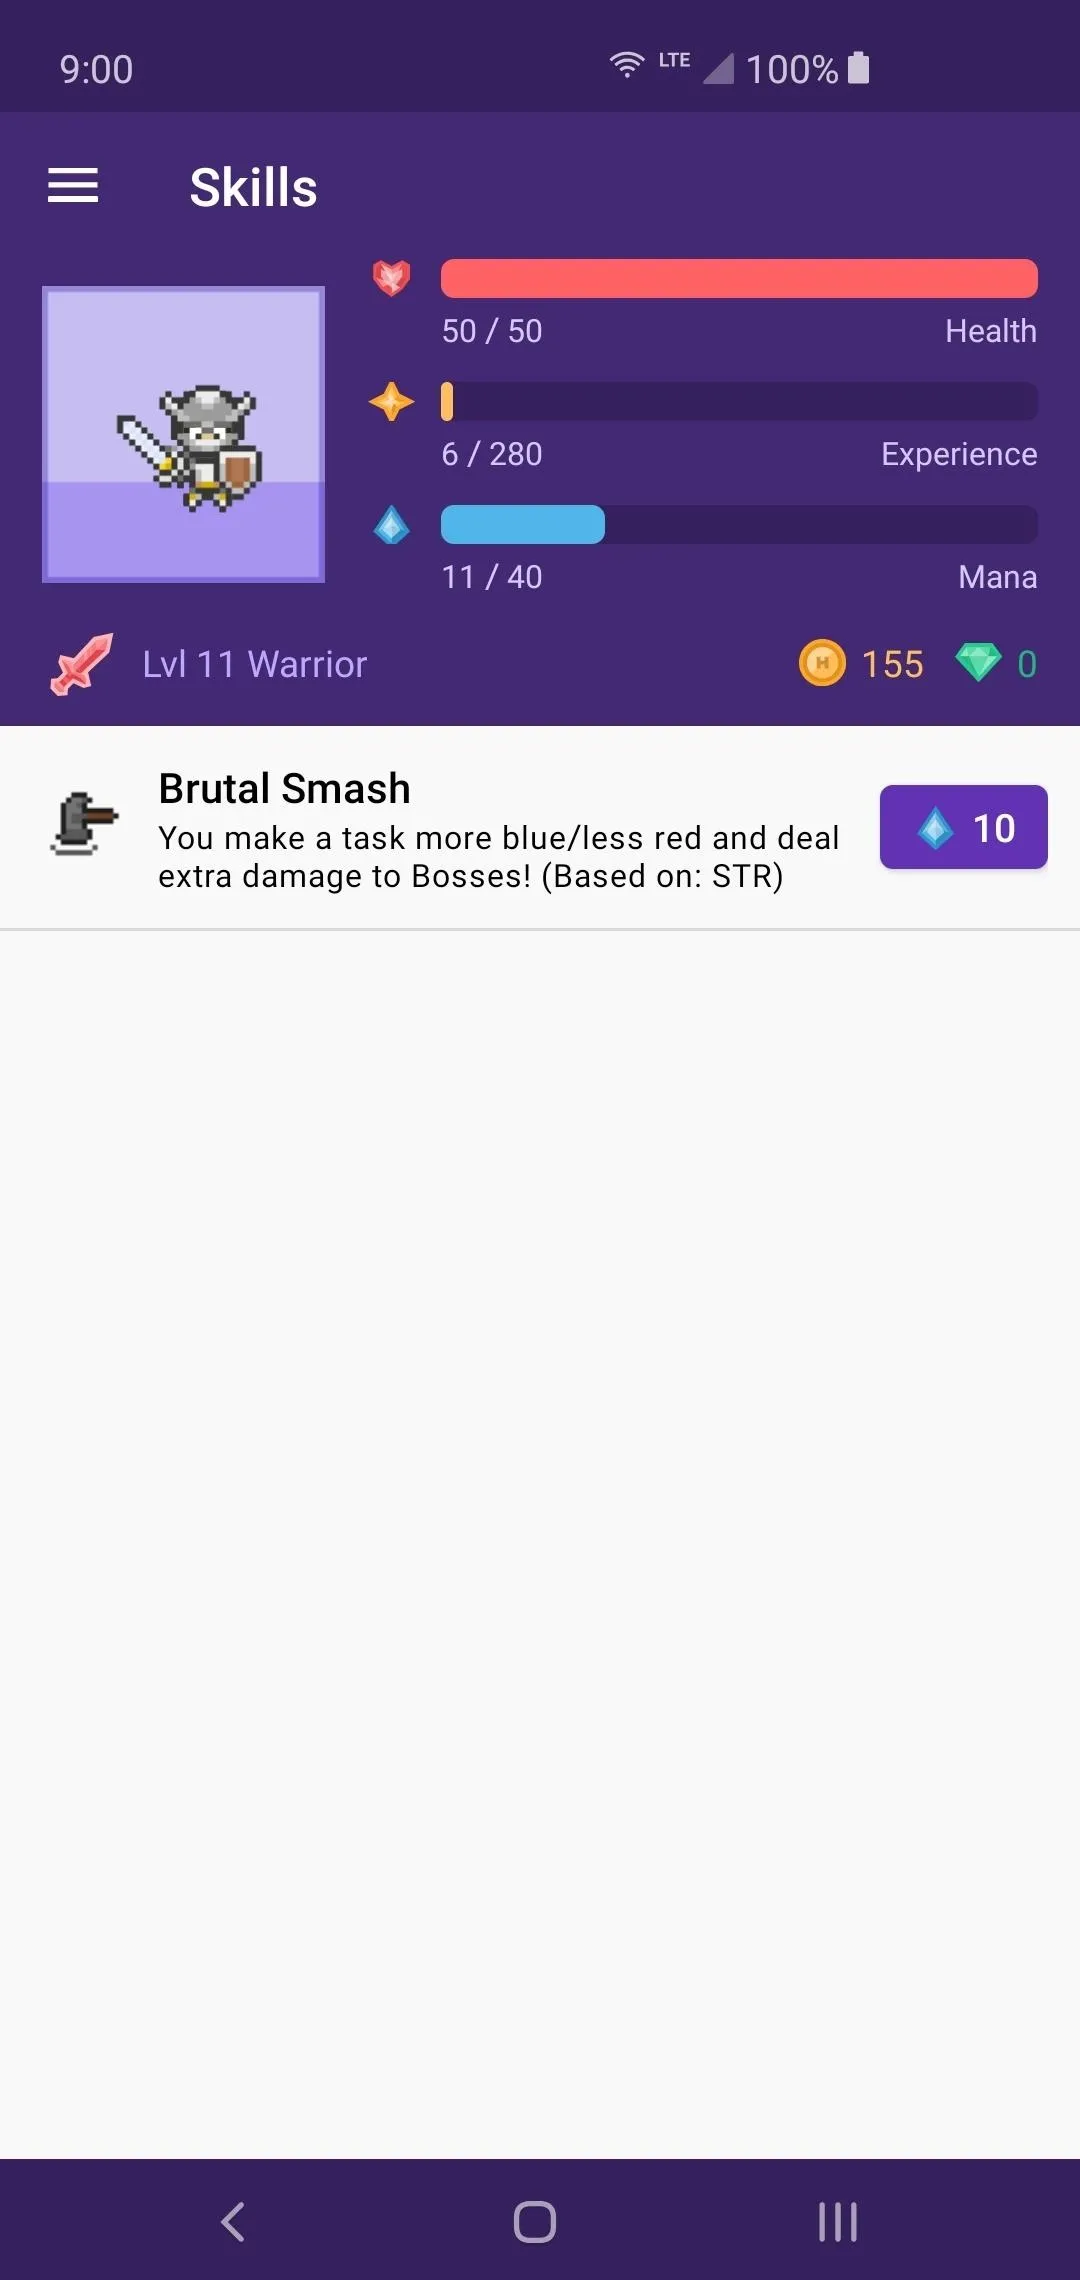
Also, once you hit Level 10, you'll be able to choose a character class to pursue. You can go with either a Healer, a Mage, a Rogue, or a Warrior. Each one offers a different play style, specialized equipment with unique bonuses, and a variety of skills too. You can swap out your character class at any time, but it will cost 3 Gems each time, so keep that in mind.

Explore the Inventory Section (Optional)
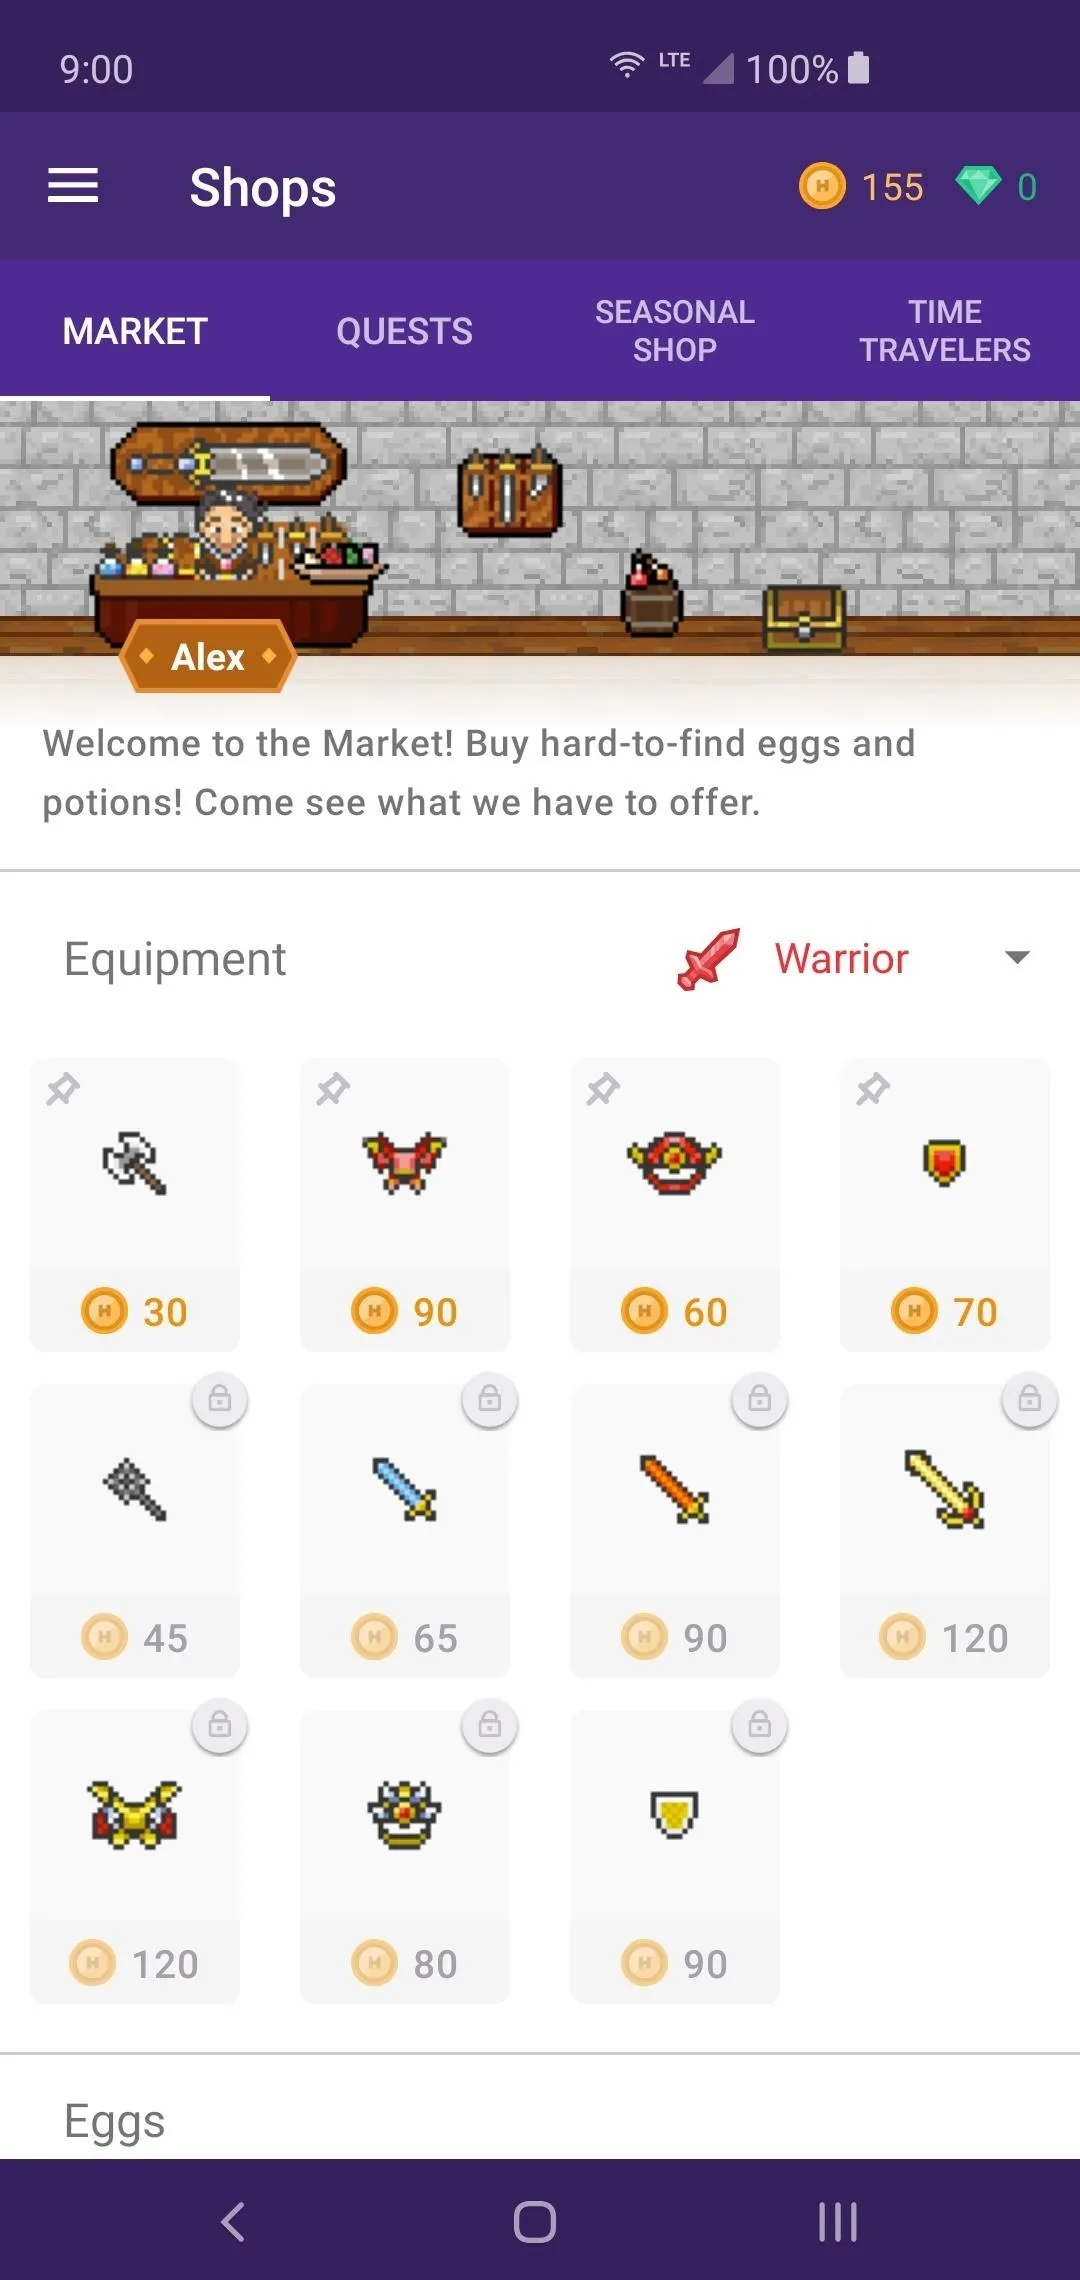
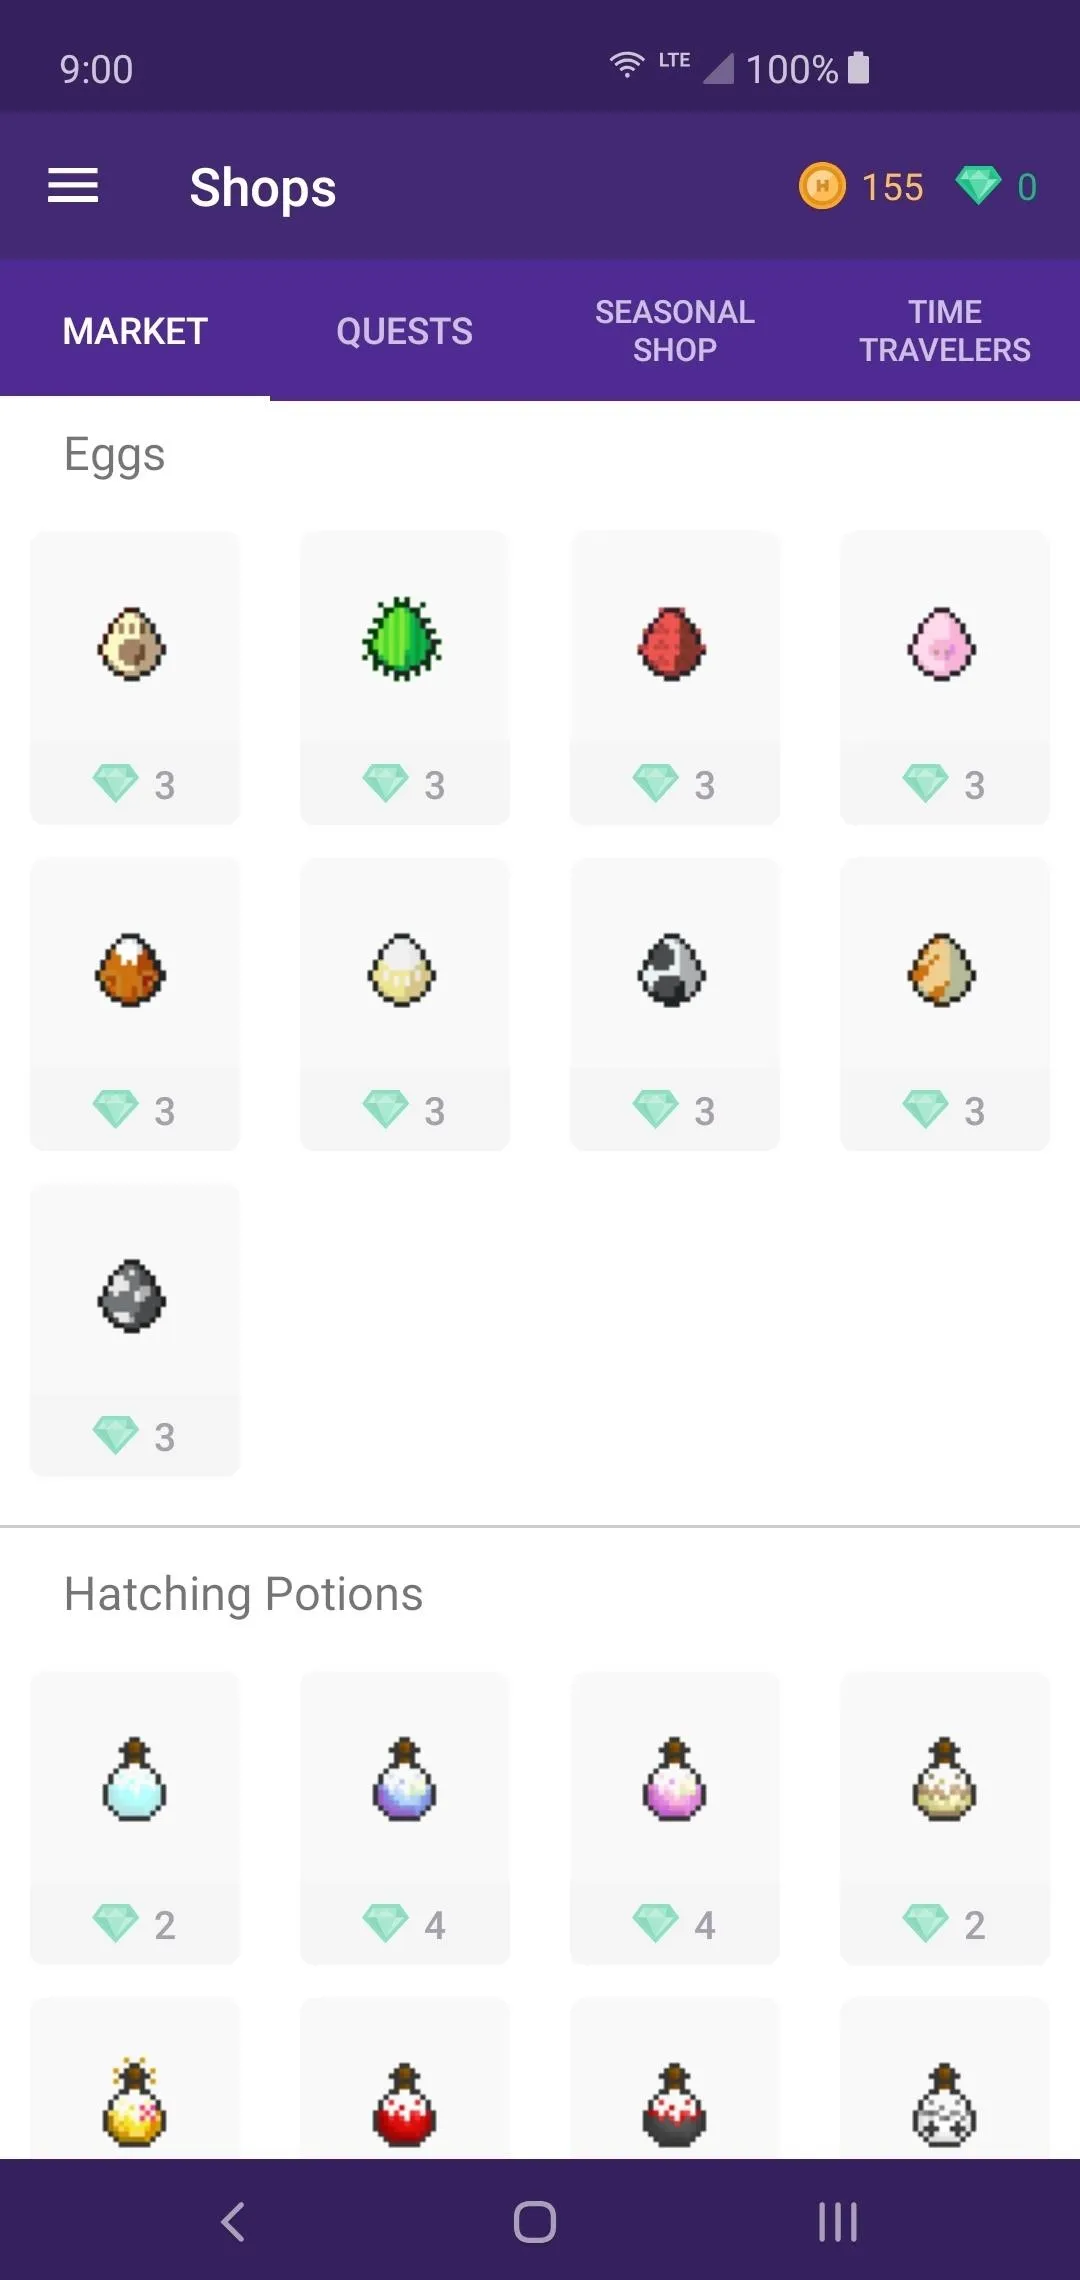
Shops
If you're looking for a particular item or equipment for a character class, you can find it here. Spend the Gold you earn from completing your tasks to purchase gear to help make your adventures a little bit easier. You can also use Gems for purchasing miscellaneous items, such as mount eggs and food for your pets.
Avatar
This is where you'll be able to change the appearance of your character like you did when you created the account. There are also special premium items you can purchase with Gems if you felt the need to create a fancy looking character.
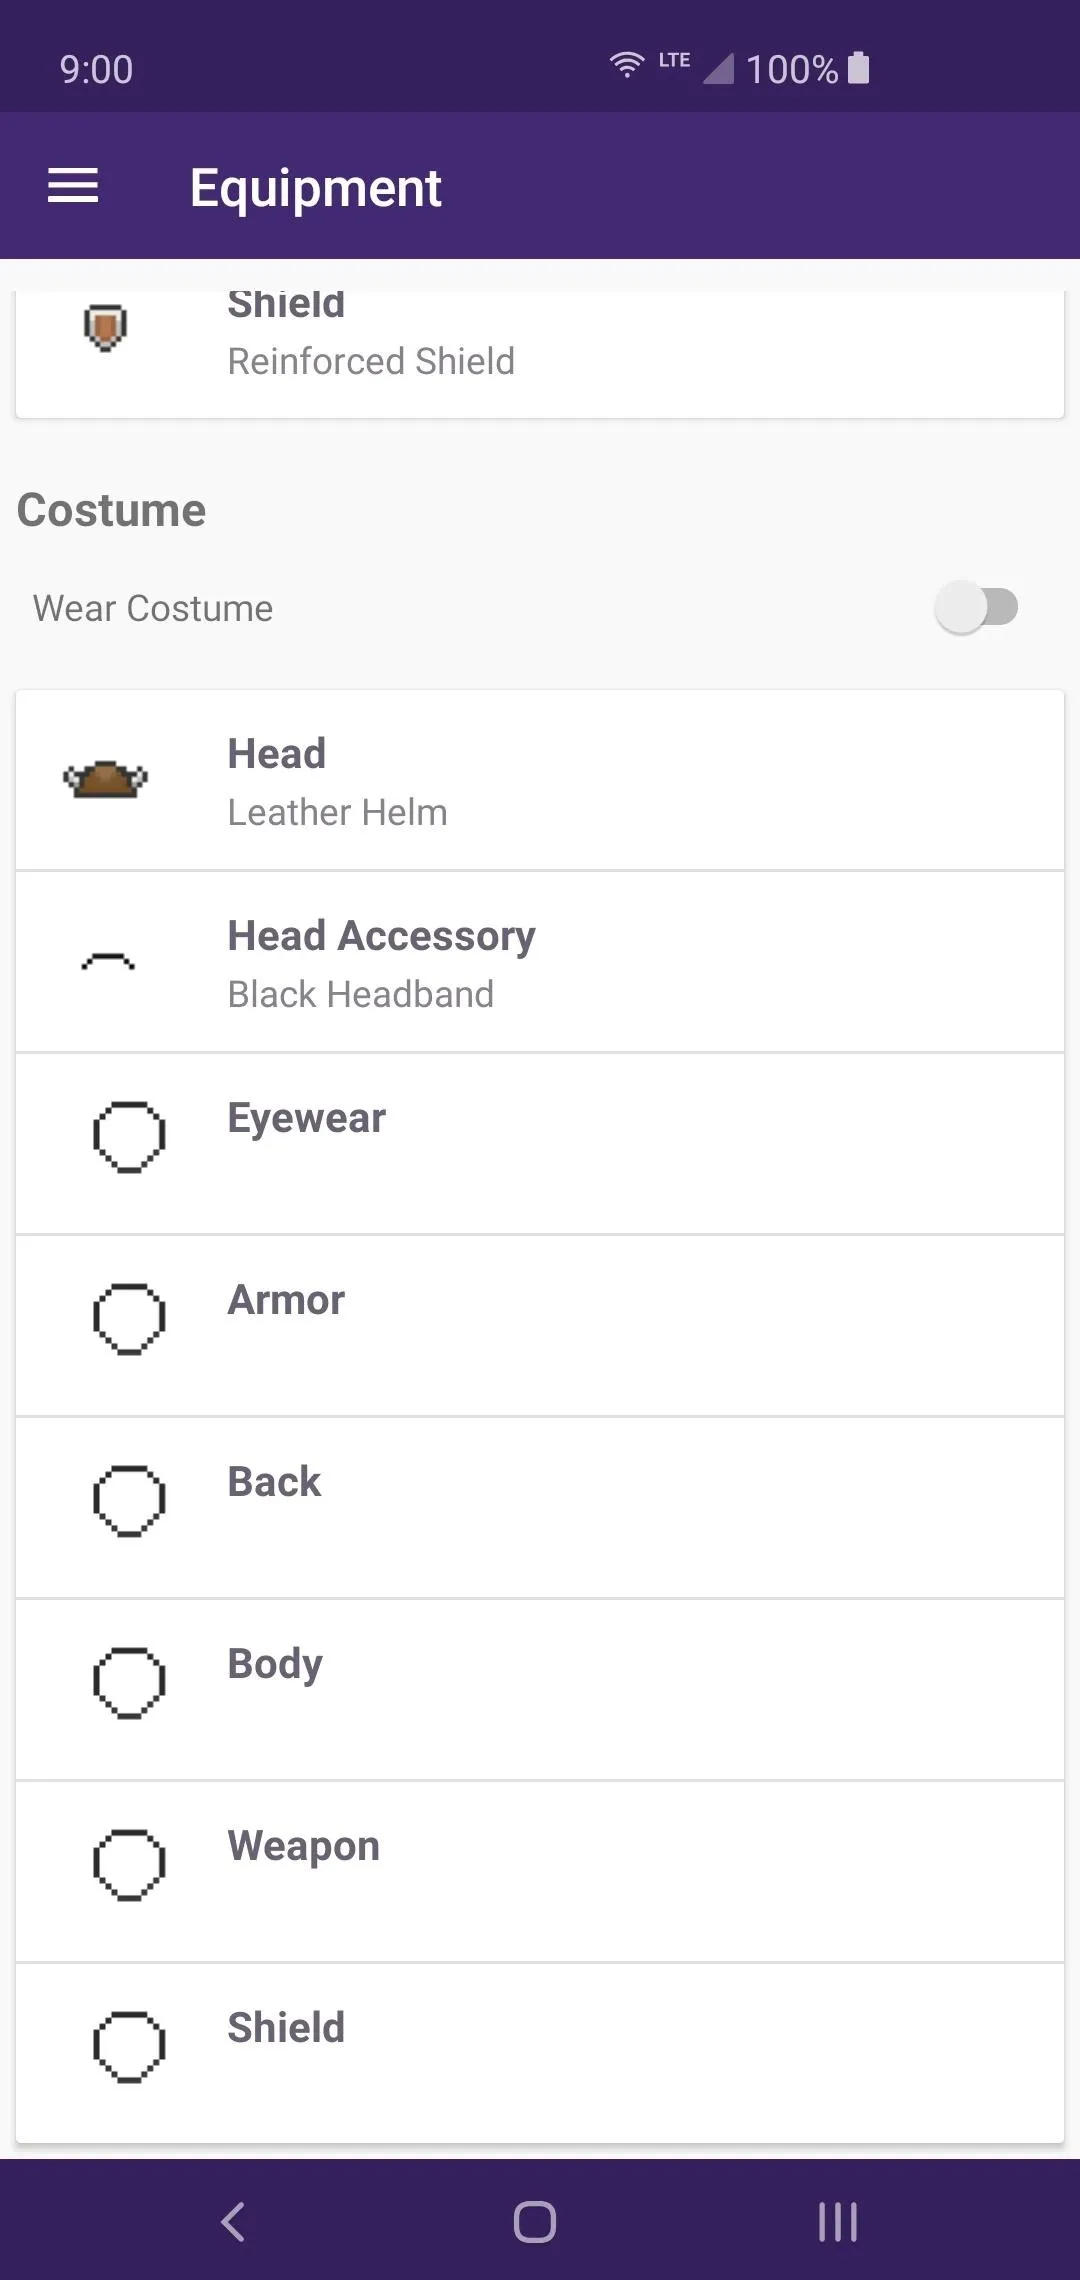
Equipment
You can manage your currently equipped armor and weapons from here, which is known as "Battle Gear." Your equipment can actually help you when completing your tasks by offering specific stat bonuses. For example, if you have a full set of gear that raises your Constitution stat, your defense will be much higher. This means when you fail a task, your HP will not be decreased as much.
You can also manage the "Costume" for your character when you scroll down to the bottom. When you enable the "Wear Costume" option, it will override your battle gear and replace the appearance of the outfit. It won't affect your stats at all, but it just alters the way your character looks.

Items
Naturally enough, this is where you'll manage all items you pick up from completing tasks or get from random bonuses. You can hatch eggs from here with a hatching potion, check your pet food, and look at other special quest items as well. Tapping an item will bring up the options you can carry out with it, such as selling it for Gold.


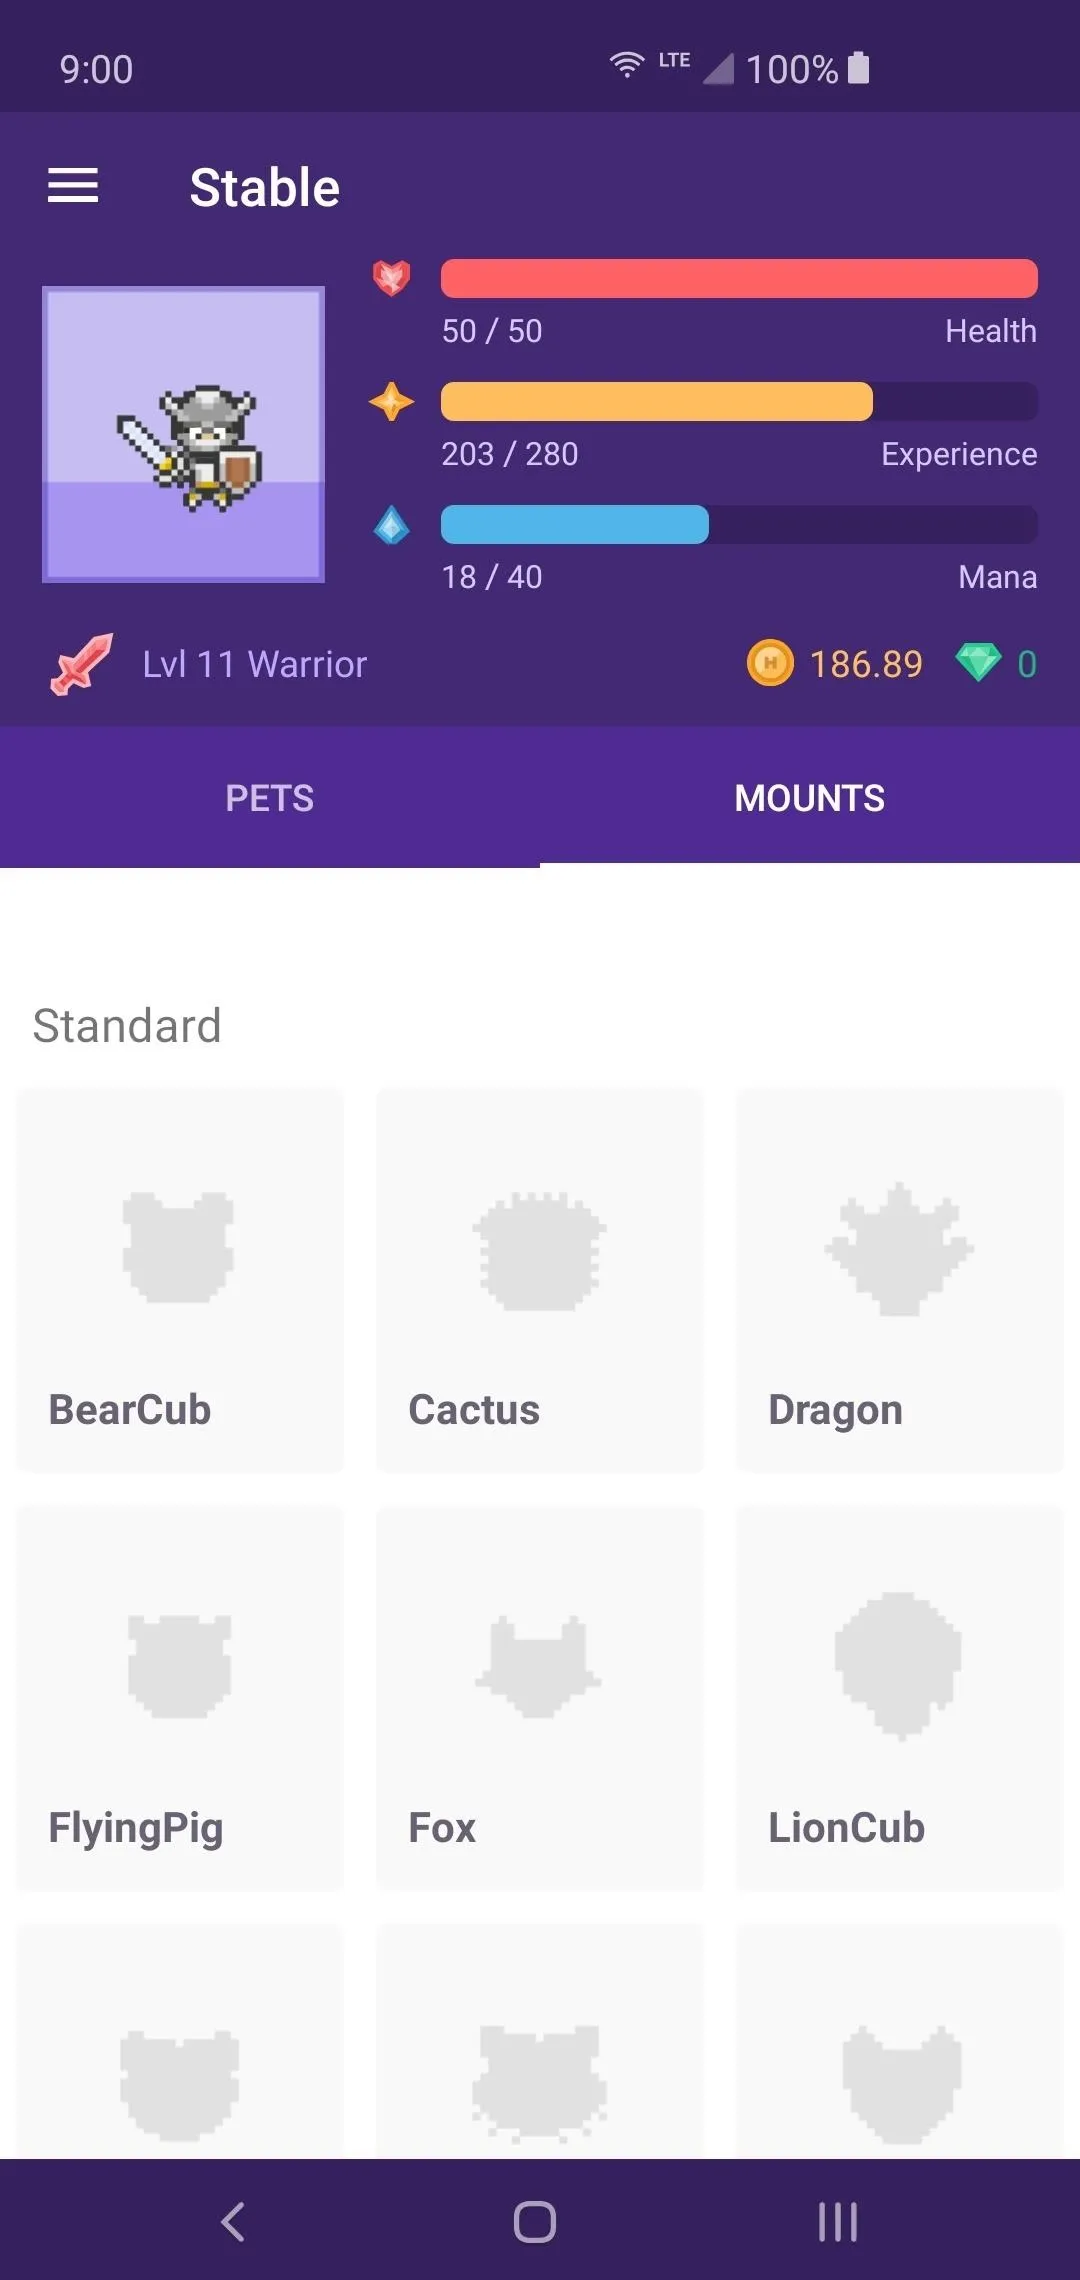
Stable
Here is where you can view and manage any pets or mounts you might receive along the way. There are many to collect, so try to hatch eggs with Hatching Potions whenever you get the chance! Hopefully, you can get some cool new pets or mounts to help you on your journey.

Explore the Social Content (Optional)
You can just as easily use this whole thing offline and never interact with the online social elements if you wish to do so. However, when you opt to use the online features, it essentially turns a game about your real-life tasks into another game — a game within a game. You level your character to go on quests with others, which encourages you to do more to help out your party members.
You will be striving to enhance your character through completing your real-life chores, then tackling specific challenges with others online. It's a rather unique aspect that can add an entirely new level of gameplay that, quite frankly, is unexpected from the type of app this is. If you feel the need to better yourself, help others do the same, and complete challenges, feel free to dive right in!
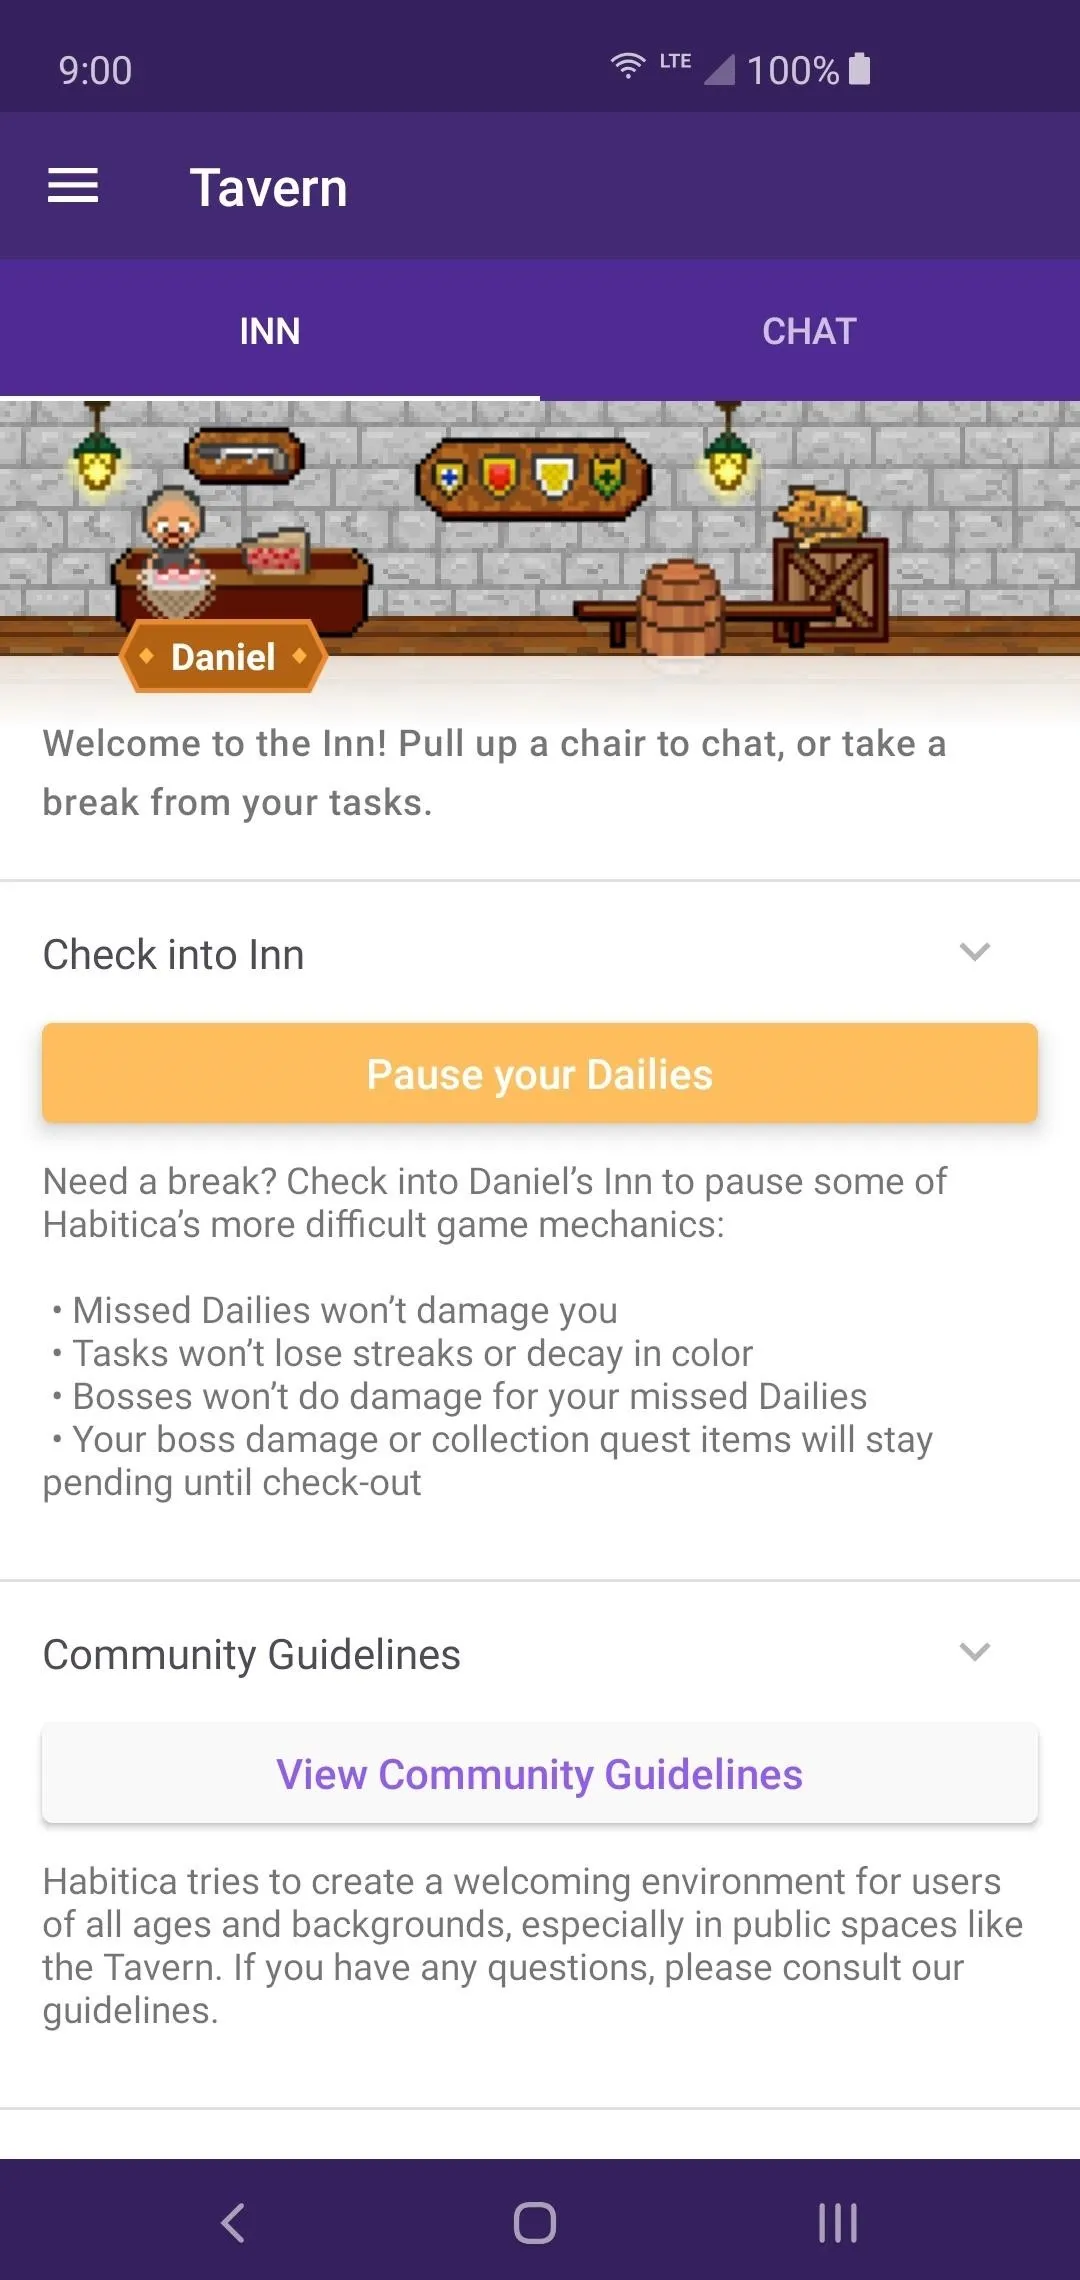
Tavern
The Tavern is a place where you can unwind and rest your character from the hard work of completing tasks. When you need a break, you can hit the "Pause your Dailies" button to check-in at the Inn. This will temporarily pause certain features that would otherwise cause negative effects on your character. You can also hit the "Chat" tab to message other players in the community as well.

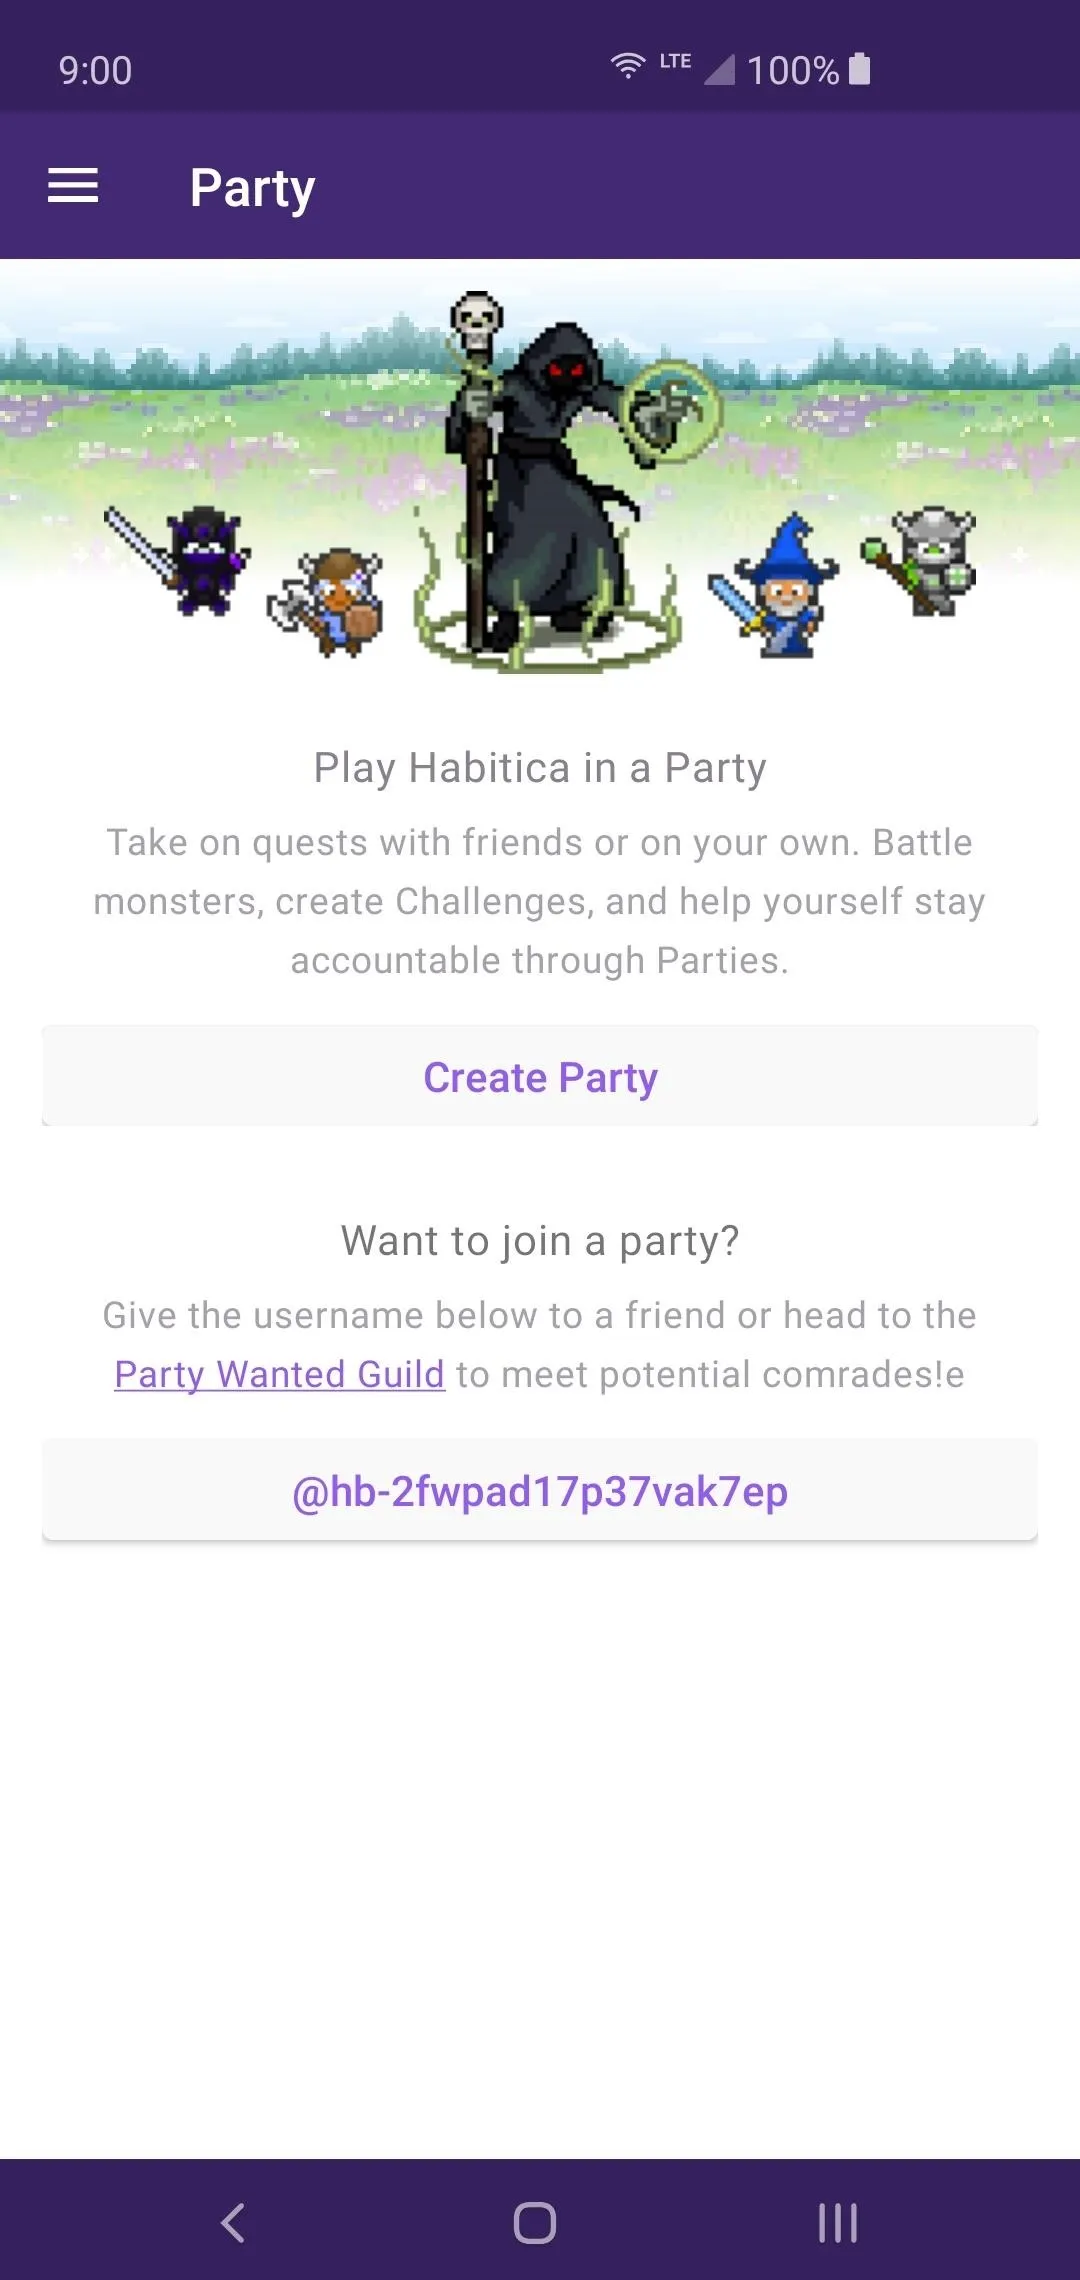
Party
This is where your equipment, character class, and skills come into play so you can be a big help to your other party members. If you have some friends who play as well, you can create a party with them and go on some adventures together! You can also venture out by yourself if you wanted to or join others by checking out the "Party Wanted Guild."
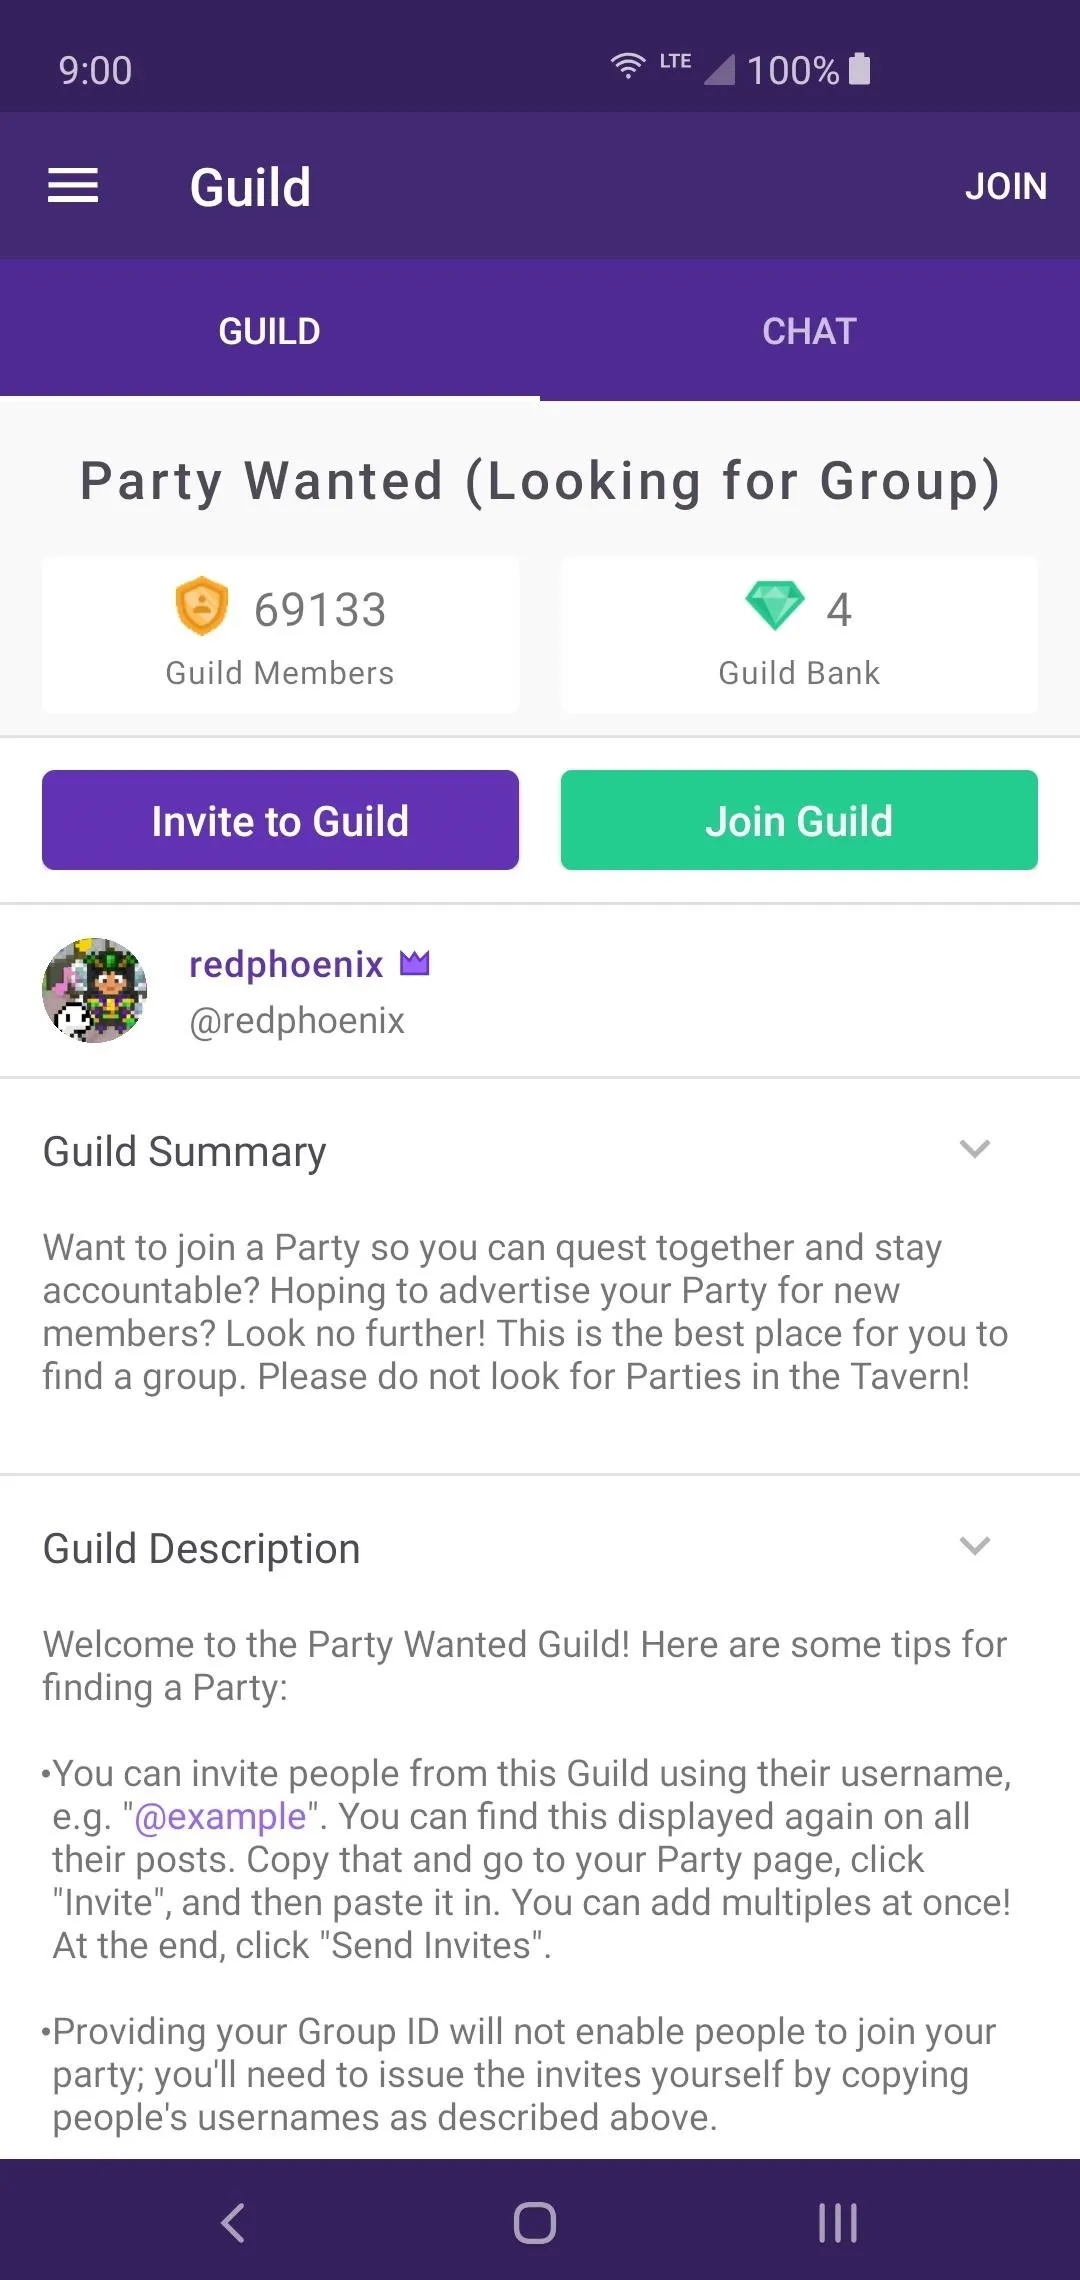
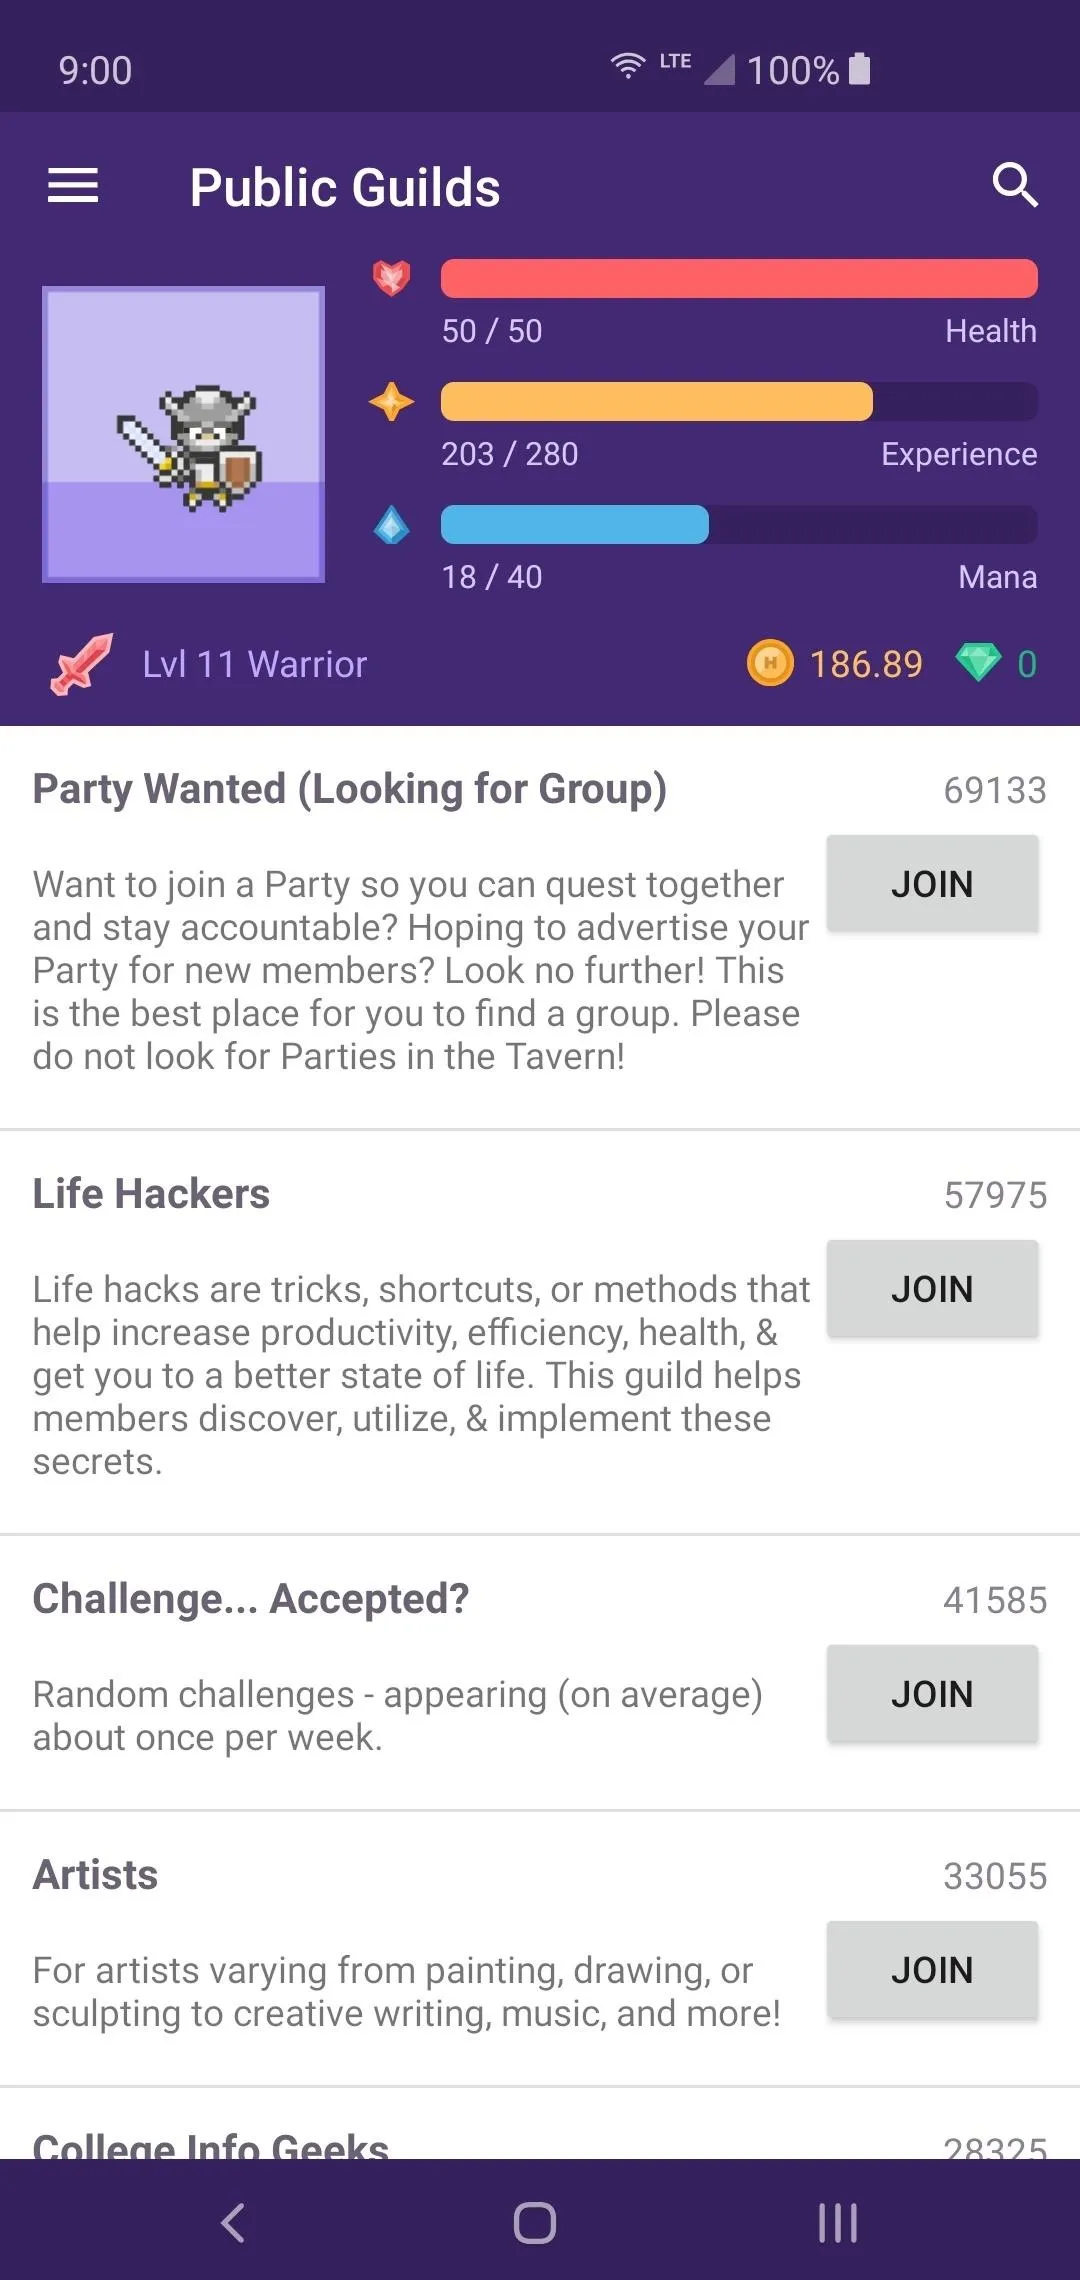
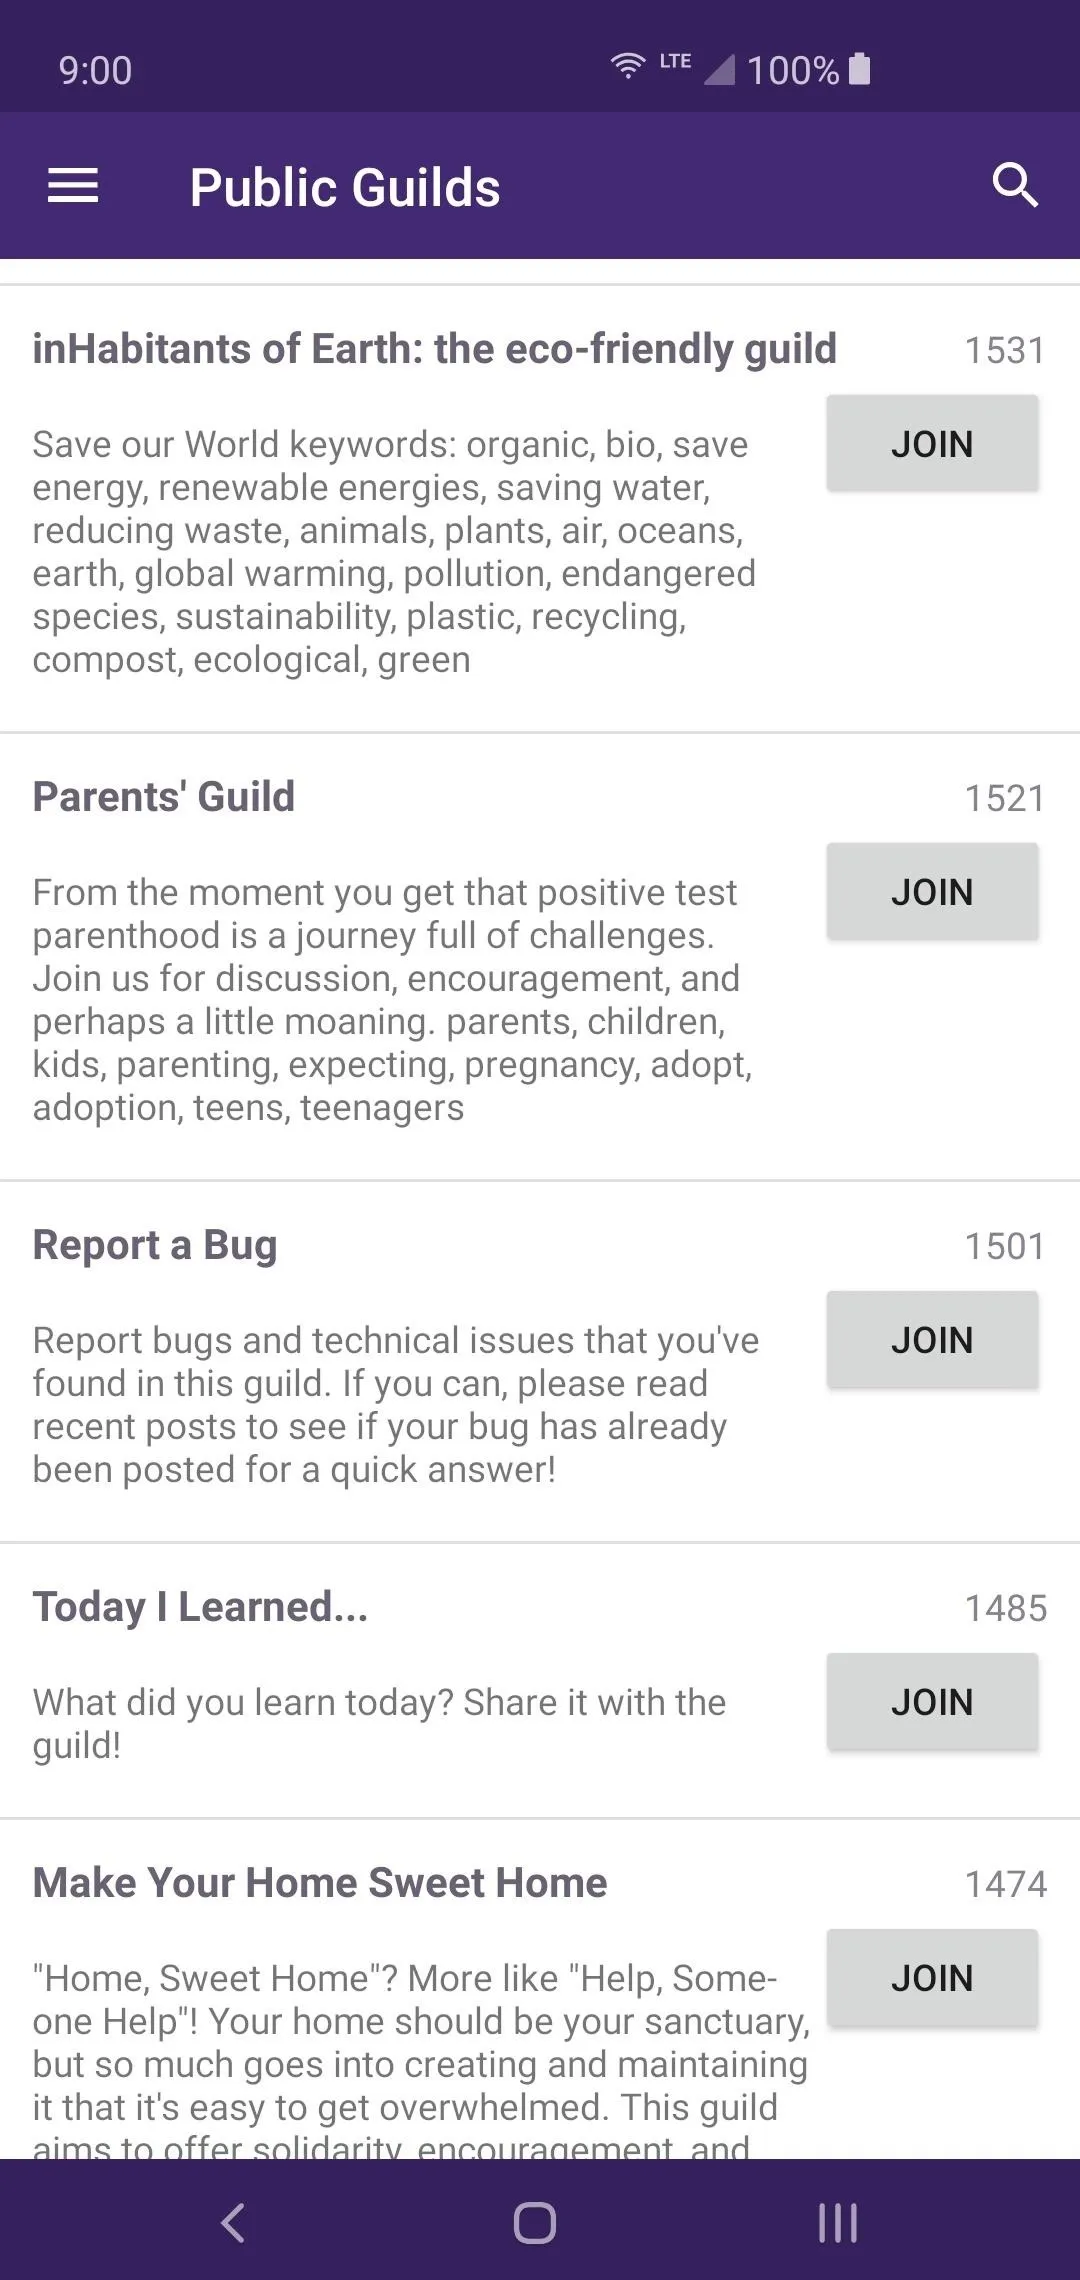
Guilds
A guild is in place to gather party members into one unified team who all help each other out where needed. You can create your own Guild, or you can view all of the Public Guilds and join one that you want to be a part of. The idea of being a part of the team and helping out with tasks can be beneficial for both parties involved.
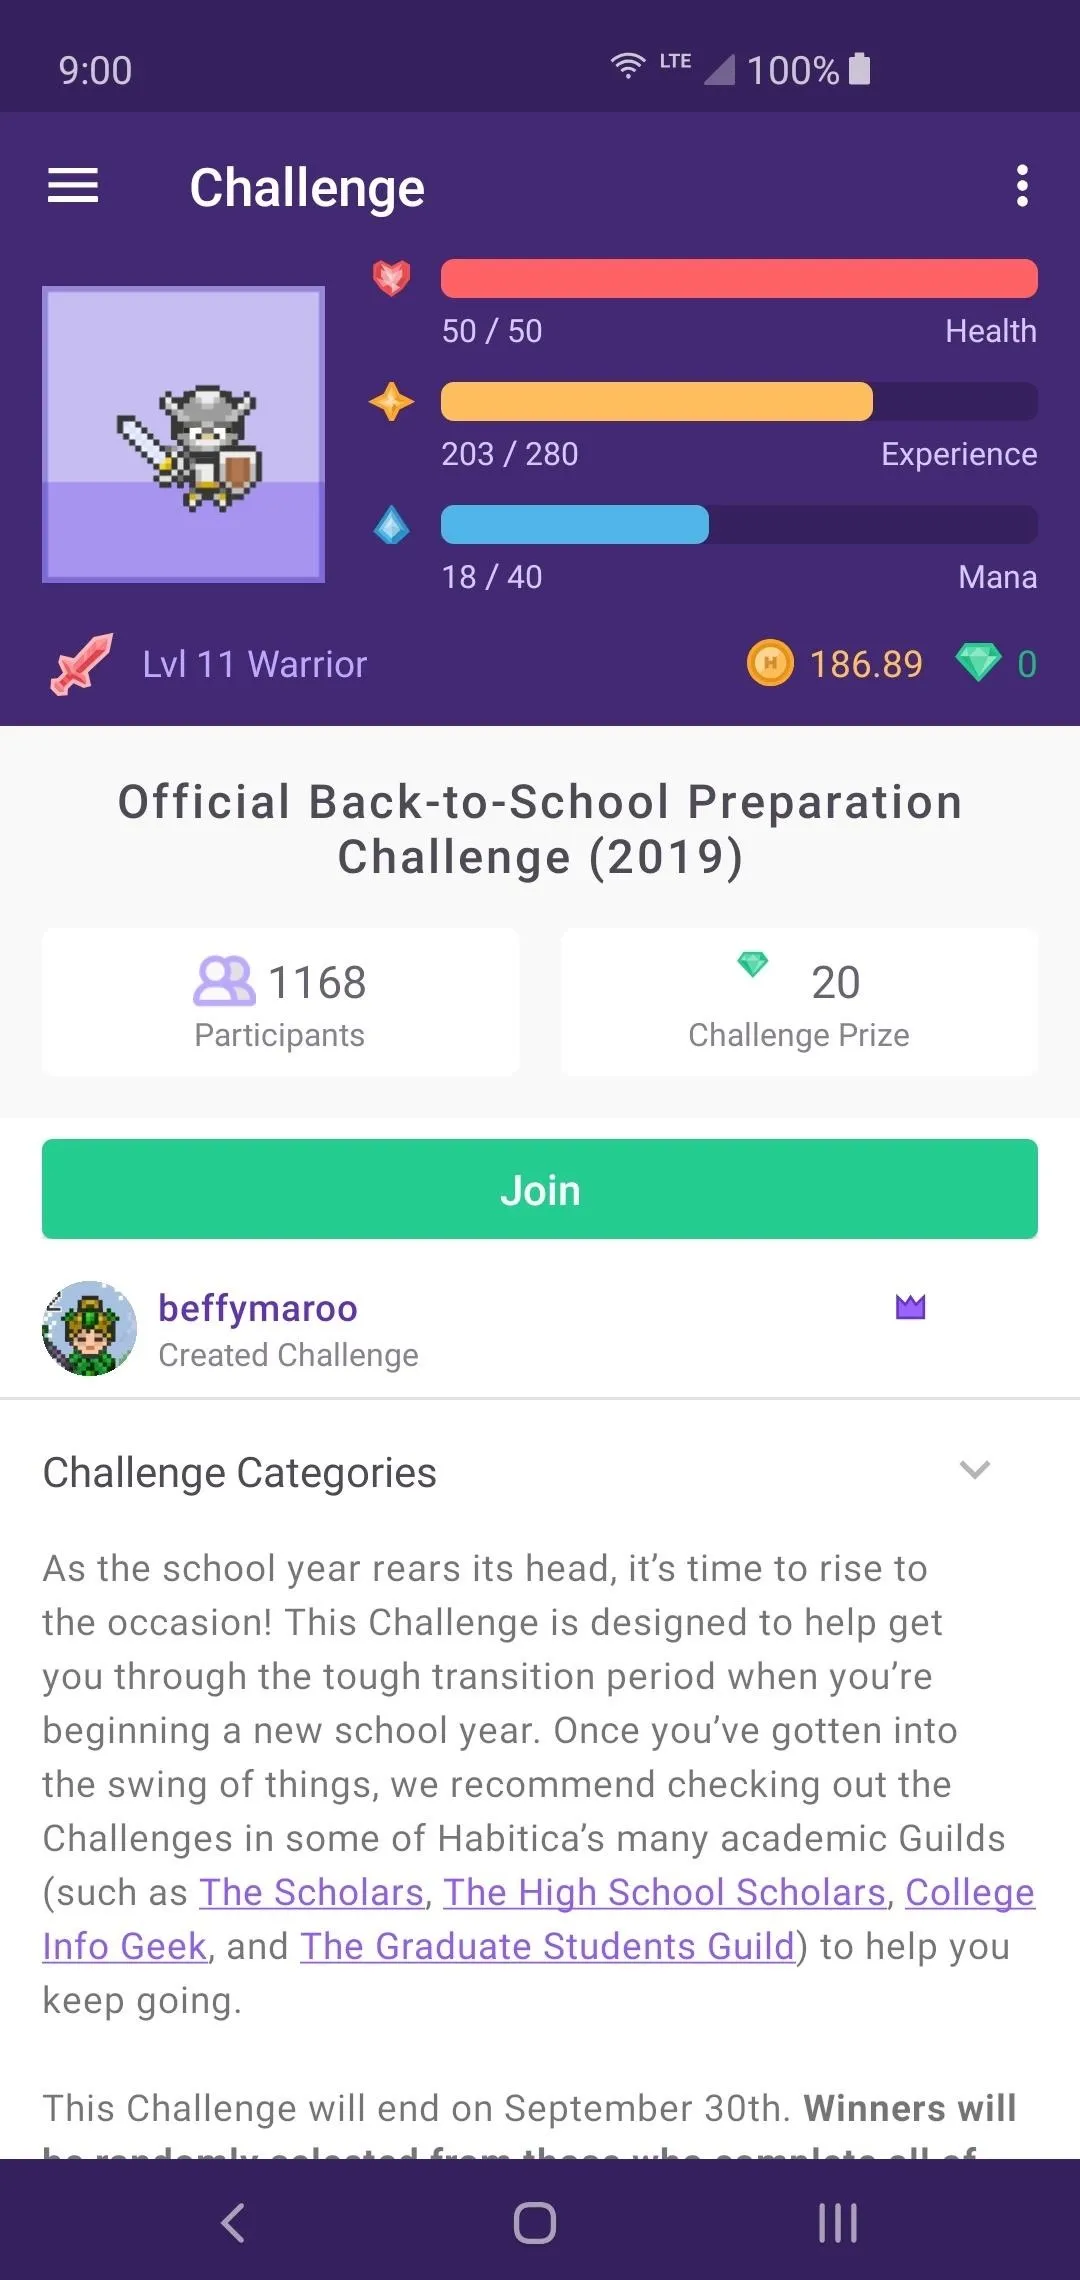
Challenges
As the name suggests, Challenges allow players to create different tasks and let the public try them. You can personally issue challenges to the public, but you'll need at least one Gem to get started with that. Upon meeting the specific task requirements, you or the person who completes the challenge will be rewarded with a certain number of Gems as a Challenge Prize.

Final Notes
Adding Tags
You can also add tags to your tasks by heading back to the "Tasks" page, then filter icon at the top right of the screen. Tap "Add New Tag," then type any label you want to help better organize your tasks when you start adding more to the list. For example, maybe you might wish to a label called "House Chores." This makes it easy to bring up all quests at once to save time and keep organized.
Watch Your HP
Whenever you gain a character level, your HP will automatically recover to the max. If your HP ever reaches zero, you'll actually lose your Gold, and your character also drop one level as well! Losing all of your Gold can set you back substantially in some cases, so do your best to complete your tasks as much as possible.
Random Item Bonuses
You can receive random items upon logging in for the first time every day, so checking back once a day will help net you some free items. You can gain random items when completing your tasks as well. A higher Perception stat will increase the likelihood of receiving random quest rewards. So having a full set of Perception gear is key to gaining free items from when completing your quests.
Check Out the Options Menu
The options menu is home to a lot of helpful features that you won't find anywhere else. Tap the menu on the left, then go to the gear icon on the right. You can edit your profile, change your character class, or log out of your current account. If you want to reset your account and start fresh or delete it altogether, tapping "Authentication" will take you where you need to be.
This article was produced during Gadget Hacks' special coverage on using your smartphone to boost productivity. Check out the whole Productivity series.
Cover image and screenshots by Stephen Perkins/Gadget Hacks


Comments
Be the first, drop a comment!