


Switching from one popular music streaming service to another shouldn't have to be a hassle, but it is if you want to transfer all your favorite music over. No popular service offers a built-in feature to export or import playlists, so if you want to move your favorite Apple Music playlists over to Spotify, you'll have to use a third-party service.
Using SongShift for iOS and Soundiiz on Android, you can transfer your favorite Apple Music playlists over to Spotify without a hitch. Although the two applications differ in the transfer process, they both allow you to do the same thing. And the best thing of all, it won't cost you a dime.
- Jump to a section: iOS Instructions | Android Instructions
Transfer Apple Music Playlists to Spotify (iOS)
You can download SongShift on your iPhone for free from the iOS App Store. If you need more features, there's a pro version for $4.99 that allows you to process multiple playlist transfers at a time, skip steps to make the transfer process faster, fix songs that are incorrectly or not matched, automatically update playlists, get rid of advertisements, and more. However, depending on how many playlists you have, the free version may be all you need.
- App Store Link: SongShift (free)

Connect Your Apple Music Account
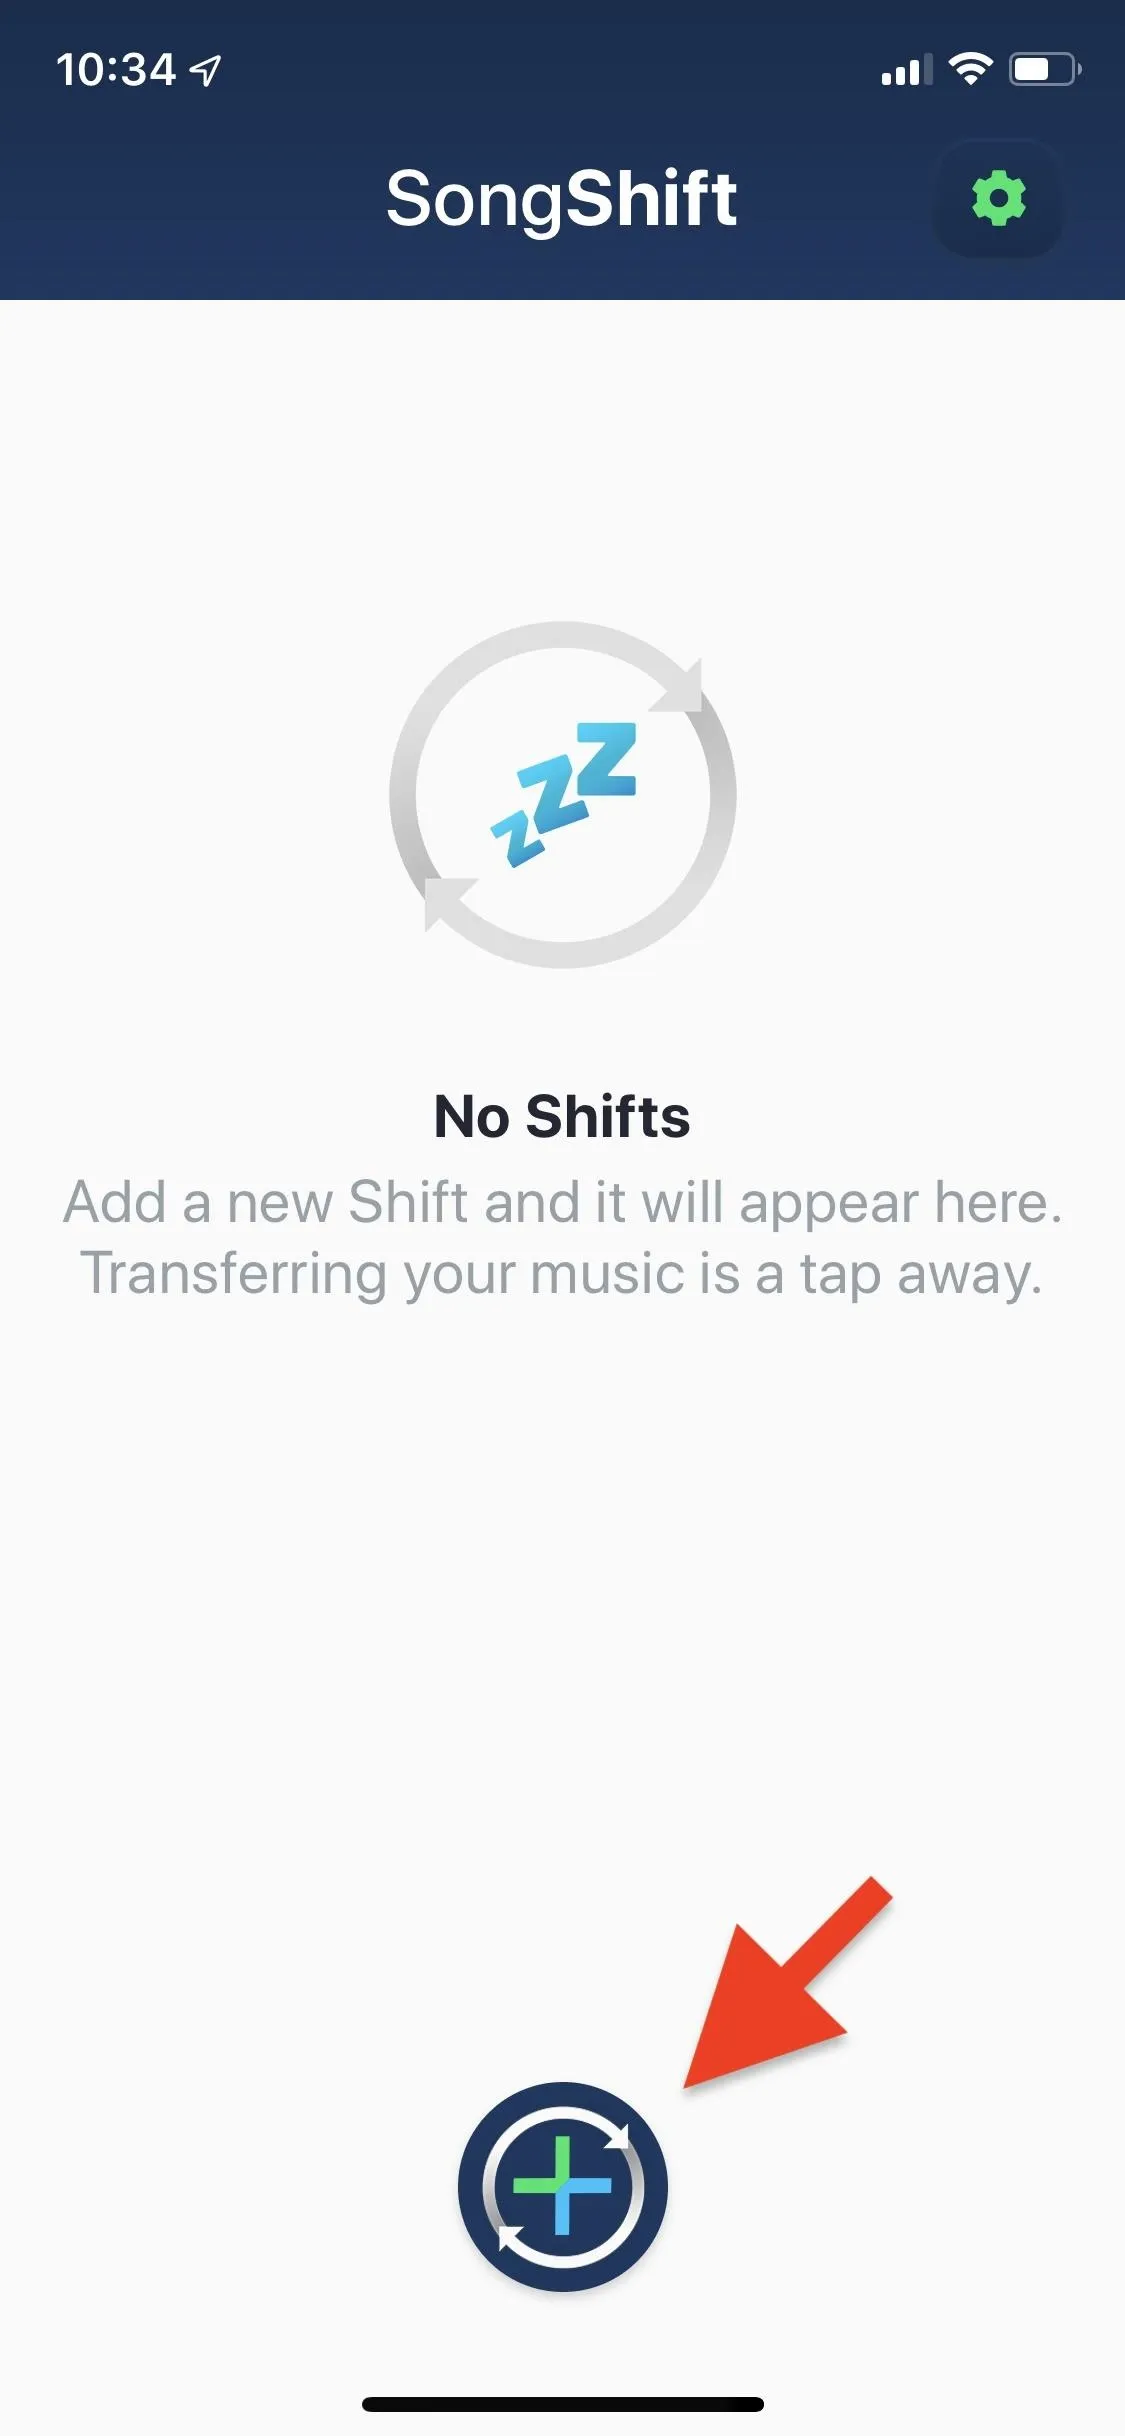
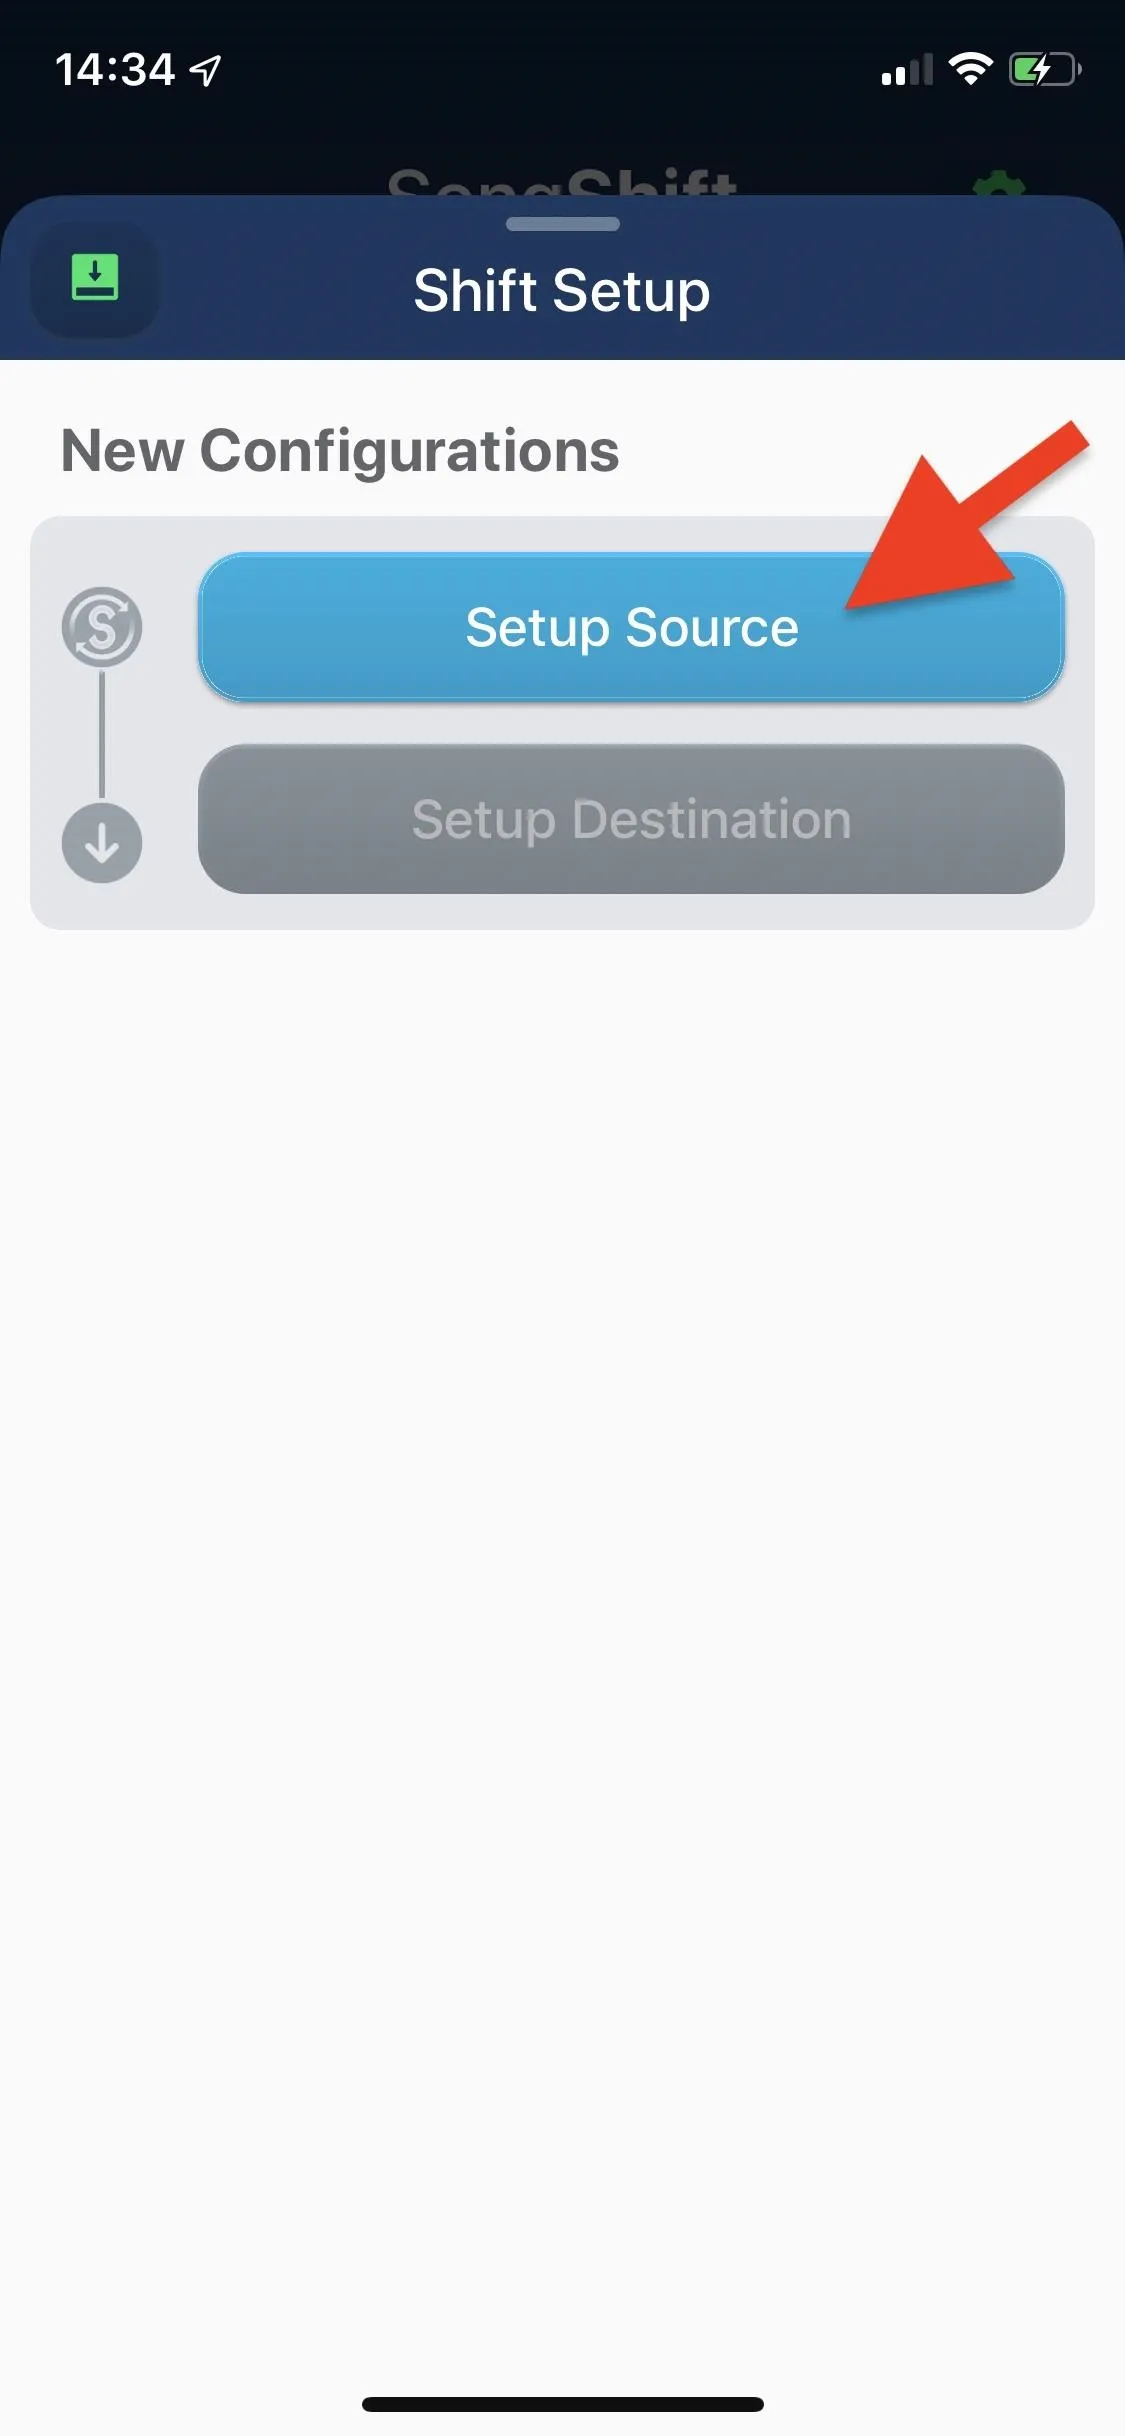
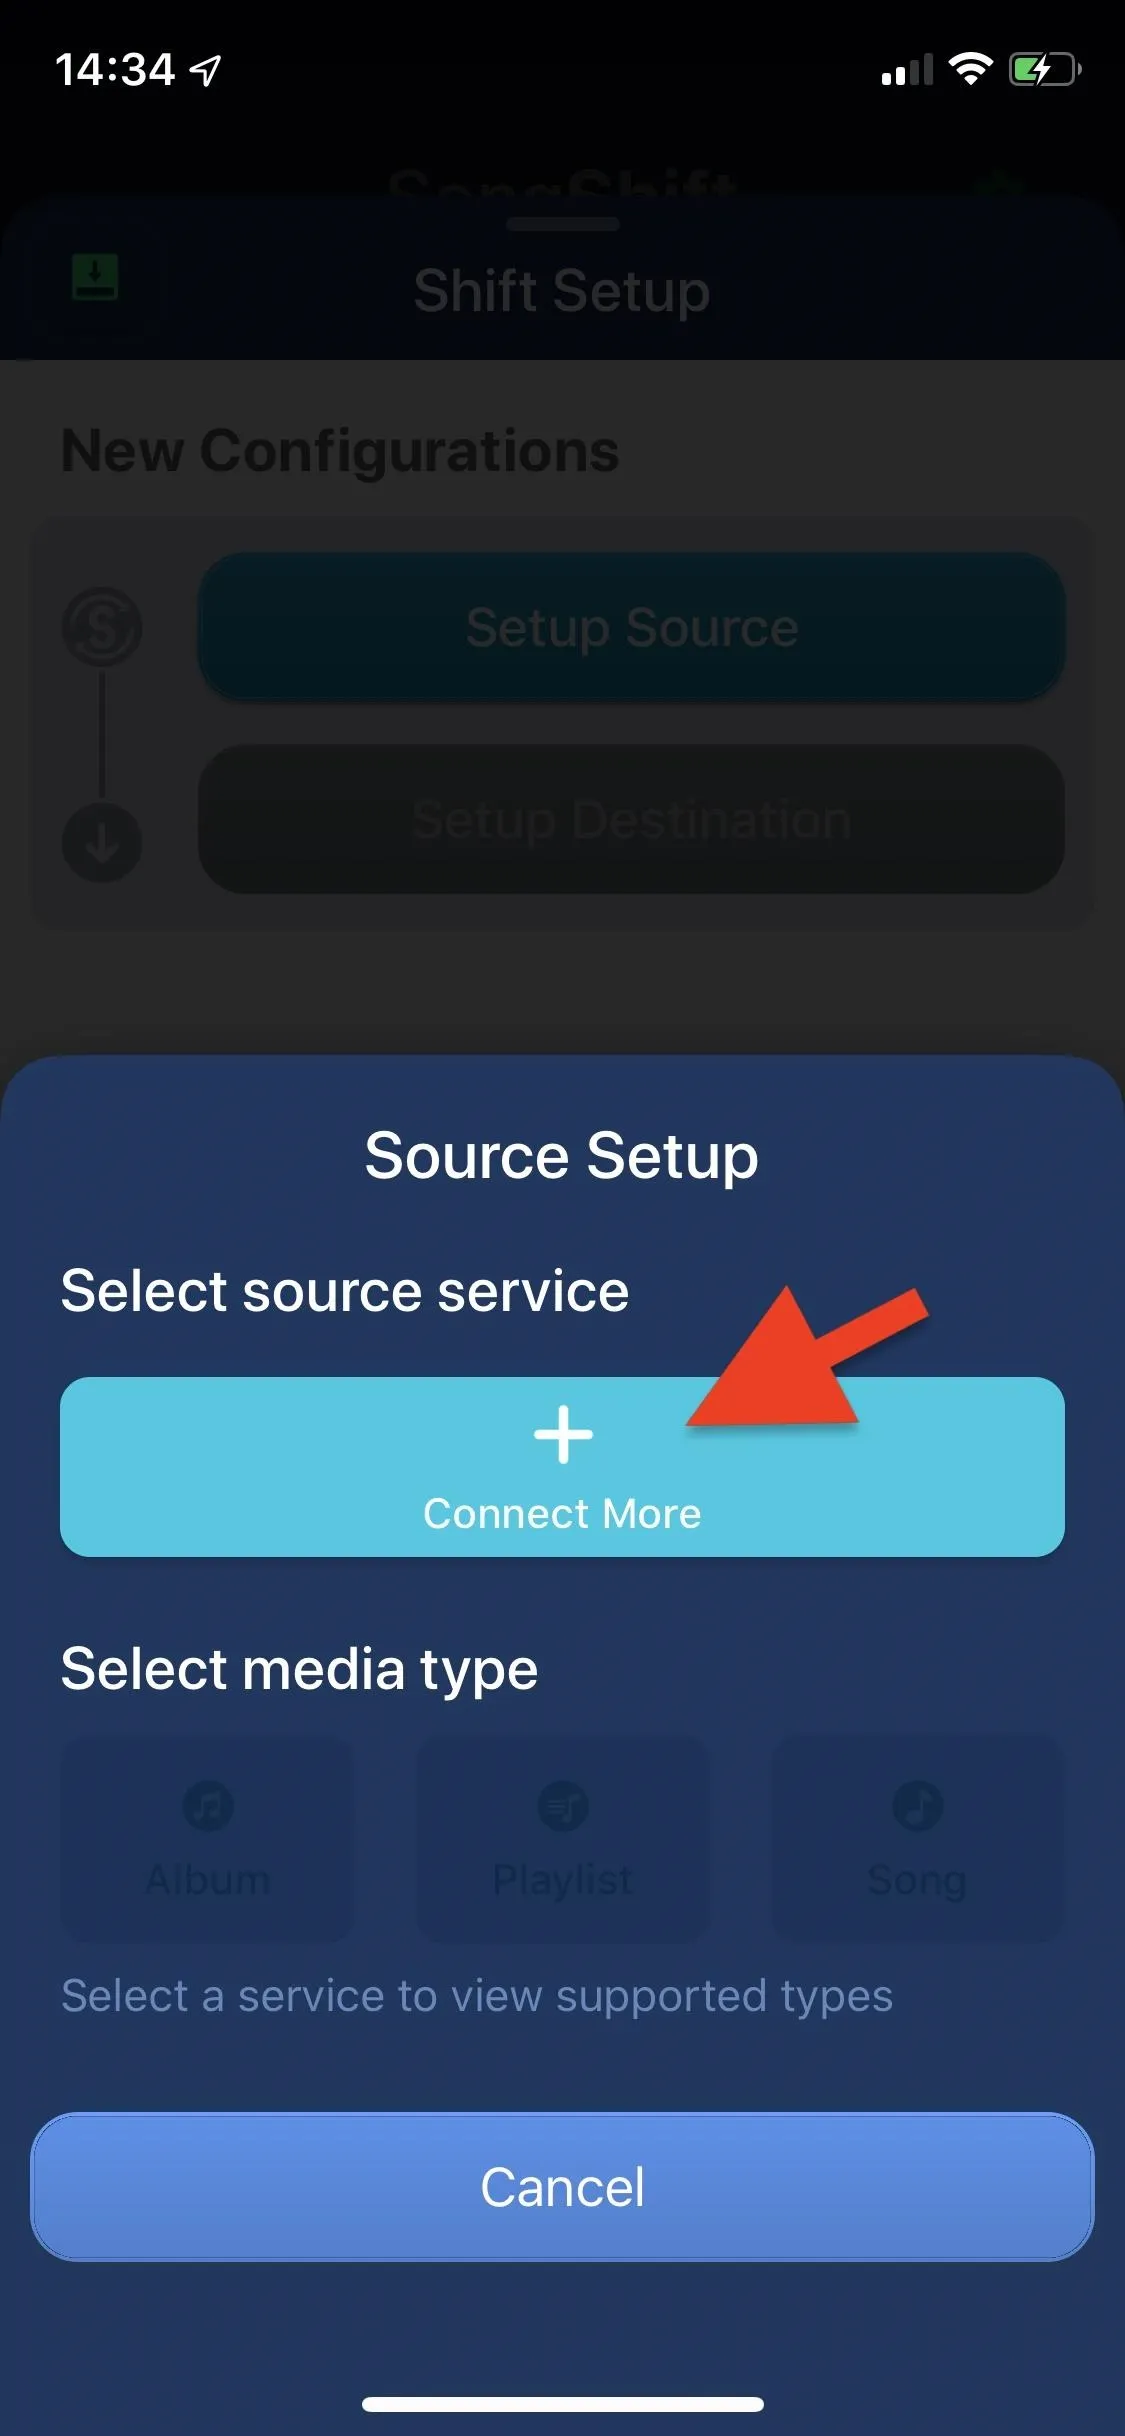
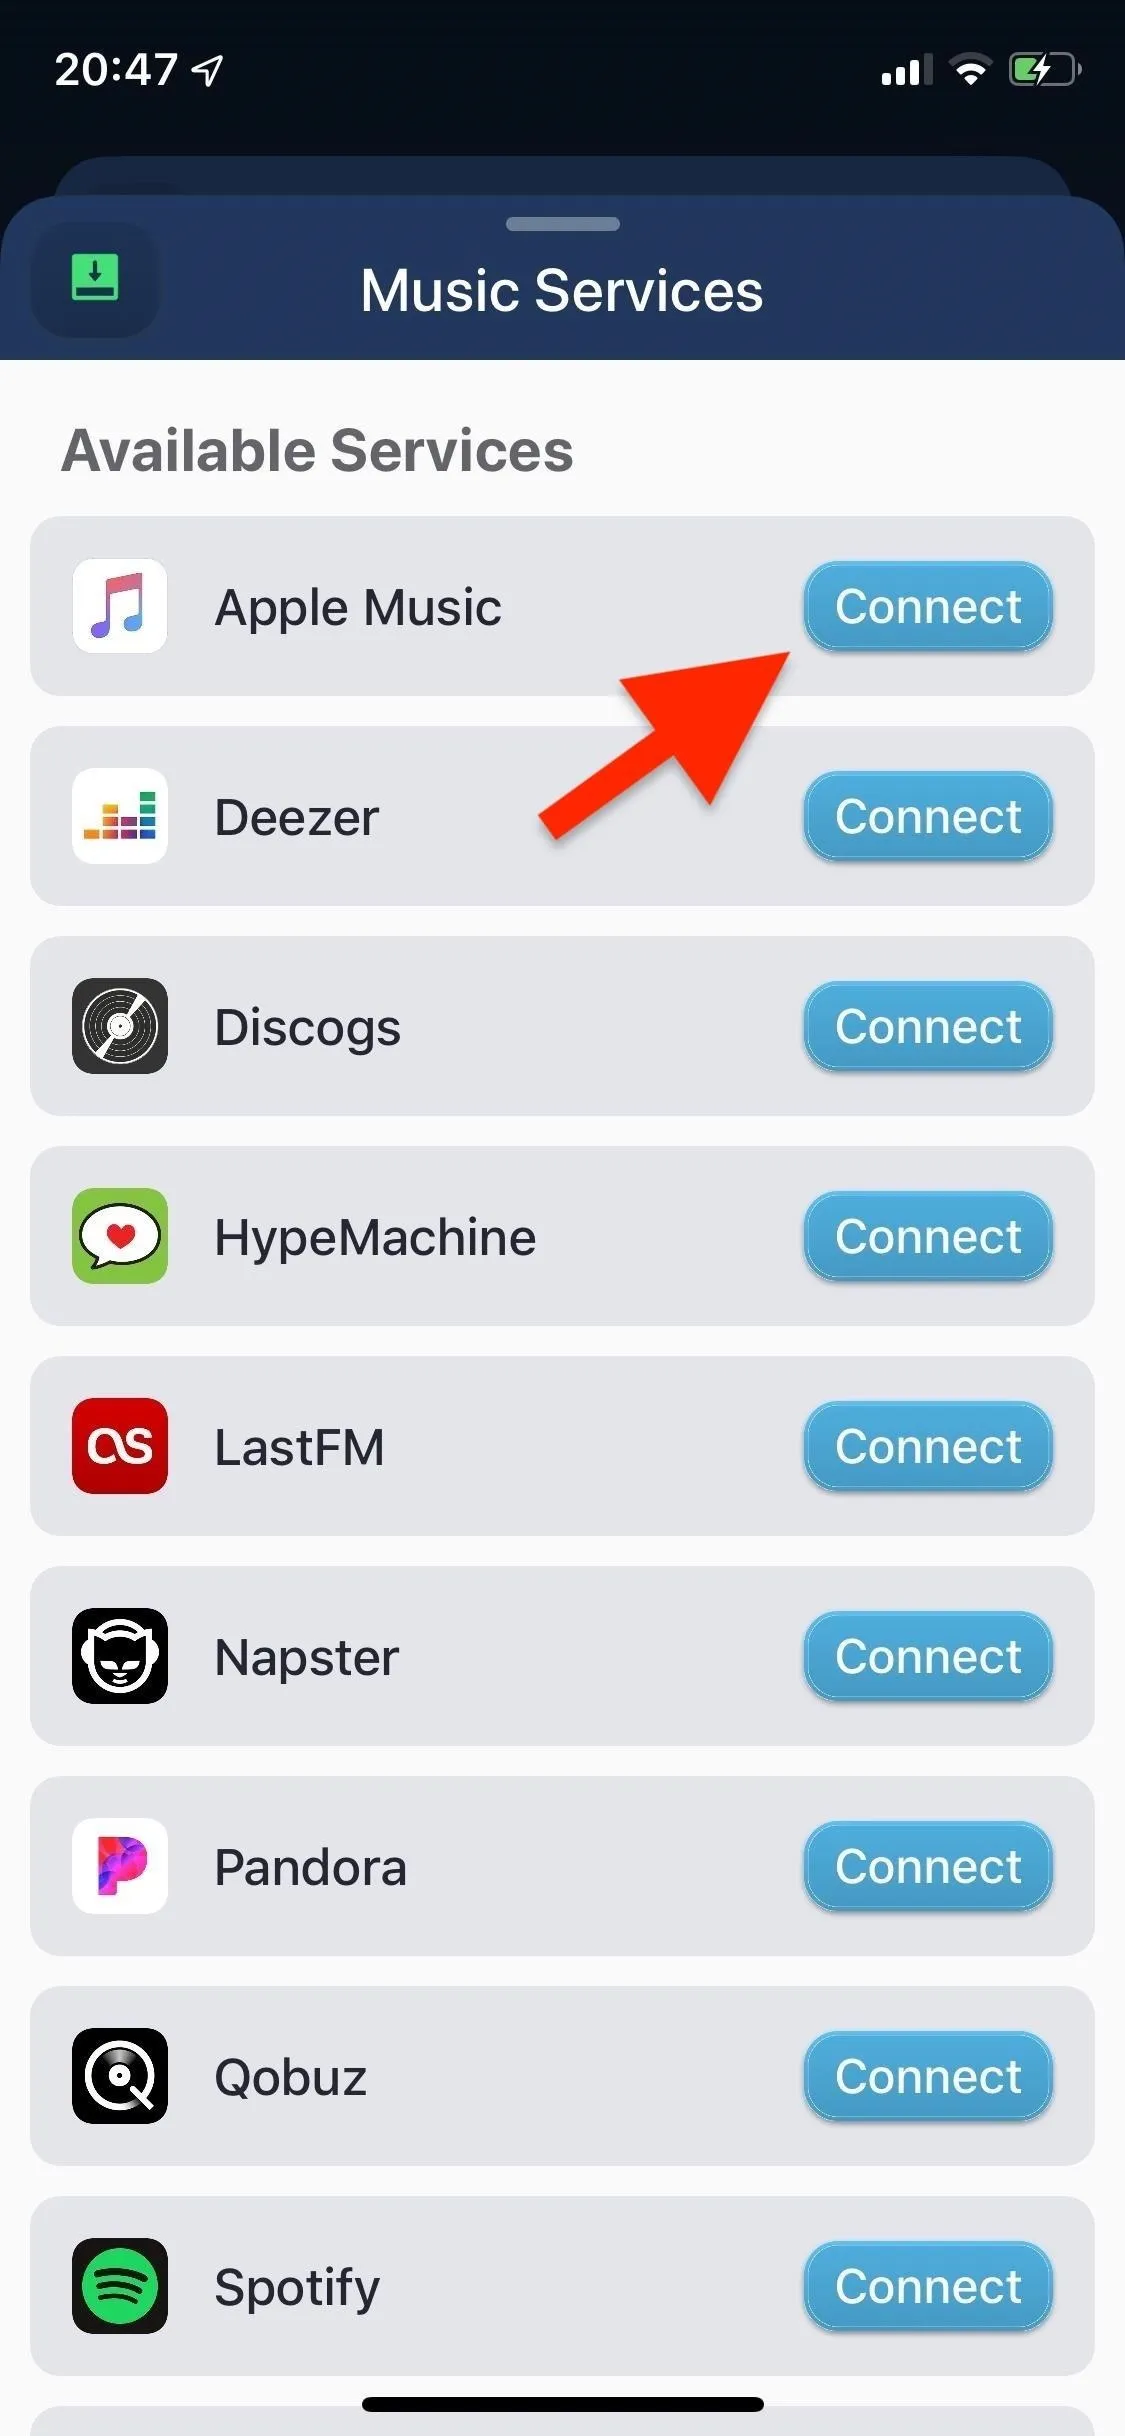
In SongShift, tap on the blue plus (+) sign at the bottom. We'll begin by connecting Apple Music (you'll connect your Spotify account next). Hit "Setup Source" under New Configurations, then tap on "Connect More" to view the full list of streaming services available in SongShift. (Note that SongShift calls transfers "shifts.")
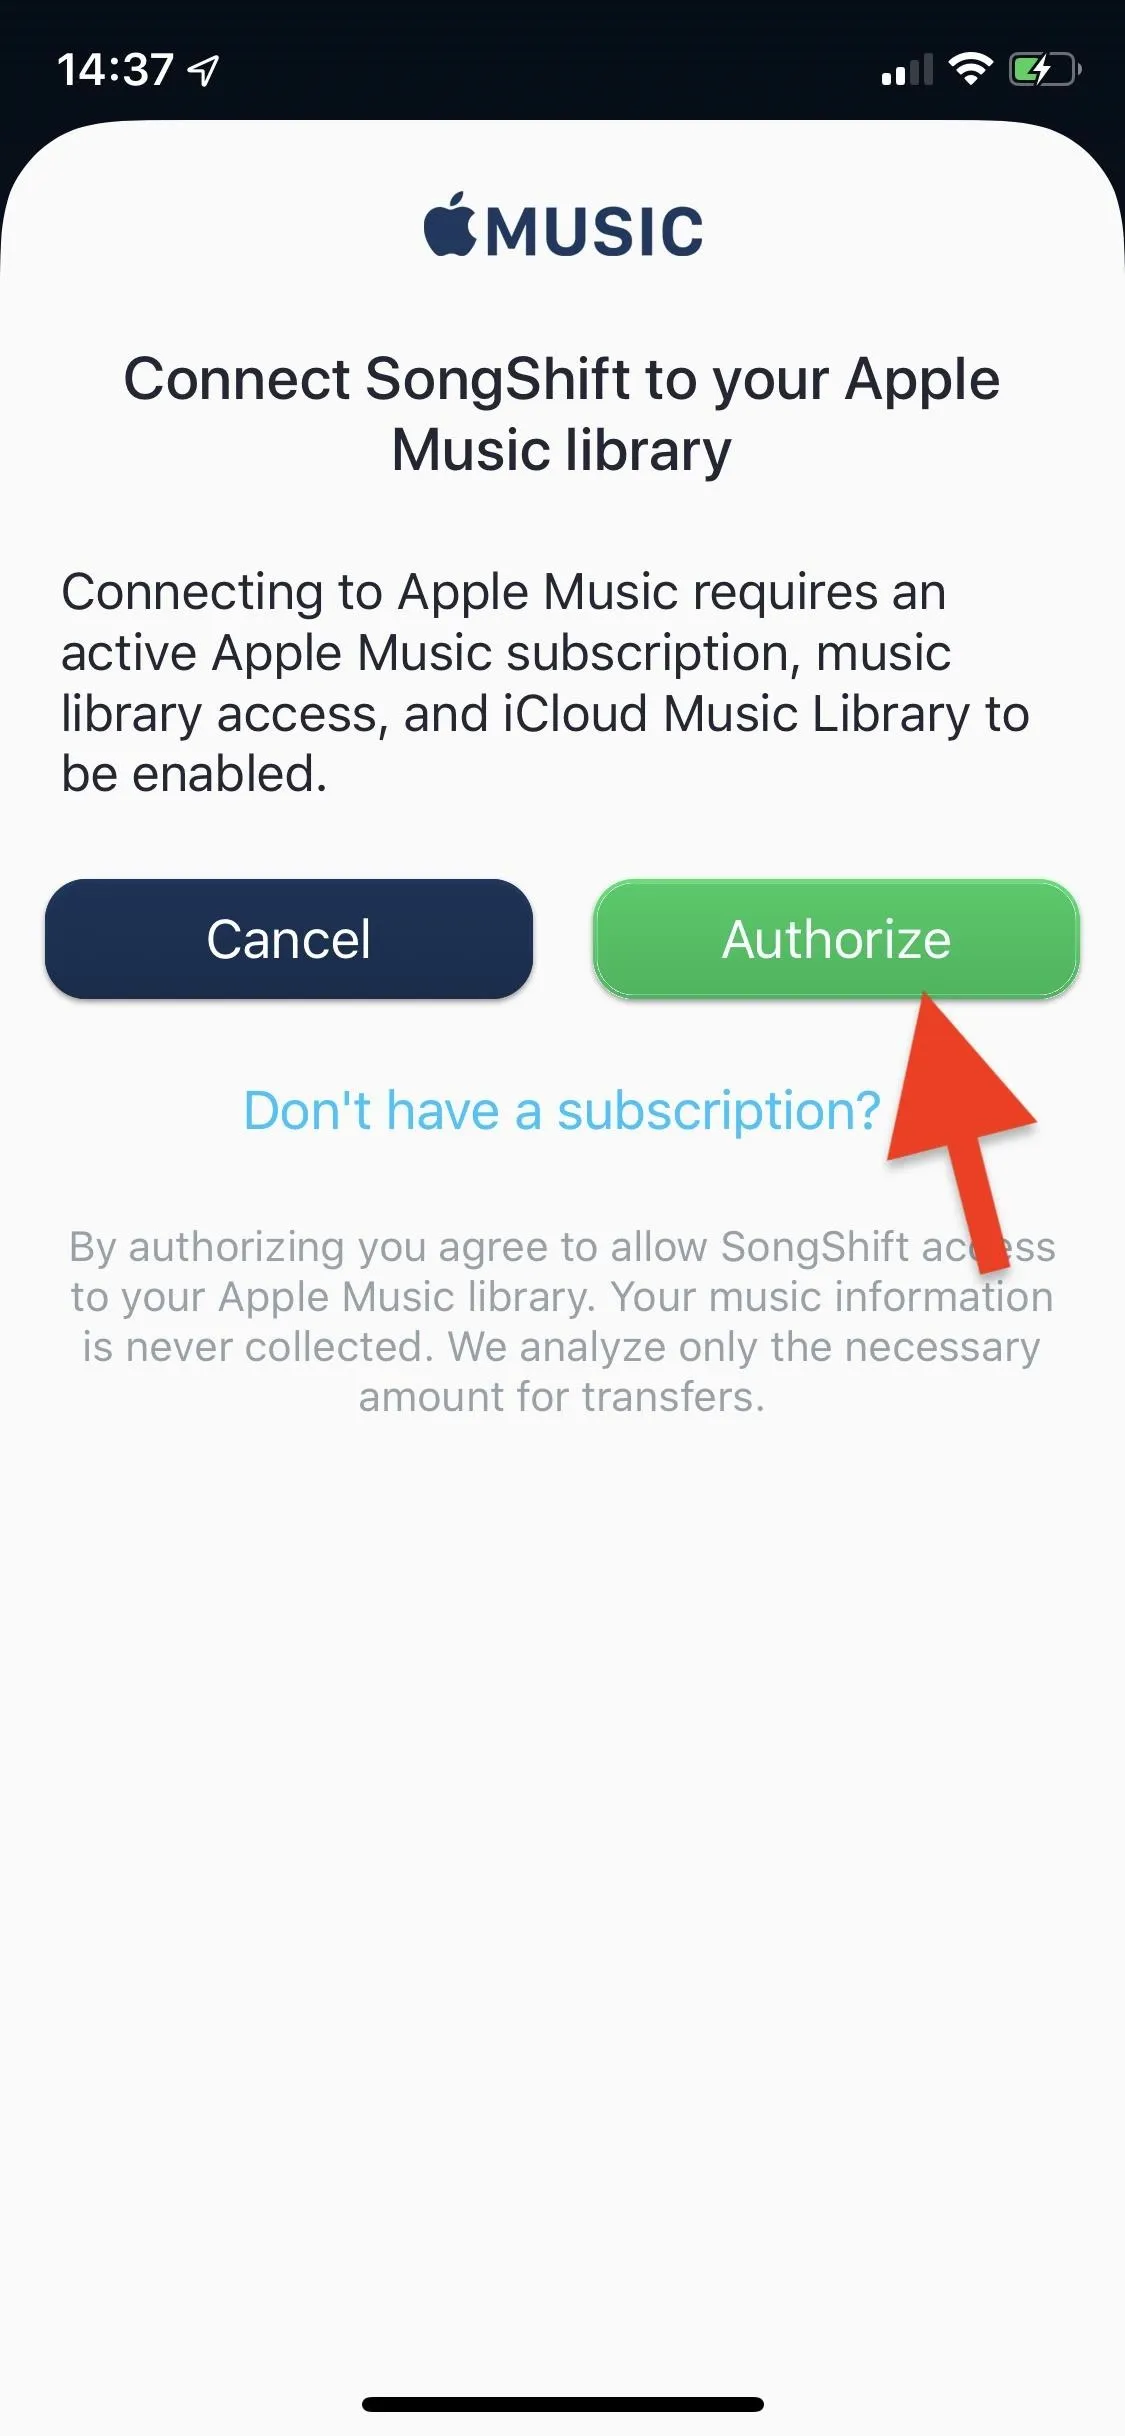
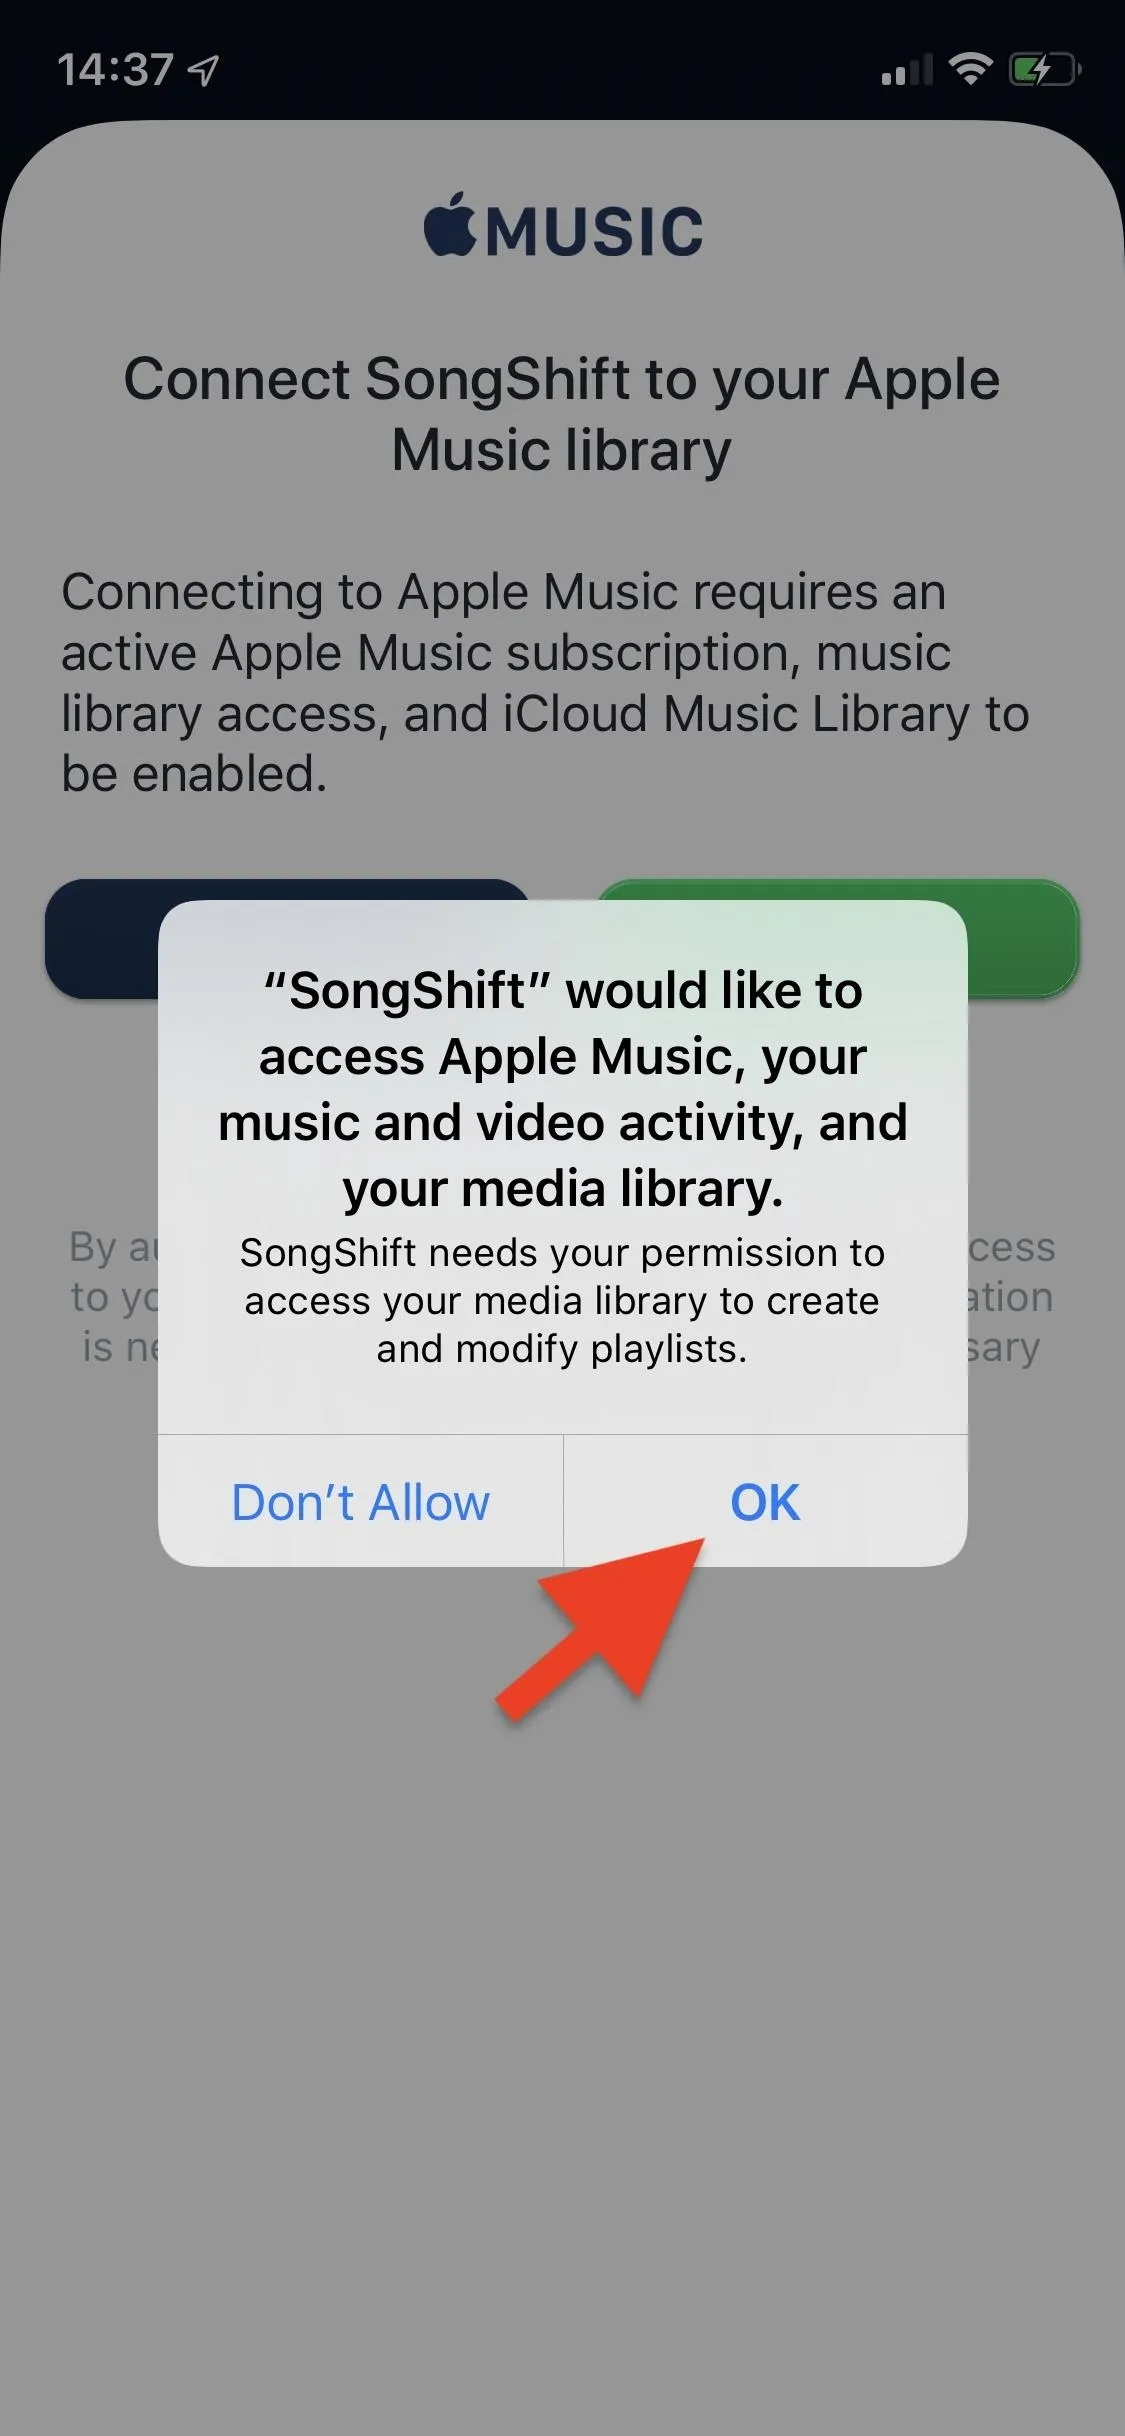
Now, tap on "Connect" next to Apple Music at the top of the list, then hit "Authorize" and "OK" to give SongShift access to your account. If you run into any issues, you may not have iCloud Music Library enabled (do that and come try again) or may need to give SongShift permissions in the "Media & Apple Music" page under Privacy in your Settings app.
Connect Your Spotify Account
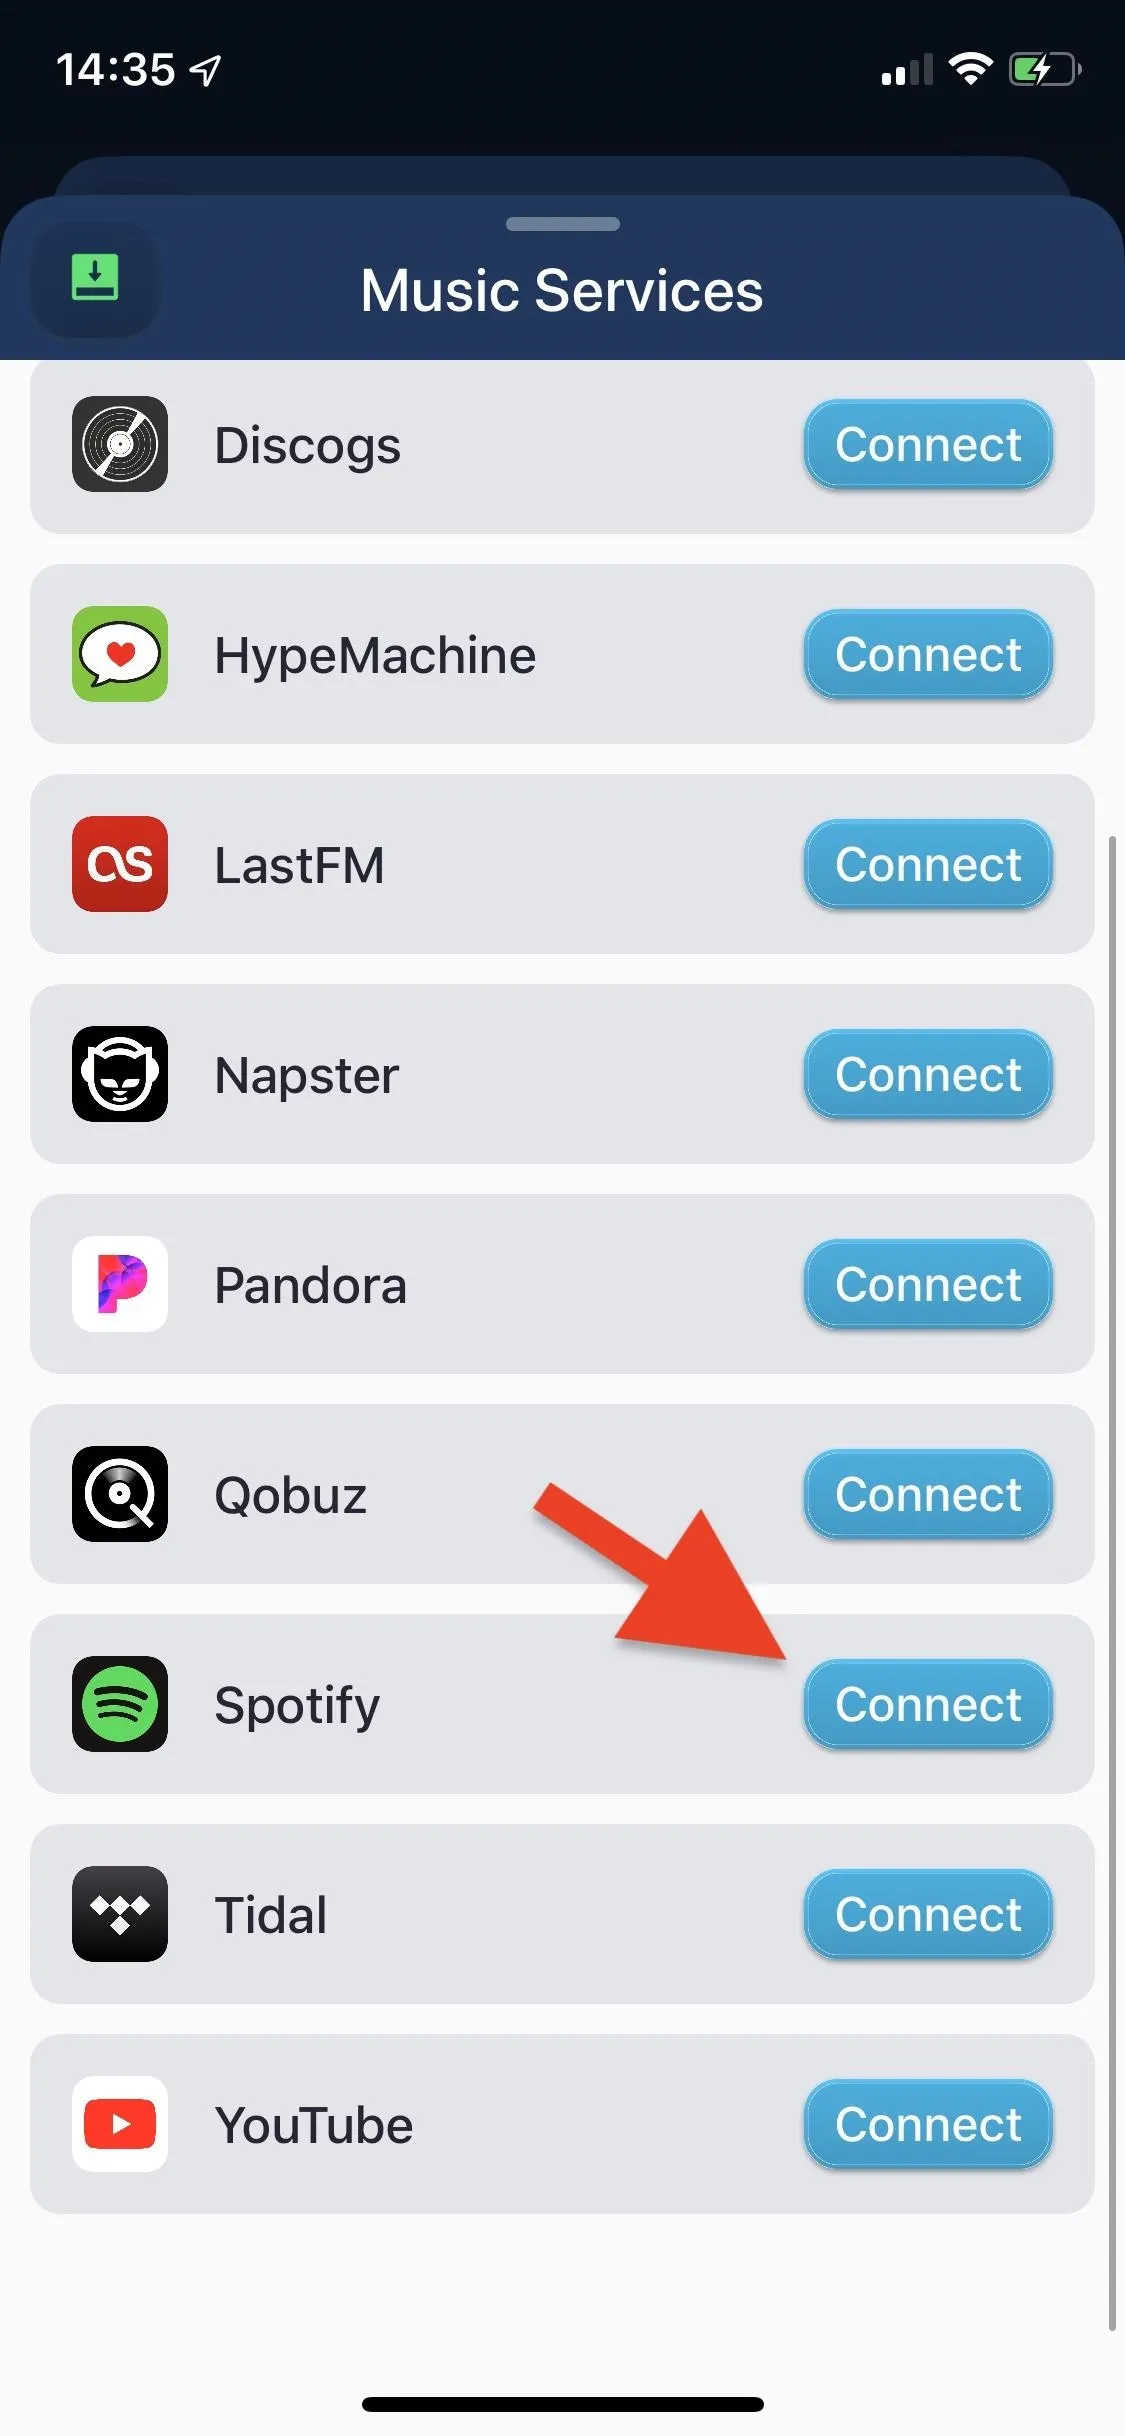
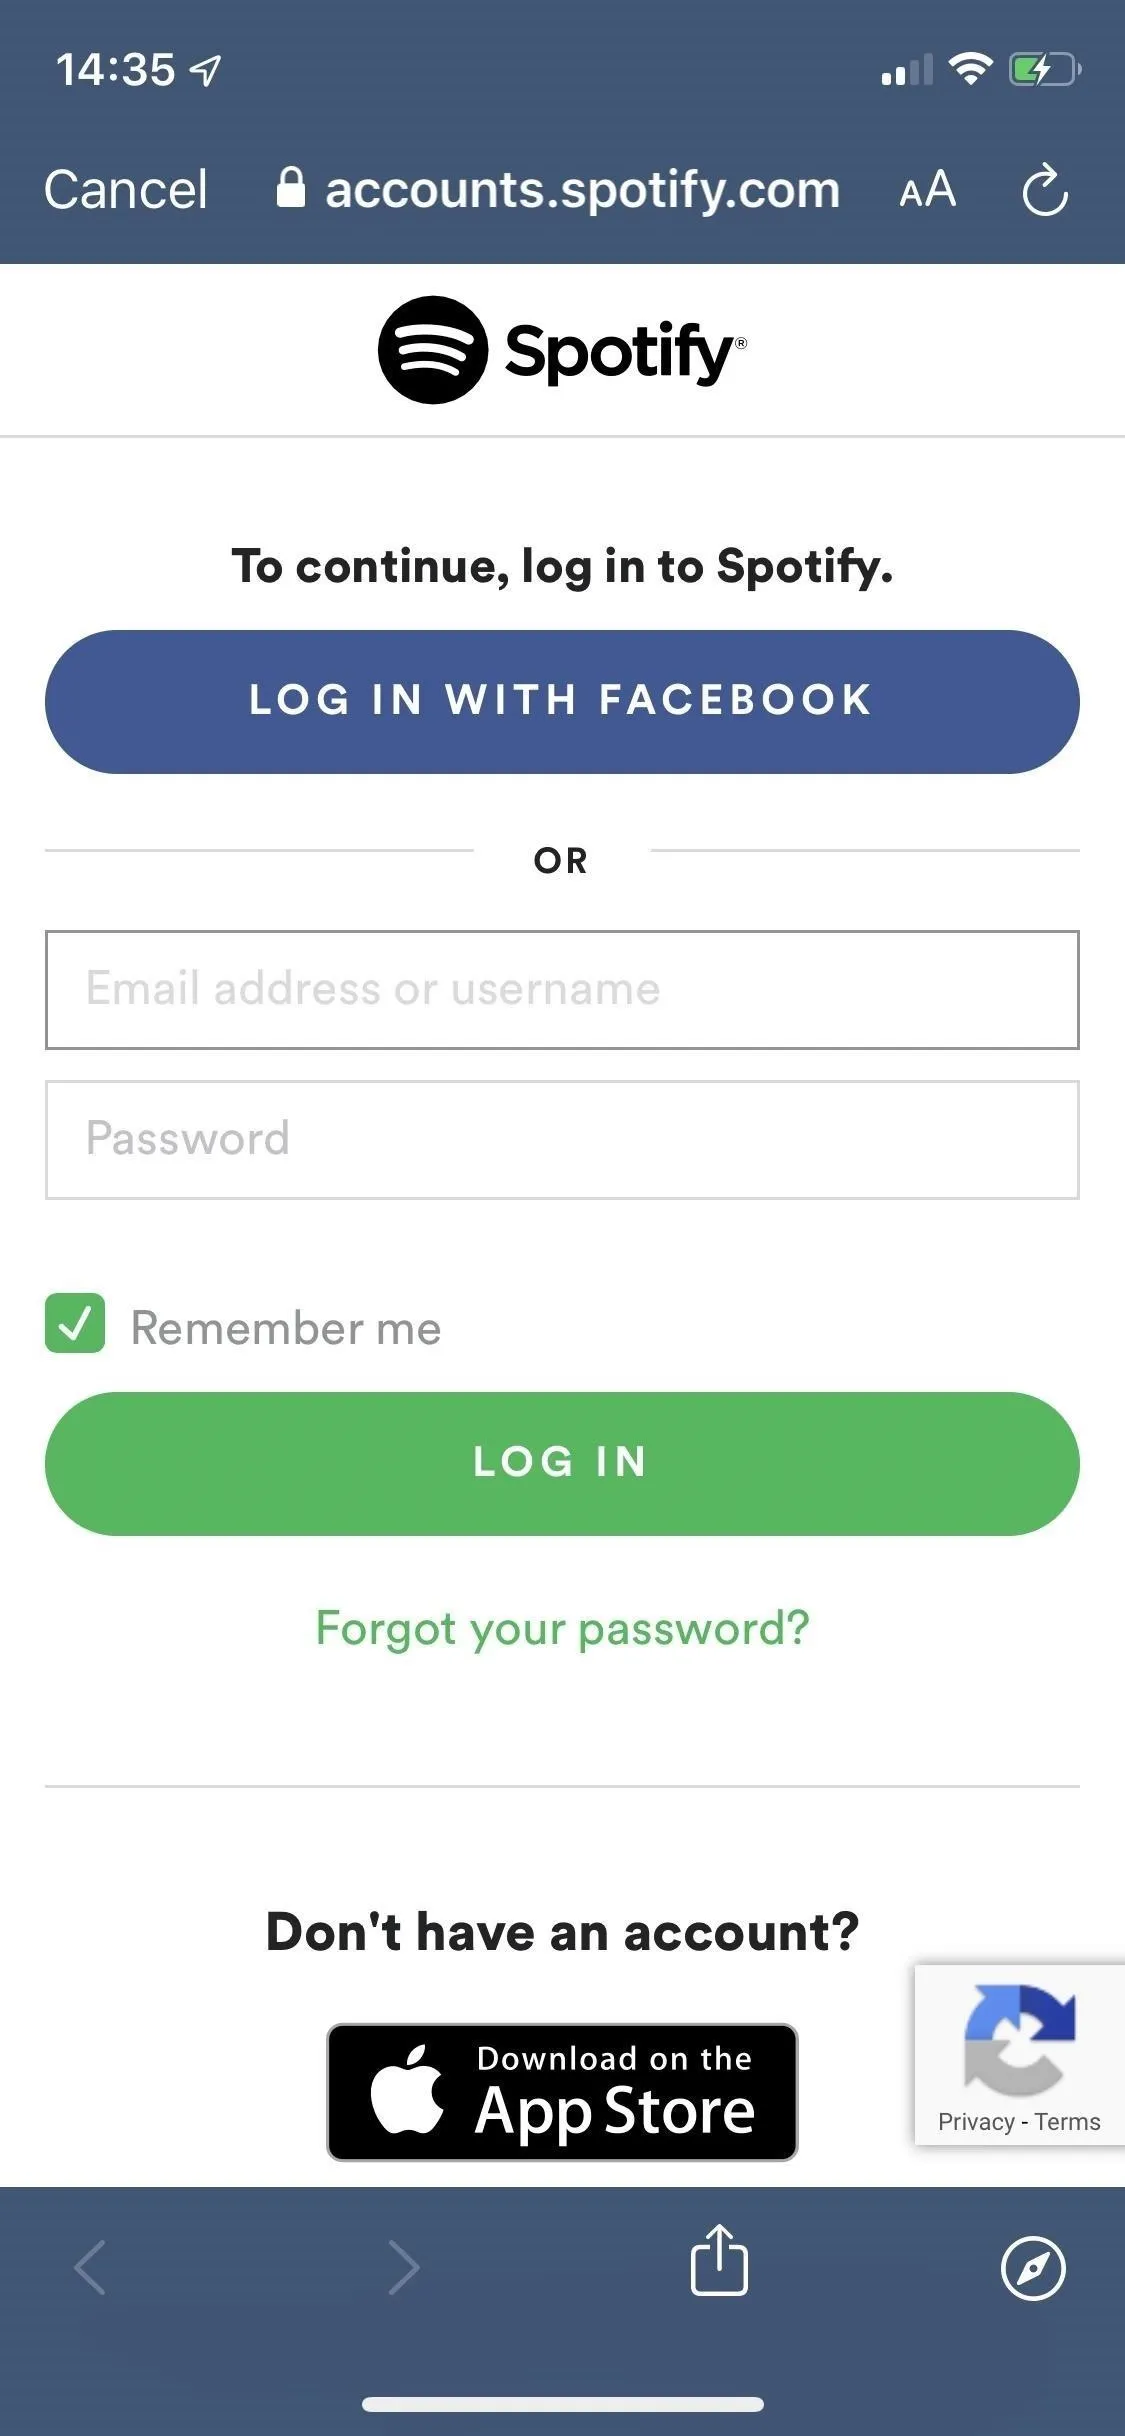
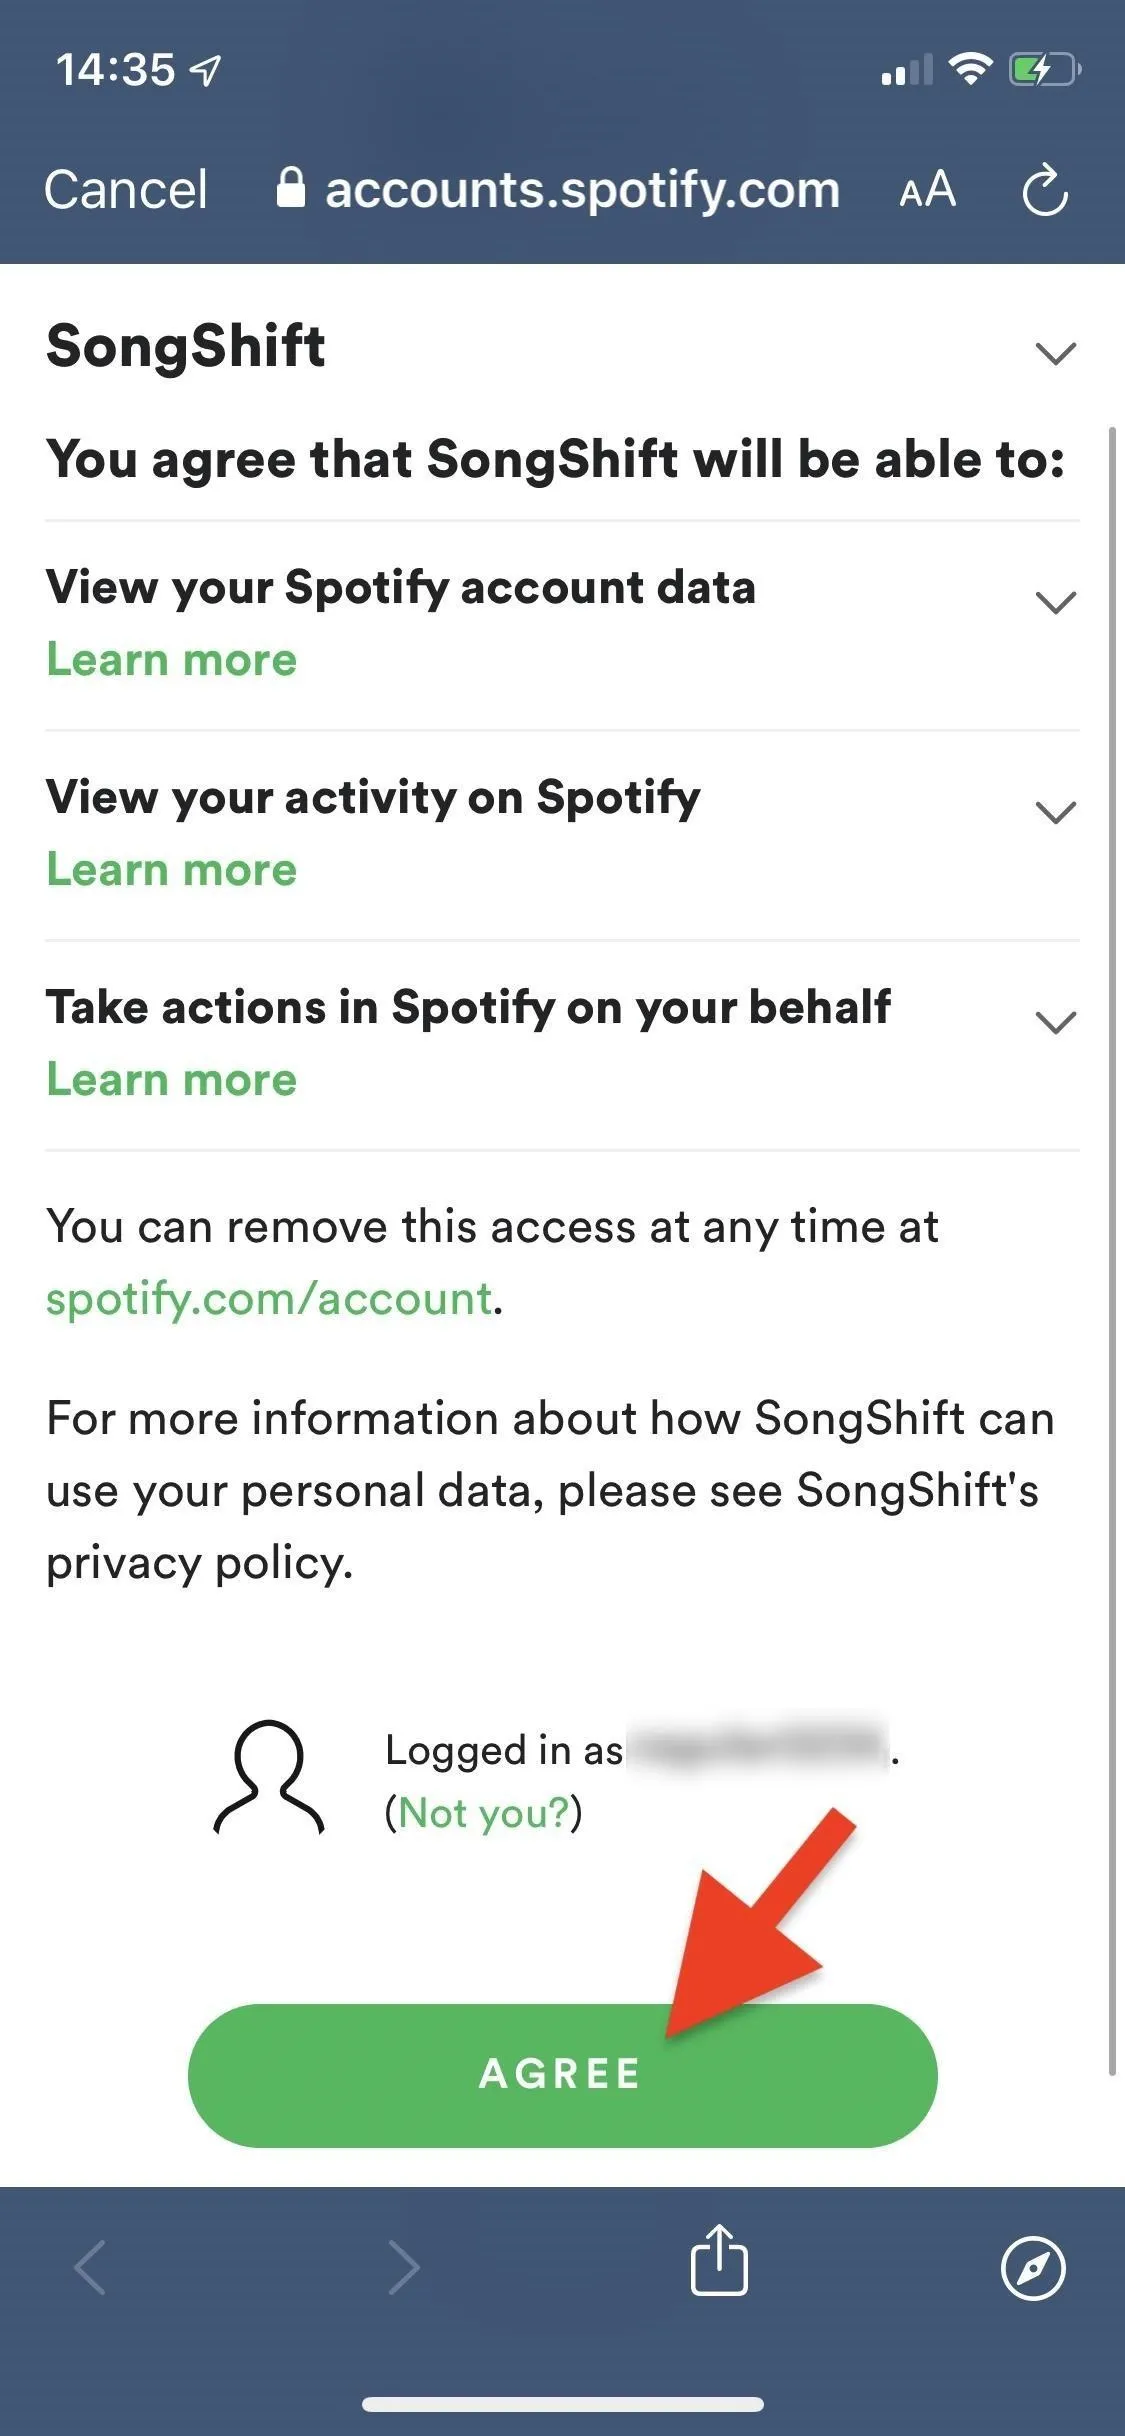
Now that your Apple Music account is connected to SongShift, it's time to connect your Spotify account. After connecting Apple Music, you'll be sent back to Music Services list. Scroll down and tap on "Connect" next to Spotify. Log in either with your Facebook account or Spotify credentials, then tap on "Agree."
Select an Apple Music Playlist to Transfer
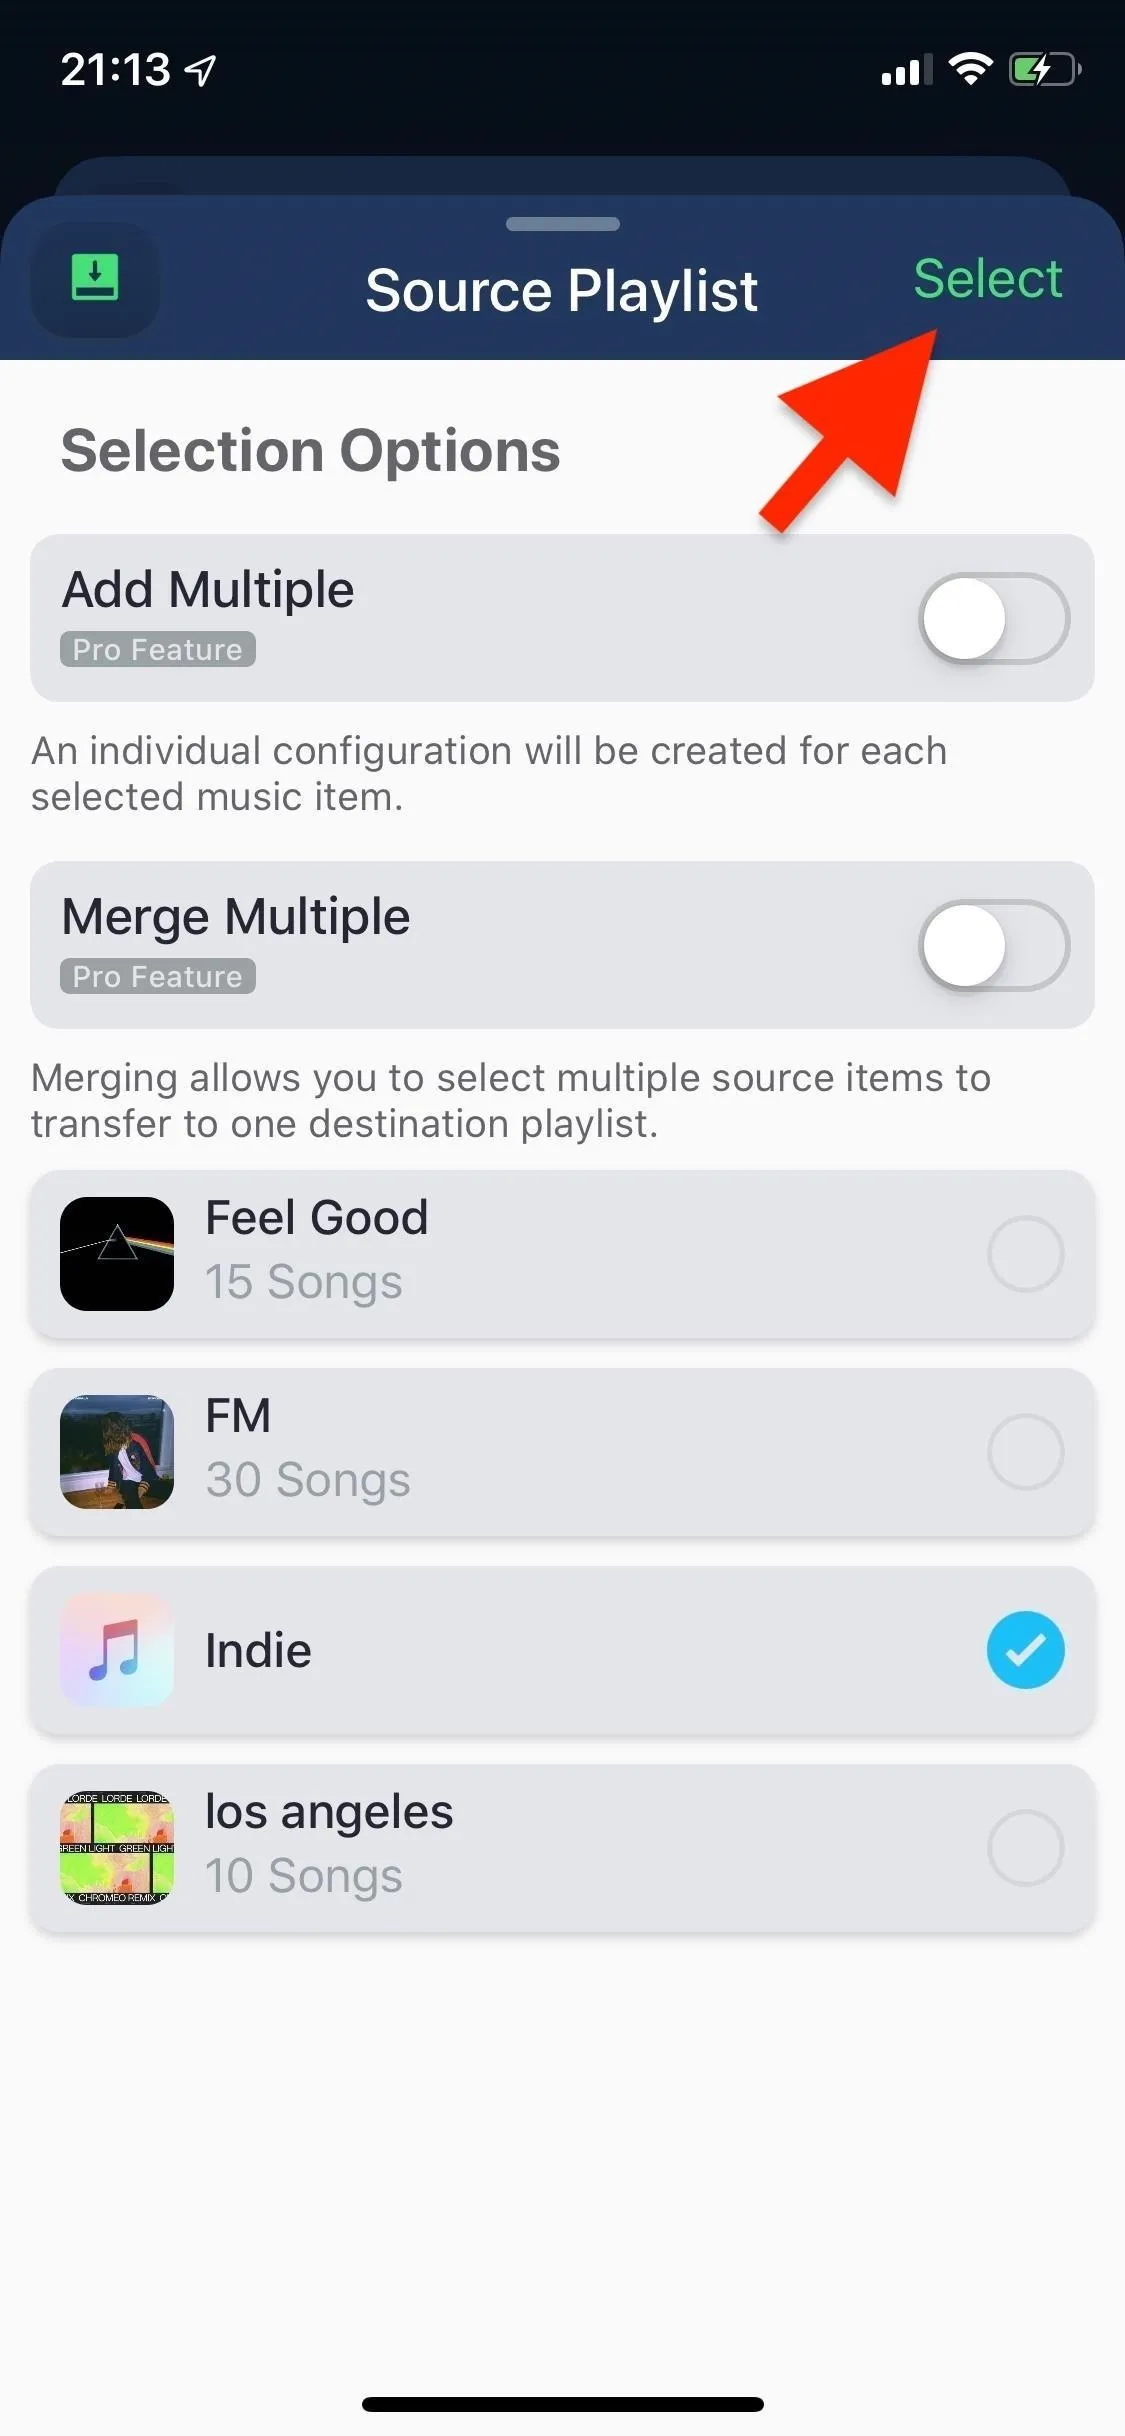
Once you're finished connecting SongShift to your two music streaming services, swipe down on the Music Services list from the bar at the top of the modal window. Now, tap on "Setup Source" again, and you'll see icons for your two streaming service accounts. Tap on Apple Music, then hit "Playlist" under Select media type. Select the playlist you want to transfer, then tap on "Select" in the top right.
You can only transfer one playlist at a time on the free version. If you want to transfer multiple playlists at once or merge multiple playlists into one, you'll need the pro version.

Transfer the Playlist to Spotify
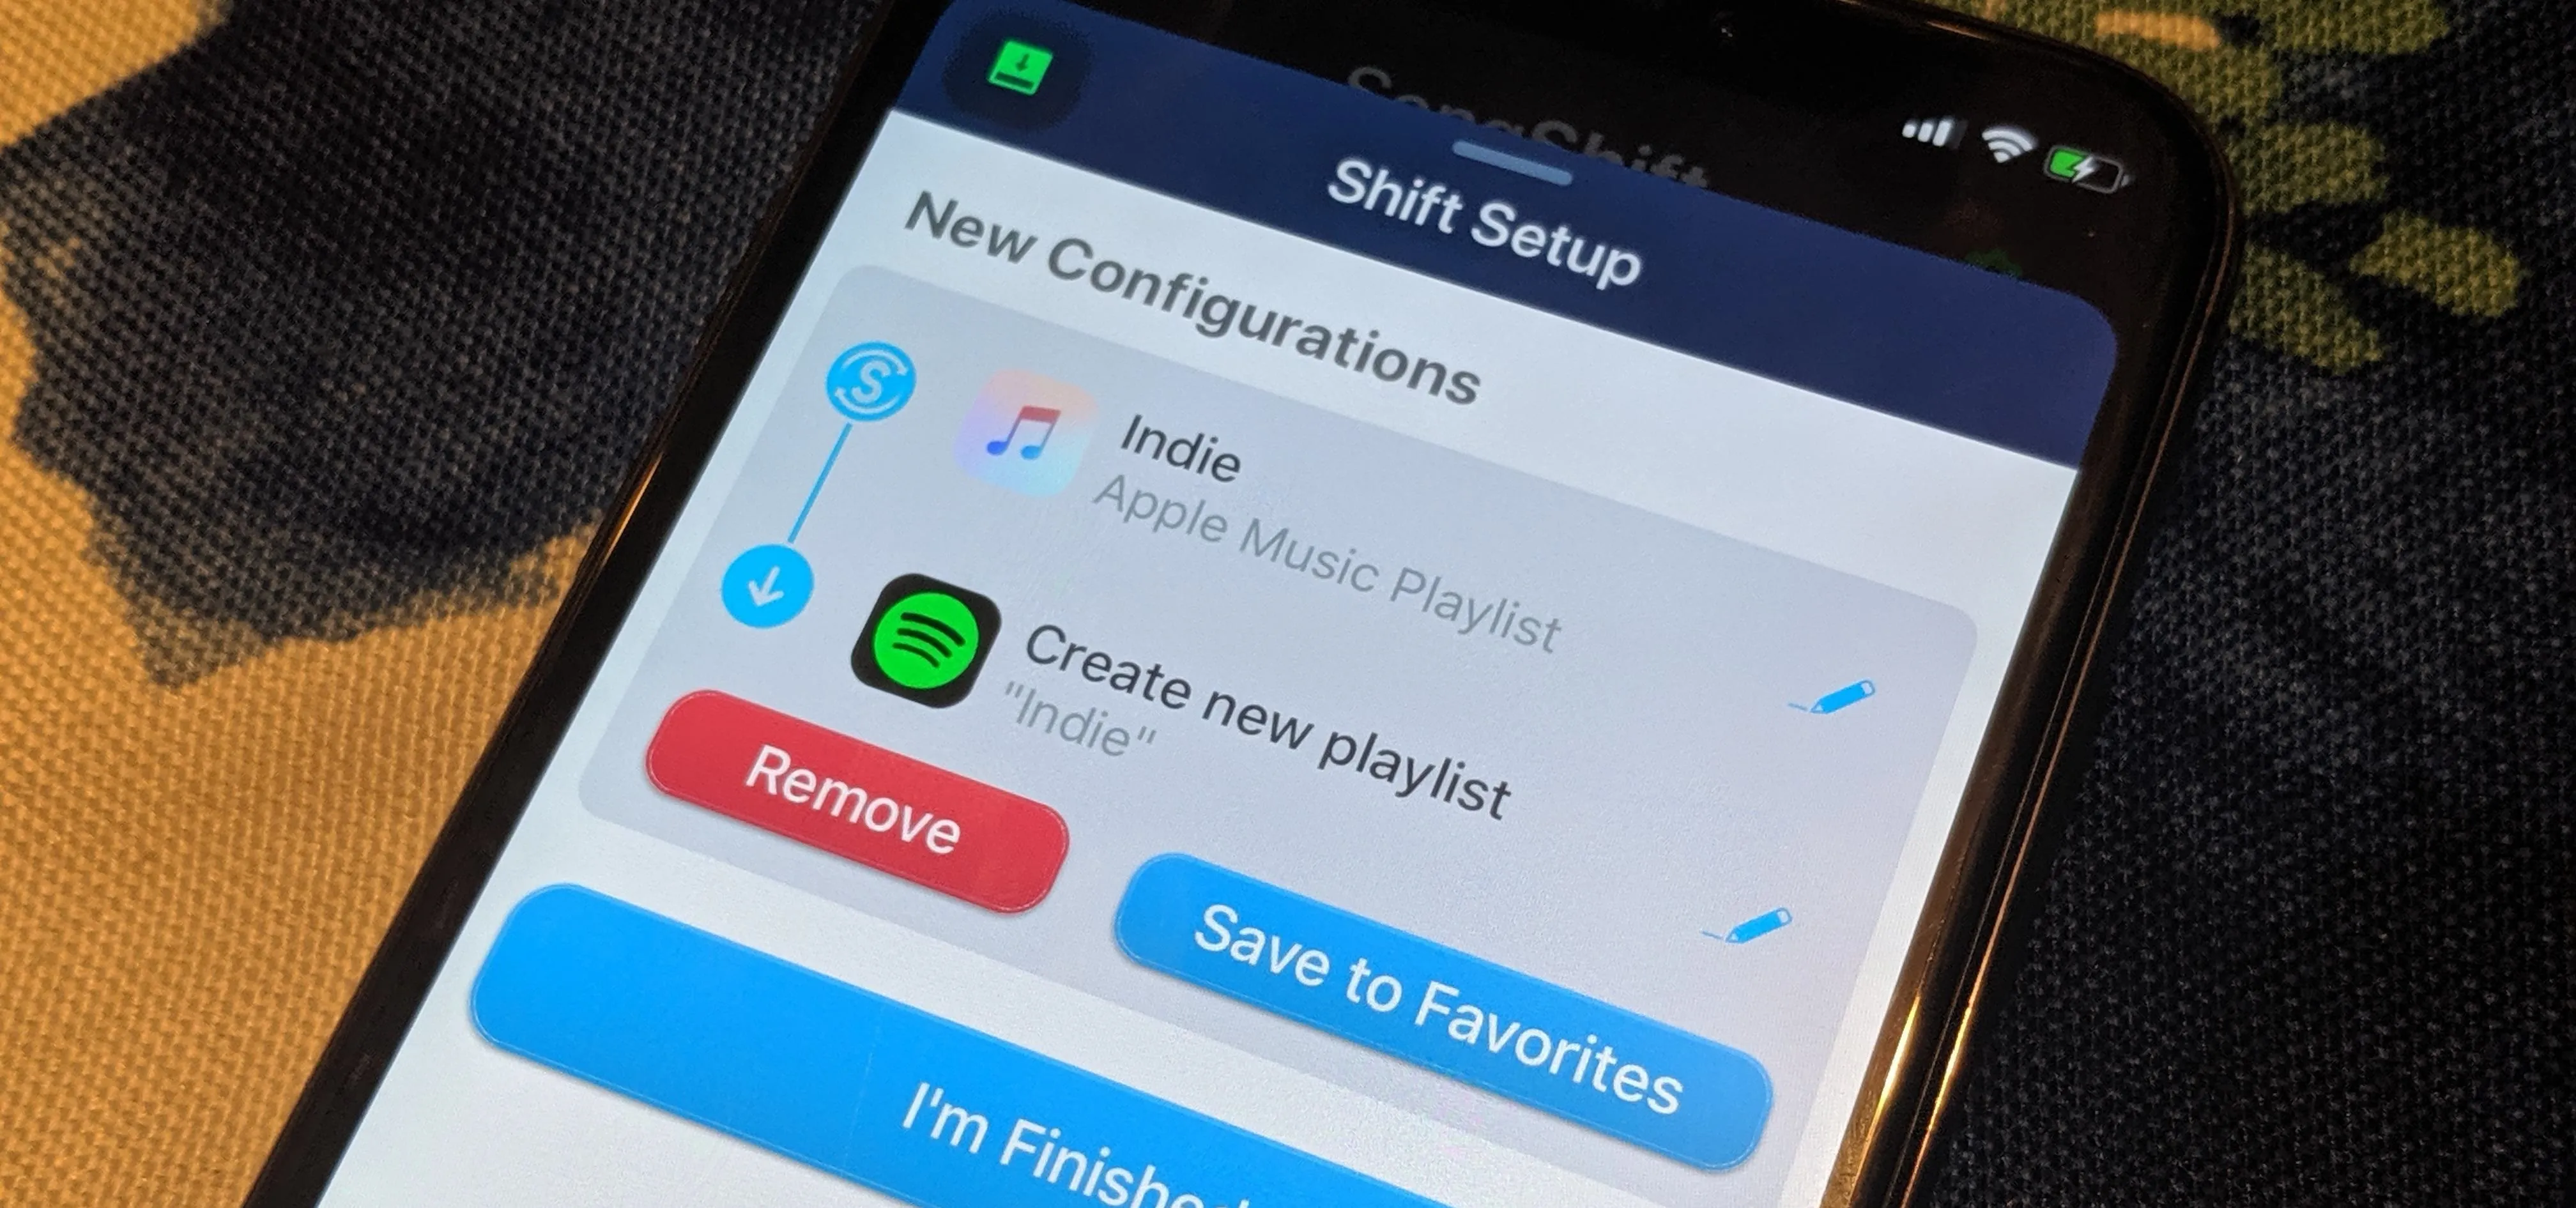
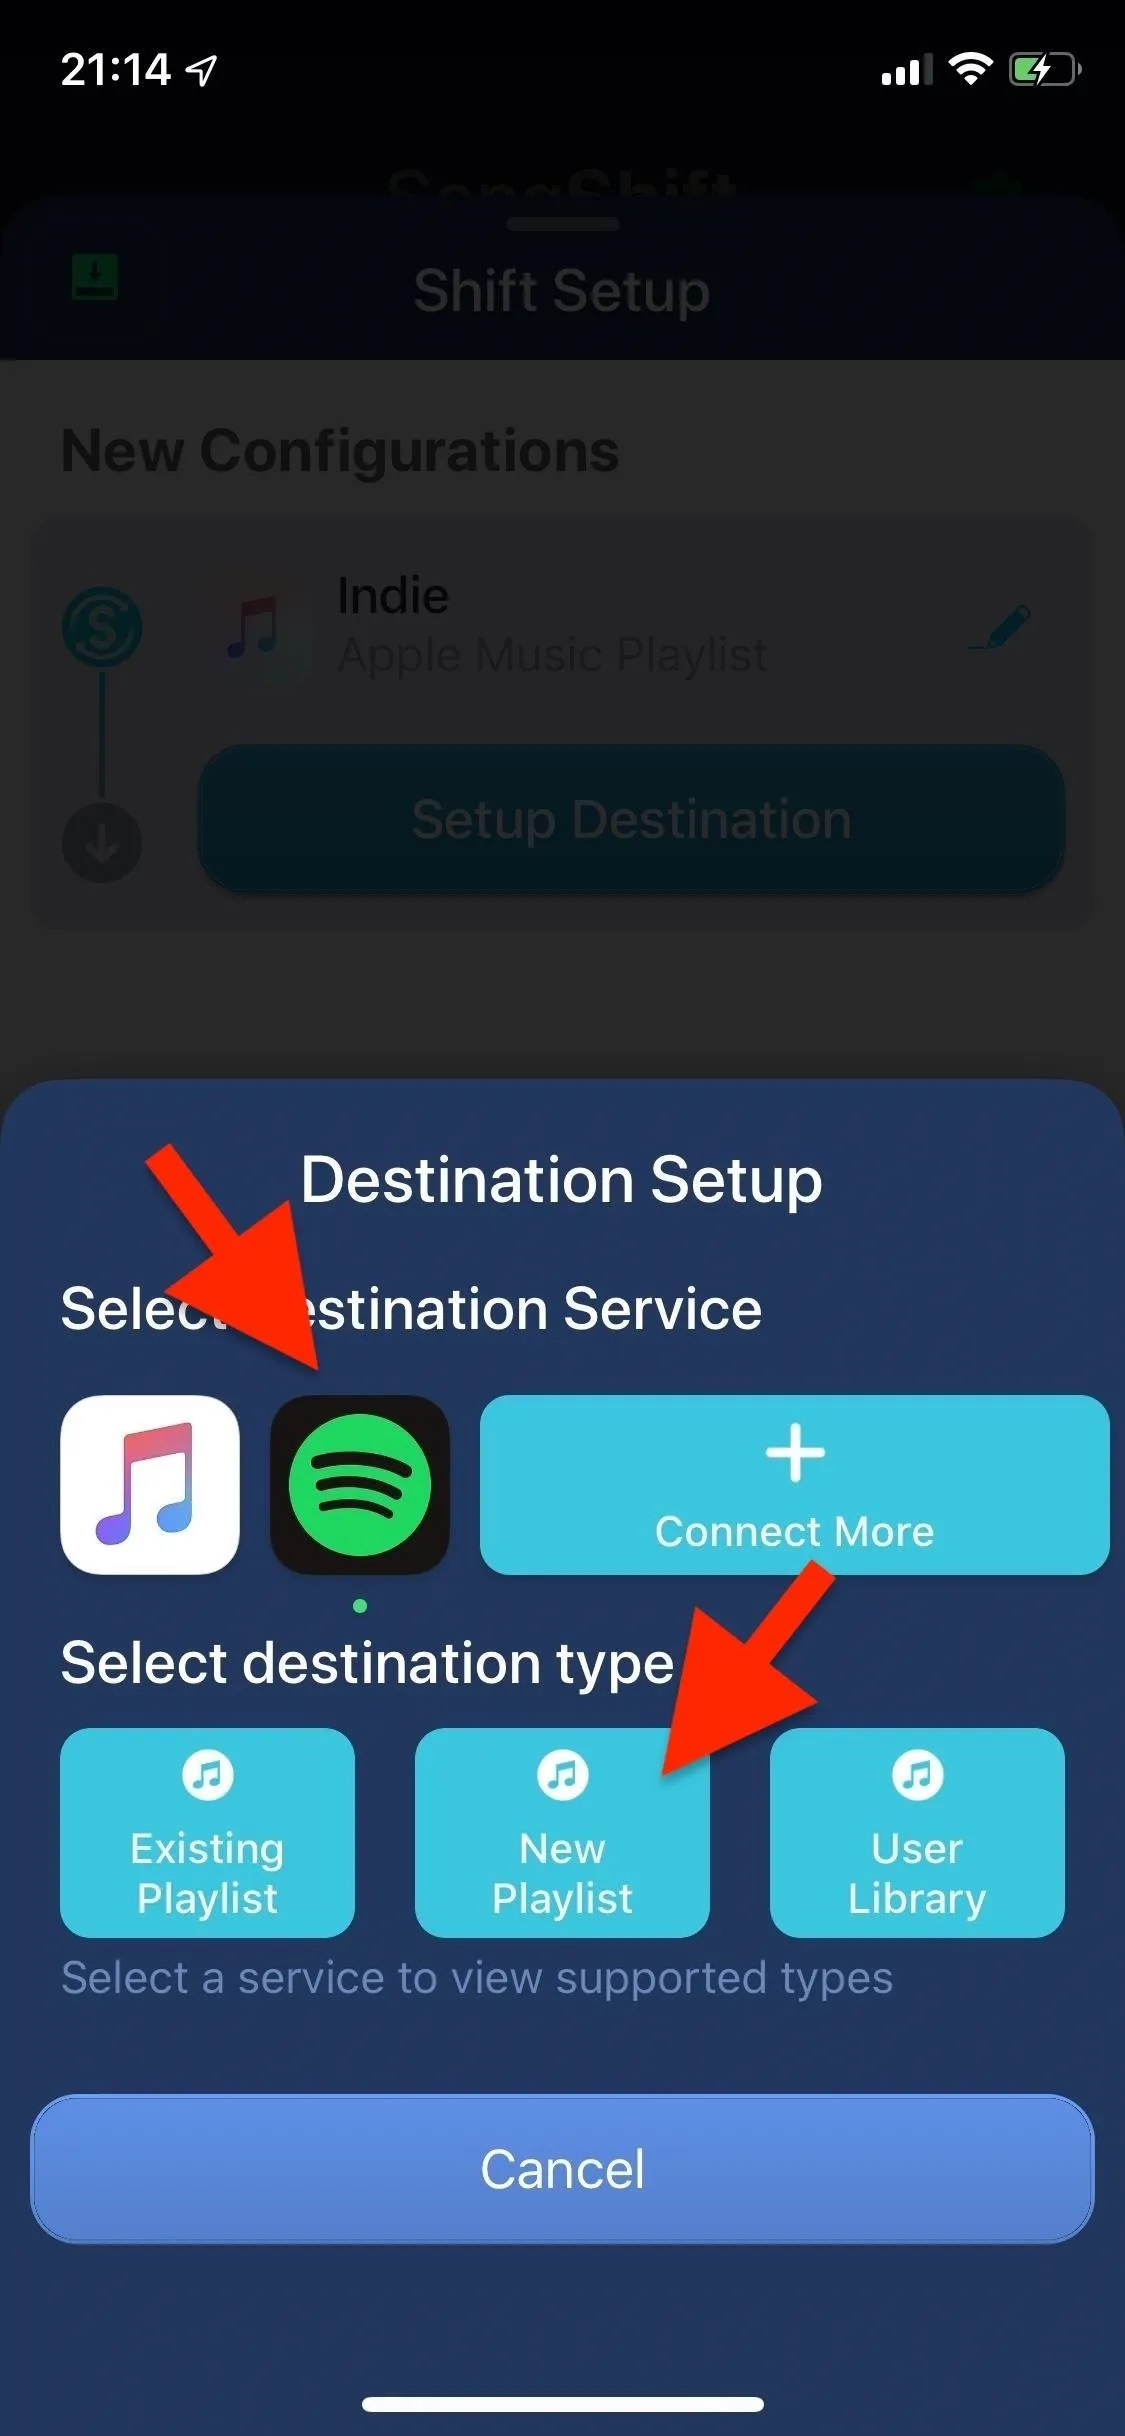
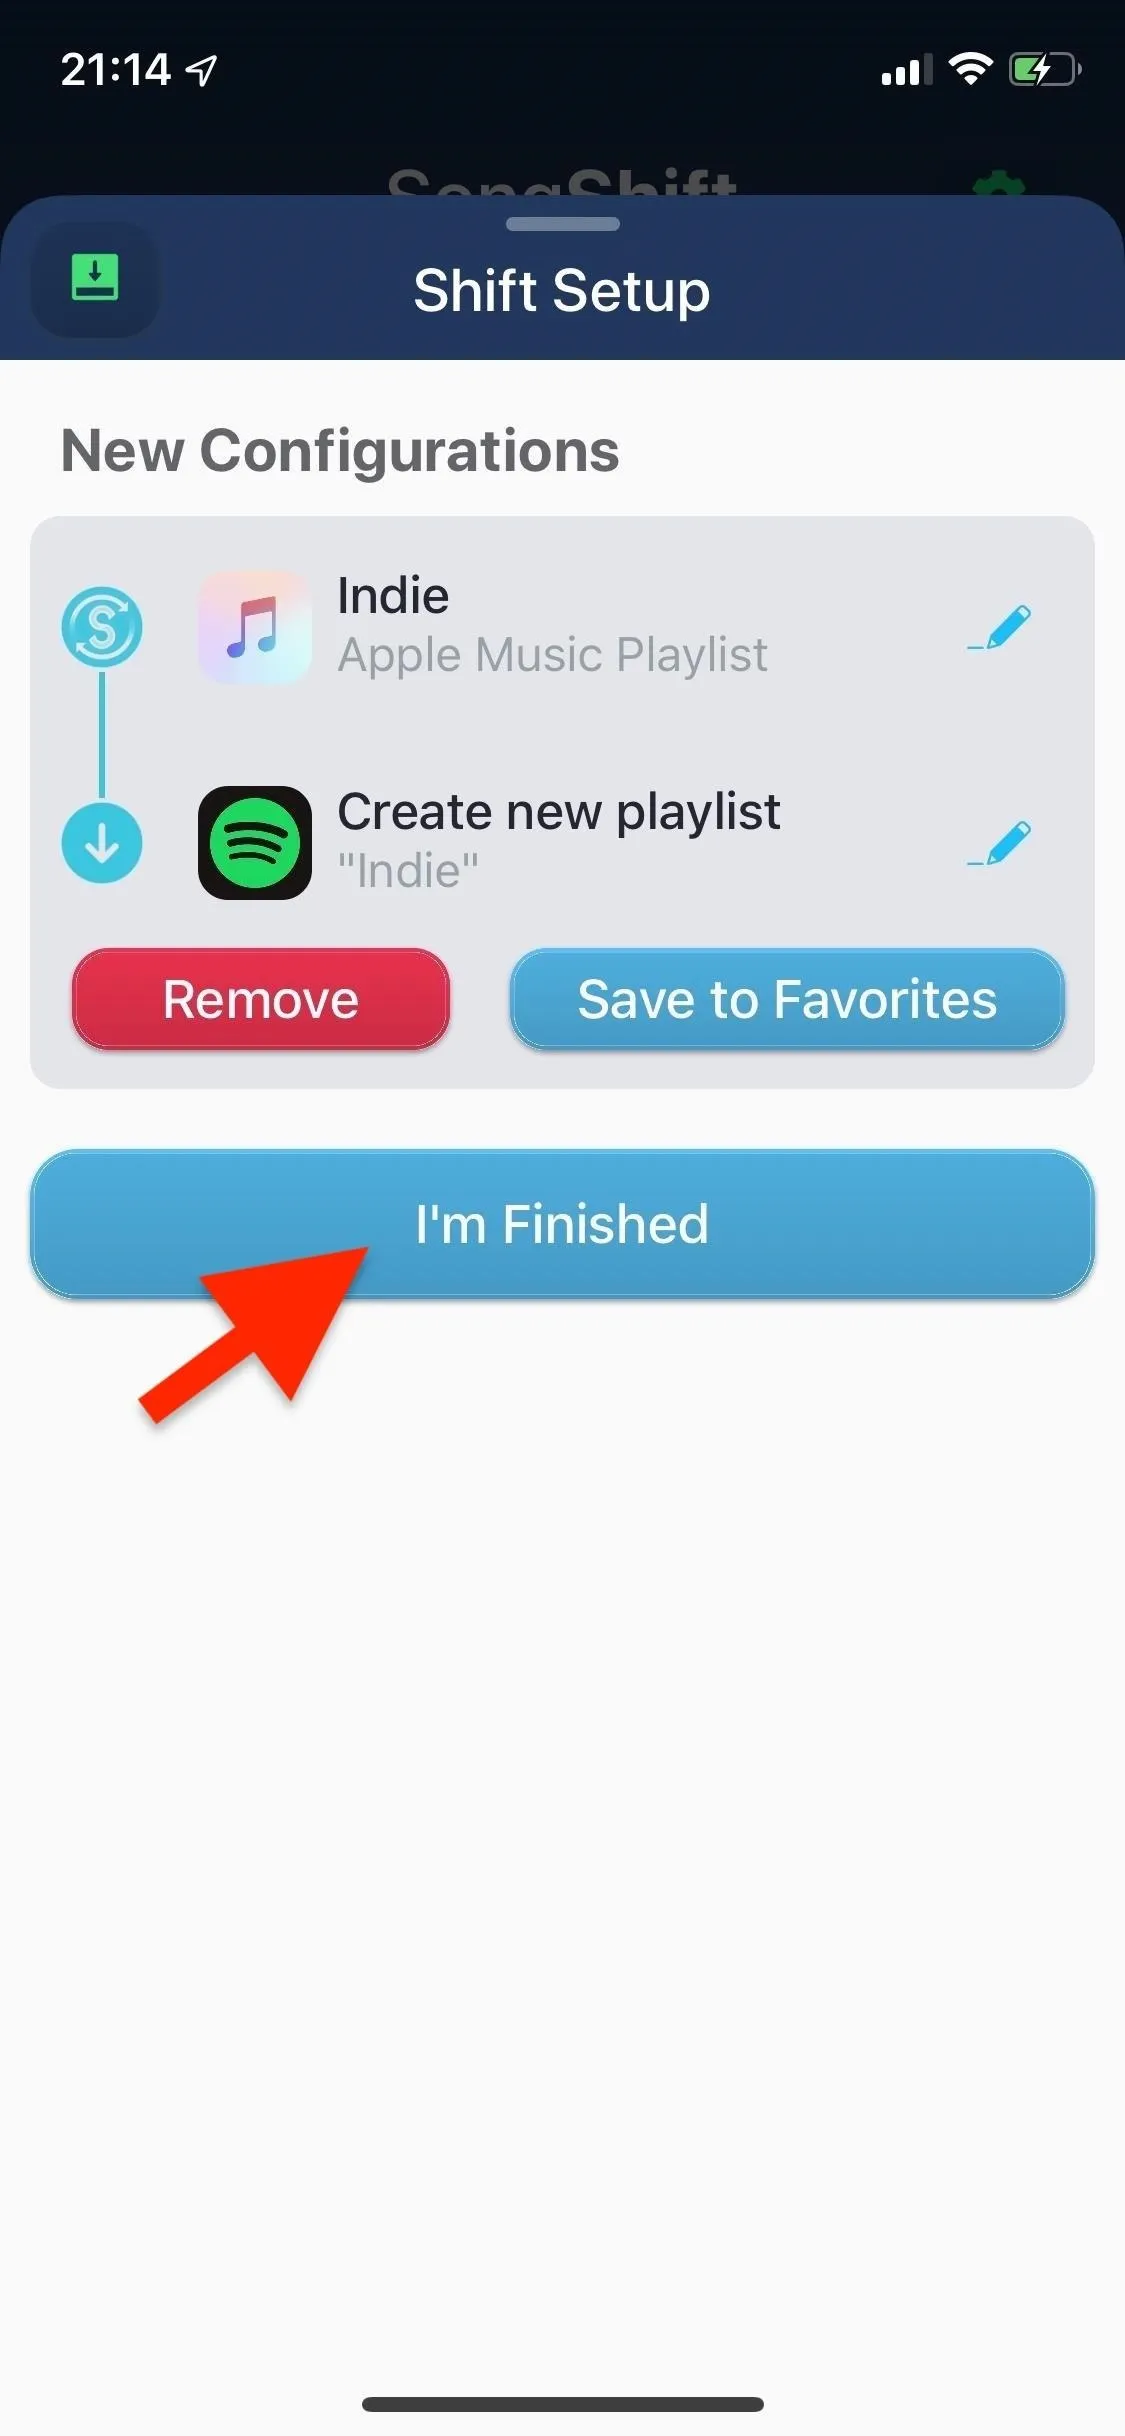
On the Shift Setup page, tap on "Setup Destination" and select Spotify as the destination. Choose "New Playlist" under destination type, and now you're almost ready to go. You can tap on the edit icon next to "Create new playlist" to type in a new name for the playlist on Spotify, but if you leave it as is, it'll keep the same name it had on Apple Music. Hit "I'm Finished" to start the transfer.
Review the Playlist's Transfer Progress
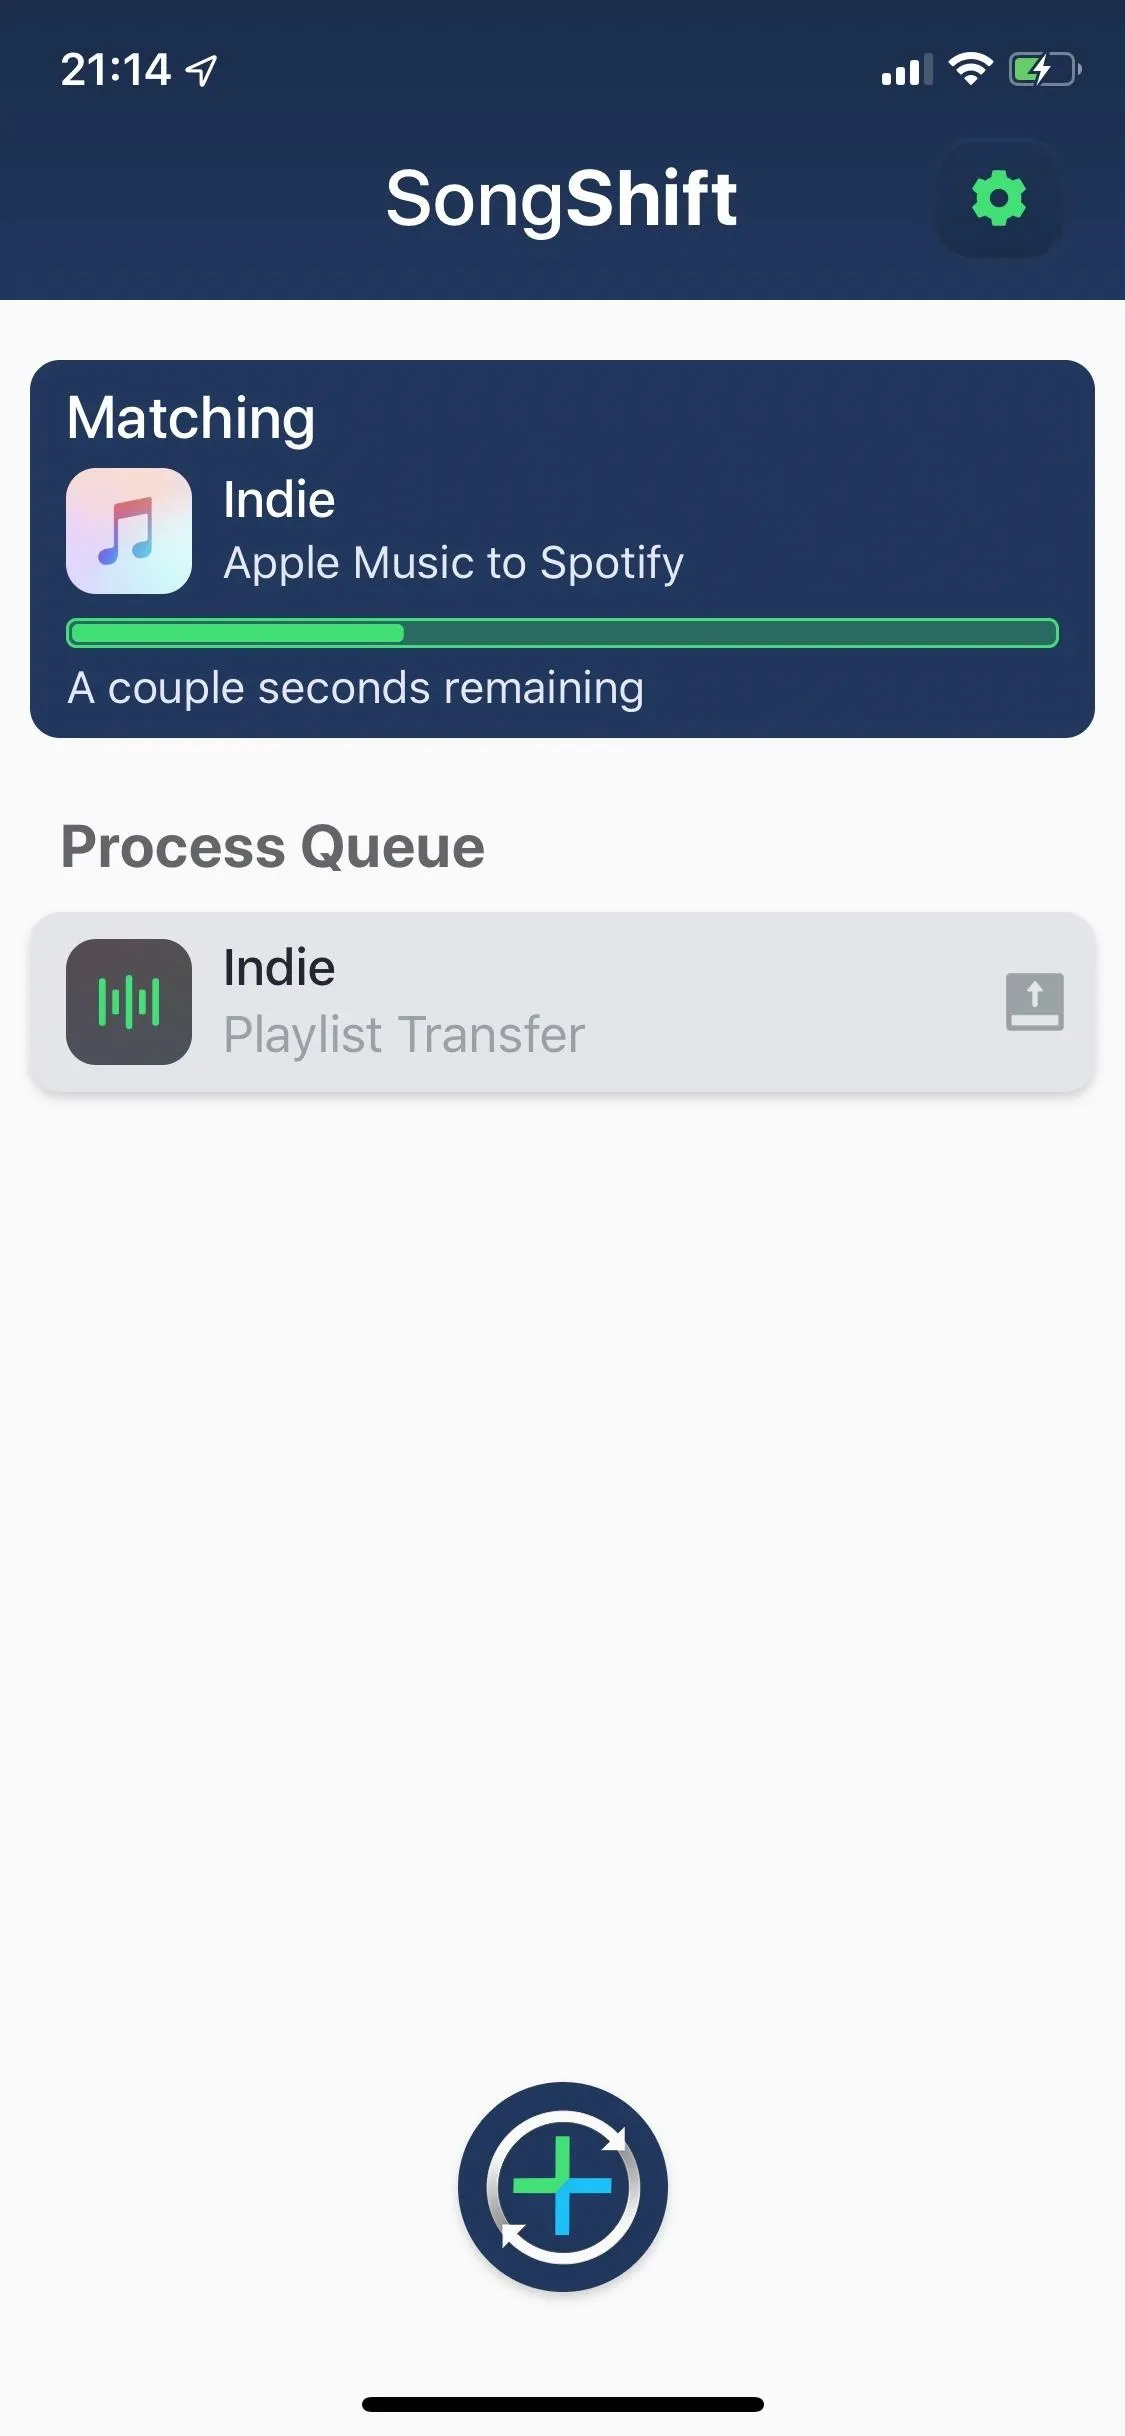
SongShift will then begin matching the songs from your playlist on Spotify. Depending on how many songs the playlist has, this could take anywhere between a few seconds or around a minute. After the playlist is matched, you can tap on it to check if the songs are correctly matched.
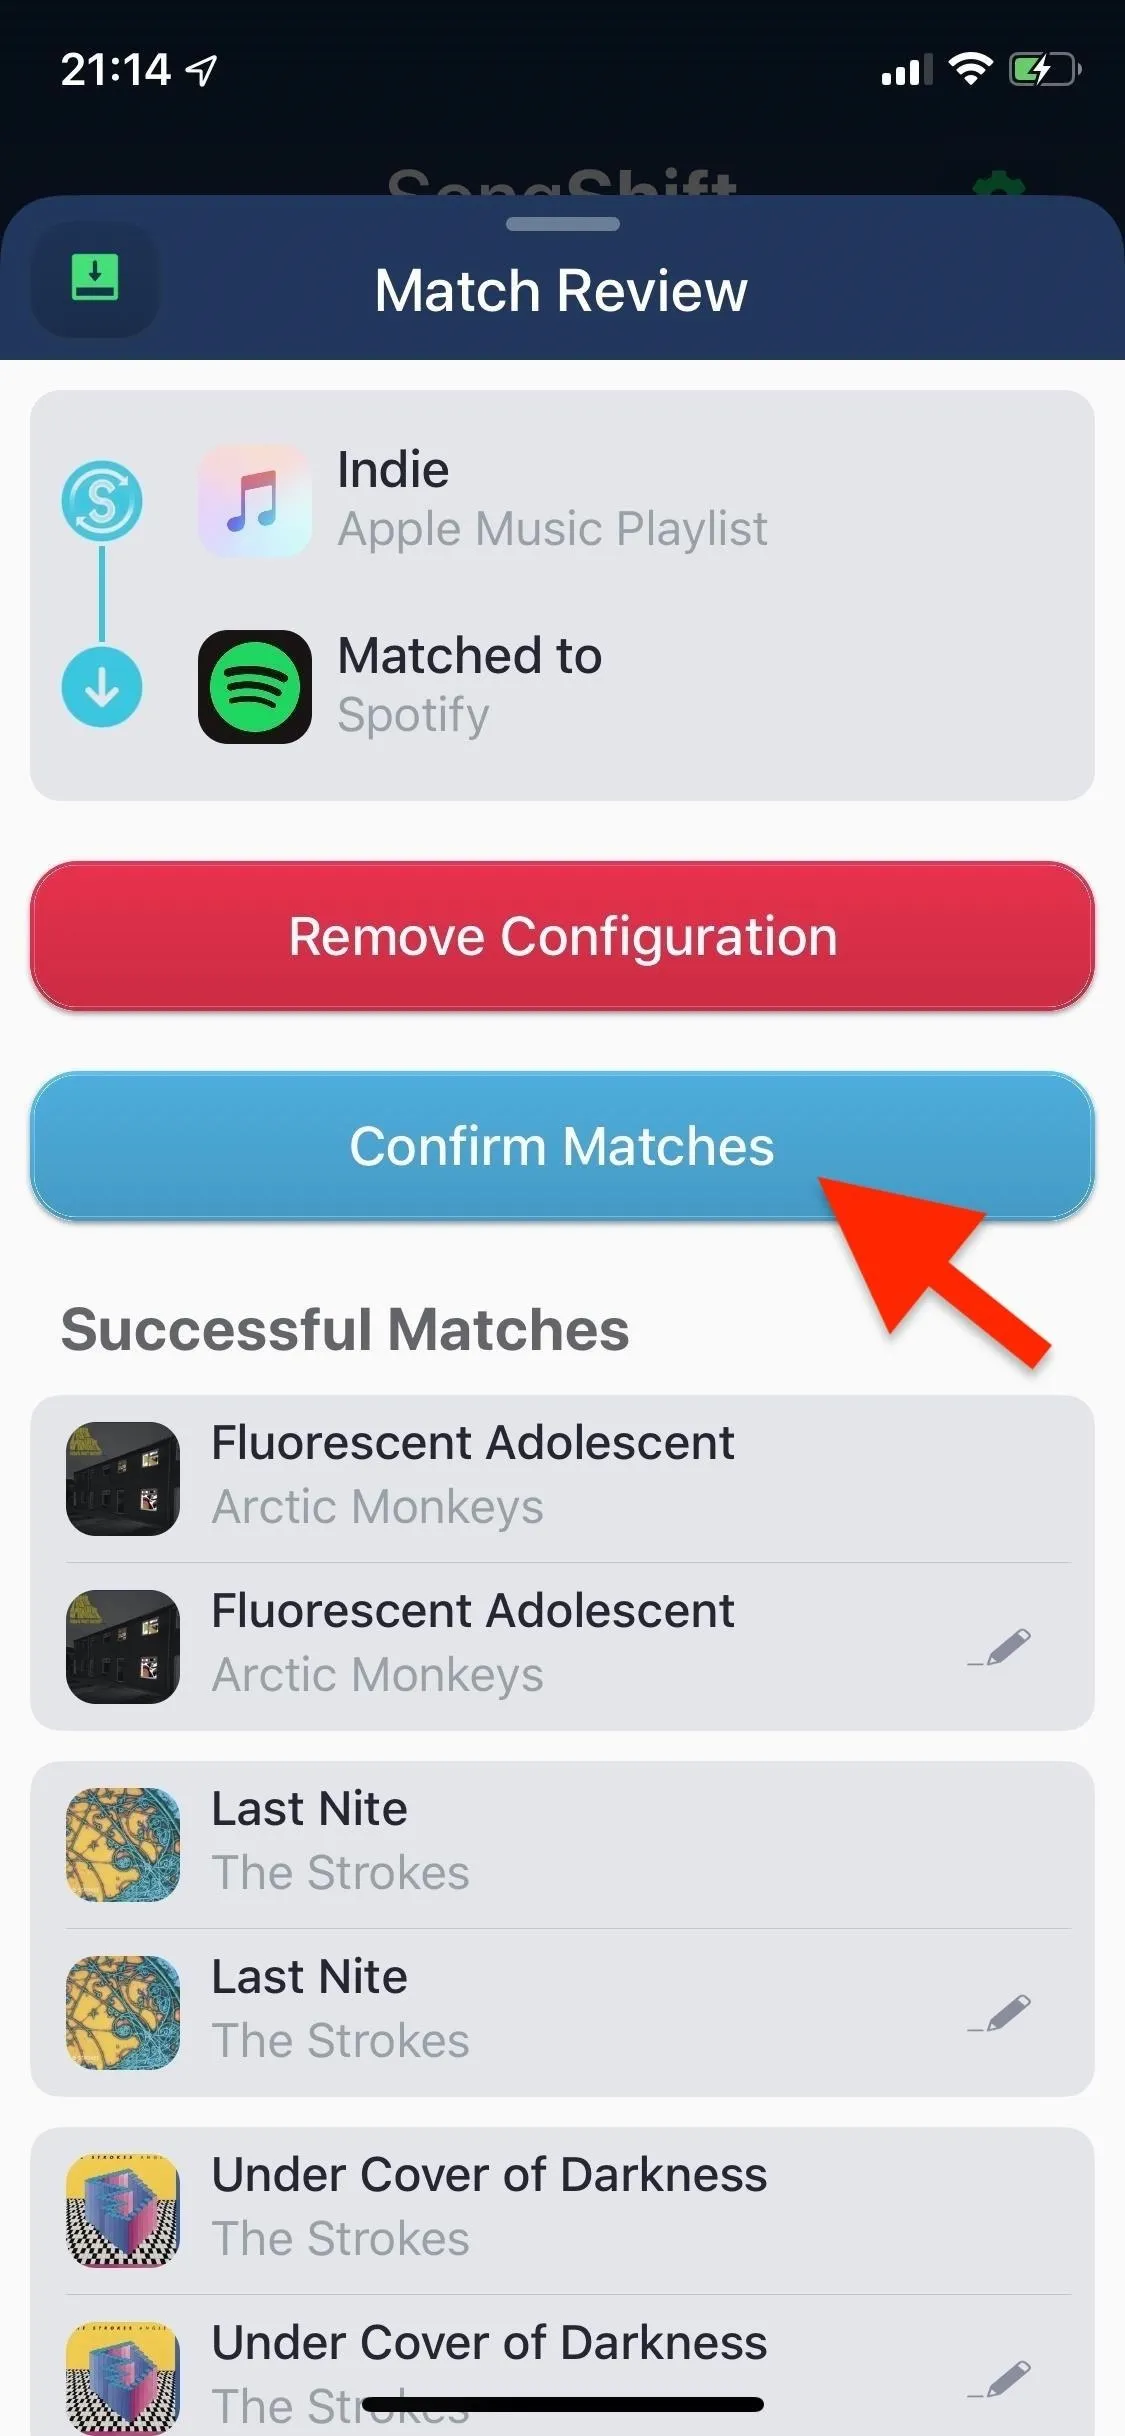
If there is a failed match, you can tap on "Ignore" to erase the song from the playlist. There's also a "Re-Match" option, but it's only available on the pro version. If a song is incorrectly matched, tap on the edit icon to either remove the song from the playlist (free) or search for it (pro). When you're finished reviewing the songs, tap on "Confirm Matches" to finish the transfer process.

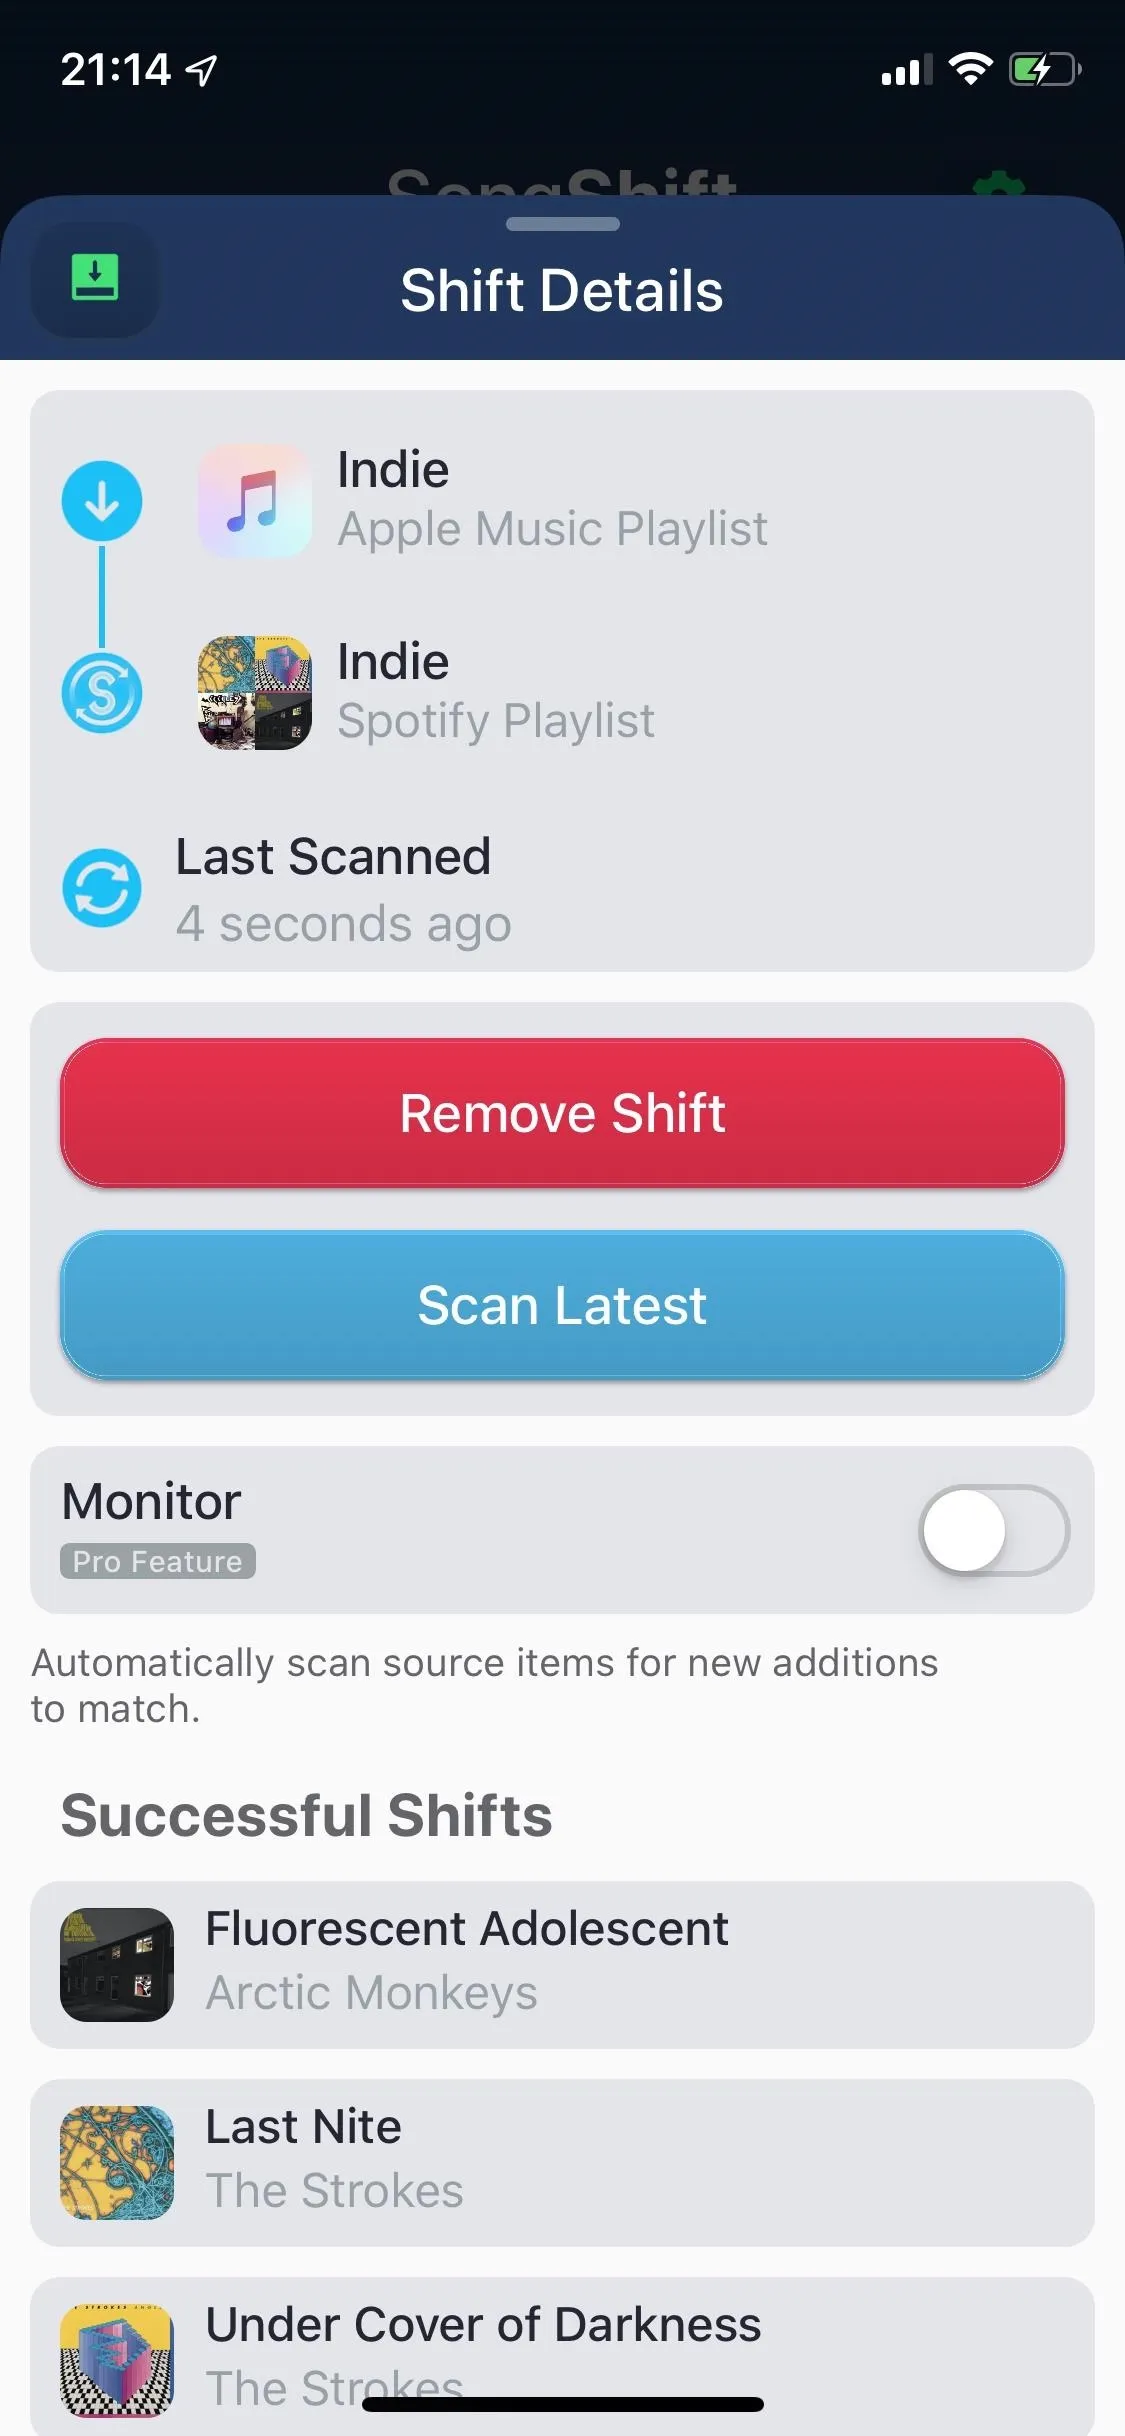
View the Completed Playlist for More Options (Optional)
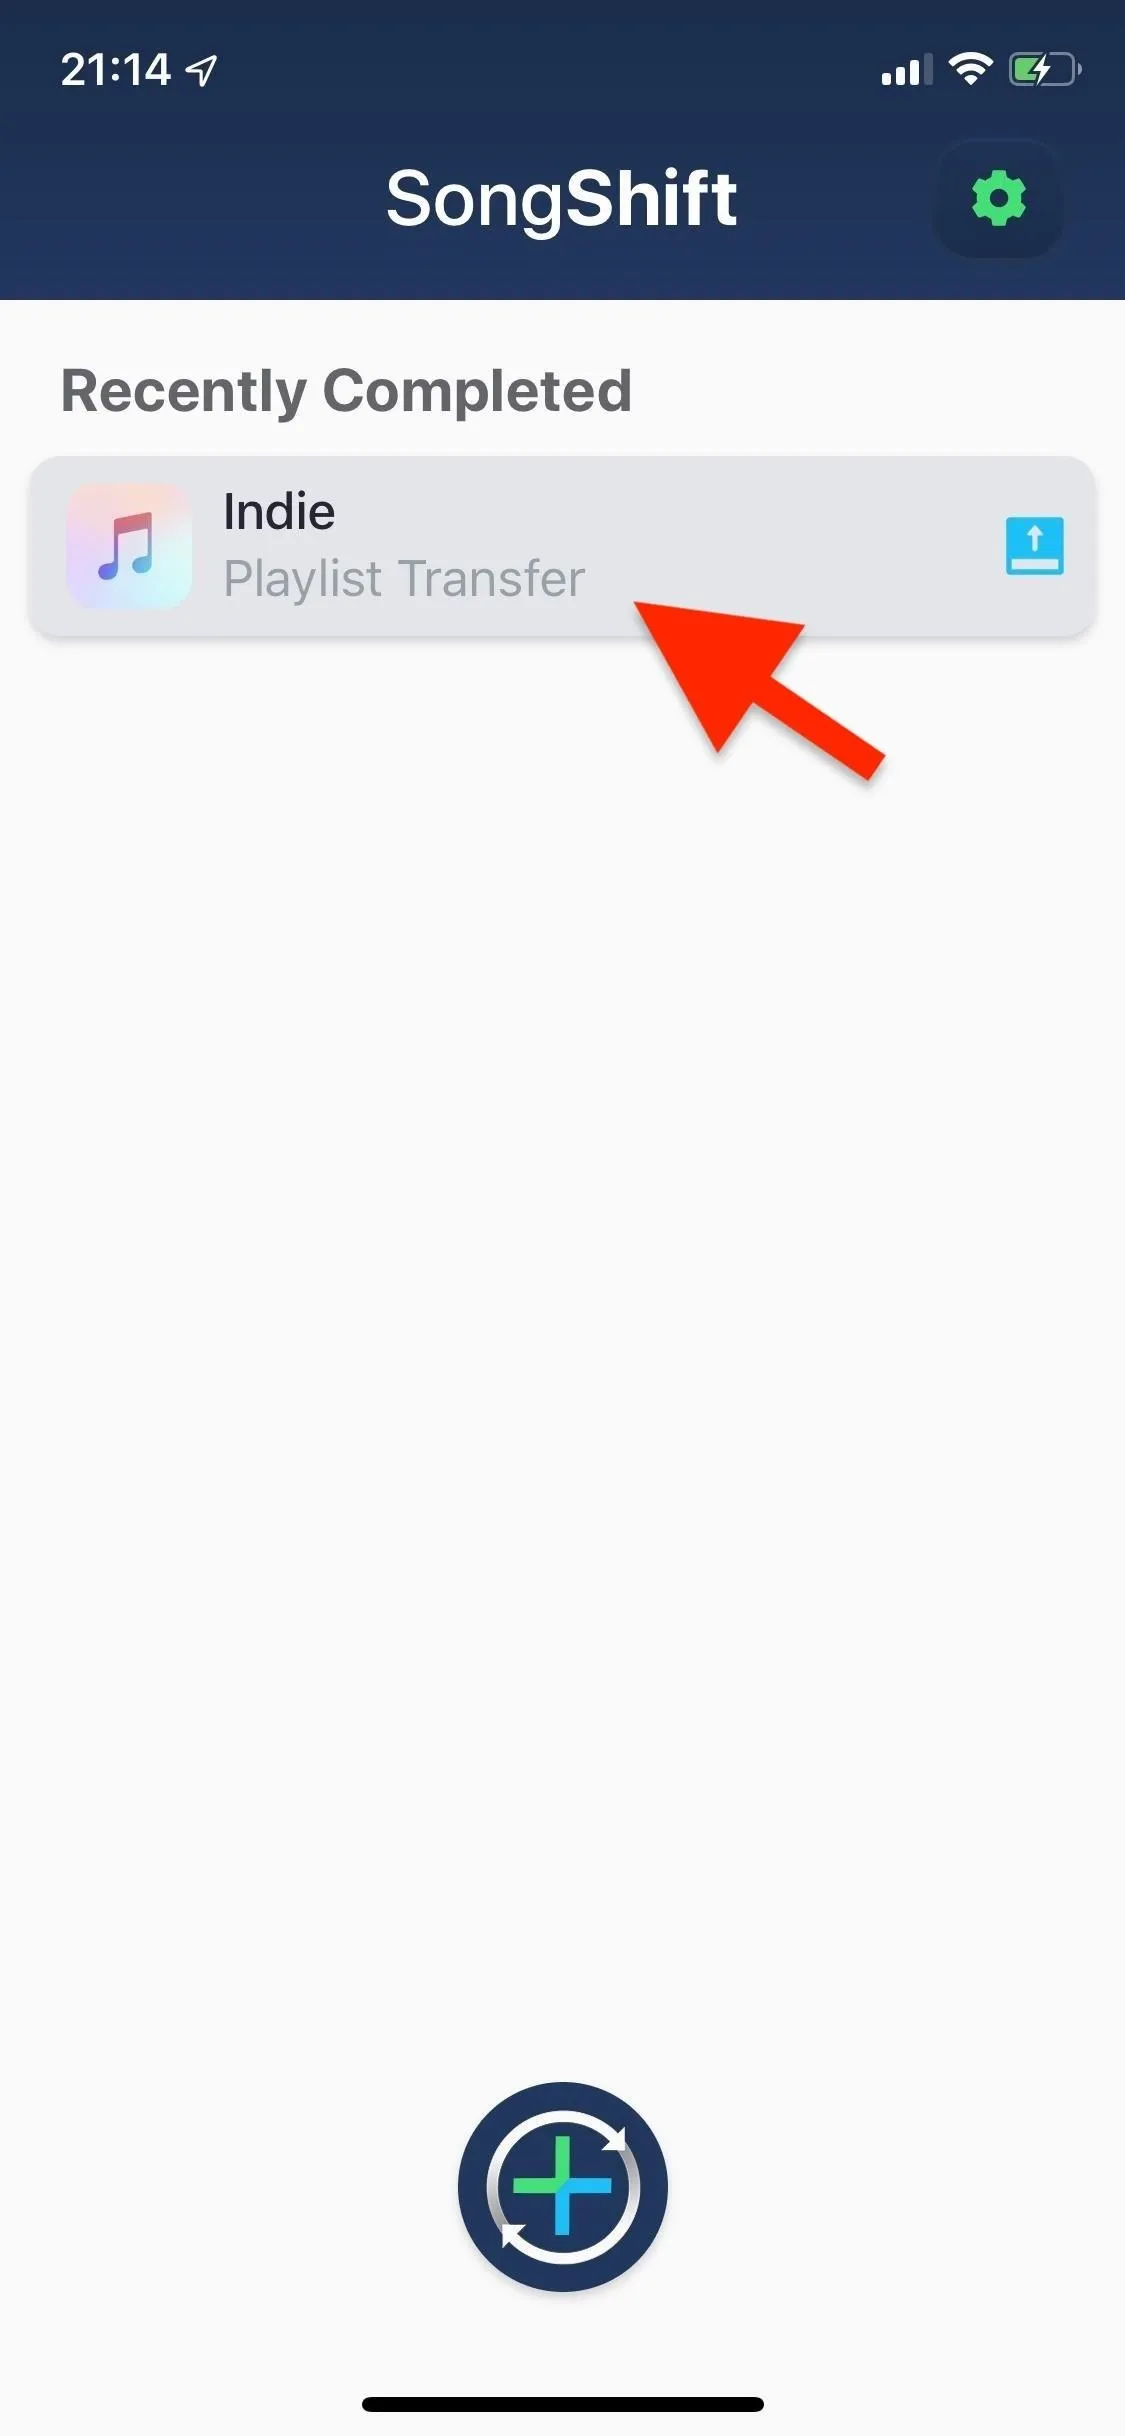
After a few seconds, SongShift will complete the transfer. When finished, you can view the transferred playlist to perform one of the following actions.
- Remove Shift: Delete the playlist from SongShift (but not from the music streaming services).
- Scan Latest: Update the transferred playlist if new songs are added to the original.
- Monitor: Automatically update the transferred playlist for new songs (pro version).
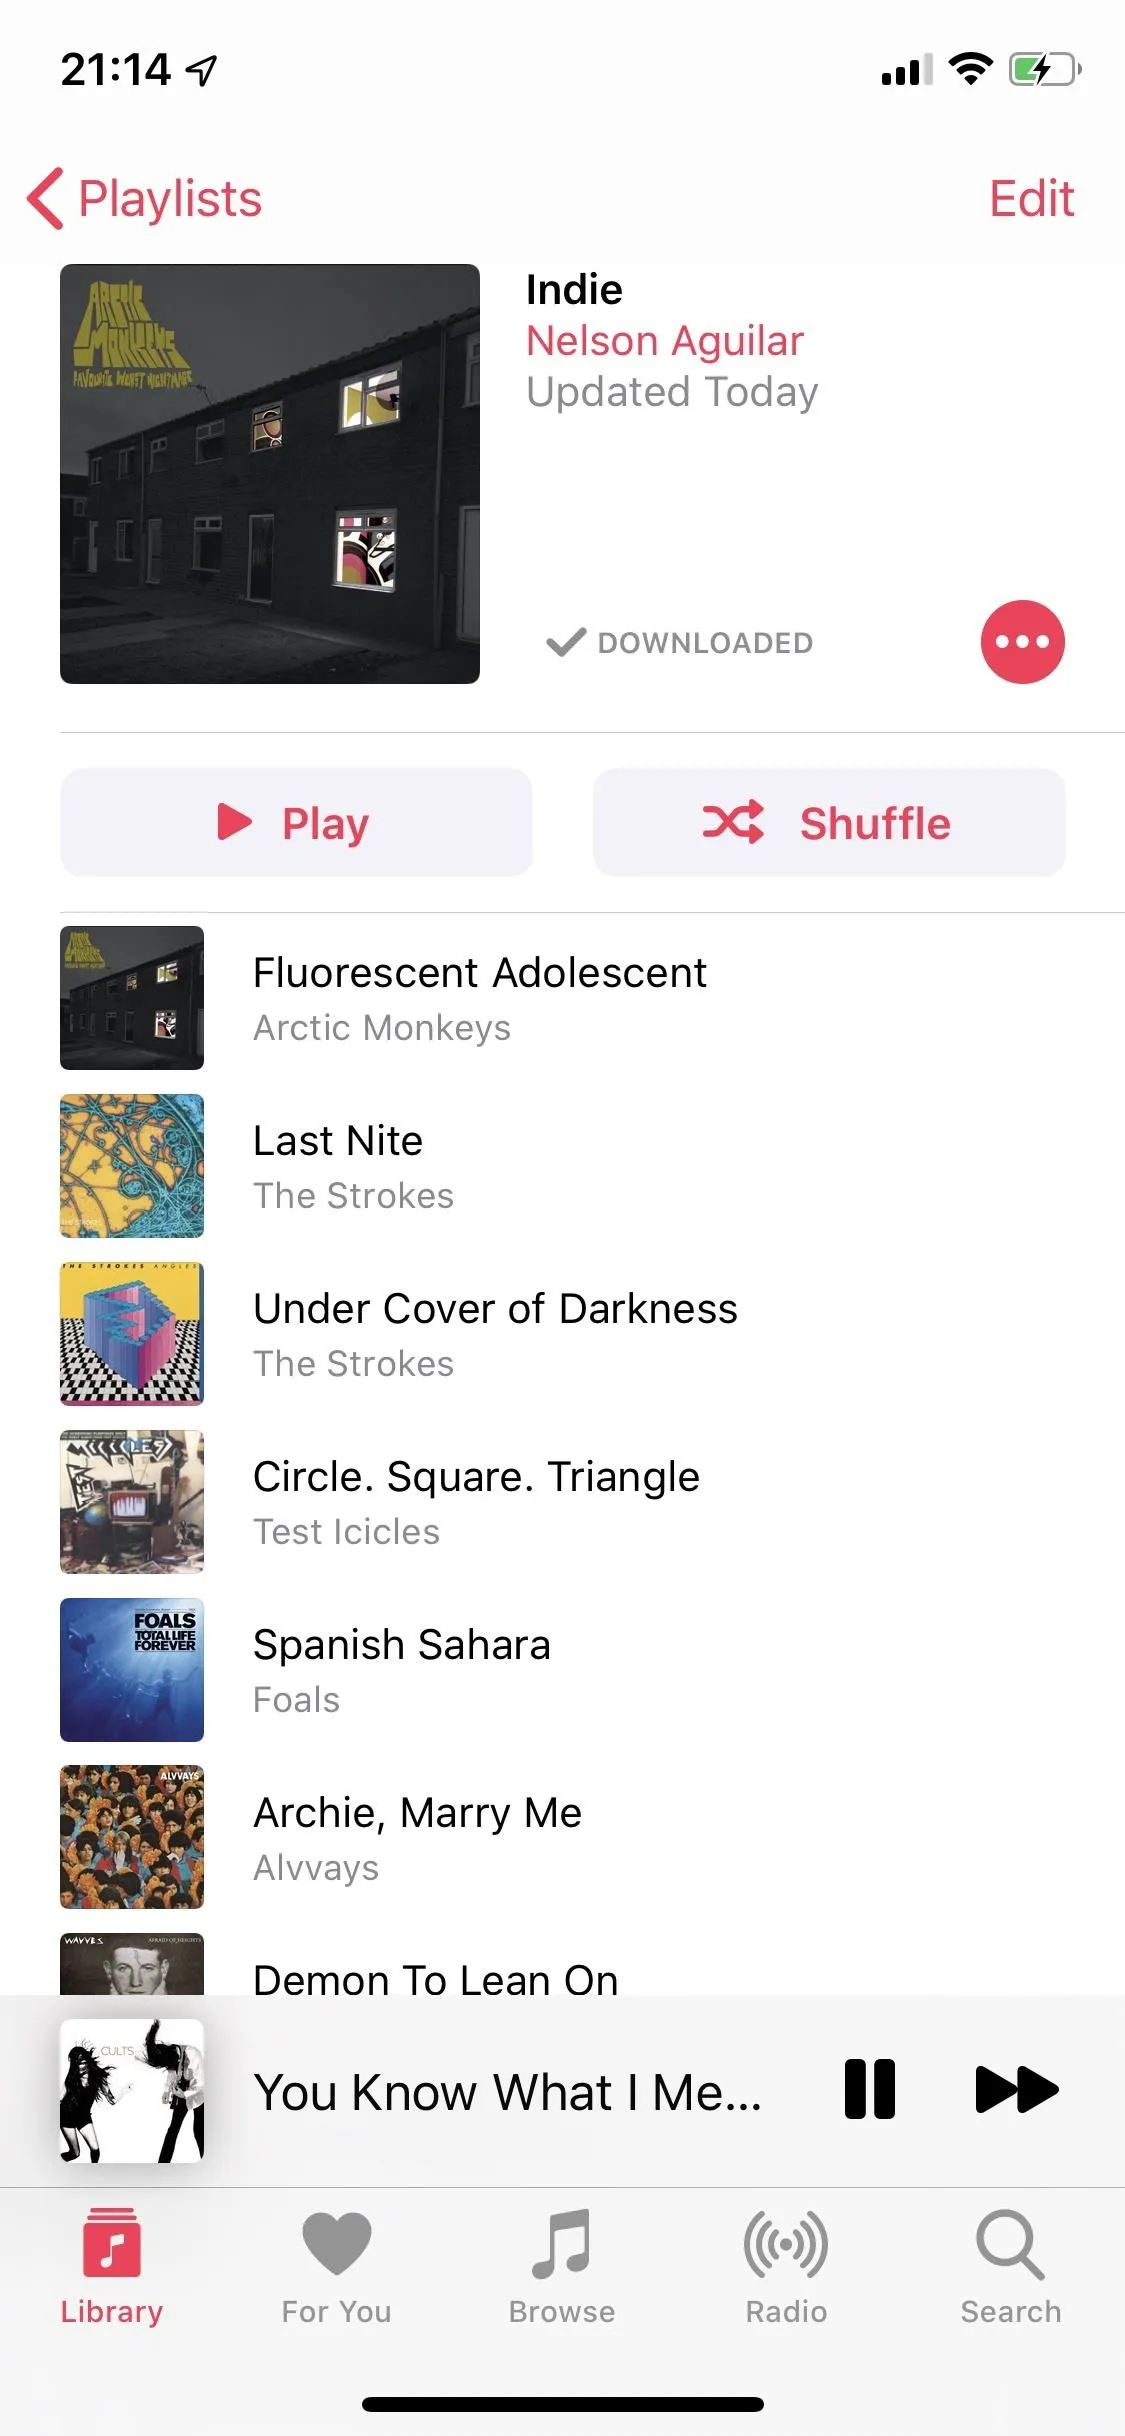
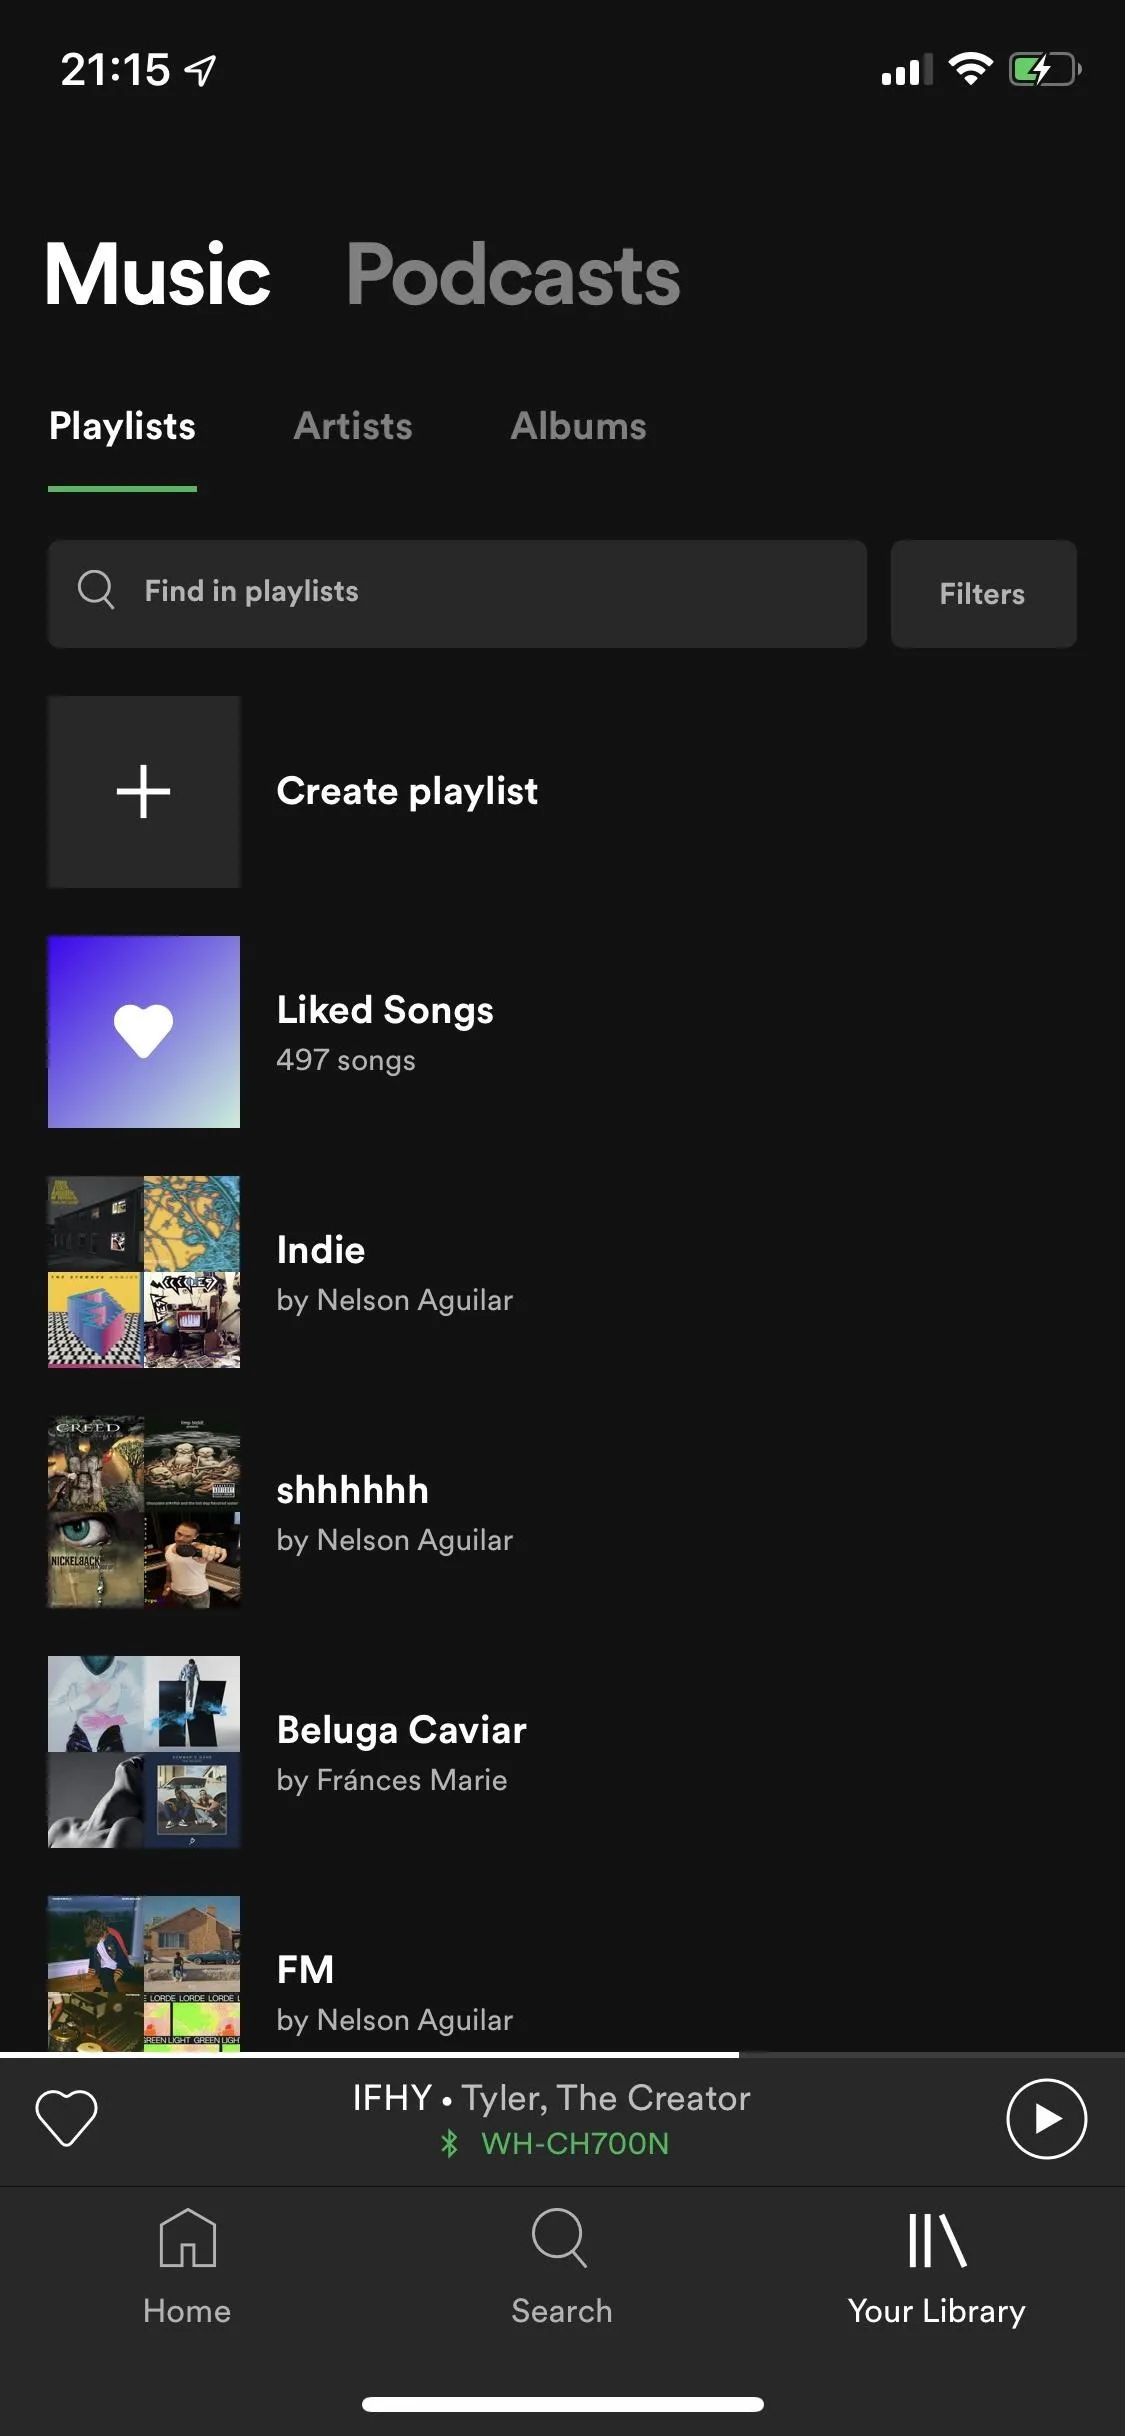
View Your Transferred Playlist on Spotify
Open Spotify, tap on "Your Library" in the navigation bar at the bottom, then find your newly transferred playlist. Below, you can see the original playlist on Apple Music and the new one on Spotify.

Transfer Apple Music Playlists to Spotify (Android)
SongShift doesn't exist on Android, so you'll be using a website in the web browser of your choice to transfer your Apple Music playlists to Spotify instead. The site is free to use, and although there is a pro version, you won't need any of those features in this guide.
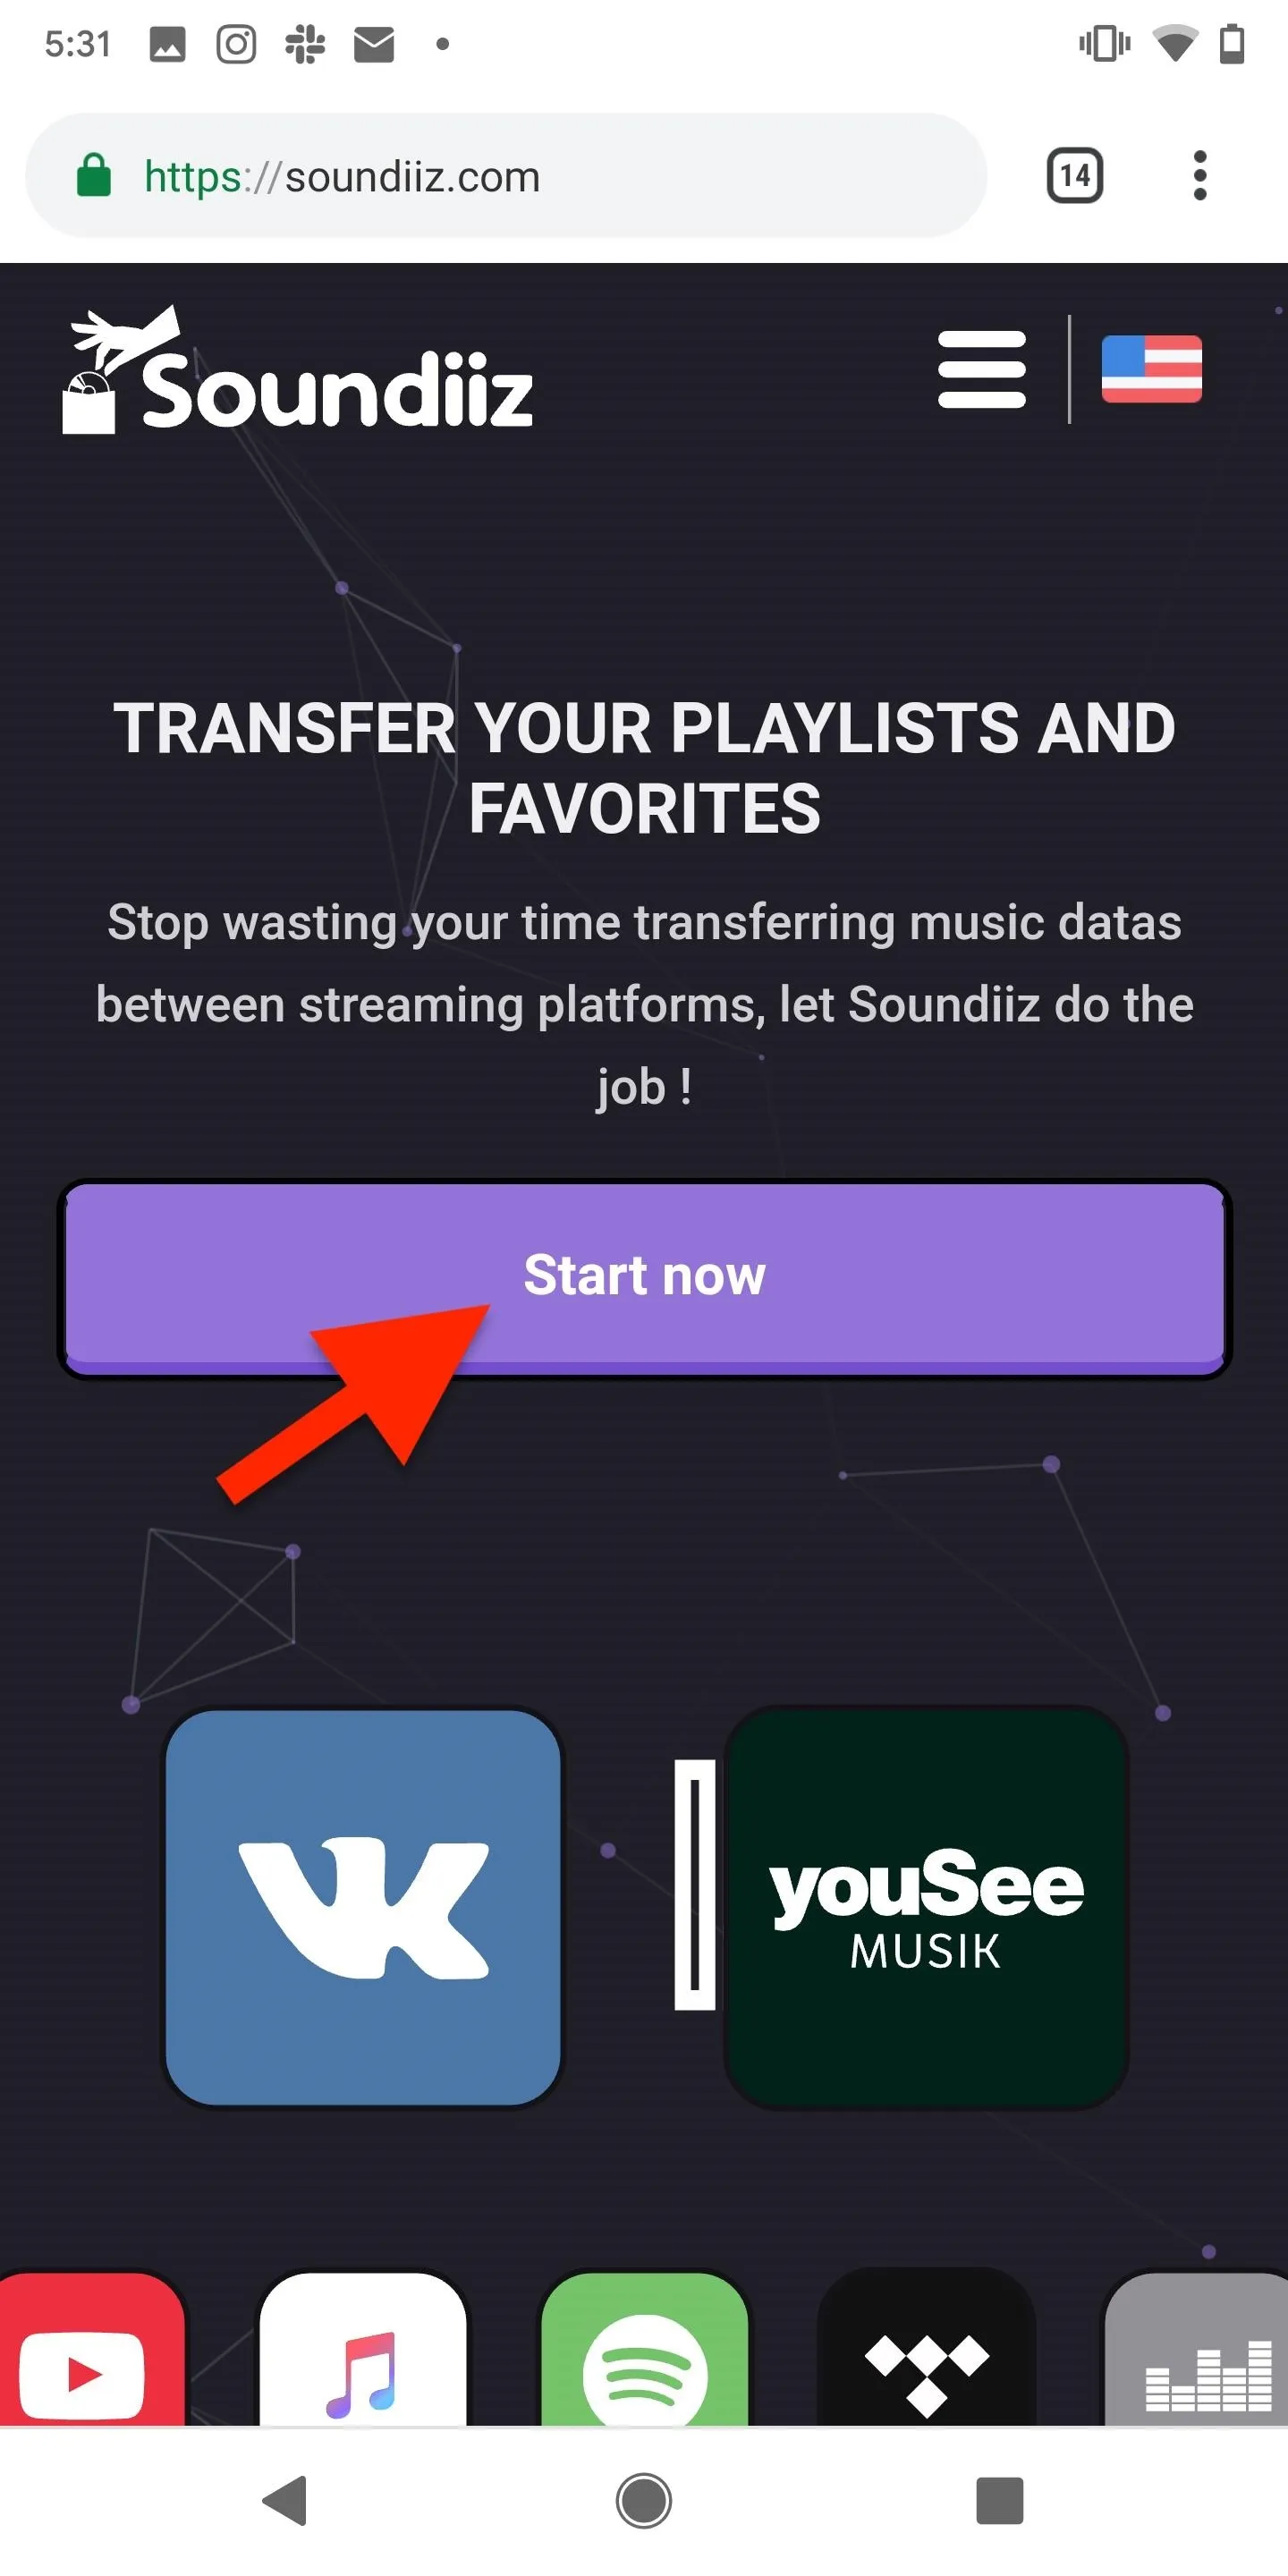
Sign in to Your Soundiiz Account
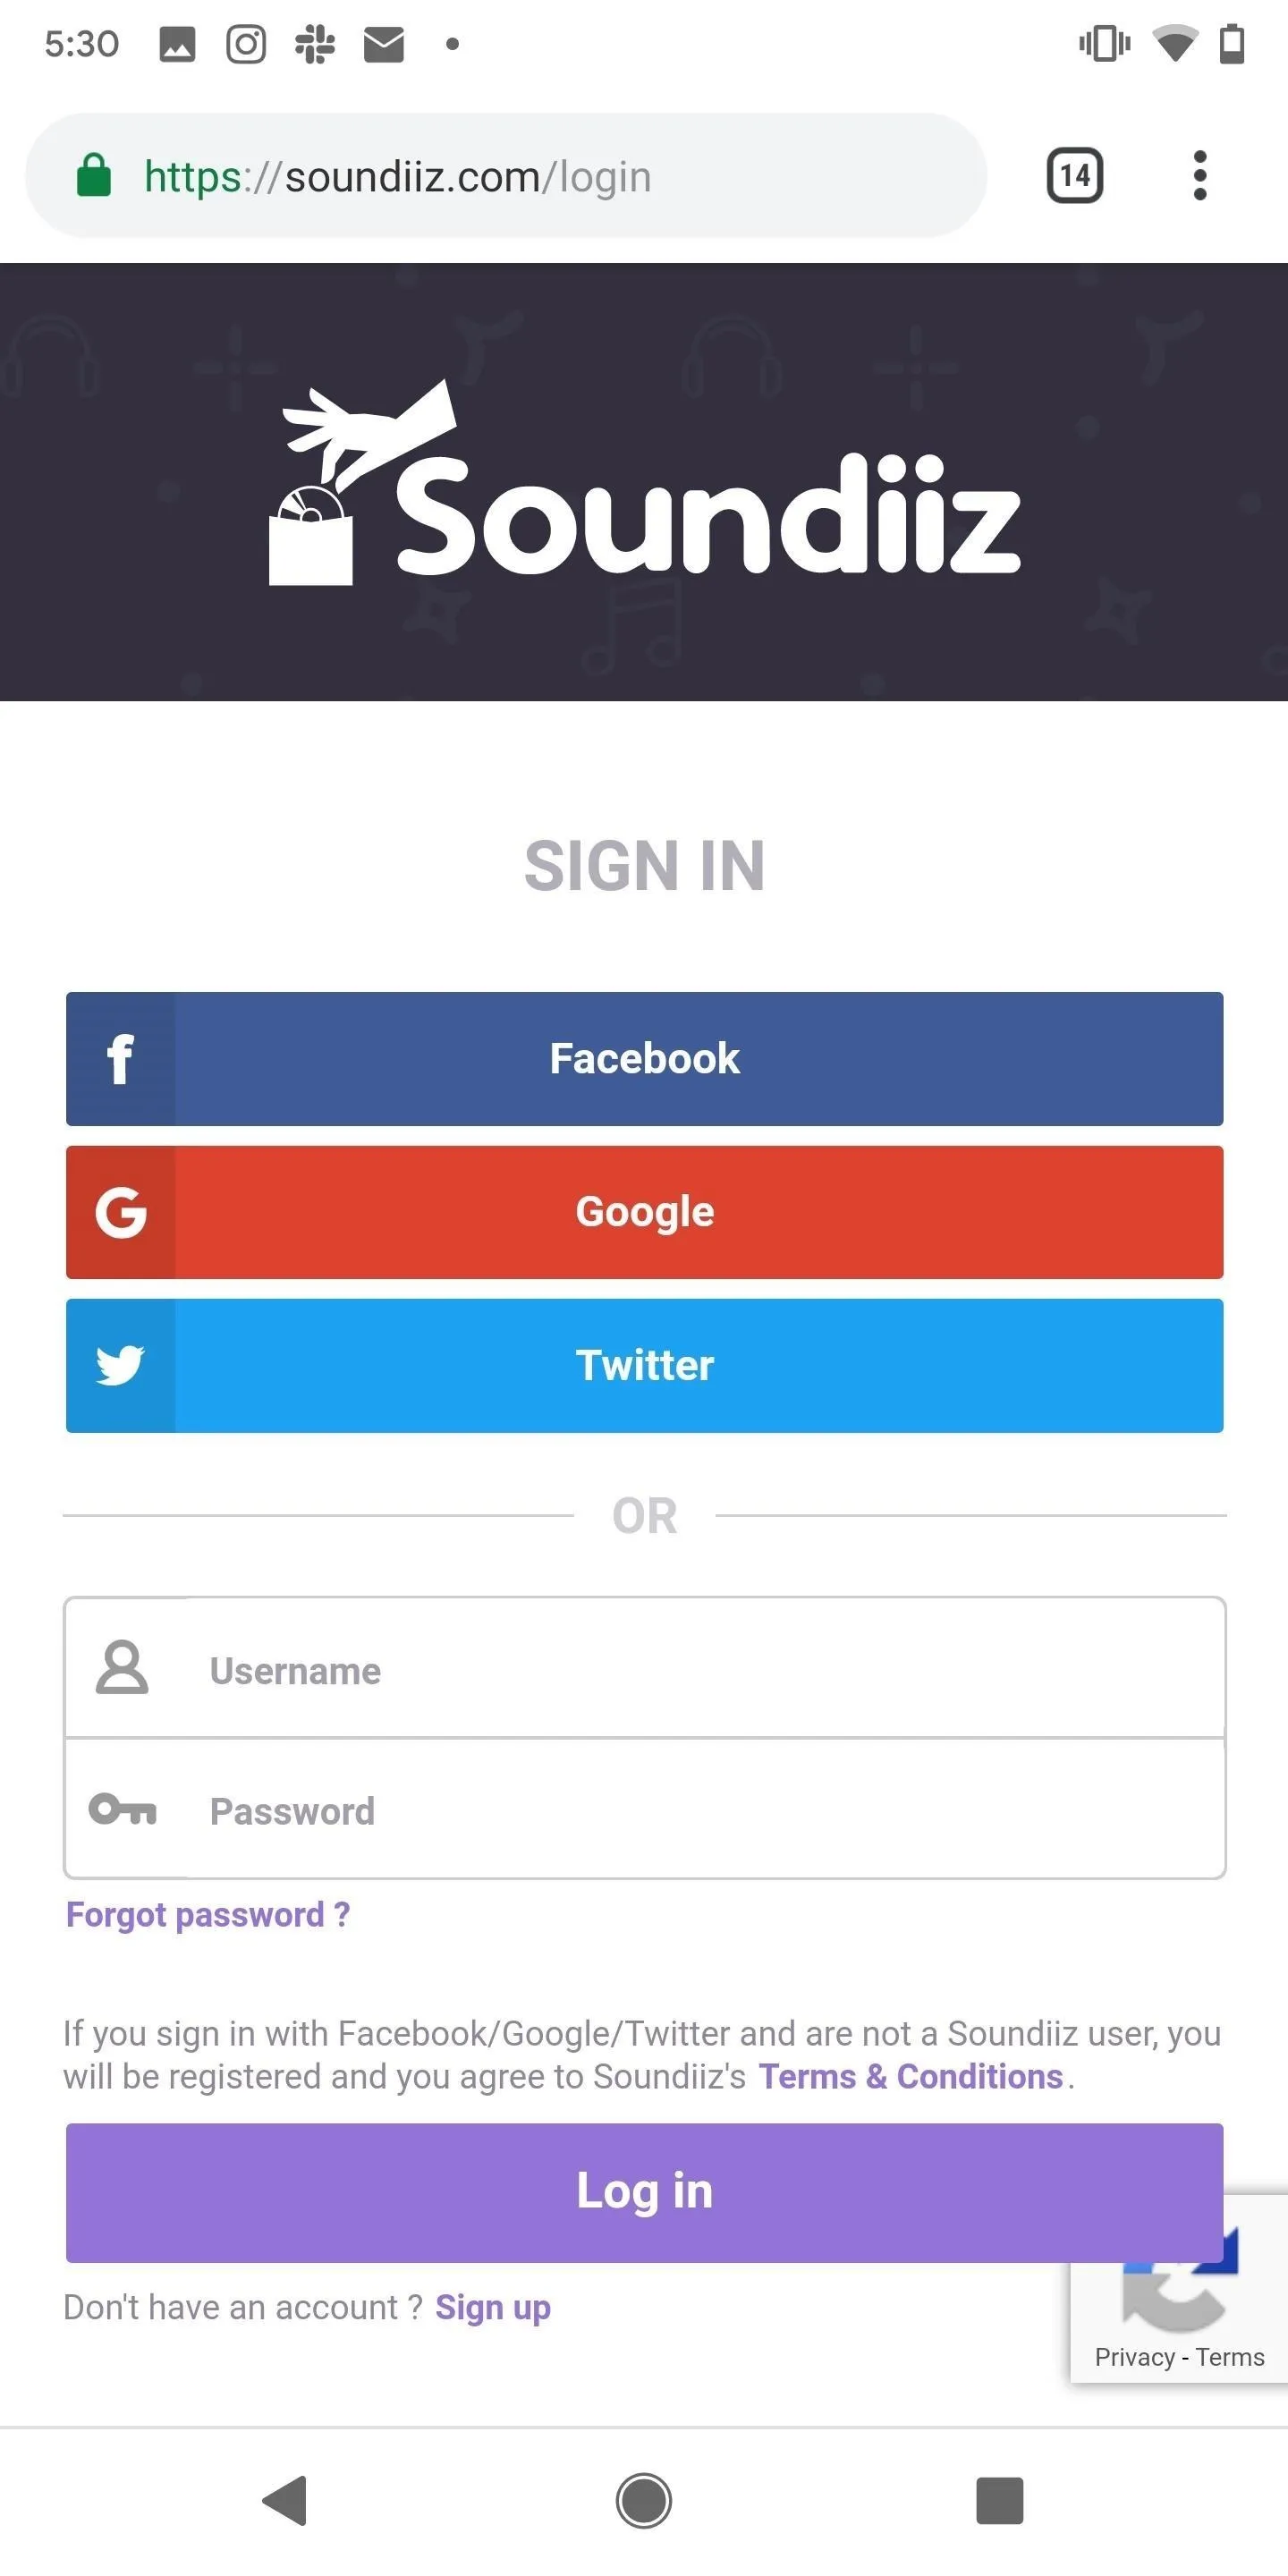
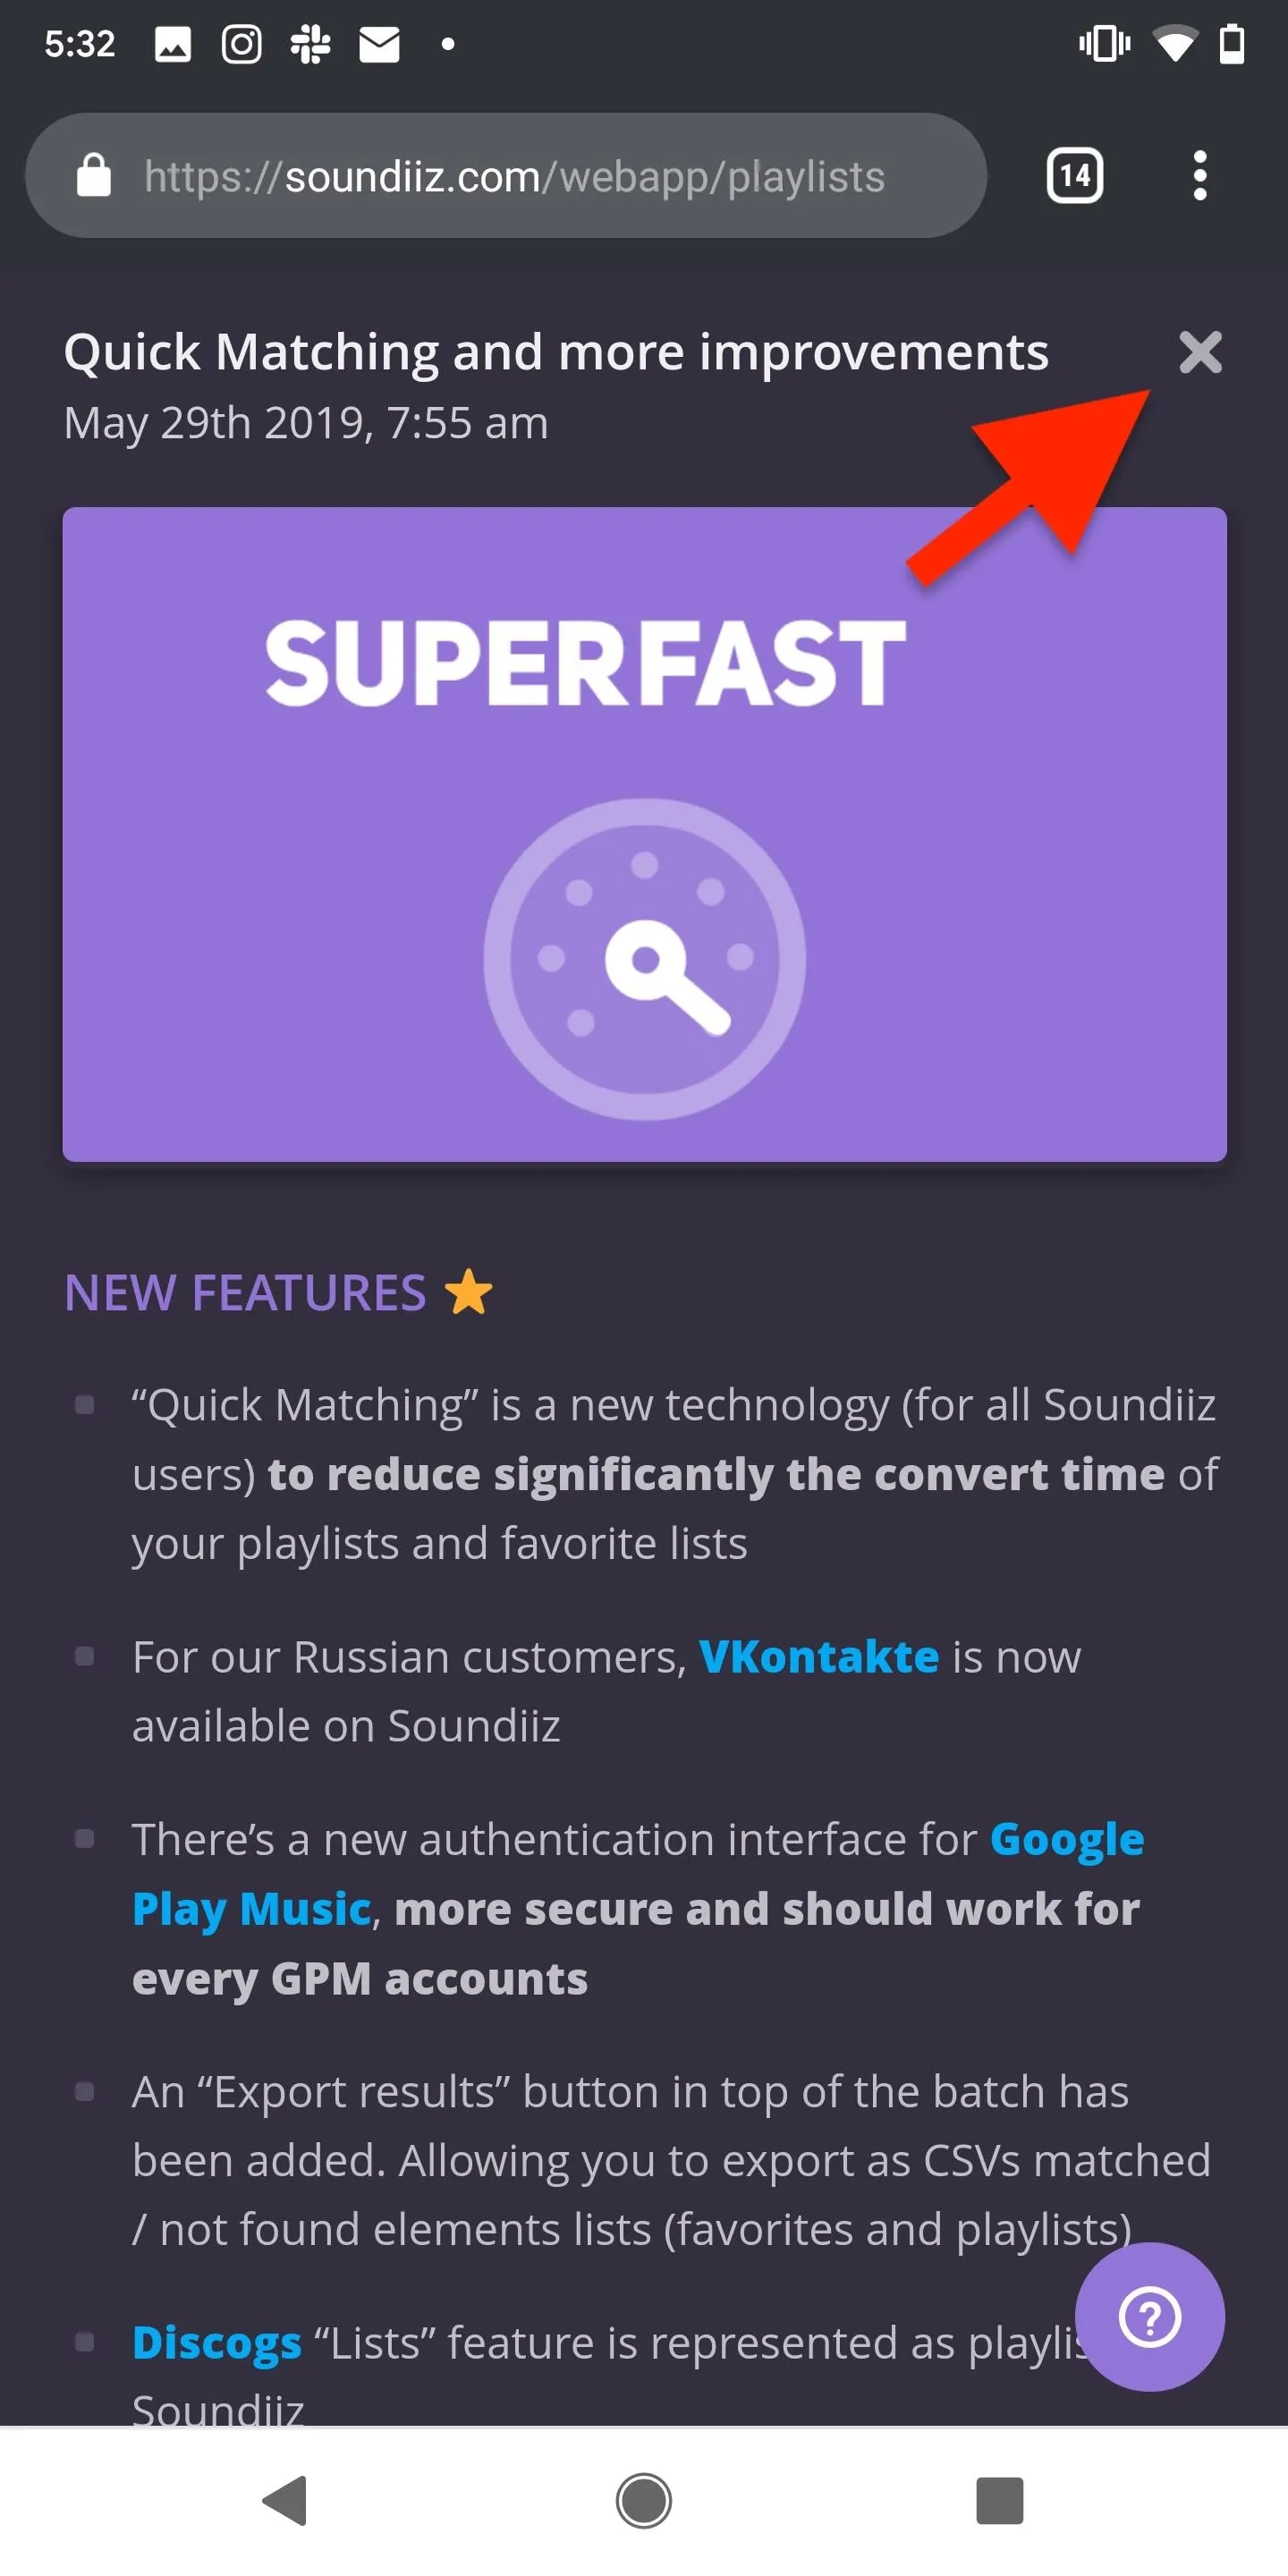
In your mobile web browser, go to Soundiiz.com and tap on "Start now" to either create a new account or log in to your existing account. After verifying your email (if you created an account), you'll be redirected to the page where the playlist transfer feature is. From there, tap on the "x" in the top right to view it.
Connect Your Apple Music Account
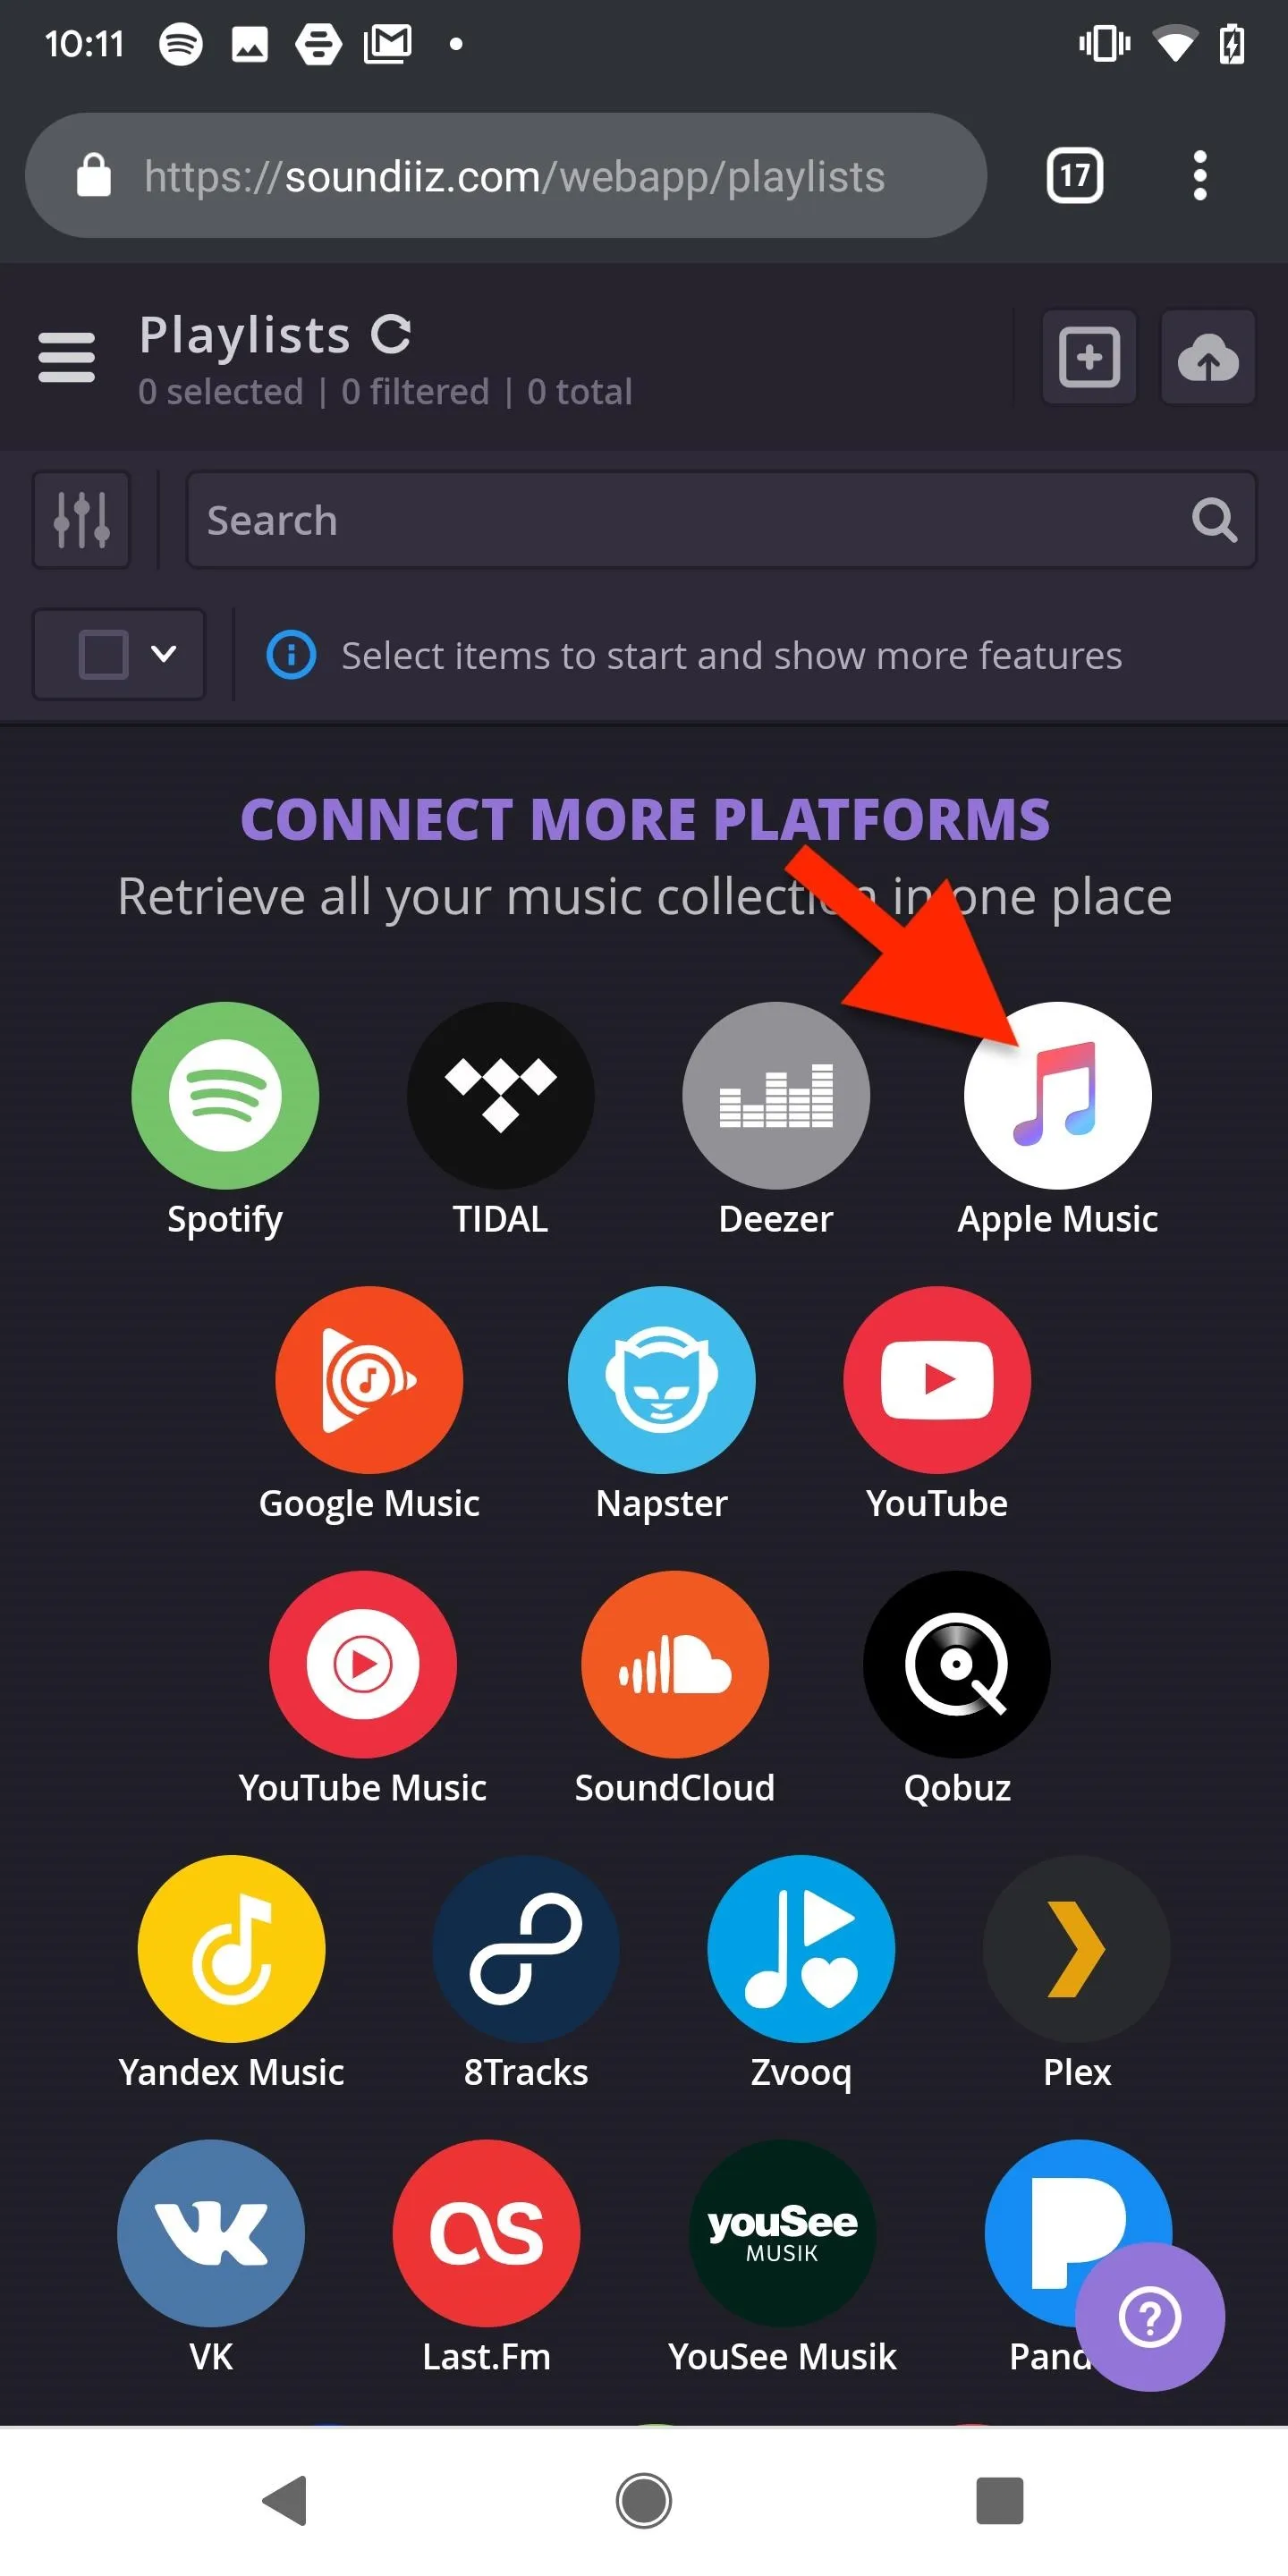
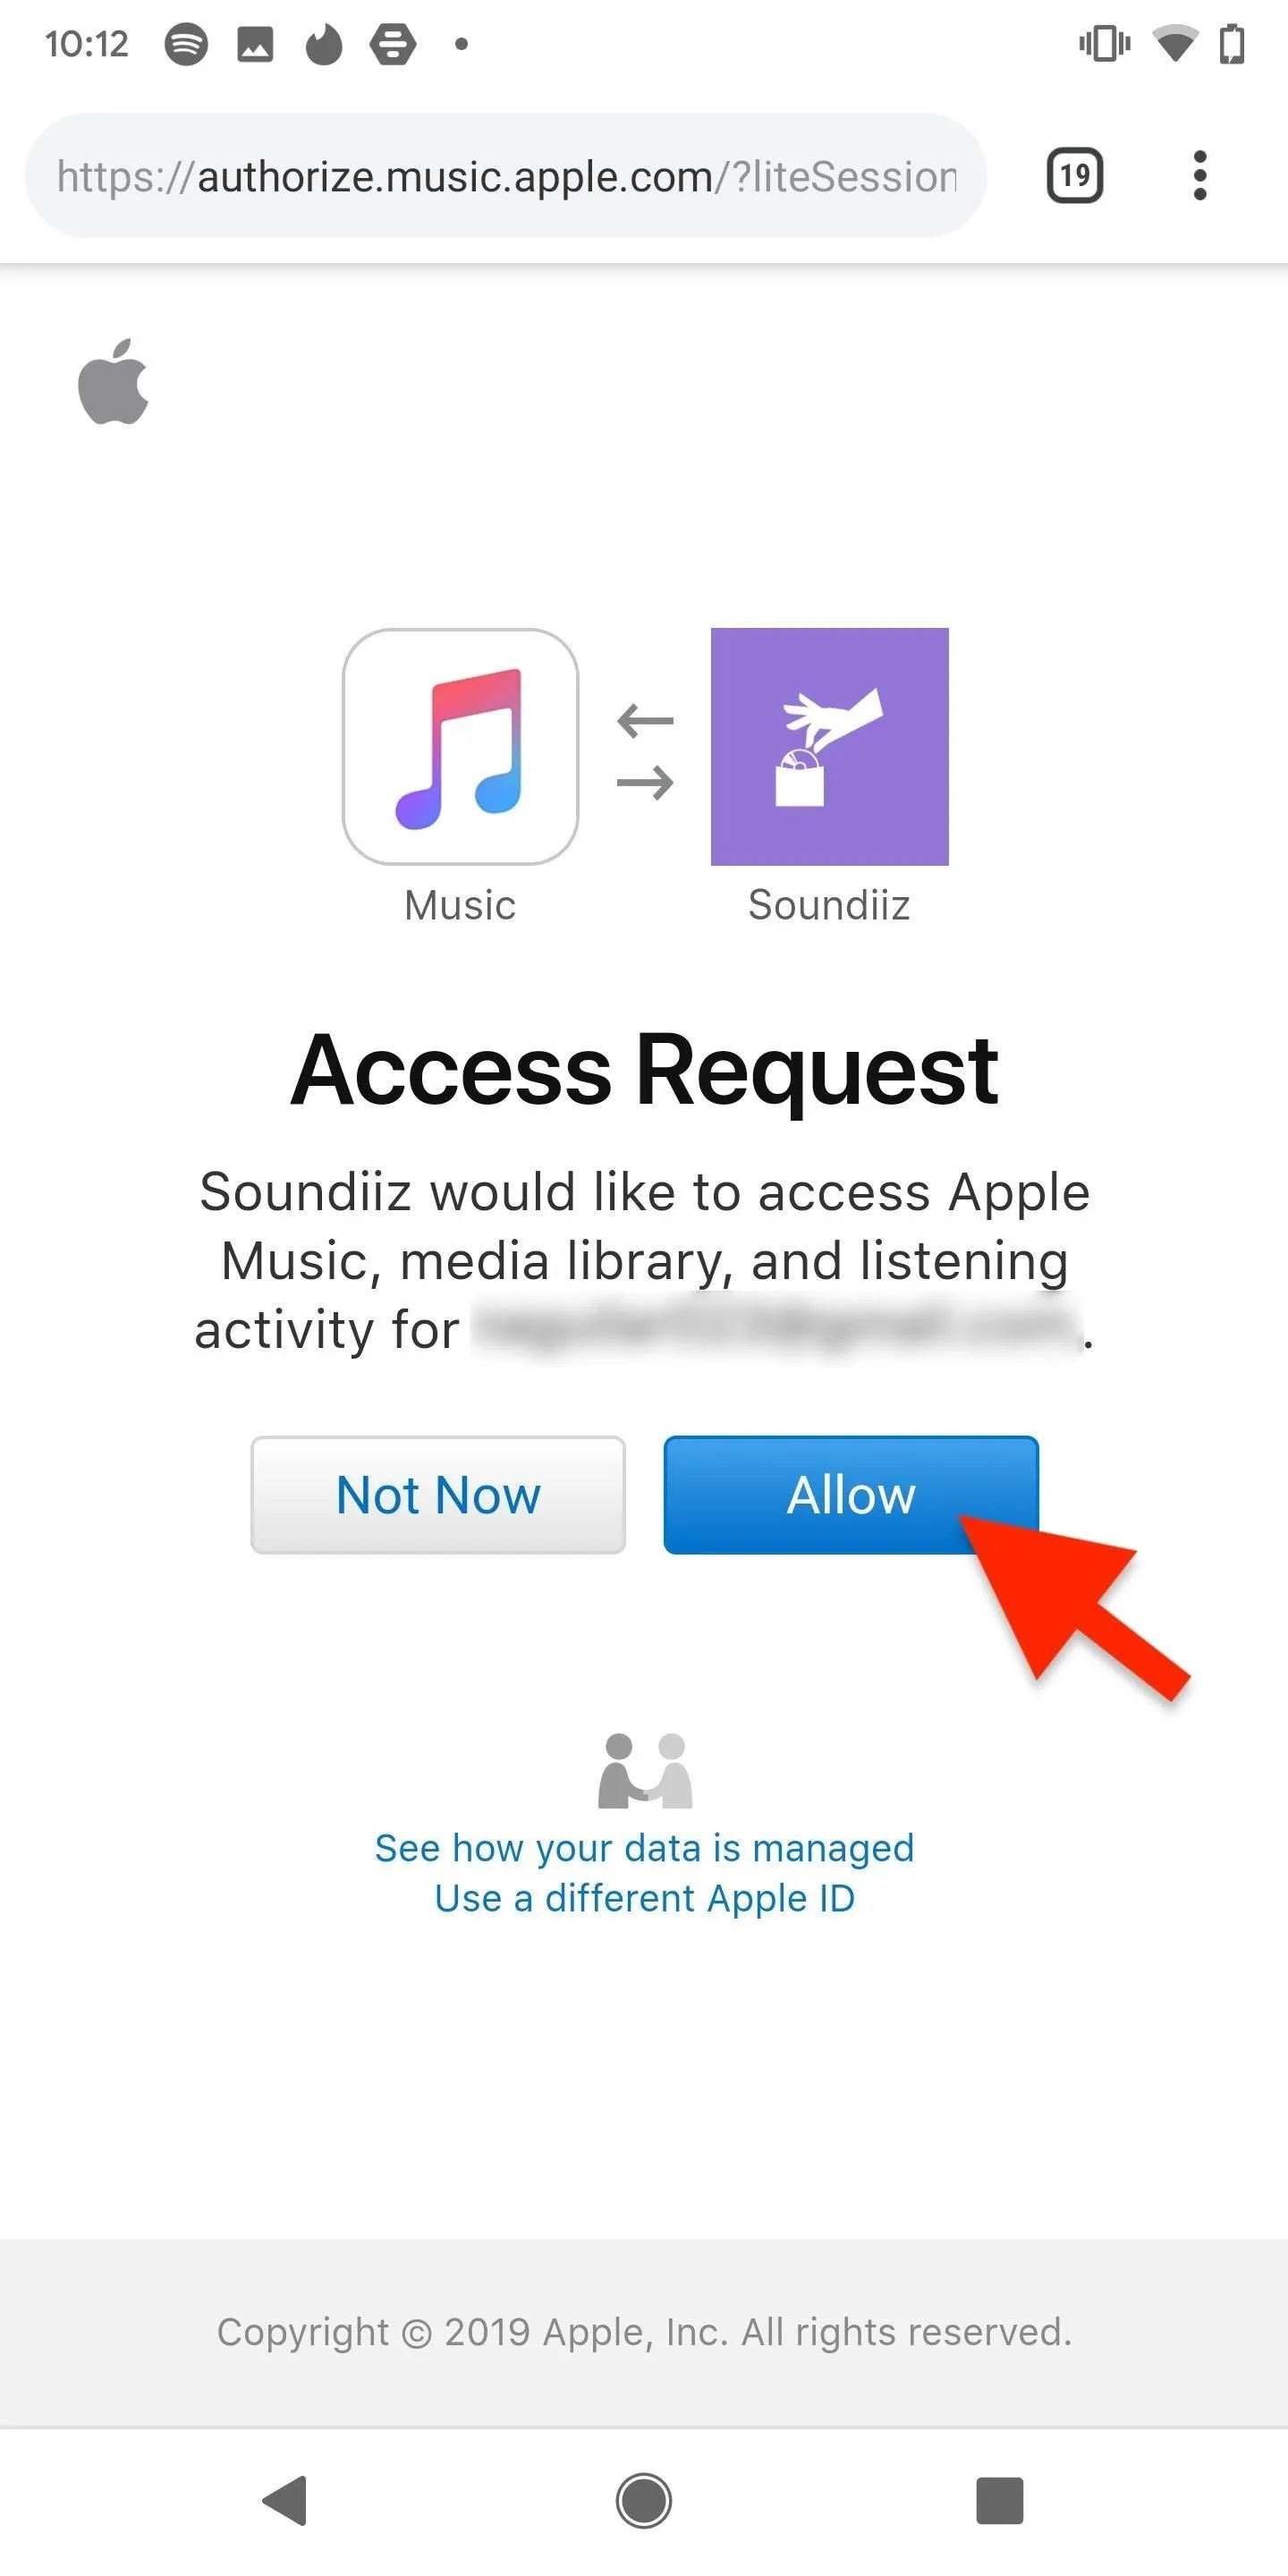
Now, you must connect your Apple Music account to Soundiiz so that the website has access to your playlists and can transfer them to Spotify. Tap on Apple Music's icon and sign in to your account; If you have two-factor authentication enabled, you must enter the code that is sent to your phone. Next, tap on "Allow," and all your Apple Music playlists will appear in Soundiiz.

Choose an Apple Music Playlist to Transfer
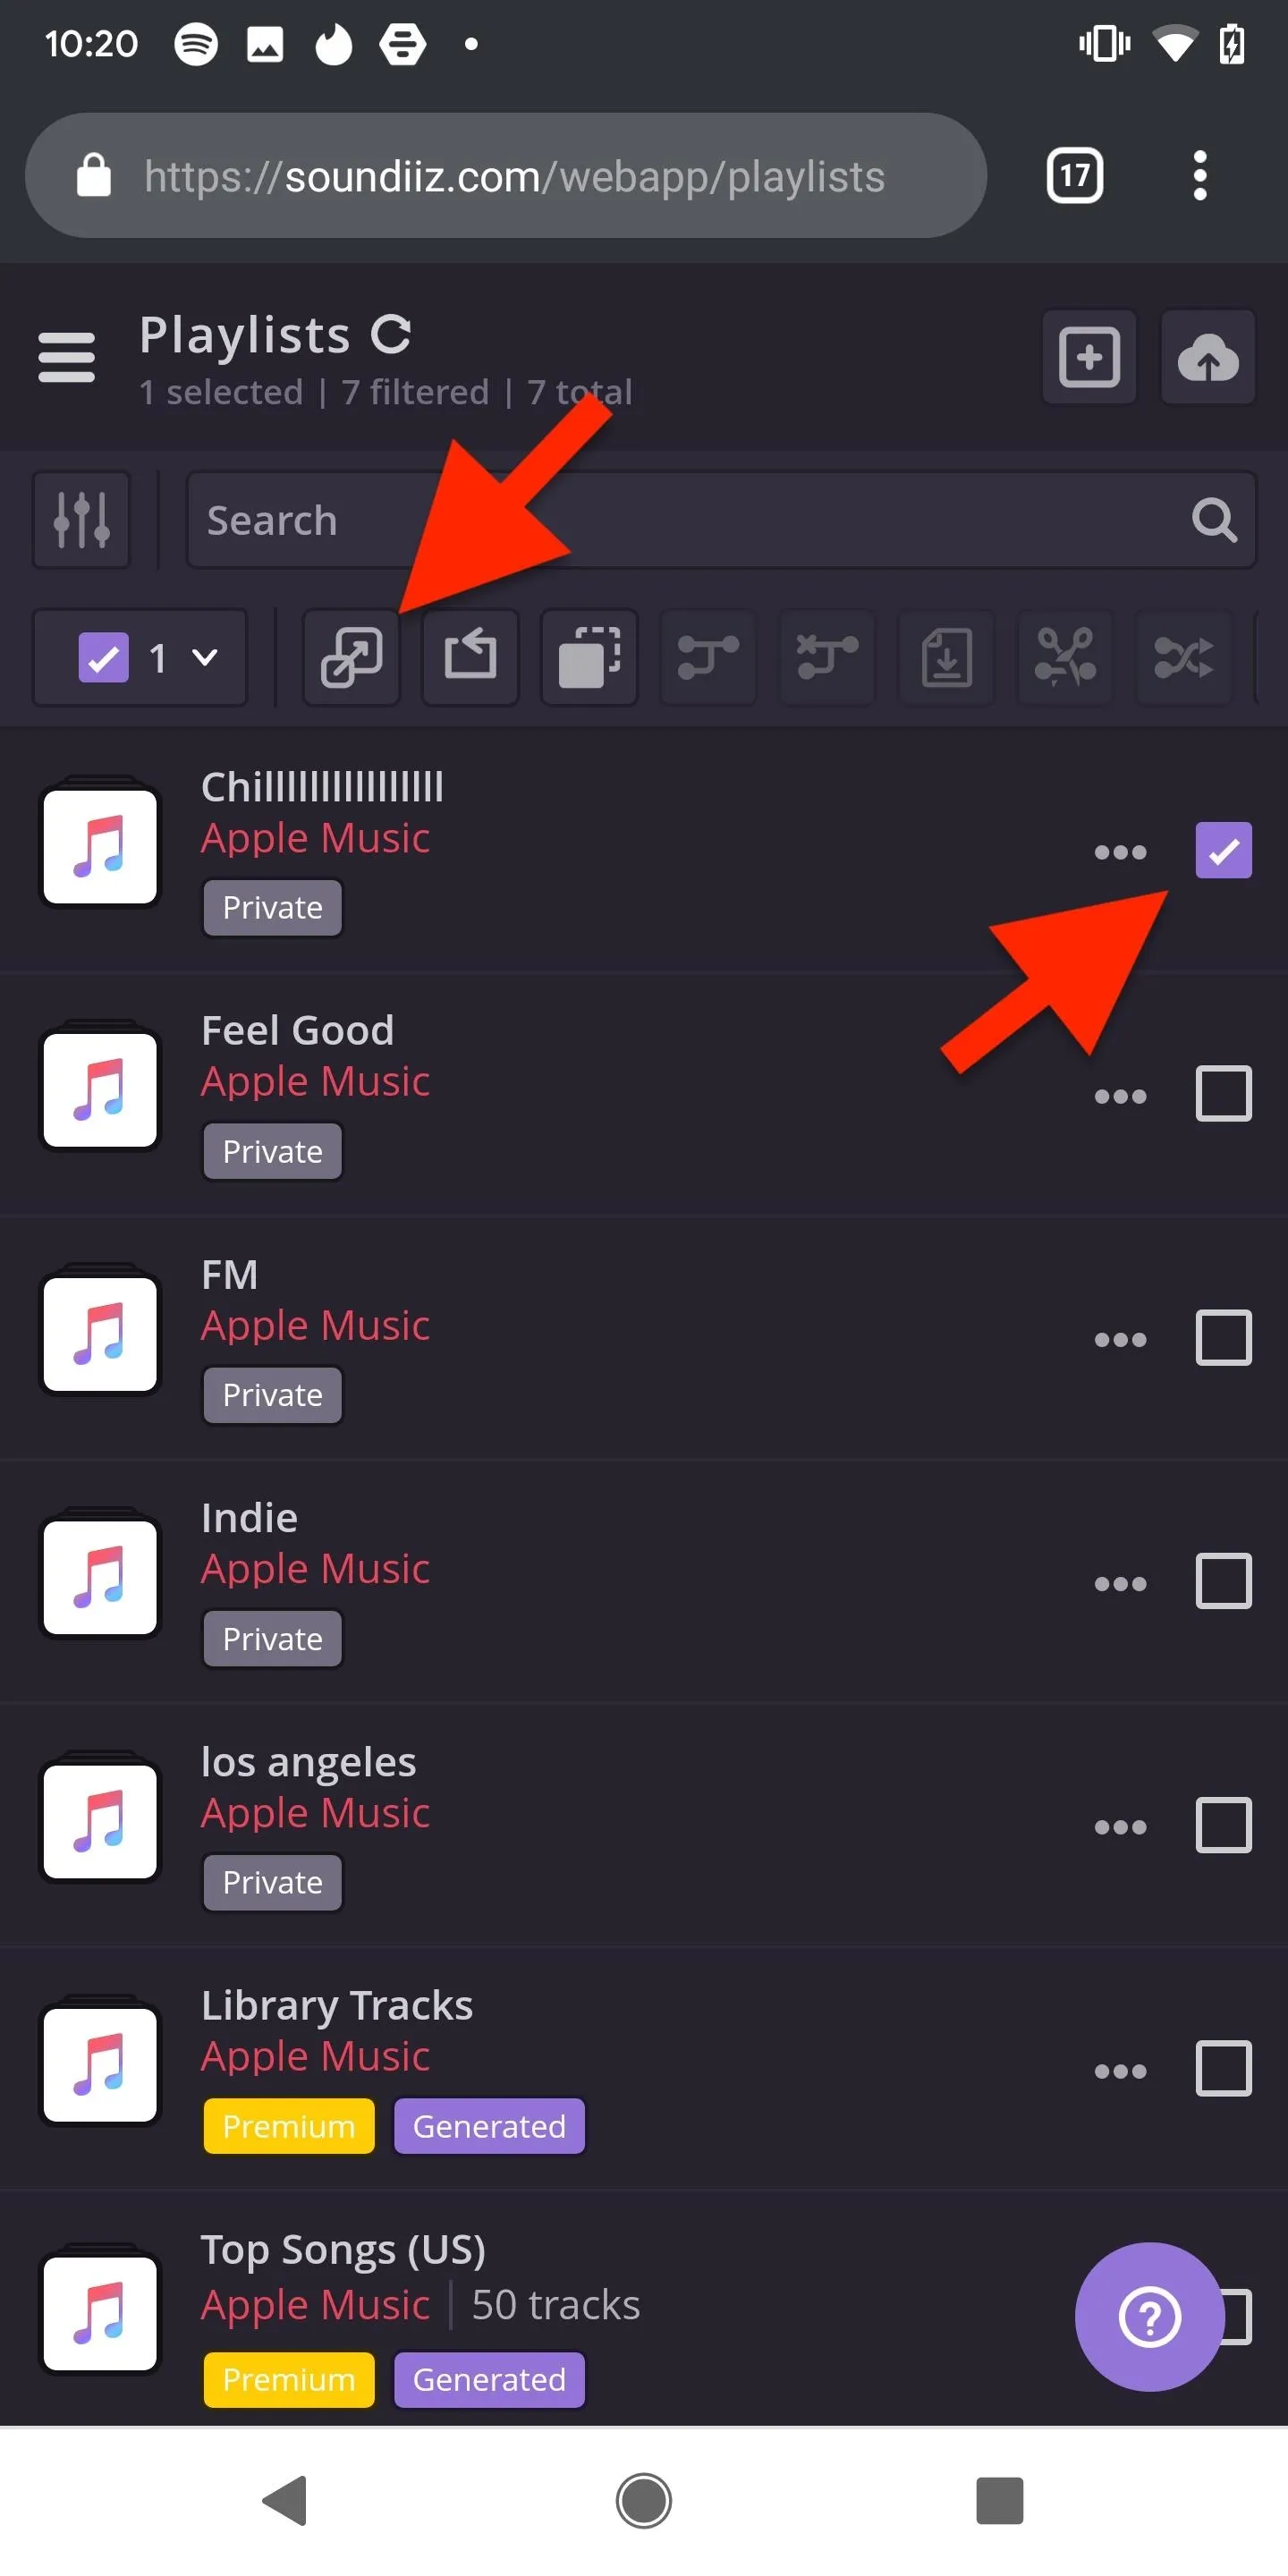
Check the box next to the Apple Music playlist you want to transfer, and then tap on the convert icon (the small square pointing an arrow toward a bigger square). Note that the pro version ($4.50 per month) allows you to to transfer playlists with more than 100 songs and also transfer more than one playlist at a time.
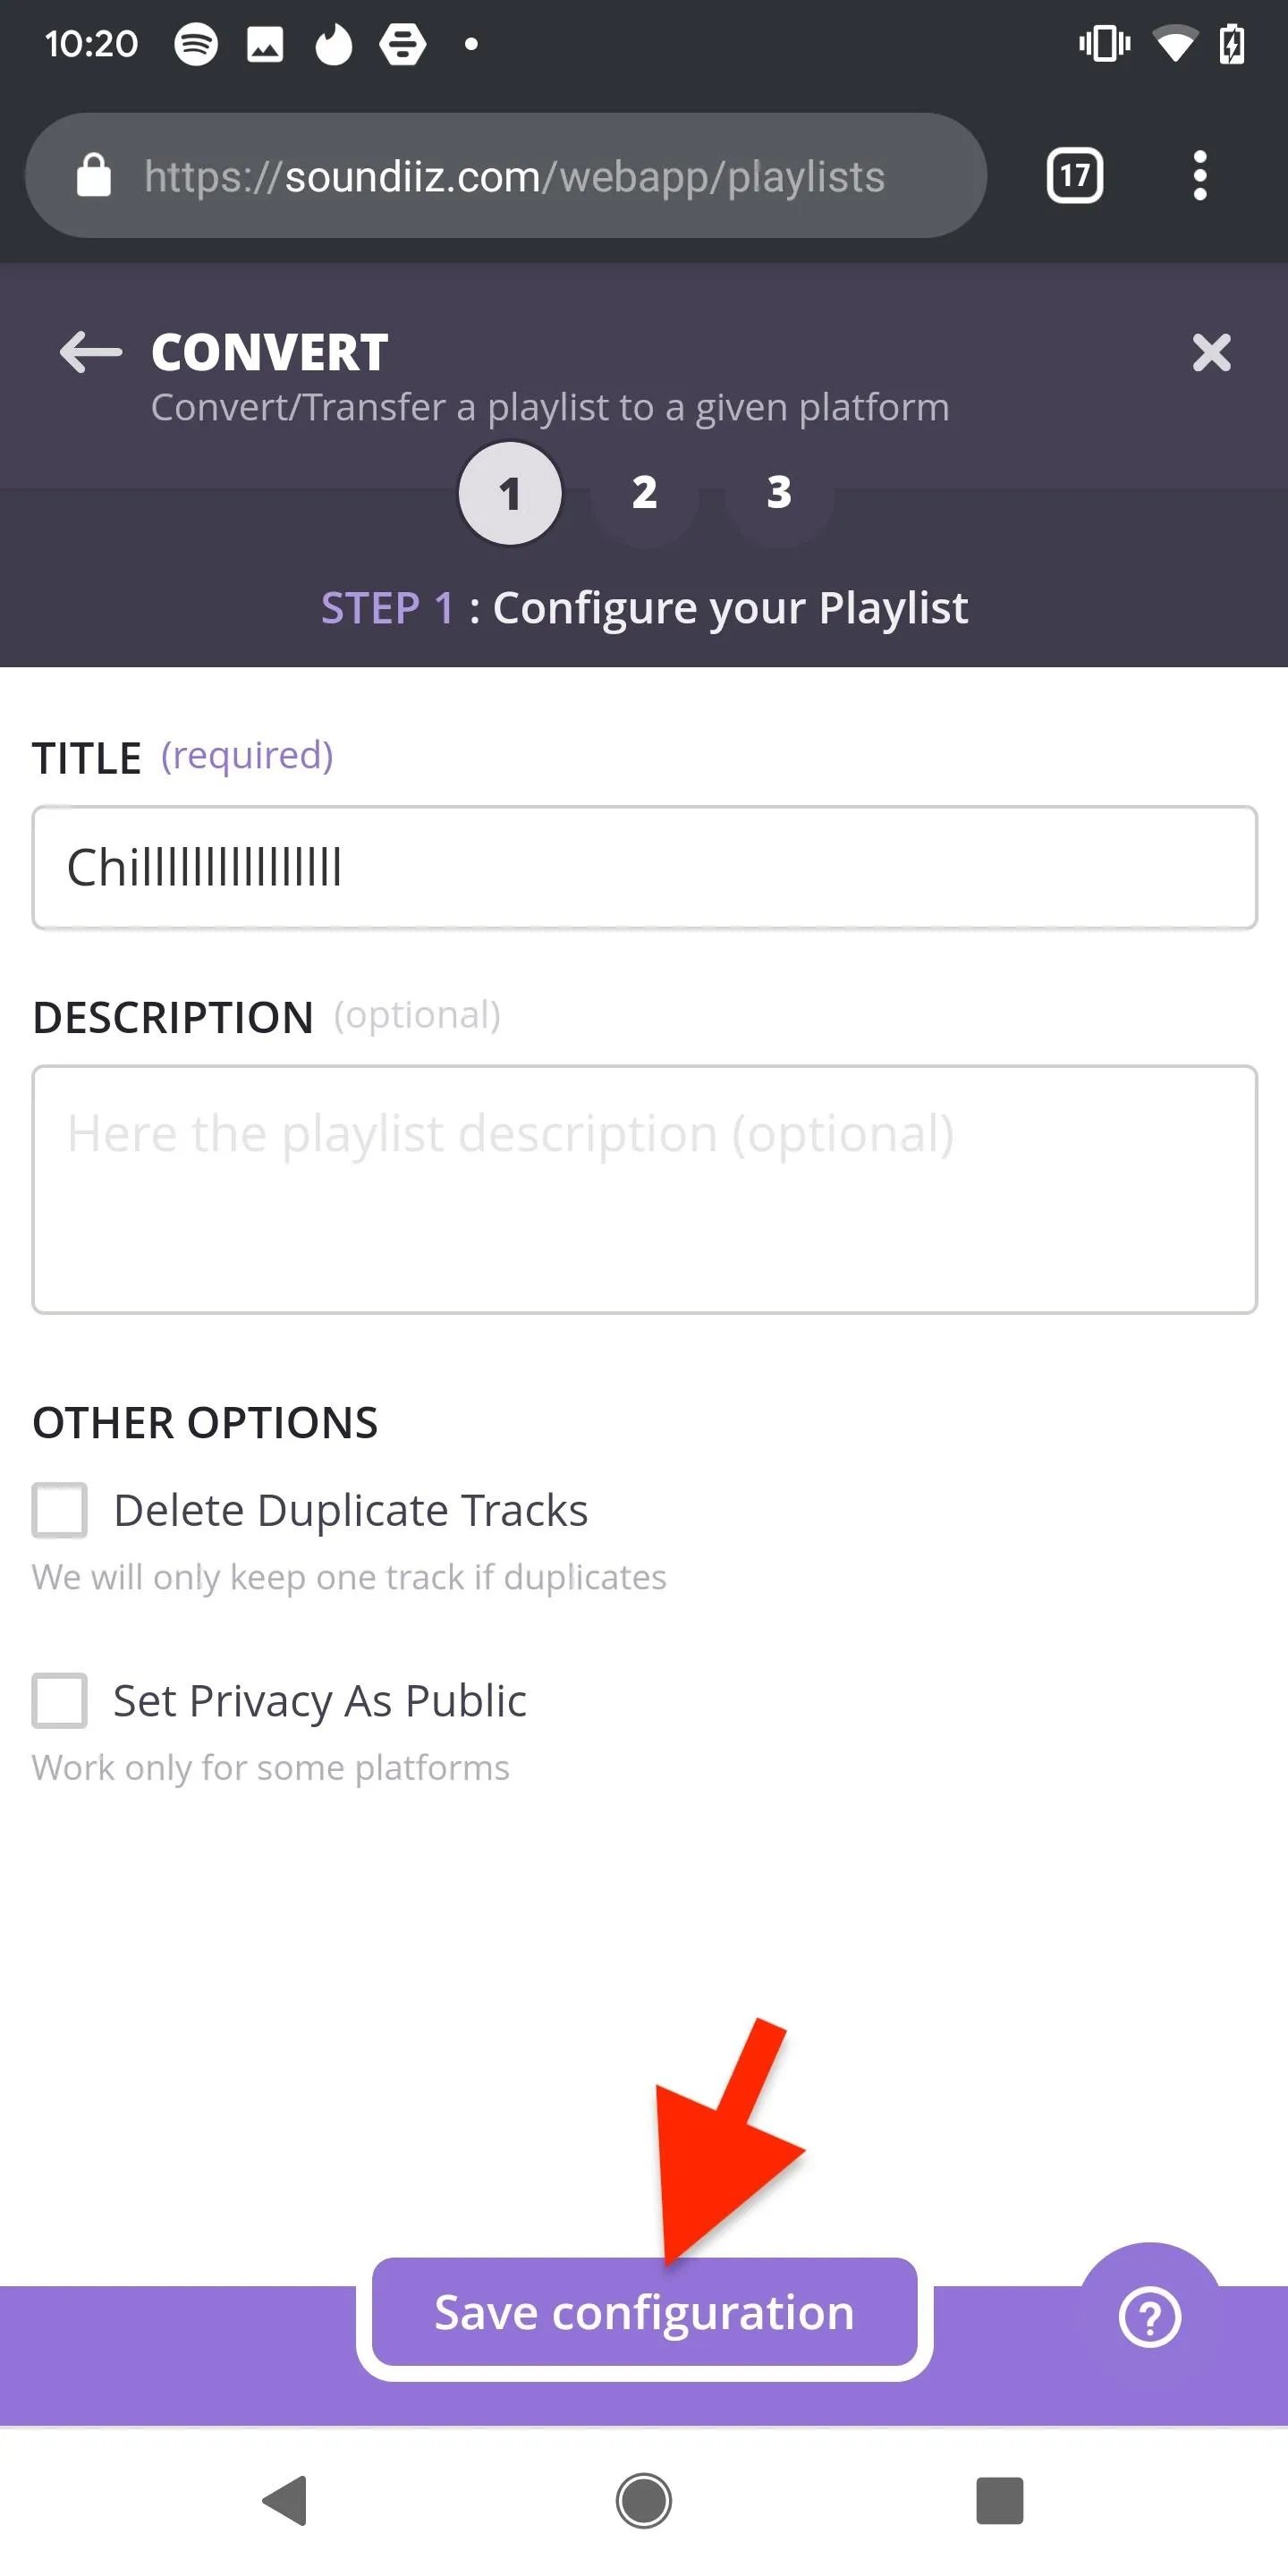
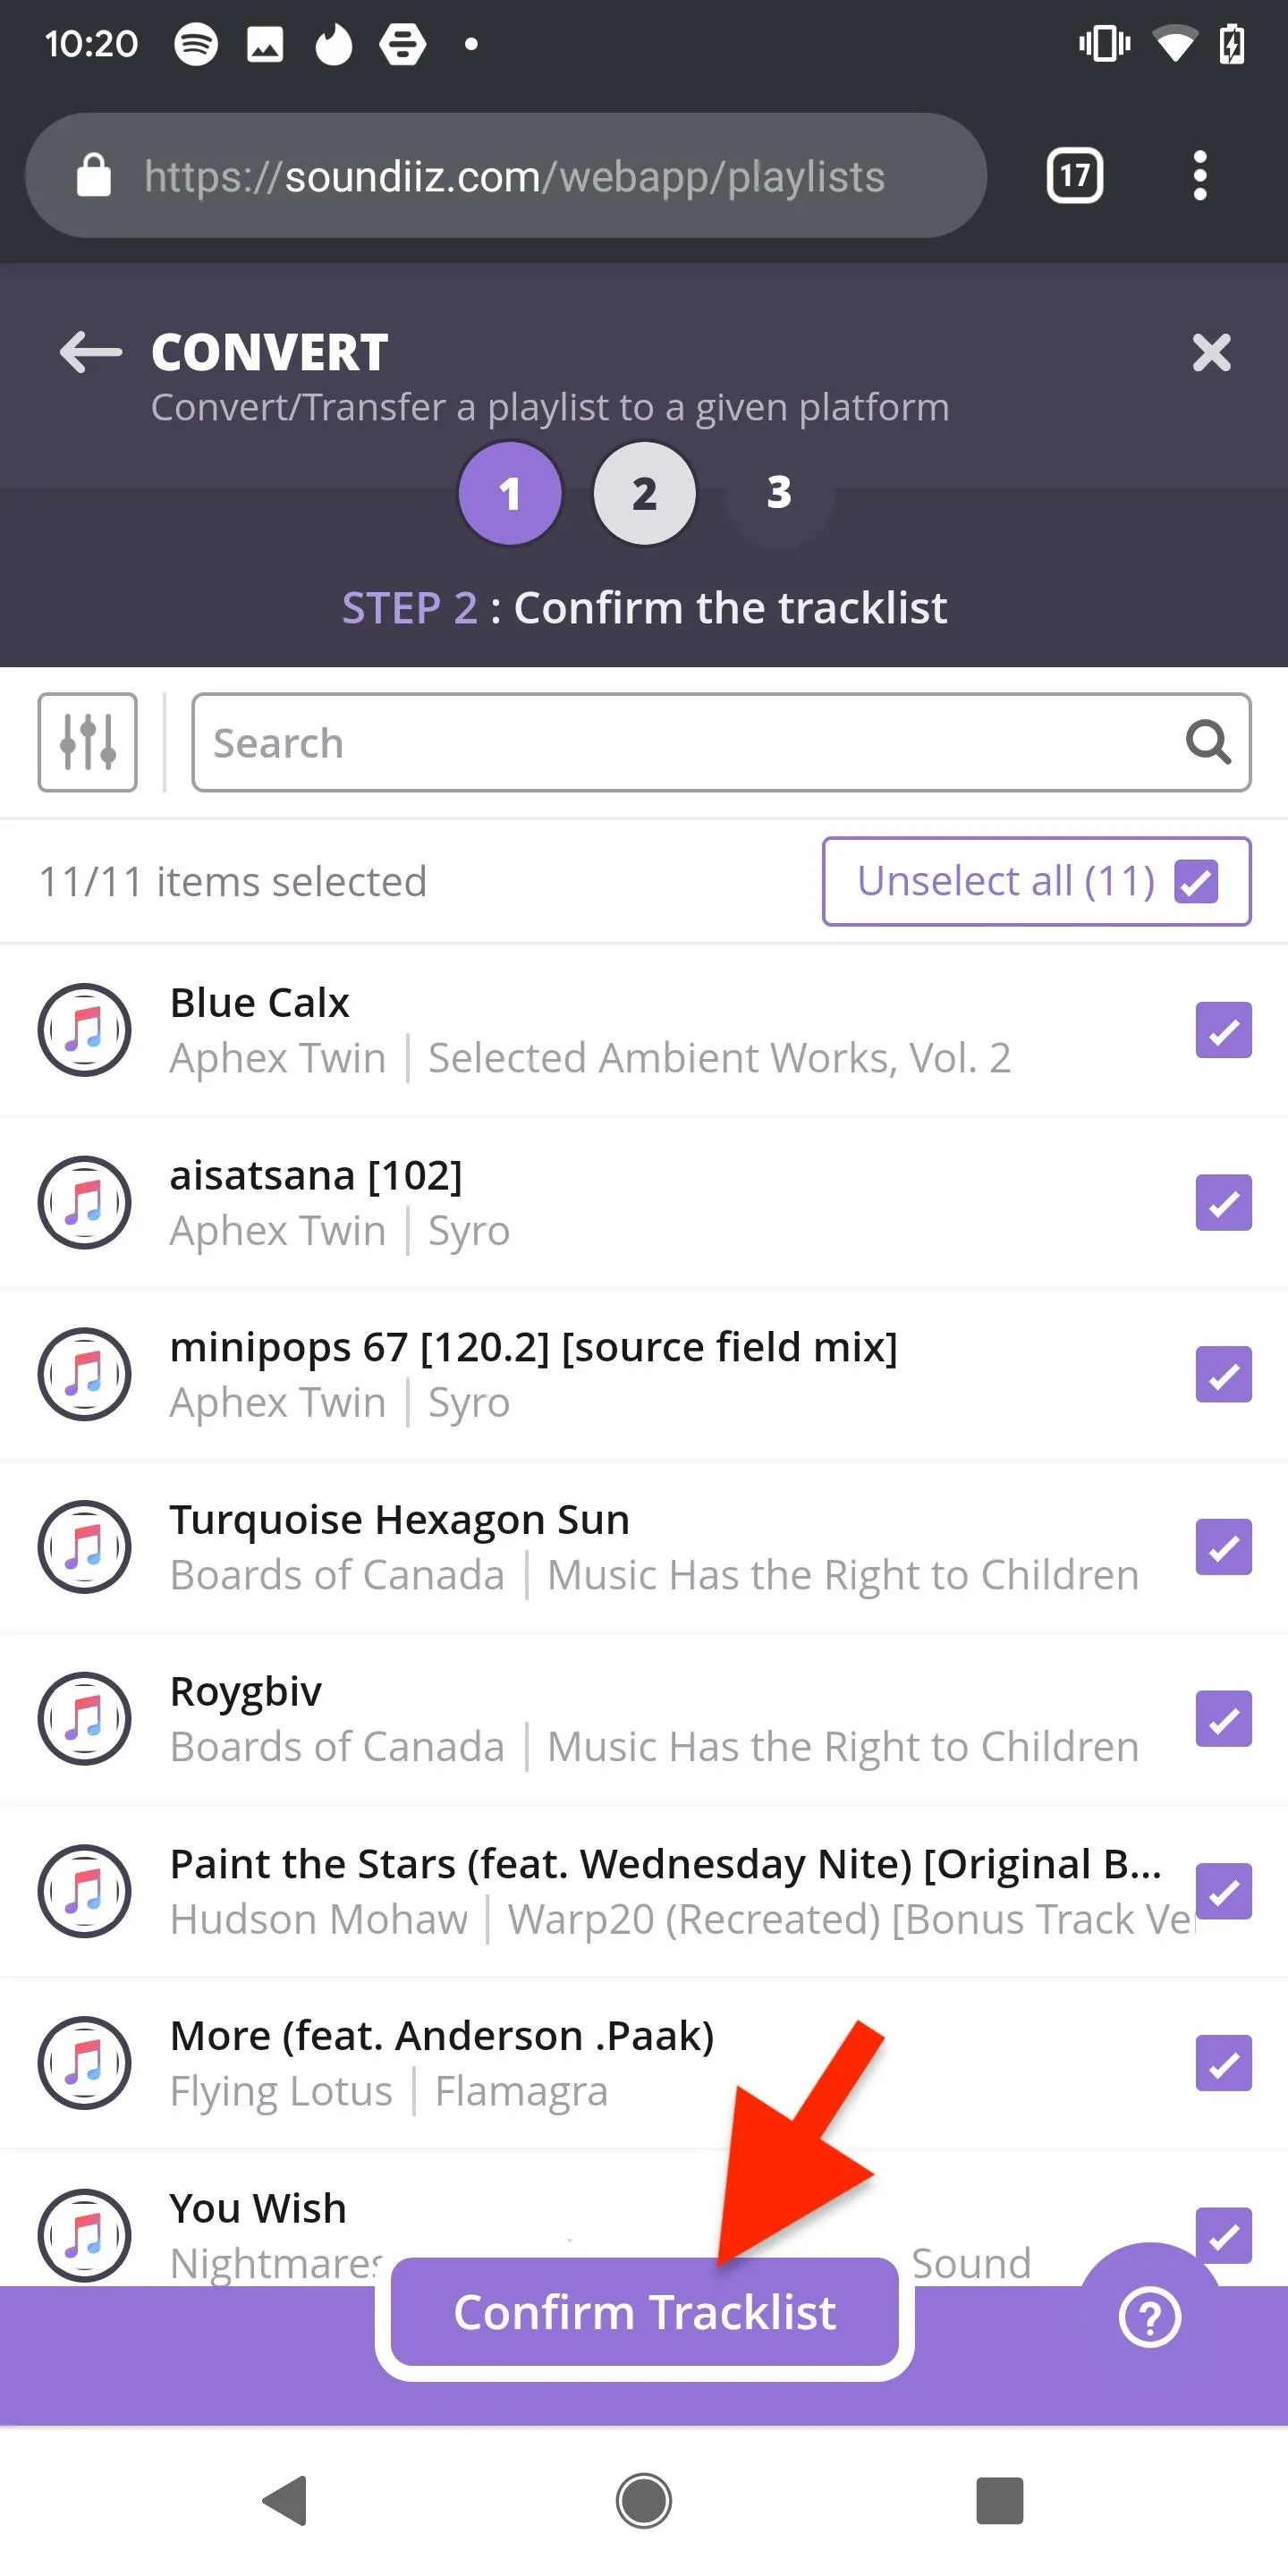
You'll be taken to a new page, where you can change the name of the playlist, enter a description, get rid of multiple tracks, and make the playlist public or private (only works with specific services). Tap on "Save configuration" to move on. On the next page, check through the playlist and make sure the songs are correct; If not, deselect any tracks to delete them from the playlist. Hit "Confirm Tracklist" when finished.
Connect Spotify & Transfer the Playlist
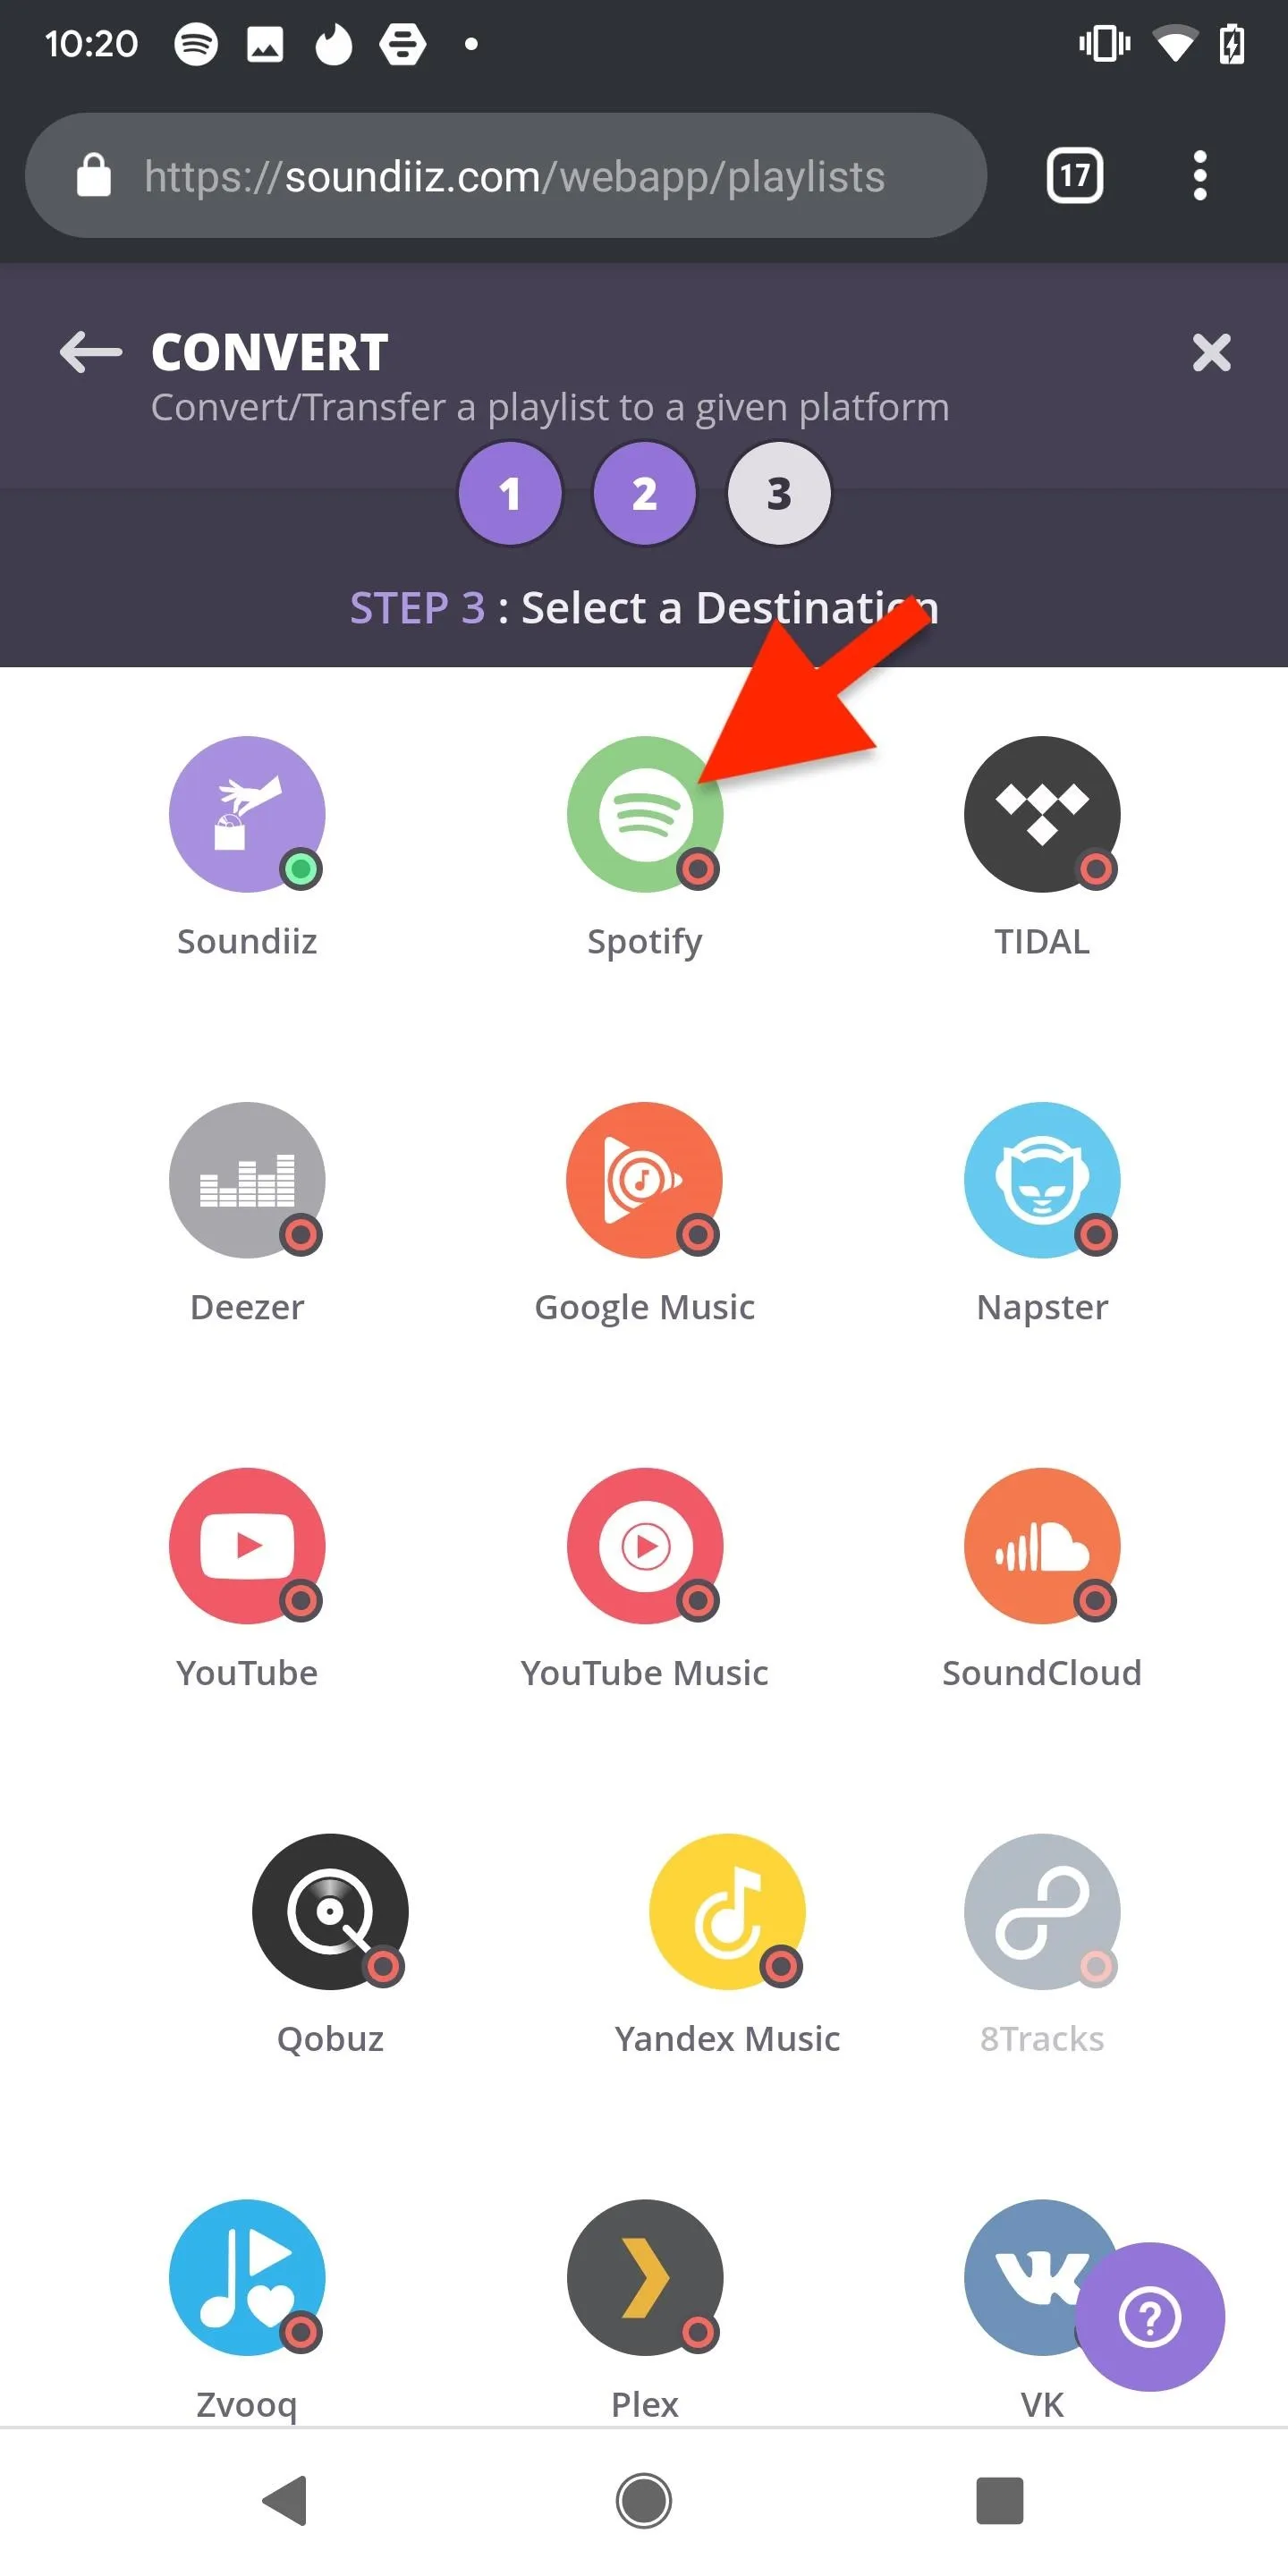
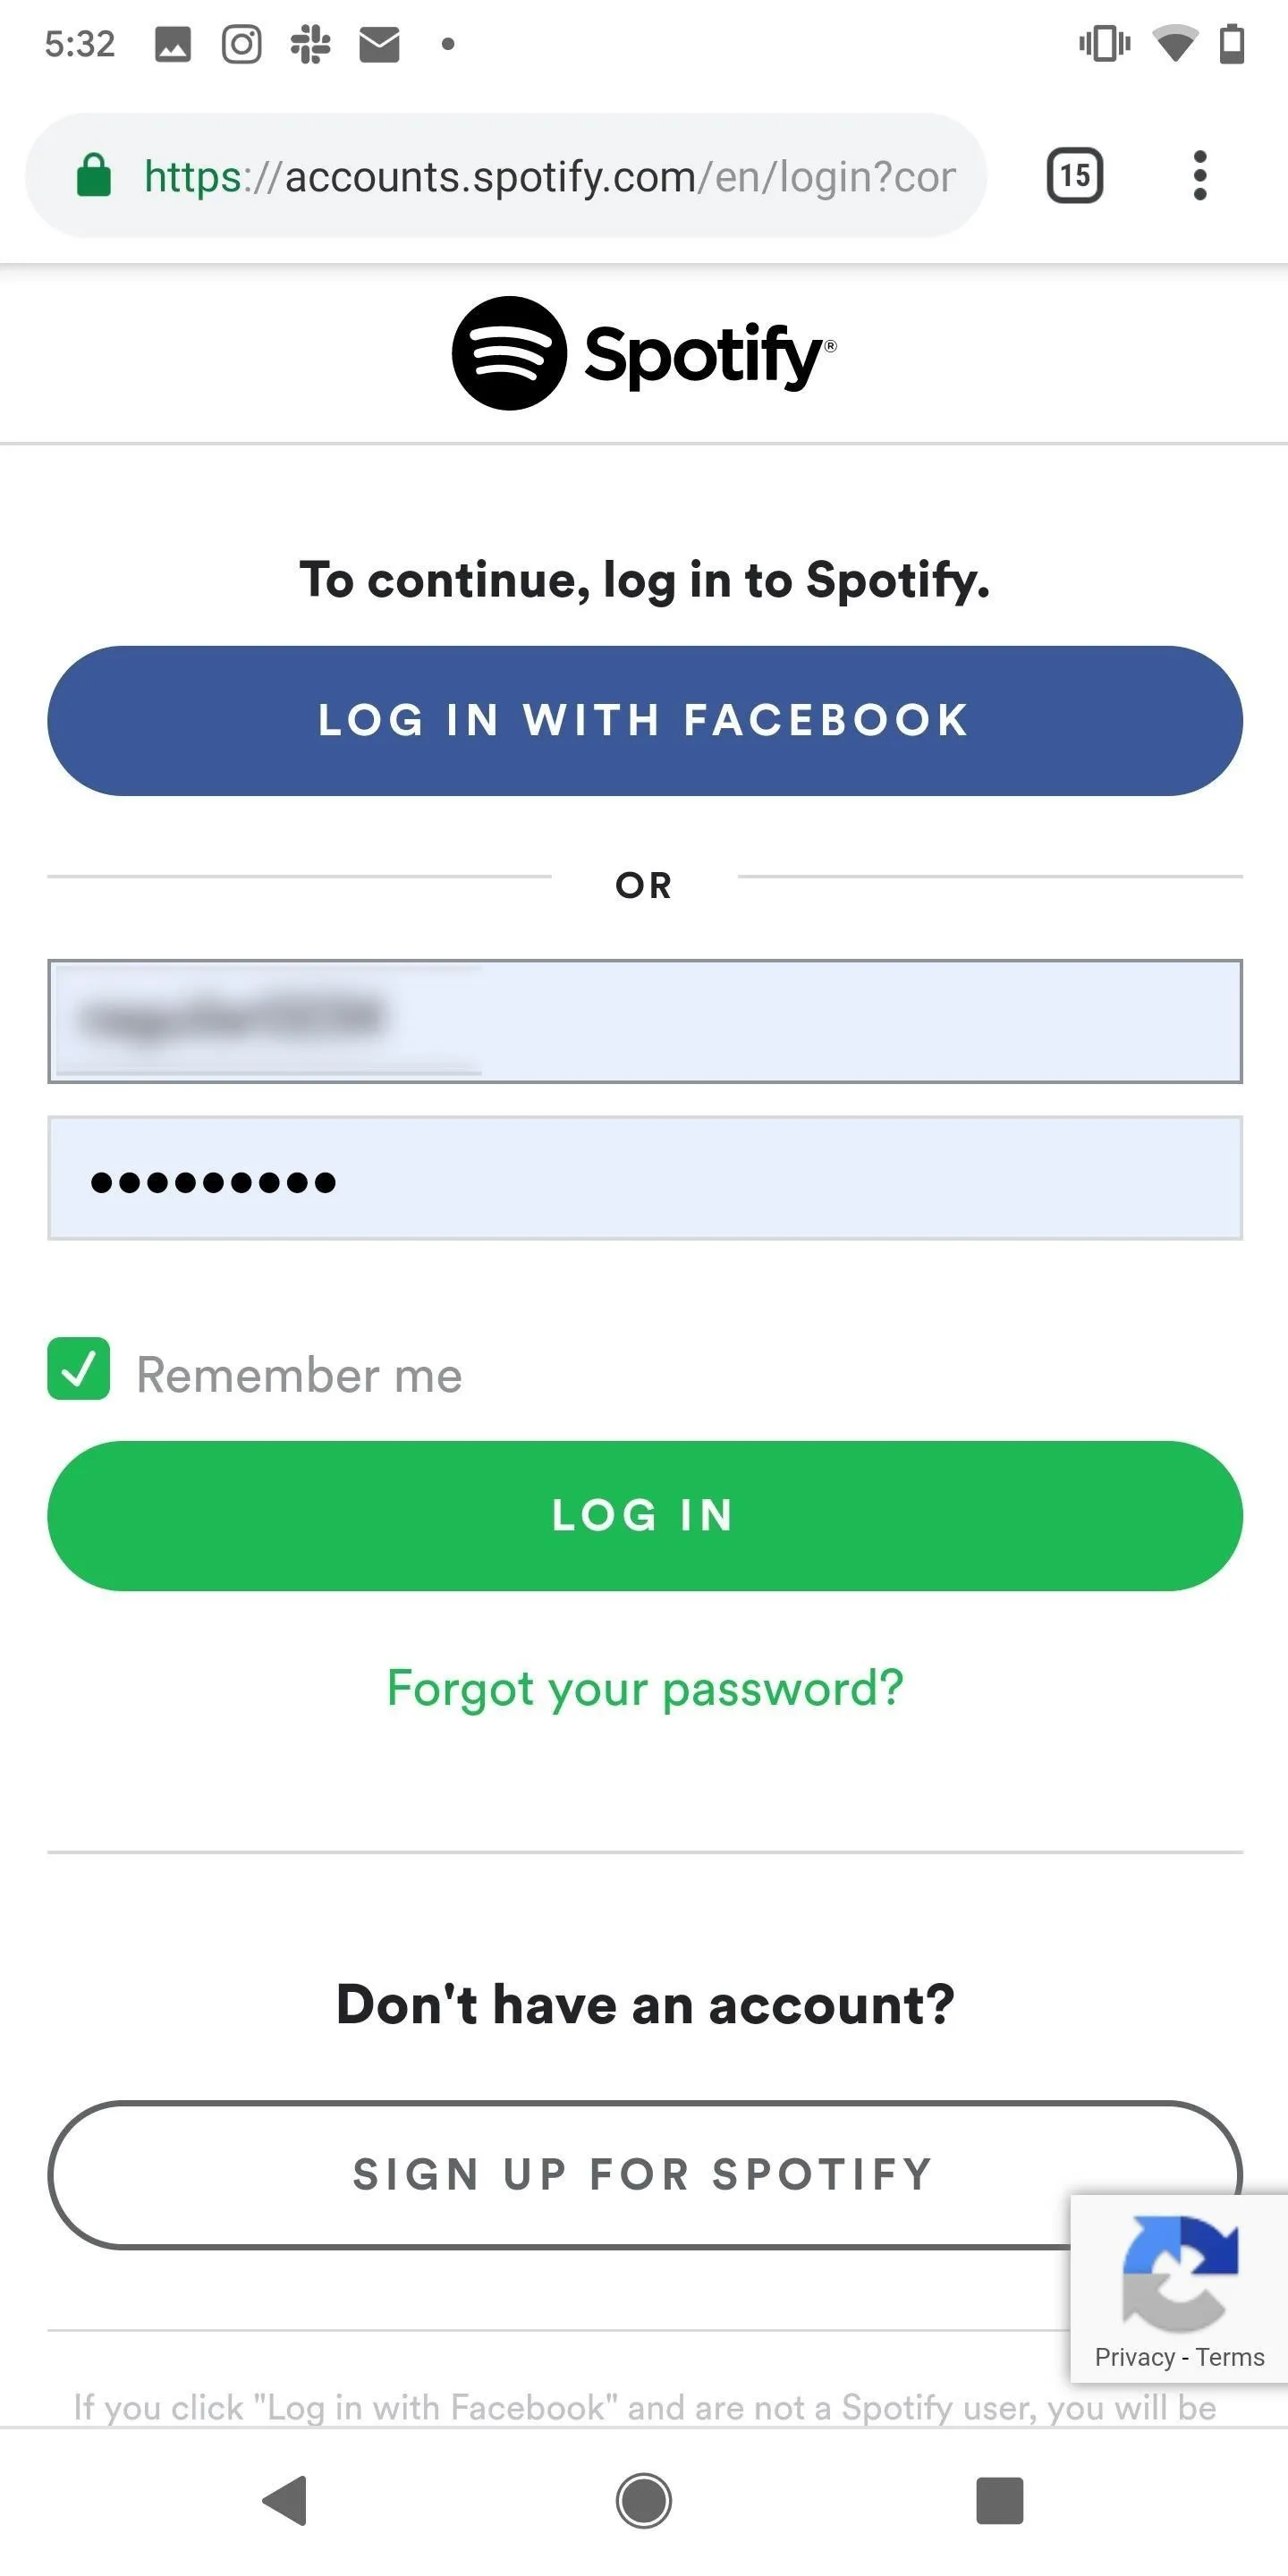
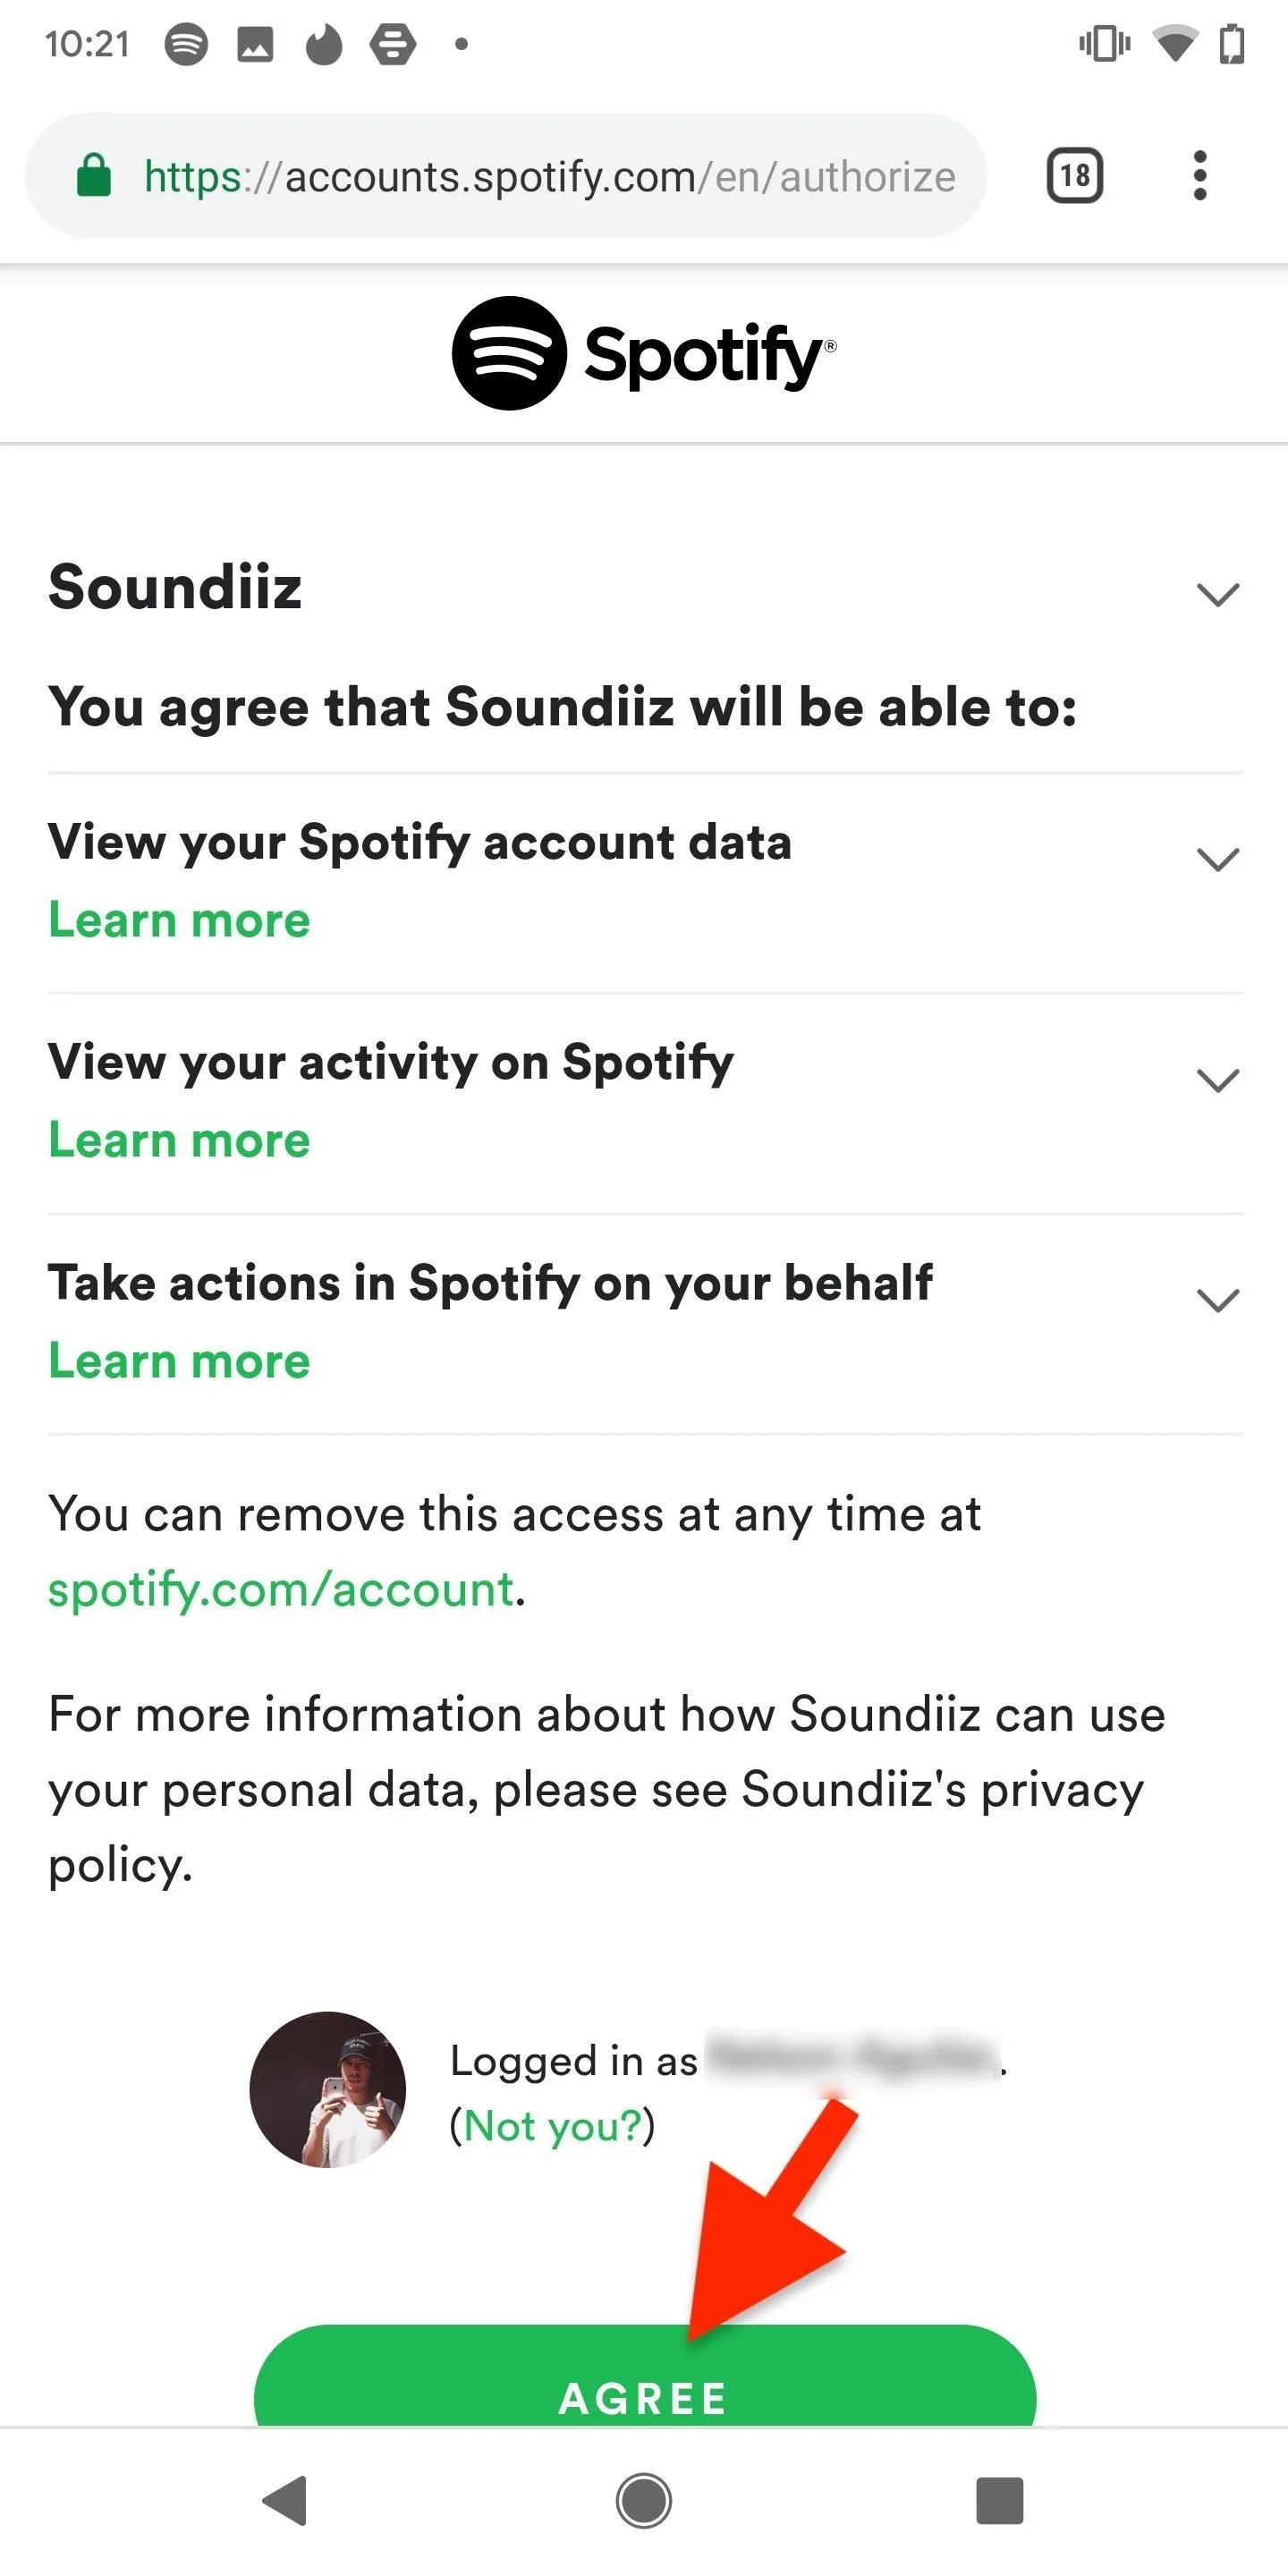
Now tap on the Spotify icon and log in to your account. Hit "Agree," and your playlist will begin to transfer over.
Check Out Transferred Playlist (Optional)
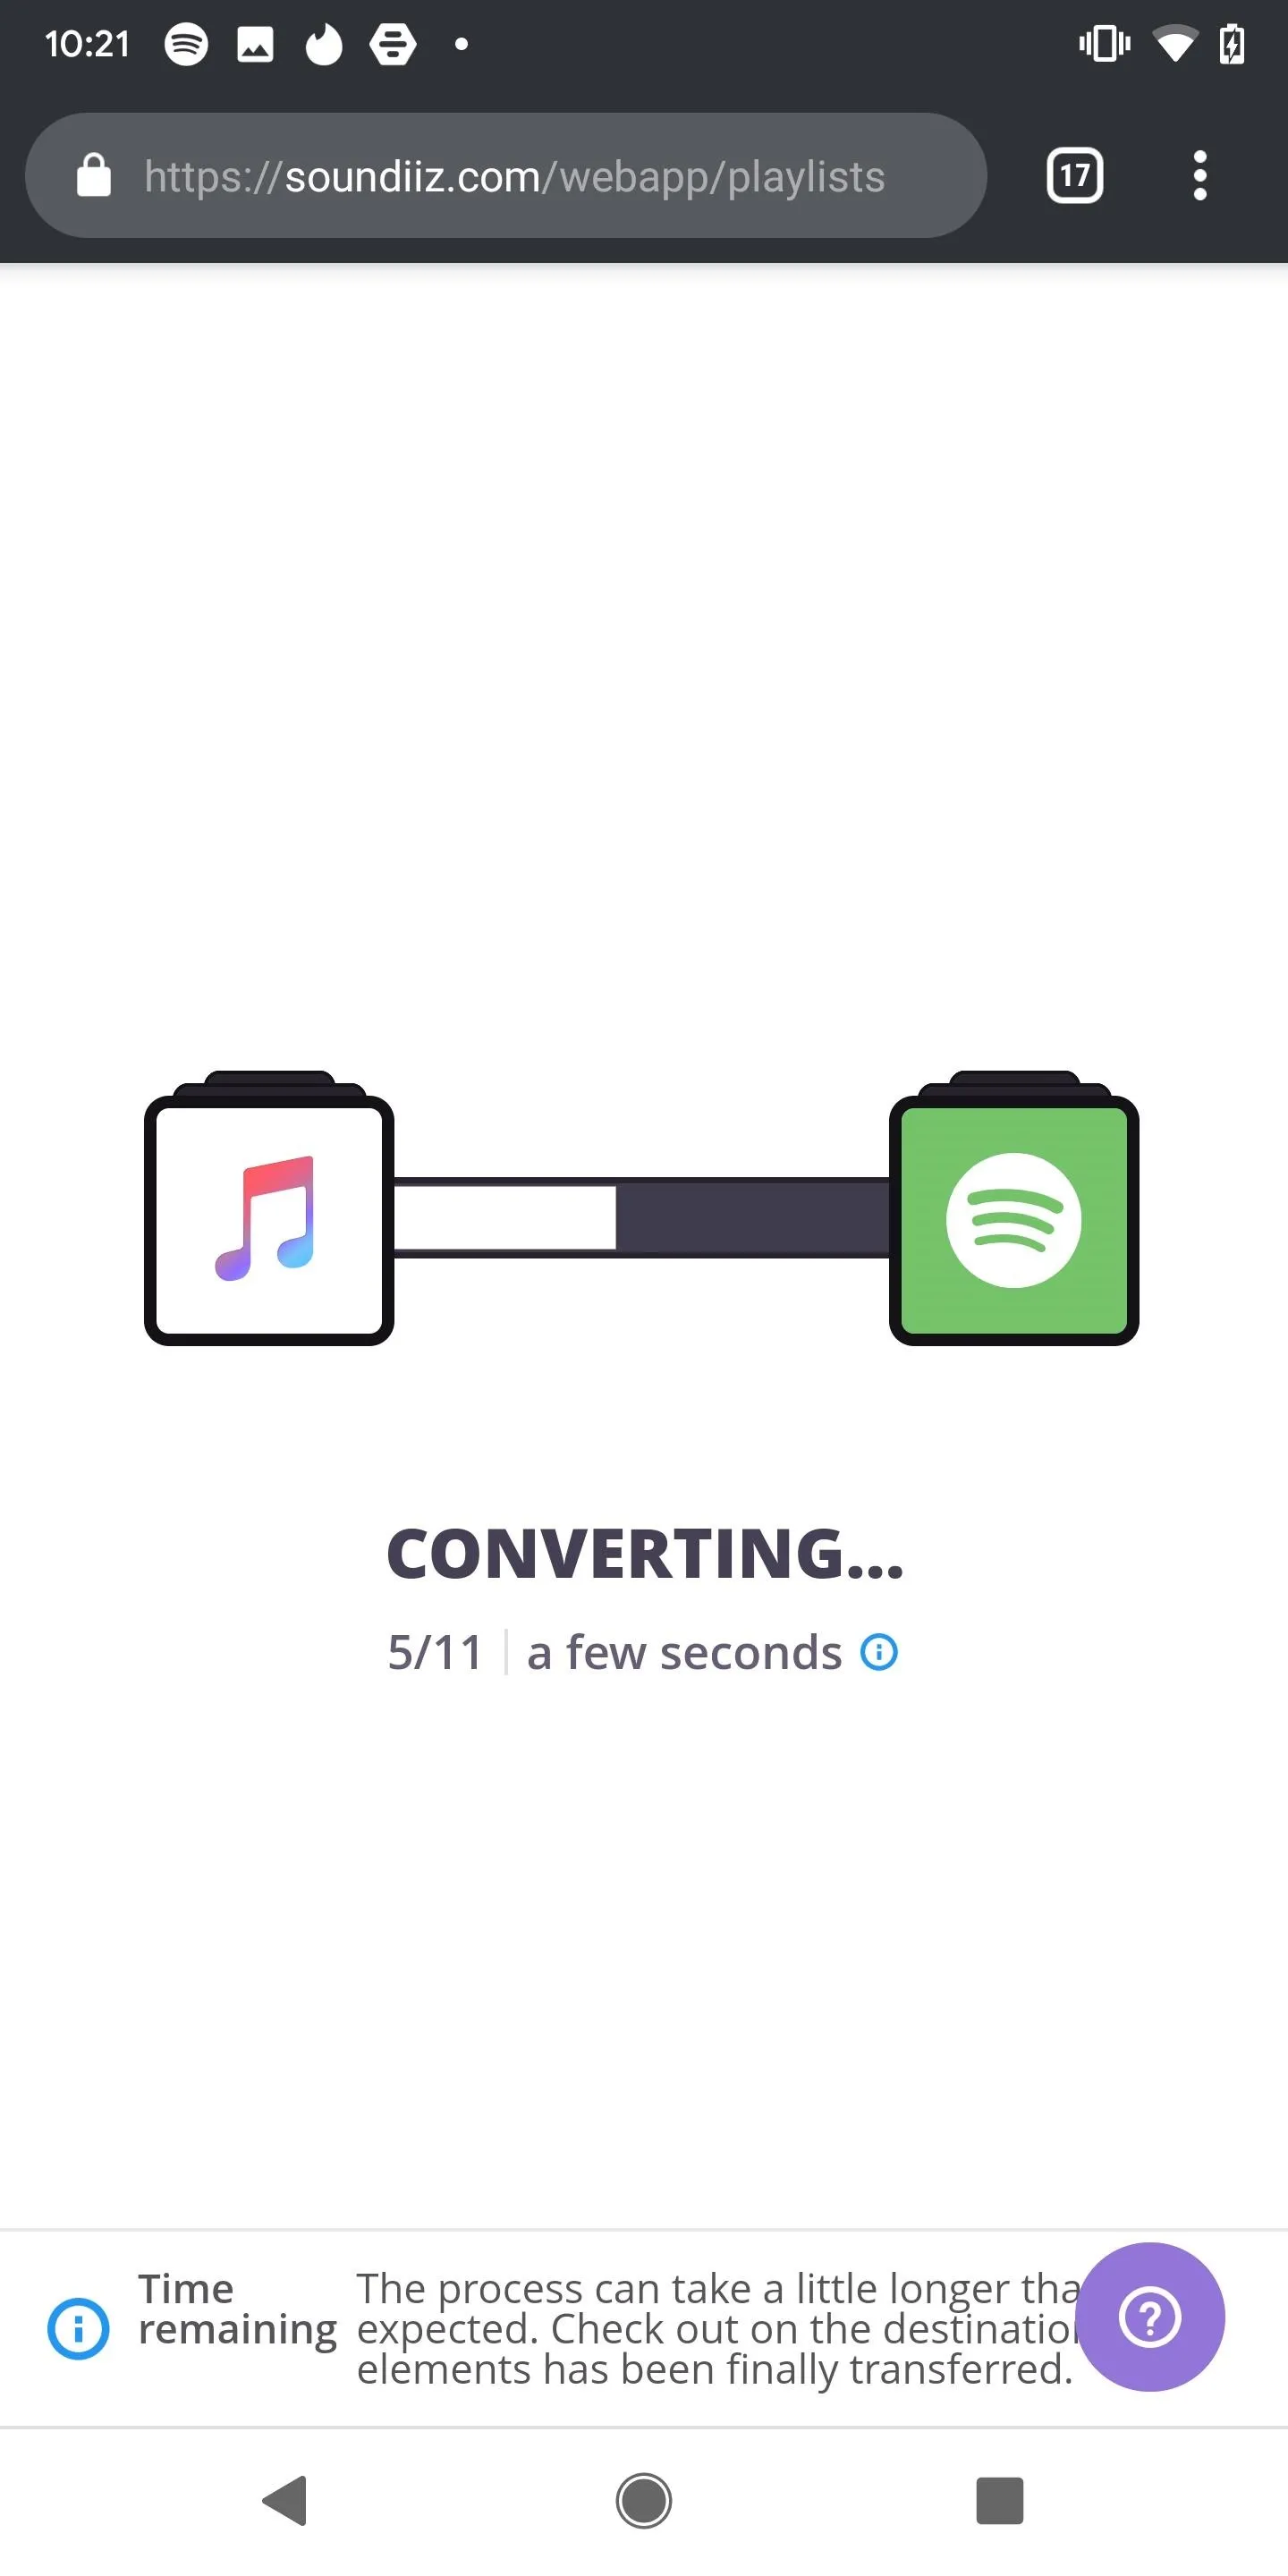
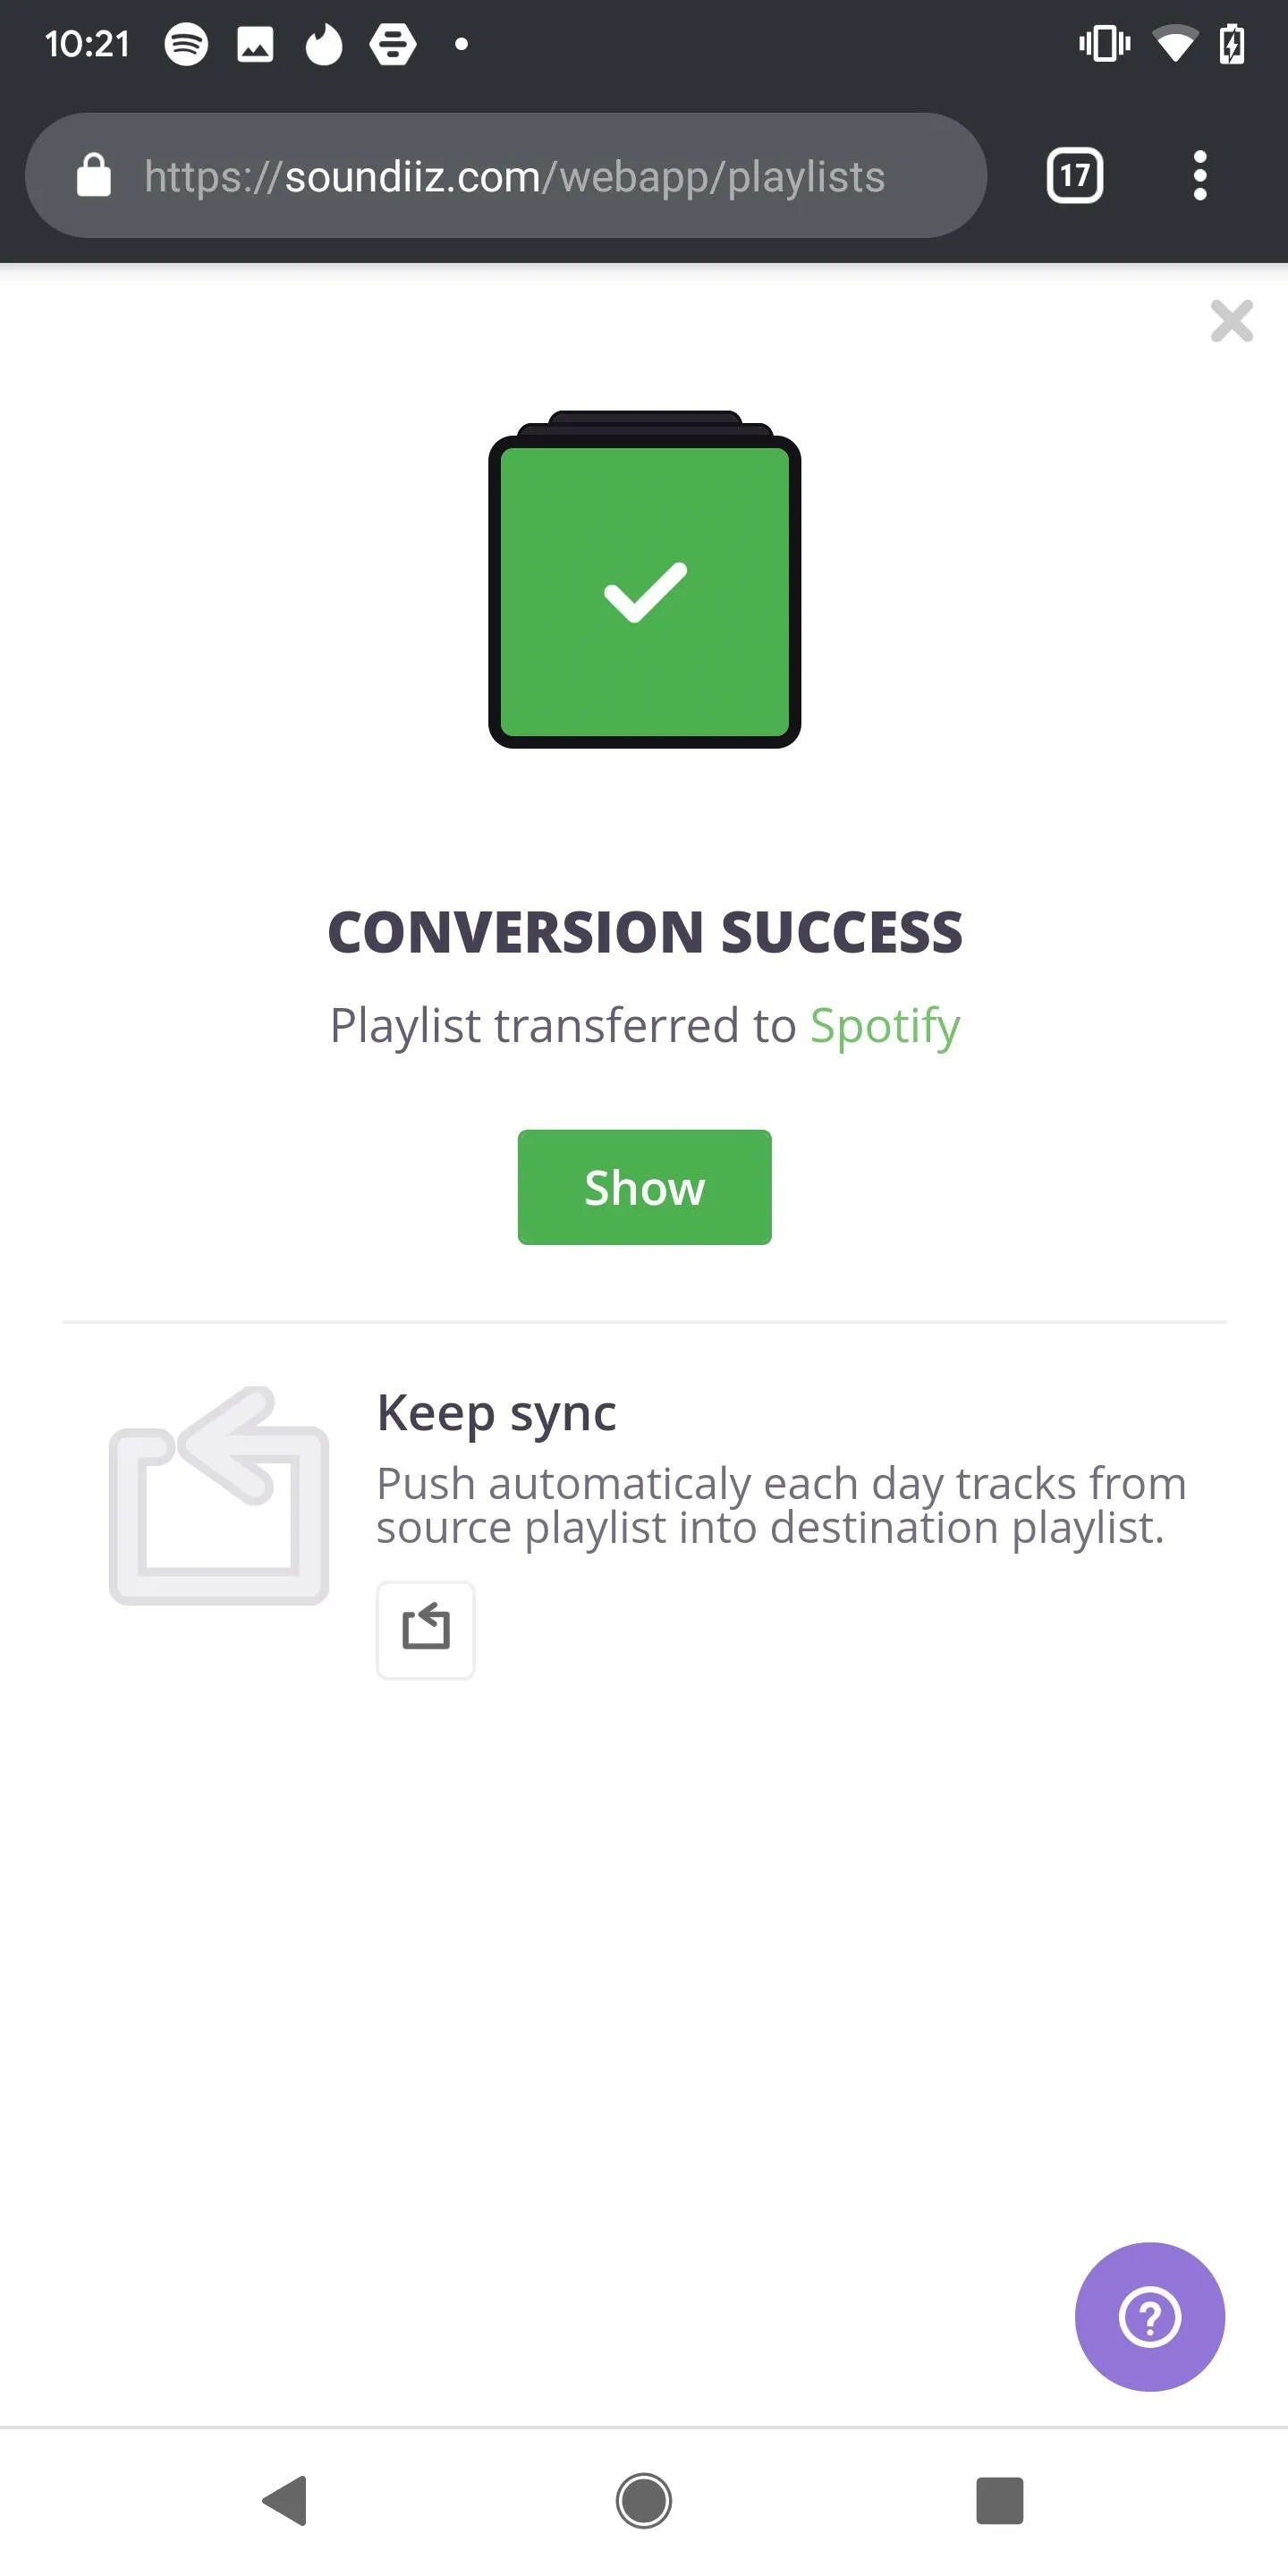
The transfer process can take a few seconds or about a minute, depending on the length of the playlist. When finished, you can tap on "Show" to view the playlist inside of Soundiiz in case you want to make any changes to it. If you do edit the playlist, you'll need to resync it.
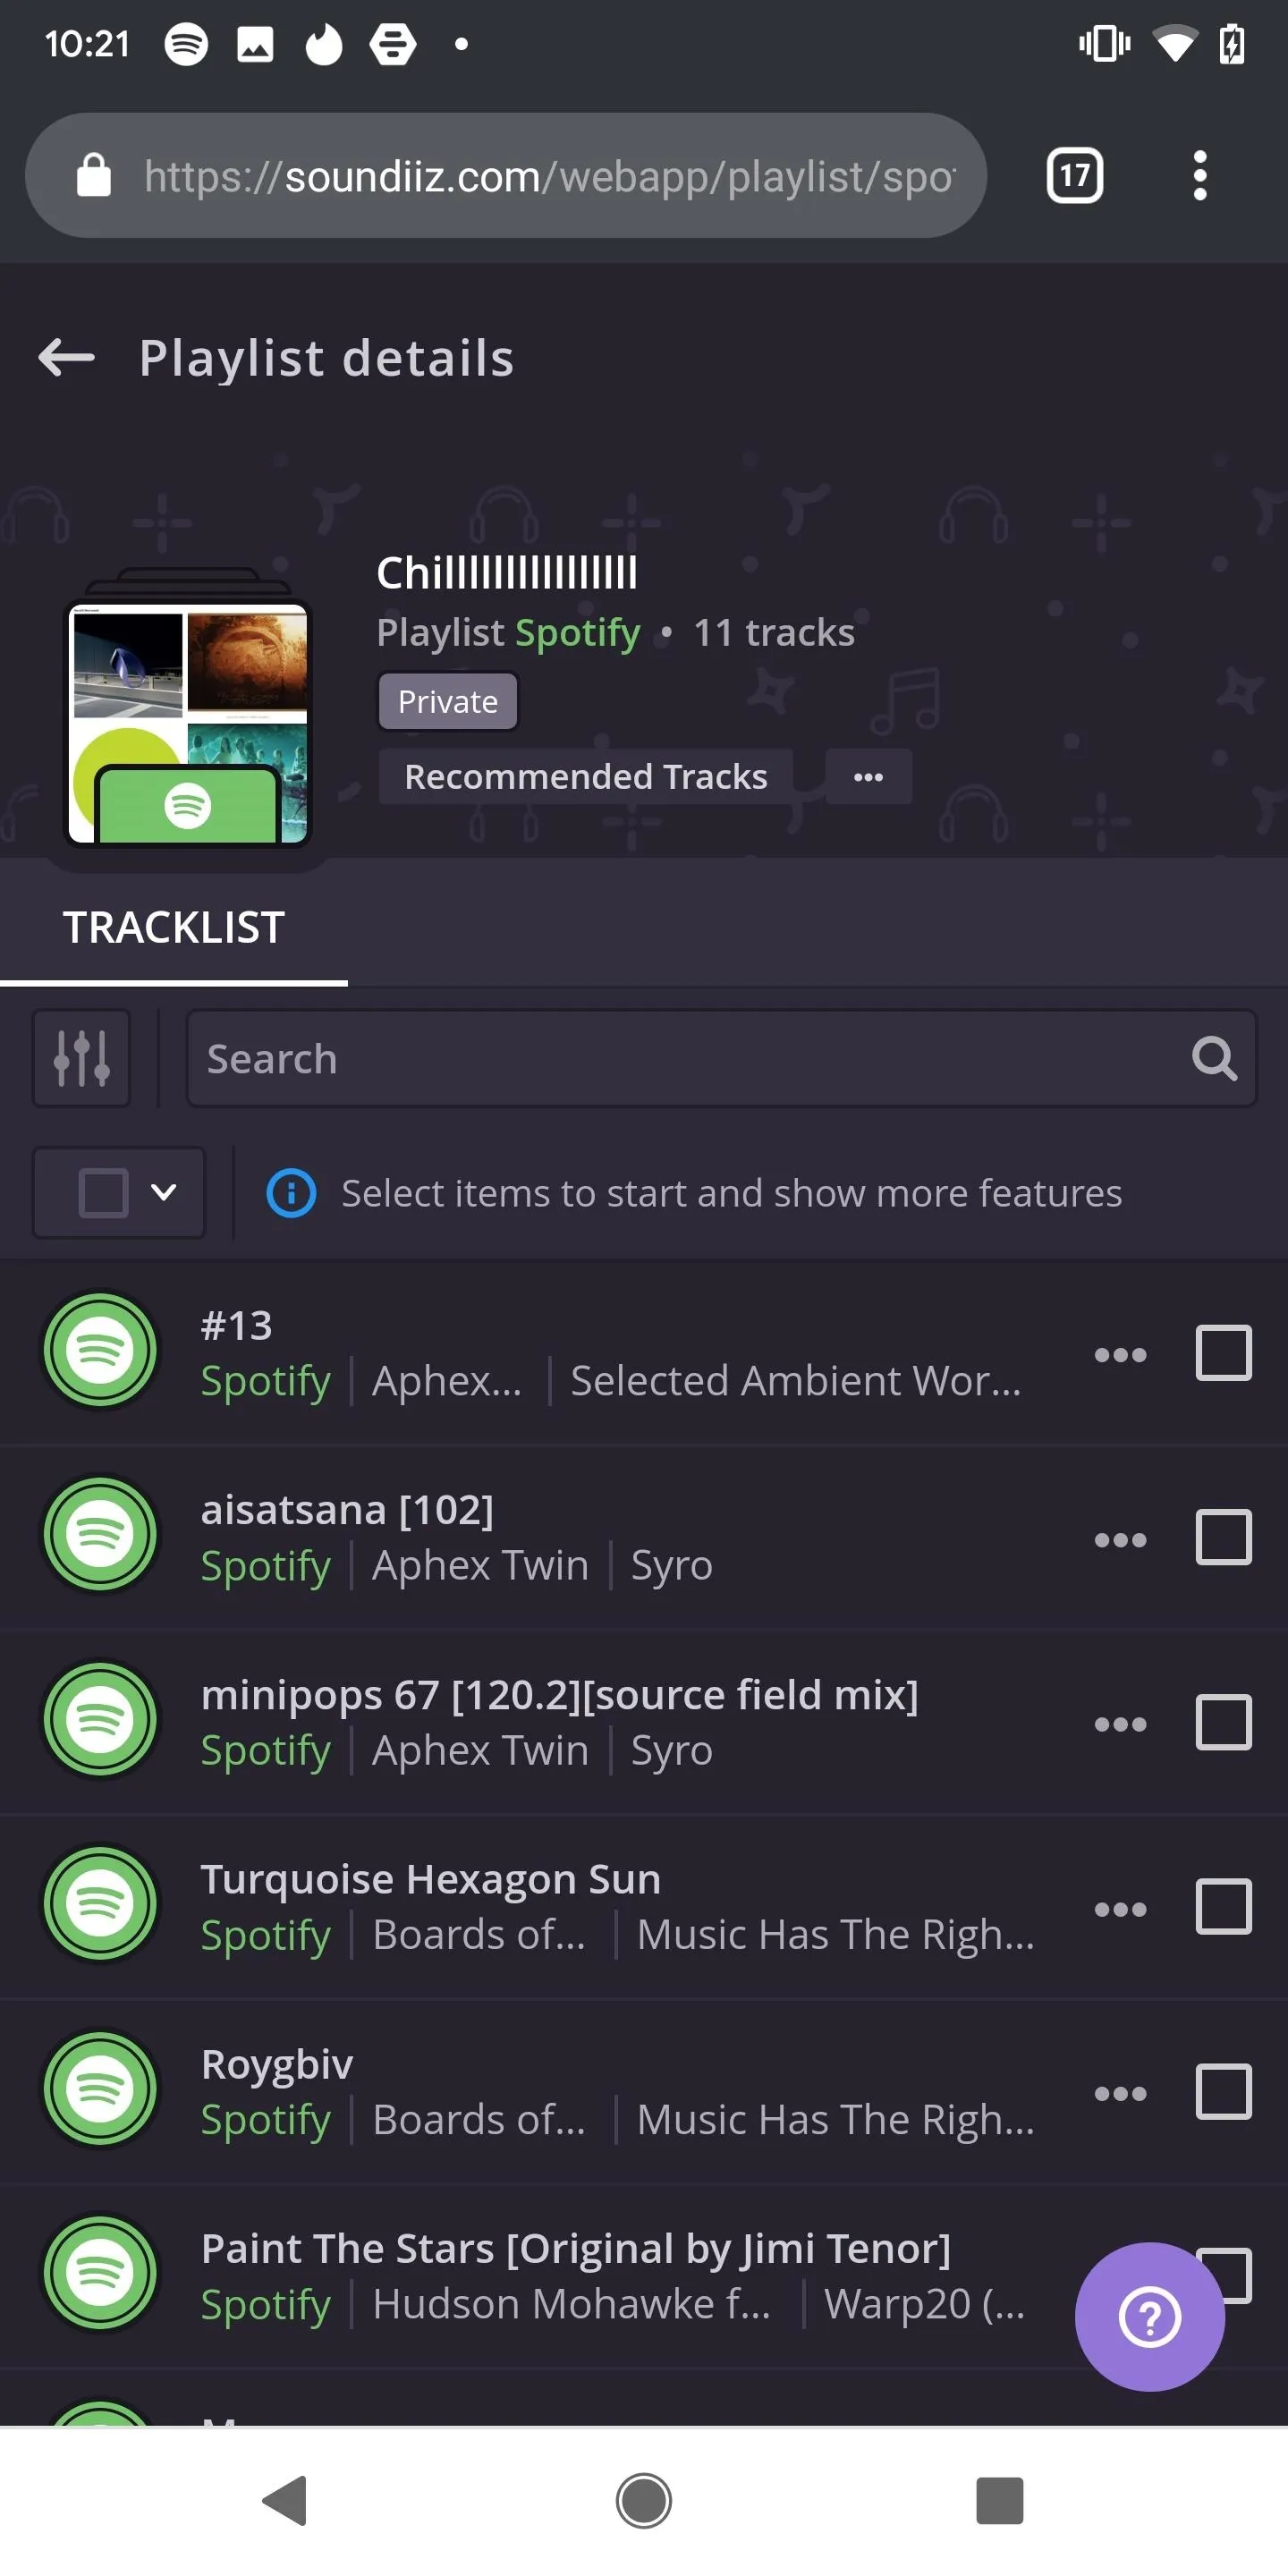
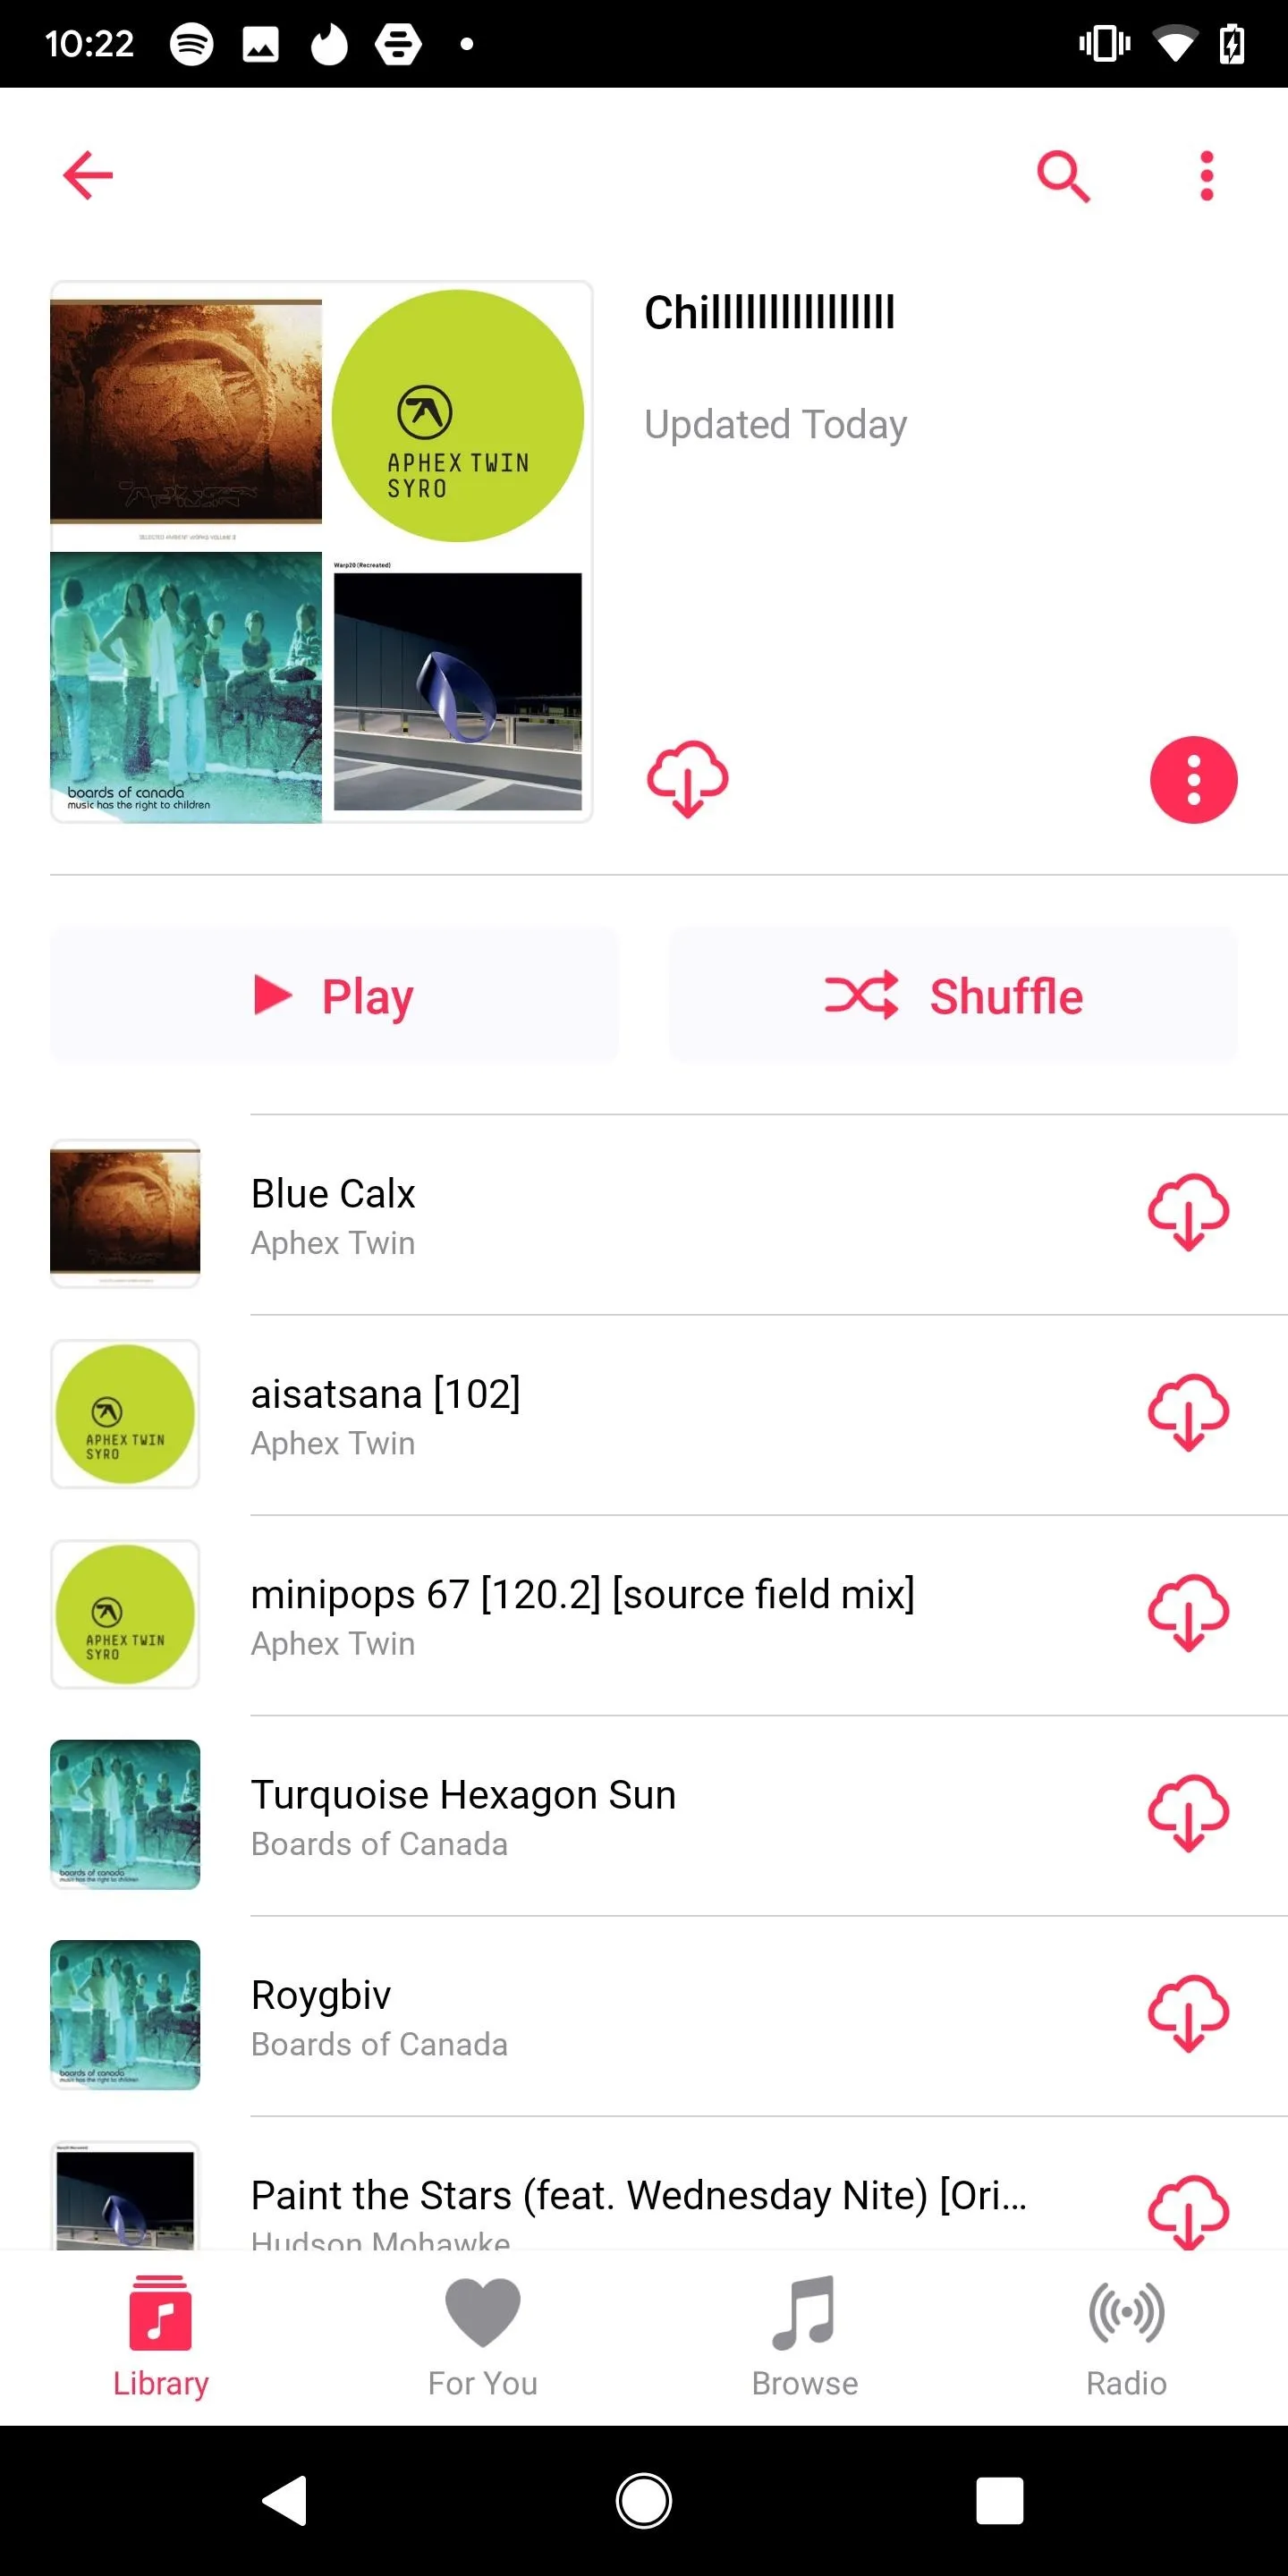
View Your Apple Music Playlist on Spotify
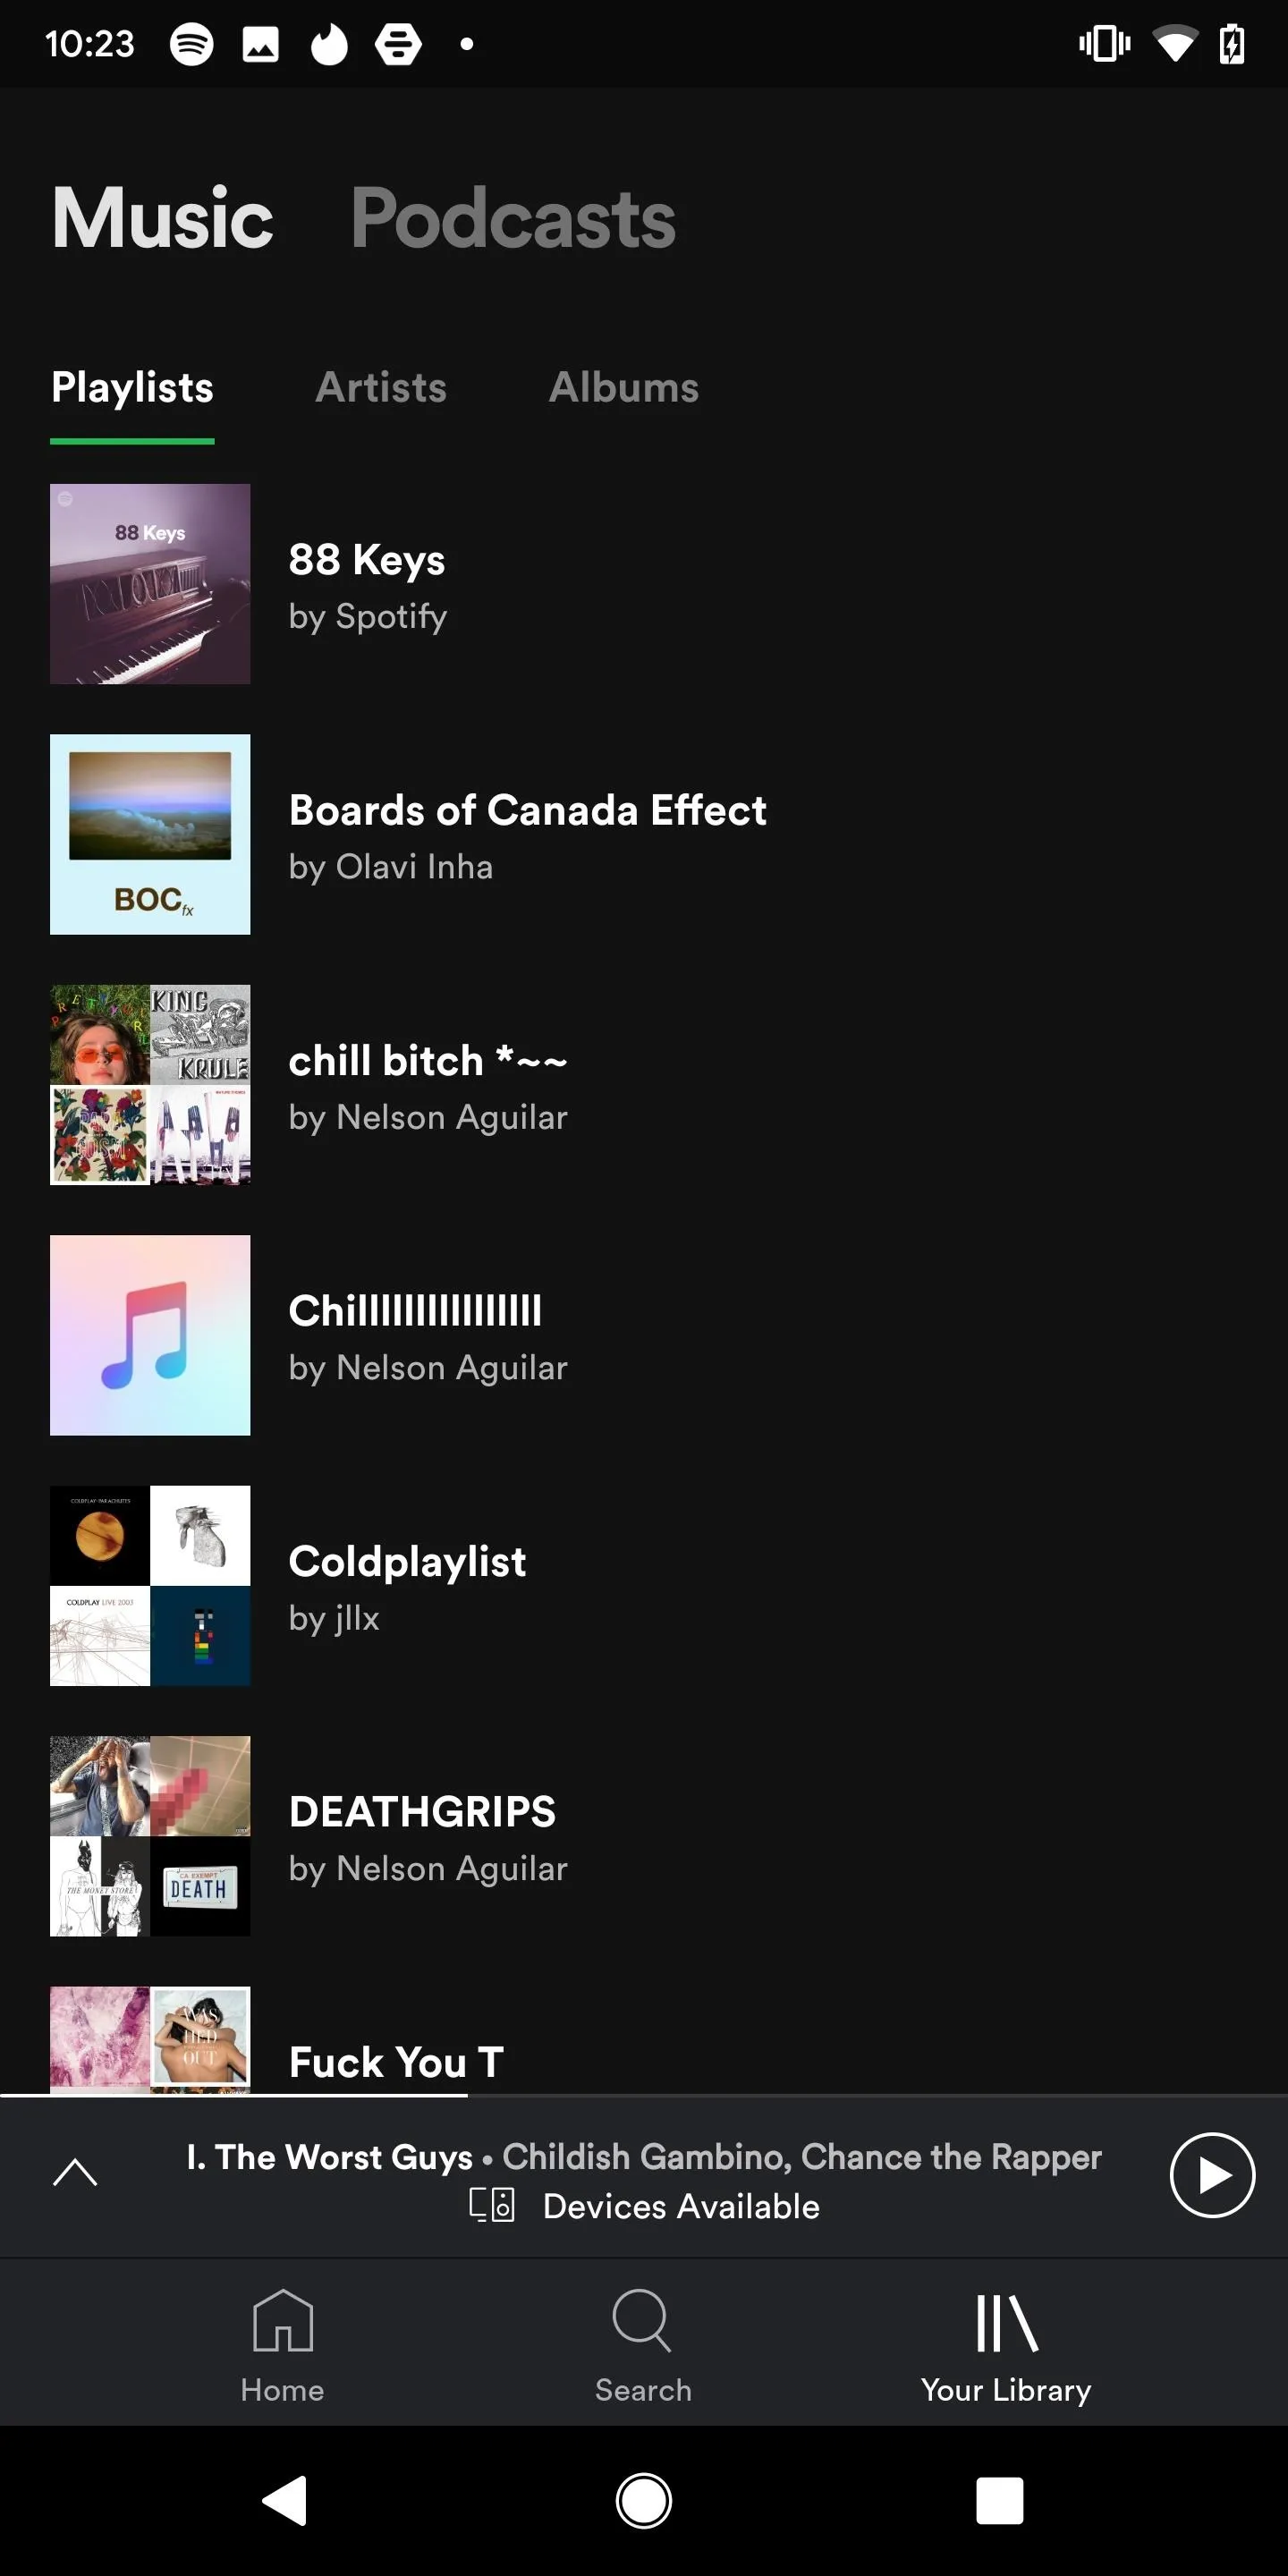
Your Apple Music playlist now exists on Spotify. Open Spotify, tap on "Your Library," and find the playlist. Tap on it to view it. Below you can see the two playlists on their respective music streaming service.

This article was produced during Gadget Hacks' special coverage on streaming, listening to, and creating music and podcasts on your smartphone. Check out the whole Music and Audio series.
Cover photo and screenshots by Nelson Aguilar/Gadget Hacks


Comments
Be the first, drop a comment!