


There are few apps or services better than Slack for keeping a team both communicative and productive. But it also makes it difficult to escape your job — after work hours and weekends should be yours, not Slack's. If you want to stop the barrage of notifications and messages on your time off, you should make use of Slack's "Do Not Disturb" and "Away" settings.
Slack is one of the better apps when it comes to notification control. You don't need to decide between all or none when it comes to receiving them — Slack gives you more intricate ways to choose how and when you want to stop notifications from coming in, as well as who gets to see when you're using the app in the first place.
Set Your Availability to 'Away'
You can instantly convey to your Slack team that you're out for the weekend if you make sure to set your availability to "Away." To be clear, Slack will automatically set your account to "Away" if you leave the app for more than 30 seconds at a time. However, once you open it again, your whole workspace can see that you're online.
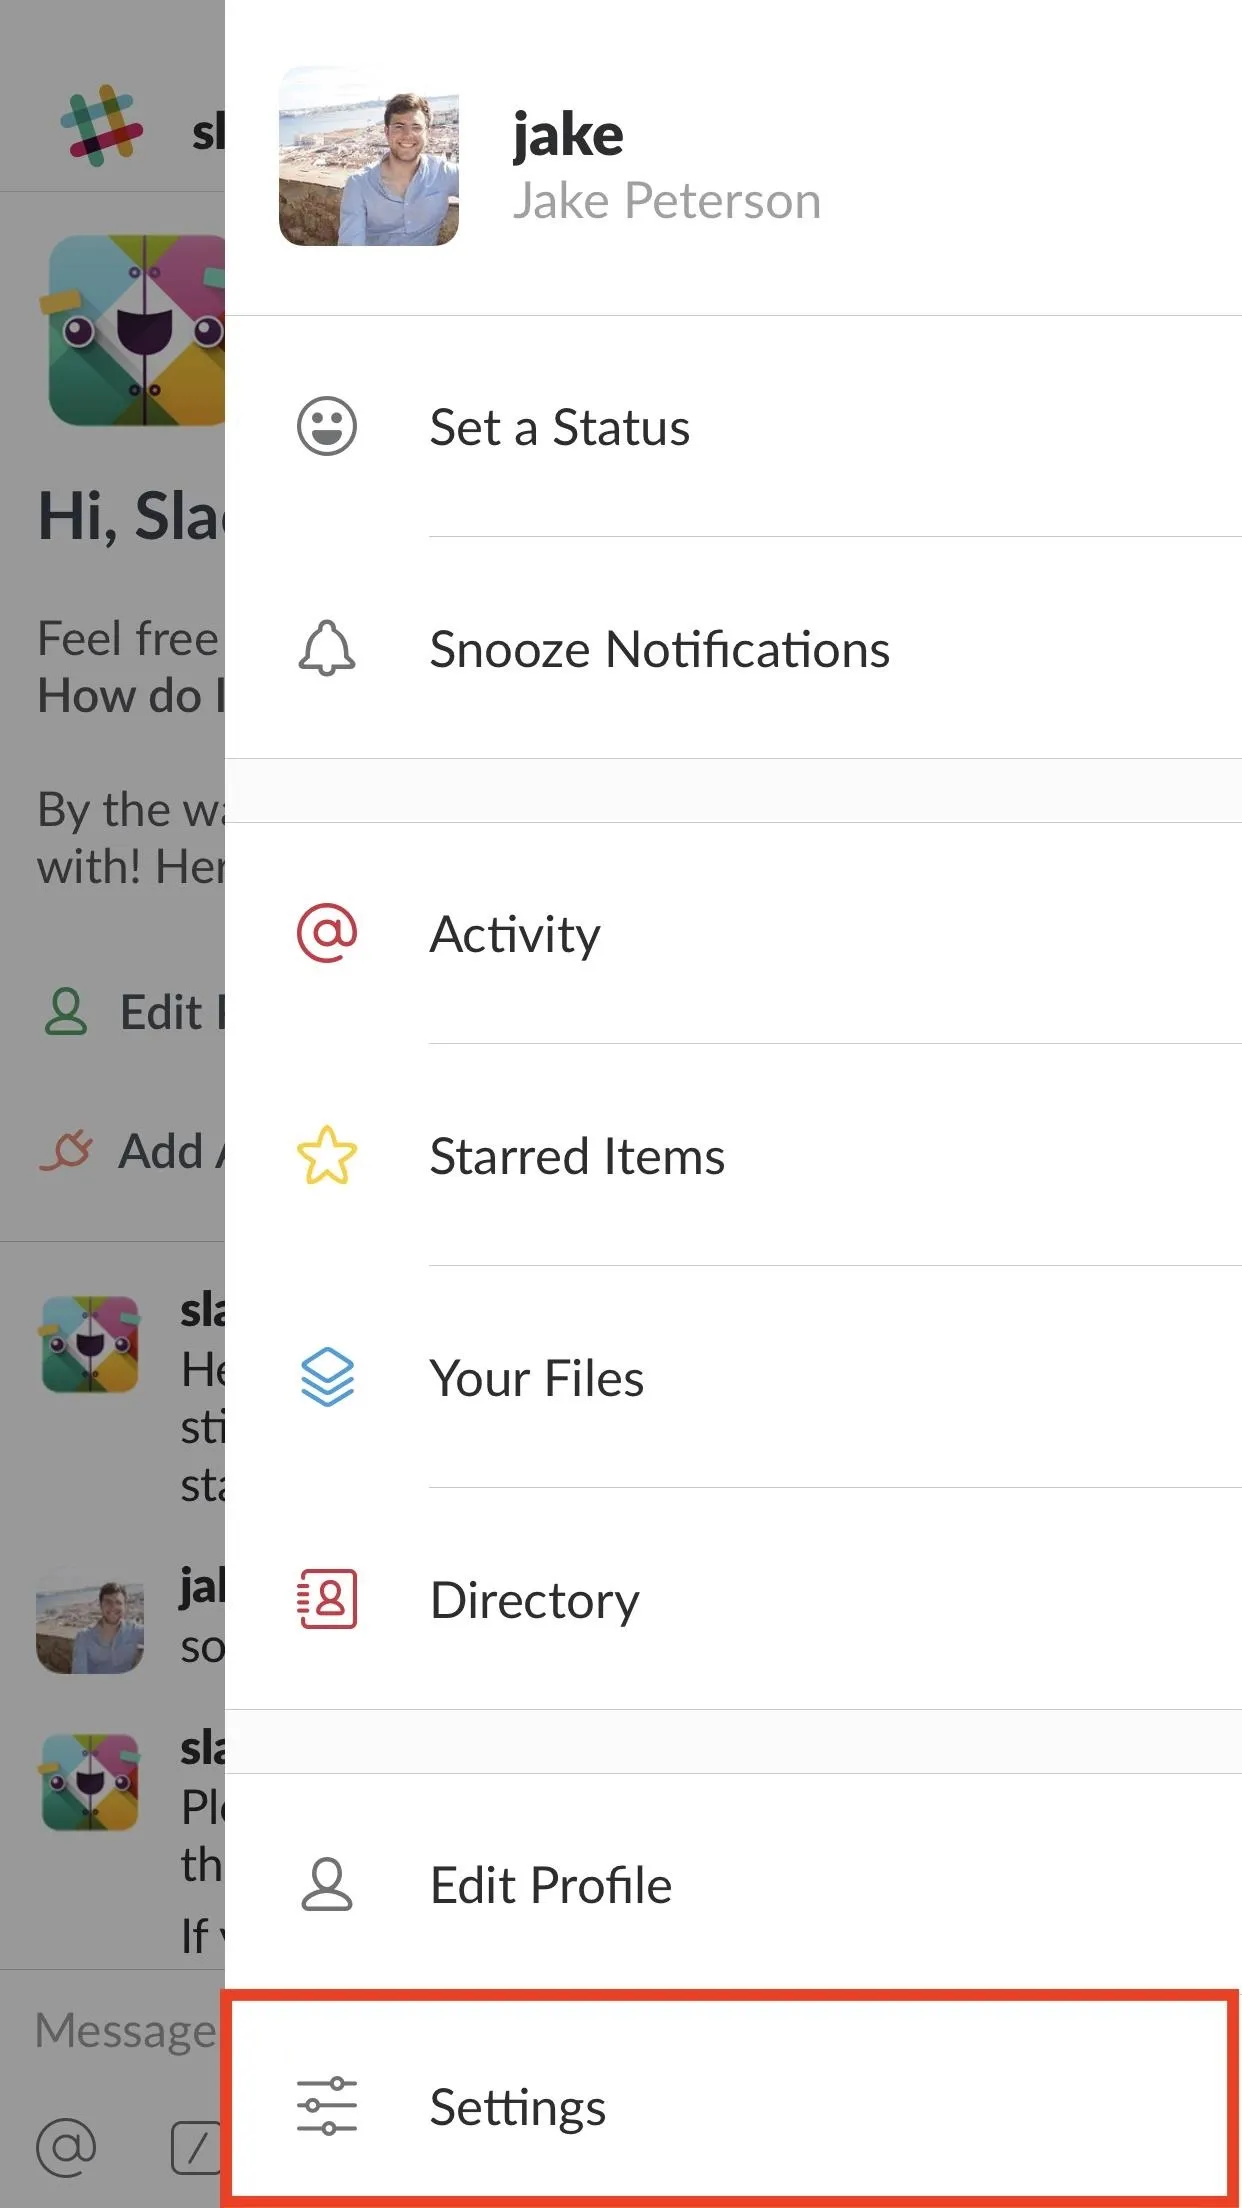
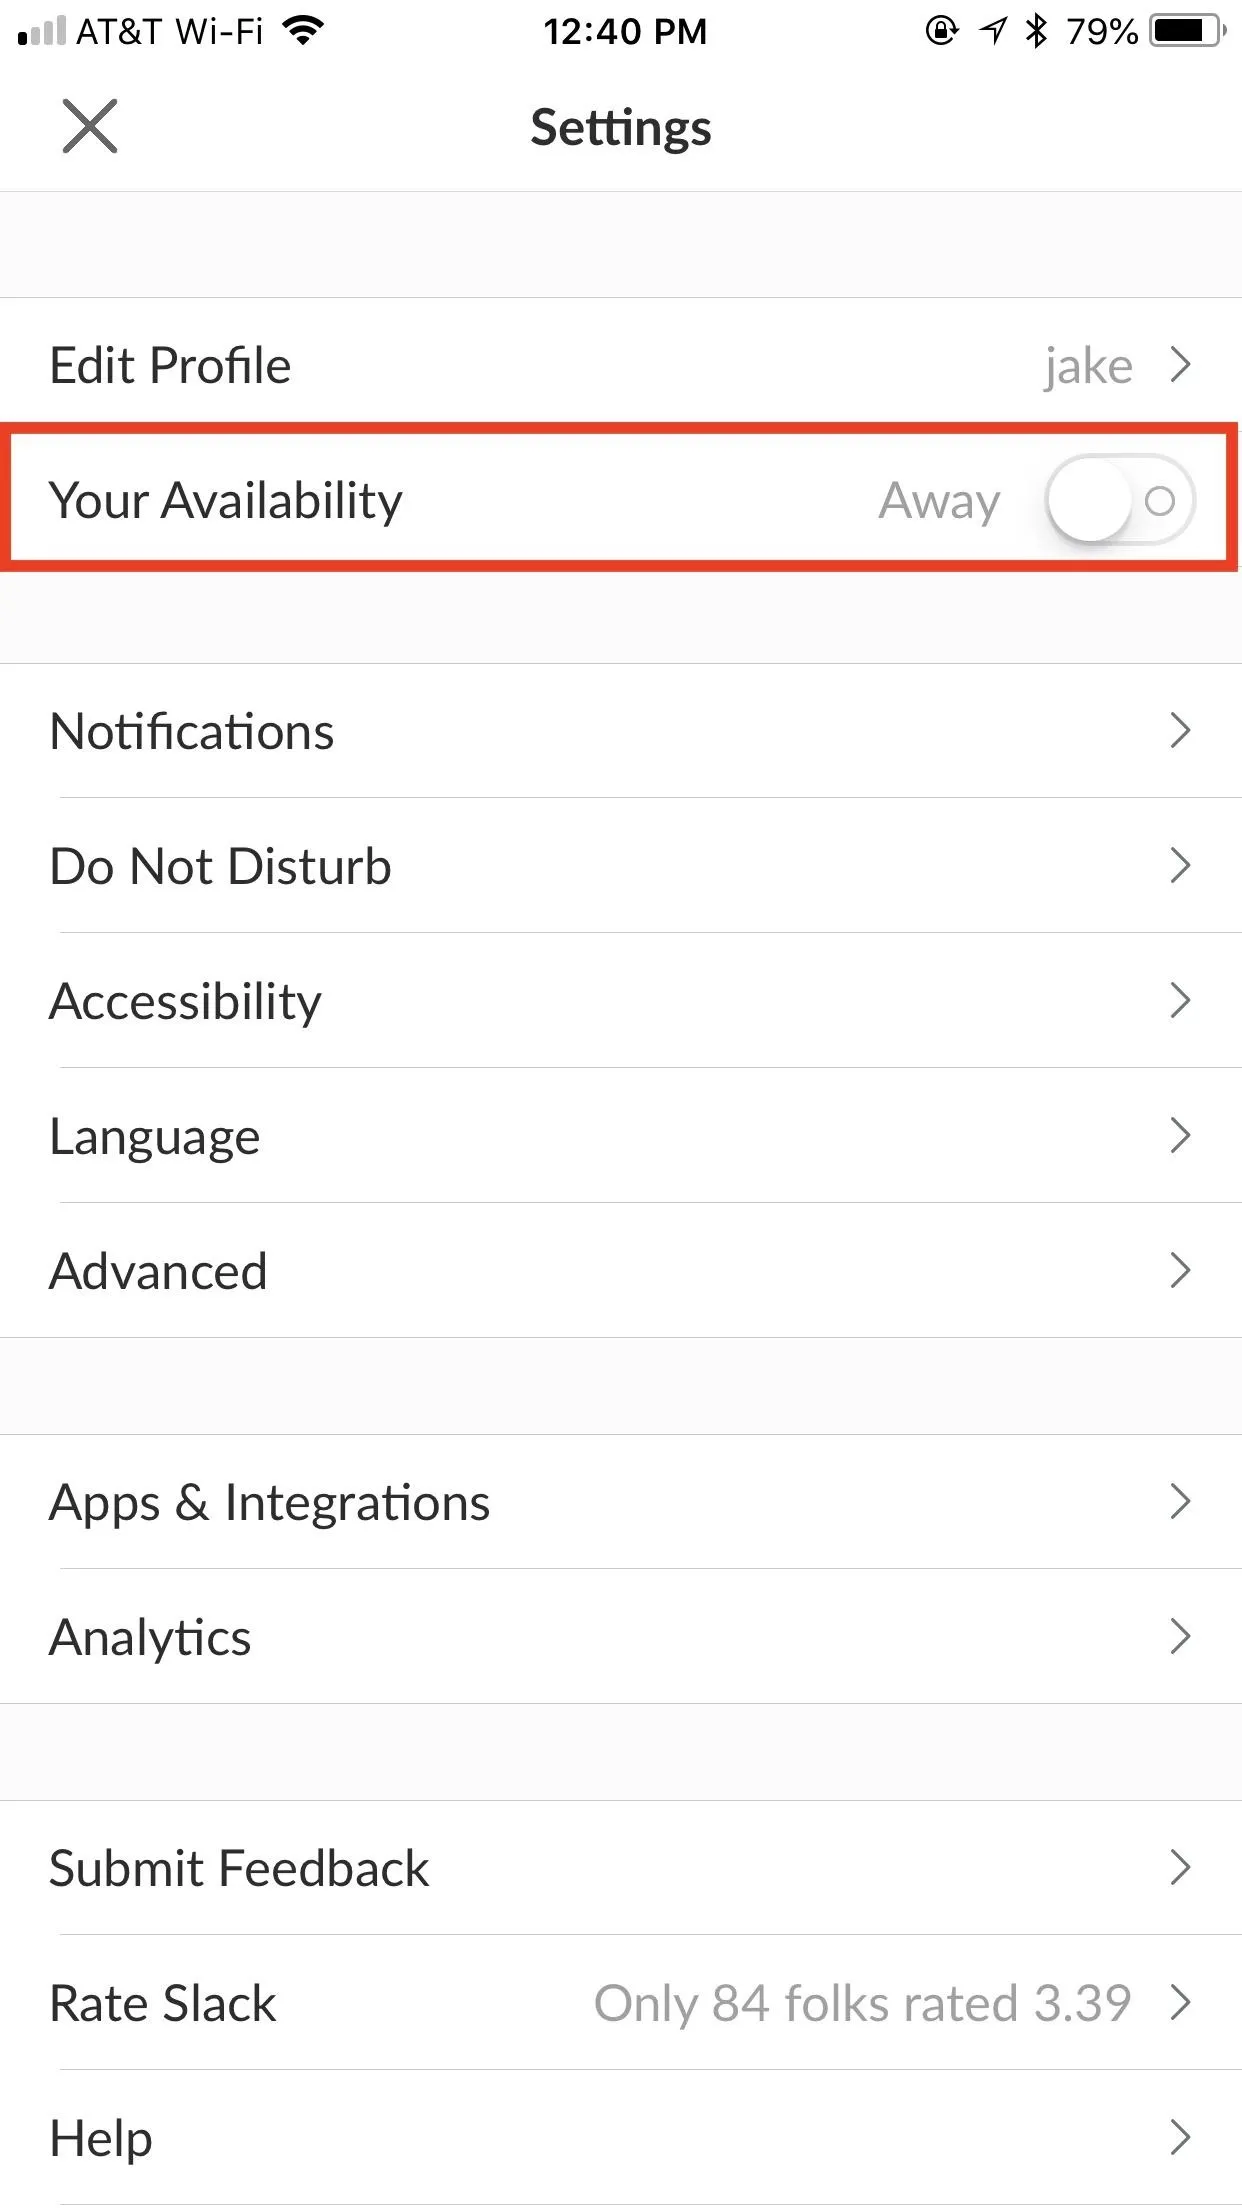
To manually enable an "Away" status, tap the three dots in the top-right corner of the display (or swipe left on iOS), then tap "Settings." Under "Your Availability" on iOS and "Availability" on Android, tap the slider to set your status to "Away" or "Offline." Now, even if you leave the app and return at some point in the weekend, your office won't see.
If, upon reopening Slack, the app asks you if you'd like to re-enable your availability, simply decline, and your anonymity will continue on. No one will ever have to know you checked in on a Saturday.
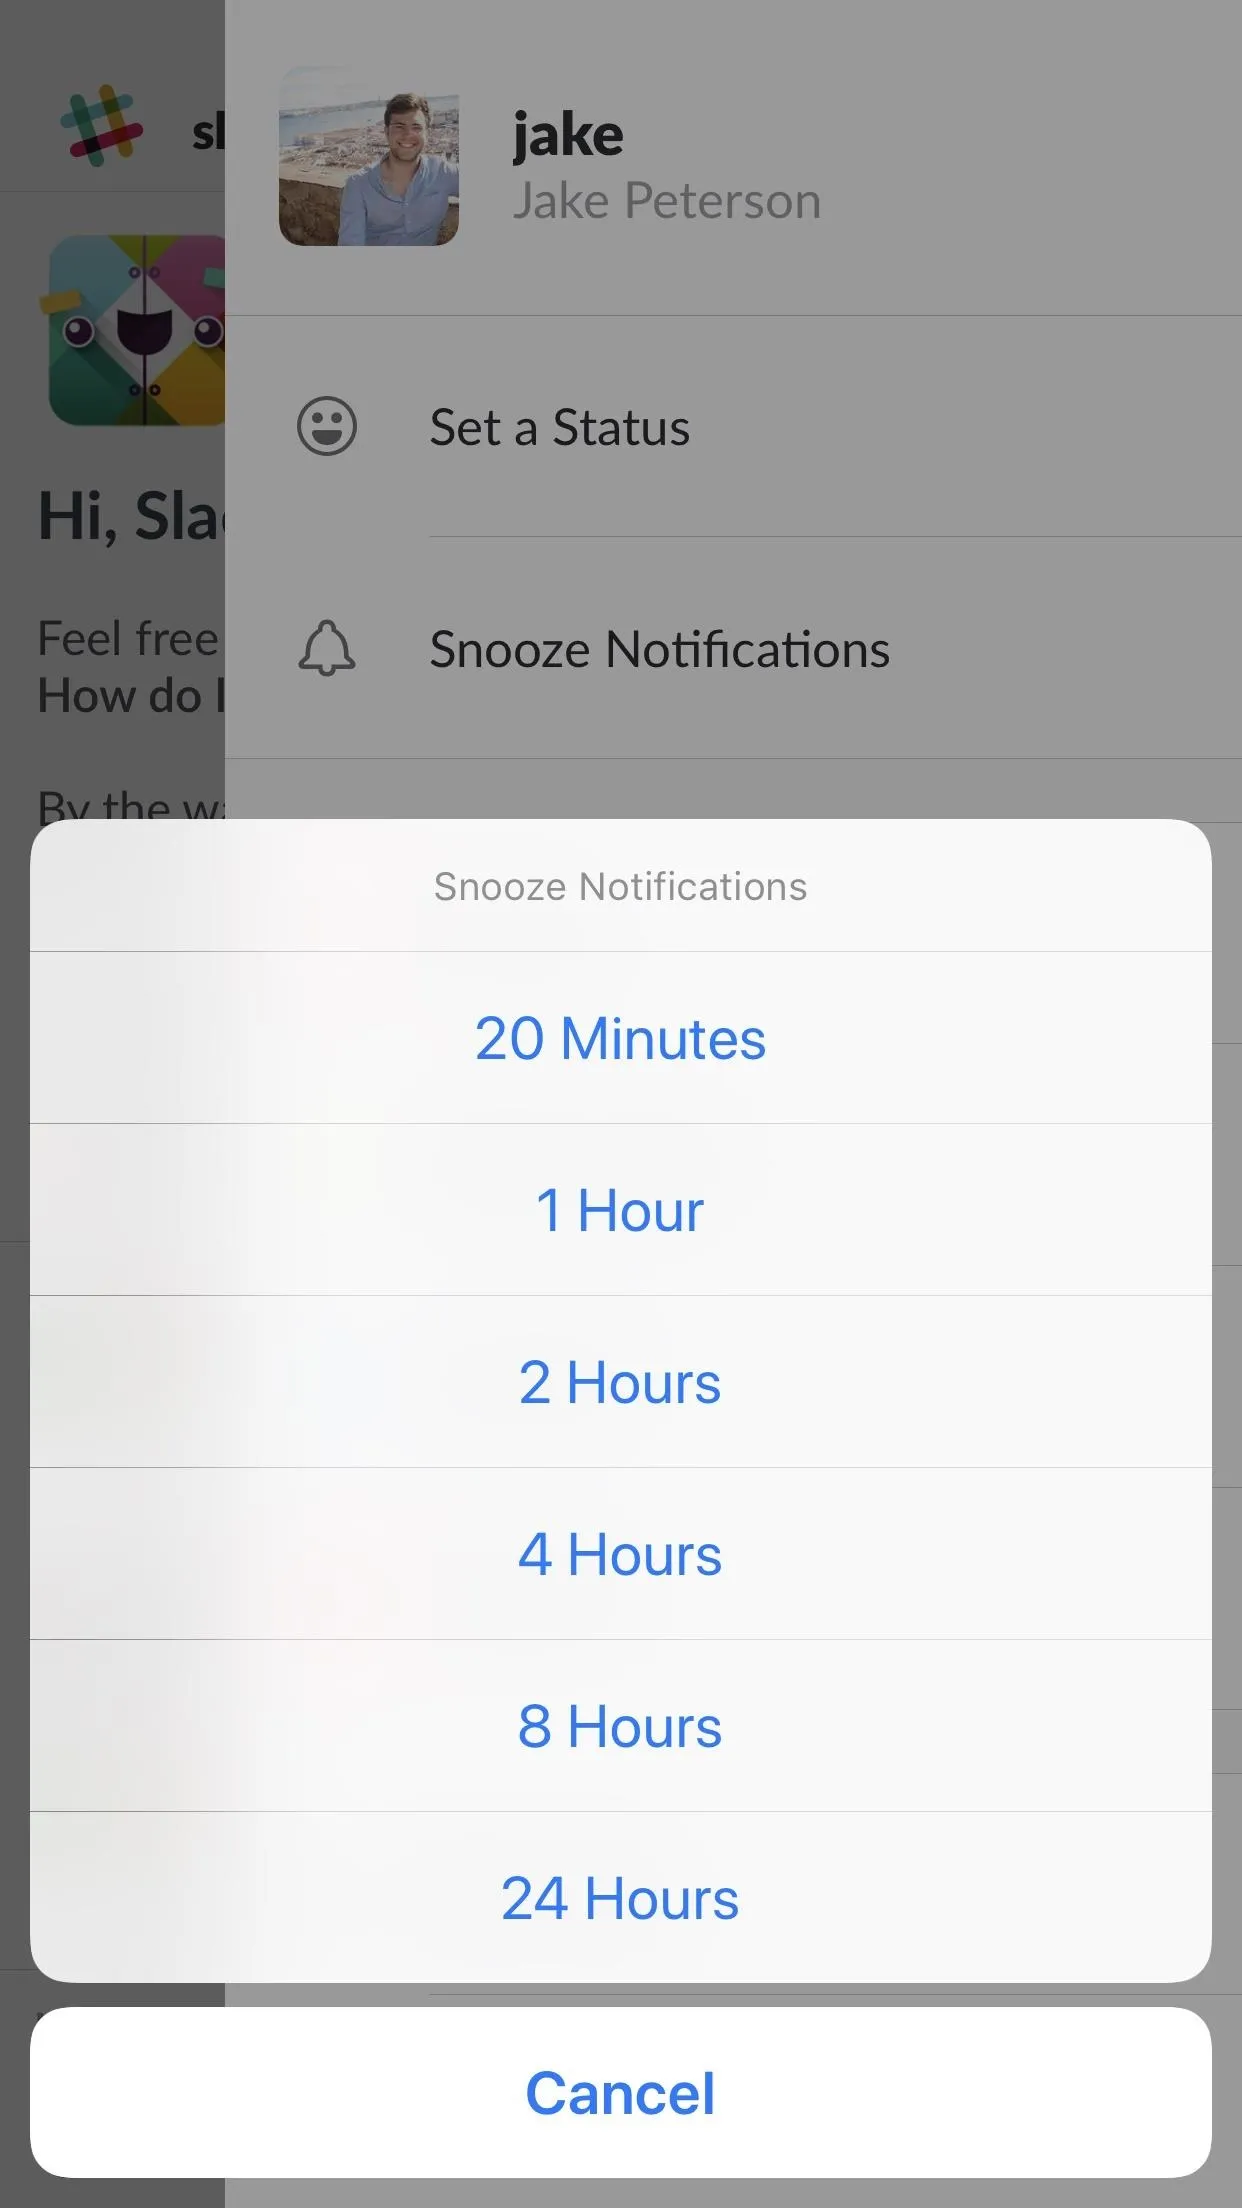
Manually Enable Notification Snoozing
You don't want to get messages from your boss at 8 AM on a Sunday. But you also don't want to disable Slack's notifications every weekend, then forget to re-enable them on Monday. That's where snoozing comes in.
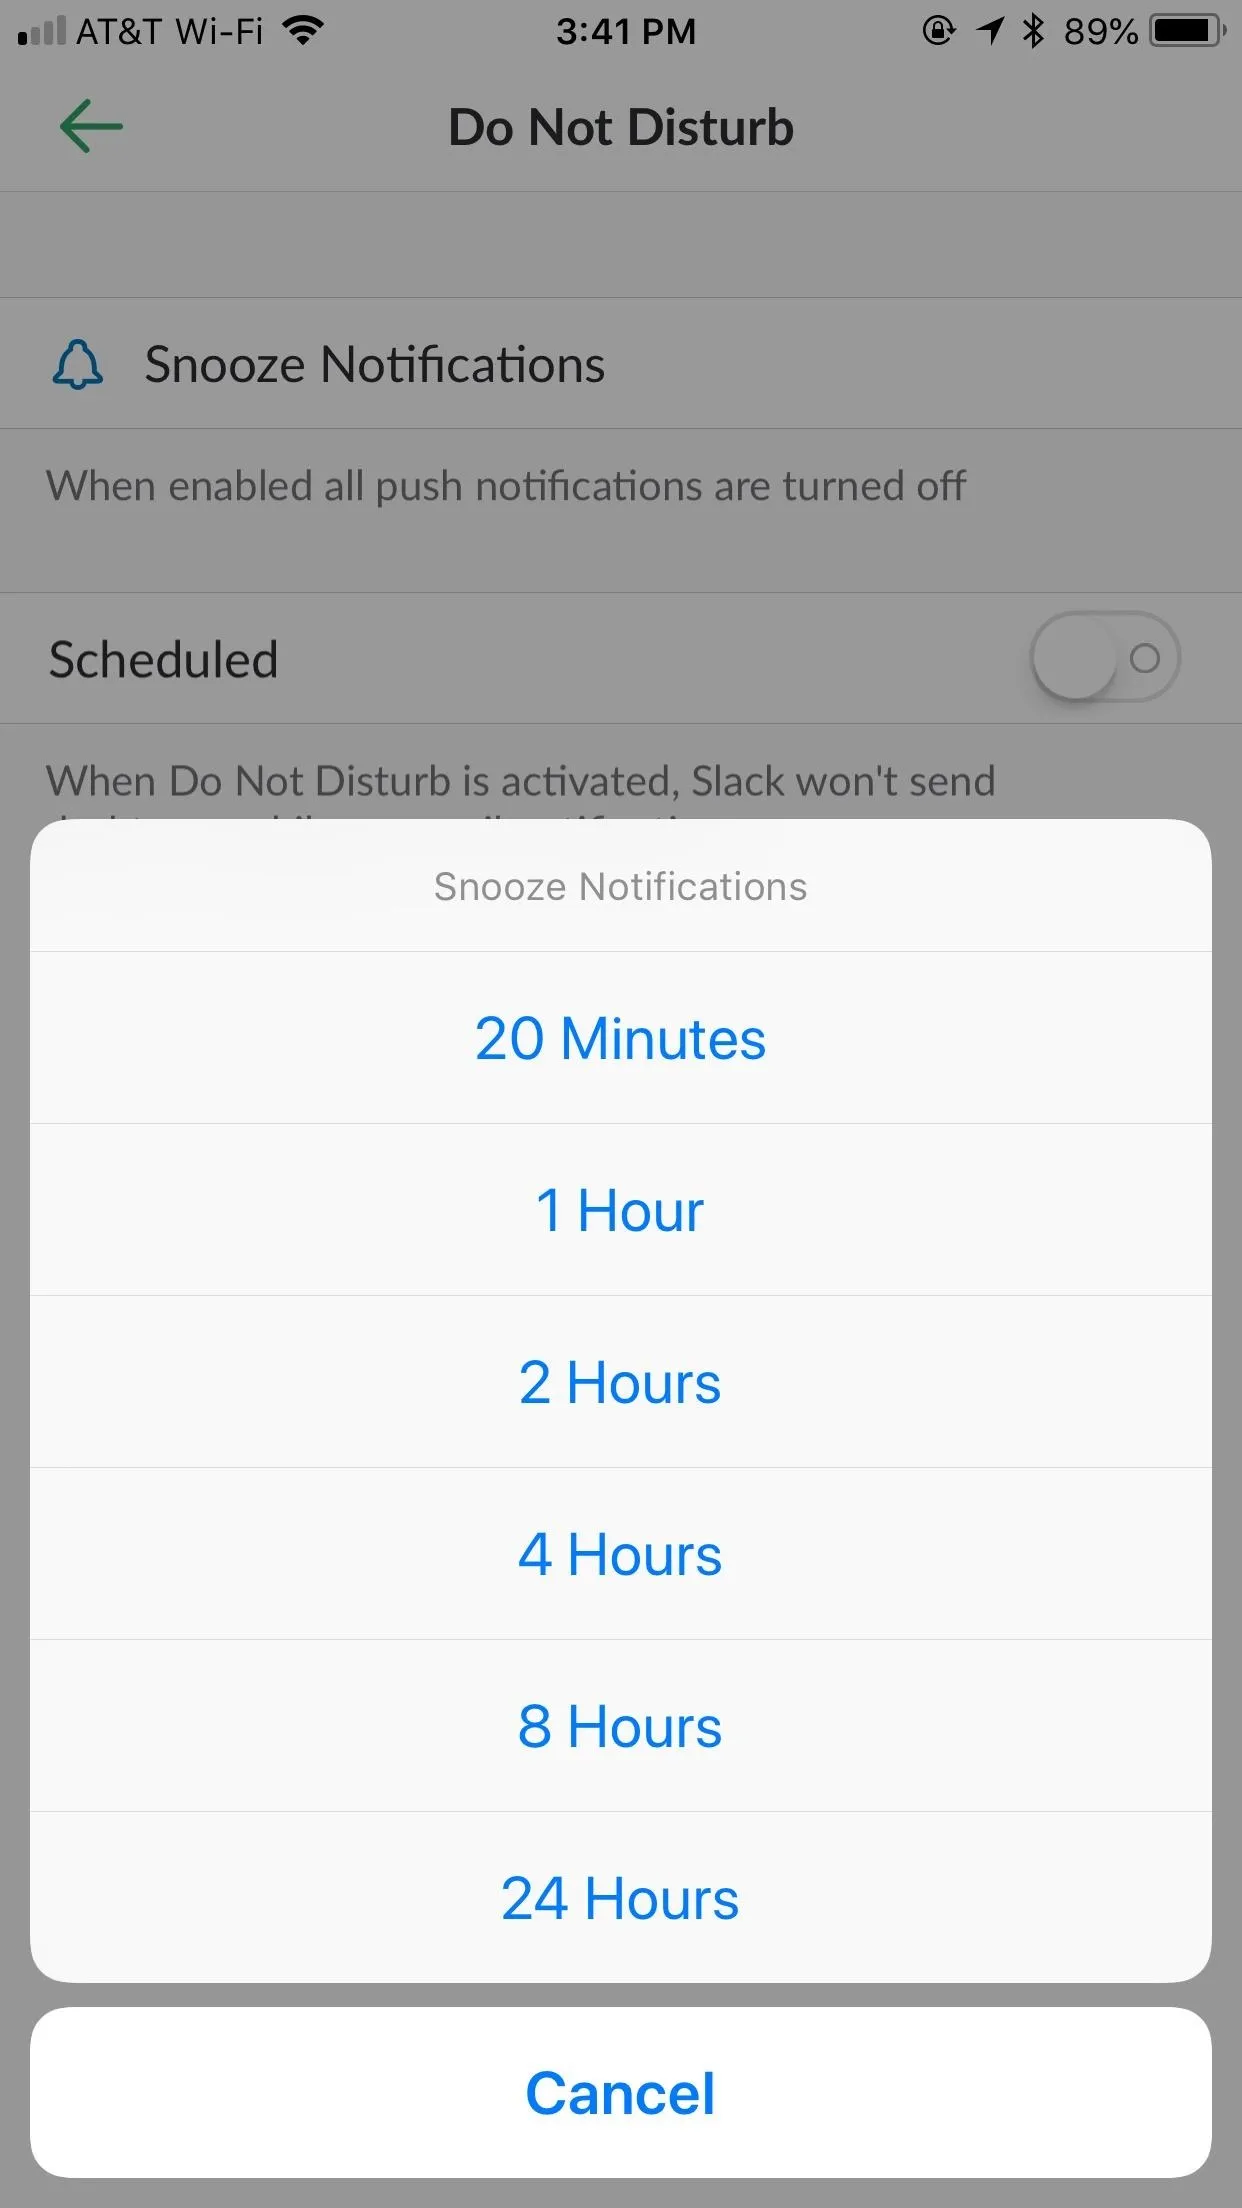
Notification snoozing allows you to block incoming messages for a certain period of time. Slack gives you six timeframes to choose from — 20 minutes, one hour, two hours, four hours, eight hours, and 24 hours. Select one of these, and it's radio silence for you.
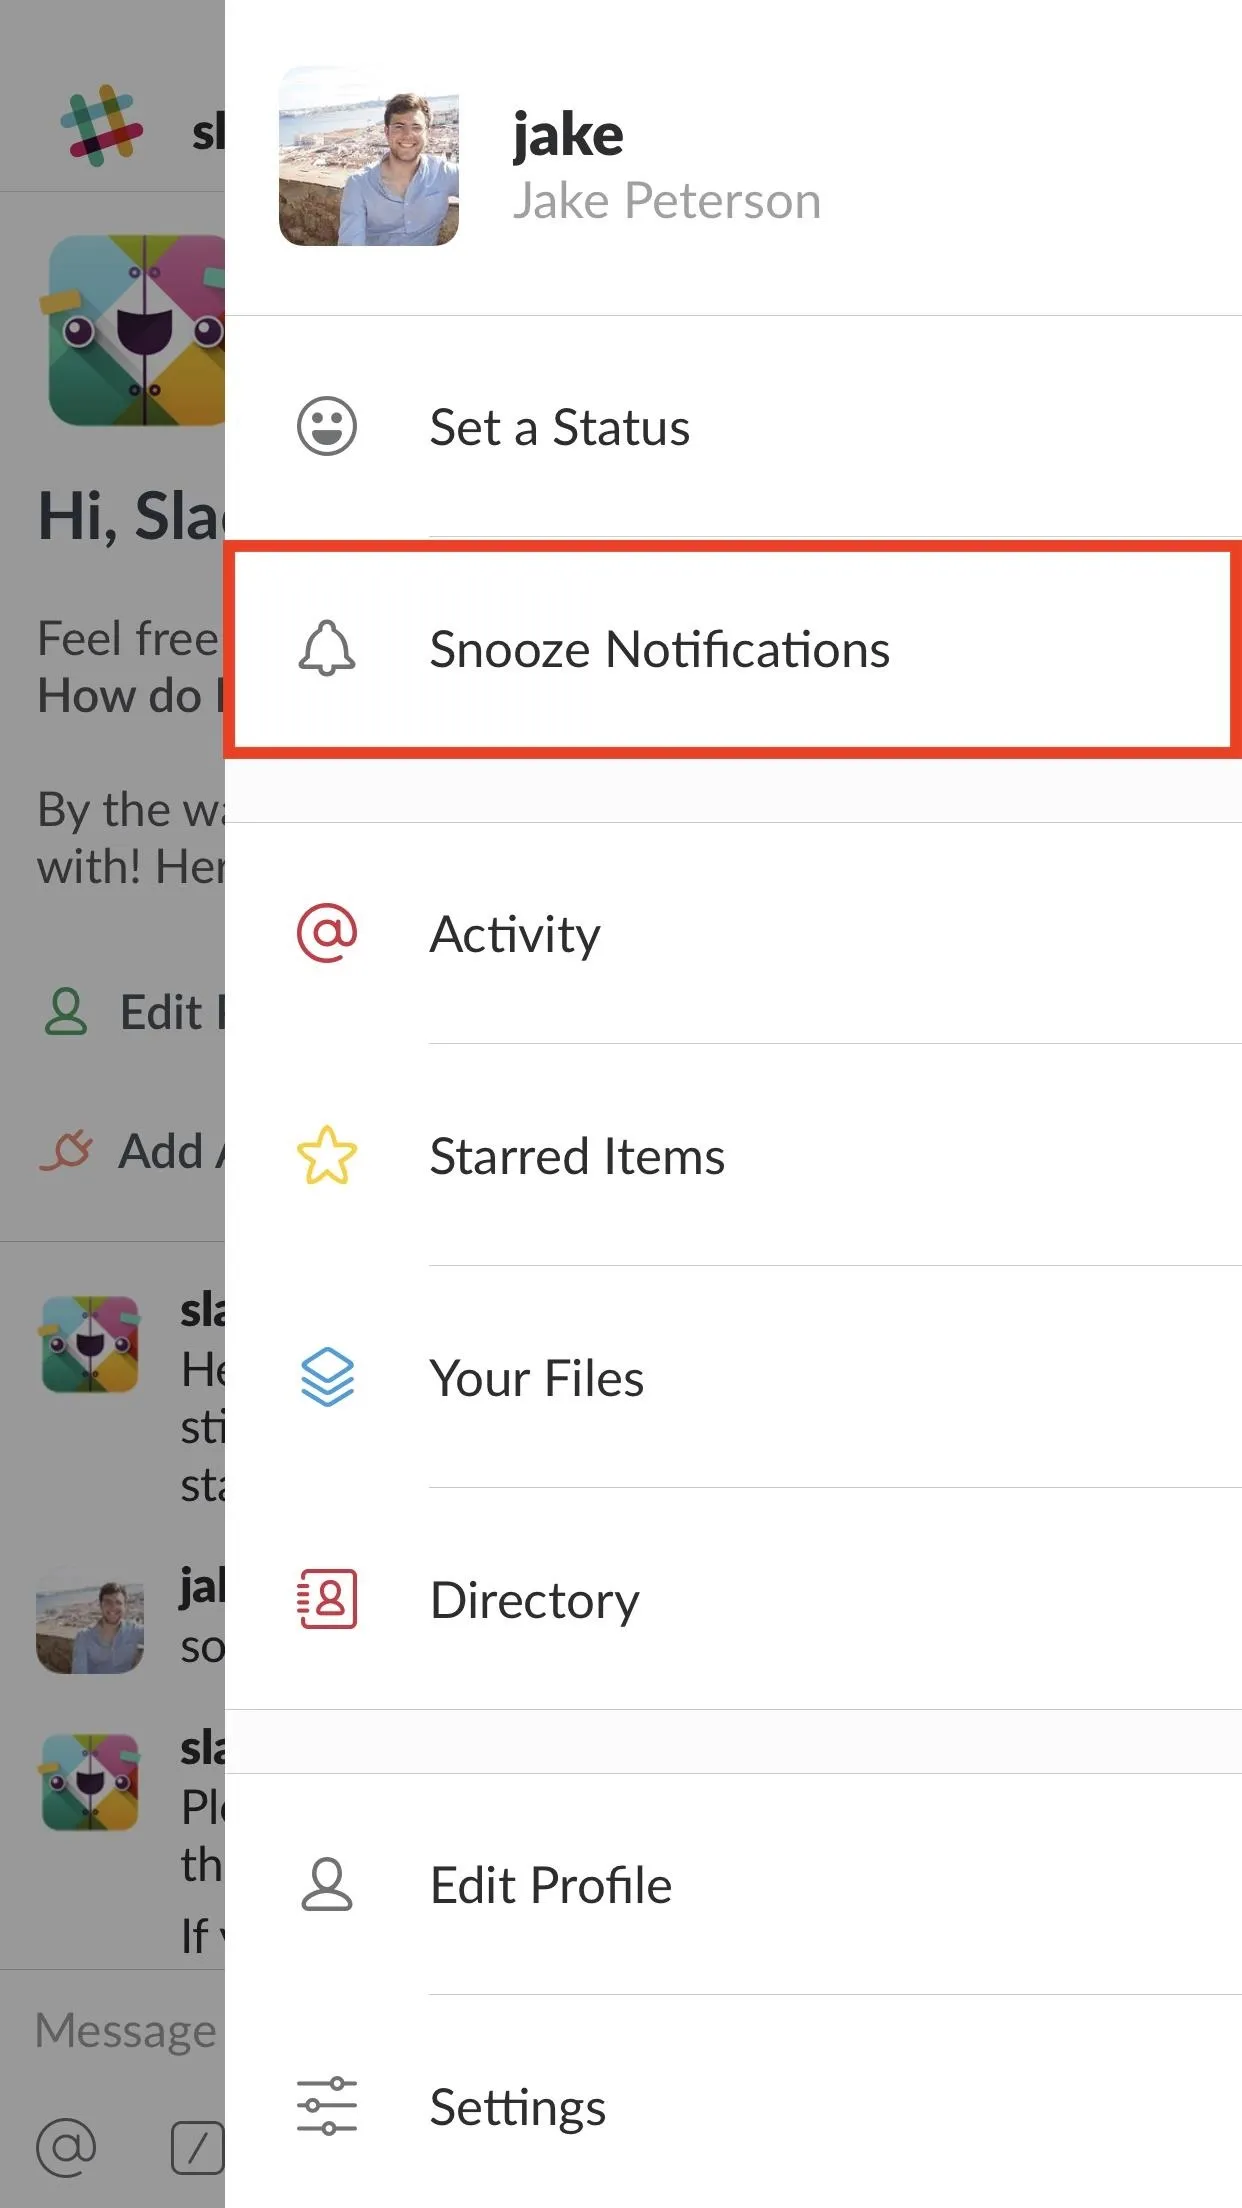
To quickly enable notification snoozing, tap the three dots in the top-right corner of the display (or swipe left on iOS). Next, tap "Snooze Notifications" and select your preferred time.
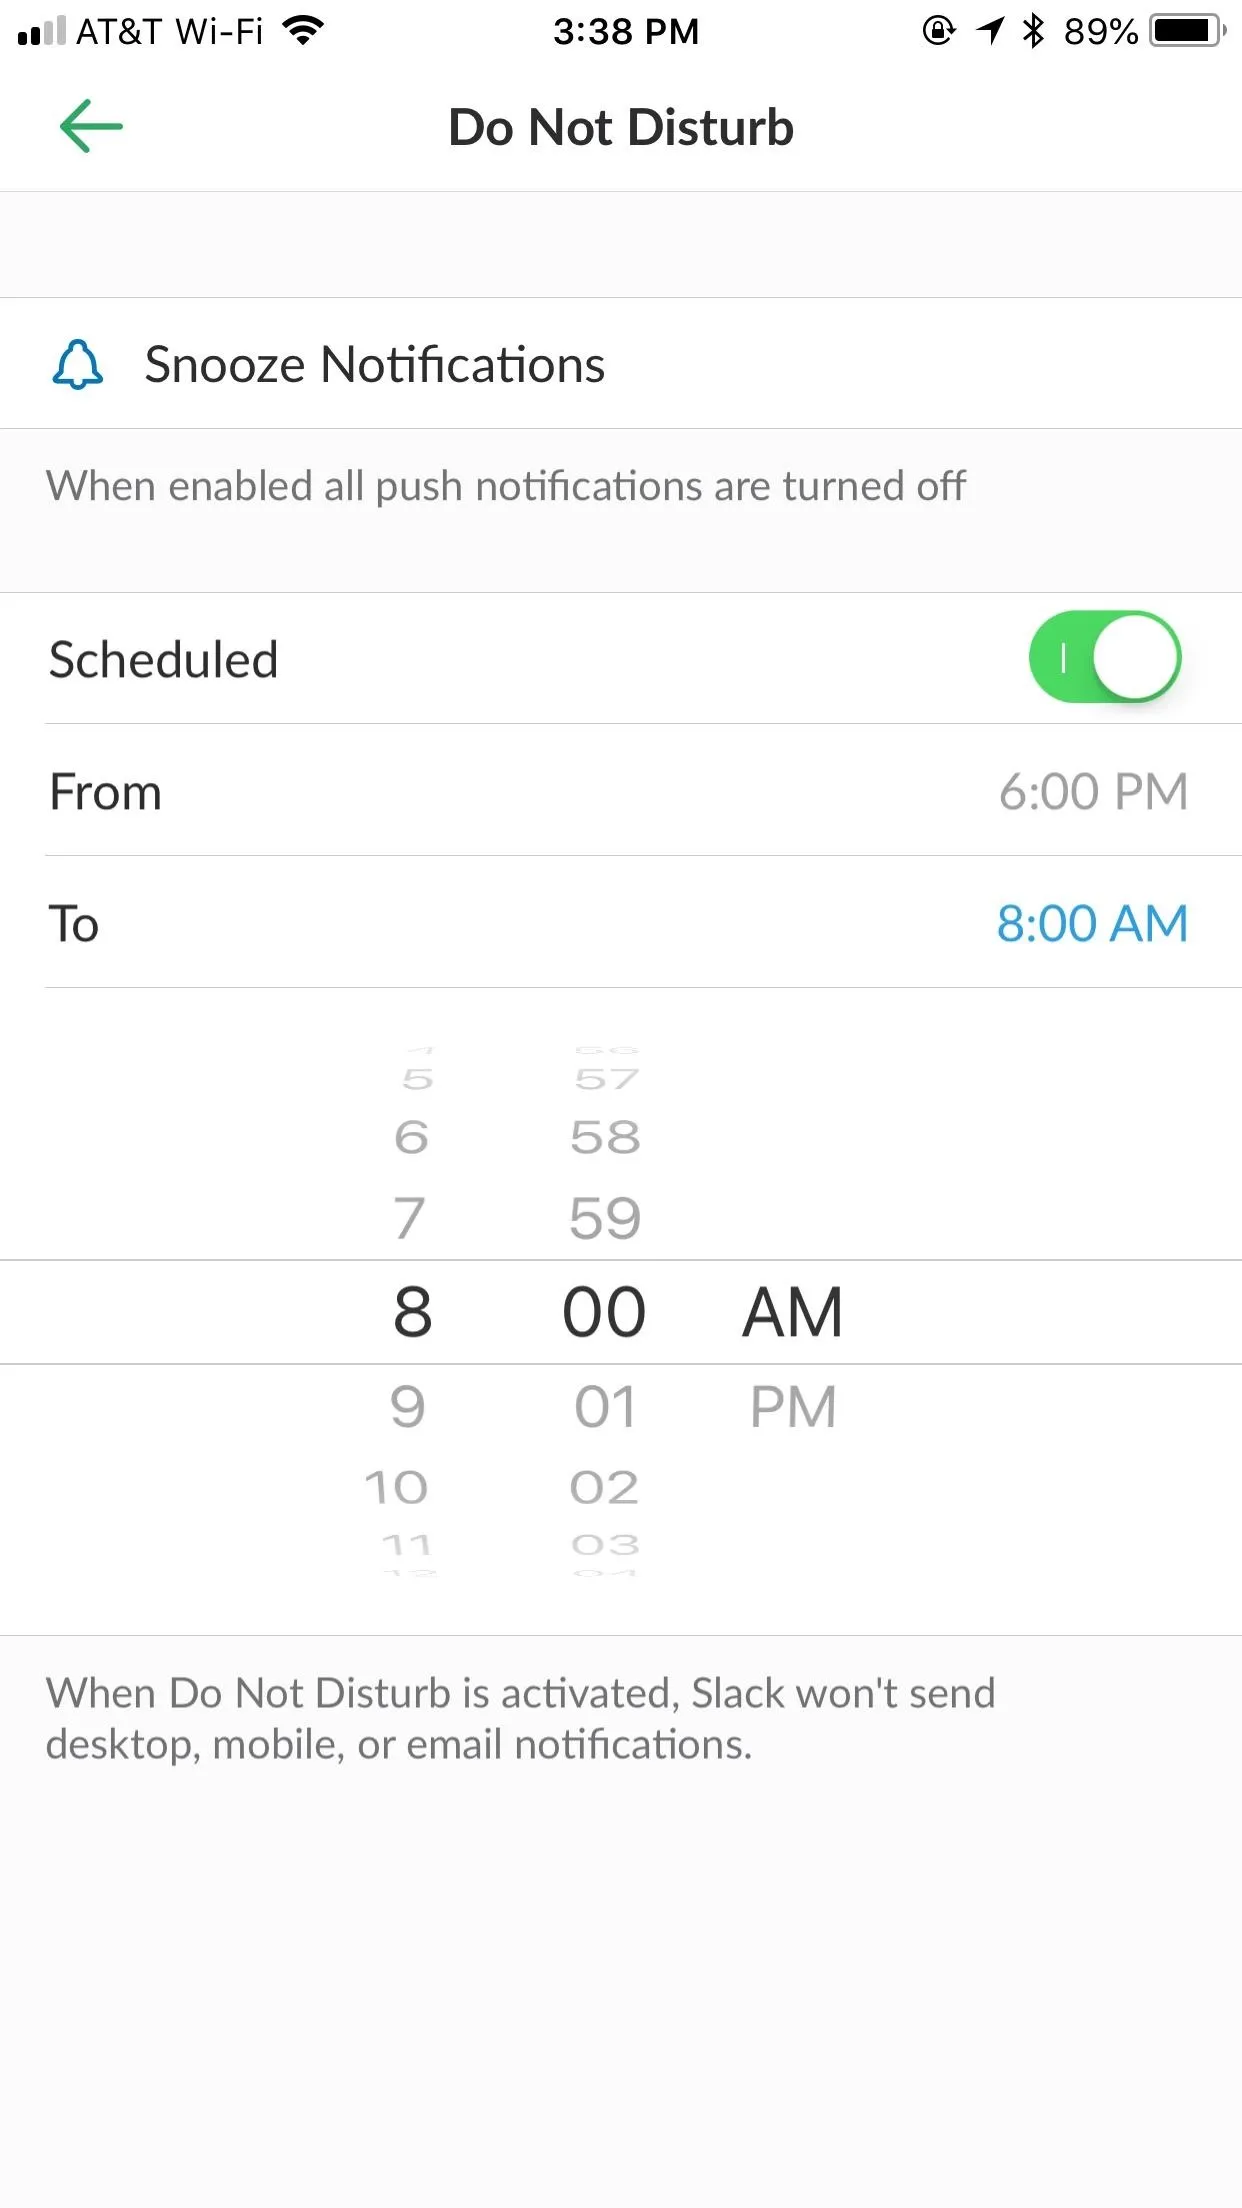
Schedule 'Do Not Disturb' Notification Snoozing
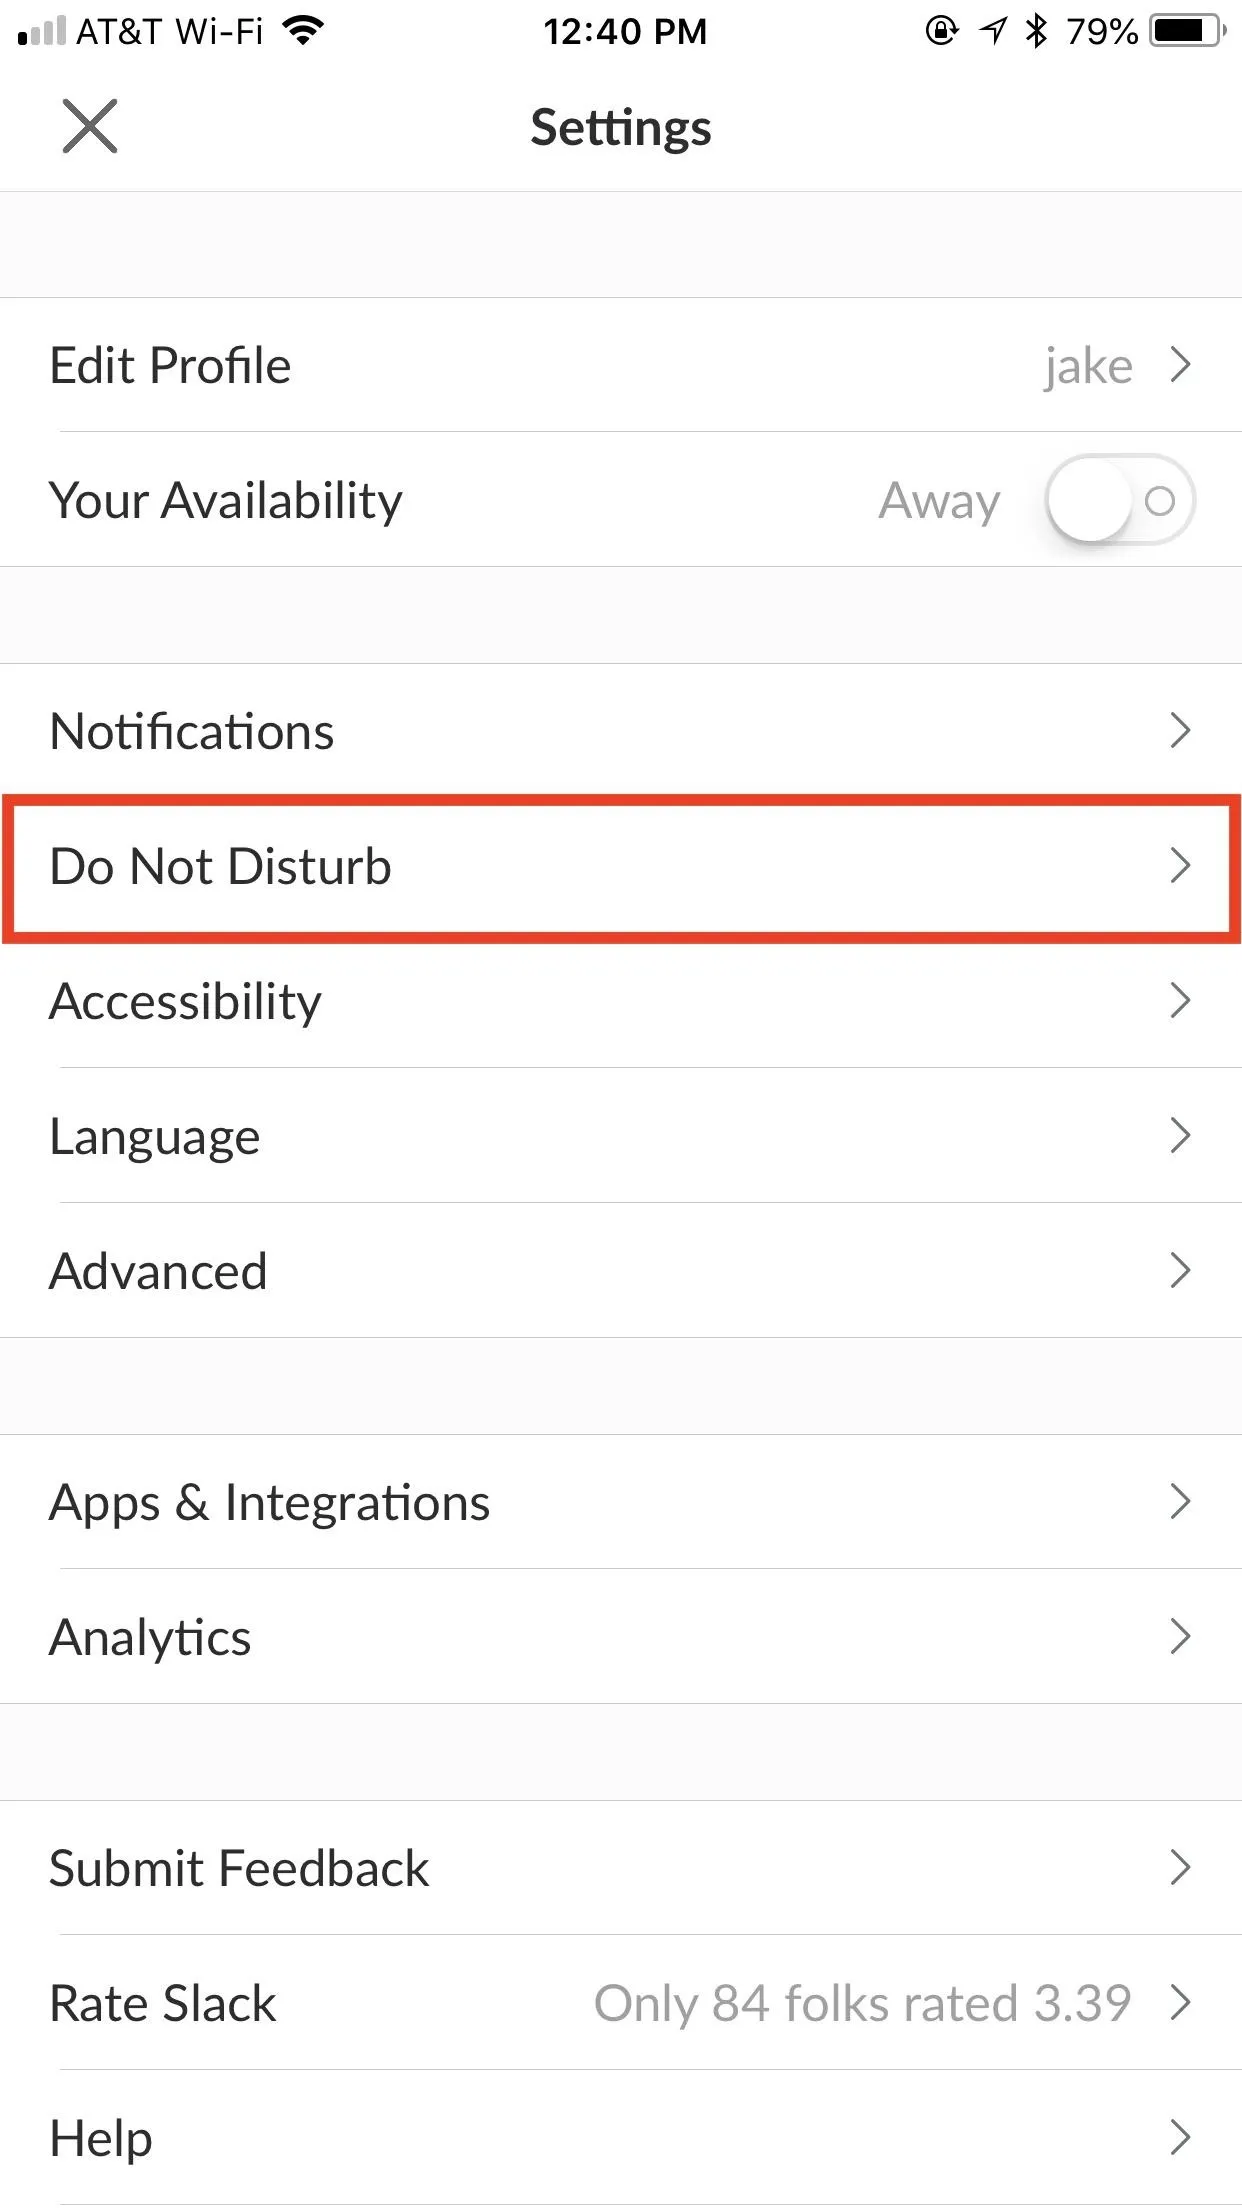
One of Slack's best — and possibly underused — features is its "Do Not Disturb" mode. This option allows you to schedule notification snoozing, which stops messages automatically during preset times. If you do not want to hear from work between 5 PM and 9 AM, this is the setting for you.
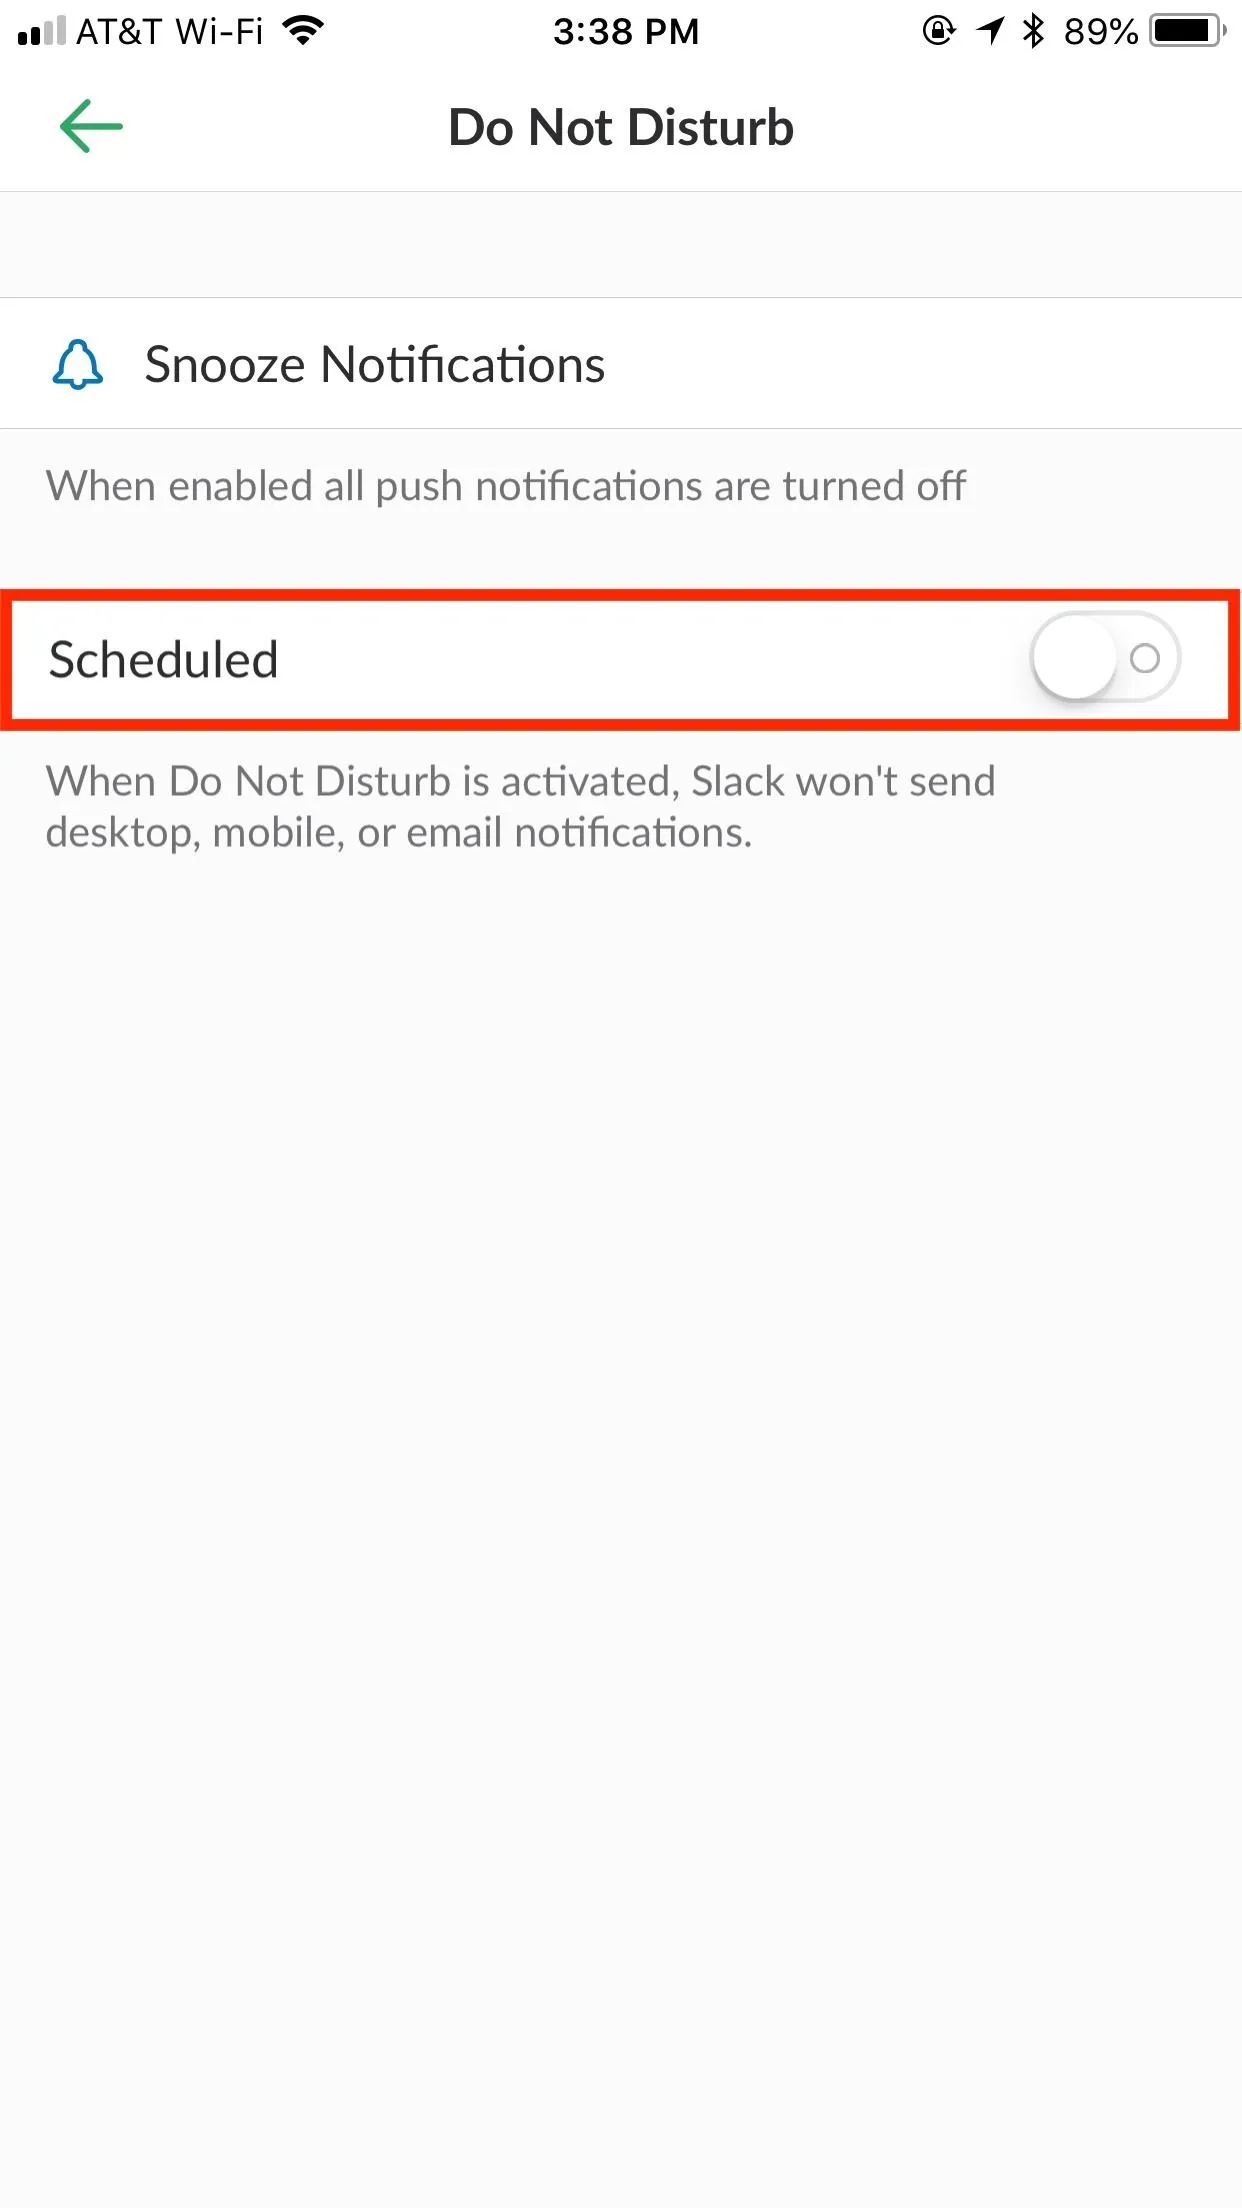
To enable Do Not Disturb, tap the three dots in the top-right corner of the display (or swipe left on iOS) then tap "Settings" and choose "Do Not Disturb." You can actually manually snooze notifications here by tapping "Snooze Notifications," then selecting one of the time options — however, scheduling appears below.


To enable scheduling, tap the slider next to "Scheduled." Next, set your start and end times by tapping "From" and "To" on iOS, and "Start" and "End" on Android. That's all there is to it.
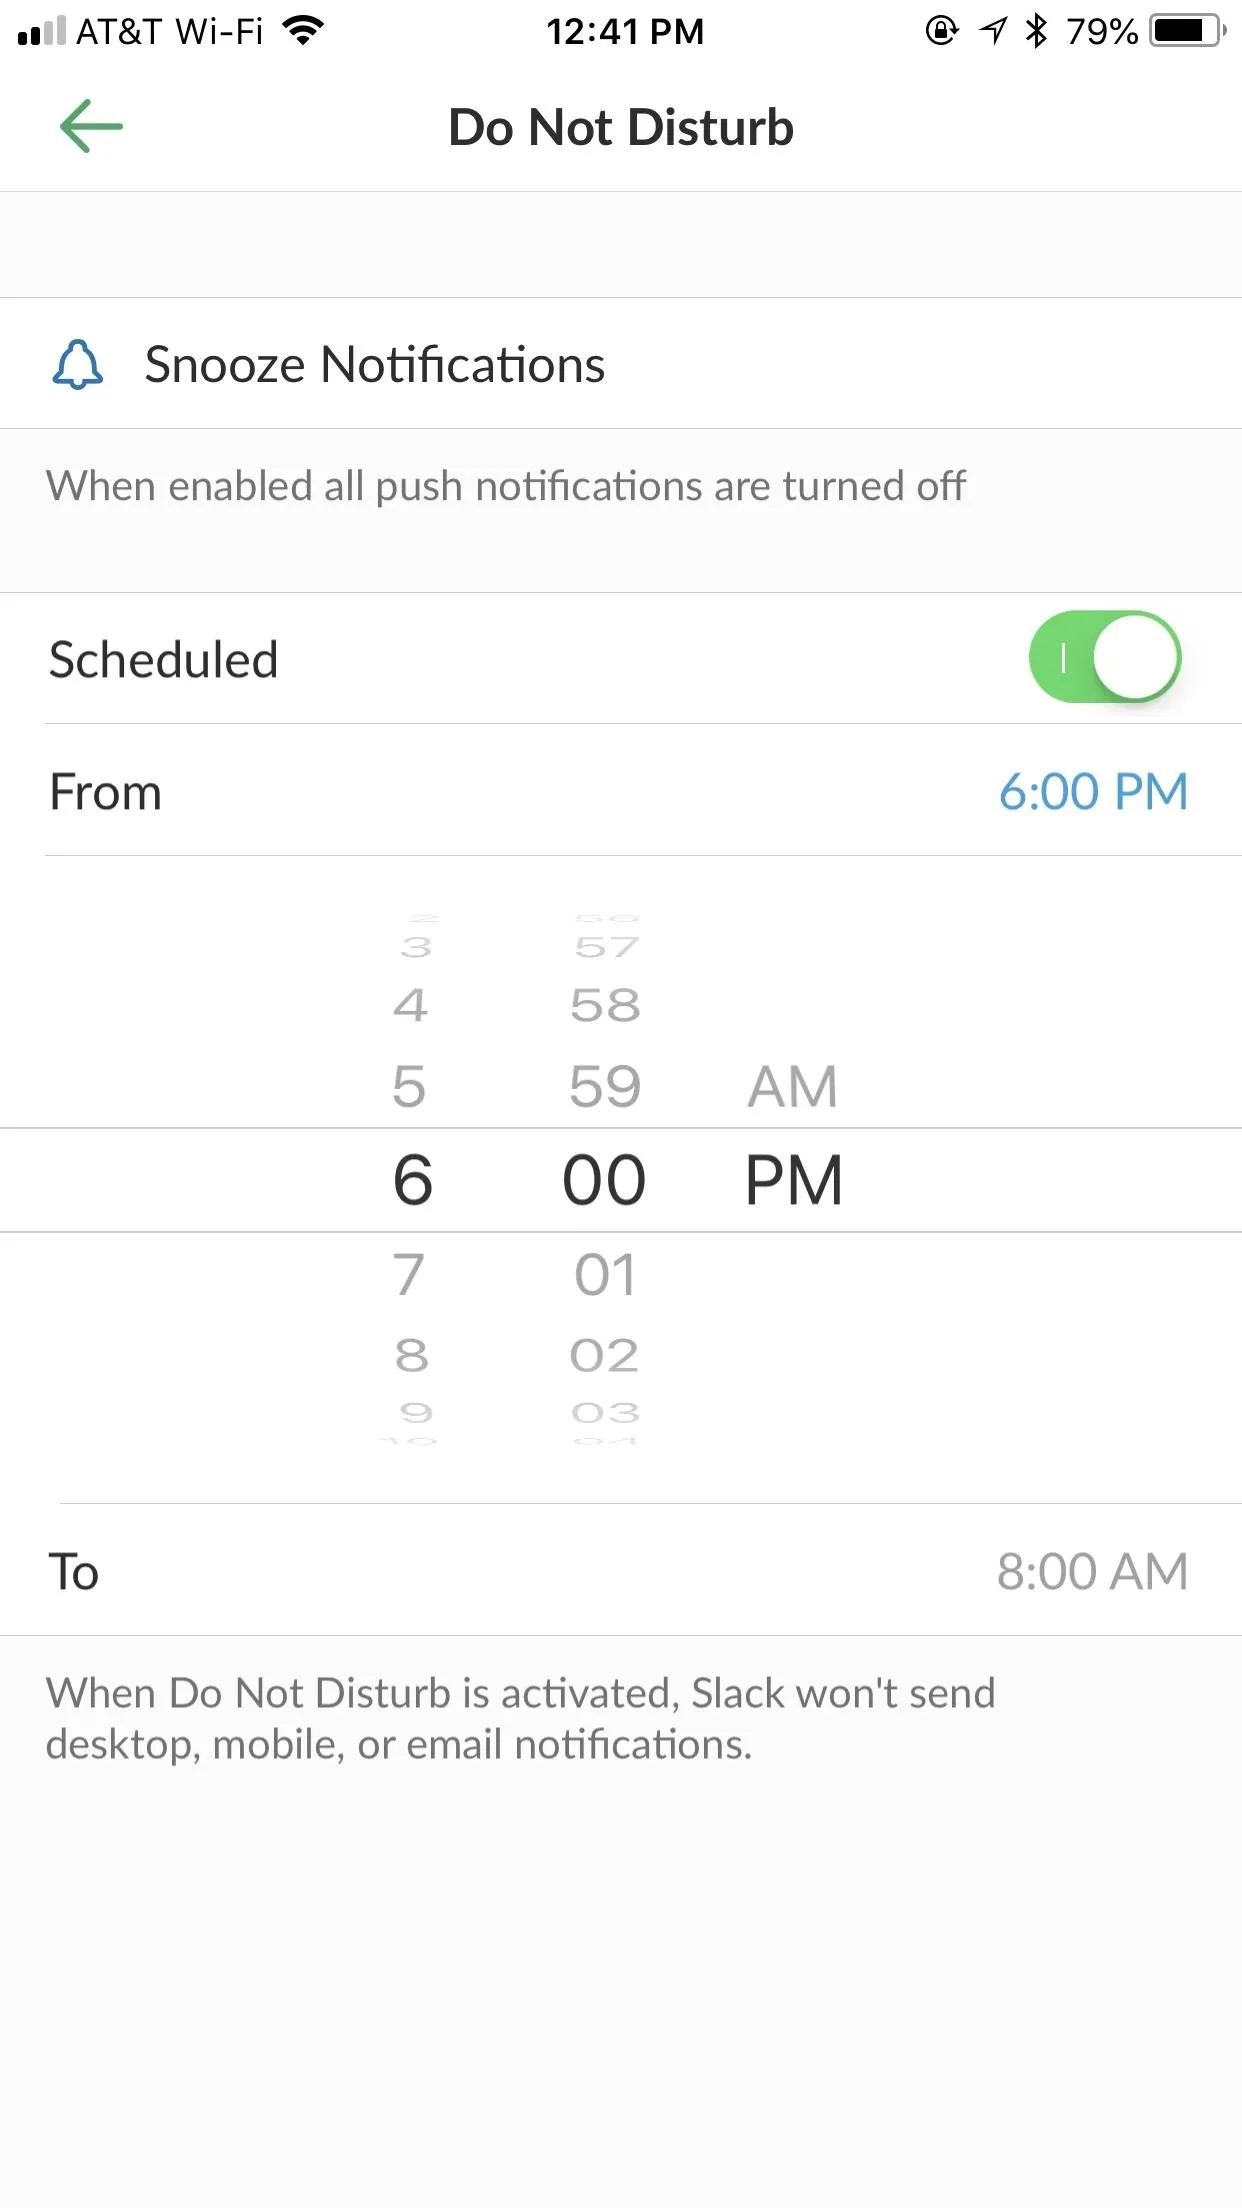
Unfortunately, you can't set dates here, just times, so weekends will follow the same snooze schedule as weekends. If you want to block notifications all-day Saturday, consider manually enabling snoozing first thing in the morning.
- Follow Gadget Hacks on Facebook, Twitter, YouTube, and Flipboard
- Follow WonderHowTo on Facebook, Twitter, Pinterest, and Flipboard
Cover image and screenshots by Jake Peterson/Gadget Hacks


Comments
Be the first, drop a comment!