


The photo-centric Instagram app is a great way to share "evergreen" pictures and videos when compared to Snapchat and Facebook's new Messenger Day feature. But like all social media, keeping the account secure is an essential aspect, as it restricts unwanted viewers from seeing your content and can prevent unauthorized users from accessing your account. Instagram has several methods for locking down the account including a new two-factor authentication (2FA) mechanism.
As part of the Facebook family of applications, Instagram is designed primarily for use with the platform, but also links with other third-party apps like Twitter and Tinder. So it's an important cog in your overall social media security, and below, we'll take a look at how to apply various settings to make the app as secure as possible.
Change Your Password & Enable 2FA
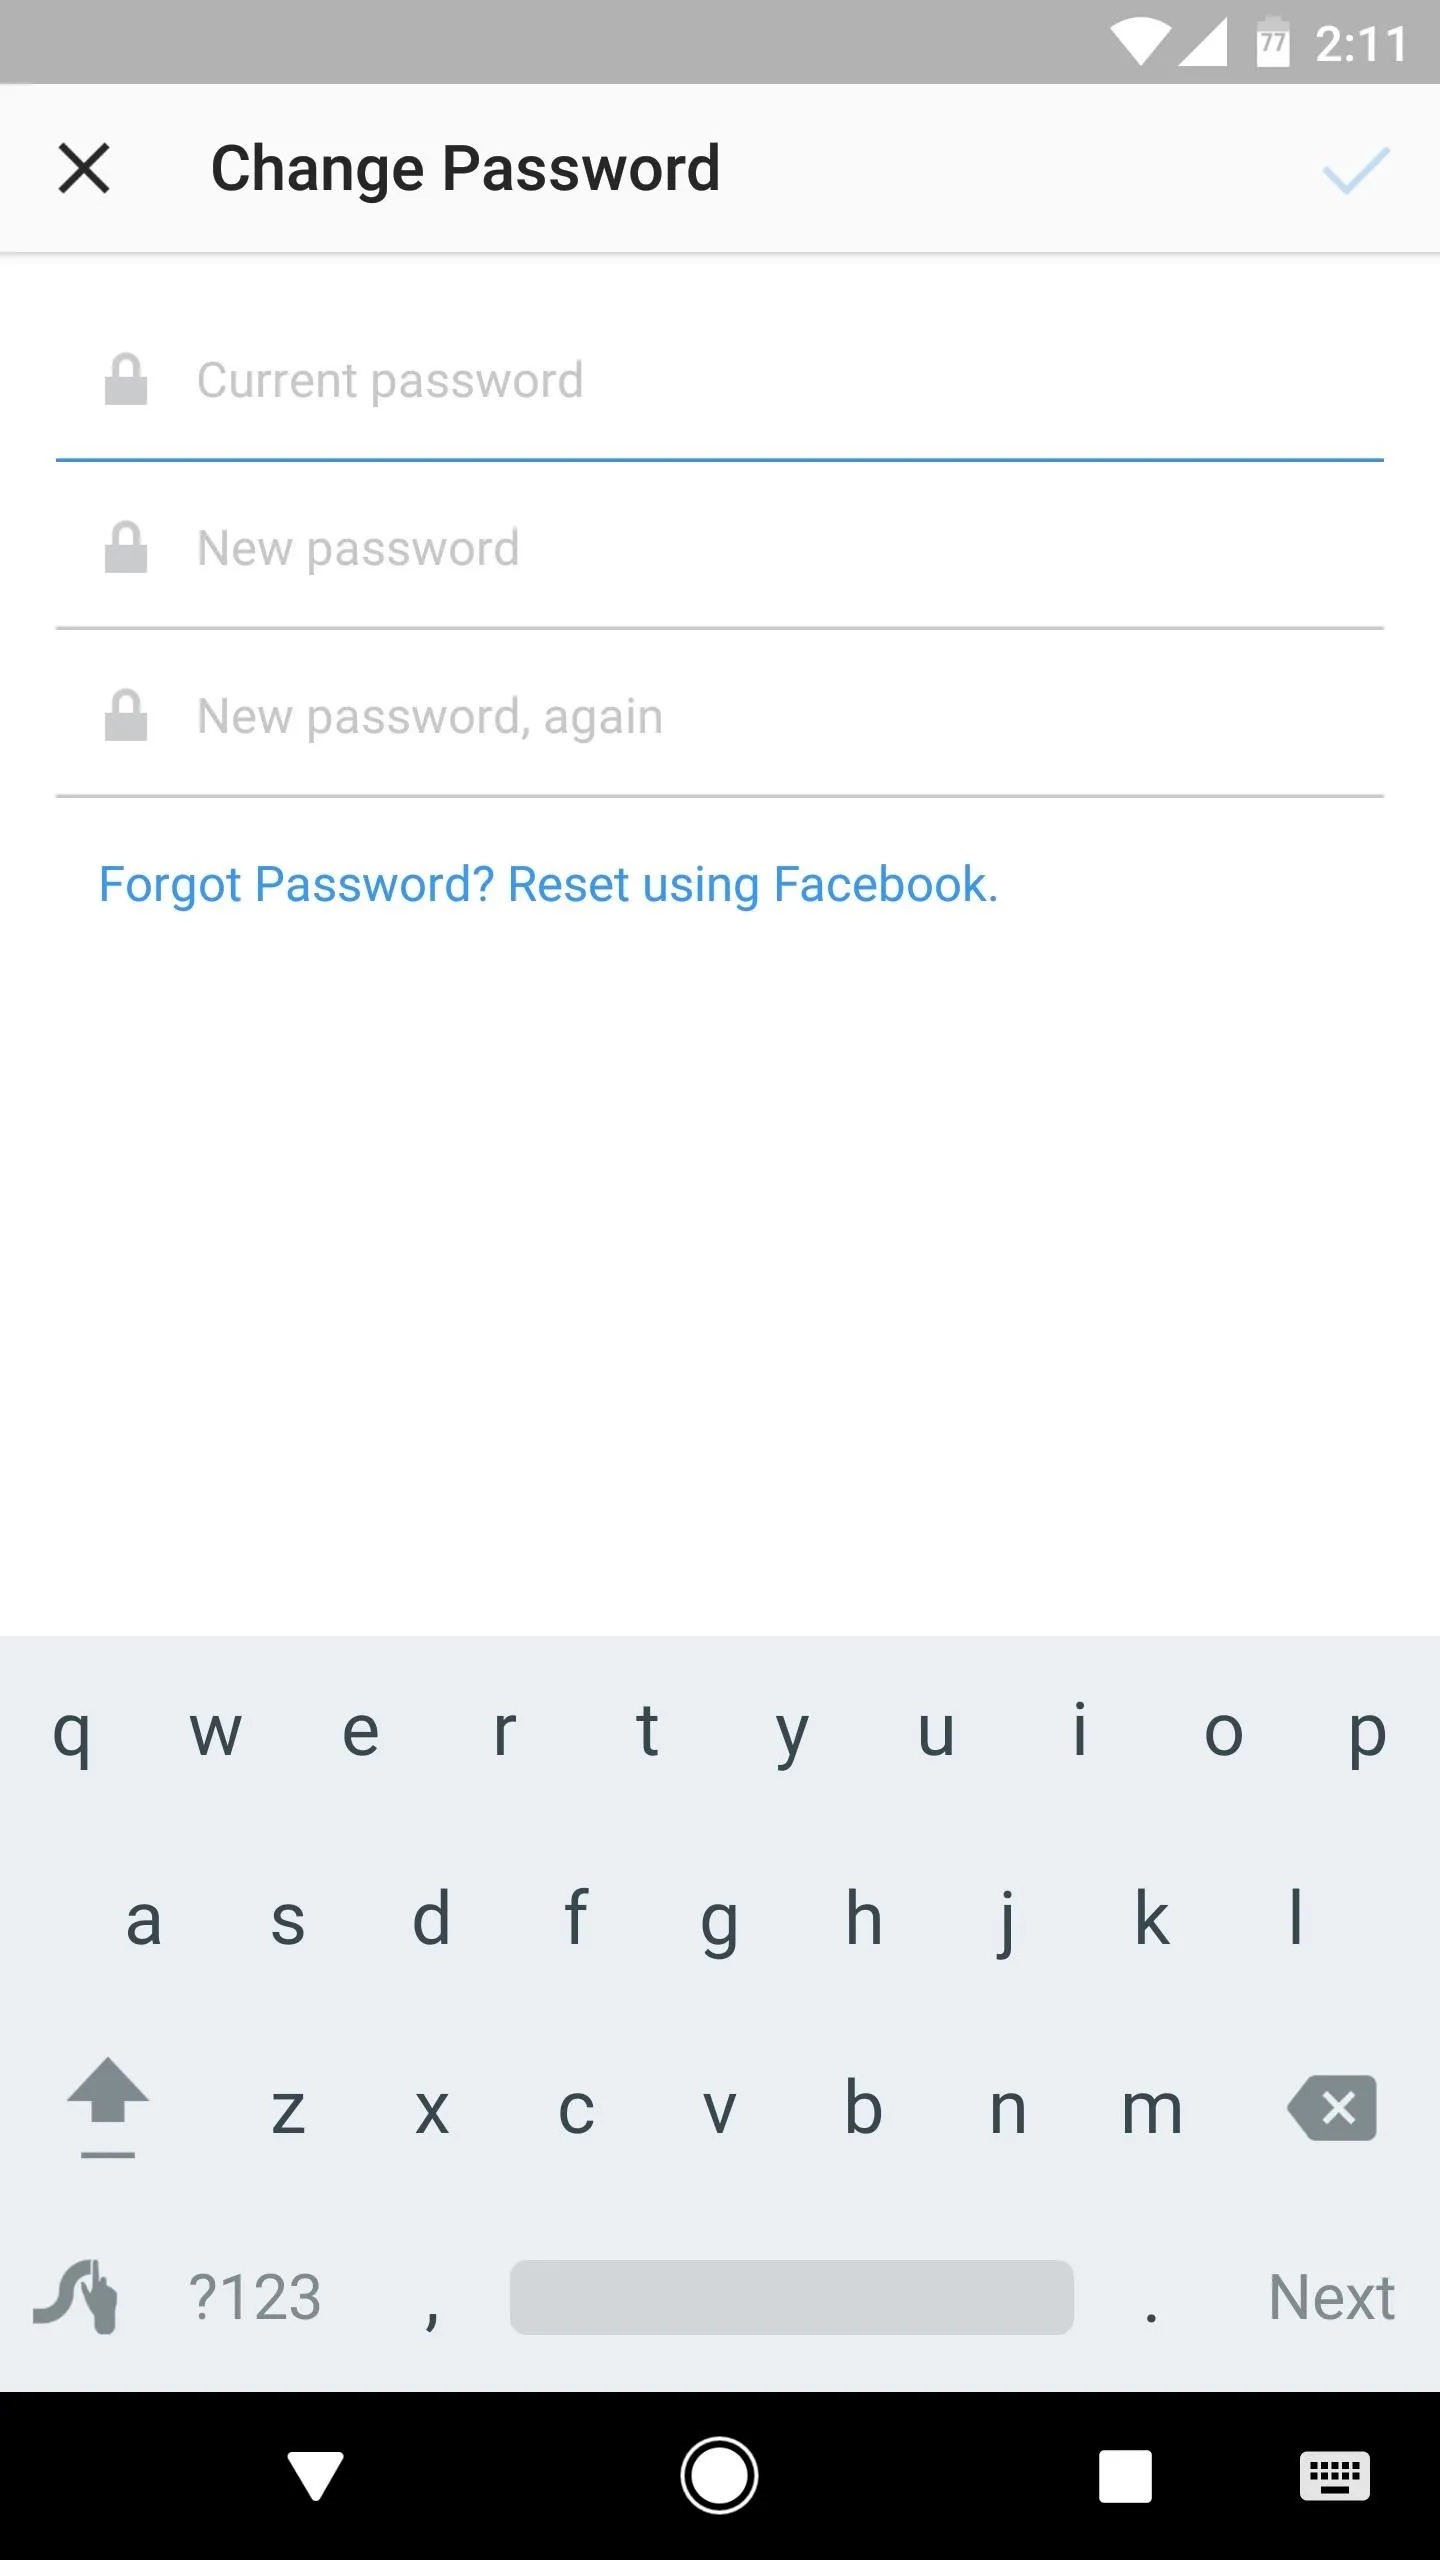
Let's say a hacker has access to your Instagram account—perhaps your username and password showed up on a list of leaked credentials, and the hacker's got it saved somewhere, but hasn't used it for any nefarious purposes yet. This threat is always present with any online service, and it's why changing your password periodically is an important security measure, as it will disable the hacker's ability to log into your profile.
But then, if you want to take matters a bit further, adding two-factor authentication to your account will virtually guarantee that no one else will be able to access your account without control of your smartphone—even if they somehow managed to get your password.
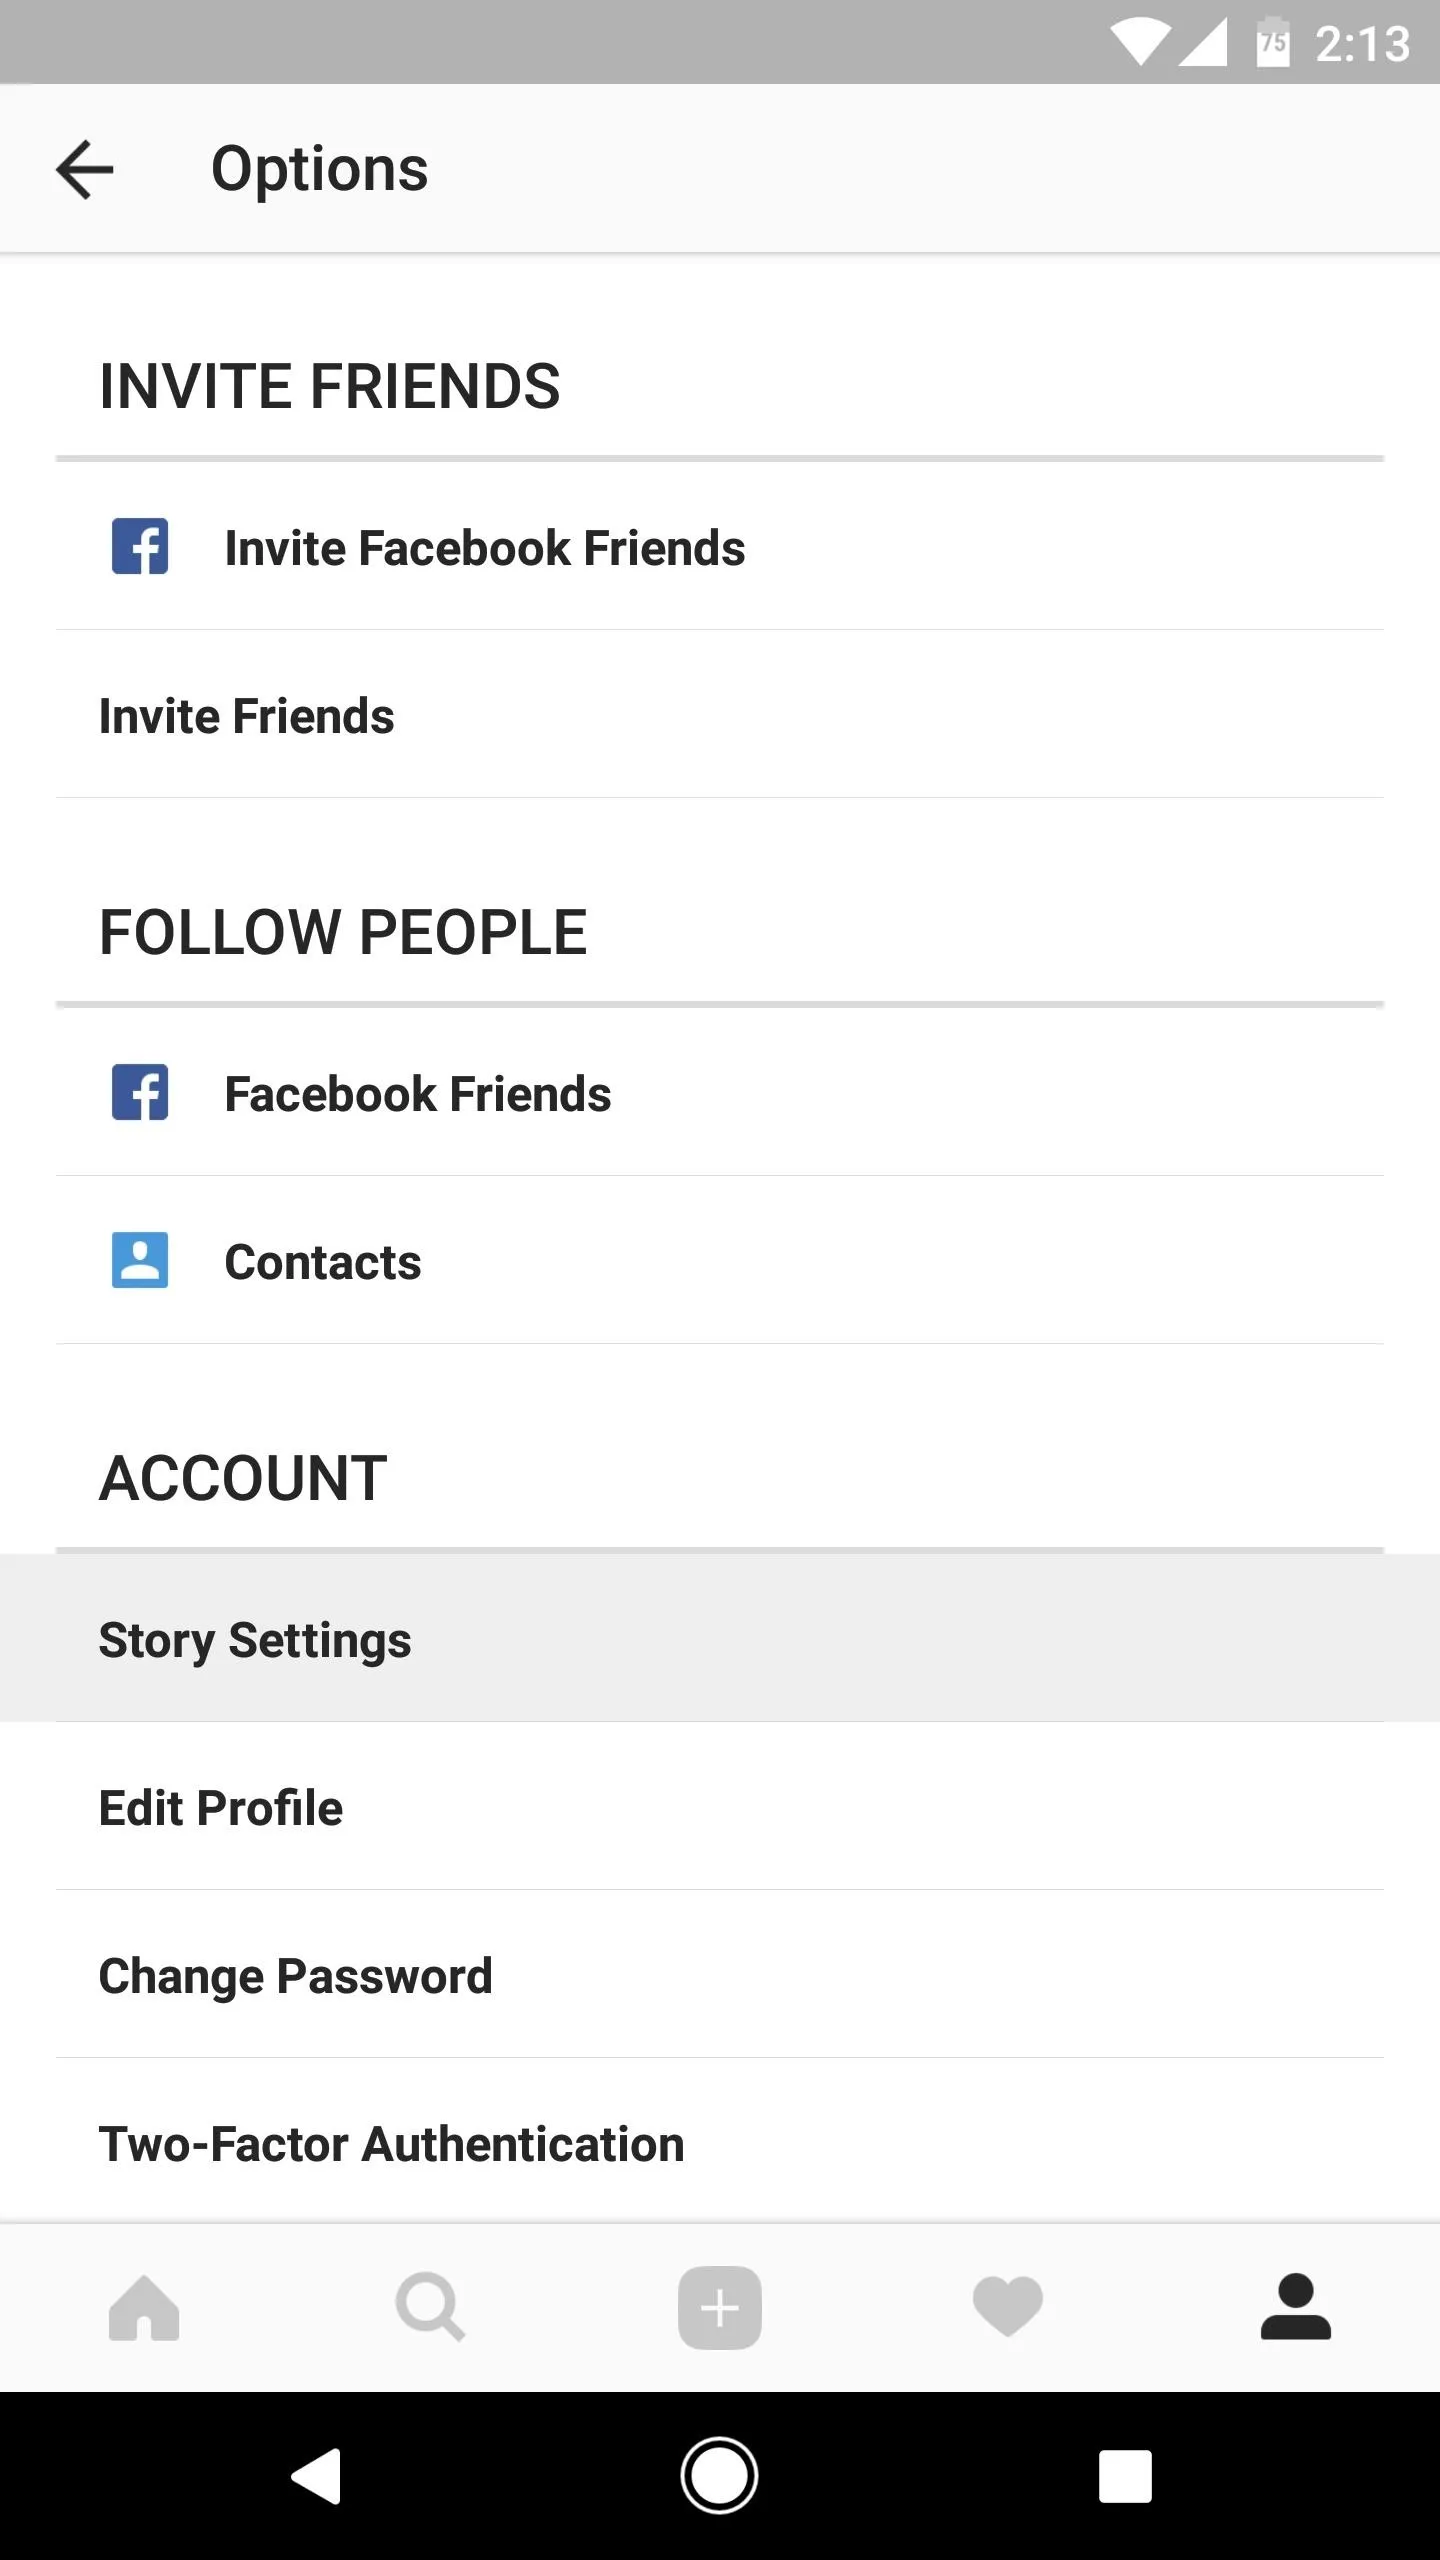
So let's tackle both of these issues since they're related. To change your password, tap the silhouette icon in the bottom-right corner of the Instagram app, then press the three-dot menu button at the top of the screen. Scroll down to the Account section and tap "Change Password." If you used your Facebook login info to create the account, you'll need to tap the "Reset using Facebook" option, then follow the prompts provided by Facebook.
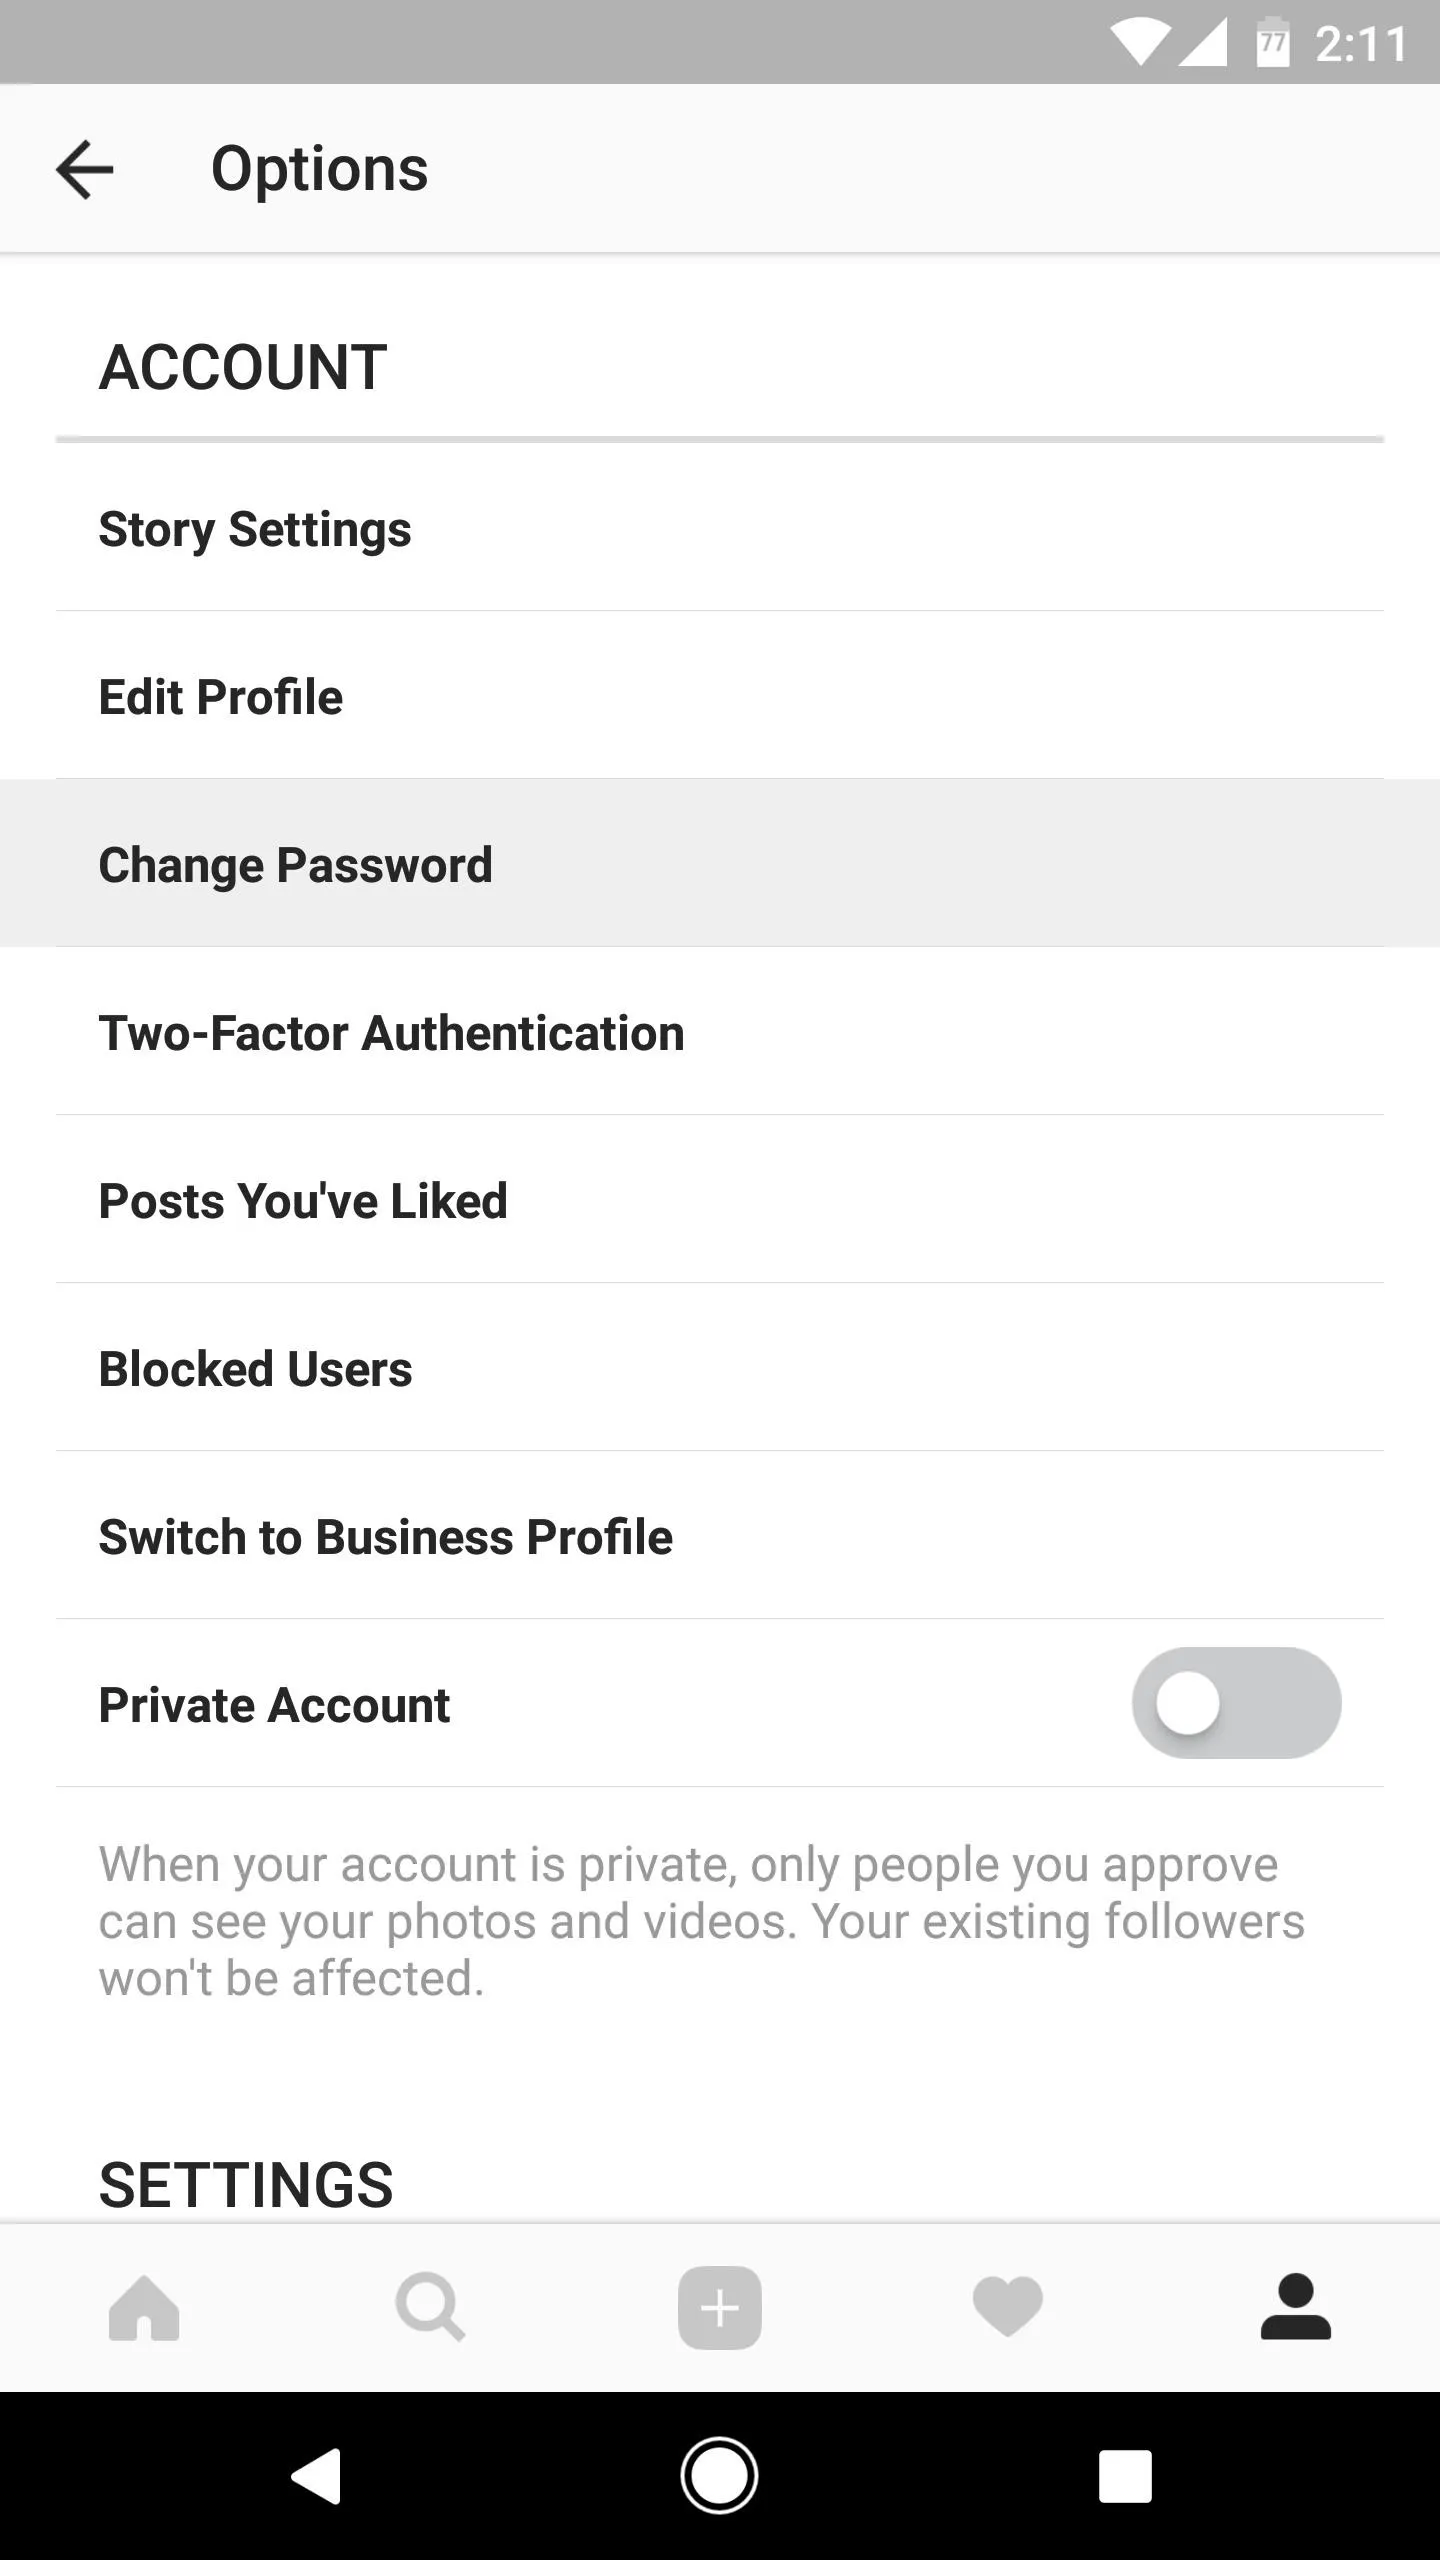
Next, find the "Two-Factor Authentication" link in the Account section and give it a tap. Enable the switch next to "Require Security Code," then you'll receive a text to the number on file in your profile, which will be used to confirm activation of 2FA. After this is complete, you will receive a list of backup codes and the app will automatically save a screenshot of this to your device. If you sync photos to a place where others can view your pictures, it would be wise to delete this screenshot asap.

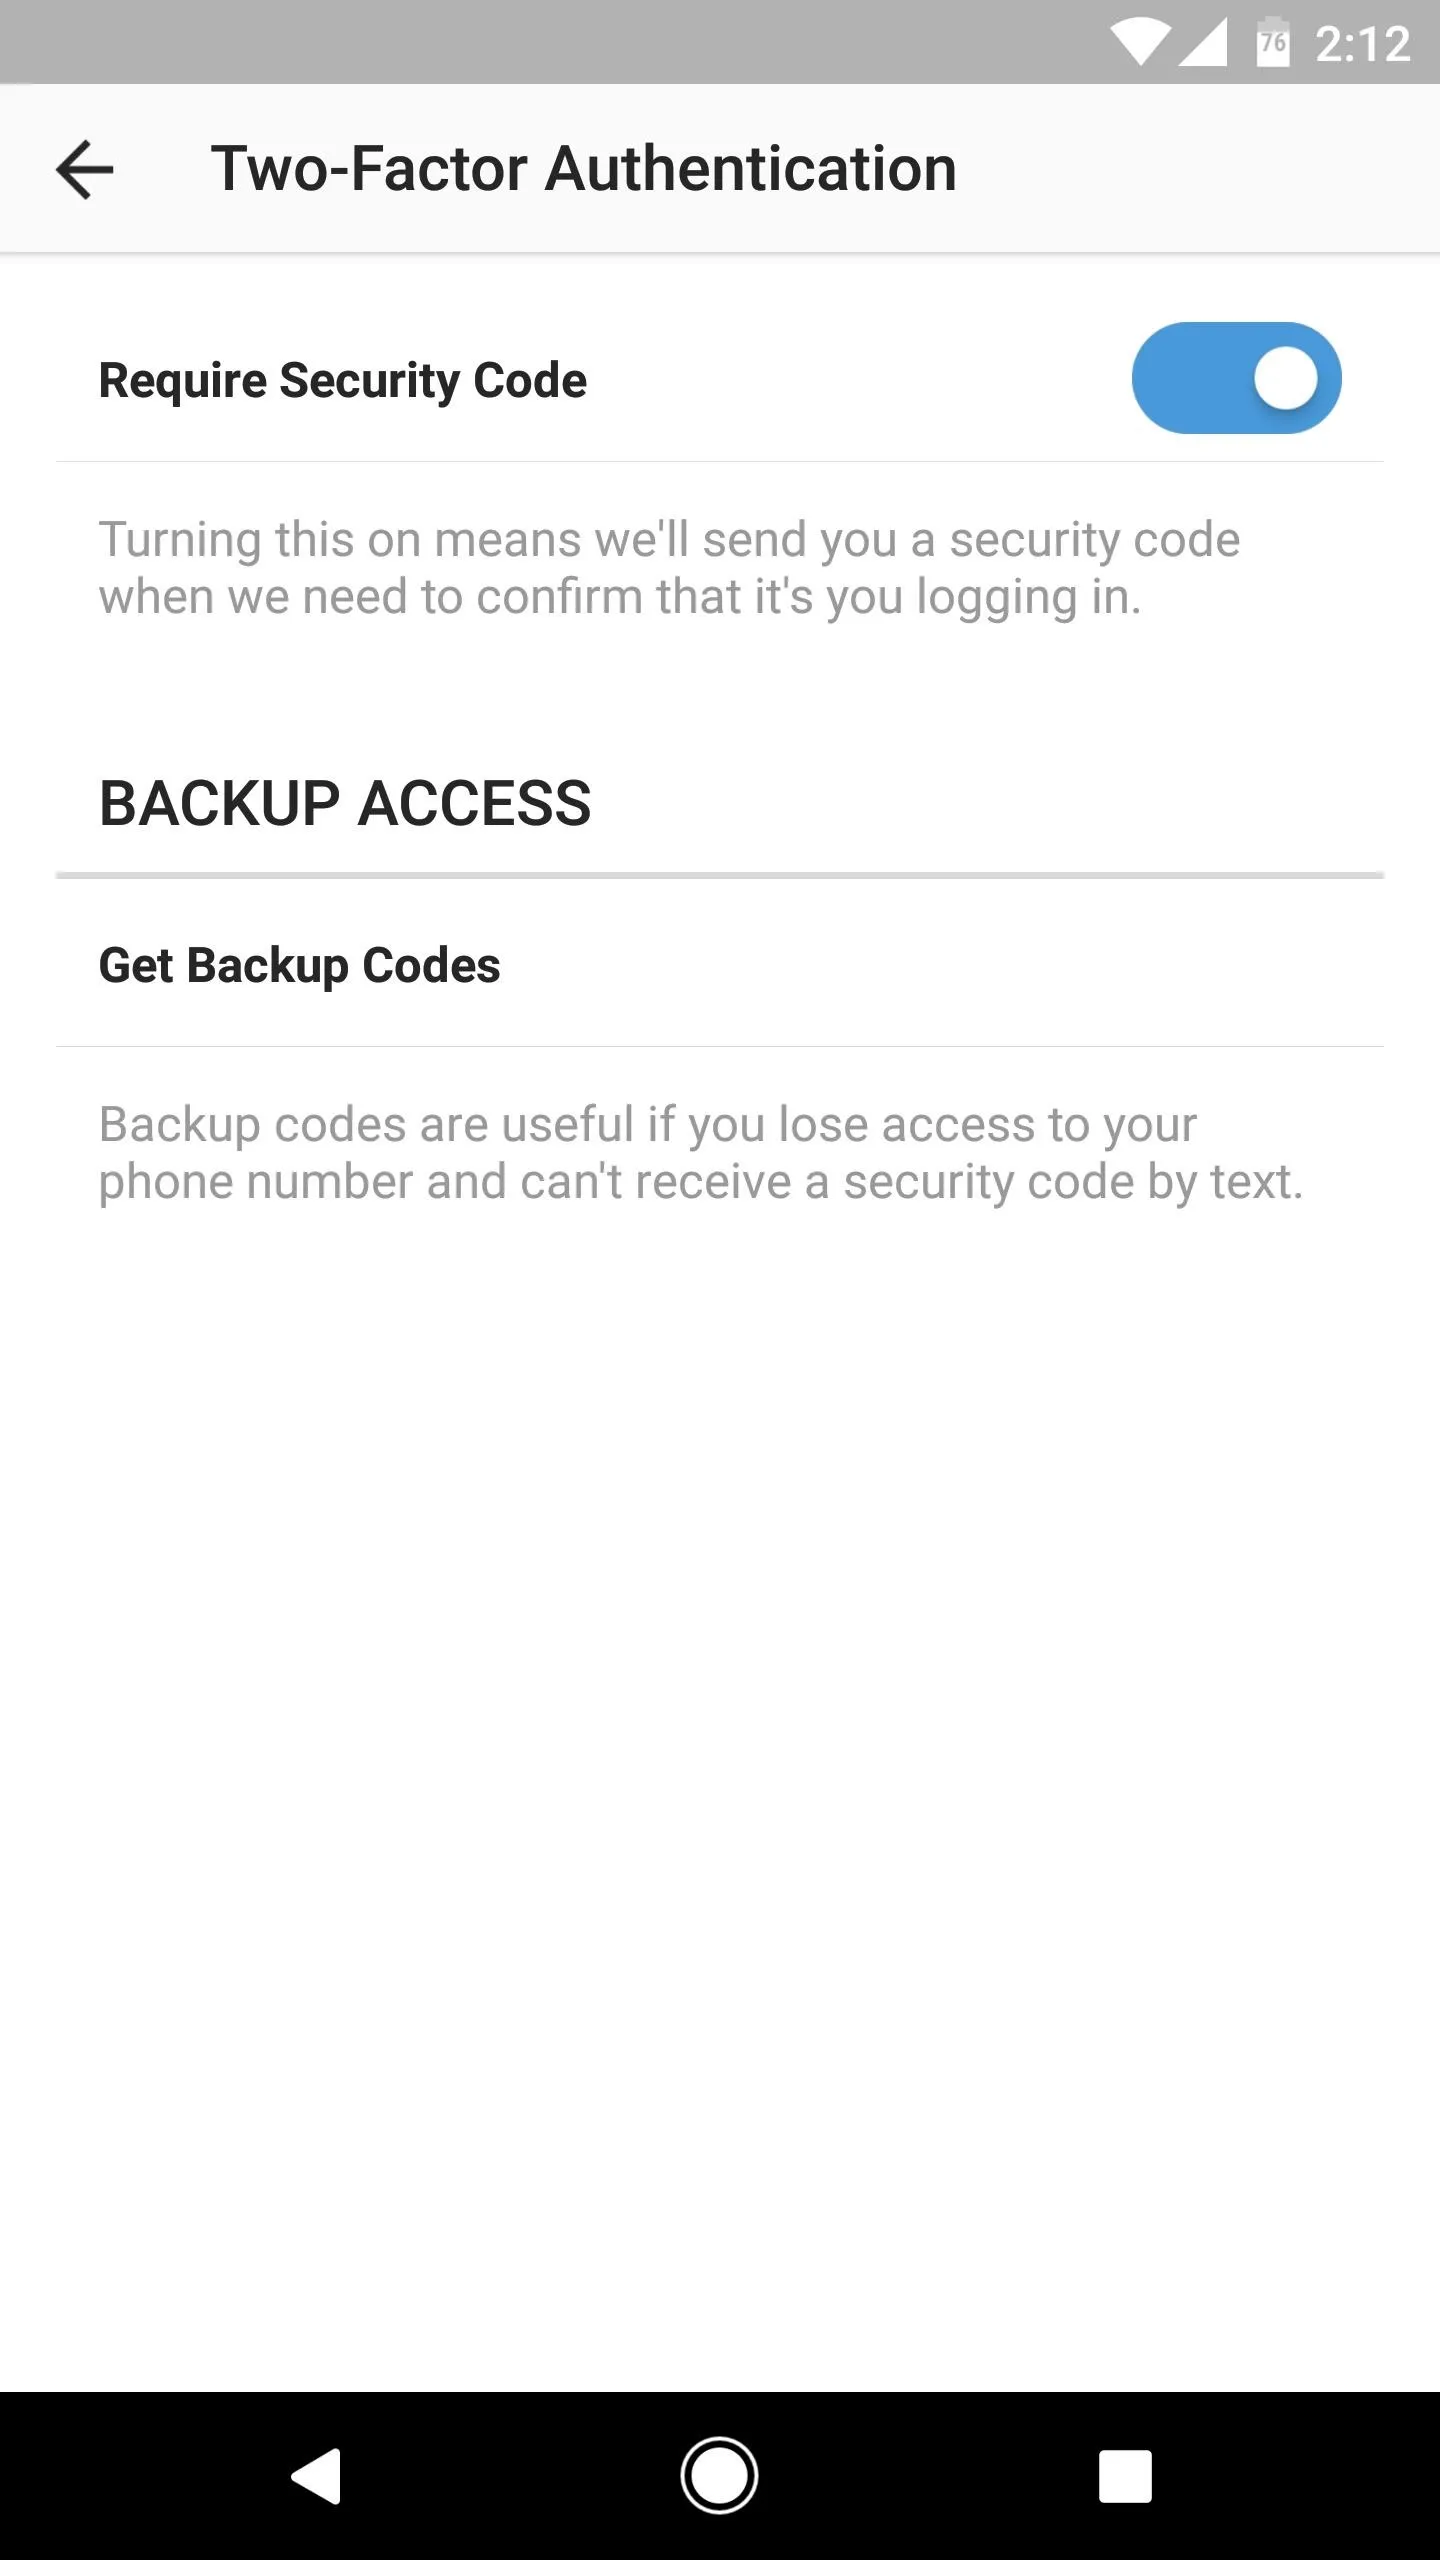
From now on, whenever you go to log into your Instagram account from any device, you'll be prompted to enter a 2FA code. This code will be sent to your phone via SMS, so simply check the message, enter the code, then you'll be logged in. Since remote threats like hackers don't usually have physical access to your phone, they won't be able to log into your account, as the 2FA code will only be sent to your phone number.
Edit Story Settings
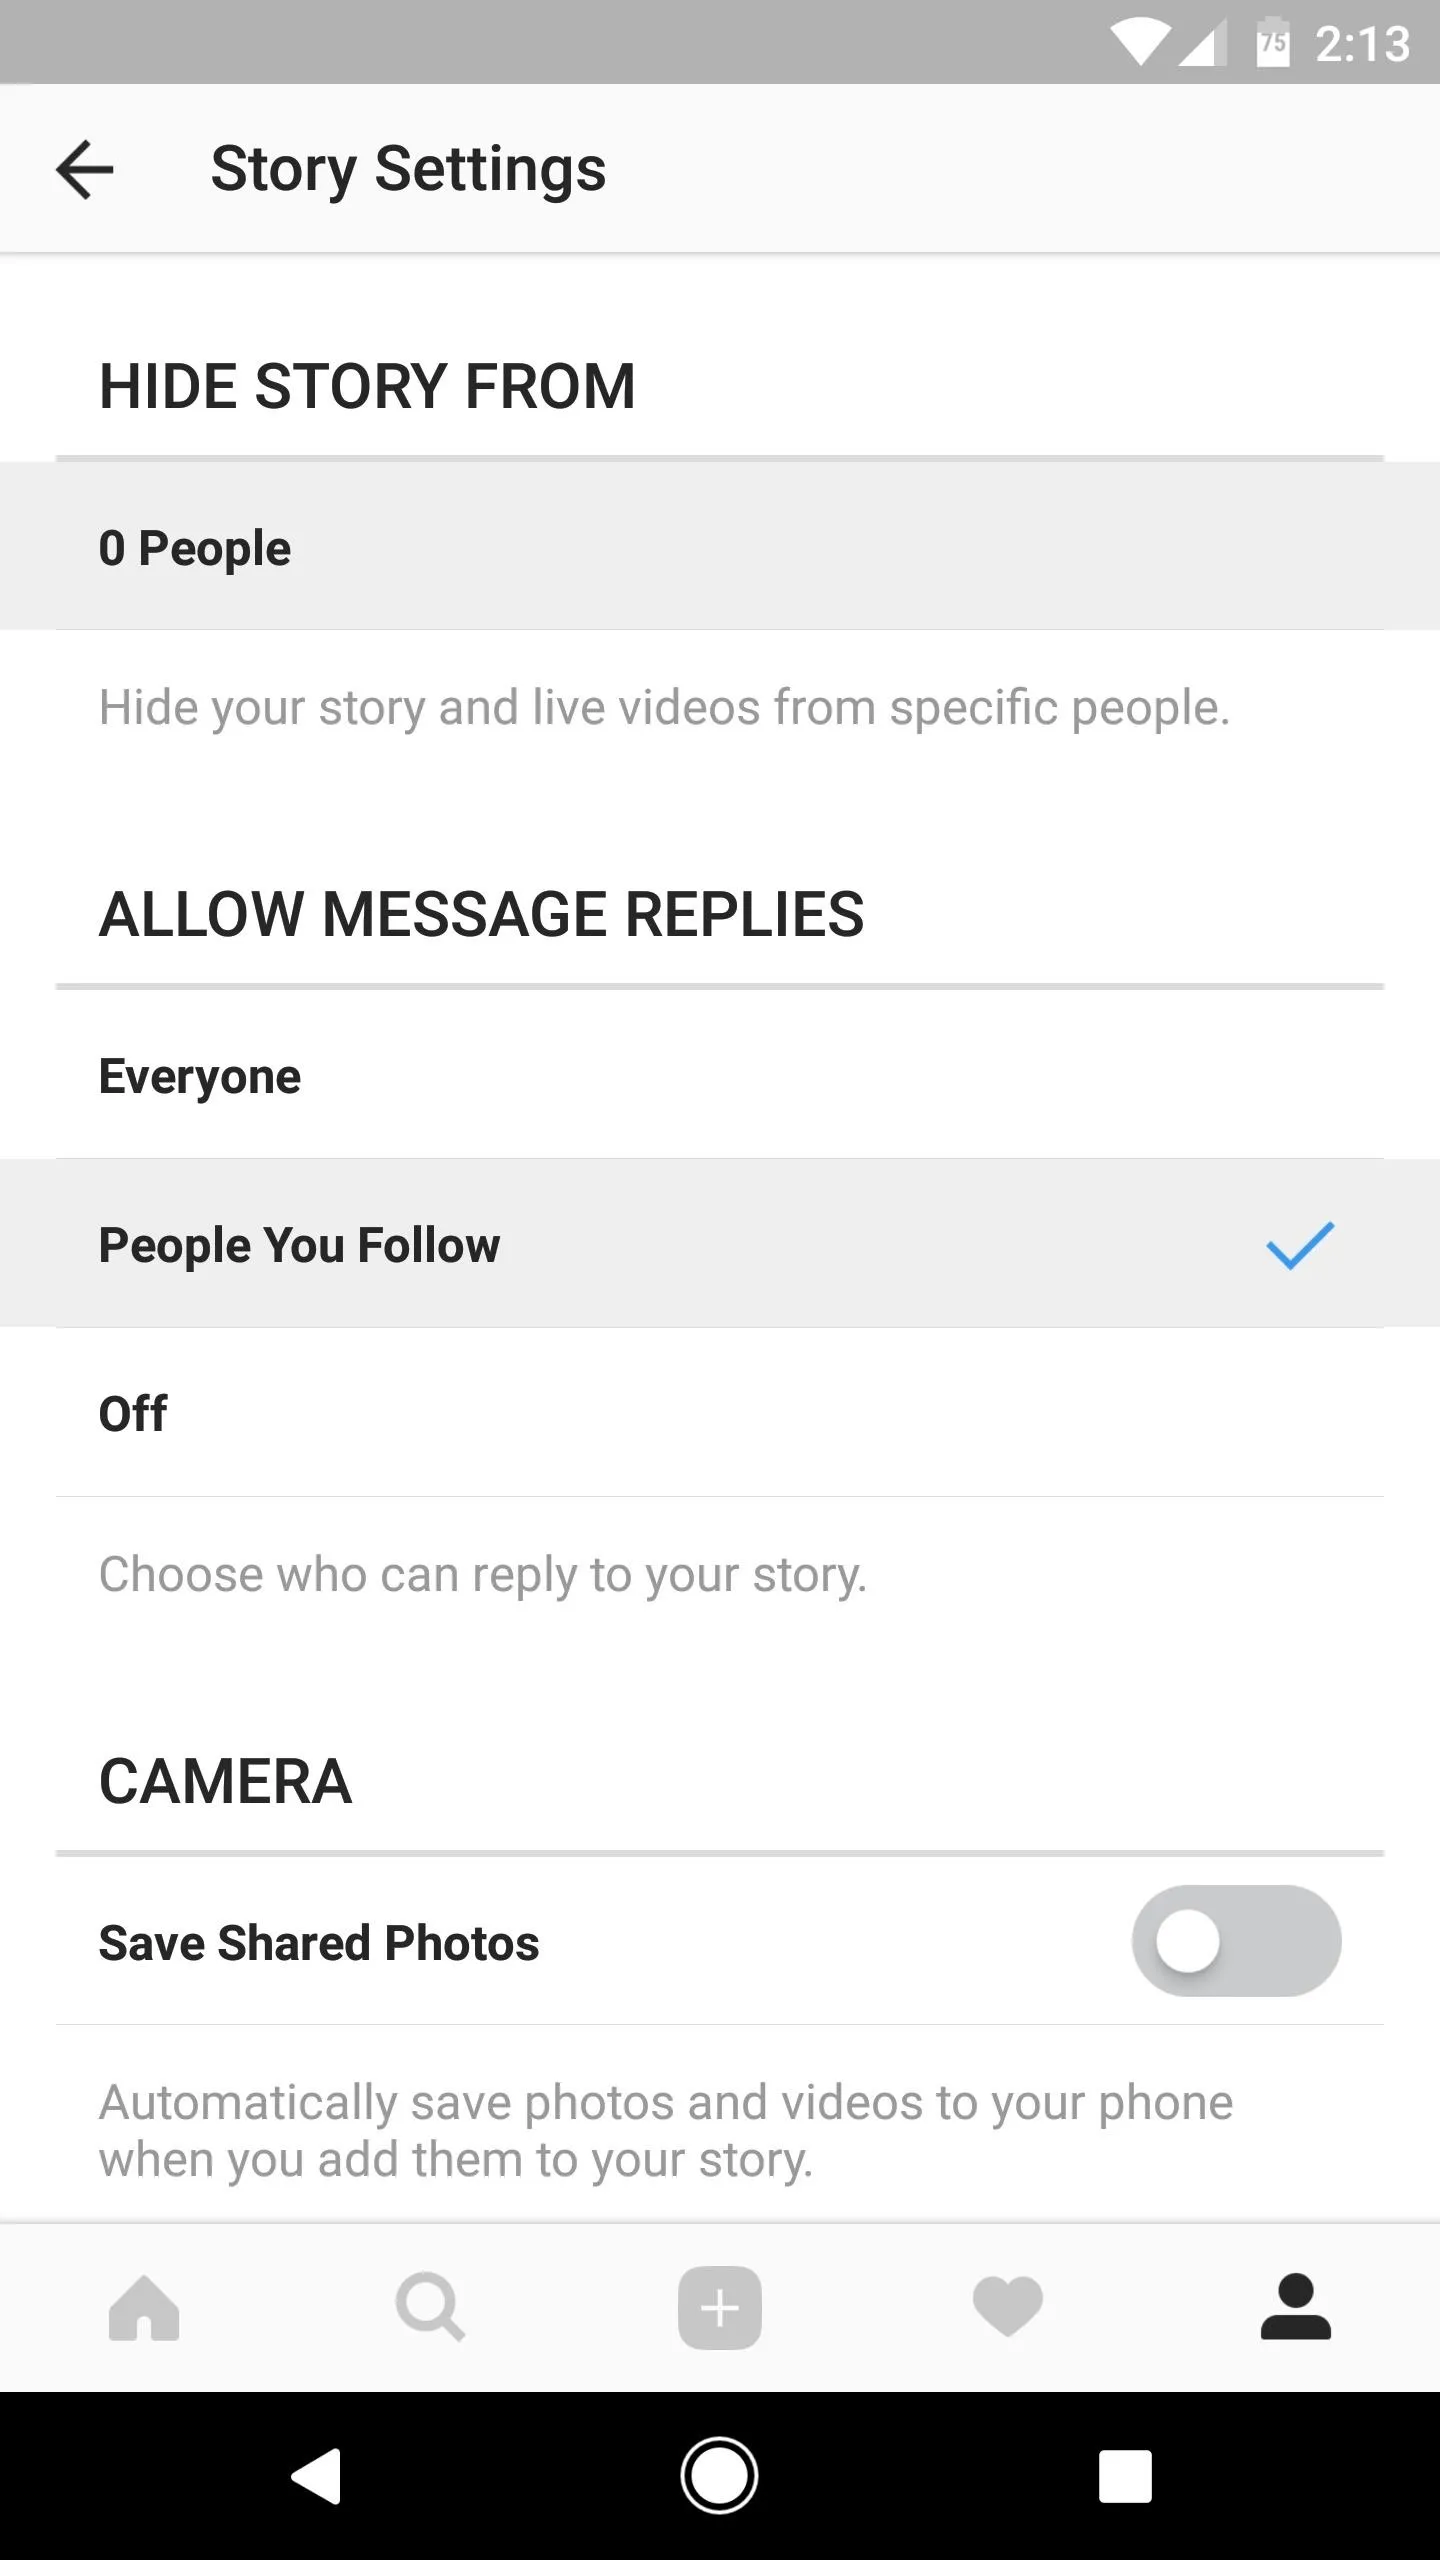
Now let's address the issue of unwanted viewers seeing certain Instagram posts. Once again, head to the Options menu by tapping the silhouette icon and hitting the three-dot menu button, and from here, select "Story Settings." The "Hide Story From" option you'll find here lets you keep specific Instagram followers from viewing your posts. Beneath this, changing the "Allow Message Replies" from its default setting of "Everyone" to "People You Follow" limits random users from being able to comment on a public post.
Block Users or Make Your Account Private
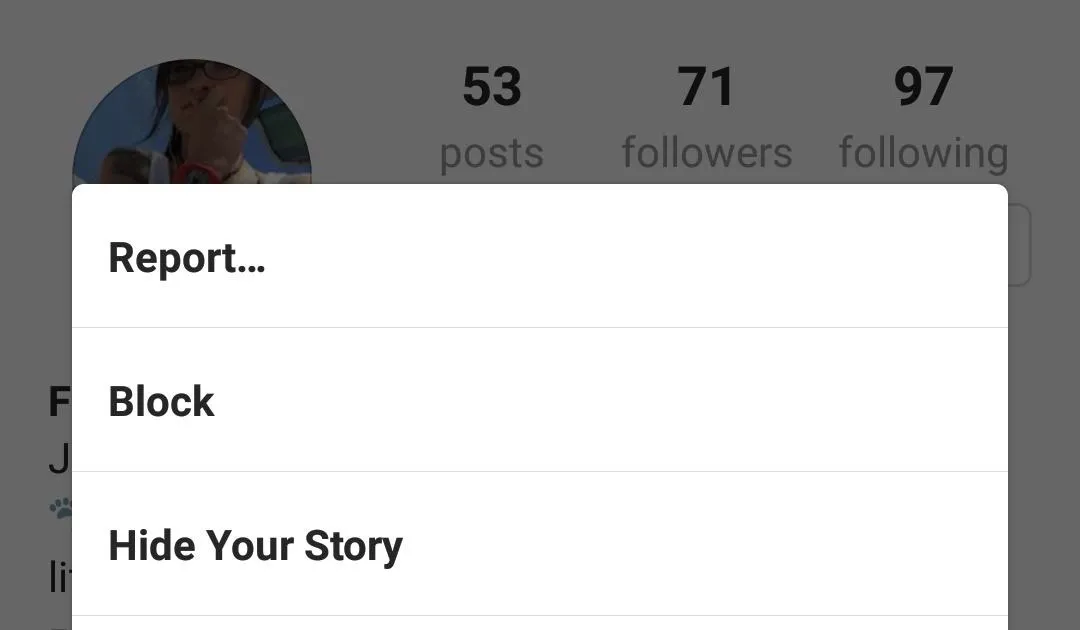
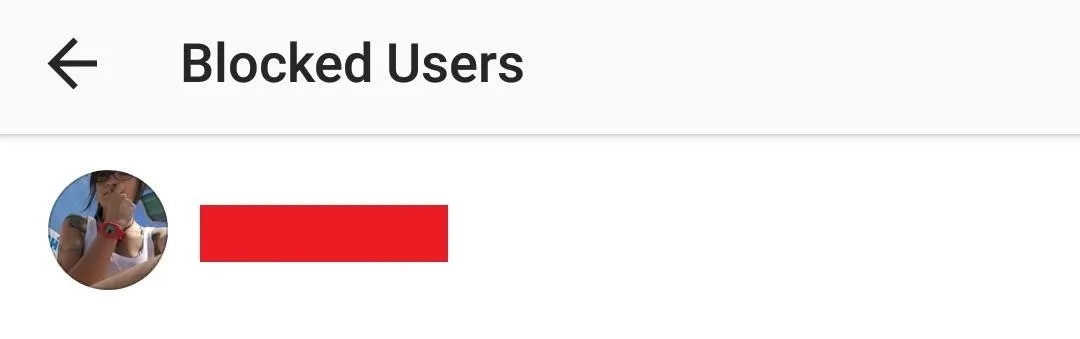
If you find that a certain individual is bothering you on Instagram, first navigate to their profile. Tap the three-dot menu button in the upper-right corner, then select "Block" from the menu that appears, and confirm your choice on the following popup. To verify that the user is actually blocked, you can check in the Options menu by scrolling to near the bottom of the Account section and tapping the "Blocked Users" link.
Sometimes it's best to just stop any potential for interaction.
If needed, you can always unblock someone. Just remember that you probably did it for a reason in the first place.
Sometimes it's best to just stop any potential for interaction.
If needed, you can always unblock someone. Just remember that you probably did it for a reason in the first place.
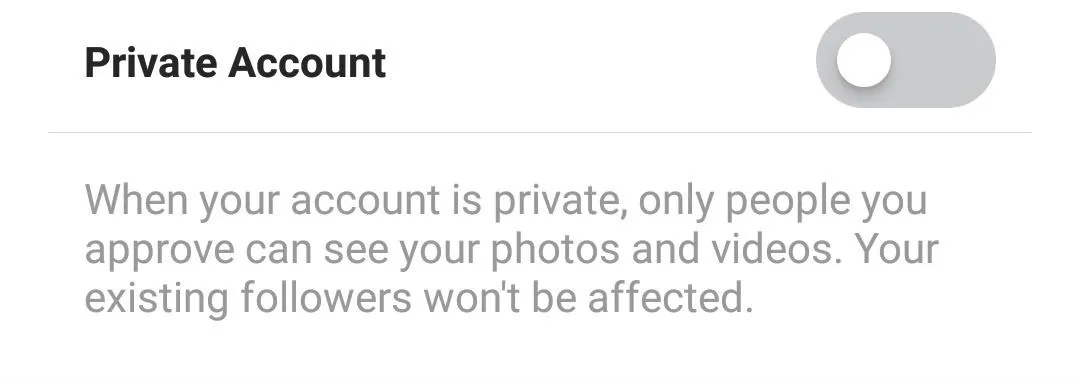
If that's not enough privacy for you, it's possible to heavily restrict the people who see your personal profile by activating the "Private Account" option at the bottom Options menu. Simply tap the switch to make your account accessible only to those who you first approve, but note that this doesn't affect your current followers.
When private, people request to follow you similar to a friend request on Facebook.
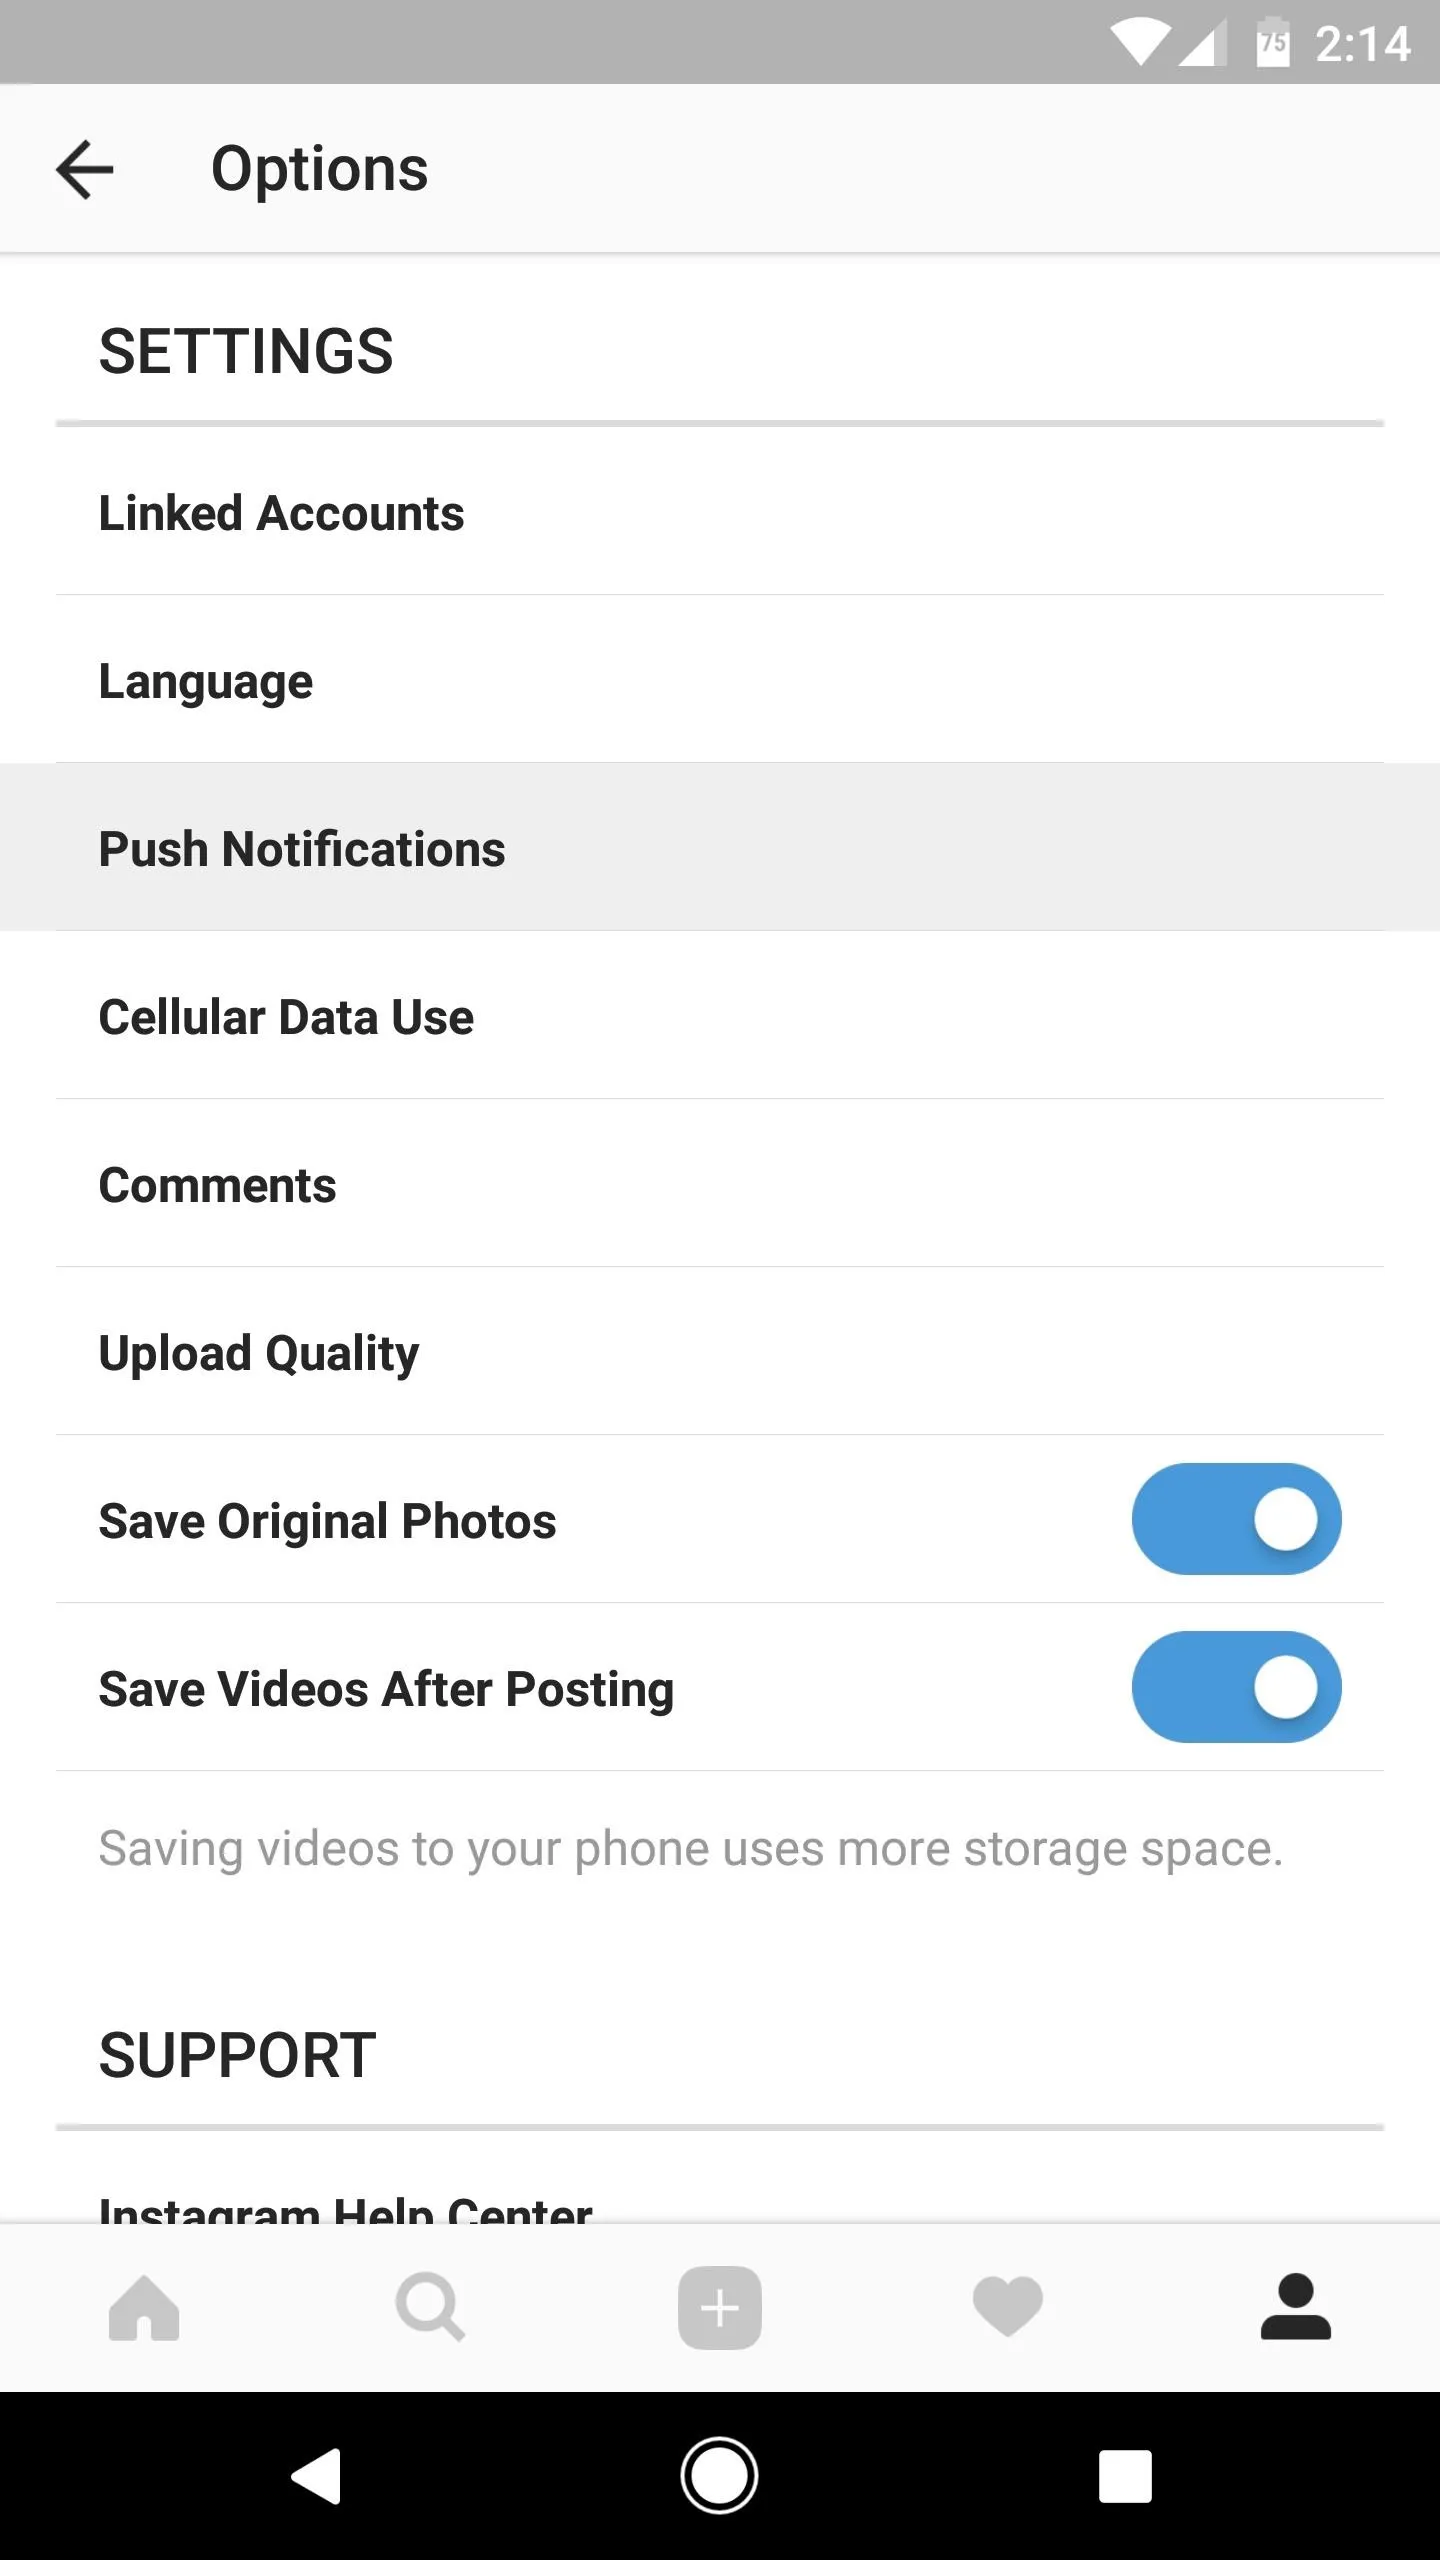
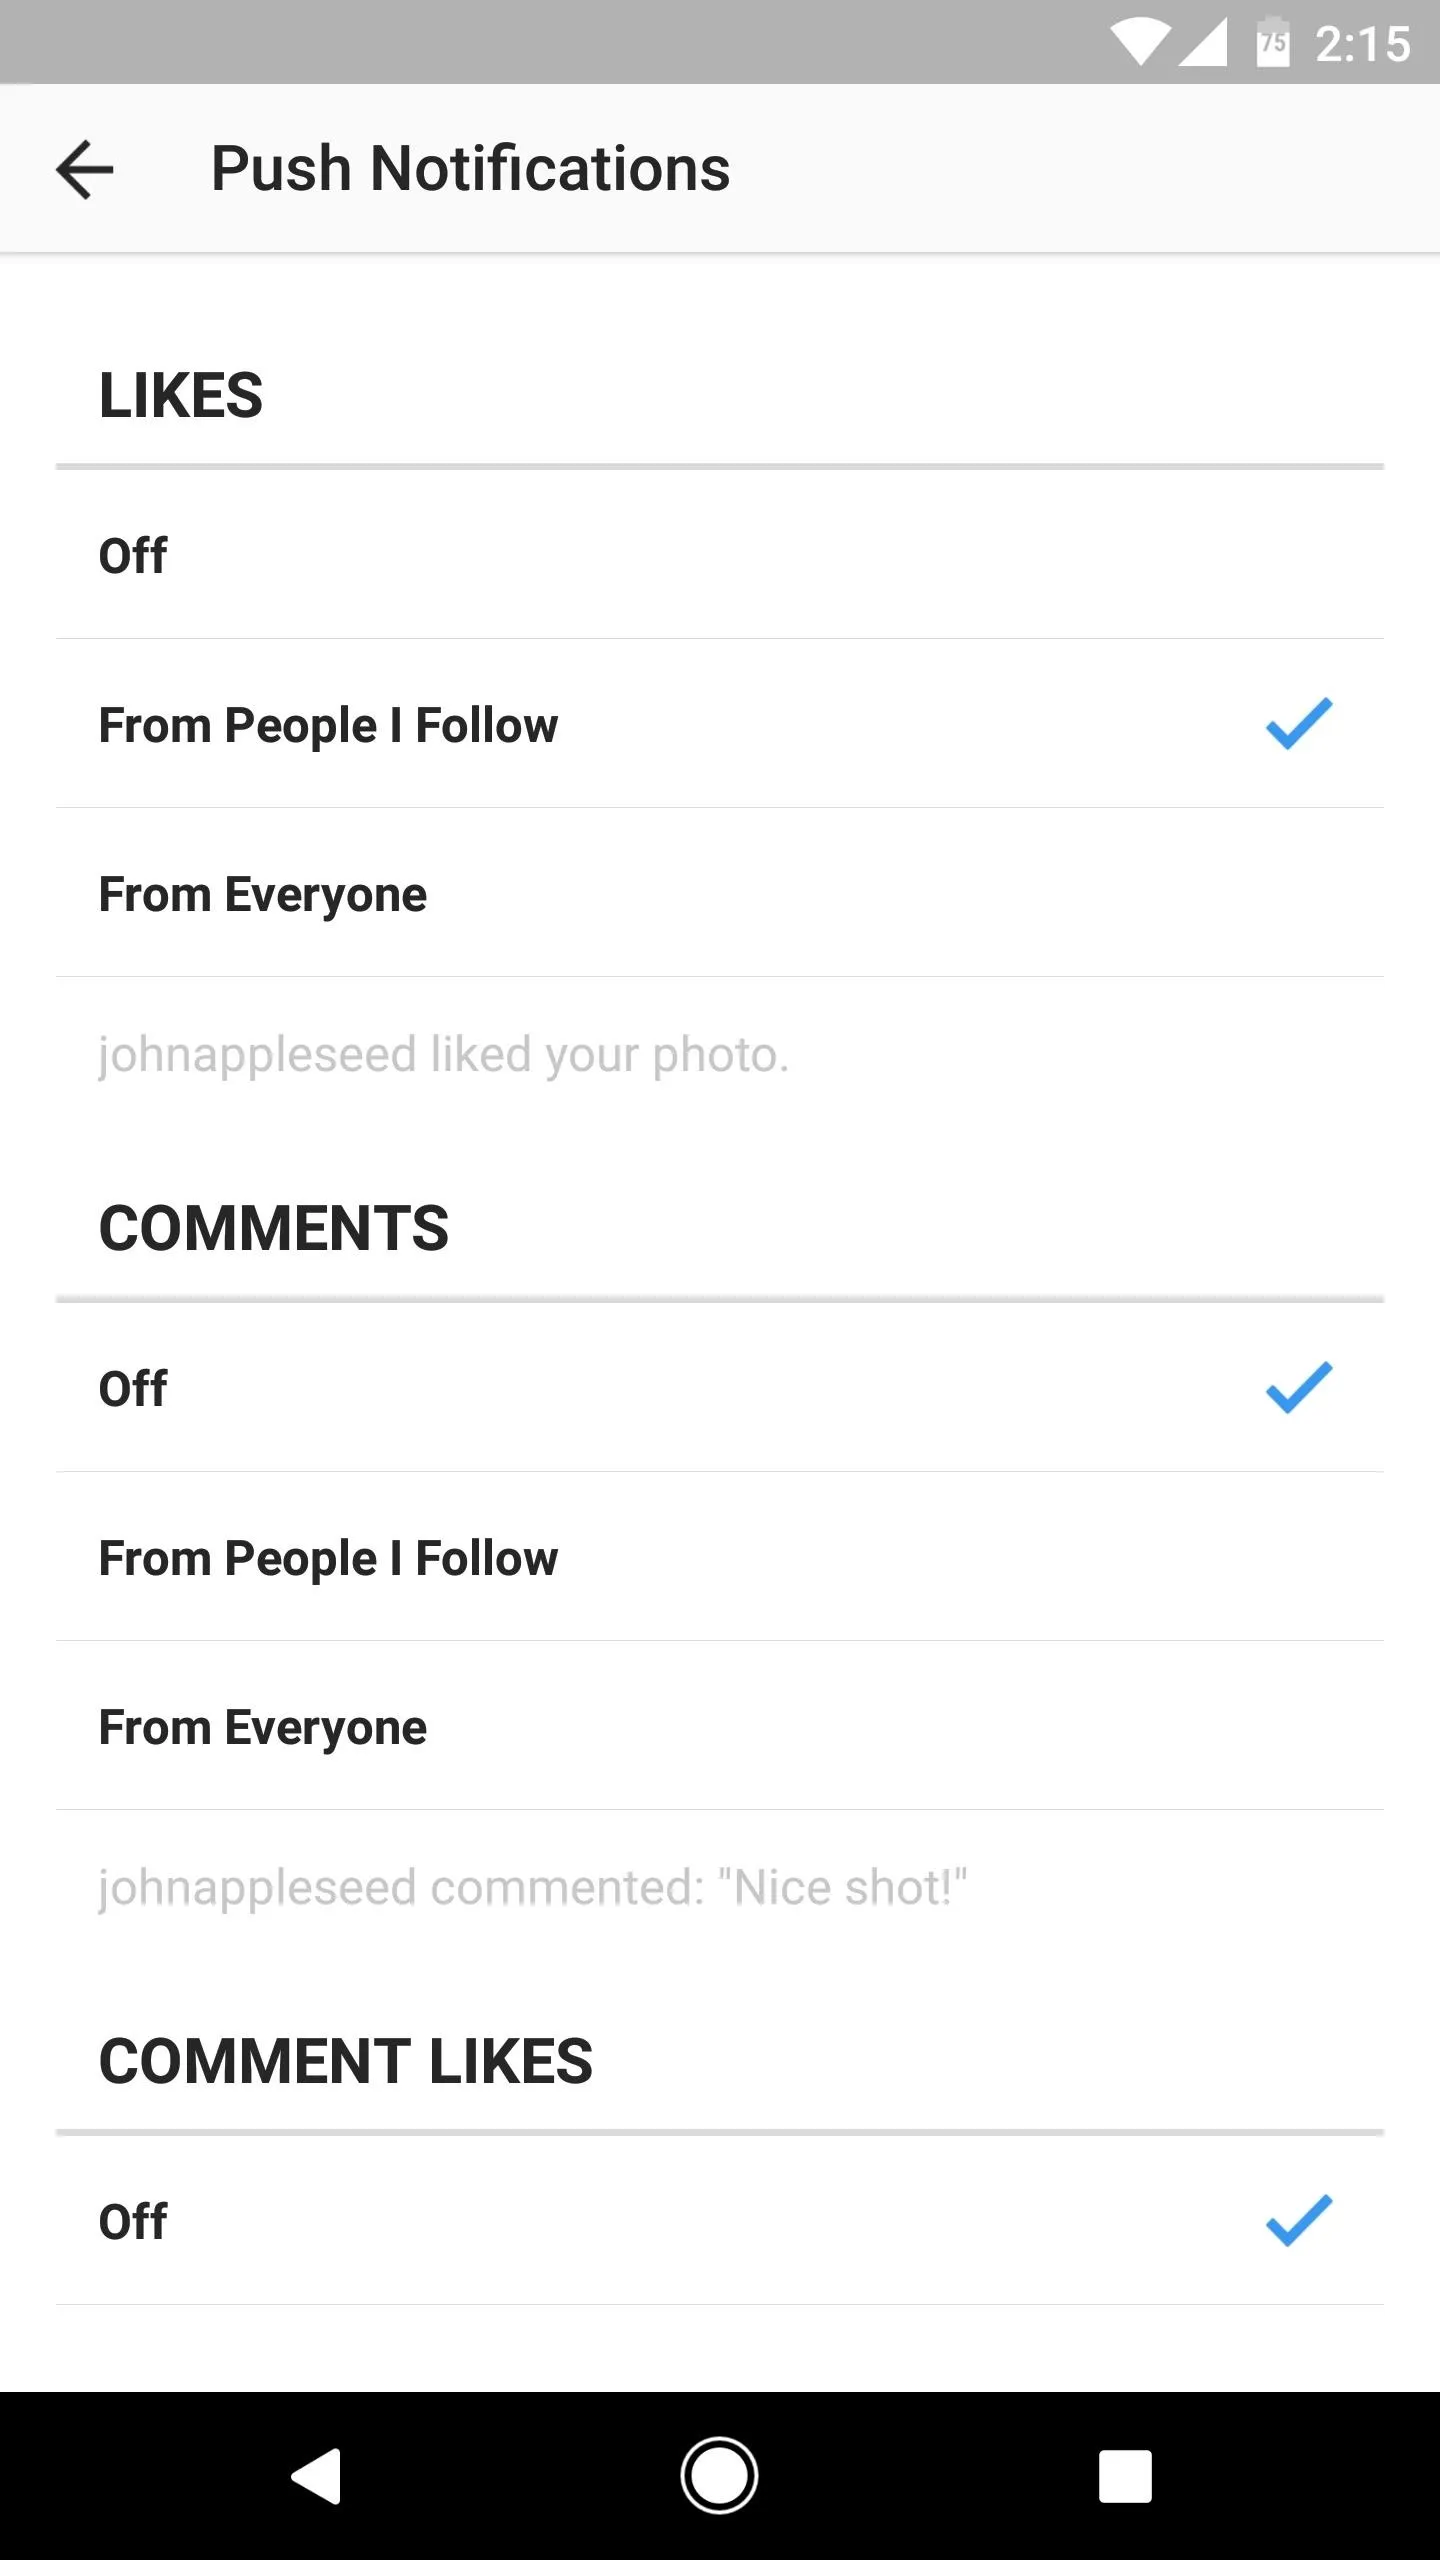
Adjust Push Notifications
Though notifications aren't inherently insecure, they do create a privacy concern when prying eyes can see information you may not want to share. To modify the various kinds of notifications, scroll down to the Settings section of the Options menu and tap on the "Push Notifications" link. Make your way through this menu and turn off everything that you don't need to immediately see.
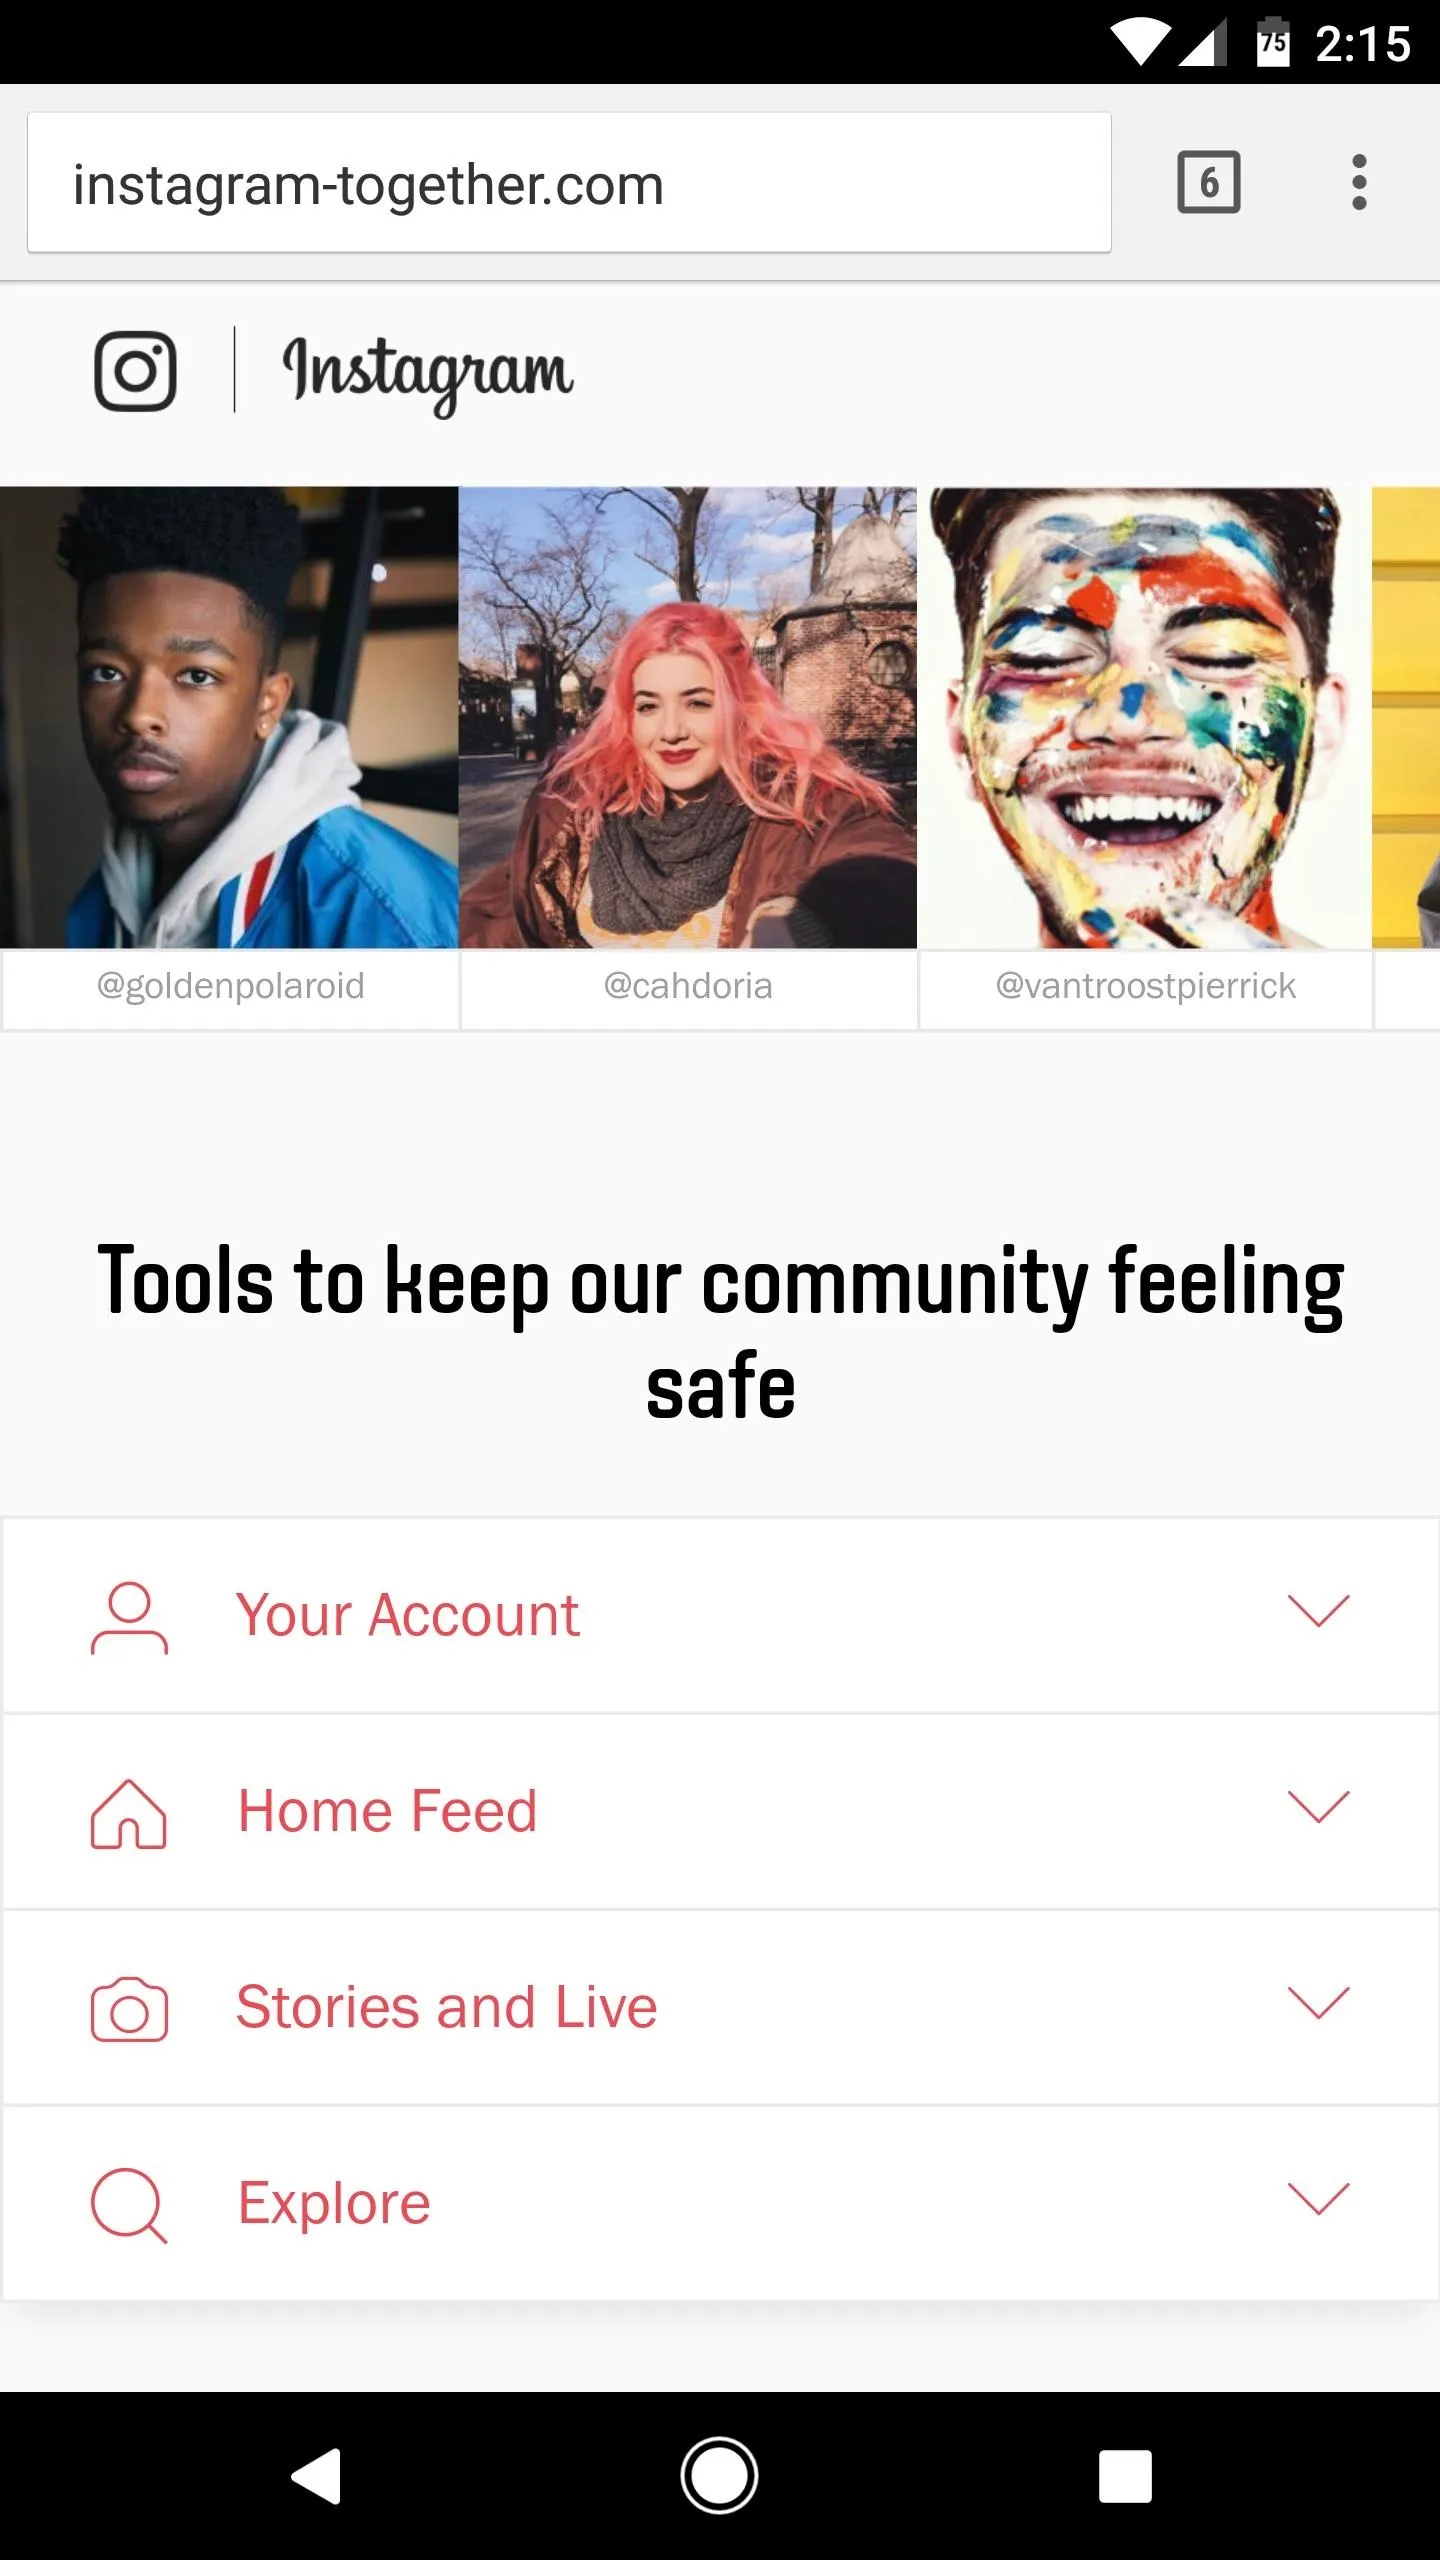
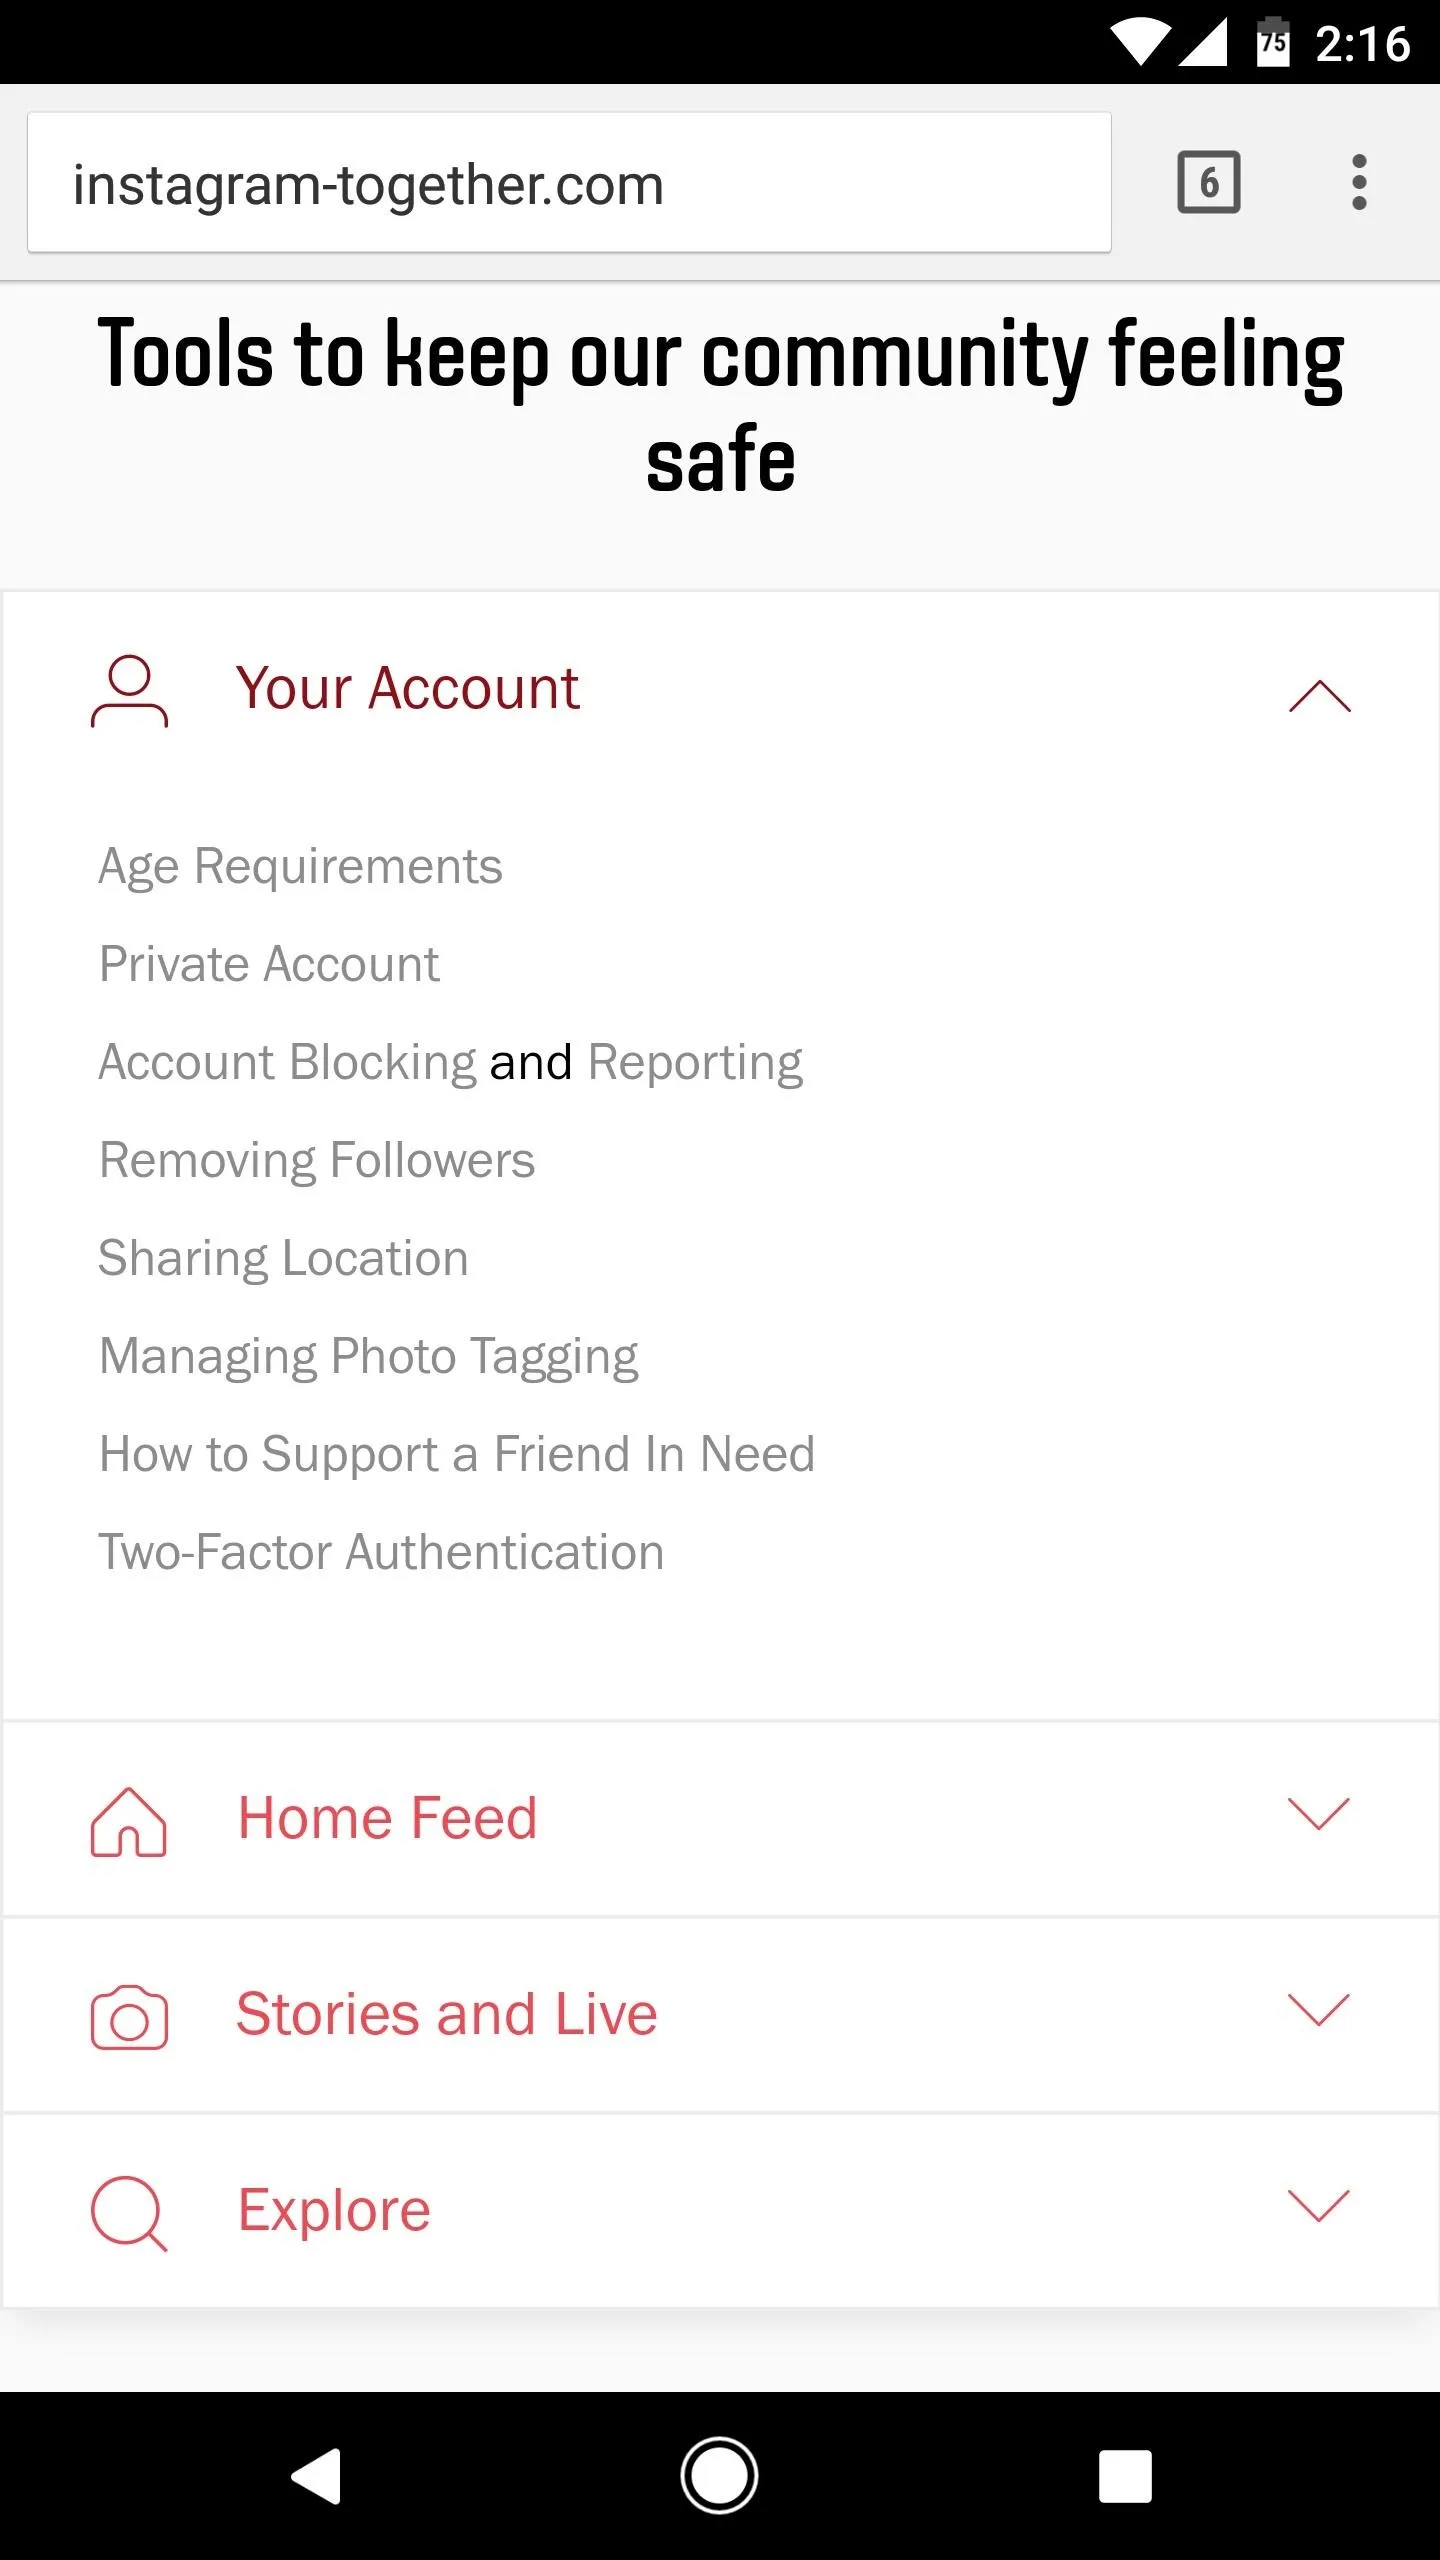
Perform Regular Security Checkups
Once you've got the above settings in order, your Instagram account will be much more private and secure. However, the available options may change over time, so keeping things secure requires vigilance. Luckily, Instagram has made this process fairly easy by providing a centralized location for many of your security needs, so periodically check the following site to ensure that everything stays secure.
By following these few steps, you will have made your Instagram account significantly safer. One last thing to note, if you have your account linked to Tinder, people who encounter your profile will be able to openly see your most recent photos, even if Instagram is set to private.
- Follow Gadget Hacks on Facebook, Twitter, Google+, and YouTube
- Follow Android Hacks on Facebook, Twitter, and Pinterest
- Follow Apple Hacks on Facebook, Twitter, and Pinterest
- Follow WonderHowTo on Facebook, Twitter, Pinterest, and Google+
Cover image and screenshots by Nick Epson/Gadget Hacks


Comments
Be the first, drop a comment!