


Google is known for merging older products into a new one's ecosystem for ease of use. The transition can take time, and that's the case with the old Google Wifi system now that Nest Wifi is out. Google is working on phasing out the dedicated Google Wifi app in favor of using the Google Home app for all your IoT needs.
Transitioning to the Google Home app will give you access to new functionality such as WPA3 security. You may still need the Google Wifi app temporarily for a few minor things like managing DNS. But all of the common options are already there in the new Google Home app, so it would be a good idea to jump on board before the old Google Wifi app is phased out.
What to Know About Migrating
- You will have to factory reset at least one Google Wifi puck
- You will not have to reset your entire network
- You will still be able to use the old Google Wifi app to manage your network
- You will not be able to undo this migration
- Certain advanced features can still only be accessed from the Google Wifi app
- You will gain functionality like WPA3 security
- Other members in your Google Home will have the same control over the Wifi pucks as you
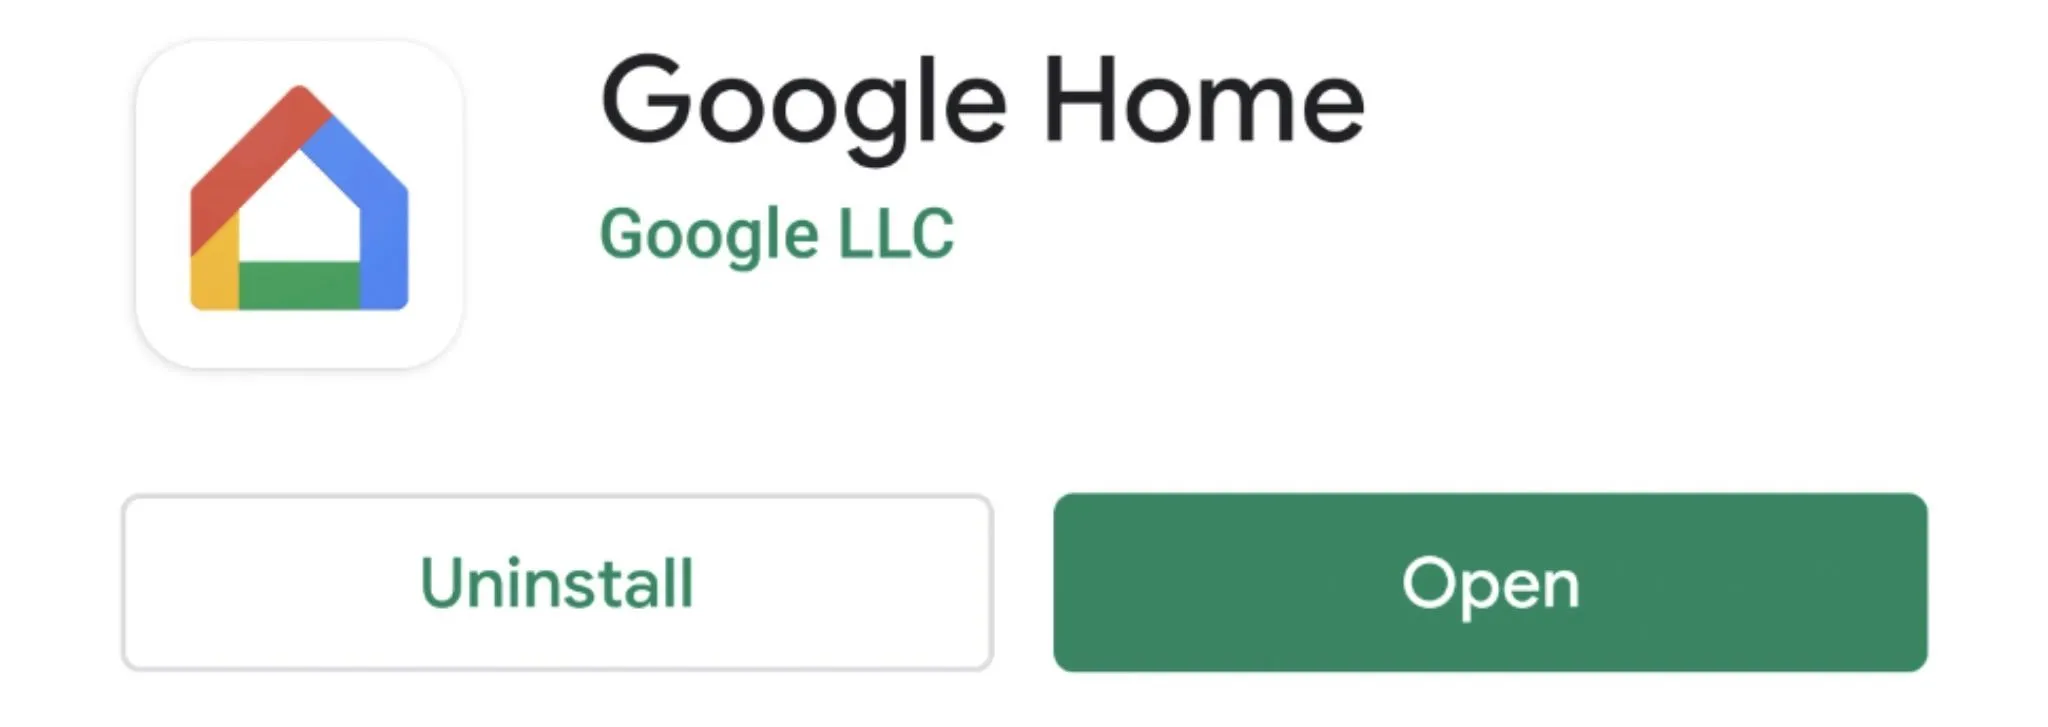
Install the Google Home App
The Google Home app is where is the magic happens when it comes to controlling all of your smart home devices. This now includes your Wi-Fi network using Google or Nest Wifi products. If you don't already have the app, grab it from the link below so you can get started.
Factory Reset Your Google Wifi Access Point
To transition your entire Google Wifi network over to the Google Home app, you only need to factory reset one of the access points. It can be one of the wireless mesh access points or the main router access point that's attached to your cable modem — it doesn't matter which one.
If your network is already set up, doing a factory reset on a wireless point is easier than the primary router. Since the router provides your mesh access points with a network connection, it makes the most sense to do it this way to keep things as simple as possible.
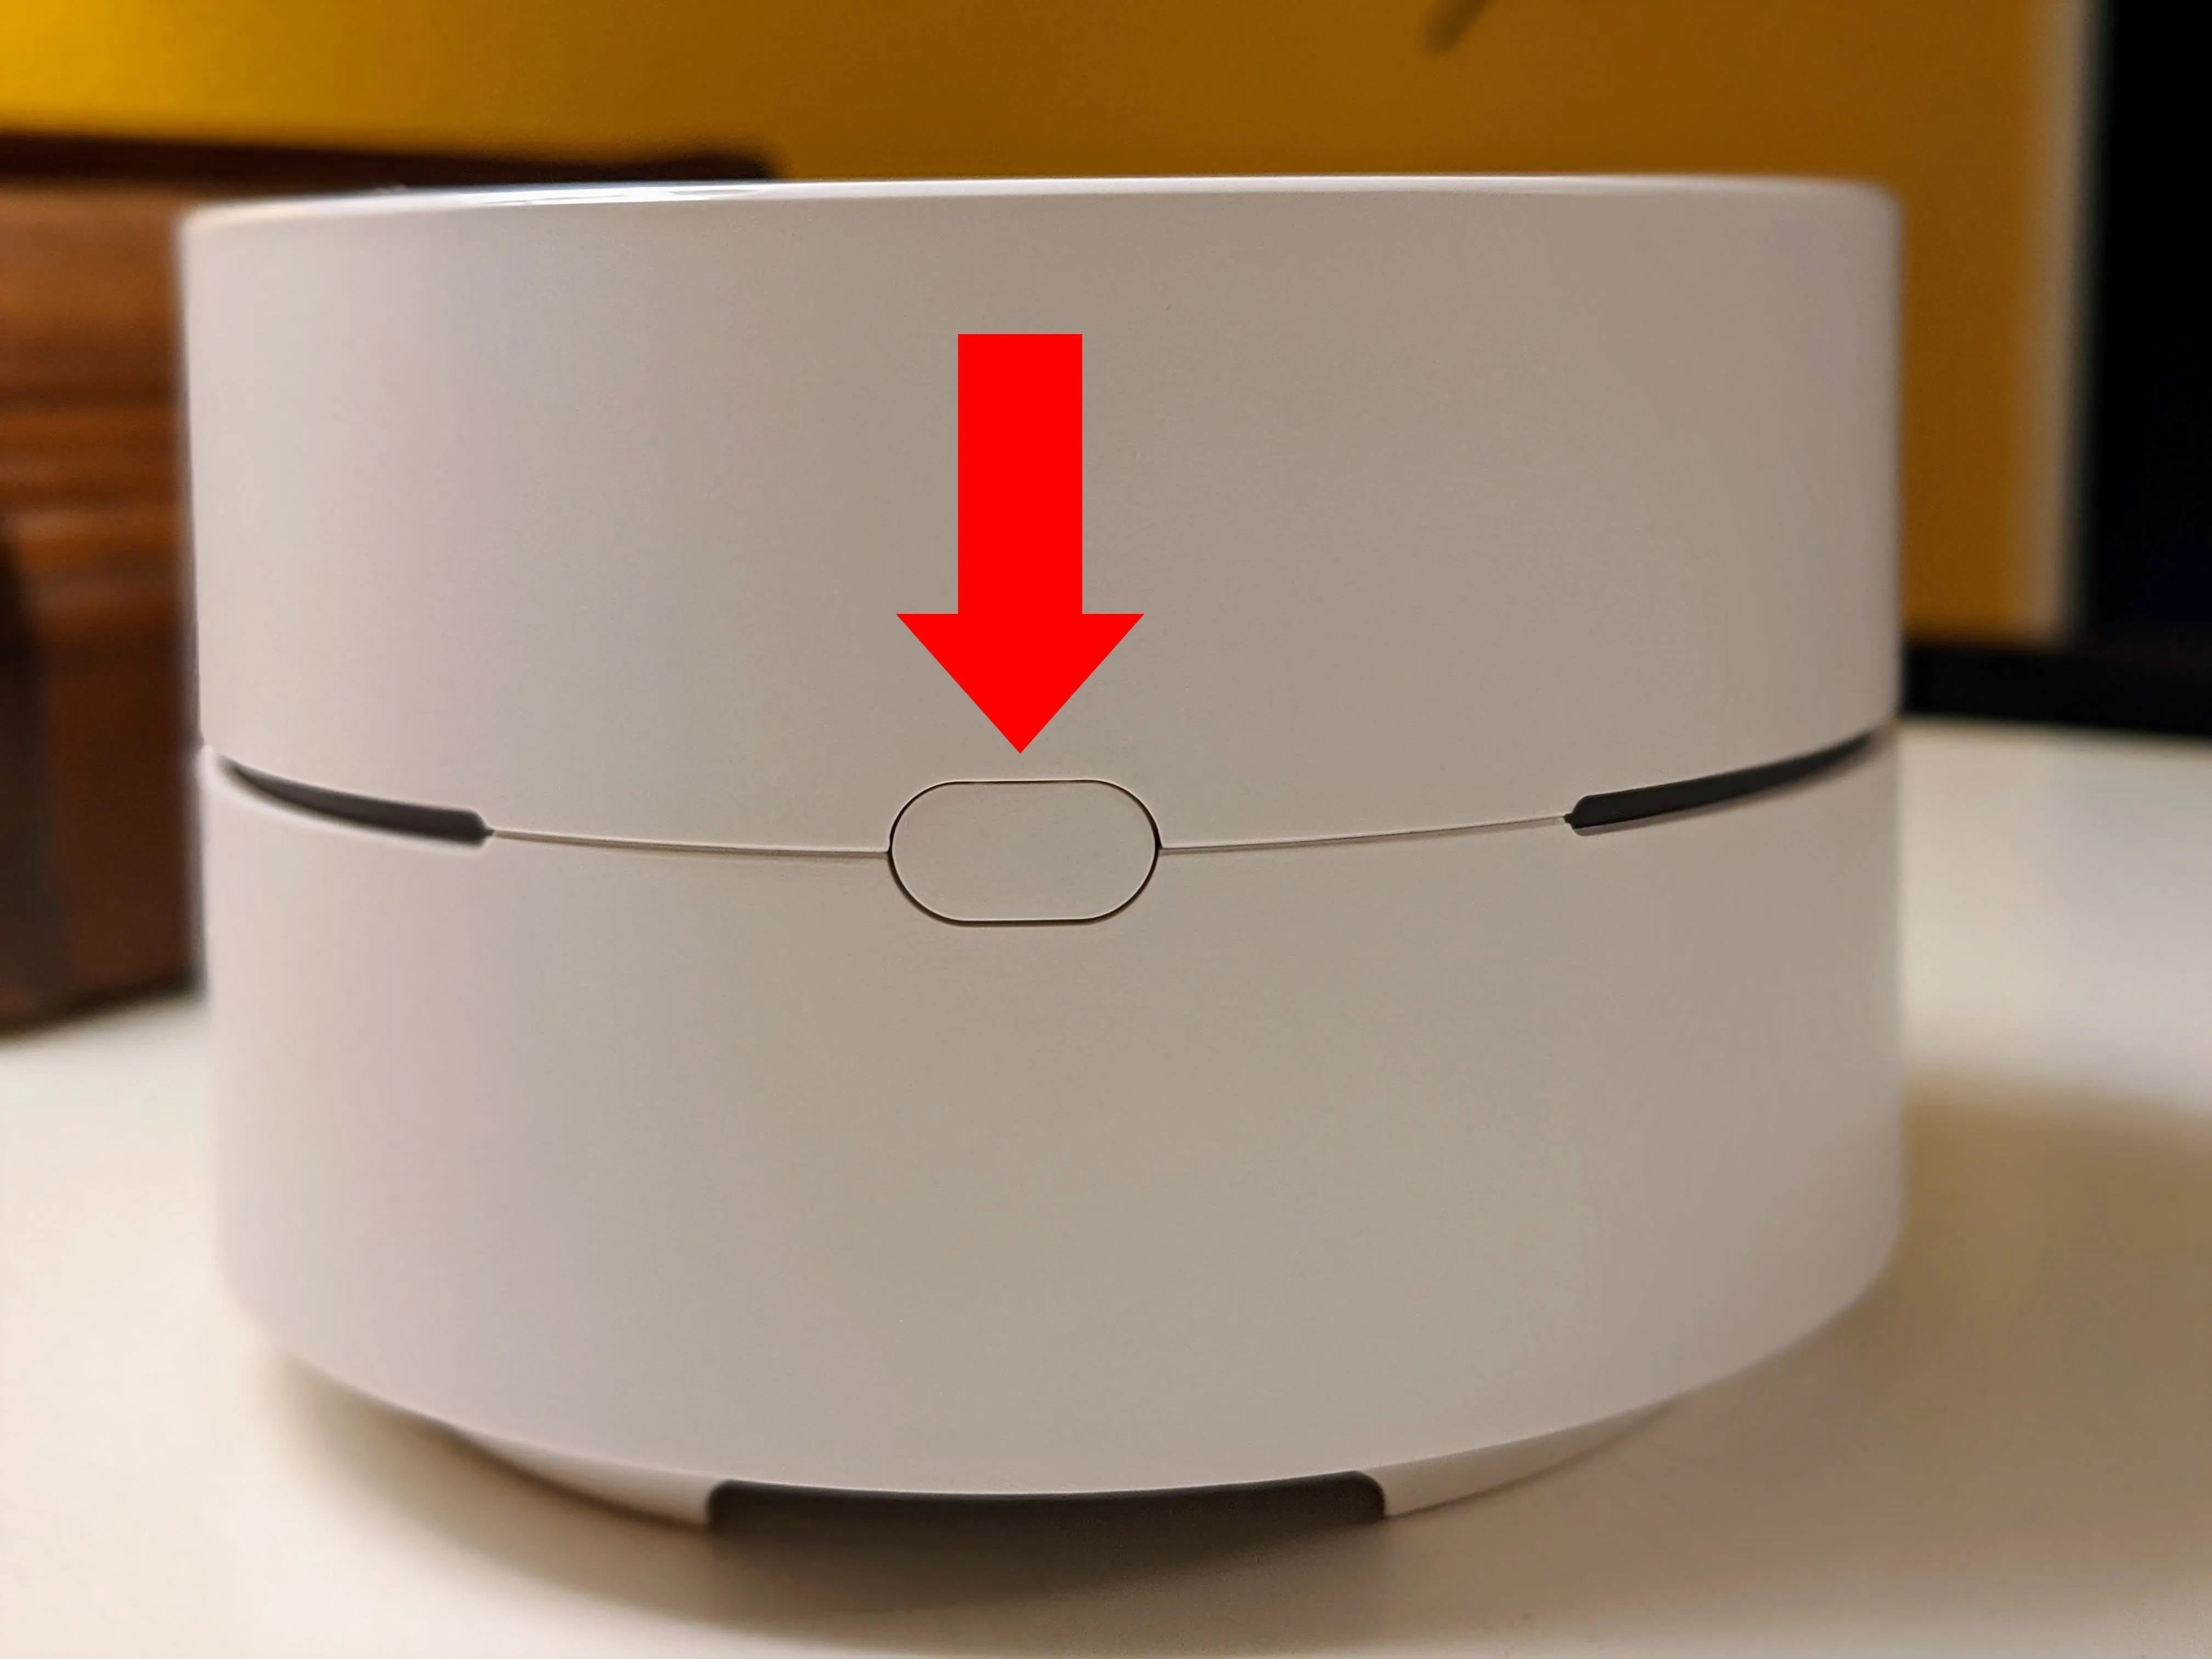
To do a factory reset on your Google Wifi, unplug the device, press and hold the reset button on the back, then plug the power cable in while still holding the button.
Stephen Perkins/Gadget Hacks
Continue pressing the button for about ten seconds, or until the light ring flashes blue. Let it sit for a few minutes so it can finish up the factory reset process. You'll know it's done when the light continually flashes blue.
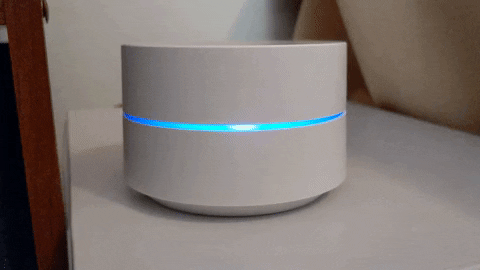
This Google Wifi has been factory reset and is ready to be set up.
Set Up Your Google Wifi with Google Home
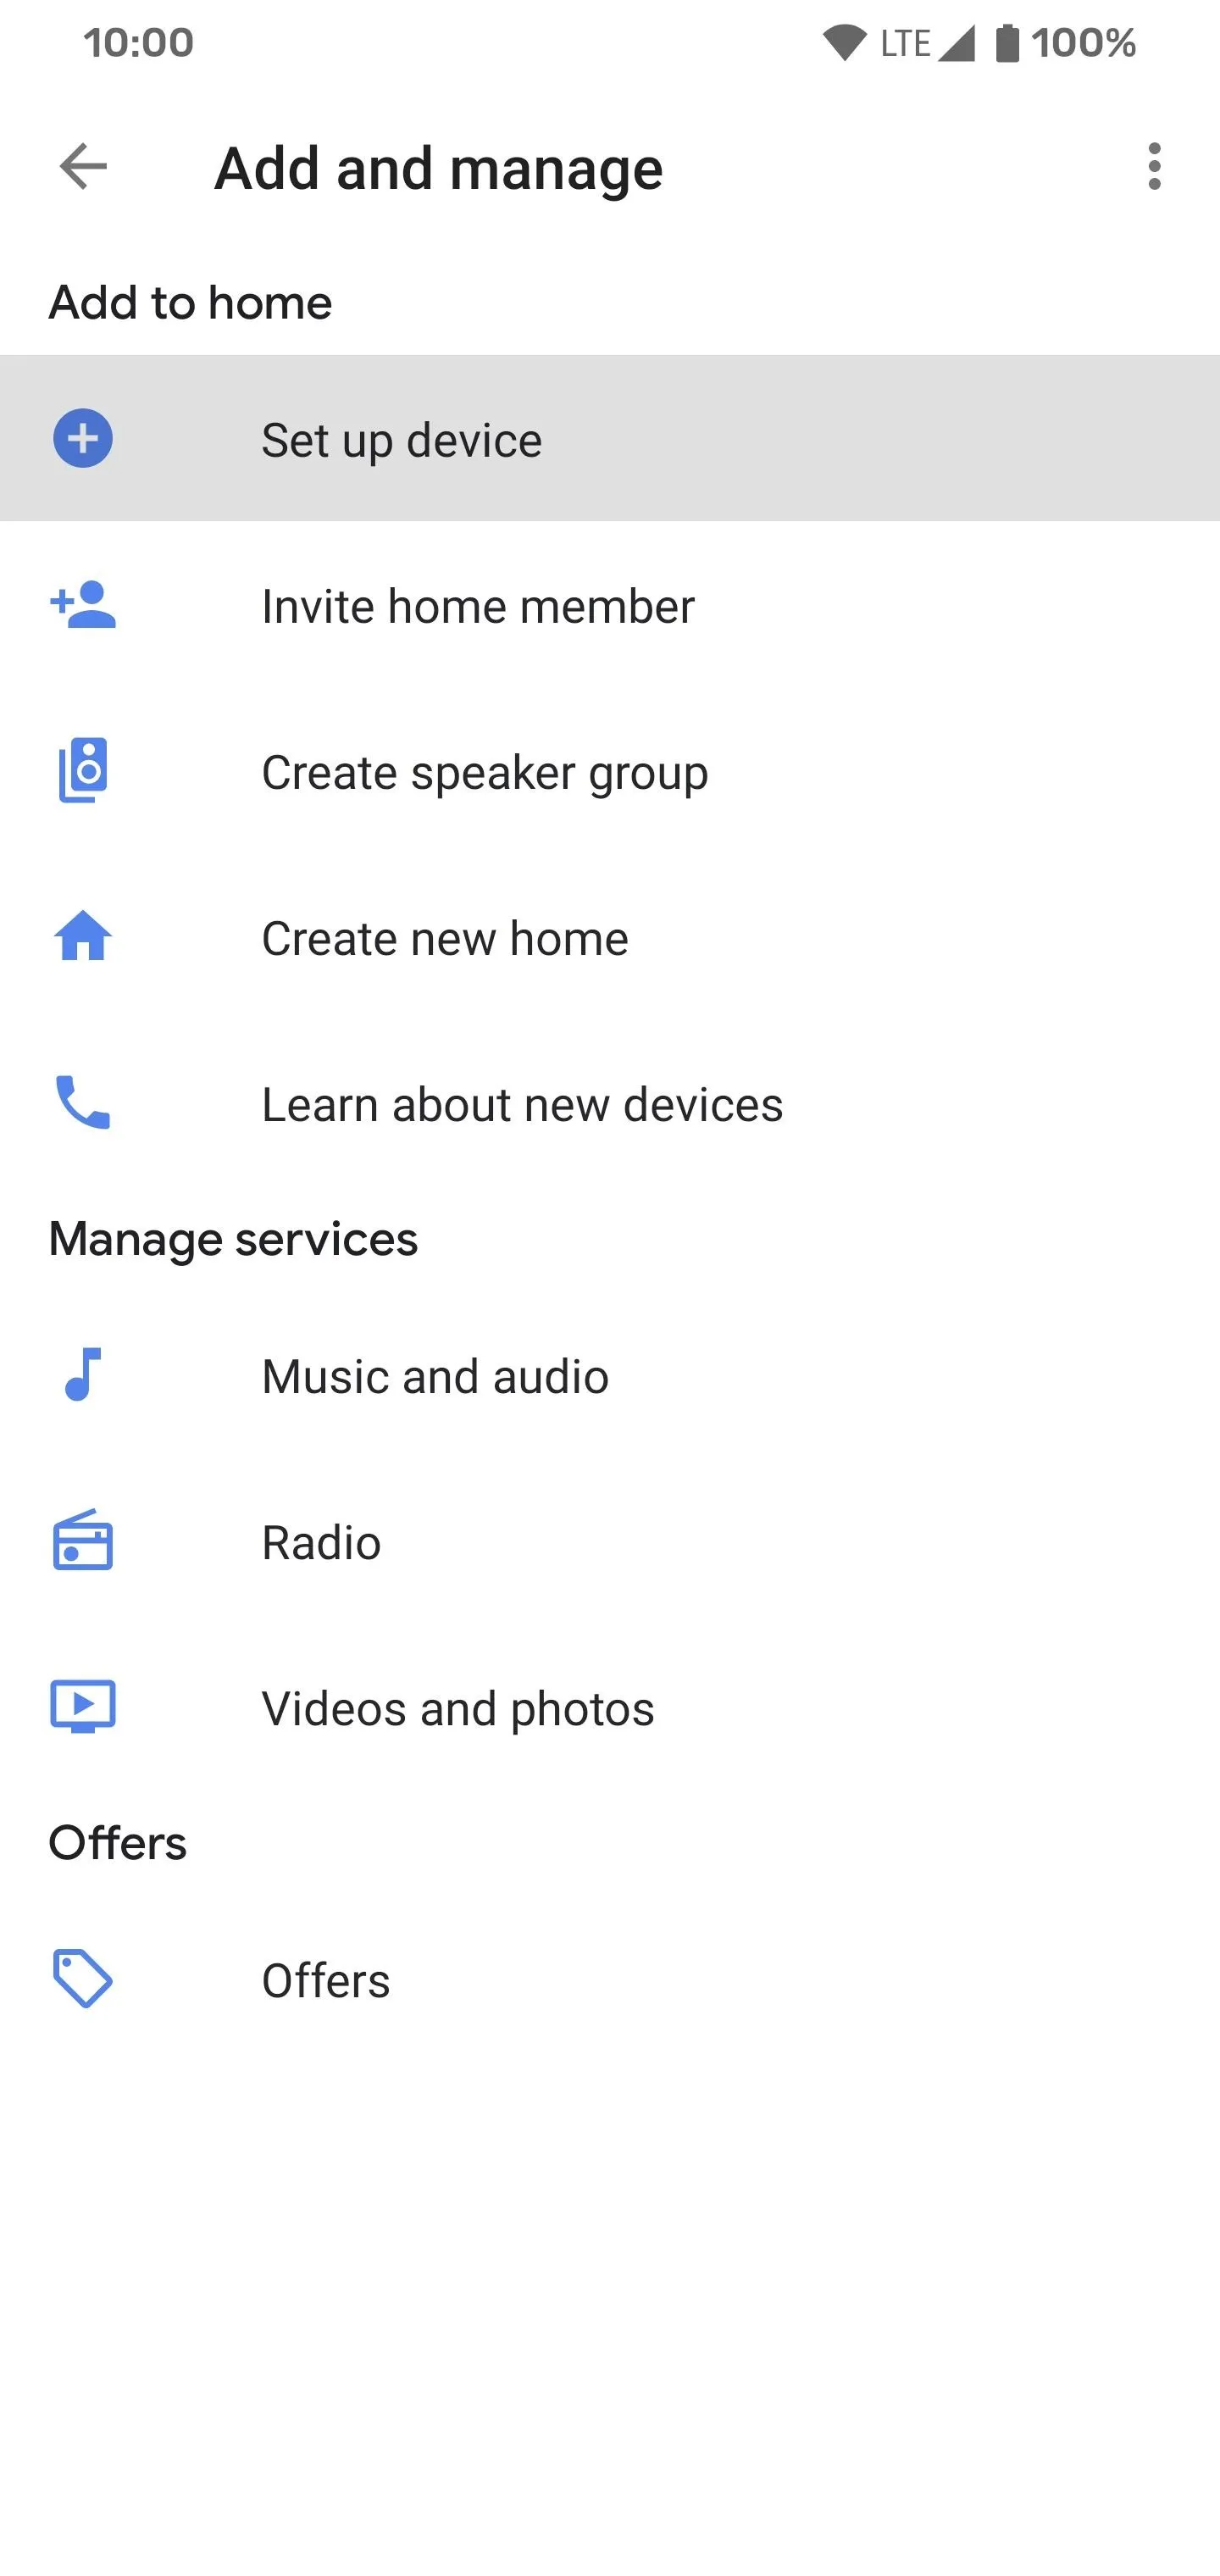
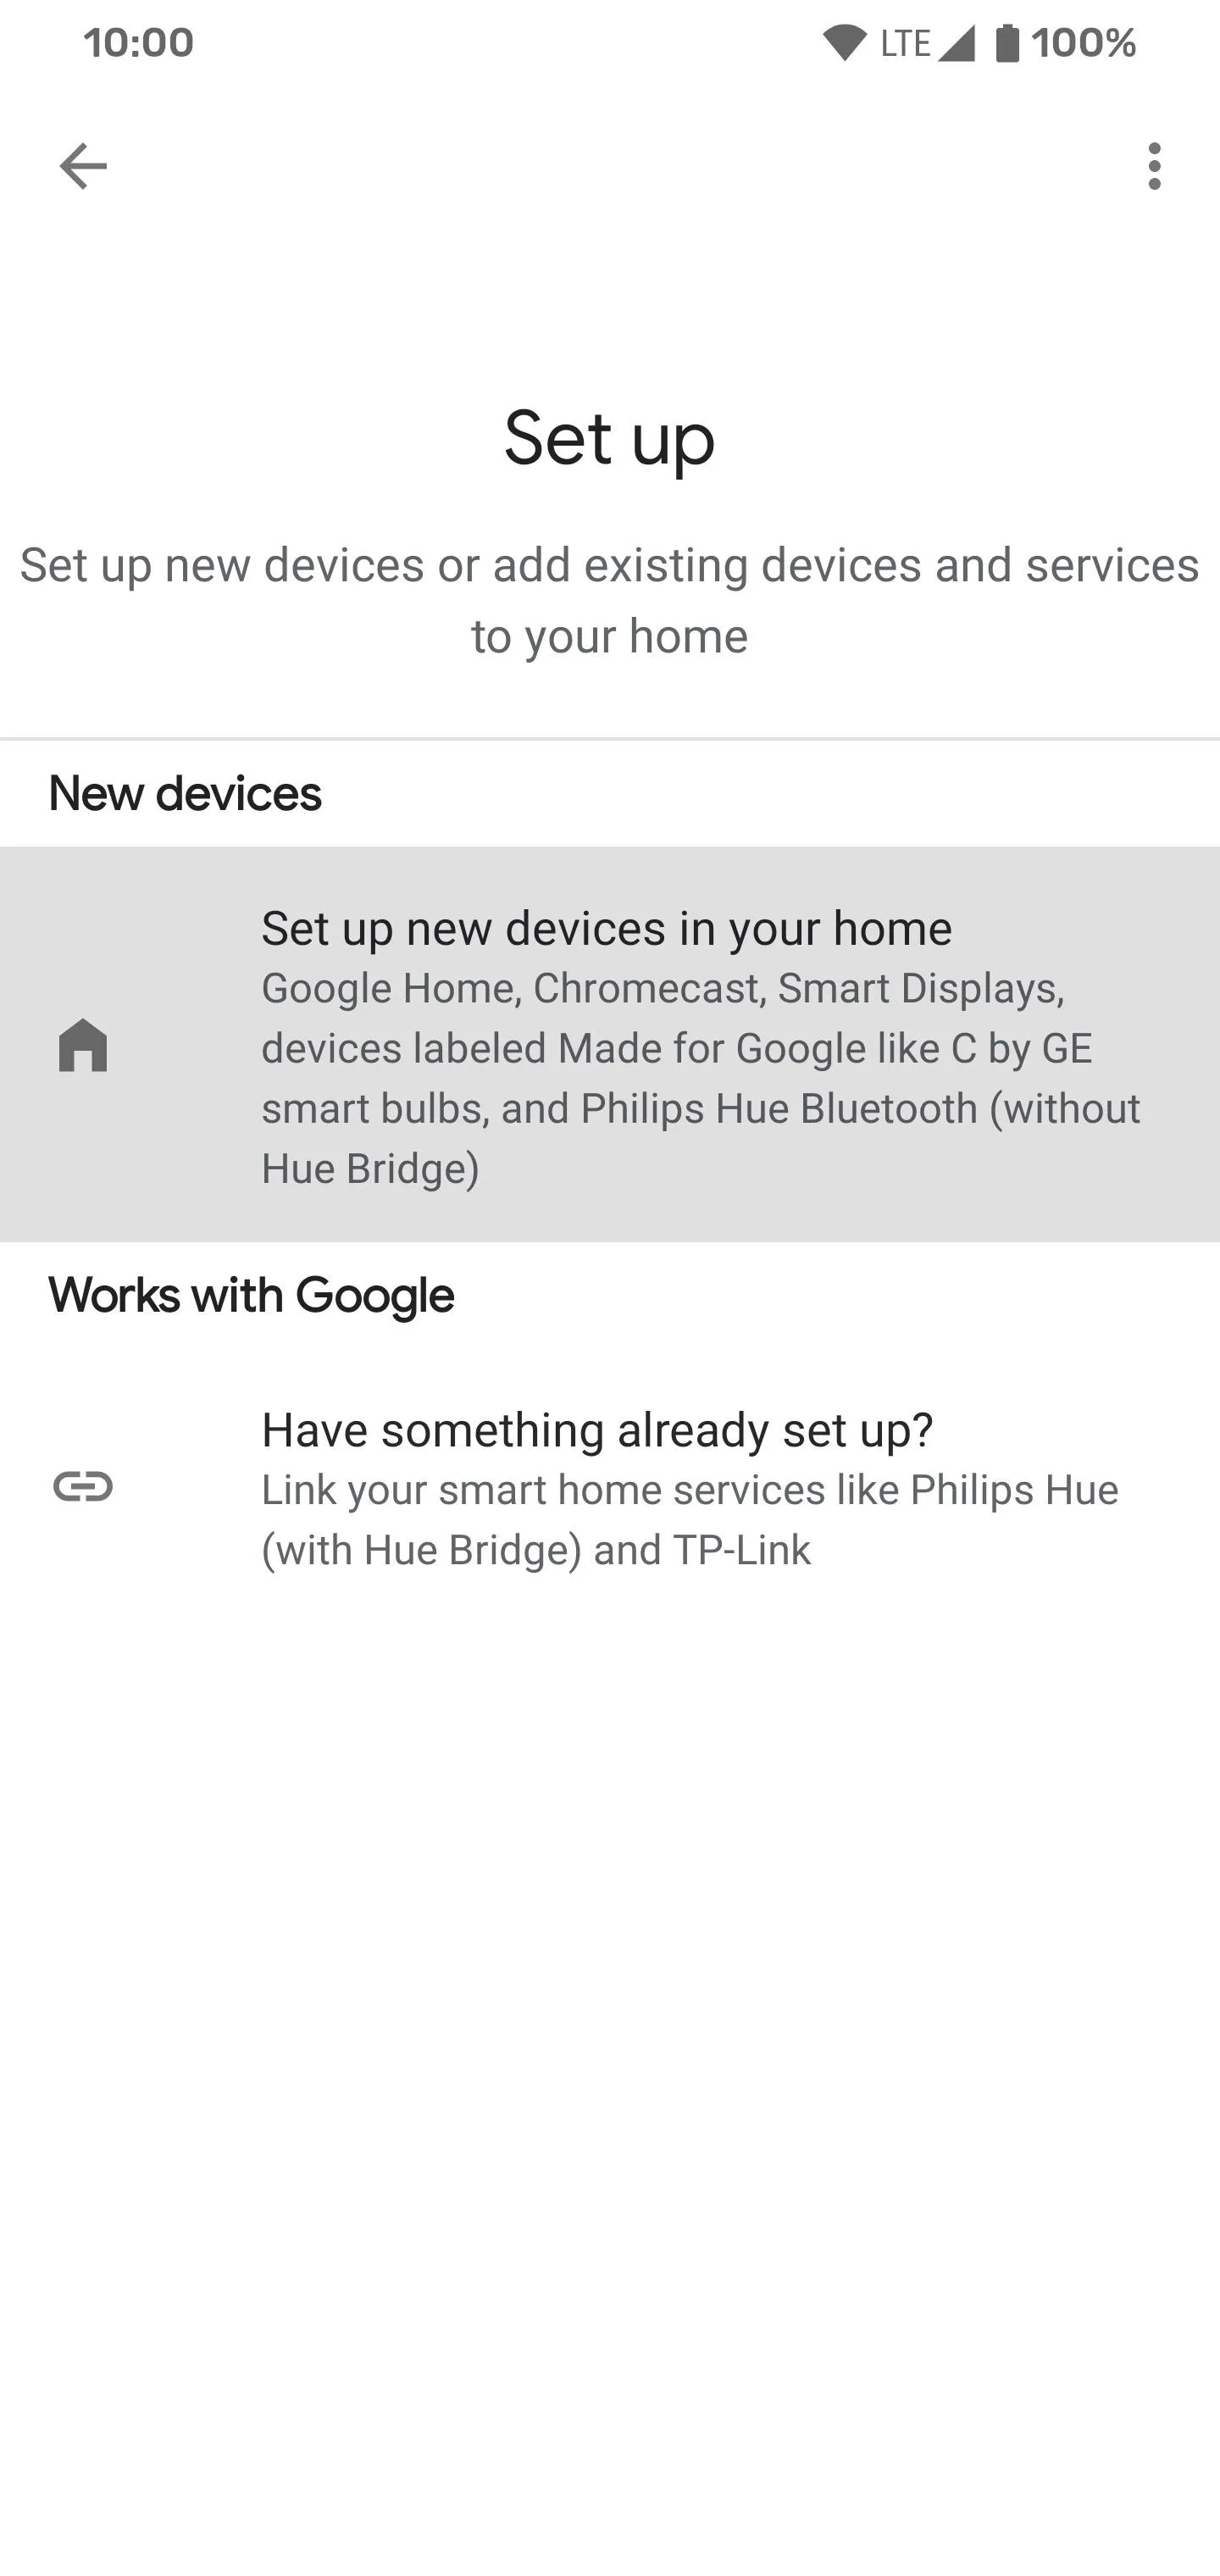
Before getting started here, make sure your access point is within range of your main router; otherwise, you won't be able to finish the setup. Now, open the Google Home app to the main screen, then tap the plus button in the upper left corner. Go to "Set up device," then tap "Set up new devices in your home."
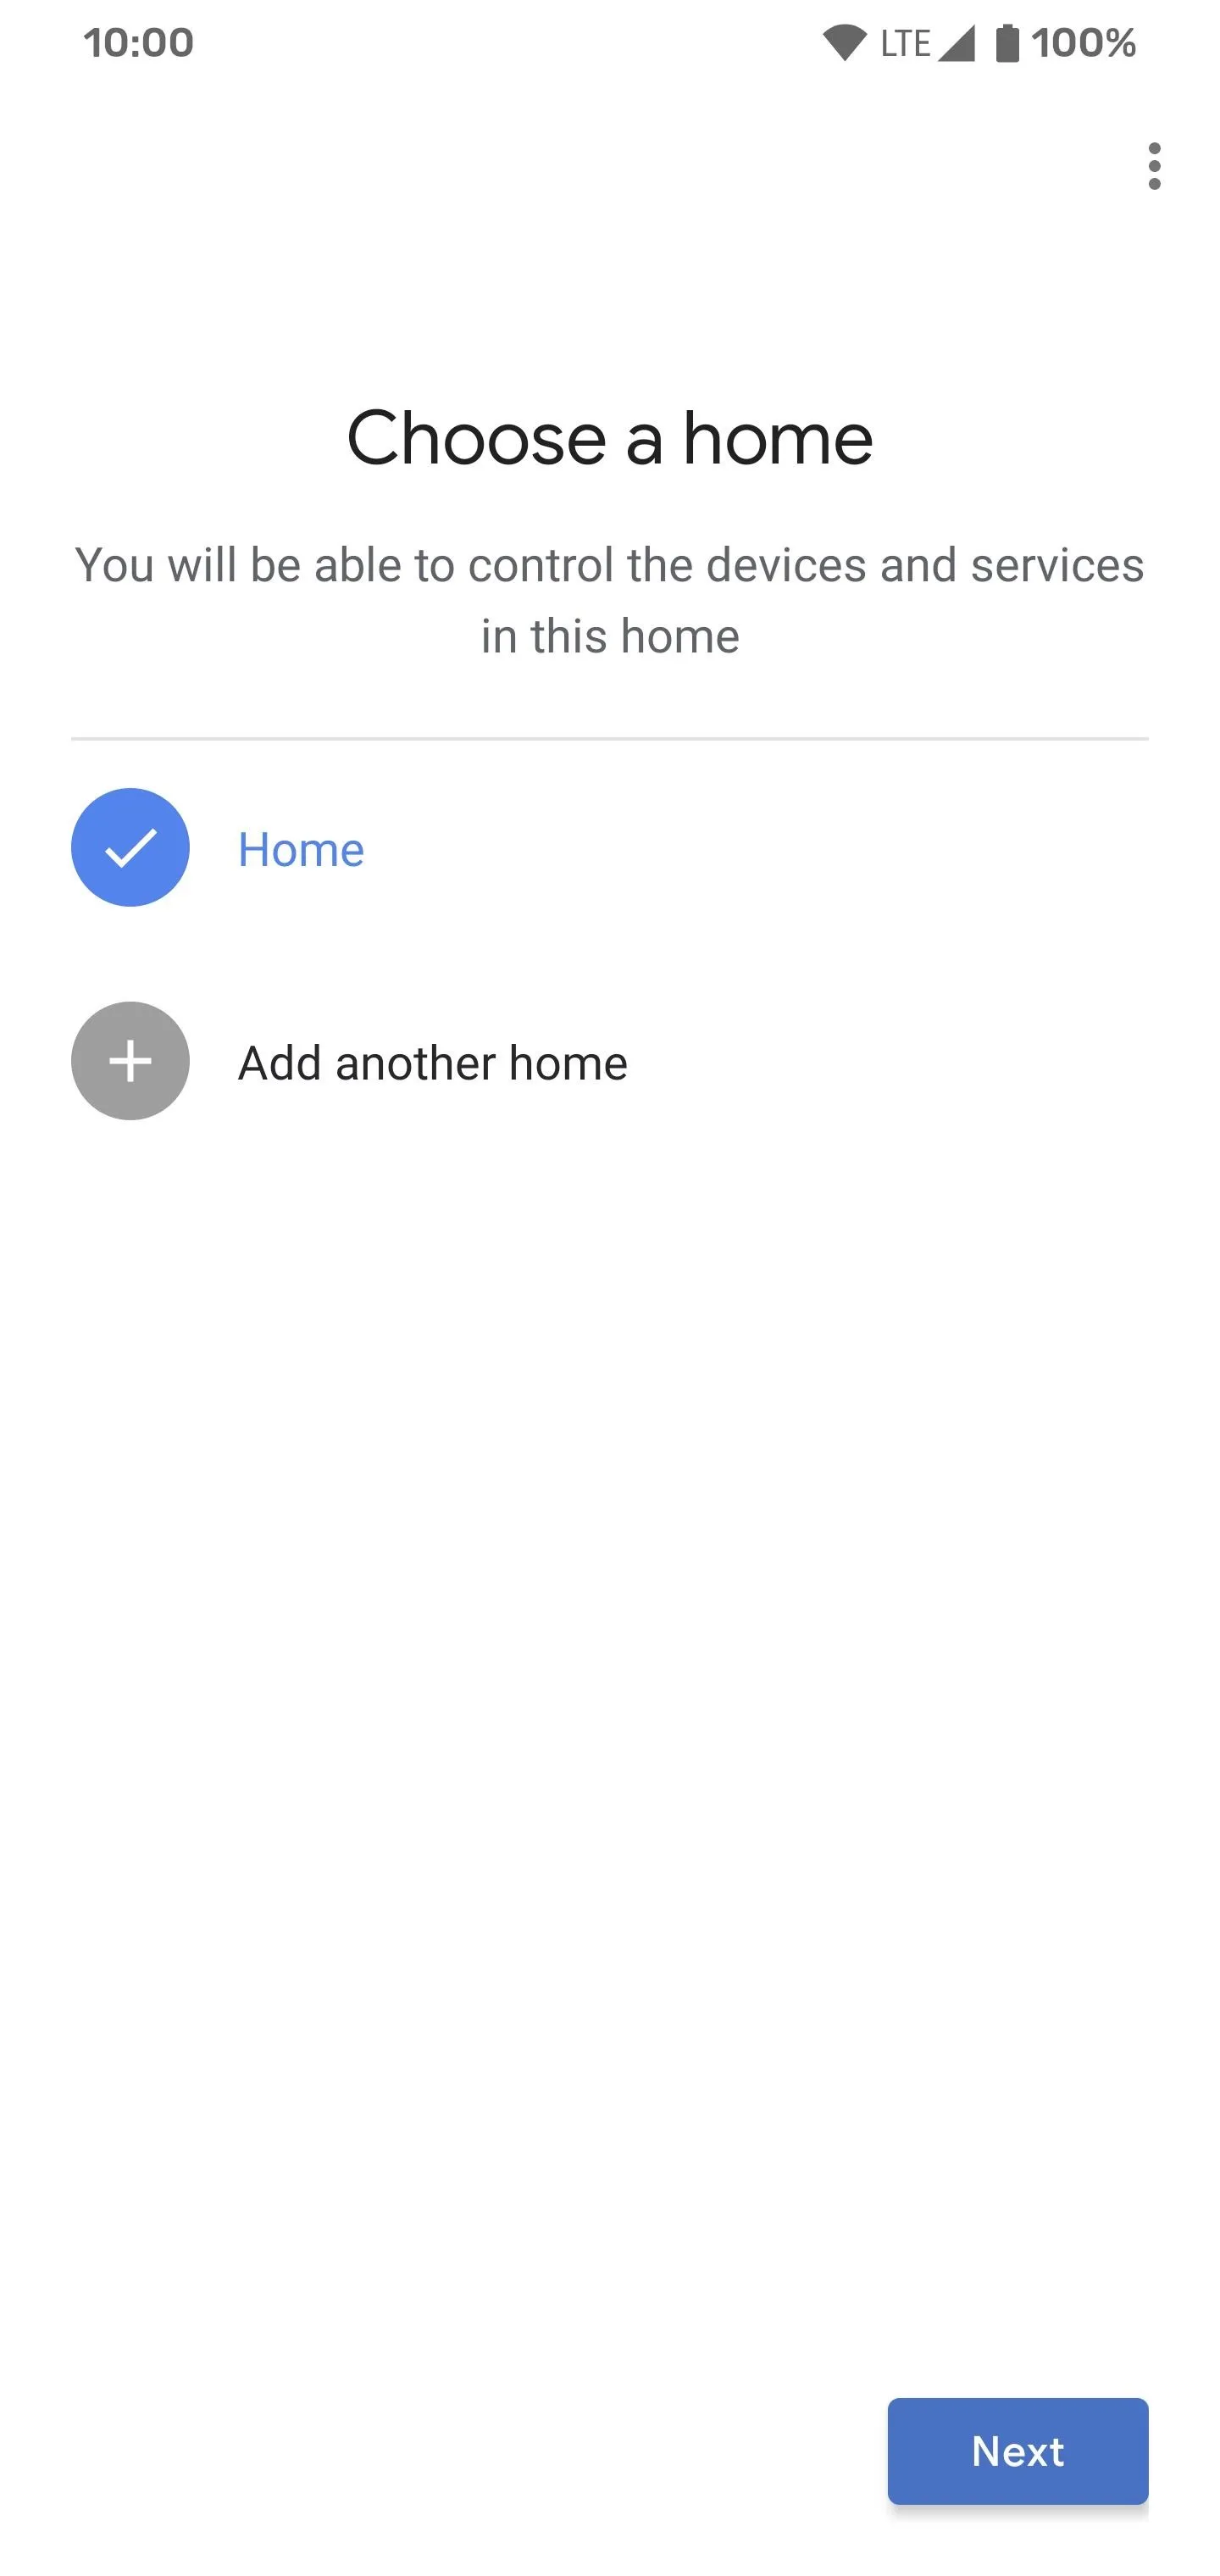
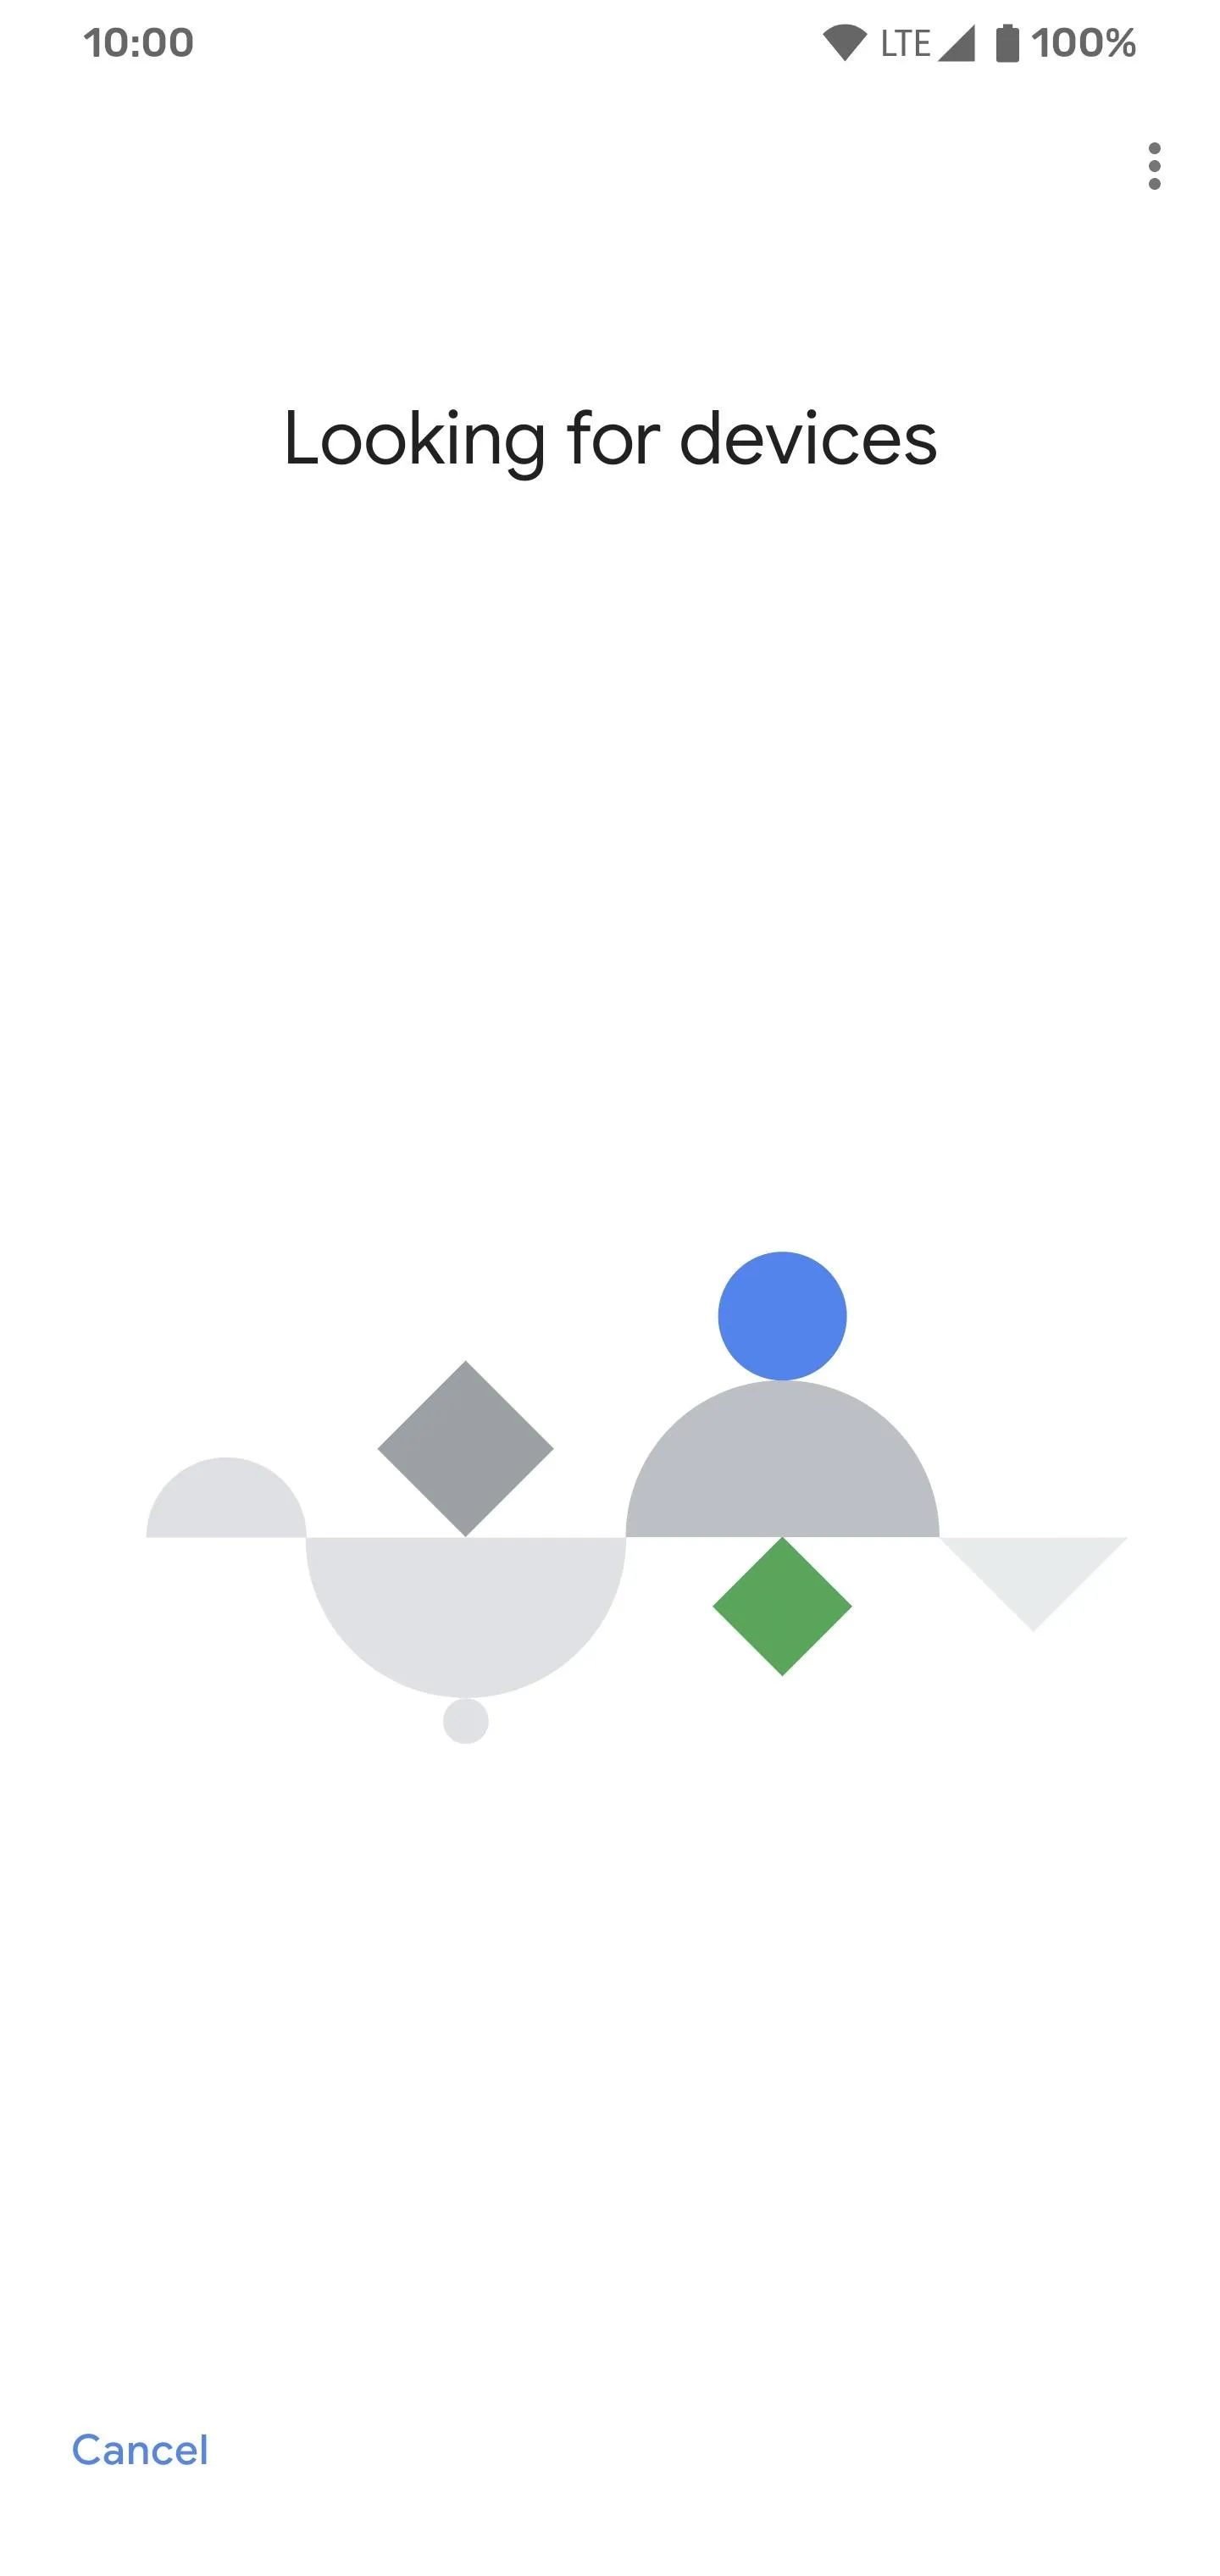
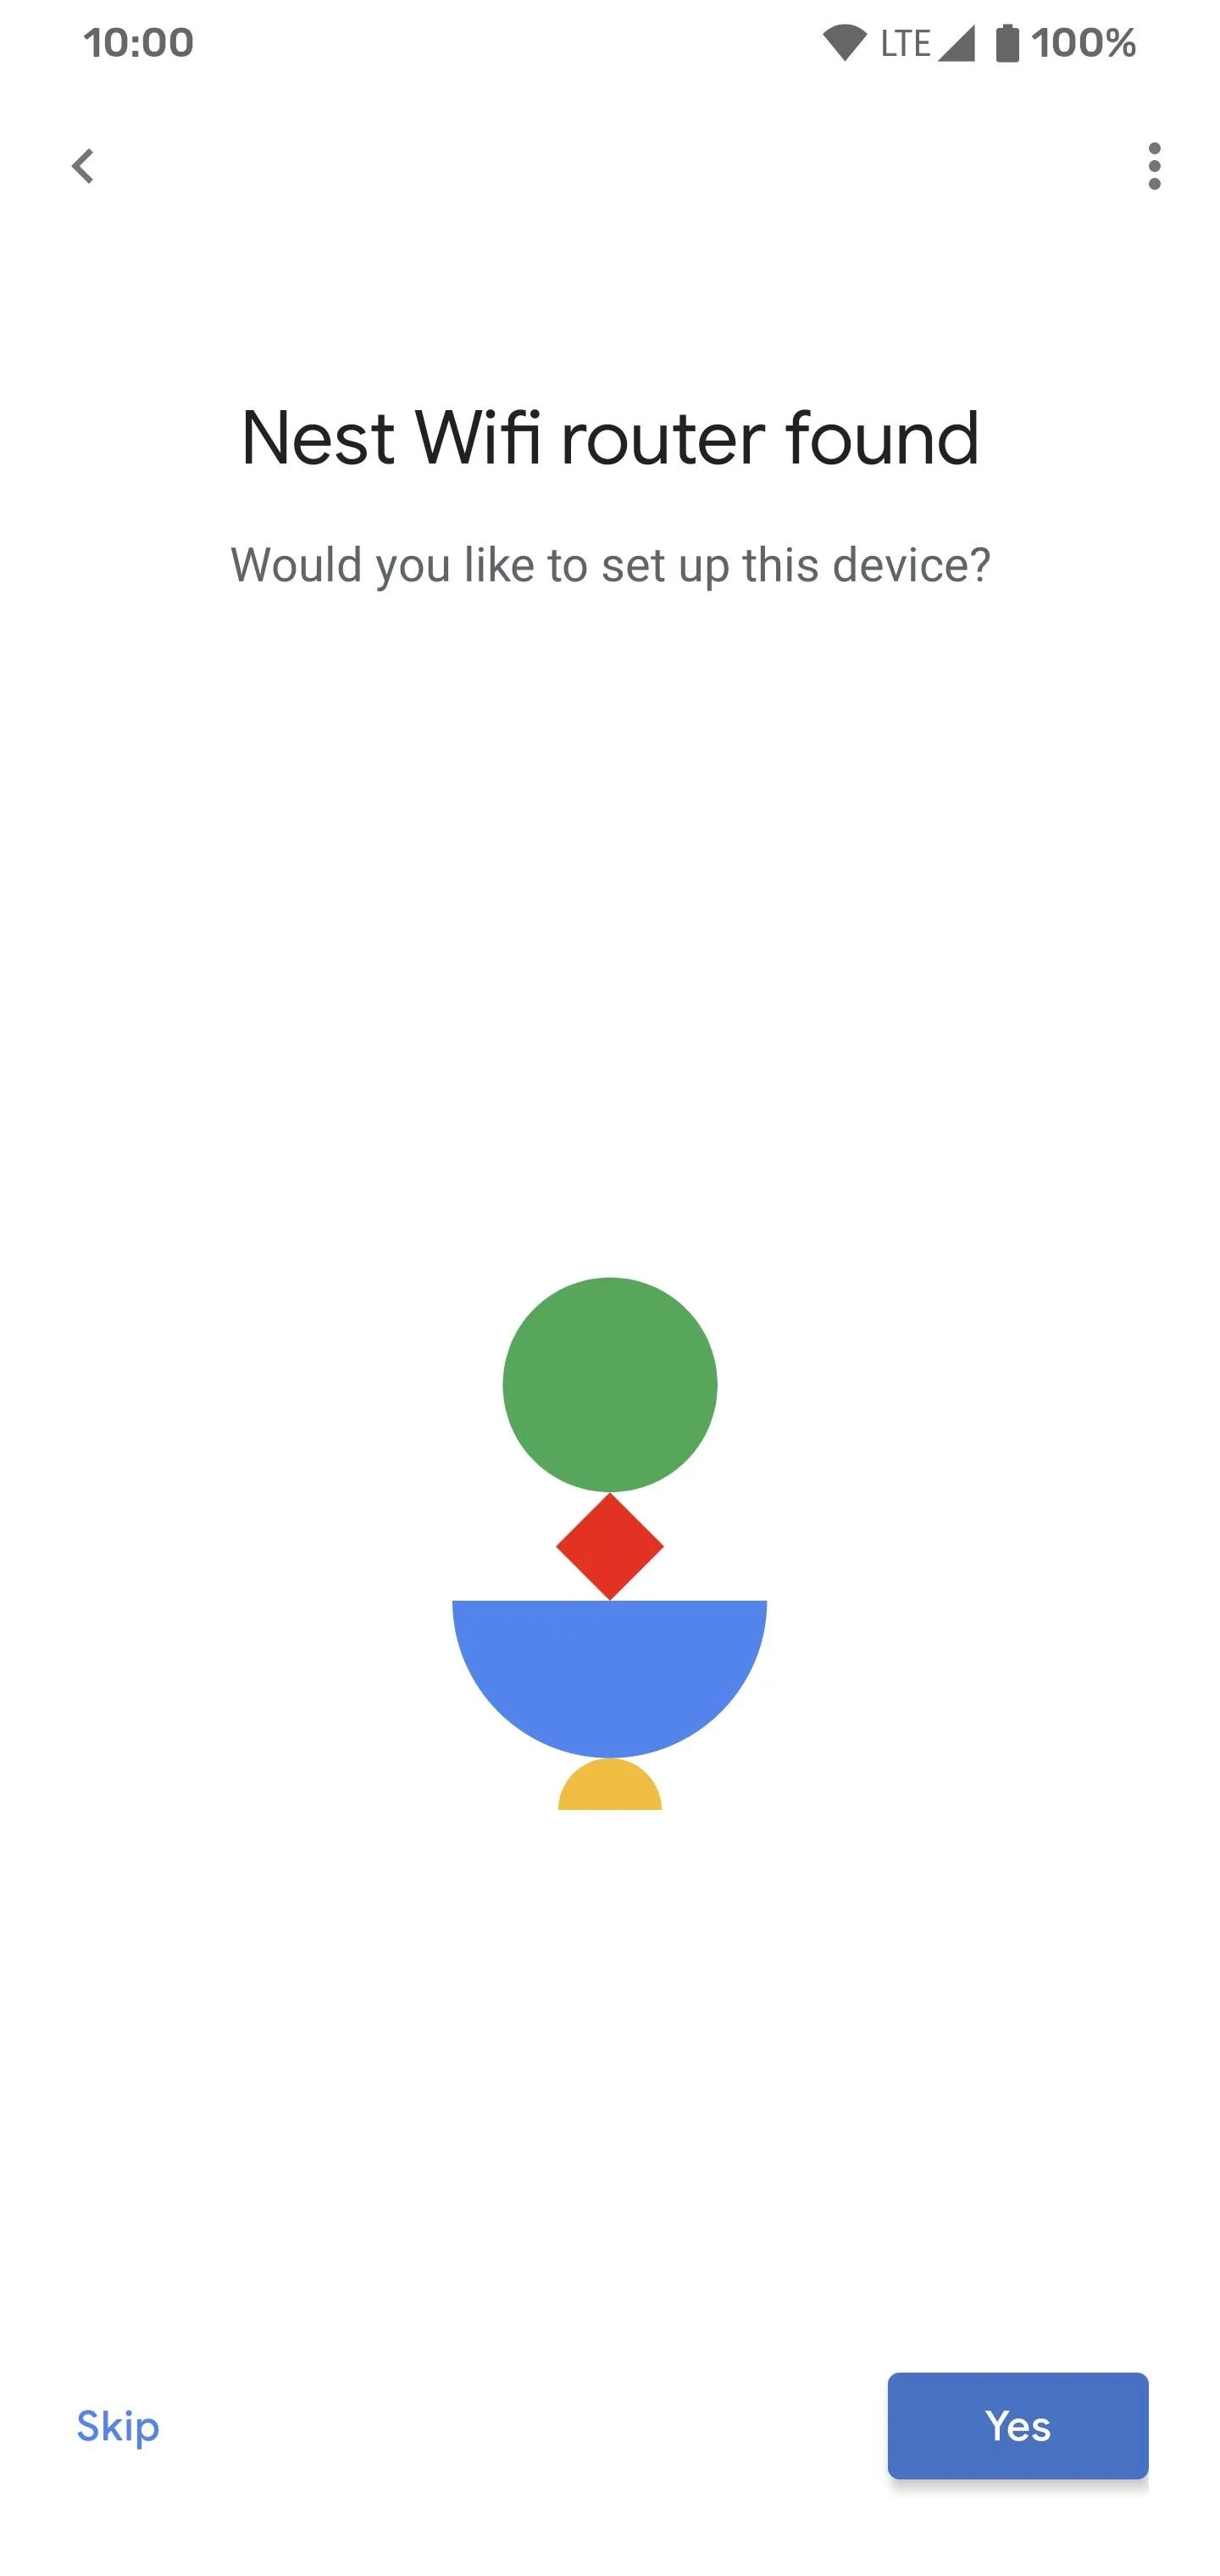
Now you can choose which home you want to set up your Google Wifi in. Hit "Next" then enable your location services if needed to help locate the device. It will begin searching for your Google Wifi. It should find it pretty quick, but it might show up as "Nest Wifi router," which is fine. Hit "Yes" when it asks if you want to set up this device. Scan the QR code on the bottom of the Google Wifi access point to continue.
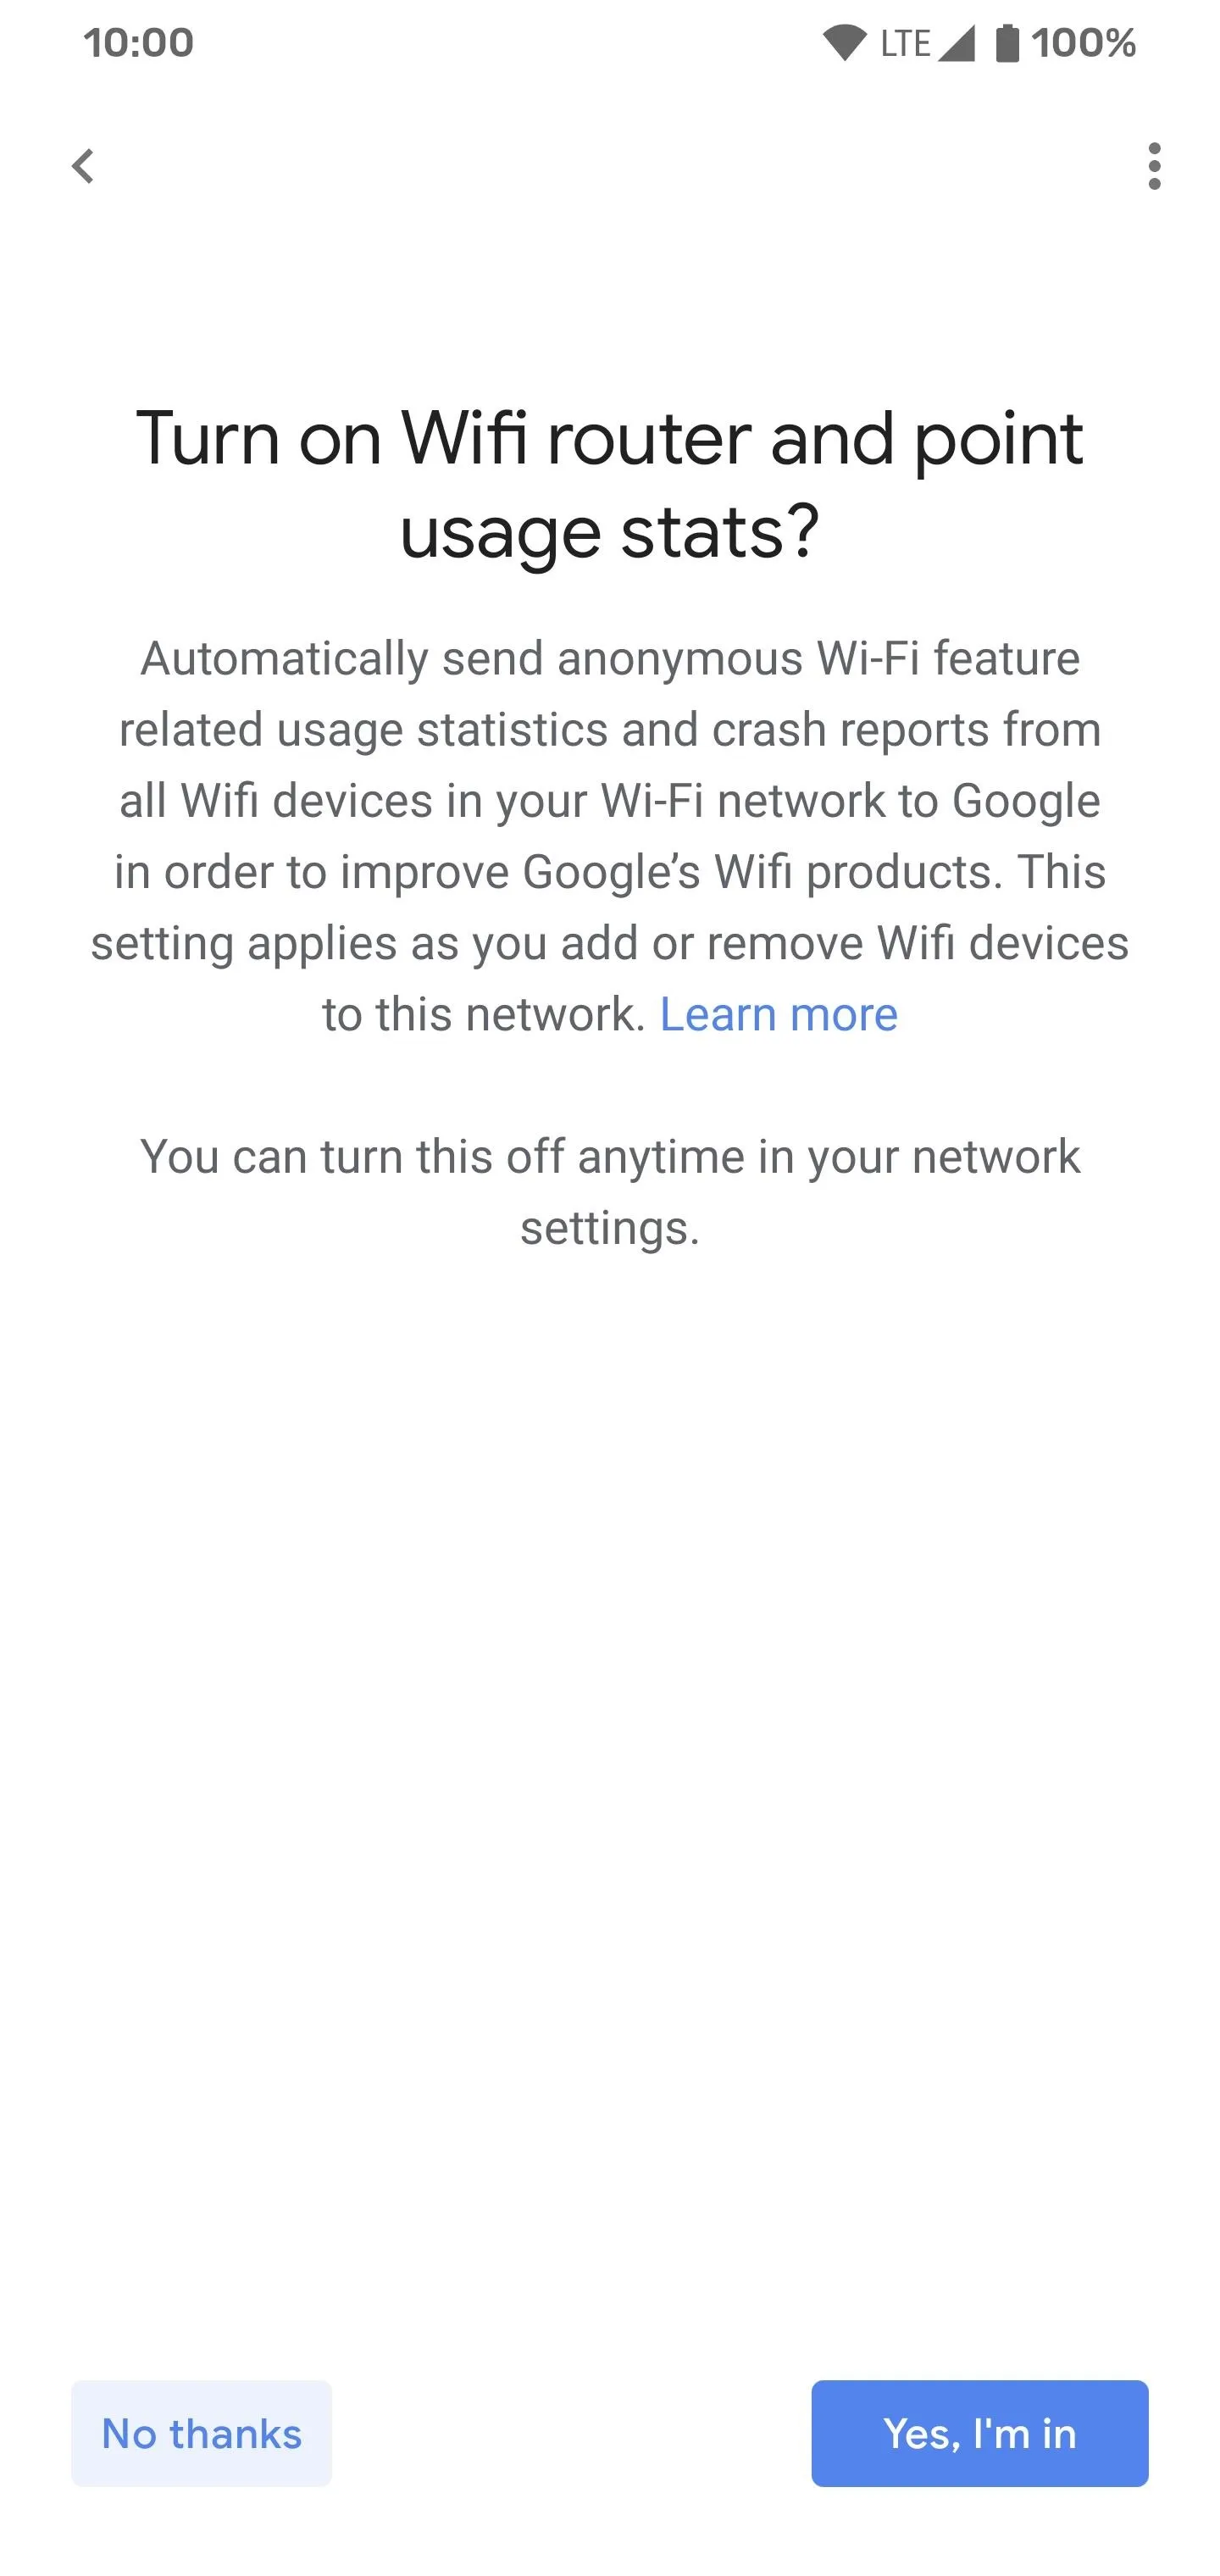
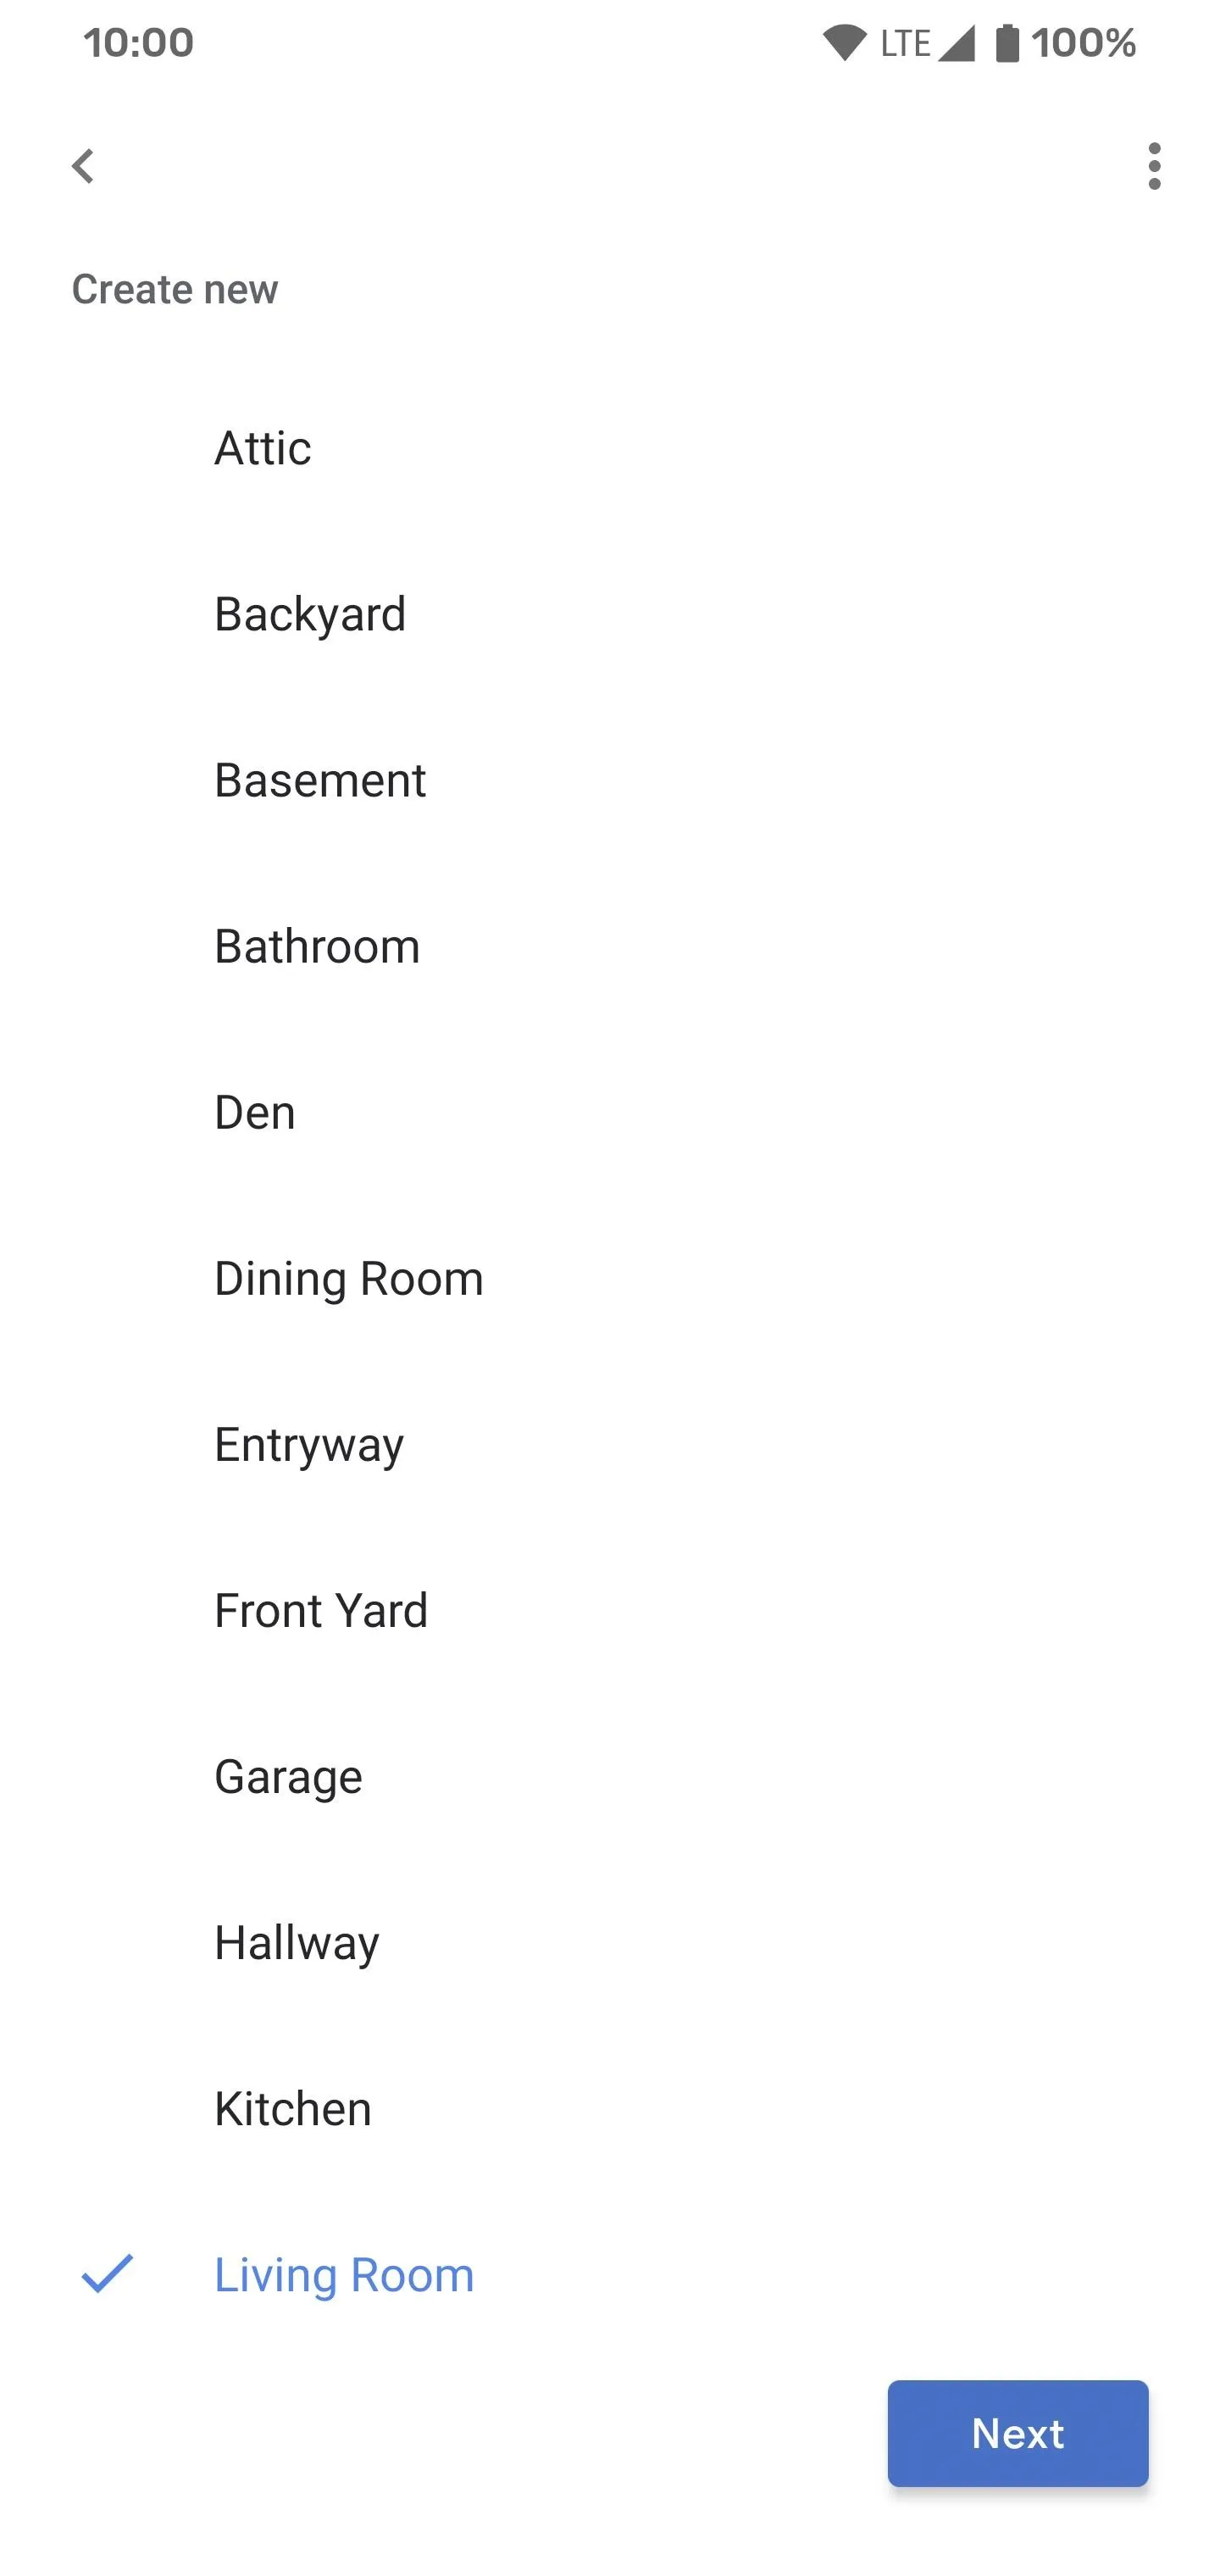
Once you scan the QR code, you'll be asked whether or not you want to use Wifi point usage stats. If you want more privacy, you should say, "No thanks," otherwise, hit "Yes, I'm In." The next screen will inform you about Nest Wifi cloud services. Tap "Got it" to move on. Now you'll add the device to one of your rooms or create a new one, then hit "Next" to continue.

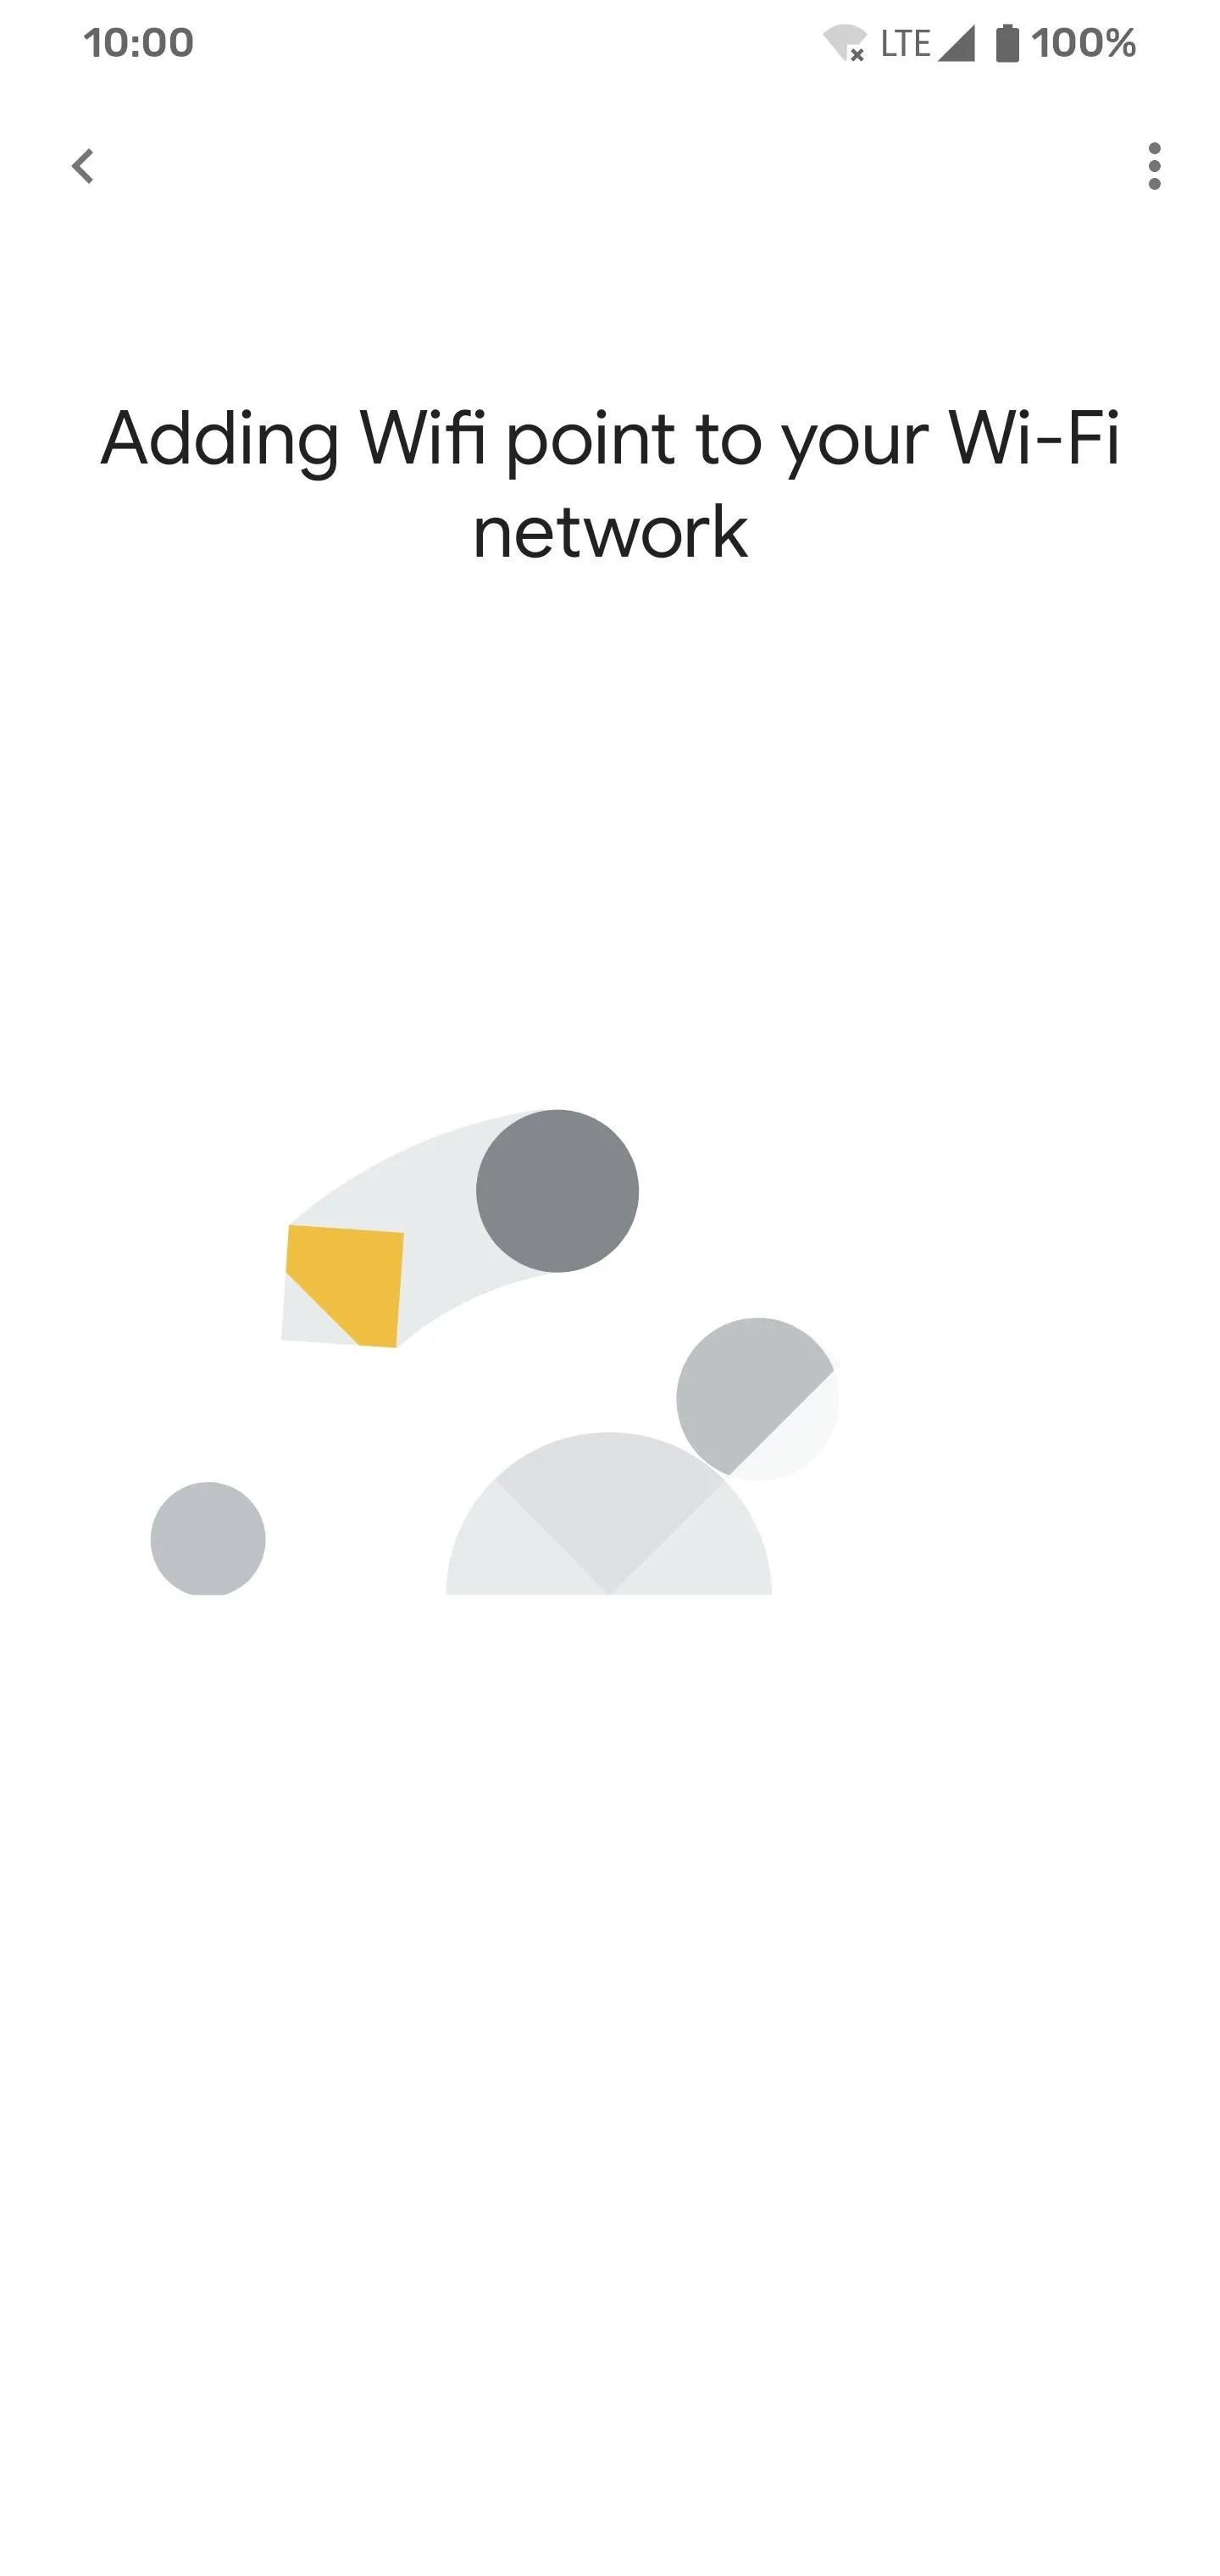
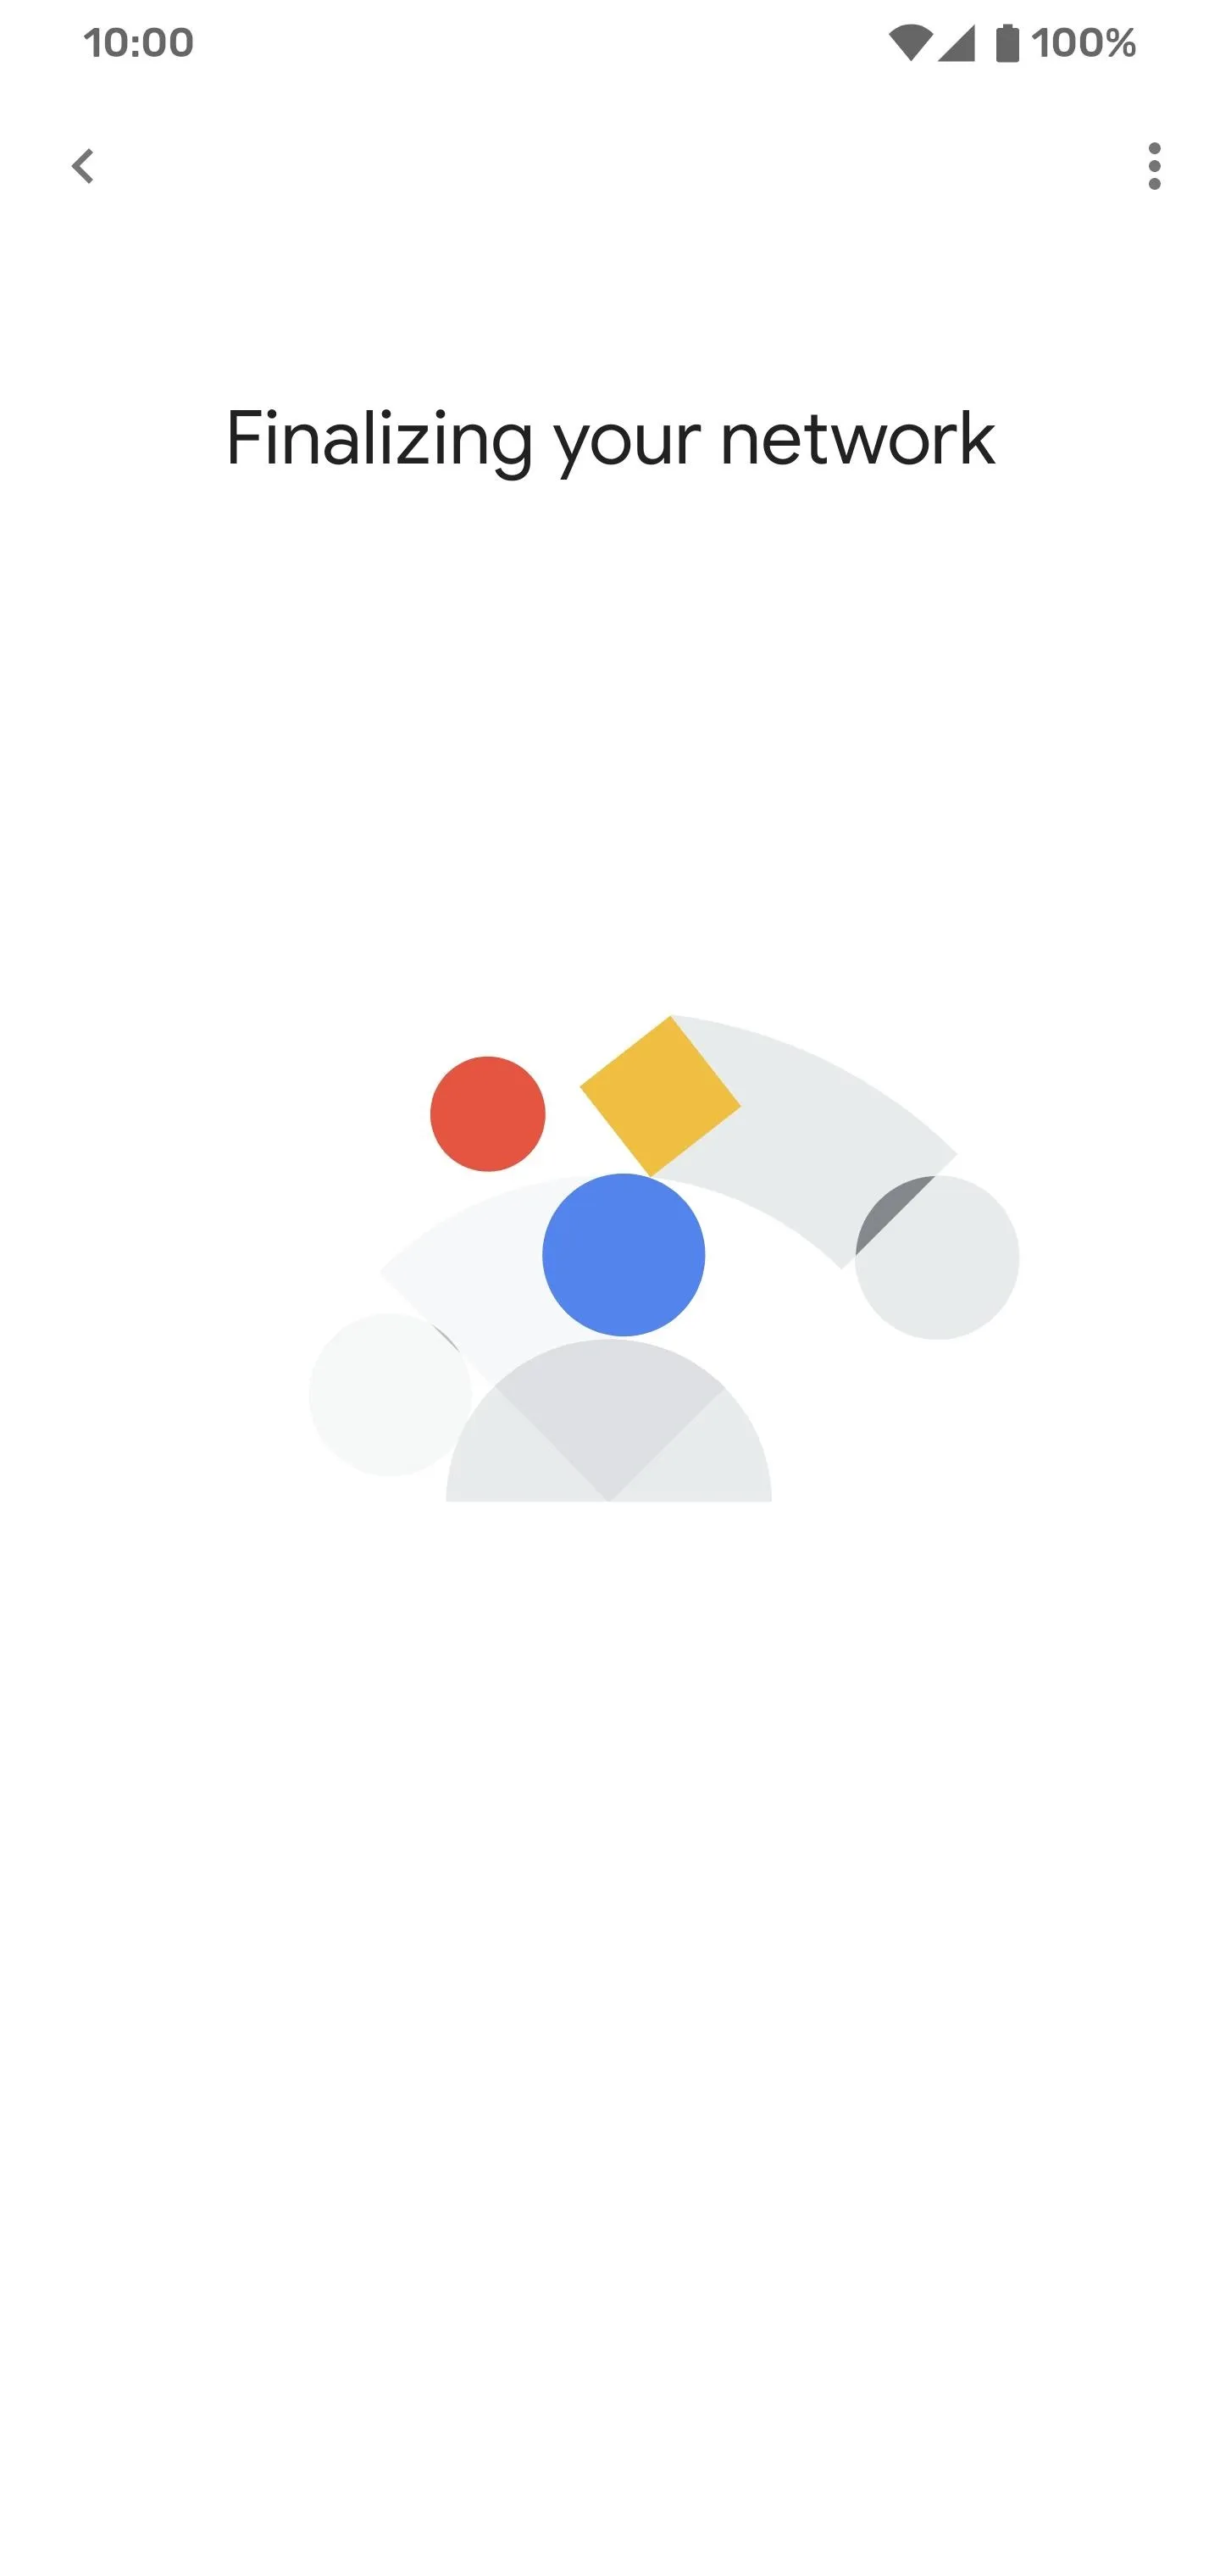
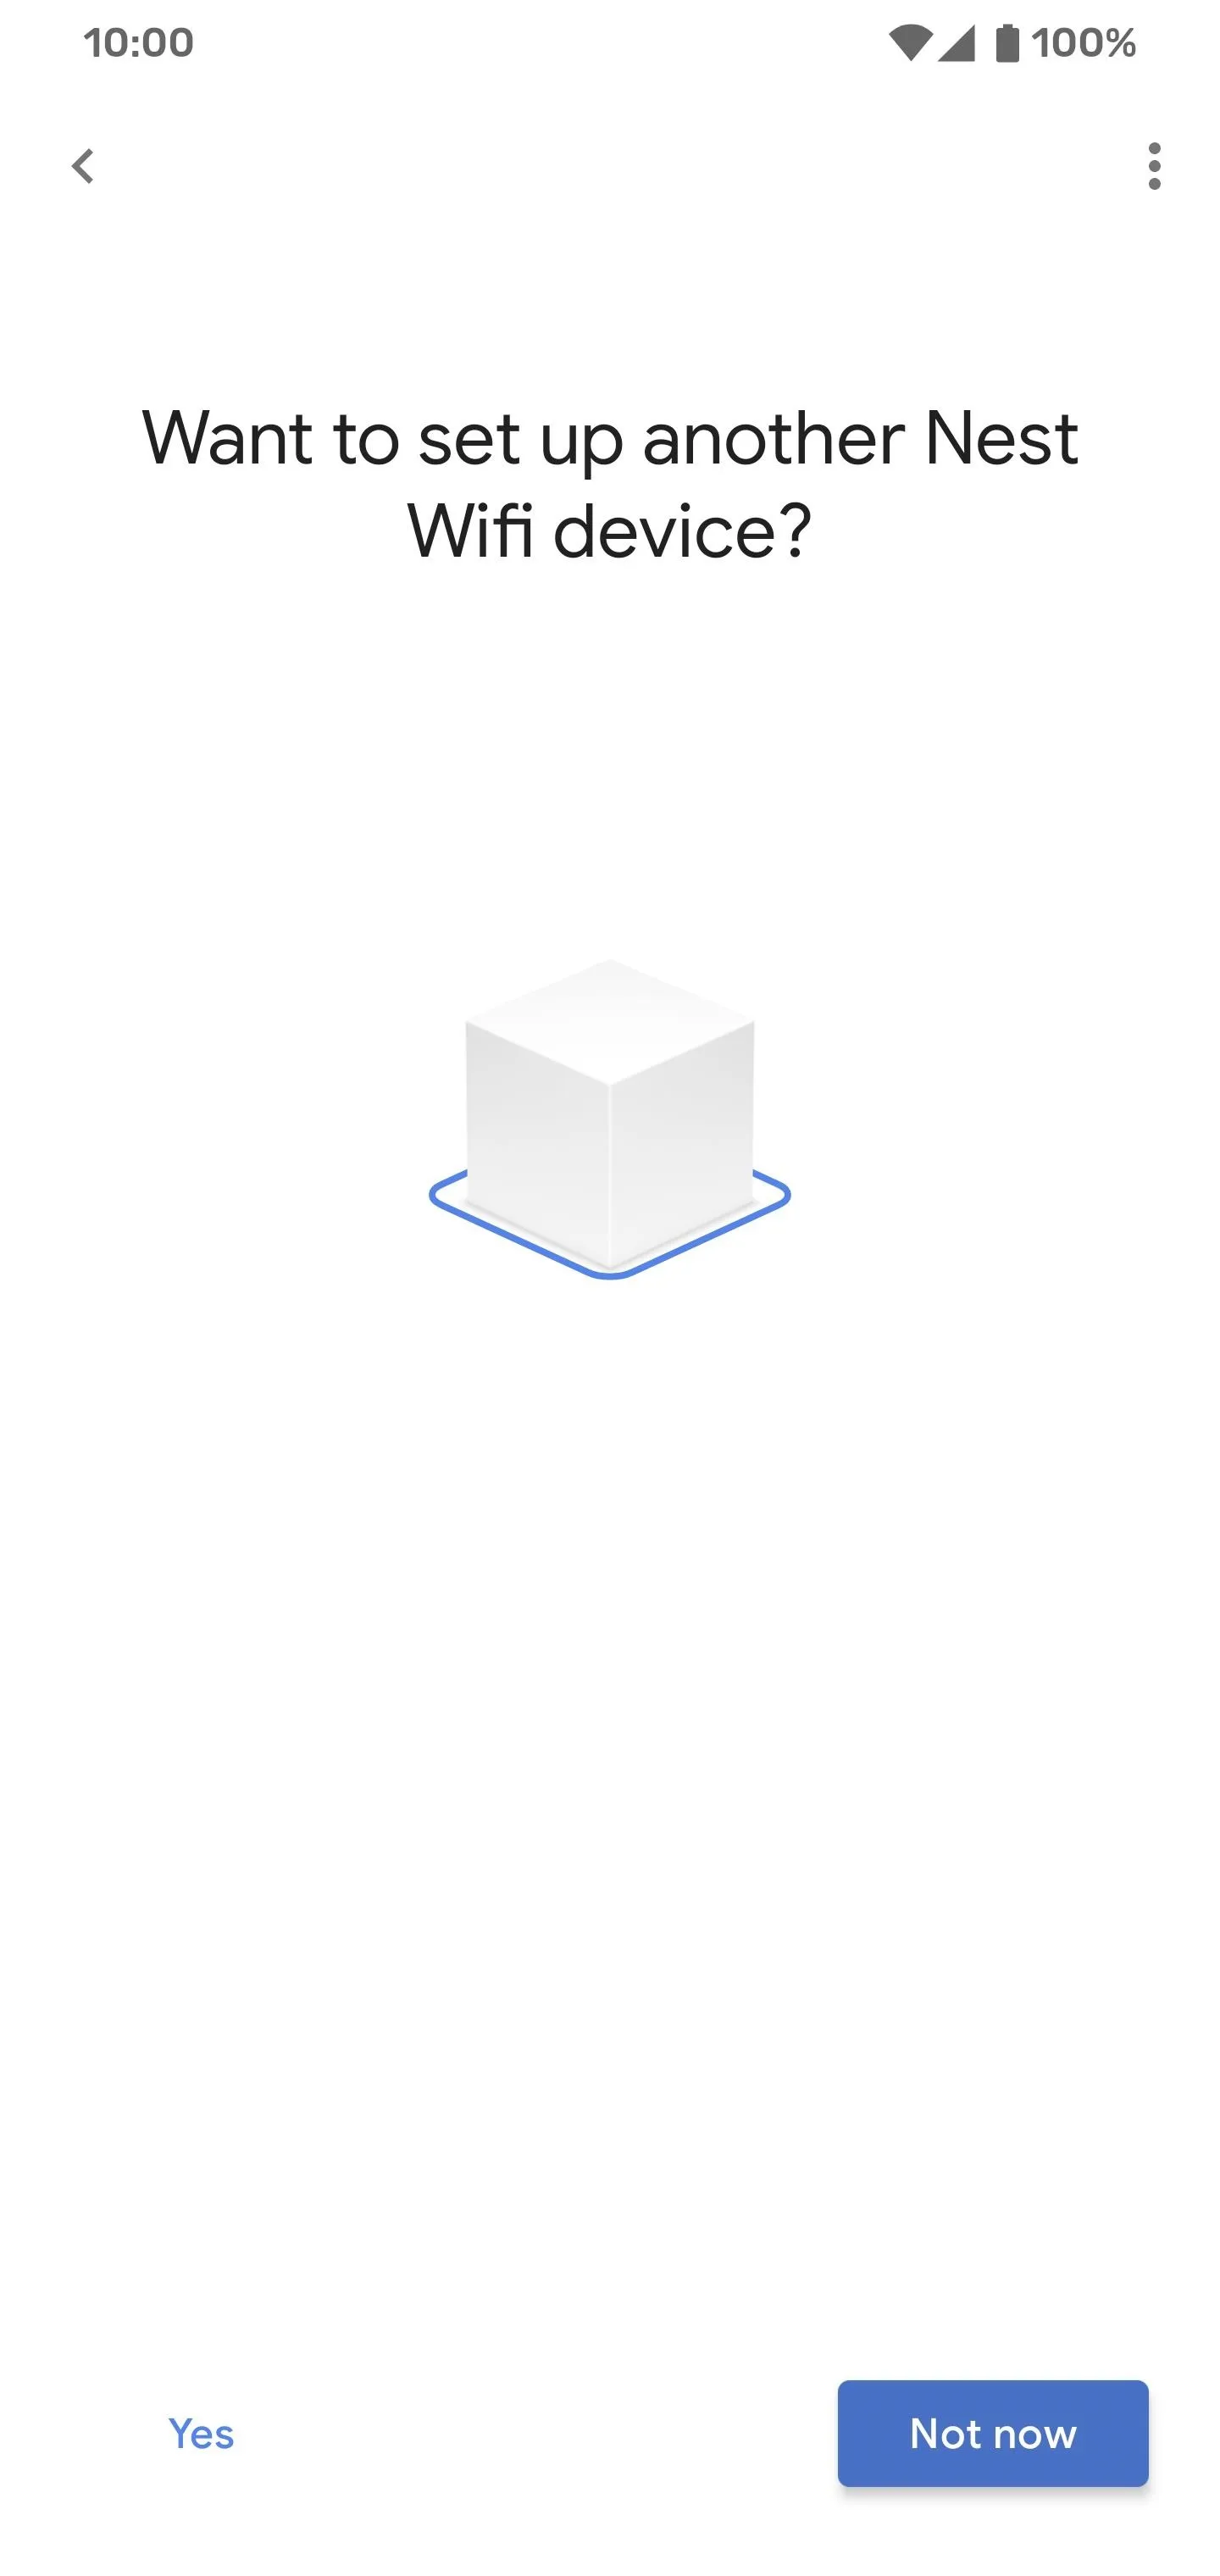
From here, it will create your mesh Wifi point and do all the background things necessary to connect it to your network. Be patient with this part, as it might take a few minutes. Once it finishes, it'll ask if you want to set up another Wifi device. Hit "Not Now" to continue.
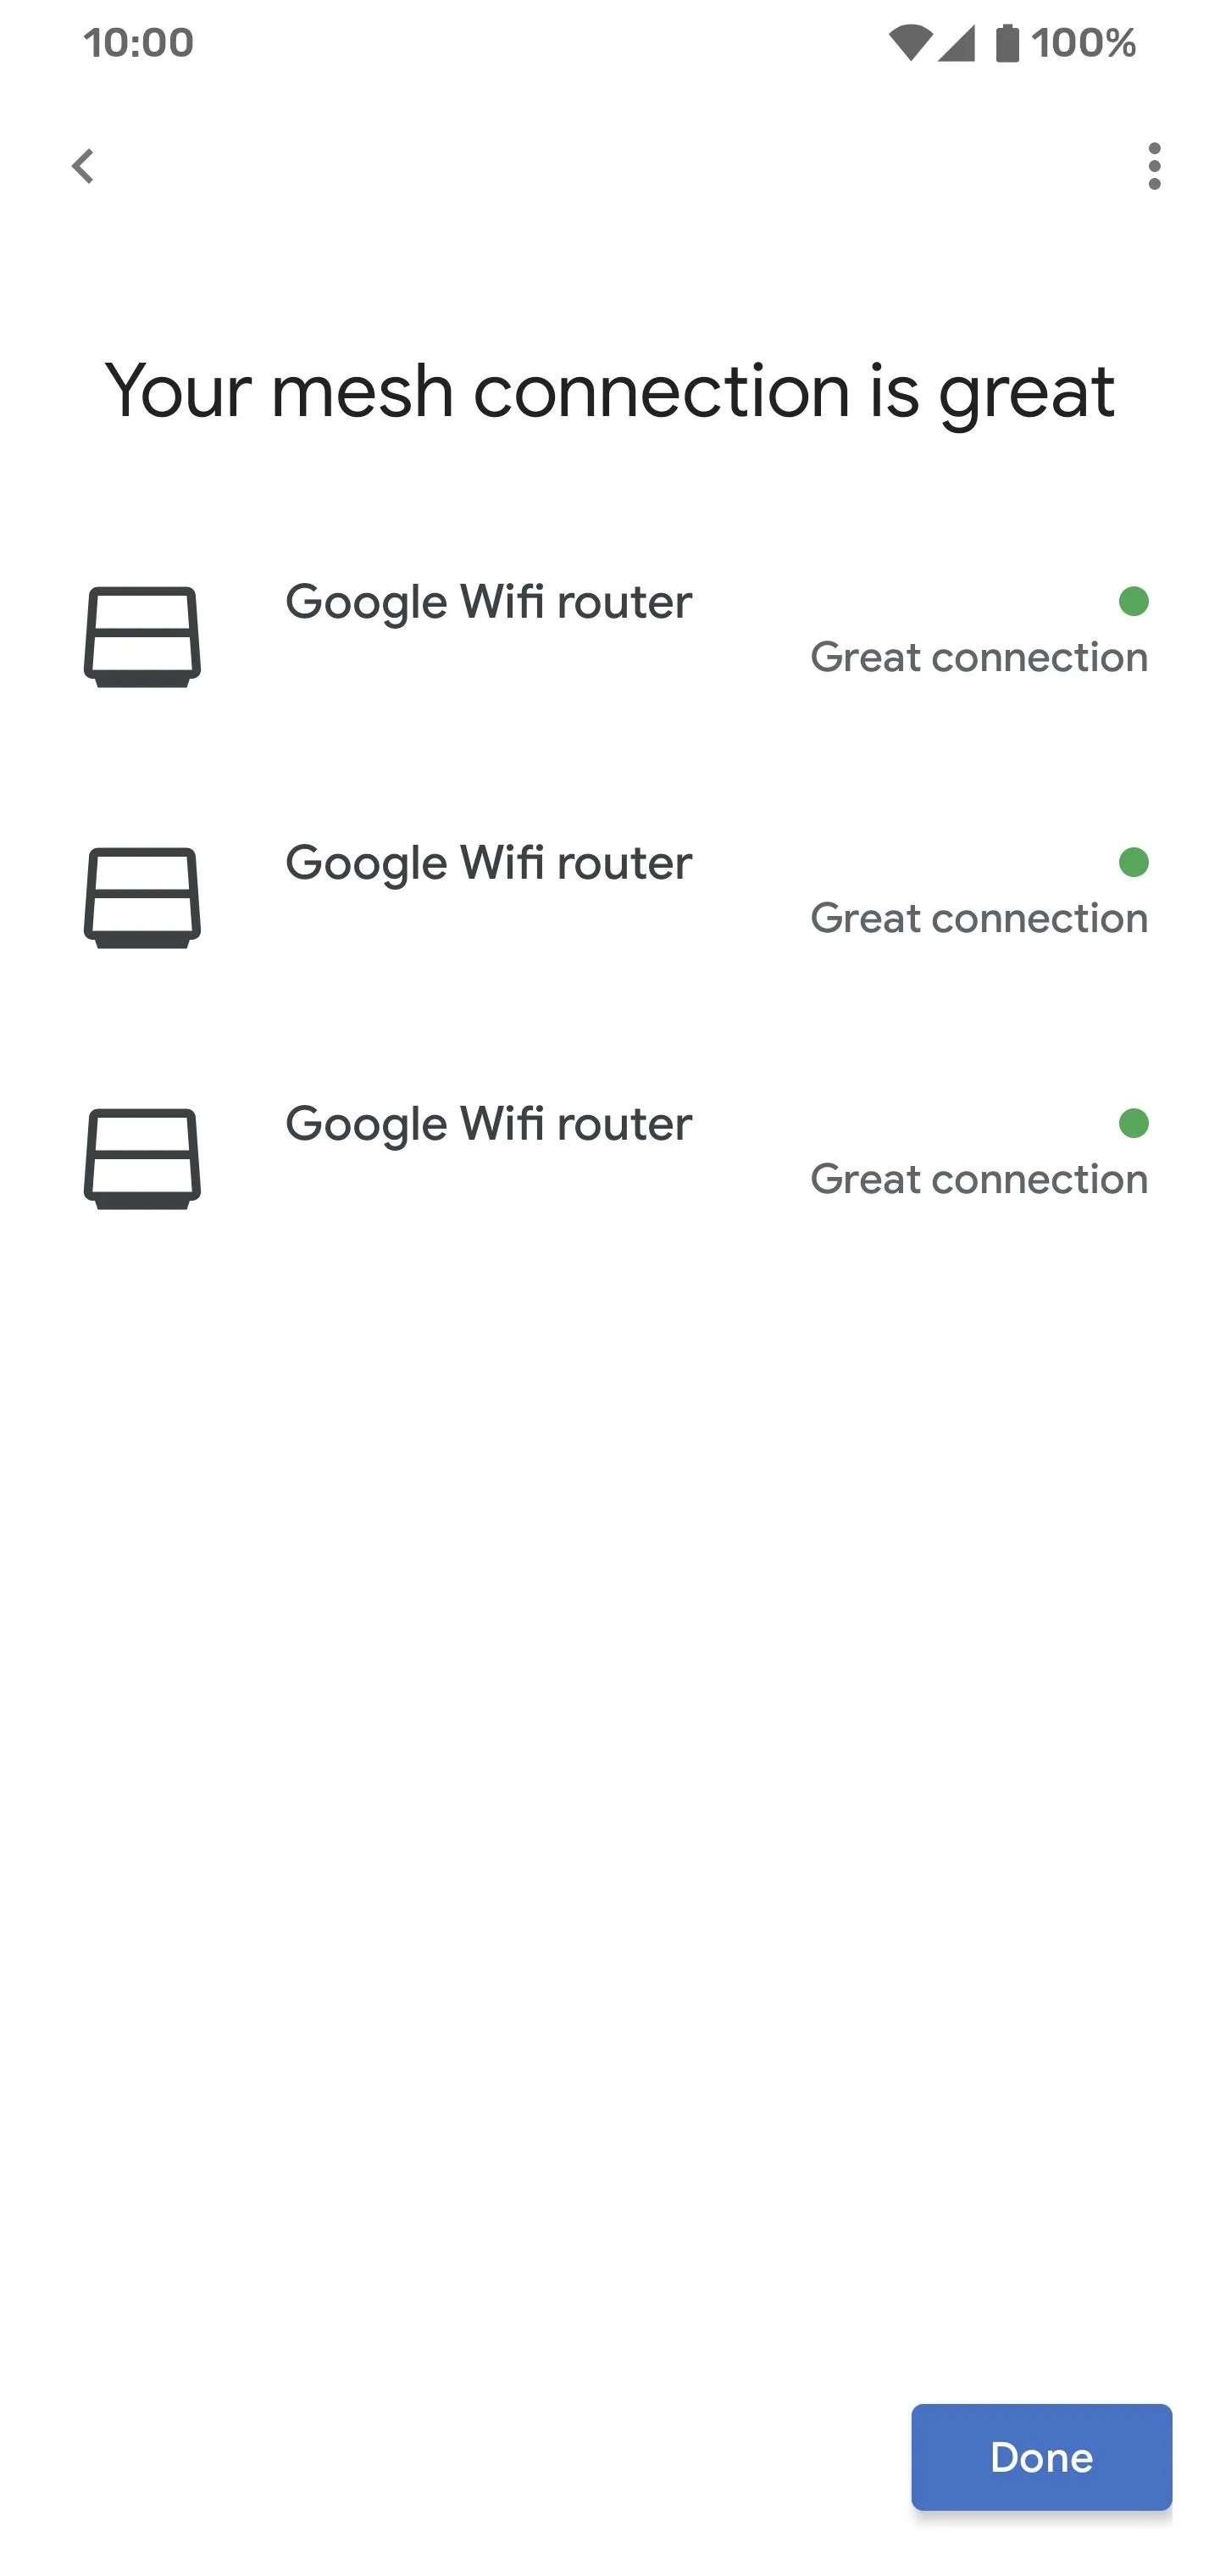
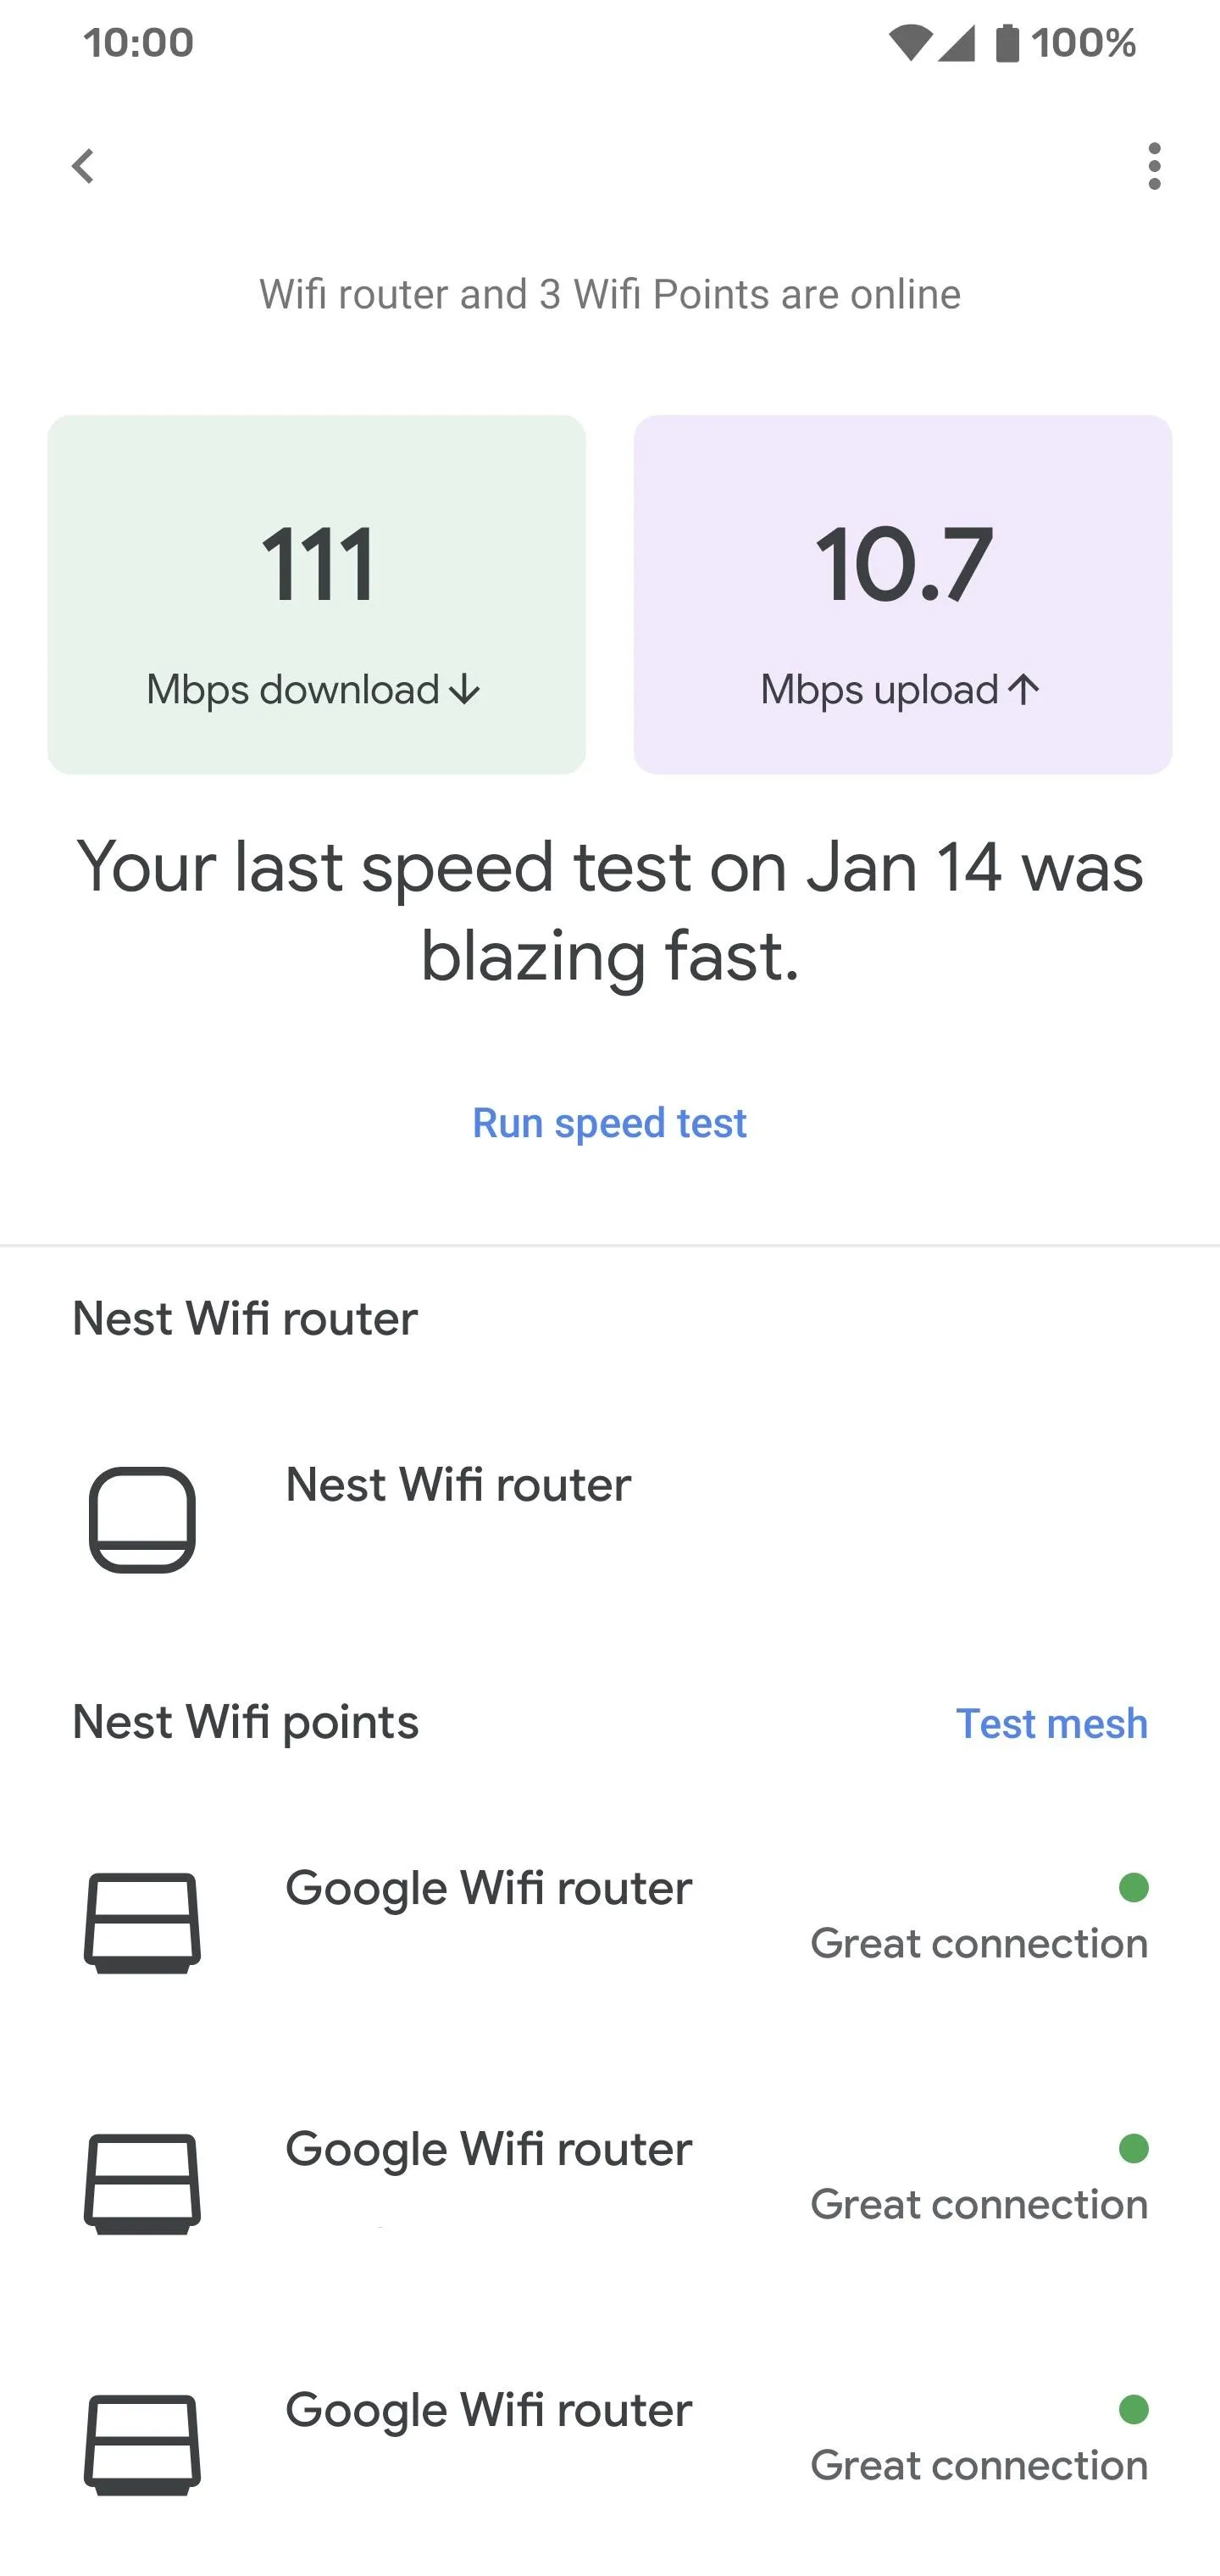
It will now automatically test the mesh connection between all of your Google Wifi access points. Once it finishes, all of your mesh connections should hopefully be labeled as "Great connection." If one or more of your mesh points have a weak connection, you'll need to adjust the location later so they can be within wireless range of each other. Hit "Done" to complete the setup.


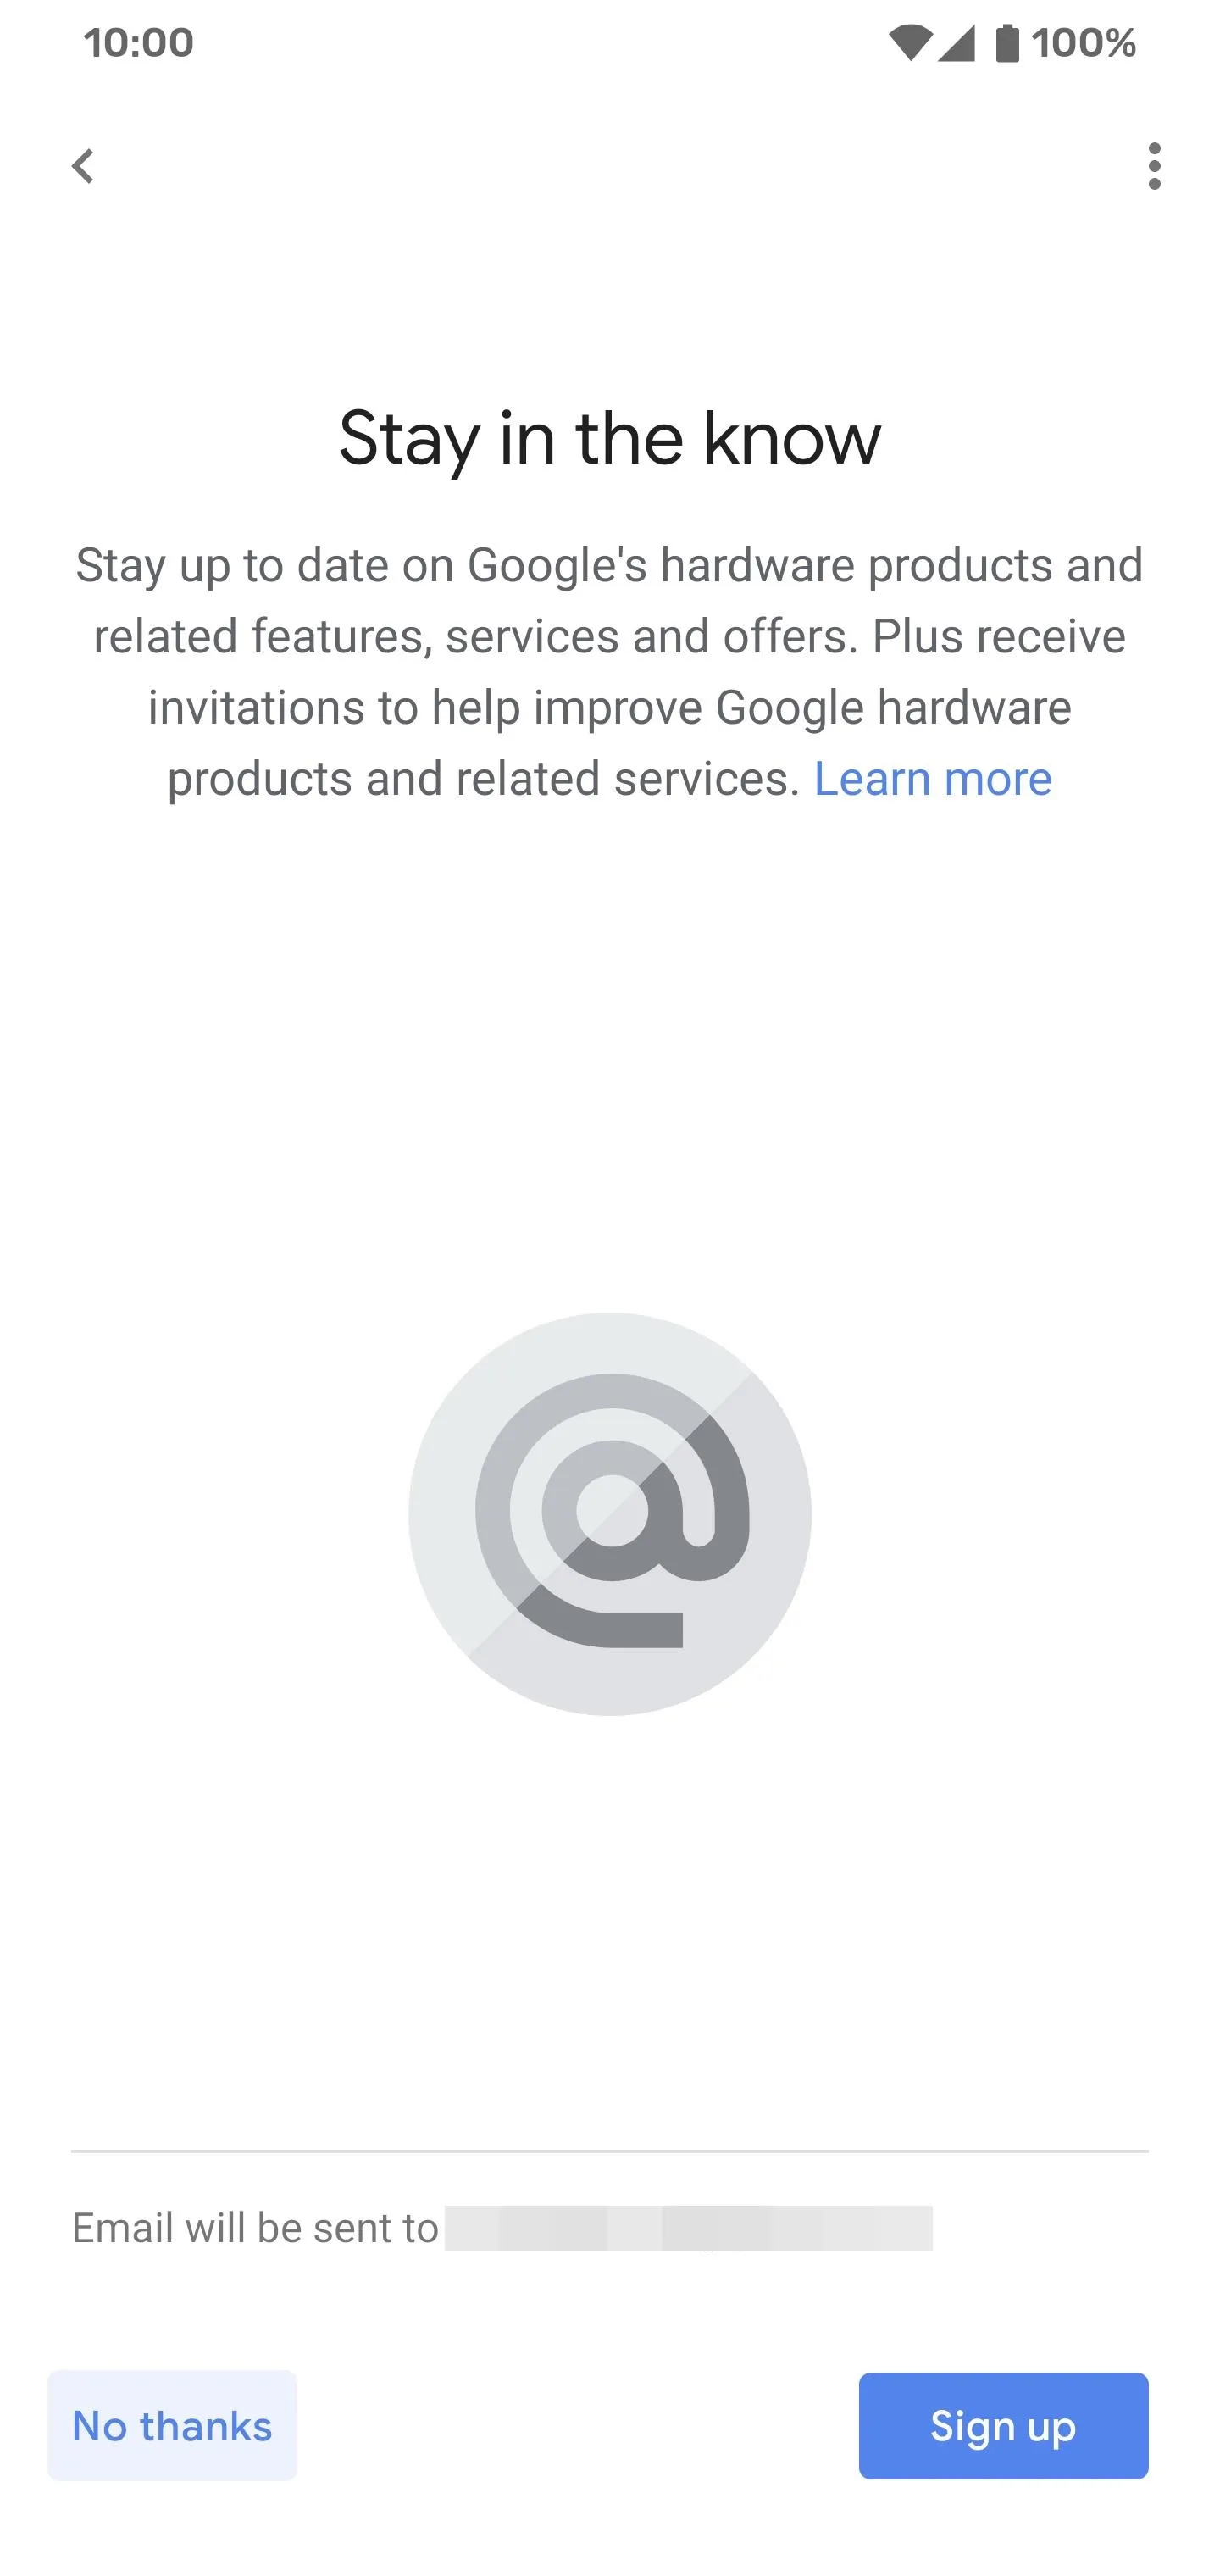
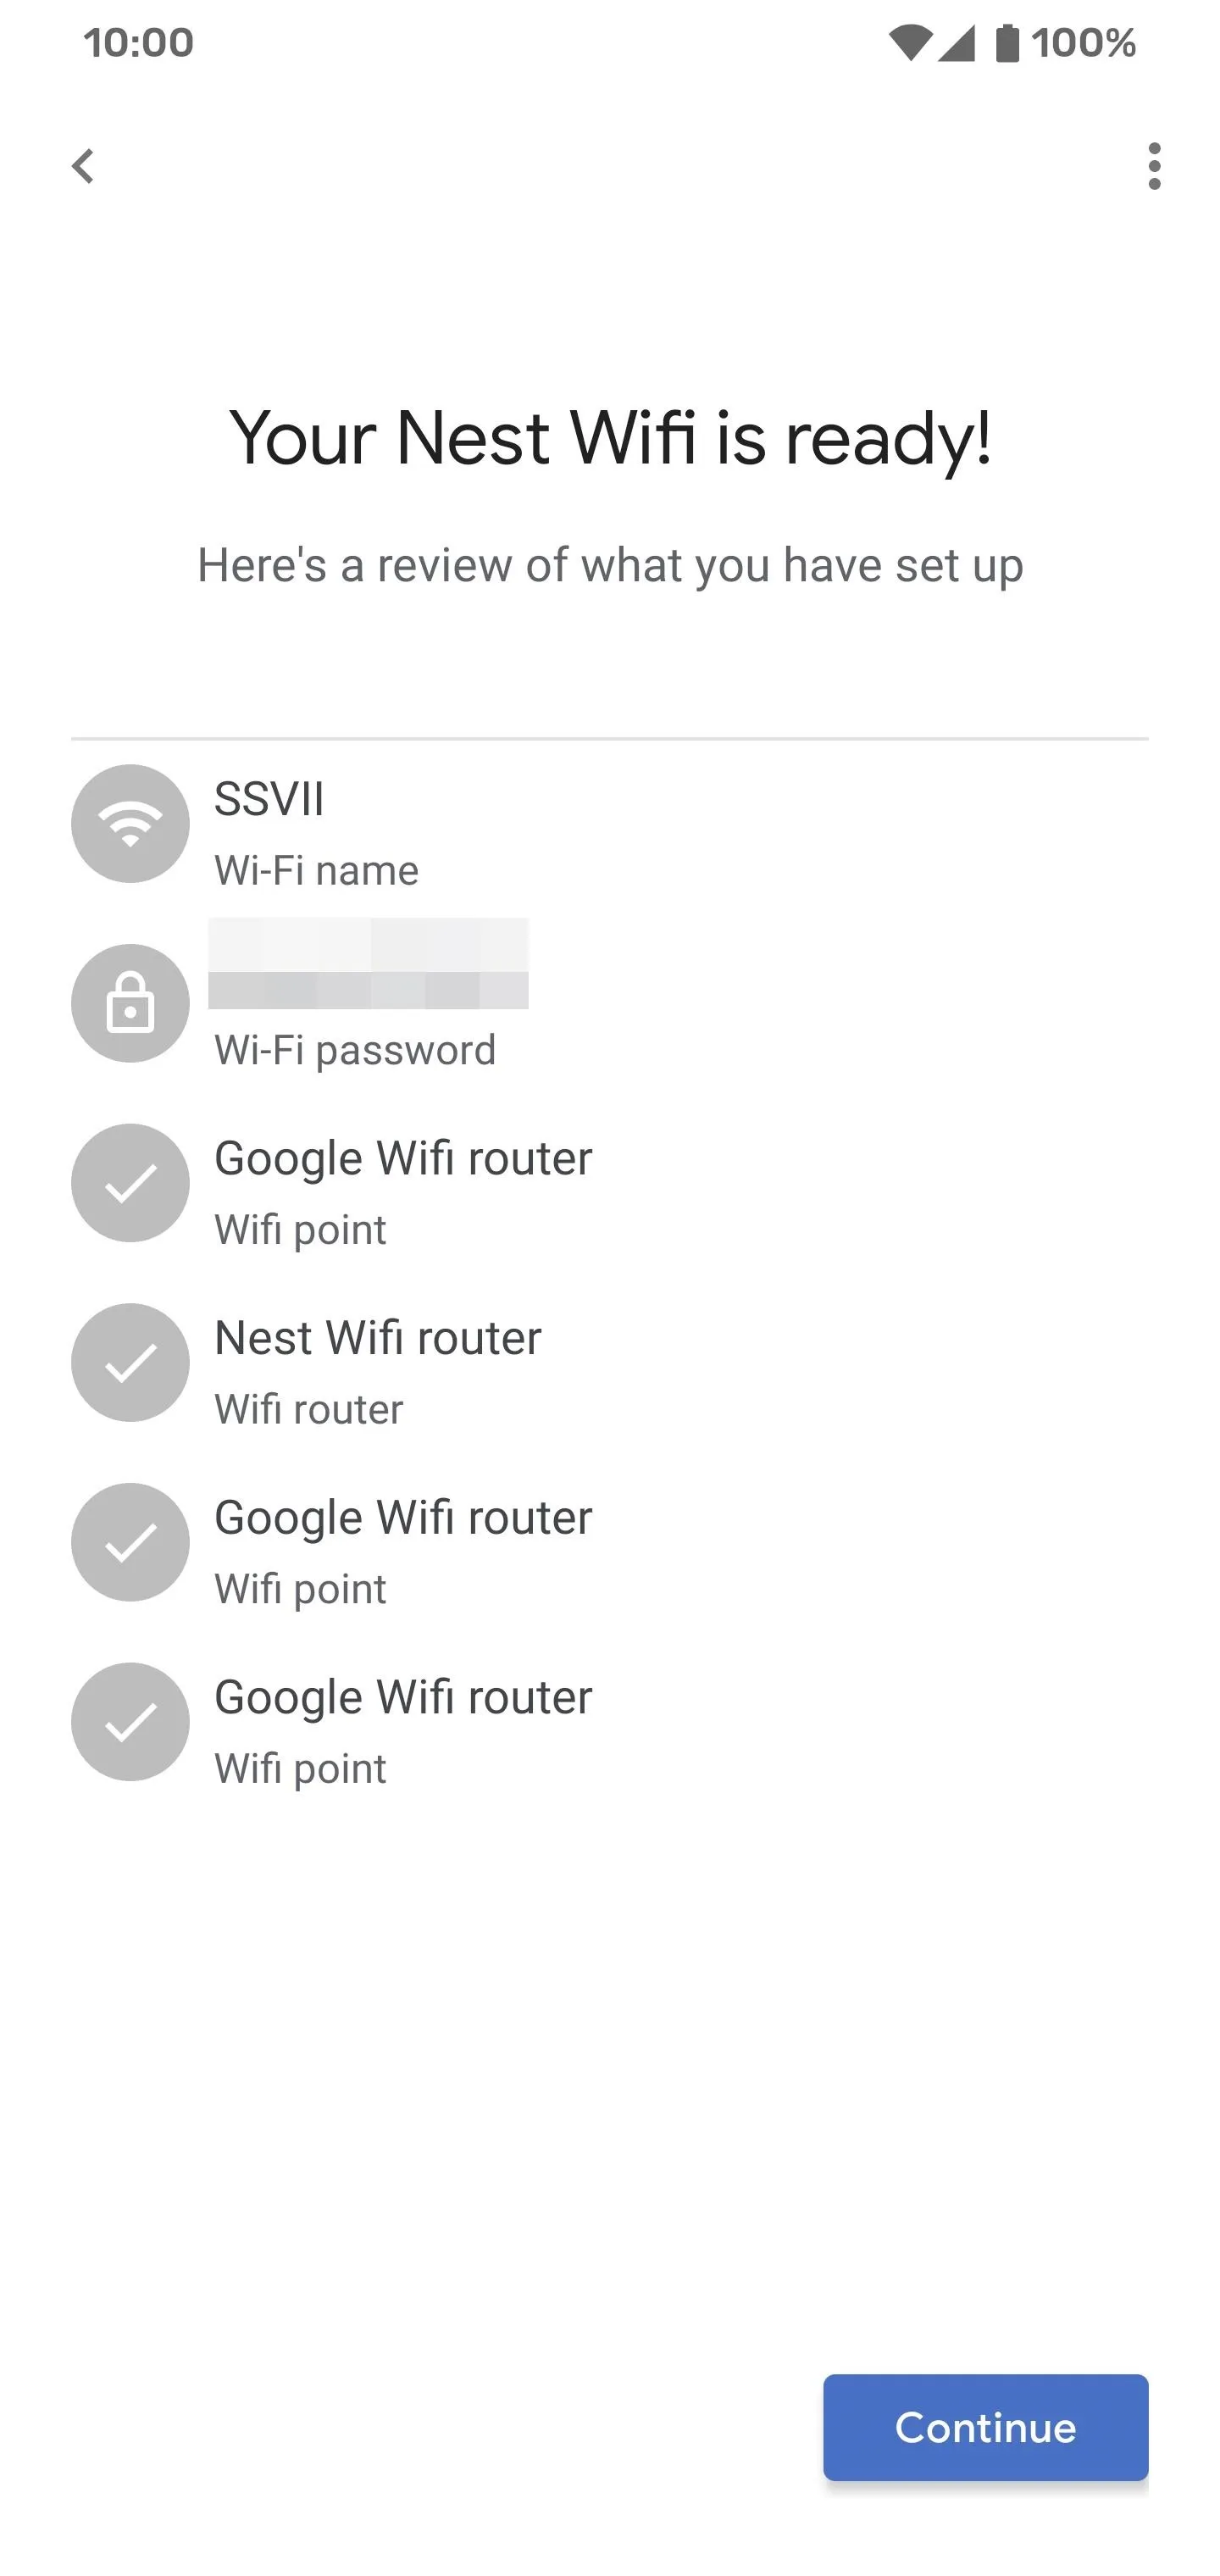
You will now be on a screen asking if you want to stay in the know about Google products and services. If you don't want to do this, hit "No thanks" to continue. Now, onto the last screen of this whole process — you'll see a brief overview of your entire Google Wifi network. Hit "Continue," and you're finally finished! You have now set your Google Wifi up with the Google Home app.
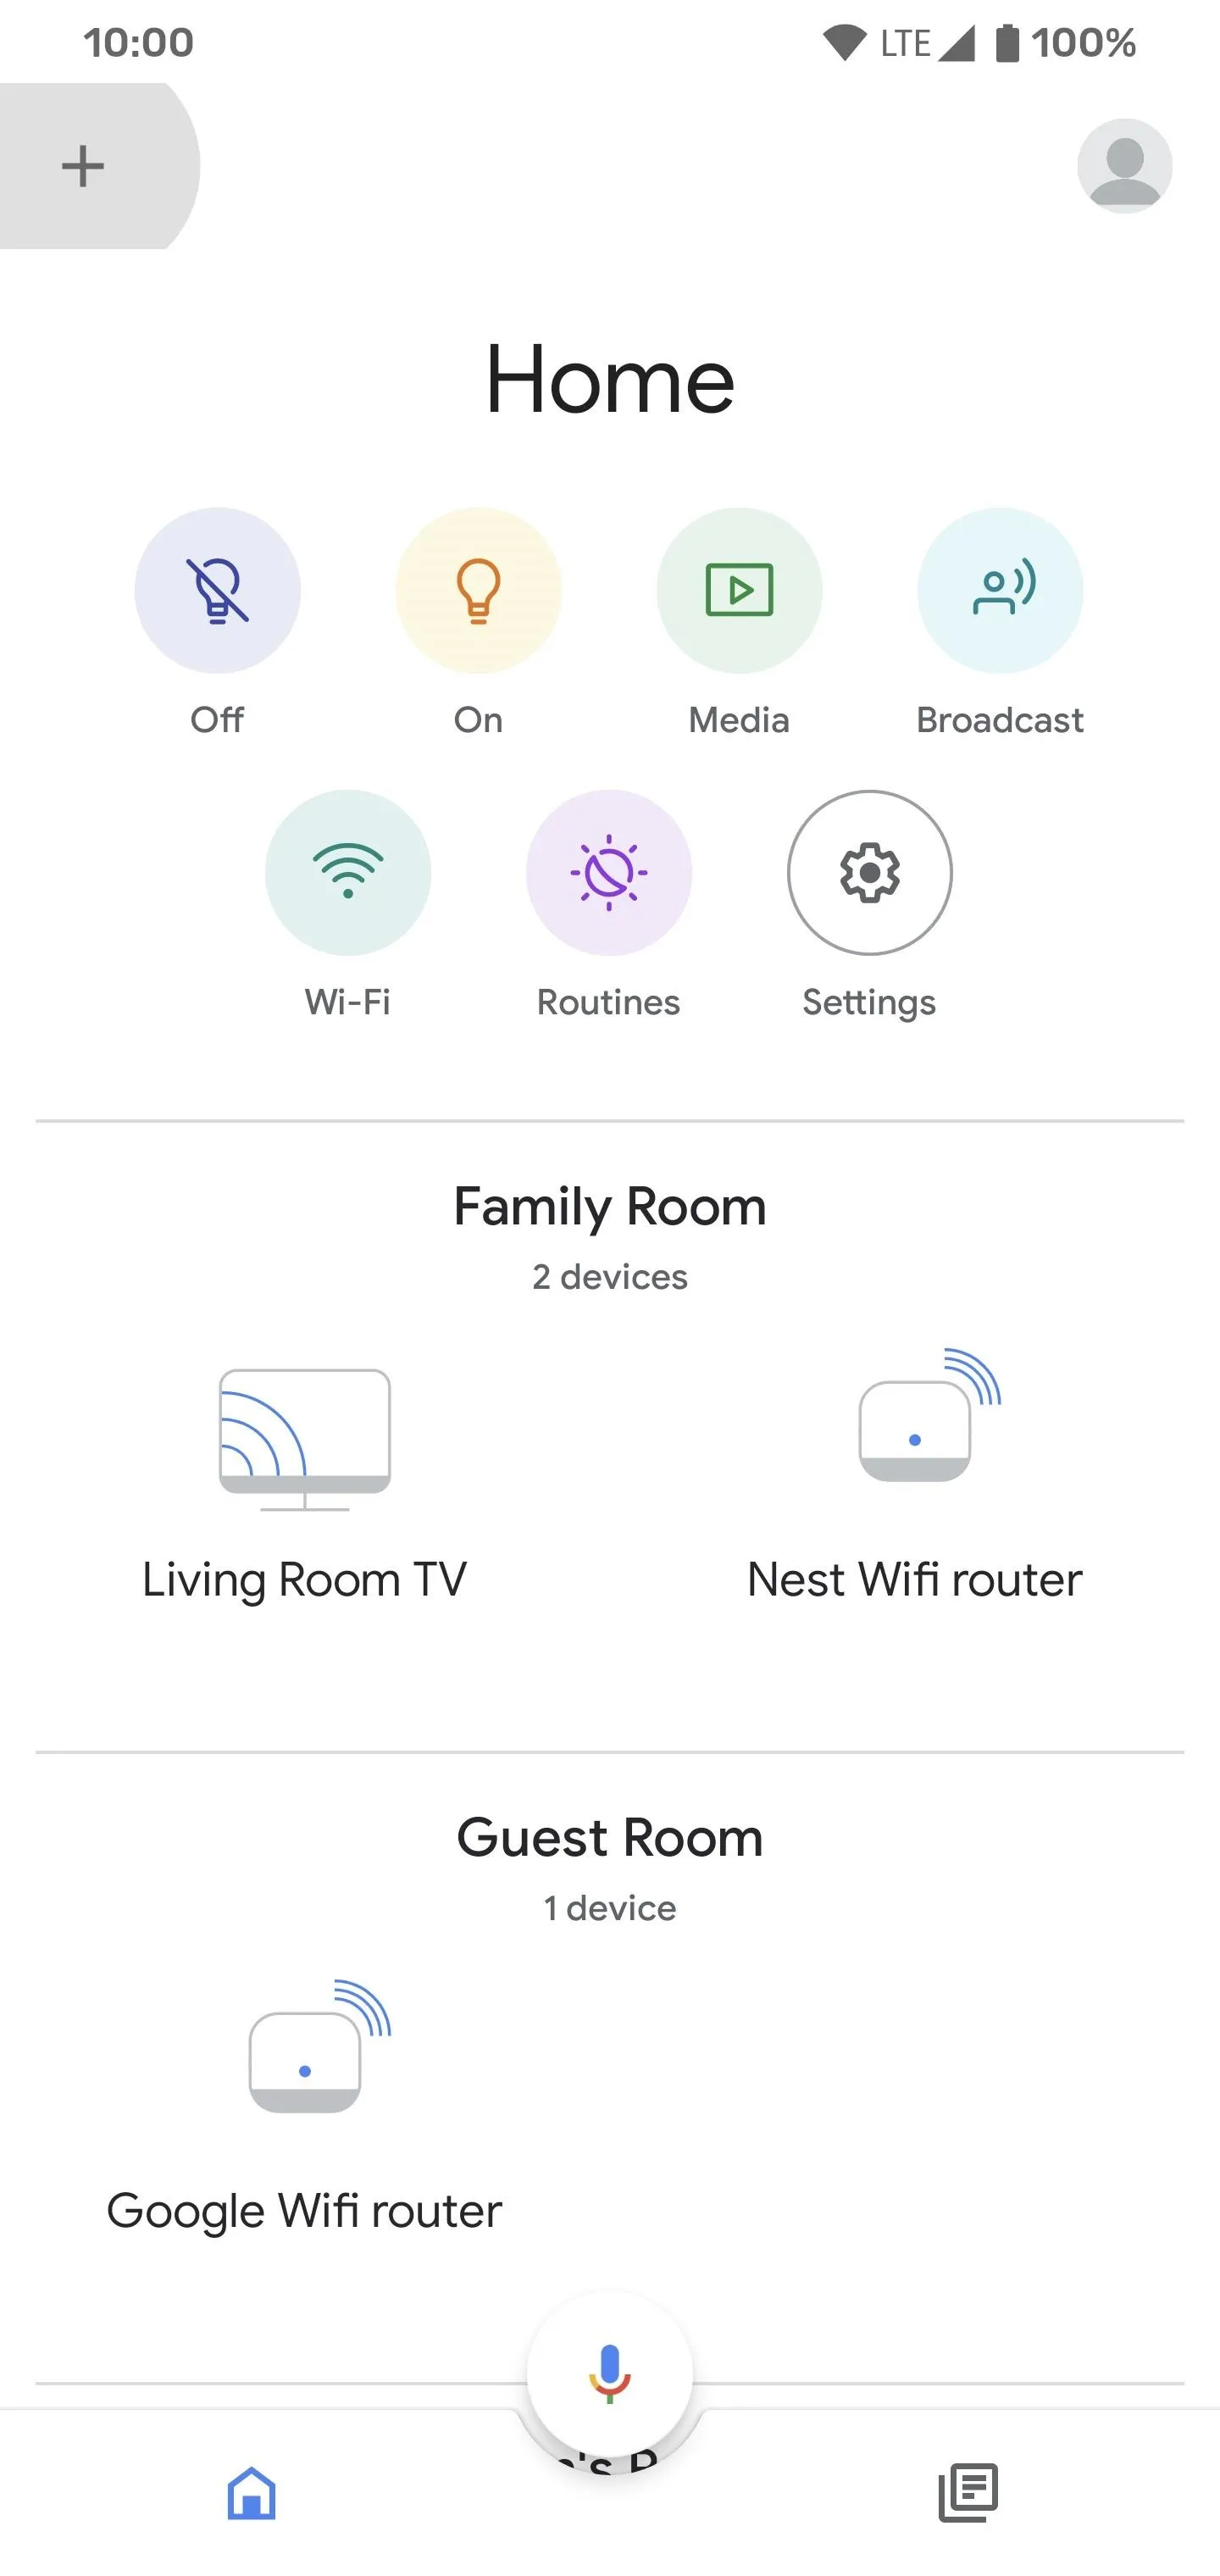
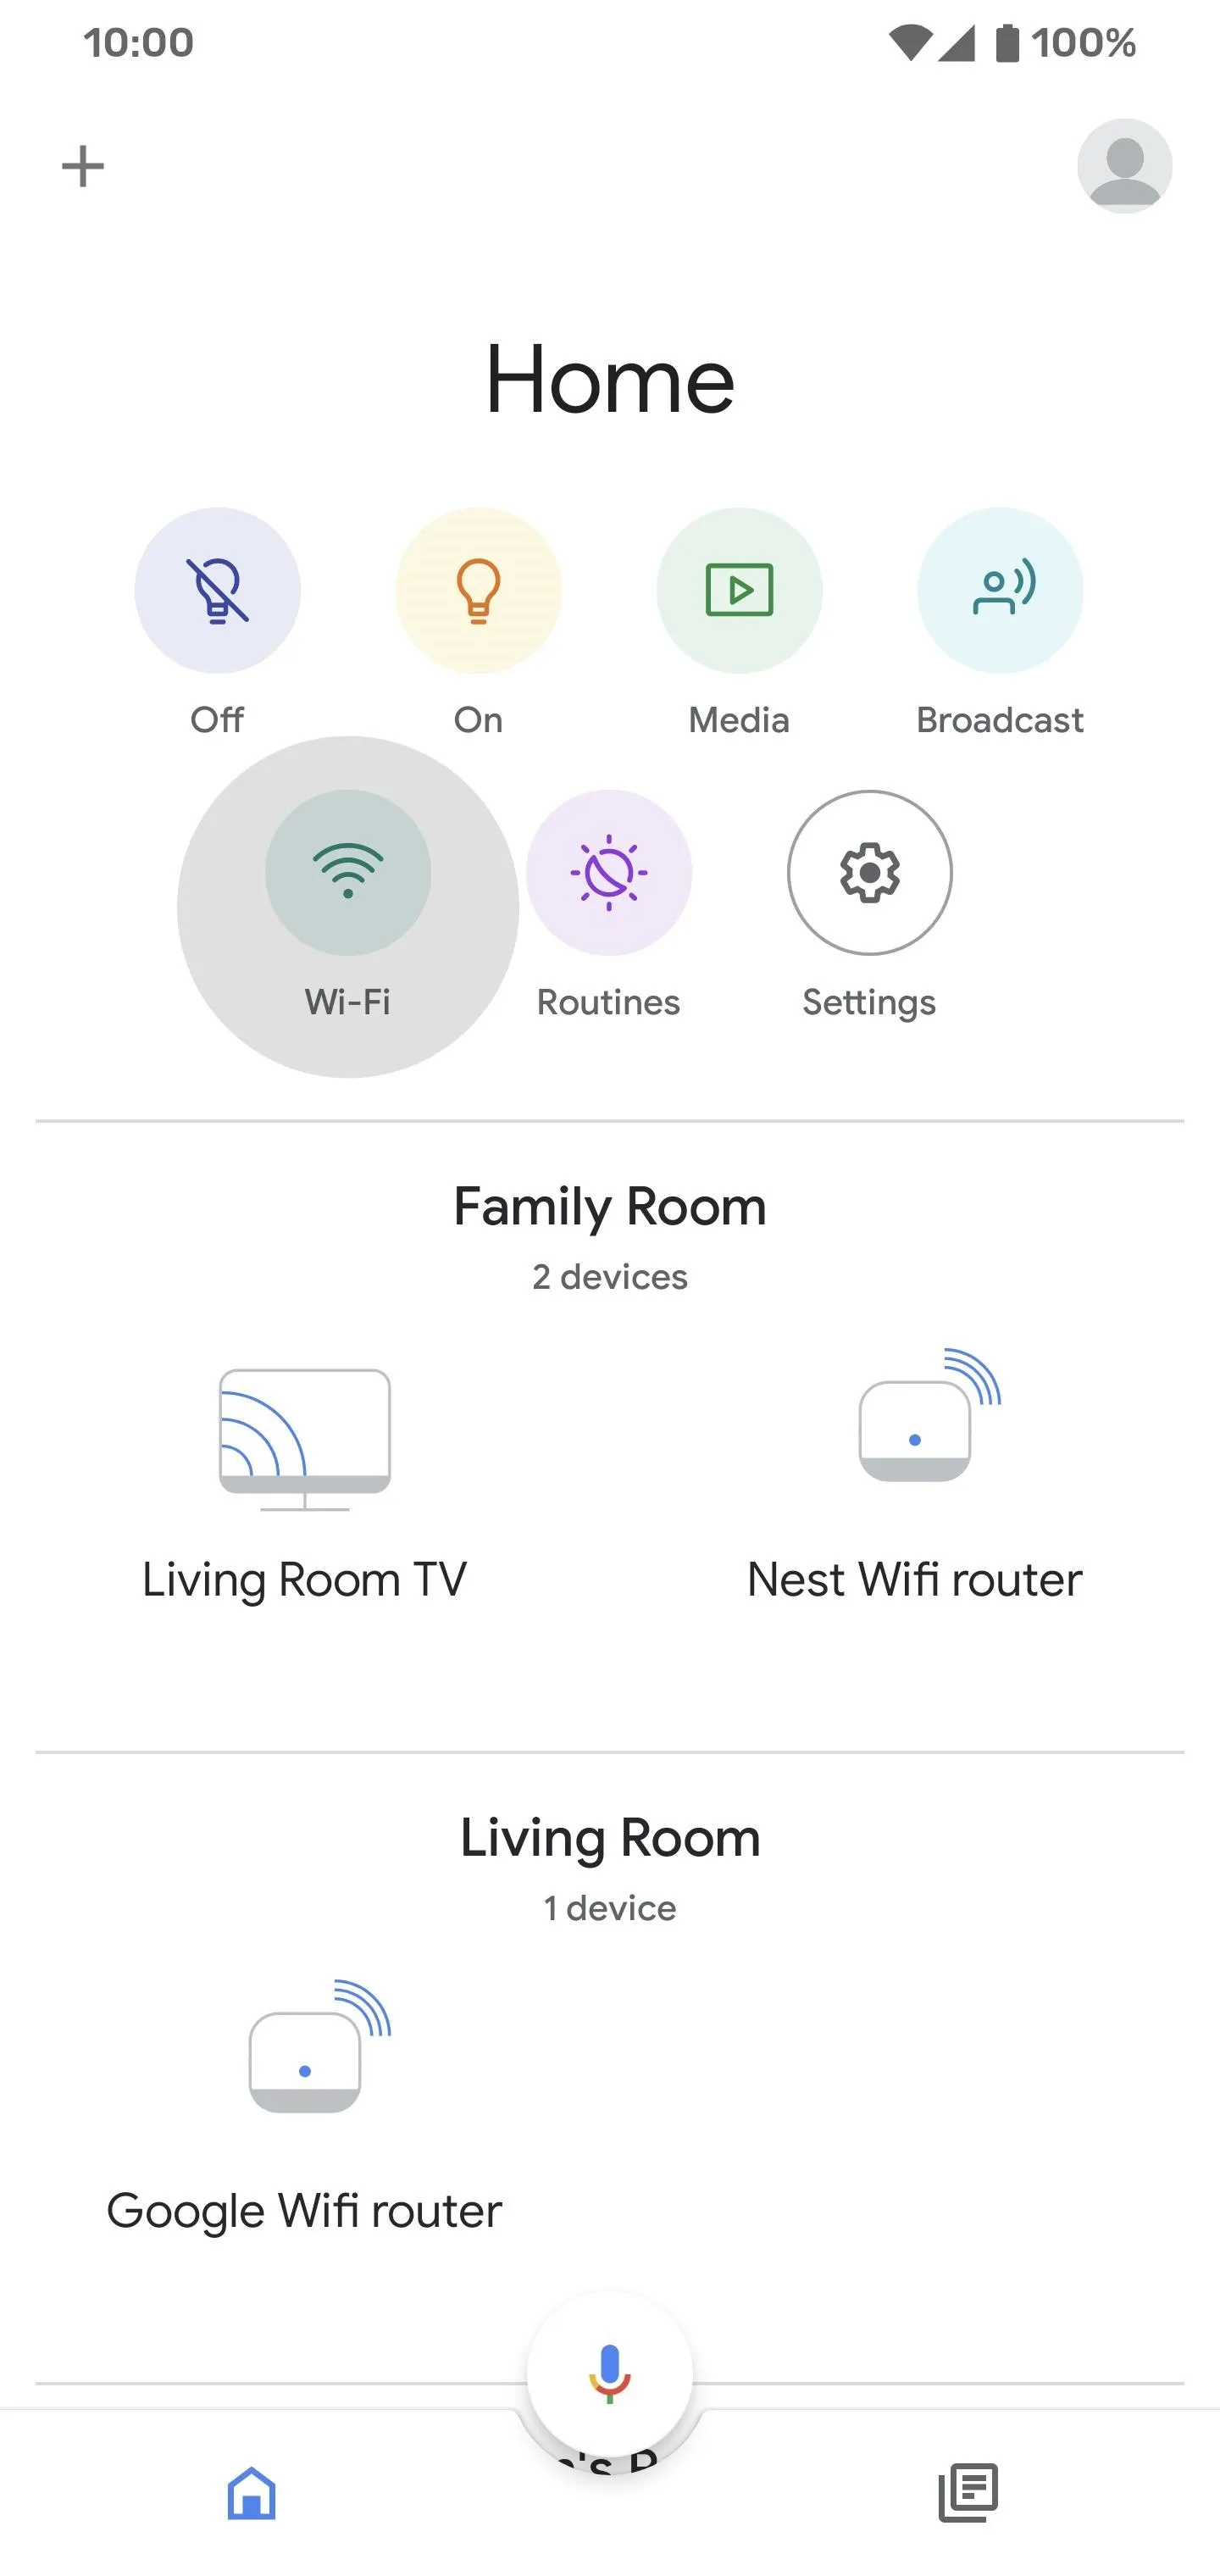
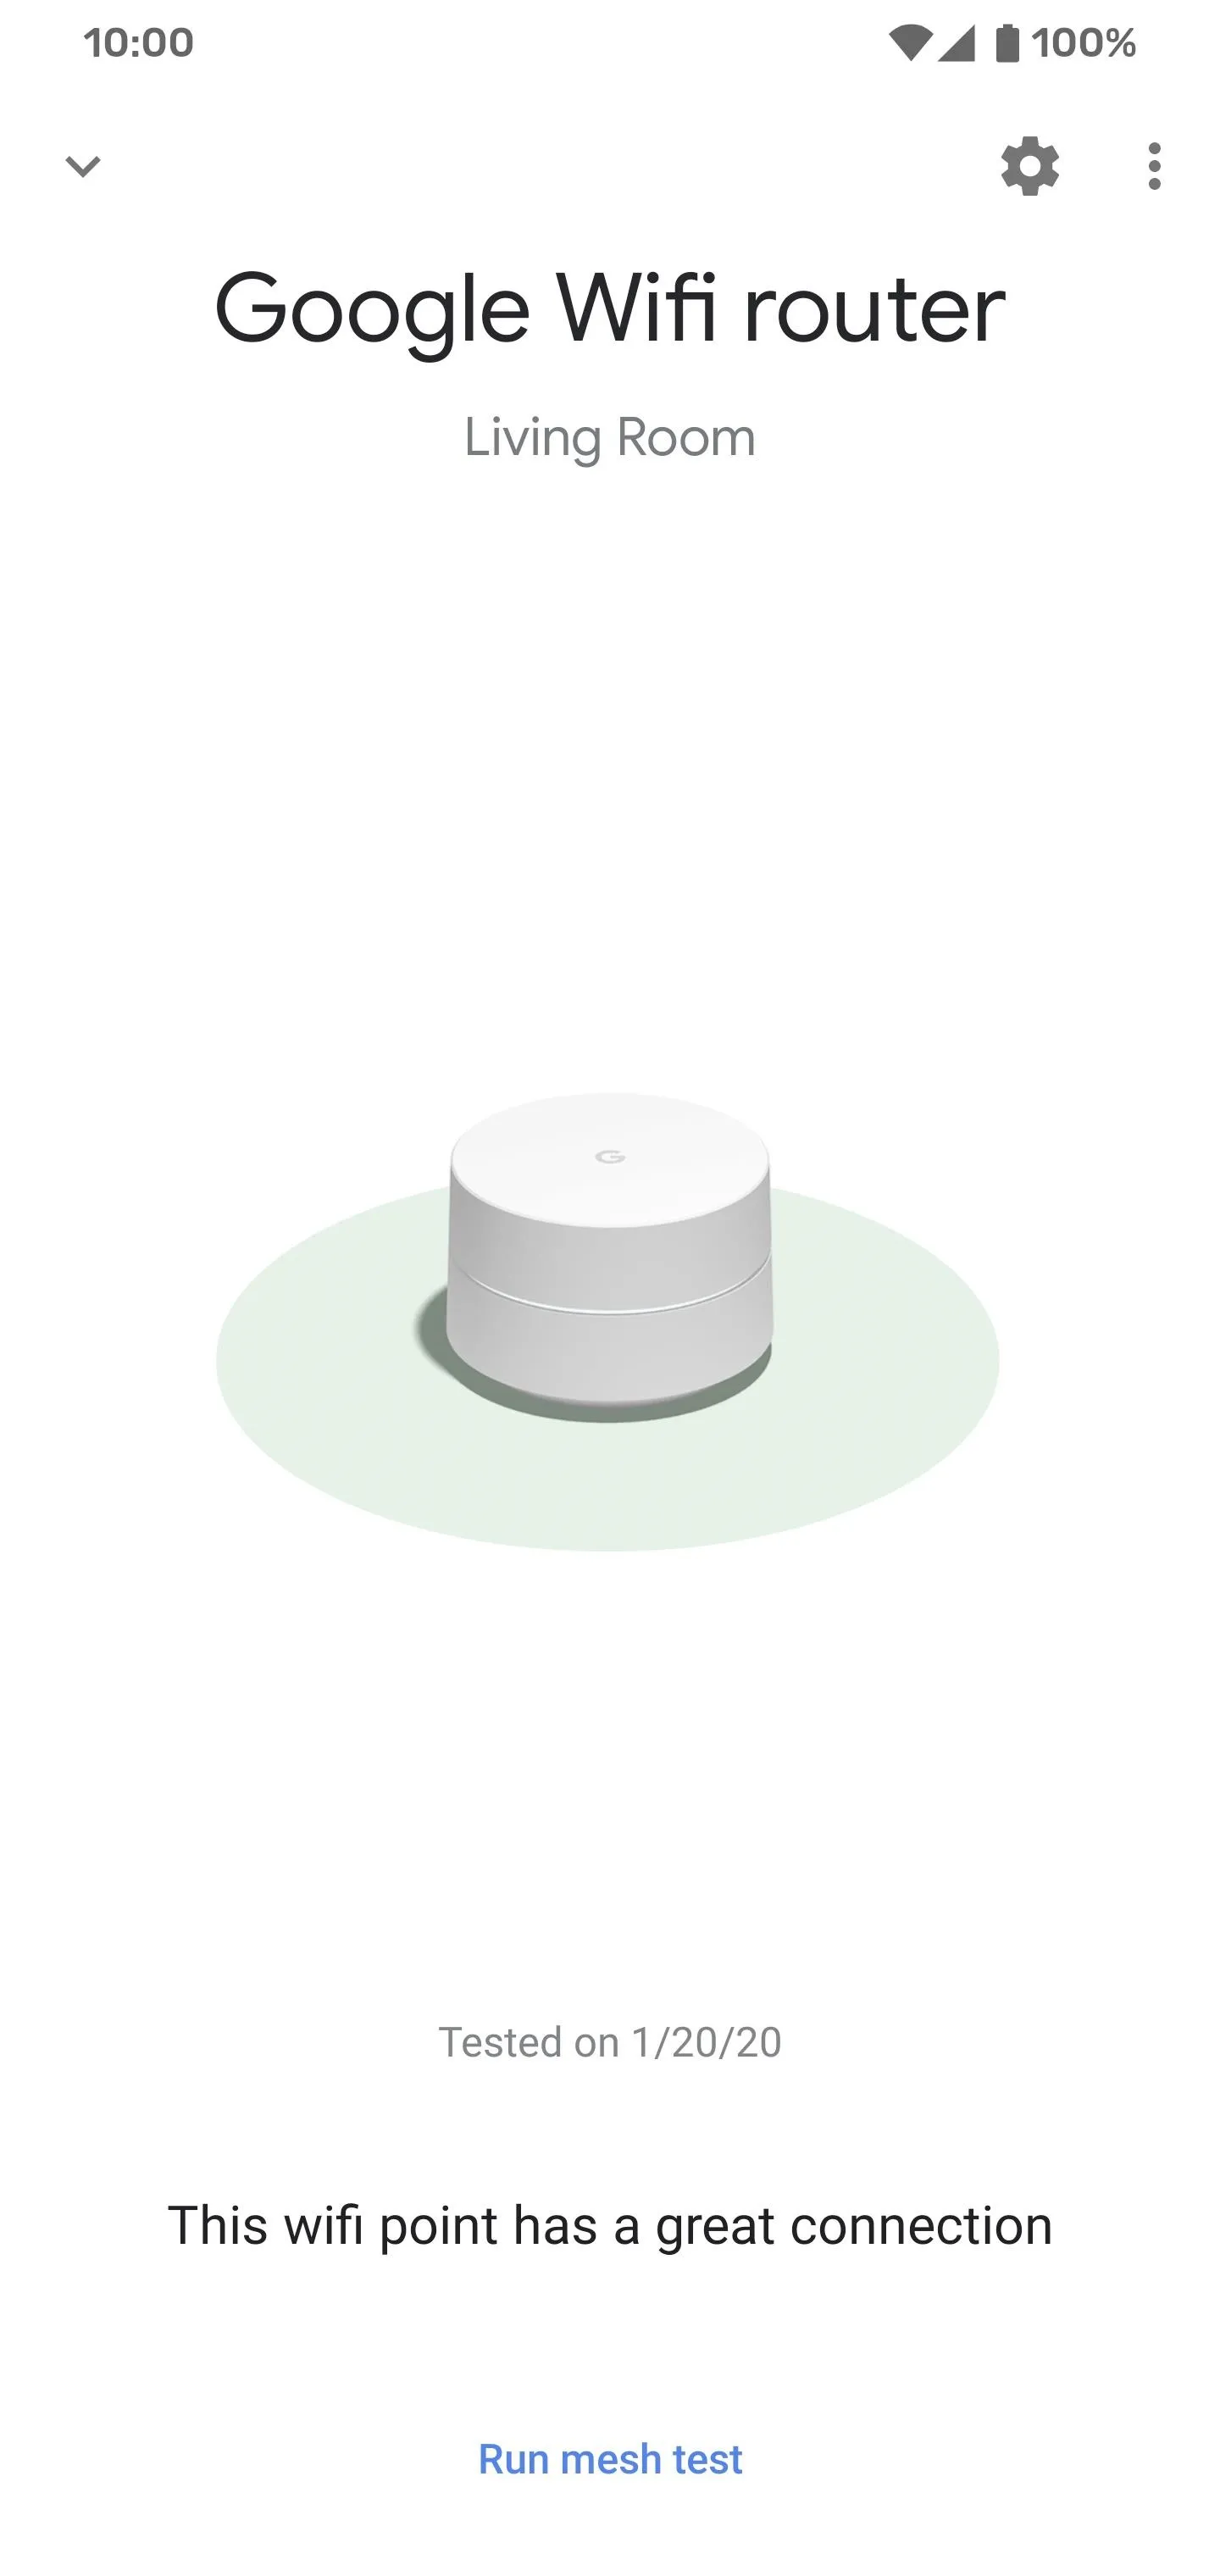
On the Google Home app's main screen, you'll notice a new green "Wi-Fi" icon at the top, which is essential. This is where you will manage your Google Wifi settings instead of the old Google Wifi app. You can now explore the new app and get accustomed to using it. You can test the mesh connections at any time, do a network speed test, change the access point names, and so much more. Enjoy!
Cover photo and screenshots by Stephen Perkins/Gadget Hacks


Comments
Be the first, drop a comment!