


IFTTT is a fantastic tool that lets you trigger actions on your smartphone that normally require more advanced hacking. With the help of its friendly user interface, turning your phone into a more personal device has never been easier. However, the app has some more intricate options under the surface, making advanced implementations of applets difficult for beginners.
To help ease users in, IFTTT compiles some of the most popular applets by both known developers and regular people. But what if you've scoured the Search submenu and still have trouble finding what you're looking for? Luckily, IFTTT gives users the power to create their own applets. Even though it can be tricky to use them at first, once you get the hang of it, creating applets will be a breeze. Who knows? You may even find yourself featured in the Discover tab.
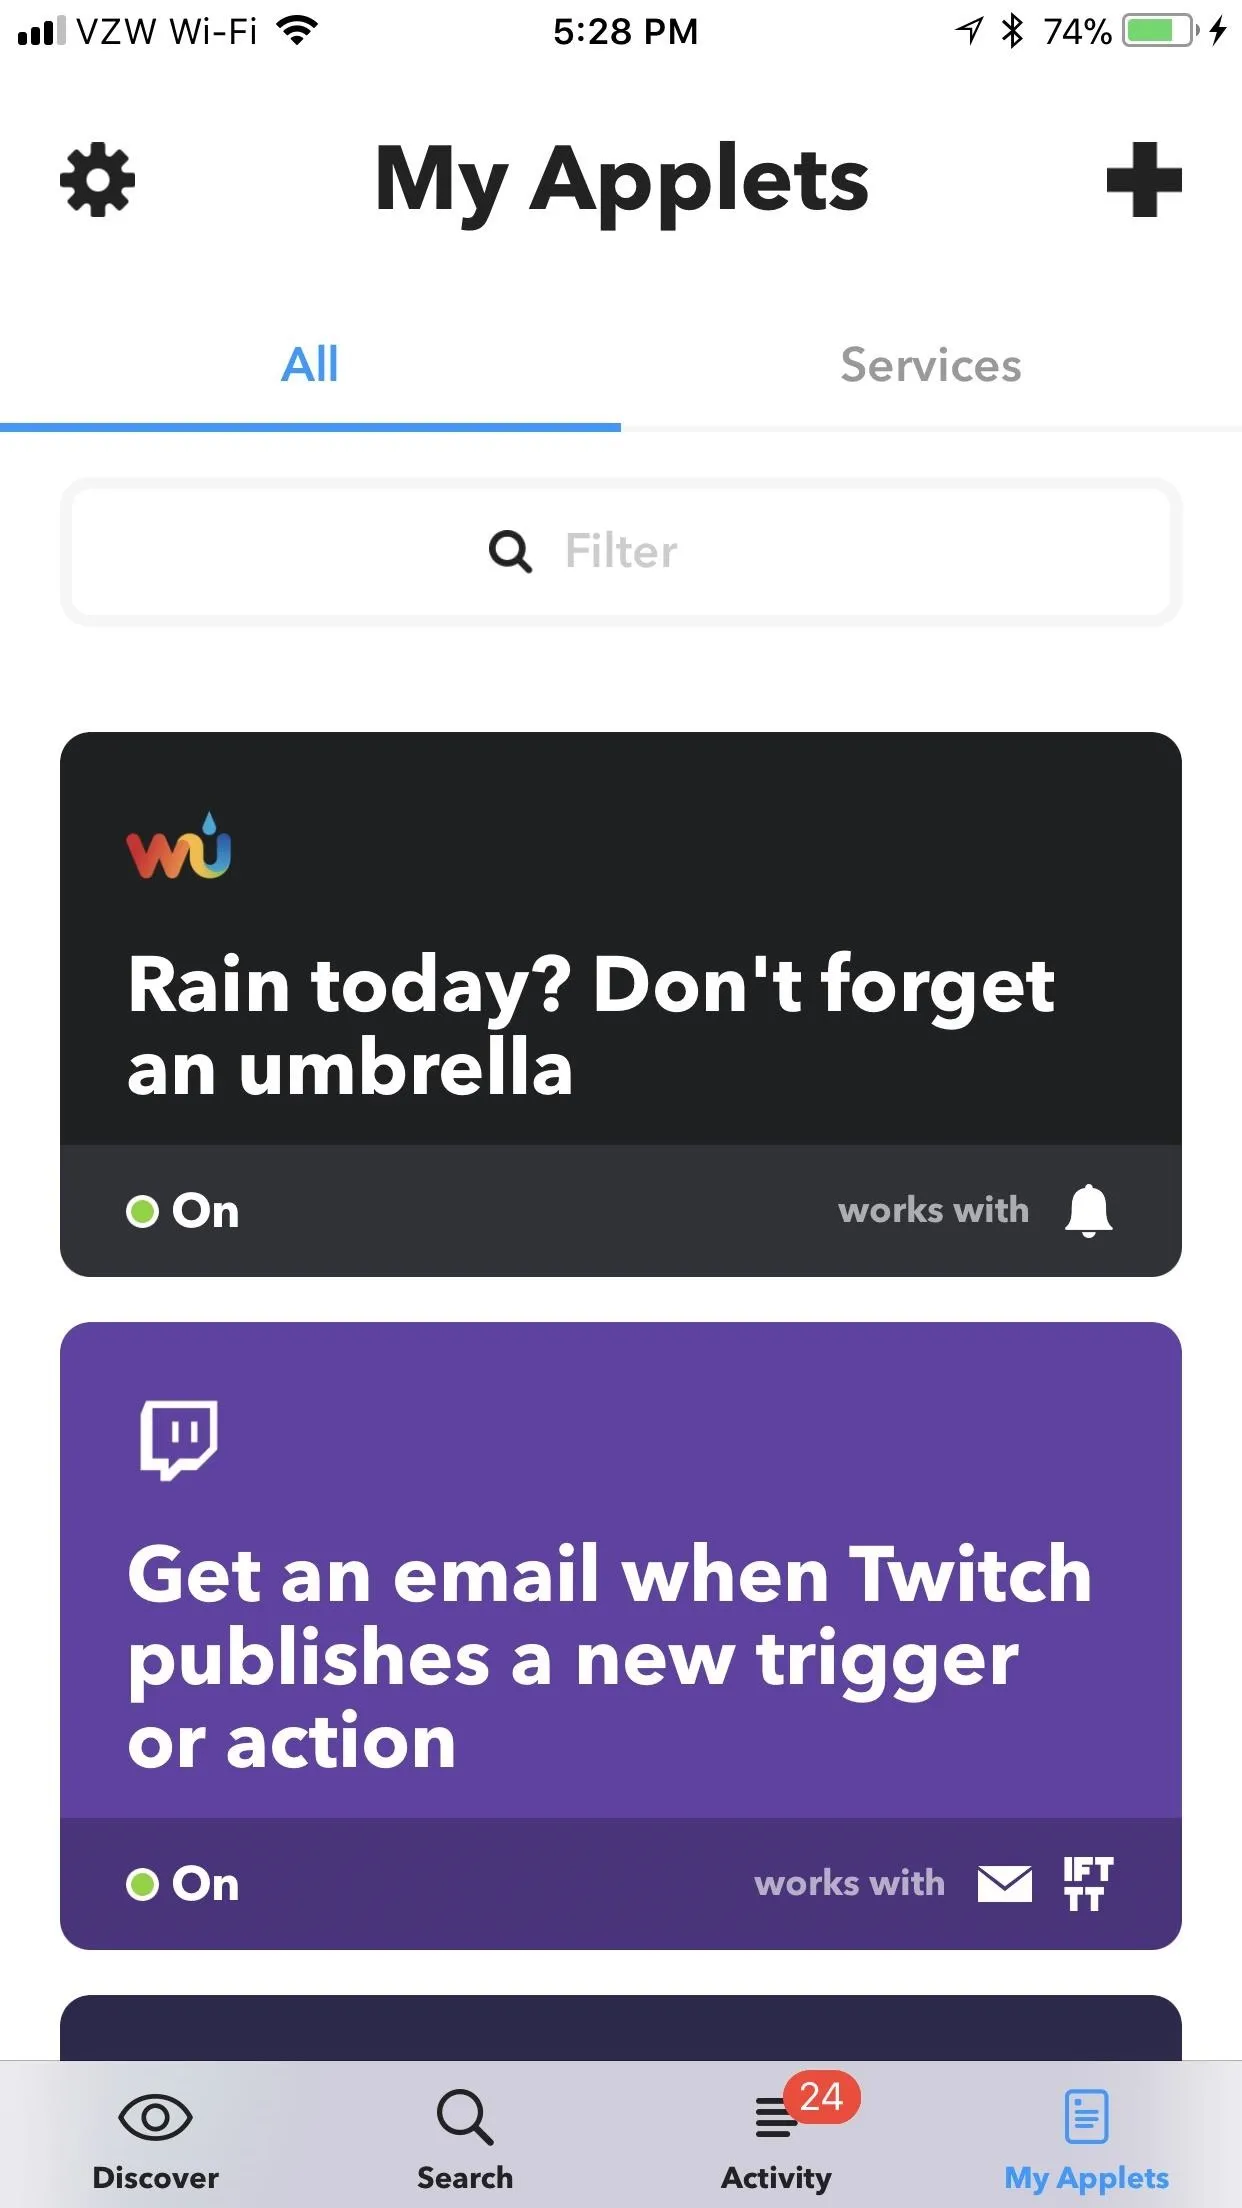
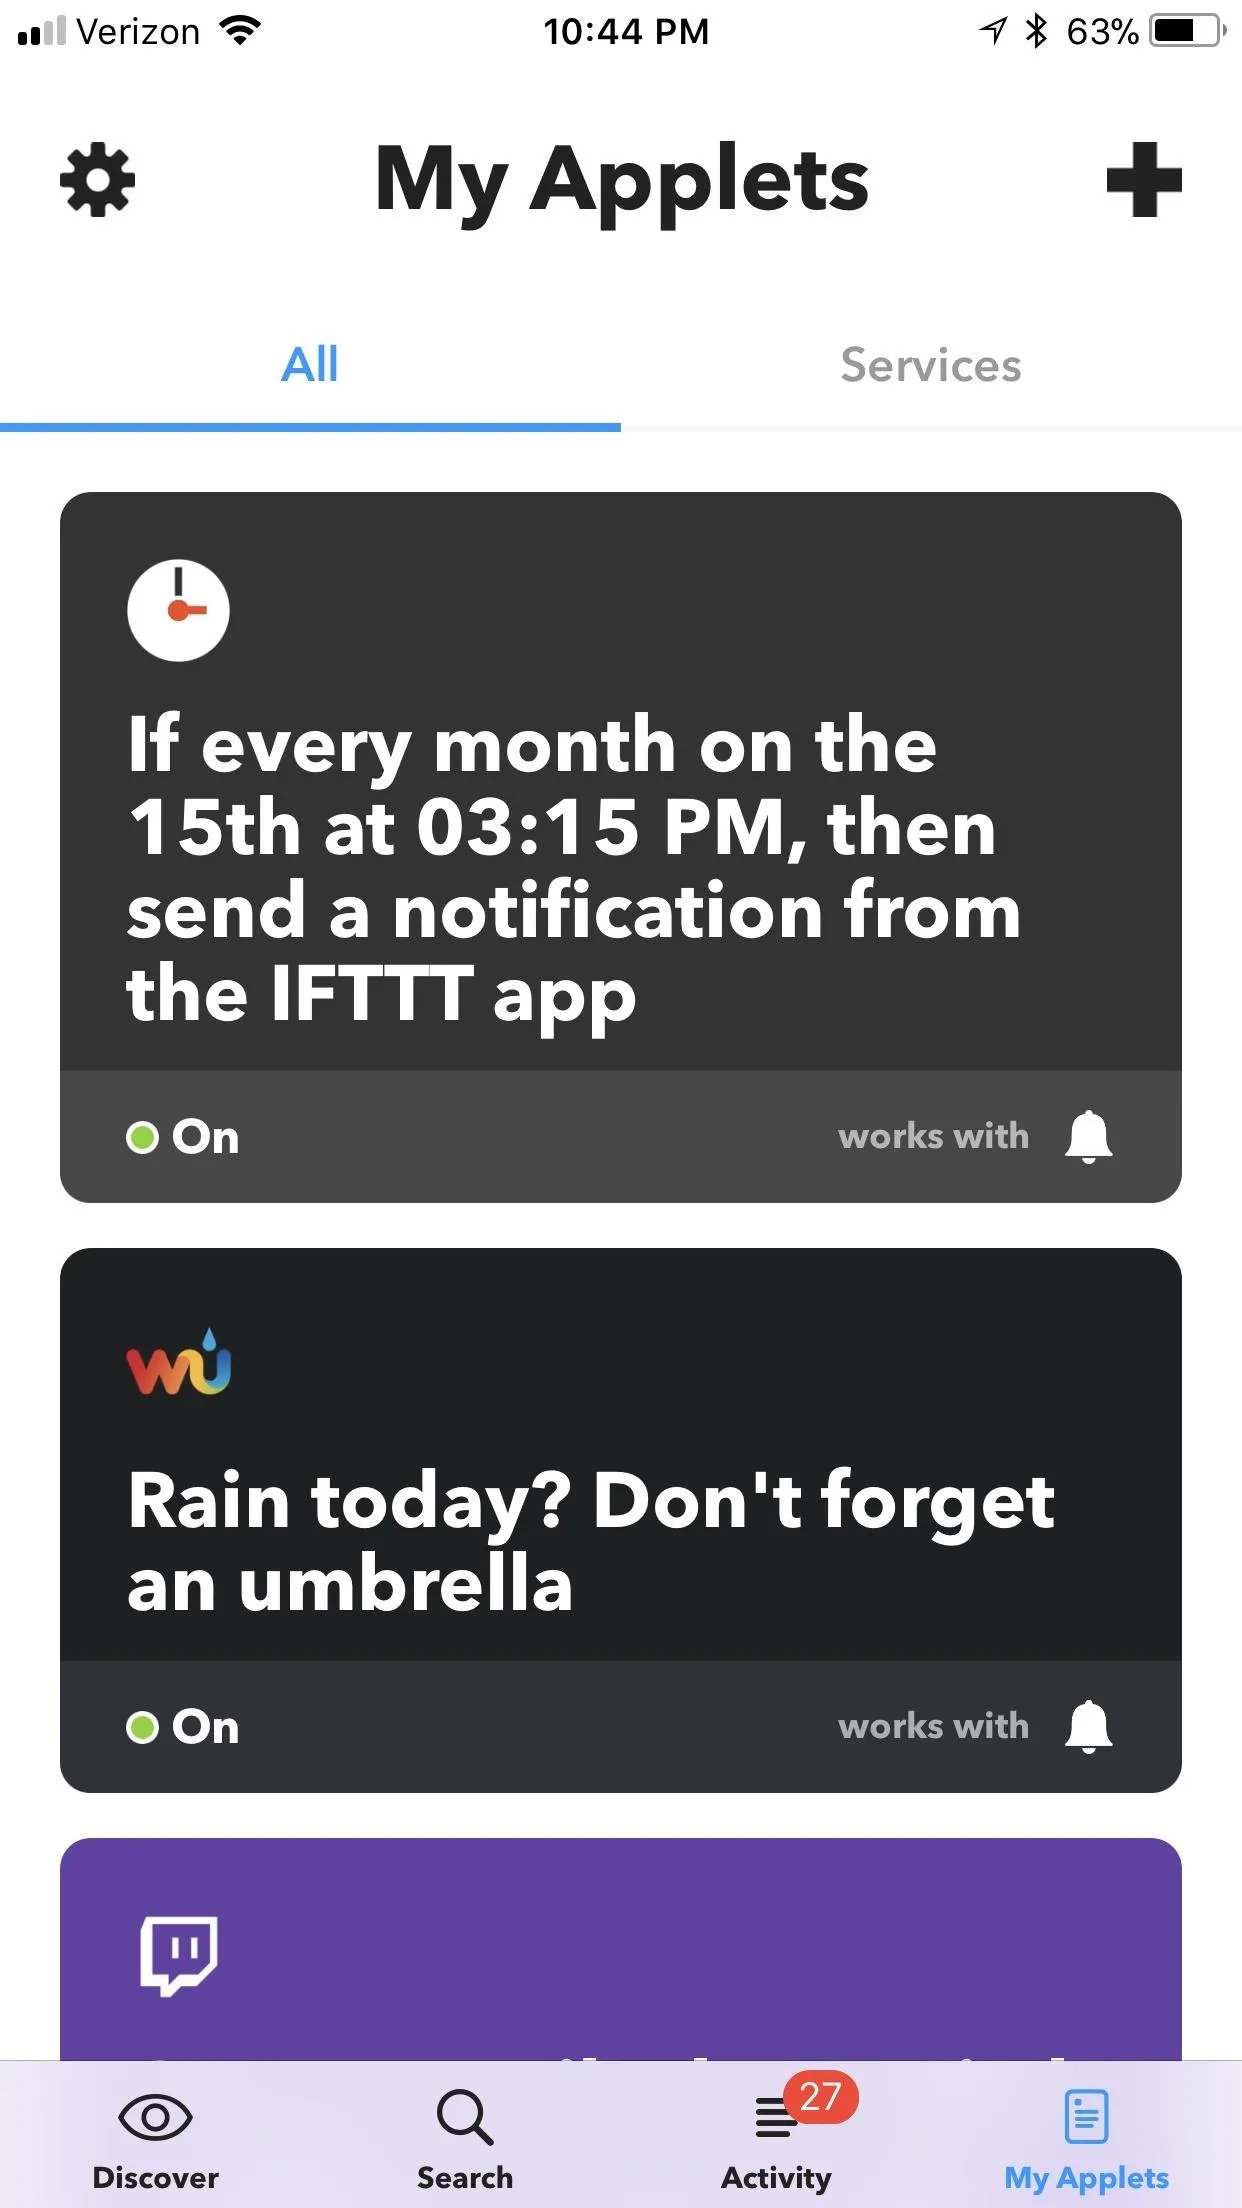
Navigate to 'My Applets'
In order to create your own applets, you'll need to head over to My Applets, which is the rightmost tab at the bottom of IFTTT's main menu. From here, tap on the plus sign in the top-right corner. Now, you'll be able to create your very own applet.
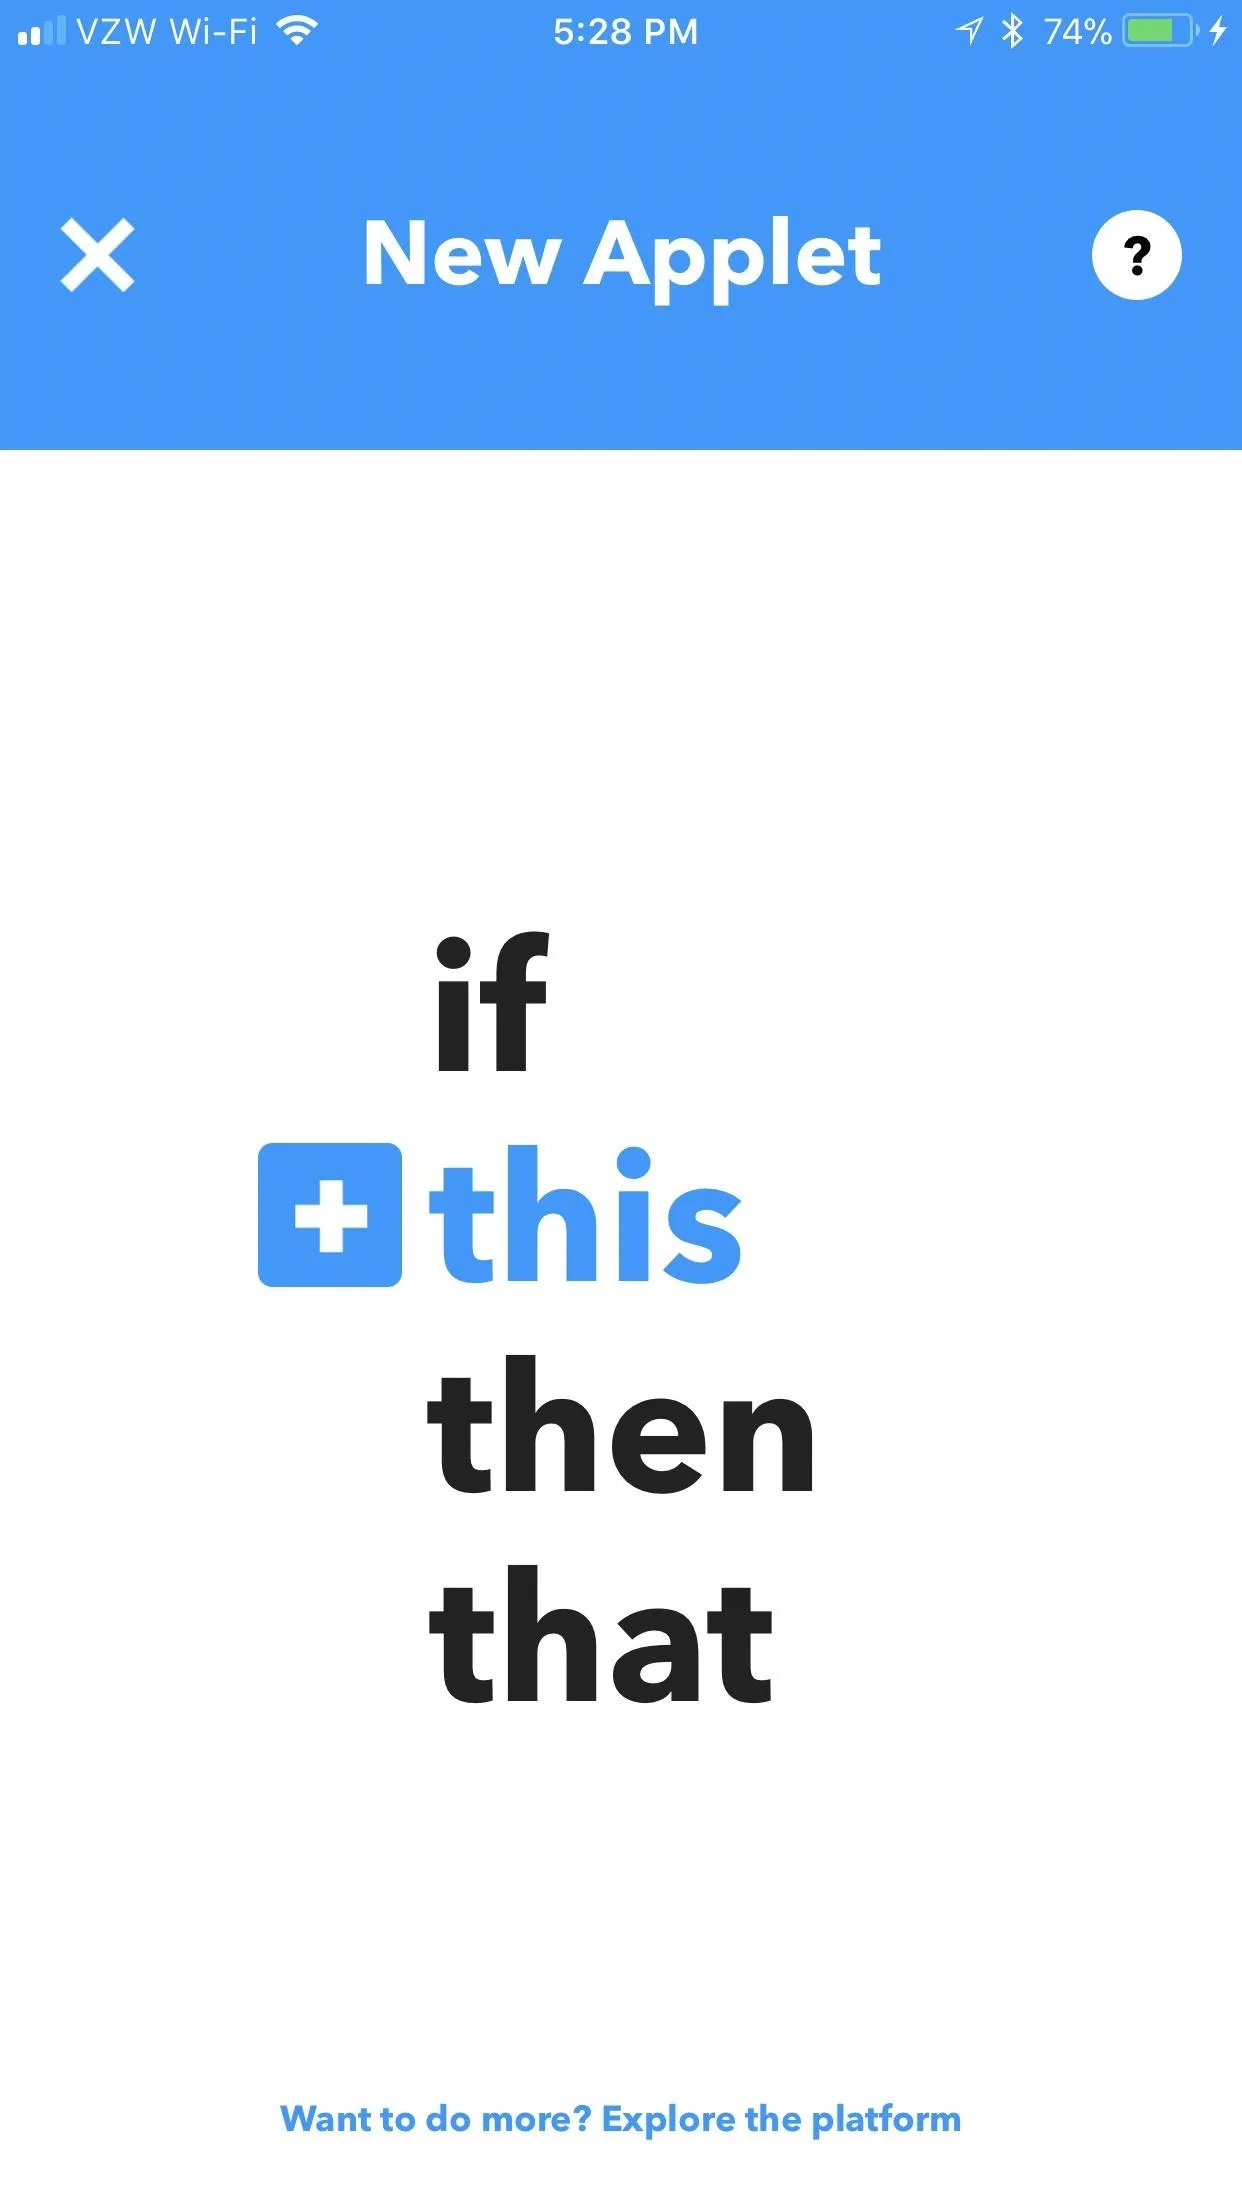
Designate the 'This'
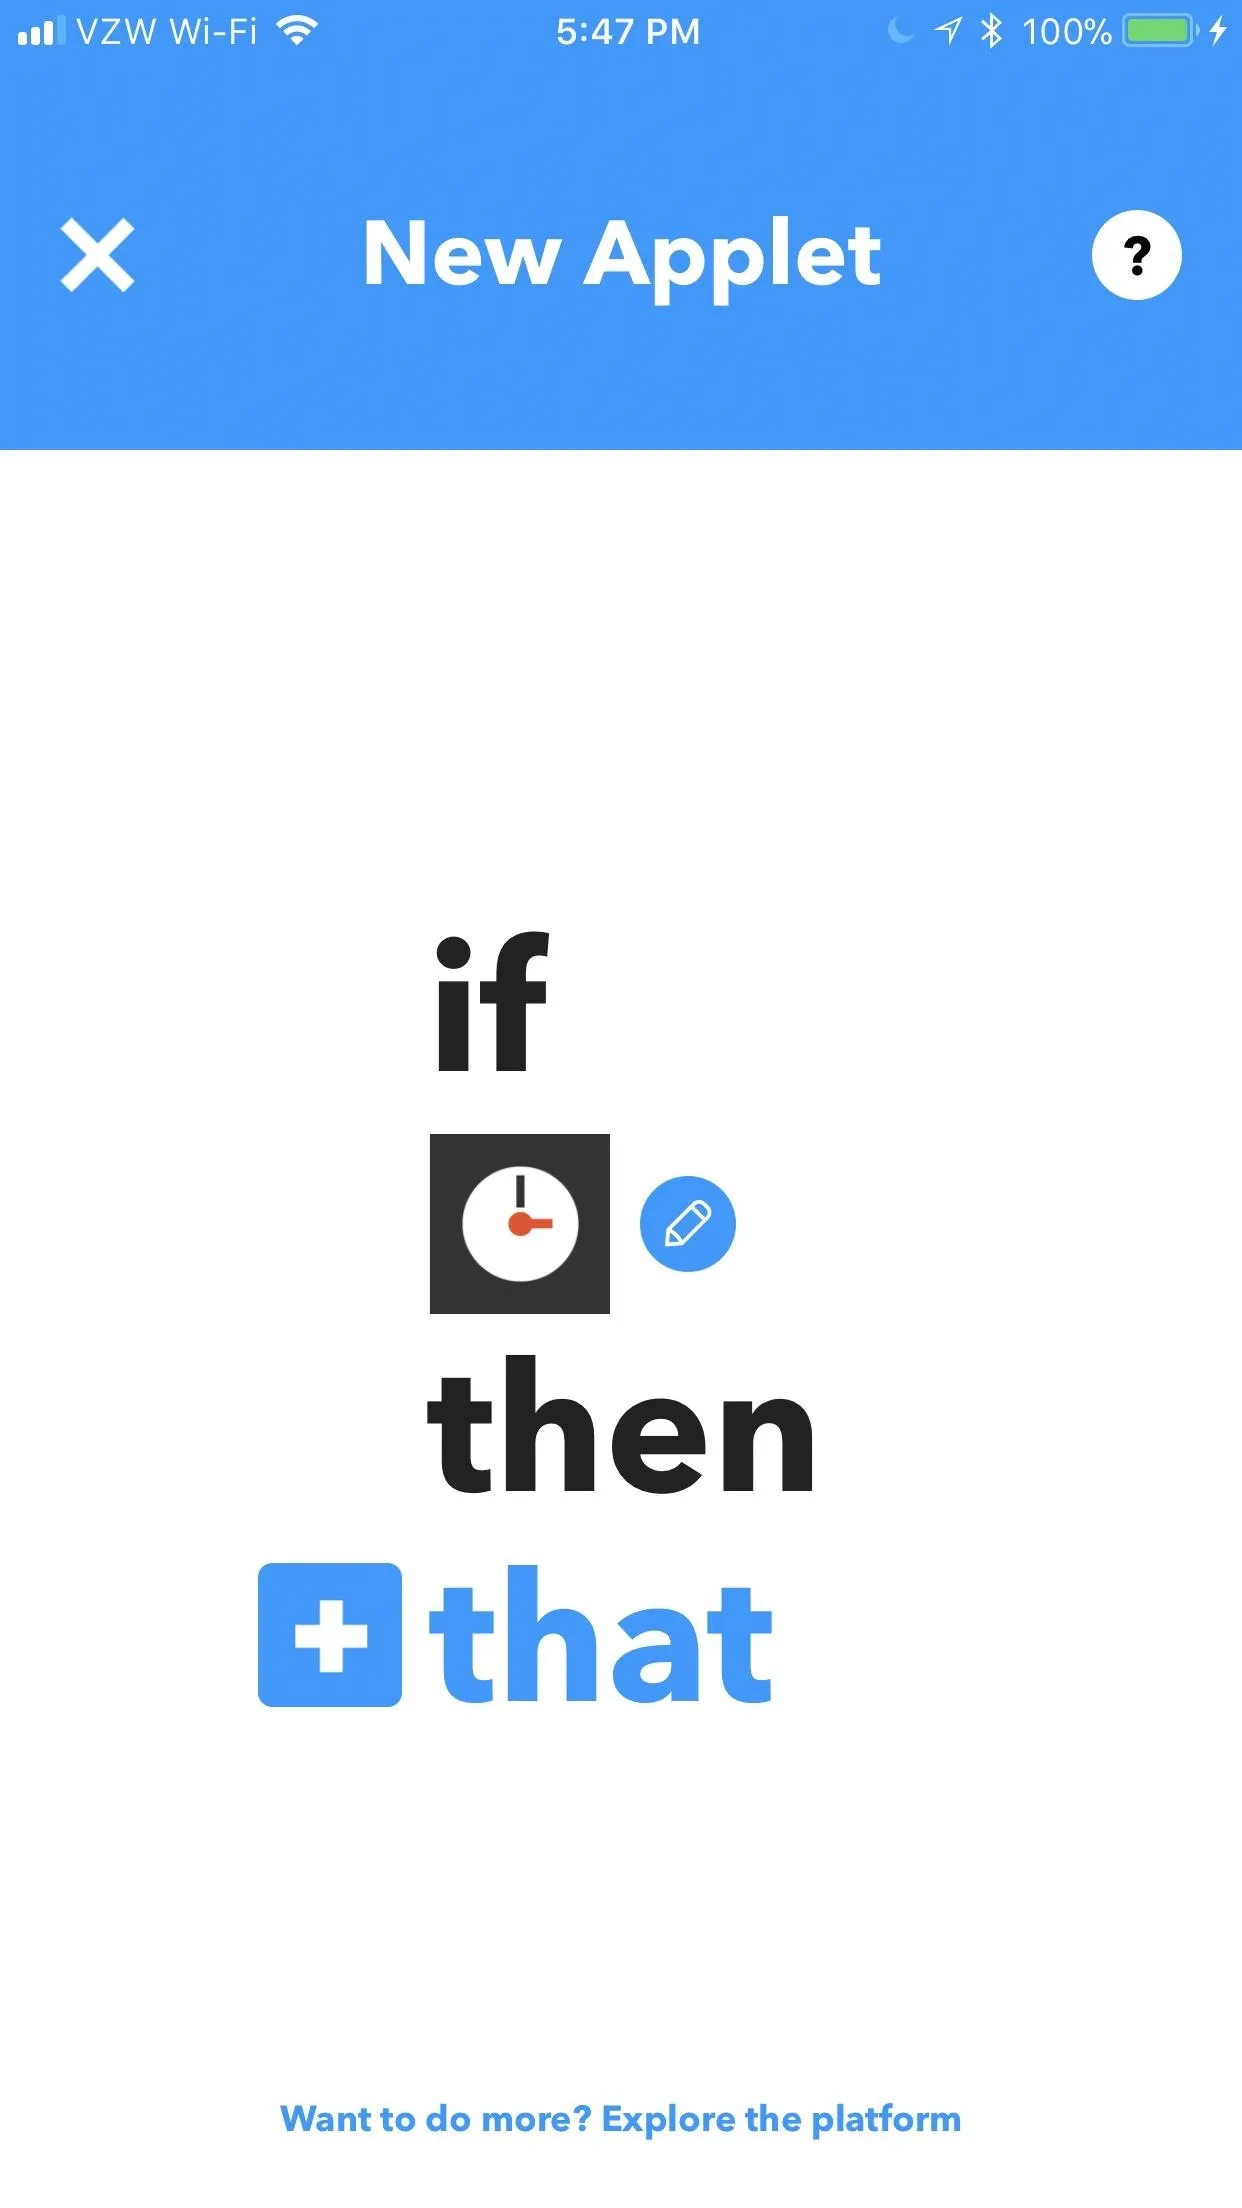
As is the namesake of the app, you need to write your applet in IFTTT's formula: If This Then That. Basically, you'll just need to fill in the blanks for what This and That are. Fortunately, IFTTT holds your hand a bit rather than expecting you to take a few semesters of Java. If you haven't chosen your "This" yet, that's the first step.
If unchosen, "this" will be colored blue with a blue plus sign next to it.

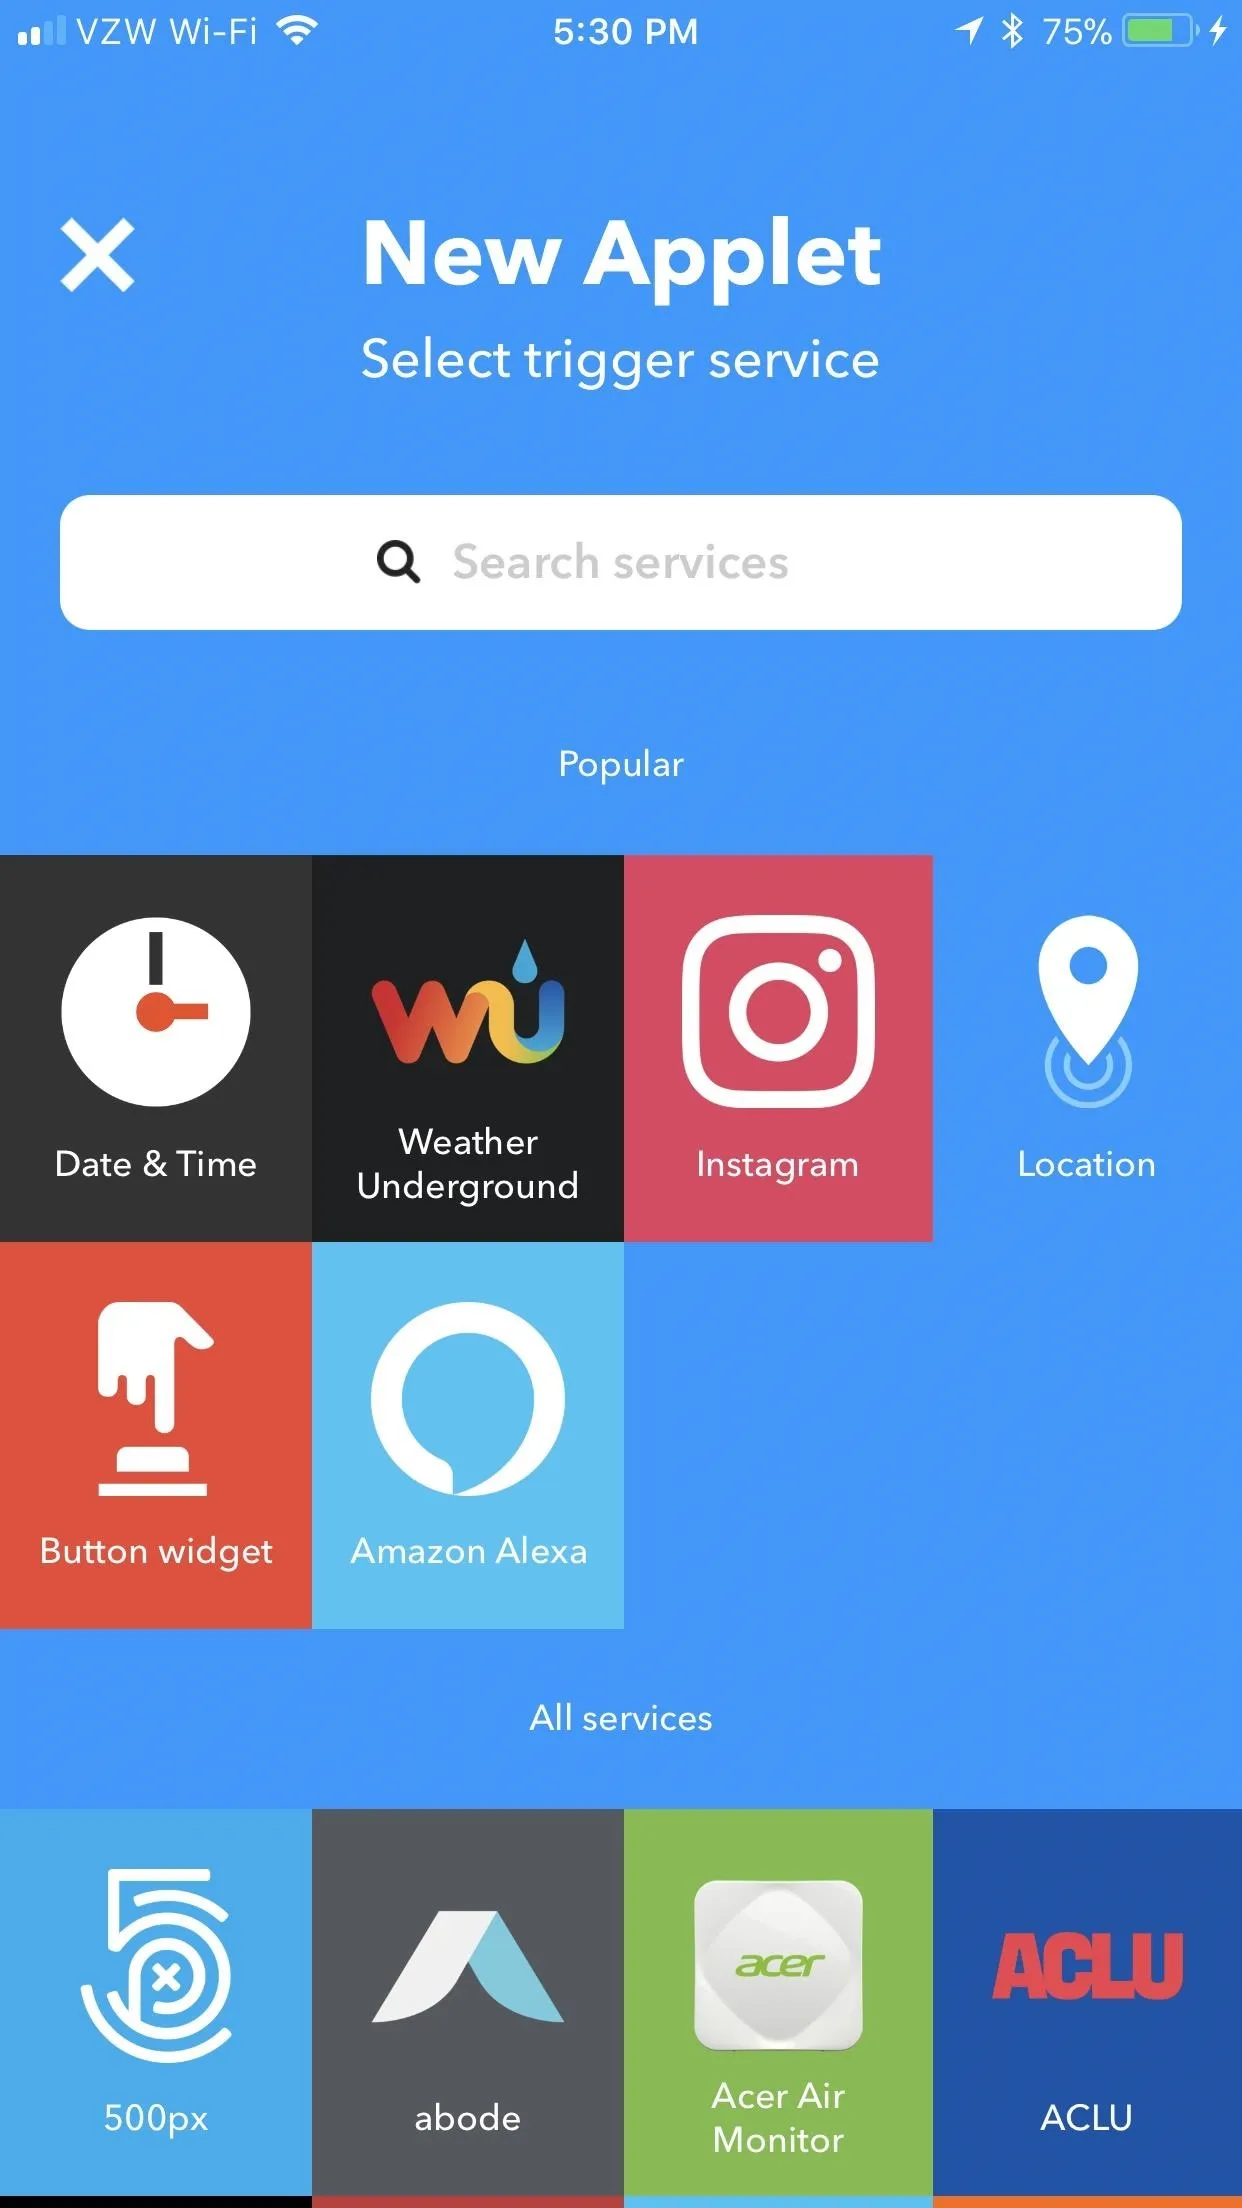
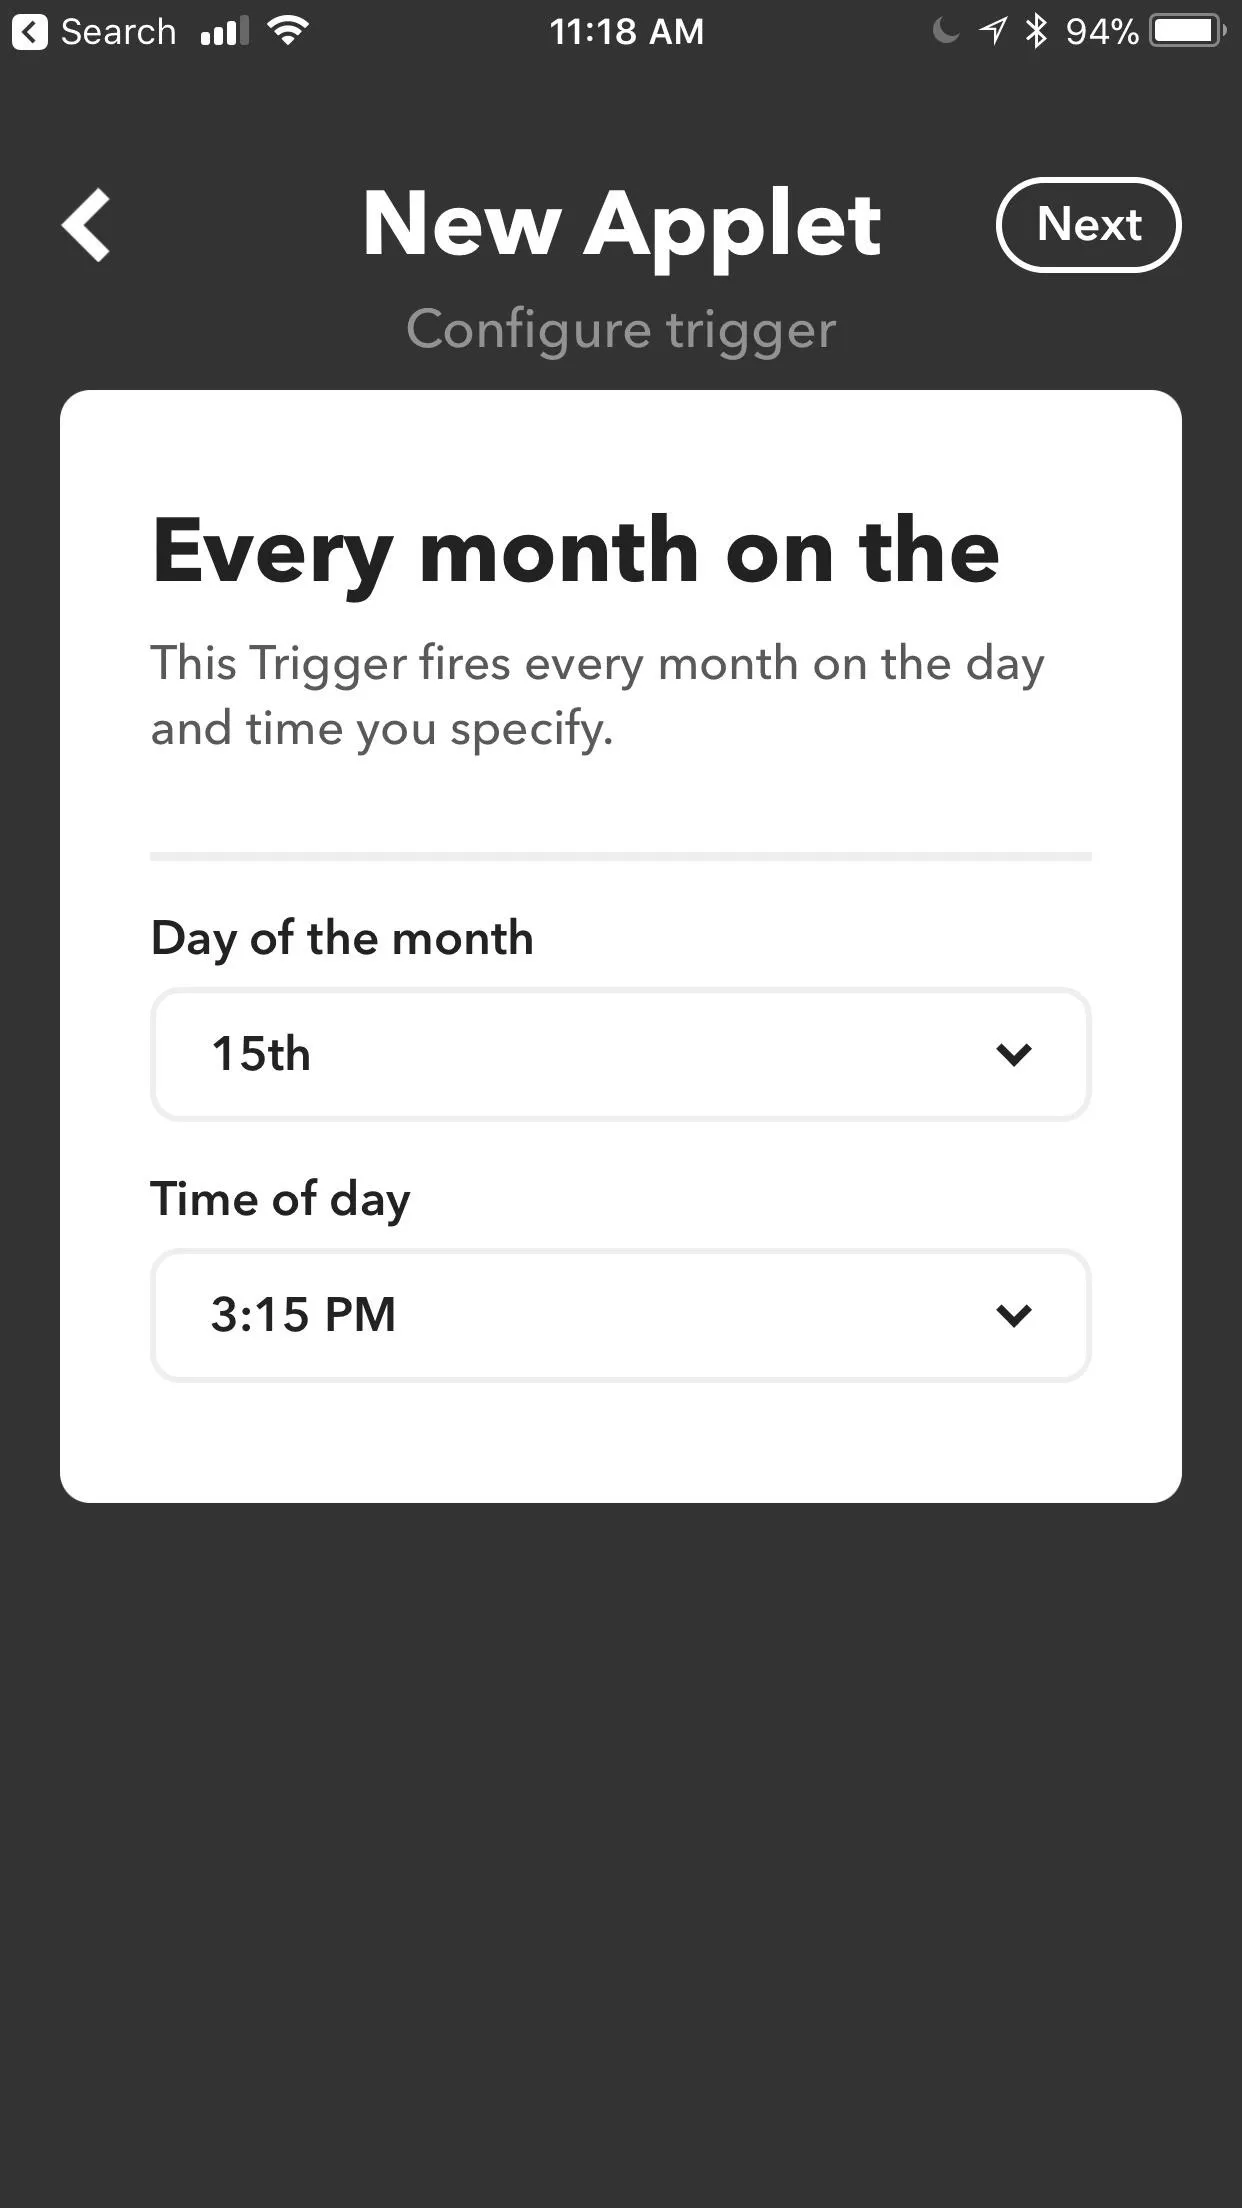
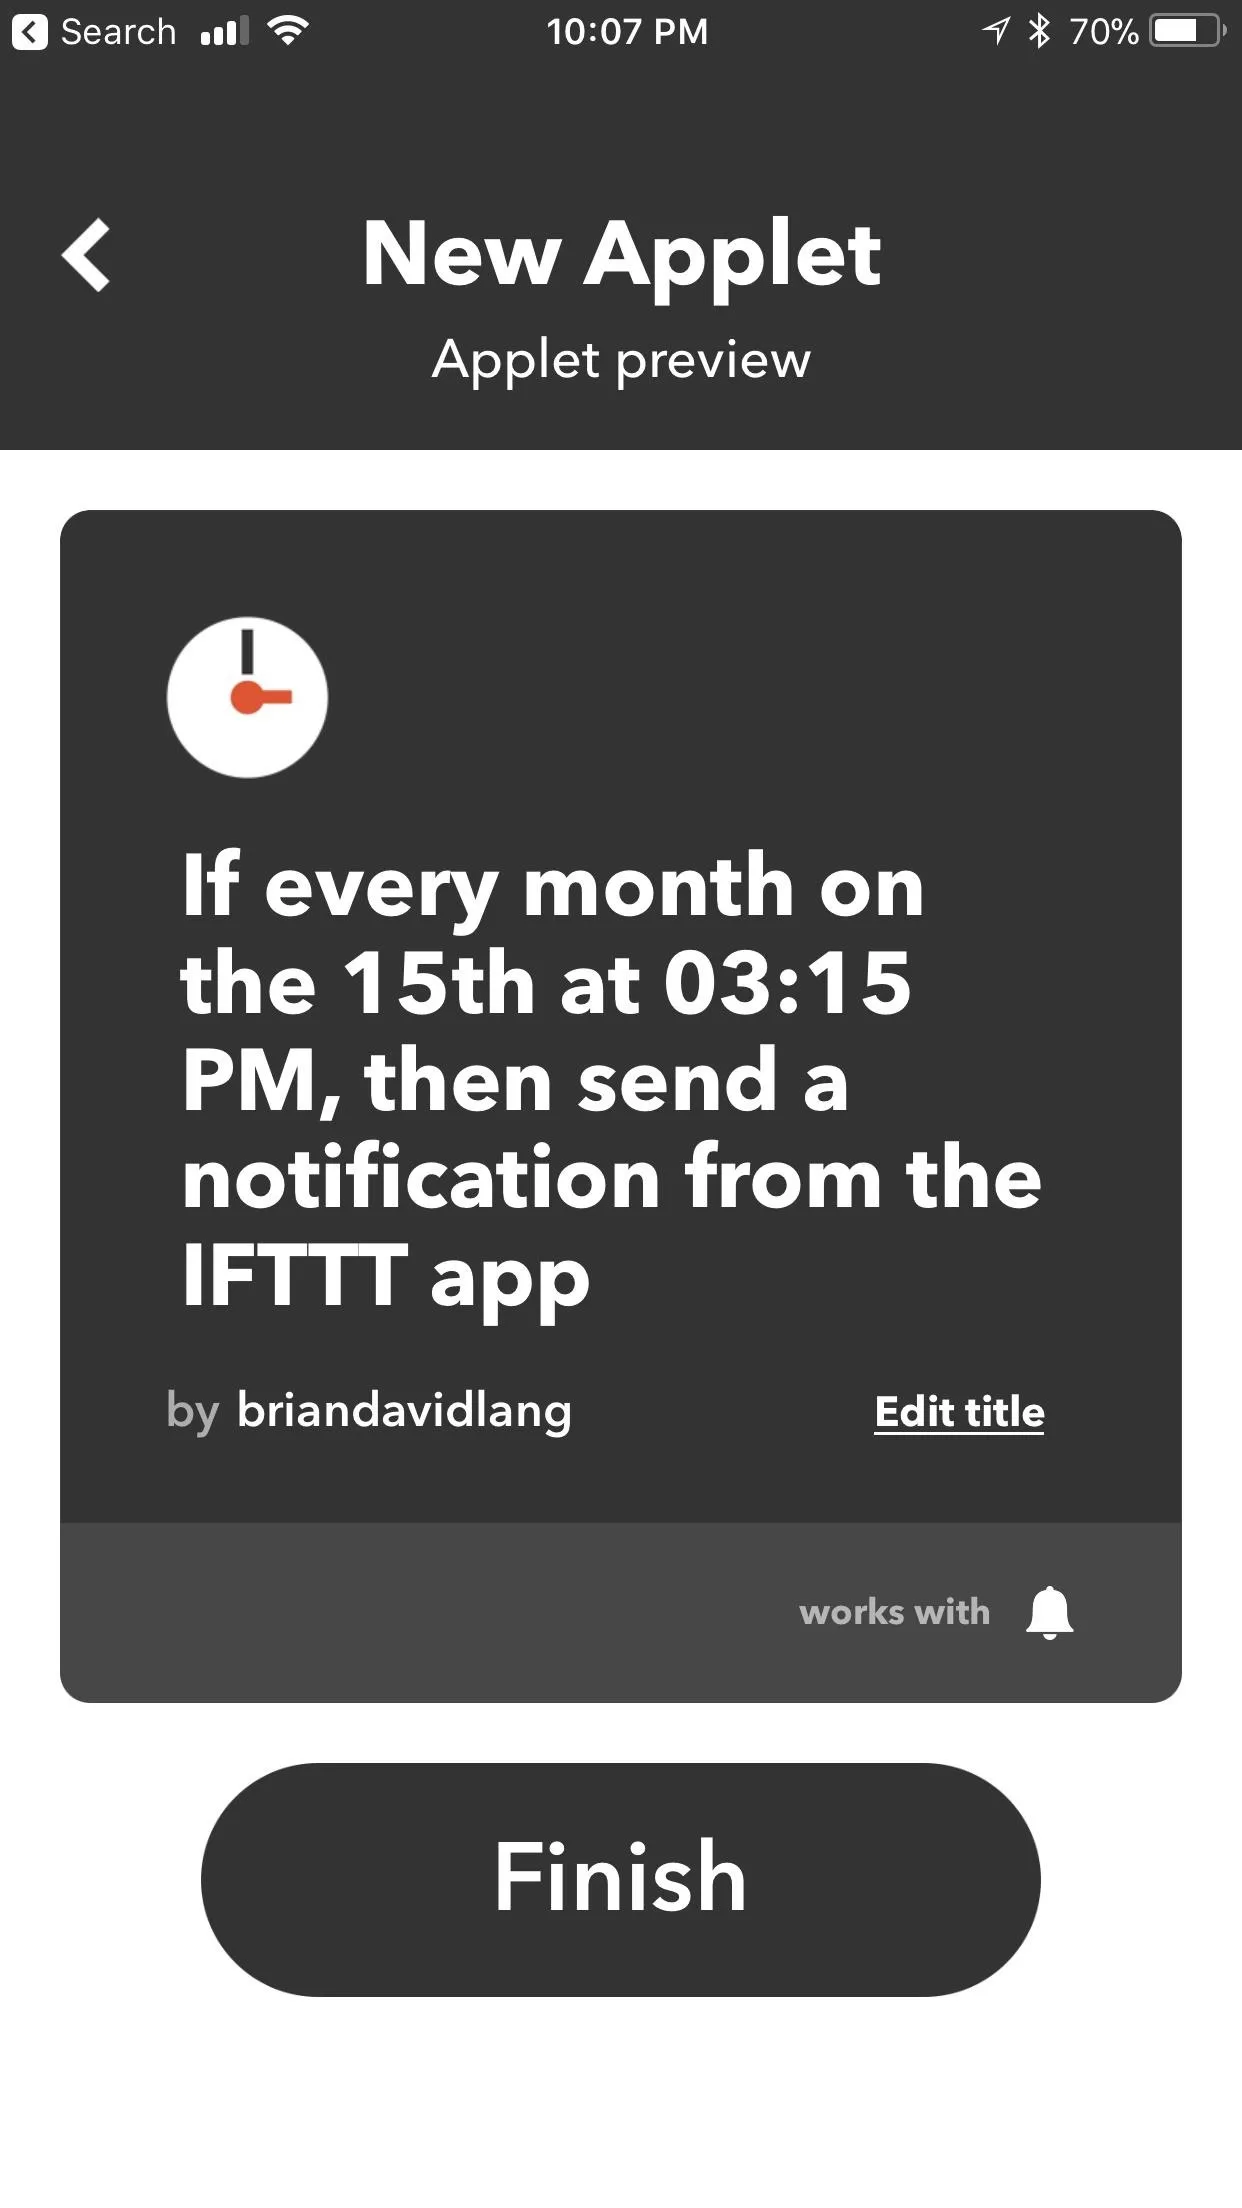
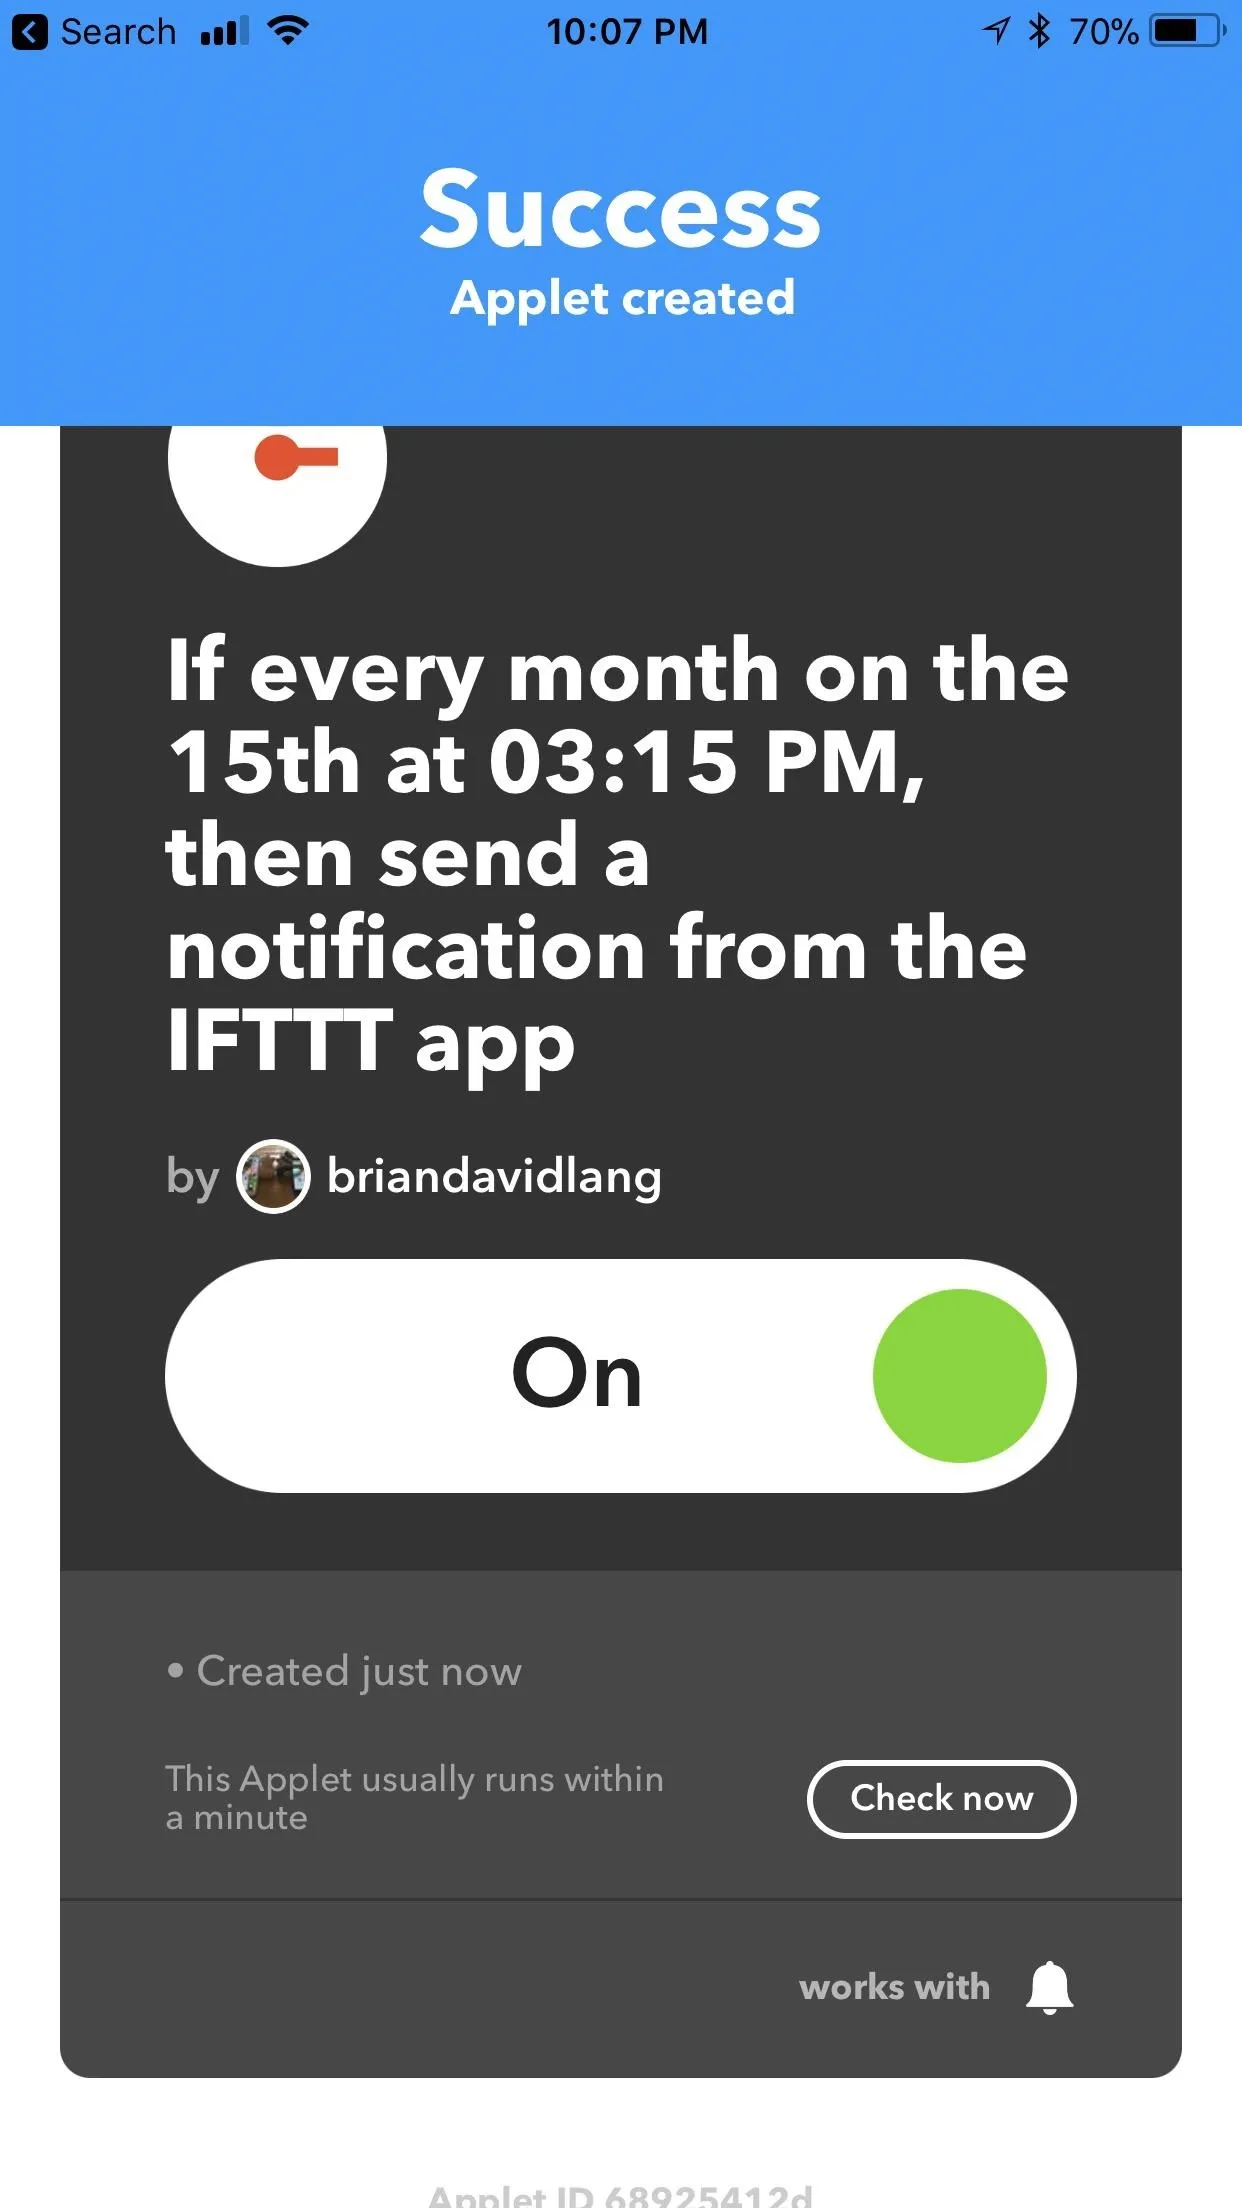
To choose a function for "this," begin by tapping on it. A list of "Popular" services will appear, with a more comprehensive list of services directly underneath it. For this example, I'll create an applet that sends a notification at 3:15 on the 15th of each month to remind me to pay my bills. So for my "this," I'll select "Date & Time."
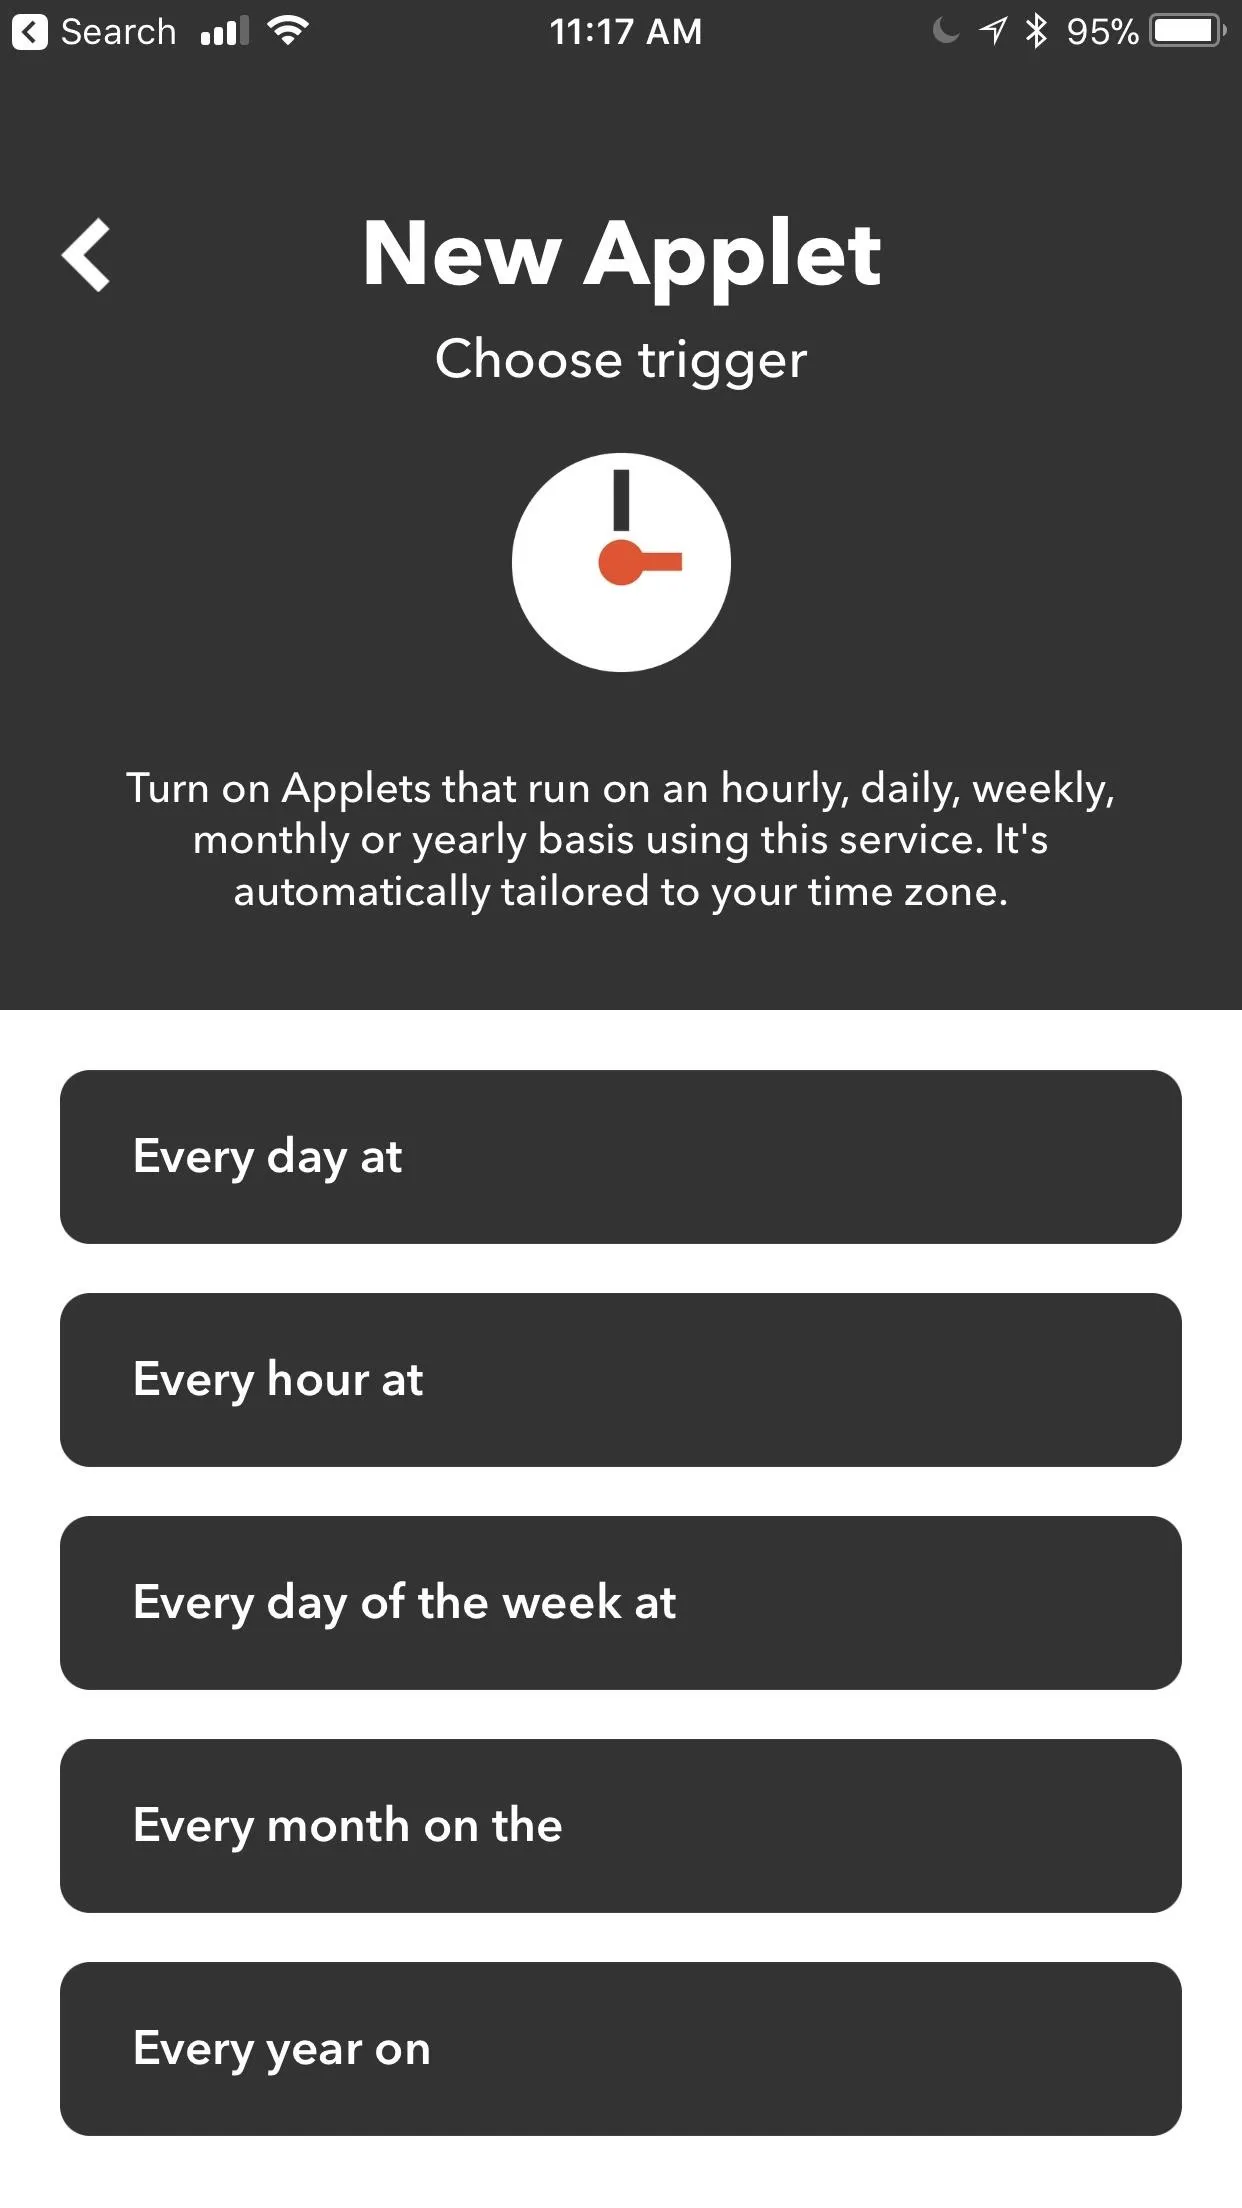
After you select a trigger for your "this" element, a list of conditions appears, detailing what will kick off the "that" action. The exact settings will vary depending on the trigger you chose, but it's just a matter of filling out the blanks, so it should be pretty straightforward. Since I chose "Every month on the" to remind me when to pay bills, I'll enter the day of the month and time of day when I want this applet to trigger. Once you've configured the available settings, hit "Next" (iOS) or press the check mark (Android).
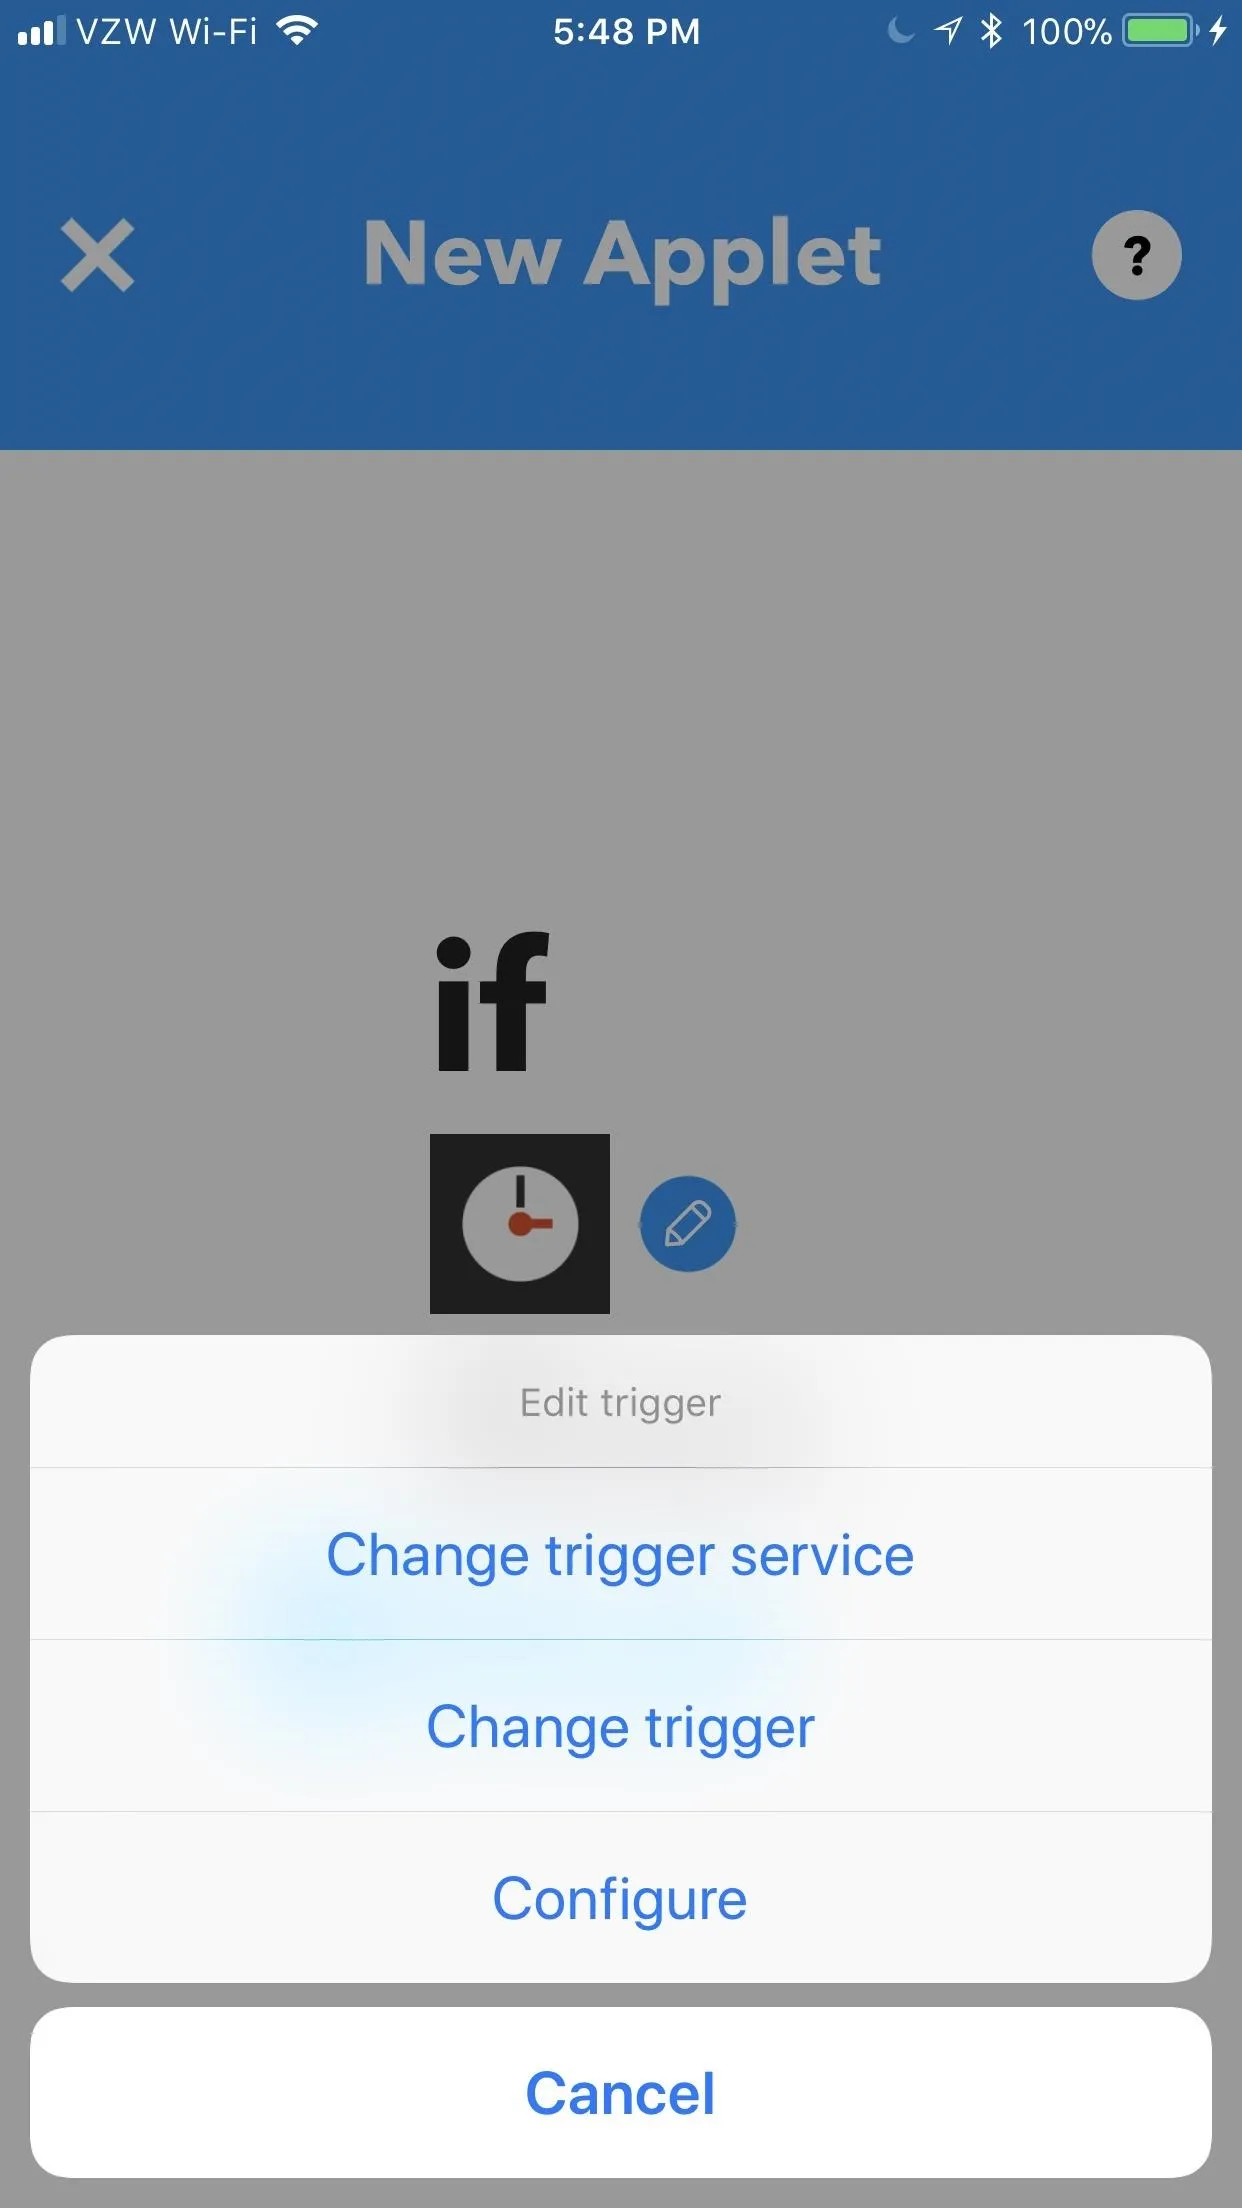
If the area that was once occupied by the word "this" is now filled in with an icon of the trigger service (in our case, "Date & Time"), then you completed Step 2 correctly. If you want to edit the trigger, tap on the pencil icon. You can change the trigger service (to a different trigger), trigger itself (same service with a different trigger), or reconfigure the trigger you chose.
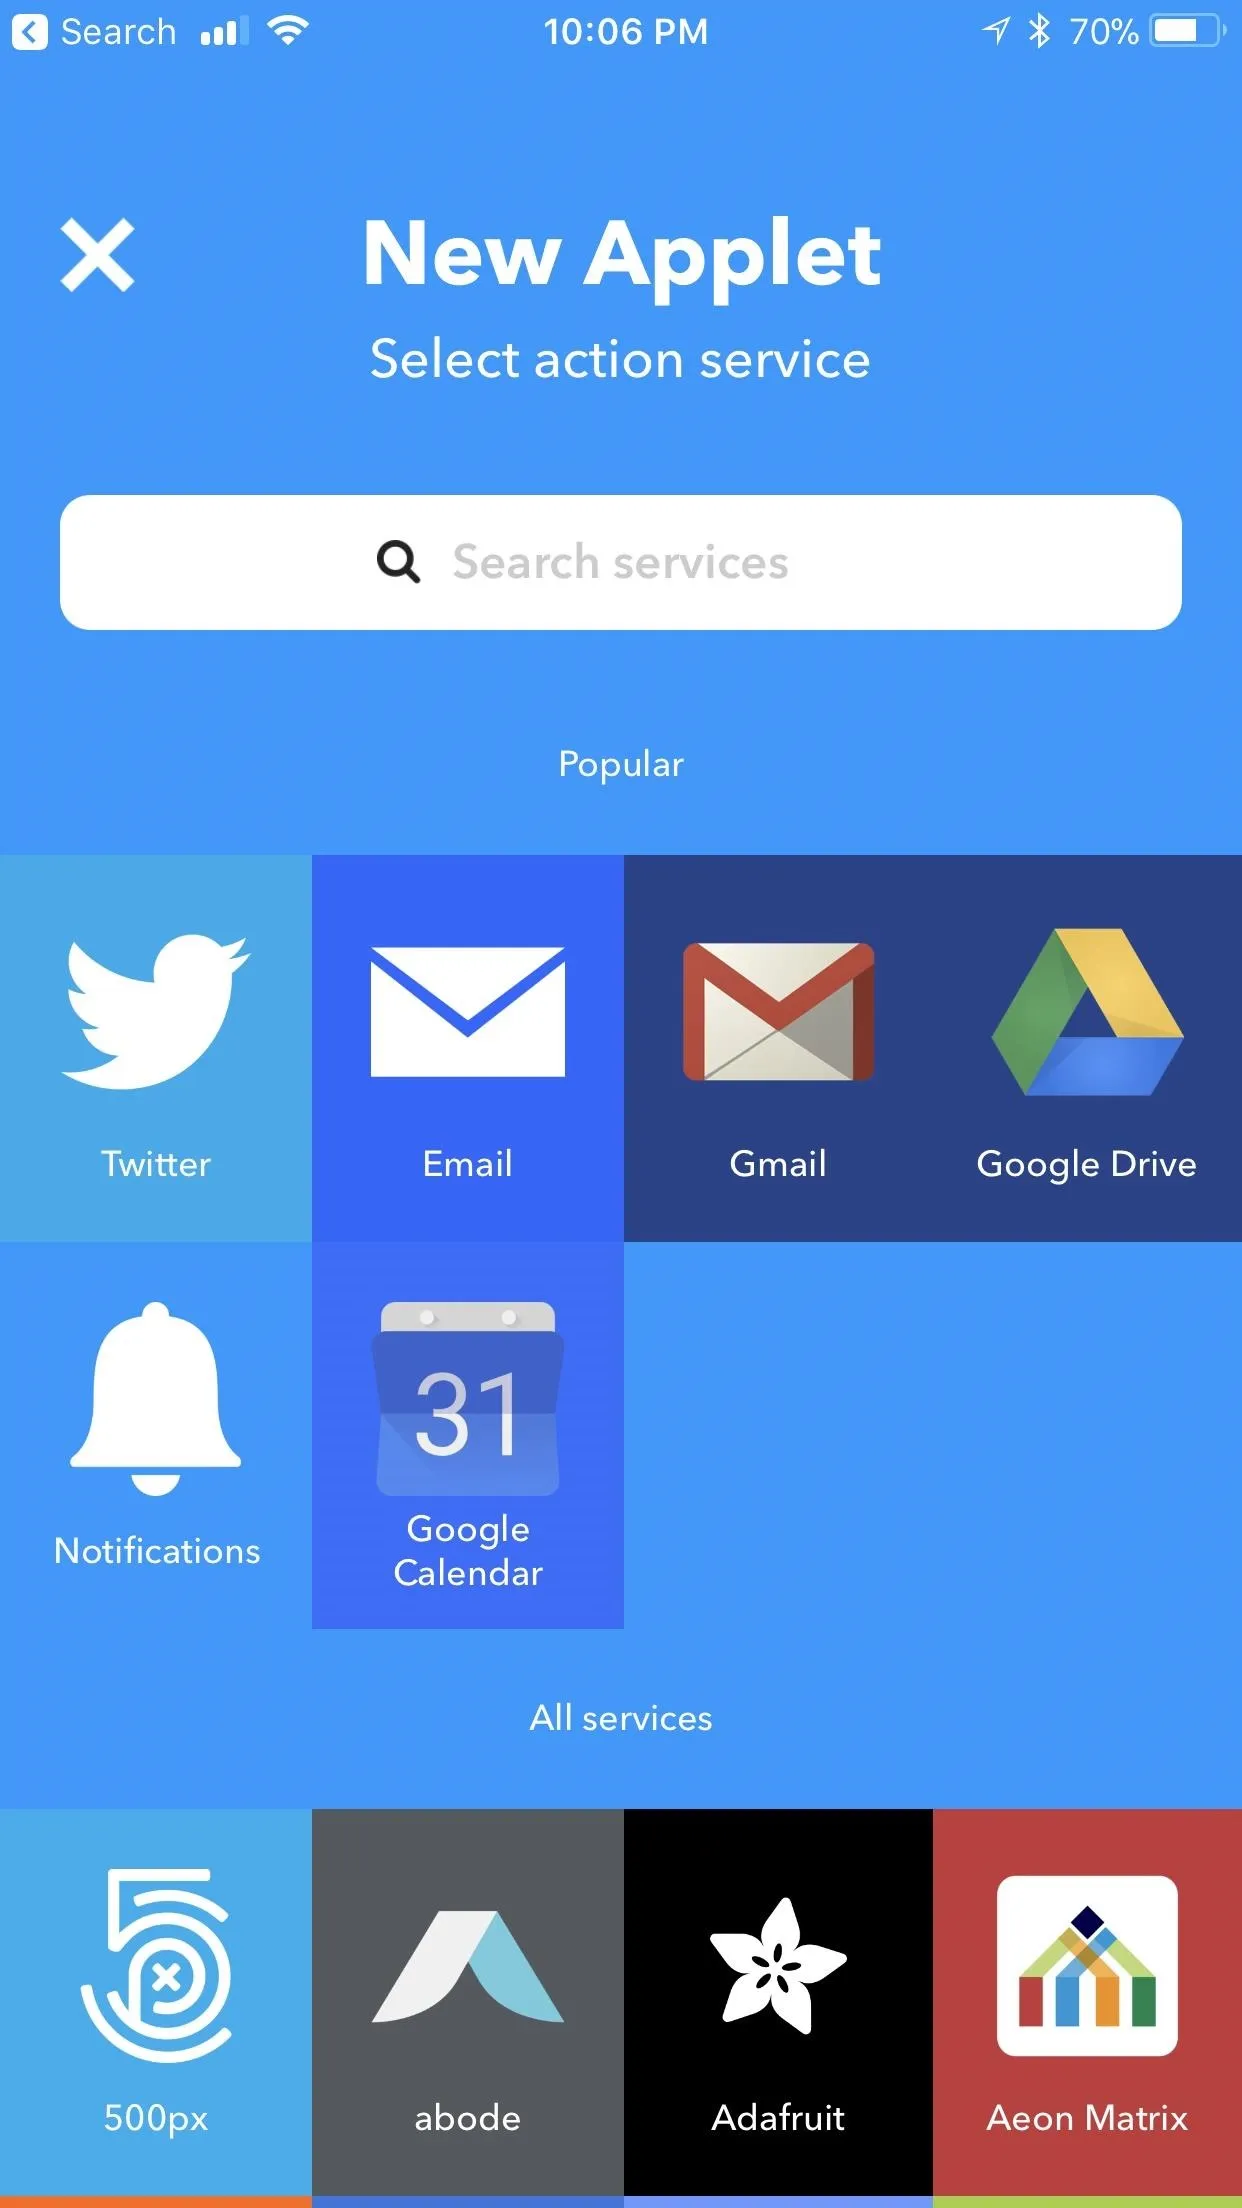
Designate the 'That'
Now, let's configure the "that" element. Just as with "this," start by tapping the blue "that" label. From there, you'll need to choose and configure a service that "this" triggers. In this case, I'm going to choose "Notifications," as I want IFTTT to notify me when I need to pay my credit card.
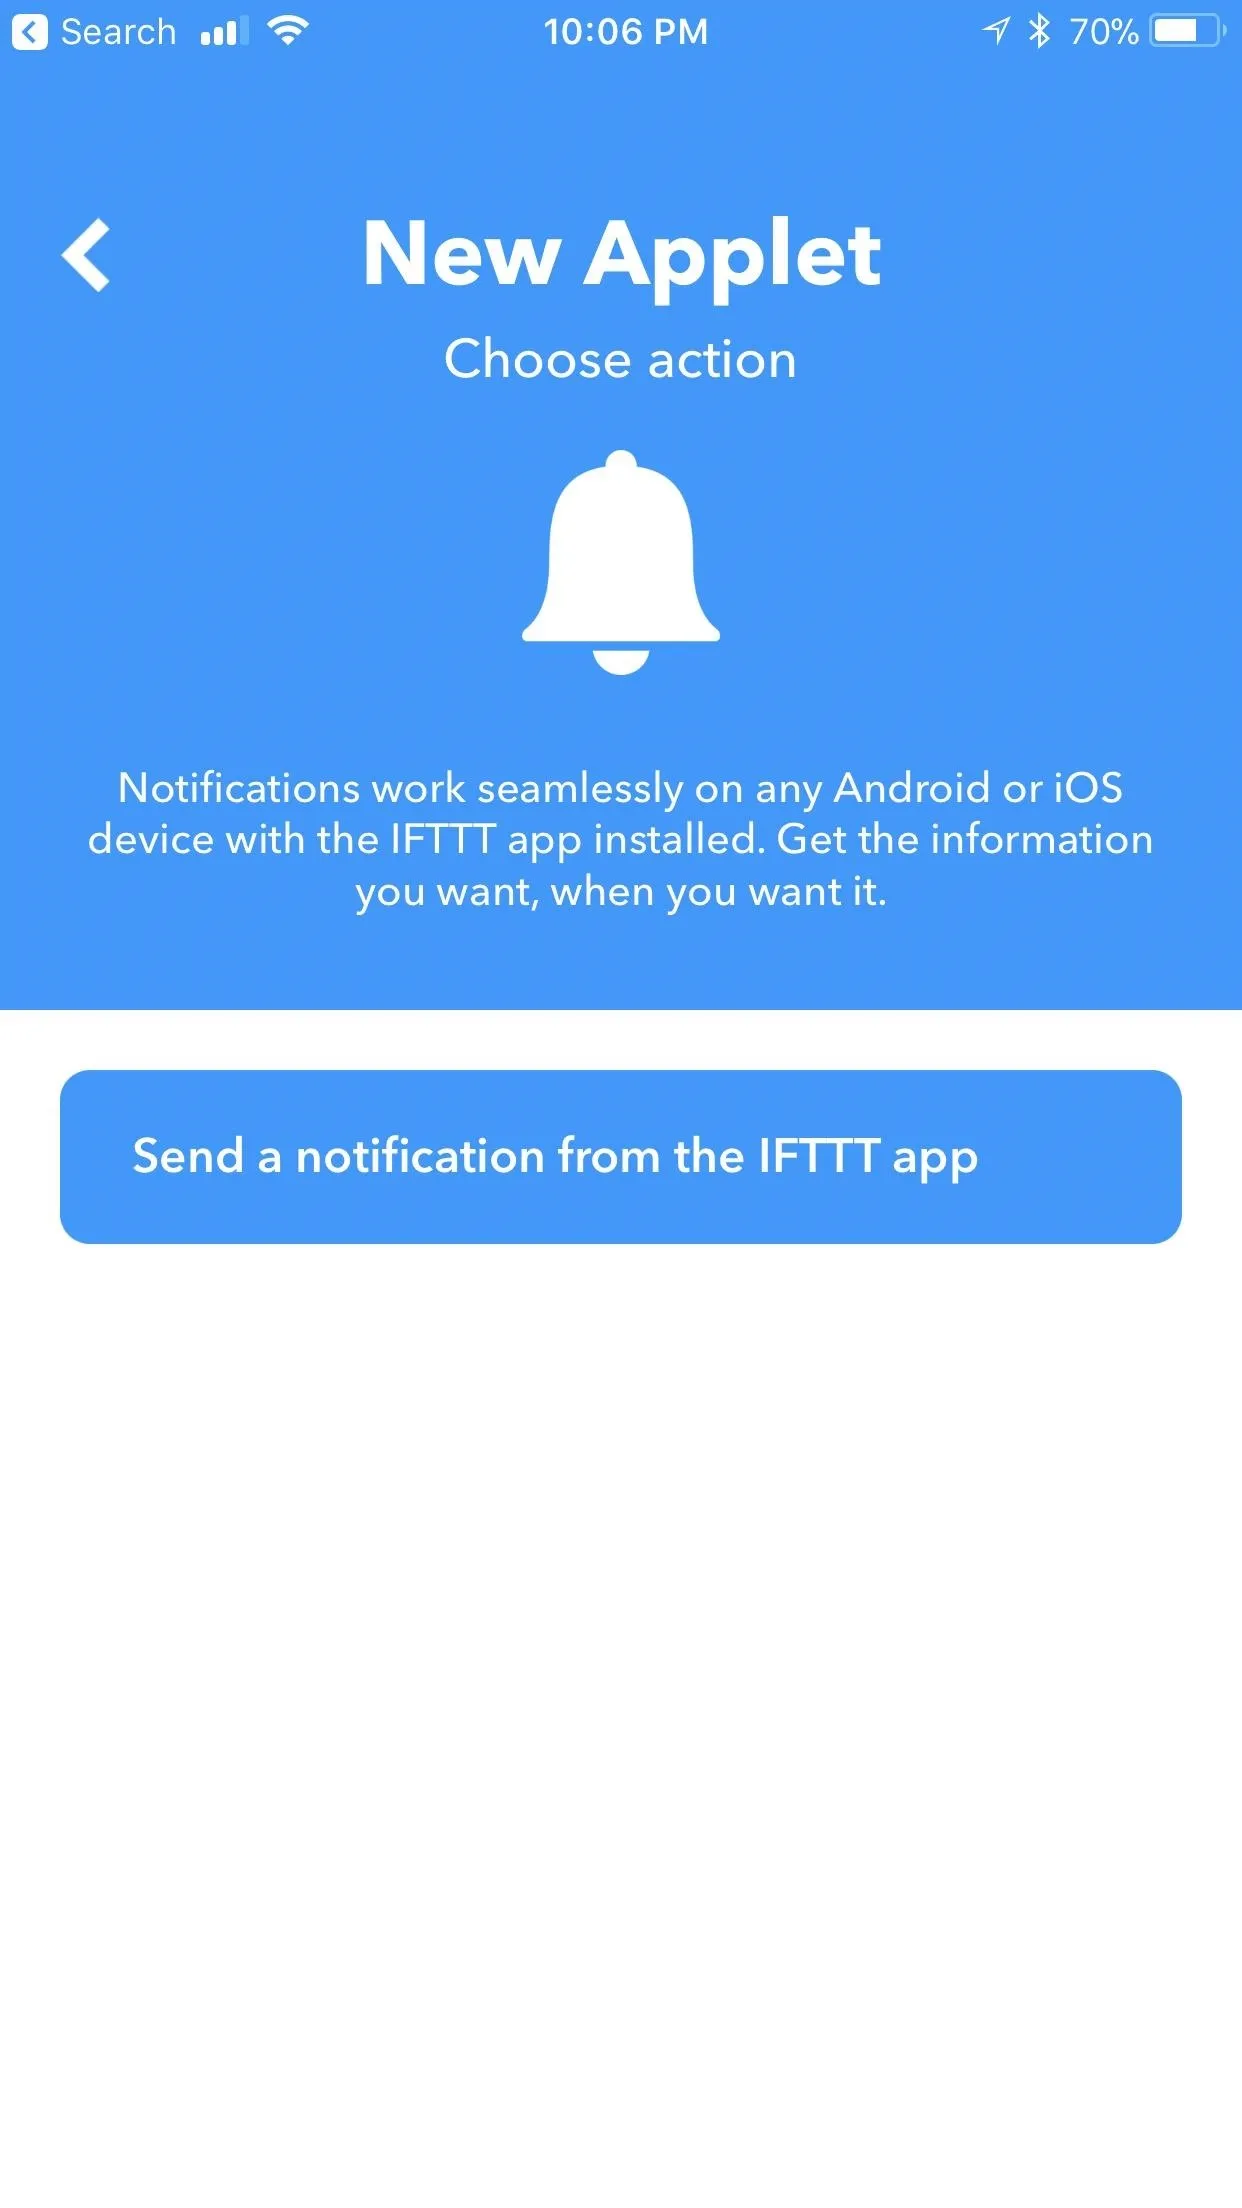
Depending on the service you chose, you'll see slightly different options — but again, they should be fairly straightforward. In the case of "Notifications," you'll need to configure the notification text. Simply type whatever you want to appear in the notification. You can also add an element called "CheckTime" that reads back the time you set for "this," if you'd like.
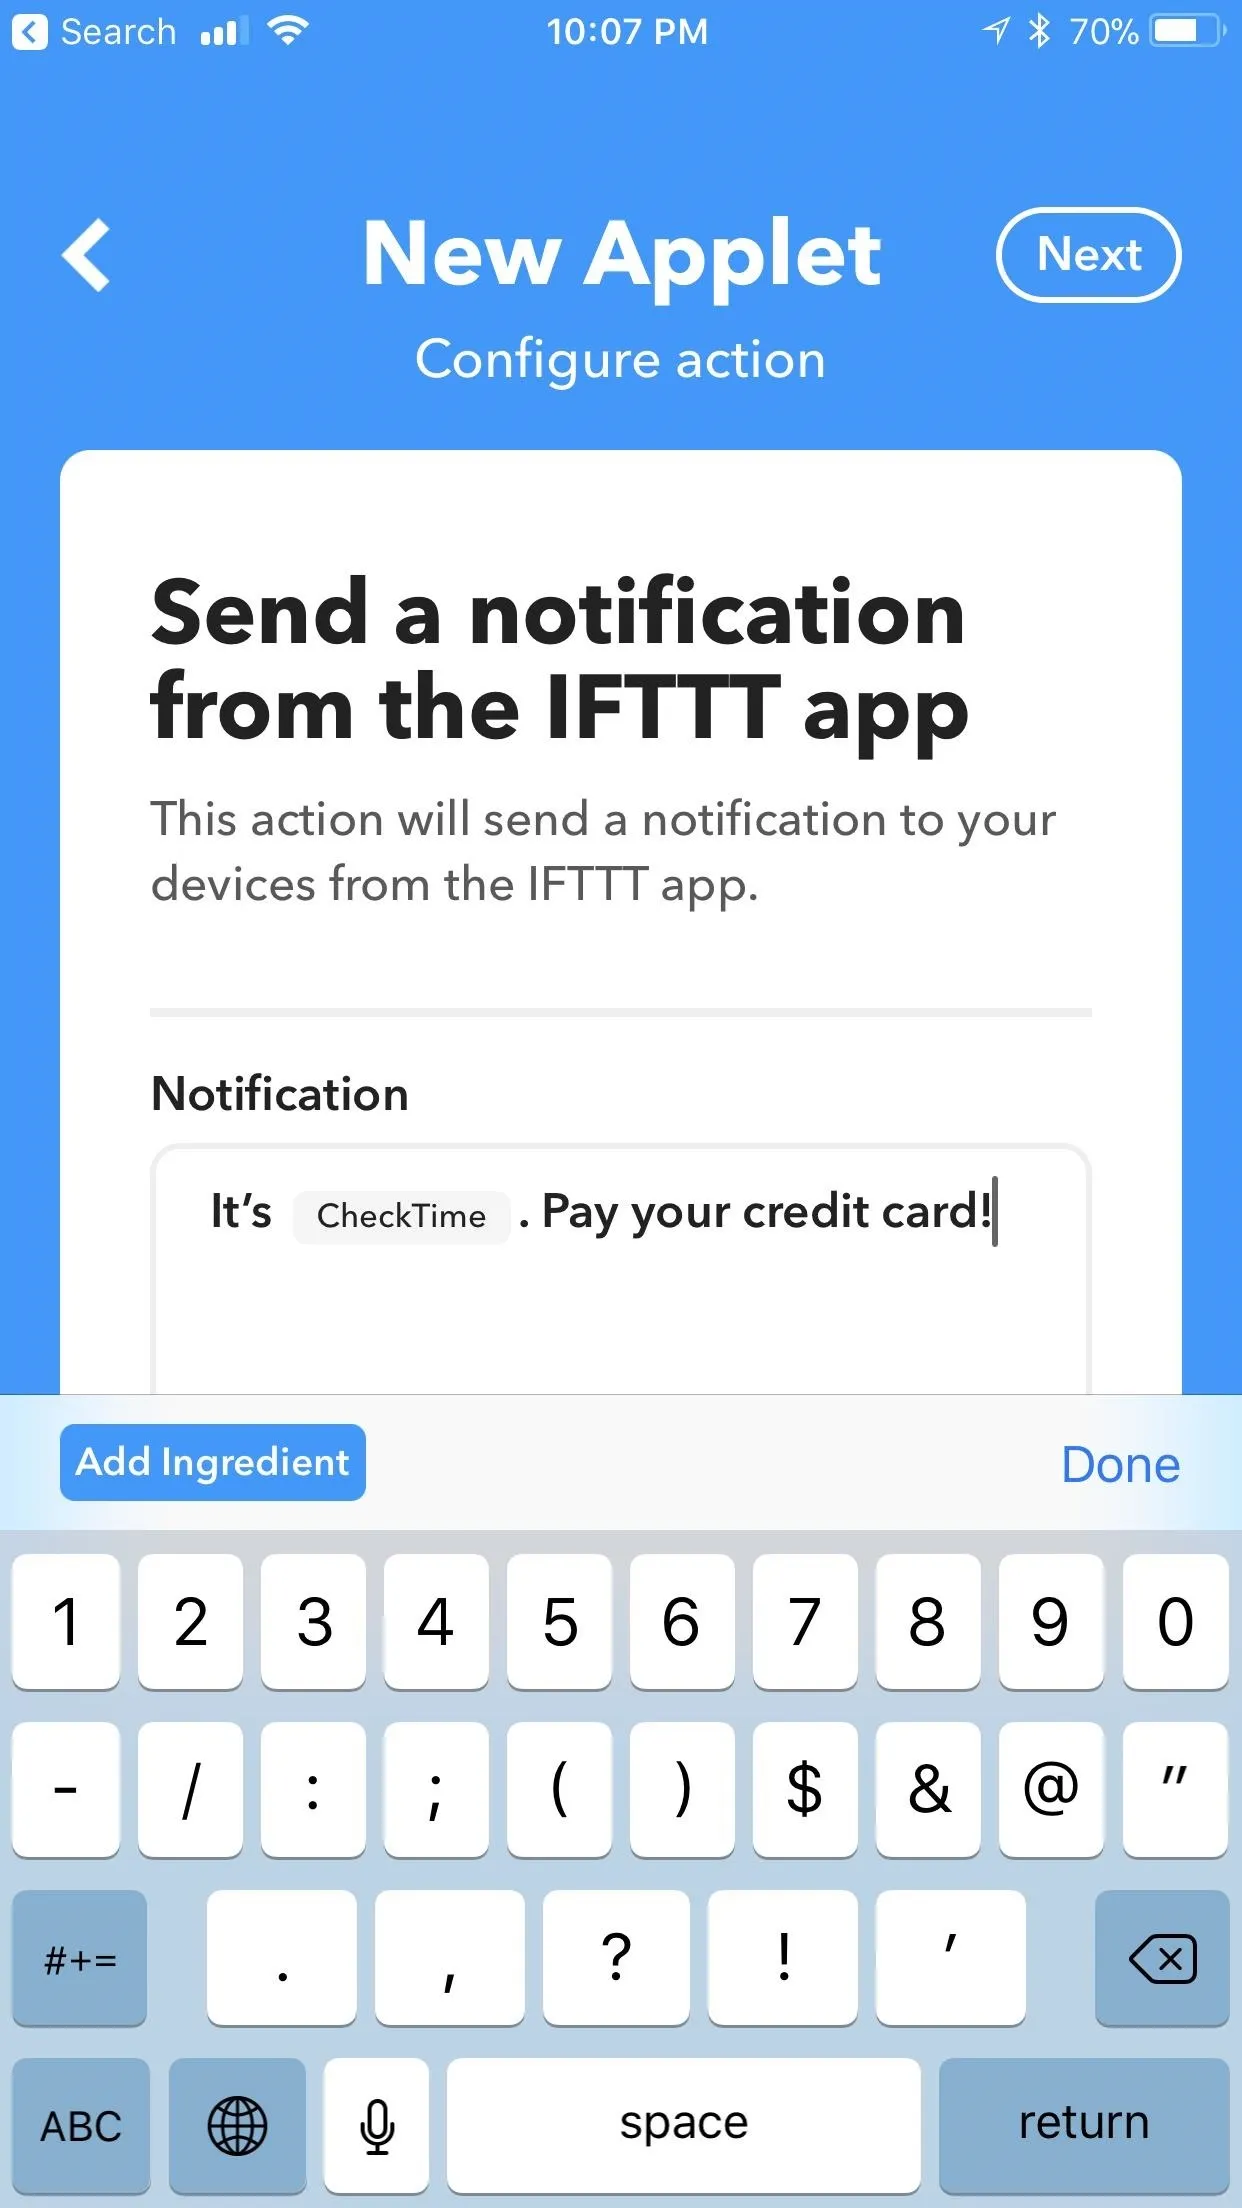
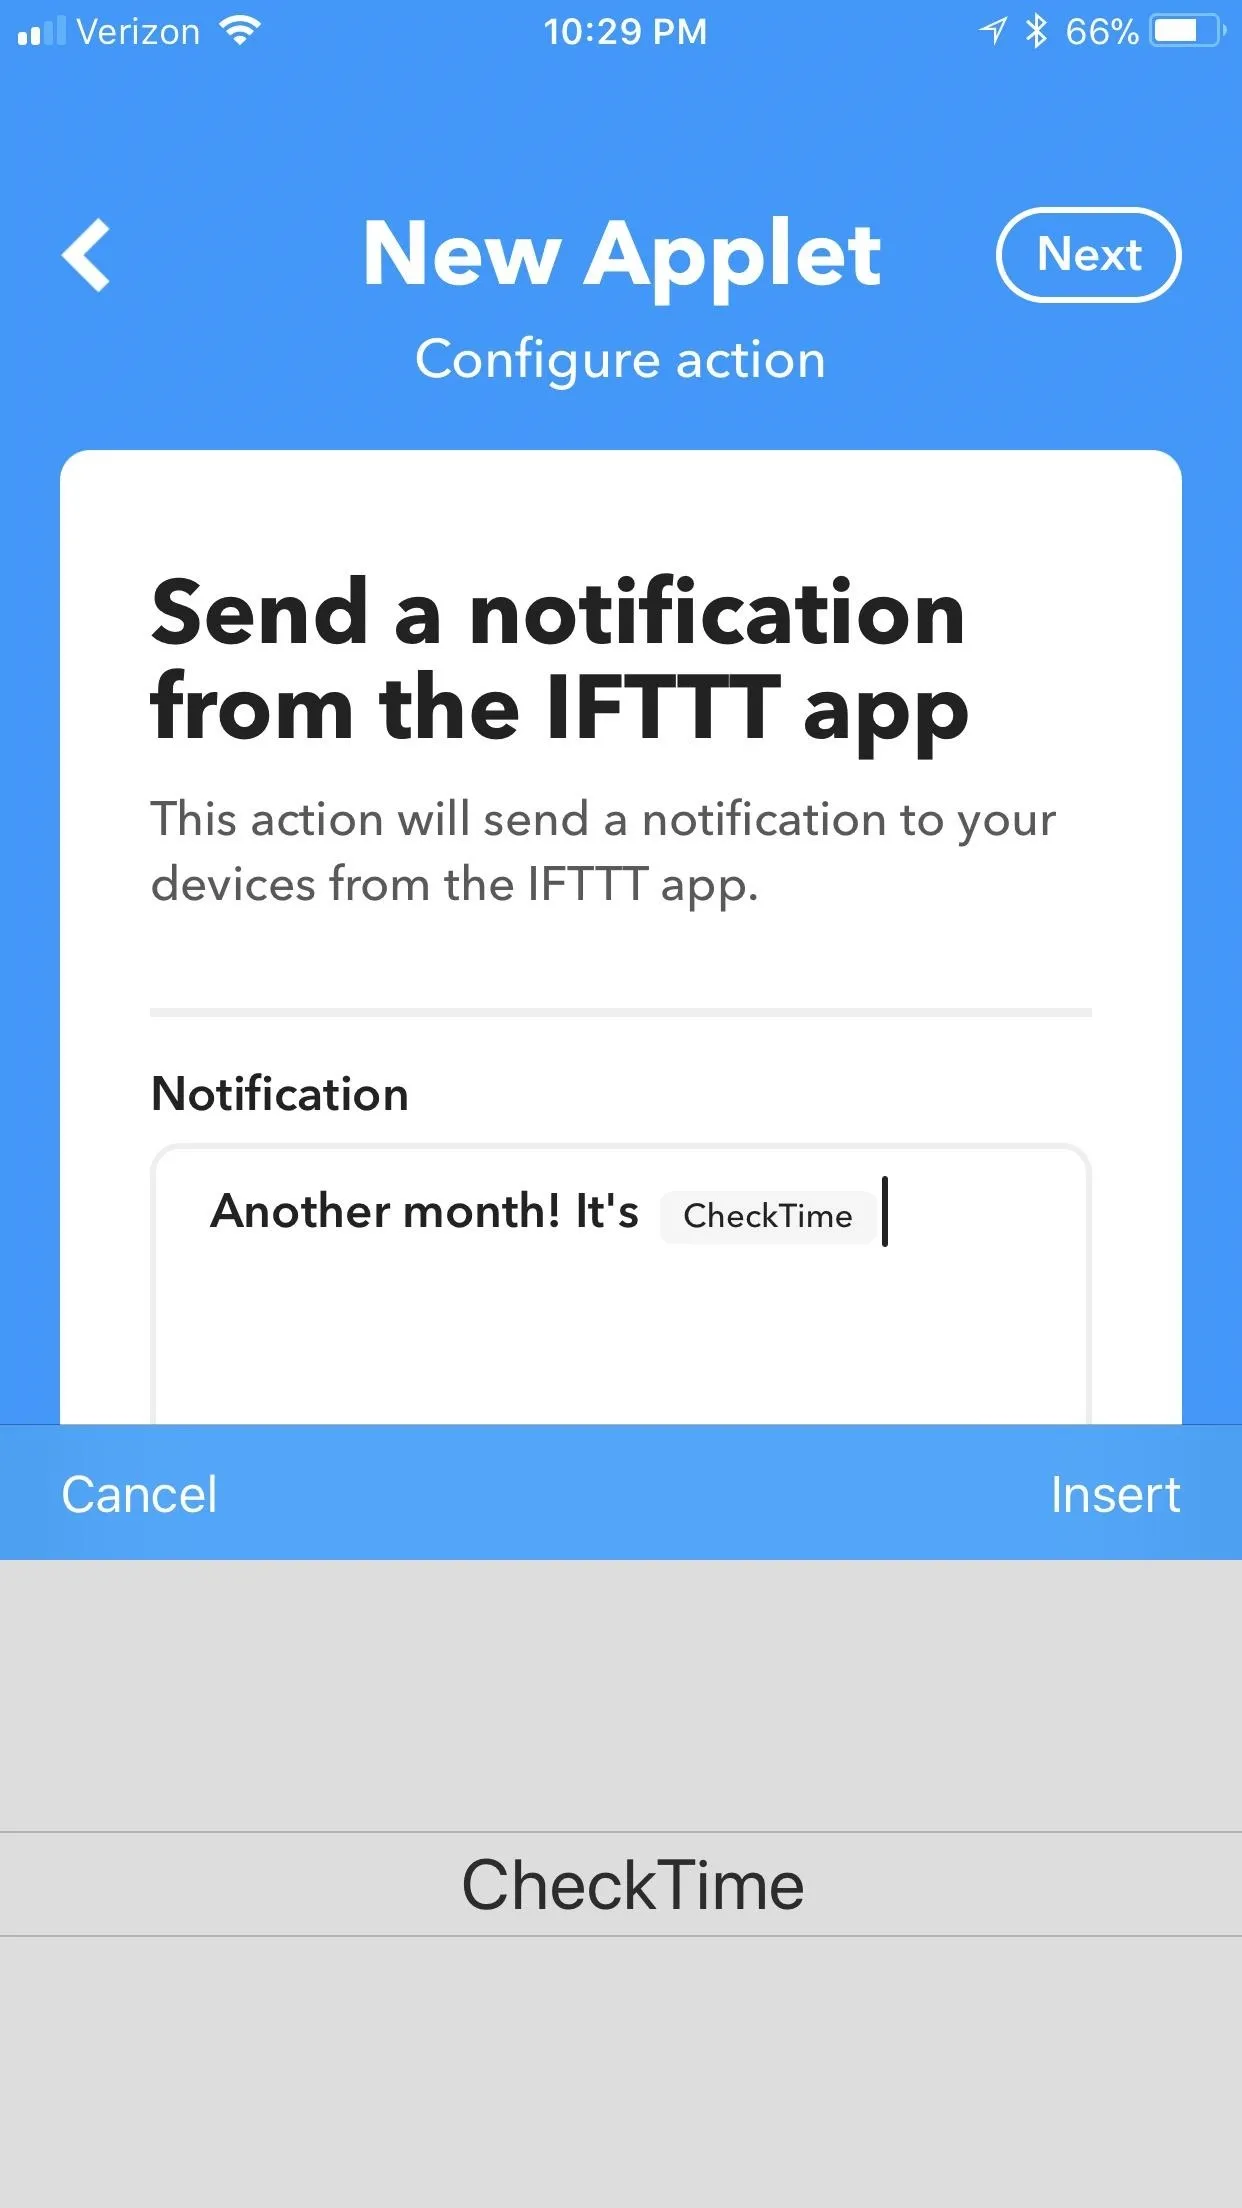
Elements such as these are called "ingredients" (the last remaining vestige of a time when applets used to be called "recipes"). Add an ingredient by tapping "Add Ingredient" while typing. The list of available ingredients will pop up. Most of these ingredients are self-explanatory, but some may require a light Googling to find out what they do.
After you're satisfied with the notification text, tap "Next" (iOS) or press the check mark (Android) in the top-right corner, then hit "Finish." Make sure your custom applet is switched on by using the toggle in the middle of the next screen. Afterwards, your custom applet will live in the My Applets tab with all of your other applets, where you can interact with it as you would any other.
What custom applets have you put together? Any applets you'd like us to walk you through? Let us know in the comments below.
- Follow Gadget Hacks on Facebook, Twitter, YouTube, and Flipboard
- Follow WonderHowTo on Facebook, Twitter, Pinterest, and Flipboard
Cover image and screenshots by Brian Lang/Gadget Hacks


Comments
Be the first, drop a comment!