


More often than not, road trips will include unforeseen pit stops that have to be made, no matter how well prepared you are. In the past, making an unscheduled stop may have led to headaches and delays when your navigation app got off track, but thanks to a feature in Google Maps, this is no longer an issue.
Google Maps now lets you add stops while navigating, which helps streamline your trip and saves precious time. Best of all, this feature is easy to use, and is available for both iPhones and Android devices, with very little variance between the two in terms of access. We've detailed the entire process for you below, so if you're interested in learning more about this feature, keep reading to find out more.
Enable Location Services for Google Maps
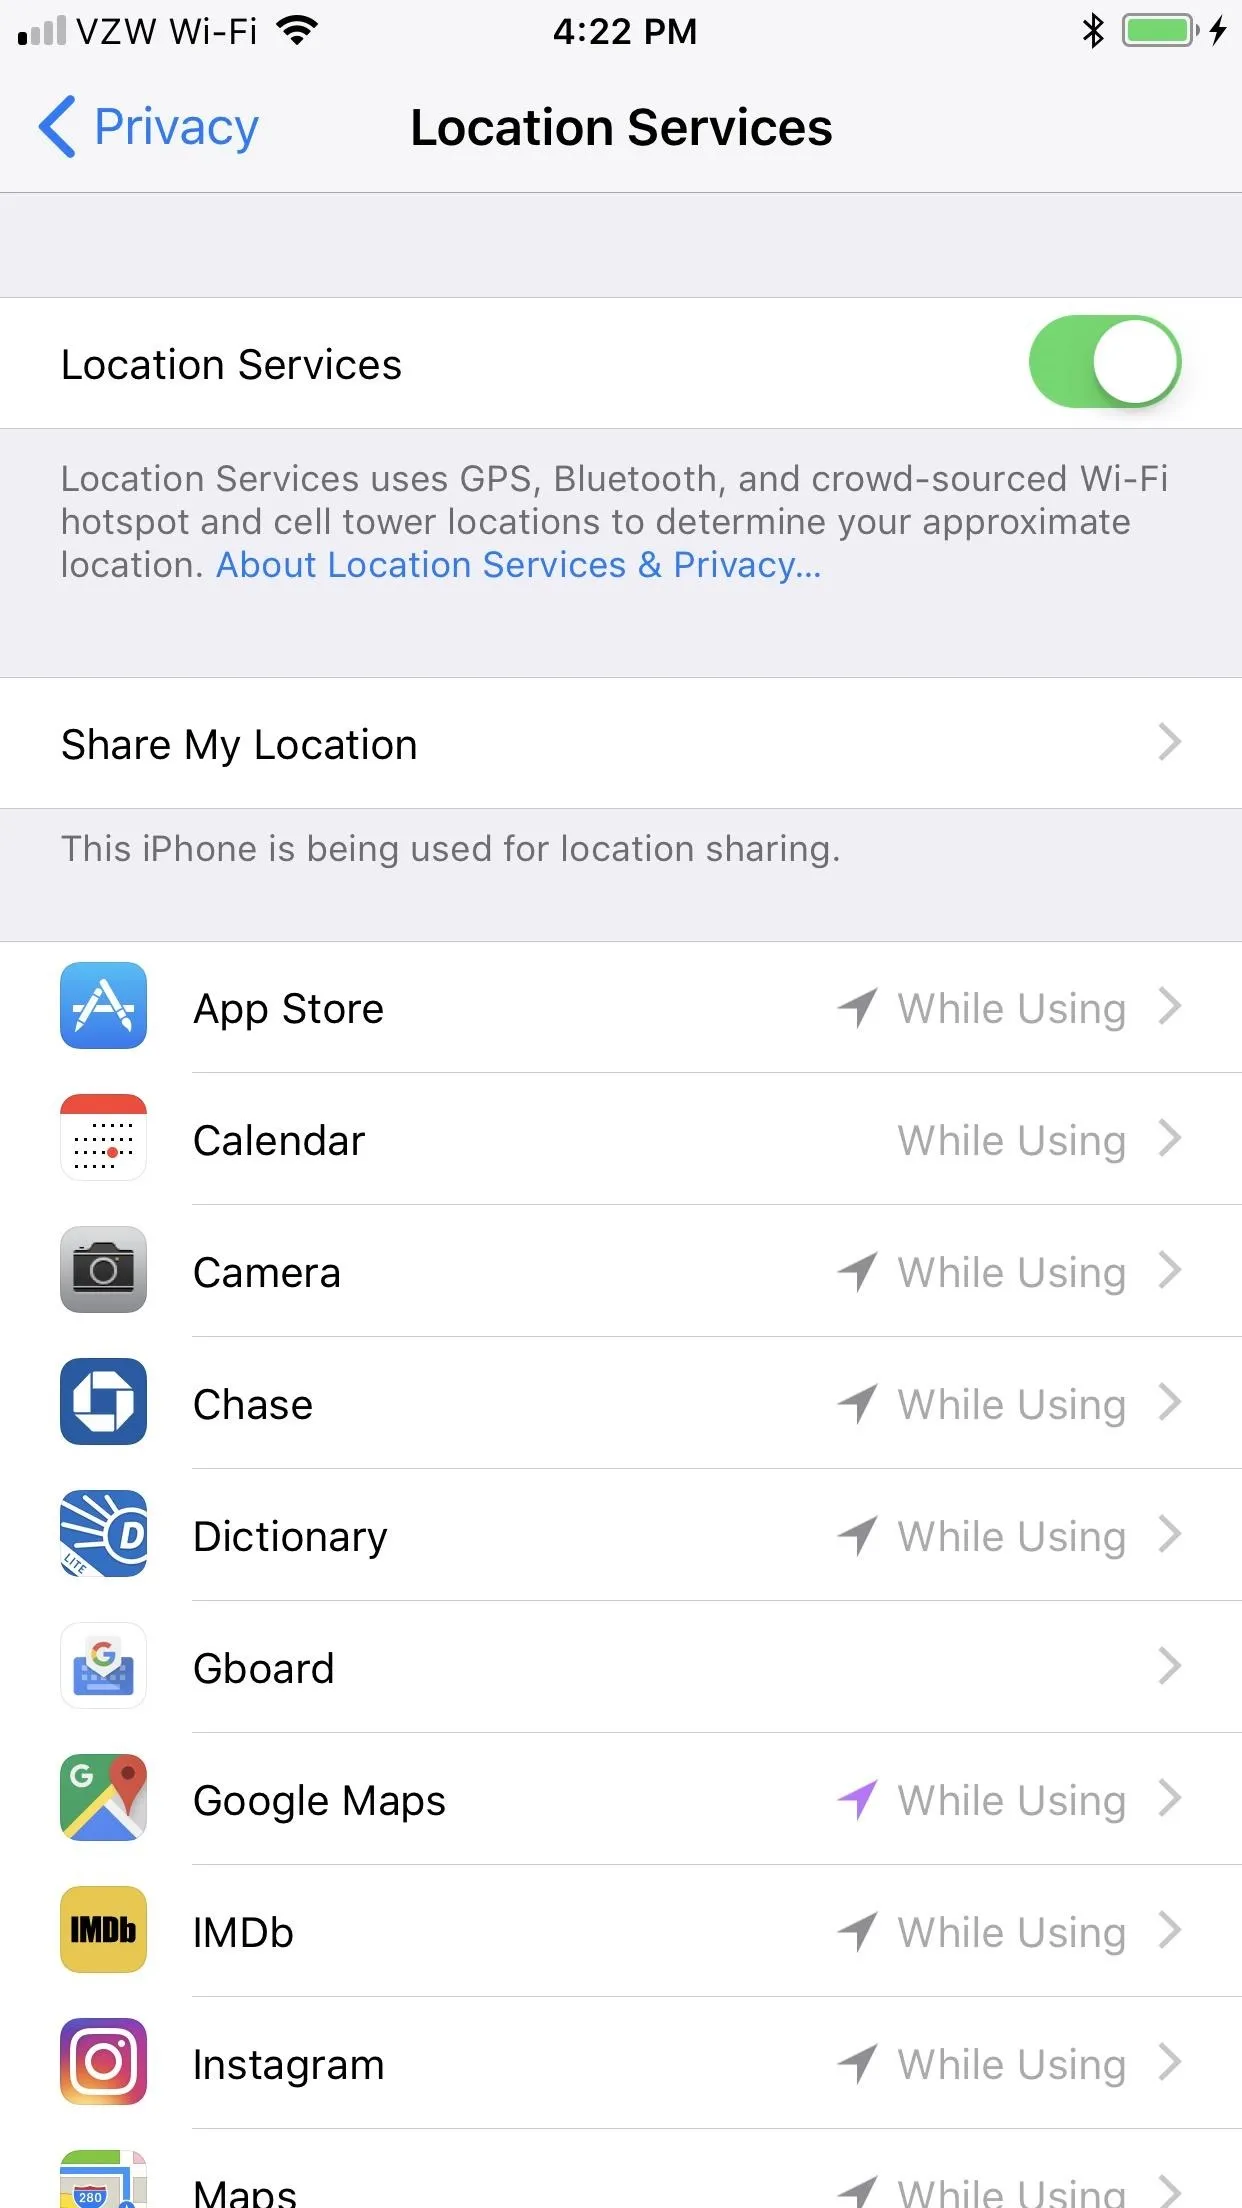
Google Maps will need to access your device's location in order to add pit stops to your route, so turn it on on your settings if you haven't already done so. For iPhone users, tap on "Privacy" in your Settings app, then choose "Location Services." On the next page, make sure "Location Services" is toggled on, then make sure "Google Maps" is set to "While Using this App" or "Always."
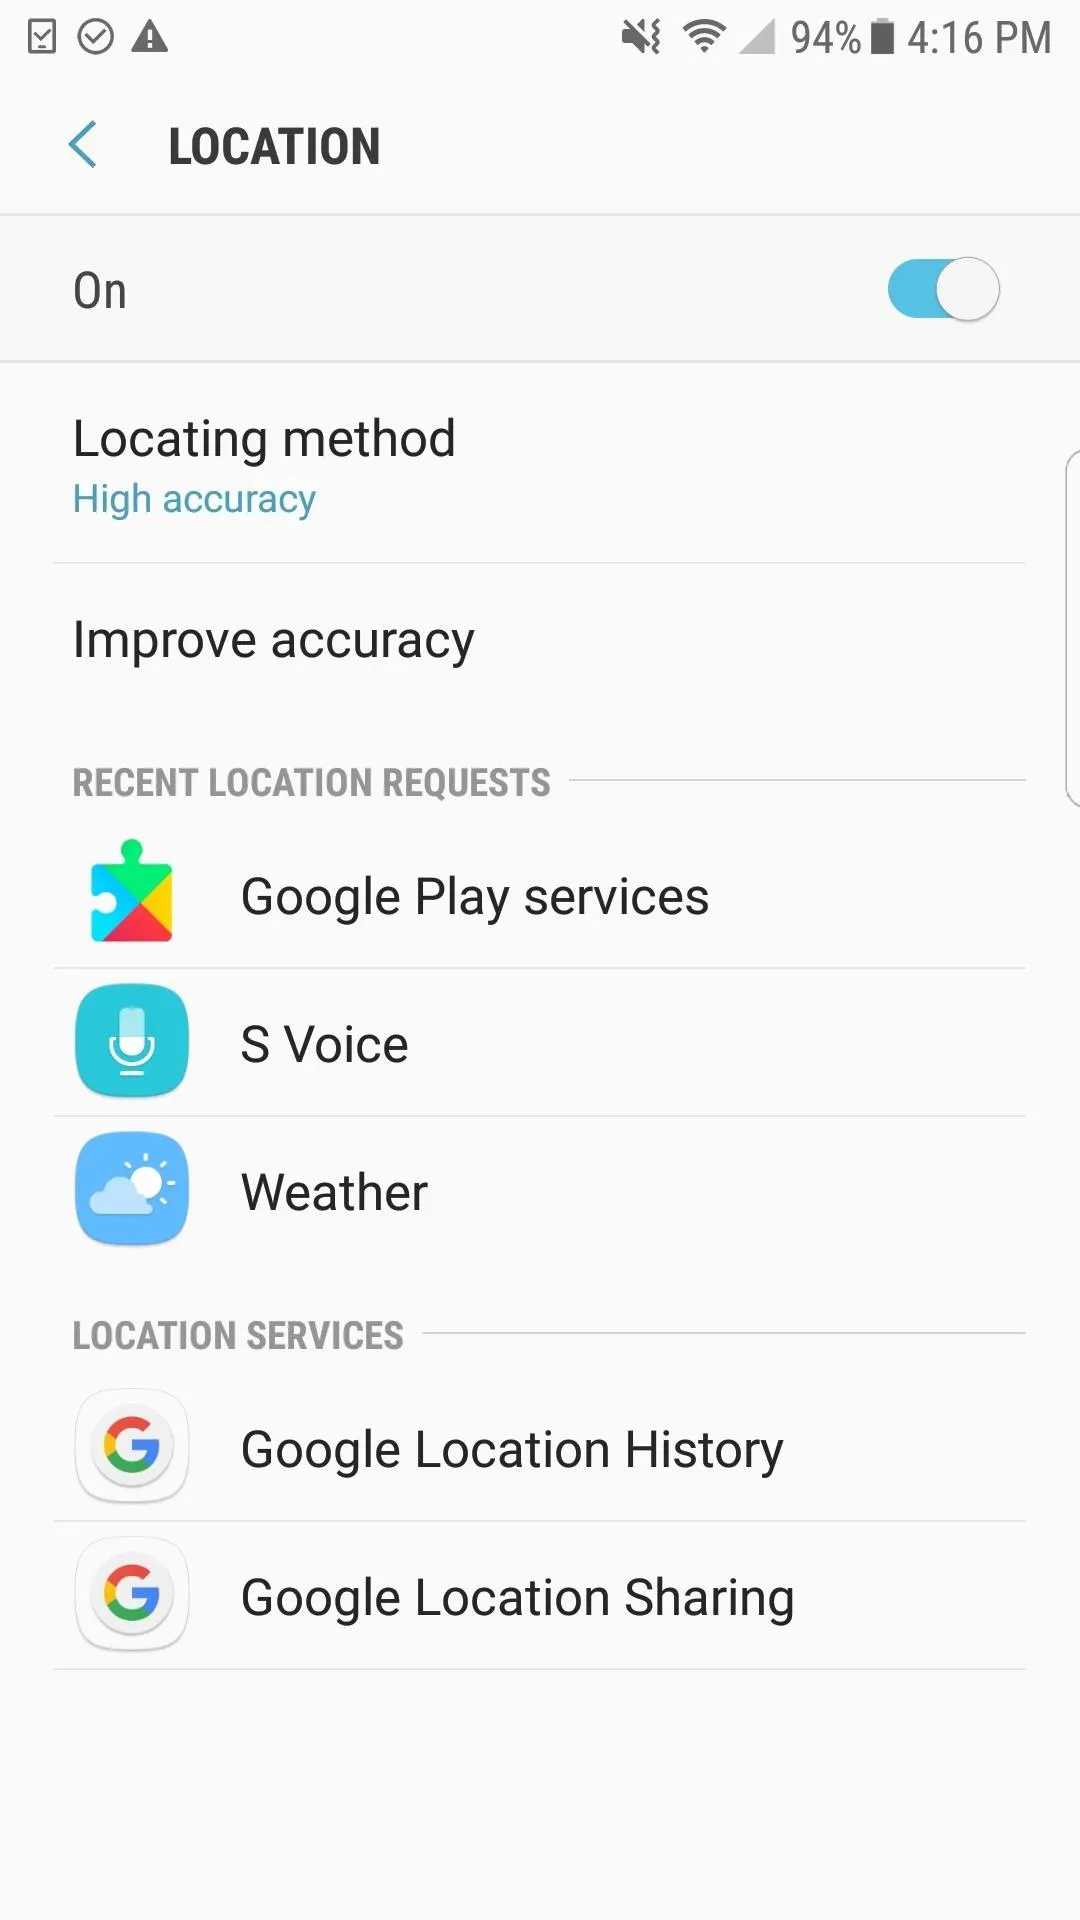
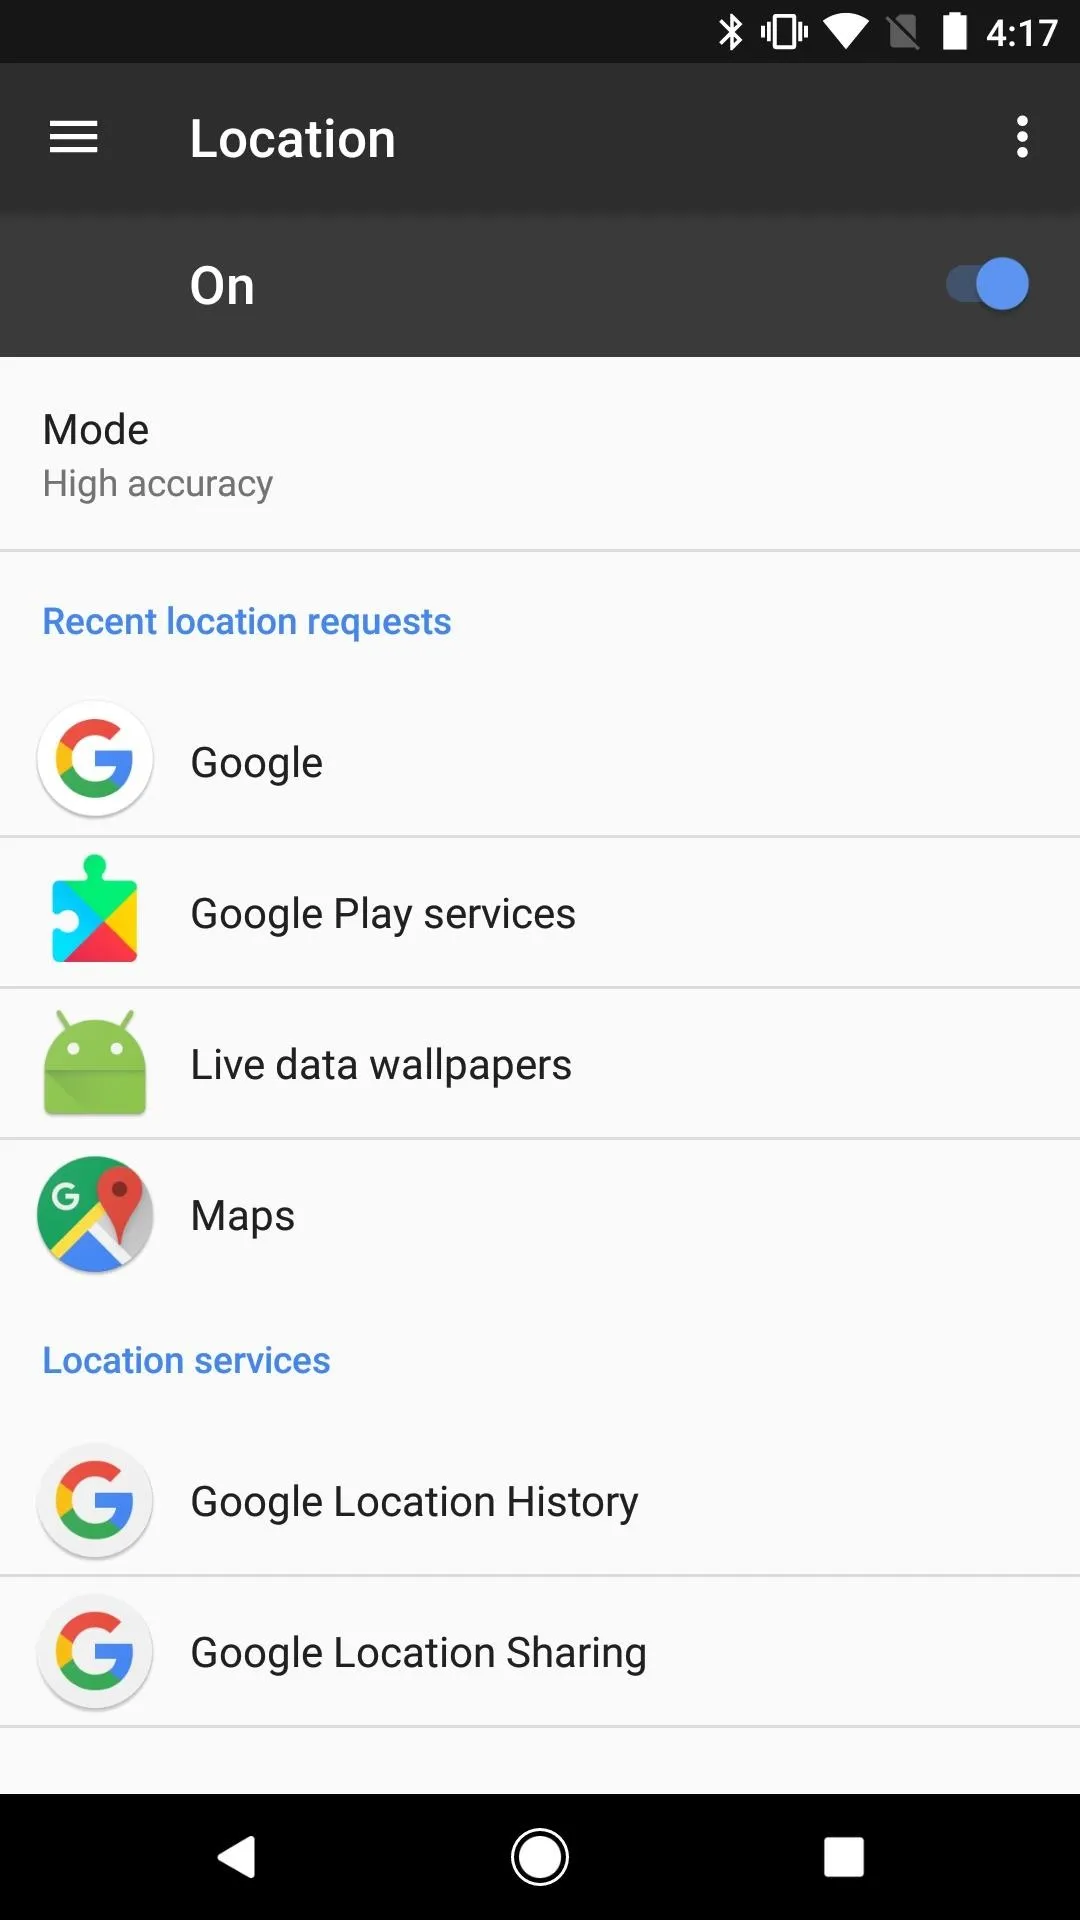
Accessing location settings can vary on Android devices. Depending on which phone model you have, it can be accessed either by going into "Connections" in Settings, tapping on "Location," and toggling it on, or you can tap on "Location" straight from Settings. Alternatively, if you're running Nougat and have a Quick Settings tile for "Location" set as a shortcut, you can just tap on that.
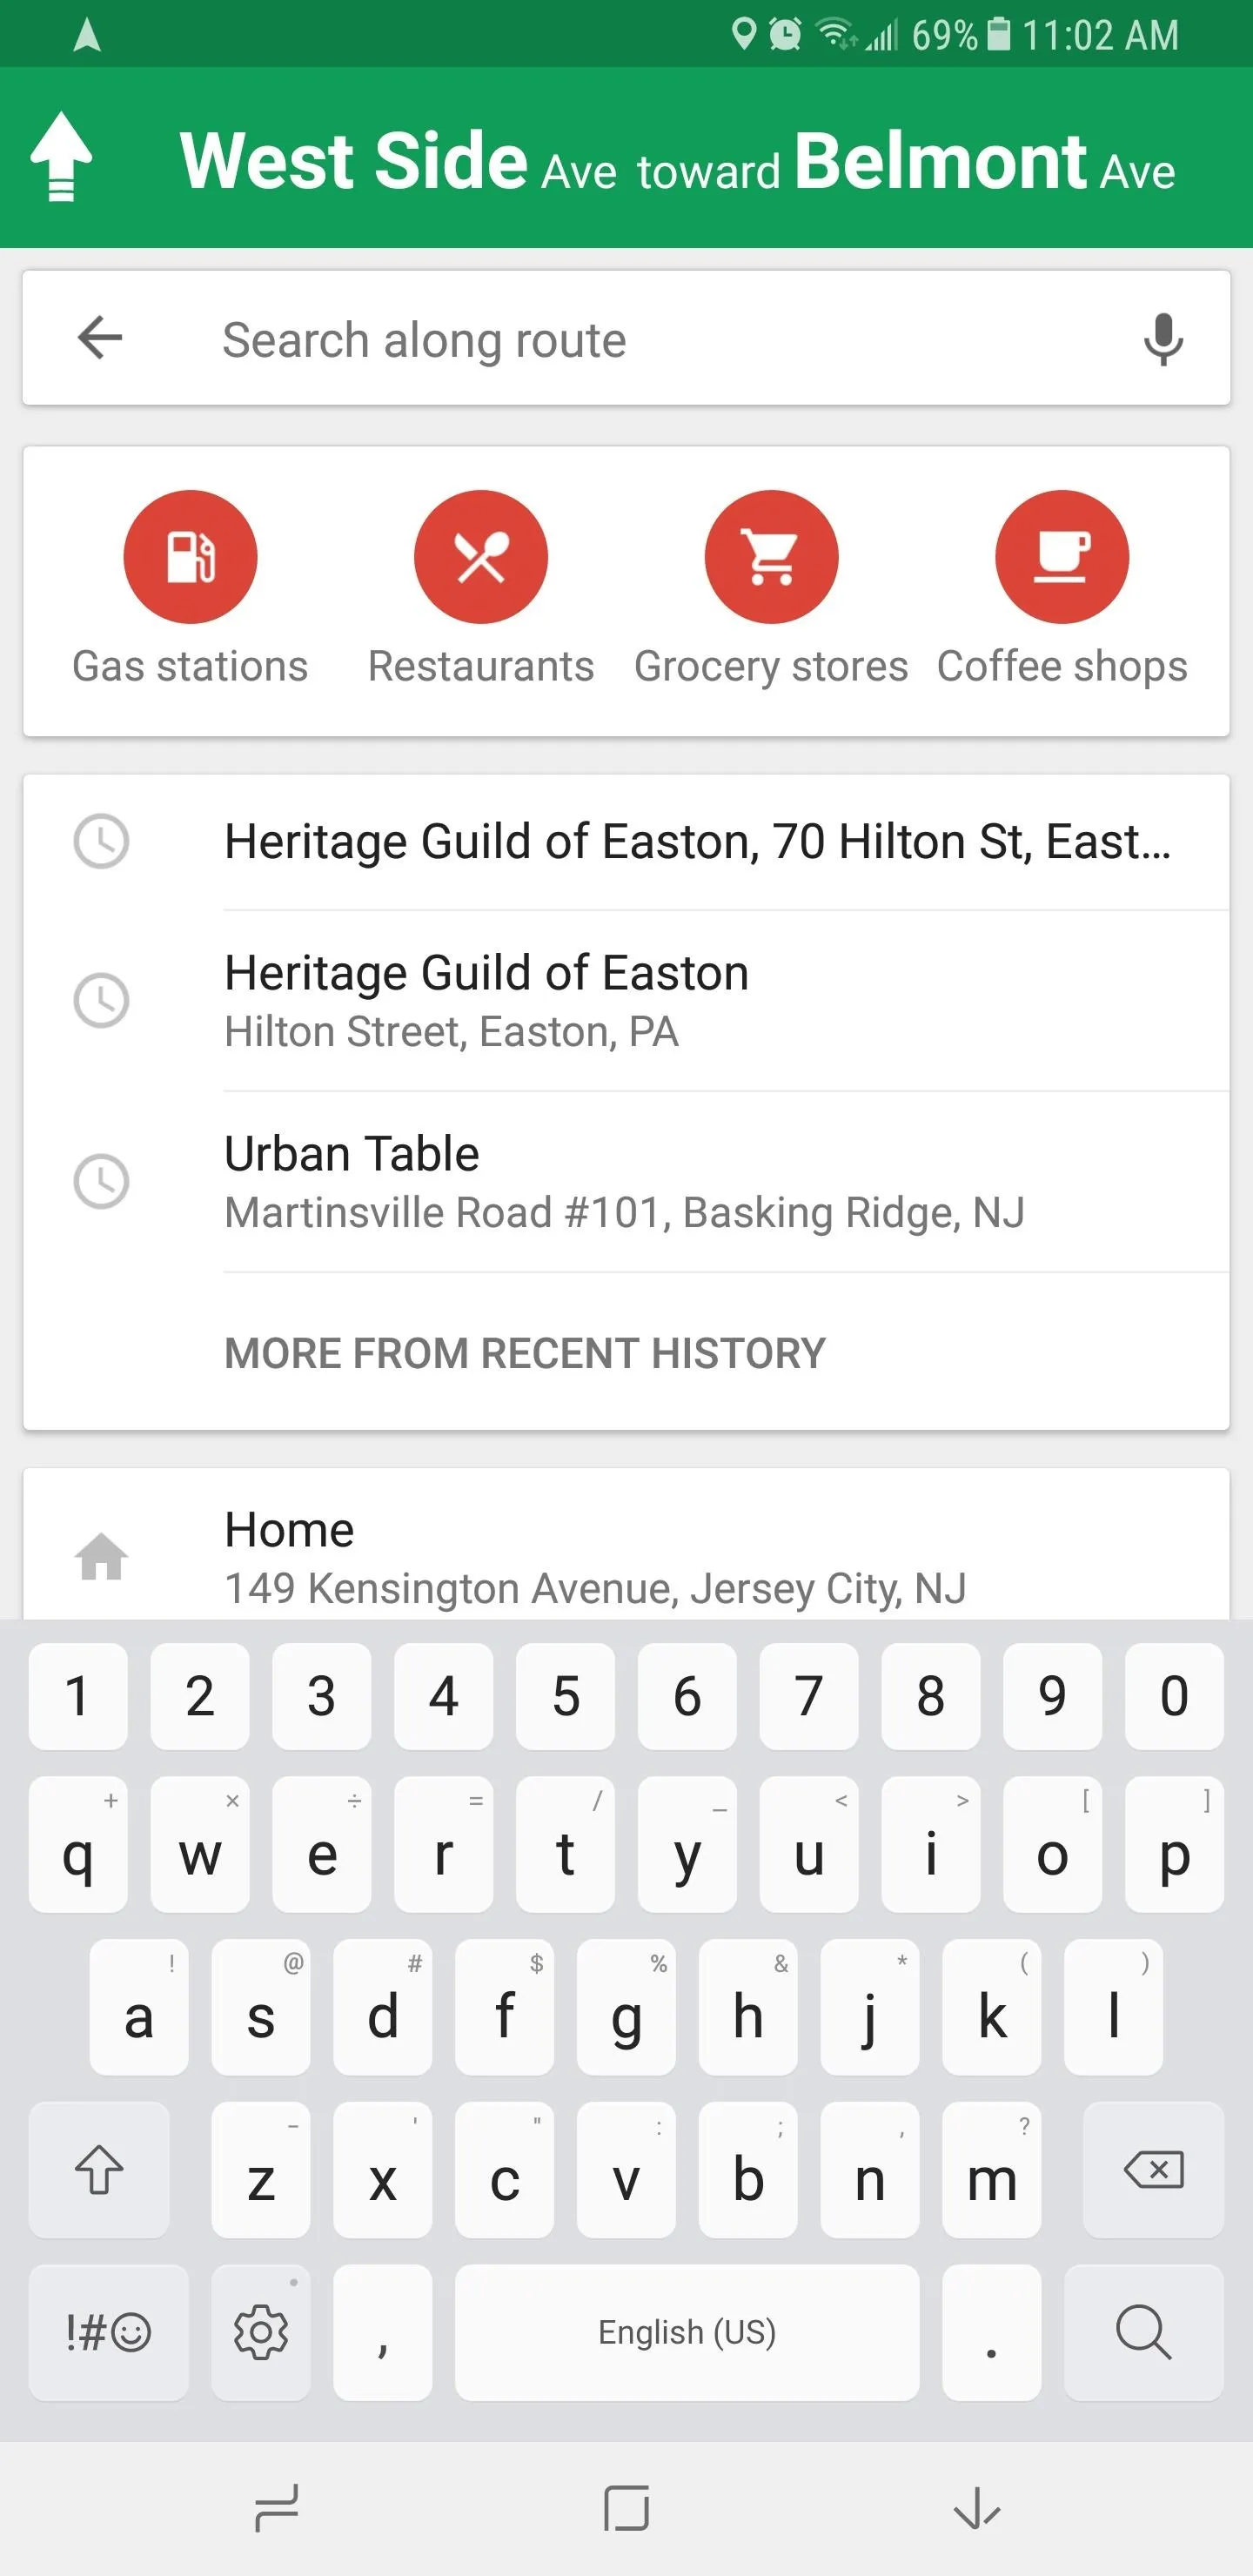
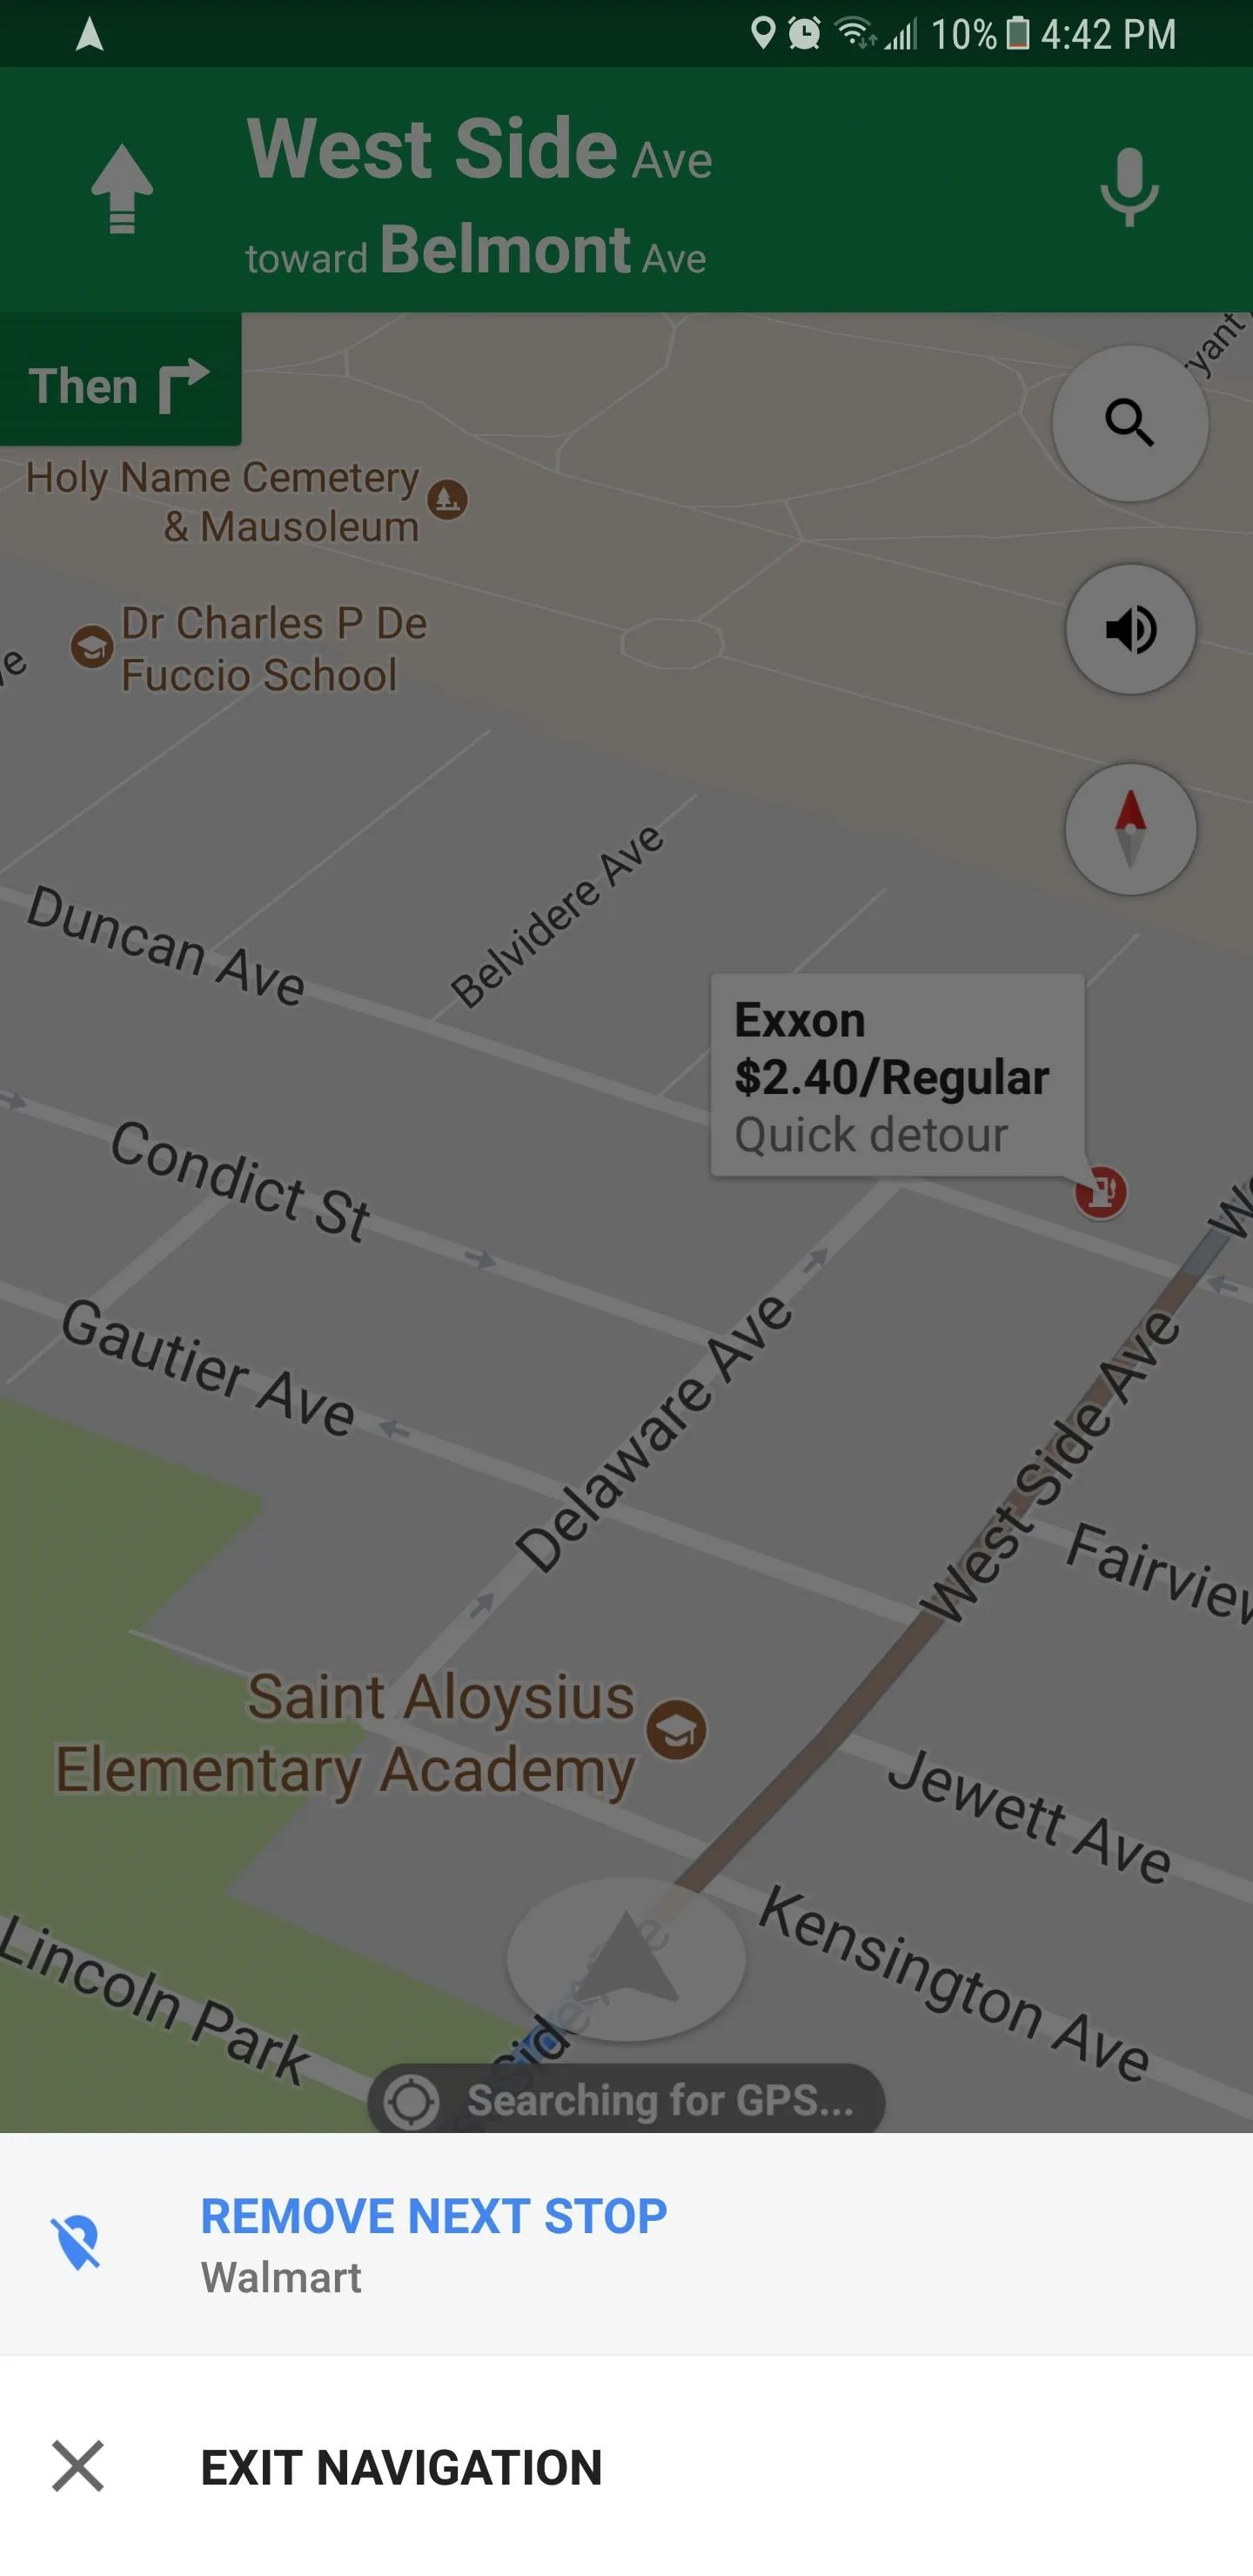
Start Navigation & Use the Search Feature
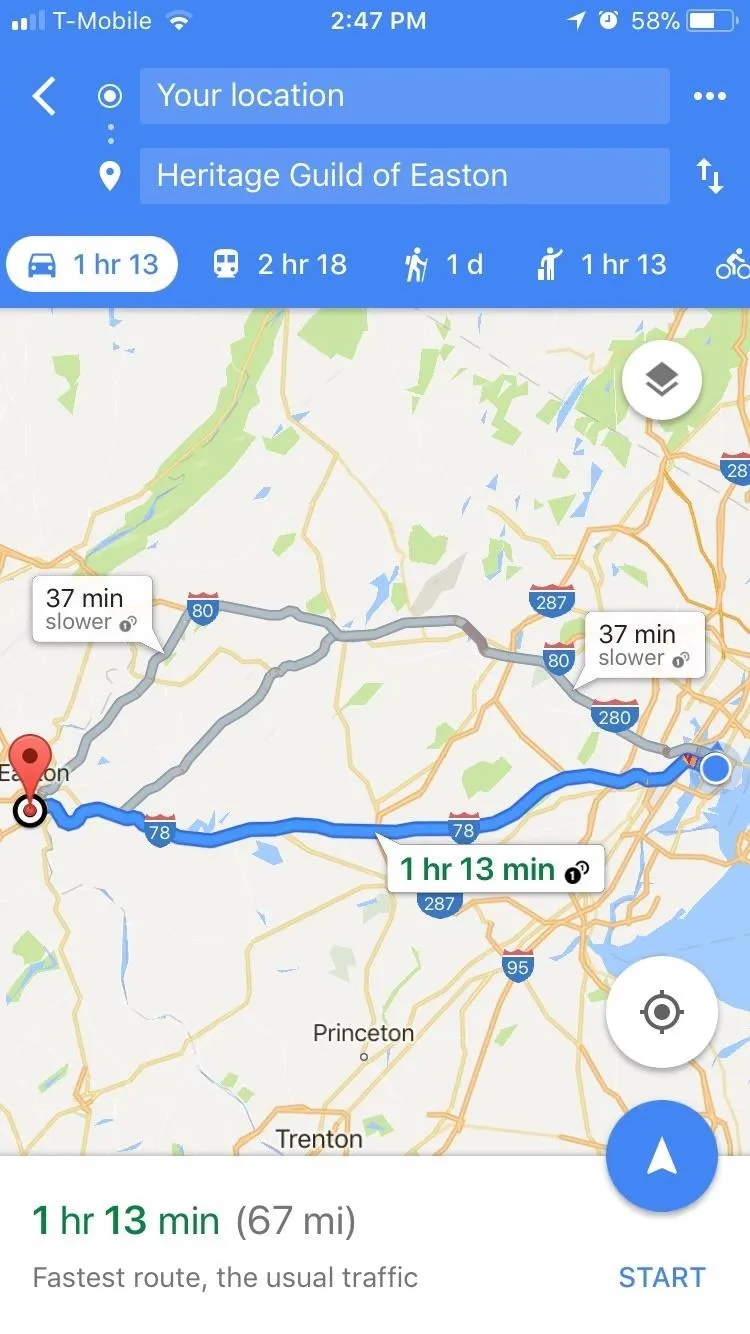
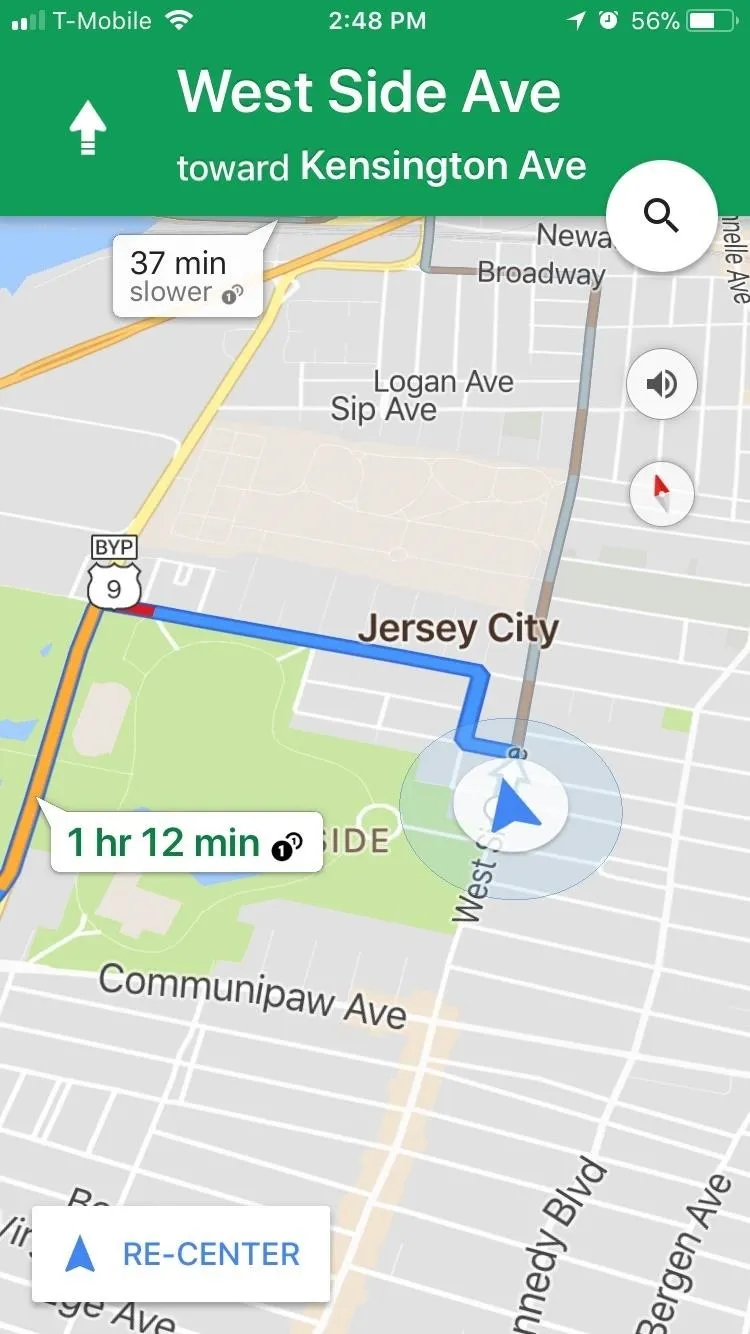
This next part starts out the same as it would if you were just getting directions to one stop. So choose your desired destination, then tap "Start" to begin navigation.
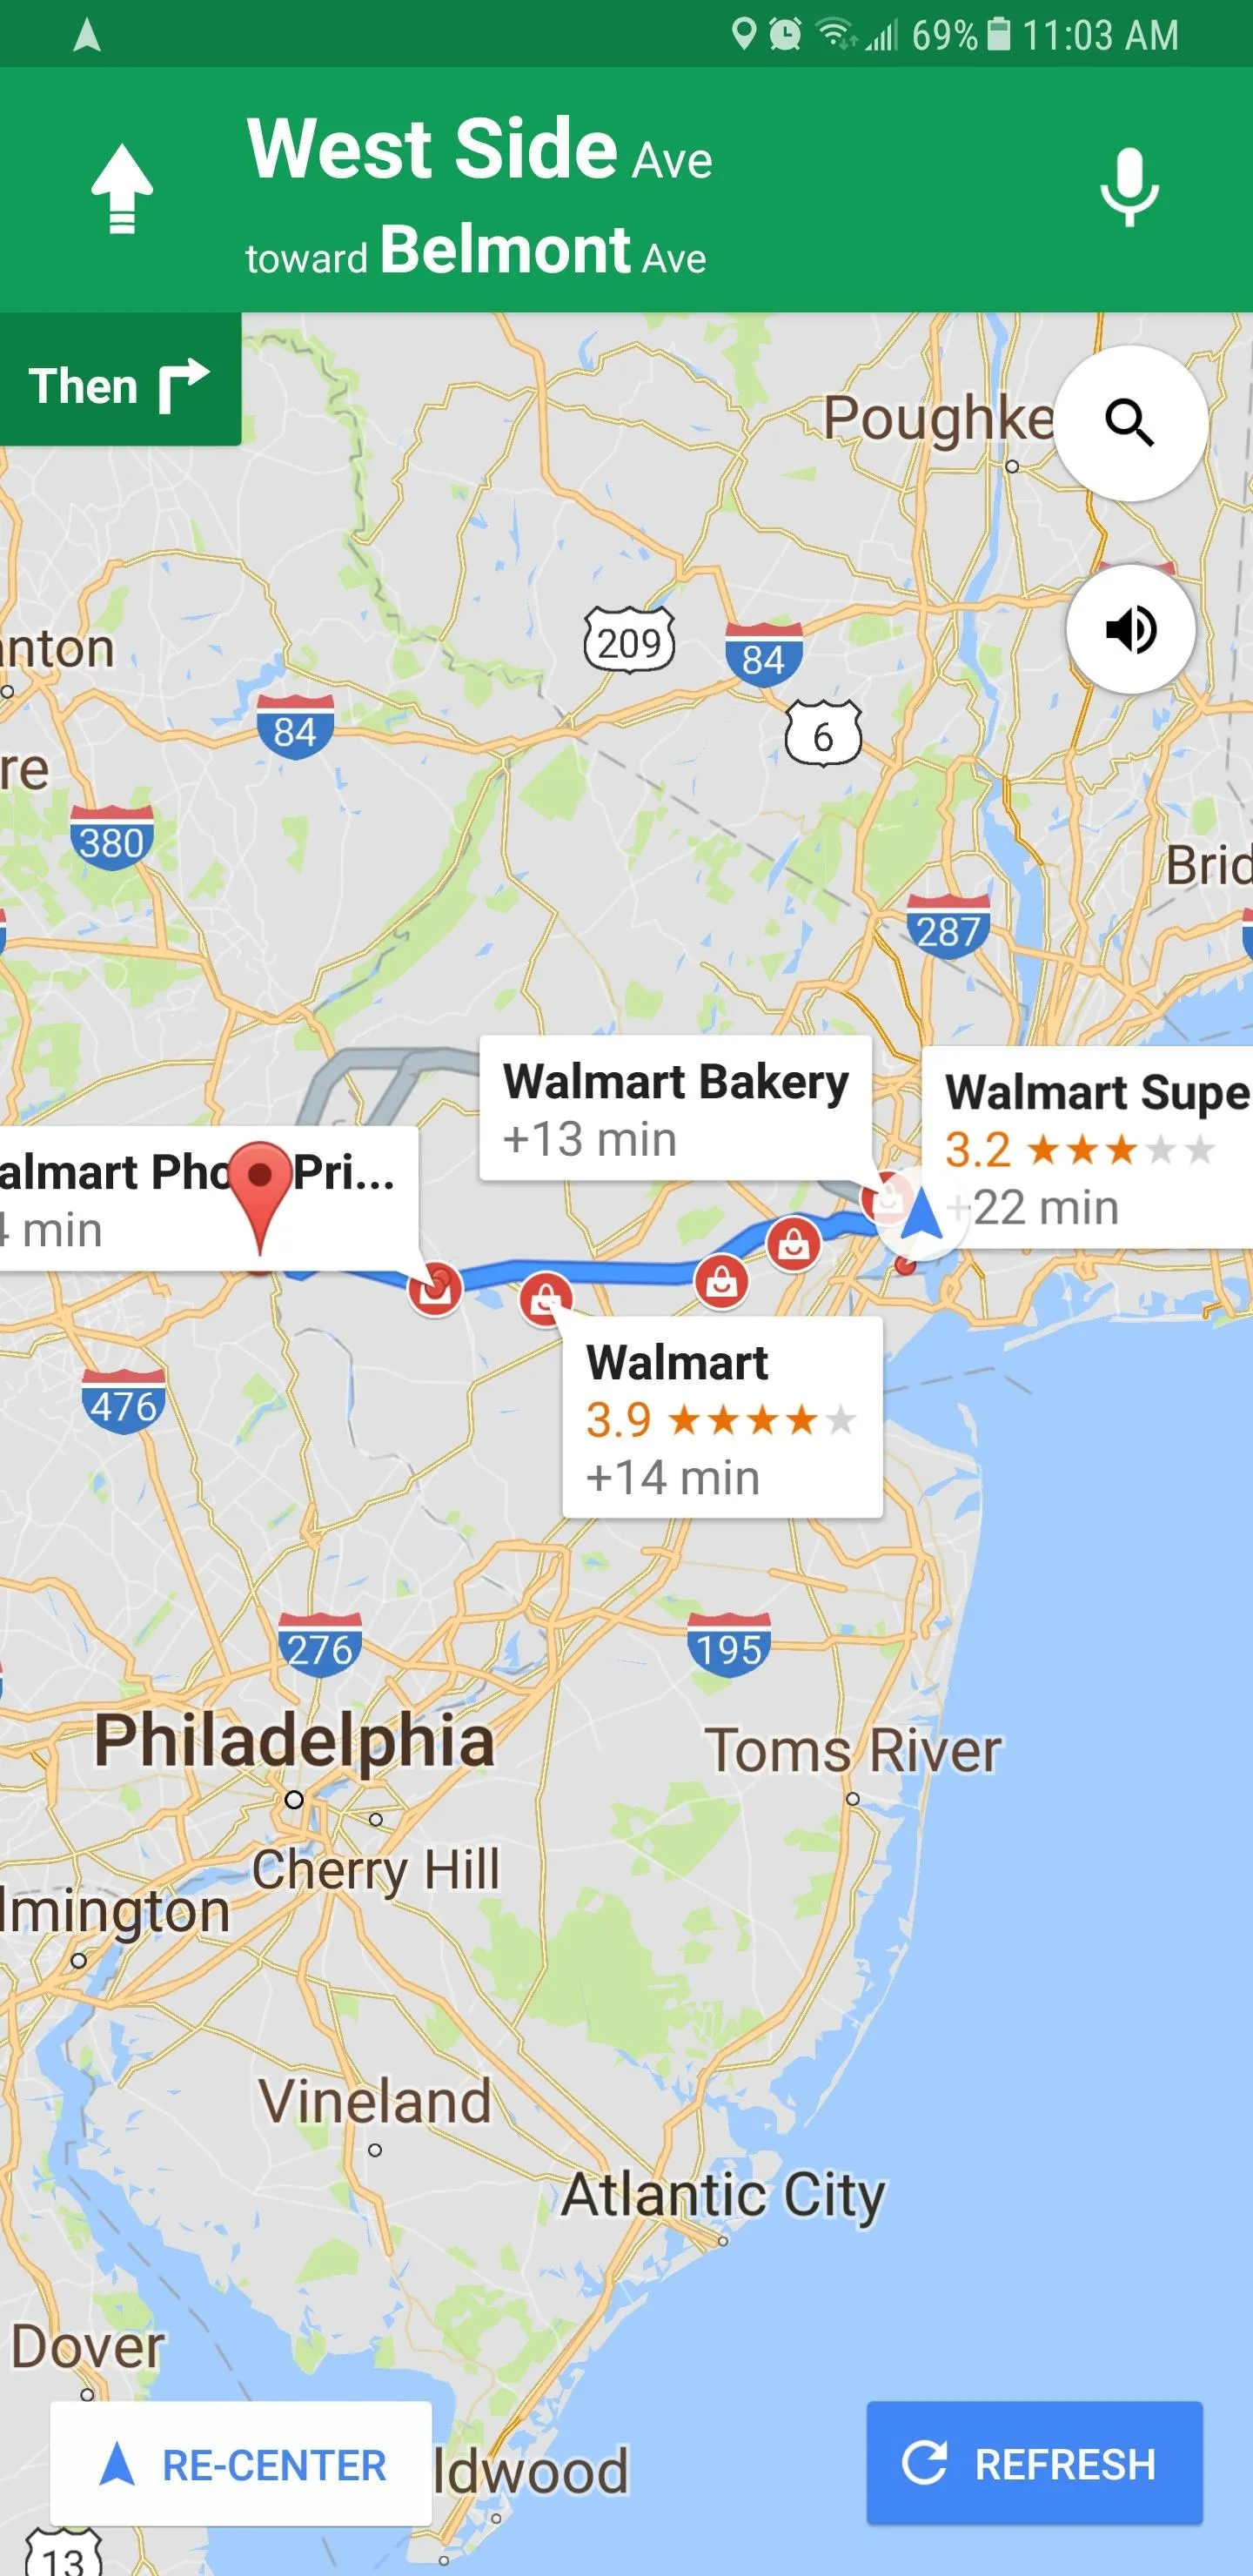
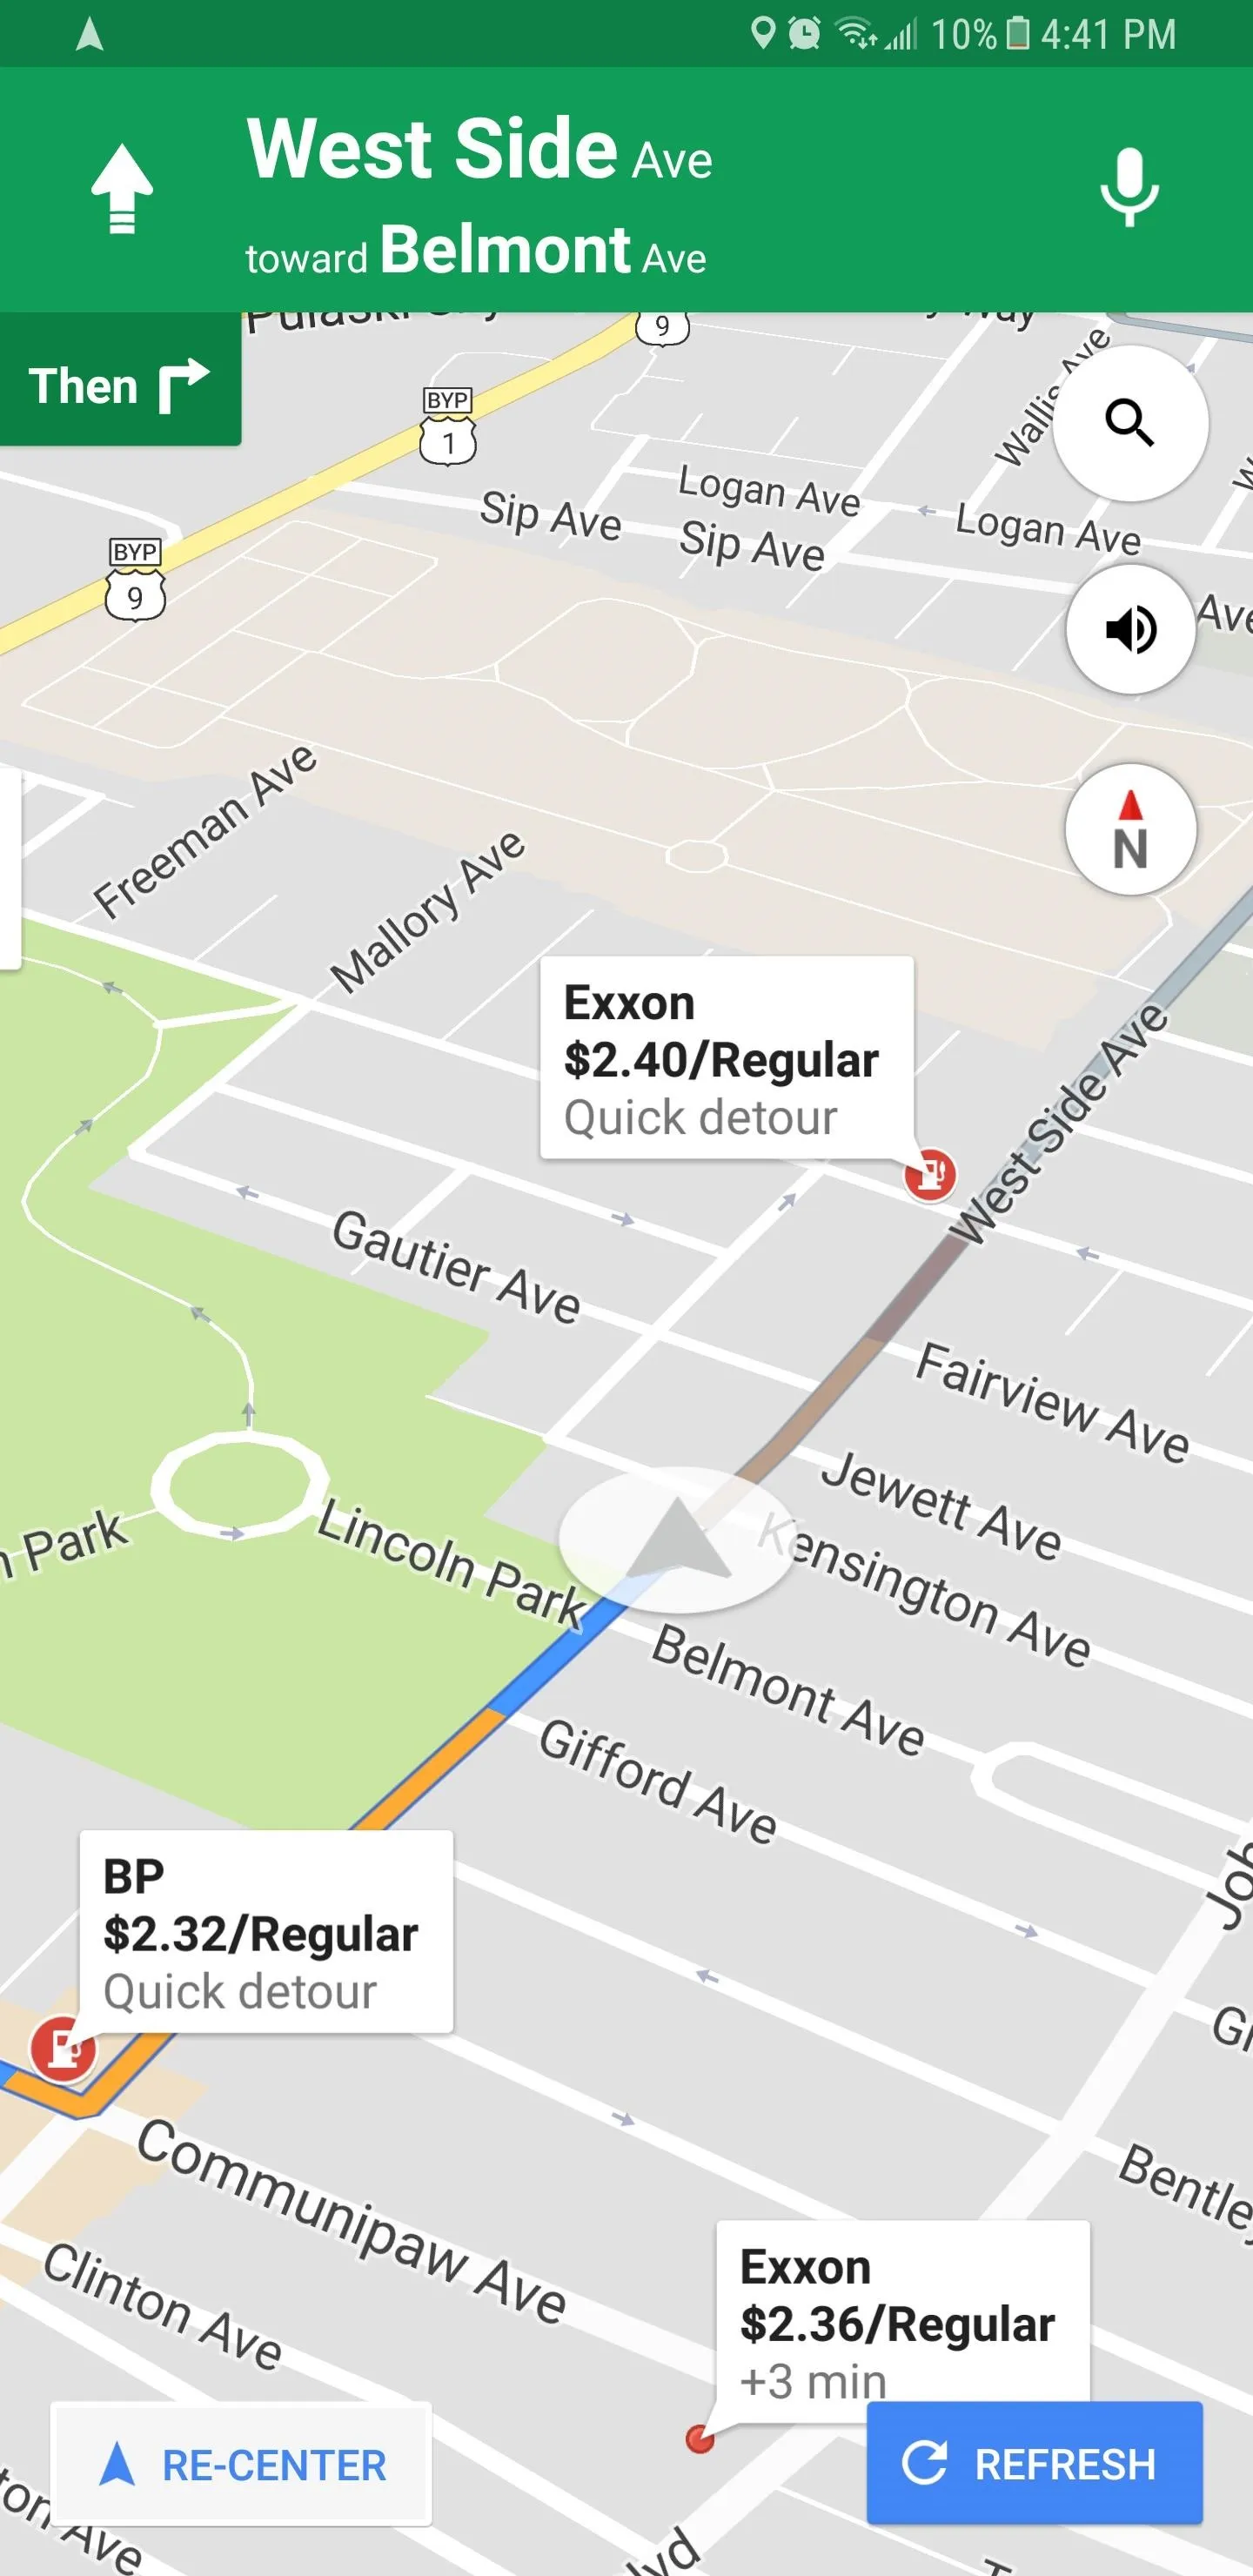
Once Google Maps enters navigation mode, tap on the magnifying glass icon in the upper-right corner of the screen. This will pull up popular suggestions for stops, such as gas stations restaurants and grocery stores.
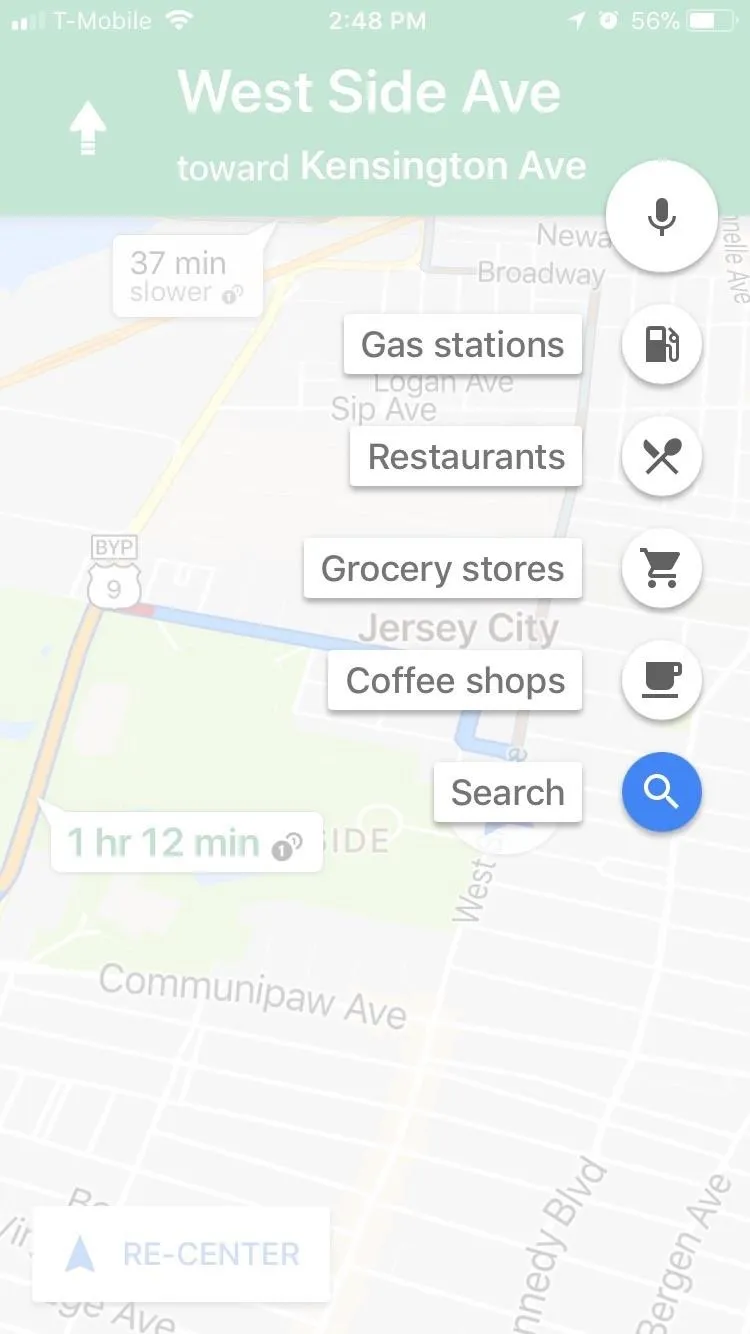
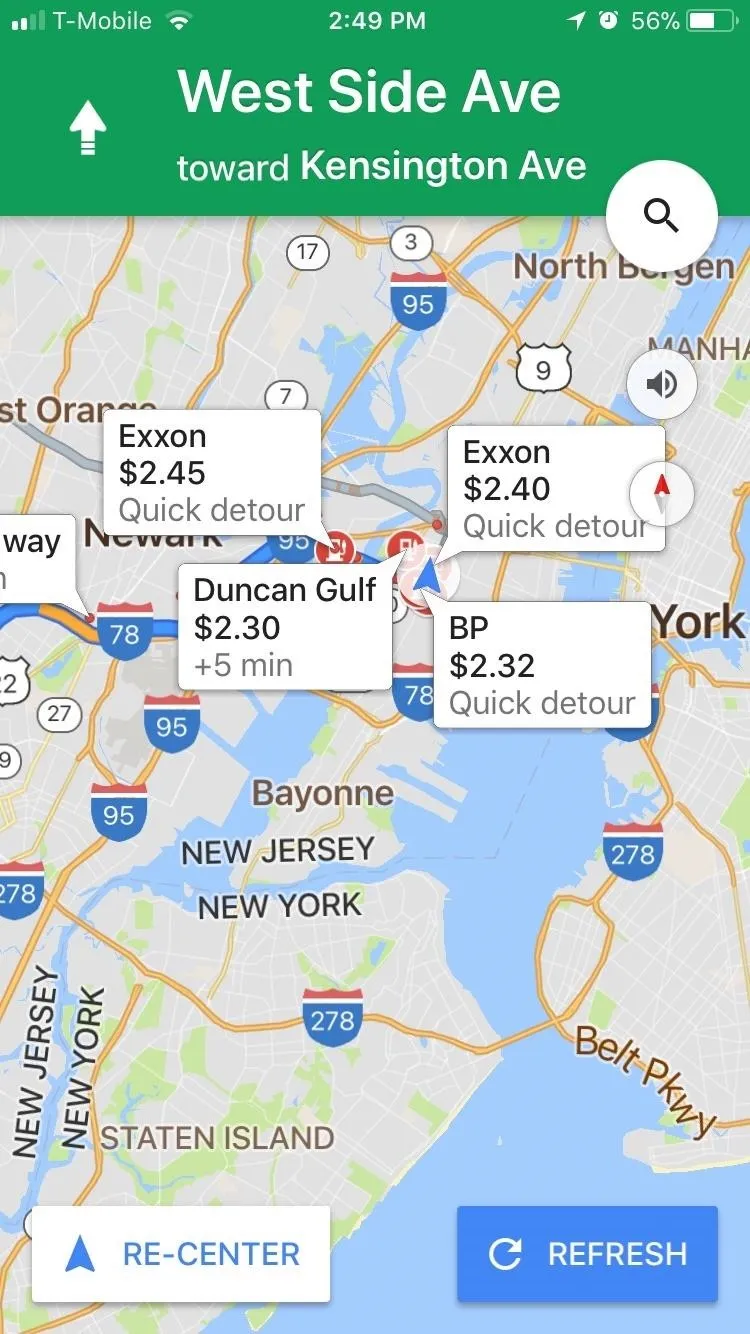
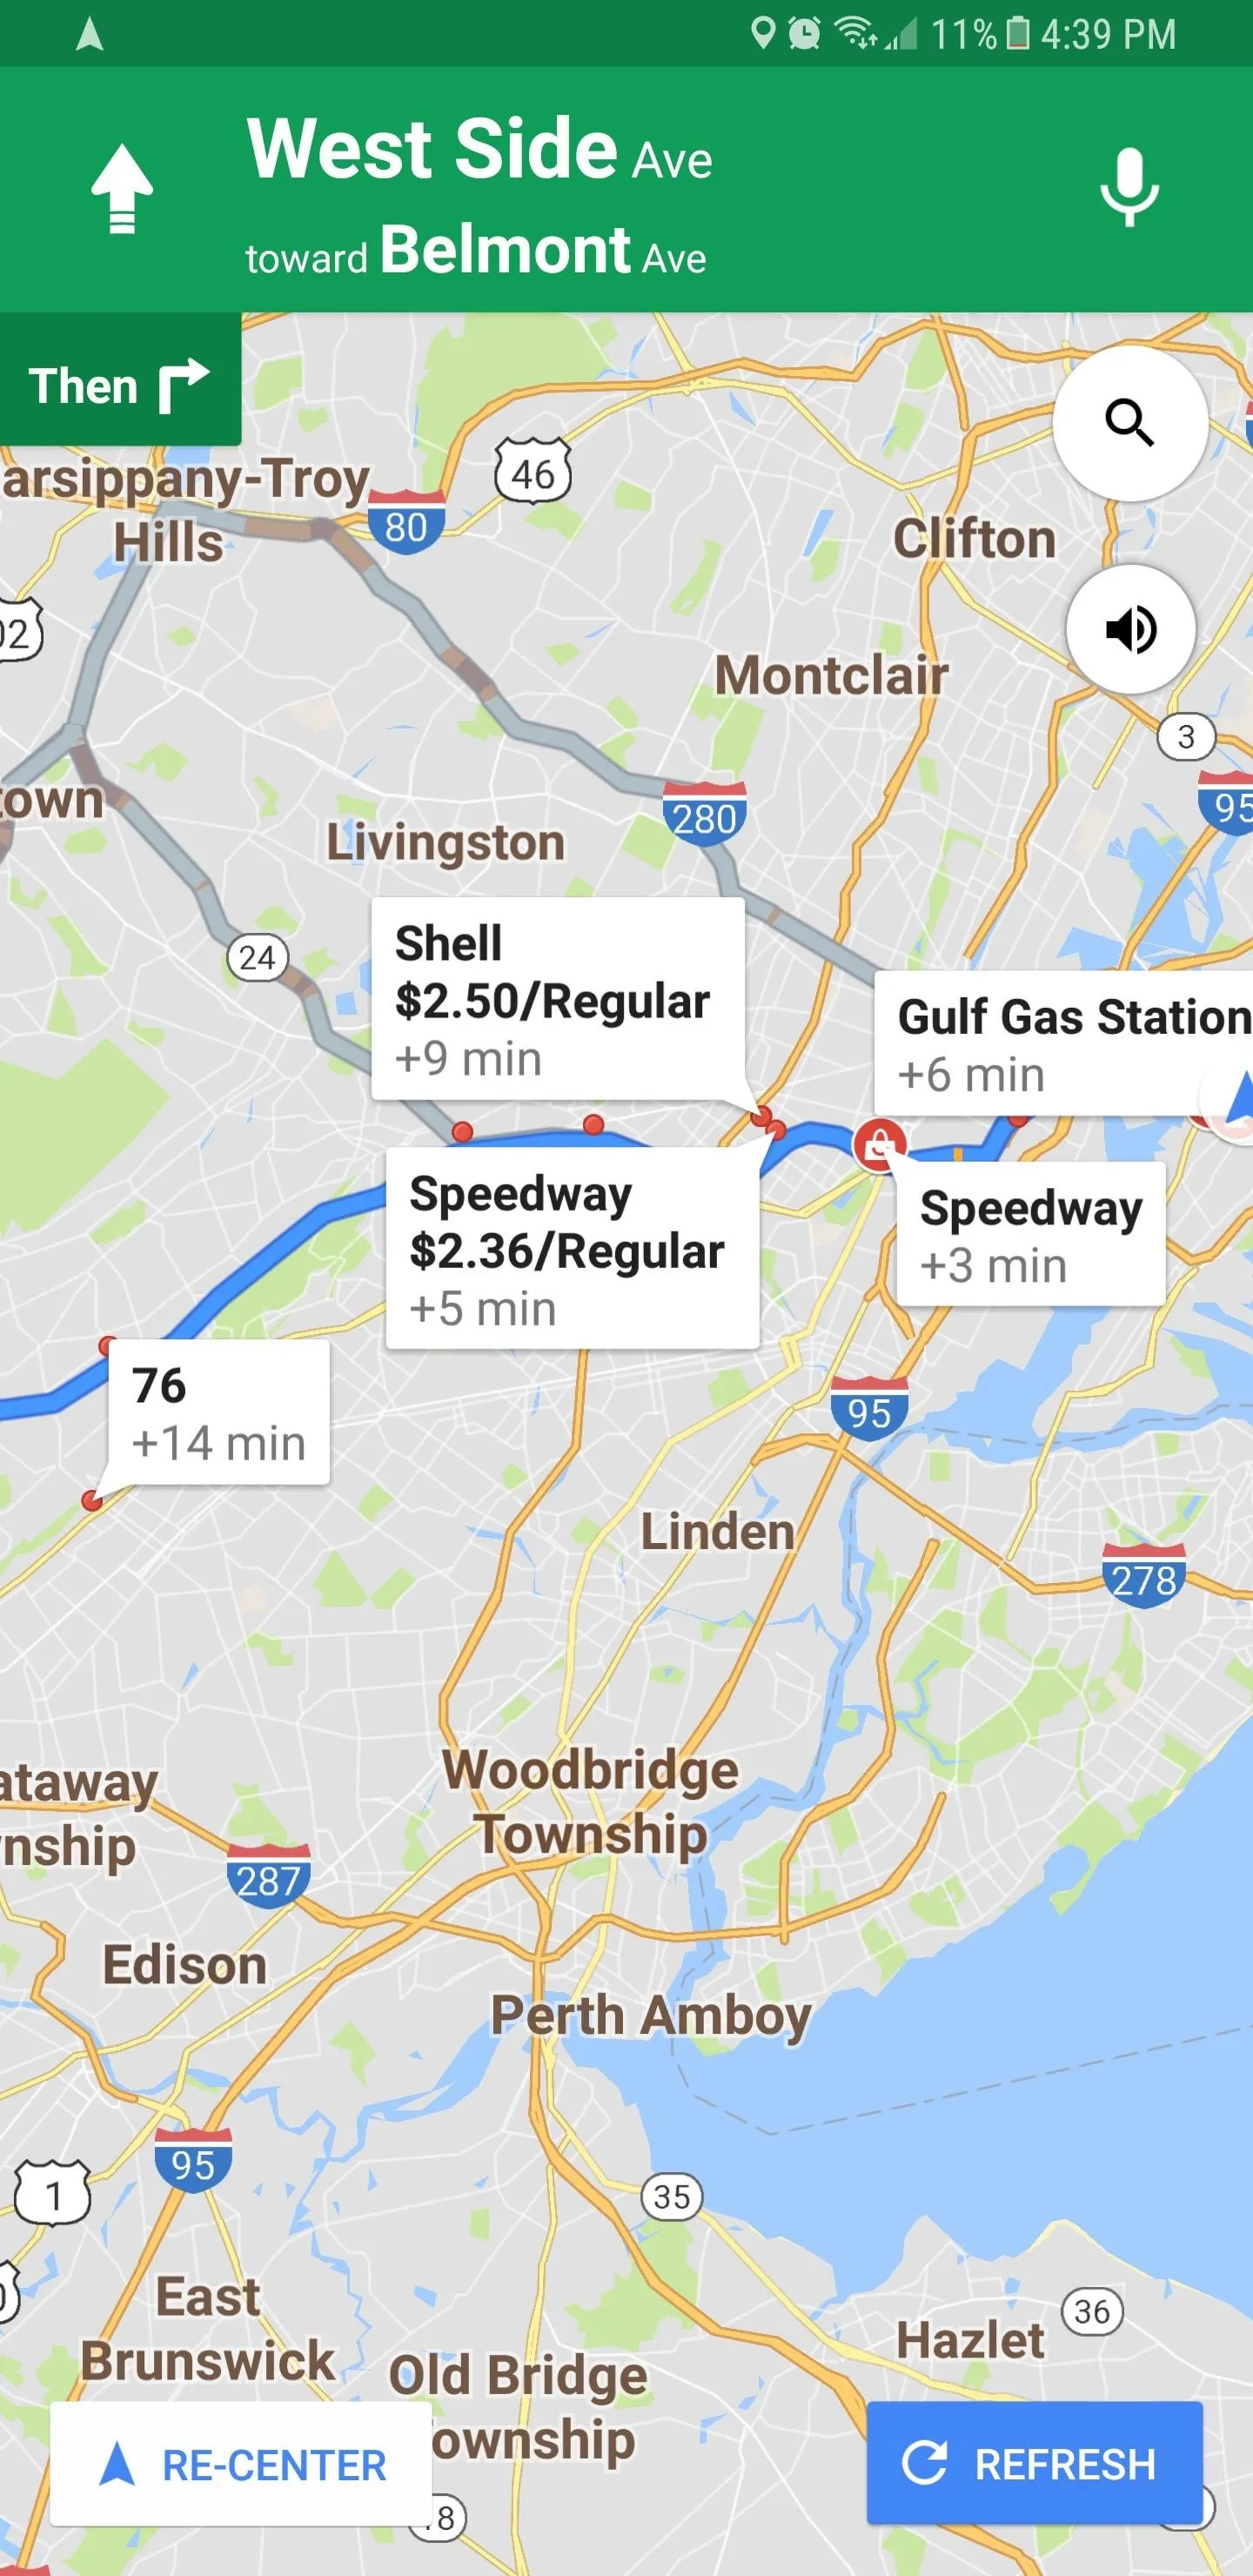
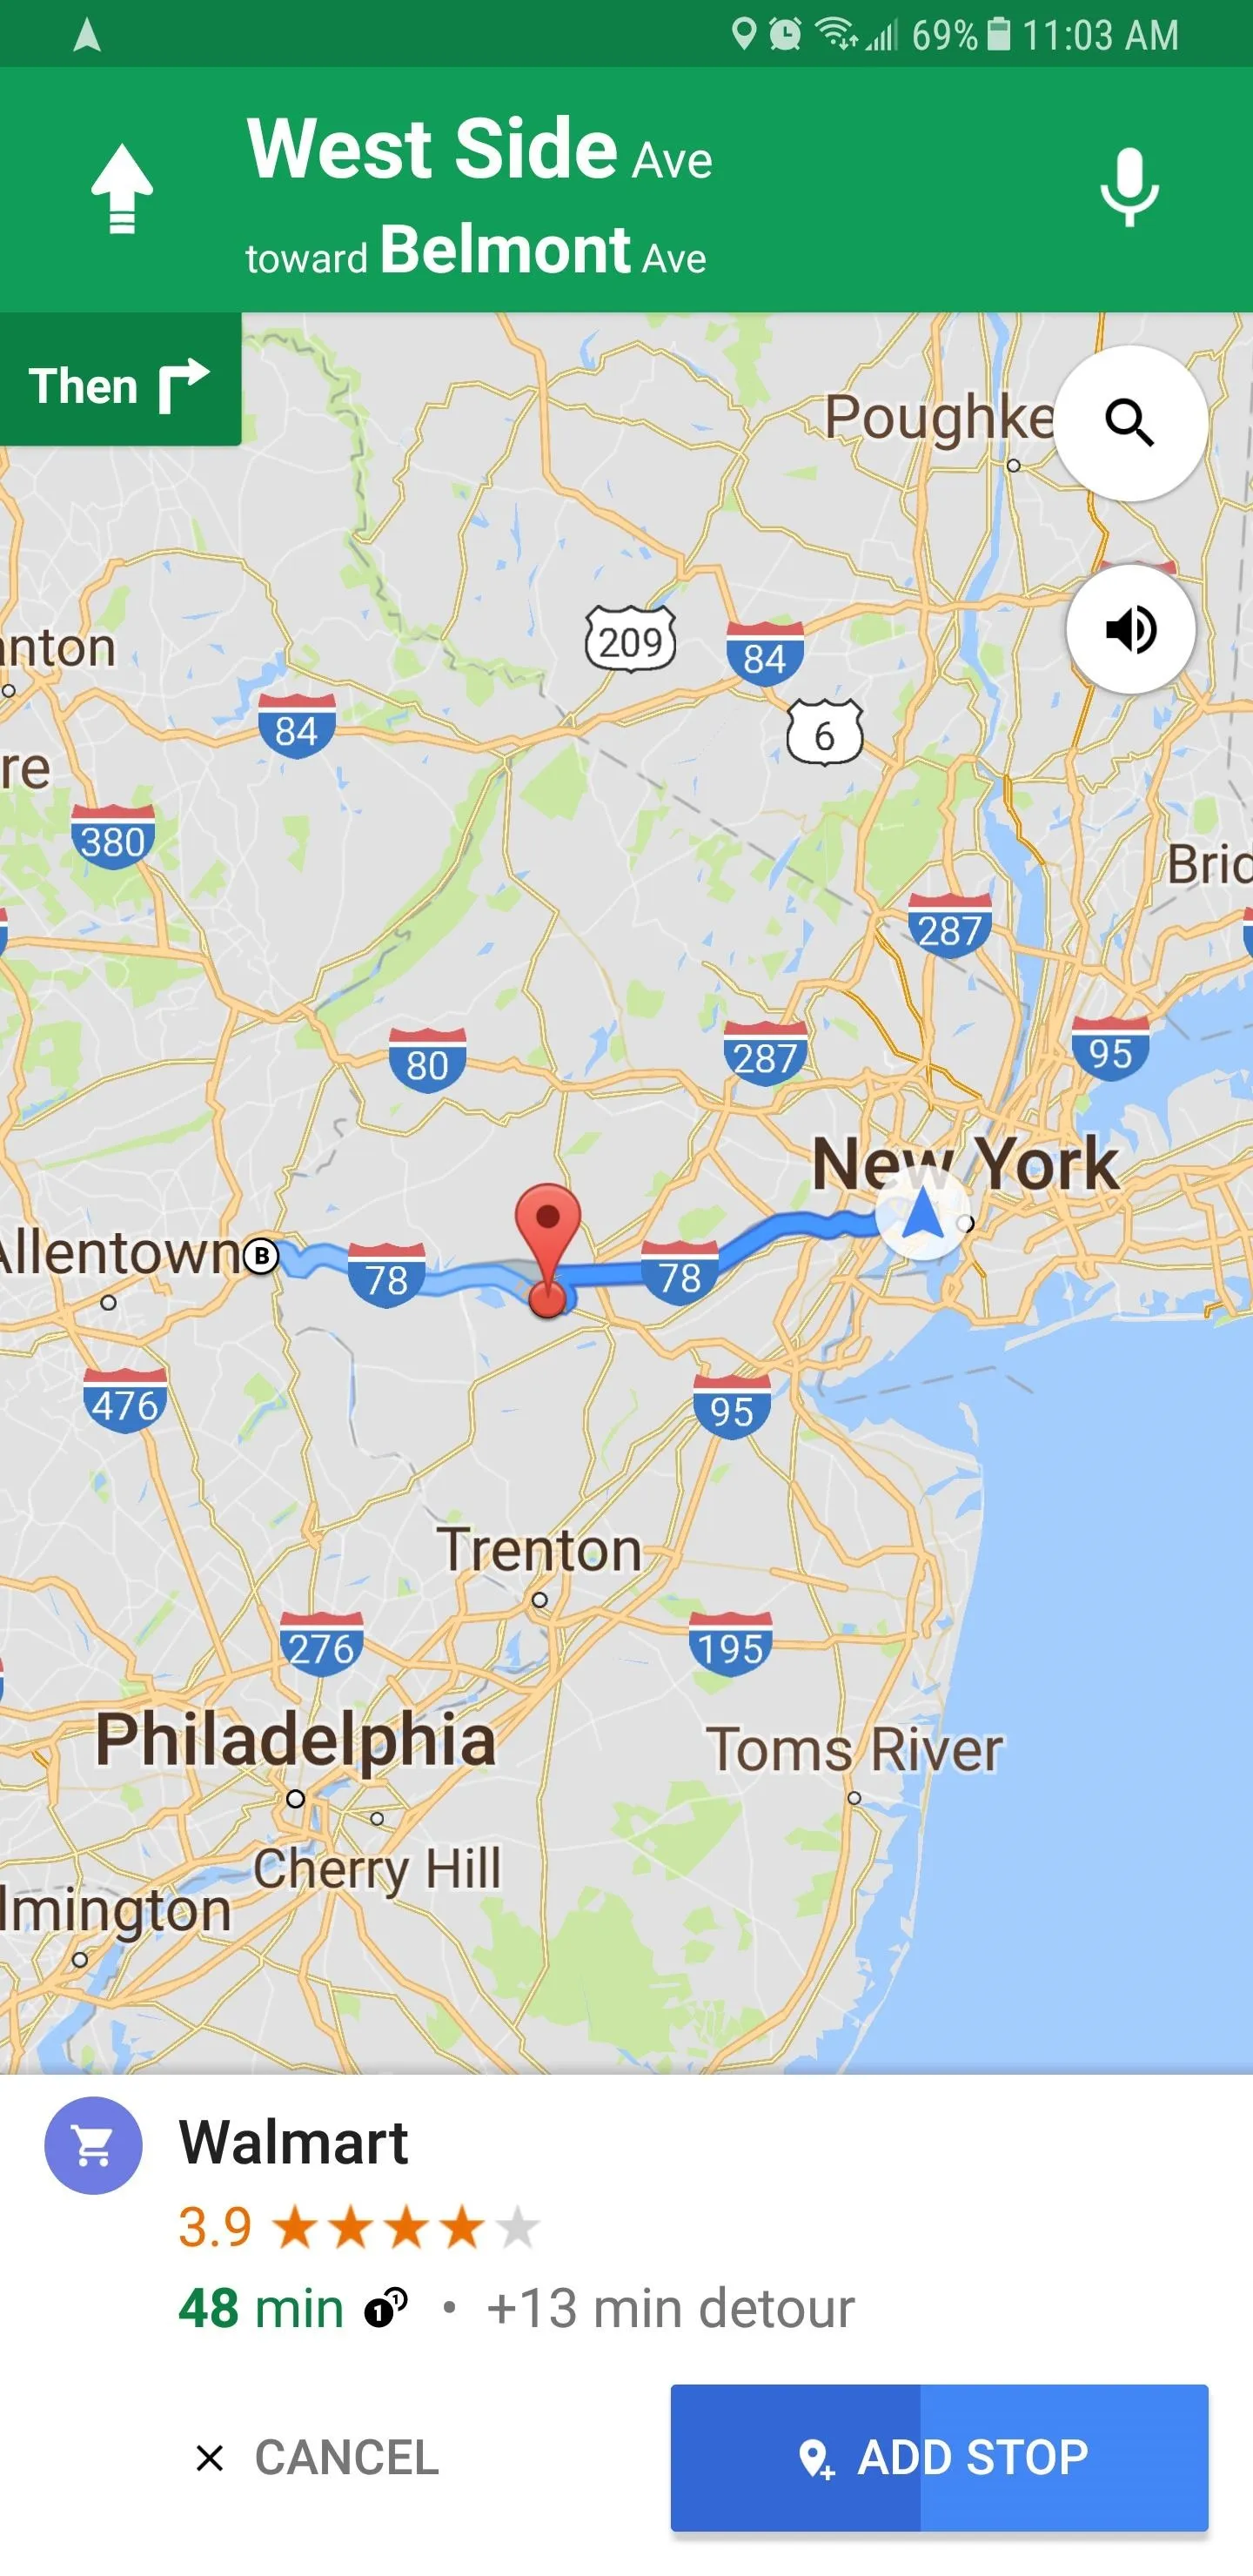
Selecting a category like "Gas stations" will yield all the gas stations that are located along your planned route, and it even shows their prices for you. Or, you can choose any of the other categories and it will pull up relevant results that are located along your planned route. If you decide you'd like to stop at one of these places, simply tap the result and it'll be added to your route automatically.
on iOS
on Android
on iOS
on Android
Add a Specific Location
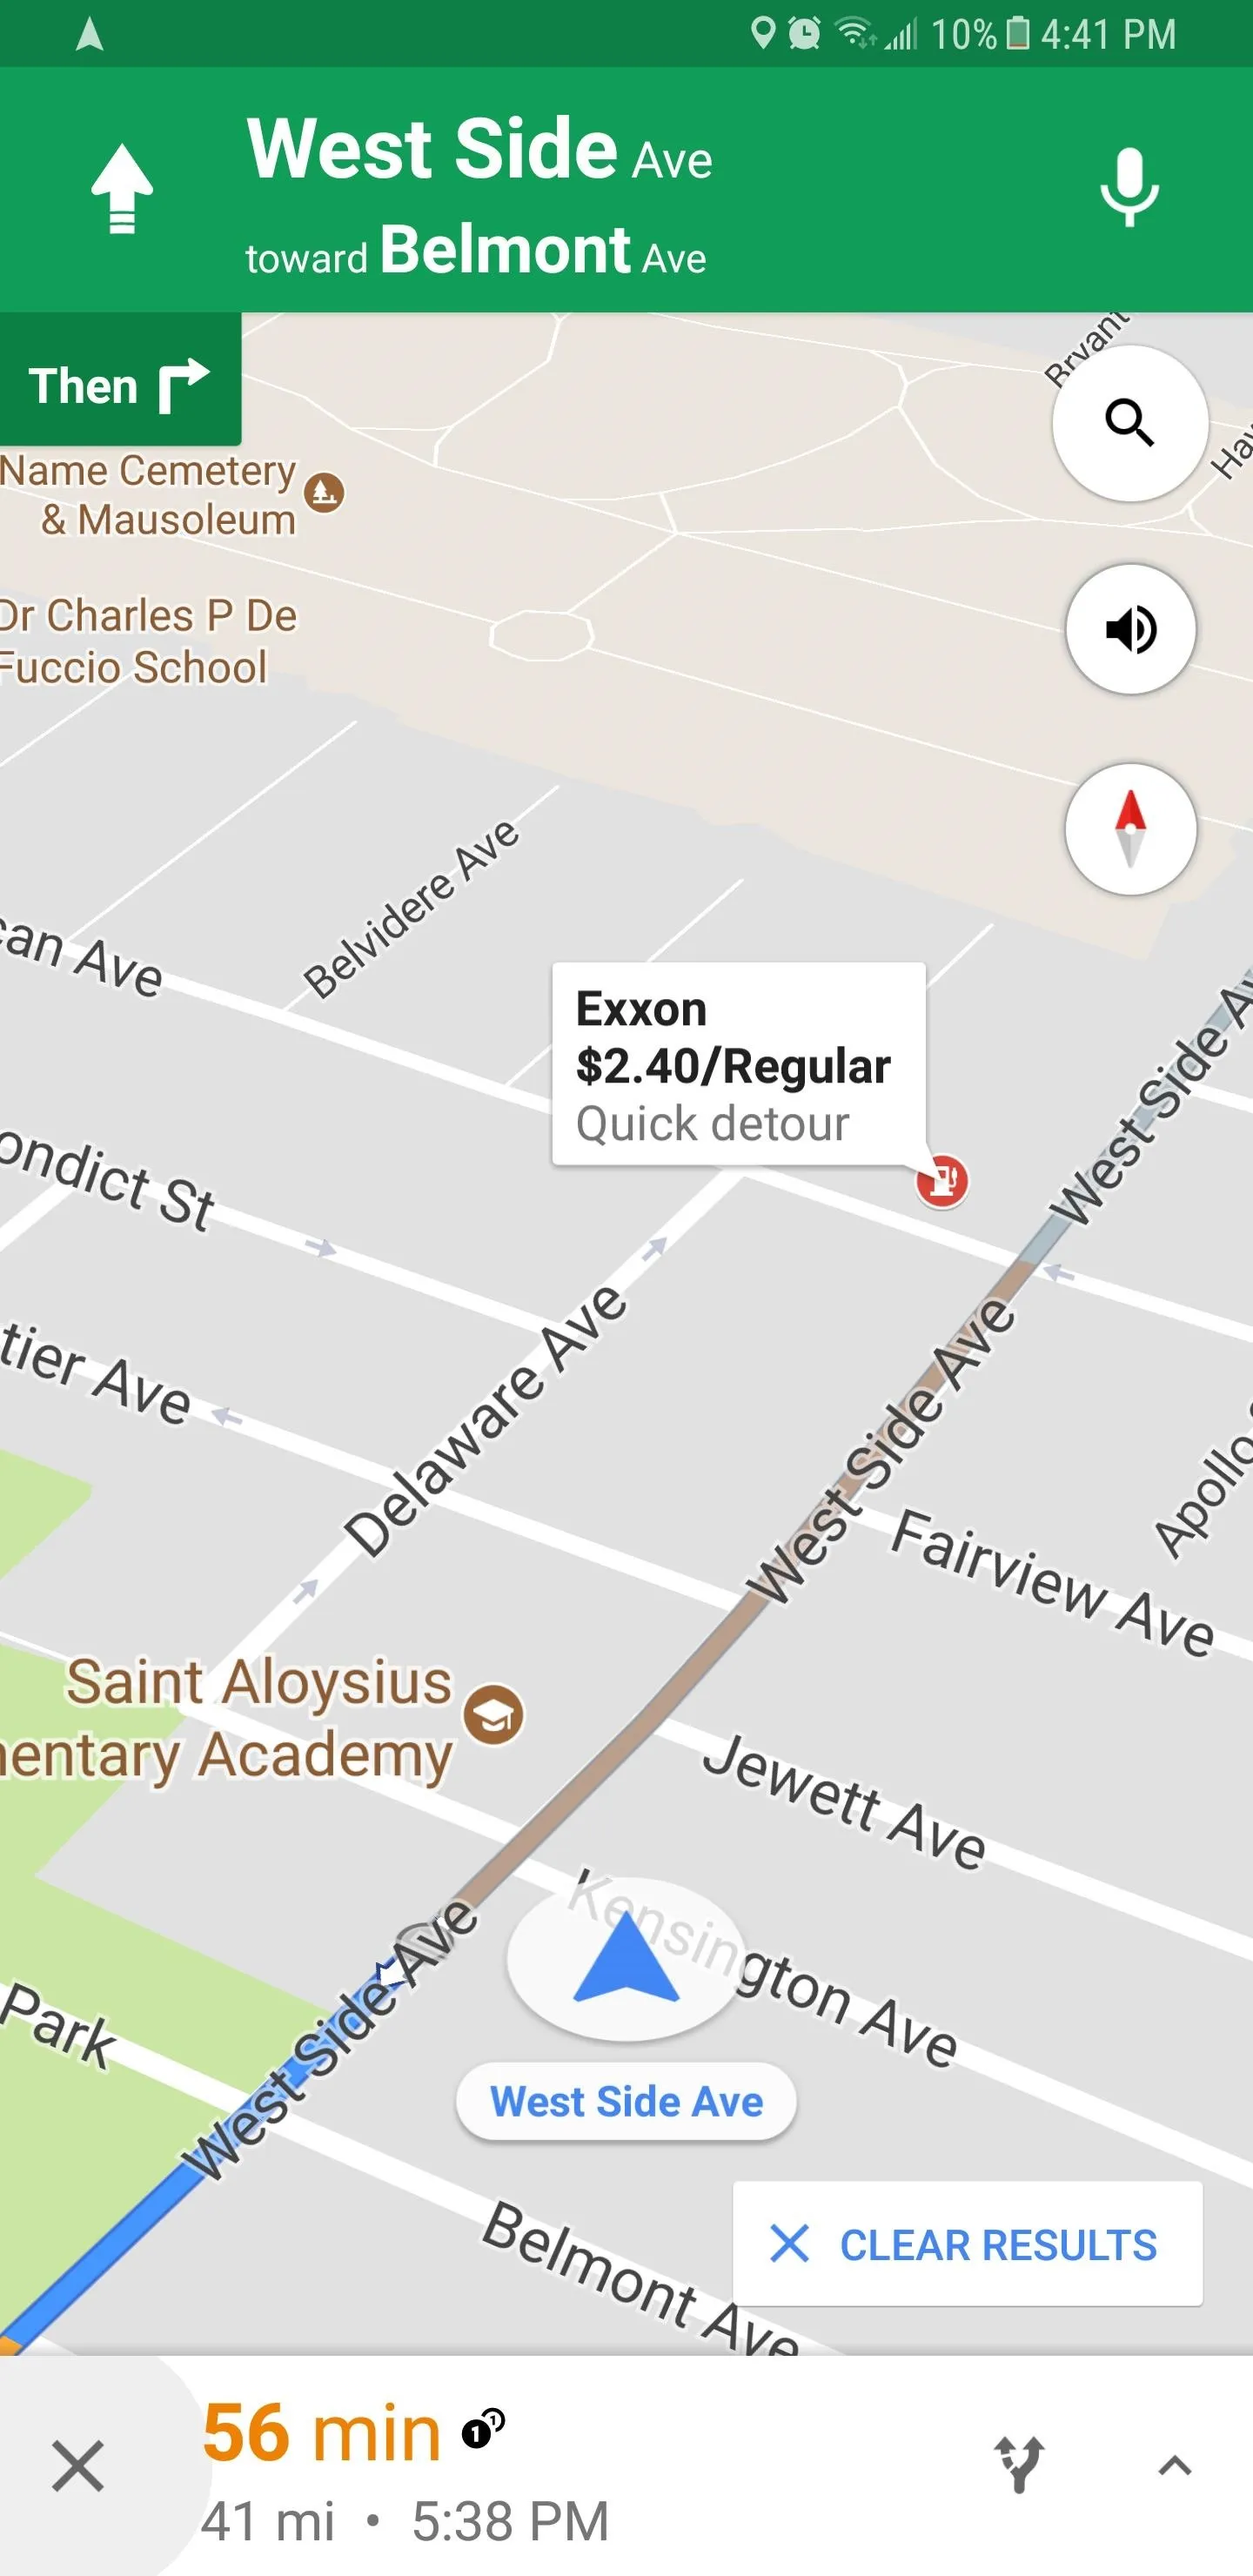
If you're looking for a more specific location, simply perform a search if you have an Android, or tap on "Search" to pull up a search bar that you can type into on iPhone. Once you've decided on a pit stop, simply tap on it, wait for it to load, and your route will automatically be updated.
Delete Pit Stop
Google Maps also lets you remove pit stops from your route, should you decide to go ahead and get to your destination uninterrupted. There are several ways to remove extra stops. For both Android and iOS, you can remove the stop either by tapping on the location pin and selecting "Remove stop," or by tapping on the caret (^) icon on the right-hand side of the banner and selecting "Remove next stop."
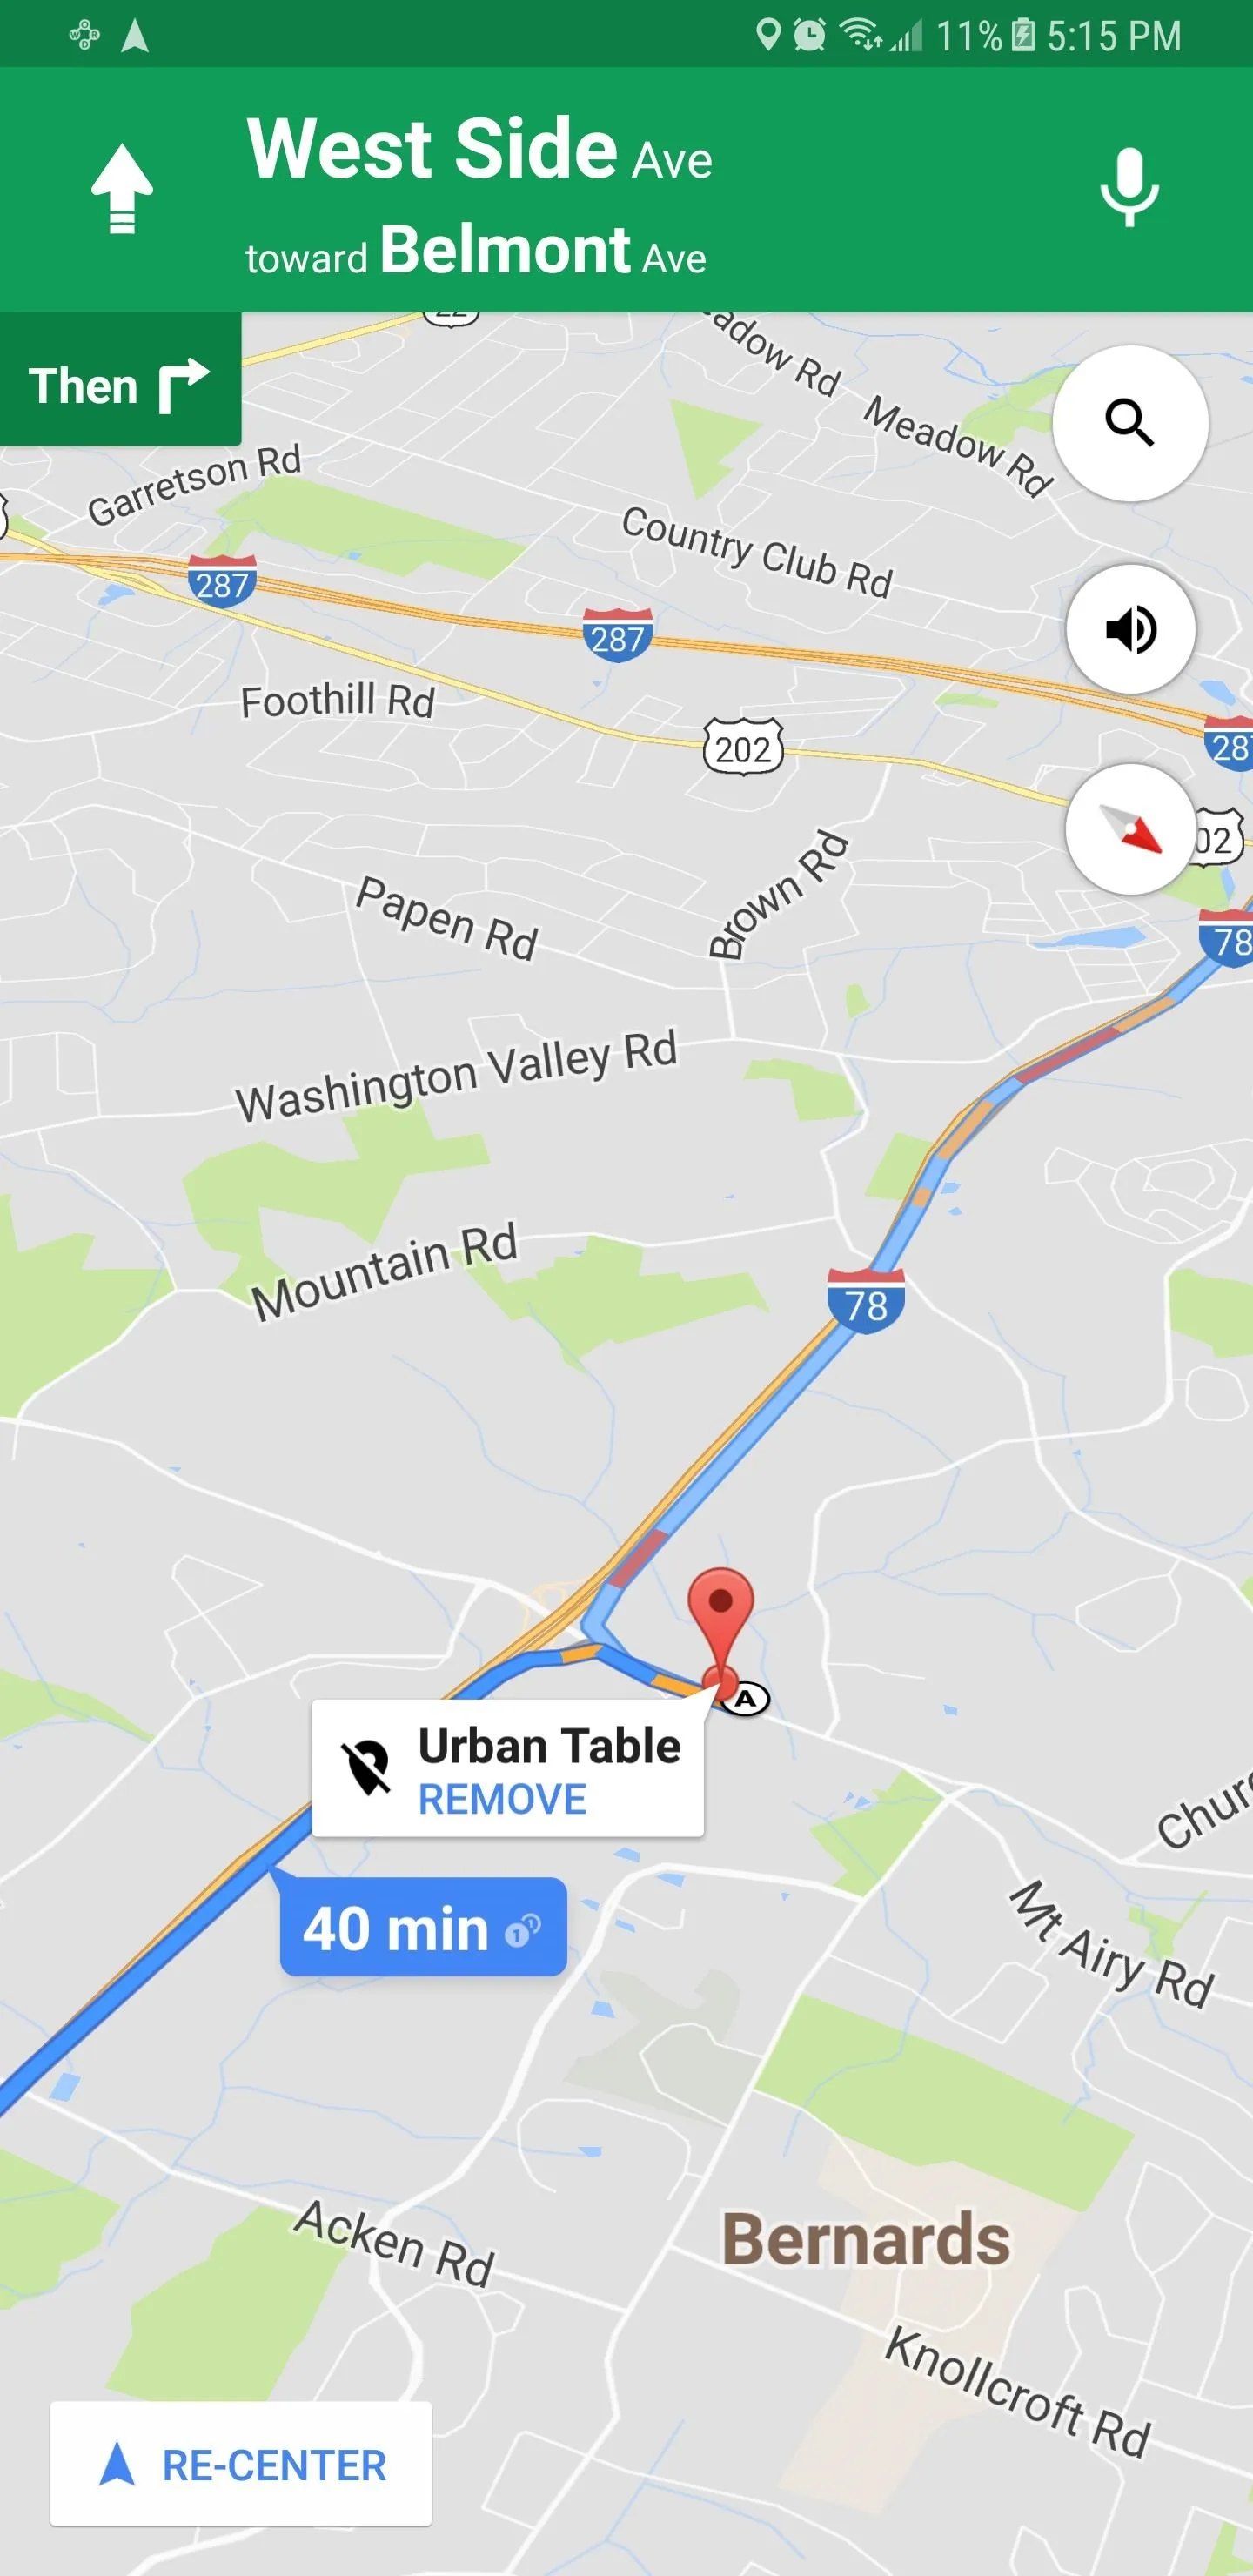
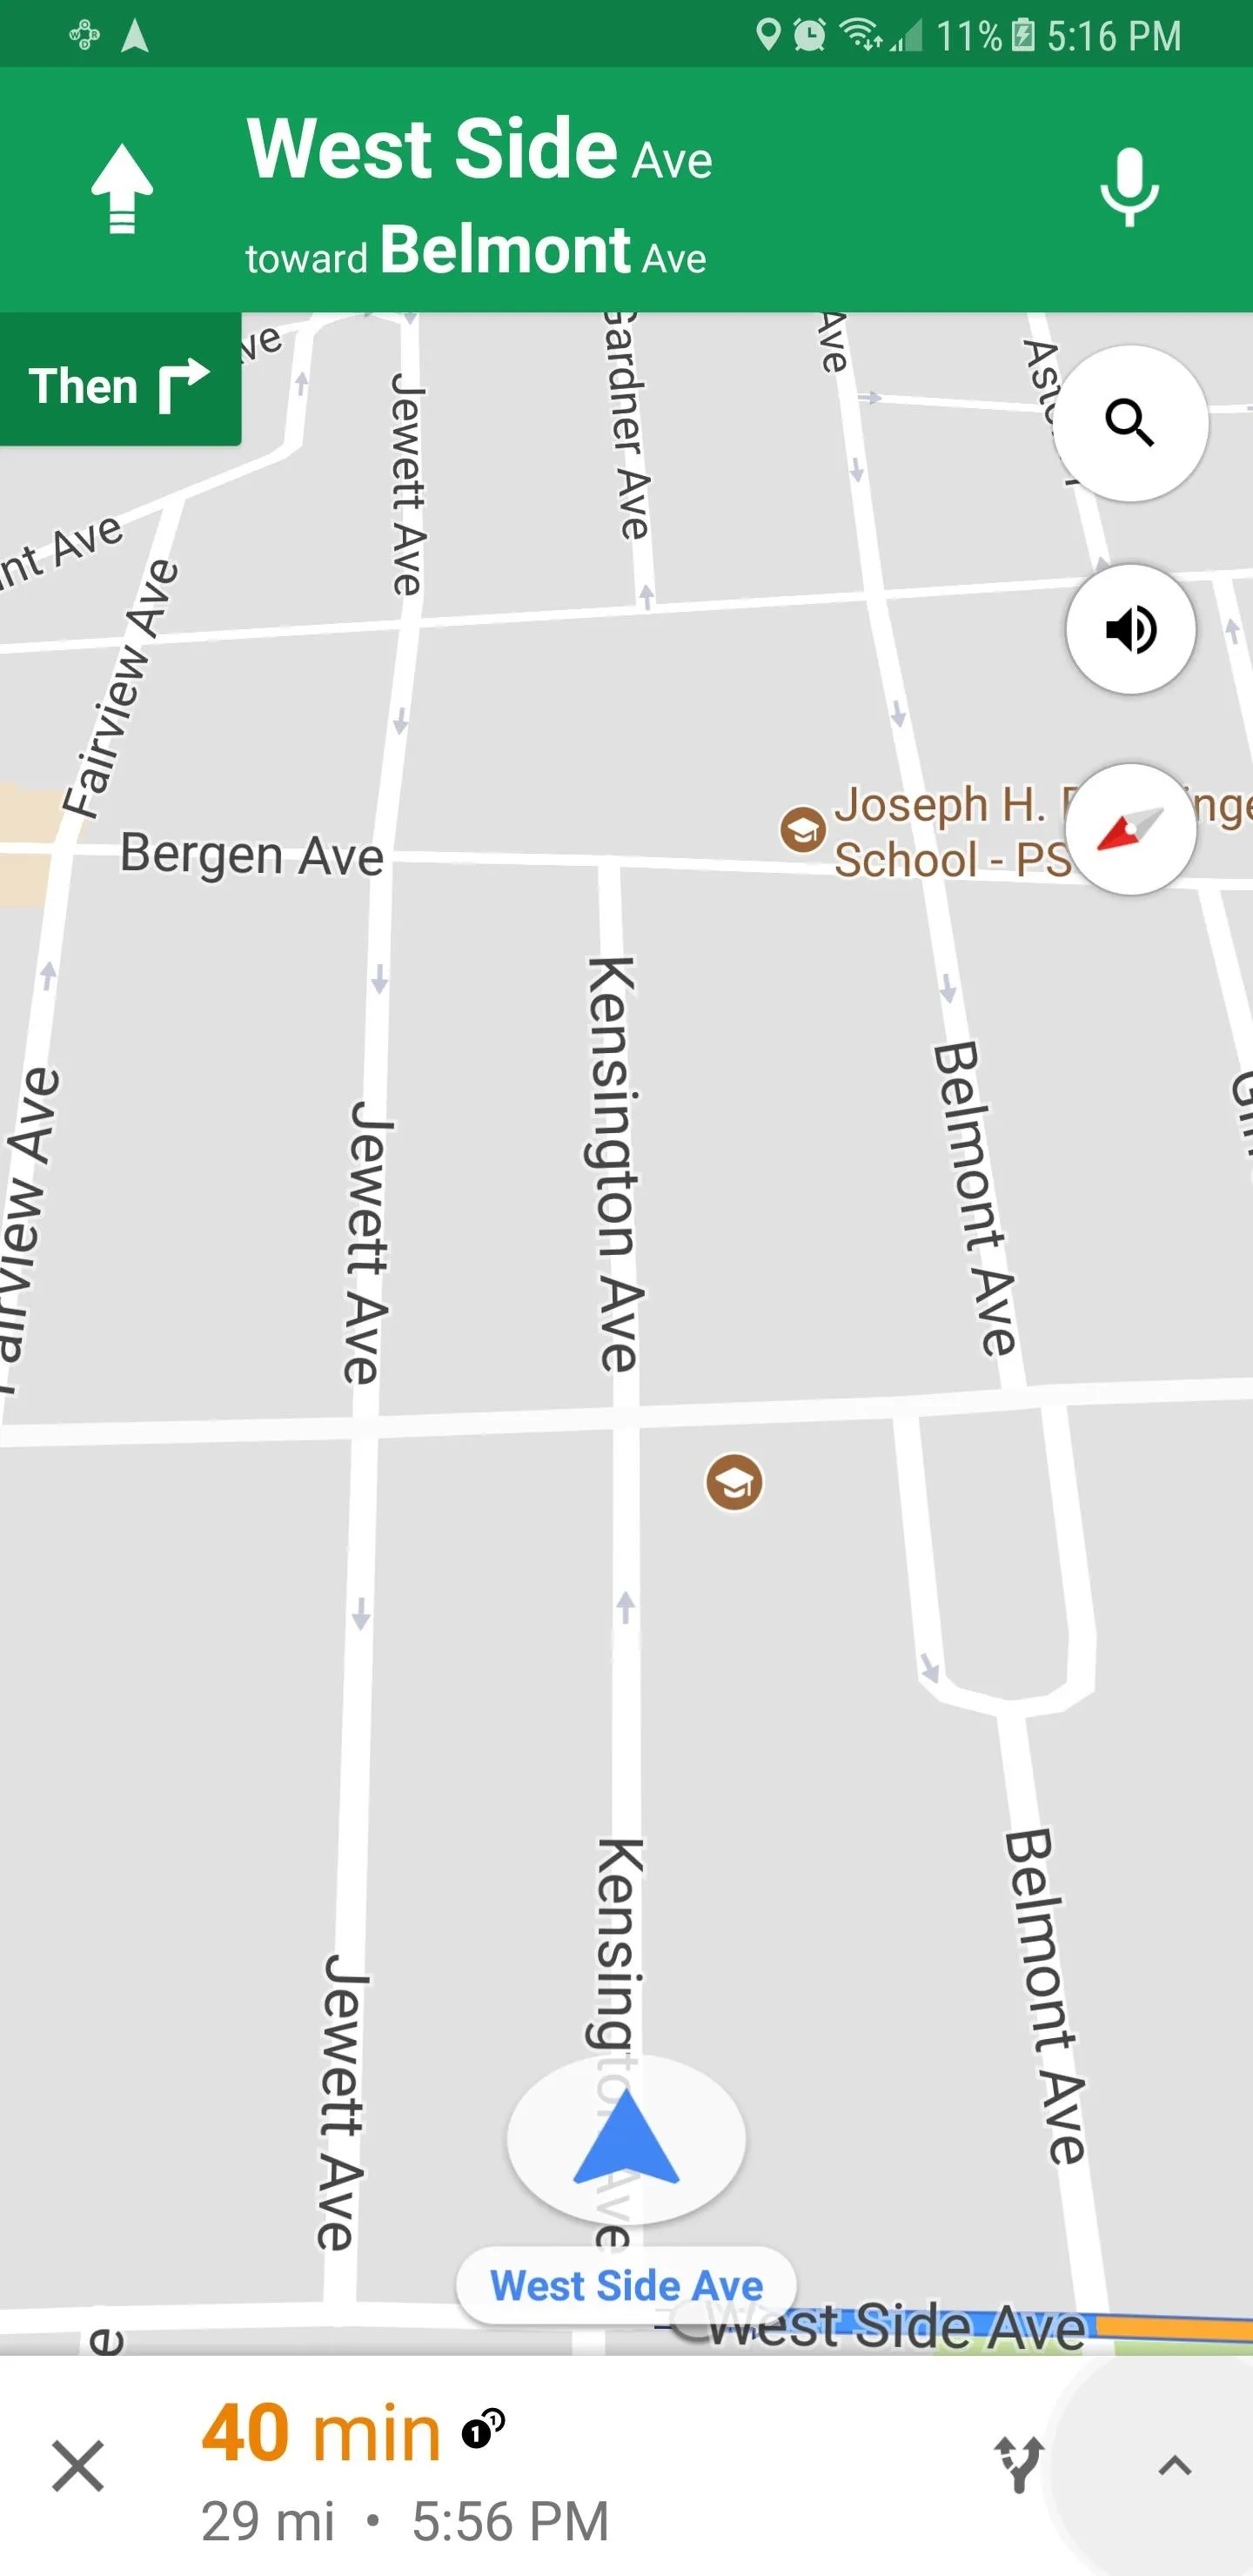
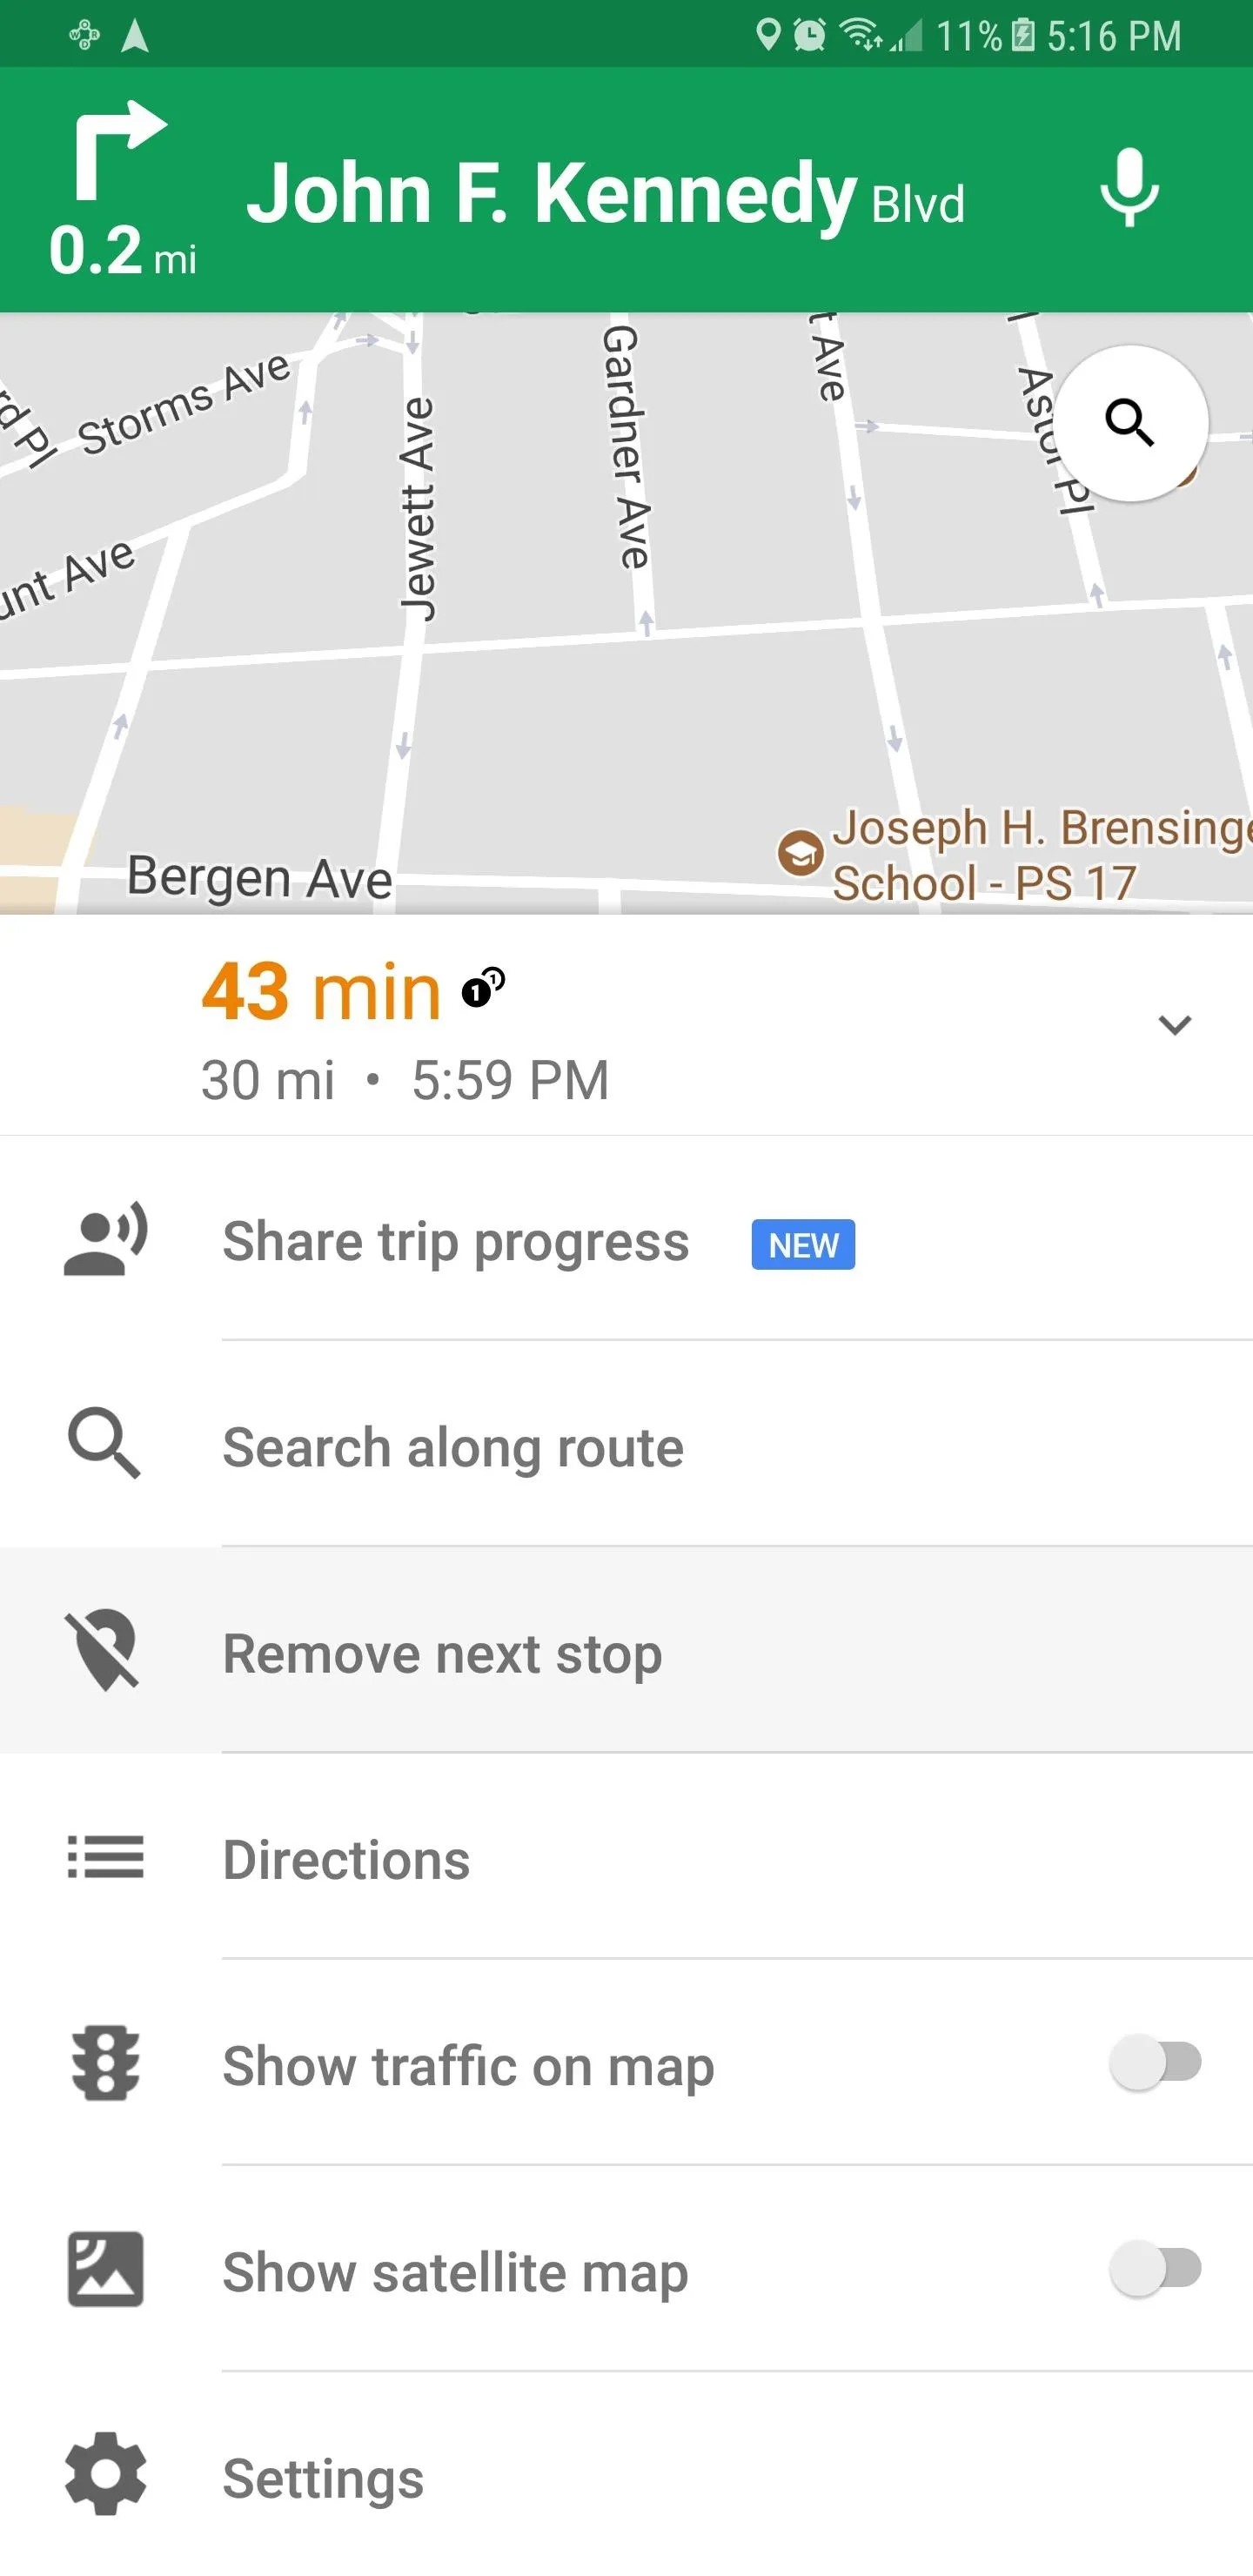
On Android, Google Maps offers an additional way of removing pit stops — just tap on the "X" button on the left-hand side of the banner at the bottom of your screen, then choose "Remove next stop."
As ready as you are for your next road trip, it's really comforting to know that Google Maps has your back in case something unforeseen forces you to stop while somewhere unfamiliar. What do you think about this feature? Let us know in the comment section below.
- Follow Gadget Hacks on Facebook, Twitter, Google+, YouTube, and Instagram
- Follow WonderHowTo on Facebook, Twitter, Pinterest, and Google+
Cover image and screenshots by Amboy Manalo/Gadget Hacks


Comments
Be the first, drop a comment!