Although not quite as common today with the always-connected world we live in, you still might be having bandwidth wars in your home right now. If the internet connection in your area is mediocre, you know the feeling well. Google Stadia recommends having a 25 Mbps connection for playing in 4K, so you can expect to need at least that much to maintain a smooth, high-quality gaming session.
Even if you don't plan on streaming 4K on Stadia, you still need a stable flow of bandwidth to ensure maximum performance with minimal hiccups. Games can't buffer in the same manner that videos do, which means they can freeze or lock up when network traffic gets bogged down. If you have Nest Wifi or Google Wifi, there's something you can do to make your Stadia gaming sessions take priority over other devices.
Use the Google Wifi App
Google Wifi is the original app that you might have used to set up your Google Wifi network a while back. The newer method involves setting up and managing your Google or Nest Wifi from the Google Home app. However, they didn't forget about the original app, either. Google recently added an option in the settings to automatically optimize your network bandwidth for Stadia gaming when active.
Download Google Wifi
To get the gaming preferred option in your Google Wifi app, you'll need to install or update as needed. Hit the link below to make sure Google Wifi is up to date and ready to go for the next step.
Enable the Gaming Preferred Option
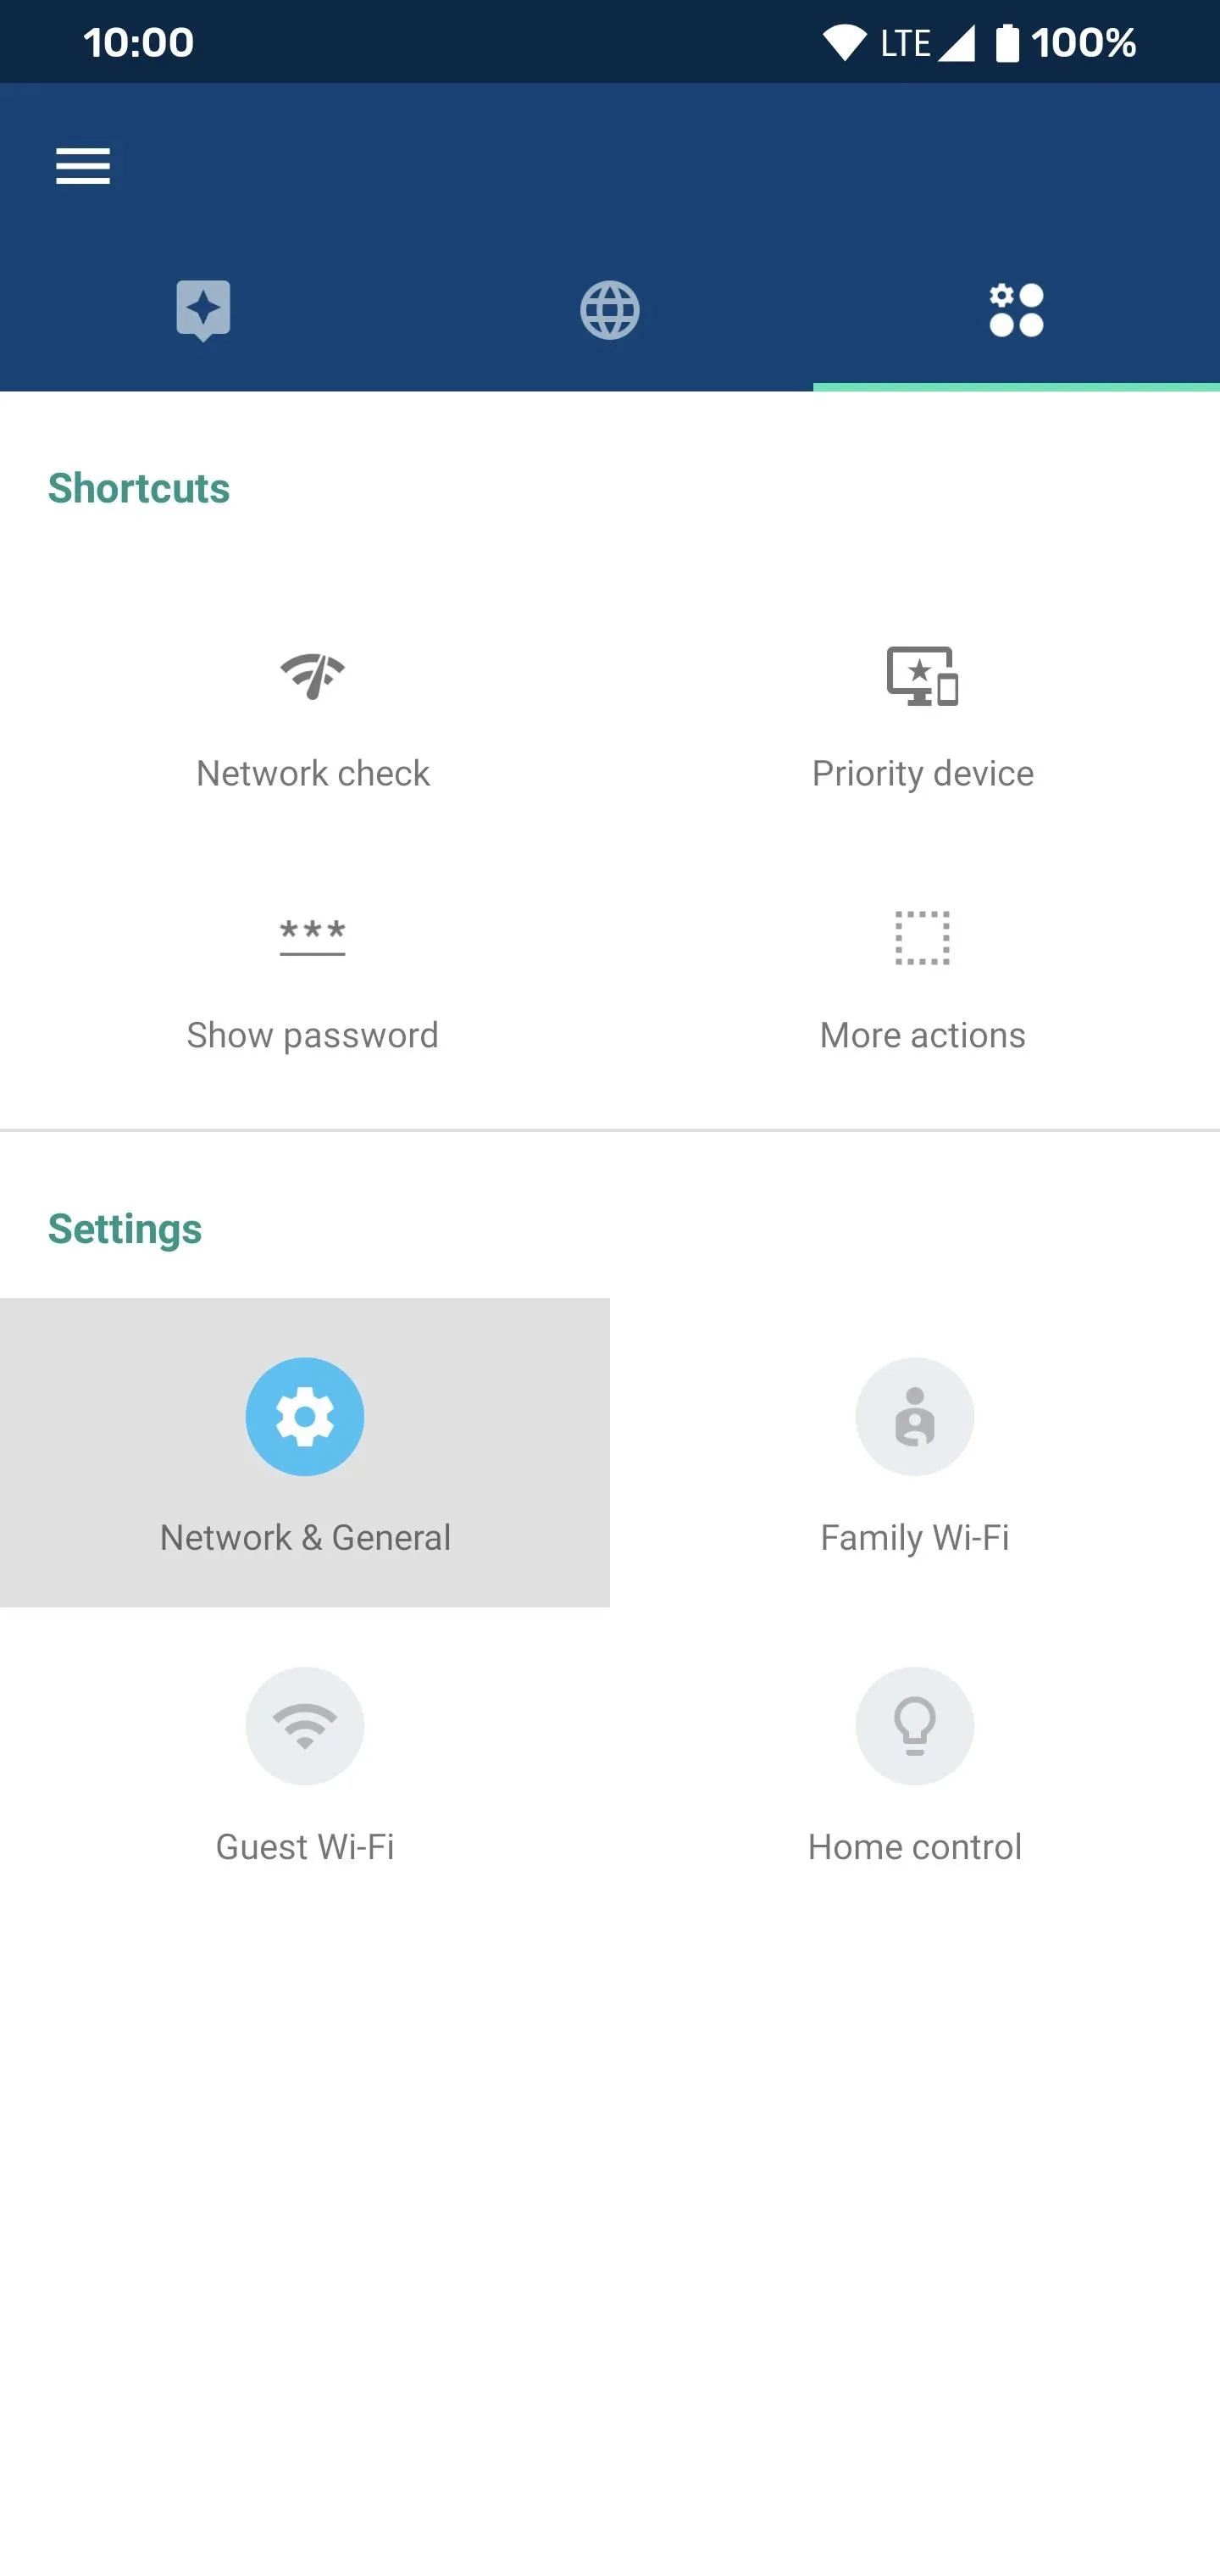
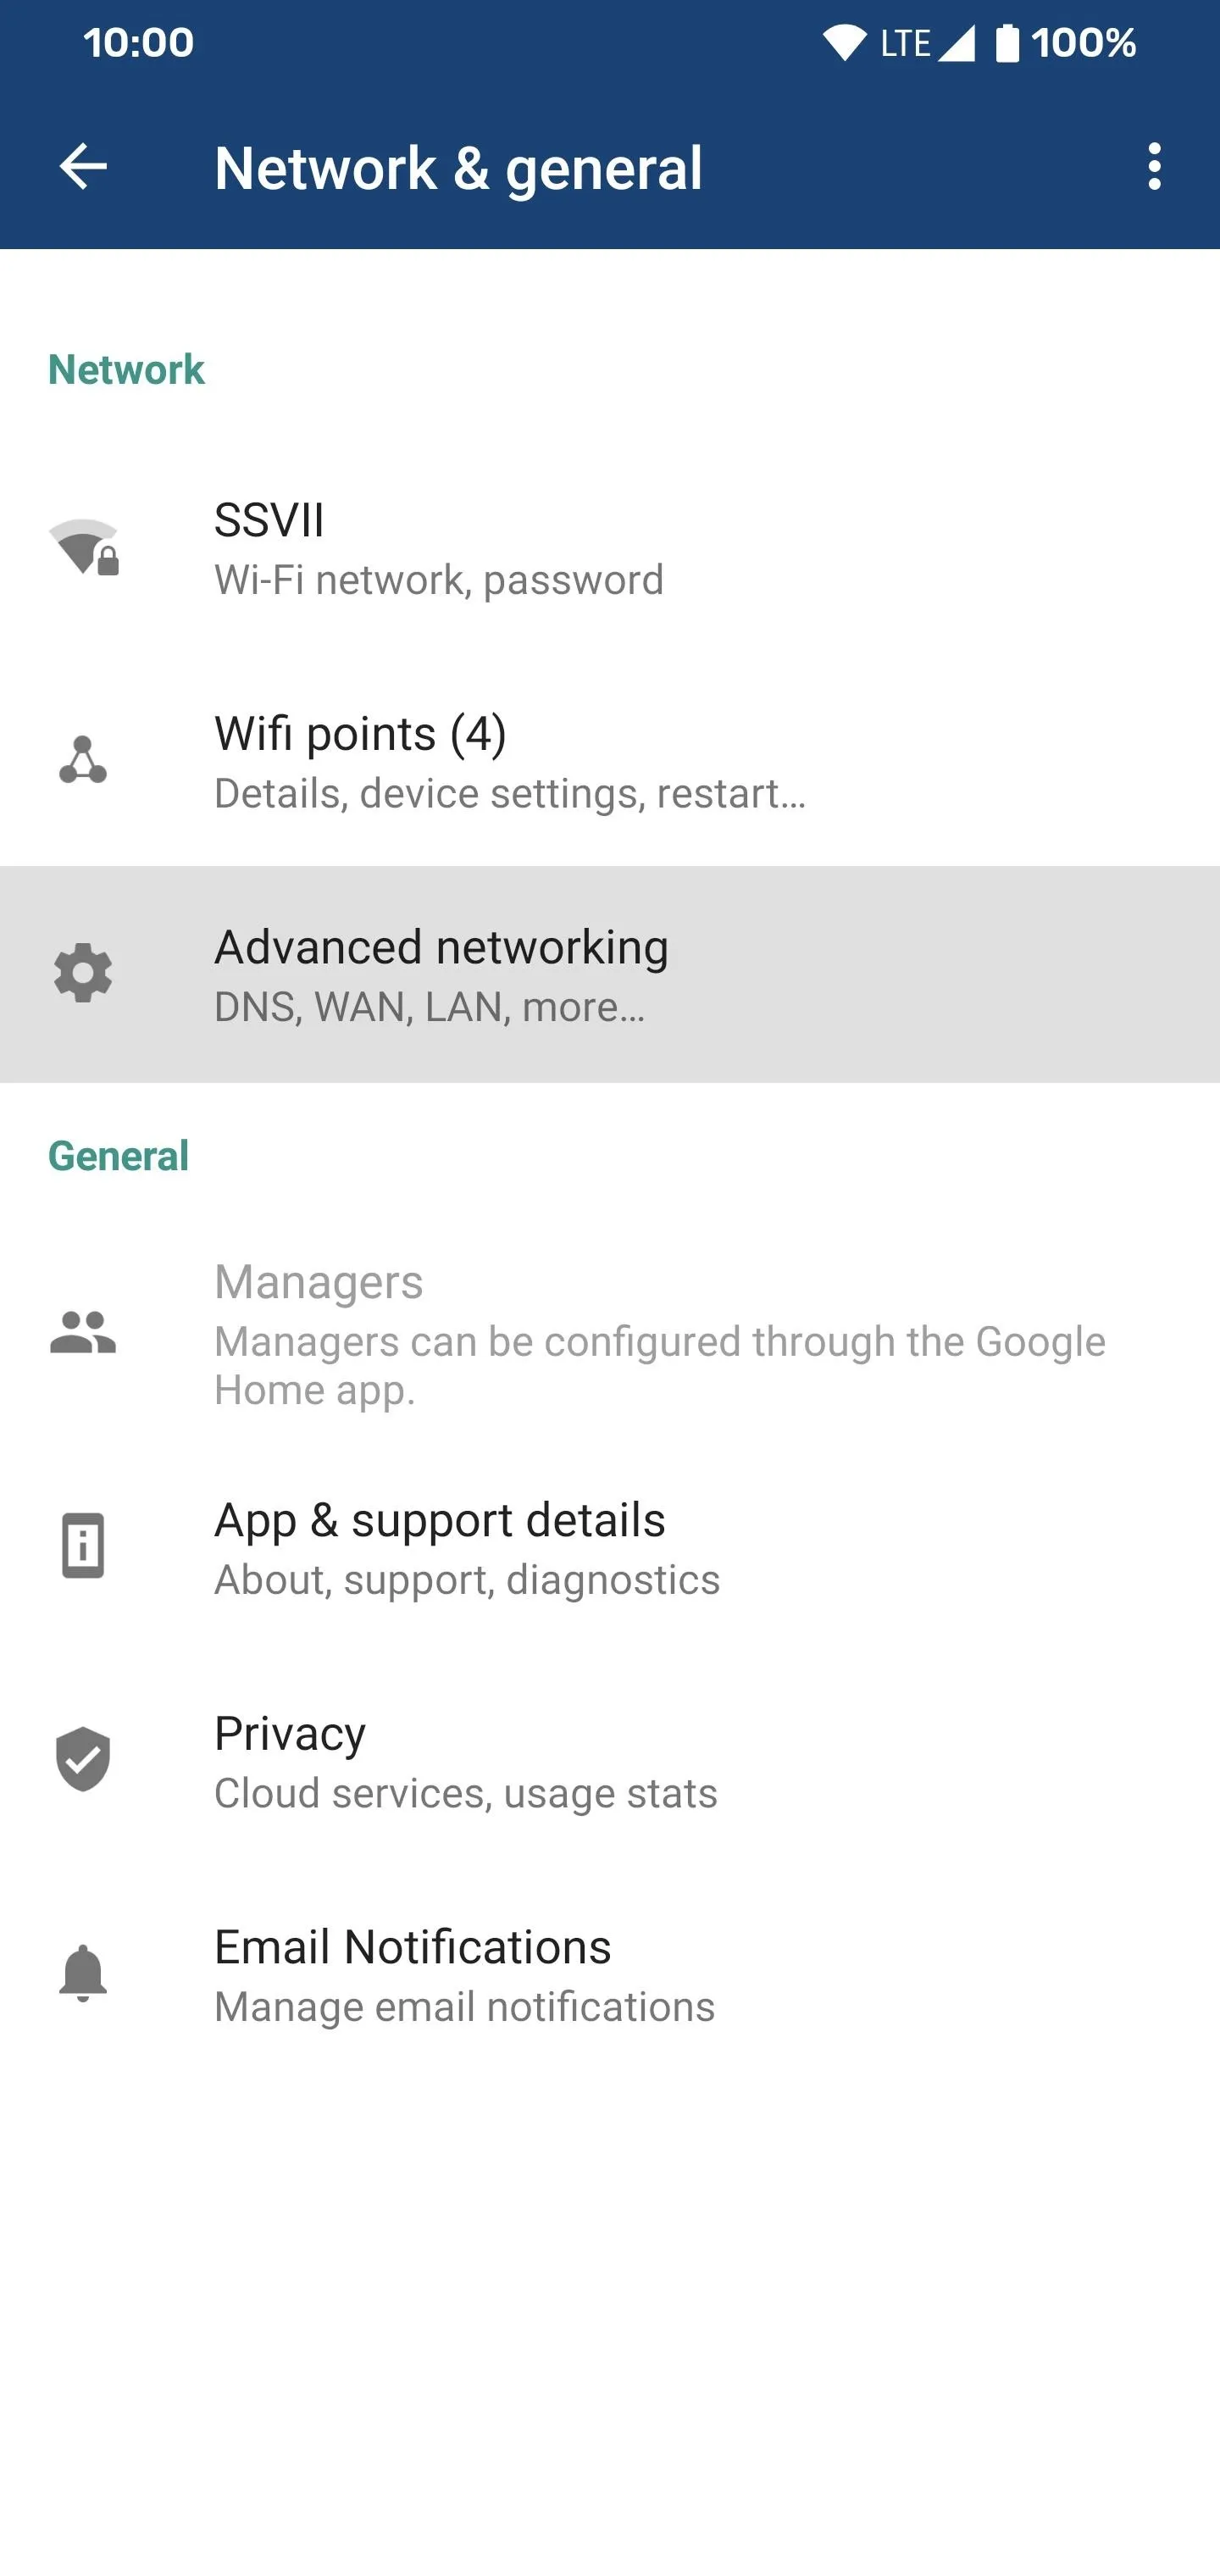
Open the Google Wifi app to the main screen, then tap the settings tab on the far right. Go to "Network & general," then head into the "Advanced networking" section. Locate the "Gaming preferred" entry at the bottom of the list, then tap it once.
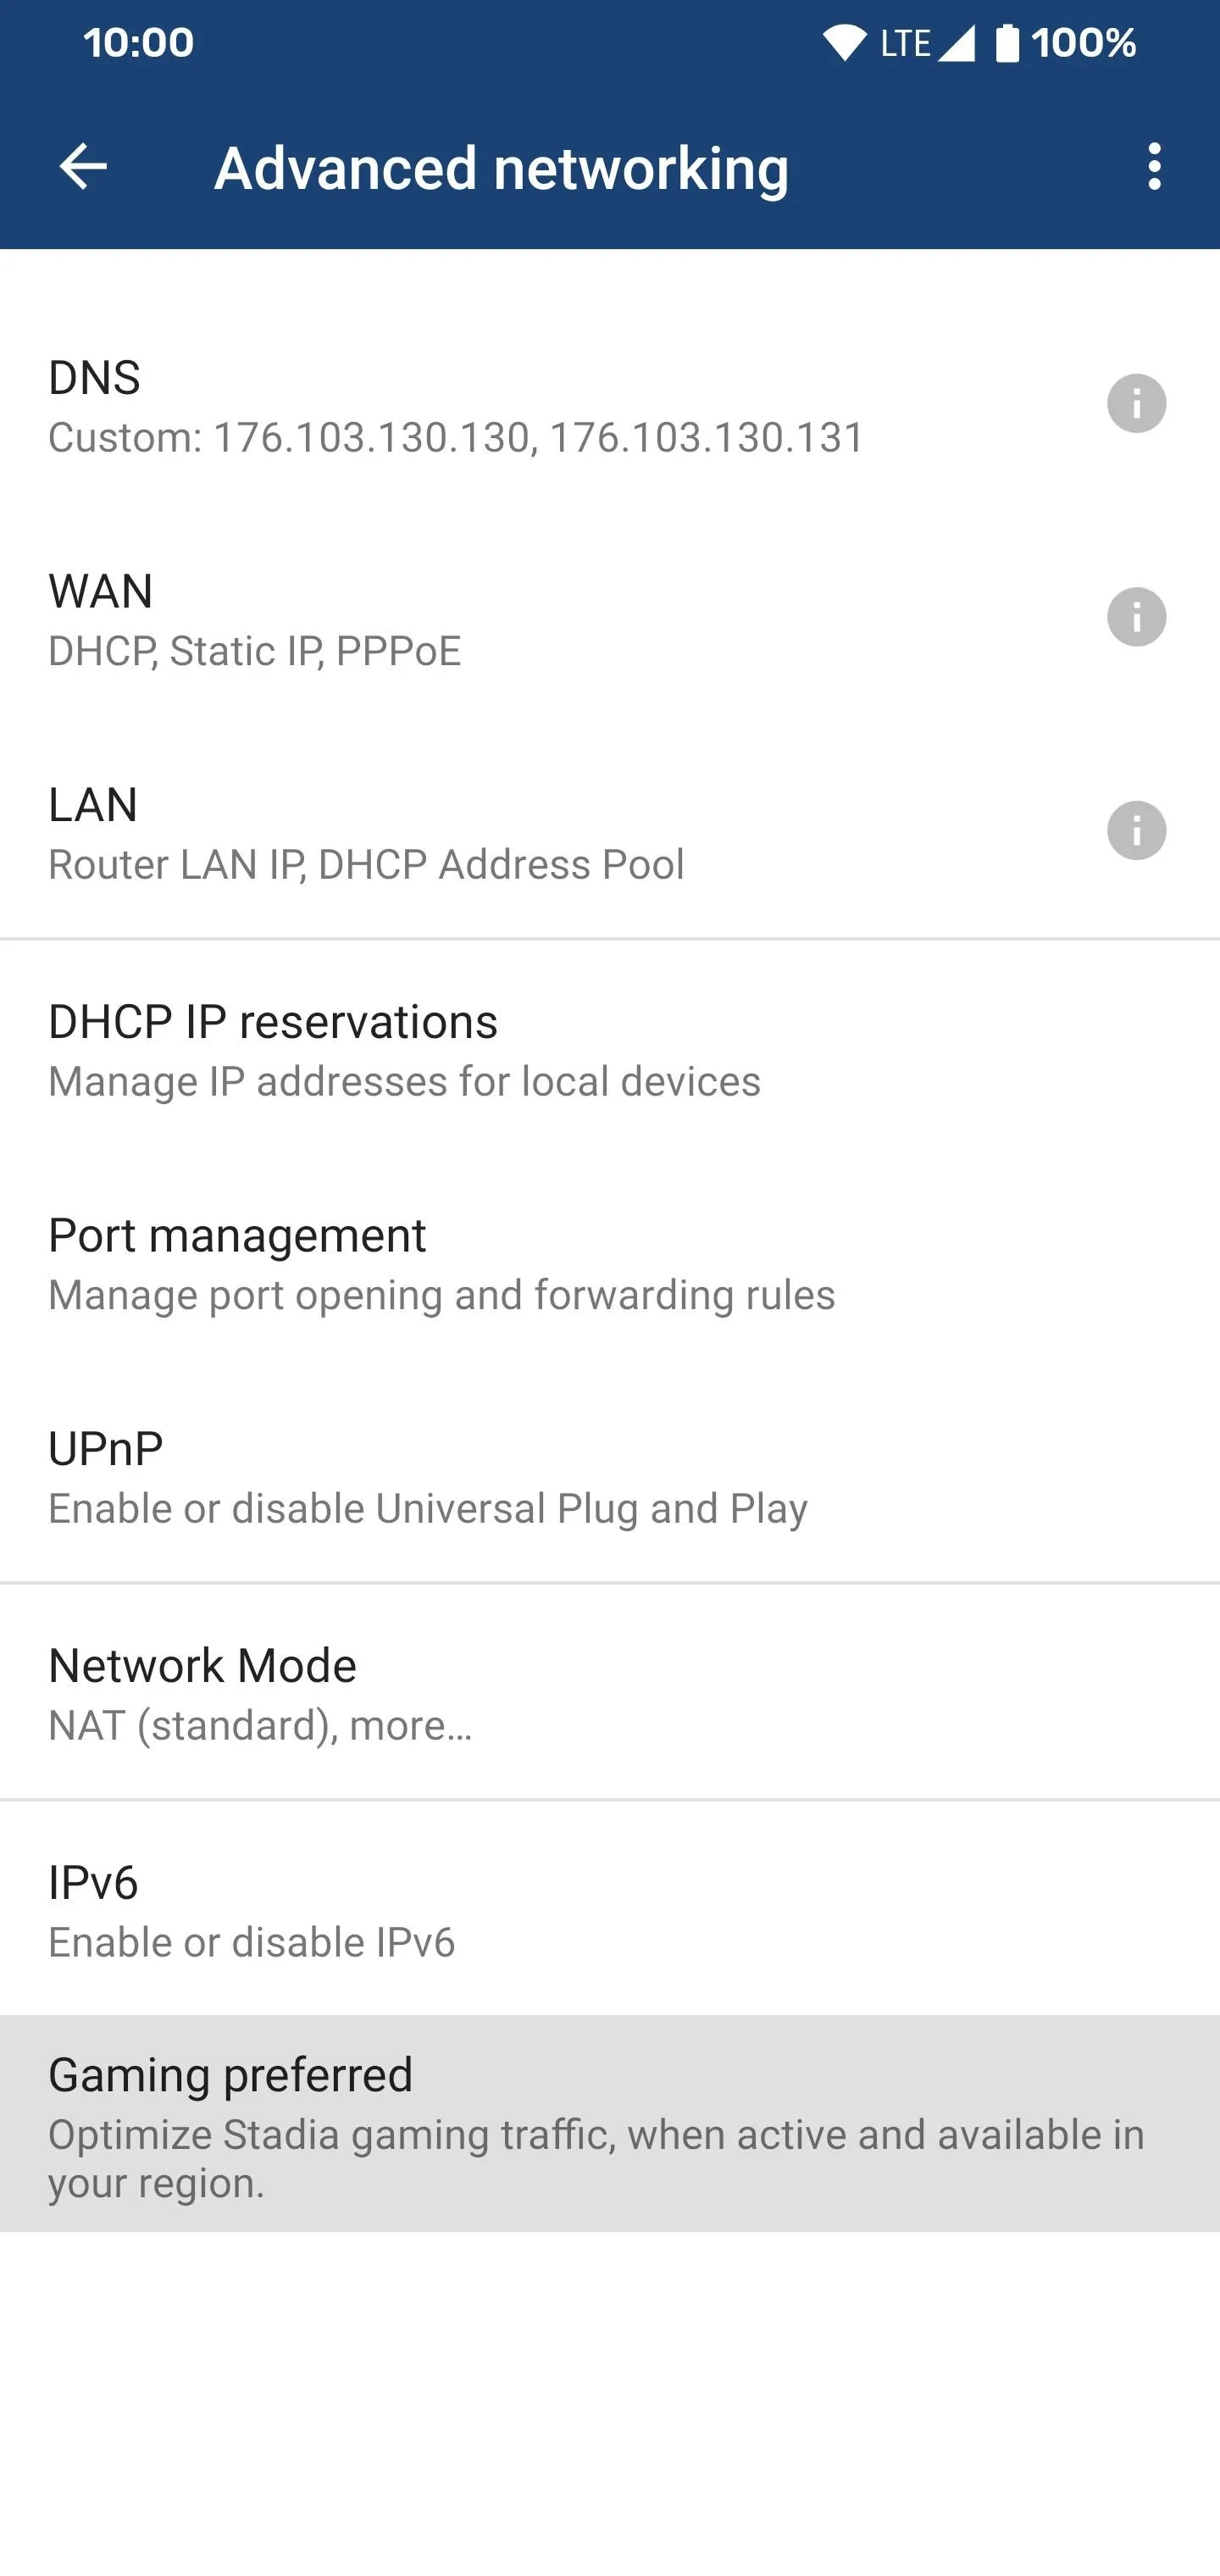


Now you can flip the "Gaming preferred" switch to the on position to activate the setting.
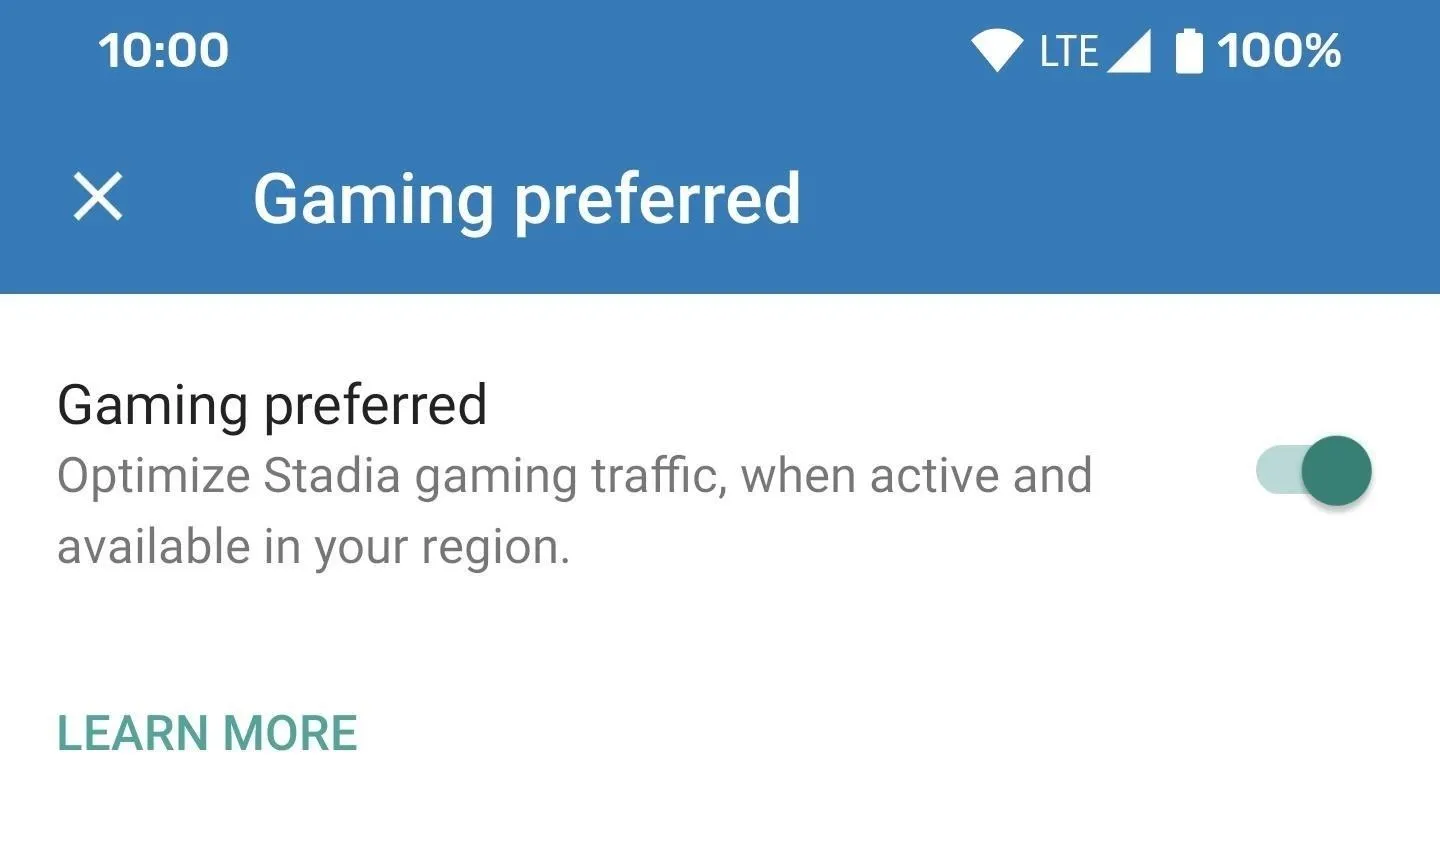
Your Google Wifi network (i.e., all active pucks) will now automatically optimize your Stadia traffic for you in the background. This helps to ensure your network will have the resources required to maintain a smooth gaming session when streaming. Enjoy your Stadia games!
Use the Google Home App
If you set up your Nest Wifi or Google Wifi network through Google Home instead of the original app, this is the one for you. No matter which one you pick, though, both methods will work for now. Just keep in mind that the original Google Wifi app will eventually be replaced with the Google Home app.
Download Google Home
The Google Home app is the central hub for all of your smart home devices, such as Chromecasts for TV and Nest Mini speakers for music. It can also control your Google or Nest Wifi network settings as well, which makes it even more useful as a one-stop-shop. Download or update the app with the link below to make sure you have the latest features.
Enable the Gaming Preferred Option
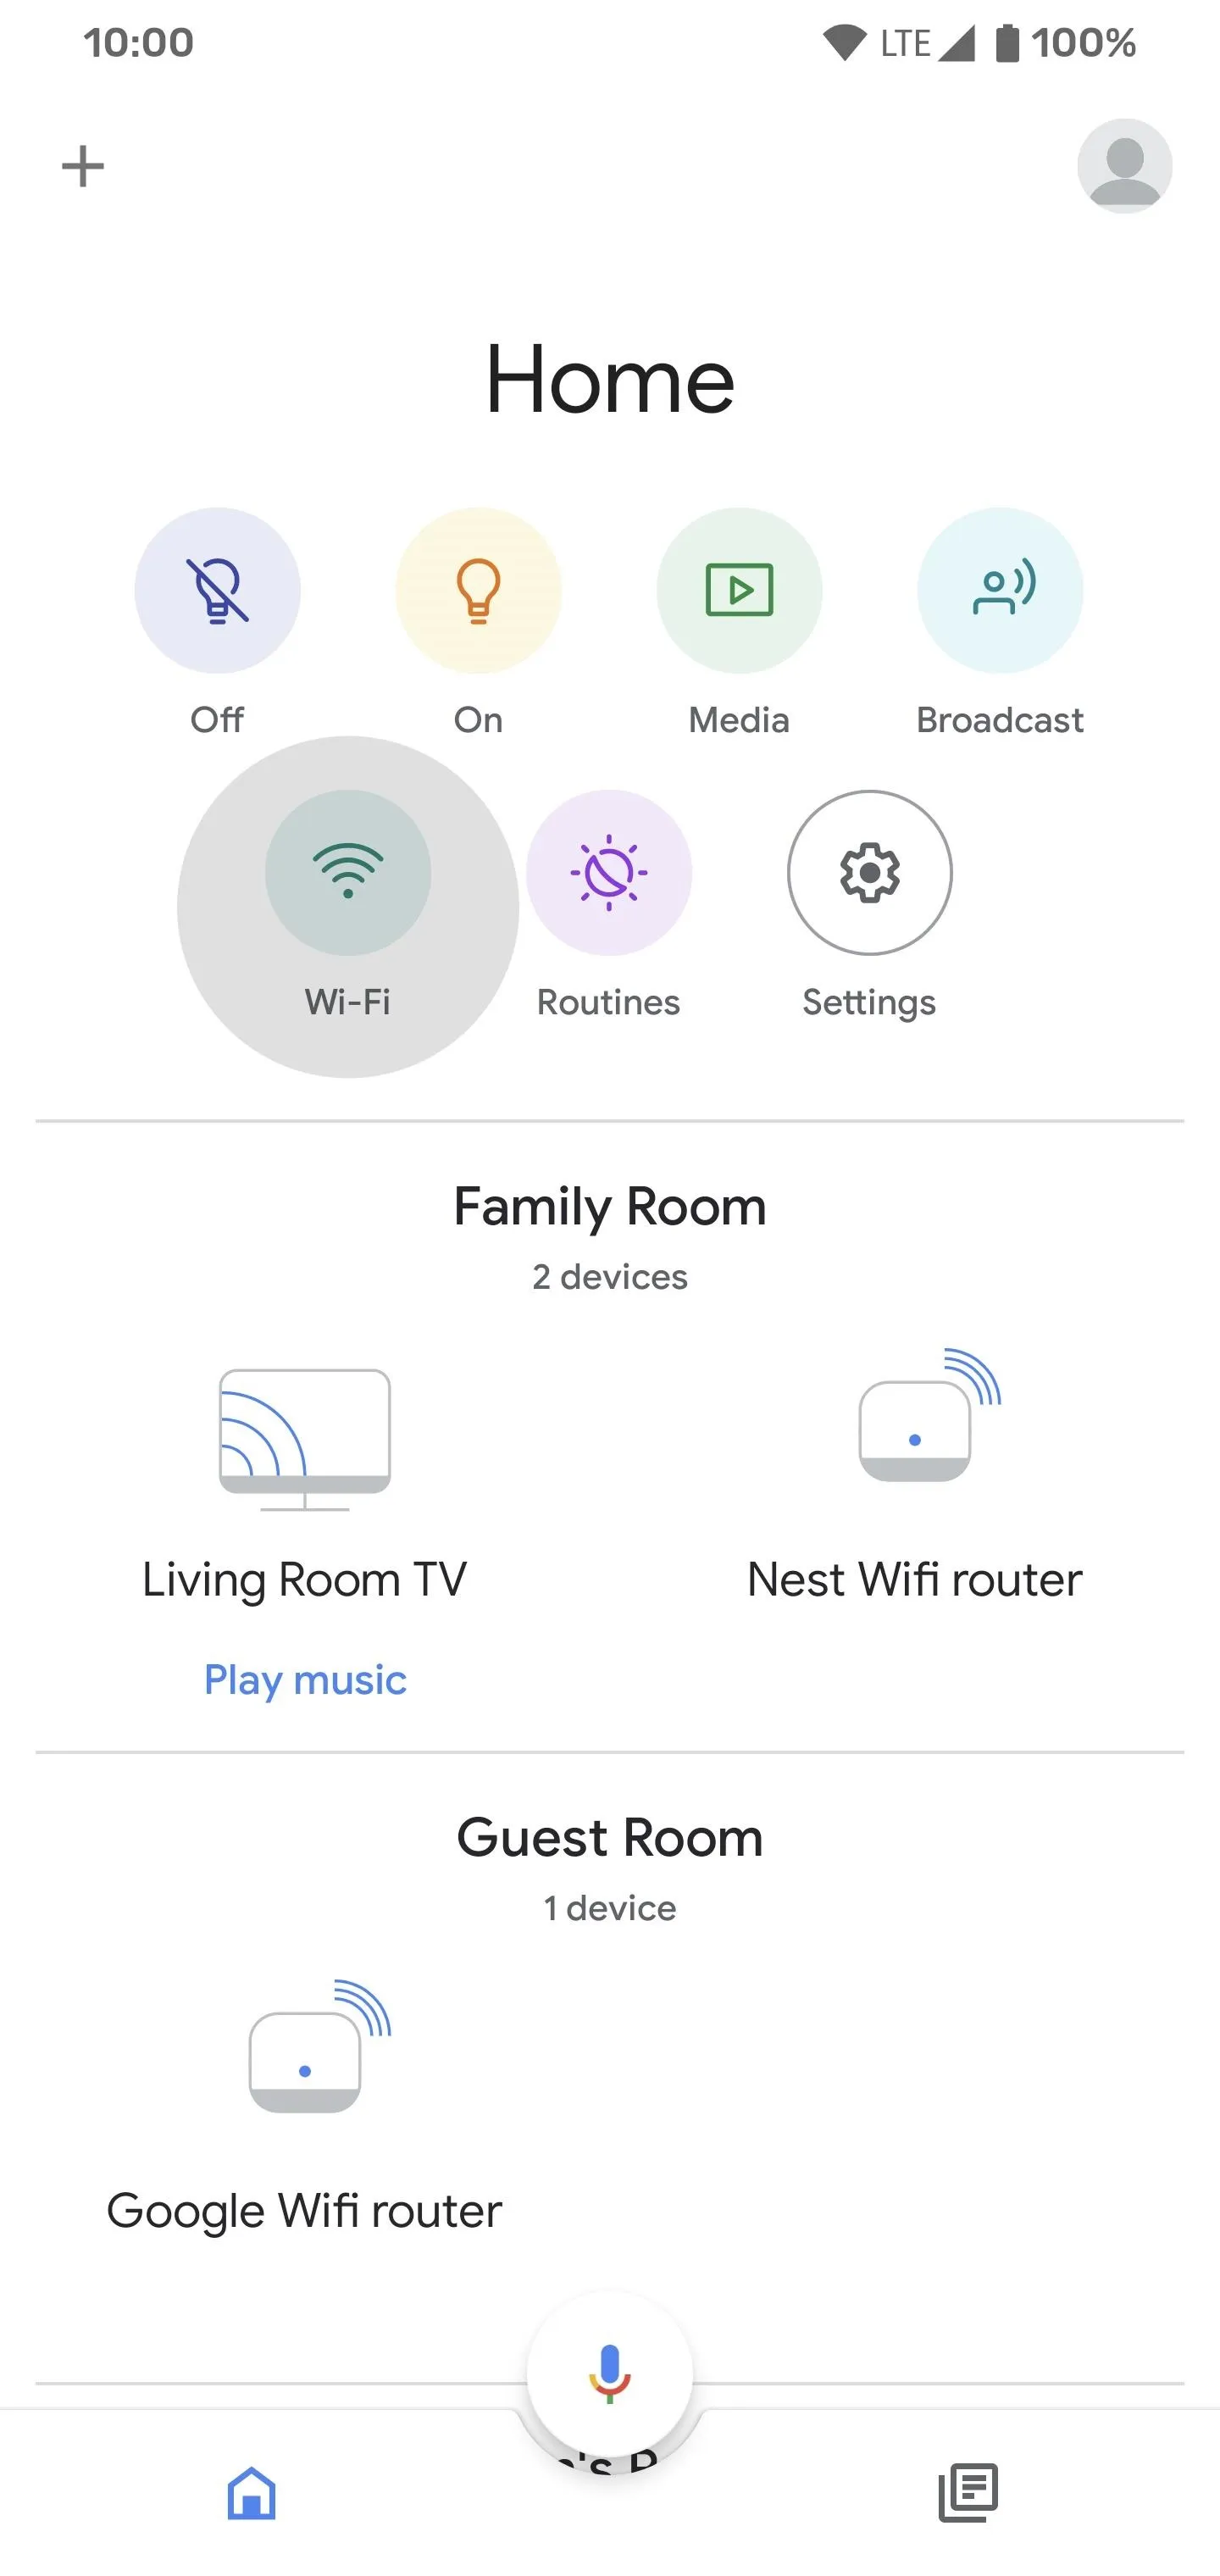
Open the Google Home app to the main screen, then tap the green "Wi-Fi" icon at the top. The next screen shows an overview of your Wi-Fi network — hit the settings icon in the upper-right.
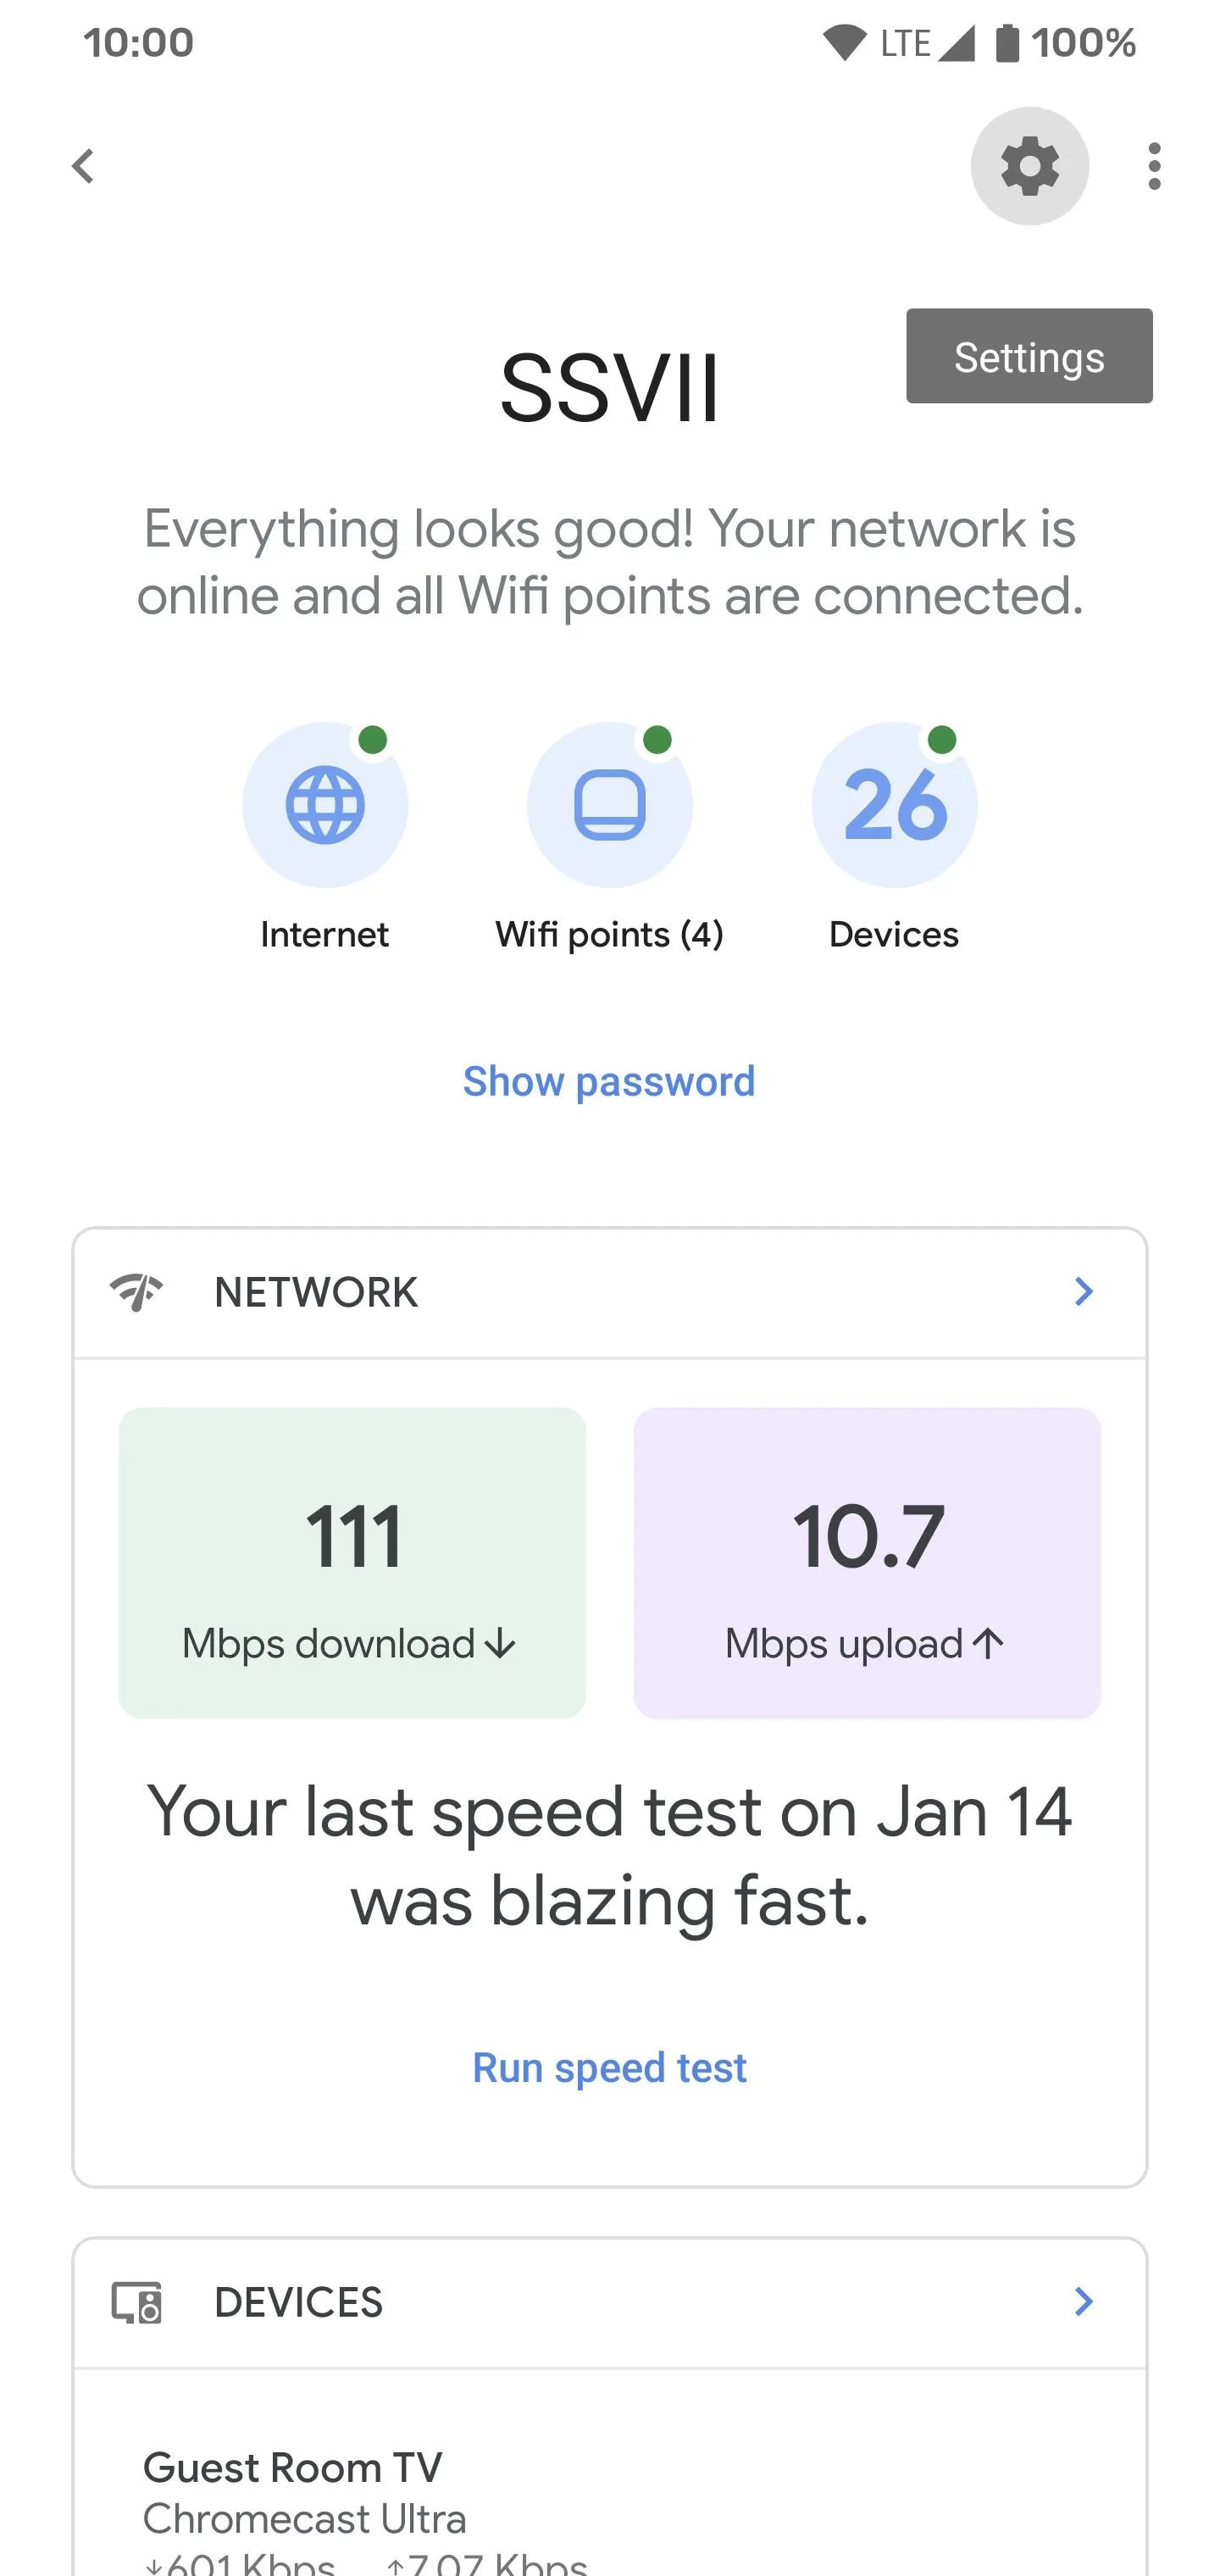


Locate the "Gaming preferred" entry near the bottom of the list, then flip the "Gaming preferred" switch to the on position to activate the setting.
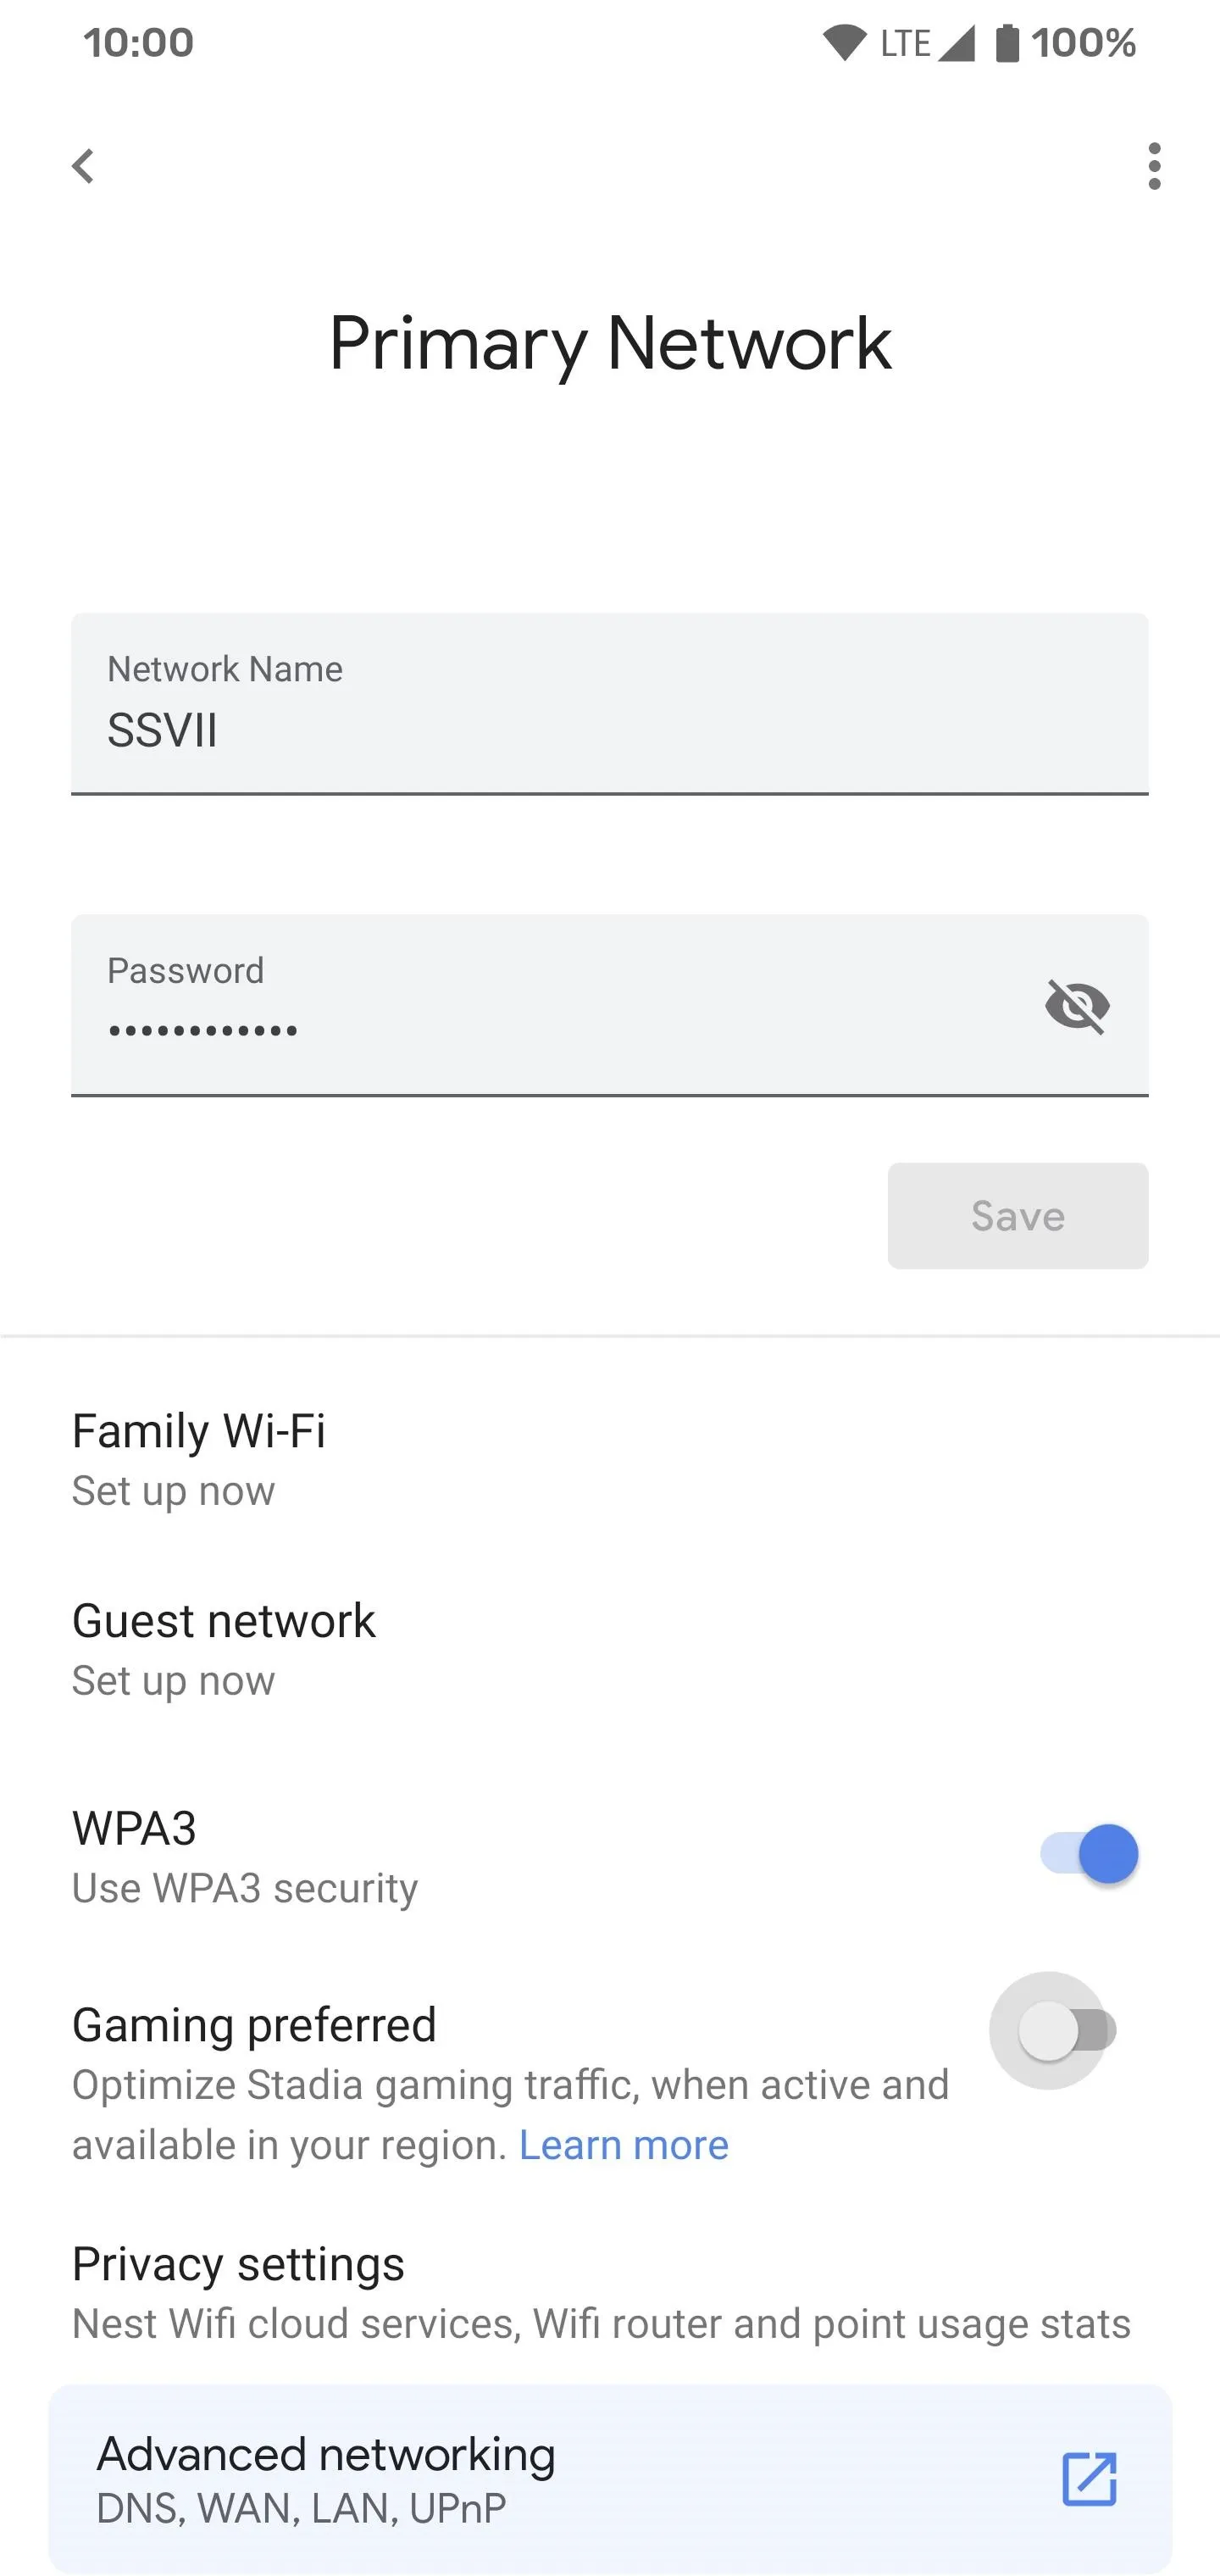
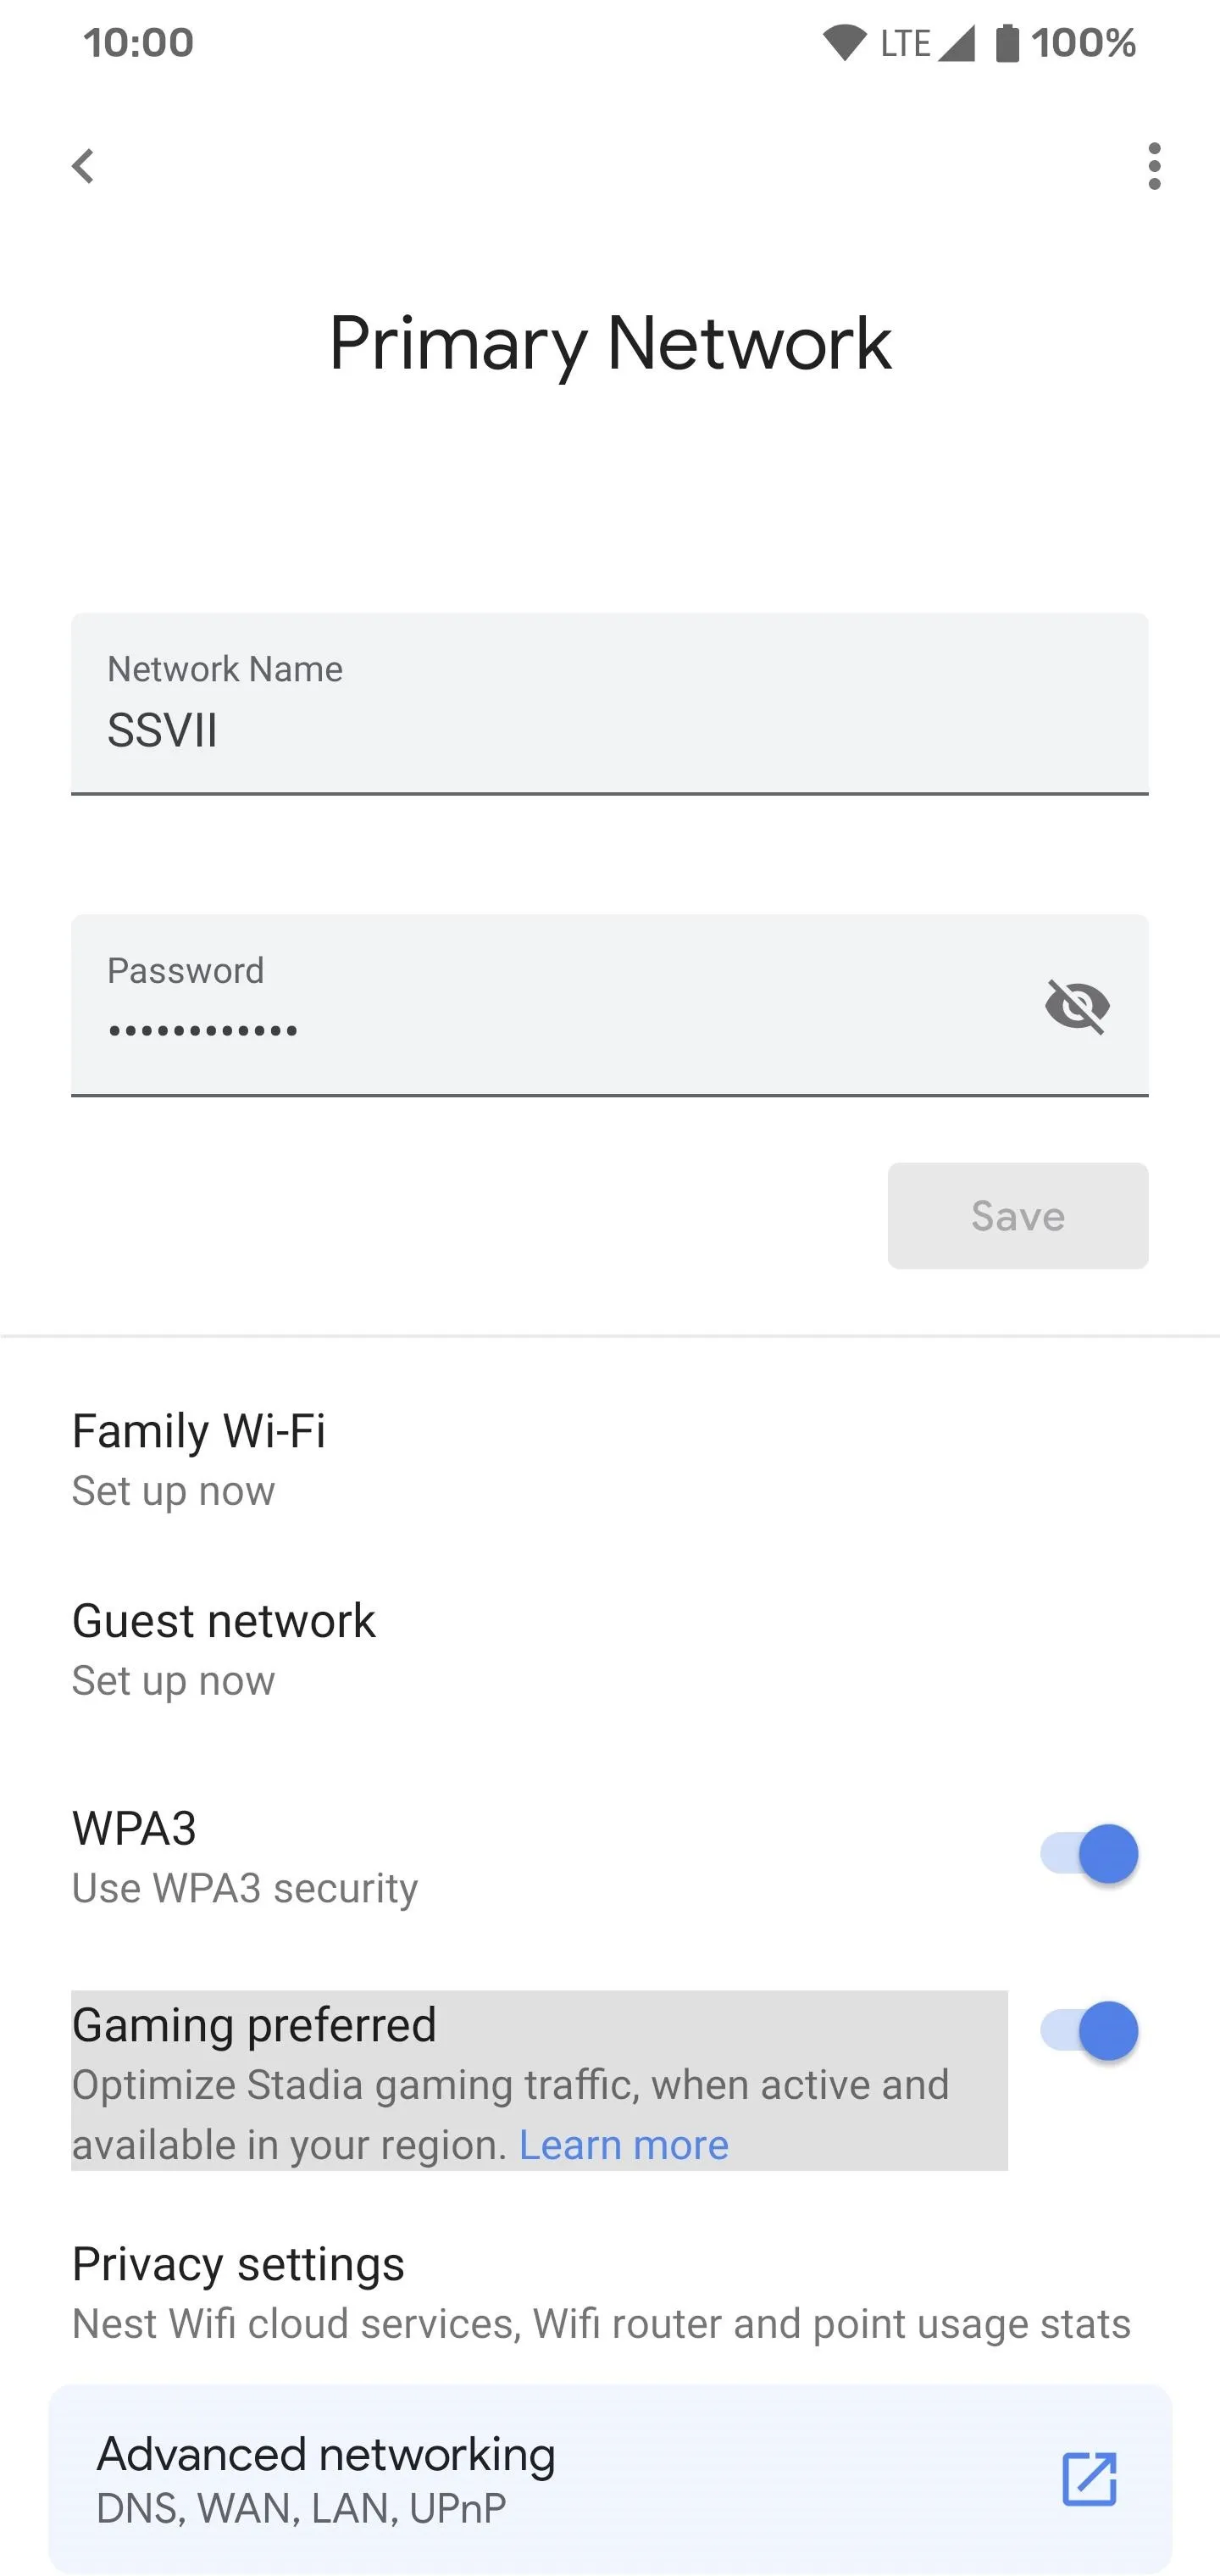


Your Google or Nest Wifi network will now automatically optimize your Stadia traffic for you in the background. This helps to ensure your network will have the resources required to maintain a smooth gaming session when streaming. Enjoy your Stadia games!
Cover photo and screenshots by Stephen Perkins/Gadget Hacks


Comments
Be the first, drop a comment!