


Handwritten notes are no doubt useful at home, work, and school, but digitizing them with your smartphone will make them easier to edit, organize, and review. You'll also always have a digital copy ready if your handwritten notes get lost or erased. And Google Keep for Android, iOS, or iPadOS makes the conversion from physical form to digital a cinch, especially when it comes to checklists.
Perhaps you've jotted down a grocery list but don't want to fumble with pen and paper at the store. Or maybe you've been tasked with capturing meeting notes from a whiteboard to distribute to the rest of the office. Whatever the reason, you can use the Google Keep app on your iPhone, iPad, or Android device to capture images of handwritten notes, lists, and memos. More importantly, it can convert them to digital text and even actionable checklists. We'll show you how it's done below.
Add the Image to a Note
There are various ways to start a new note with an image, and they work pretty much the same whether you're using Android or iOS. The third option below can also add an image to an already existing note.
- Long-press the Keep Notes icon from your Home Screen, App Library, or All Apps drawer, select "New photo note" from the actions, and take a picture of the physical note. If it's good, tap "Use photo," the checkmark button, or "OK" to create the photo note.
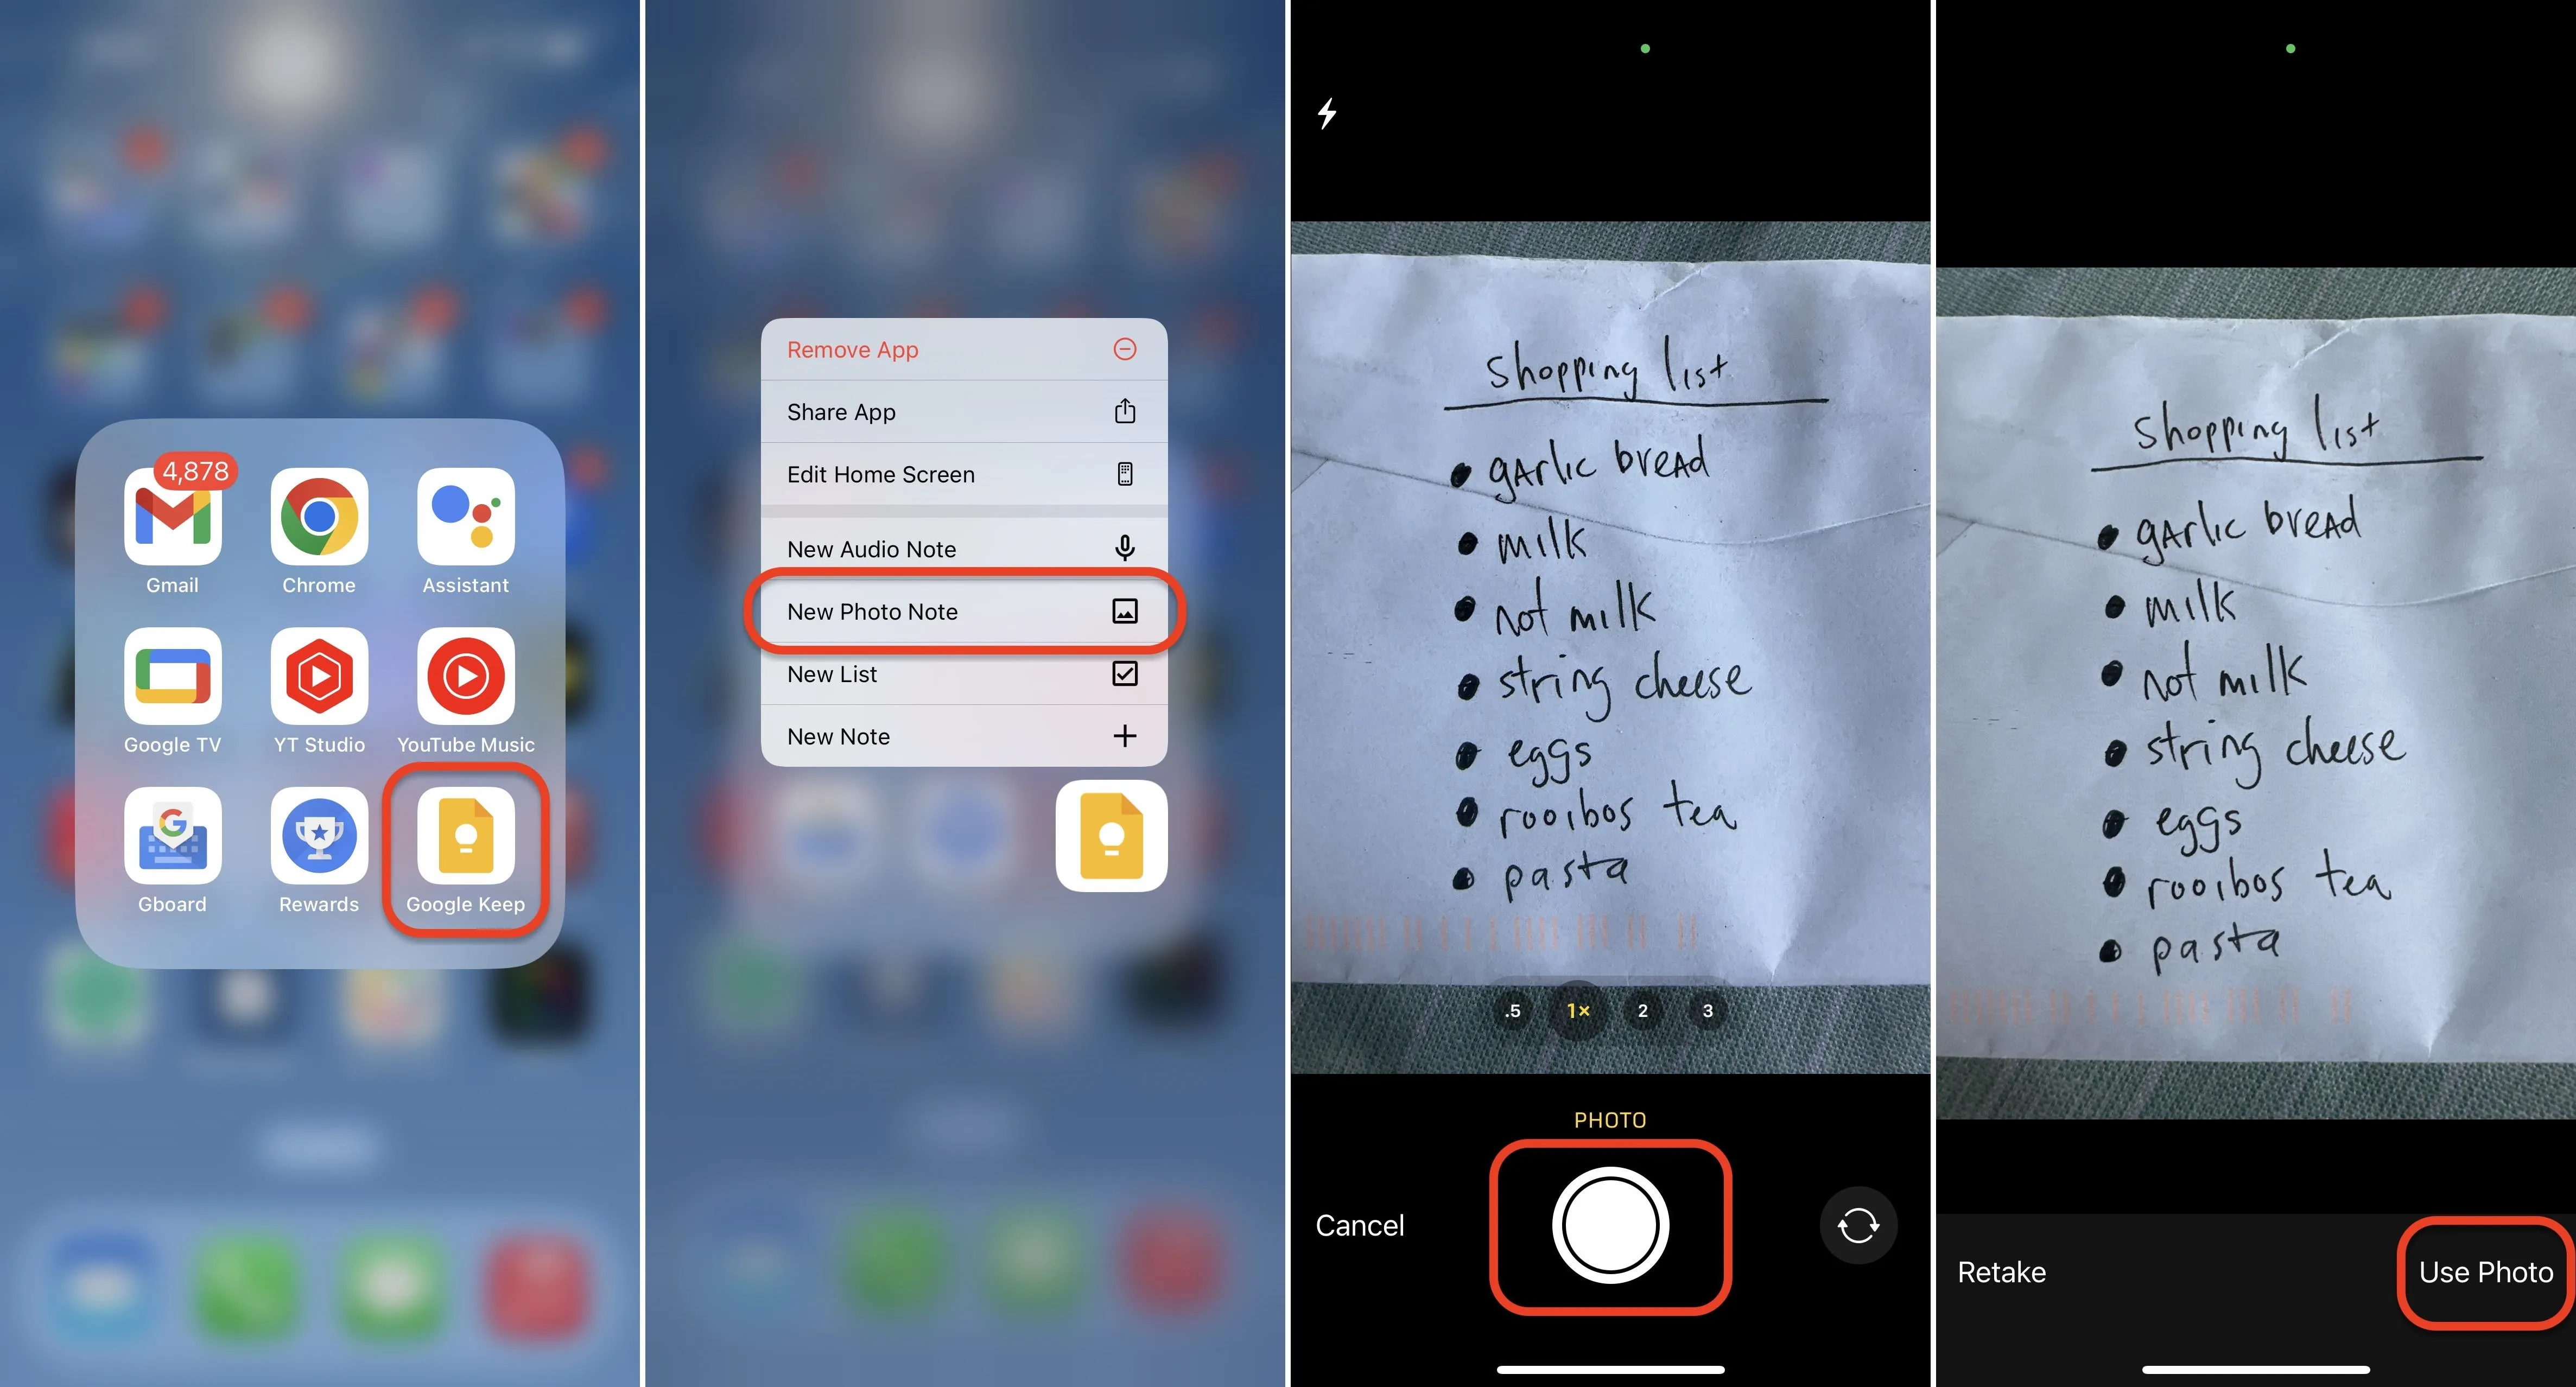
- Open Keep Notes to your main list of notes, tap the photo icon in the bottom toolbar, and choose "Take photo" or "Choose image" from the actions. If taking a picture, snap a photo of the physical note, then tap "Use photo," the checkmark button, or "OK" to create the photo note. Otherwise, pick one from your default photo library.
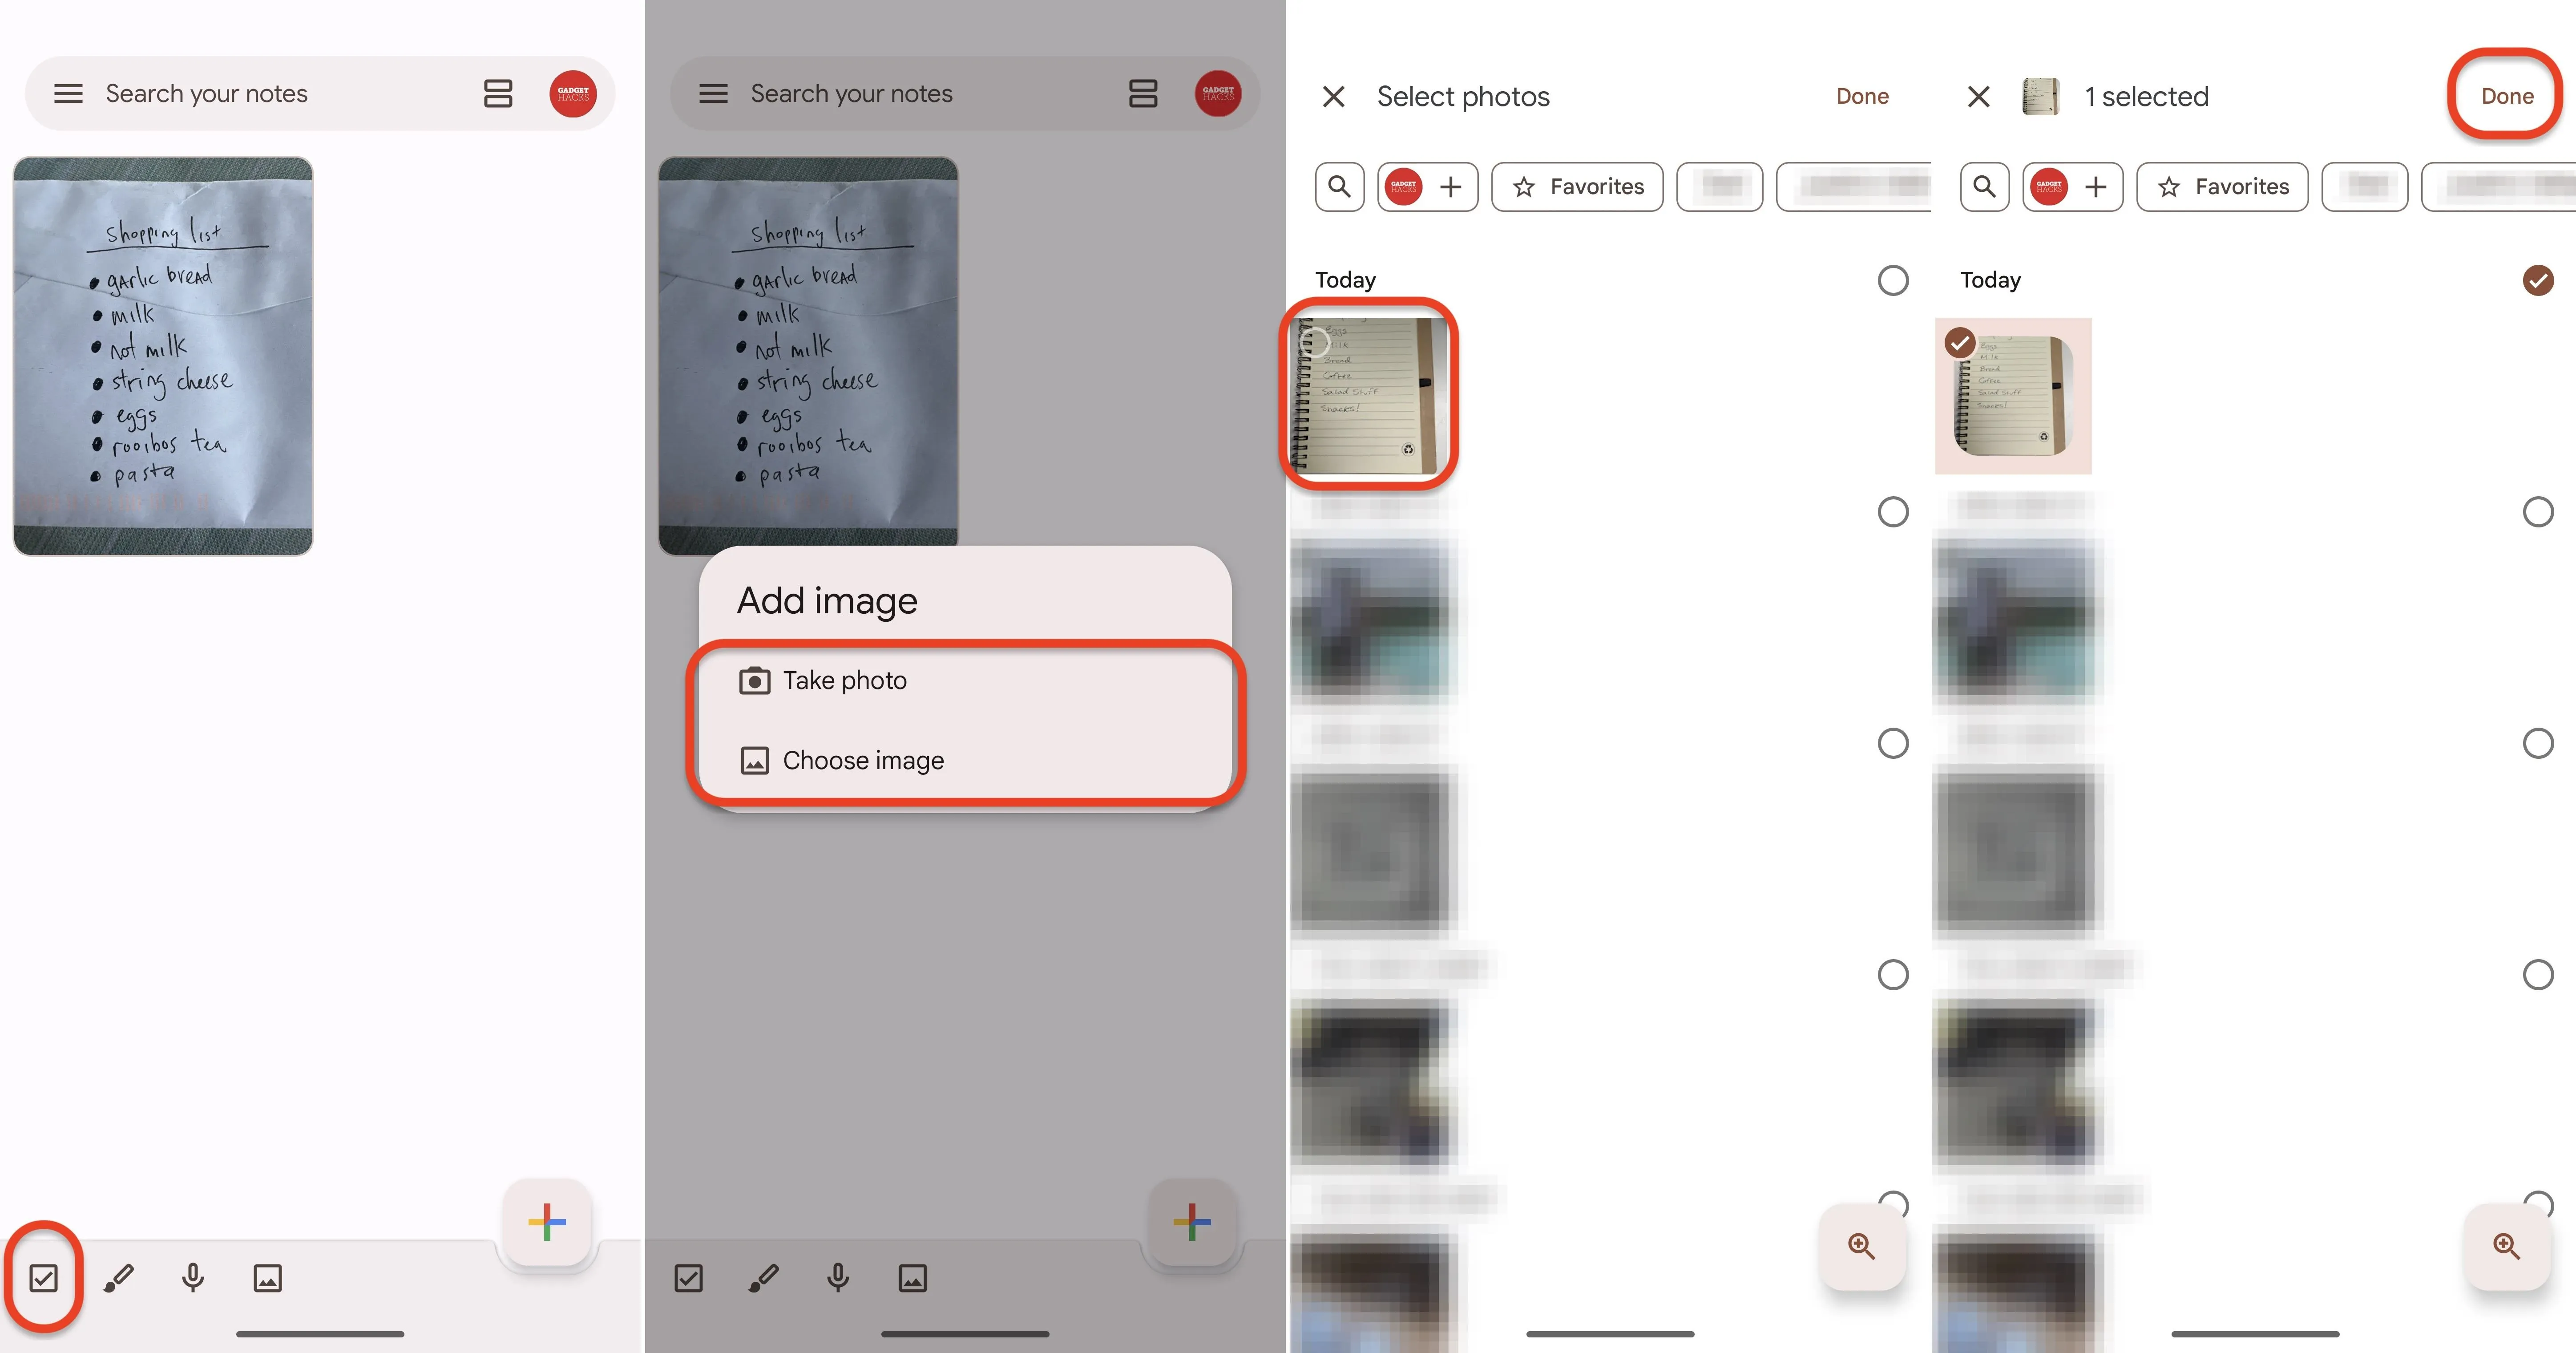
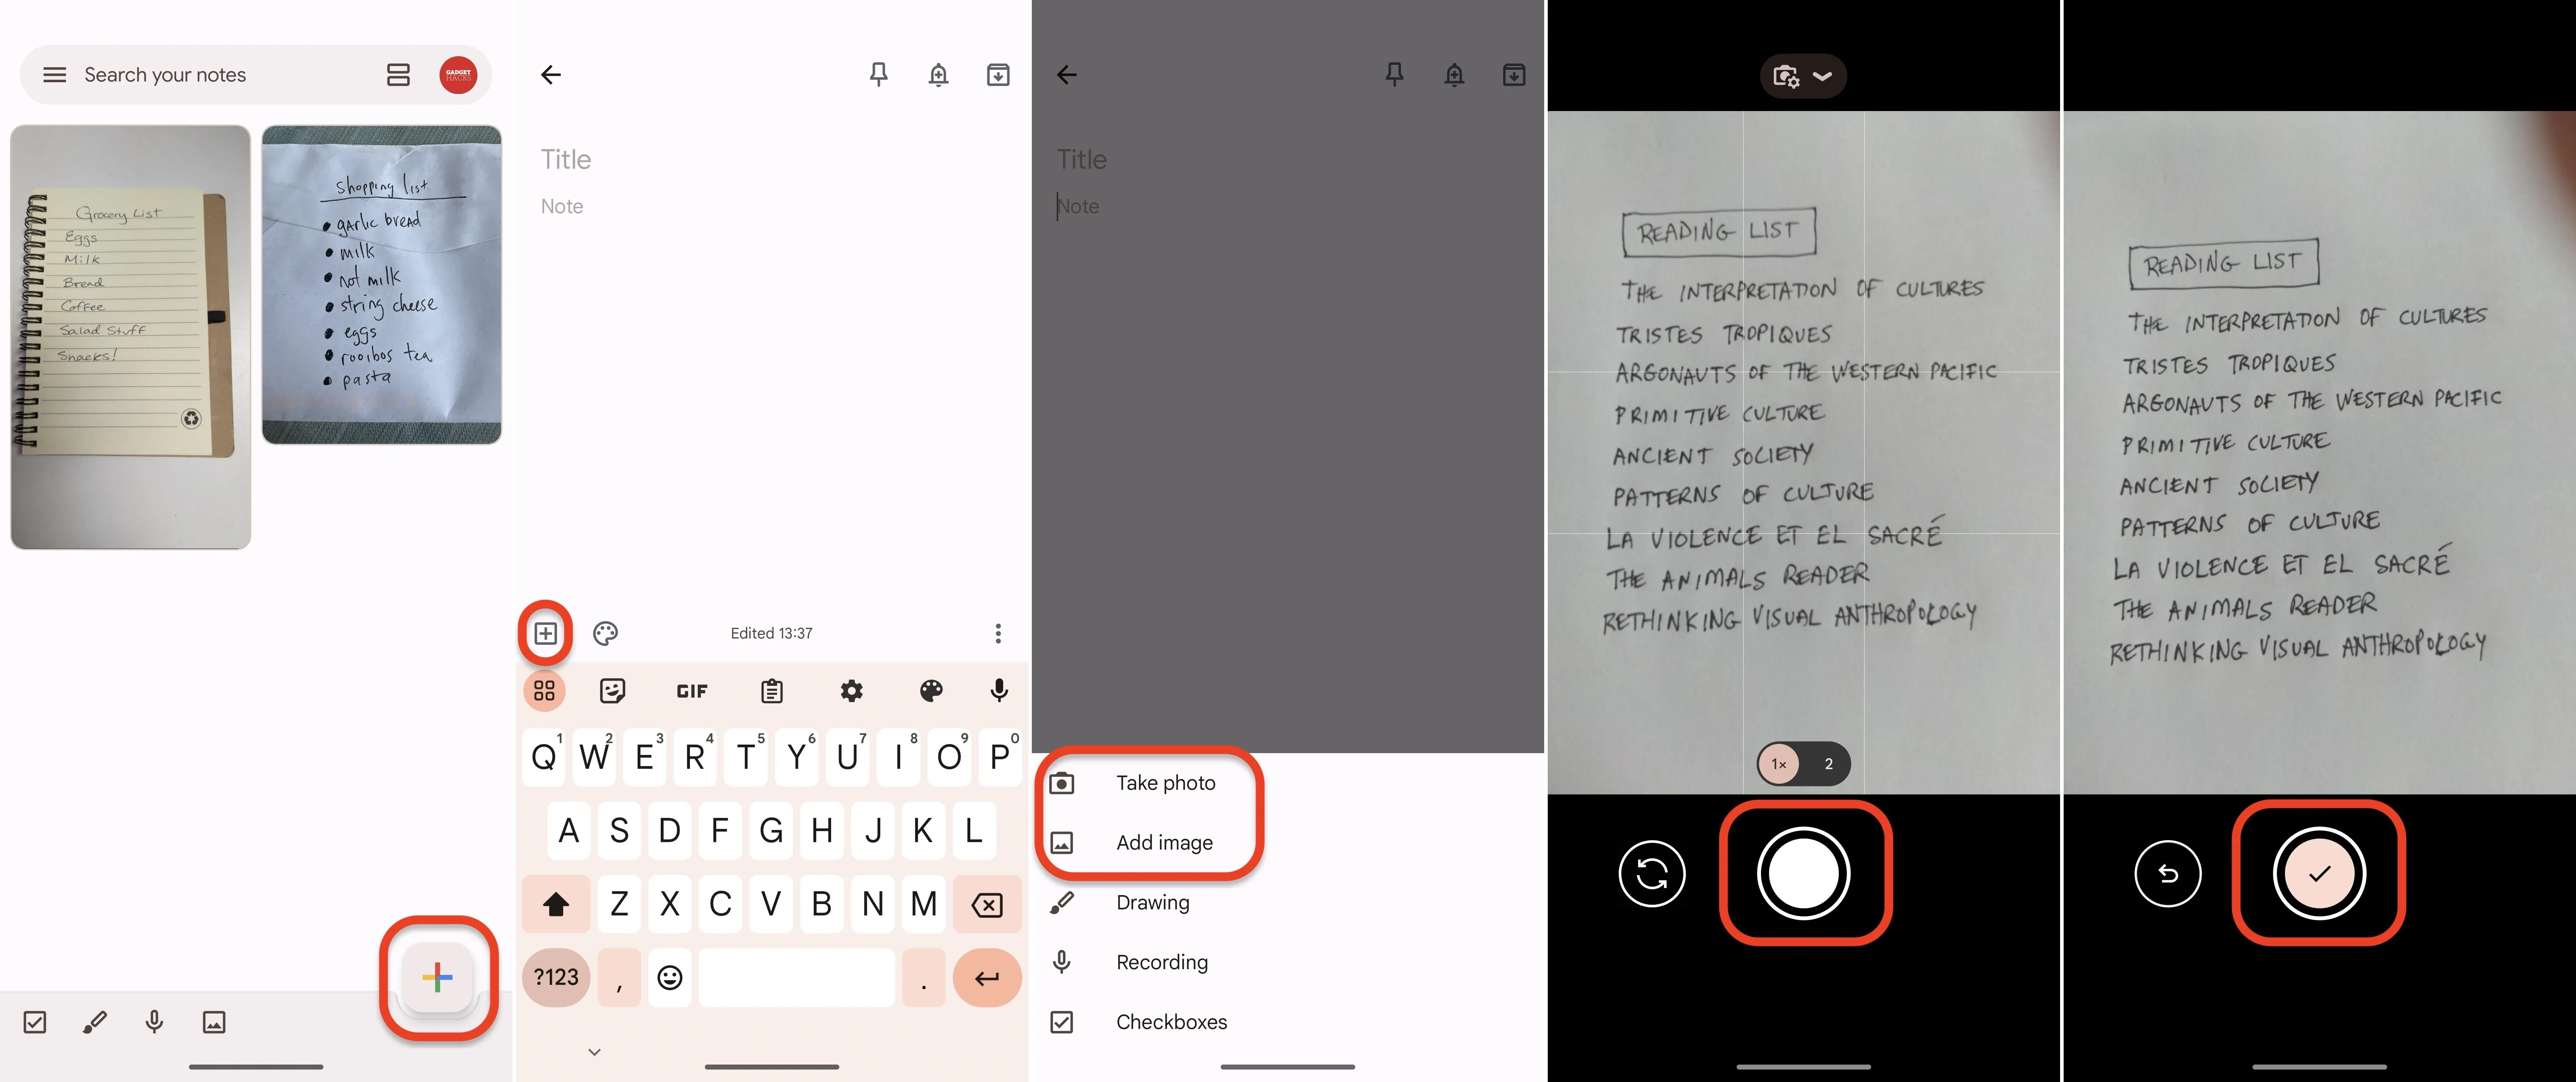
- Open Keep Notes to your main list of notes, tap the large plus (+) at the bottom to start a new note, tap the small plus [+] from the bottom toolbar, and choose "Take photo" or "Choose image" or "Add image" from the actions. If taking a picture, snap a photo of the physical note, then tap "Use photo," the checkmark button, or "OK" to create the photo note. Otherwise, pick one from your default photo library.
You may have to give Google Keep permission to access your camera and photos if you've never used the Keep Notes app before. When taking a picture, you can tap the retake button to try again if the first photo you snapped was blurry or not good enough.
Grab Text from the Image
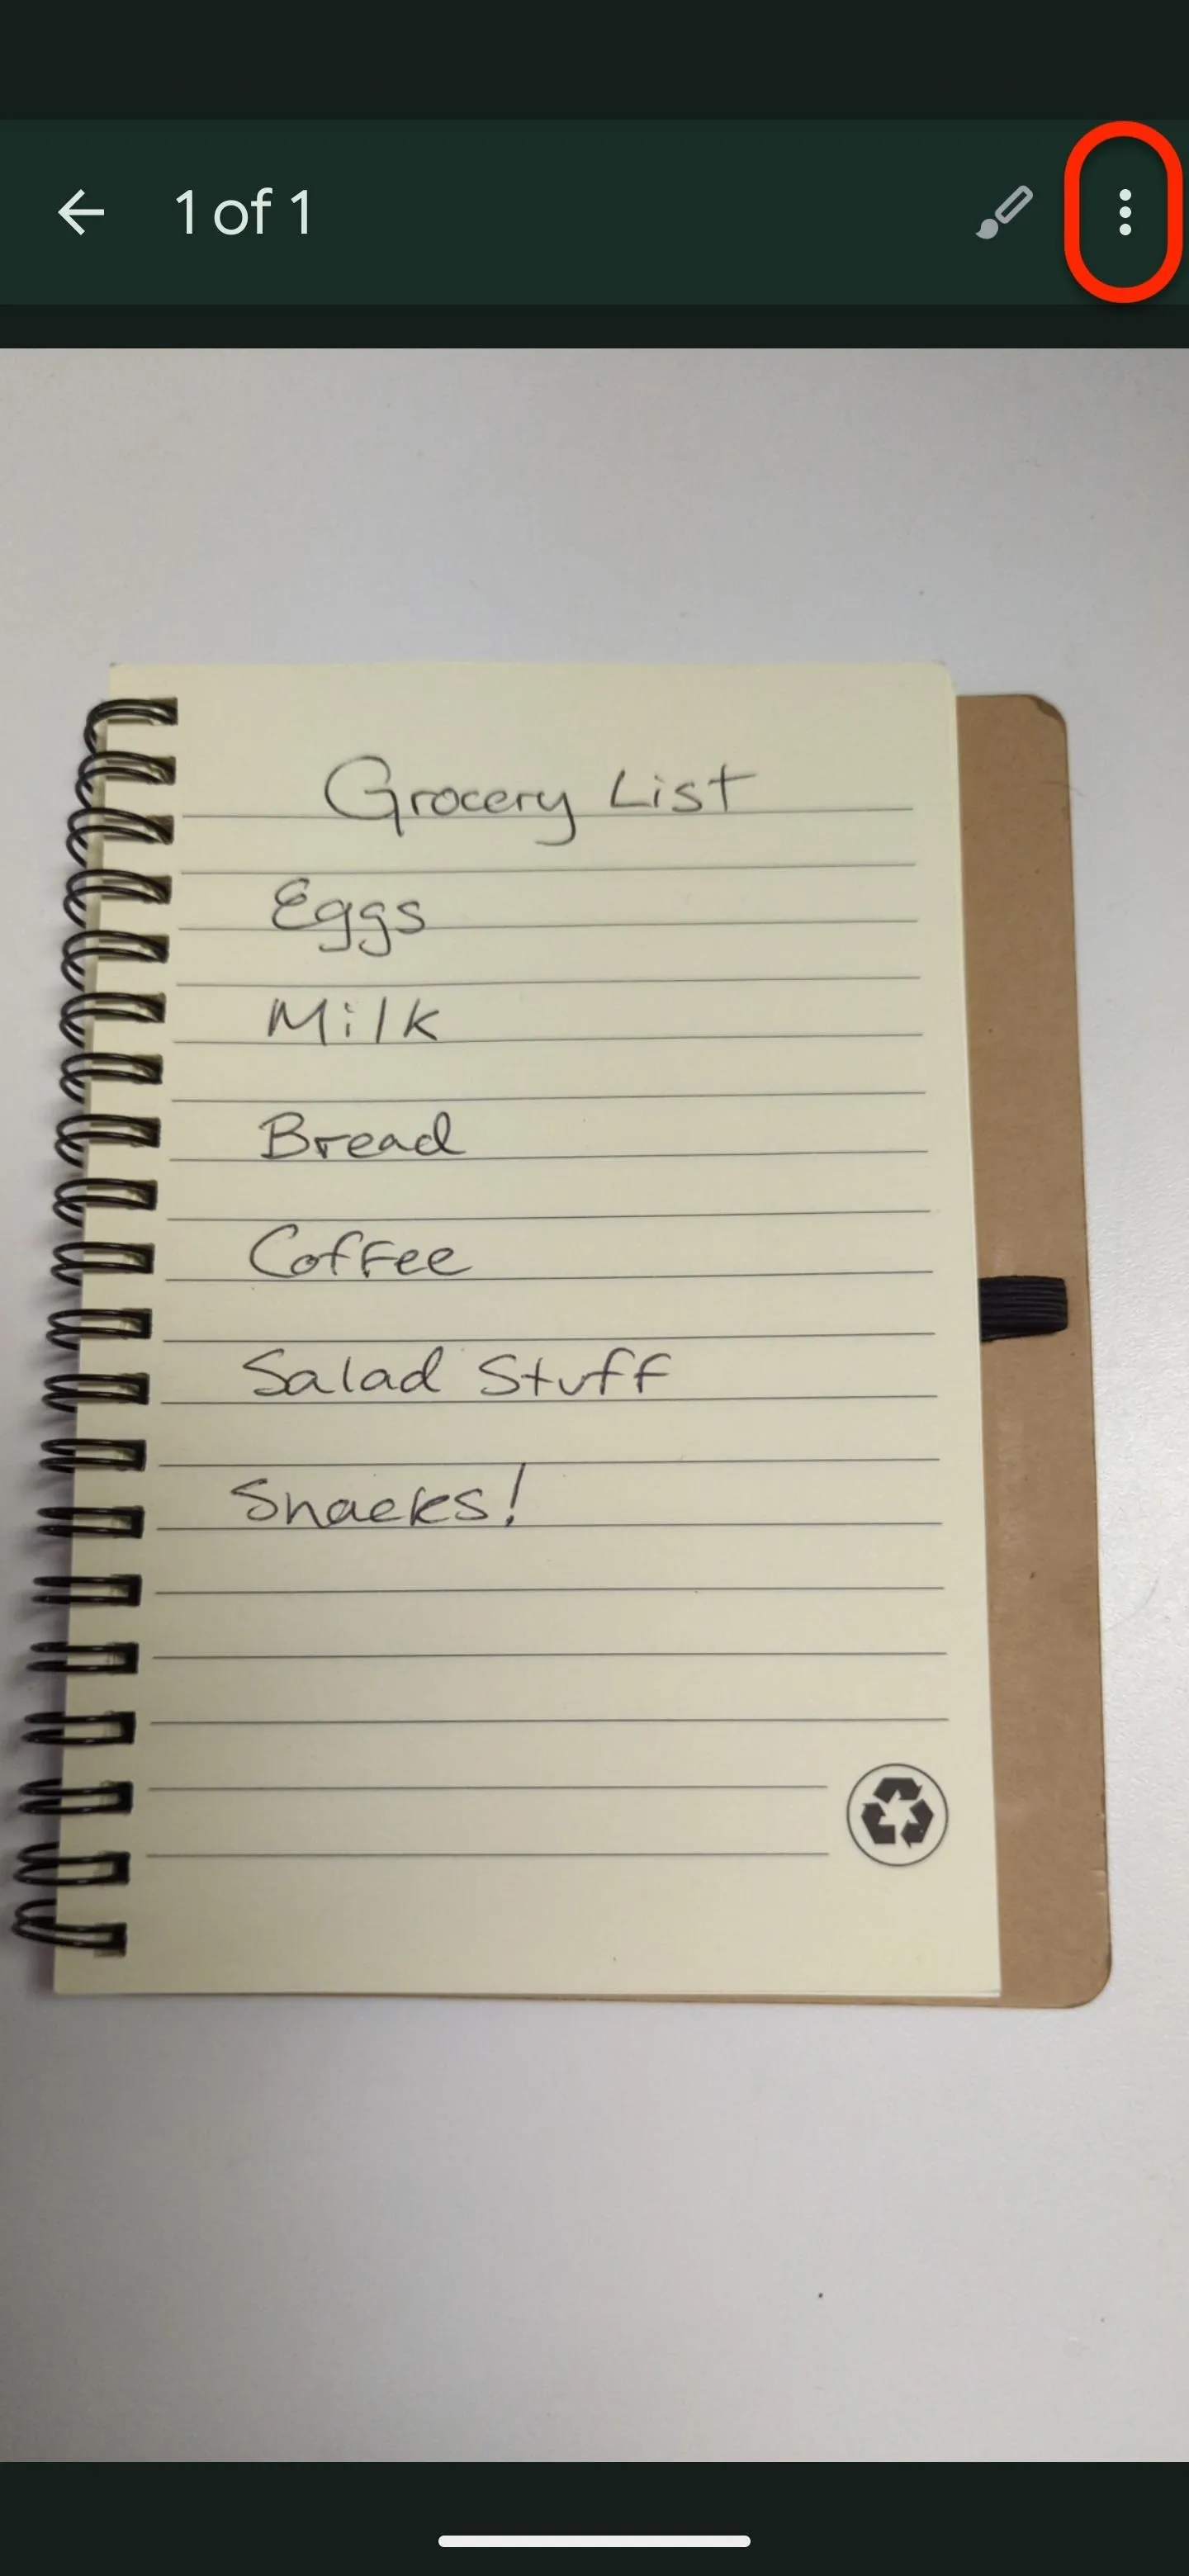
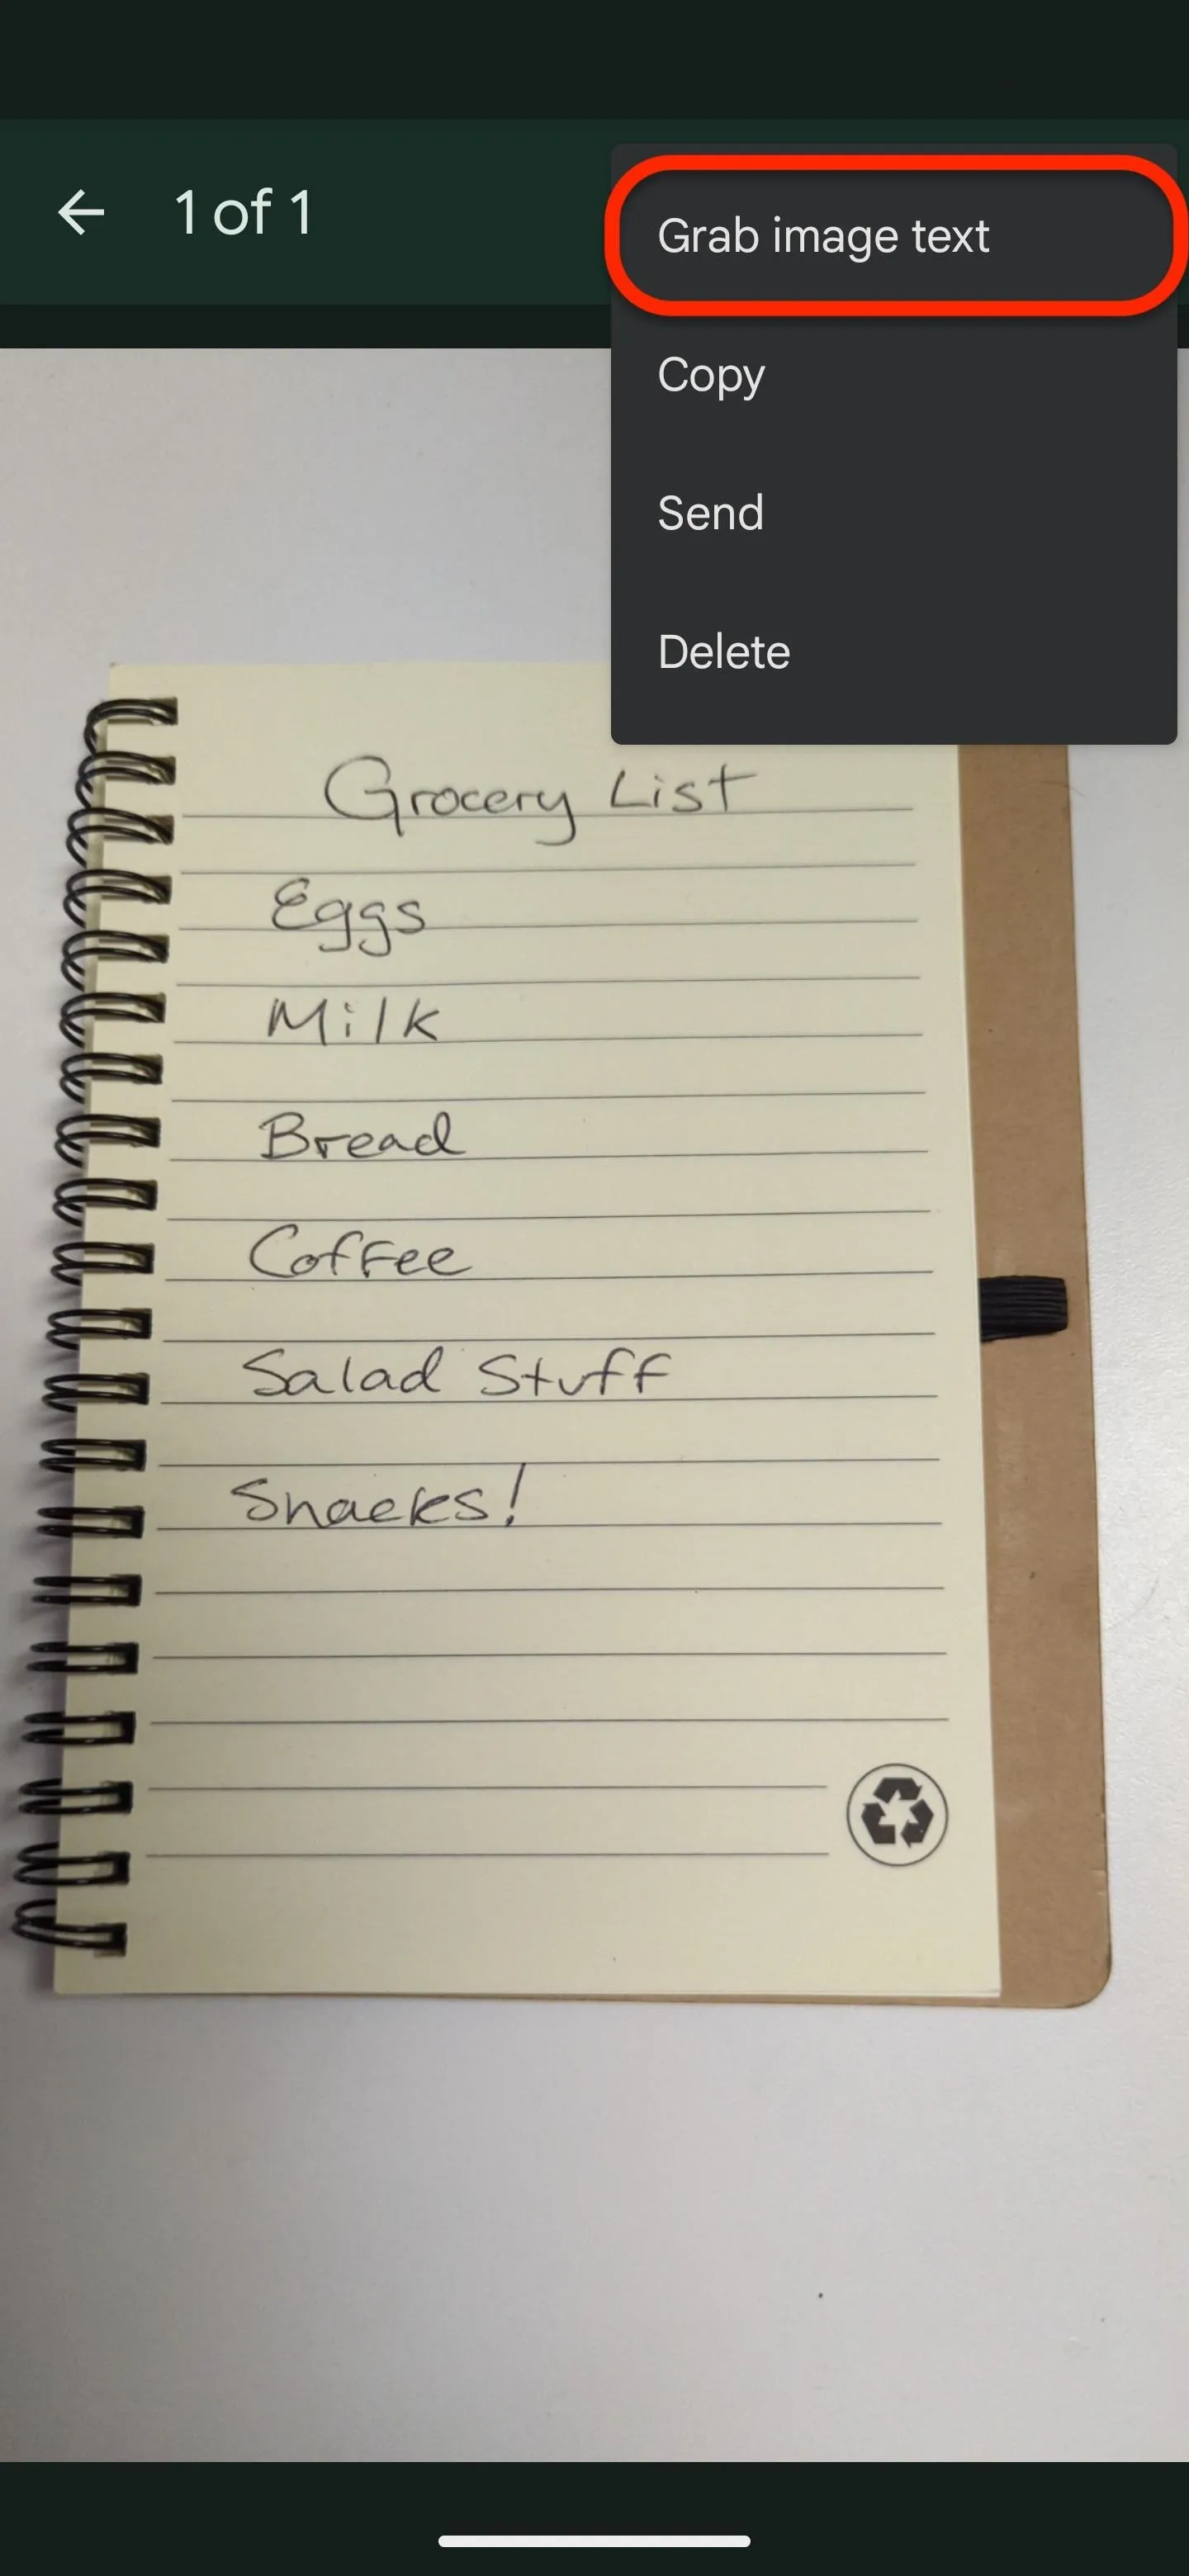
In your new or old note with the image you just took or imported, tap the image to expand it, then tap the three-dot button in the top right for more options. In the menu, select "Grab image text." Keep Notes will paste the text from the image directly into your note's text field under the title.
Another try should do the trick if it doesn't work the first time.
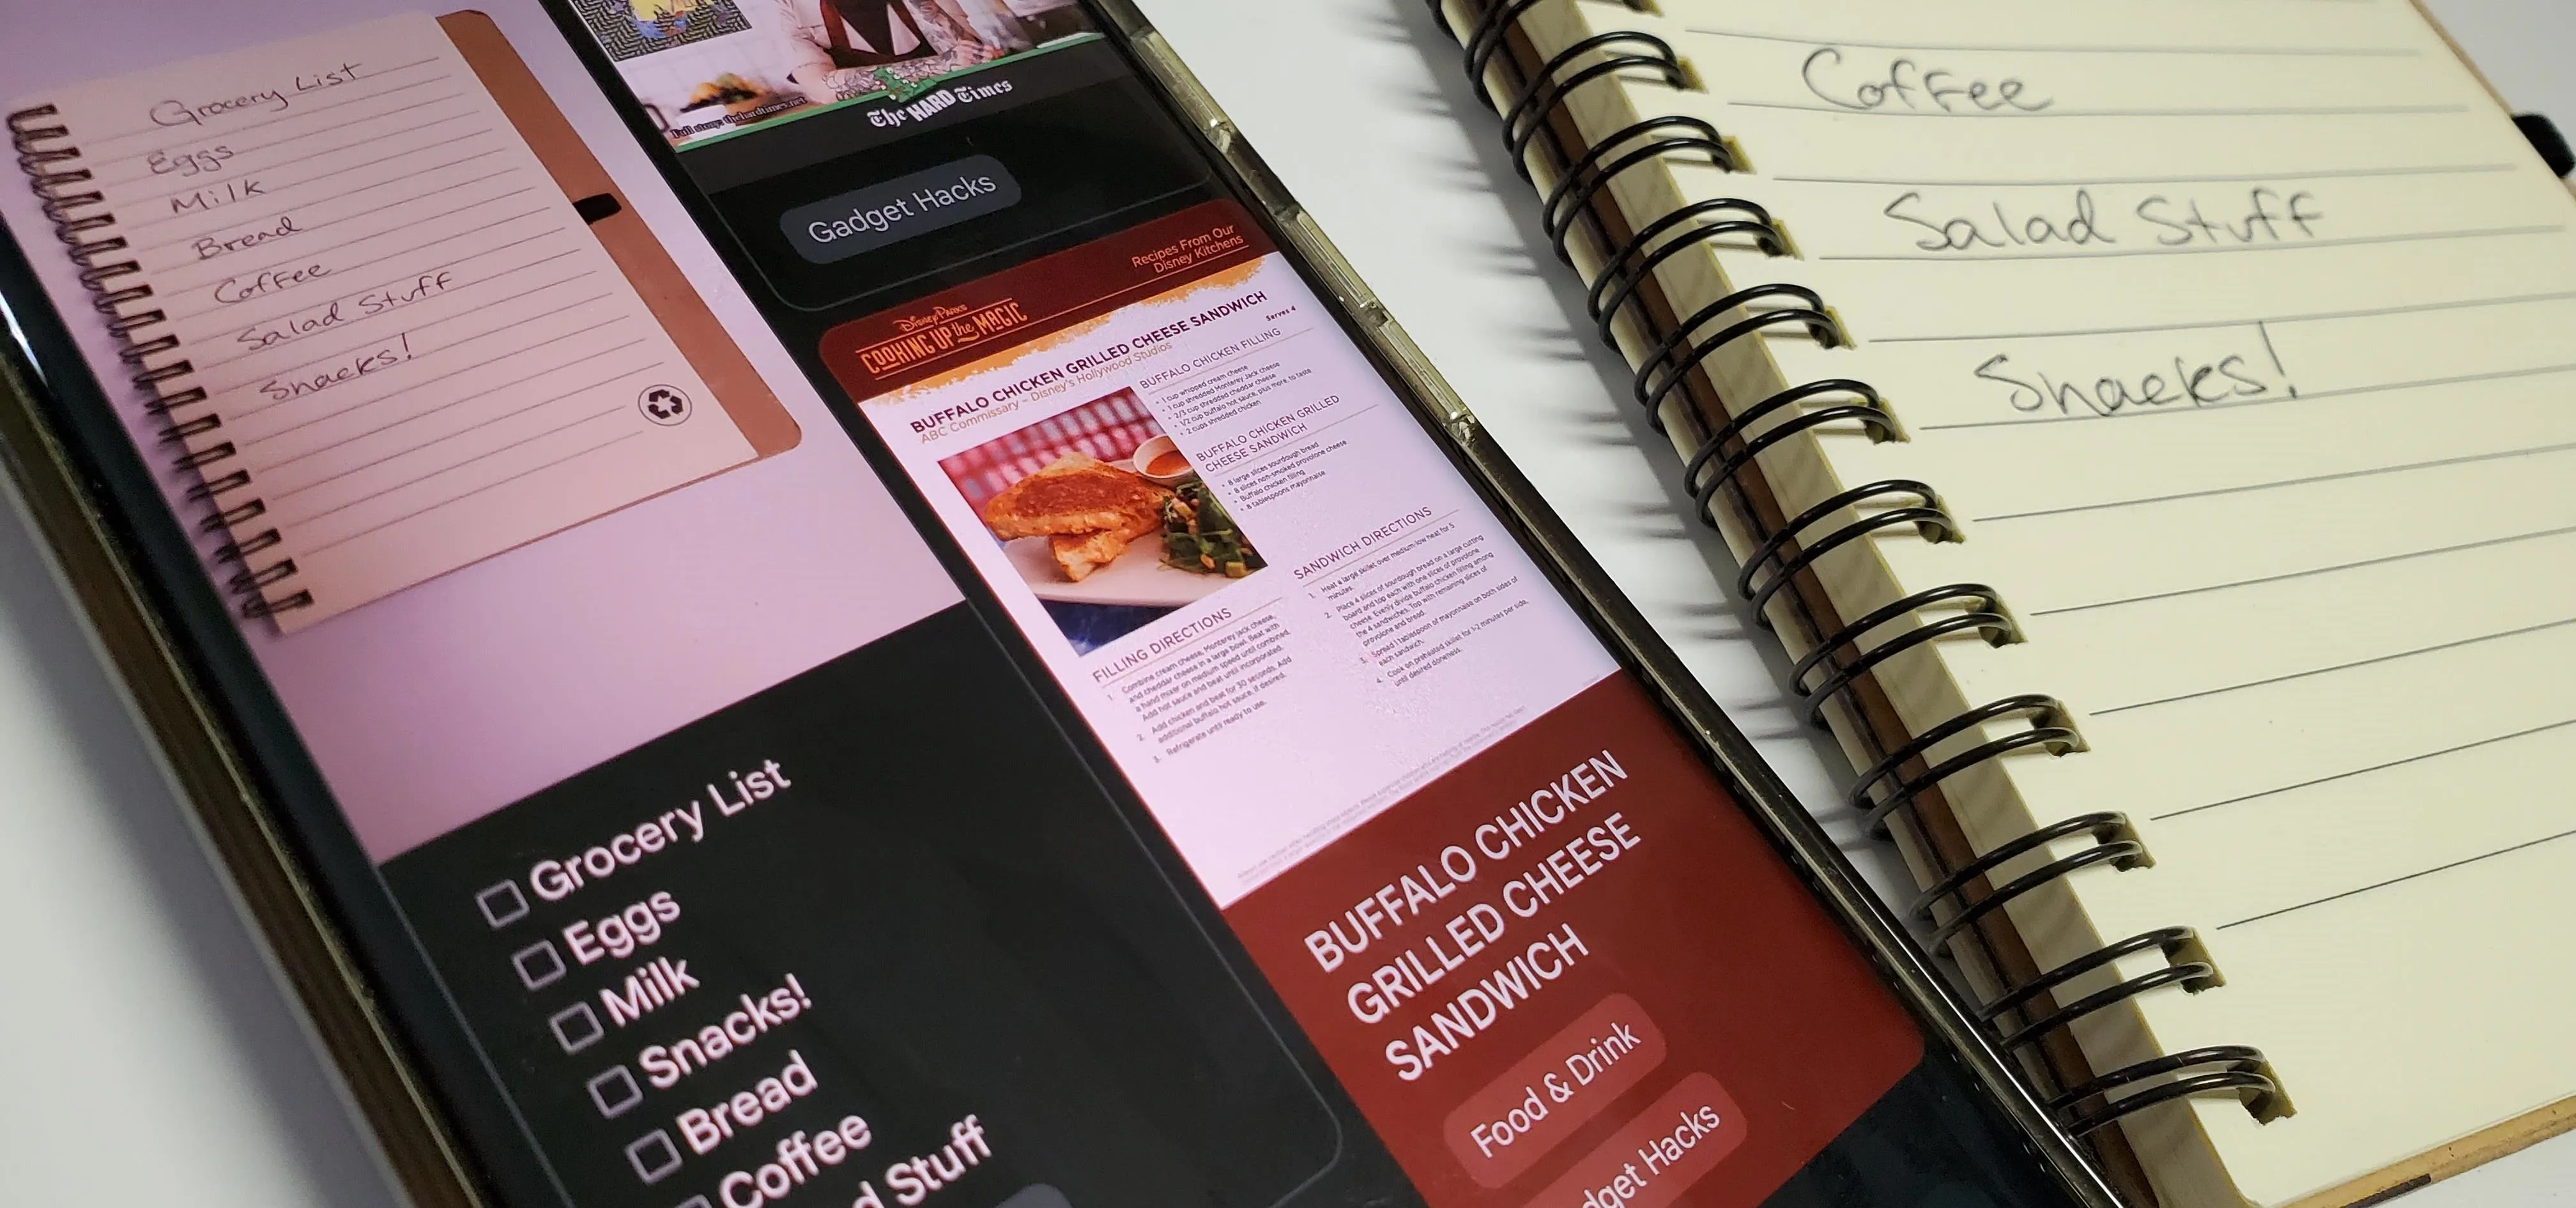
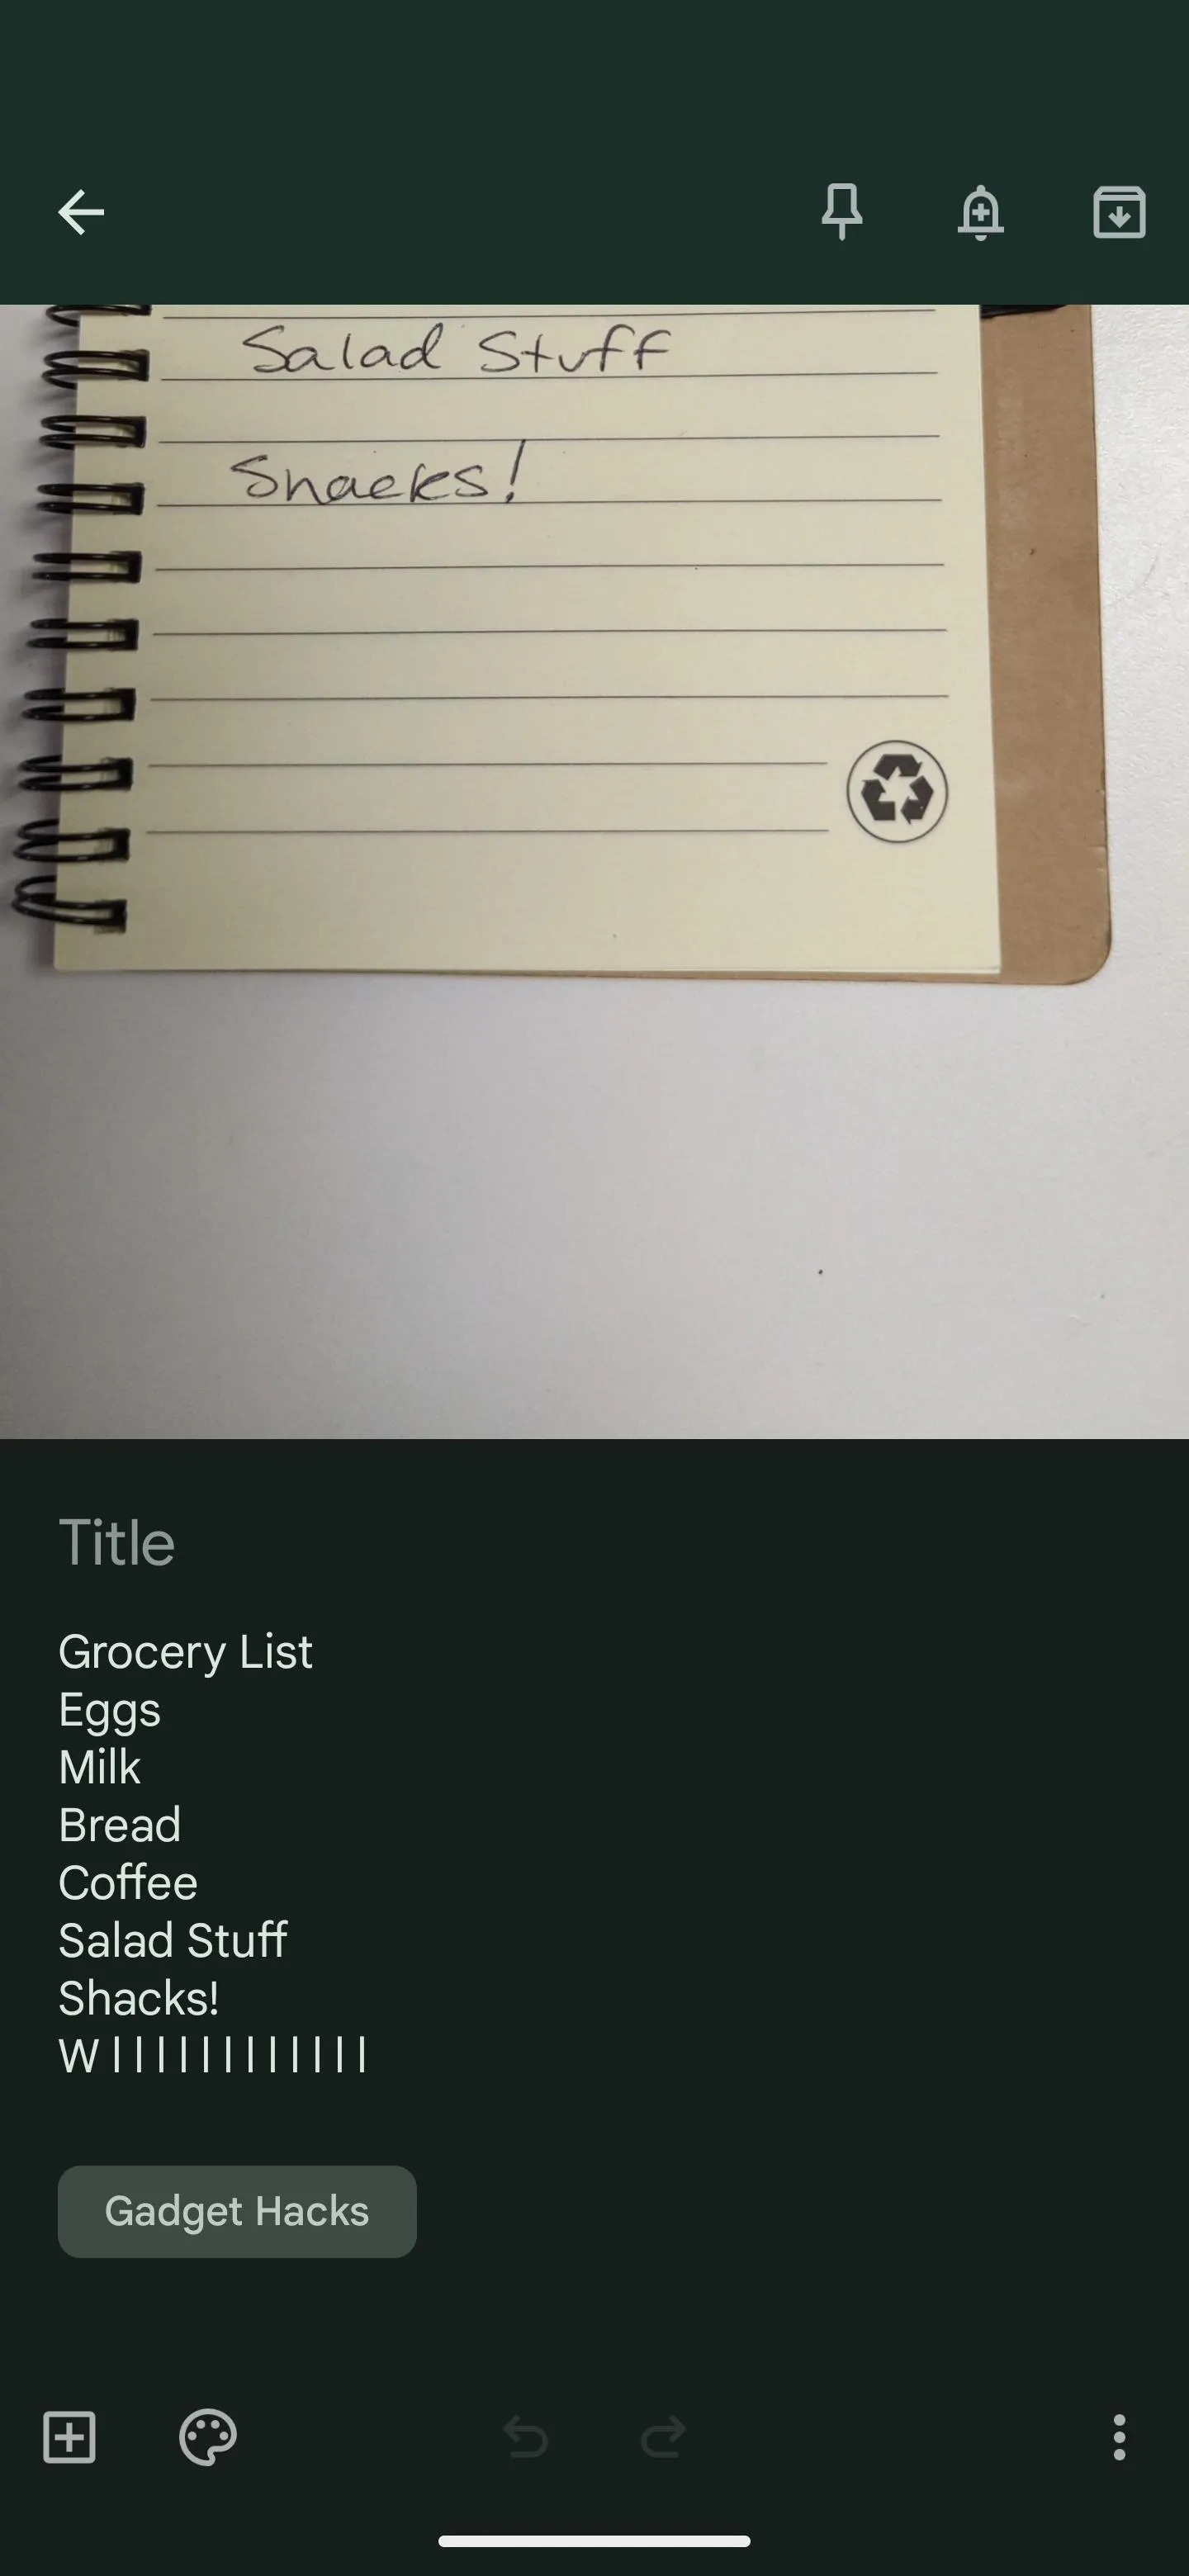
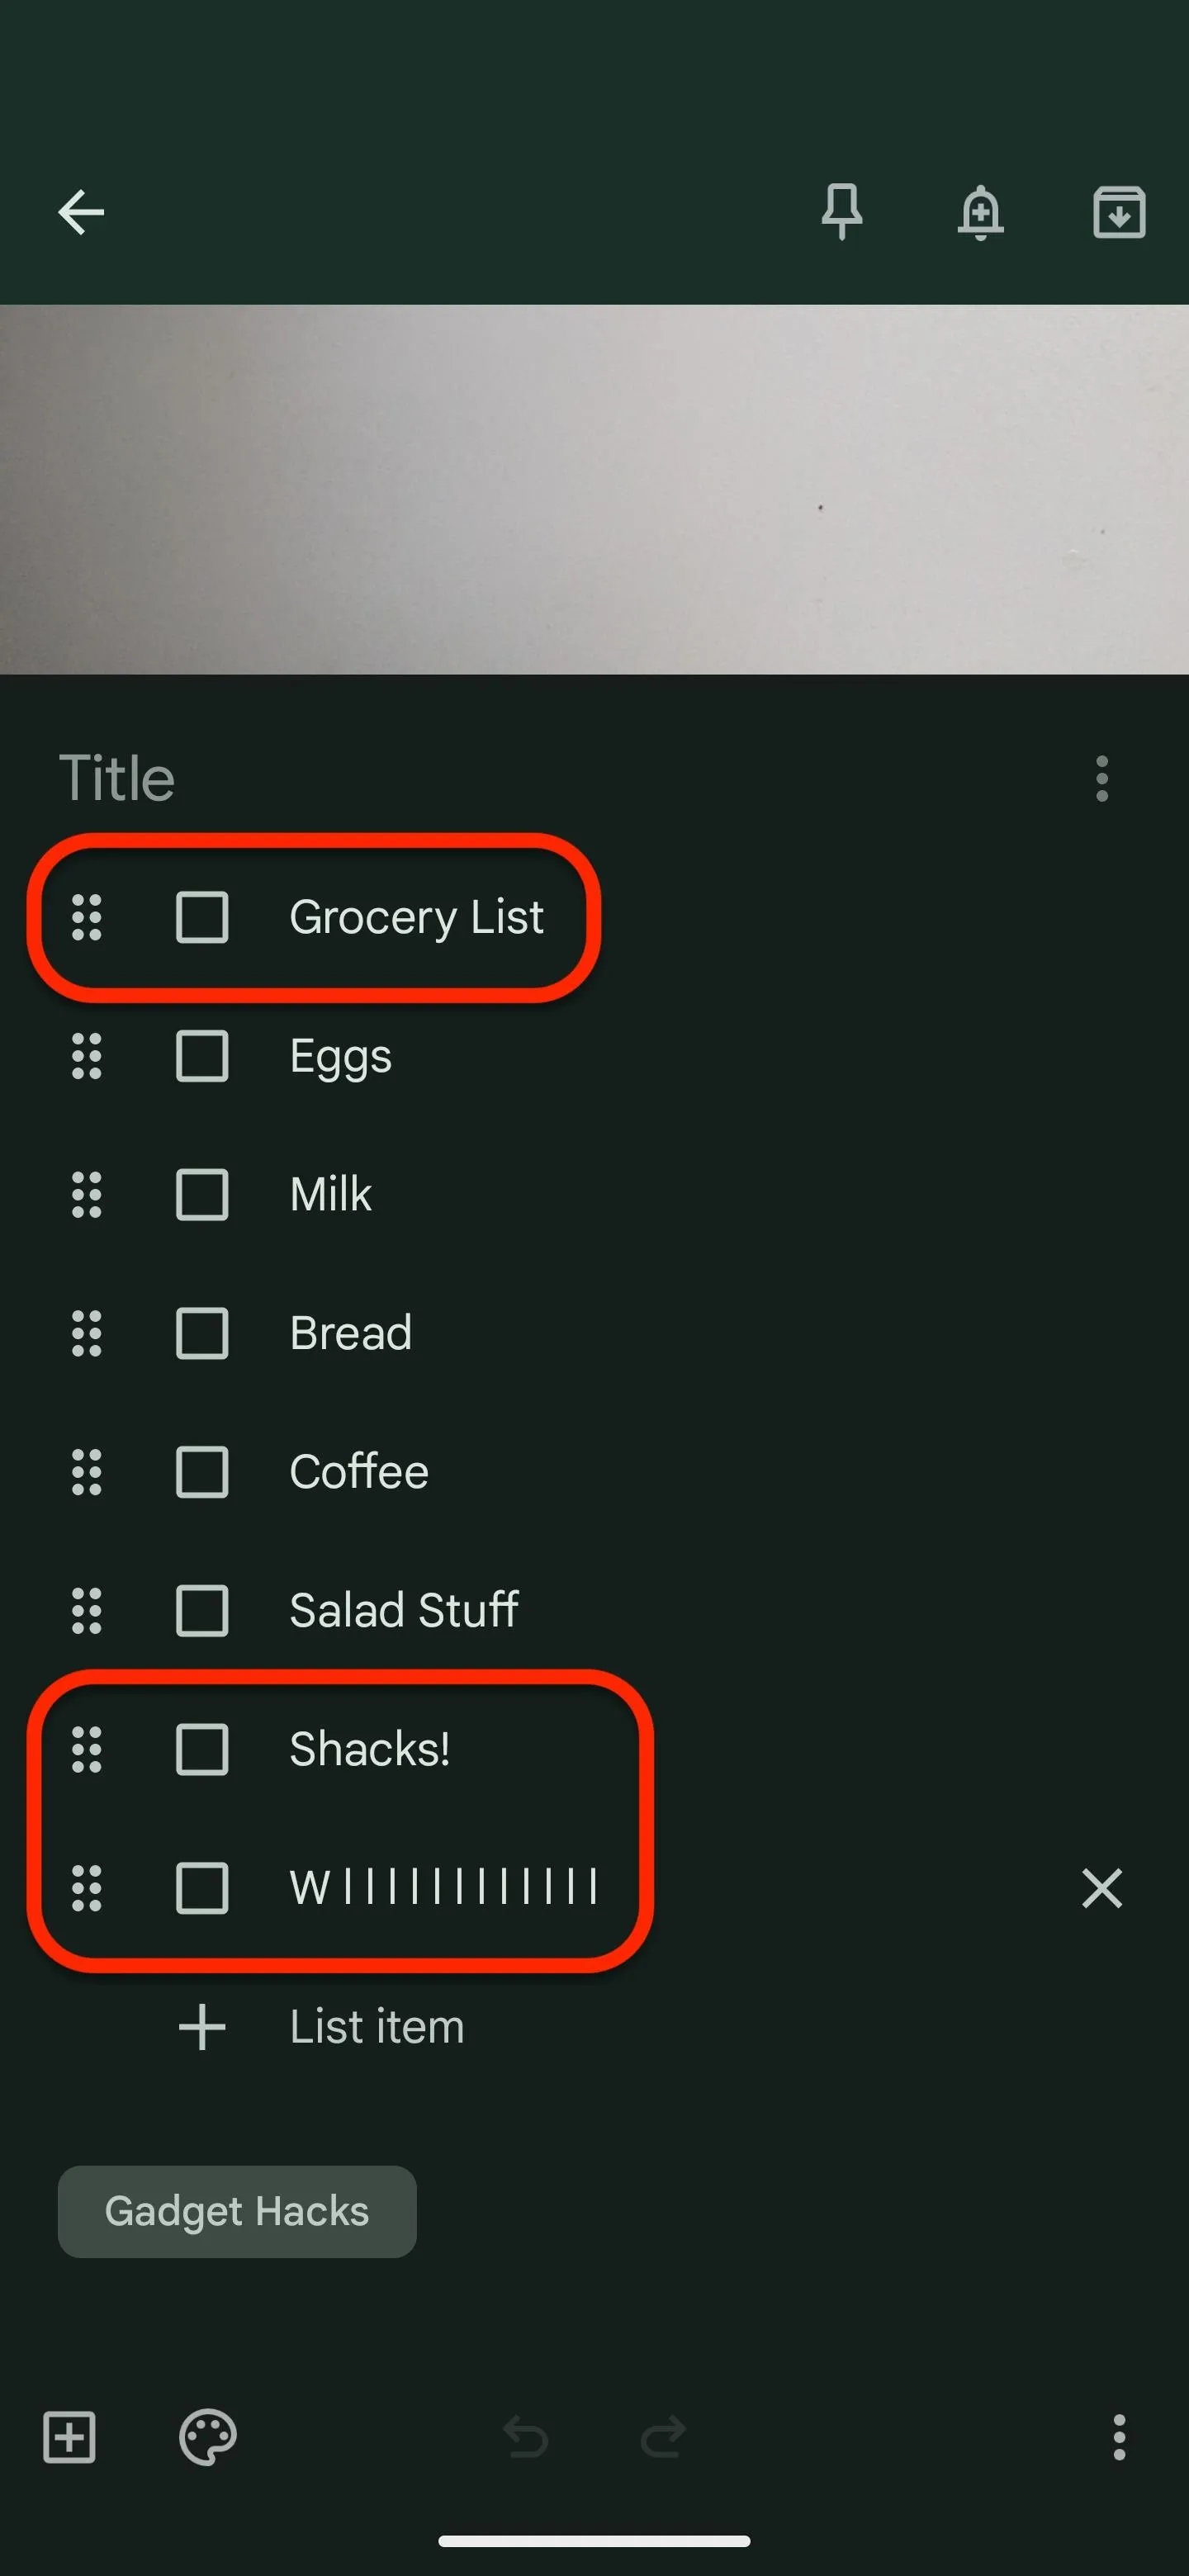
For the transferred text, your mileage may vary based on the legibility of the handwriting or typeface (it works on typed content too). In my grocery list example, my "n" in "Snacks" does look like the "h" it used, but I'm not sure where the "W||||||||||||" came from.
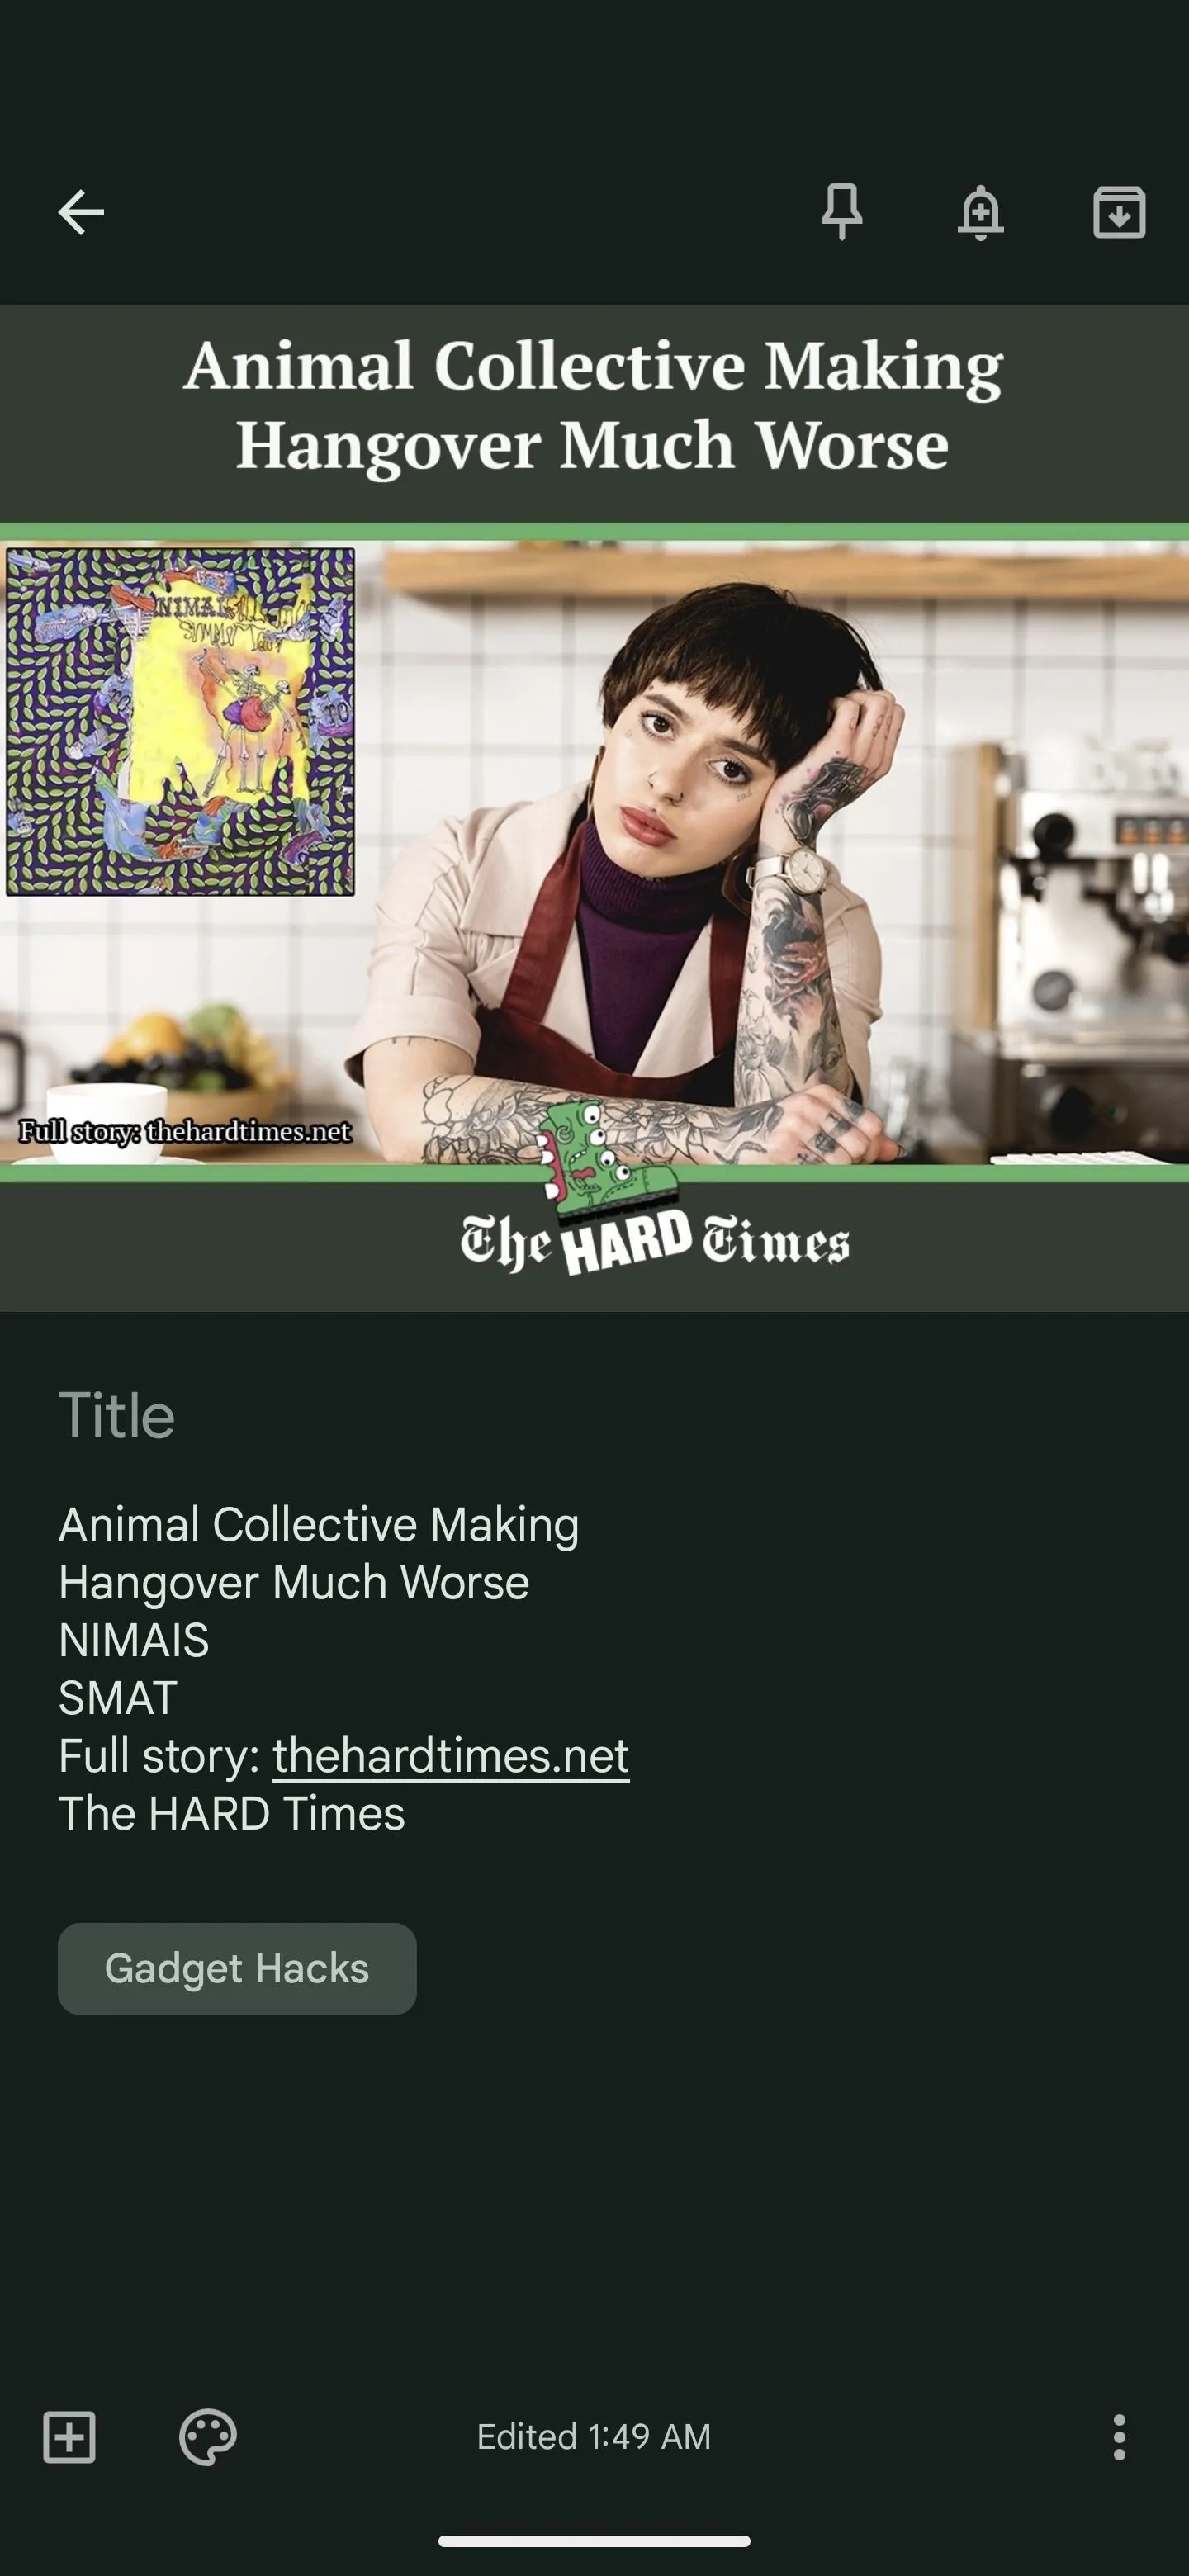
As just mentioned, this feature isn't limited to handwritten text. It can also pull printed text from any image saved to your device, as seen below.
Add Checkboxes and Revise
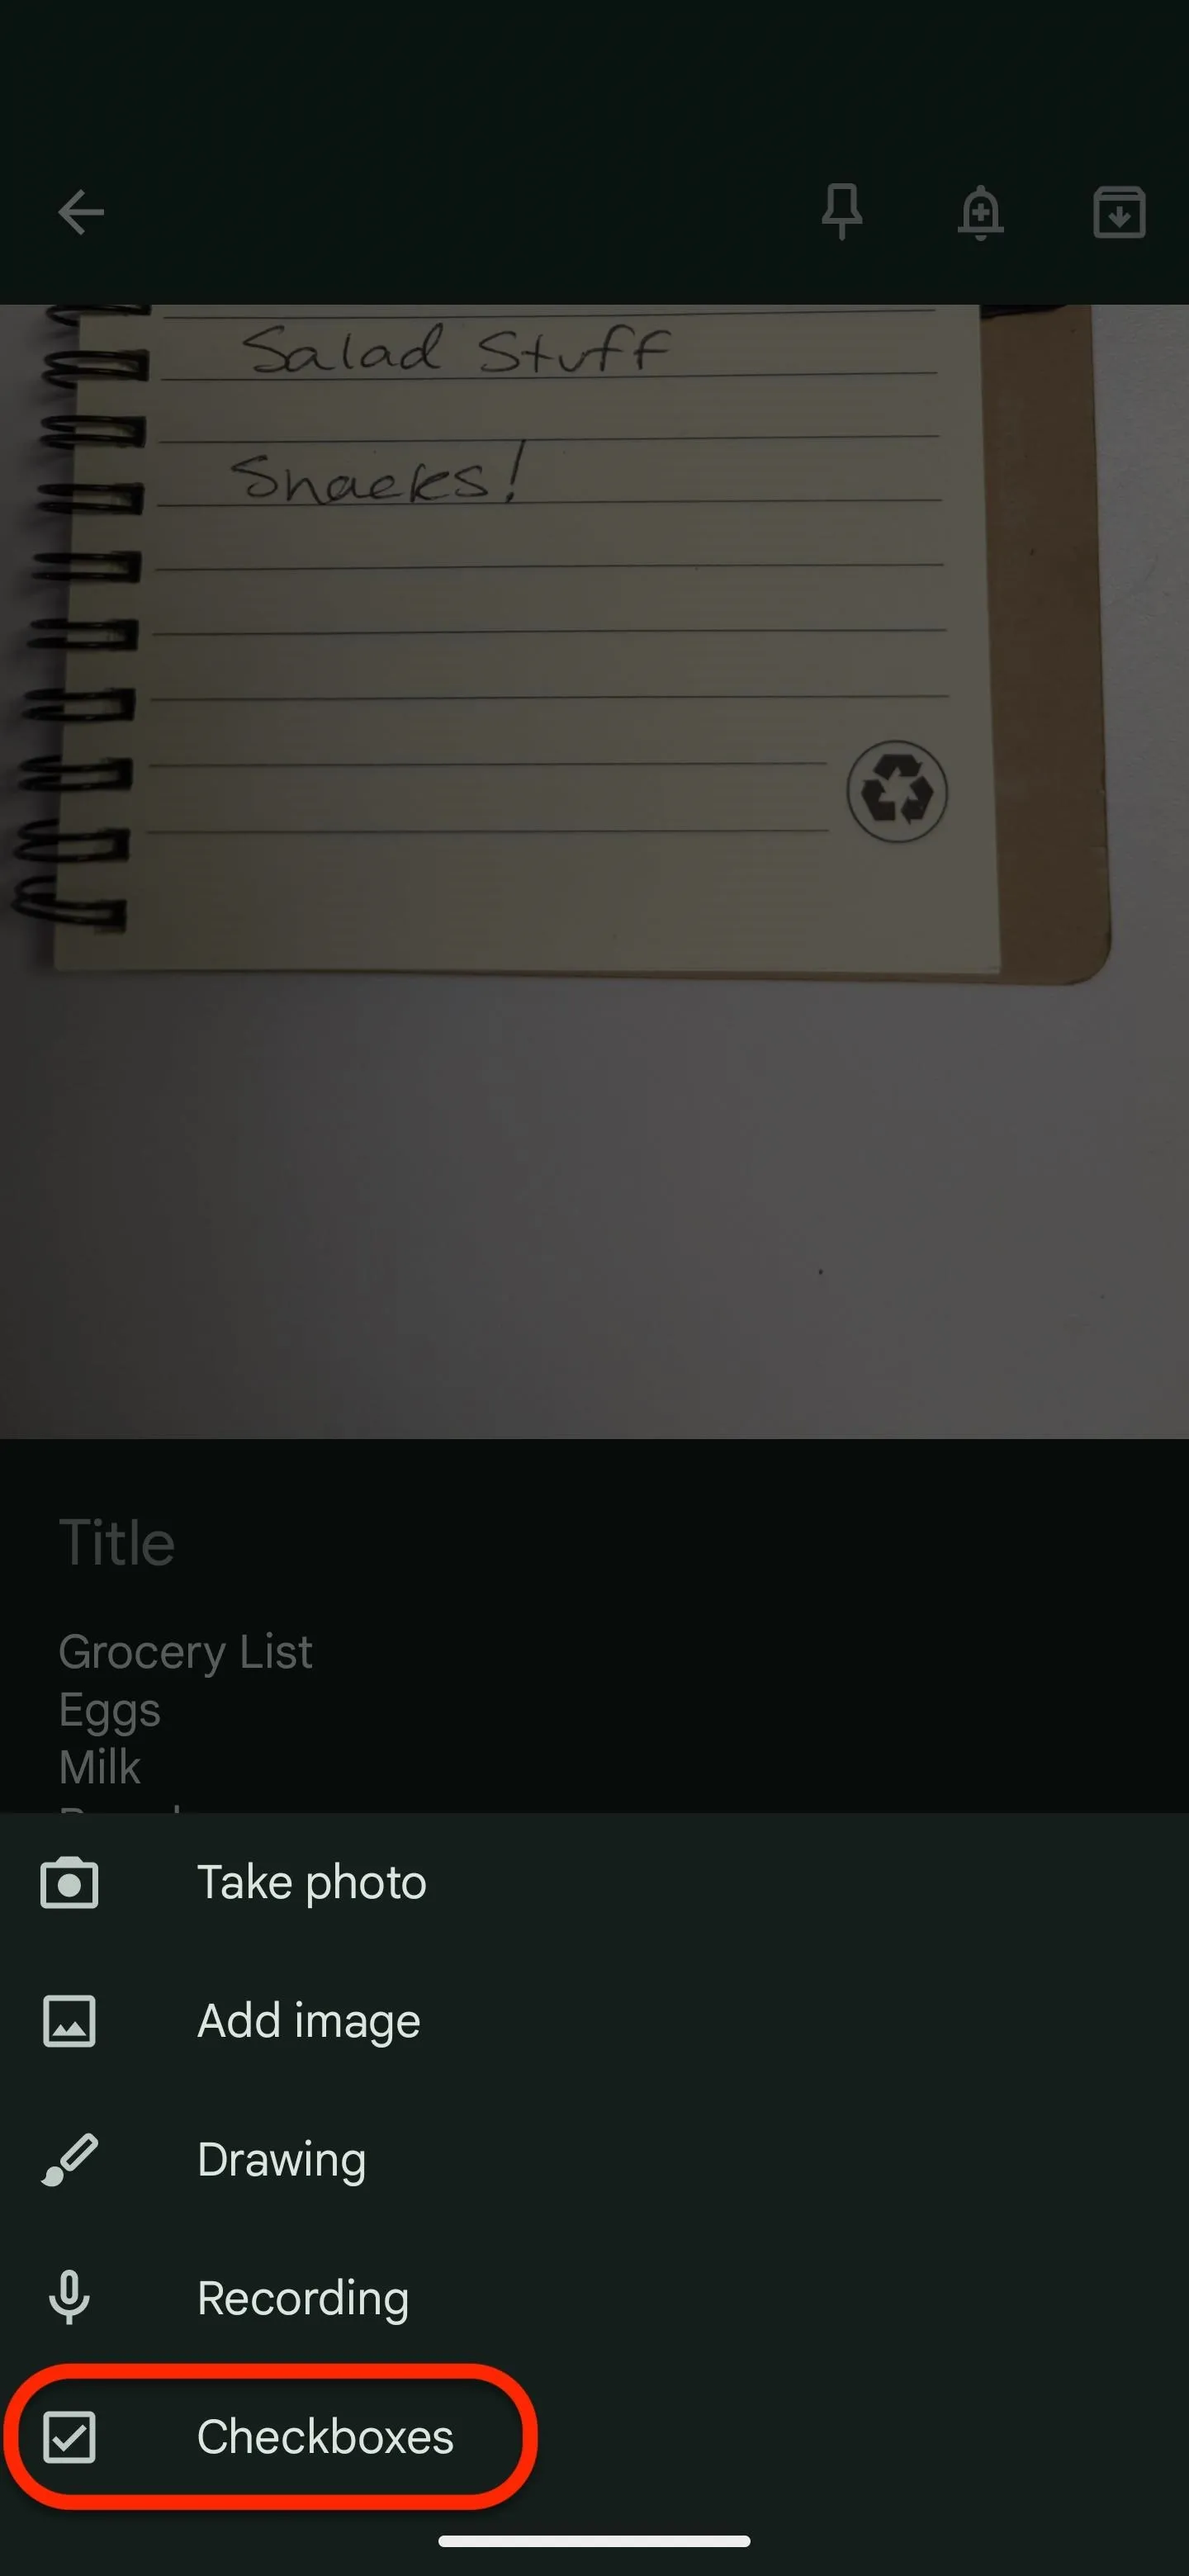
To convert the inputted text into a checkable list, tap the small plus [+] in the bottom toolbar, then choose "Checkboxes." This will add a checkbox in front of every line in the note. Then you can make any other edits needed.
- If you have a heading in your handwritten list, Keep Notes will likely add a checkmark box for it too. You can copy and paste the text into the note's title field, then "X" out the entry in the checklist to remove it.
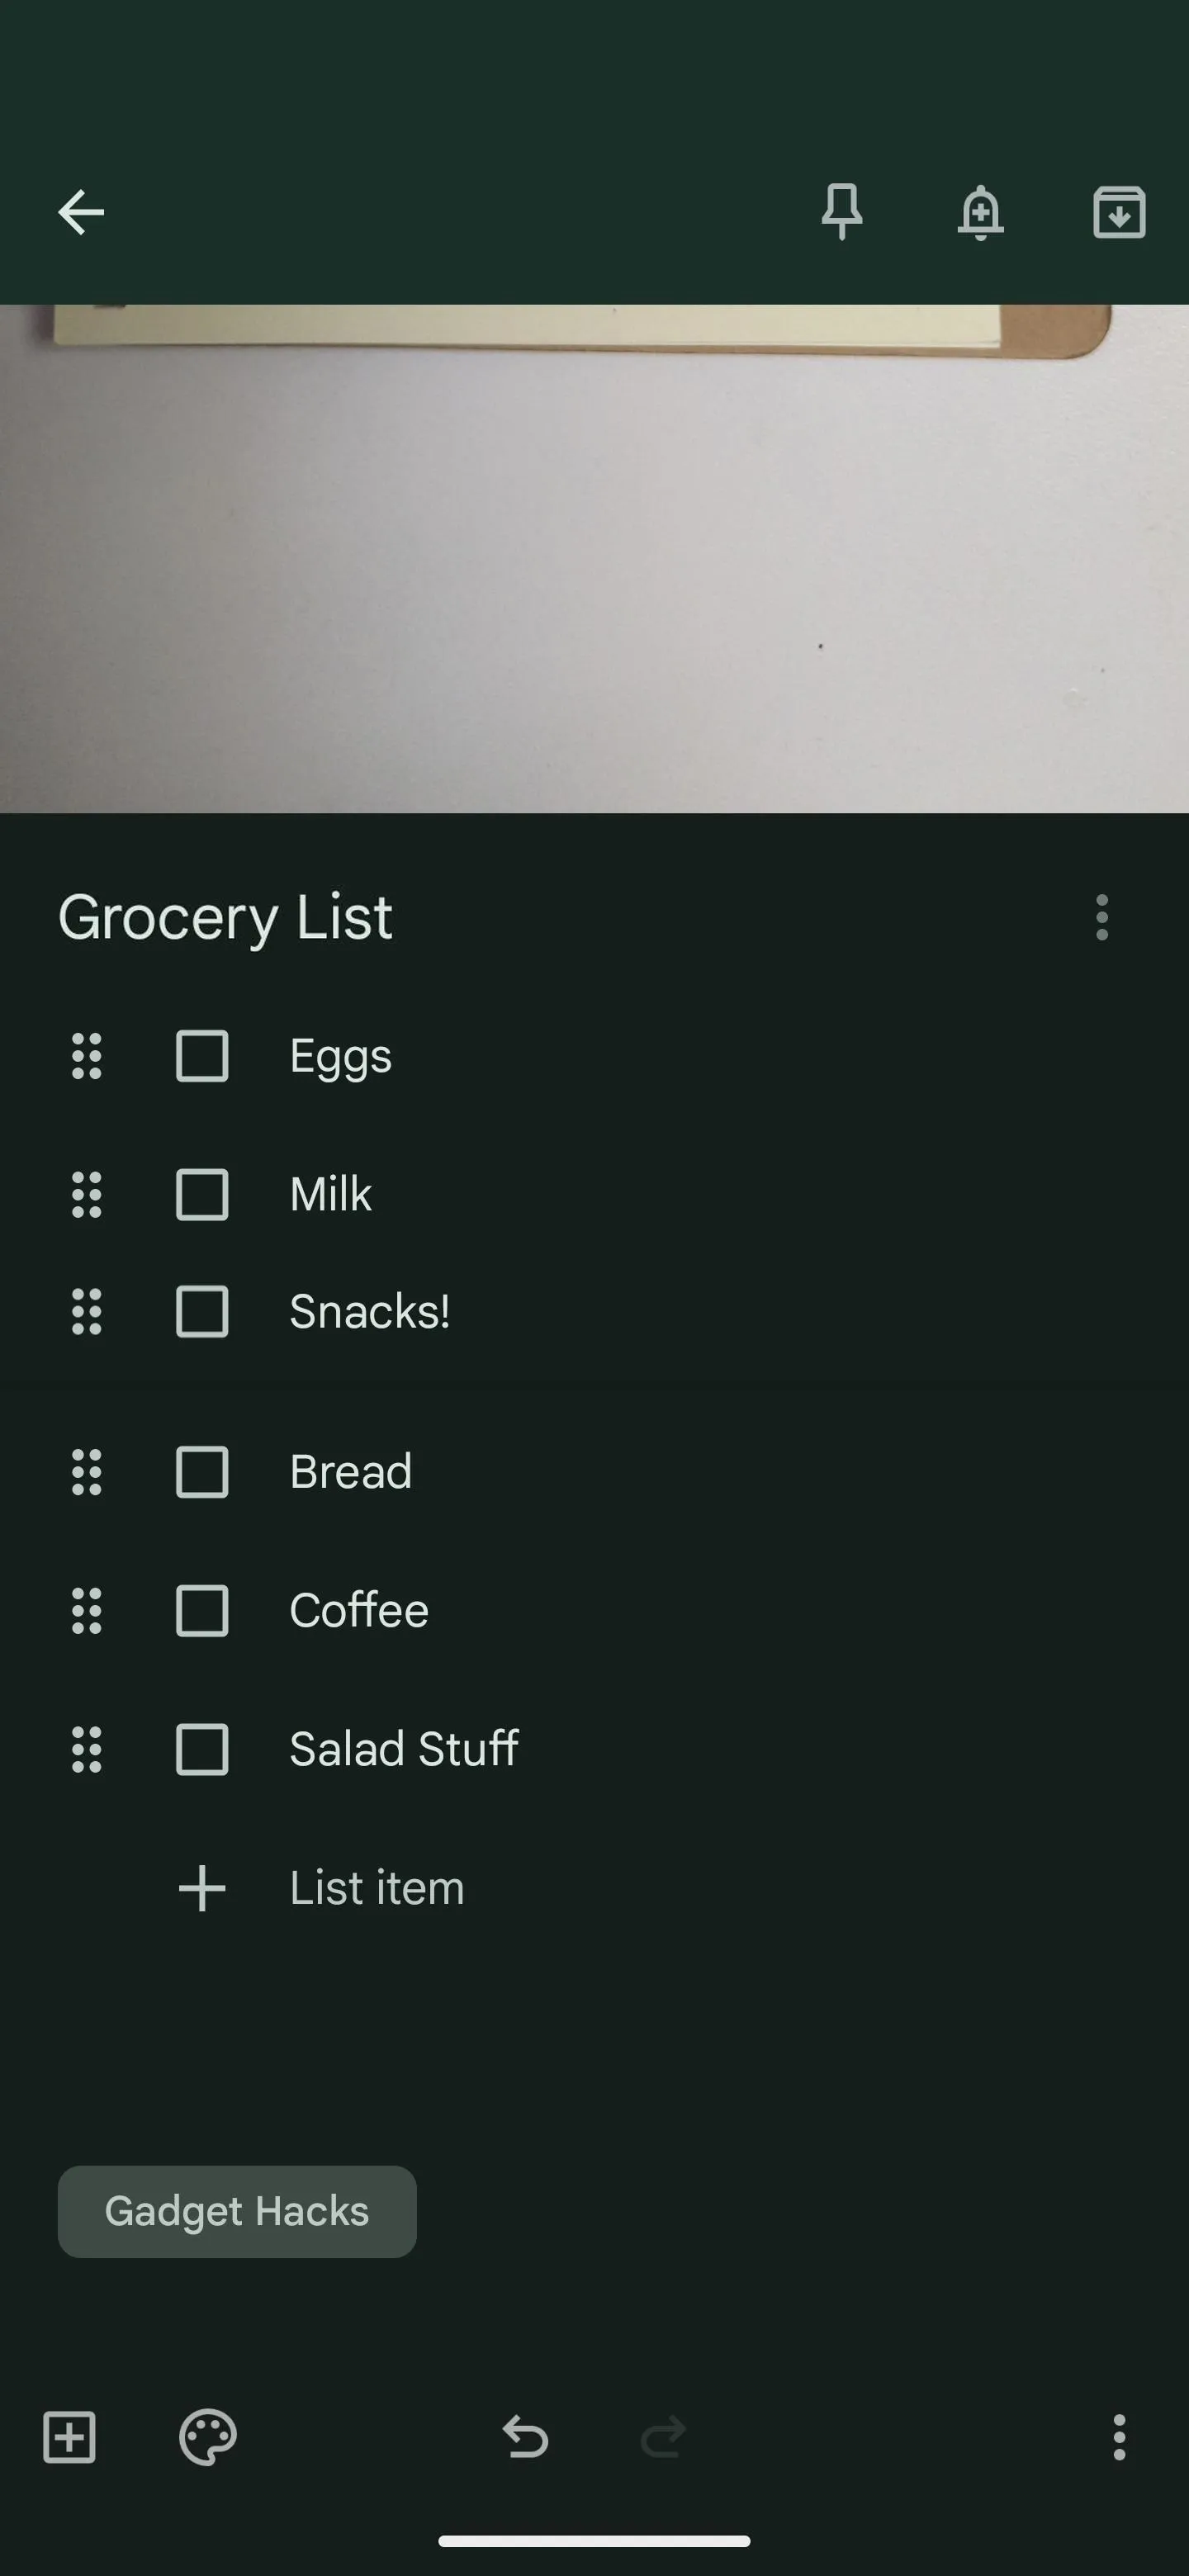
- Keep Notes may make some other mistakes you need to fix, or perhaps you want to add more information to each entry. Tap the text for the entry, then make any adjustments needed.
- To reorder the list, tap and hold the six-dot icon to the left of a single entry, then drag and drop it to another location.
If you've read this far because of the whiteboard scenario, you might need to convert your Google Keep note to a Google Doc. It's an easy task to accomplish if so.
Cover photo and screenshots by Tommy Palladino/Gadget Hacks


Comments
Be the first, drop a comment!