If you're using or need to use Zoom, the popular video teleconferencing service, you've almost certainly heard about "Zoombombing" by now. While Zoom has been adding security measures to address the problem, there are other things you can do to prevent or stop Zoombombers in their tracks so that your video meetings and chats go undisturbed and uninterrupted.
Zoombombing, for those of you who don't know or need a refresher, is the art of sabotaging a Zoom video conference online. Most of the time, the troll causing trouble is someone completely random that found the link to a meeting somewhere online. In some cases, they've found the password for those that required one. Either way, they would jump on and cause all types of chaos, from showing lewd and gory content to racial slurs and other inappropriate language.
Zoom enhanced security on its platform on April 8, 2020, which requires all meetings to have passwords, turns on "Waiting Room" by default, removes meeting IDs so that they can't be screenshotted, and consolidates security features in the settings, to name just a few. You can also restrict sharing content to only hosts, block someone's camera, and stop a participant's microphone.
You can mute a participant's mic in more than one way, and each option offers a different solution to your problem. Do you want only to mute one person or quiet every single participant in the meeting? Do you want the muting to be permanent or so that people can unmute themselves? Whatever it is, one of the options below, available for Zoom on iOS and Android, is sure to help.
Mute a Single Participant's Microphone
If there's a single participant you want to shut up momentarily, there's an easy way to mute their microphone. However, it won't work permanently, as the participant can easily unmute themselves as soon as they're muted. Use this option only when you need to keep someone quiet for a few seconds, or as a warning, but not as a permanent solution.
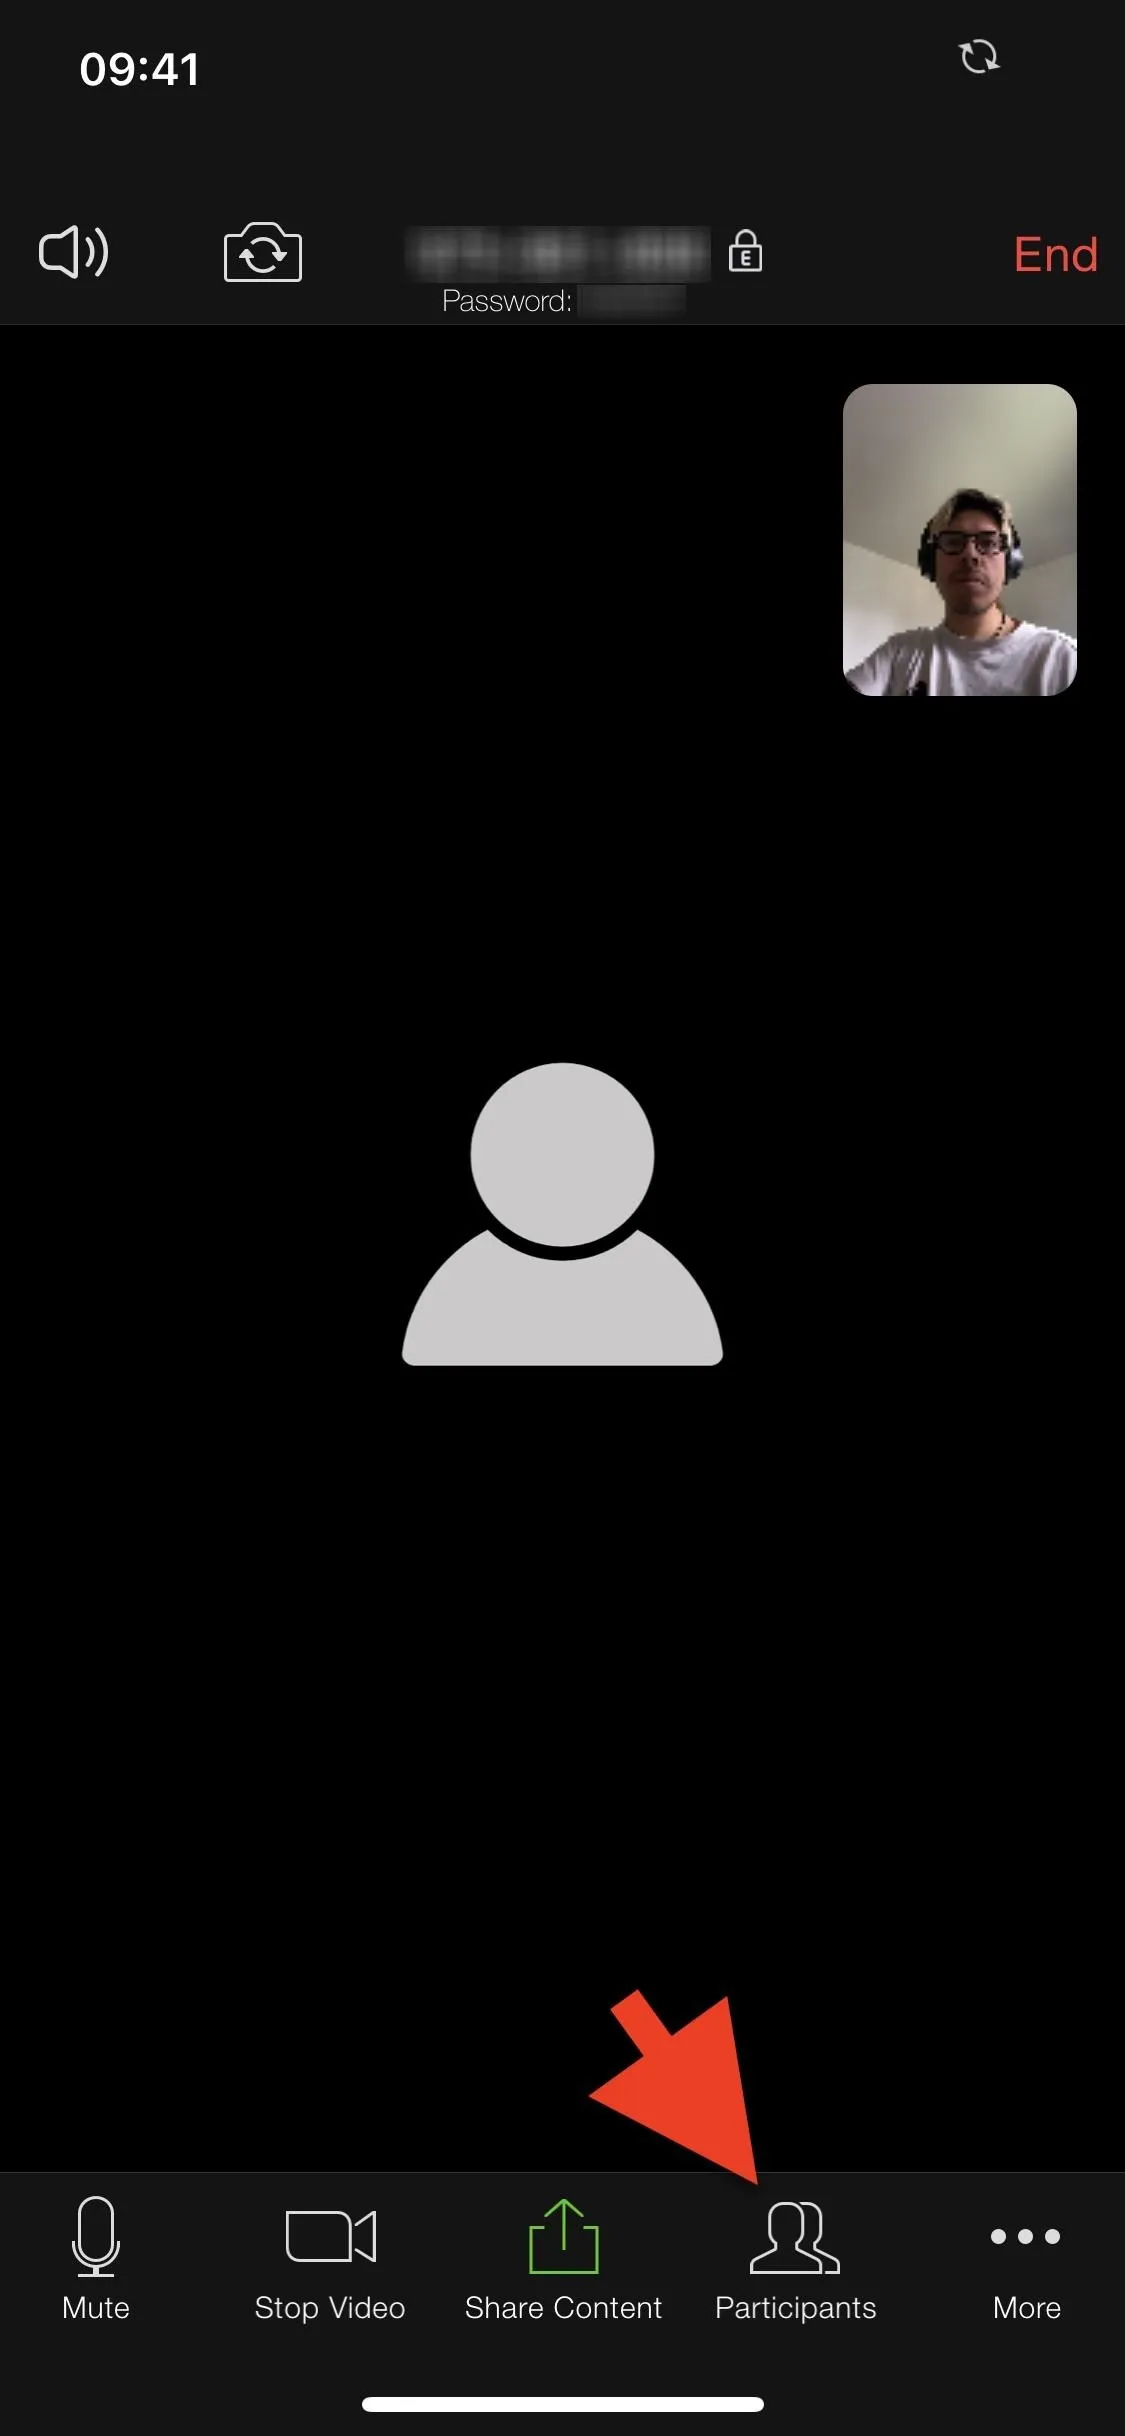
To mute a participant, tap on "Participants" in the navigation bar and find the person you want to mute. Tap their name and then on "Mute Audio" (iOS) or "Mute" (Android) to stop their mic from working. As mentioned above, the participant can simply unmute themselves, but it's an easy and quick fix to momentarily stop someone who is disrupting a meeting.
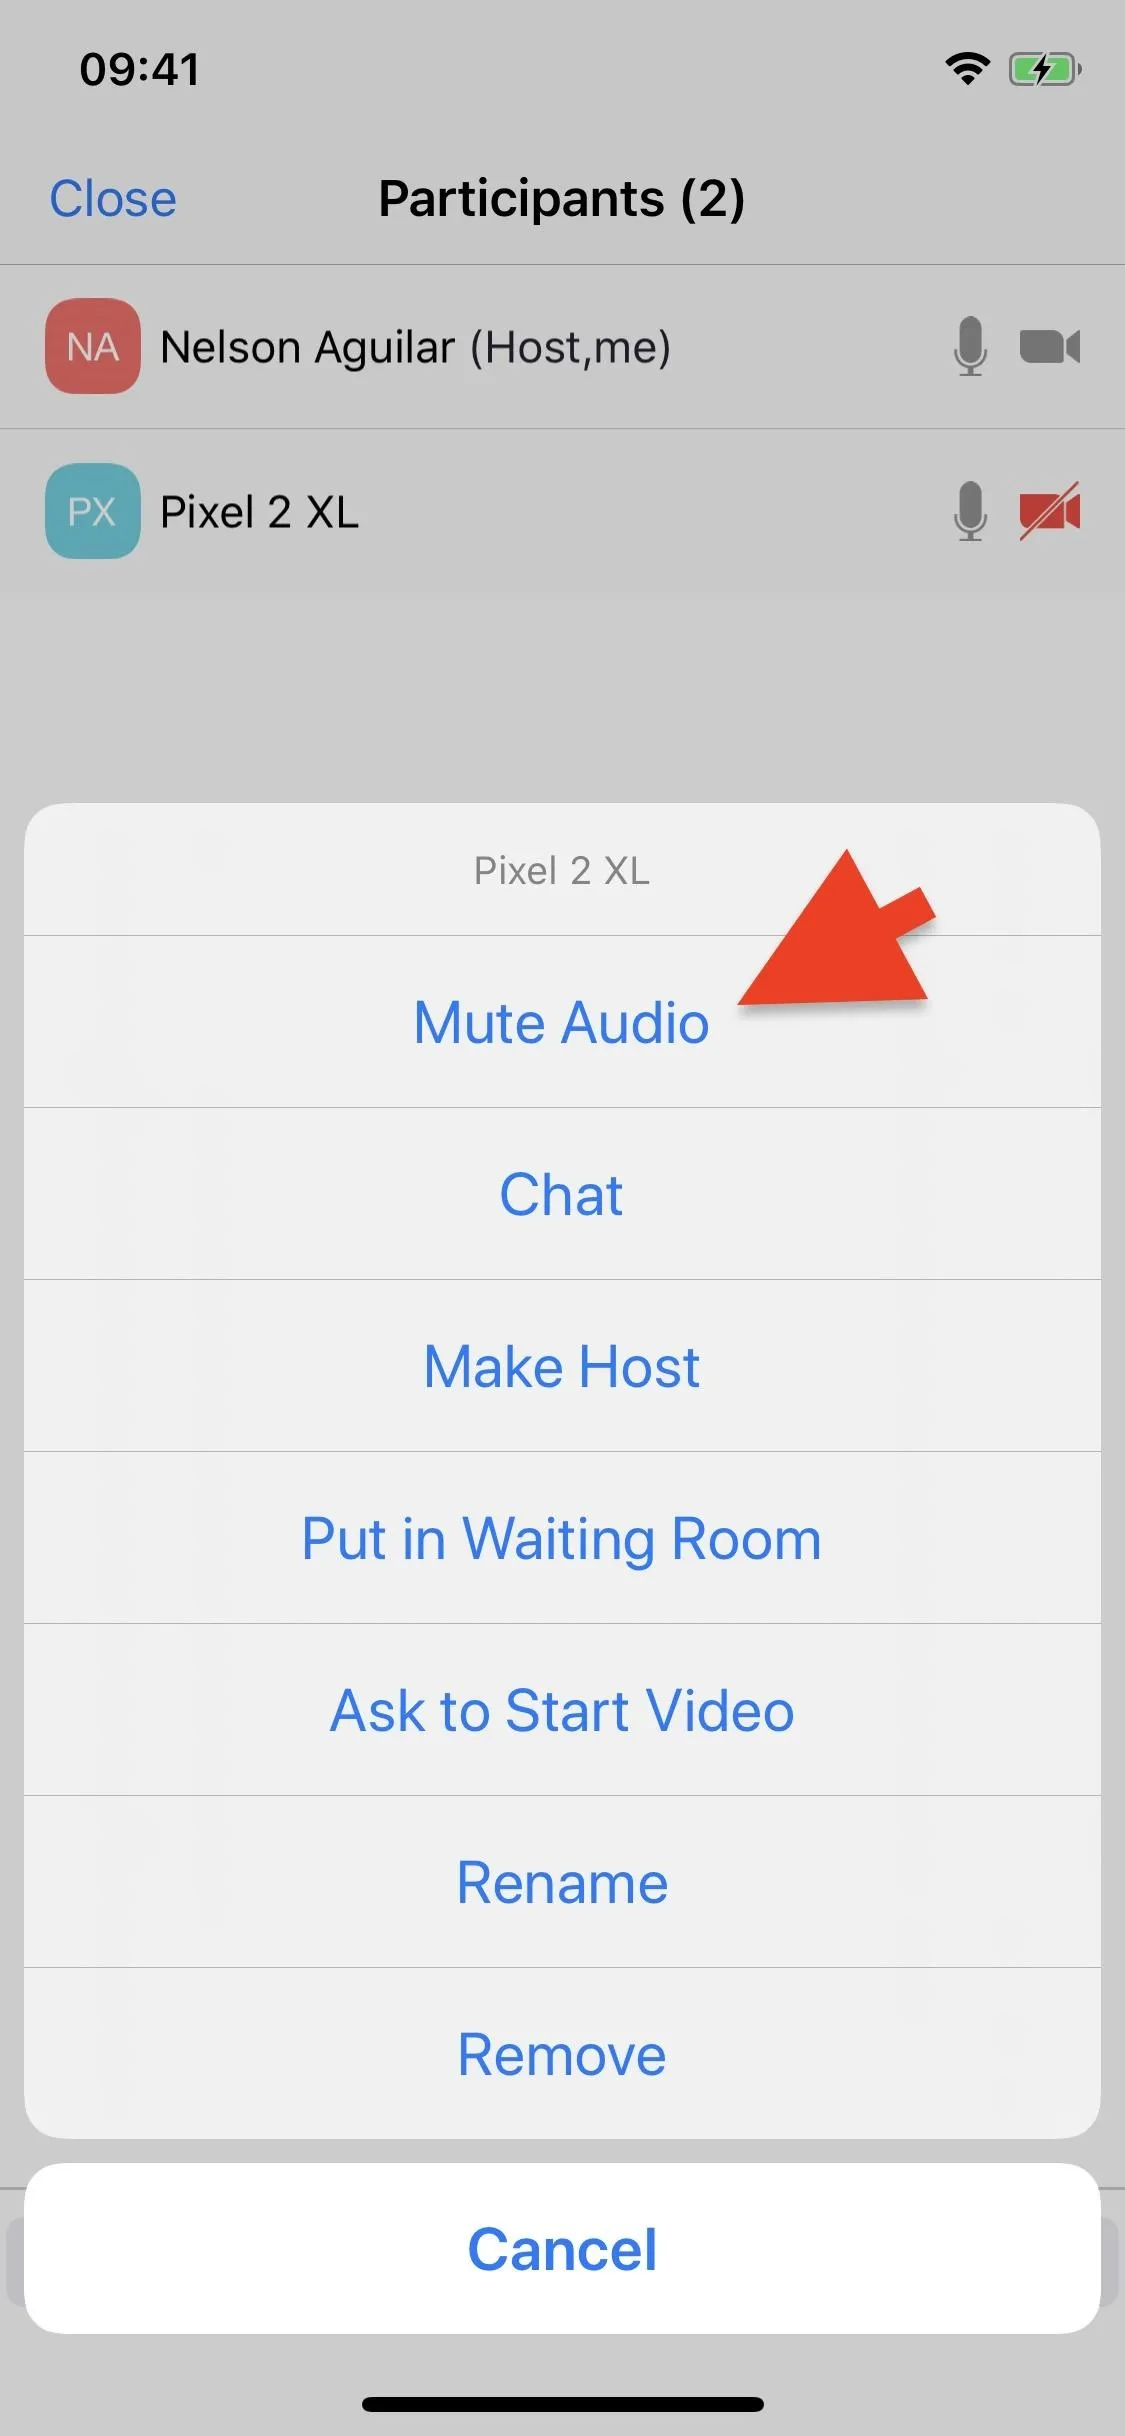


Note that in the web client, you can uncheck the "Allow participants to unmute themselves" option in "Participants" under the "More" options. Doing so will block individuals from unmuting themselves after you mute them. However, the option is not available in the mobile apps unless you mute everyone (see Option 2 below).
Mute All Participants' Microphones
A harsher, but more permanent solution, to cutting off someone's audio is to just mute every single participant in your meeting. Although it does stop all sound from working (except your own), none of the participants can unmute their microphone, unlike in the previous option.
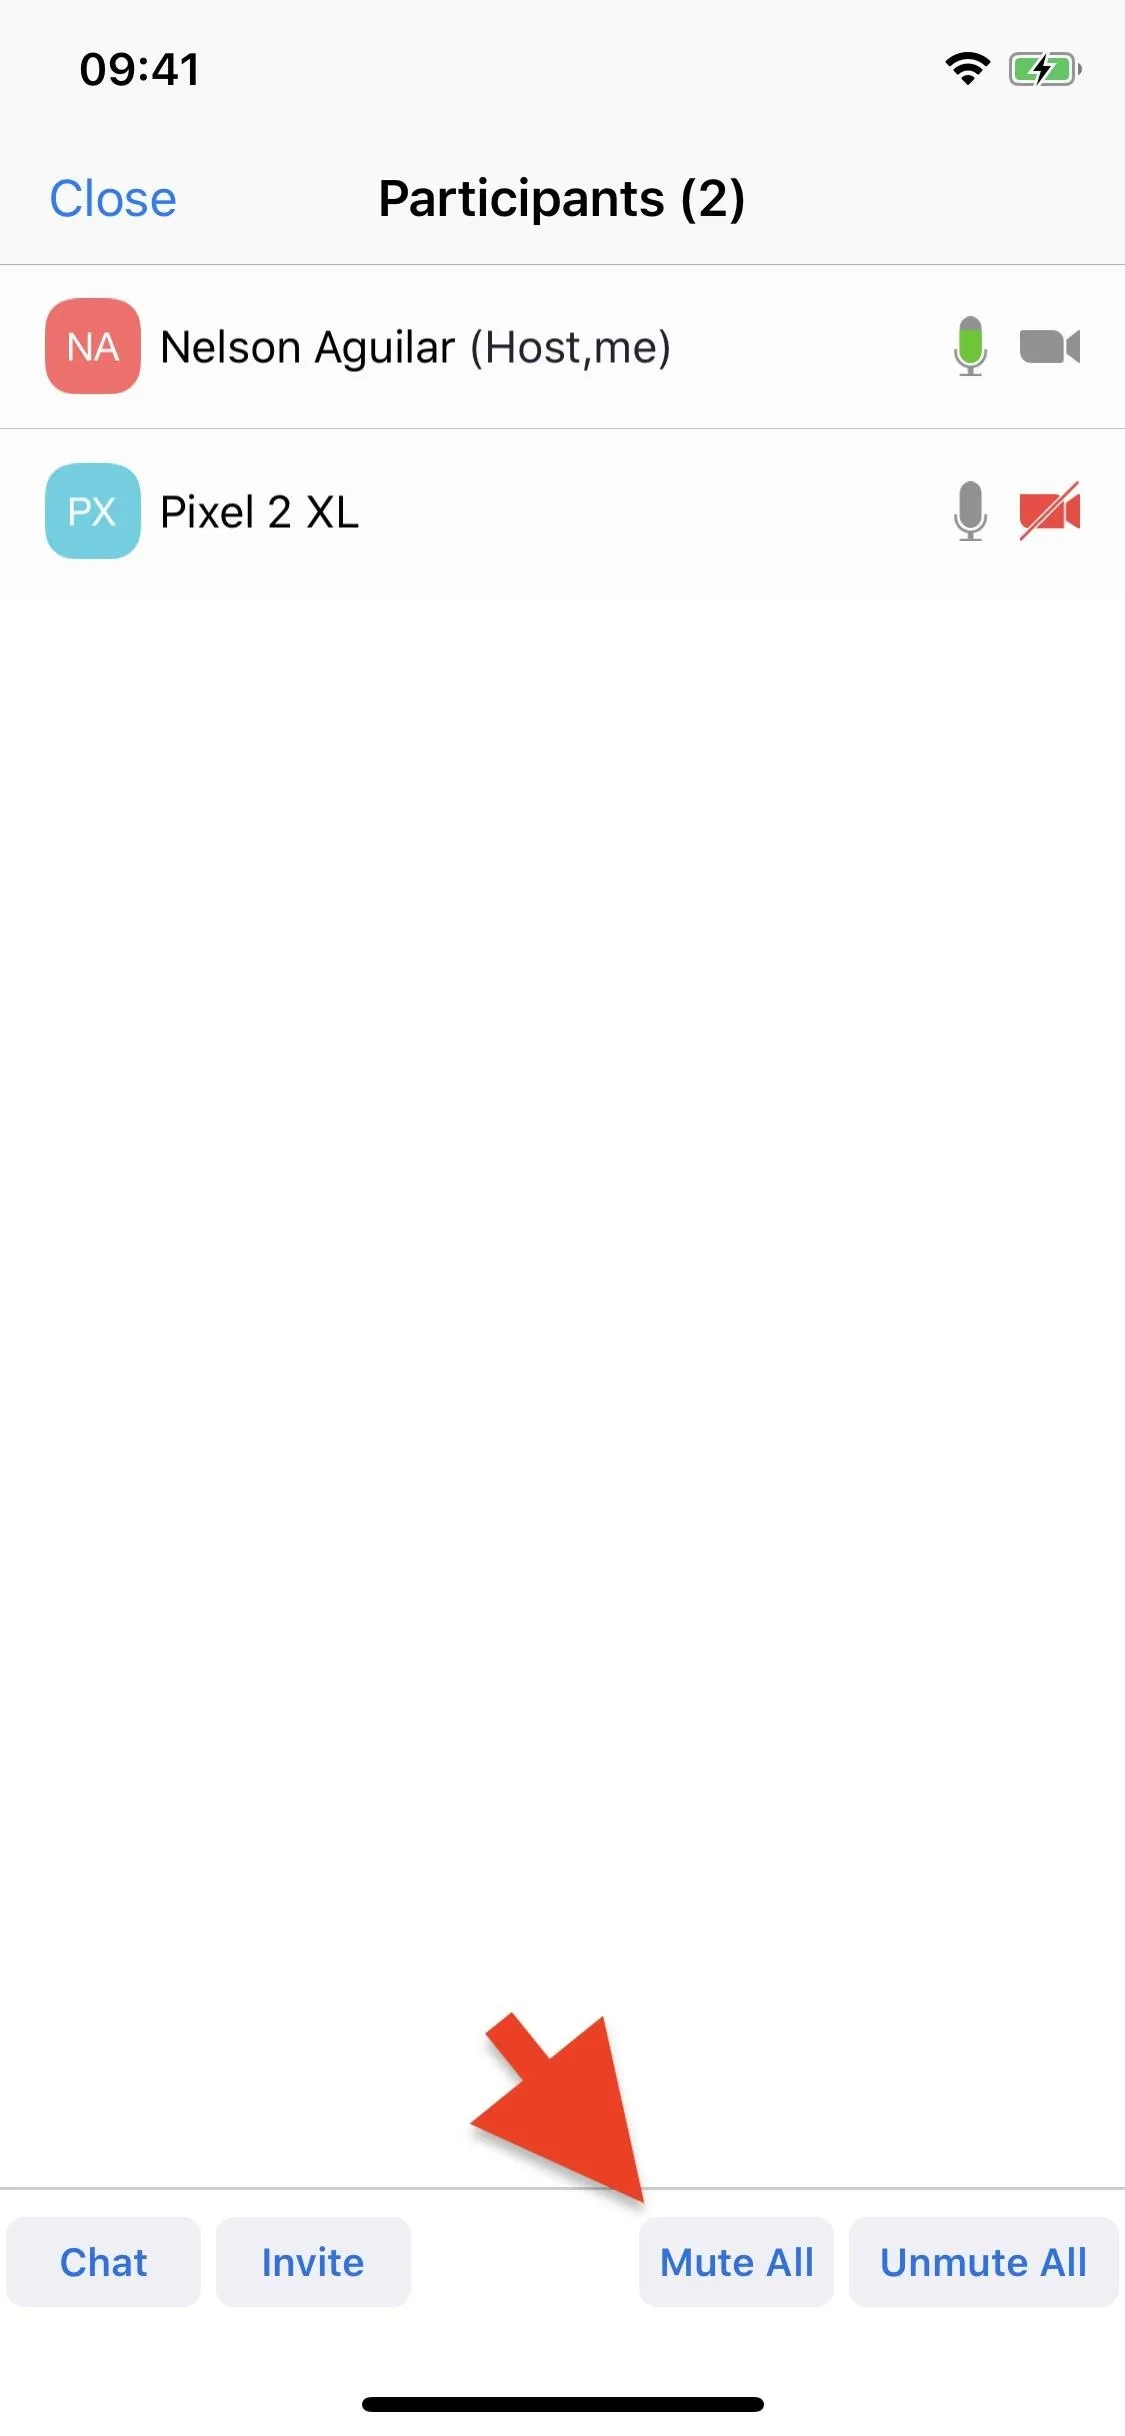
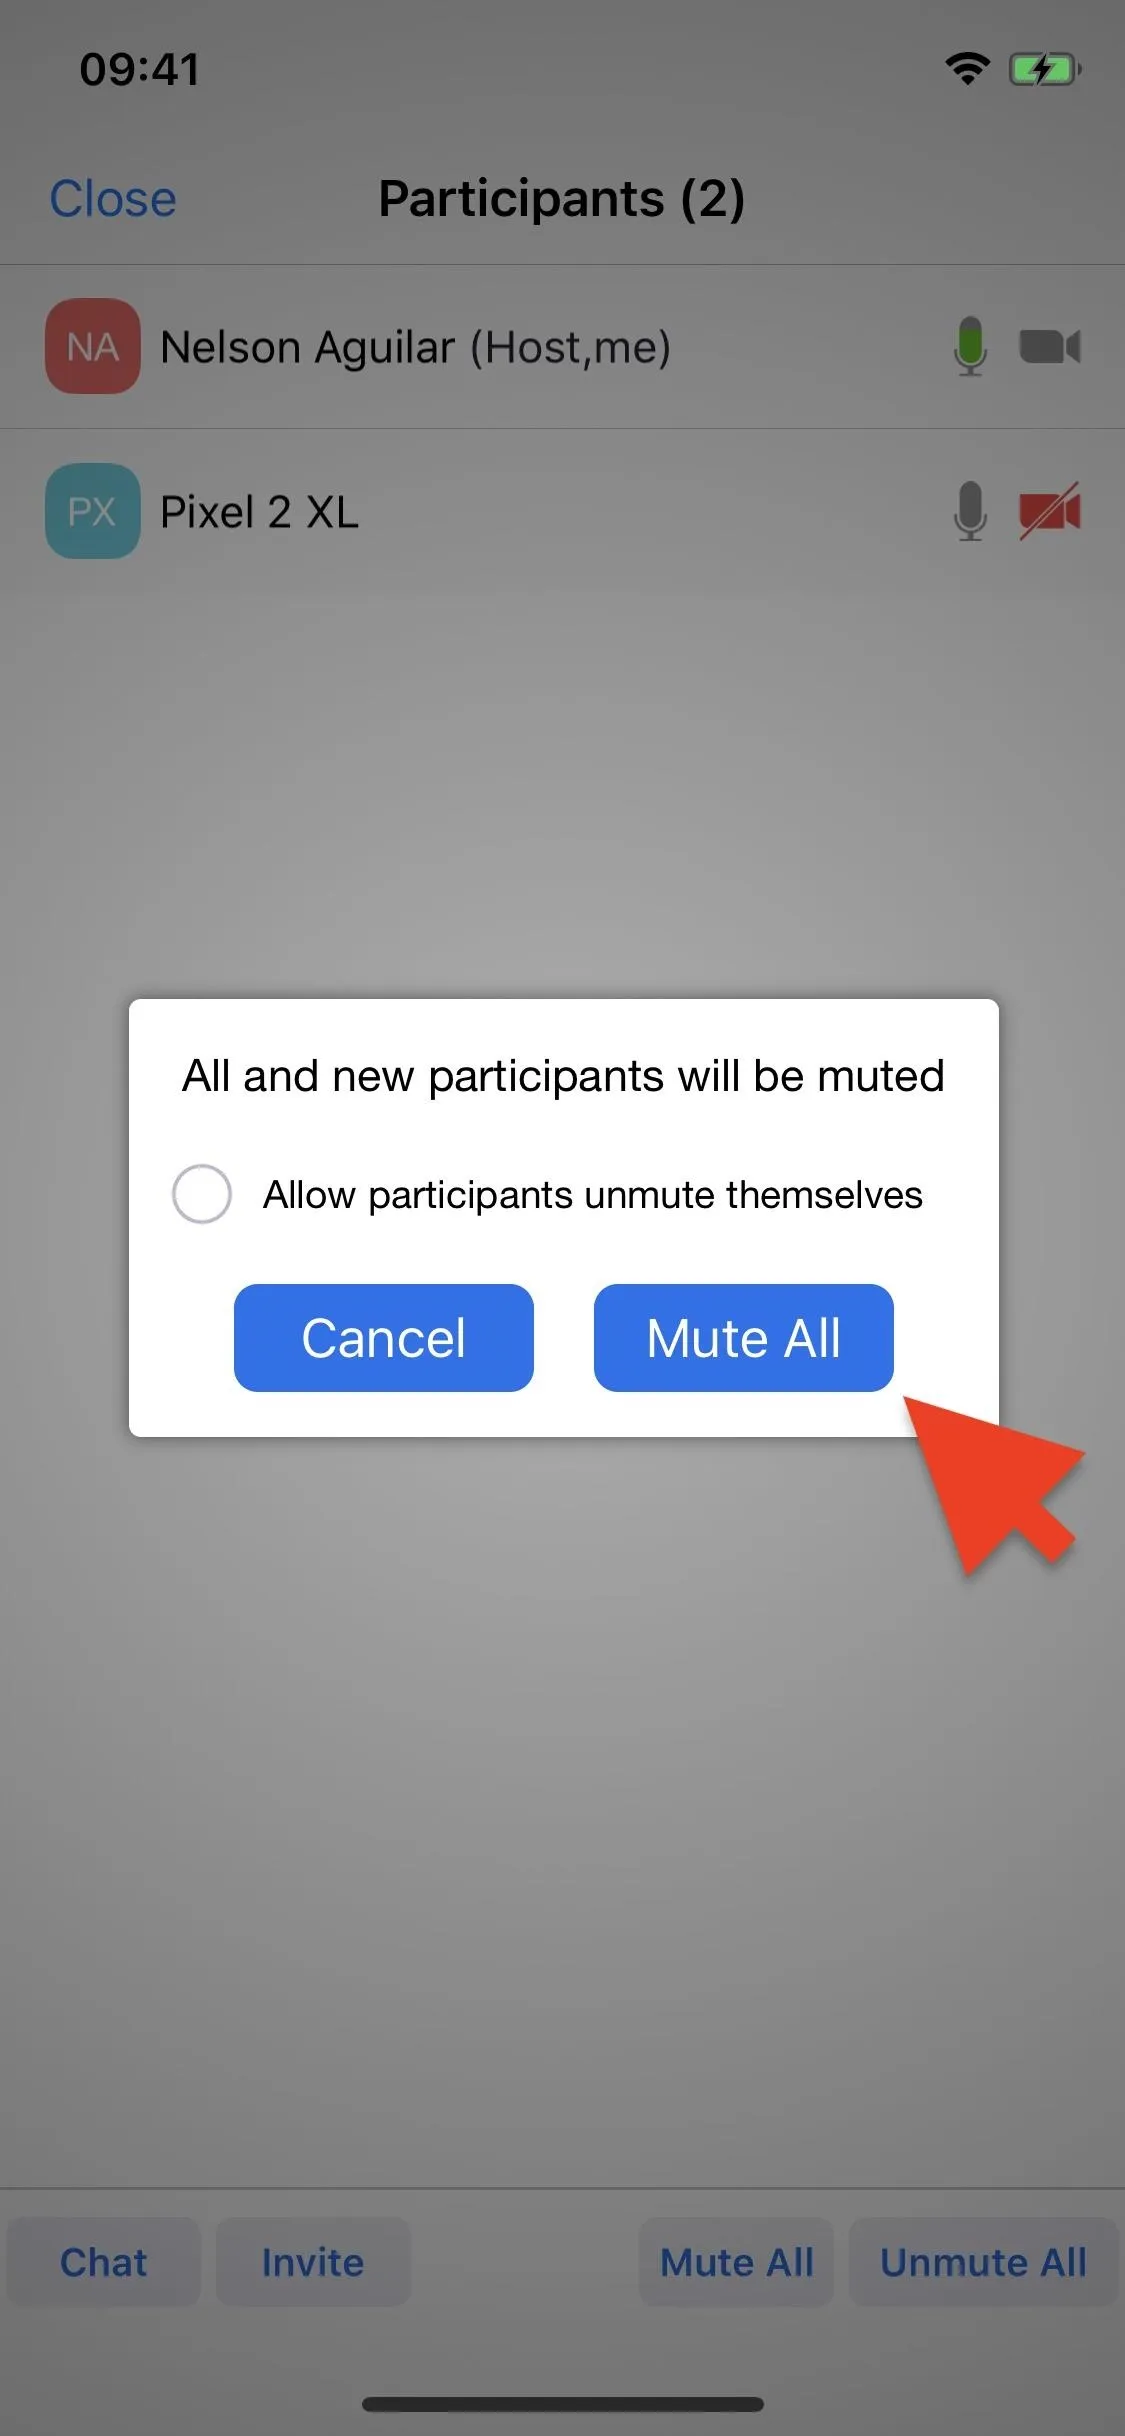
In a meeting, go into "Participants" and look at the bottom of the screen. You'll see several options you can choose. Tap on "Mute All," and a pop-up will appear. On it, uncheck the circle next to "Allow participants unmute themselves" and tap on "Mute All" once again. If you want to open up people's mics again, you can tap "Unmute All" at the bottom of the "Participants" screen, or you can just tap one user and unmute just them temporarily so they can speak.


Combine Options 1 & 2 for More Control
As a temporary workaround to blocking individual users from using their mics during a meeting, you can "Mute All" as described in Option 2 above, then go into each person in the chat as described in Option 1, tap their name, and unmute them. Afterward, whenever someone needs to be silenced, touch their name and mute them, and they won't be able to unmute themselves, as long as you made sure to uncheck the "Allow participants unmute themselves" when muting everyone.
Obviously, it's not a practical solution if there are tons of users in the meeting, but for smaller video conferences, it does the trick.
Mute All Mics on Entry After Starting a Meeting
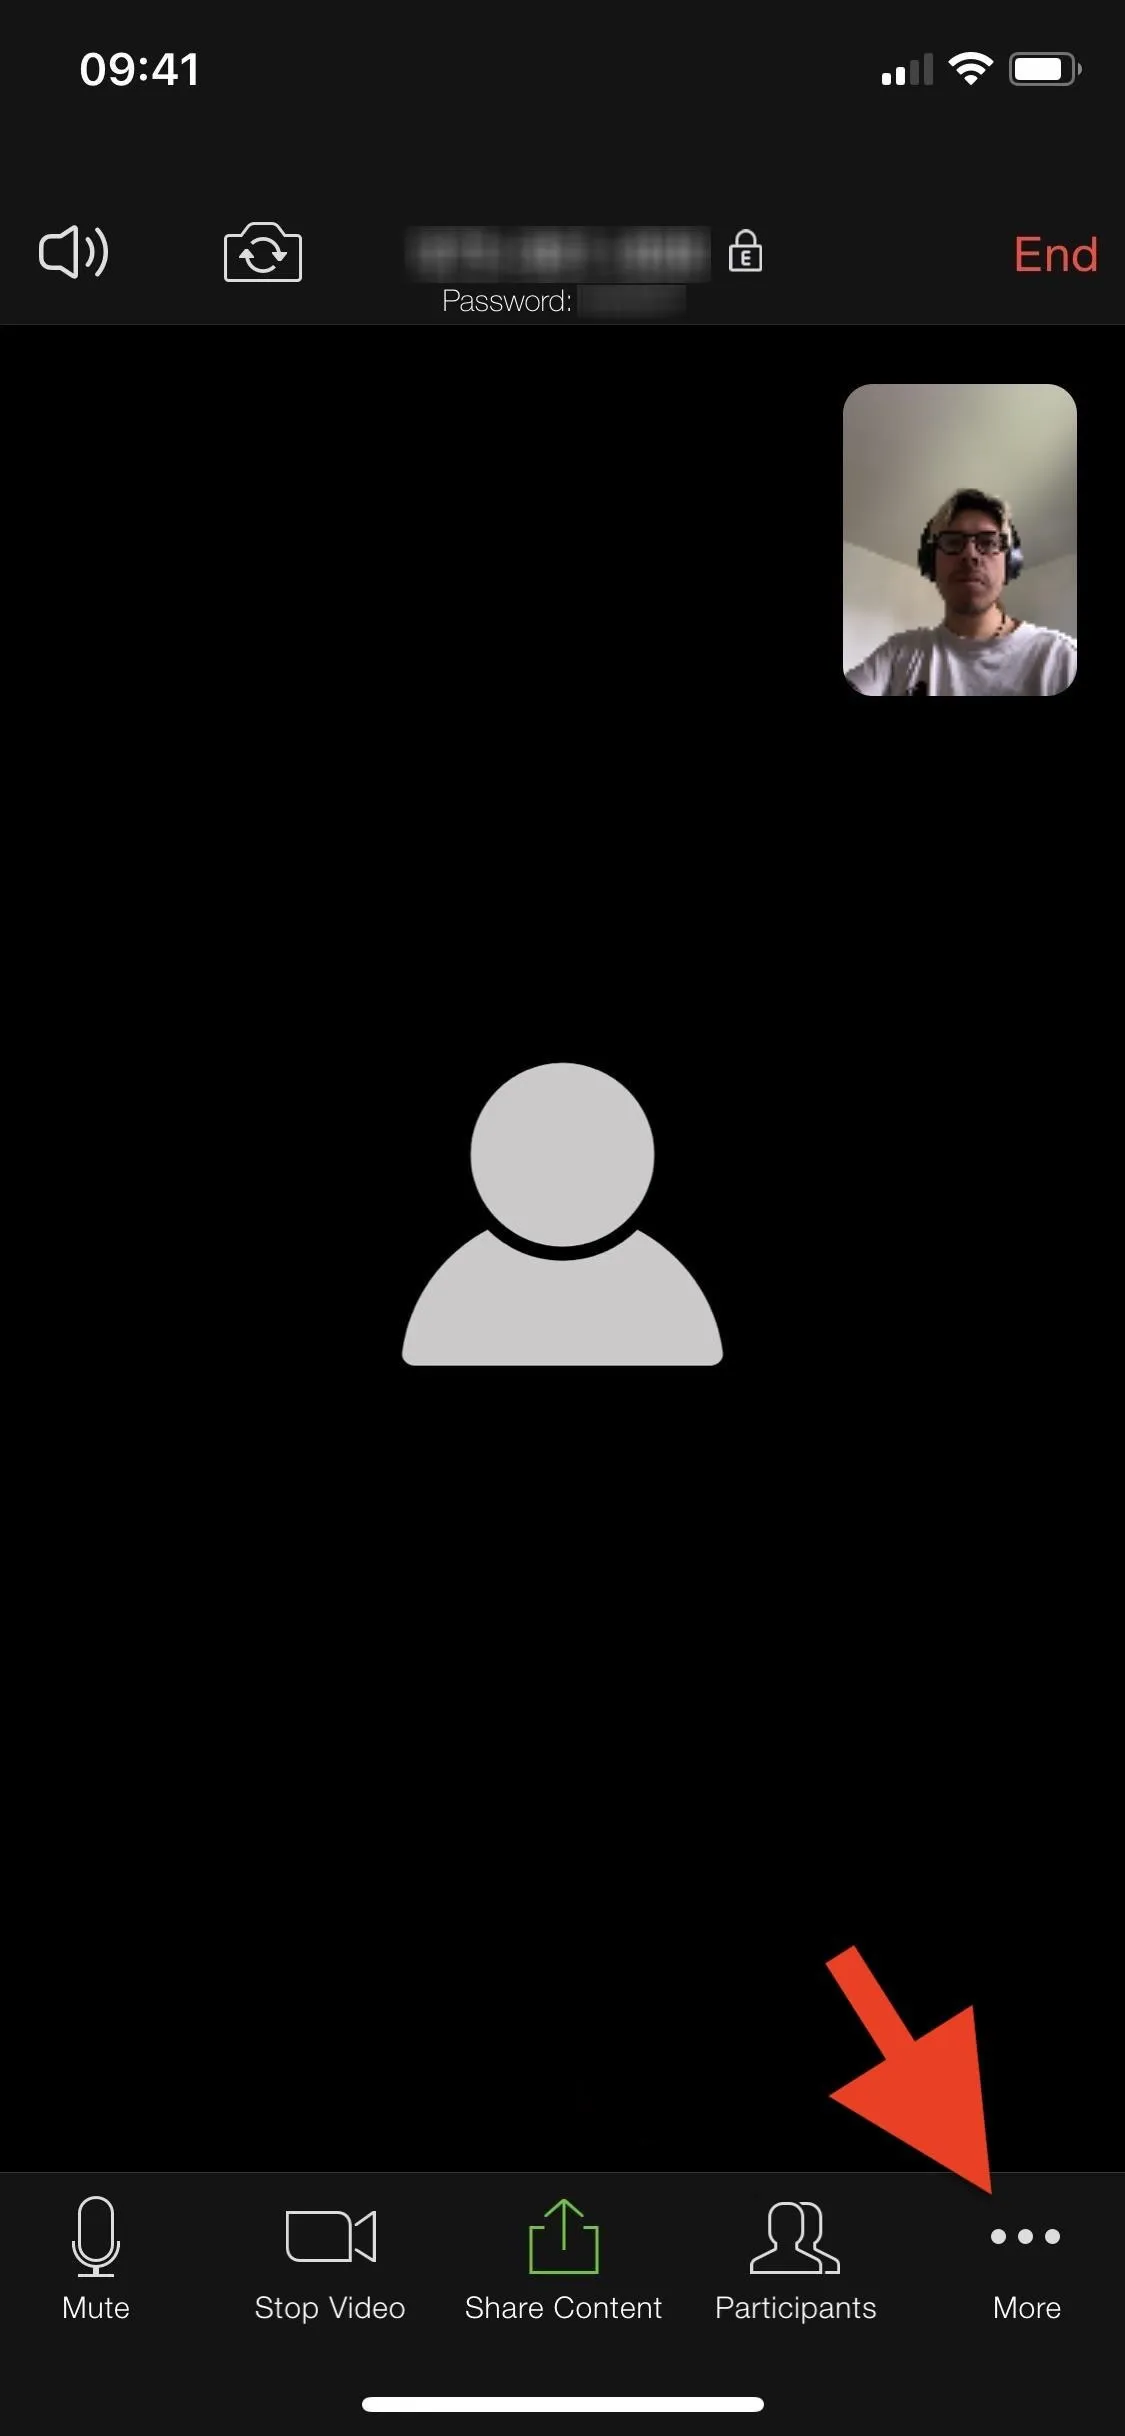
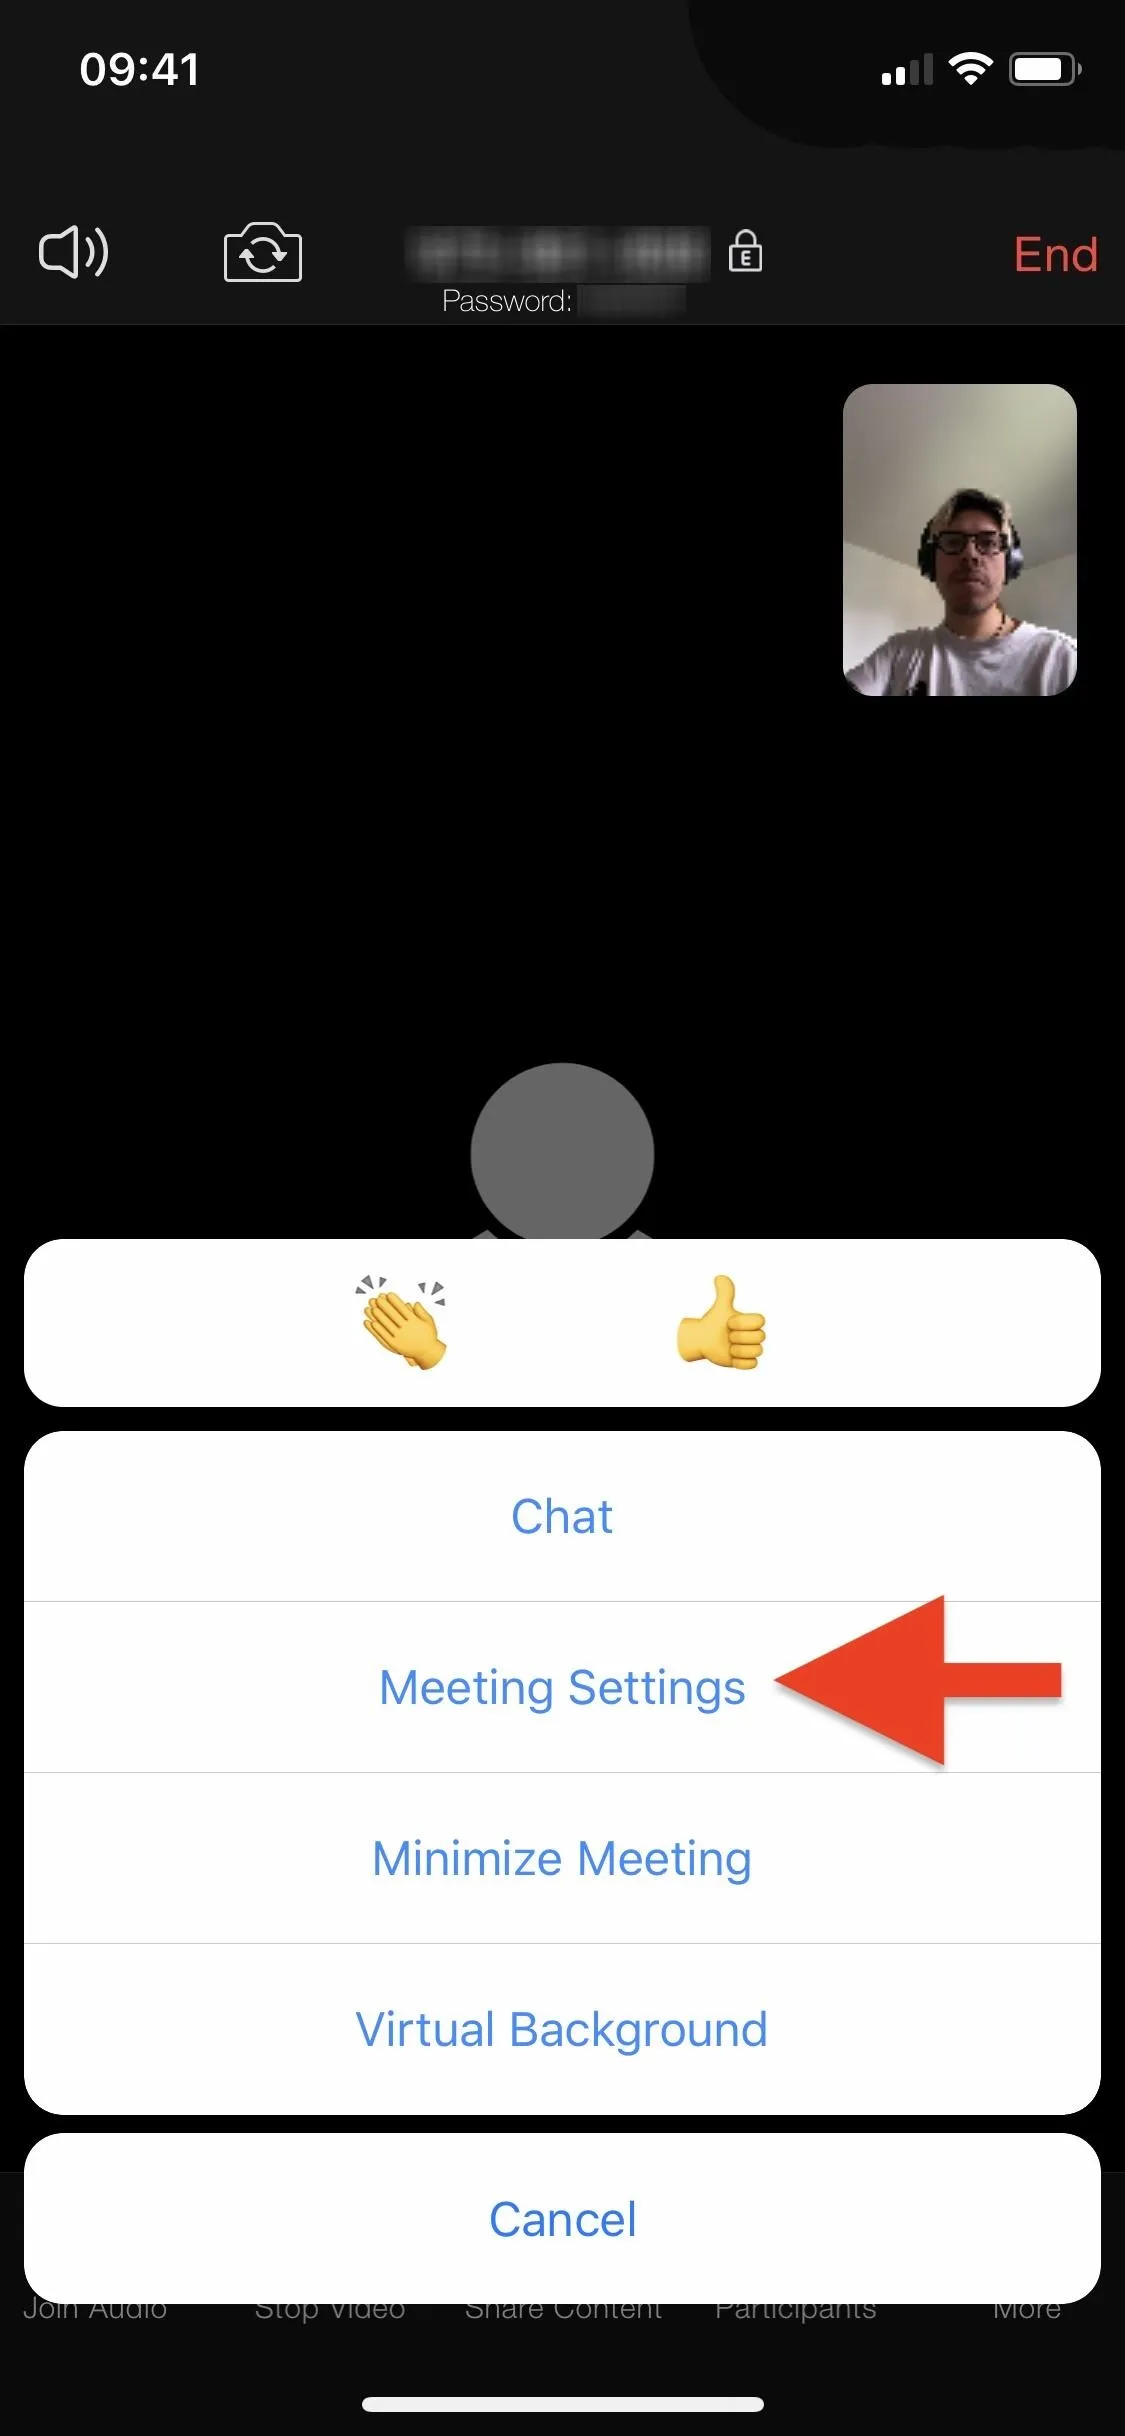
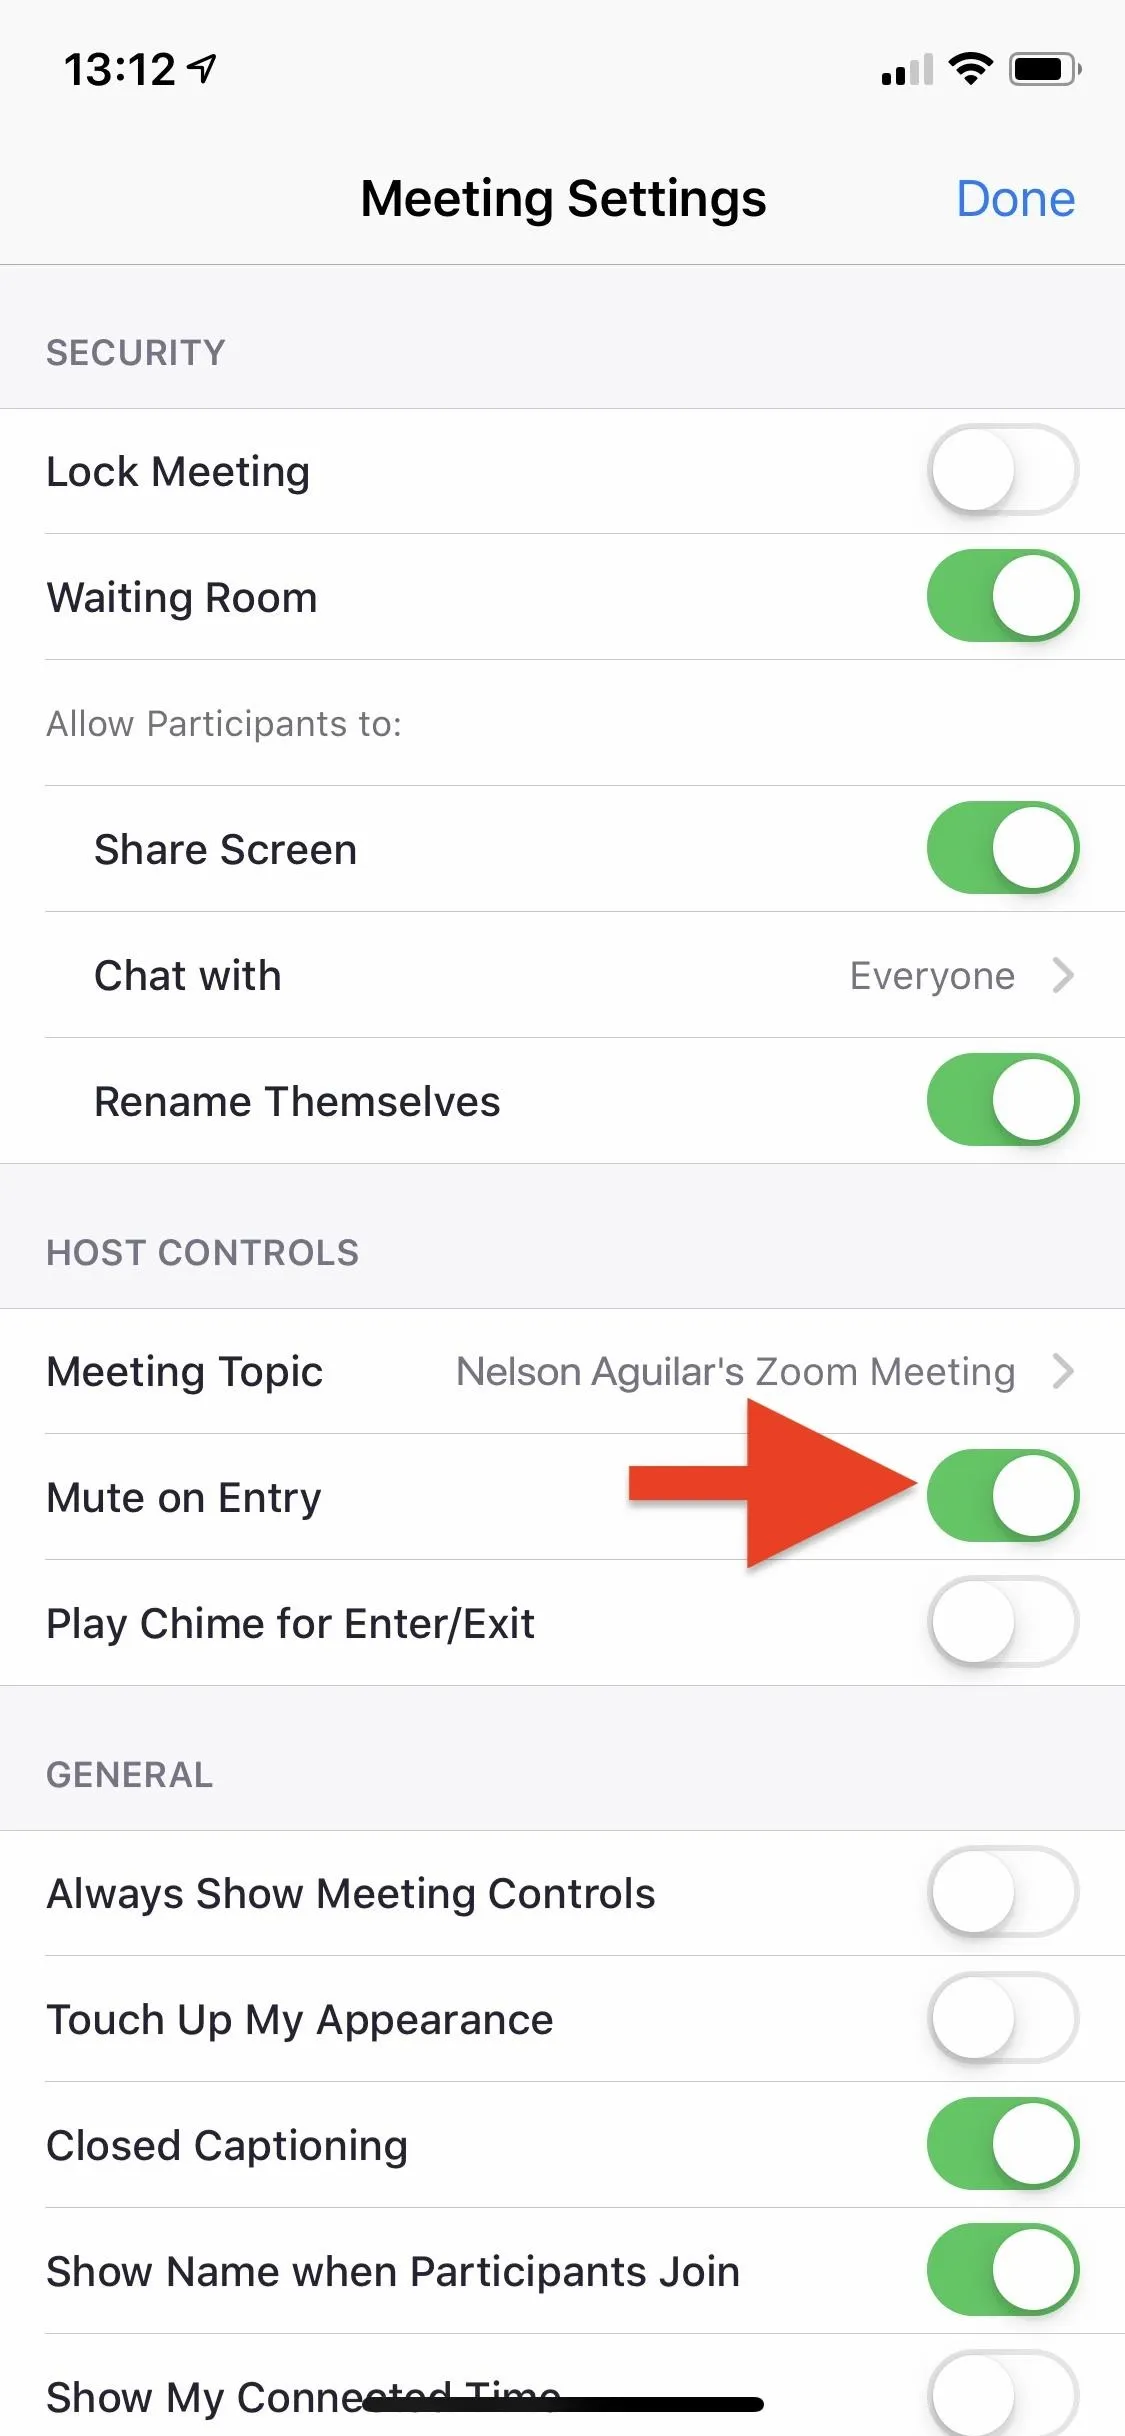
After a meeting is started, you can tap "More" in the navbar, followed by "Meeting Settings." From the list, you can toggle on "Mute on Entry" under Host Controls (iOS) or General (Android), and that will keep everyone who join's mics off from the get-go. They can, however, turn on audio without any issues unless you mute everyone using Option 2 or 3. The "Mute on Entry" only silences them when they join the meeting, to prevent accidental disruptions.
Participants can mute themselves on entry by default from their Zoom settings.


Mute All Mics on Entry by Default
Much like Option 3 above, you can mute everybody who joins your meetings when they first enter but as an app-wide feature. That means you don't have to keep selecting "Mute on Entry" in the current meeting's settings since it will be turned on automatically for all sessions. Participants will still be able to unmute themselves, however, unless you mute them all with Option 2 or 3.
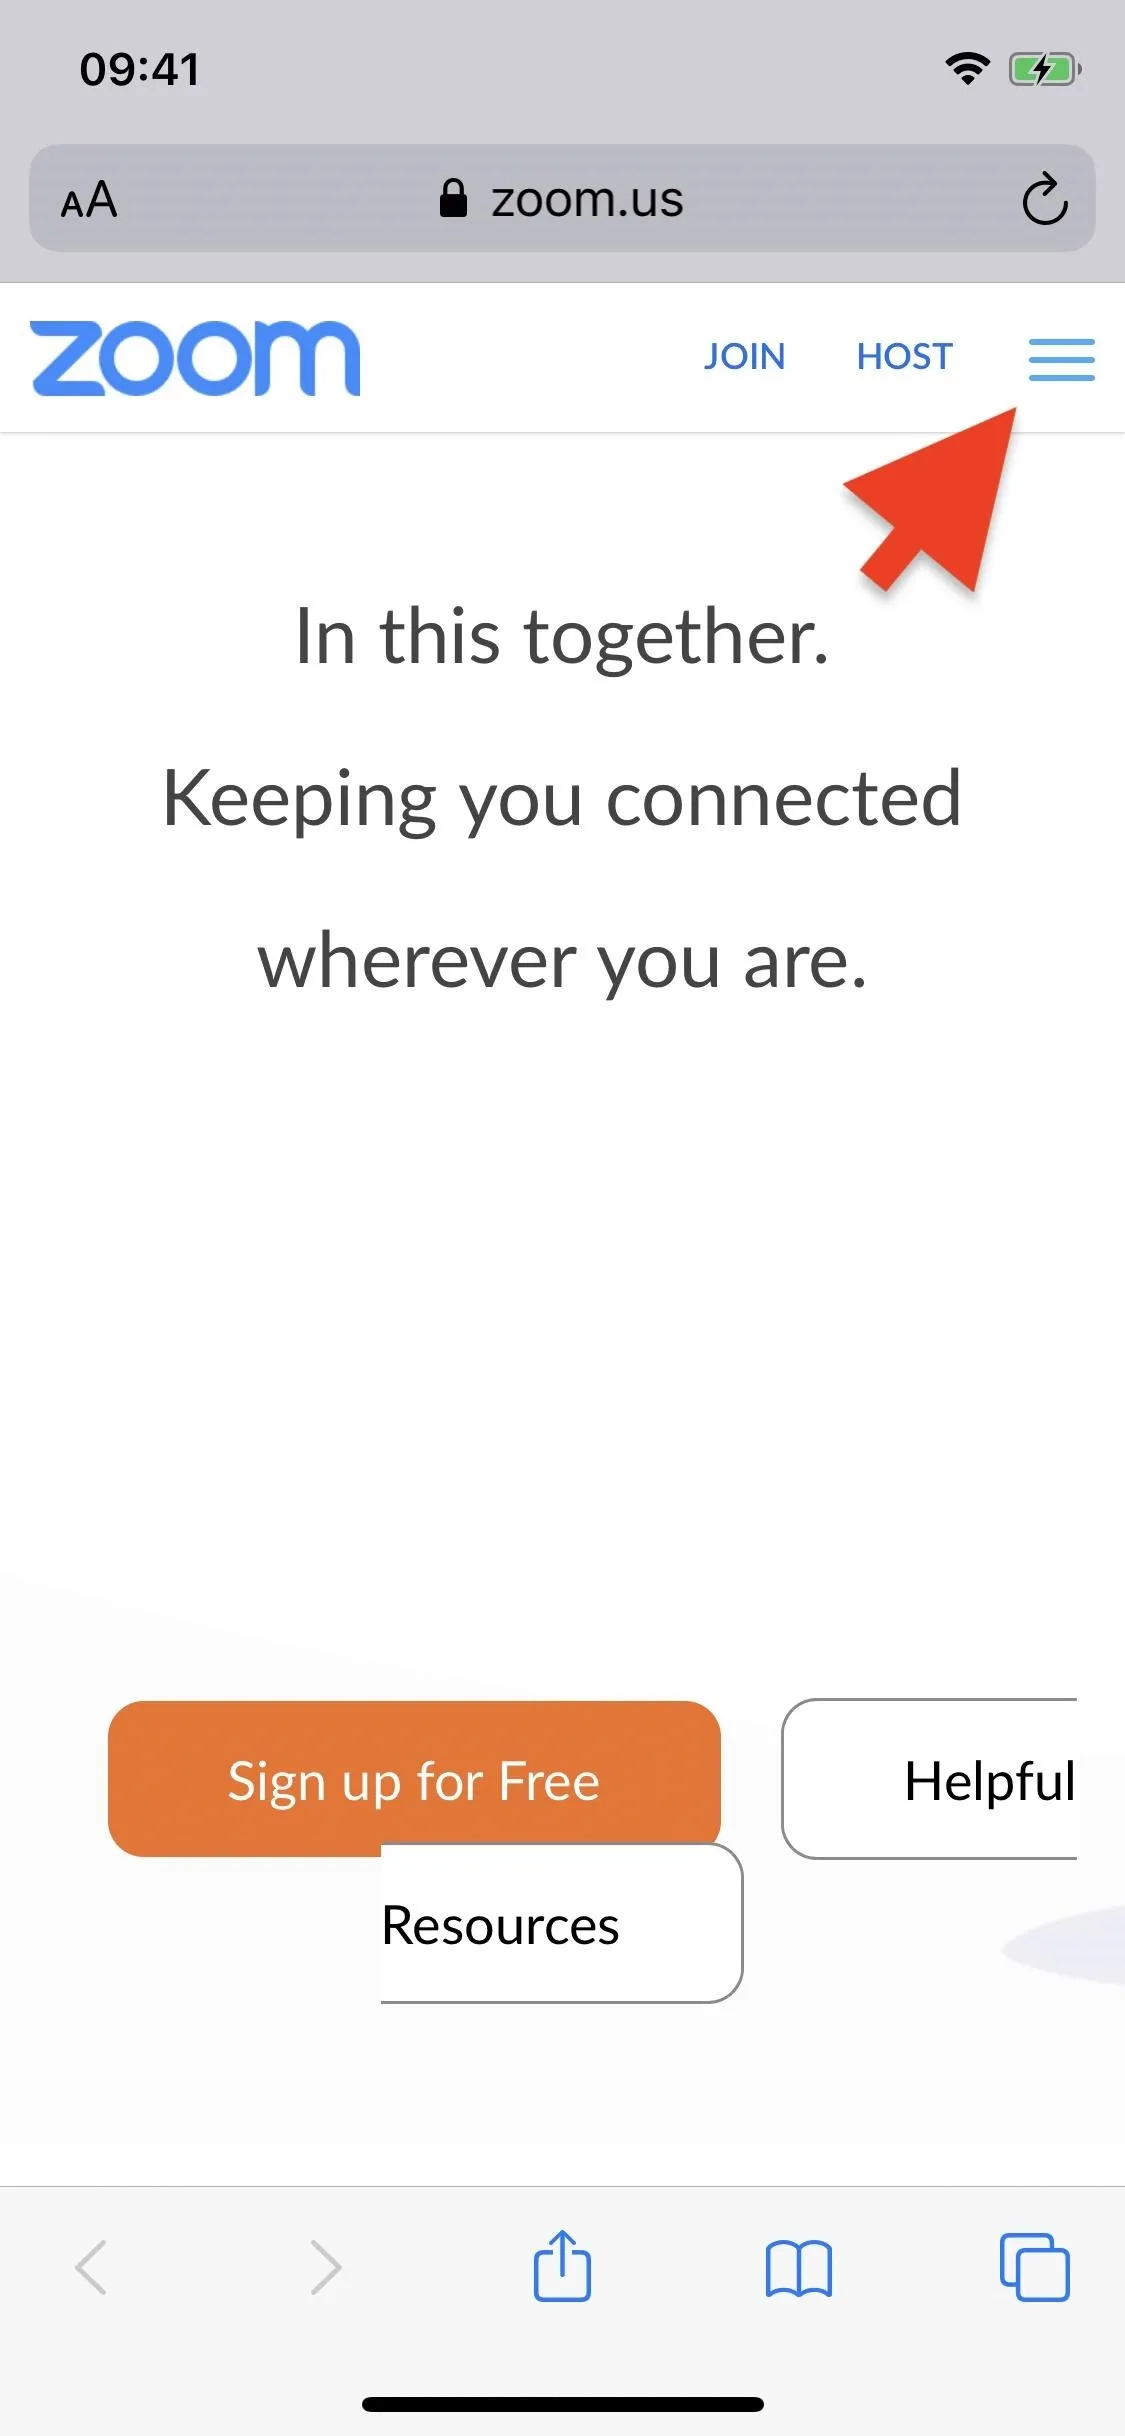
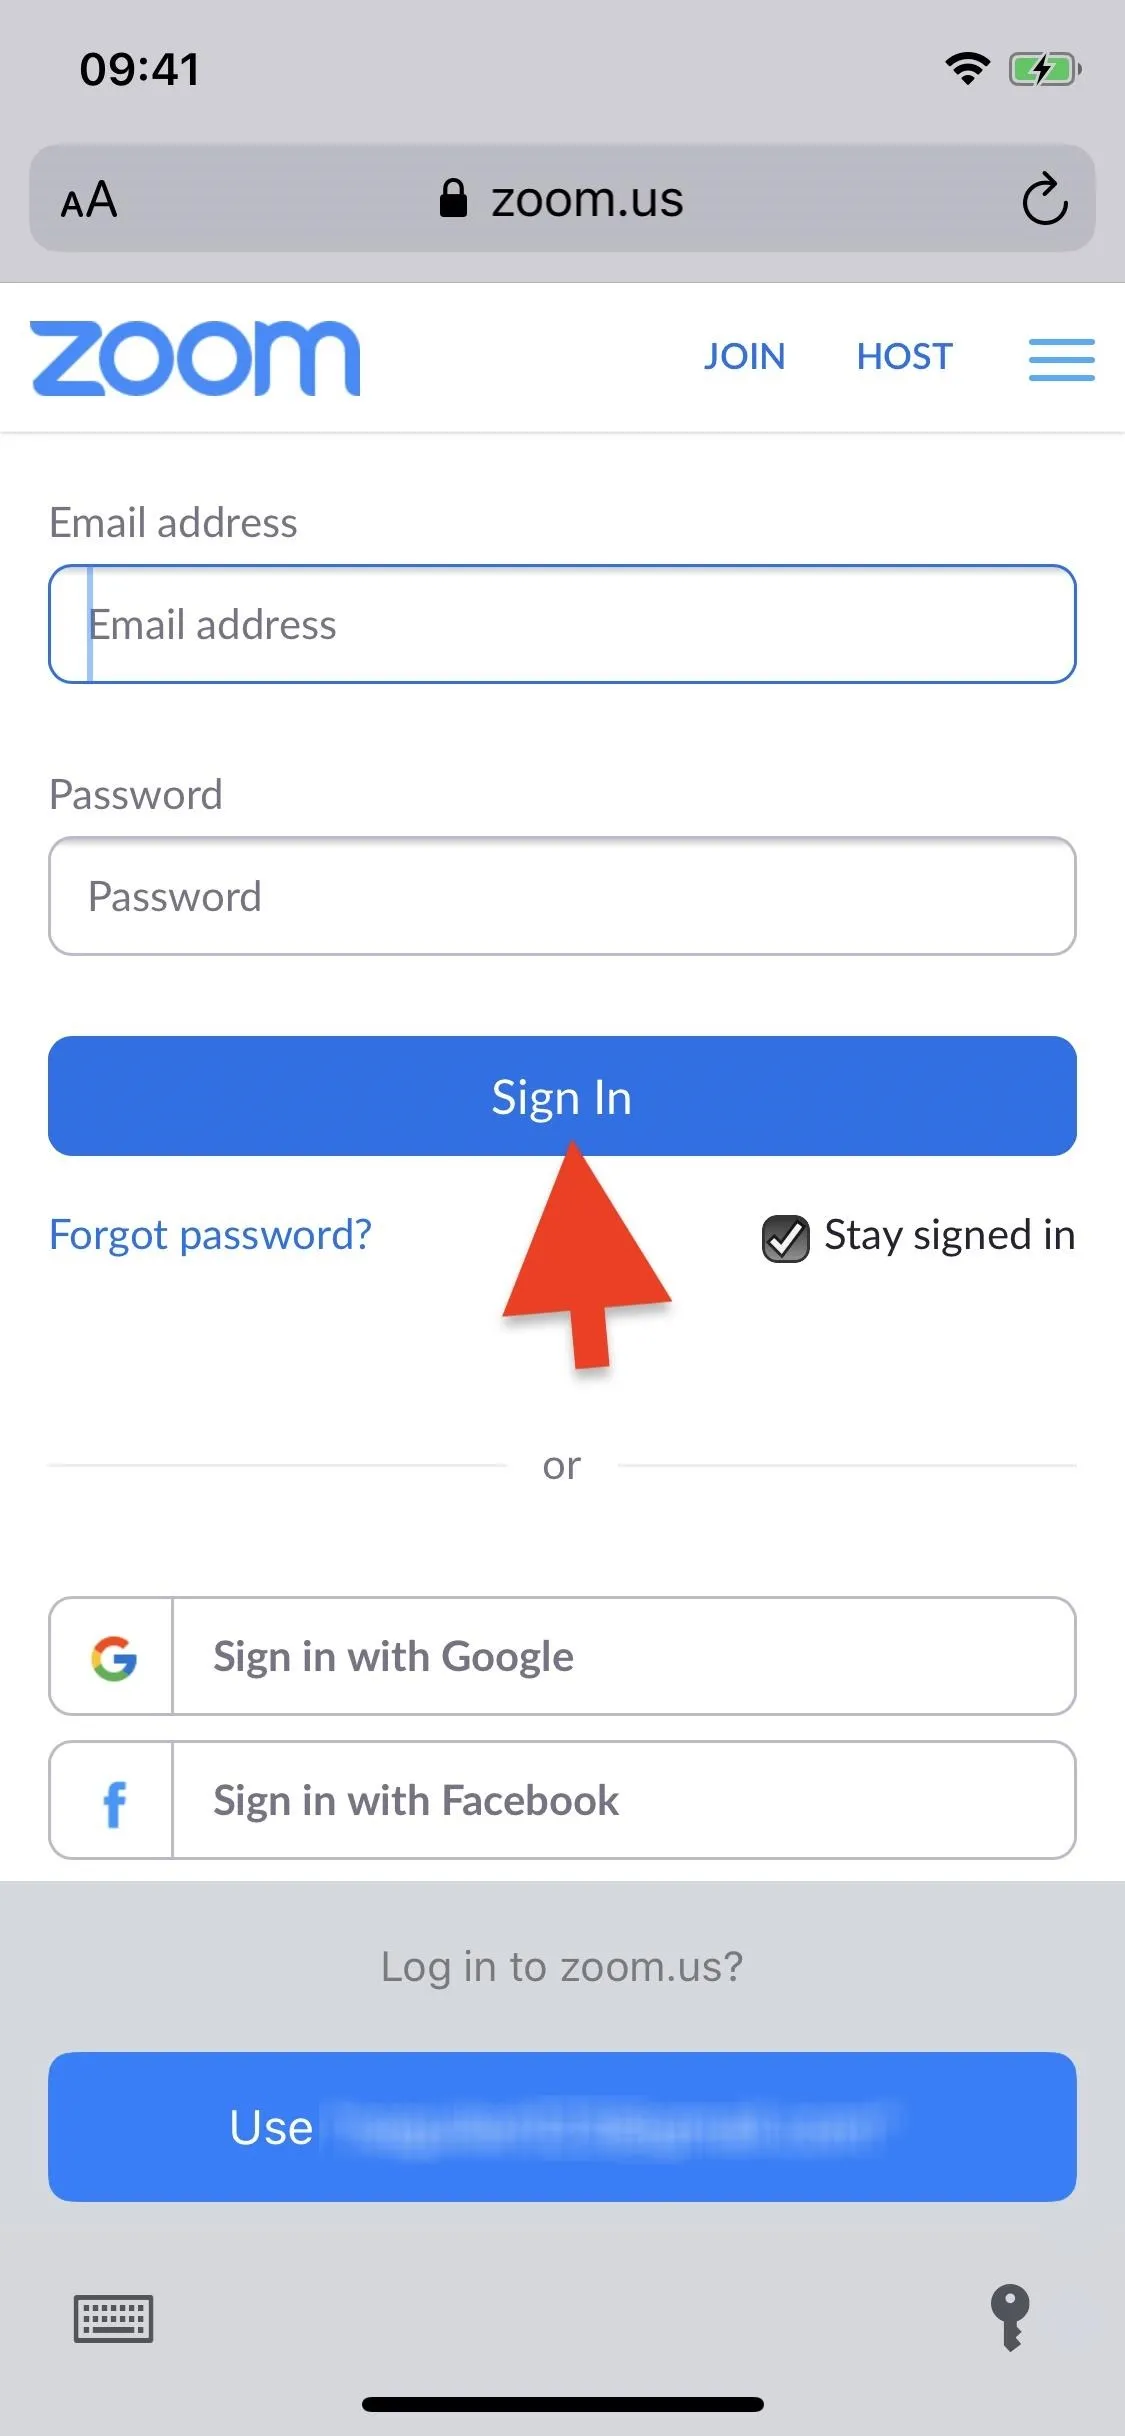
To enable the setting, you need to use the Zoom web portal. So in any browser on your phone, open zoom.us, tap the three-lined menu icon up top, then select "Sign In" from the options that appear. Enter the email address and password attached to your Zoom account, and then tap on "Sign In" again. You can also sign in using an SSO (single sign-on), Google, or Facebook account.


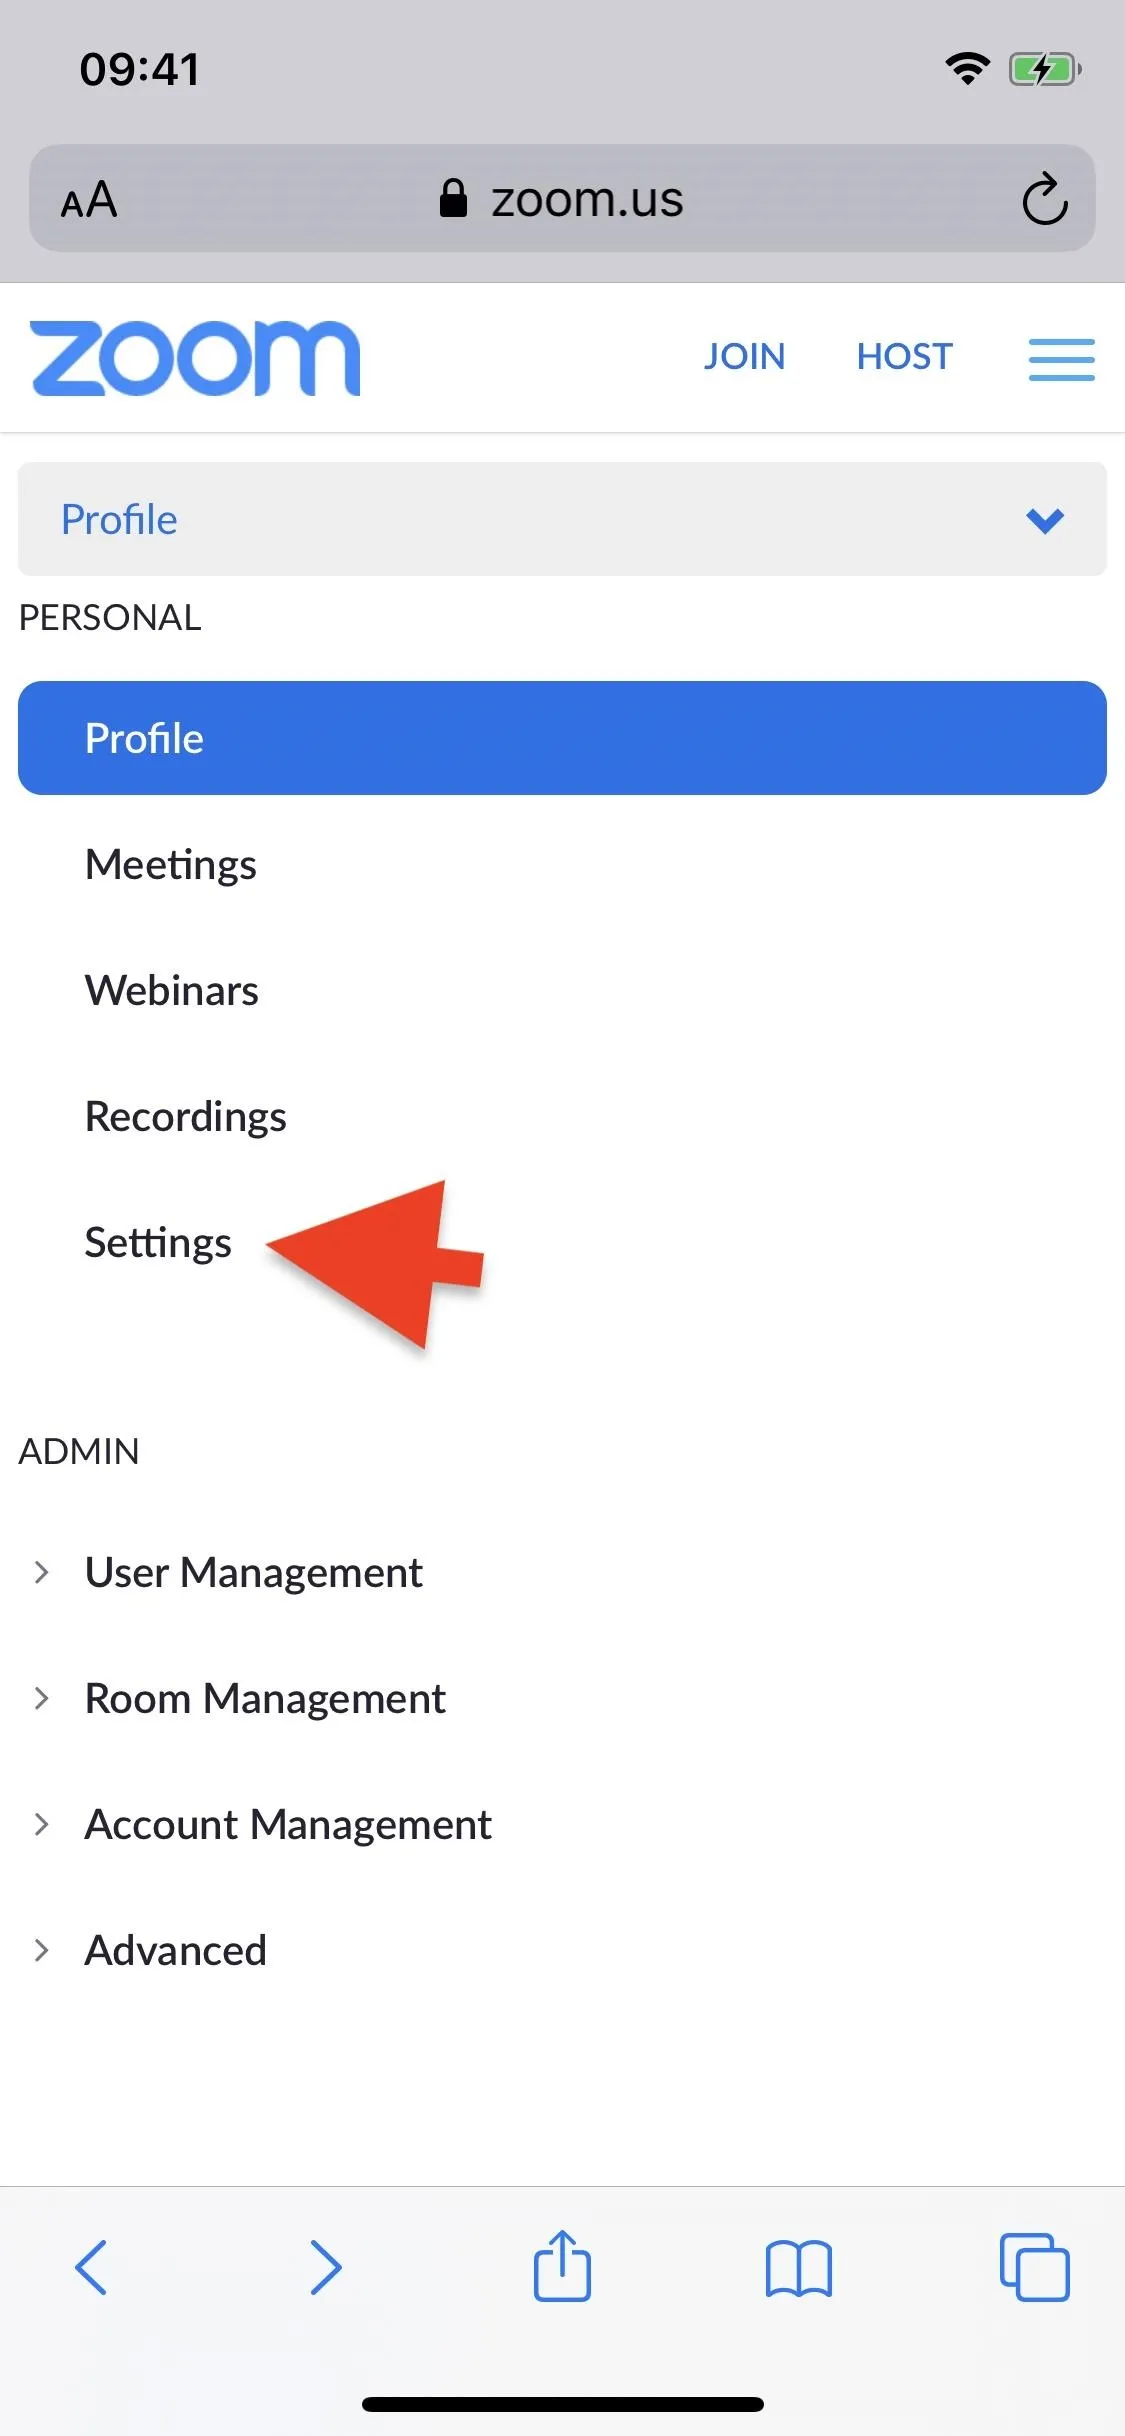
Next, tap on the "Profile" banner near the top and hit "Settings" from the drop-down menu. Scroll until you find "Mute participants upon entry," then toggle the setting on. All participants that join a meeting you host will automatically be muted.
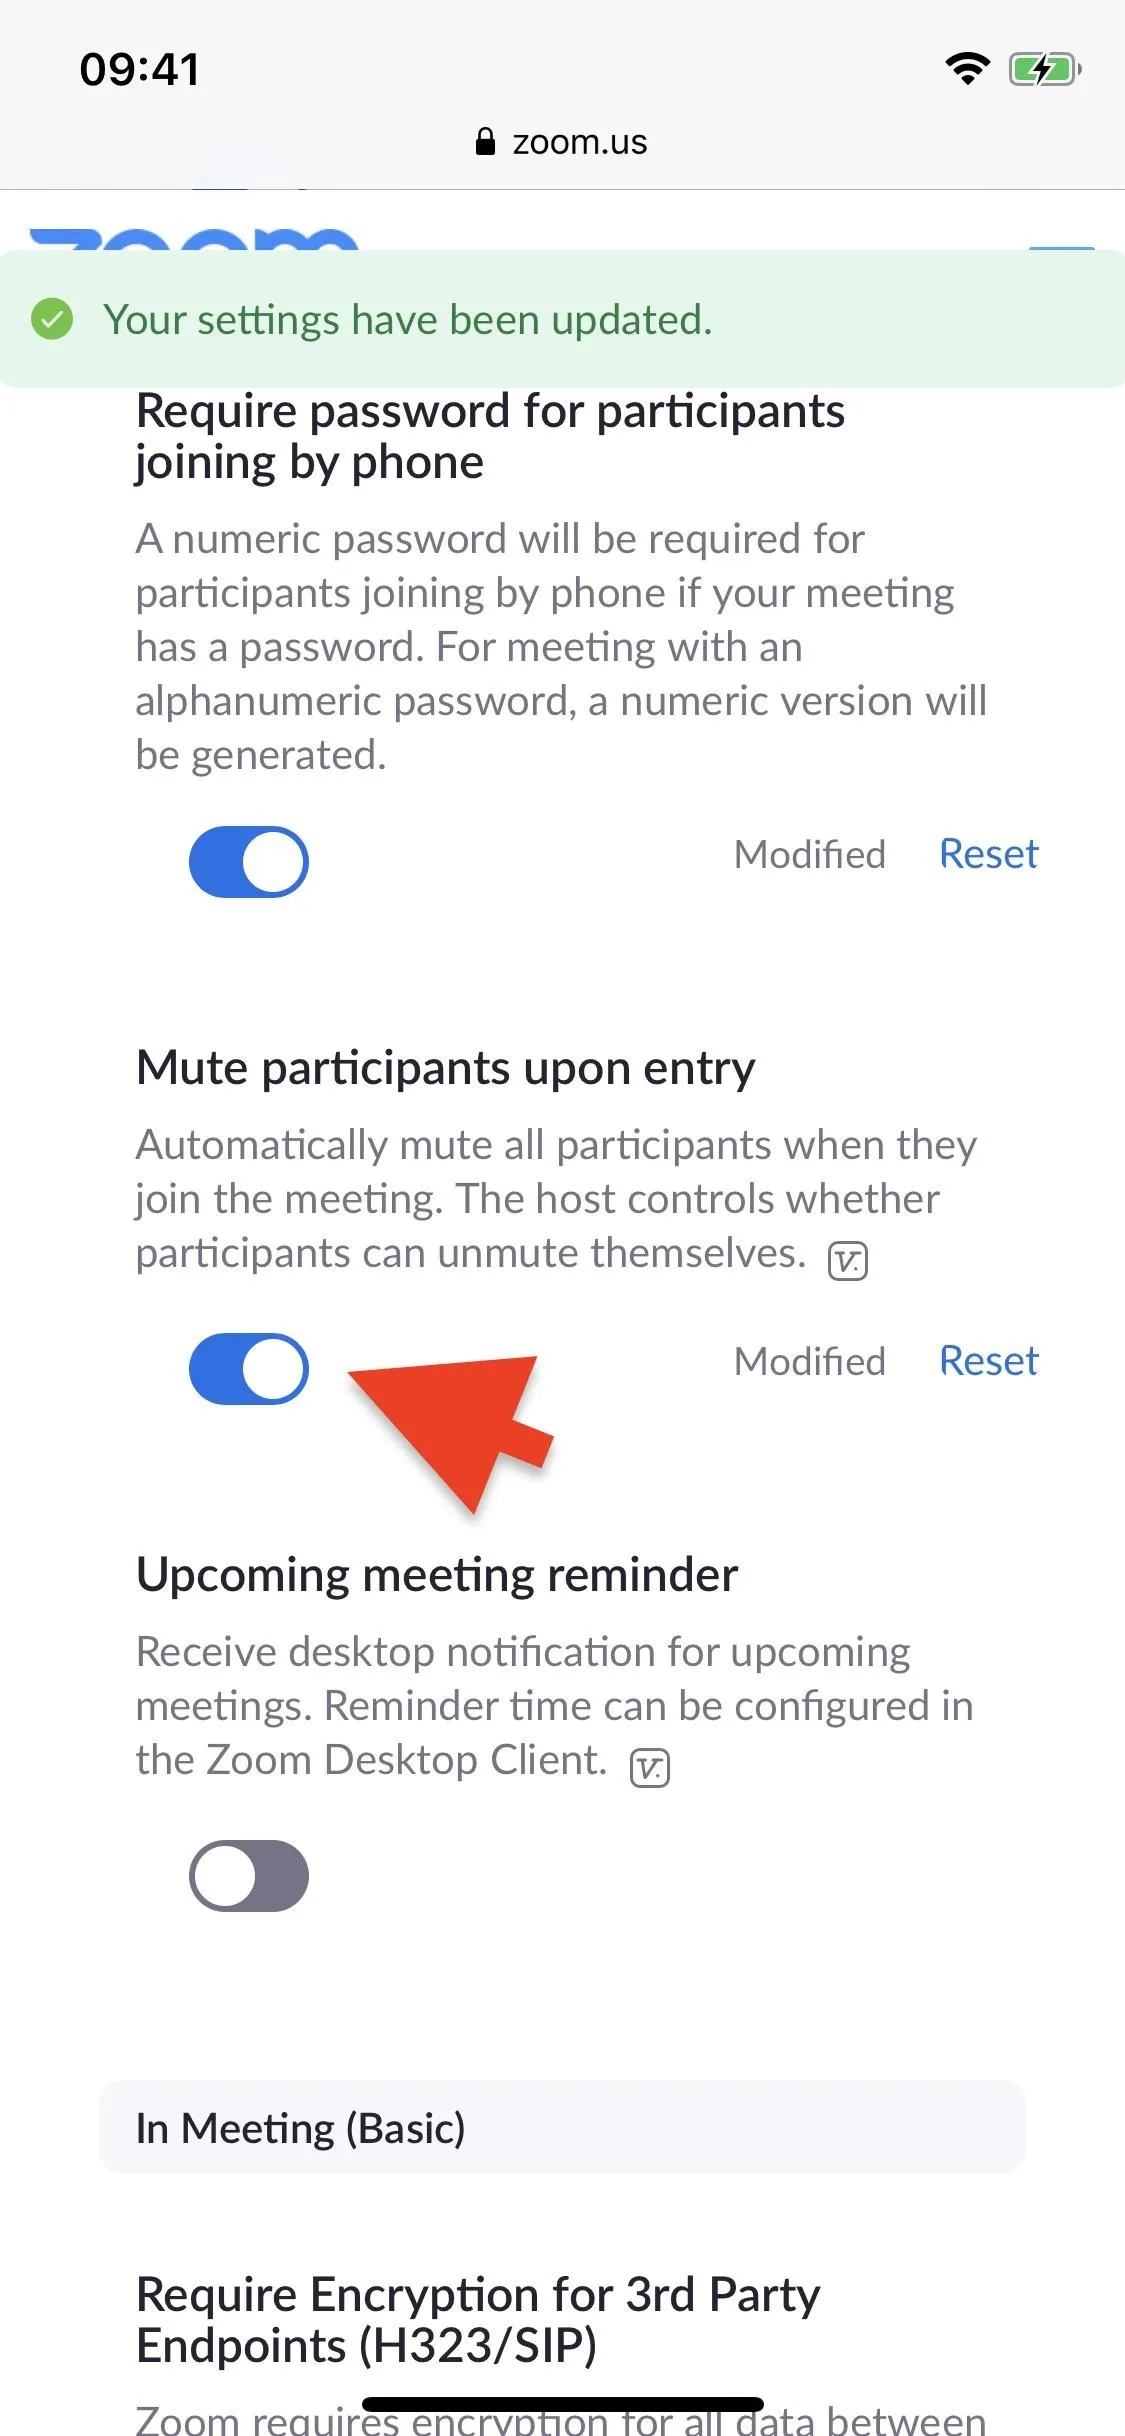


Note that while testing the feature out, we found that the account-wide setting did not really work, at least, not for us. You may have better luck. Zoom's tech support could not explain as to why it wasn't working for us when starting meetings via iOS, Android, or the web client.
Send a Participant to the Waiting Room
If a meeting participant is unruly for longer than you want, but you don't quite want to kick them out of the video conference, you can send them to the Waiting Room. In this virtual purgatory, people wait until the host is ready to have them join or rejoin the meeting. It's a quick and easy way to stop someone from speaking, by expelling them momentarily from the meeting.
As mentioned previously, Zoom has enabled the Waiting Room feature for all accounts, so anyone who joins your meetings will go there right away, and you'll have to admit them. However, the setting can be toggled off to skip the Waiting Room when people join. If the Waiting Room is disabled for you as a host...
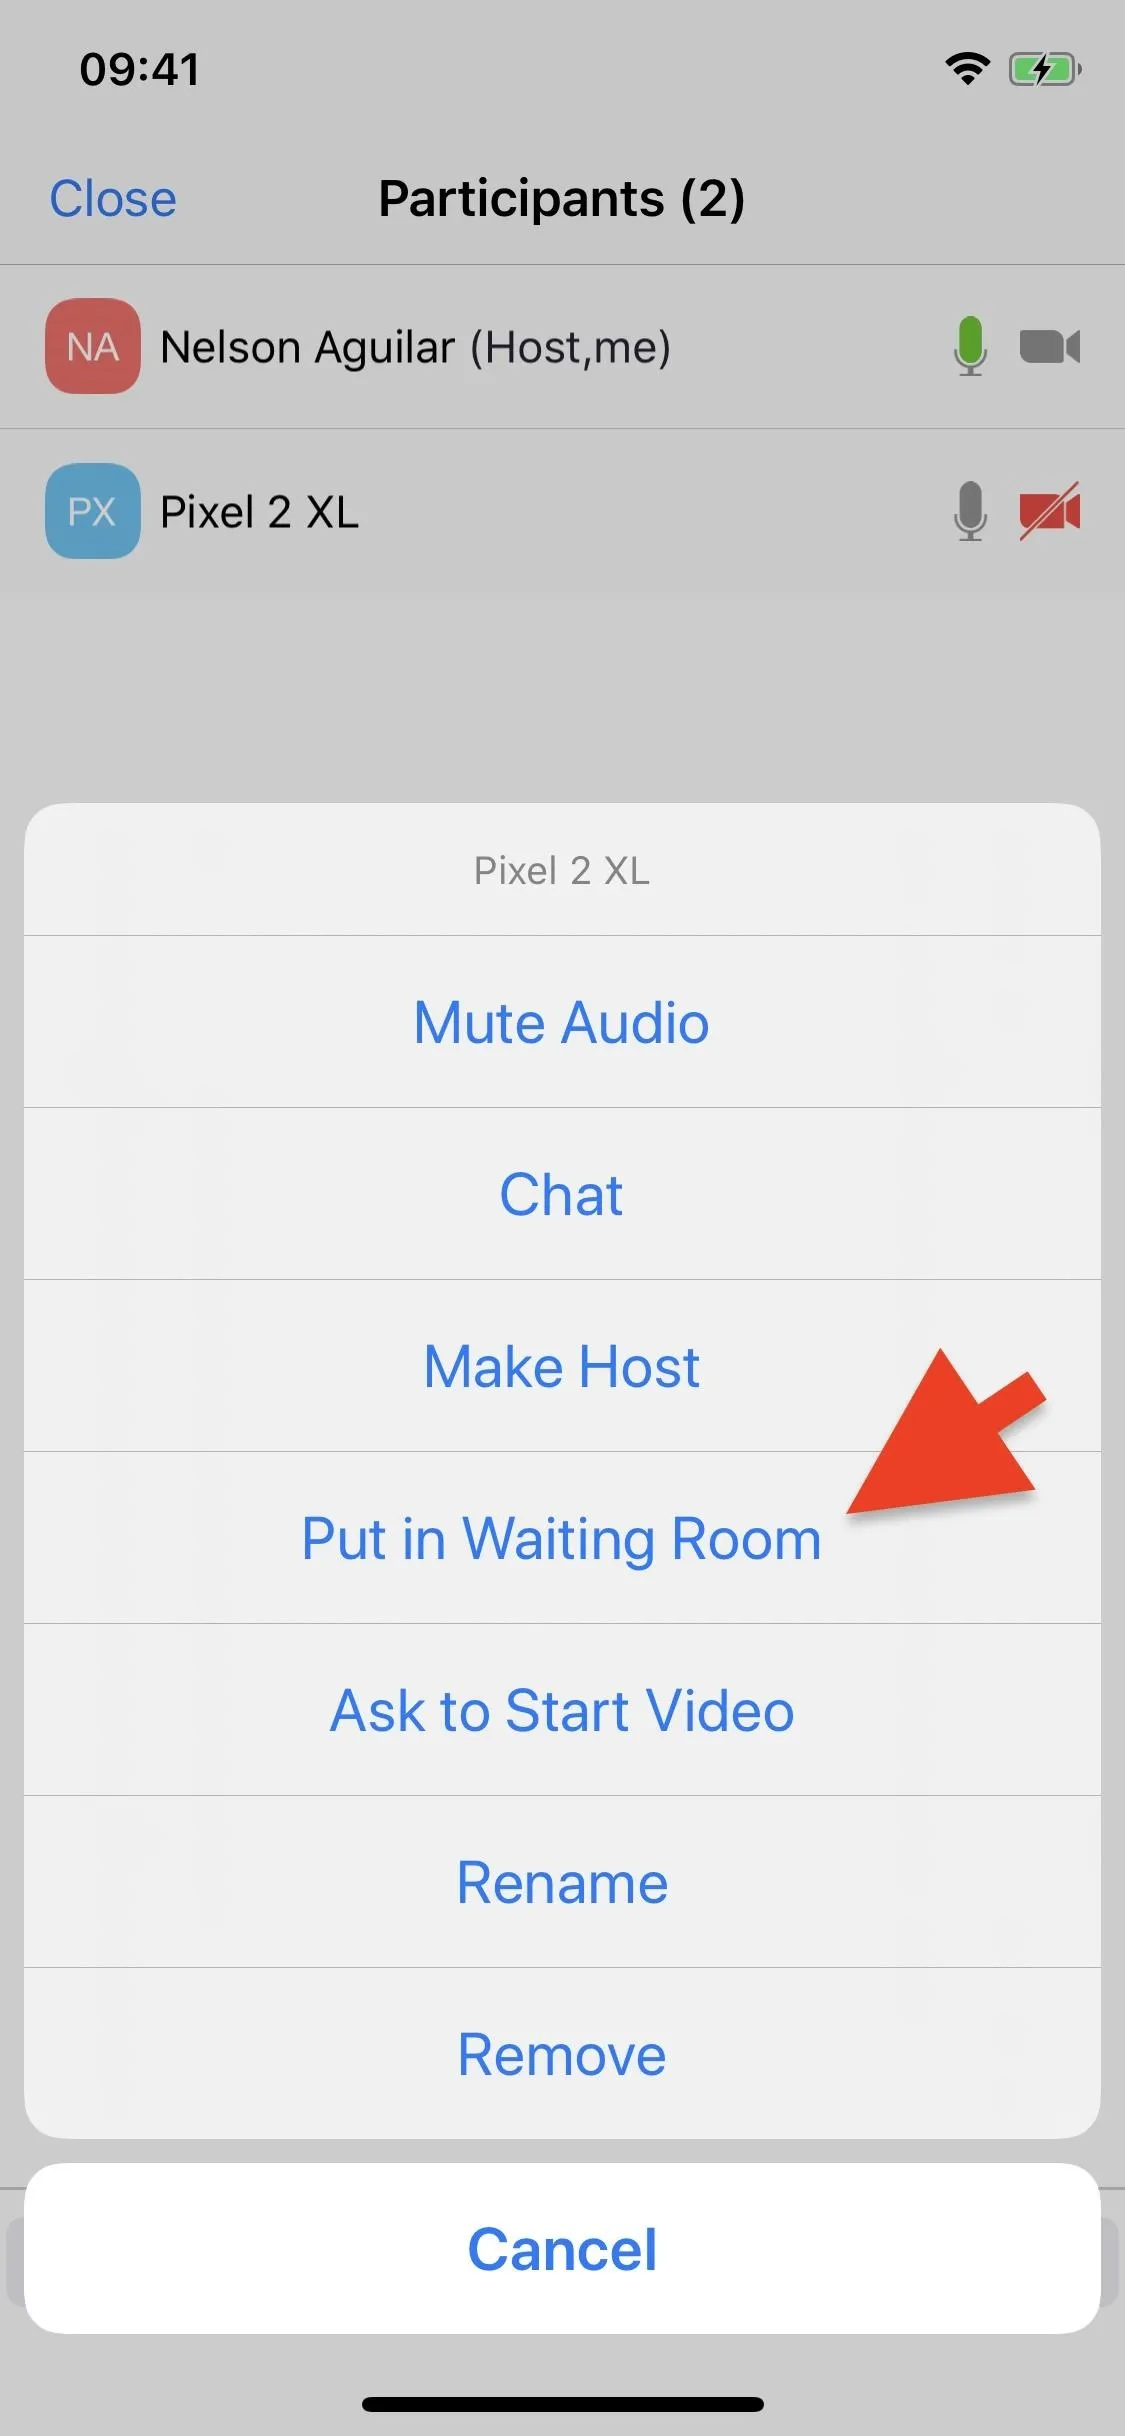
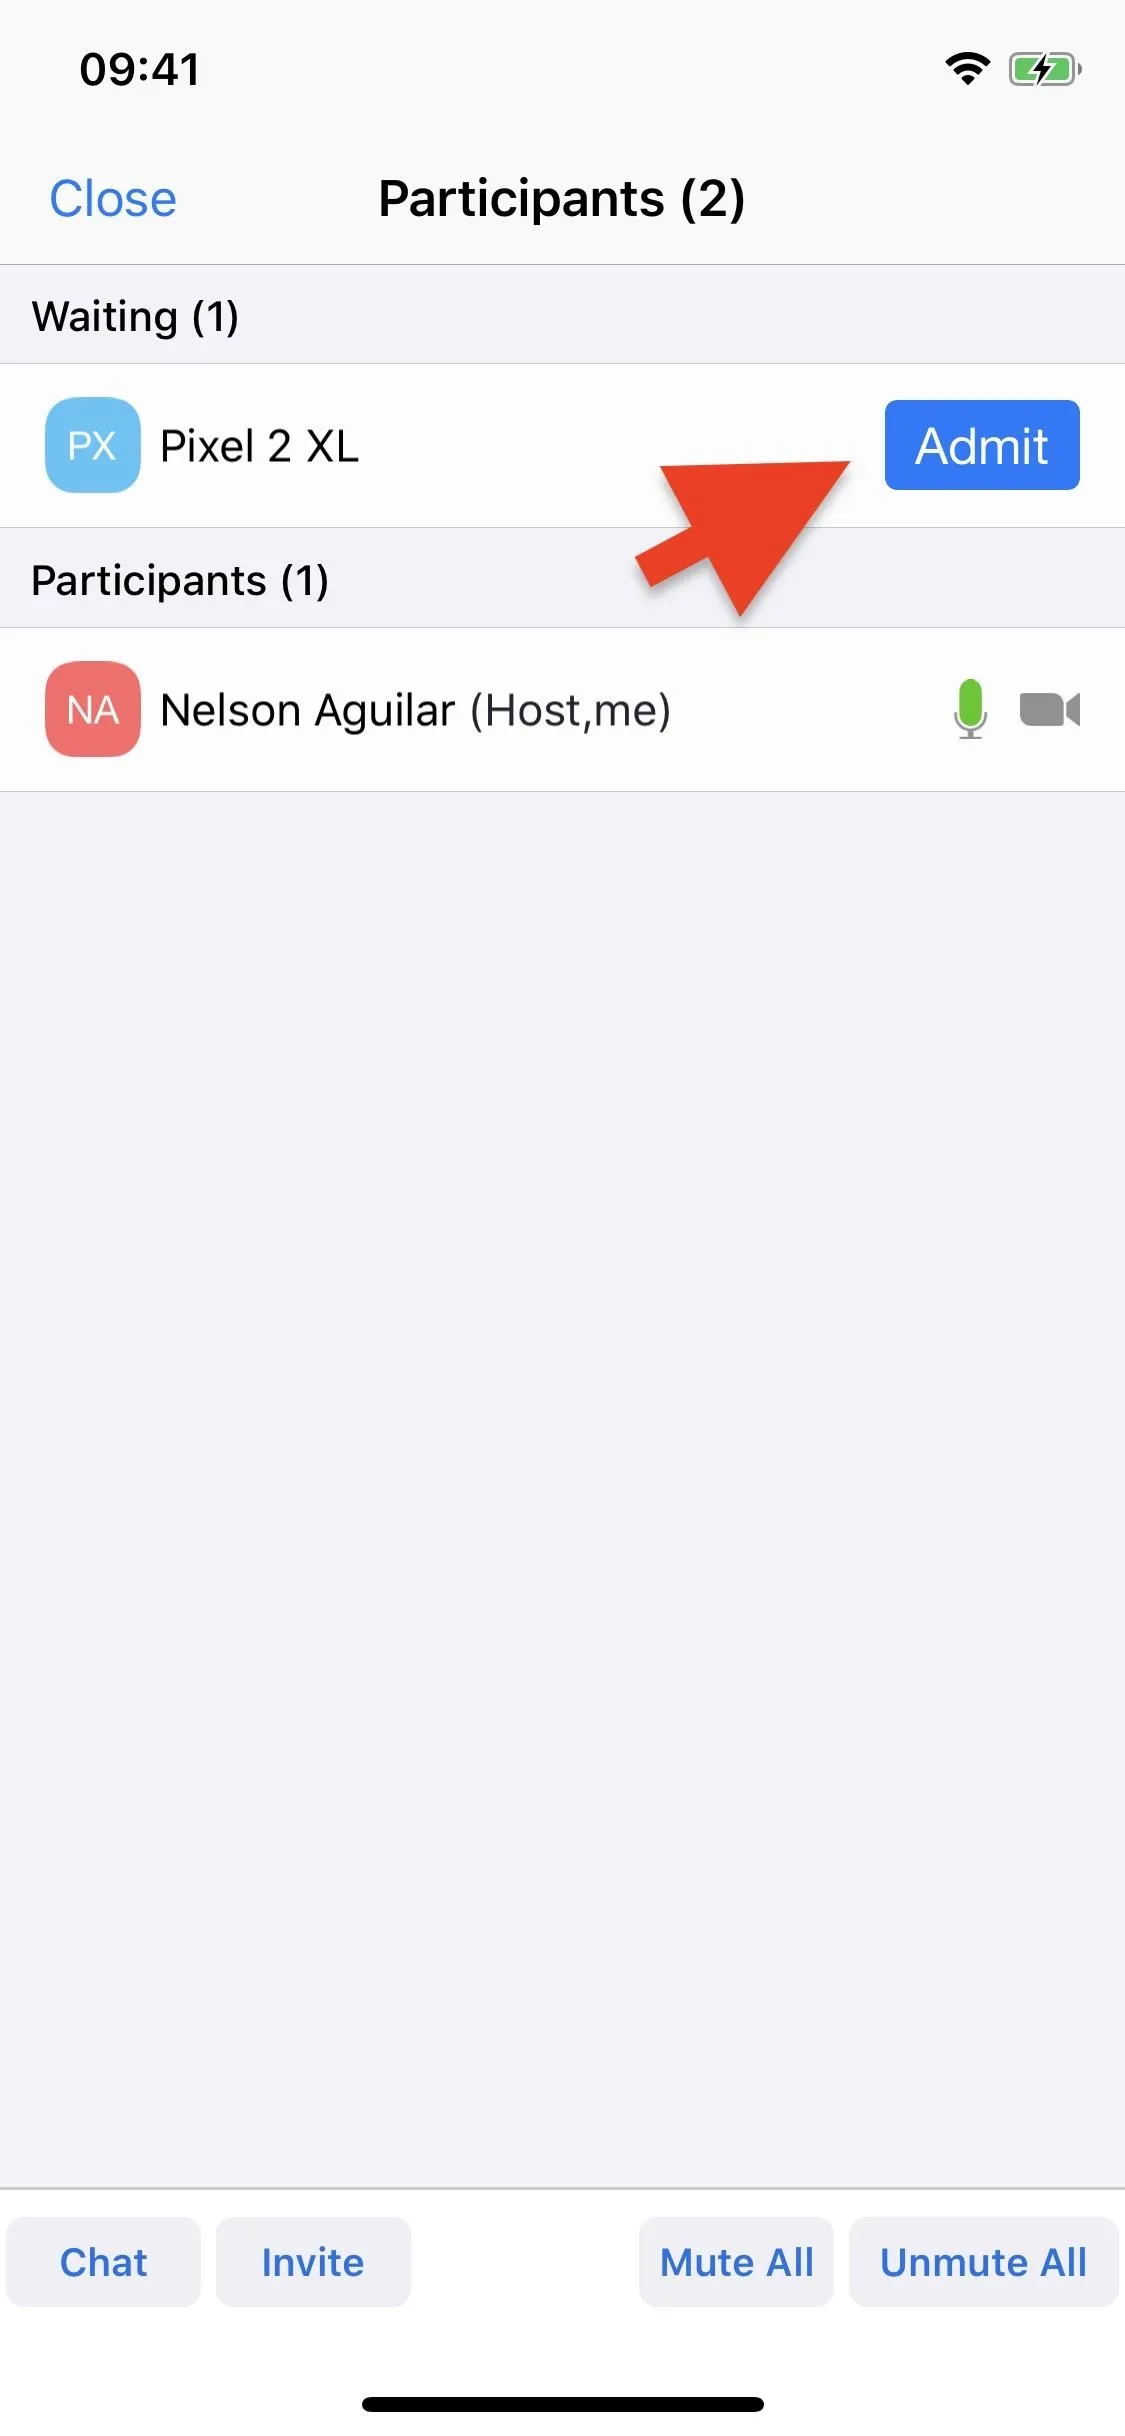
During a meeting, tap on "Participants" in the navbar, find the person you want to mute, and tap on their name from the list. Several options will appear; tap on "Put in Waiting Room." The participant will be sent to the Waiting Room, where they cannot use their audio or video to interfere in the meeting, nor view what's happening in the conference. Once you're ready to bring them back, tap on the blue "Admit" button next to their name.


Permanently Remove a Participant
The last and harshest option is to remove a participant from the video conference permanently. Once they're removed, they won't be able to rejoin the meeting, so only use the option if you're sure you don't want the person back on the call.
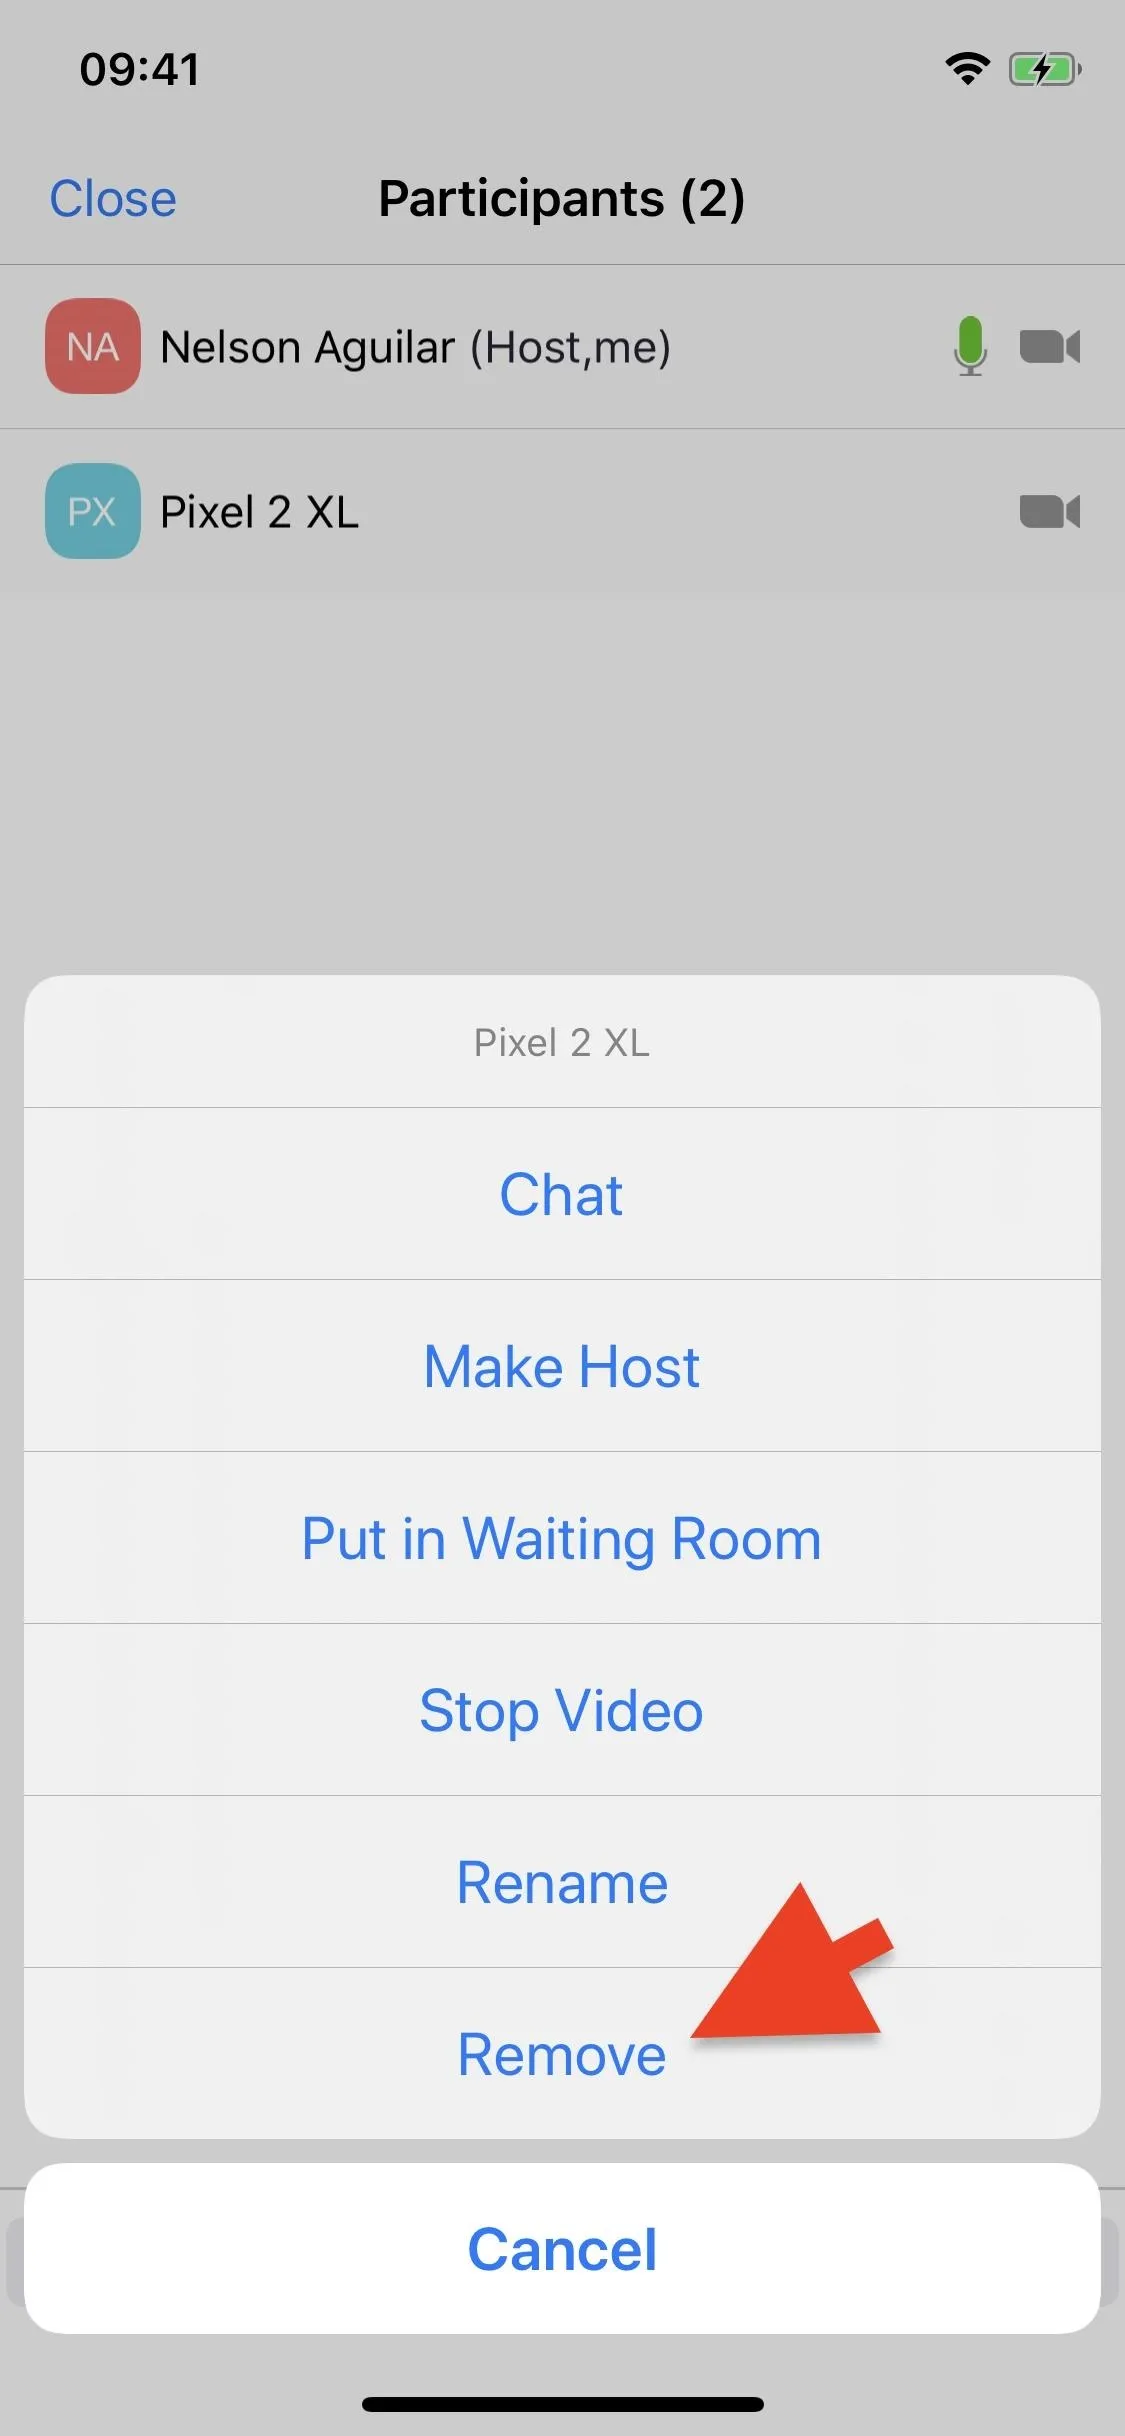
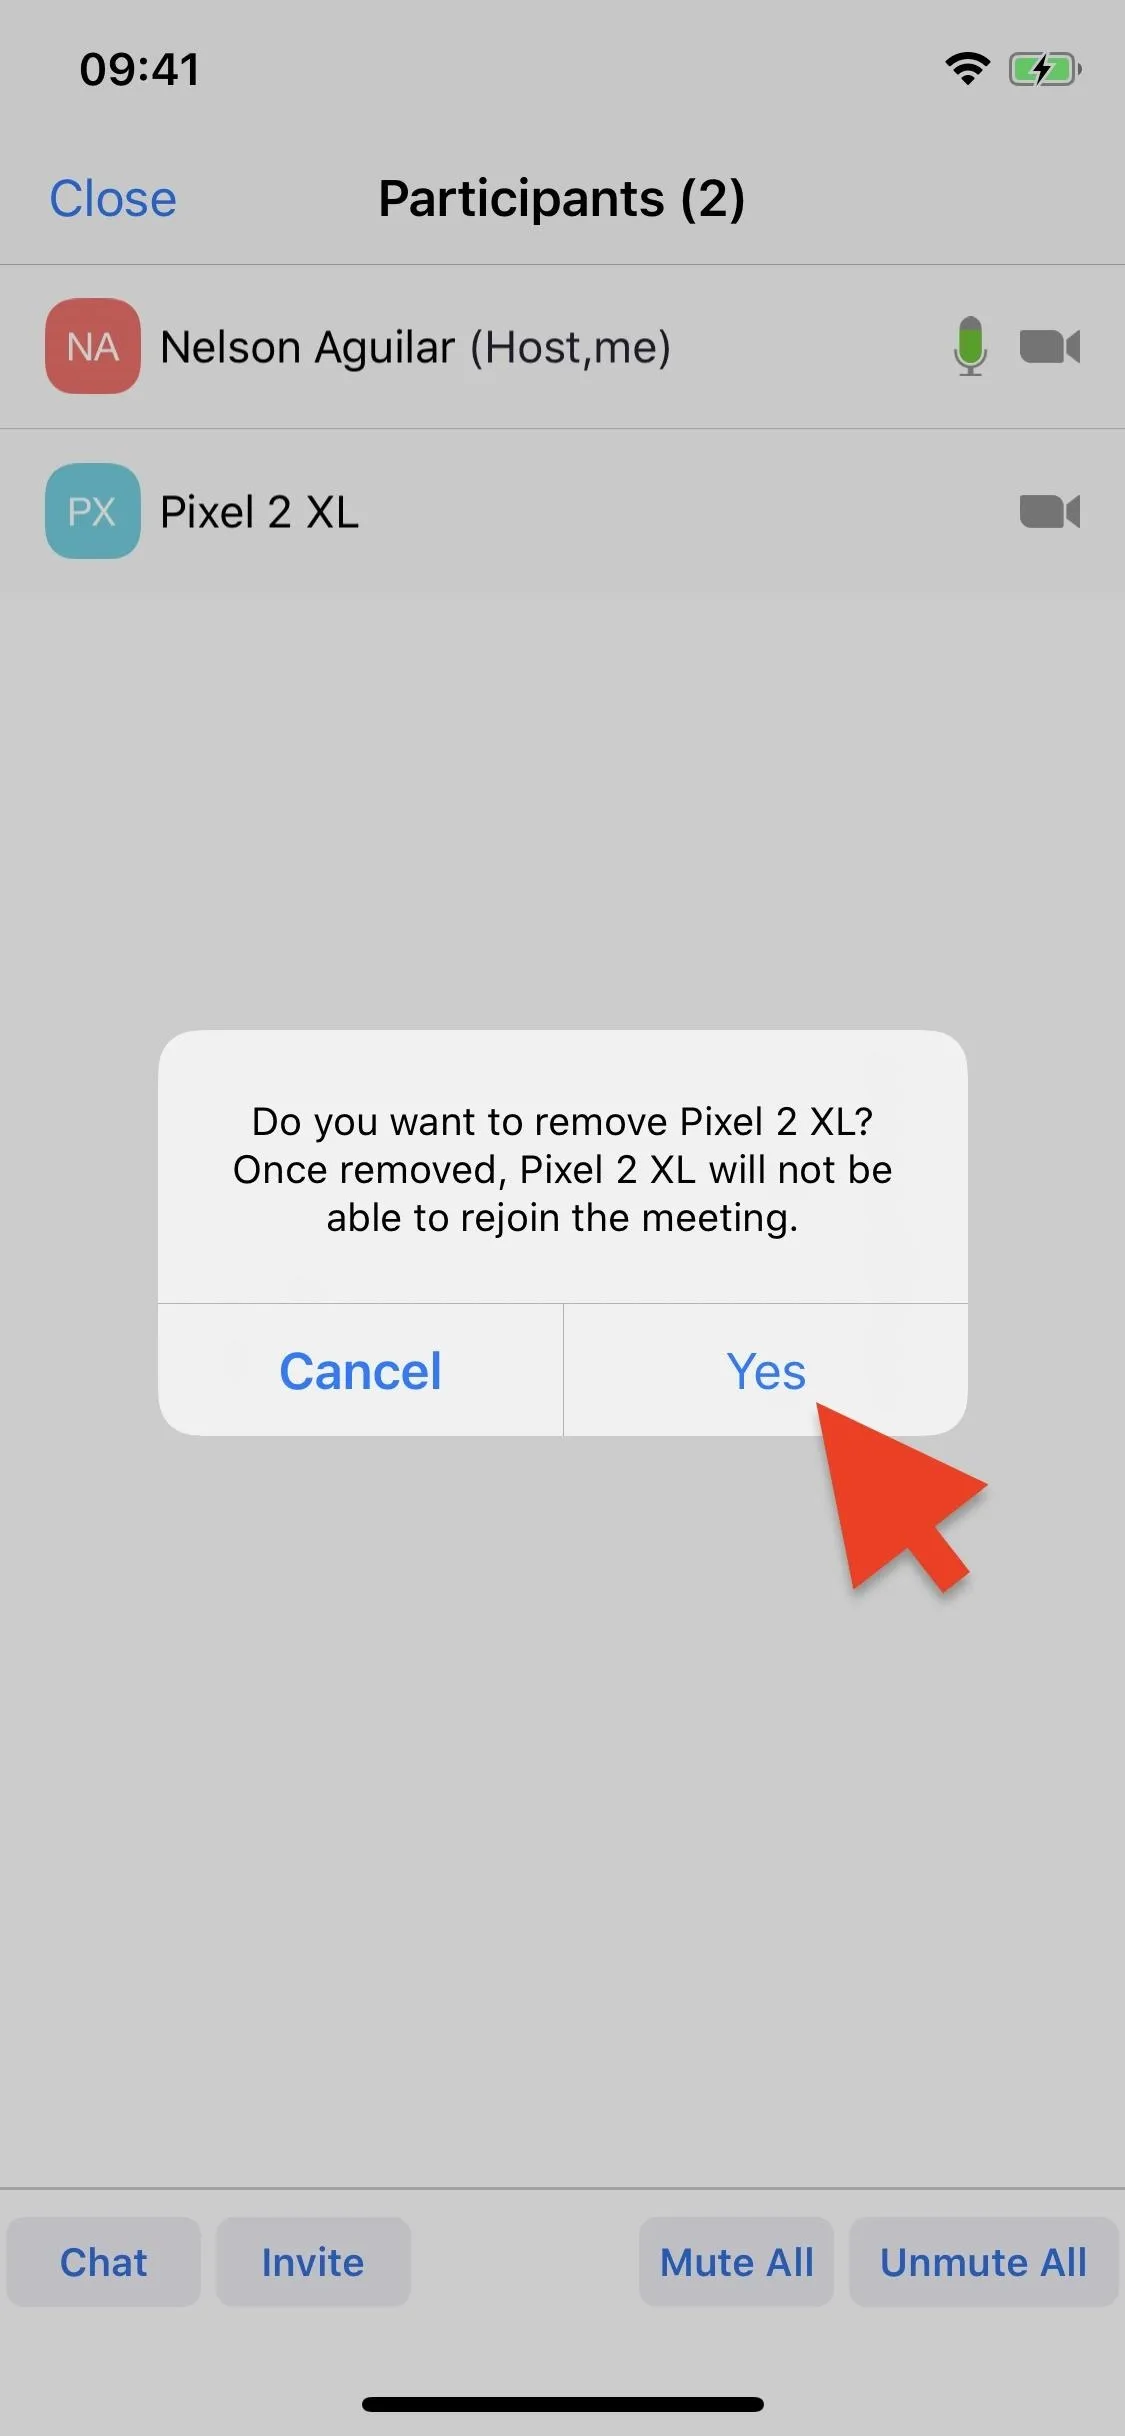
To remove a participant from the video call, tap on their name from the "Participants" tab, and hit "Remove" on the action sheet. A pop-up will appear asking if you're sure you want to remove the person because, as previously mentioned, they won't be able to rejoin the meeting. If you're sure, tap on "Yes" (iOS) or "OK" (Android). The person will be permanently expelled from your call.


Start a Webinar Instead
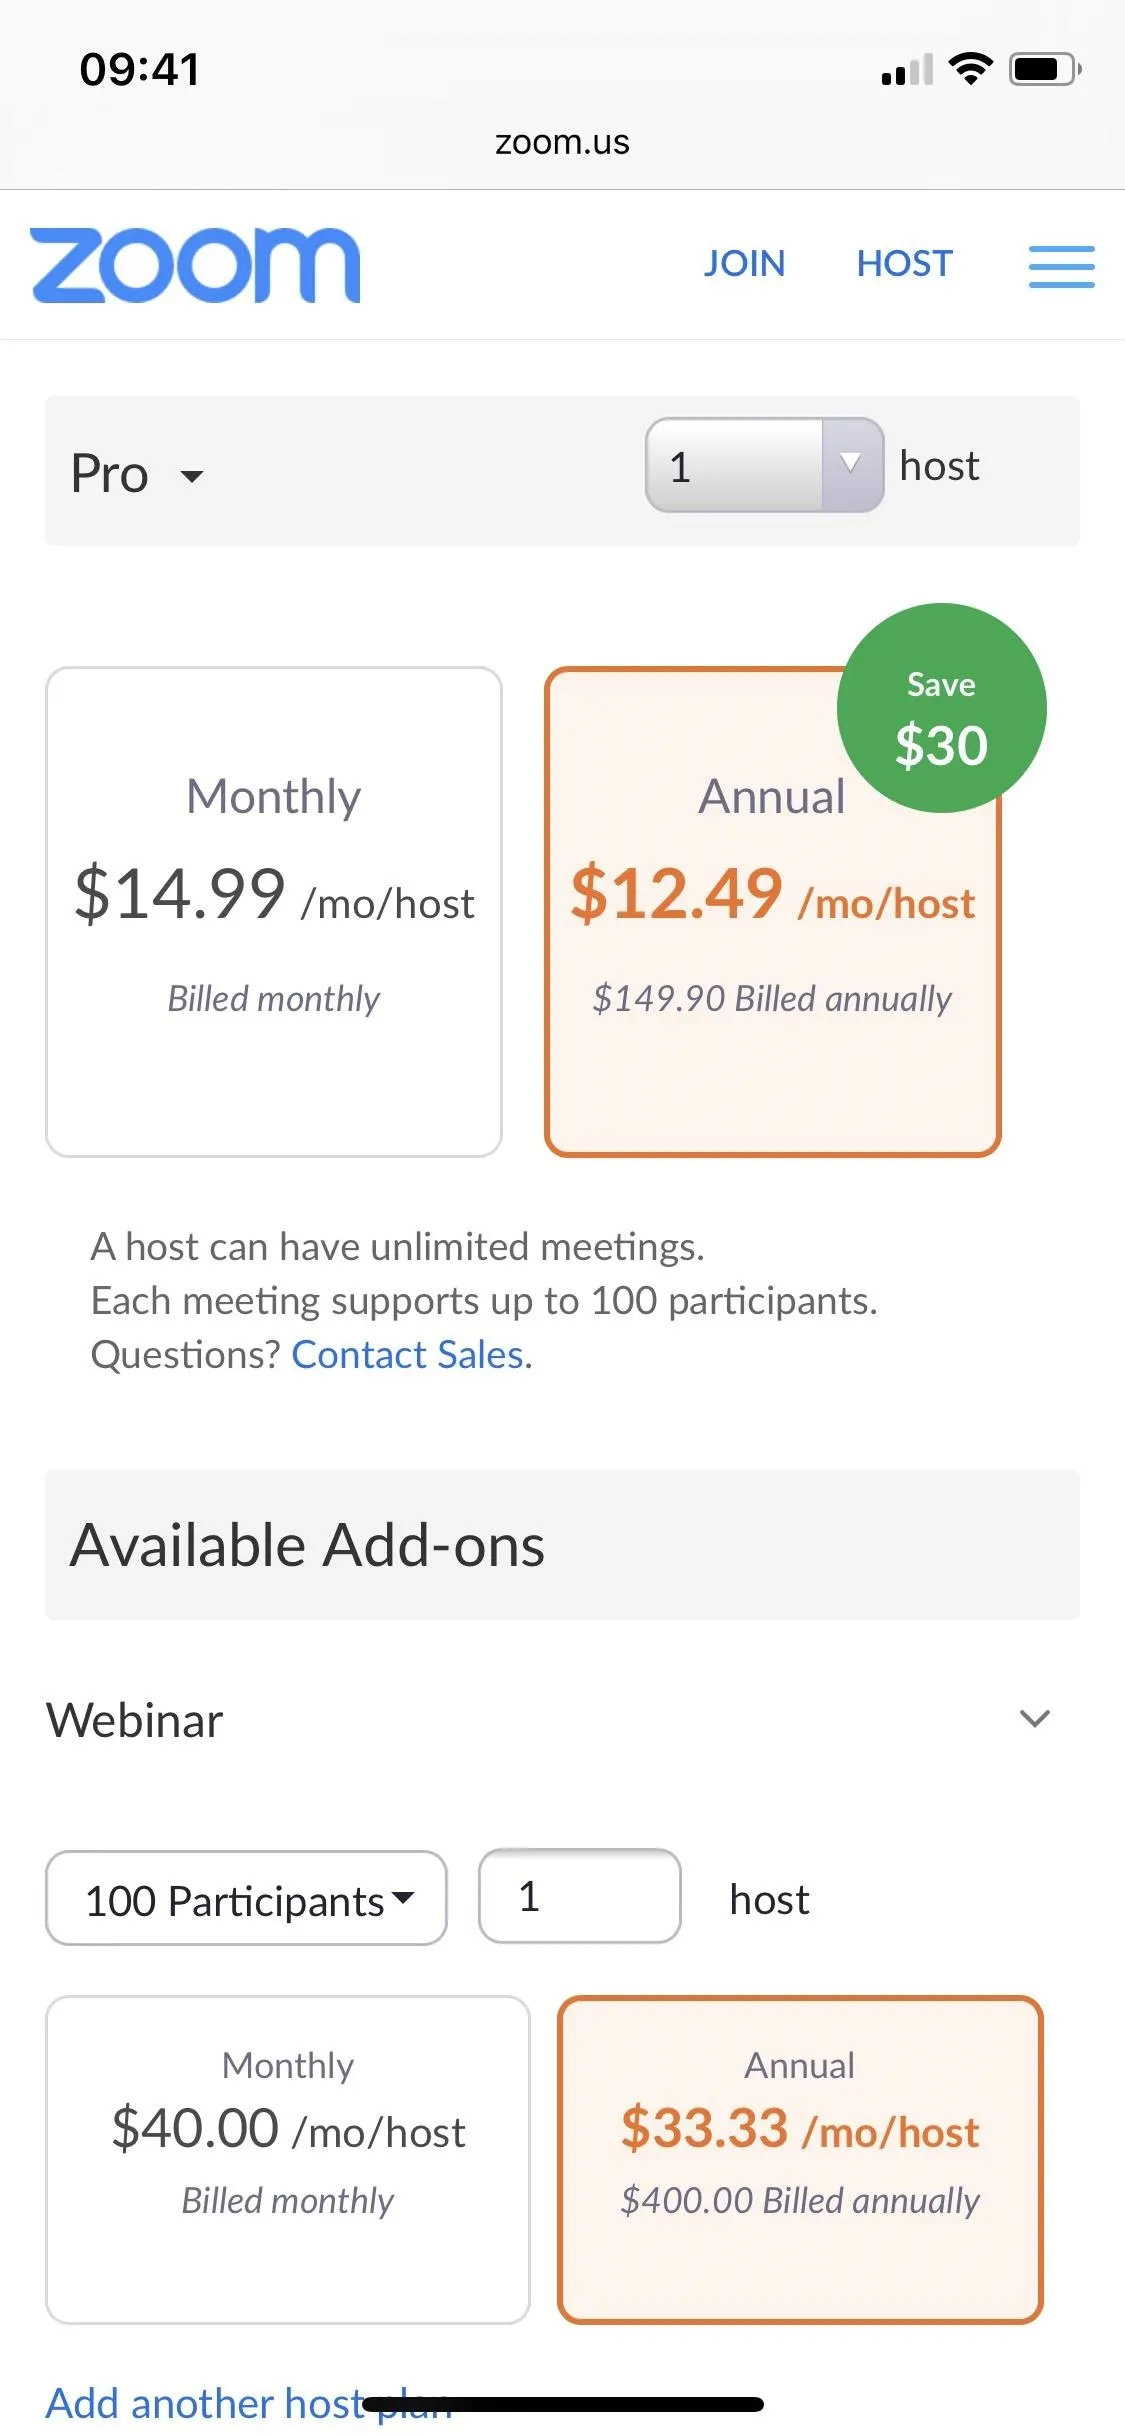
If you're holding more of a webinar than a meeting, you can sign up for webinar status in Zoom (it's a paid feature). When you host a webinar, all attendees will be muted automatically, and they cannot unmute themselves unless you specifically un-silence them one by one. However, it's not a feasible option for most people as it costs, at its cheapest, almost $46 per month paid out in one annual payment.



Cover photo and screenshots by Nelson Aguilar/Gadget Hacks


Comments
Be the first, drop a comment!