There are many different ways and many different apps that allow you to censor a racy photo and then share it to Instagram or Facebook. If you're in a time crunch and don't have the time or the patience to deal with something like Photoshop, then Snapseed is a great and easy app that will blur out your raunchy images in a quickie.
For instance, if you are a female and want to post a topless photo to Instagram but can't because of Instagram's anti-nipple policy, then Snapseed provides you with a "Lens Blur" filter to blur out the area that is "too sensitive" for the IG community.
If you don't have it already, download and install Snapseed for Android or iOS — you won't regret it, it's one of the best photo editing apps out there. Once the app is installed, go ahead and open it to access the main menu. From here, I'll walk you through how to use Snapseed's blur filter to ensure that your photos are safe to share on social media.
Choose Your Content
From Snapseed's main home screen, tap anywhere to open up a photo. If you need help doing this, then check out our guide below where we show you how to choose content to import for editing on an iPhone or Android device:
Apply Snapseed's 'Lens Blur' Filter
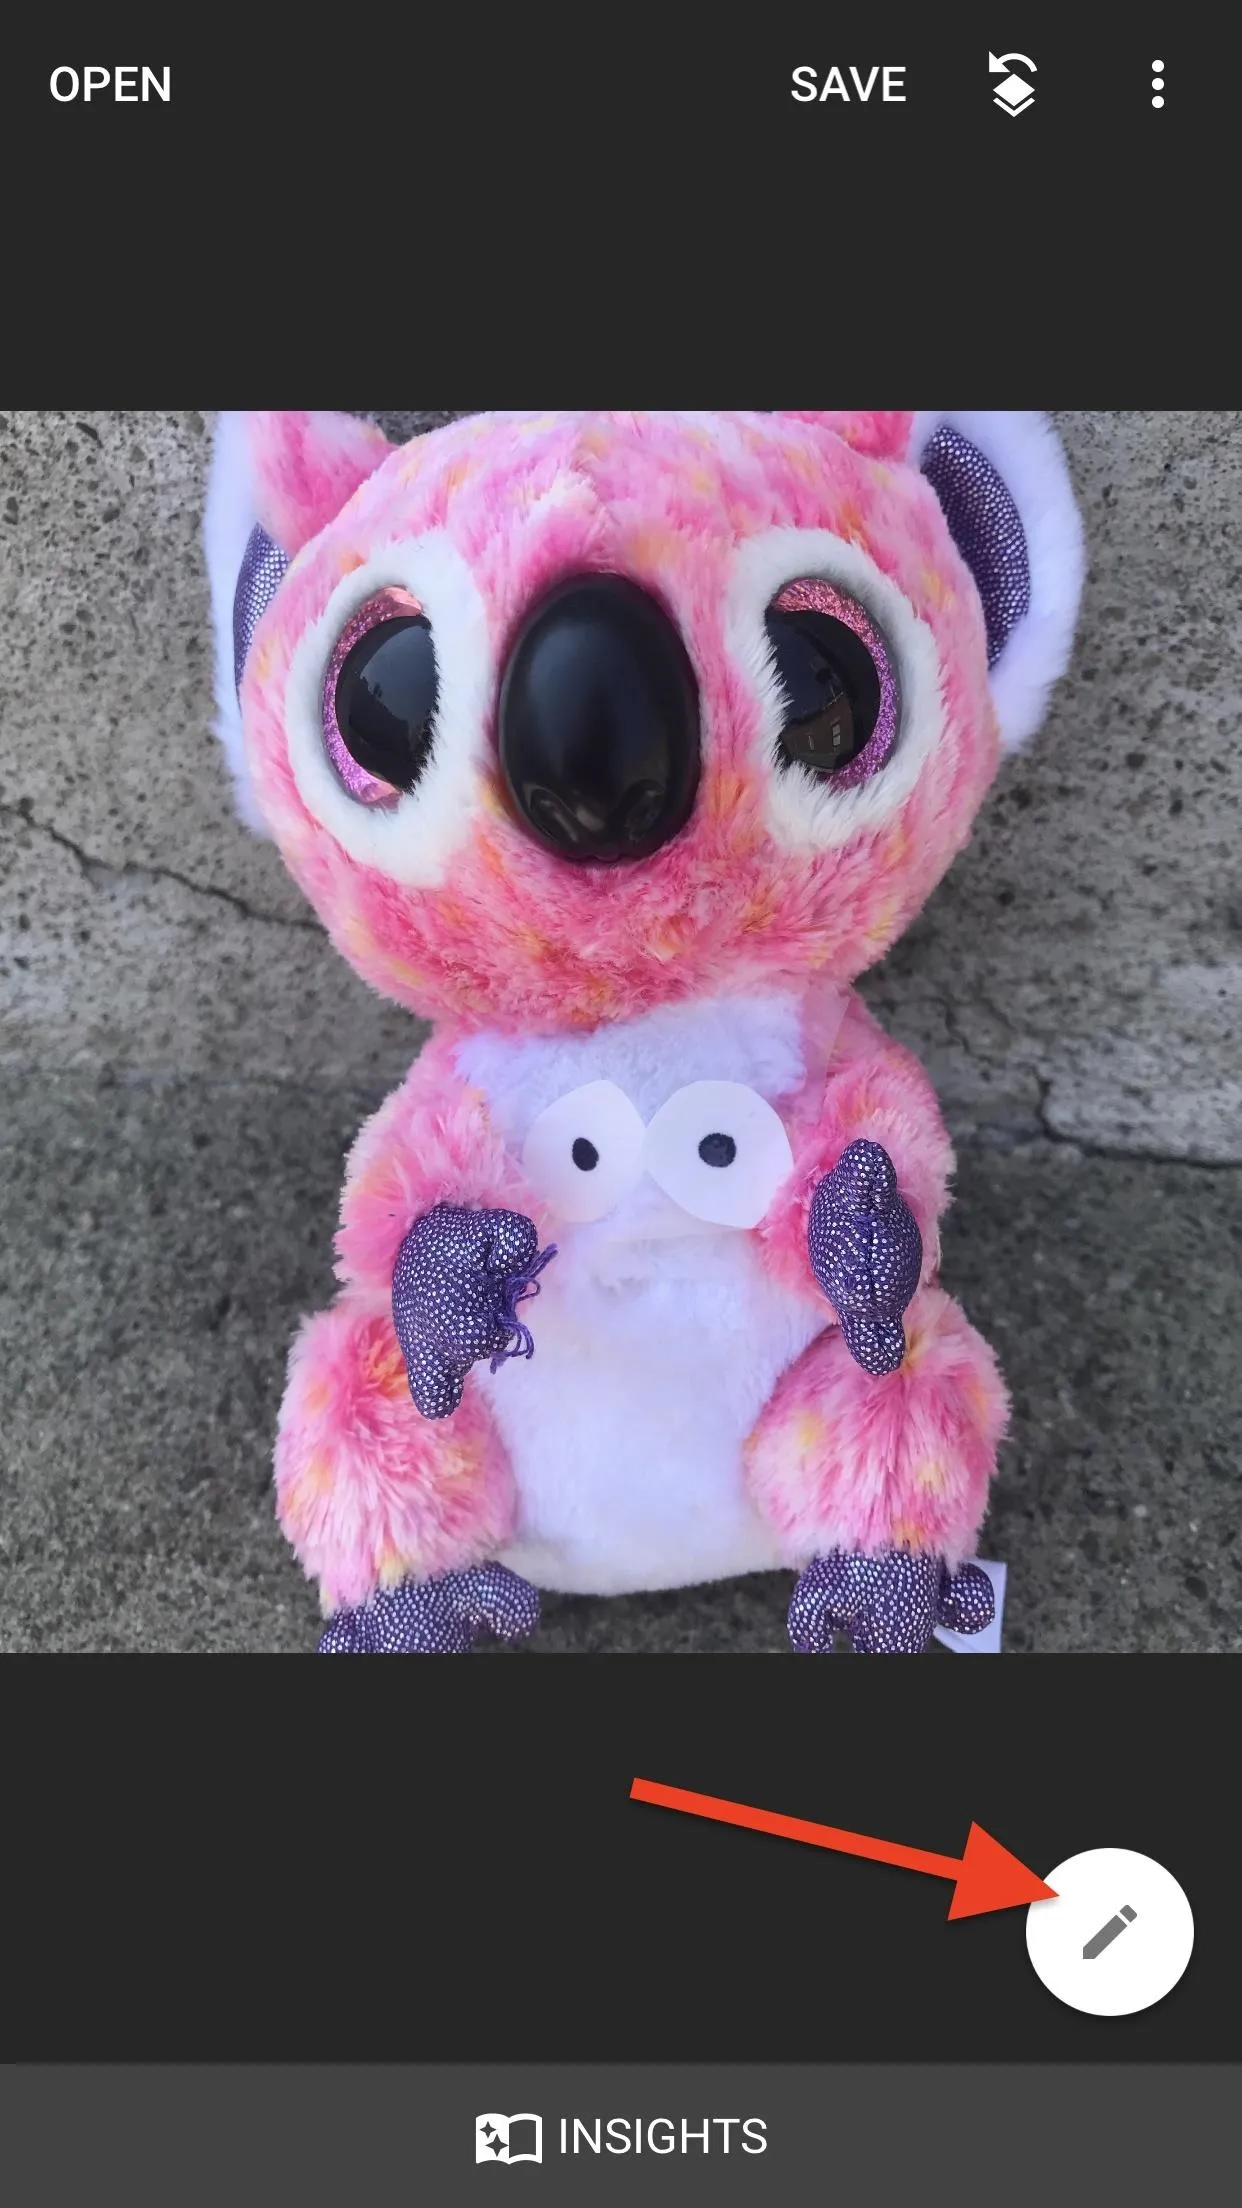
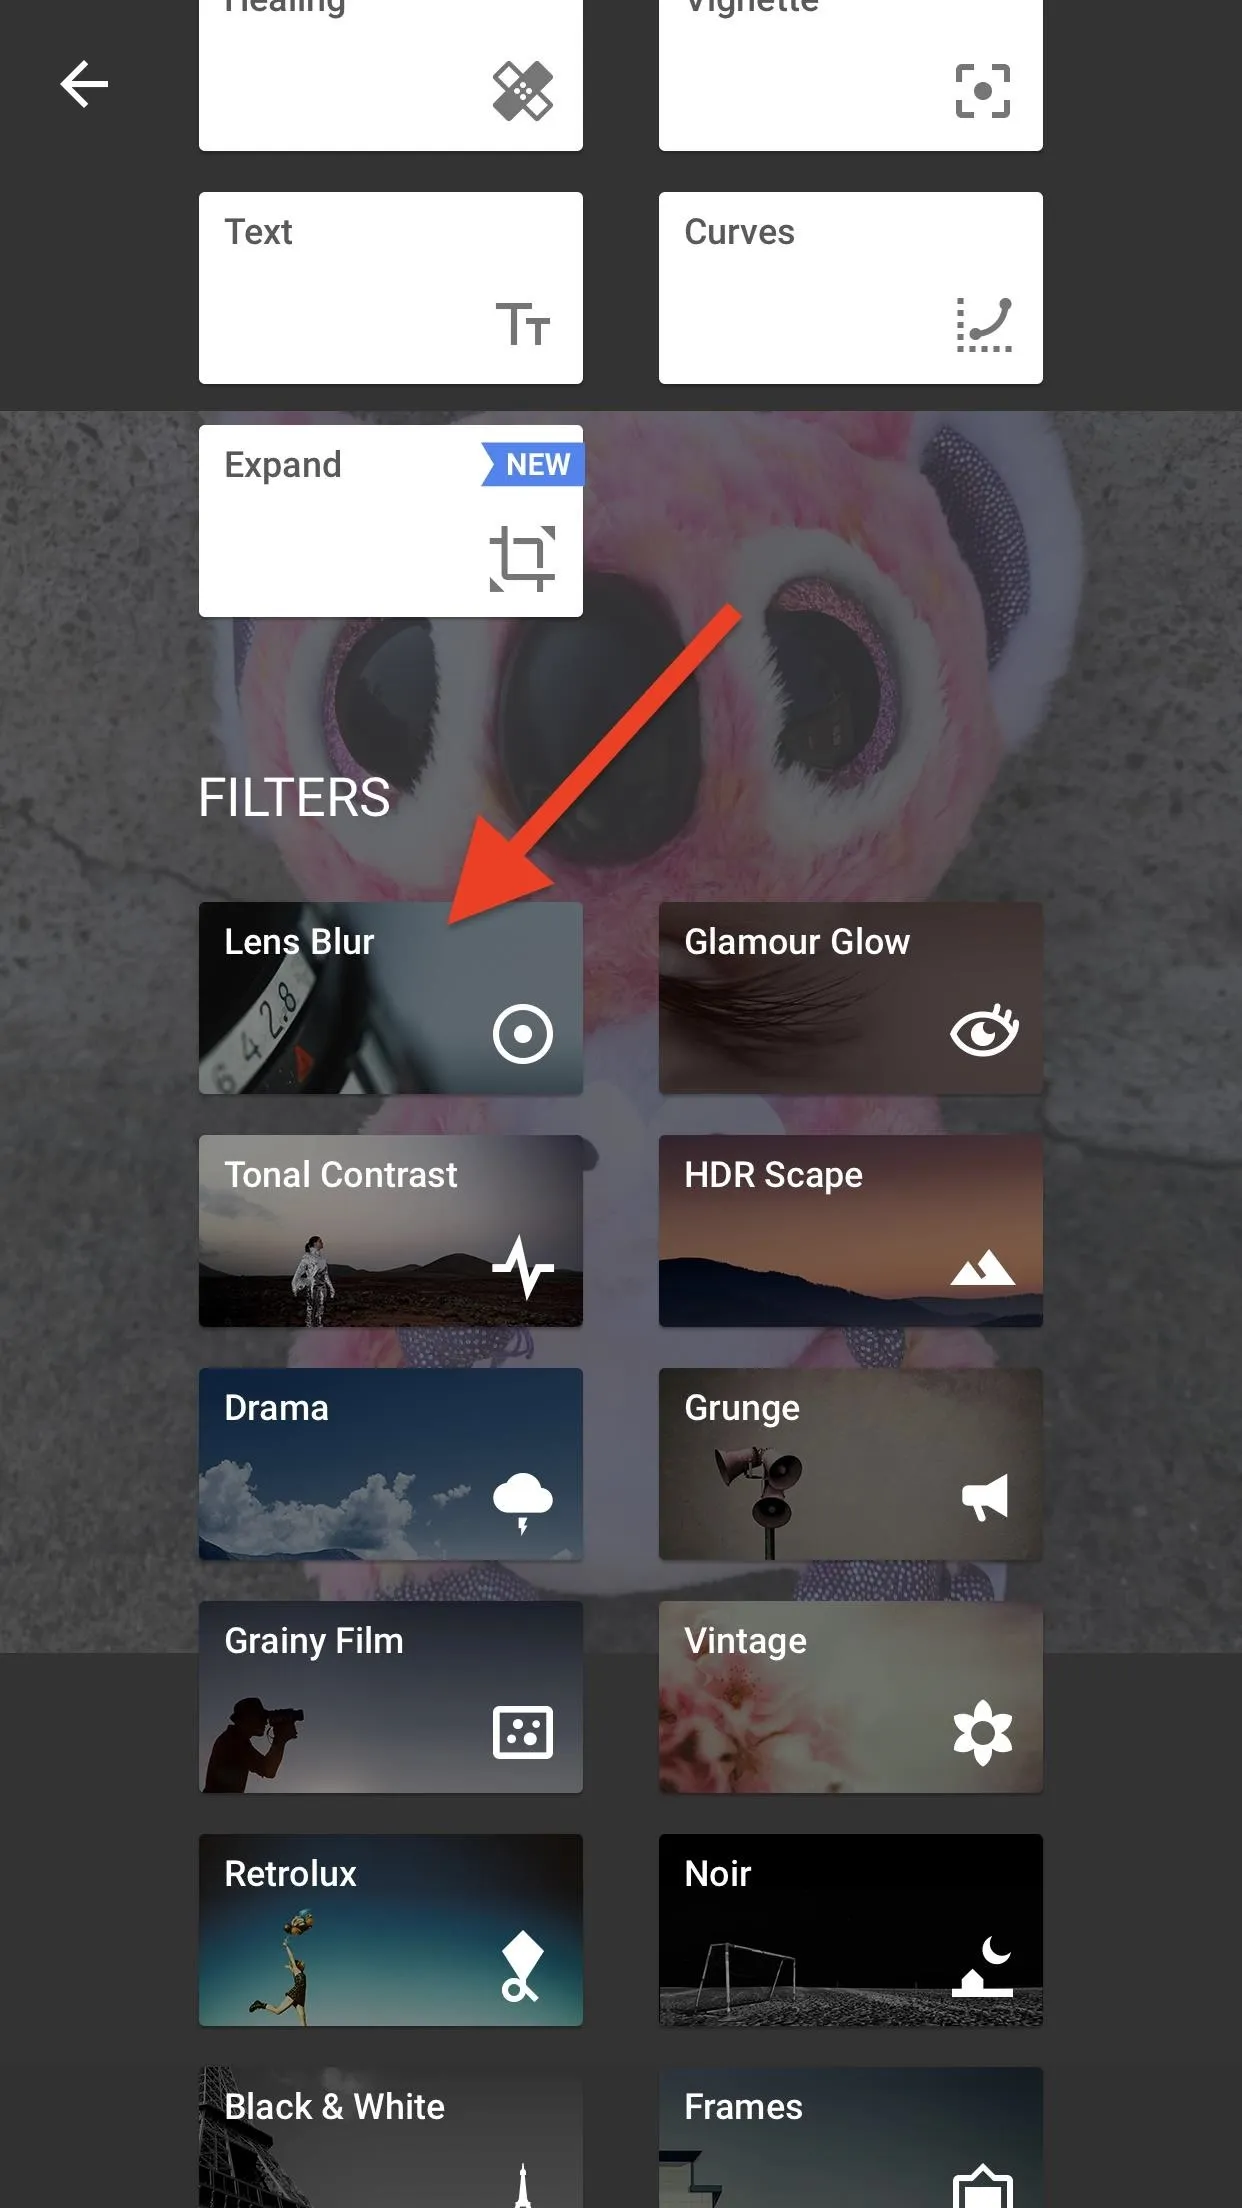
Once you've picked out your content, you are now ready to start blurring out the sensitive area. Tap on the editing icon at the bottom-right corner. This will show all of the editing tools and filters available, so tap on "Lens Blur" under the Filters section.
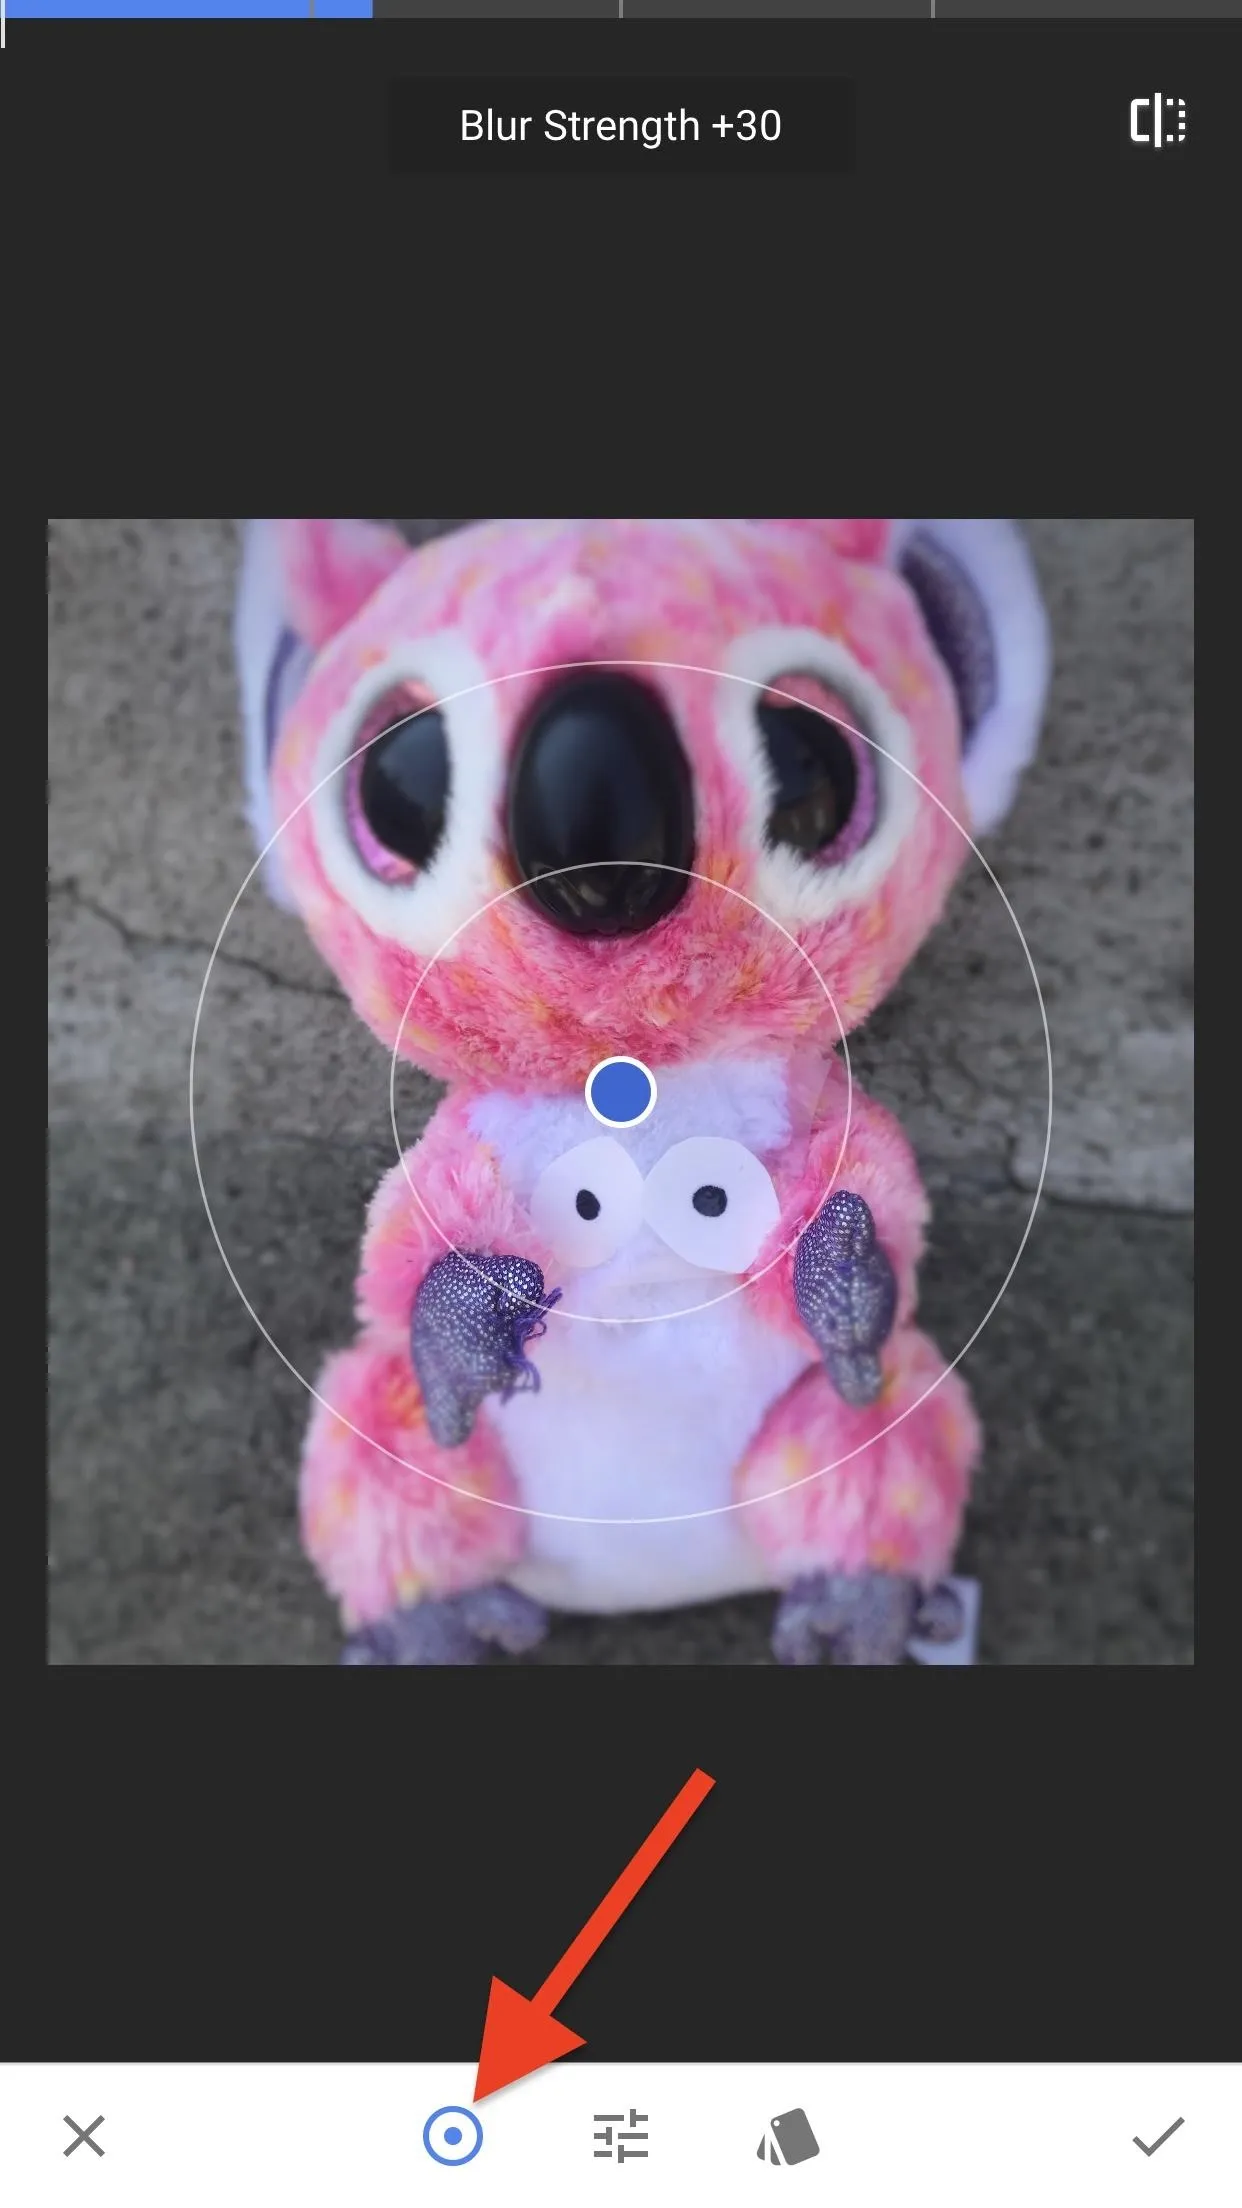
Once there, at the bottom left-hand corner of the tool bar, you'll find a circular icon. Tap on it to toggle between a linear or elliptical focus. Depending on what area you want to blur out, choose the focus that fits your image the best. Pinch the screen to alter its size, shape, and placement on your content.


Make Some Blur Adjustments
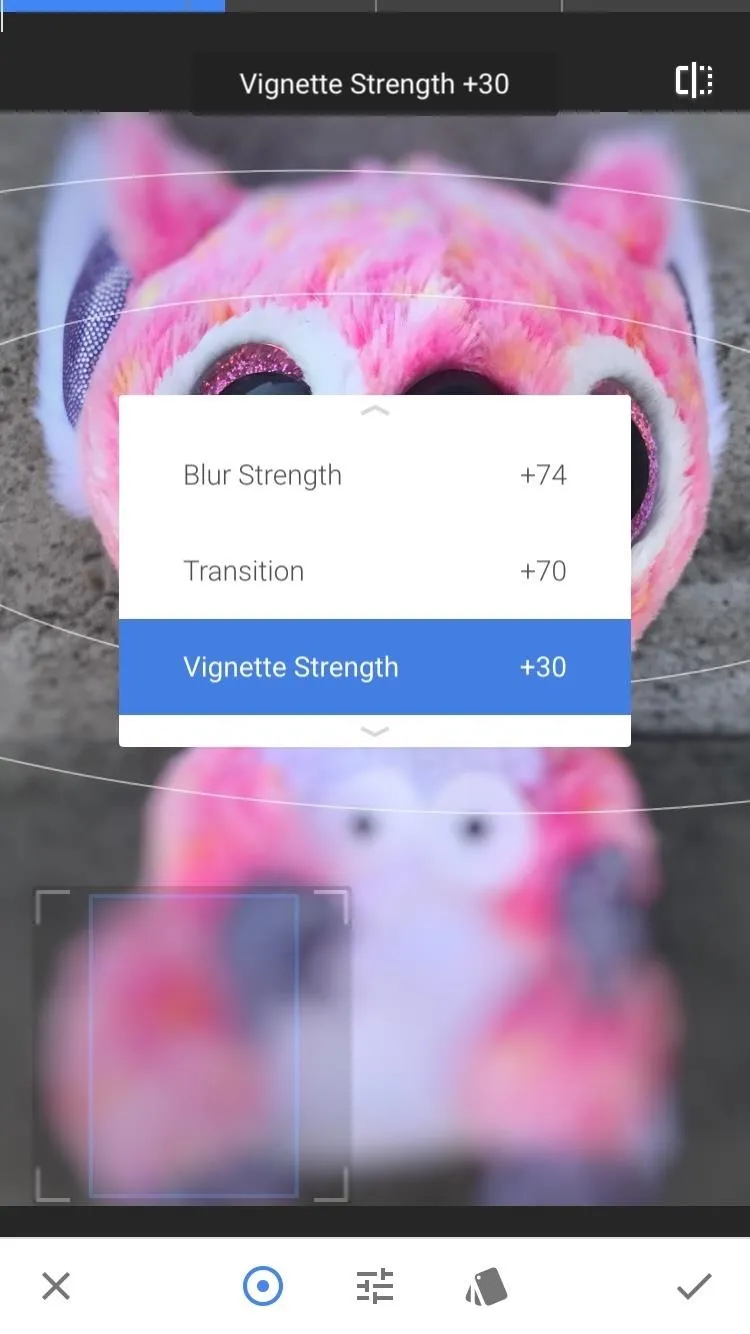
Once you have your linear or elliptical blur filter set how you want, you'll want to adjust the blur properties. There are three aspects you can change — Blur Strength, Transition, and Vignette Strength. By default, these options are set to +30, +70, and +30, respectively.
When entering the "Lens Blur" filter, "Blur Strength" will be available to adjust right away. So swipe to the right or left to increase or decrease the amount of blur. I highly recommend blurring out sensitive areas as much as you can to ensure your content does not get reported.
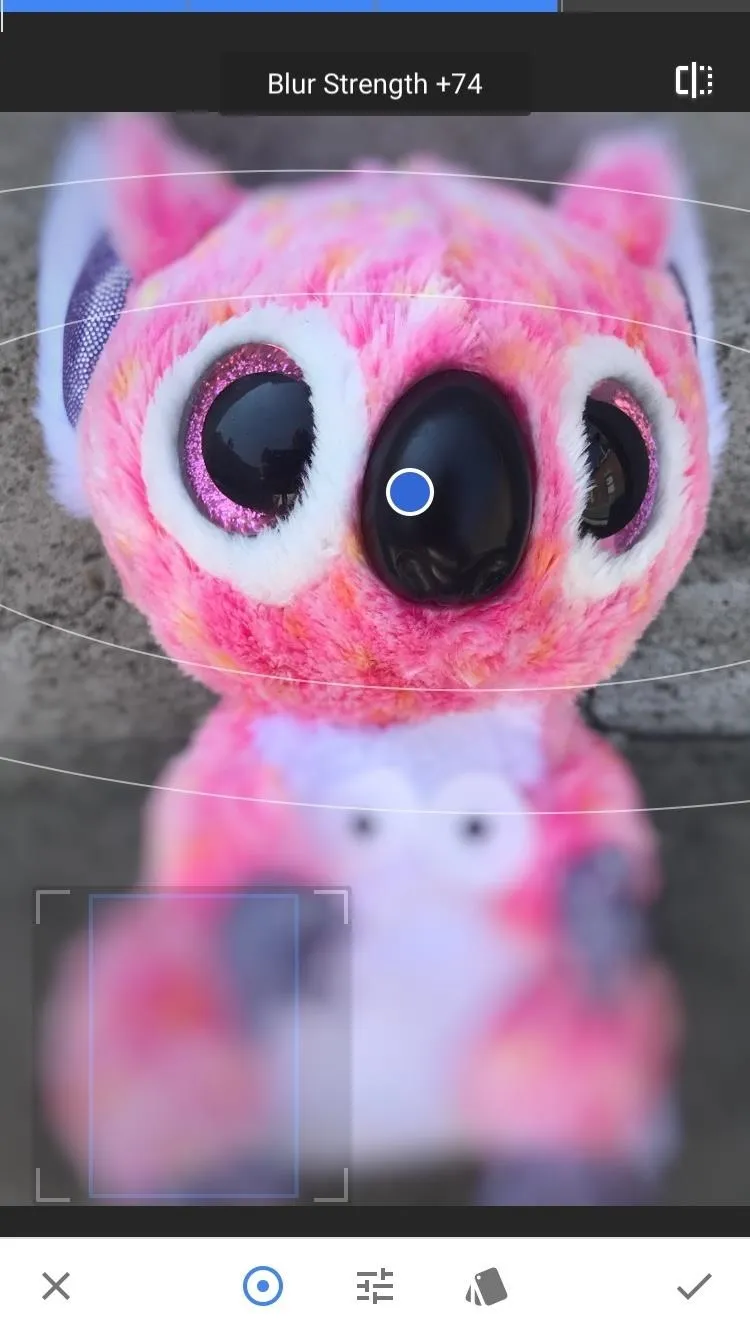
To increase or decrease the distance of fade between the area in-focus and the area you would like to blur, swipe vertically on the screen and select "Transition." You can access the same menu by tapping on the adjustments icon on the bottom tool bar next to the circular/linear focus icon. Swipe to the right to increase the amount of fade.
"Vignette Strength" allows you to increase or decrease the amount of shadow around your image. So access the menu again to choose that adjustment option, then swipe to the right to darken the edges of your image.


Change the Blur Shape (Optional)
Lastly, there is an option to change the shape of specular highlights in your blurred area. The shapes option is located at your tool bar on the bottom next to the menu icon (it looks like a bunch of tags).
If you'd like to change the shape of an area within the blur, you can choose between things like circles, pentagons, octagons, stars, and even hearts. You might not see a dramatic difference, like a very clear outline of a heart, but it is something to play around with depending on the type of content you are looking to post.
When you are finished editing your image, tap on the check mark at the bottom-right-corner. Then, if you're using an iPhone, tap on "Save" at the top to save it to your device. If you're using an Android, tap on the "save" icon at the top. From here, choose the option that suits your purposes.


Once you've edited and saved the image, you are now free to share it to social media without fear of it being taken down for breaking the rules.
- Follow Gadget Hacks on Facebook, Twitter, Google+, YouTube, and Instagram
- Follow WonderHowTo on Facebook, Twitter, Pinterest, and Google+
Cover image, screenshots, and .gifs by Bettina Mangiaracina/Gadget Hacks





Comments
Be the first, drop a comment!