Adobe Premiere Clip is a great mobile app for users with little to no editing experience. Its automatic editor will sort your clips into a fun video in seconds, leaving you to just choose the music. But what if you're looking for more than automatic settings? What if you want some serious control over your project, from the editing to the way the image looks?
Luckily for you, Adobe Premiere Clip is more than just an automatic editor. The app comes with a freeform editor, which gives you some of the tools that could be found in professional editing software. If you'd like to know how to set up your own freeform project, just follow the steps below.
The Adobe Premiere Clip app works across platforms, so it does not matter whether you use the iOS version or the Android version. However, because of some minor layout differences, we have split iOS and Android into their own sections below.
On iPad, iPhone & iPod Touch
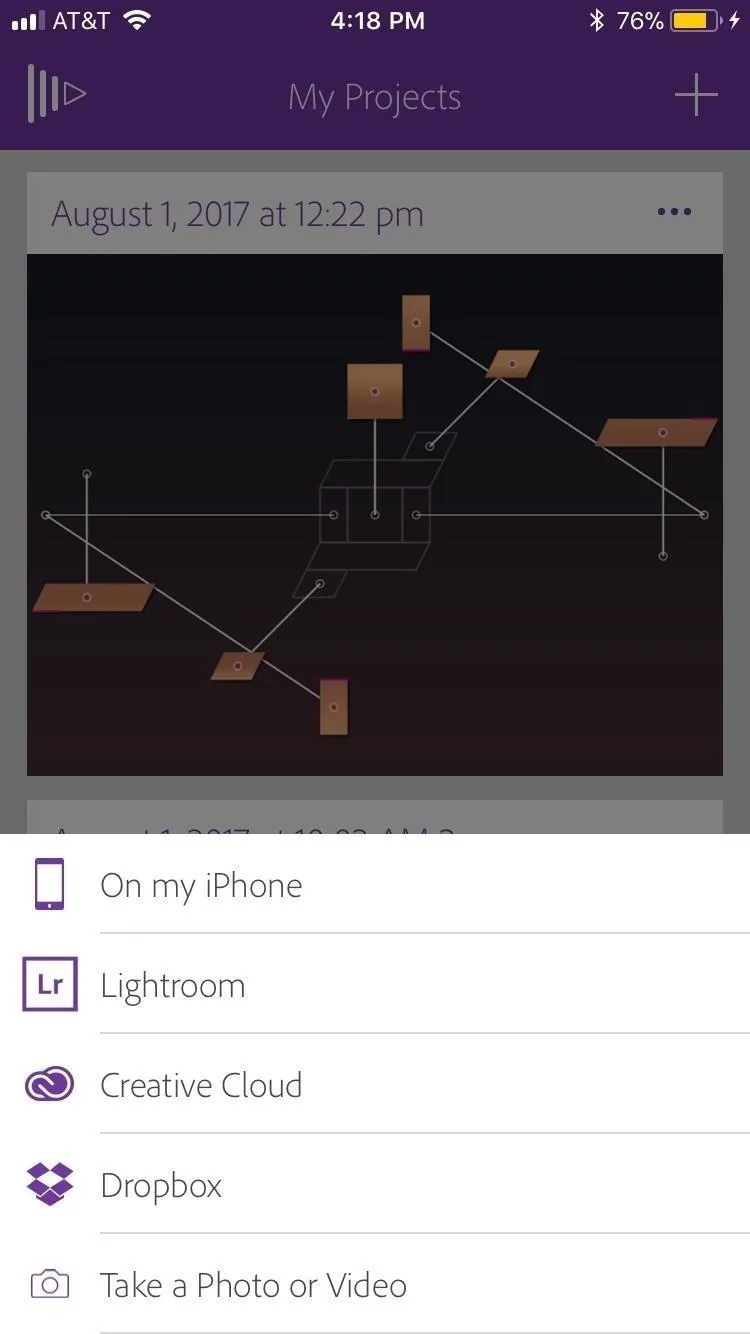
- Tap the (+) button in the top-right corner of the display.
- Tap which area you would like to pull photos and videos from. You can choose between content on your iPhone's storage or items stored in Lightroom, Creative Cloud, or Dropbox. (If you choose one of the latter options, you may have to sign in if prompted.) You can also tap "Take a Photo or Video" to produce content for your project in the moment.
- Select one or more images or videos for your project.
- Once you have selected enough items, tap "Add (#)" at the bottom of the display. This button will display the number of photos and videos you have selected for your project.
- Tap "Freeform."
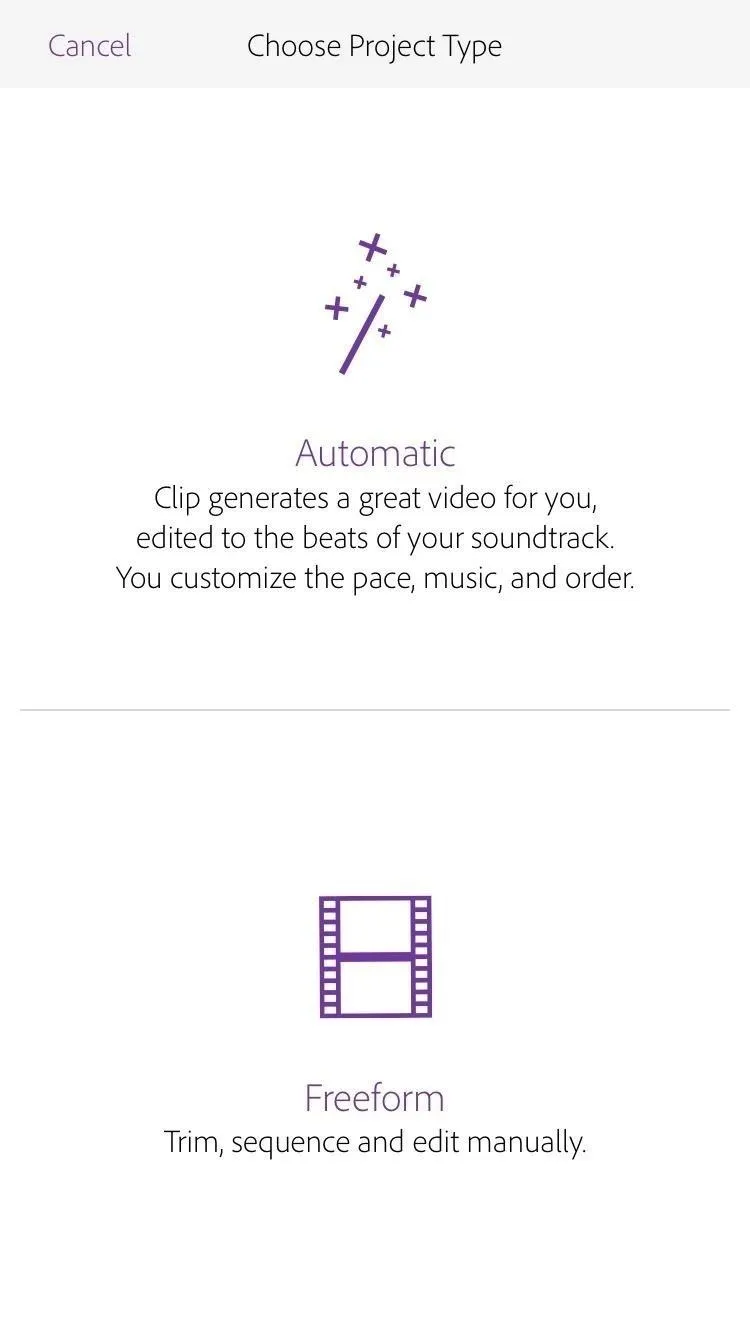


If you already have a project in the "Automatic" editor, no biggie. Just tap the Filmstrip icon in the top-right corner of the display, then tap "Covert to Freeform Editor." Your project will seamlessly be moved to the freeform editor without you having to do anything else.
On Android Devices
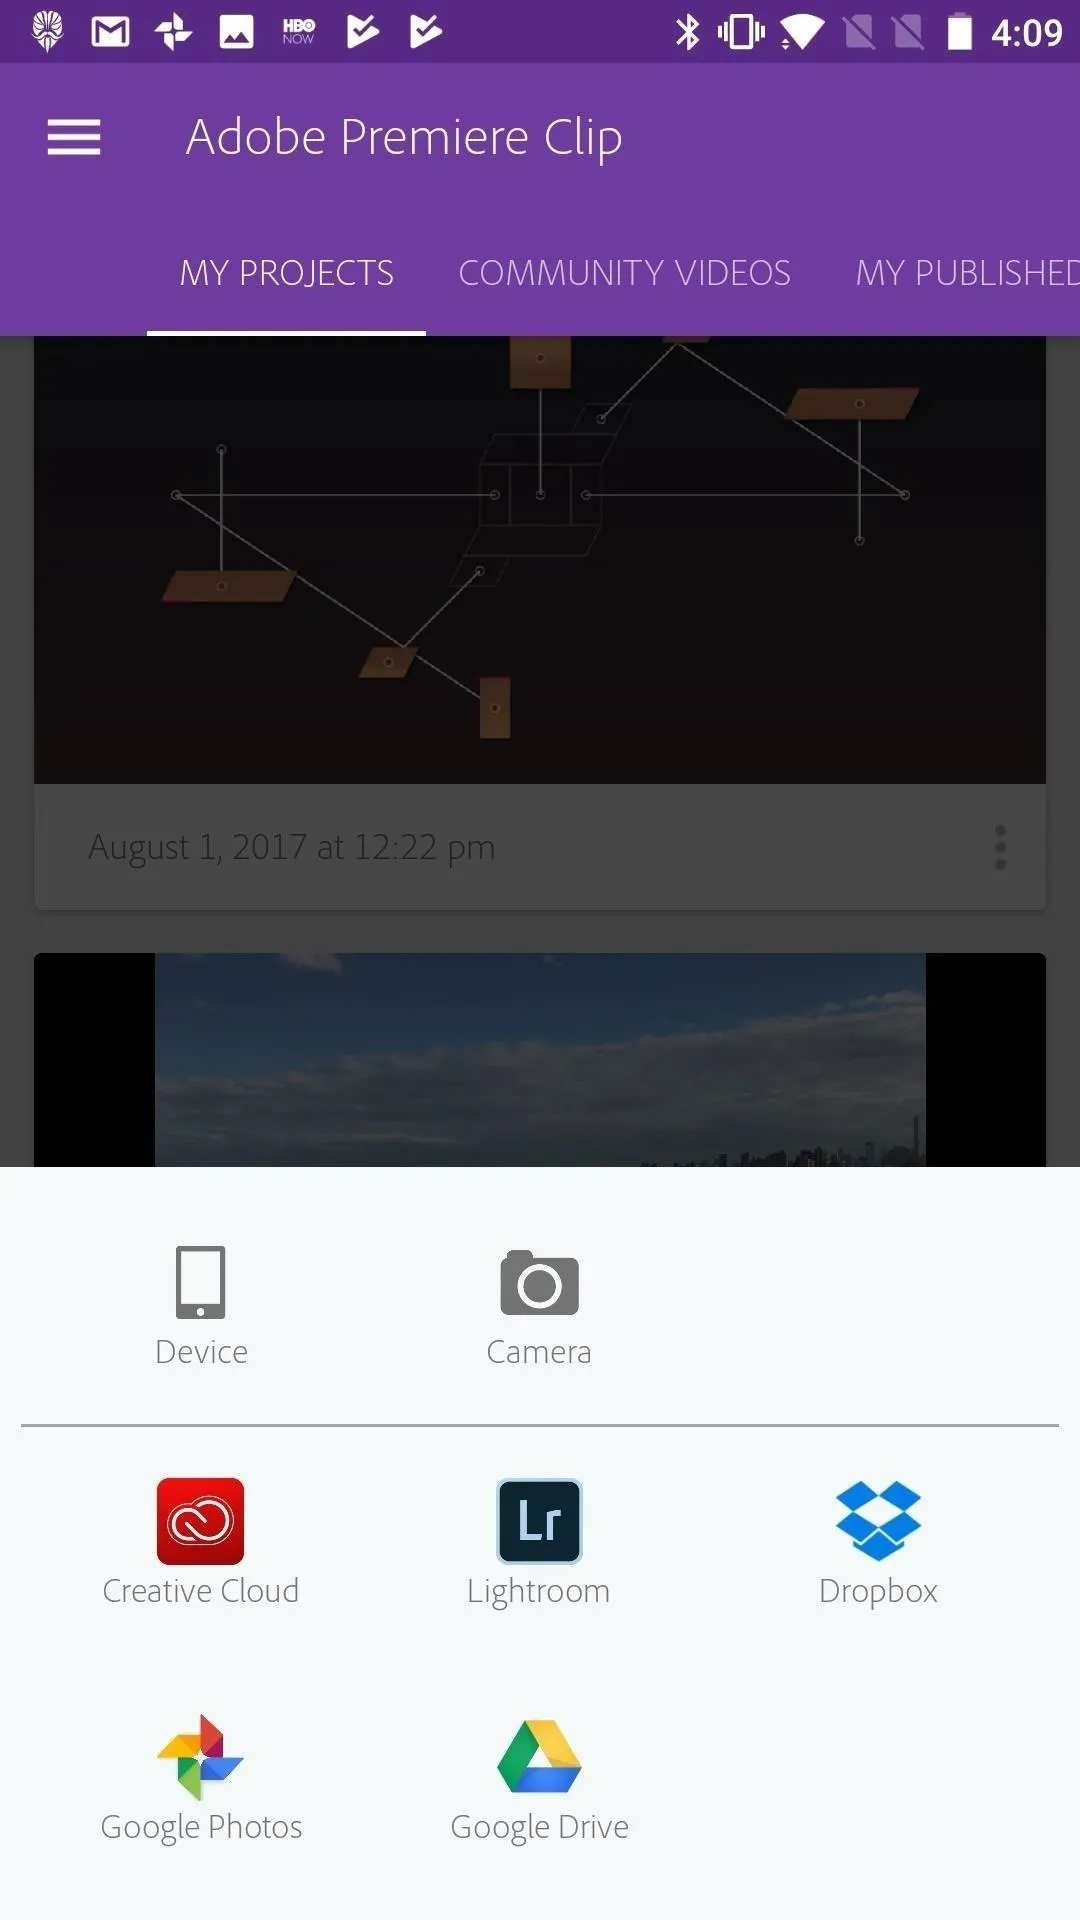
- Tap the (+) button in the bottom-right corner of the display.
- Tap which area you would like to pull photos and videos from. You can choose between content on your Android device's storage or items stored in Lightroom, Creative Cloud, Dropbox, Google Photos, or Google Drive. (If you choose one of the latter options, you may have to sign in if prompted.) You can also tap "Camera" to produce content for your project in the moment.
- Select one or more images or videos for your project.
- When you've selected your photos, tap DONE (#). The number of photos and videos you have selected will appear in the parentheses.
- Tap "Freeform."
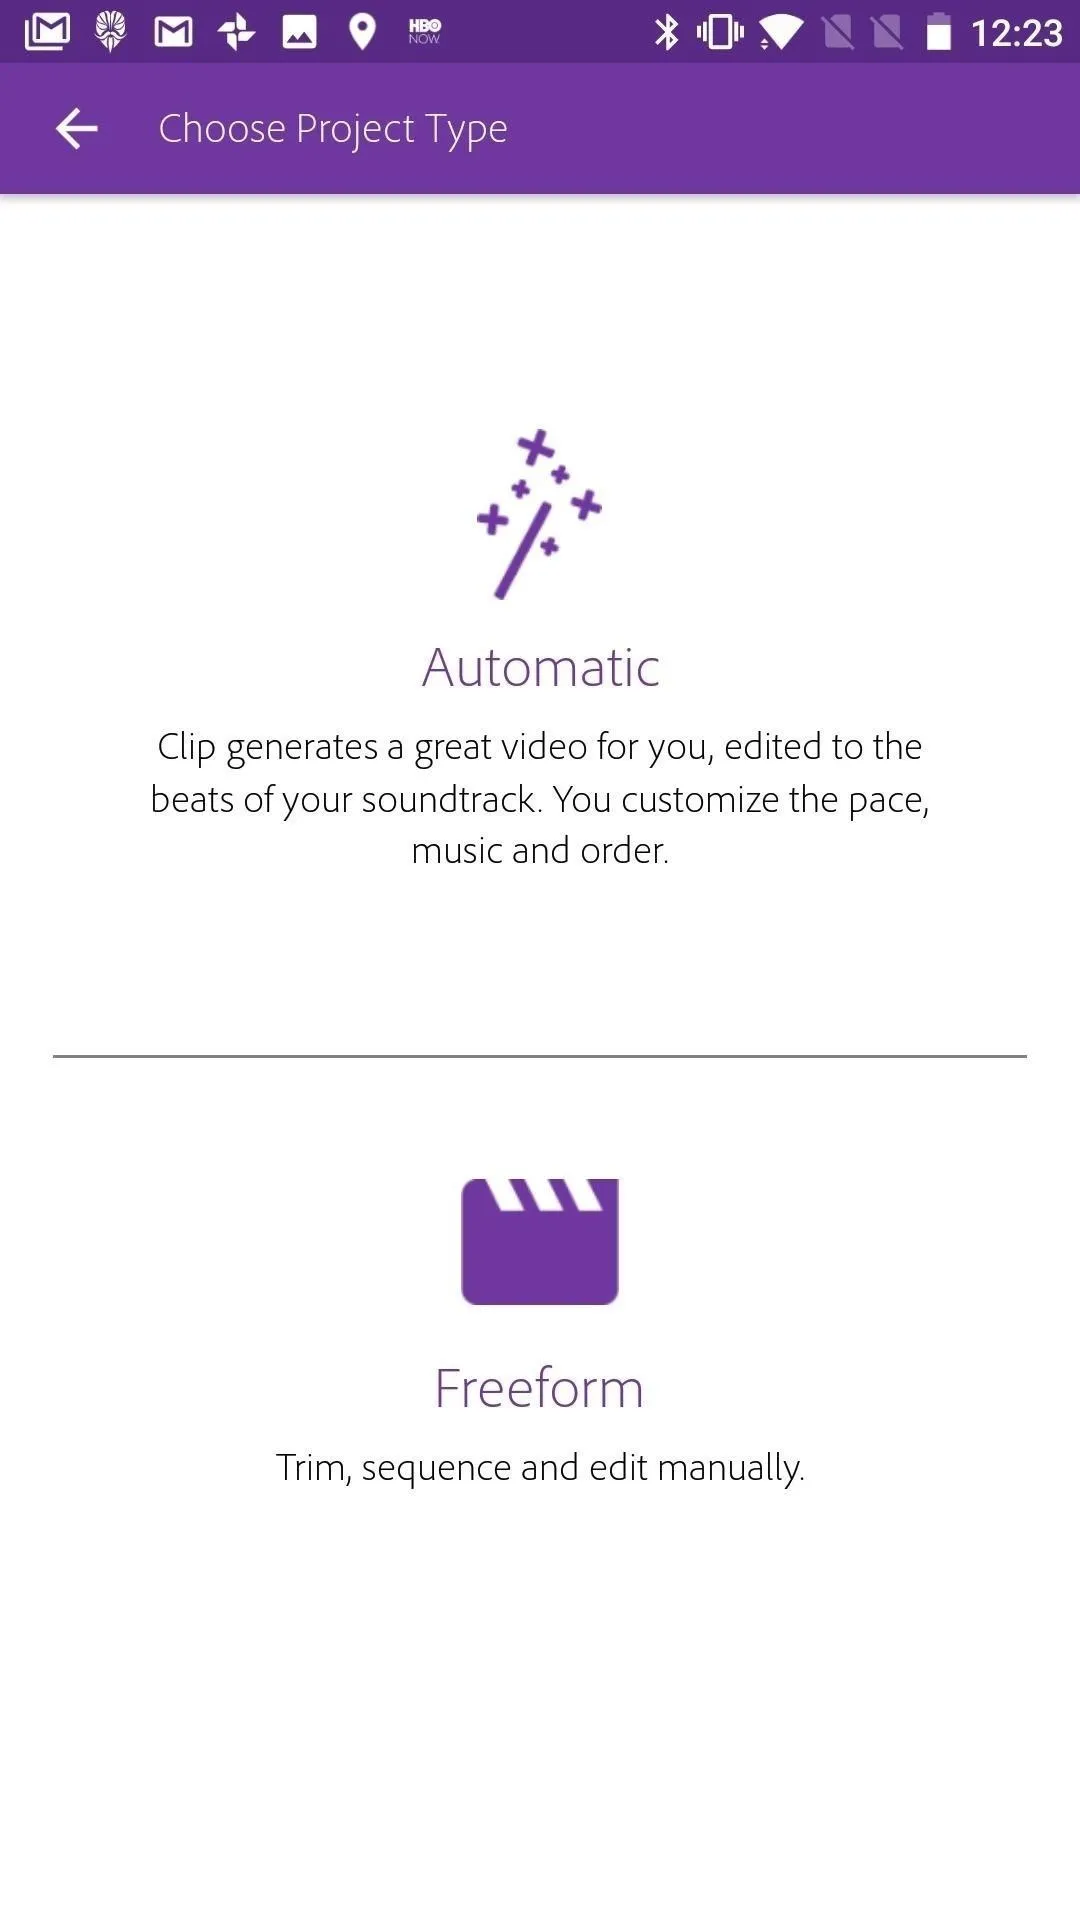


If you have a project in the "Automatic" editor, it's just as easy to convert as on iOS. Just tap the slate icon in the top-right corner of the display, then tap "Covert to Freeform Editor." Your project will seamlessly be moved to the freeform editor without you having to do anything else.
Using the Editing Tools in the Freeform Editor
In the freeform editor, you have tools to help customize your video to your liking. You can add a title, make color adjustments, add transitions such as fades and crossfades, trim your video, edit exposure, and much more.
- Follow Gadget Hacks on Facebook, Twitter, Google+, YouTube, and Instagram
- Follow WonderHowTo on Facebook, Twitter, Pinterest, and Google+
Cover image and screenshots by Jake Peterson/Gadget Hacks




Comments
Be the first, drop a comment!