
Are you interested in video editing, but have no background in it? Are you looking to put together a short from some clips you've shot, but don't know where to start? You could use iMovie, an application that comes free with every iPhone, but then what would you do on Android? There must be a universal solution that works across both iOS and Android to let you work however and wherever you like.
There is, in Adobe Premiere Clip! Premiere Clip works on both iOS and Android, so no matter which phone you have, you'll be ready to go. If you're a beginner at editing, though, you might not know where to start. Isn't Premiere pro-level software? How can you start there?
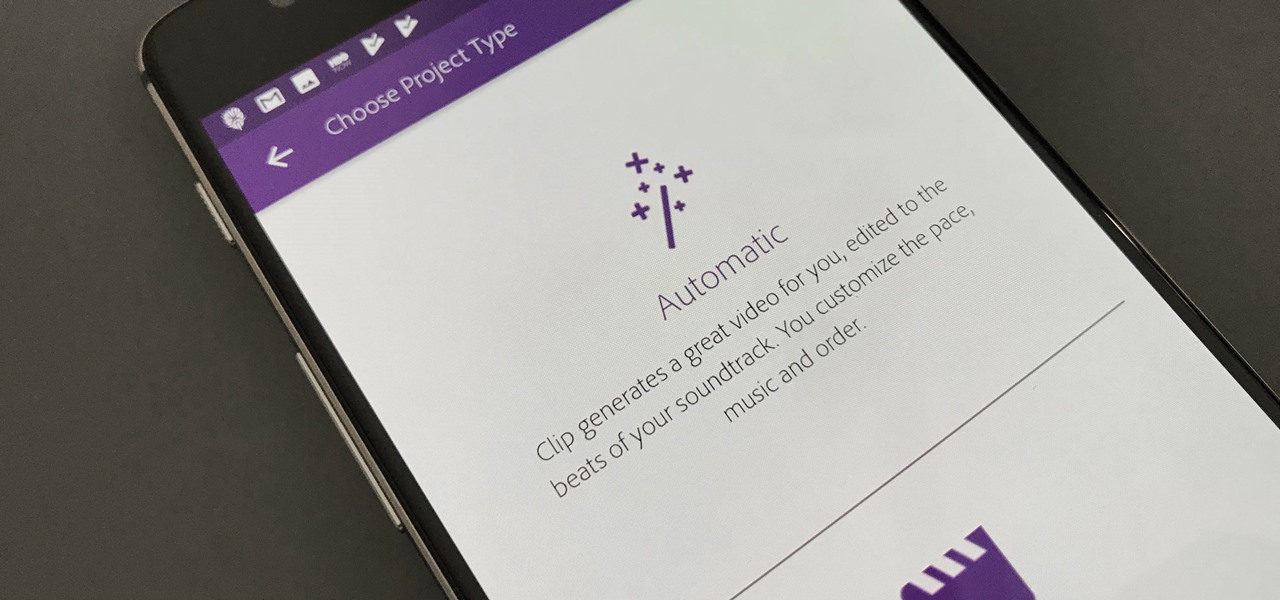
Easy — Premiere Clip comes with a feature called Automatic Editing, so no matter who you are or what experience you have with video editing, you can put together a movie right now.
Method 1: Automatic Editing on iPhone, iPad, or iPod Touch
Like many cross-platform apps, Premiere Clip is designed slightly differently between iOS and Android. The fundamentals are the same for the most part, but we have the instructions split here for your convenience. First up, we have the instructions for Apple users.
Step 1: Import Photos & Videos
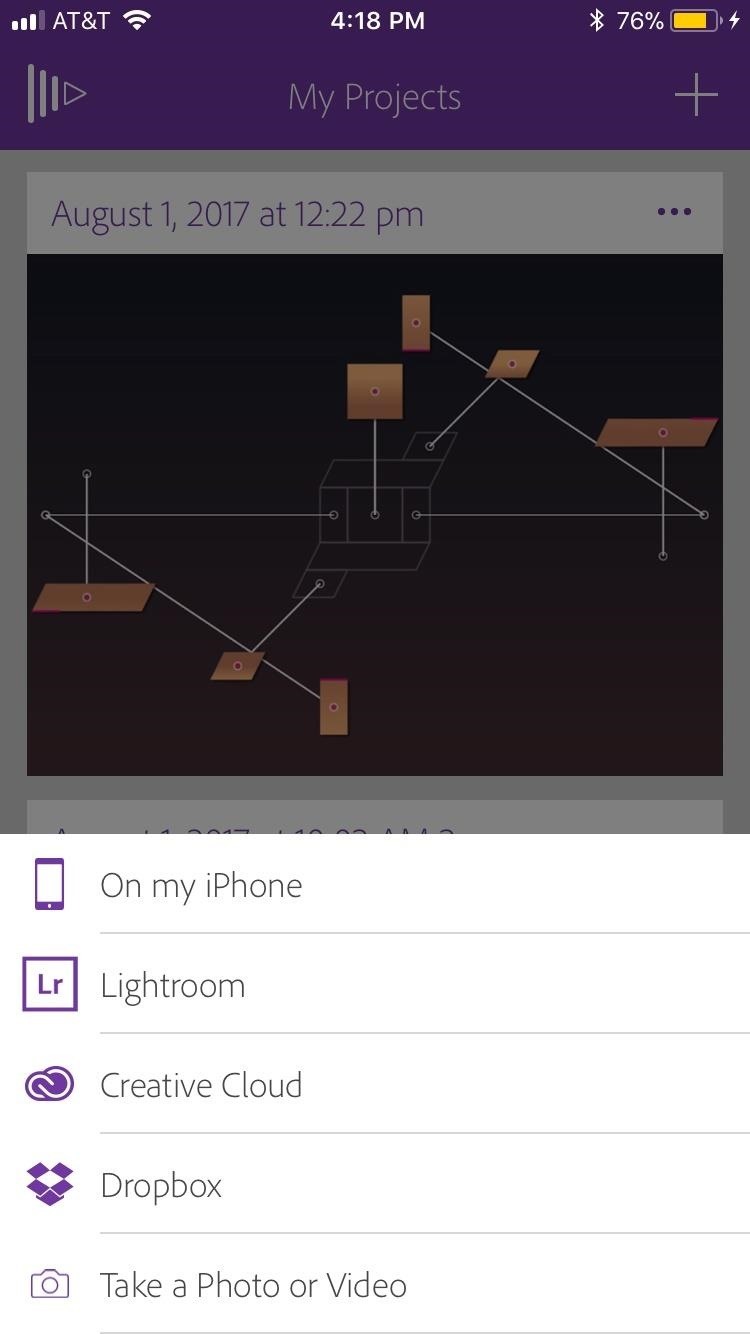
The first thing you'll need to do is import photos and/or videos into a new project in Premiere Clip. To do that:
- Tap the (+) button in the top-right corner of the display.
- Tap which source you would like to pull media from:
- If your photos and videos are stored on your device, tap "On my iPhone," then tap each photo and video you would like to use.
- If your photos and videos are stored in Lightroom, Creative Cloud, or Dropbox, tap one of those options. Sign in, if prompted, then select your photos and videos there.
- You can also tap "Take a Photo or Video" to produce content for your project.
- Once you have selected enough items, tap "Add (#)" at the bottom of the display. This button will display the number of photos and videos you have selected for your project.
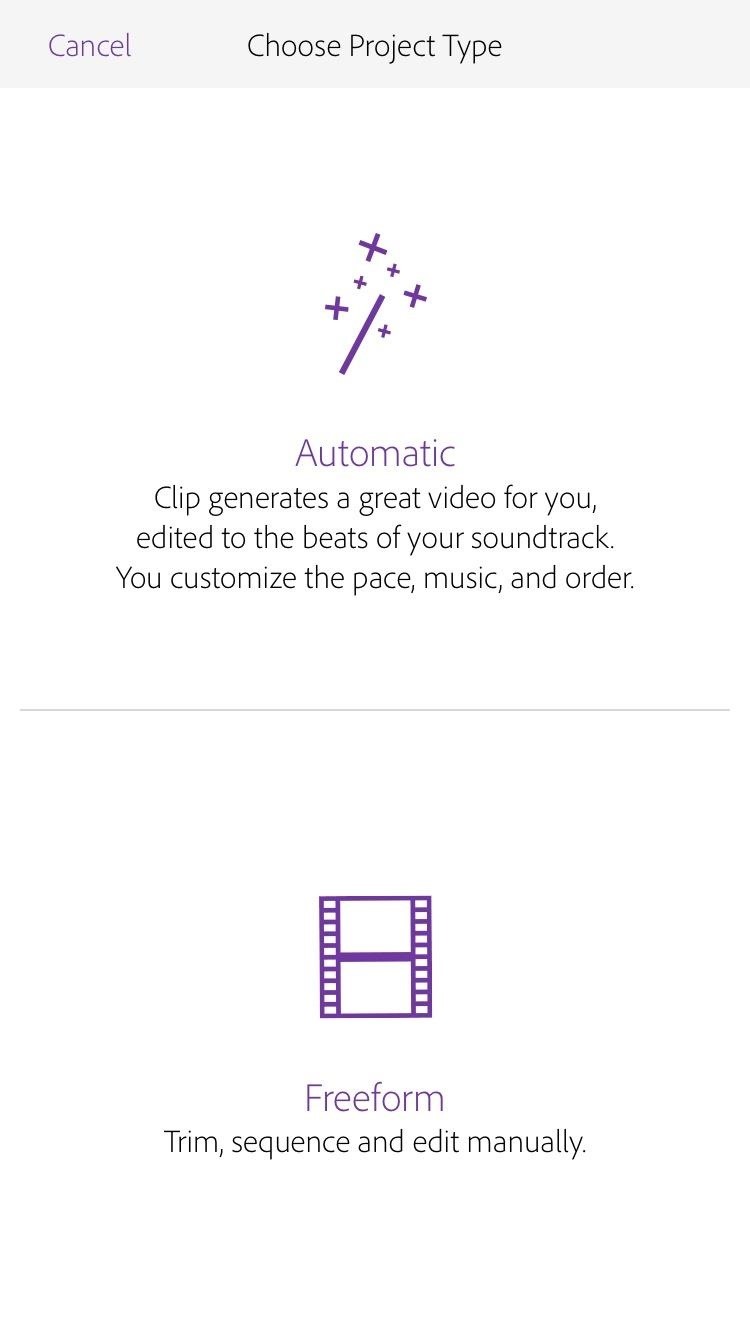
- Tap "Automatic."
Premiere Clip will now load your project together. When finished, you will see a screen with your video at the top and a song in the middle. Tap the play button on the video to watch what Premiere Clip has produced on its own.
If you're happy at this point, great! Just skip ahead to Step 5 below to see how to save your video. Otherwise, follow the directions below for further editing techniques.
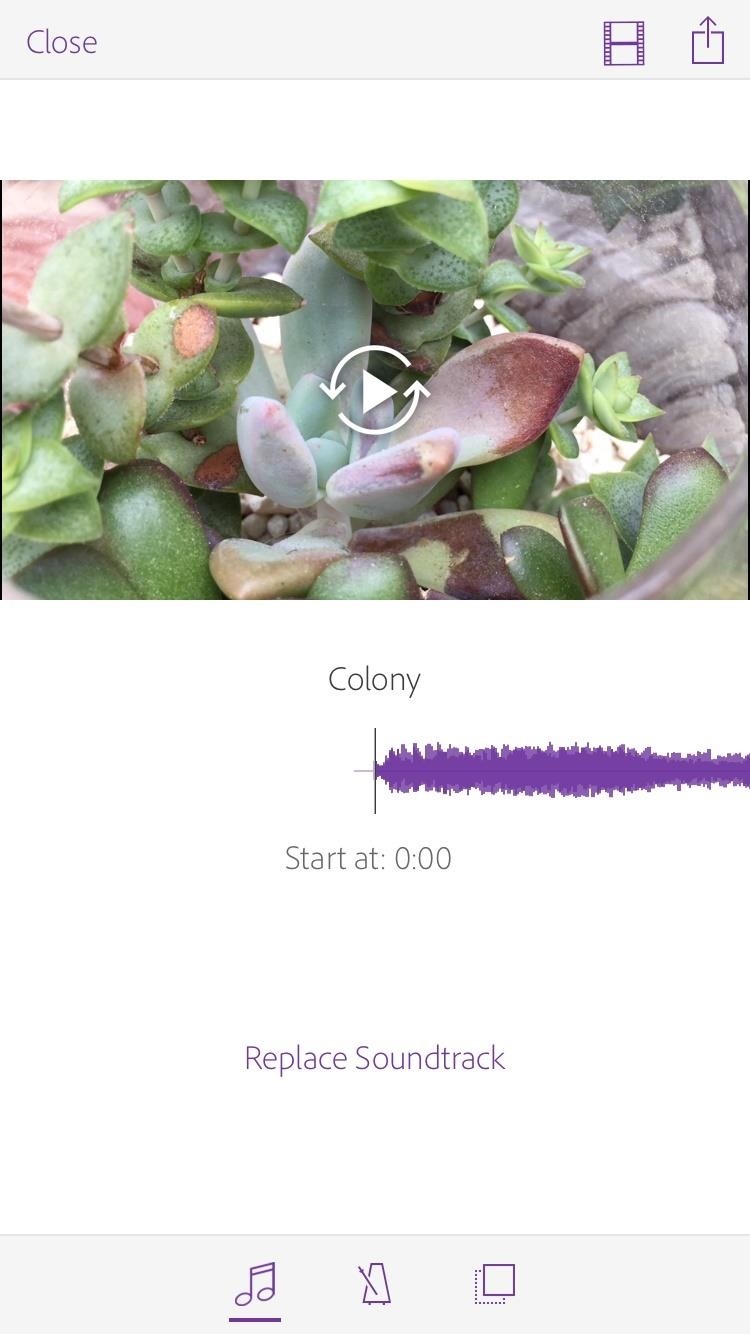
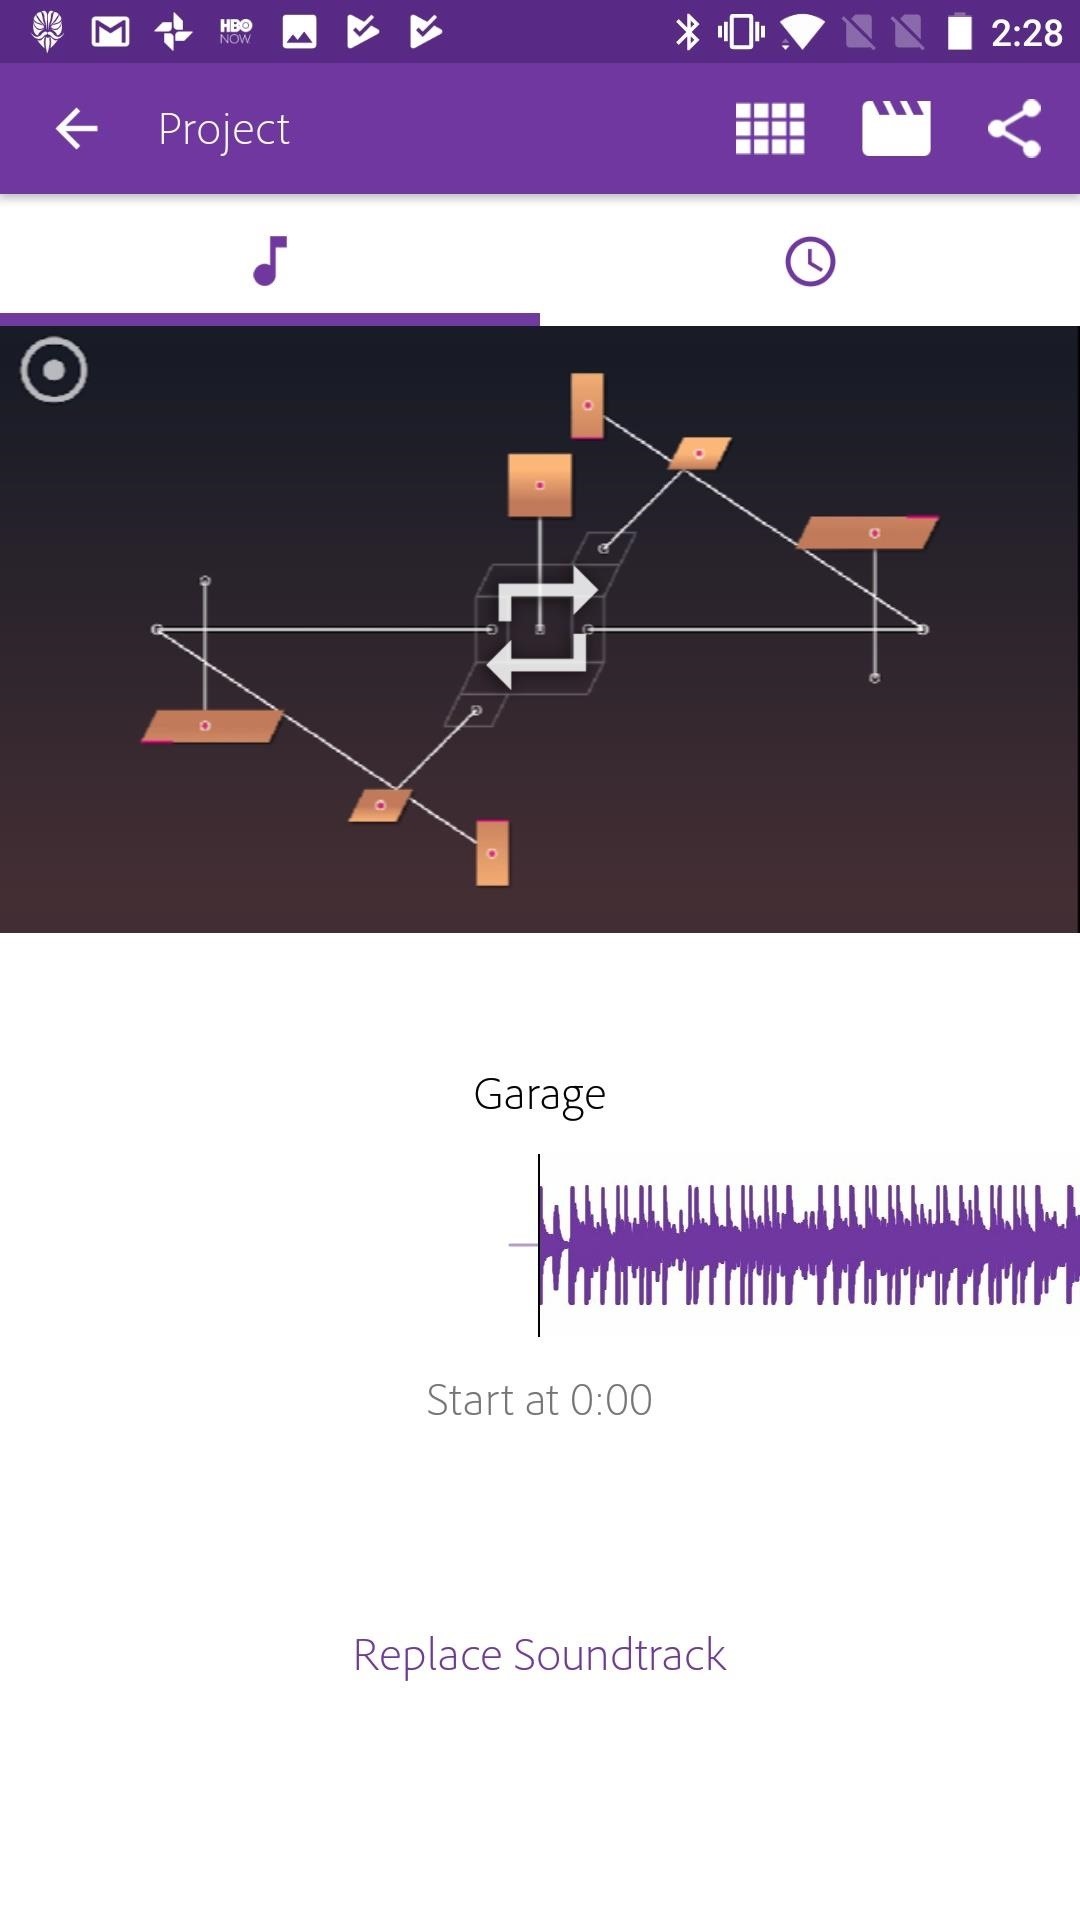
Step 2: Add Music
If you are unhappy with the music selection, there is an easy way to change it:
- Tap "Replace Soundtrack."
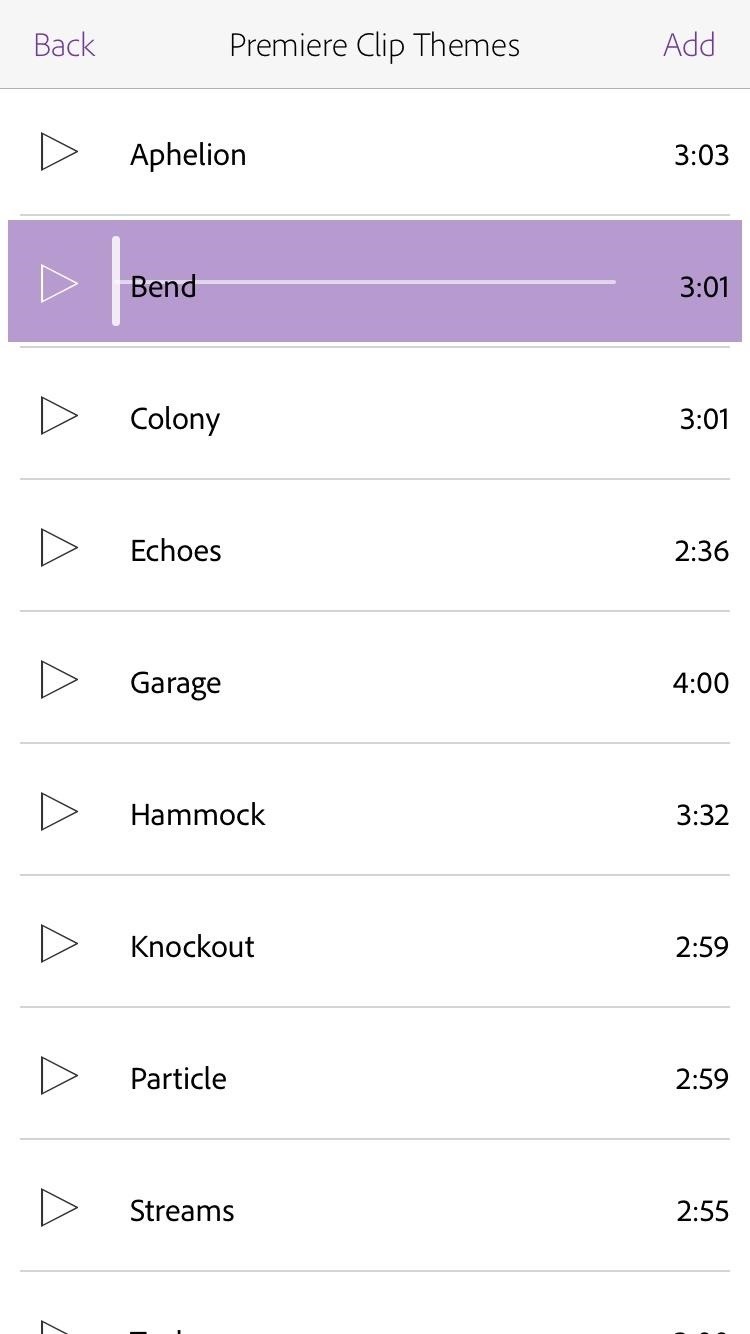
- To select a song from Premiere Clip, tap Premiere Clip Themes. Tap the play button next to any song to preview it, then tap "Add" to place that song in your video.
- To enter your own song, tap either Playlists, Albums, Artists, or Songs. Browse these folders until you find a song you like. Again, tap play to preview the song, then tap "Add" to place that song in your video.

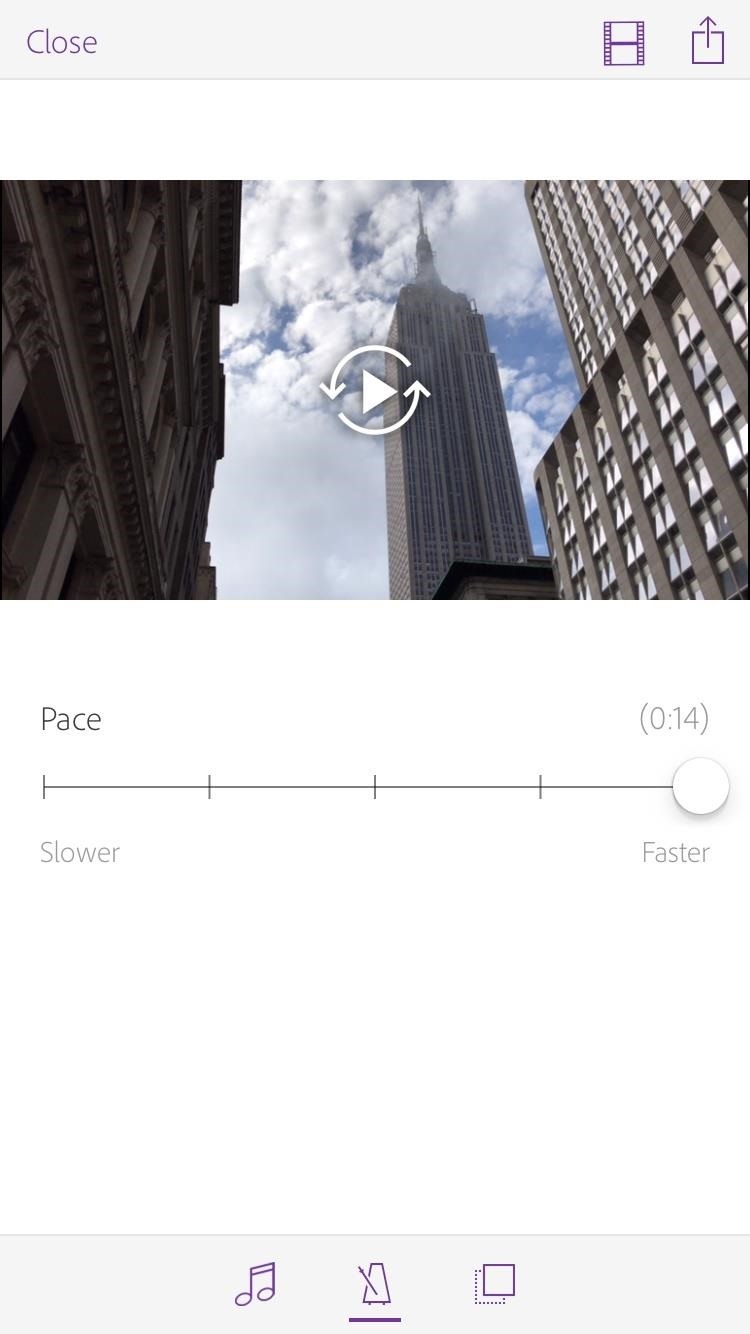
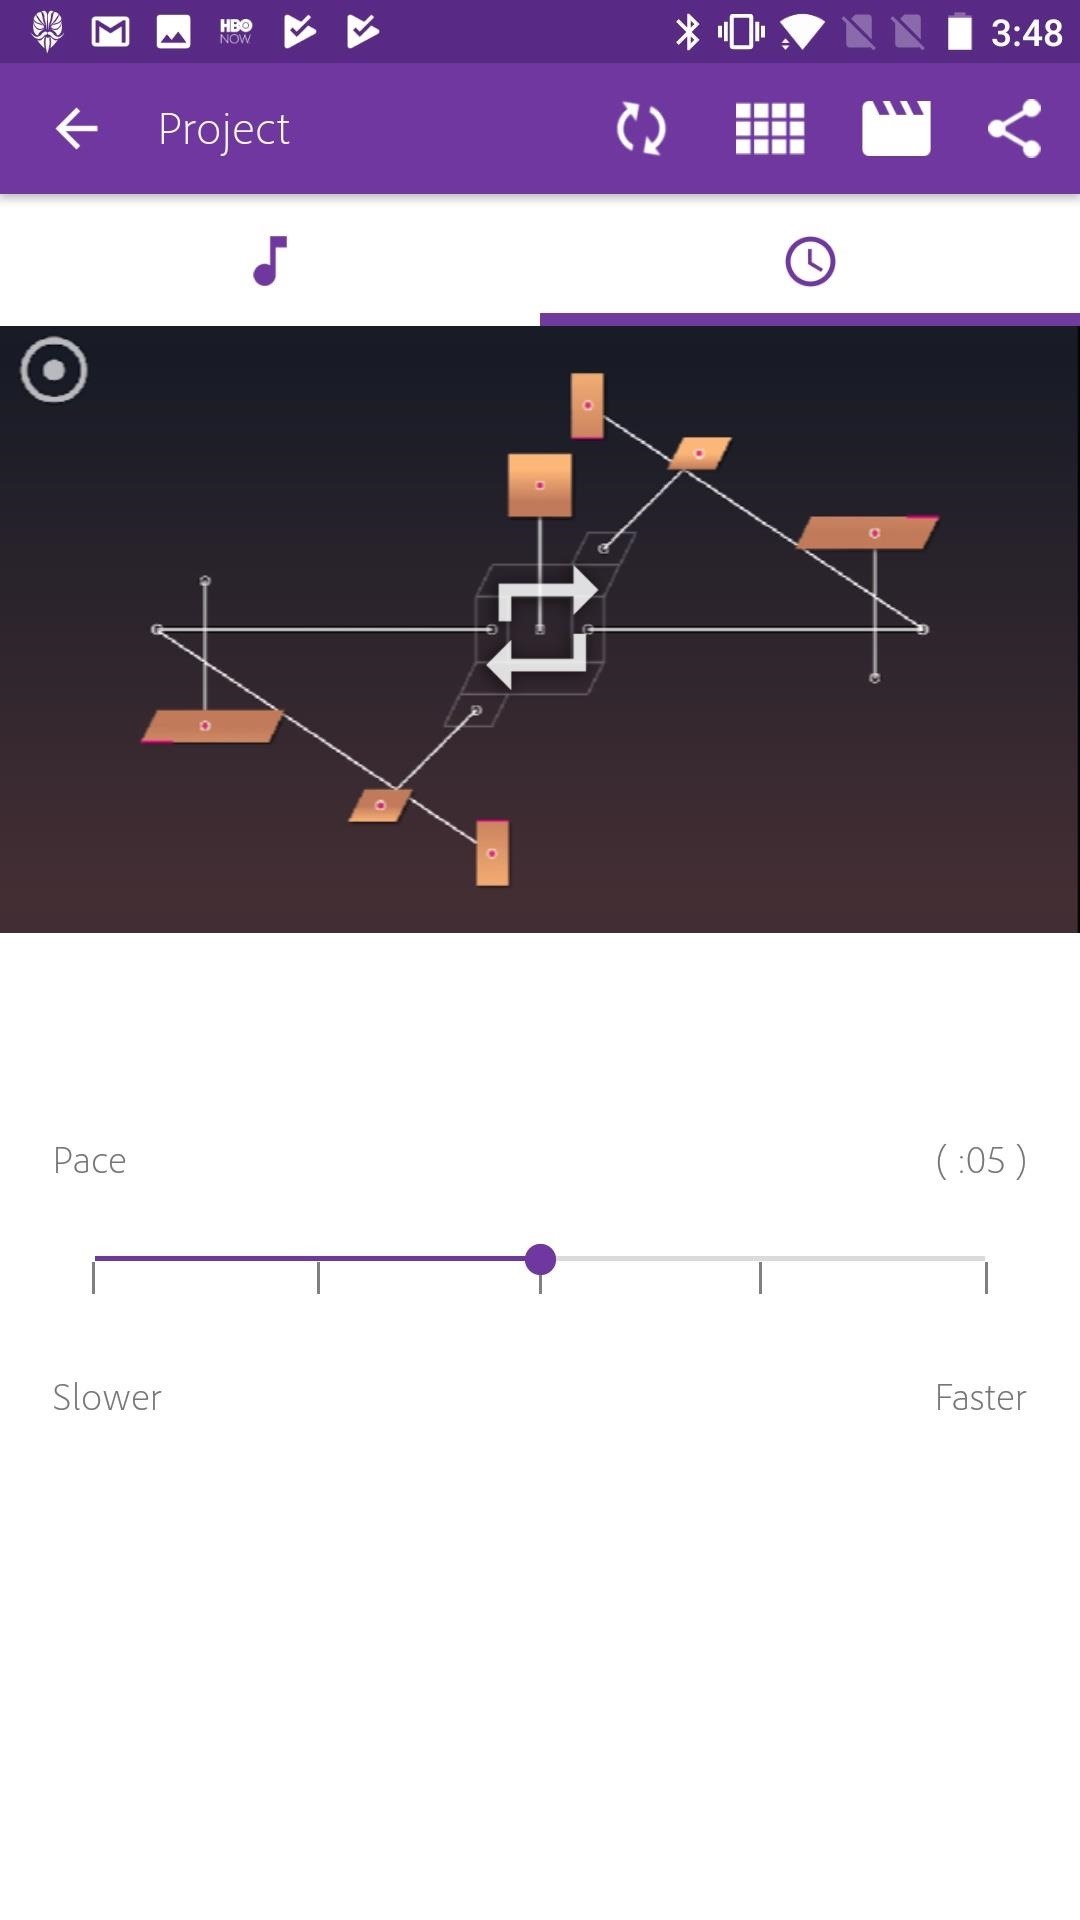
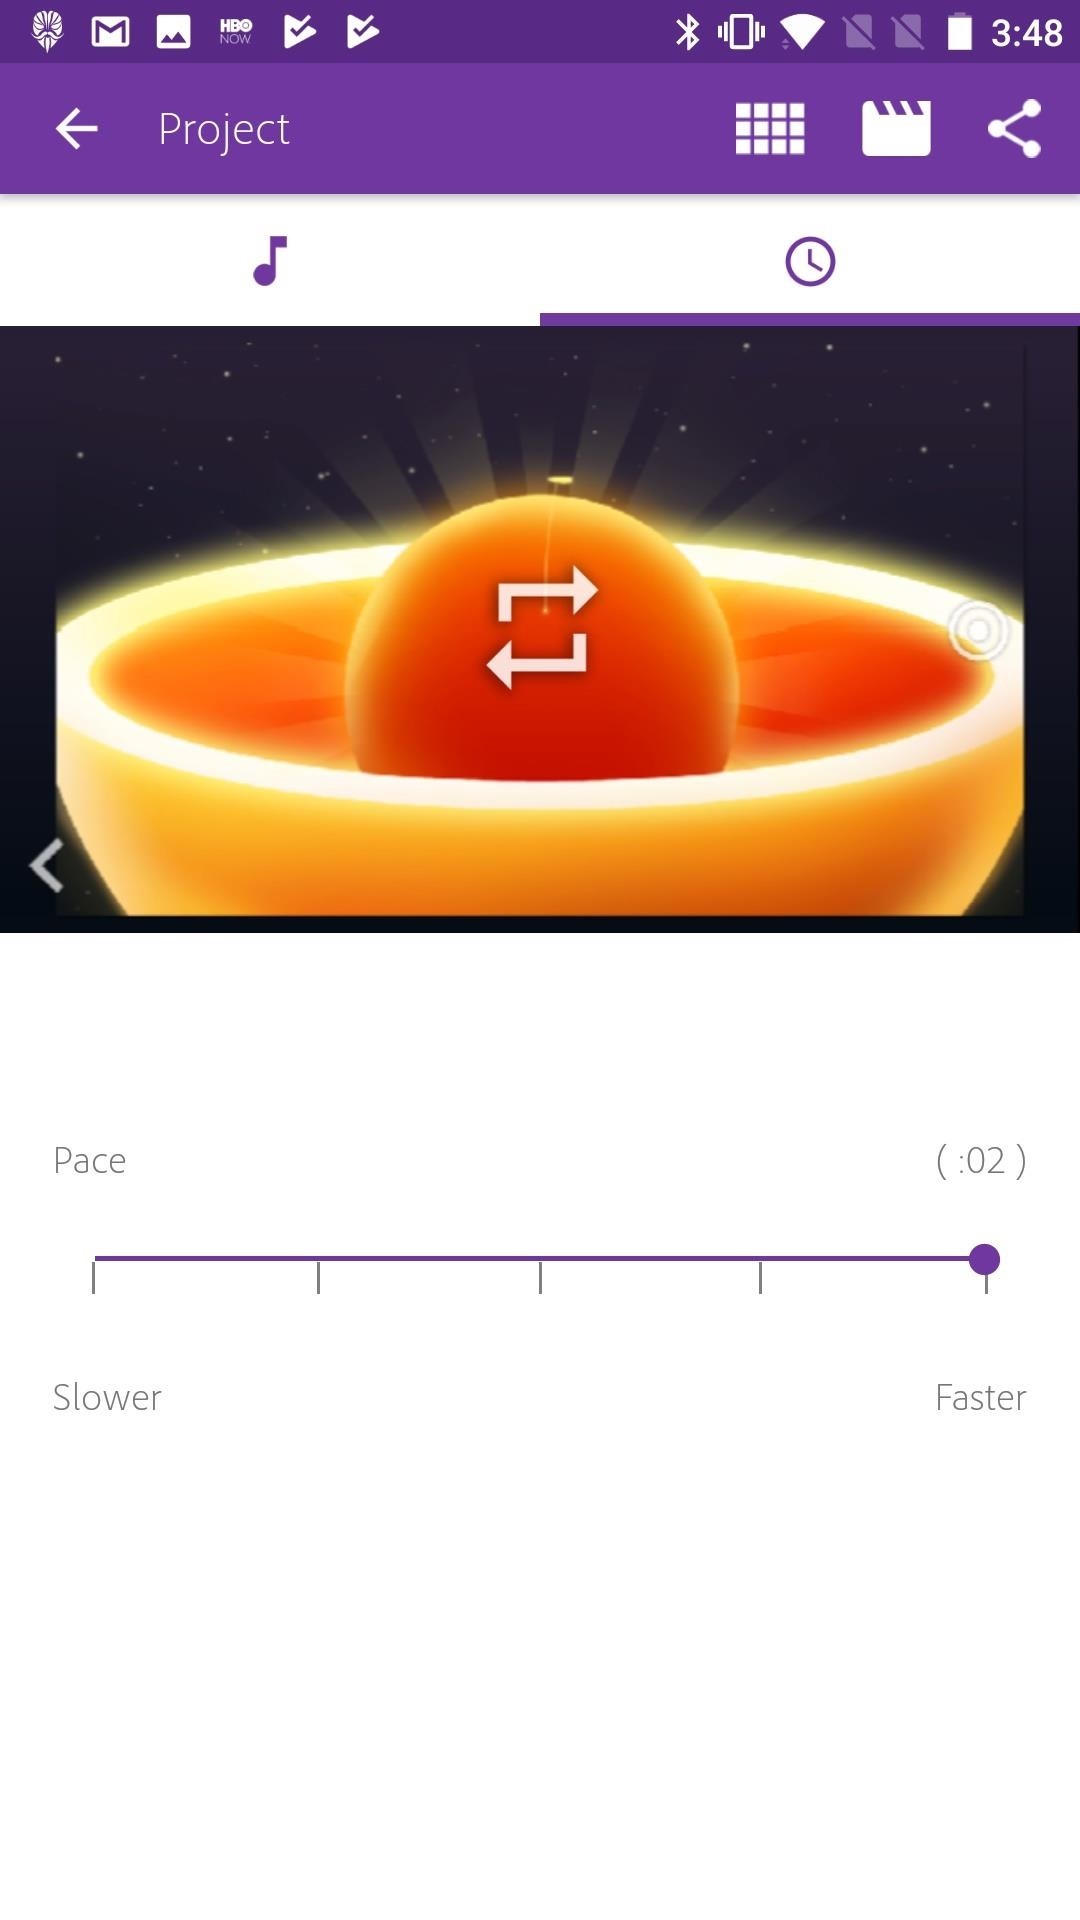
Step 3: Adjust Pacing
If you think the automatic pacing on your video is either too fast or too slow, you can change that!
- Tap the metronome icon on the bottom of the display.
- Drag the slider to match the pacing you'd prefer. As you make the video faster or slower, you will notice the timestamp on the right change accordingly.
- To preview your pacing, just tap the play button on the video. When you're satisfied with pacing, tap the back button.

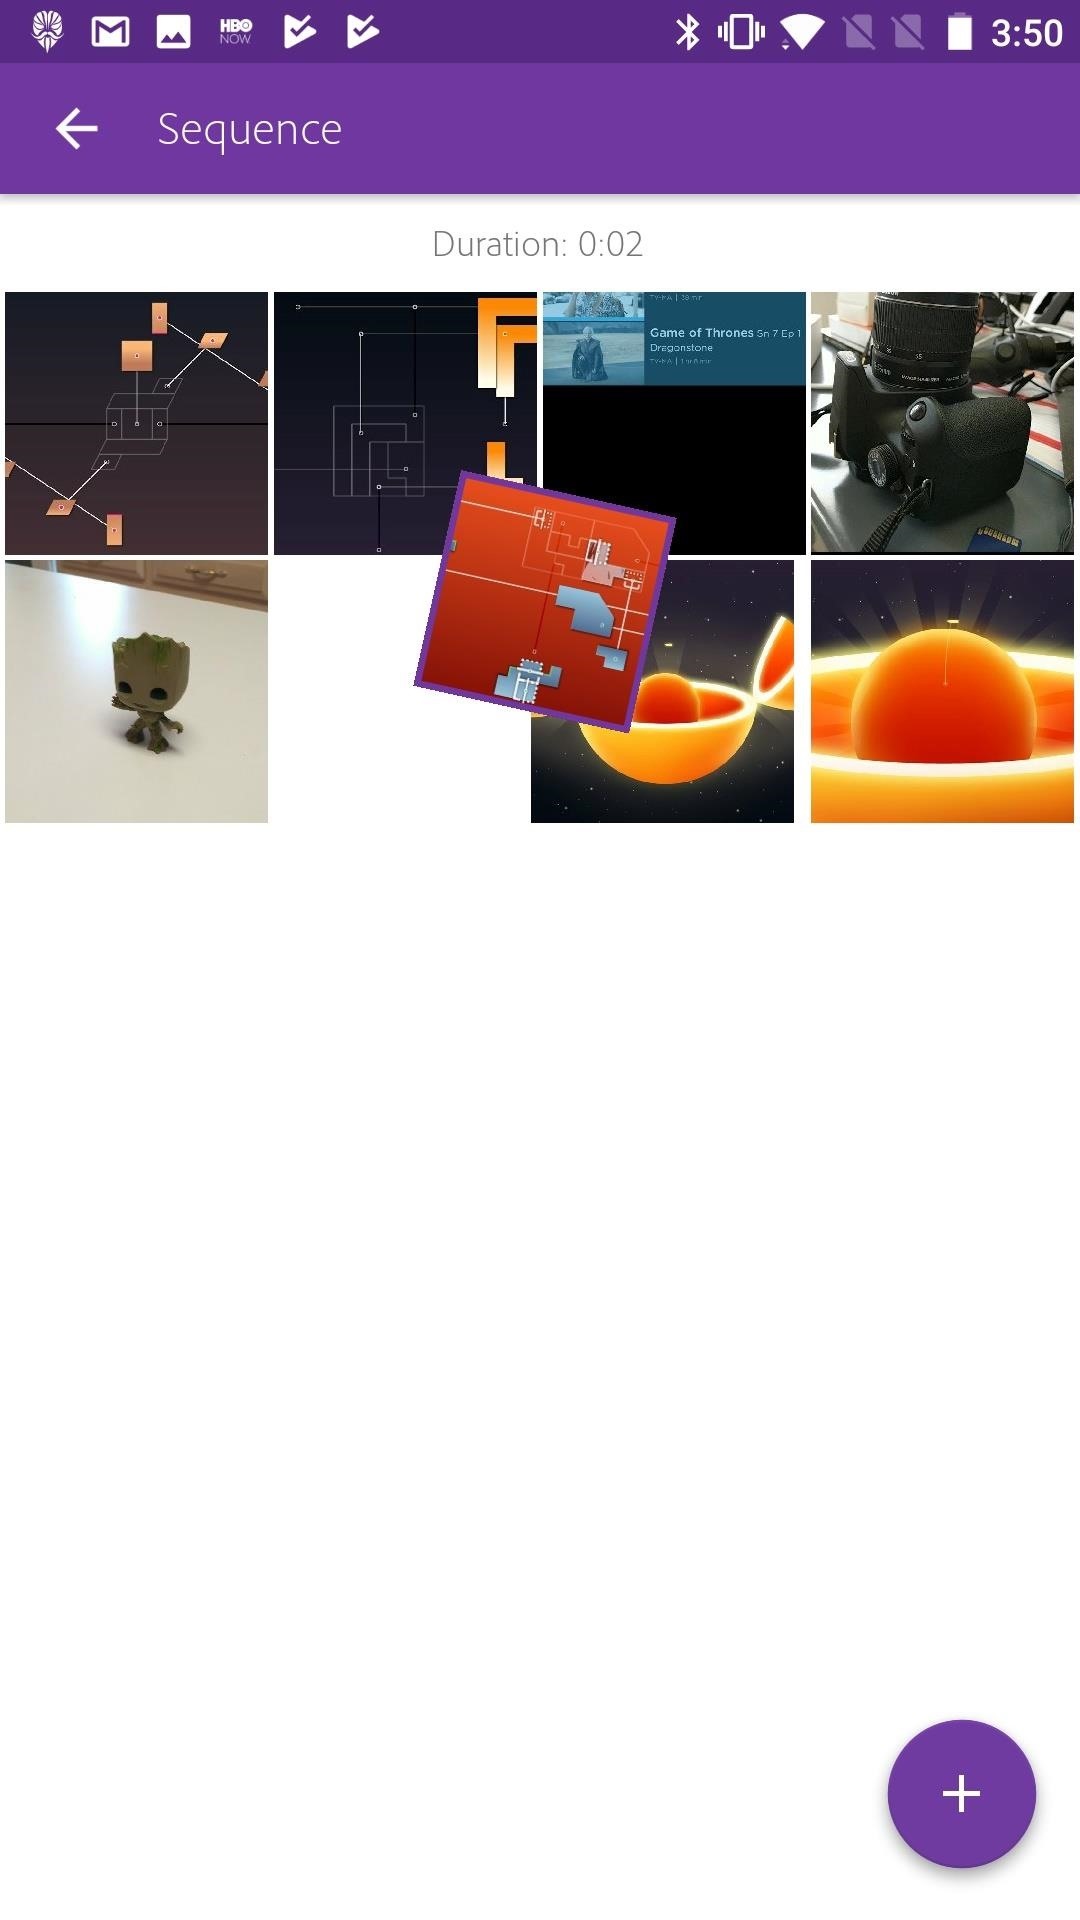
Step 4: Customize the Sequence
If you don't like the order Premiere Clip has put your photos and videos into, it's really easy to fix:
- Tap the squares in the bottom-right corner of the display to bring up the Sequence menu.
- To rearrange clips, press and hold on the item you want to move, then drag it wherever you'd like.
- To delete a clip, tap it, then tap the X that appears. Finally, tap the trash icon that appears.
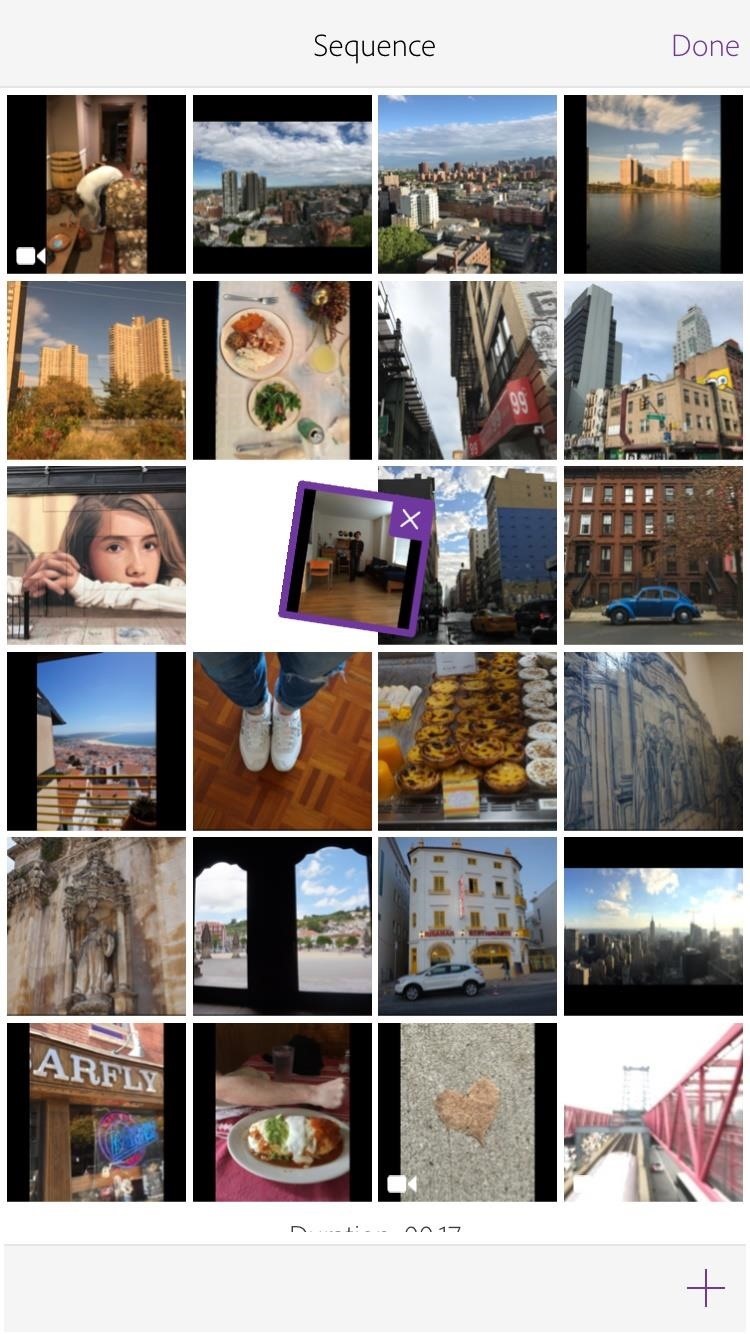
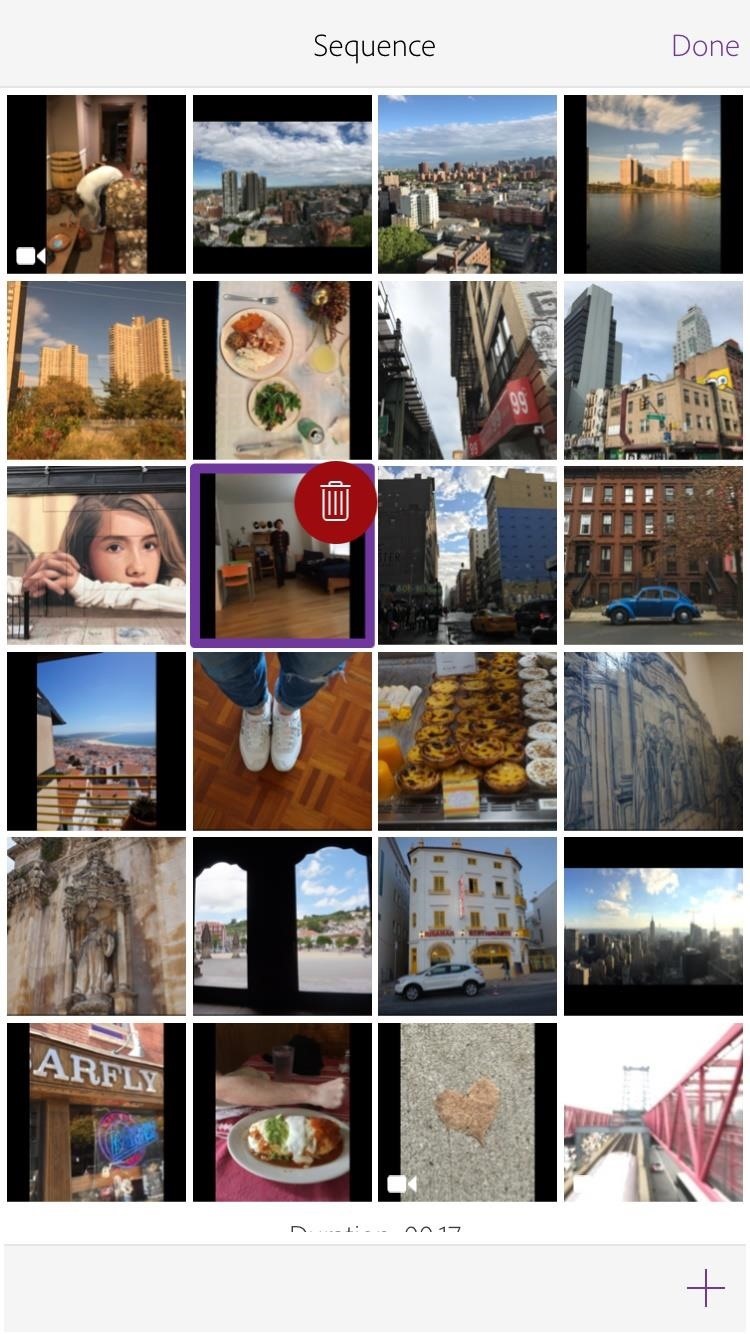
To add more photos and video to your sequence, just tap the (+), then follow the steps from the beginning of this section.
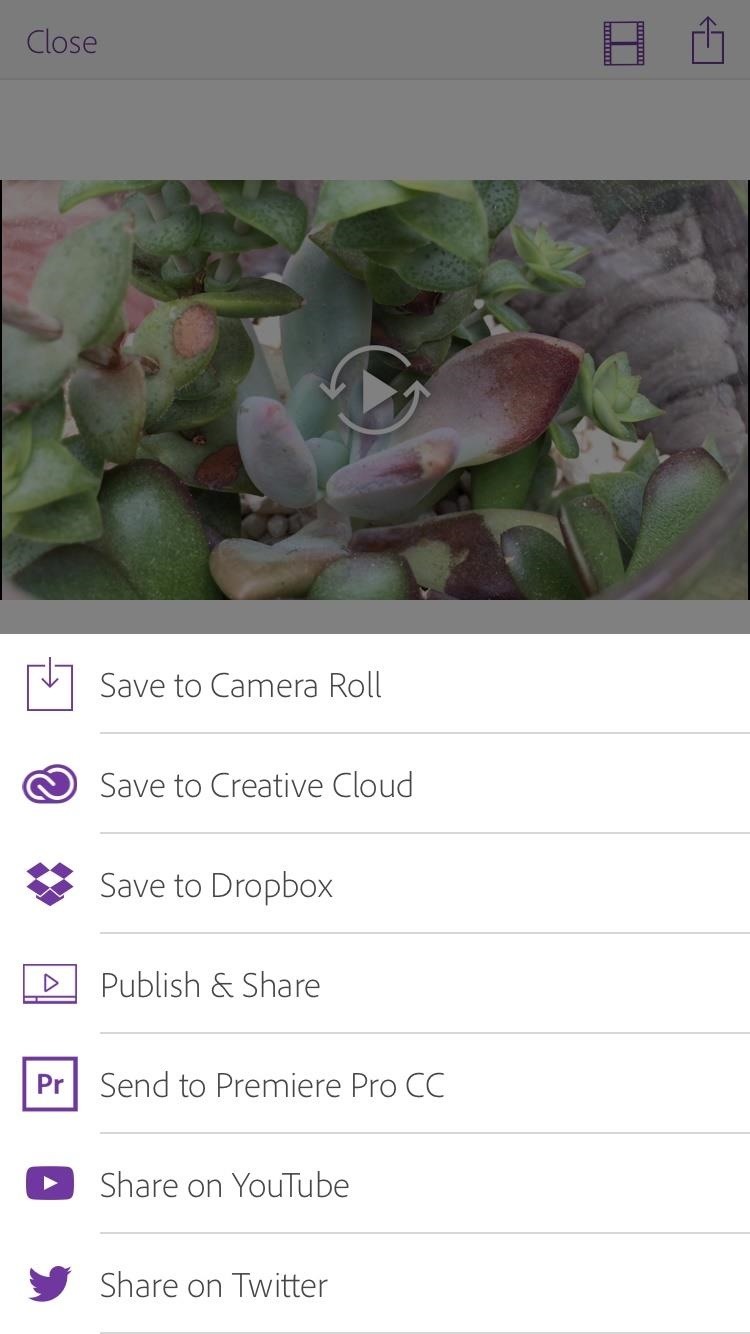
Step 5: Save Your Video
When you're happy with your video, you can save it by tapping the Share Sheets icon in the top-right corner. From there, most of the options are for saving the video to Adobe's Creative Cloud servers, but that's a paid service, so we recommend choosing "Save to Camera Roll." This will create a copy of the video that you can find in the Photos app, which makes it incredibly easy to share!
Method 2: Automatic Editing on Android
Like I mentioned before, the fundamentals of Premiere Clip go unchanged between both iOS and Android, but some of the finer aspects are a bit different. So to make this guide easier to follow, we've created separate instructions for Android users that you can follow in the steps below.
Step 1: Import Photos & Videos
To get started, you'll need to add some media. This can be a batch of photos, some video clips, or a mix of both. So from Adobe Premier Clip's main menu:
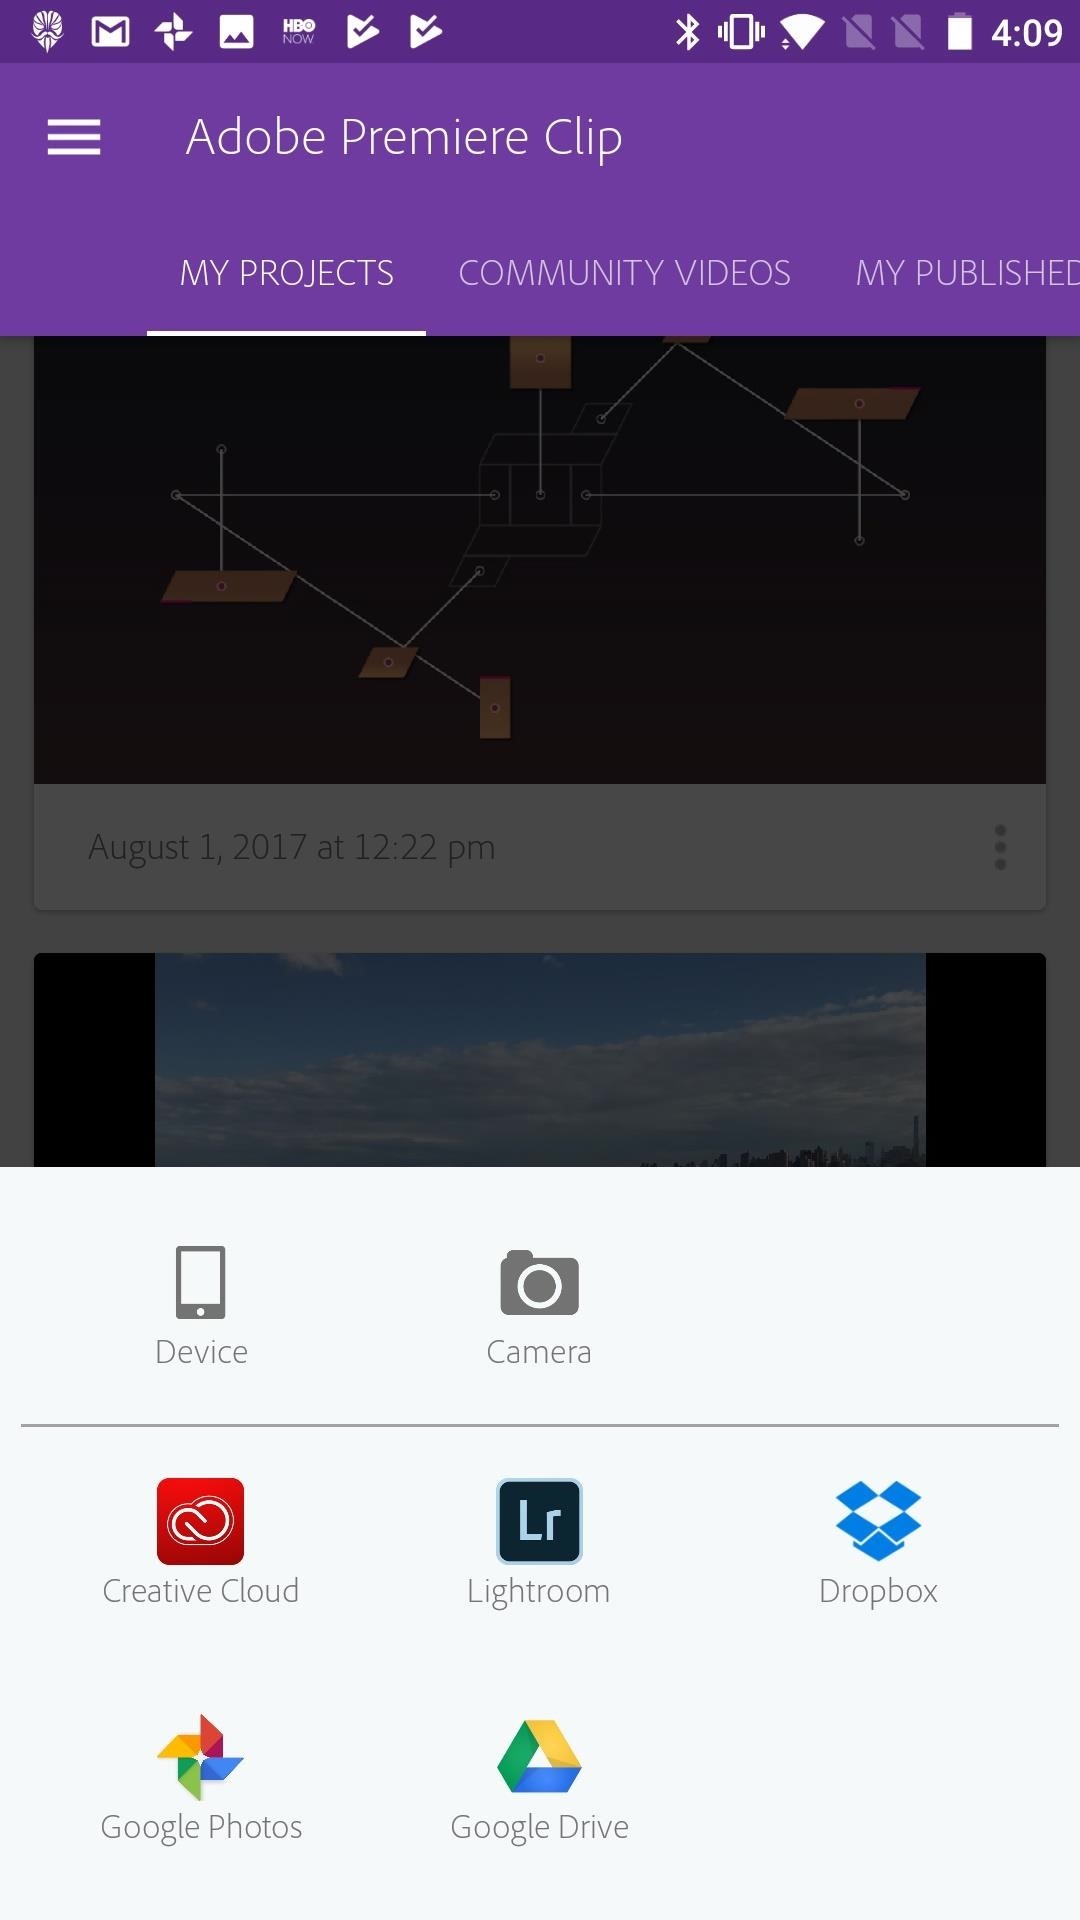
- Tap the (+) button in the bottom-right corner of the display.
- Tap which source you would like to pull media from.
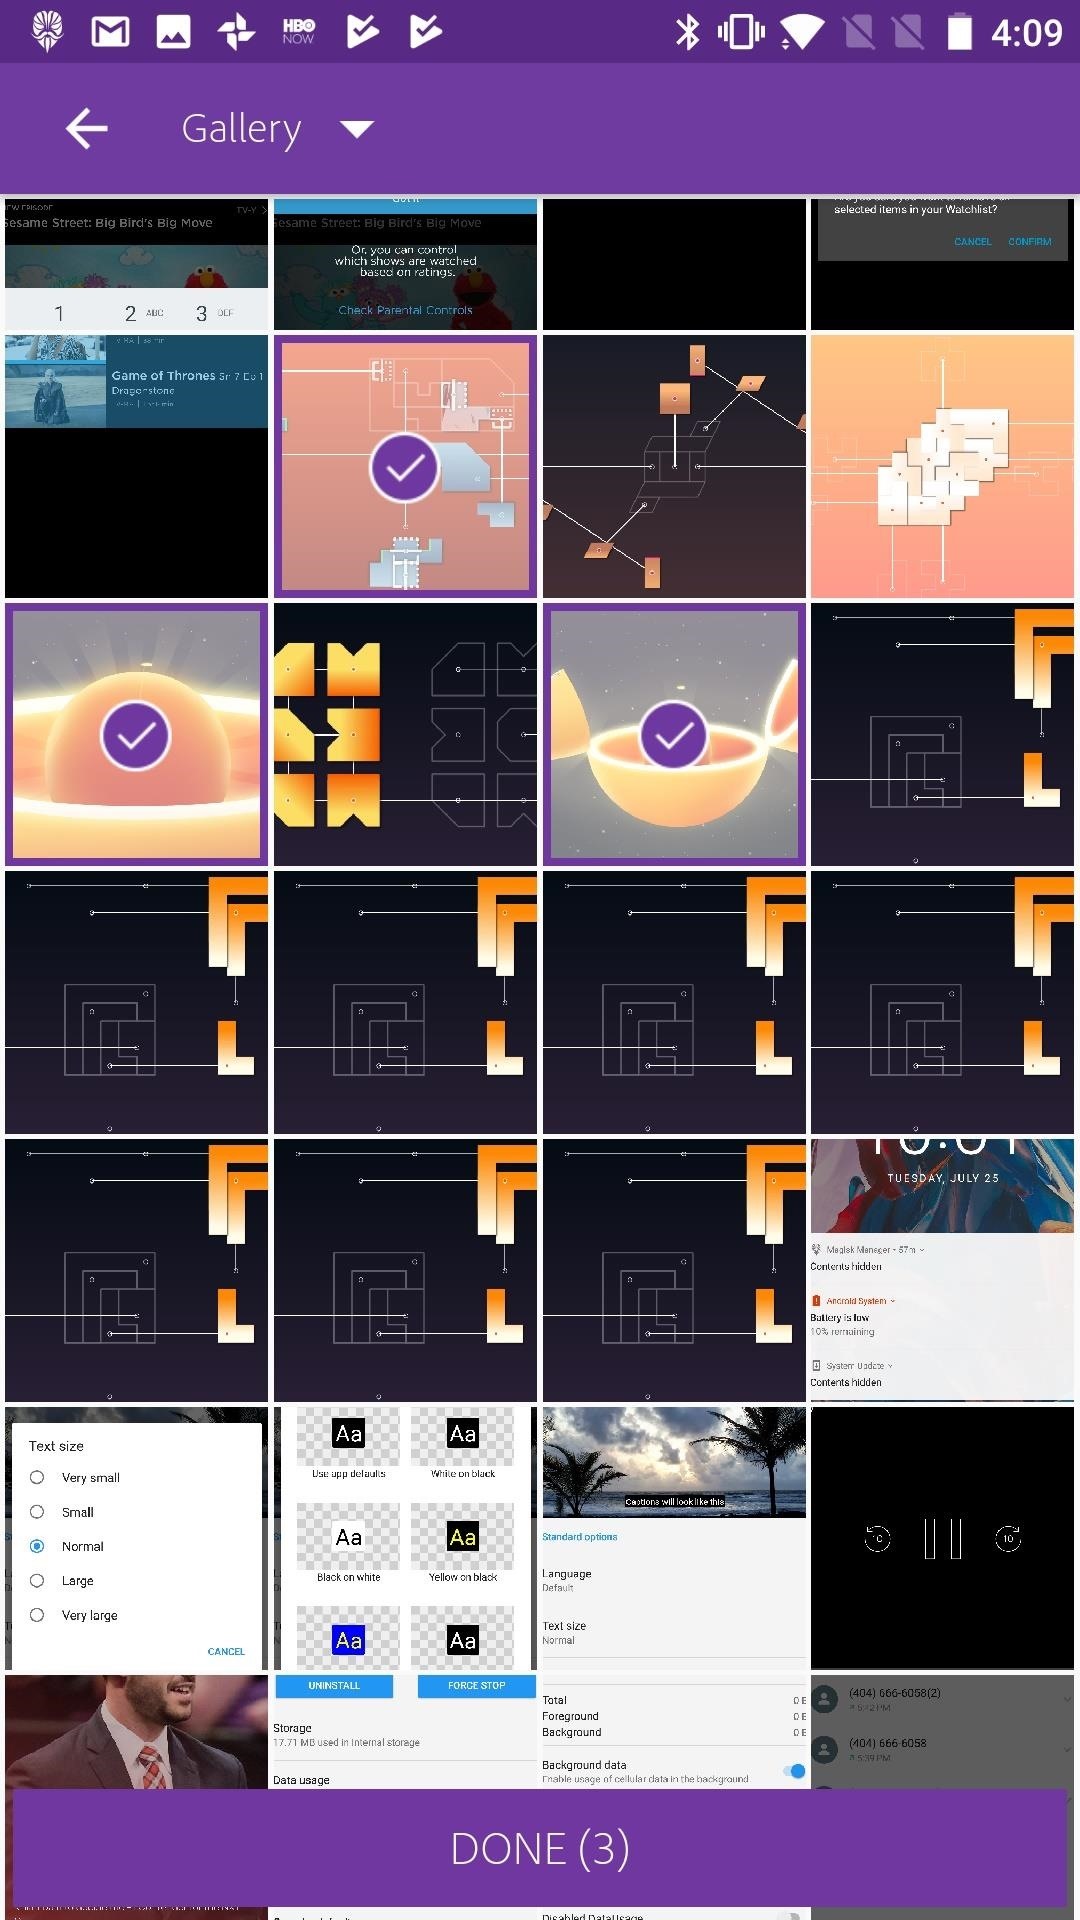
- If your photos and videos are stored on your device, tap "Device," then tap each photo and video you would like to use.
- If your photos are stored on Dropbox, Google Photos, or Google Drive, tap one of those options. Sign in, if prompted, then select your photos and videos there.
- When you've selected your photos, tap DONE (#). The number of photos and videos you have selected will appear in the parenthesis.
At this point, Premiere Clip will automatically arrange all of the photos and videos you added, integrate them seamlessly into one video, and set them to music. If you like the automatic creation as it stands, you're all set! Otherwise, the next few steps will show you how to customize your creation a bit.
Step 2: Import Music
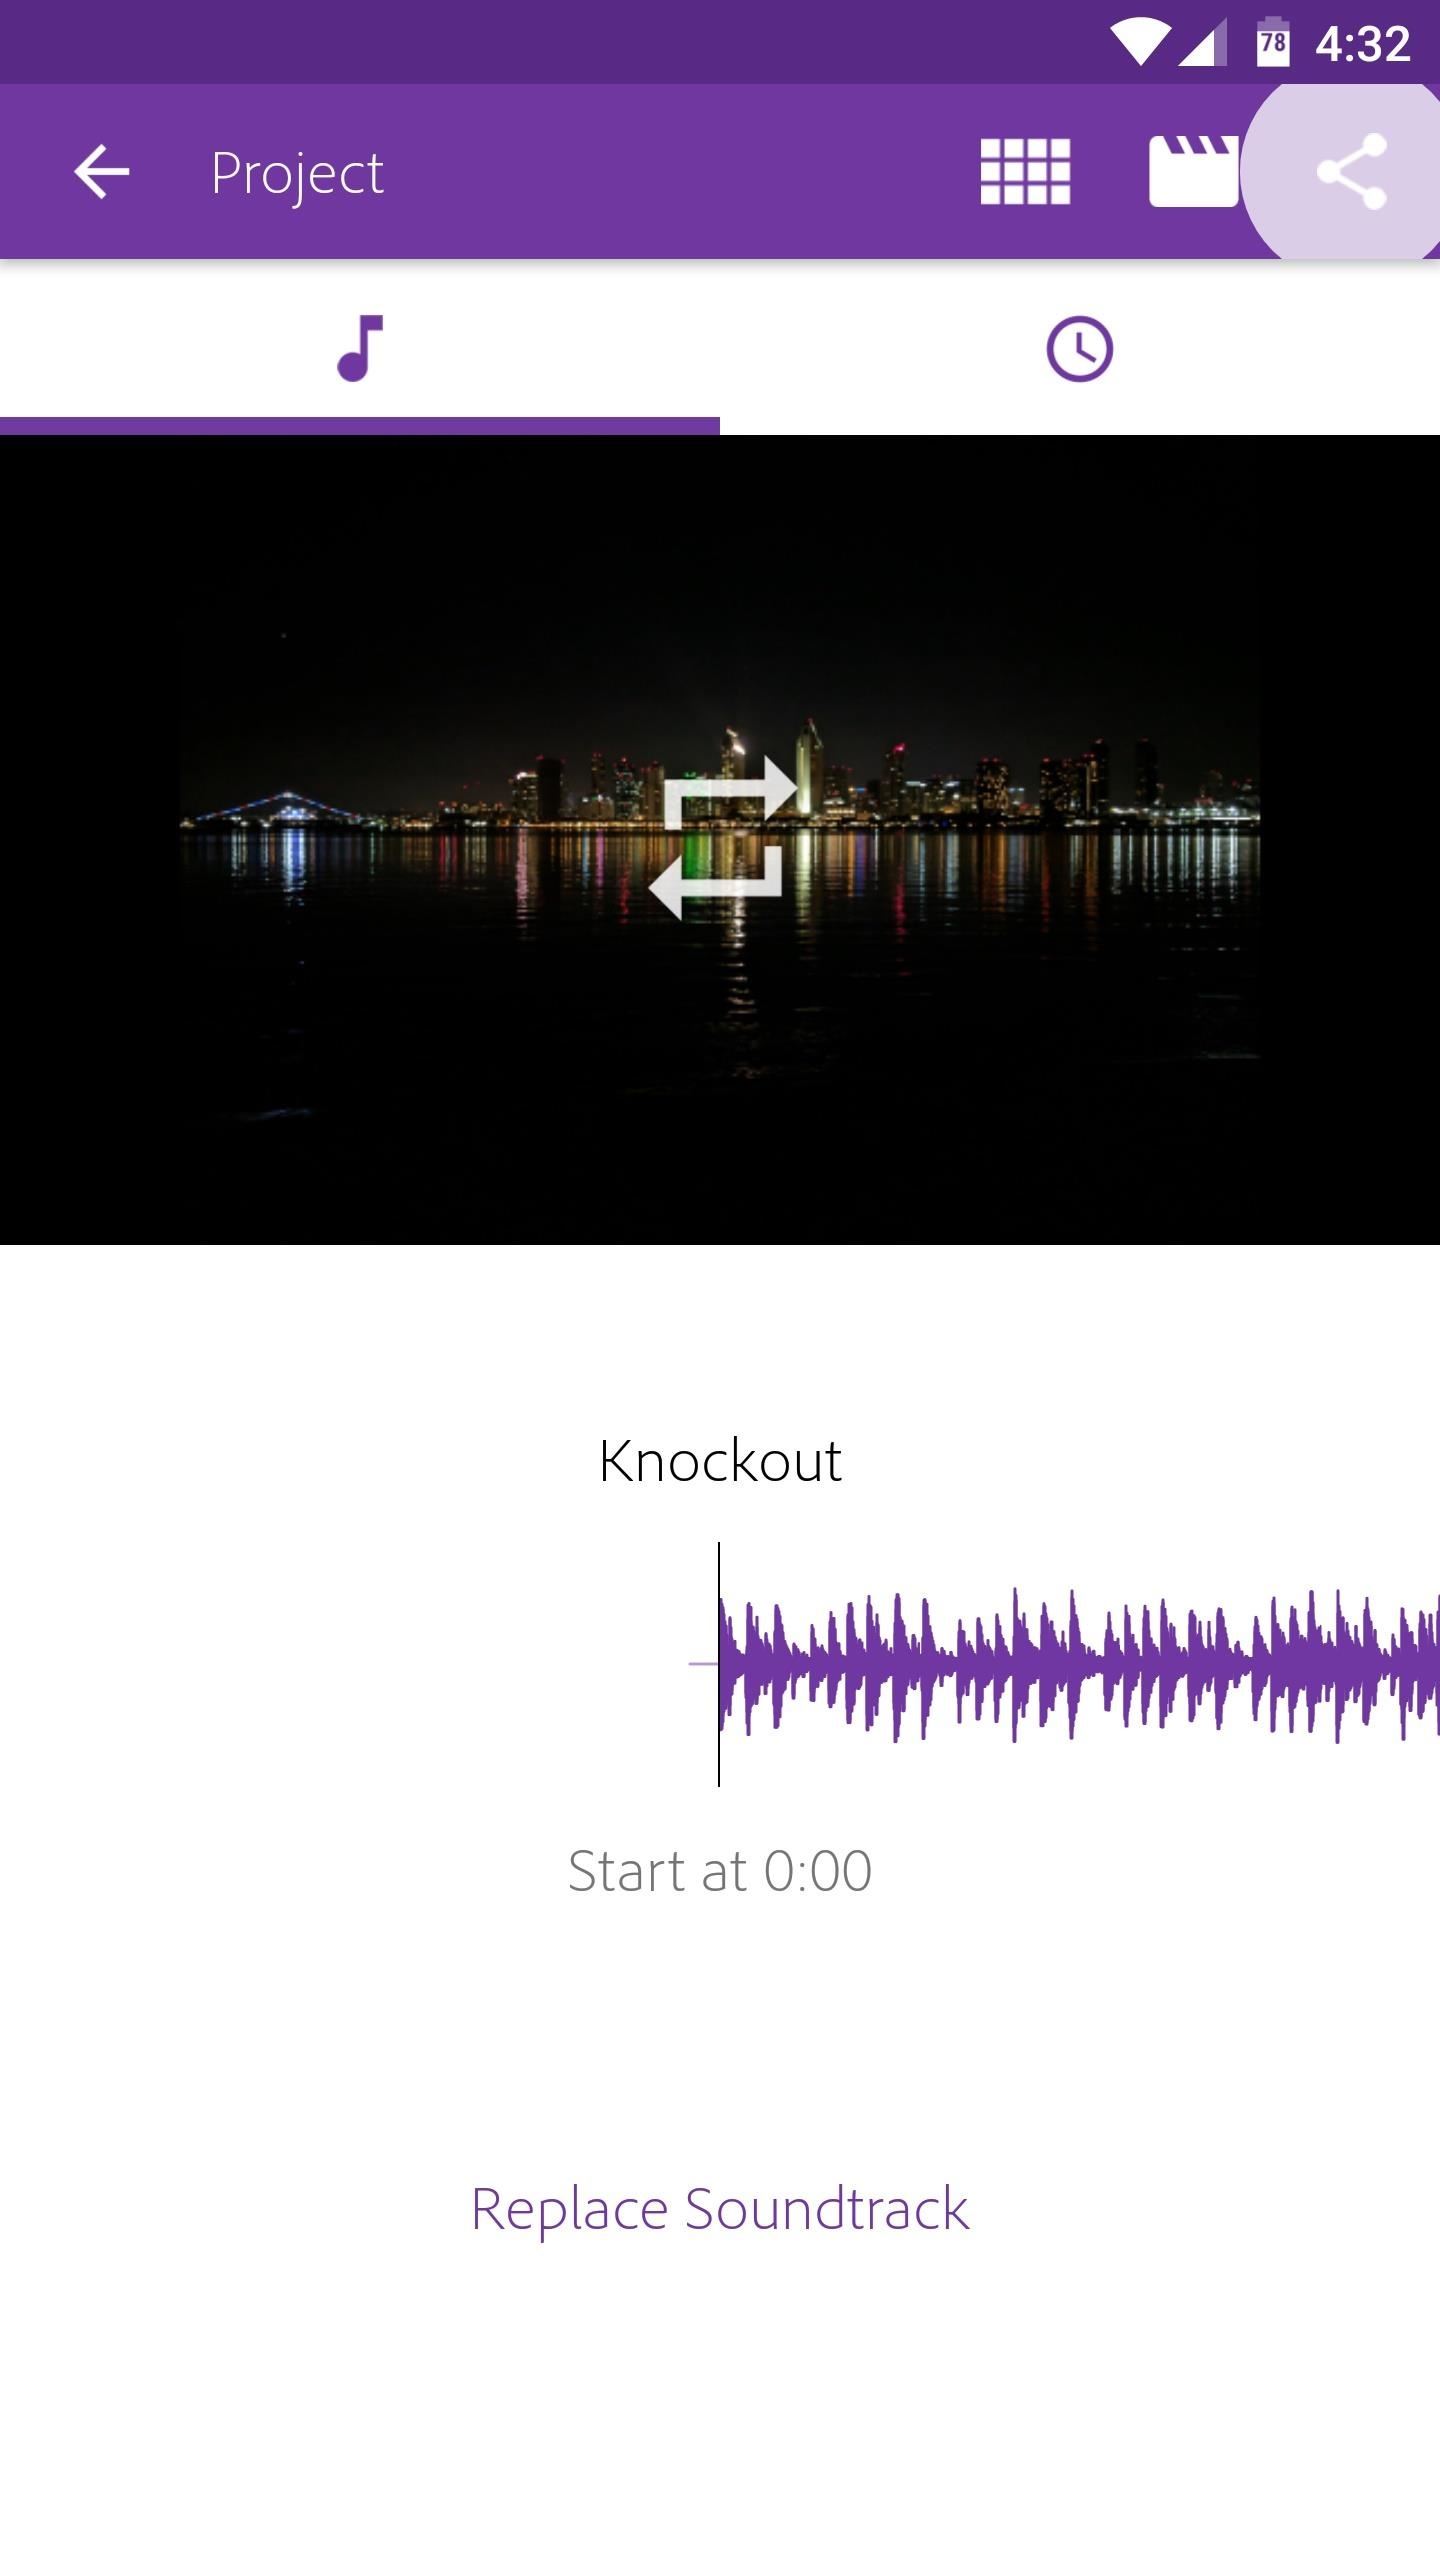
If you're not fond of the music that Premier Clip automatically added to your video:
- Tap "Replace Soundtrack."
- To select a song from Premiere Clip, tap "Premiere Clip Themes." Tap the play button next to any song to preview it, then tap "Add" to place that song in your video.
- To enter your own song, tap either "Playlists," "Albums," "Artists," or "Songs." Browse these folders until you find a song you like. Again, tap play to preview the song, then tap "Add" to place that song in your video.

Step 3: Adjust Pacing
If you feel like the automatically-generated video is a bit too fast or slow for your tastes, you can change the tempo rather easily.
- Tap the clock icon in the top-right corner of the display.
- Drag the slider to match the pacing you'd prefer. As you make the video faster or slower, you will notice the timestamp on the right change accordingly.
- To preview your pacing, just tap the play button on the video. When you're satisfied with pacing, tap the back button.
Step 4: Customize the Sequence
If you're not happy with the order that Premiere Clip used when automatically arranging your video, you can move video clips and photos into a different spot.
- Tap the checker box icon in the top-right corner of the display to bring up the sequence menu.
- To rearrange clips, press and hold on the one you want to move, then drag it wherever you'd like.
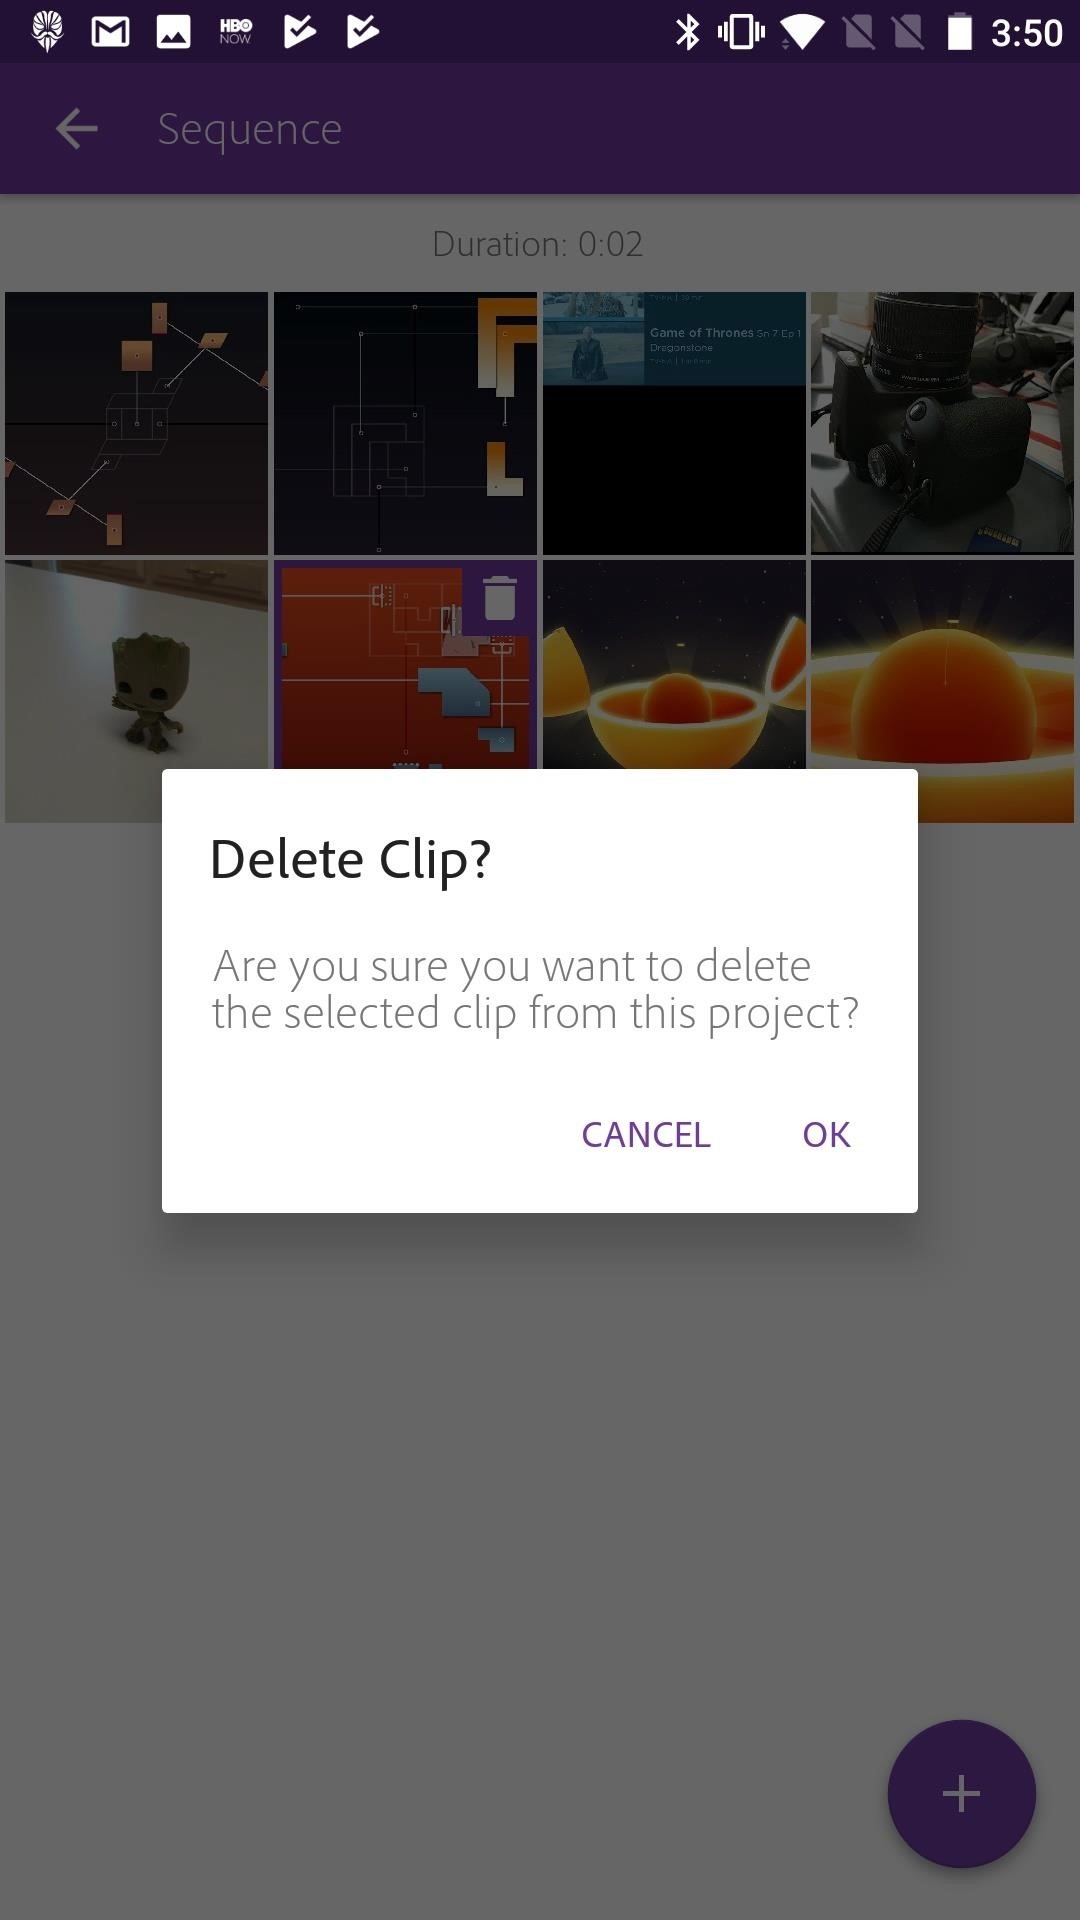
- To delete a clip, tap it, then tap the trash icon that appears. Tap "OK" on the popup to delete your selection.
To add more photos and video to your sequence, just tap the (+), then follow the steps from the beginning of this section.
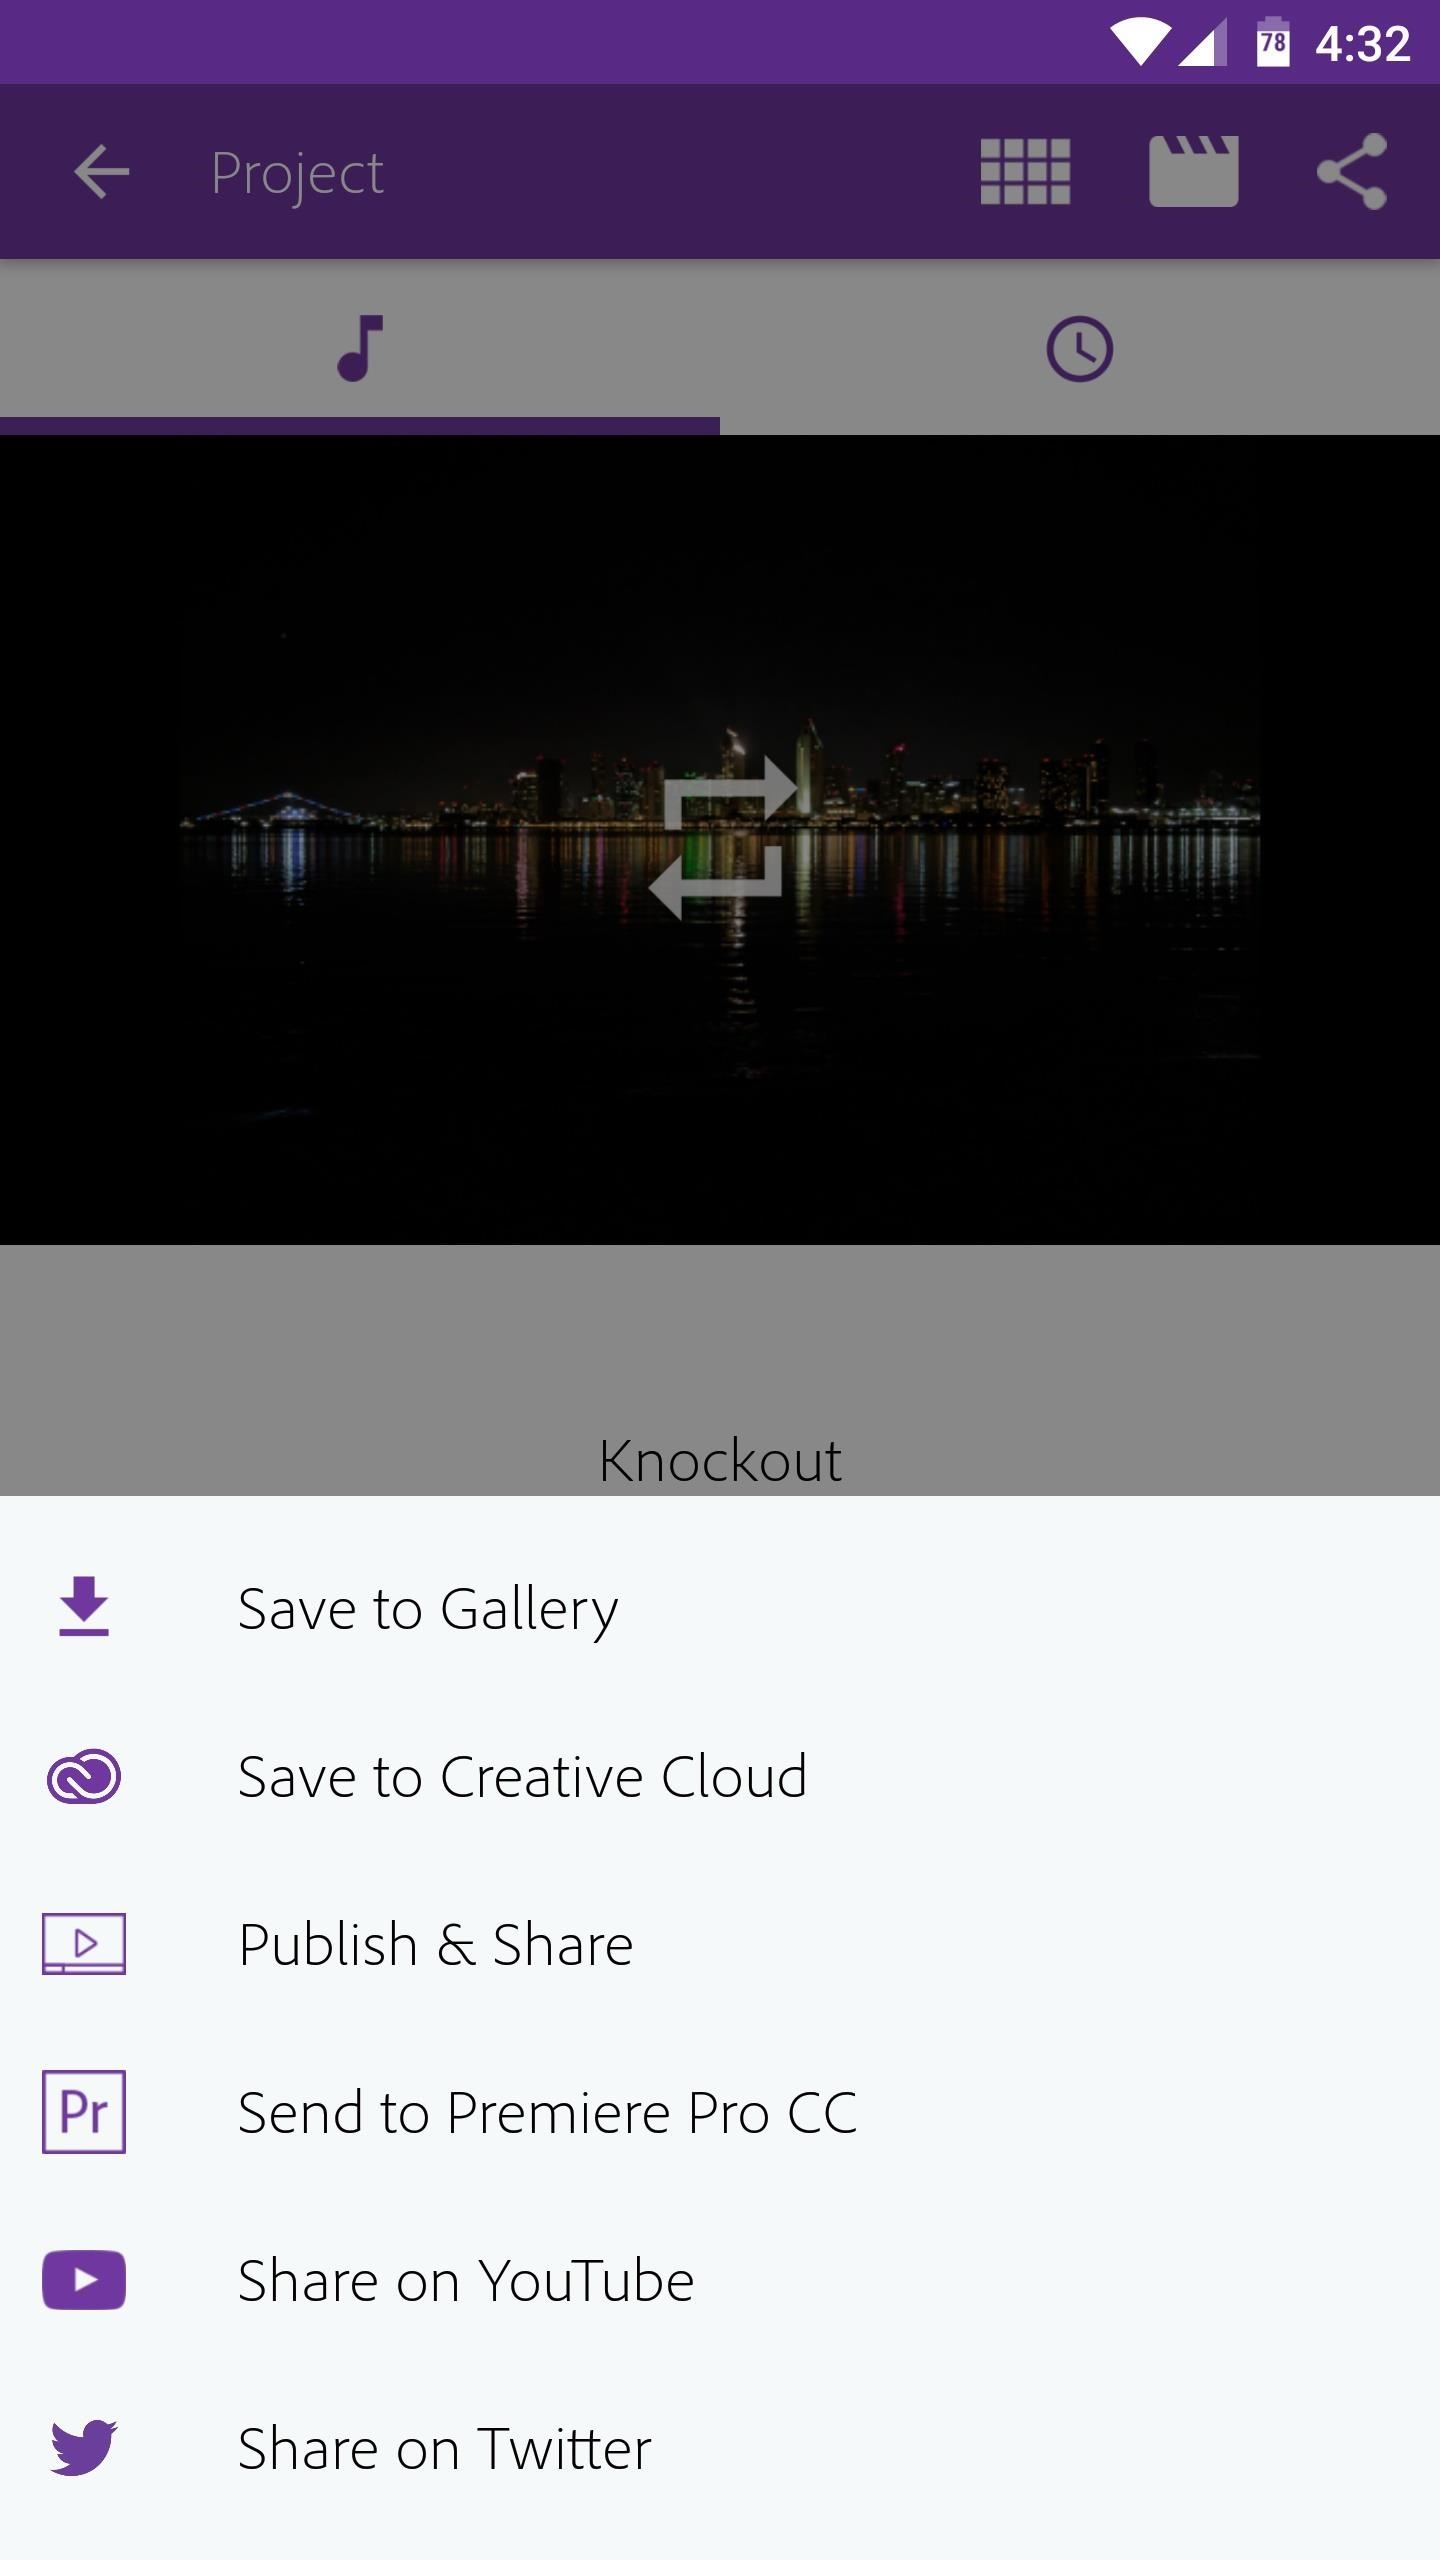
Step 5: Save Your Video
Once you're completely satisfied with your creation, you can save it by tapping the share icon in the top-right corner of the screen. From there, your best option is "Save to Gallery," which will save a copy to your phone's storage that you can access and share from your favorite gallery app. Once you've done that, you'll be all set!
This article was produced during Gadget Hacks' special coverage on smartphone-based video creator tips for filming and editing. Check out the whole Videography series.
Just updated your iPhone? You'll find new emoji, enhanced security, podcast transcripts, Apple Cash virtual numbers, and other useful features. There are even new additions hidden within Safari. Find out what's new and changed on your iPhone with the iOS 17.4 update.


Be the First to Comment
Share Your Thoughts